How to print a contact directory
Printing a contact directory from ChurchSuite is simple and quick. Here's how...
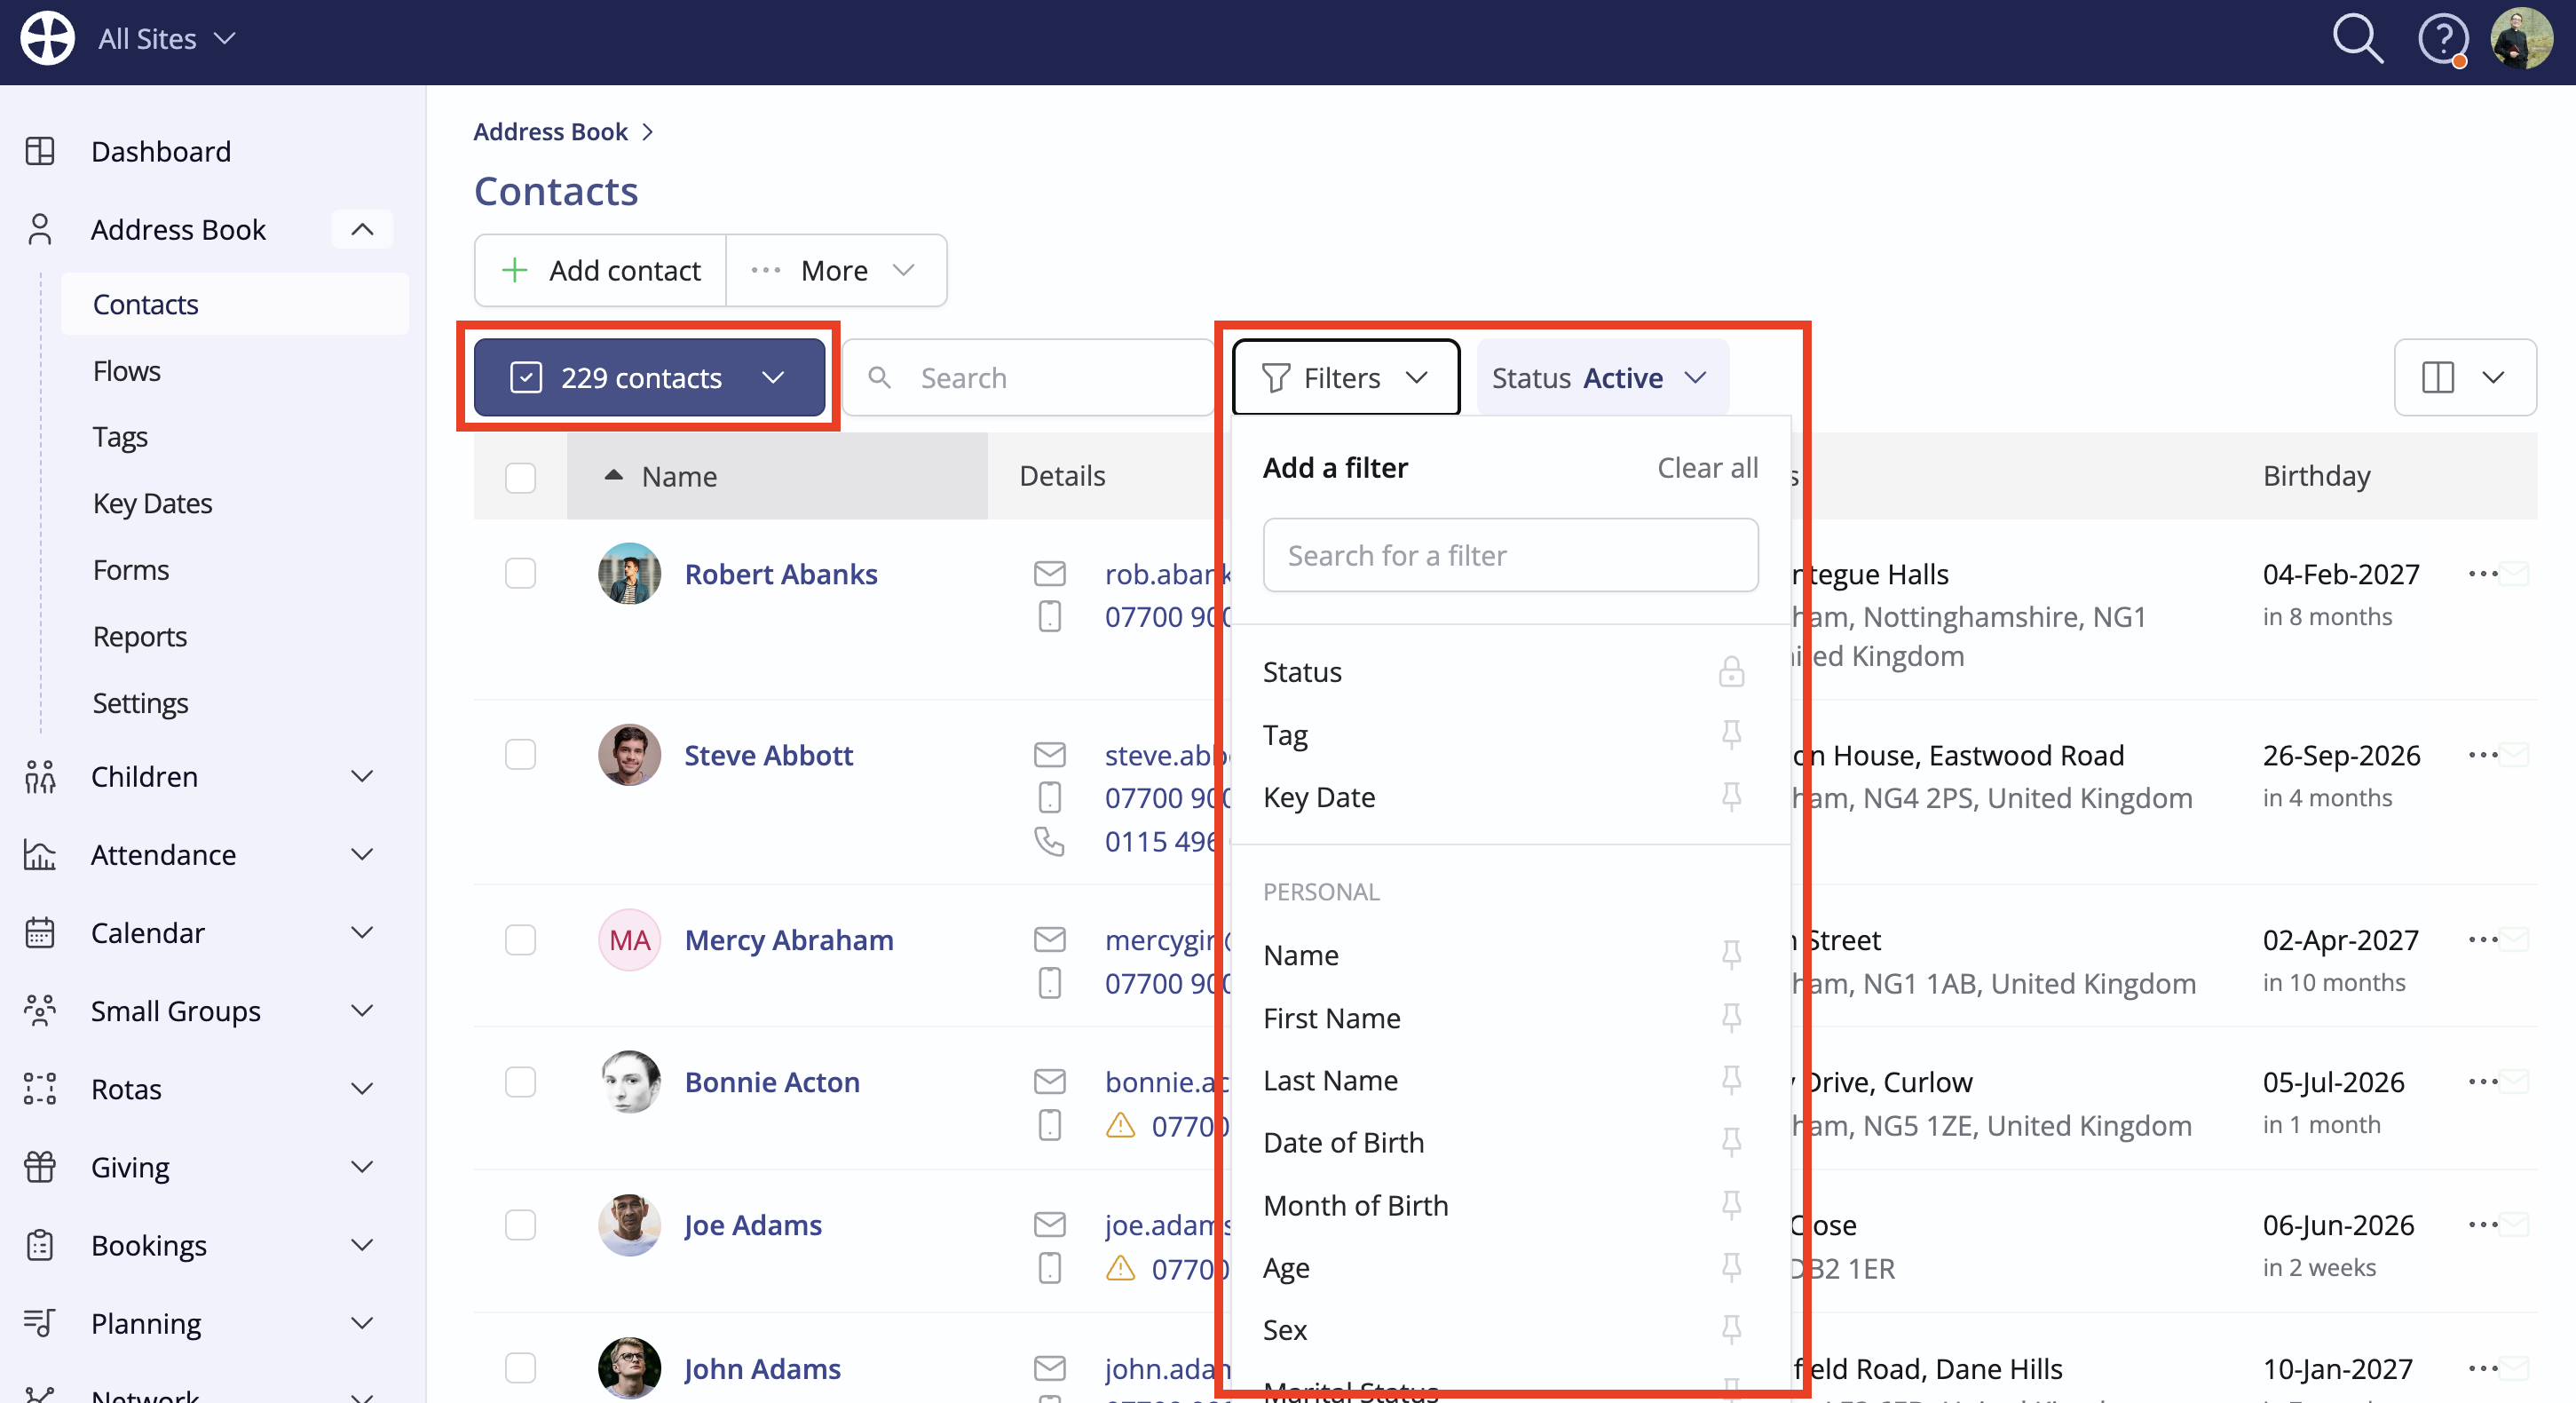
1. Decide who to include
Head to the Address Book module. To include your entire Address Book in the directory, click on the Bulk Actions menu or use the Filters to select just the contacts you require. You can filter to include those in specific Tags, those in particular Key Dates and so on. Once filters have been applied, the contact list immediately reflects those filters:

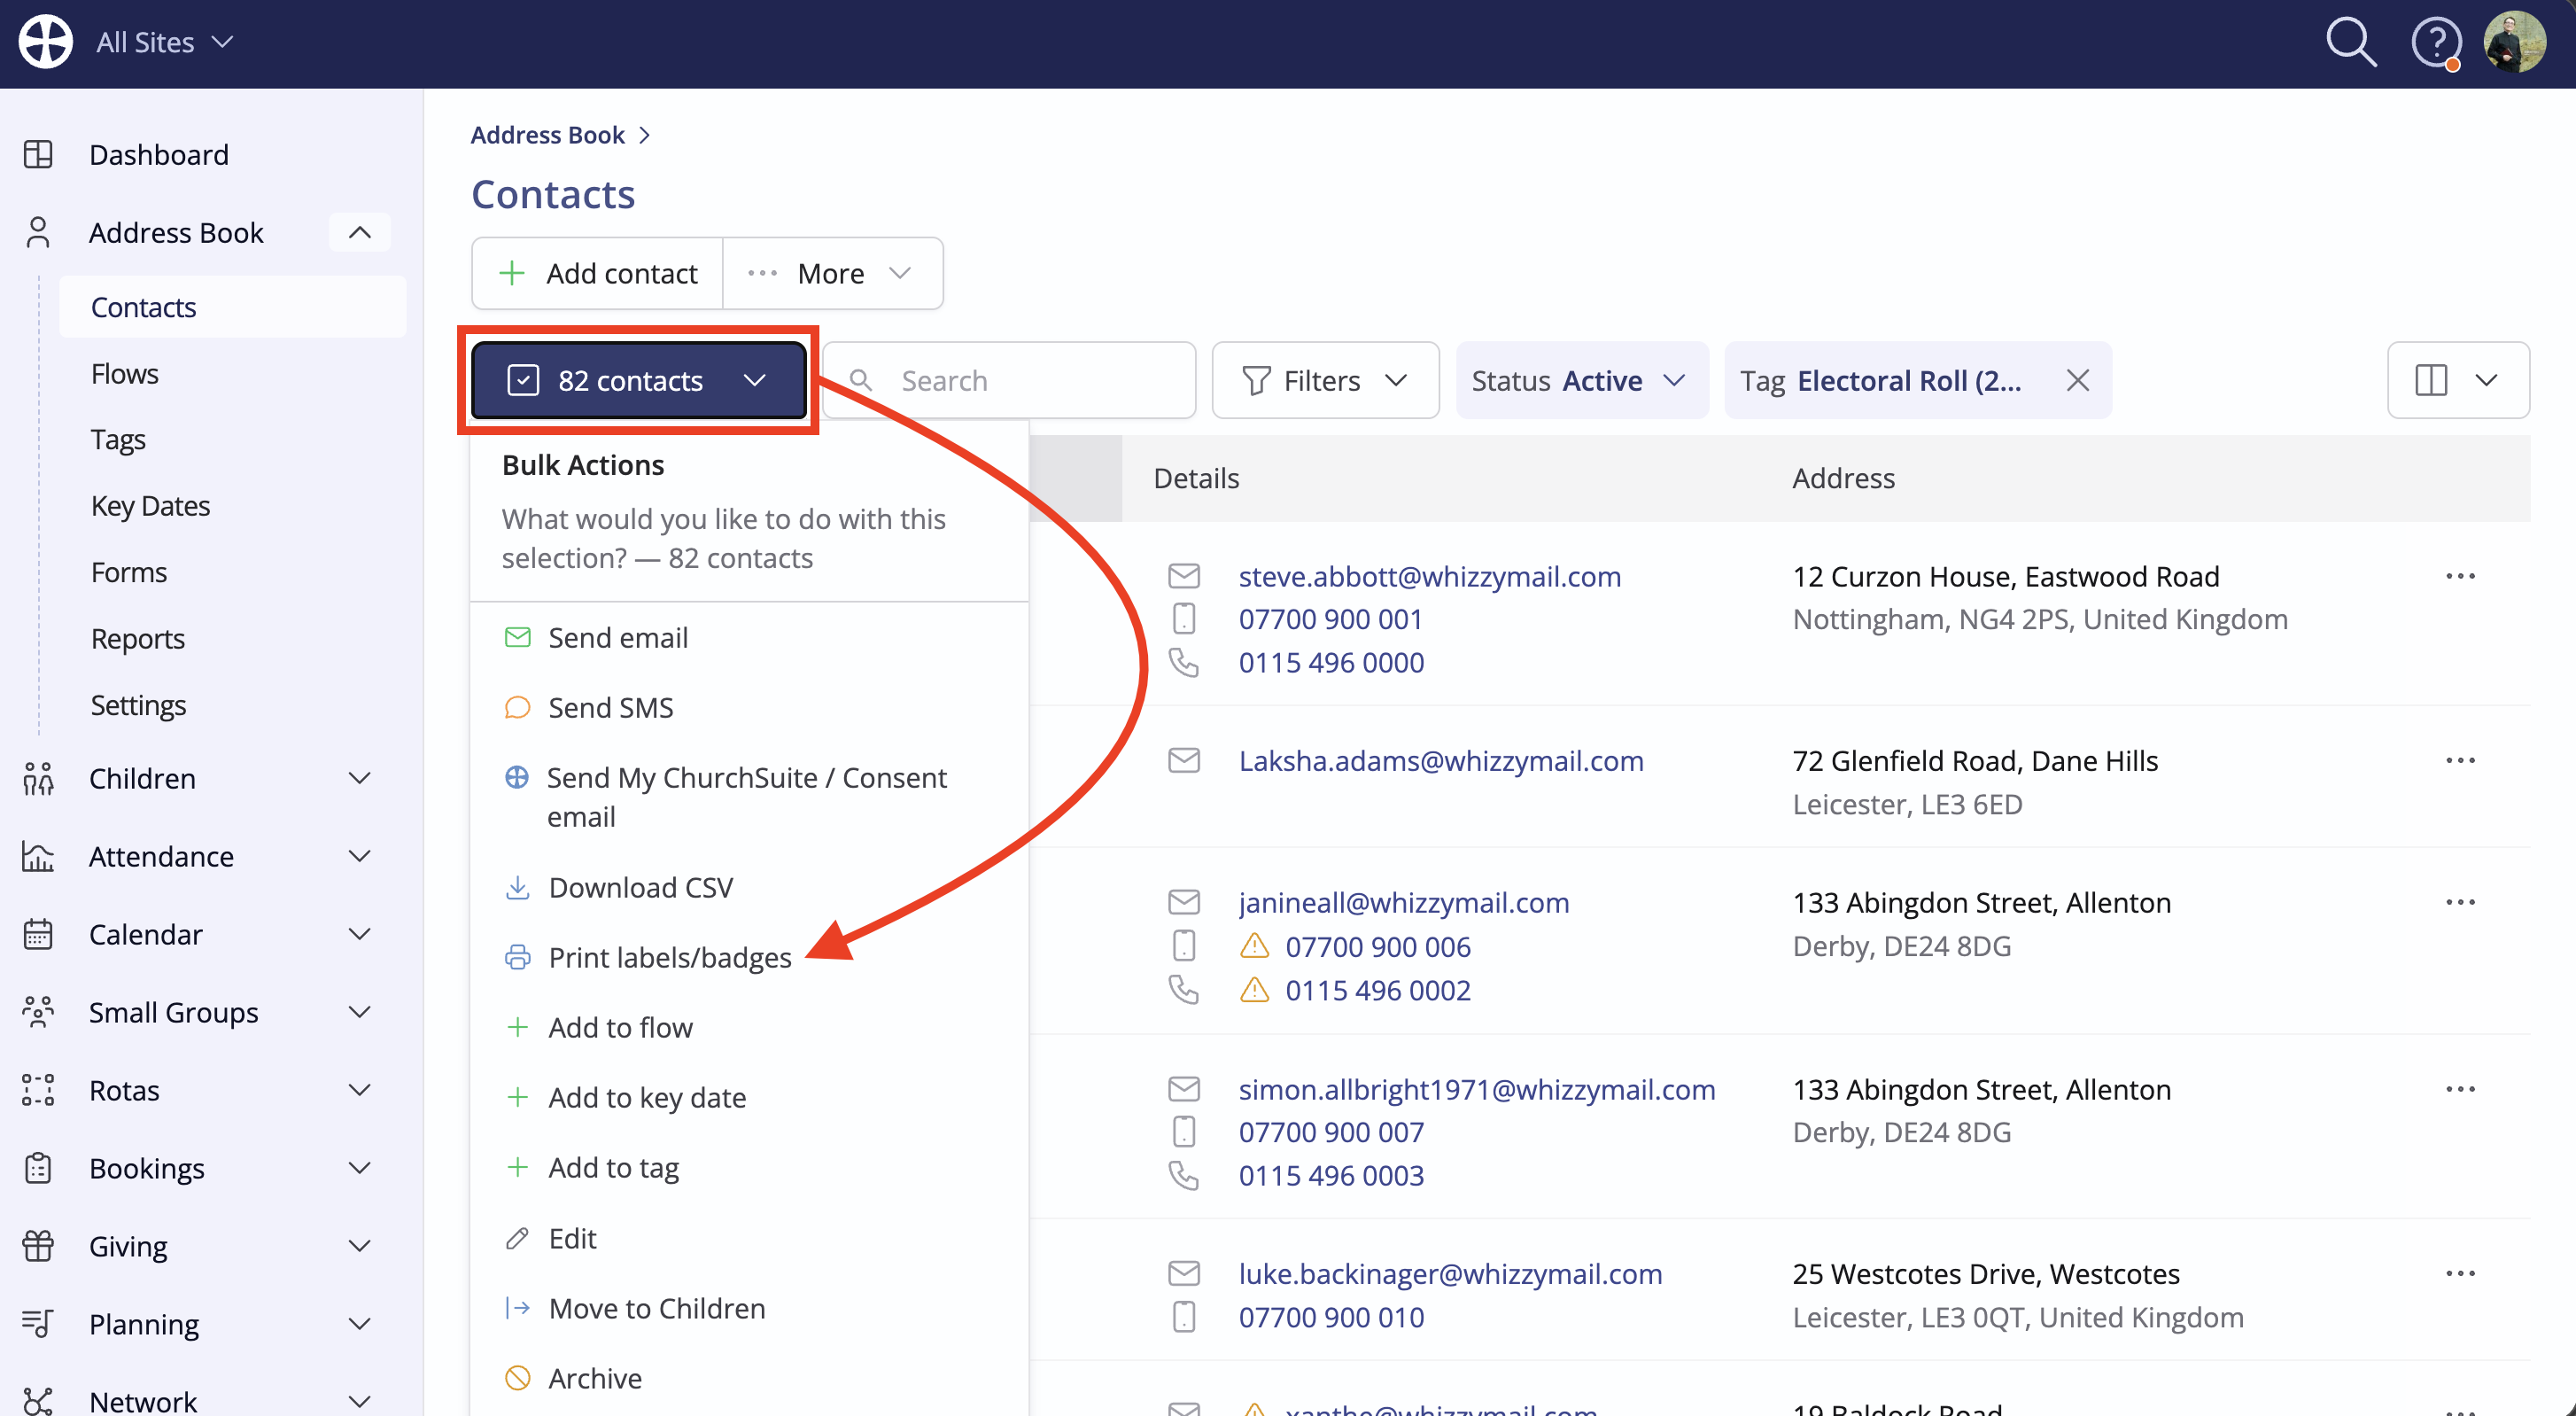
2. Choose what to include
Click on the Bulk Actions menu and select to Print labels/badges:
On the pop-up, choose the Directory tab. Here you can select which details to include - tick all the checkboxes that you wish to apply and click Generate directory:
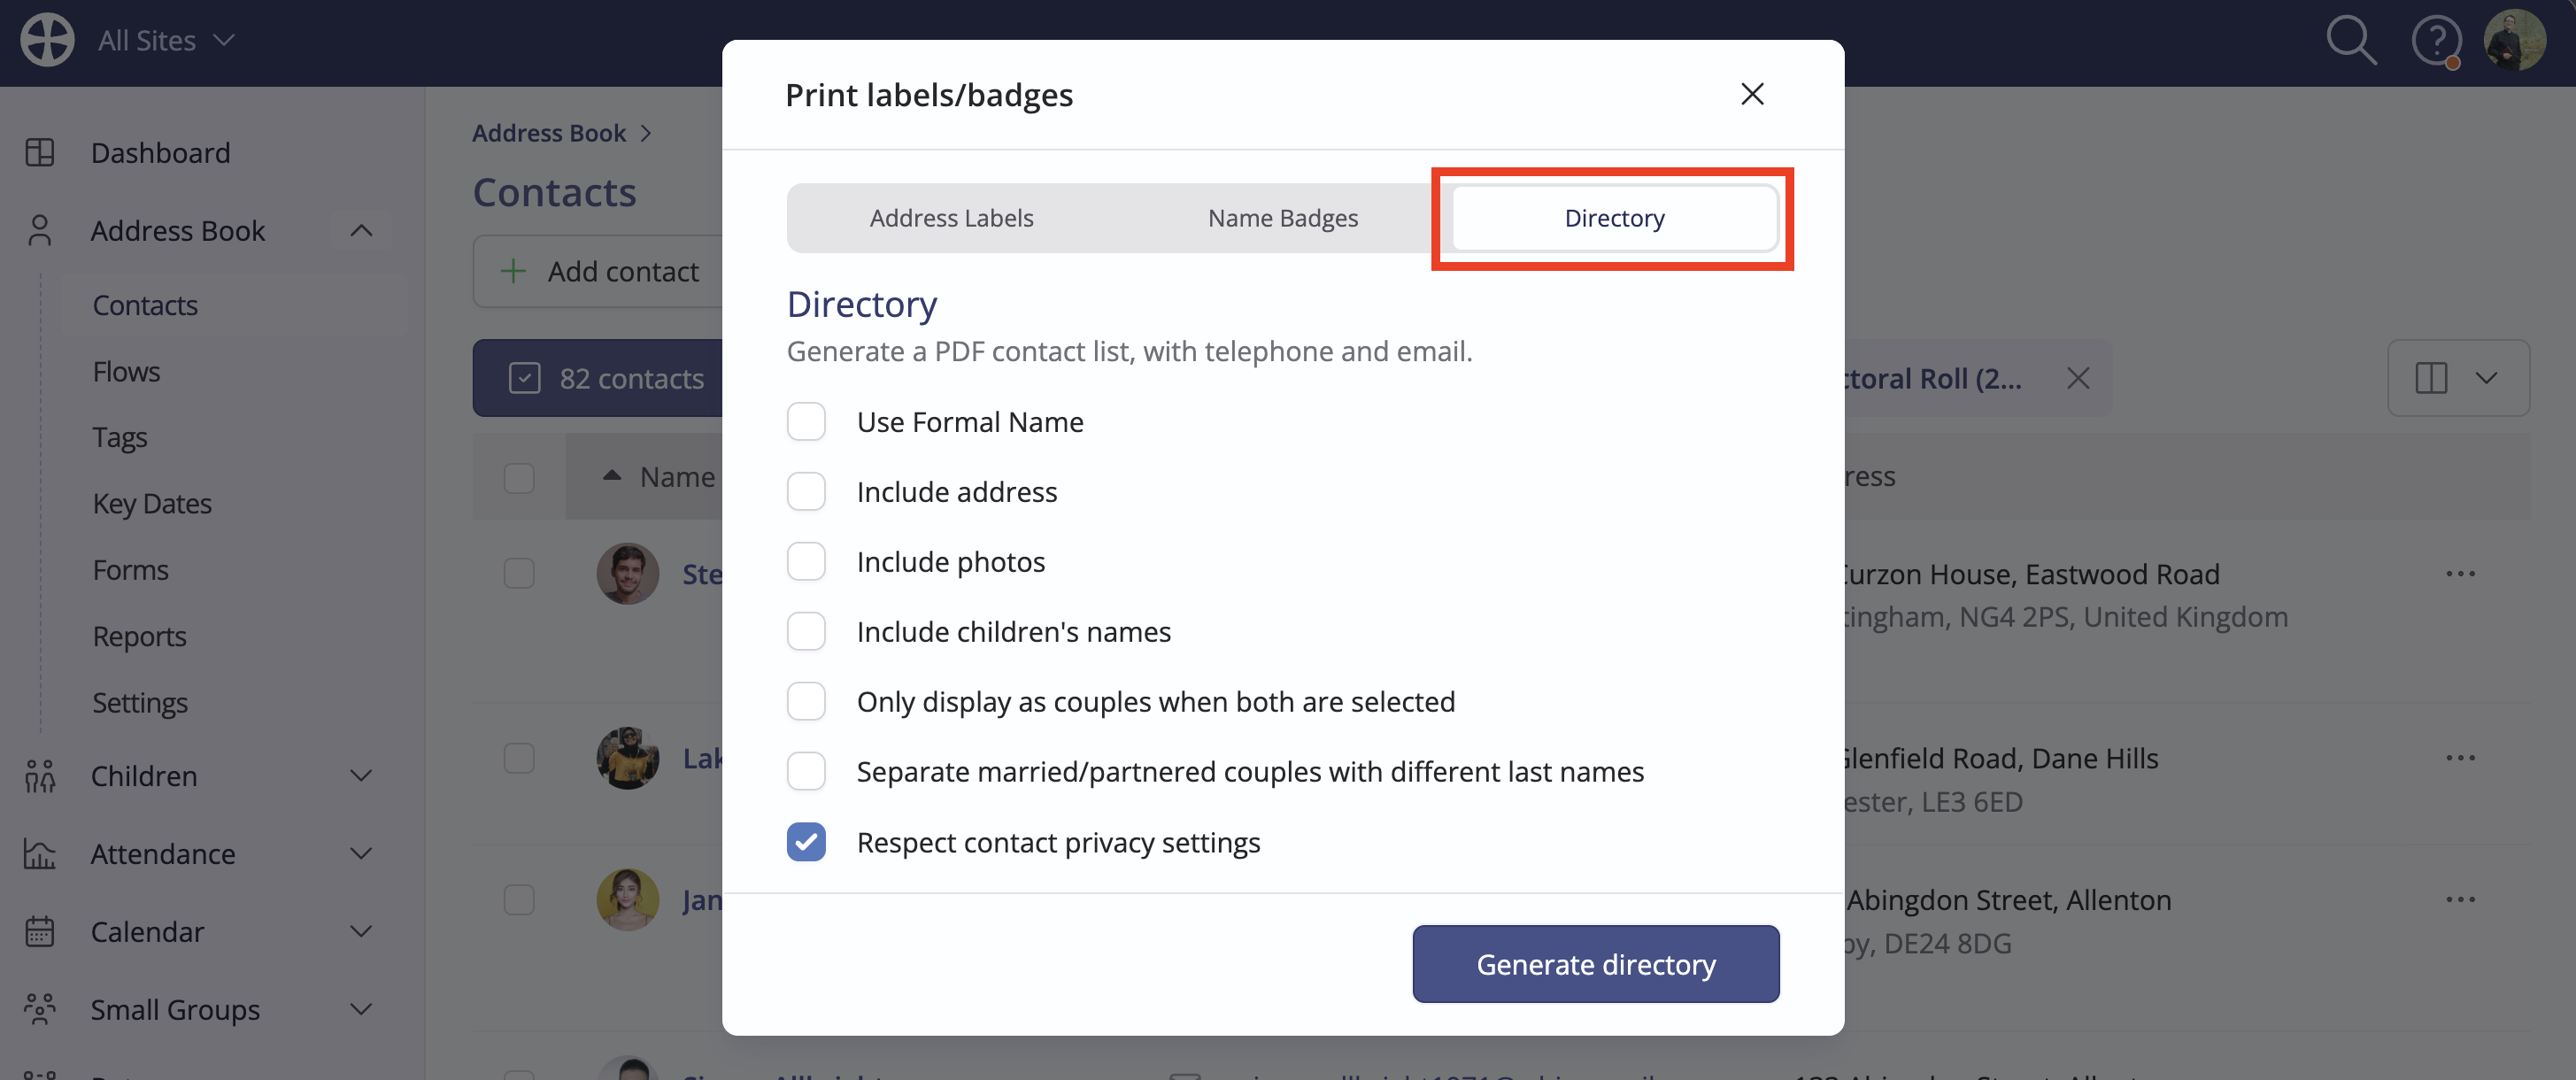
Privacy of information
In the same way that each person's privacy settings control which of their contact details are visible to others in the member-facing My ChurchSuite, the PDF also respects contact privacy settings. However, where you have a lawful basis for doing so, you can override privacy settings by unticking the Respect contact privacy settings to include full contact details of all included contacts, even if they have made any of their details not visible.
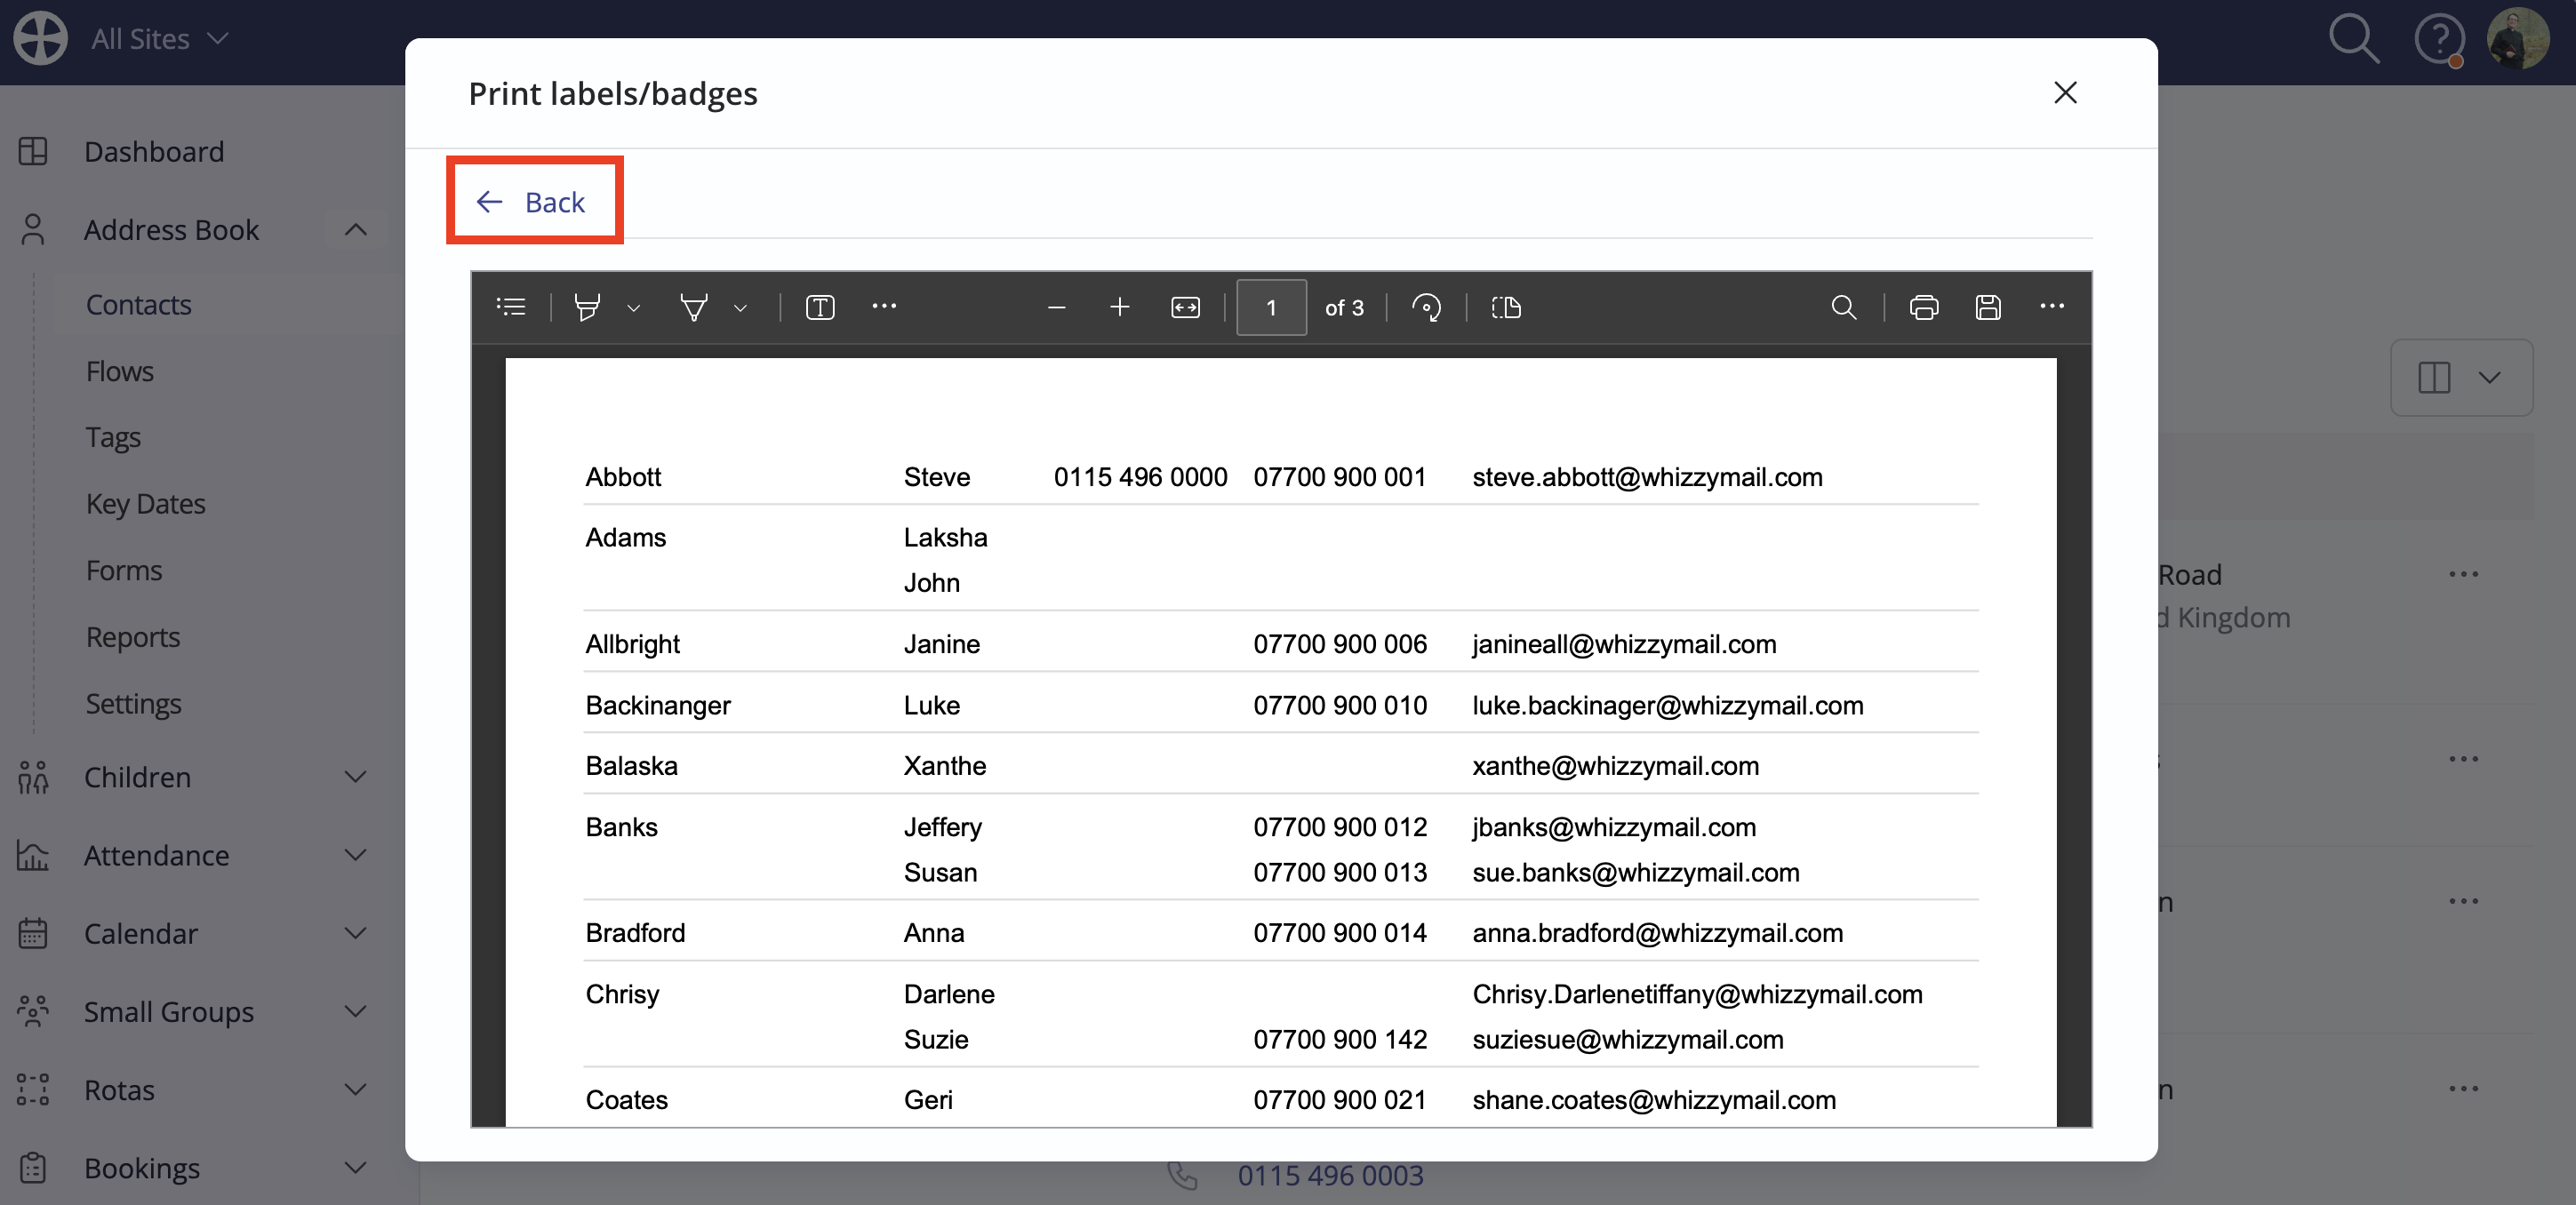
3. Print your directory
A styled PDF preview of your contact directory is shown, ready to download or print! Should you wish to change which details are included, you can helpfully click Back to do so: