Embed calendars and events into your website
In this article
Introduction
Overview of embed configurations
Adding and managing embed configurations
Combine similar events - feature explained
Embedding an individual event into a page on your website
Introduction
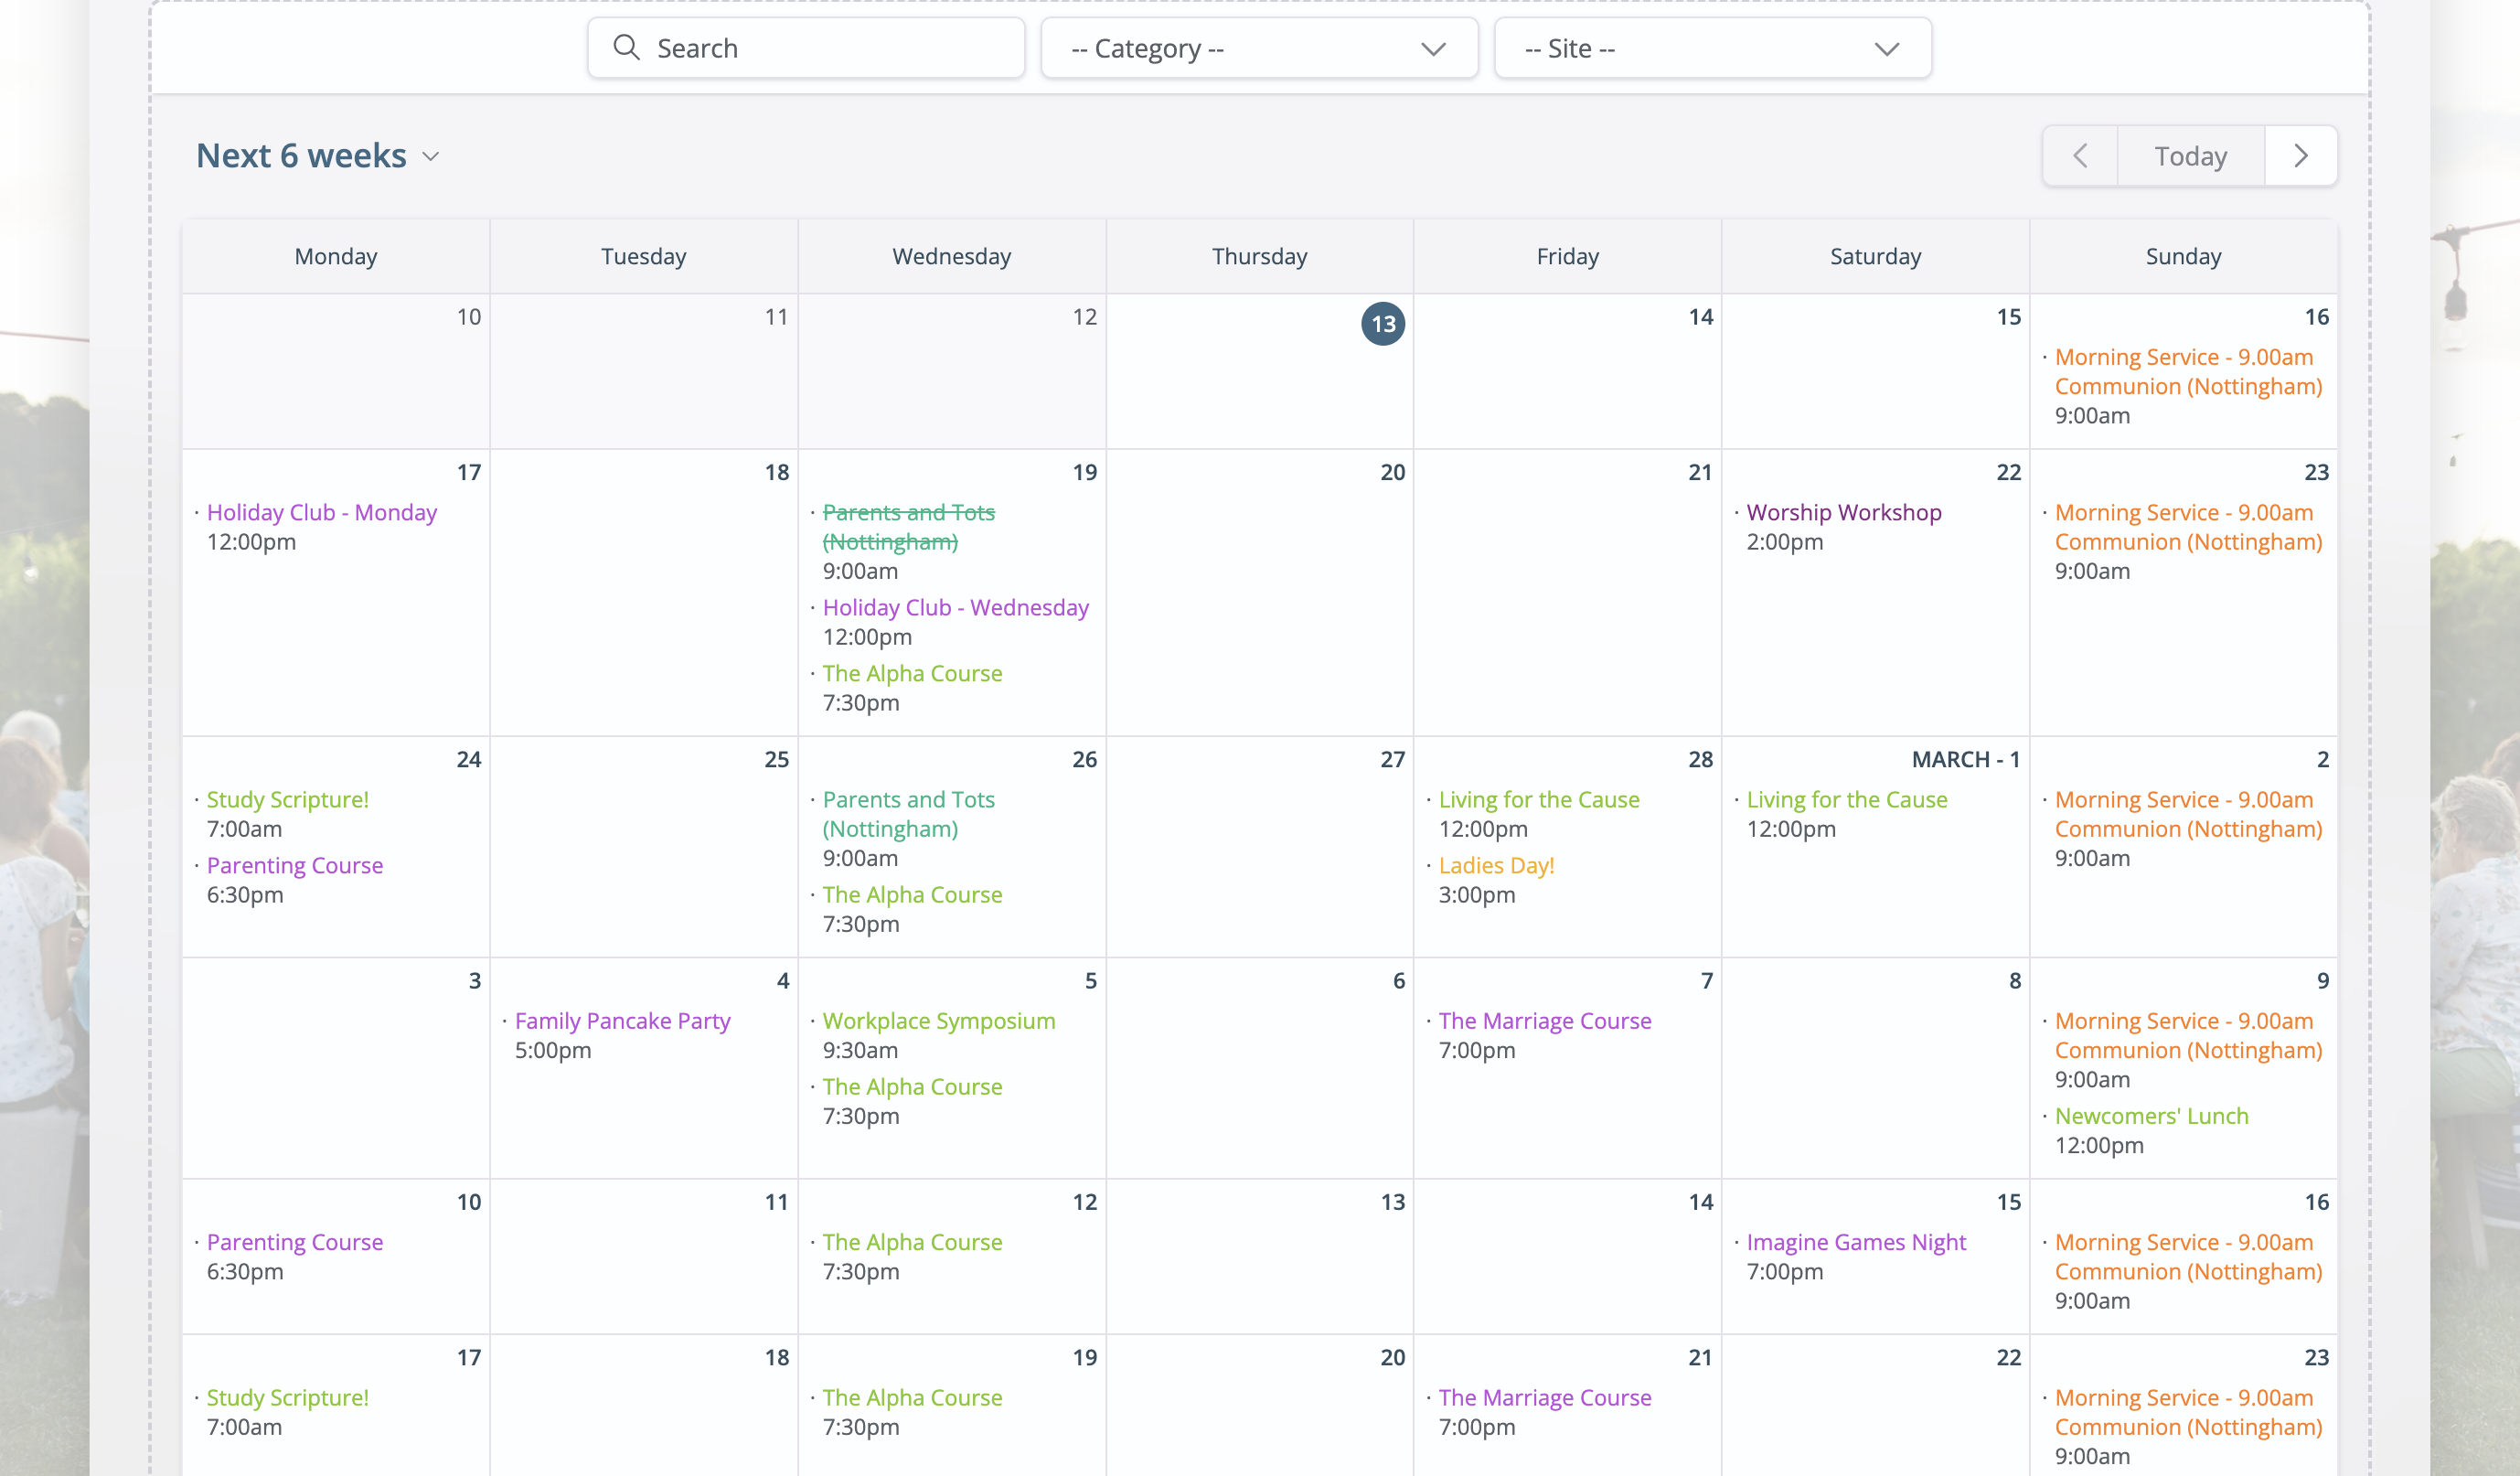
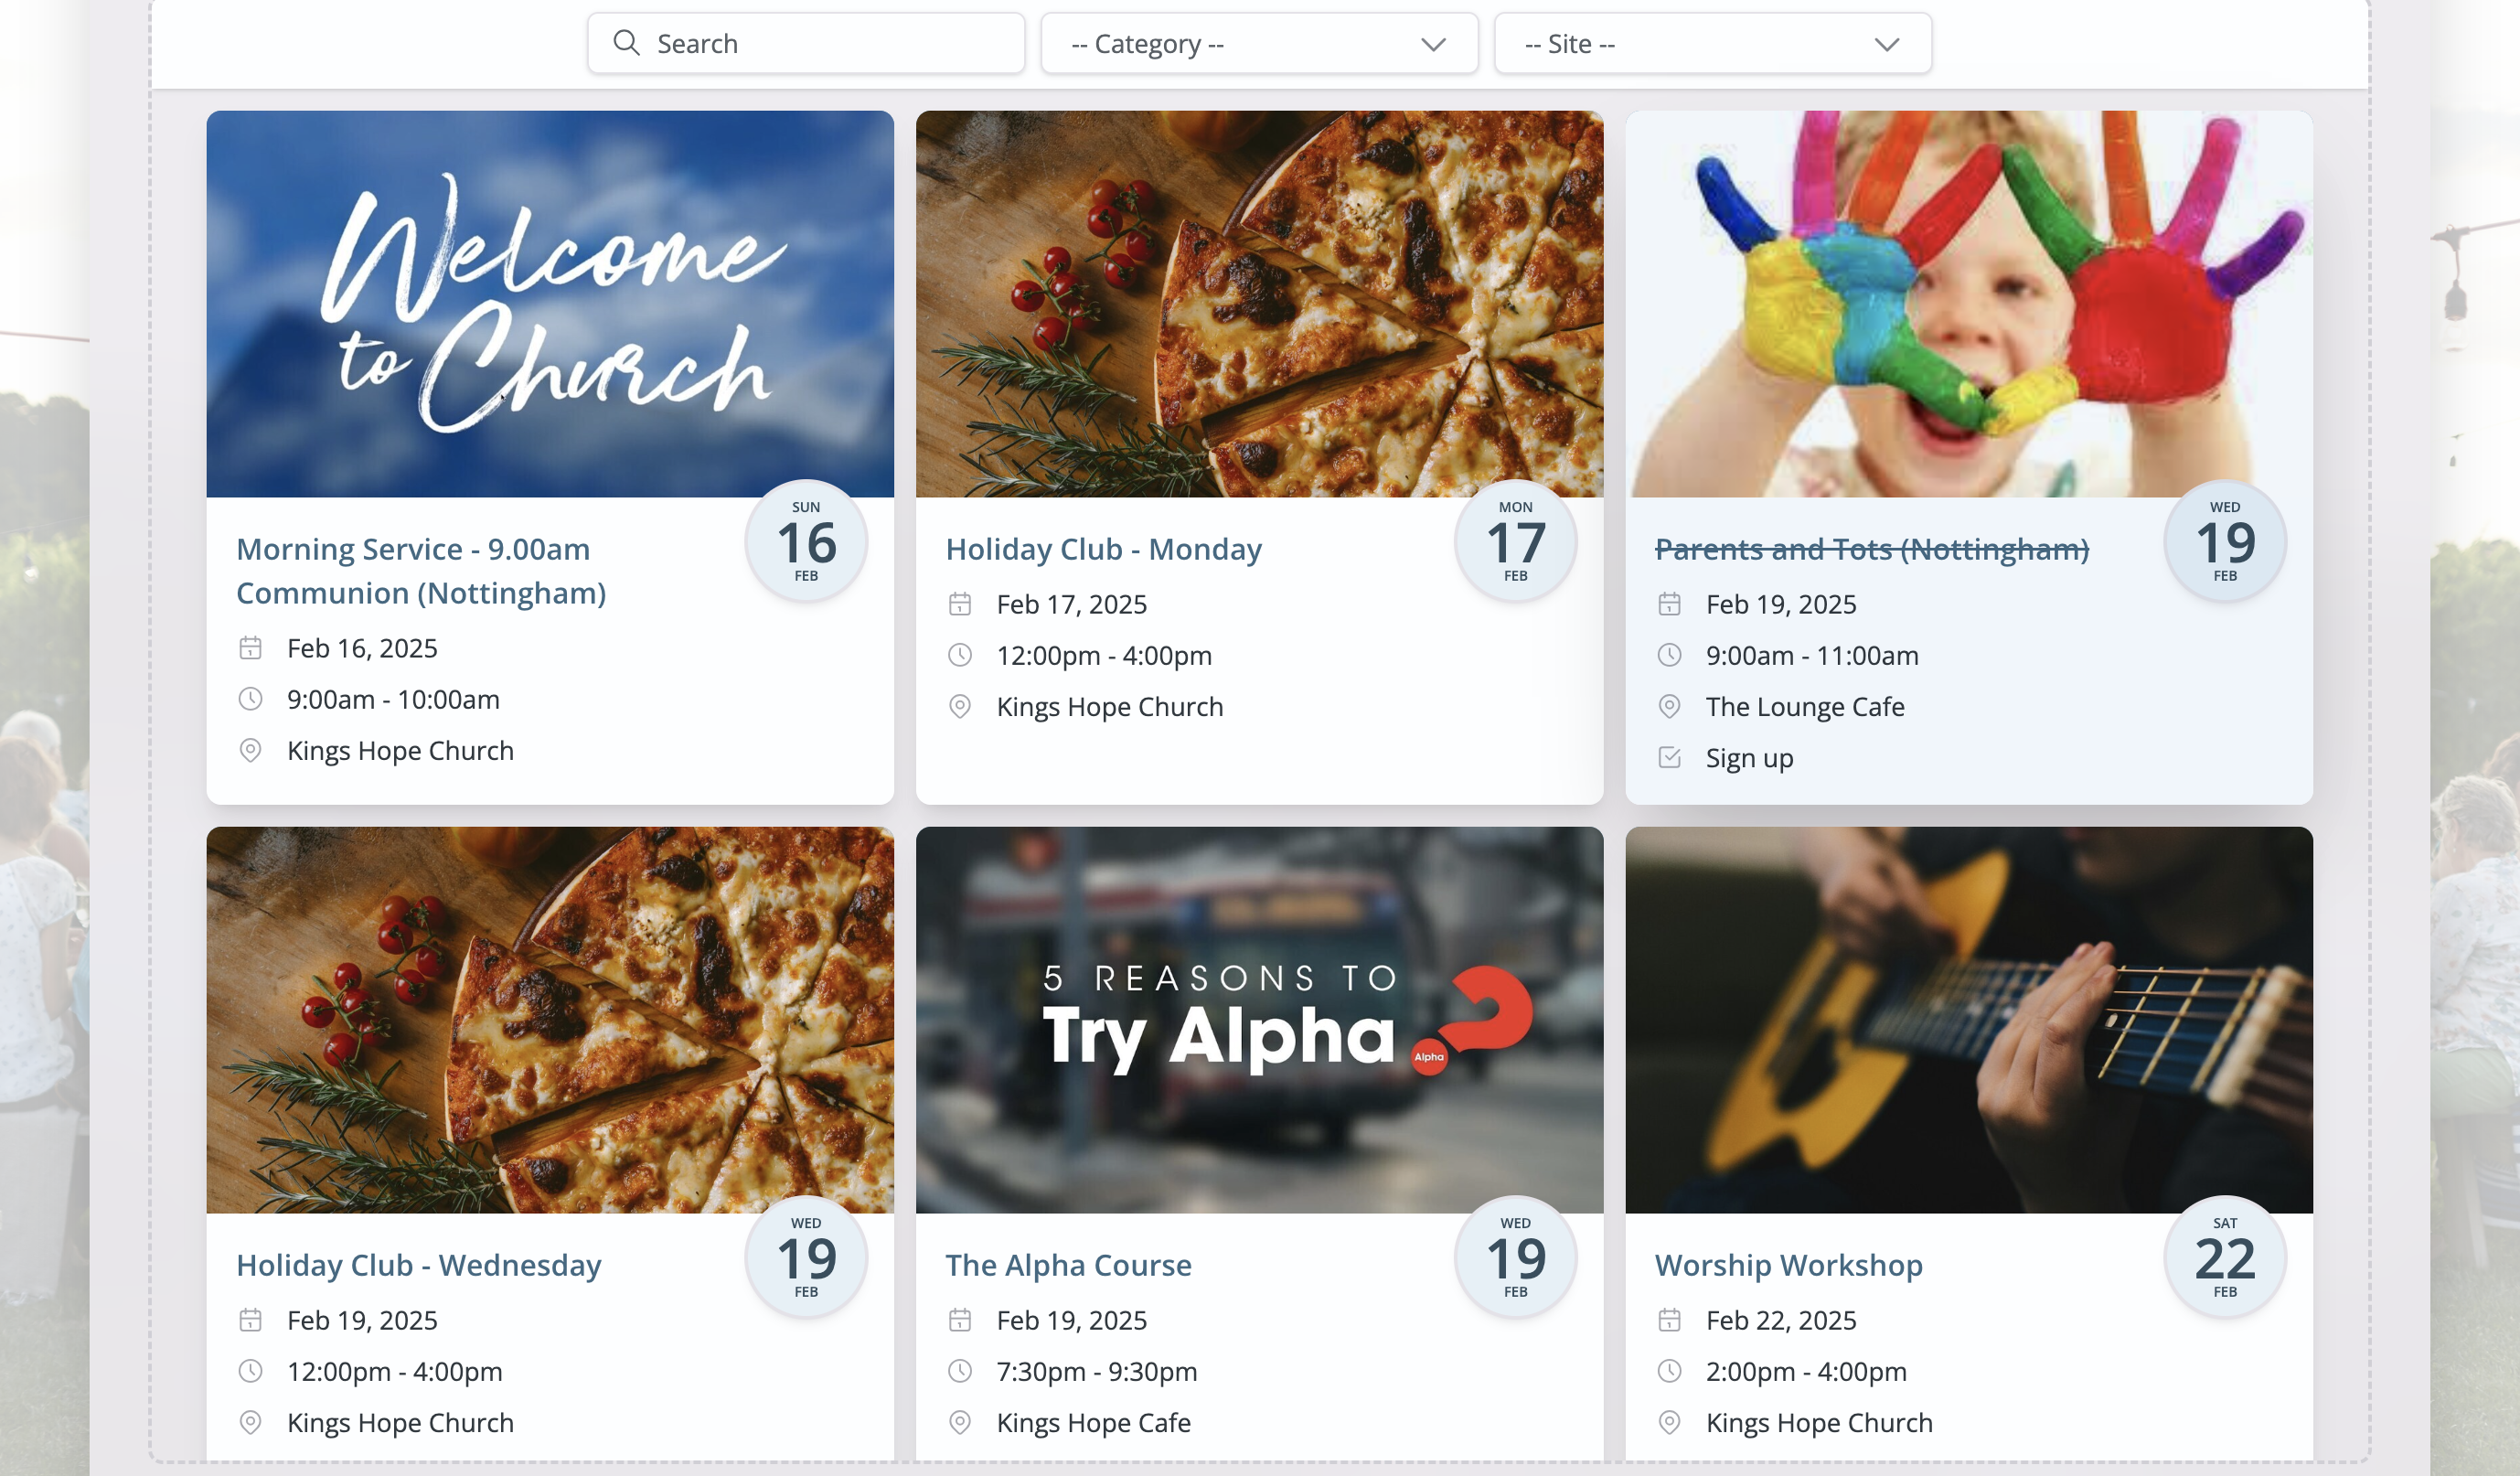
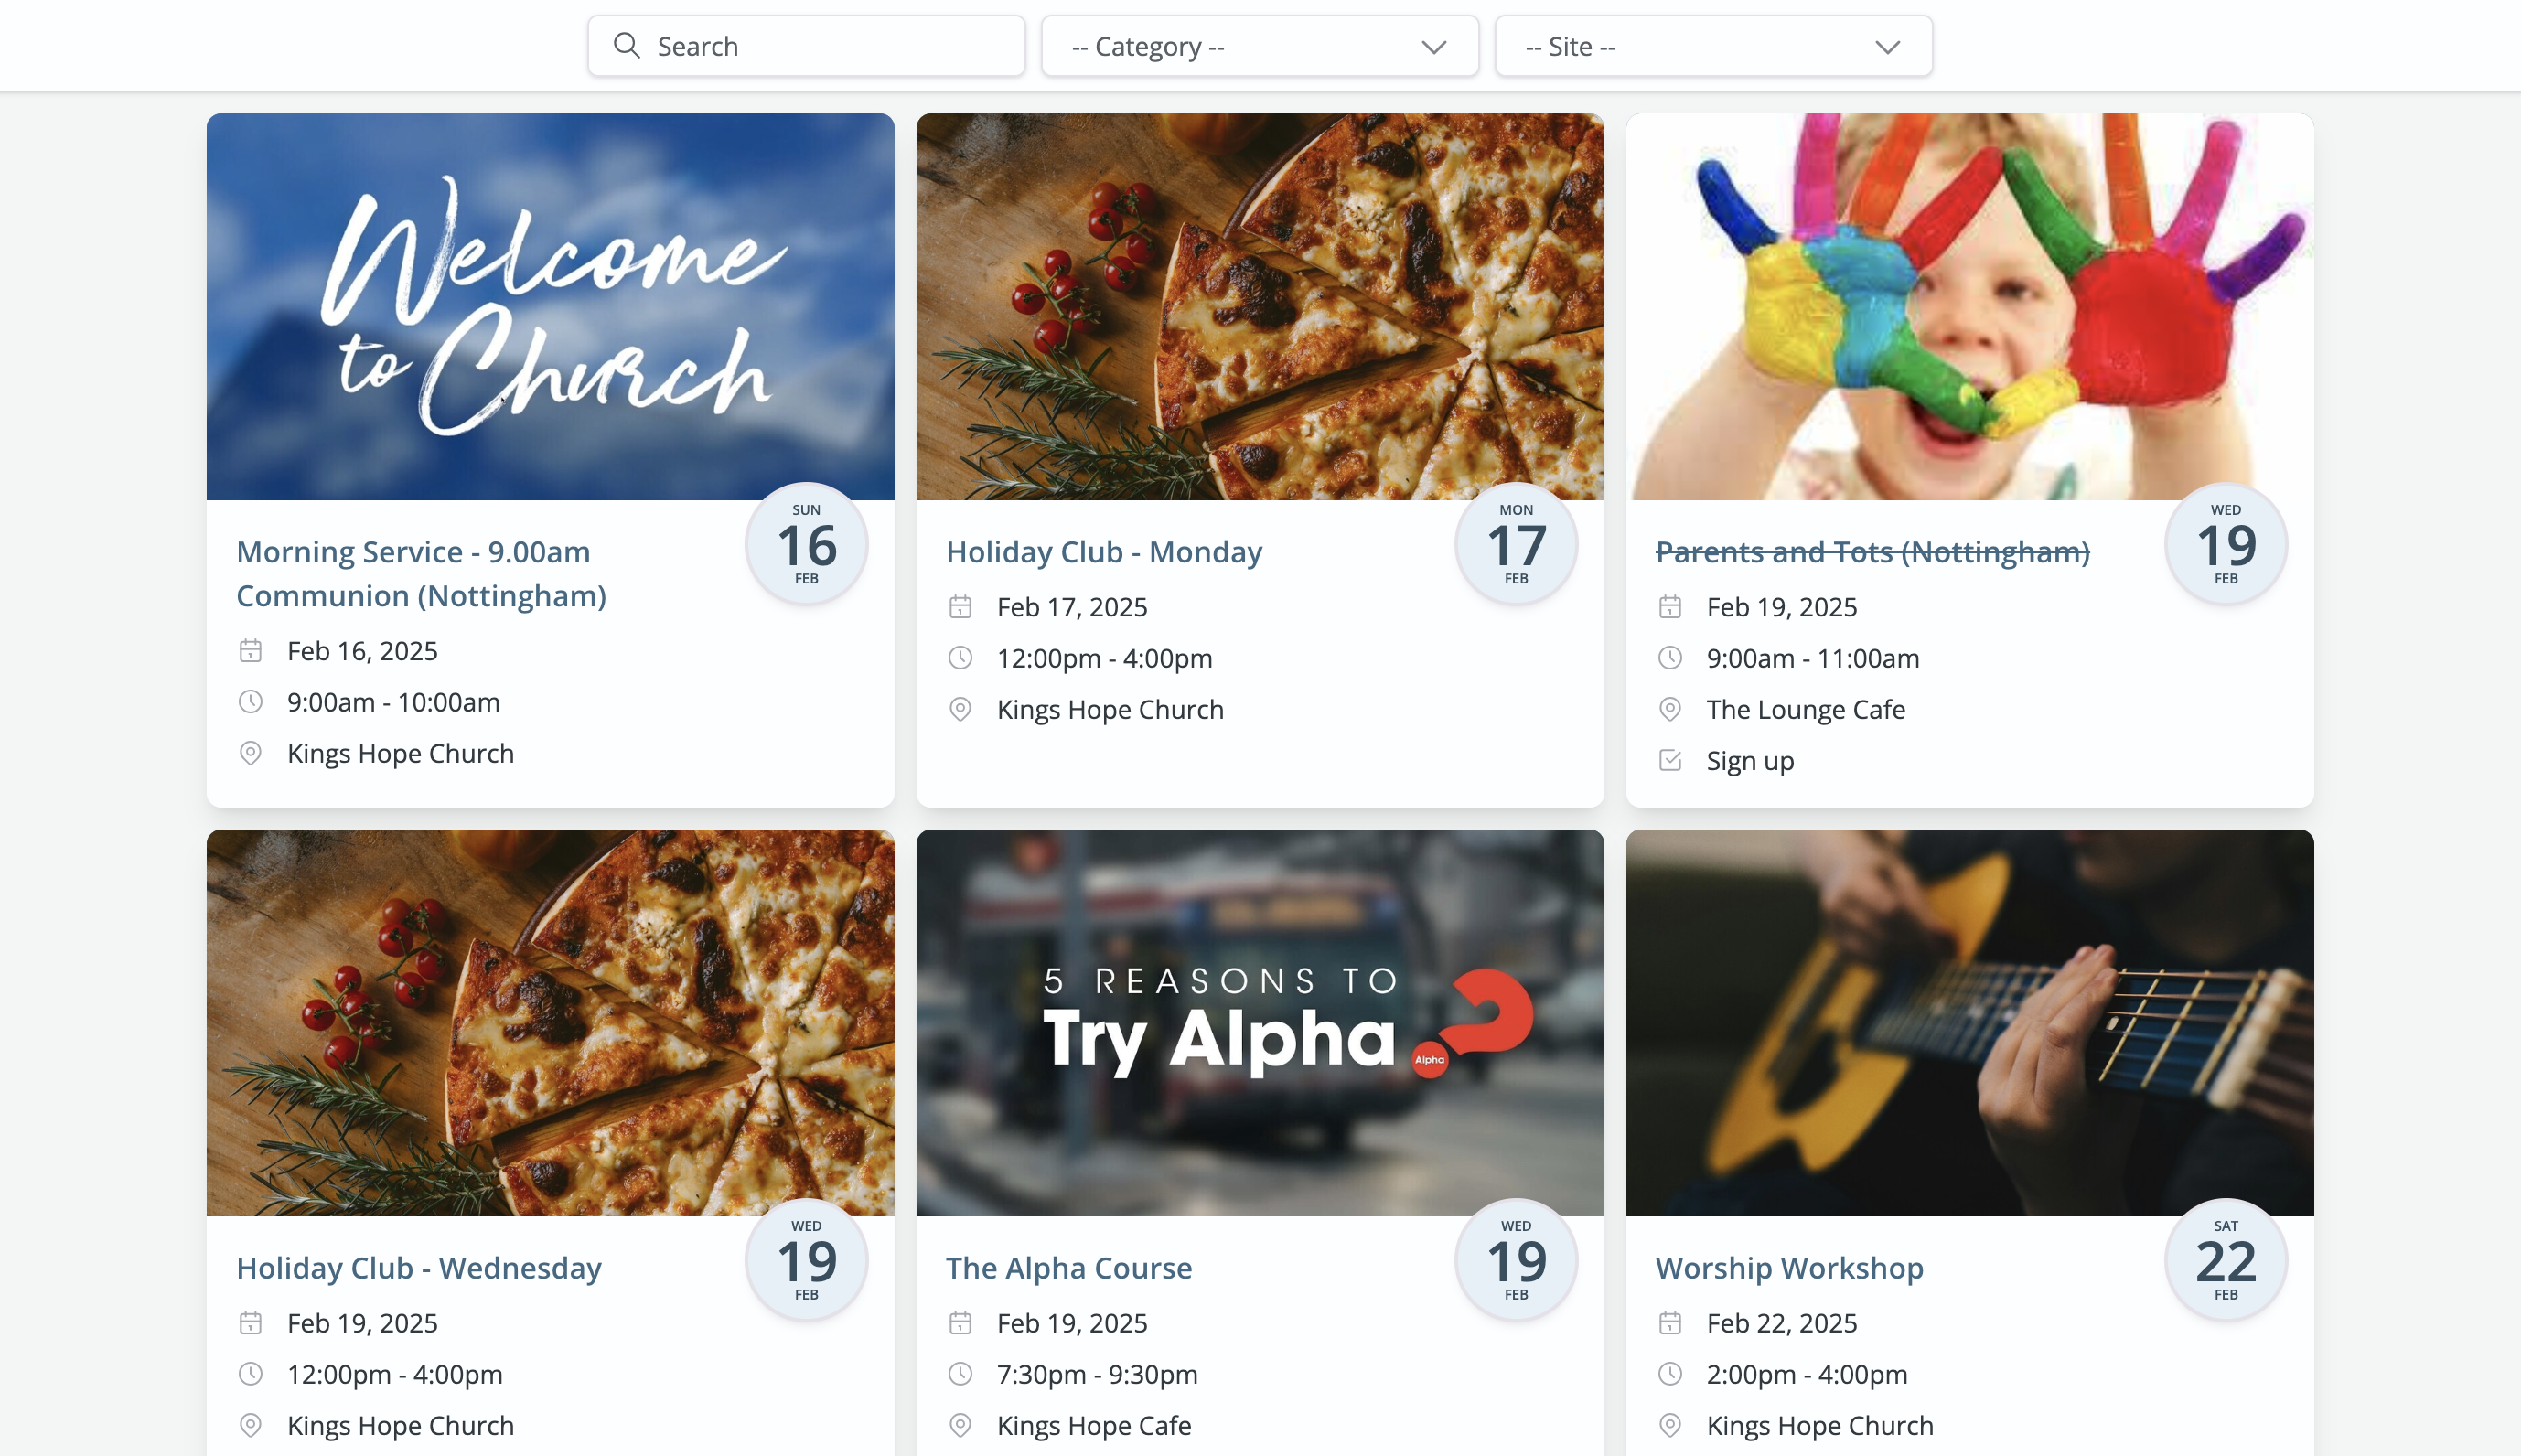
The Calendar module includes a helpful website integration that enables you to embed event calendars and lists into pages on your website so that website visitors can view and navigate upcoming events. Once embedded, your website remains up to date as events are added or updated within ChurchSuite. Here's an example of the embeddable calendar and event list:
Check out our demonstration website
We've created a demonstration website showcasing all of ChurchSuite's embeddable features. The Events section describes the simple 'copy and paste HTML' method iFrames (explained in this article), but for greater flexibility, styling control and increased search engine optimisation, your website developers may be interested in using our customisable event JSON feeds.
Overview of embed configurations
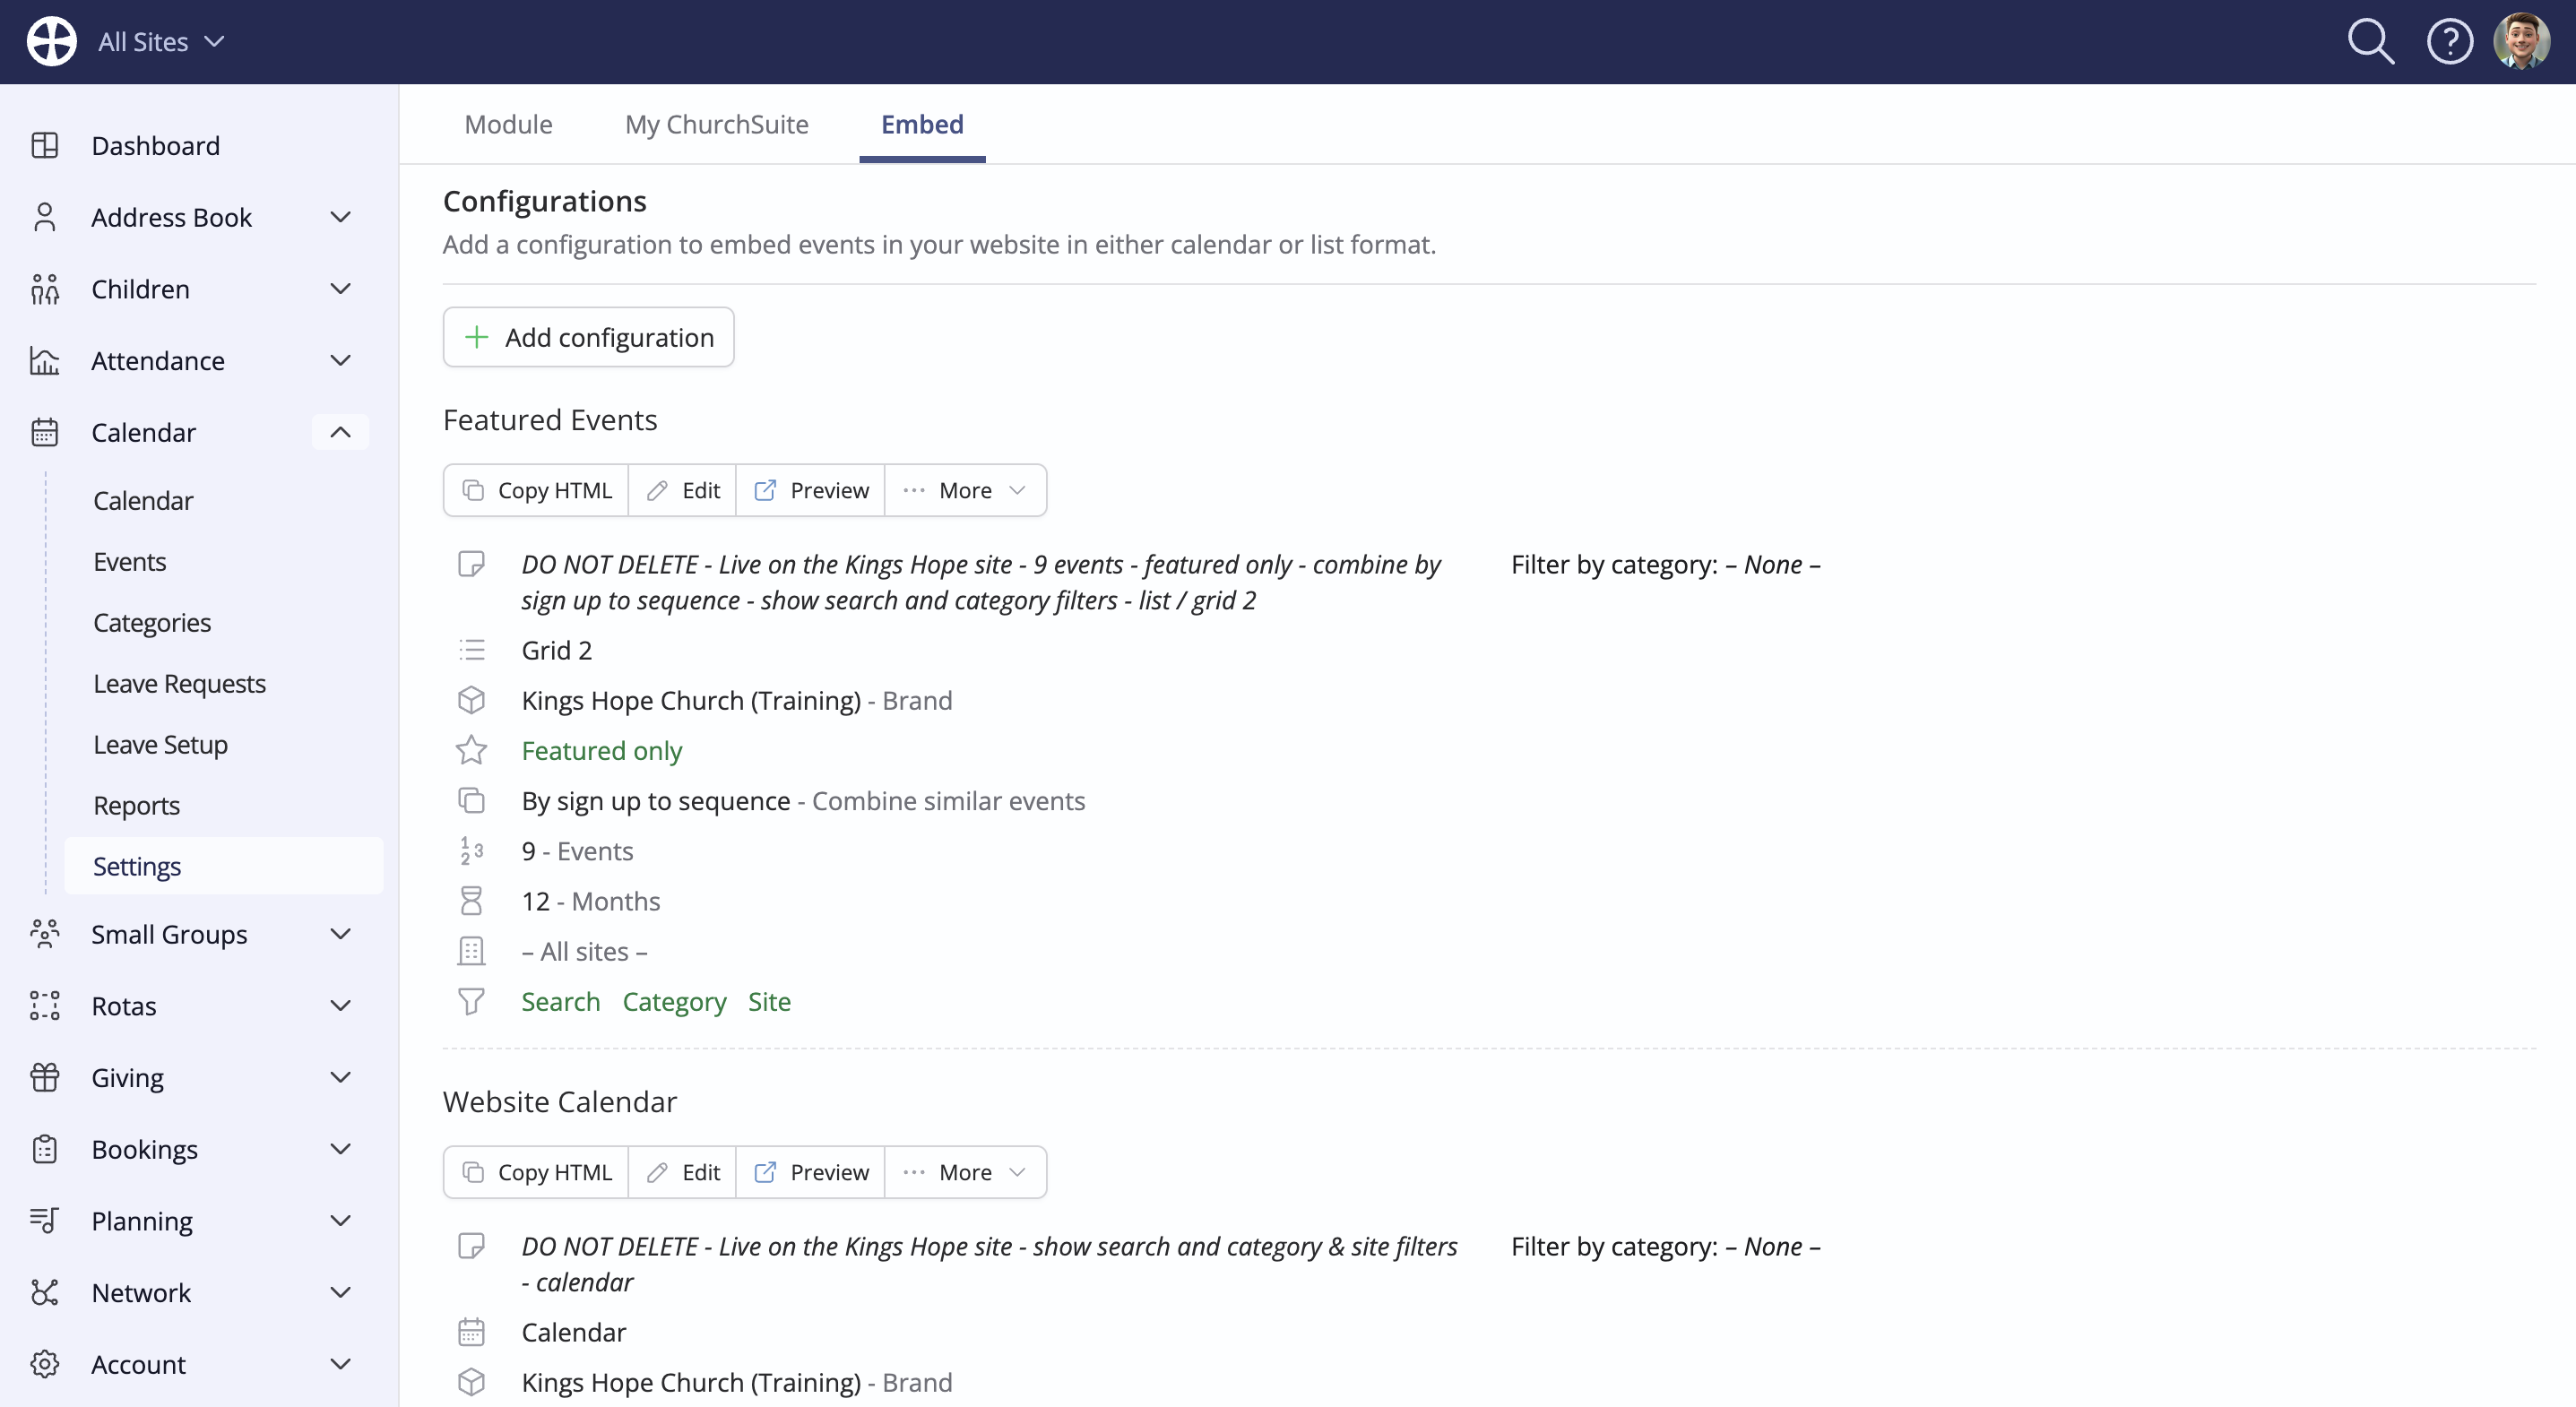
The Calendar module settings include a section for adding and managing embed configurations. An embed configuration contains all the settings for each calendar or event list you have embedded in your website. Each configuration has its own HTML code that you'll copy from the configuration into the appropriate page on your website, which creates a secure connection between your embedded ChurchSuite content and your Calendar module. Once embedded, subsequent changes to the configuration settings in ChurchSuite are immediately reflected on your website without requiring you to add new HTML each time. You can create multiple configurations - ideal where you want to show different calendars or lists in your various website sections.
Remember, only events with visibility set as Show in embed are shown in an embedded calendar or event list, and only events with visibility set as Show in featured events will show in a featured event list. Event visibility is managed on an event-by-event basis, which means you have complete control over which events will be shown or featured for website visitors - see our related support article for further information about Managing event visibility.
The remainder of this article explains how to add and make changes to a configuration. To visualise what your embeddable calendar or event list will look like and how it will function for website visitors, read on. Configurations have a helpful Preview so you can easily visualise the user experience before adding the HTML code to your website.
Adding and managing embed configurations
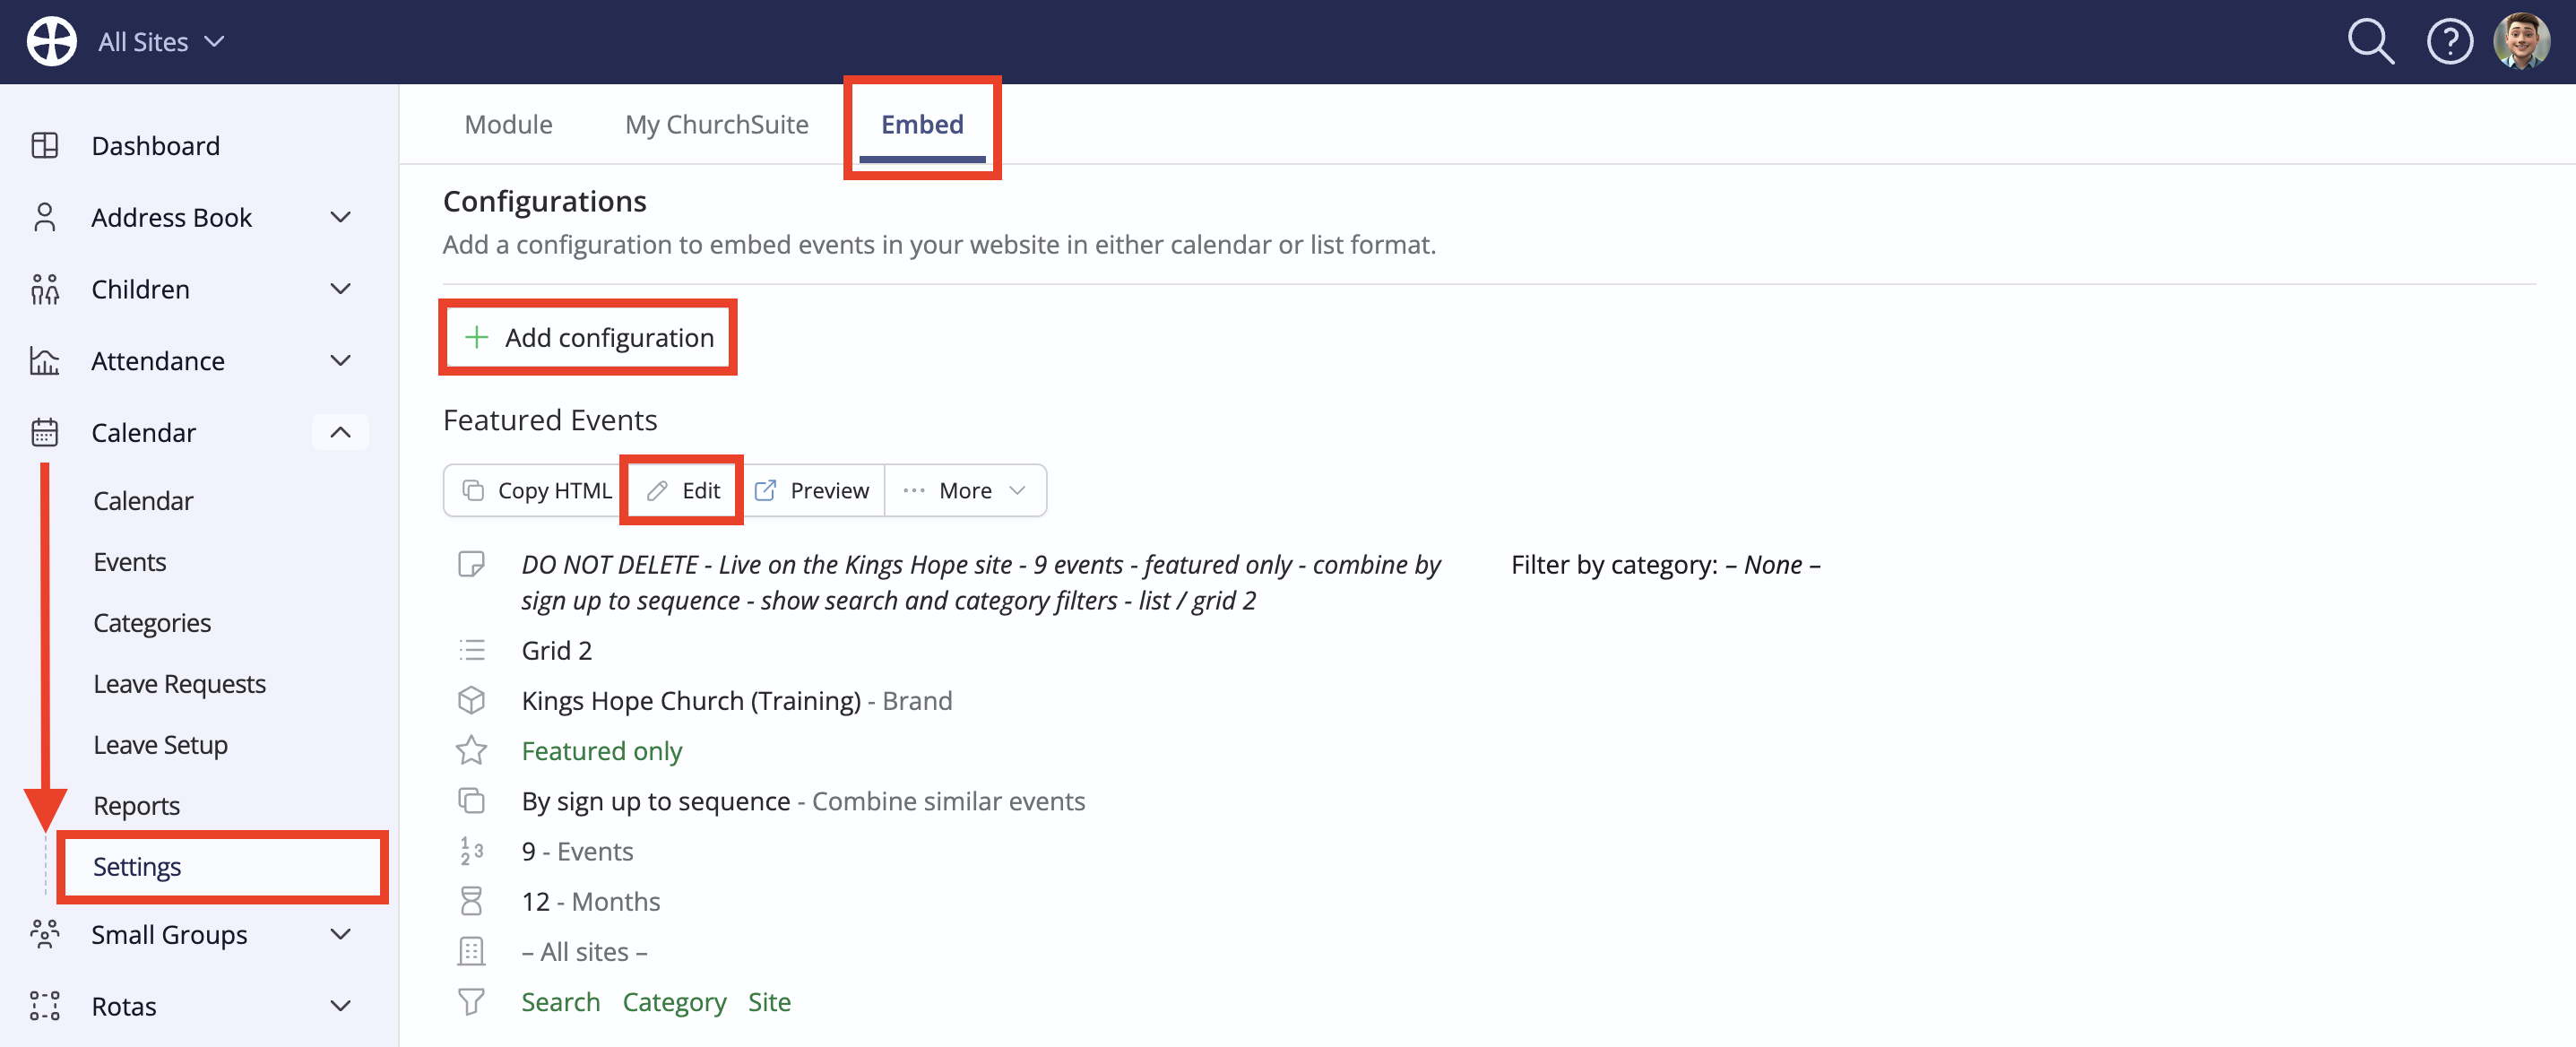
Working within the Calendar module, navigate into the module settings, accessed via the cogwheel icon in the top-right corner of the page. On the Embed Options tab, click Add configuration, or click Edit to make changes to an existing configuration.
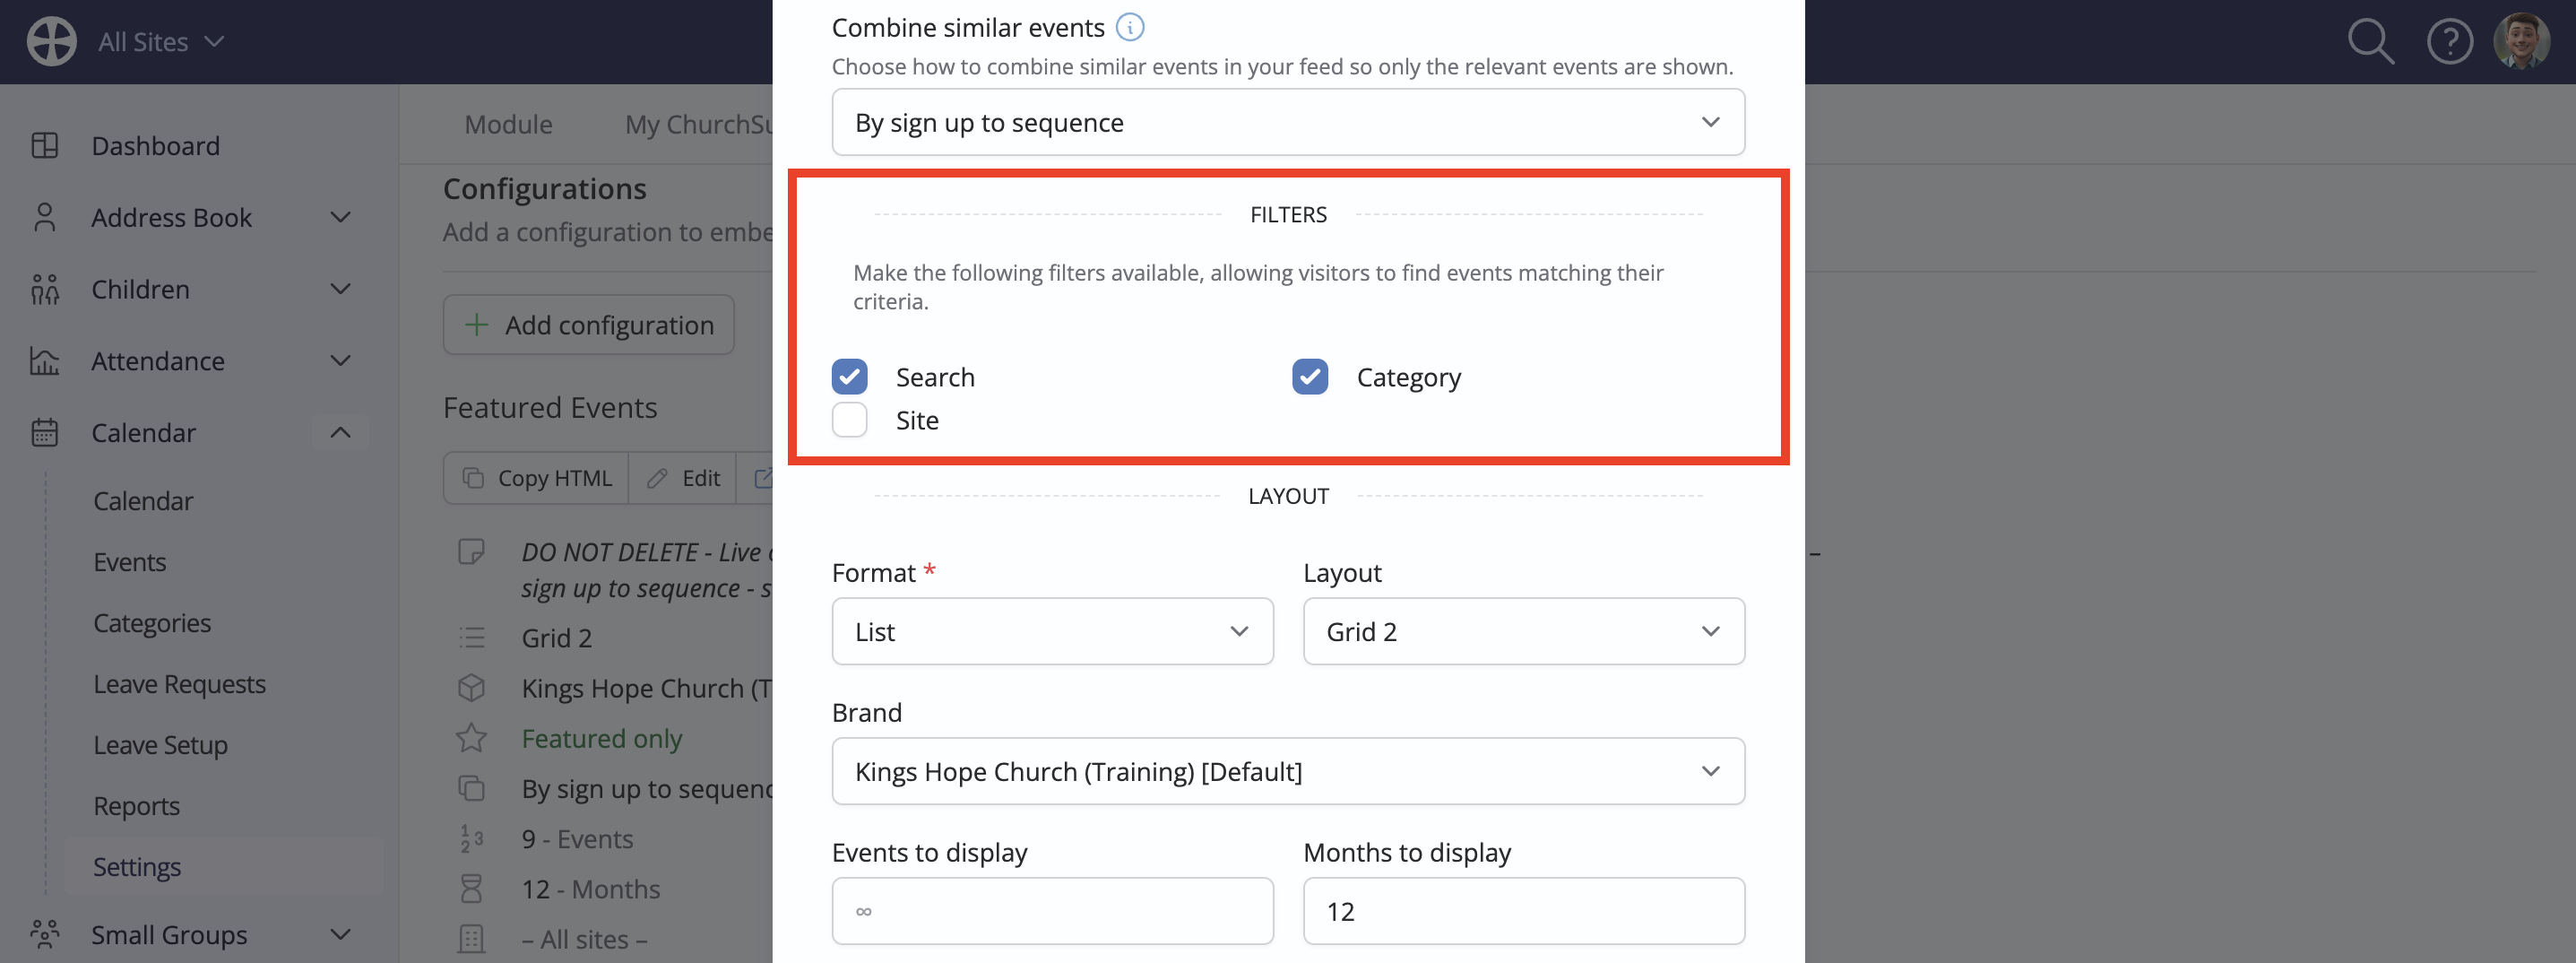
On the Add/Edit configuration pop-up, enter a suitable configuration Name and optional Description, used internally to help you identify this configuration within a list. For example, it may be helpful to note the website page URL where the configuration HTML will later be deployed. Optionally Filter by category; this will be helpful where you only wish to show certain events - for example, all your upcoming courses or all your family events. Multi-site customers can also optionally Filter by Site, which is useful for embedding site-specific calendars and event lists in site-specific web pages.
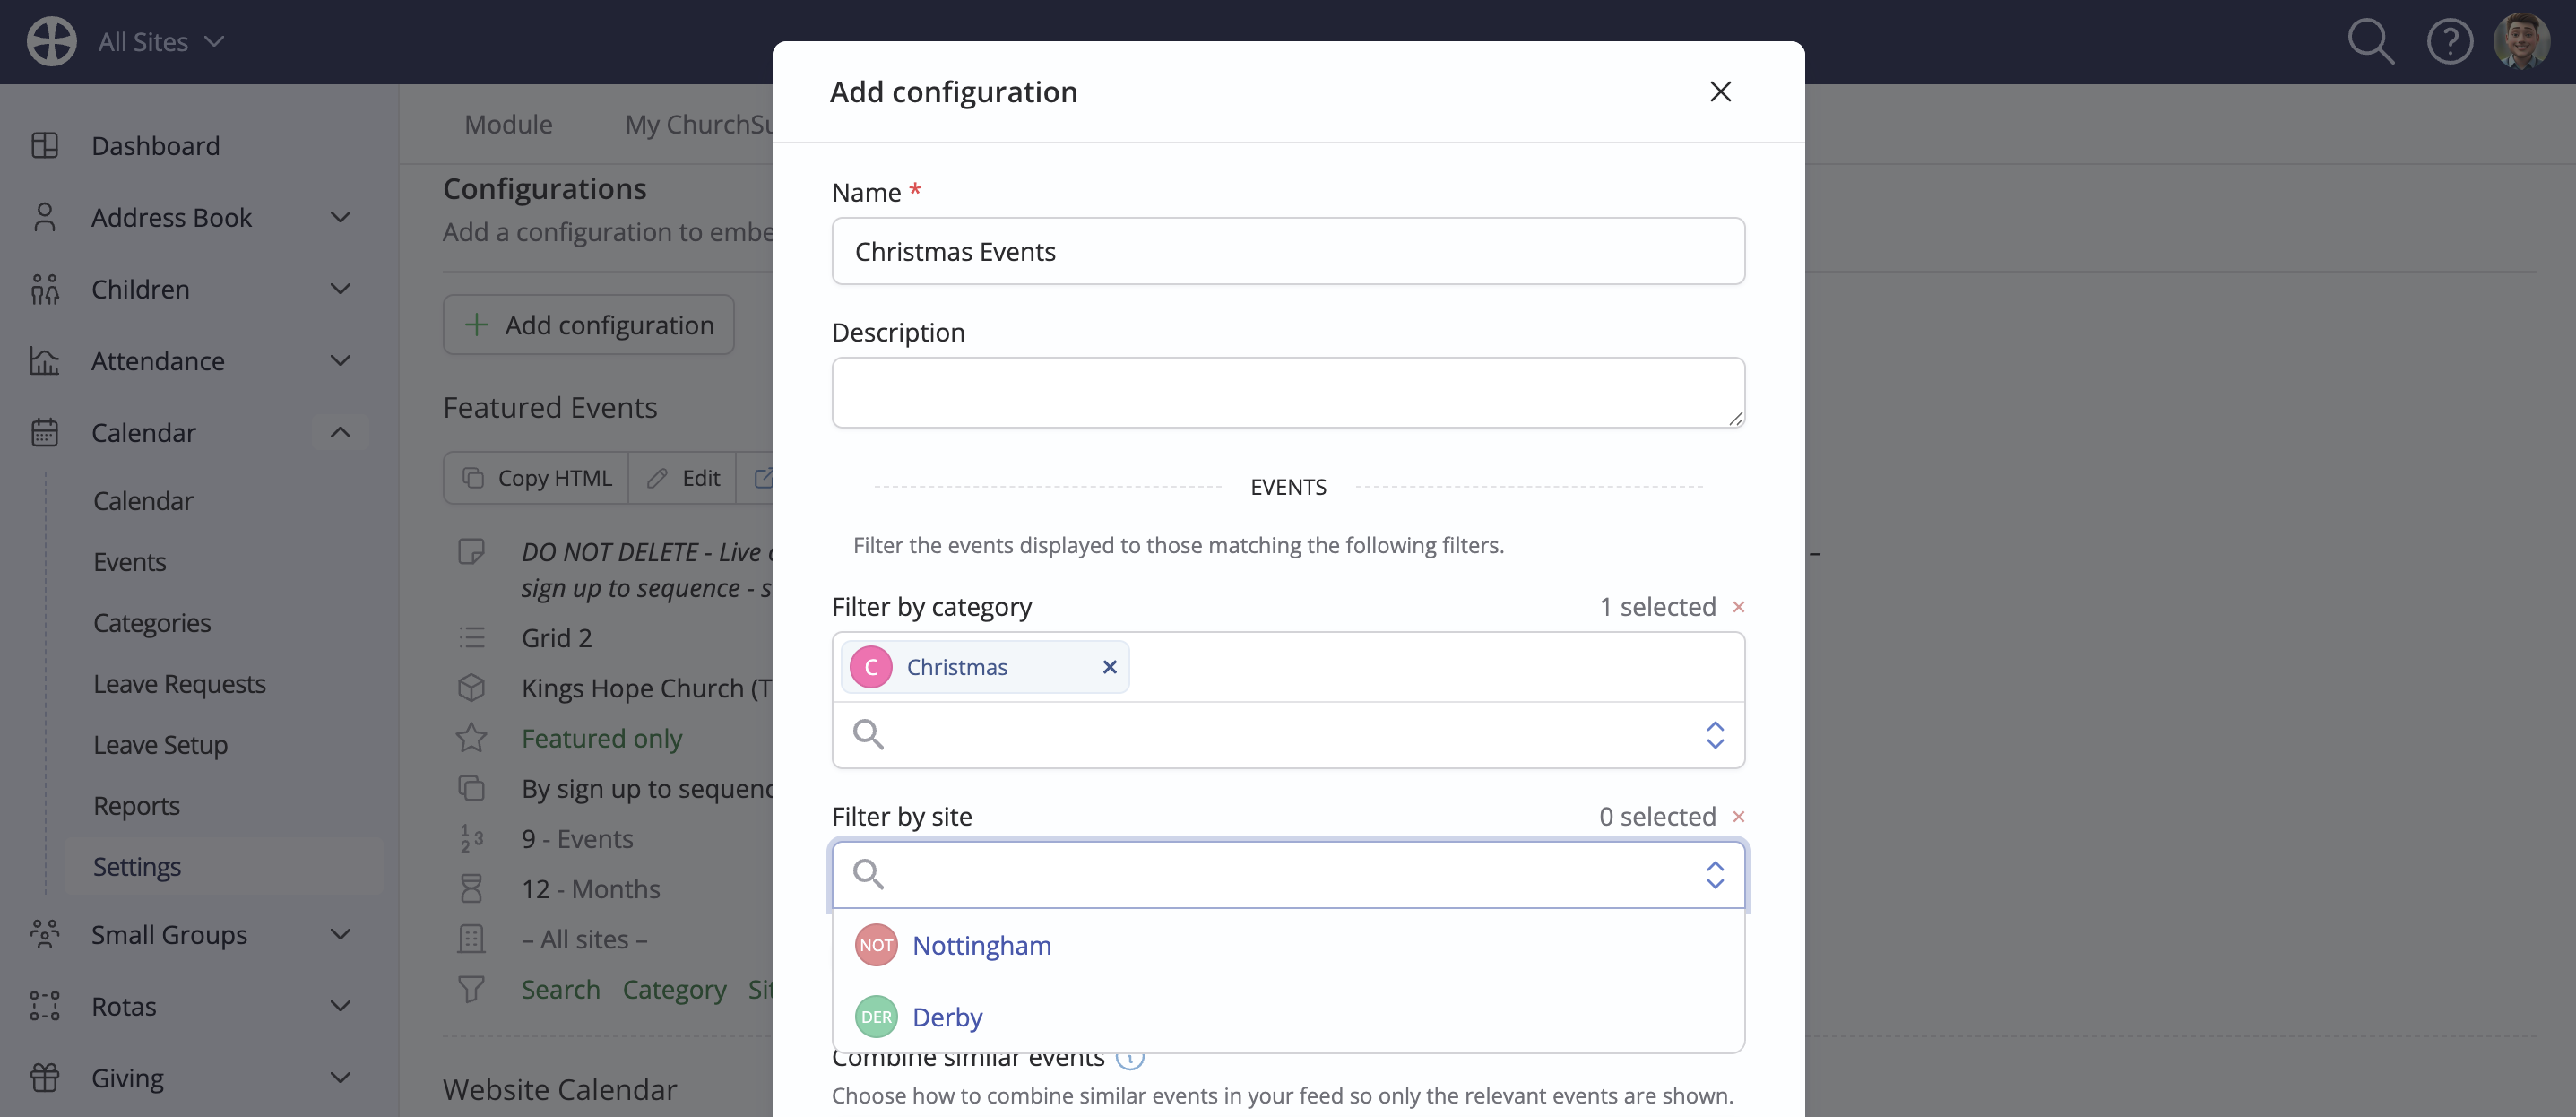
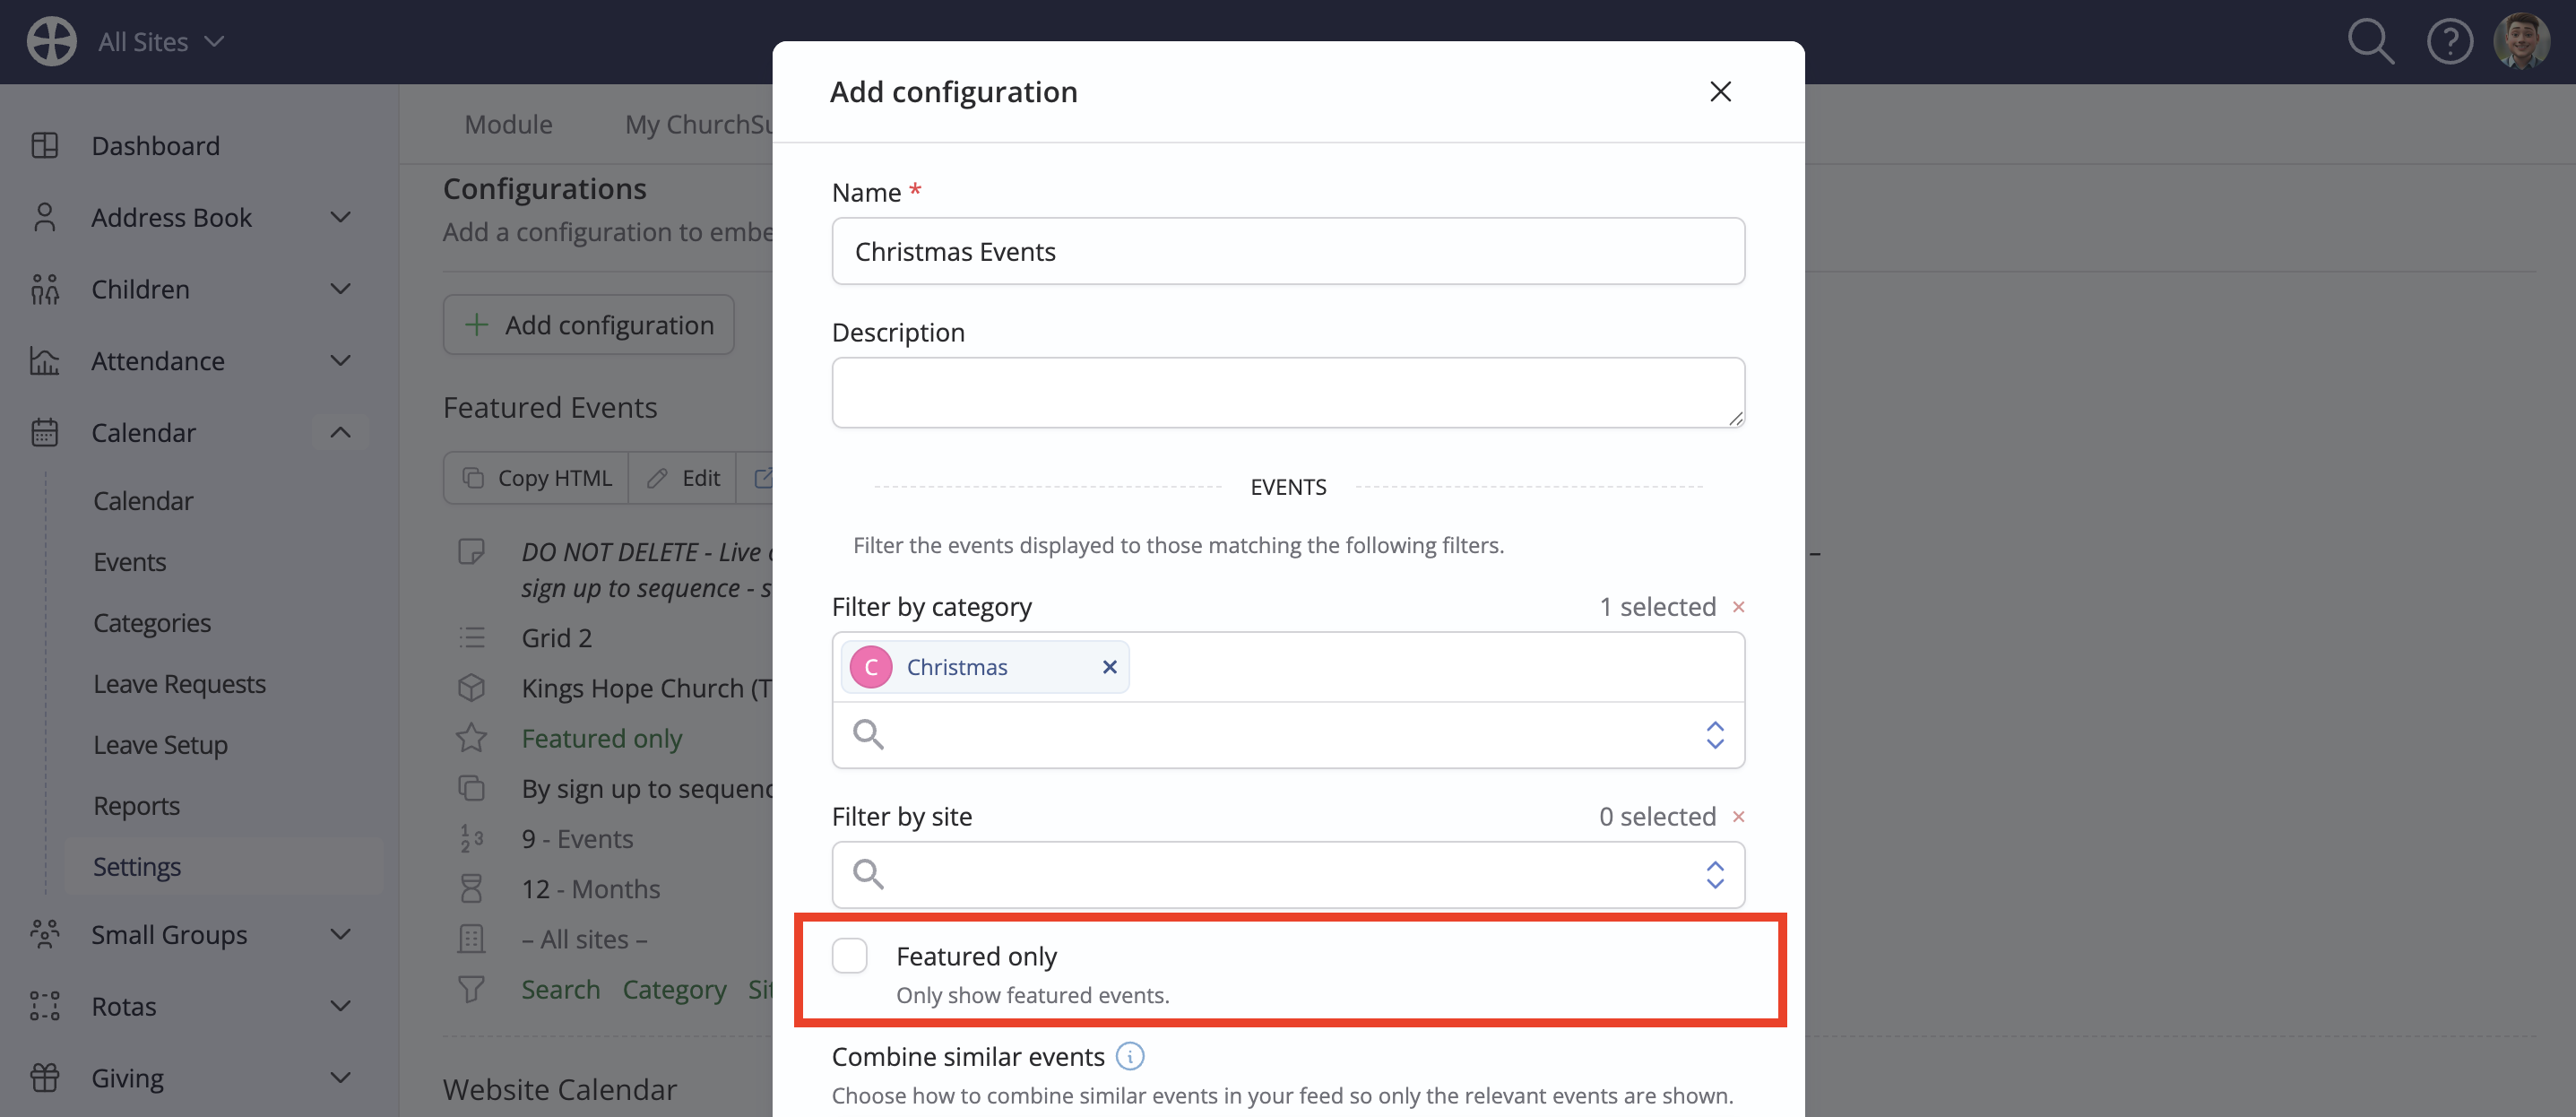
By default, the configuration shows all filtered events set to Show in Embed, but you can optionally choose to show Featured-only events—i.e., events set to Show in Featured Events.
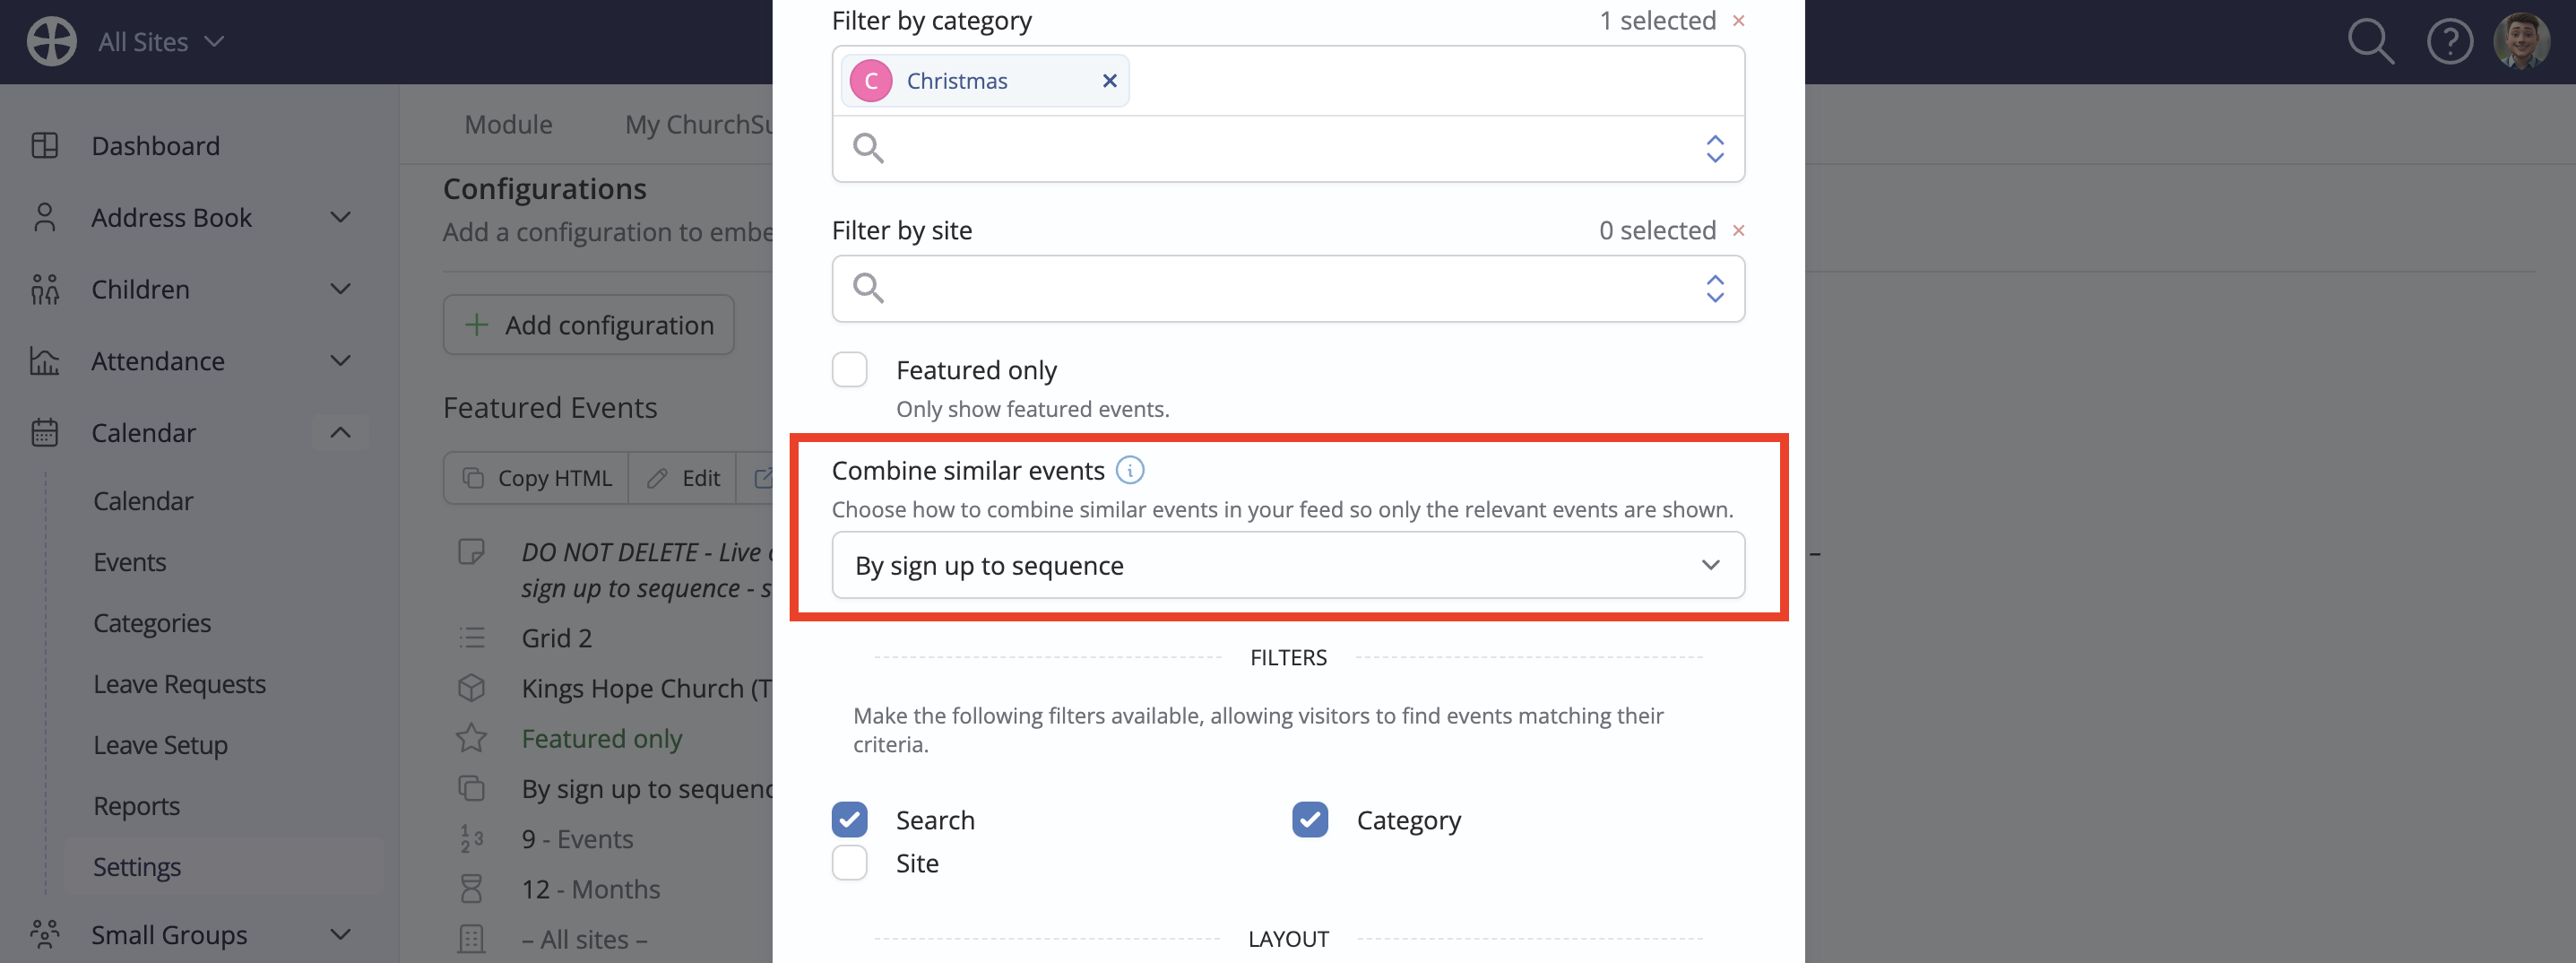
Next, select how sequence events are shown, choosing whether to Combine similar events (see below):
Combine similar events - feature explained
Choose from four options that control how event sequences are combined within an event list:
1) By sign up to sequence (default)
For sequence events with "Sign up to sequence" enabled, the list will only show the next uniquely named future event in the sequence. And for sequence events that do not have "Sign up to sequence" enabled, the list will show the next future event in the sequence and also all future-dated, ☑️ signup-enabled events. Consider these two examples:
Alpha Course (01-Jan-20XX) Sign up to sequence enabled, so the first future date is included
Alpha Course (08-Jan-20XX) (name matches with the previous date, so excluded)
Alpha Away Day (15-Jan-20XX) (unique name, so displayed)
Alpha Course (22-Jan-20XX) (name matches with the previous date, so excluded)
Sunday Service (01-Jan-20XX) Sign up to sequence disabled
Sunday Service (08-Jan-20XX) (name matches with the previous date, so excluded)
☑️ Sunday Service (15-Jan-20XX) (signup enabled, therefore included)
☑️ Sunday Service (22-Jan-20XX) (signup enabled, therefore included)
Sunday Service (29-Jan-20XX) (signup disabled, but name matches previous, so excluded)
Where a sequence does not have signup enabled for any events in the sequence, all events in the sequence will be surfaced.
This option offers the most versatility for a busy events calendar. It ensures the event list only shows the next pertinent date for each "Signup to sequence" enabled sequence but still shows all signup-enabled events where "Signup to sequence" is disabled and all sequence events where signup is not enabled.
2) By sequence
This option only shows the next upcoming event from each sequence. As each event passes, the next date in the sequence is shown. For example:
Alpha Course (01-Jan-20XX)
Alpha Course (08-Jan-20XX) (event name is not a factor, so excluded)
Alpha Course Away Day (15-Jan-20XX) (the unique name is not a factor, so excluded)
3) By sequence & name
This option shows the next upcoming, uniquely named events in the sequence. Consider this sequence example:
Membership 101 (01-Jan-20XX)
Membership 101: Beliefs (01-Feb-20XX) (unique name, so displayed)
Membership 101: Beliefs (08-Feb-20XX) (name matches with the previous date, so excluded)
Membership 101: Next Steps (01-Mar-20XX) (unique name, so displayed)
Membership 101: Next Steps (08-Mar-20XX) (name matches with the previous date, so excluded)
Subsequent events from the sequence that contain a repeated name are not displayed.
4) Show all events
This option doesn't combine any event dates in a sequence and shows all future events in the sequences.
Next, optionally make filters available to help website visitors navigate and find events of interest using an event name Search or to further filter by Category and (for multi-site customers) Site.
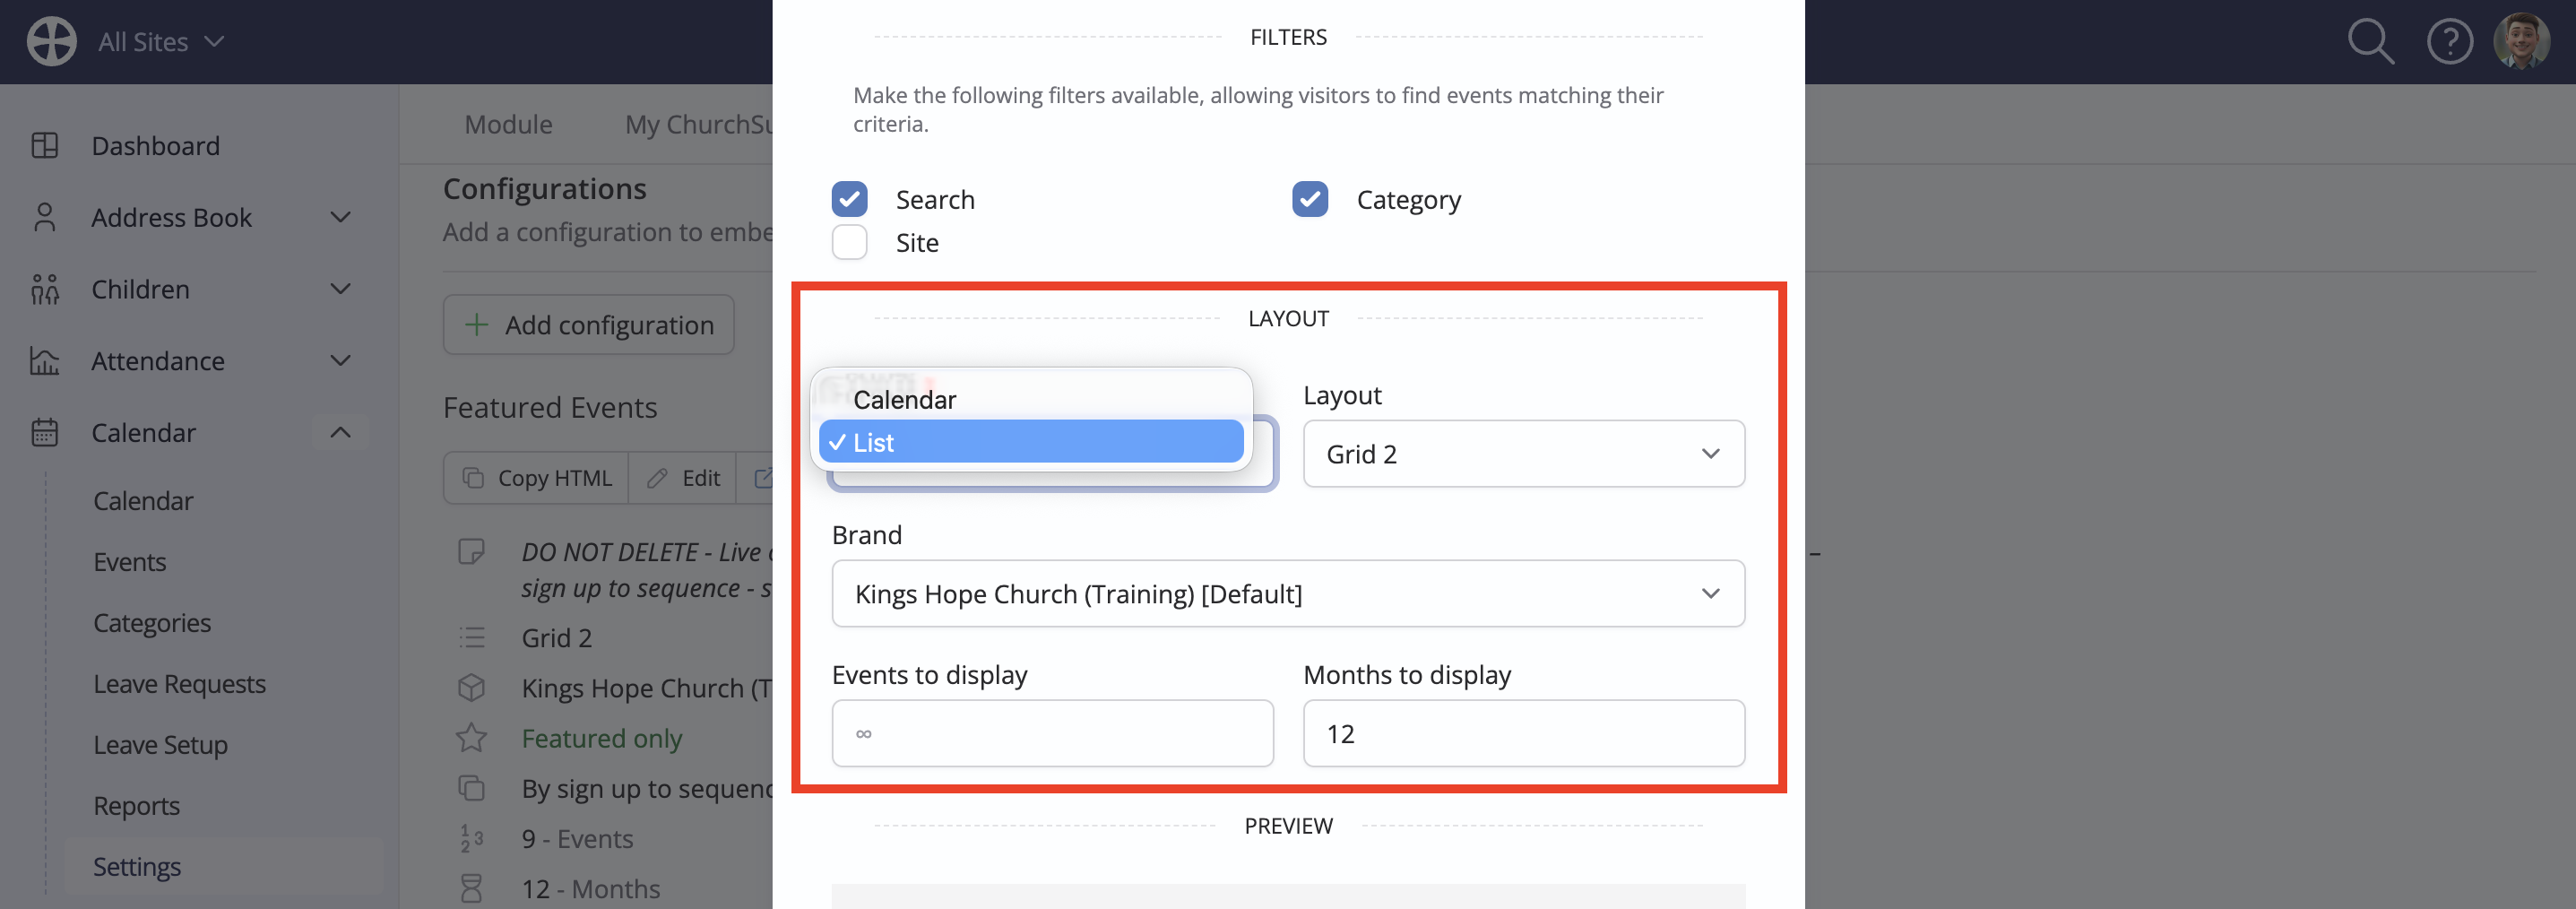
In the next section, choose your preferred Format, choosing from a Calendar or preferred List Layout. Your organisation's default Brand is used, but you can choose a custom brand. For example, a Youth event list can sport your Youth Brand—see our related article for further information on Using brands. Depending on the Format chosen, optionally set a maximum number of Events to display and the maximum number of future Months to display. For the Calendar format, you can also choose the Week start day.
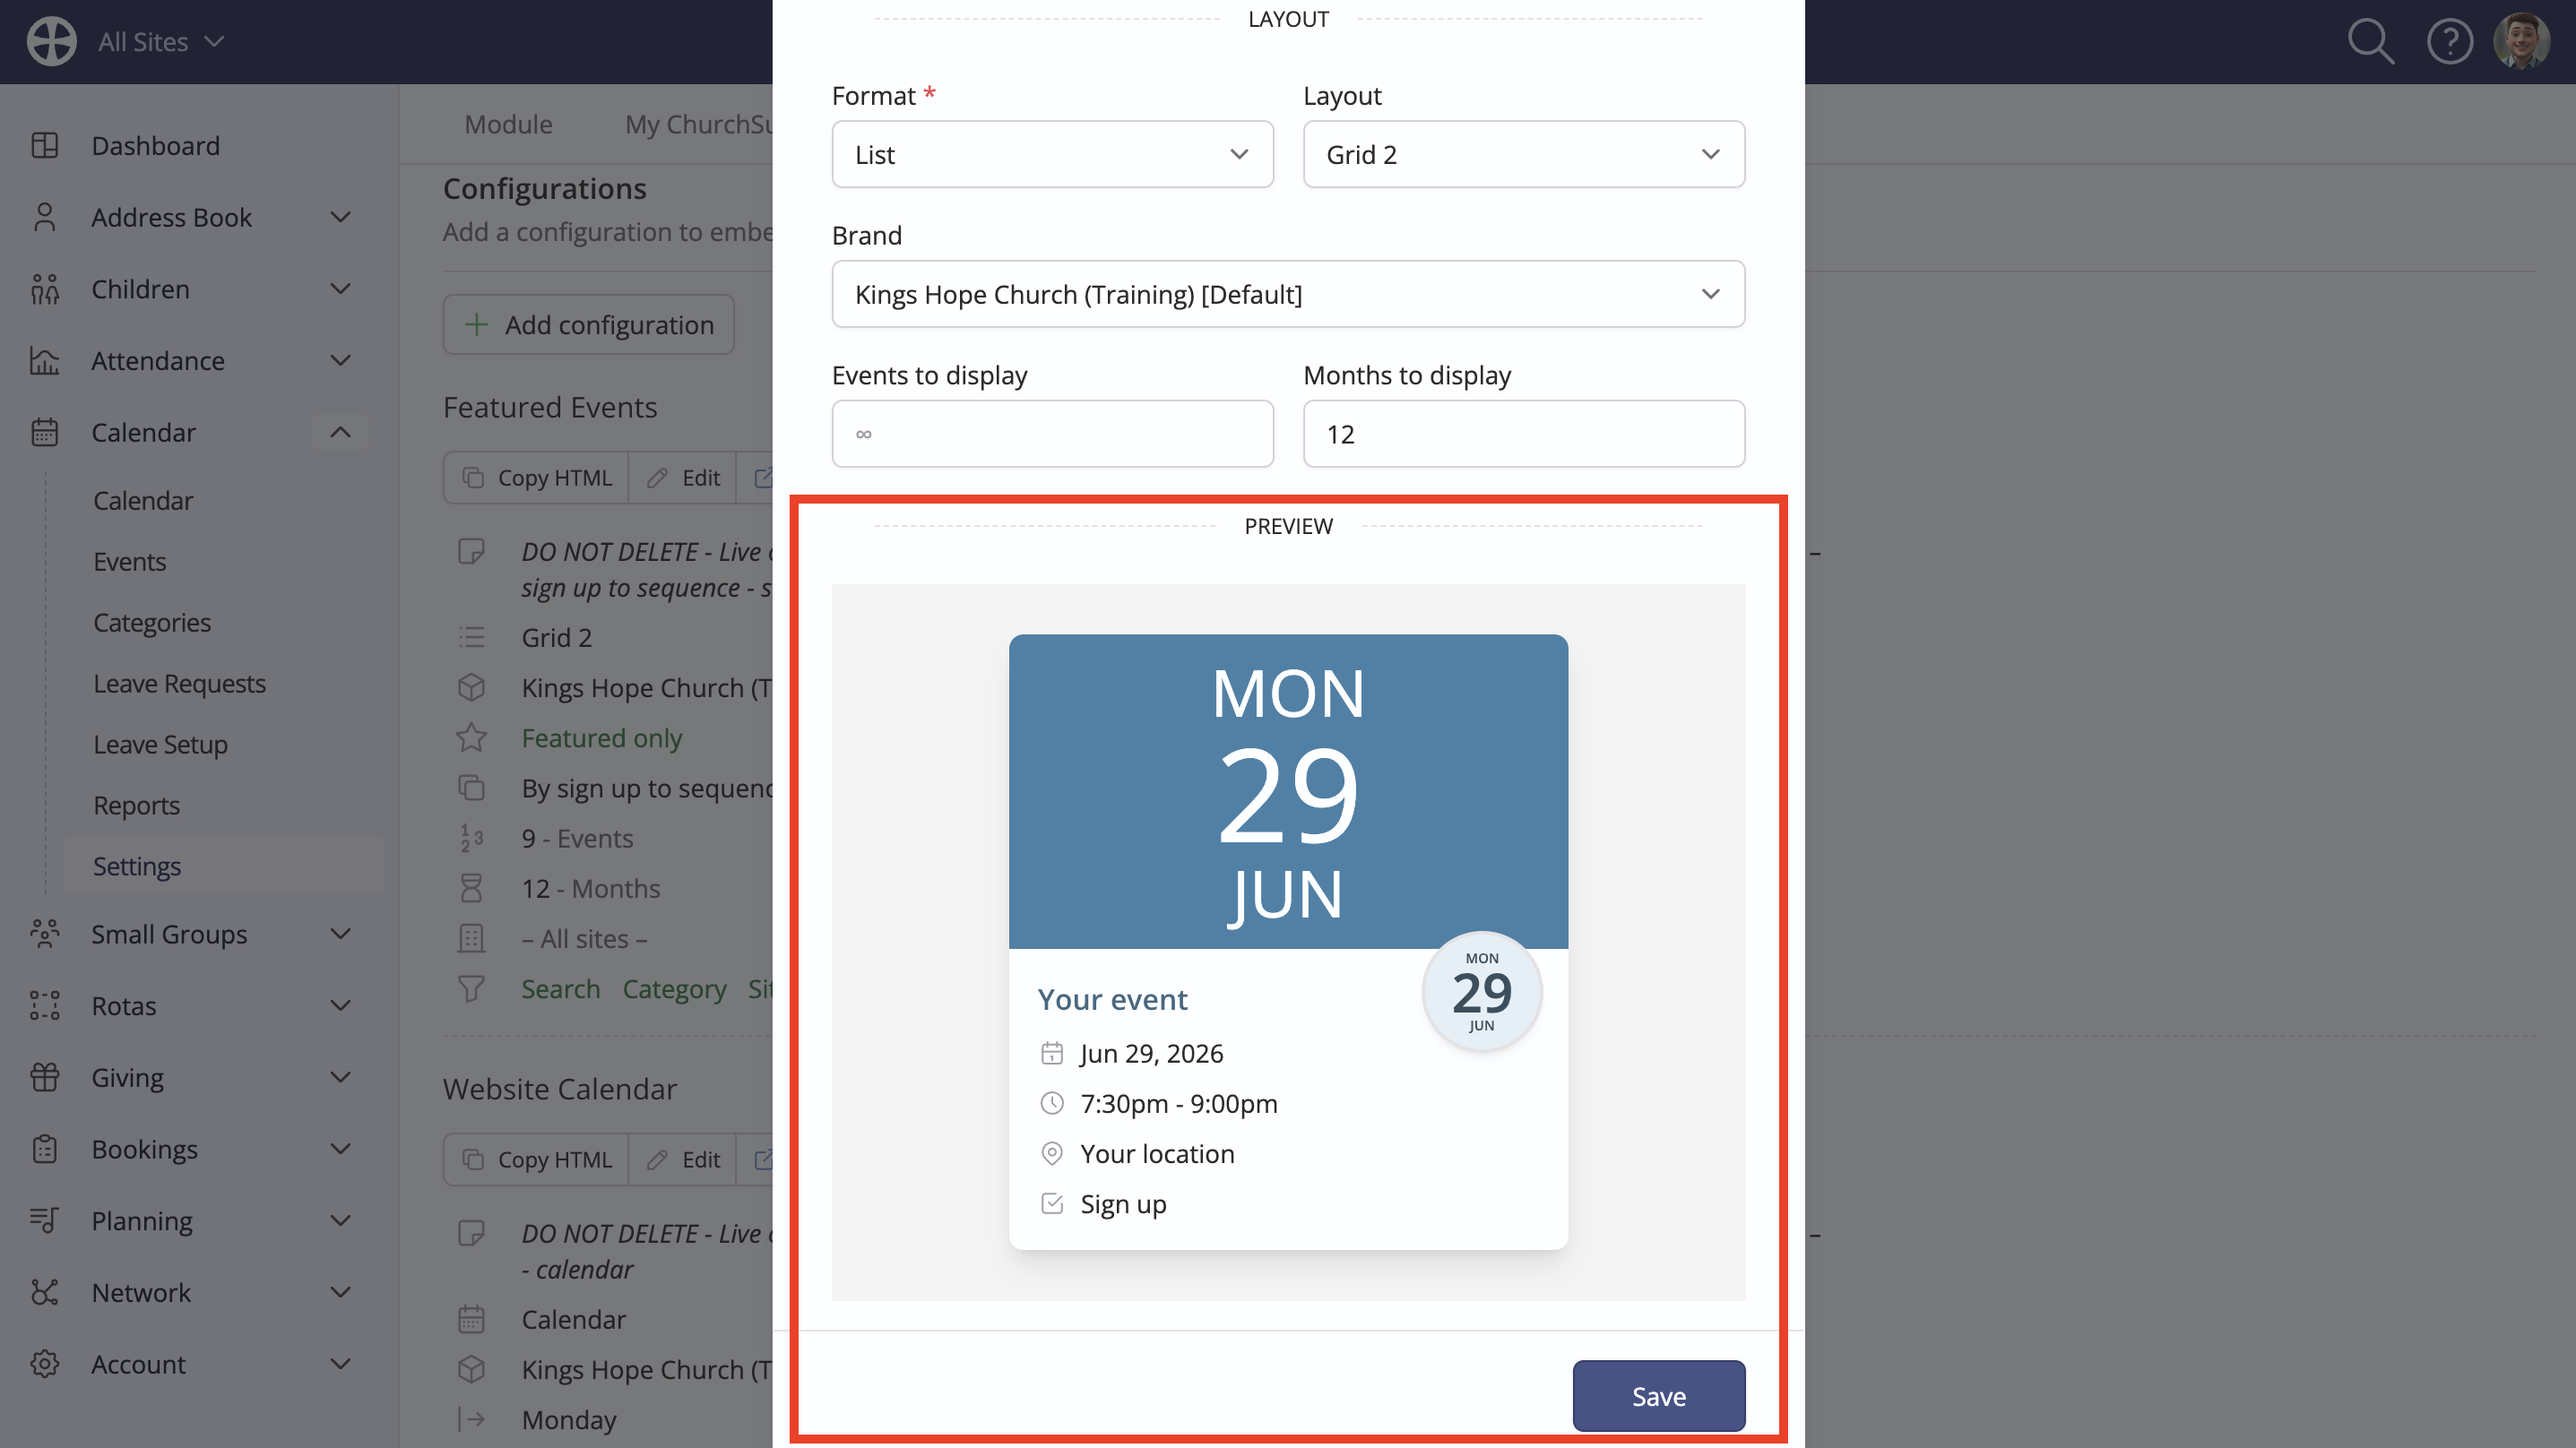
As you make changes to the configuration settings, the Preview shows a likeness of the styled calendar or event list. Click to Save configuration changes.
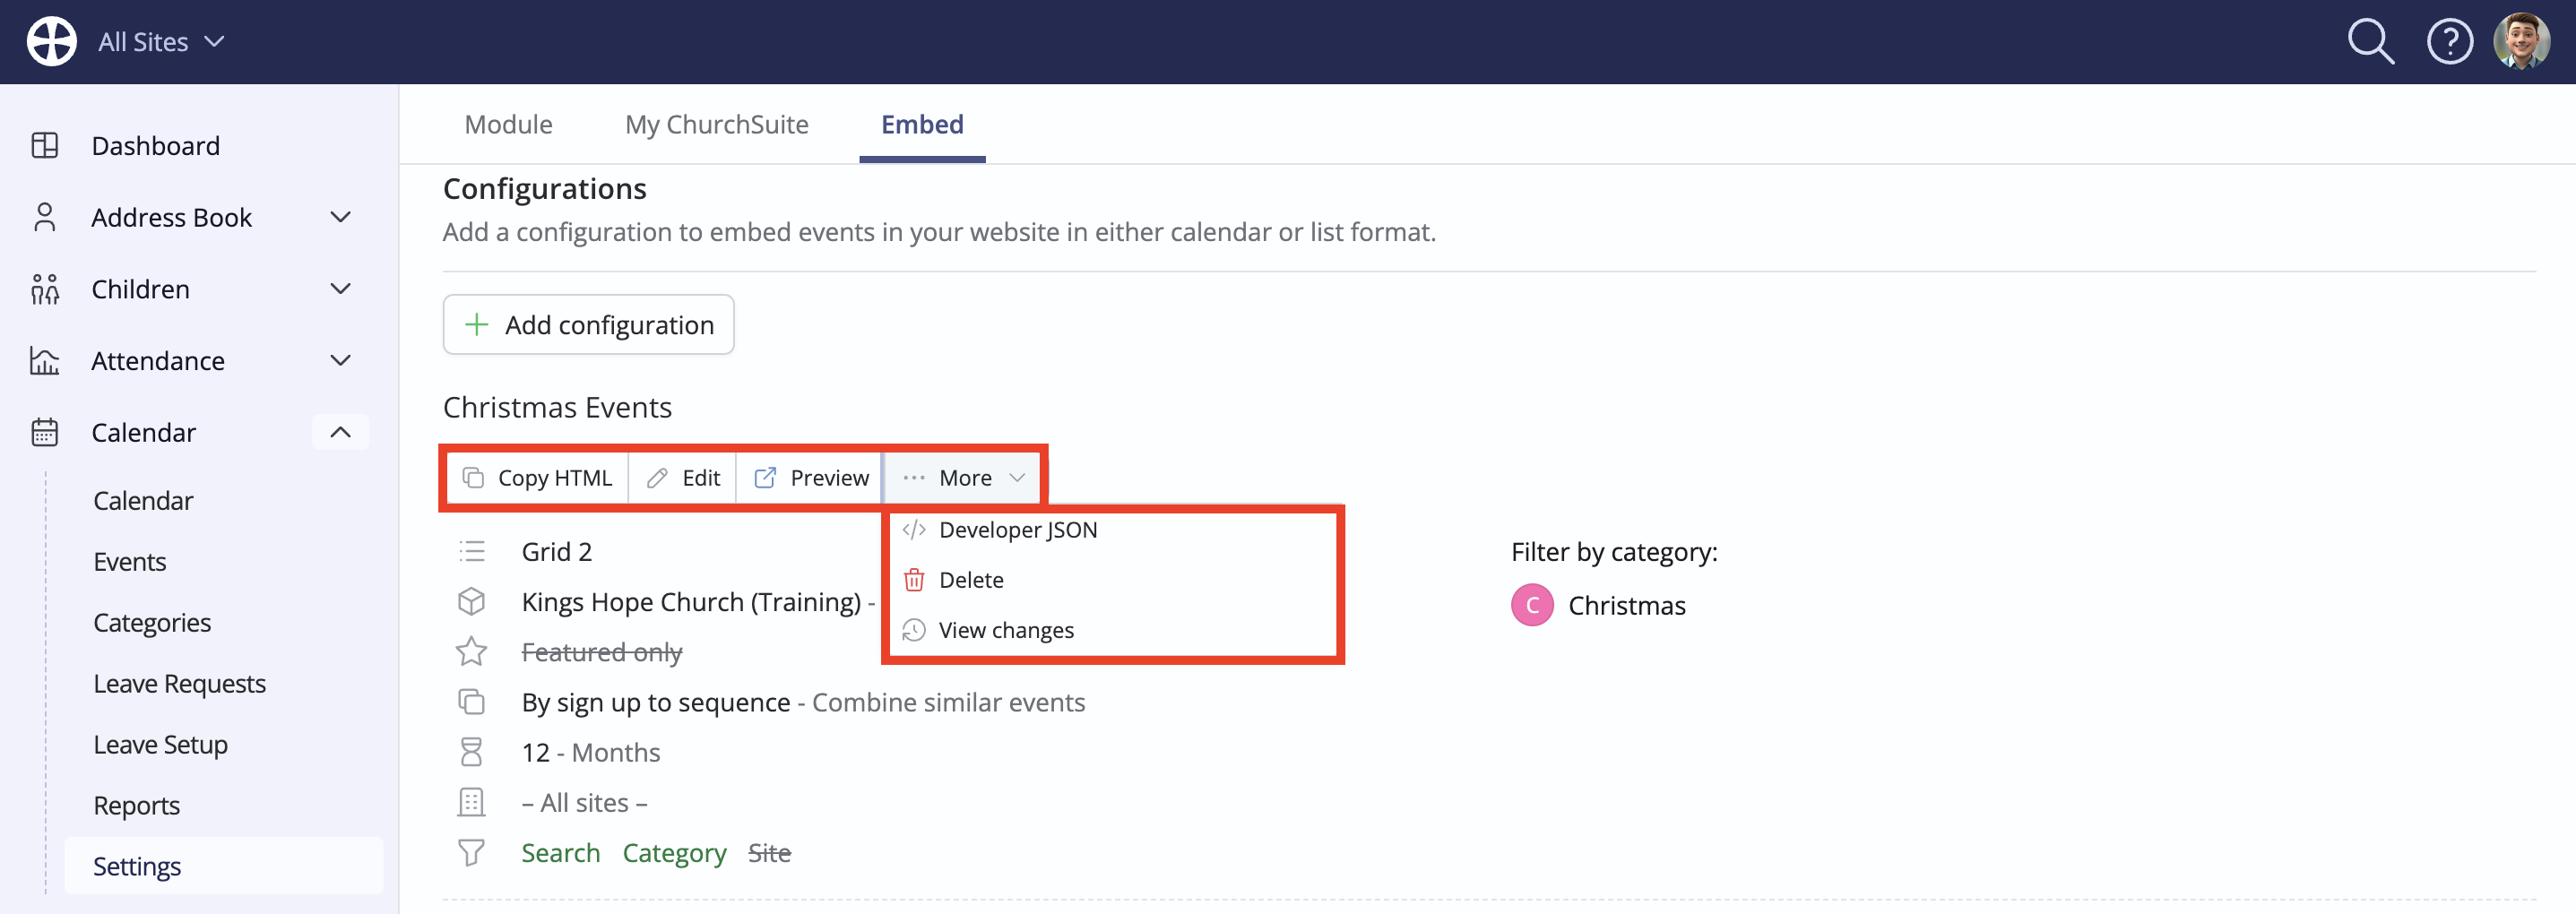
Saving the configuration returns you to the Embed Options tab and the list of Configurations, including all the details you just added for a new or edited configuration. From here, you can Add further configurations, Edit or Delete a configuration or View changes made to a configuration's settings. You can Preview a configuration at any time to visualise in a new browser tab how the embeddable calendar or event list will look for your website visitors.
The Developer JSON option will take you to the JSON feed of raw data, which can be helpful if you want to style events in your website, for example. For more information, see the related support article on Developer API.
When you are happy, click Copy HTML (to copy the configuration HTML code to your device clipboard) and then paste it into the Source Code or Embed Block section of the appropriate page of your website. Most modern websites are easily managed through a user-friendly content management system; however, you may wish to seek assistance from your website service provider to complete the task of adding the HTML code to the appropriate page and position on the page.
Here's the HTML generated for an example configuration. For those familiar with HTML, note that you can manually edit some of the iframe parameter values if you wish, e.g. the iframe height, scrolling and width.
<<iframe frameborder="0" height="800" allowtransparent="yes" scrolling="yes" src="https://demo.churchsuite.com/-/calendar/23bd3932-c07e-4946-89bf-32fef1be03aa" style="border-width:0" width="100%"></iframe>>
You can return to the Embed Options to make subsequent changes to a configuration. Once a configuration's HTML has been added to your website, subsequent changes to the configuration settings in ChurchSuite are immediately reflected in your website - it's not necessary to embed new HTML.
Embedding an individual event into a page on your website
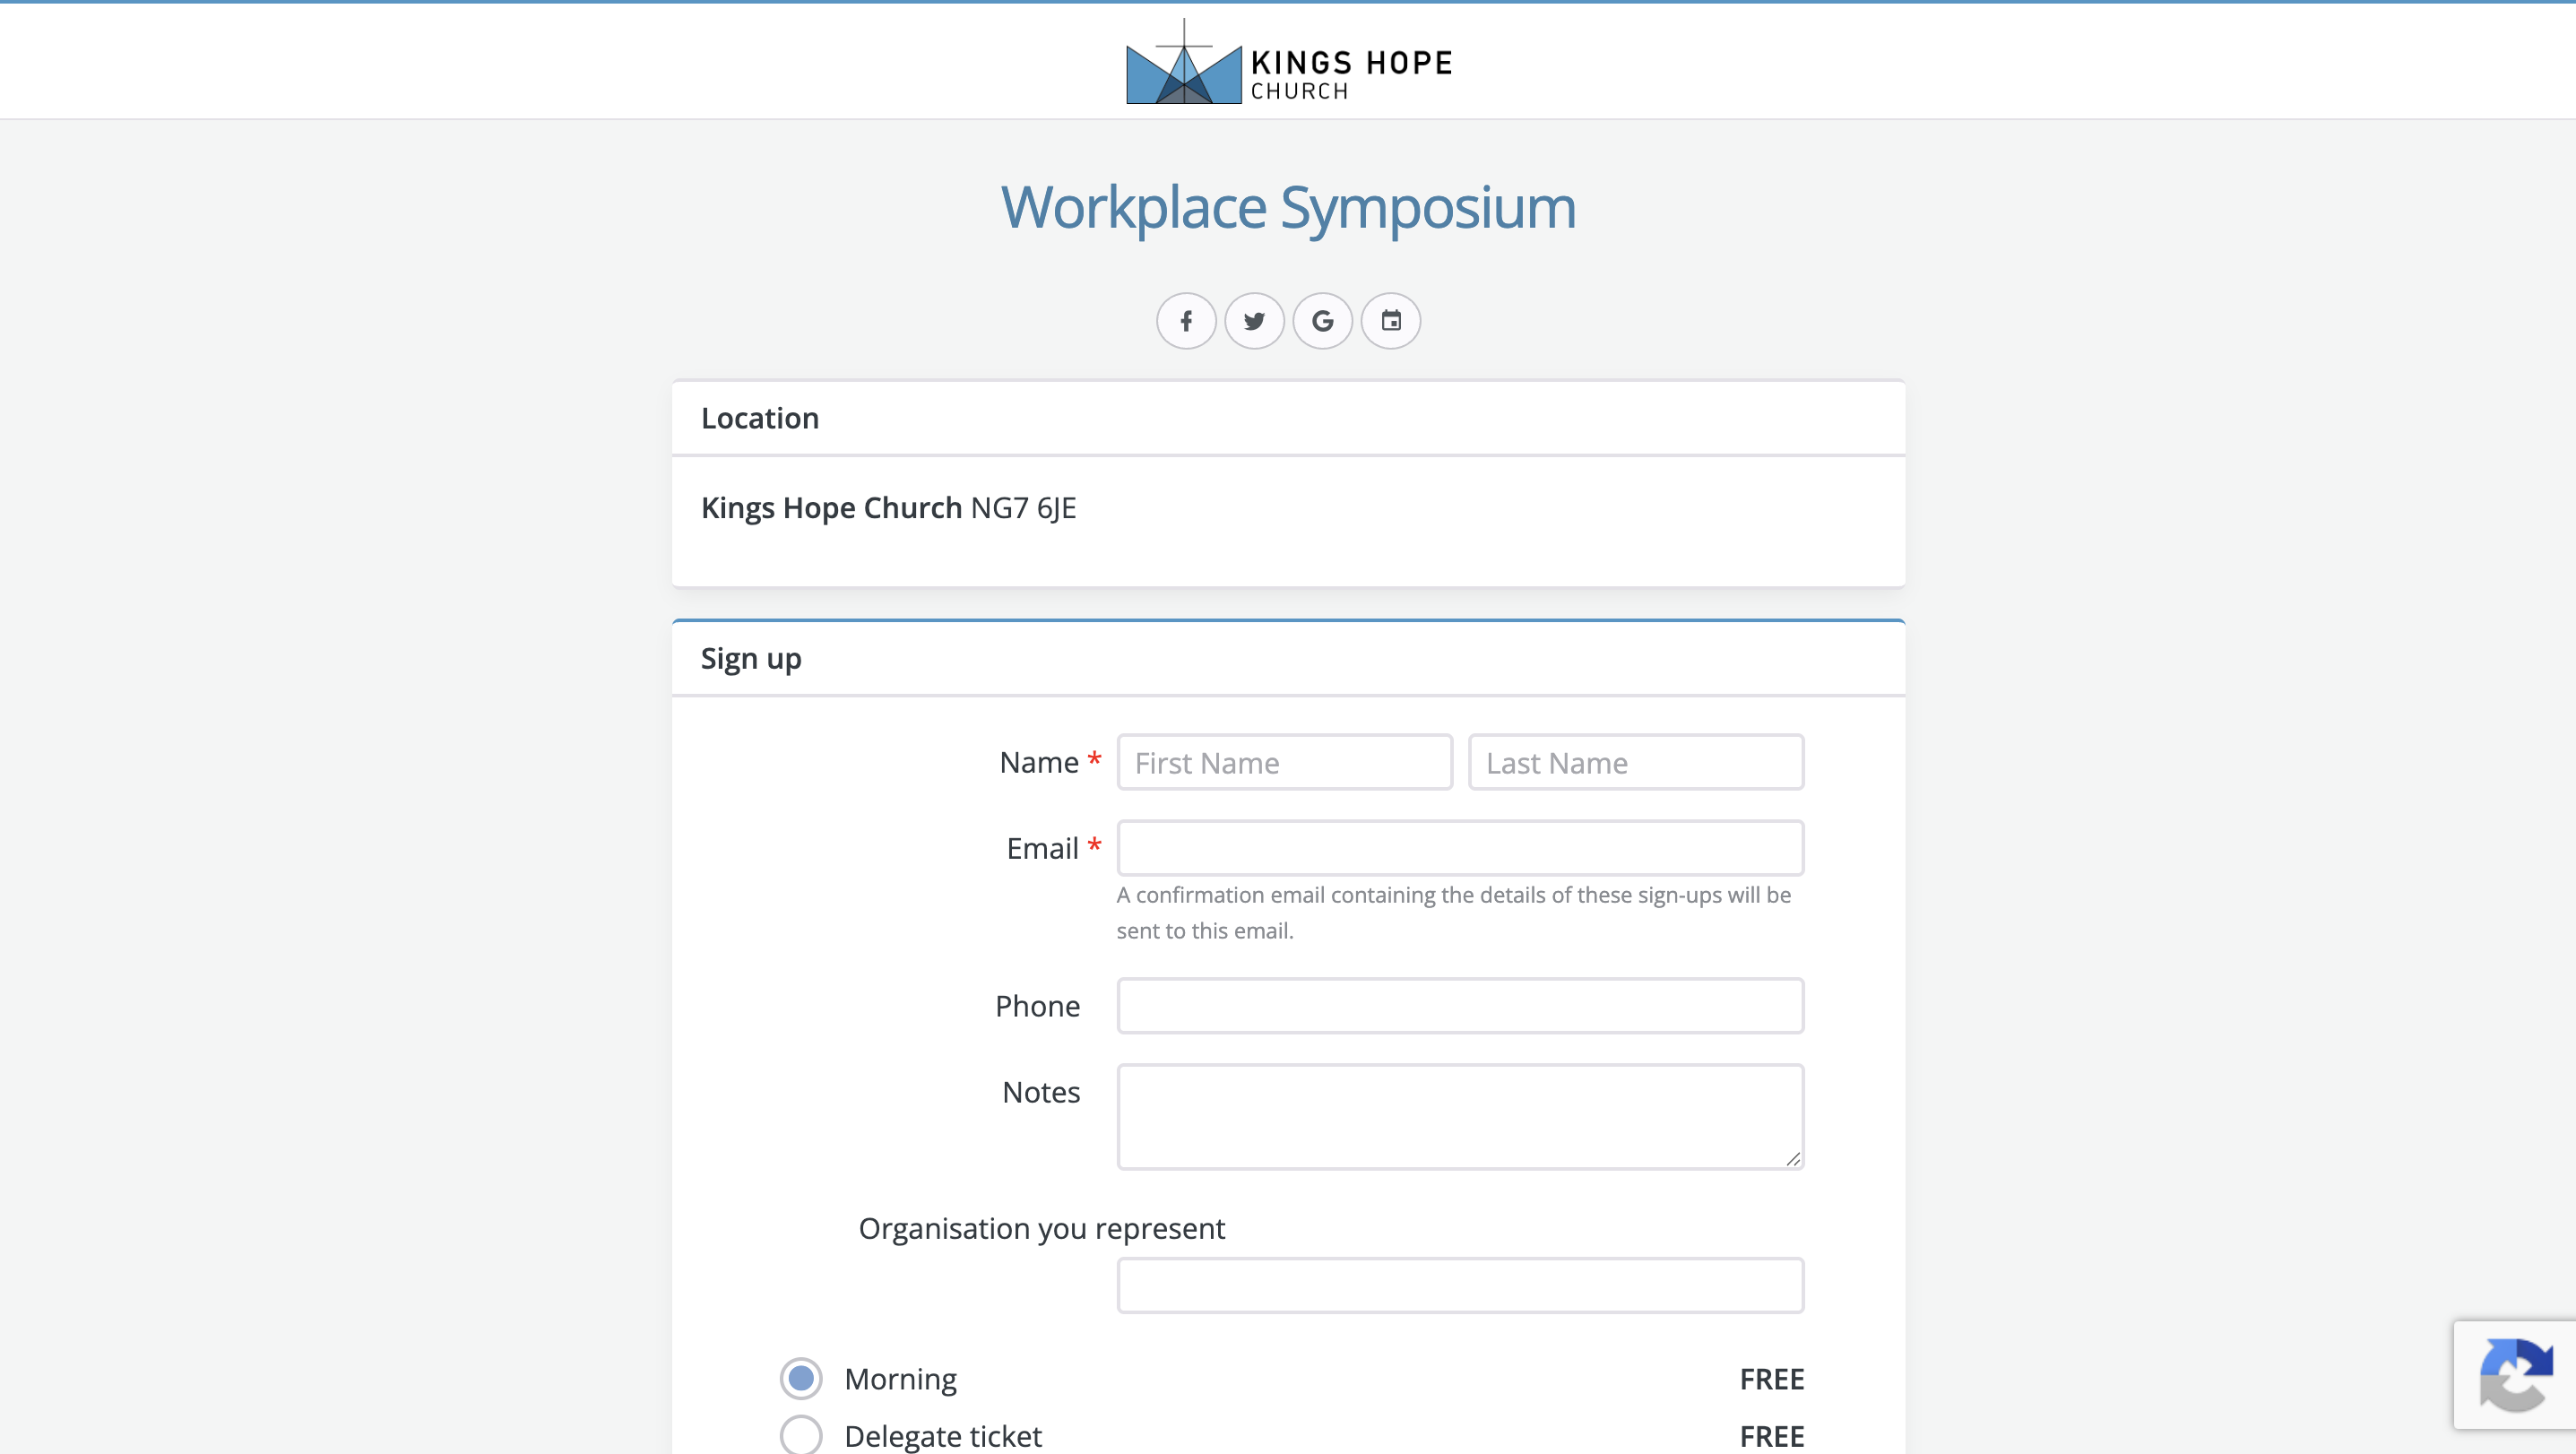
When website visitors click on an event from an embedded Calendar or Event list, the Event Page opens in a new browser tab. While this is usually a desirable user workflow - especially on mobile devices - it is also possible to embed elements of an Event Page directly into a page on your website, which may be useful for an event where you already have an event-specific page and want to include the ChurchSuite "signup form" within the same page, keeping website visitors on your web page. For example, you may have a page featuring your upcoming Weekend Away with lots of information about the event. With the embeddable event functionality, you can embed the ChurchSuite signup form directly into that page on your website.
For events with visibility set to Show in Embed, clicking on Embed opens the Embed options for that event.
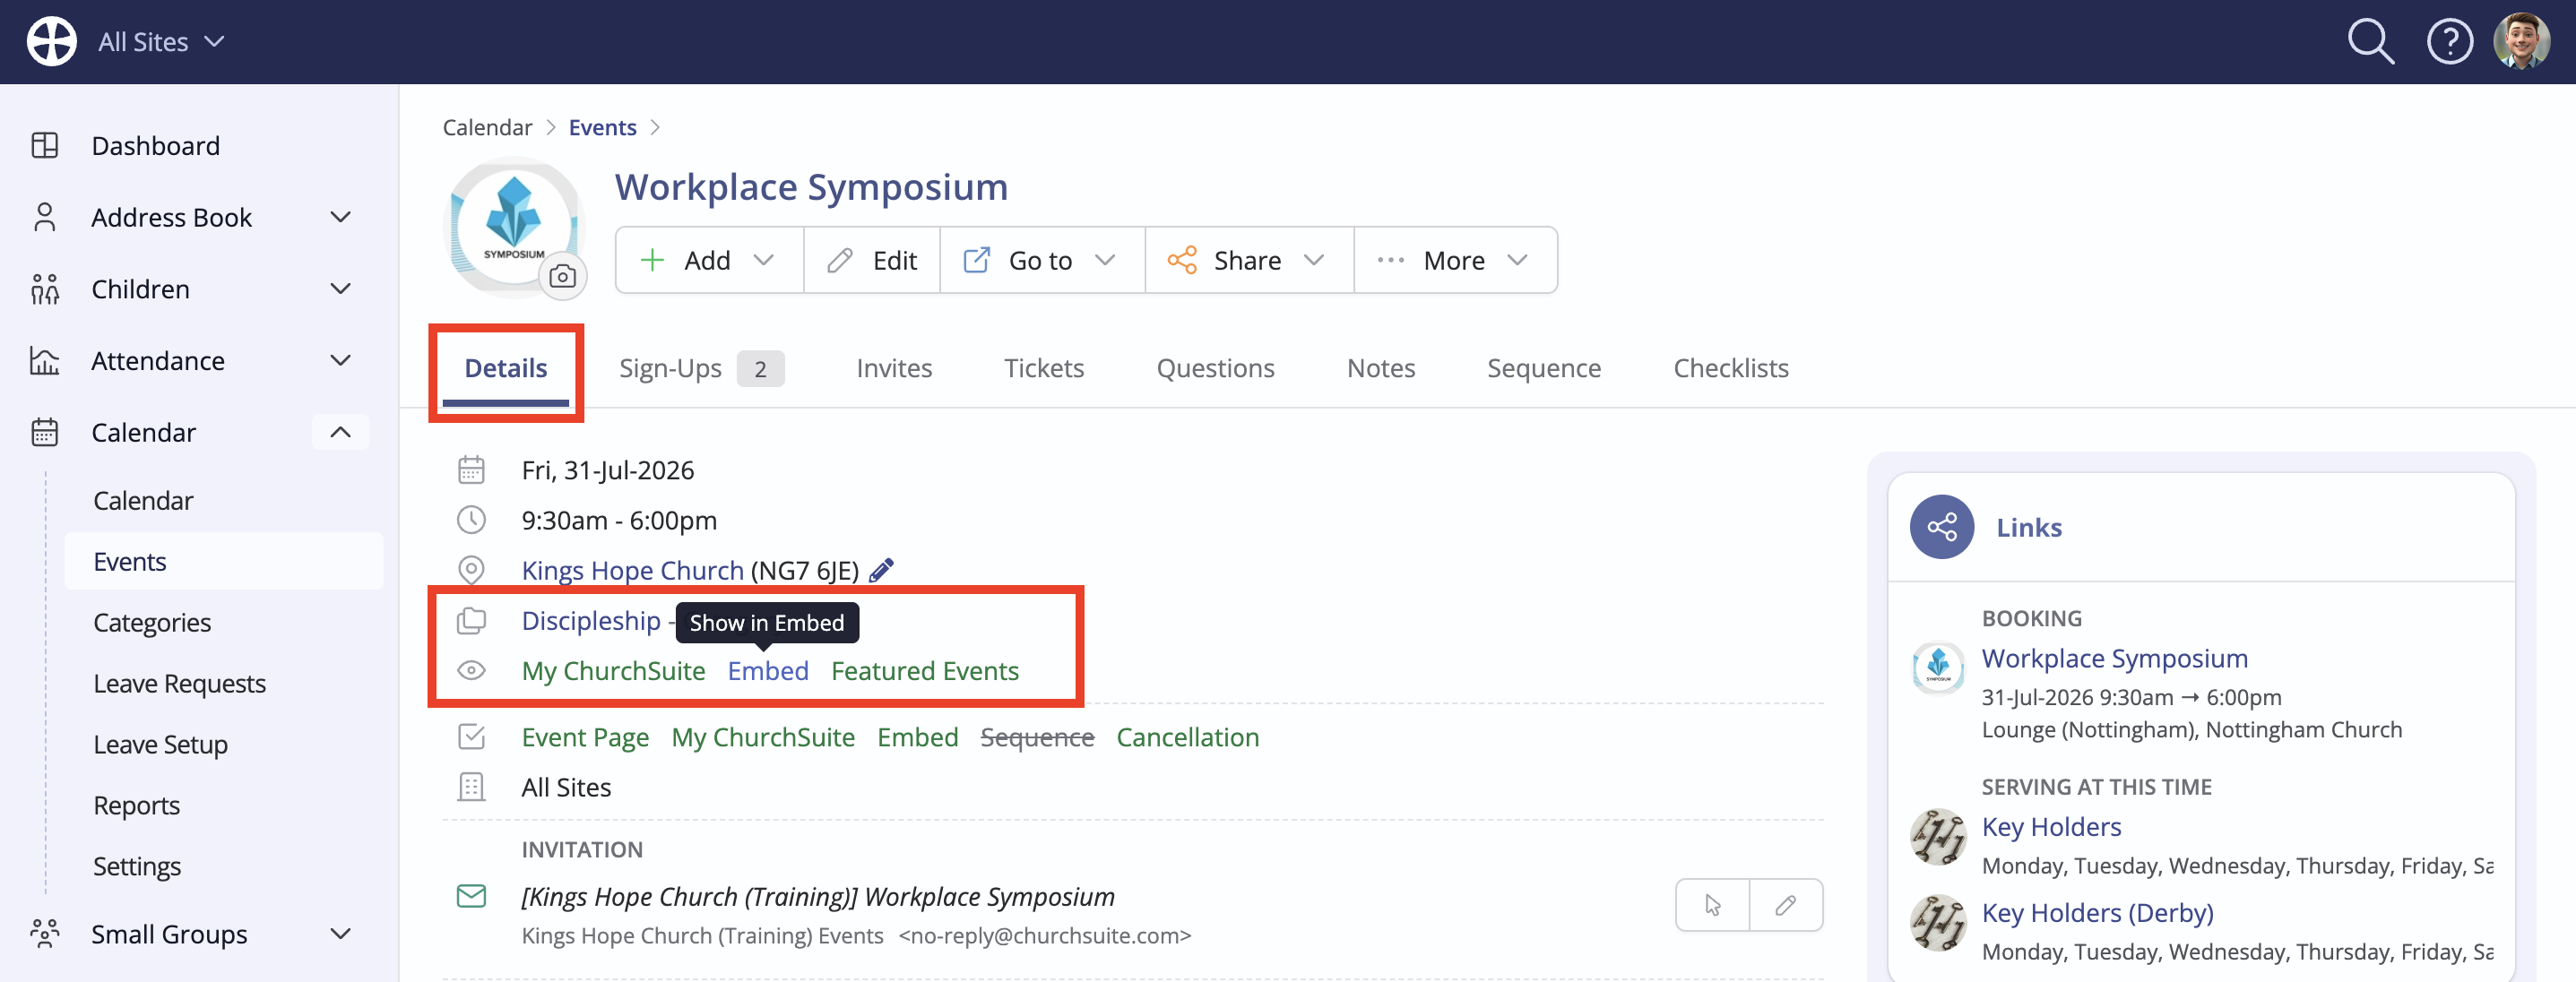
On the Embed pop-up, select each of the display Options you require. Click Preview at any time to see what the form looks like. Once you are happy, copy the Embed Code from the pop-up into the 'source code' or 'embed block' section of the appropriate page on your website, positioning the code where you would like the event page form shown. Click X to close the Embed pop-up when you are finished.
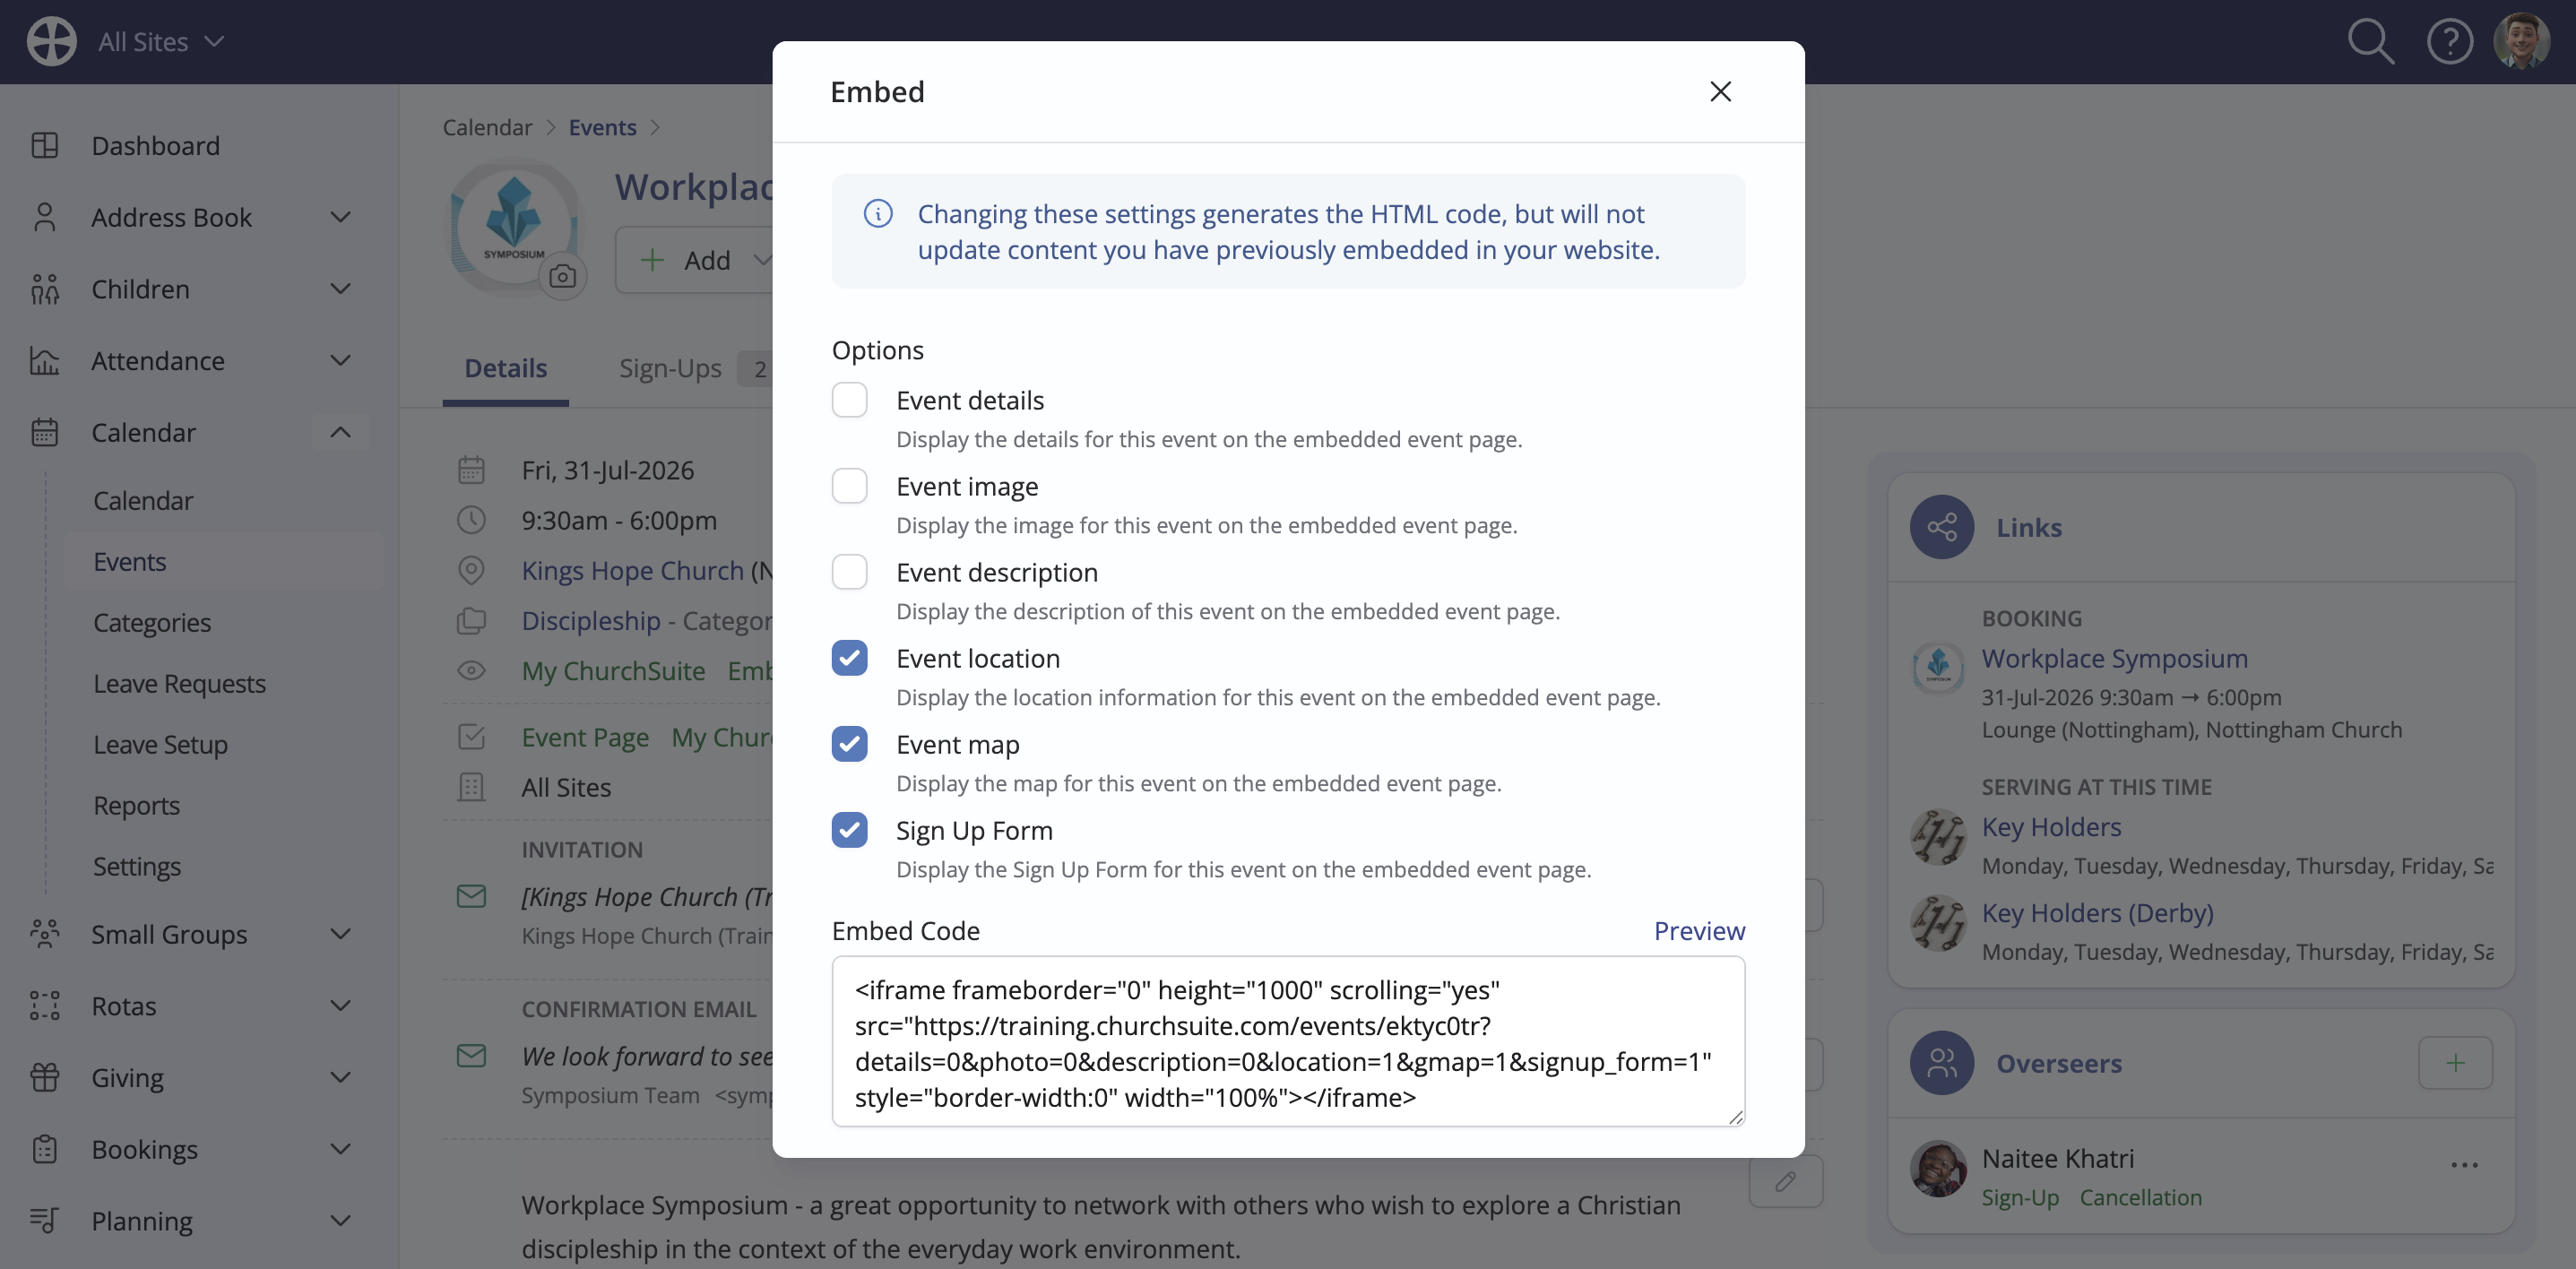
Using the Options above, it's possible, for example, to select not to show any of the event details, images, description, location or map - perhaps where you already have all that information on your web page but where you want a simple Signup form.