Sending event invitations
In this article
Getting started - event settings
Sending invitations
Receiving an invitation
Accepting an invitation
Declining an invitation
Selecting 'More information'
Managing event invitations and responses
Communicating with invitees
Calendar module users can send event invitations by email to people in the Address Book and Children module, and track the response status for each invitee. The invitee User experience makes engaging with your events simple and intuitive.
Getting started - event settings
You can send invitations for a future-dated event that has Sign Up enabled. When adding or editing an event, use the Visibility and Sign Up settings to manage the event audience (where the event is shown) and where people sign up.
For example, an event can be invitation-only. Only an invited audience who have been sent the Event Page URL can respond (and they are unable to add additional signups).
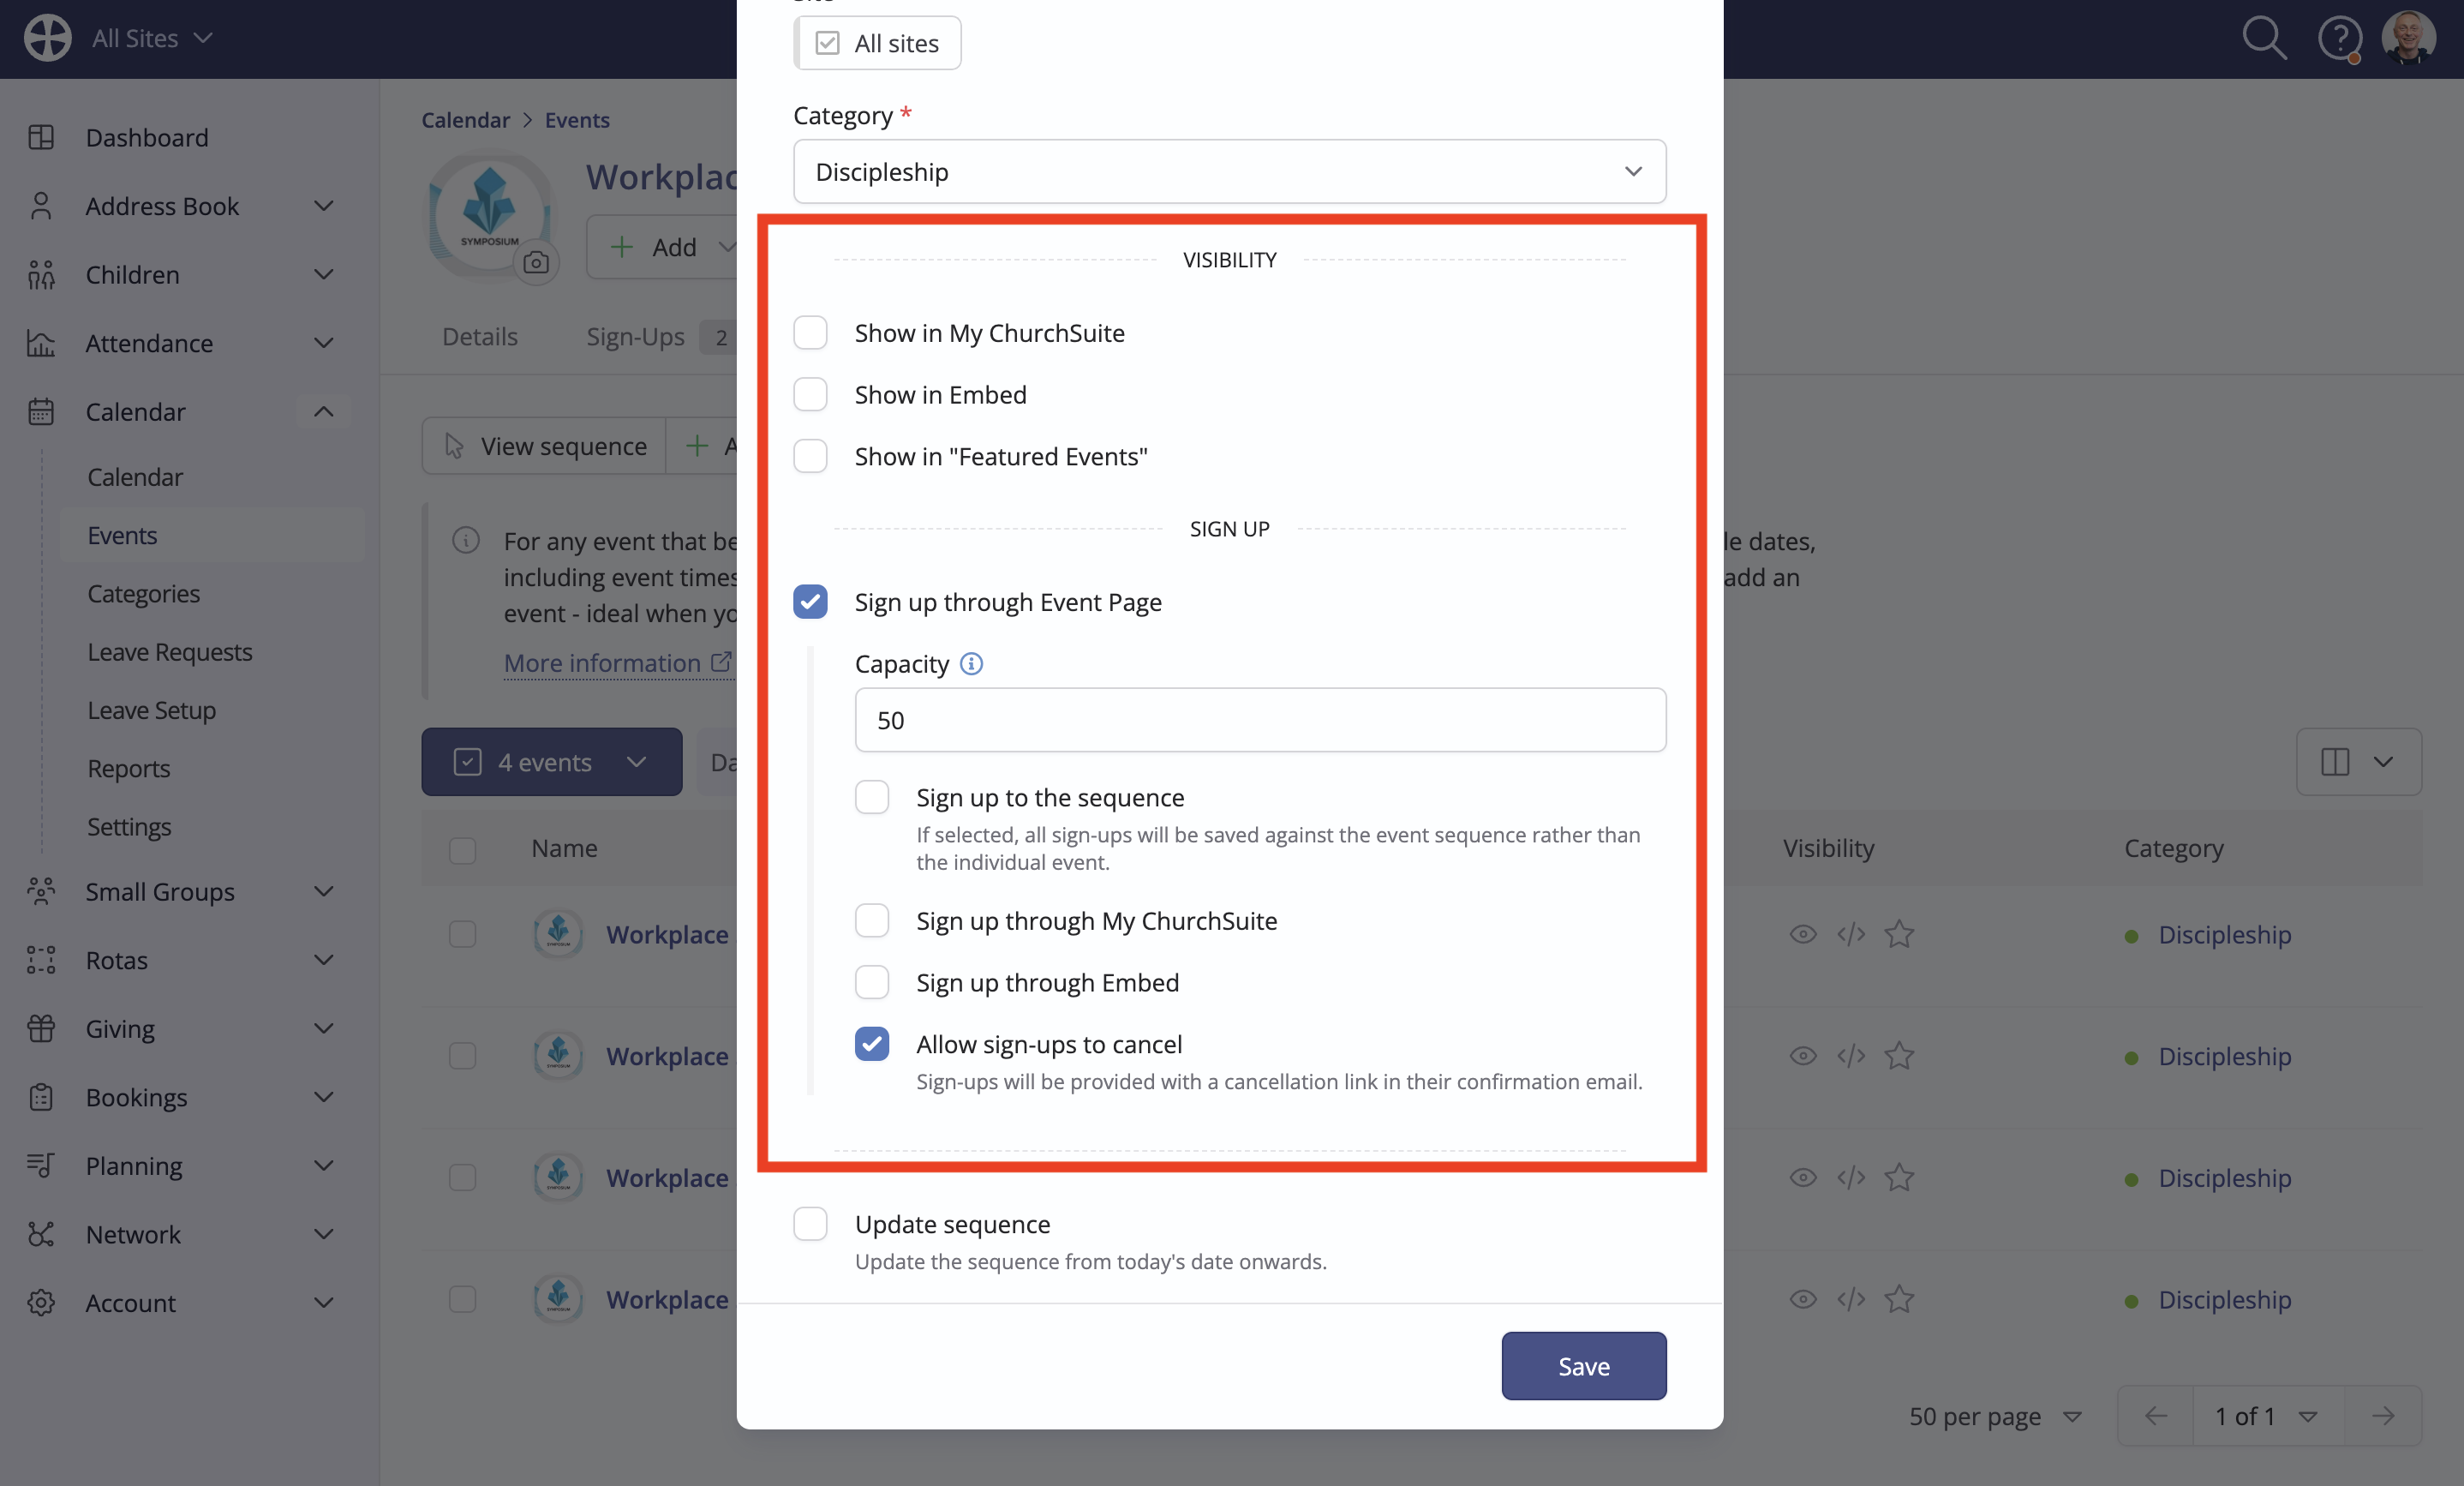
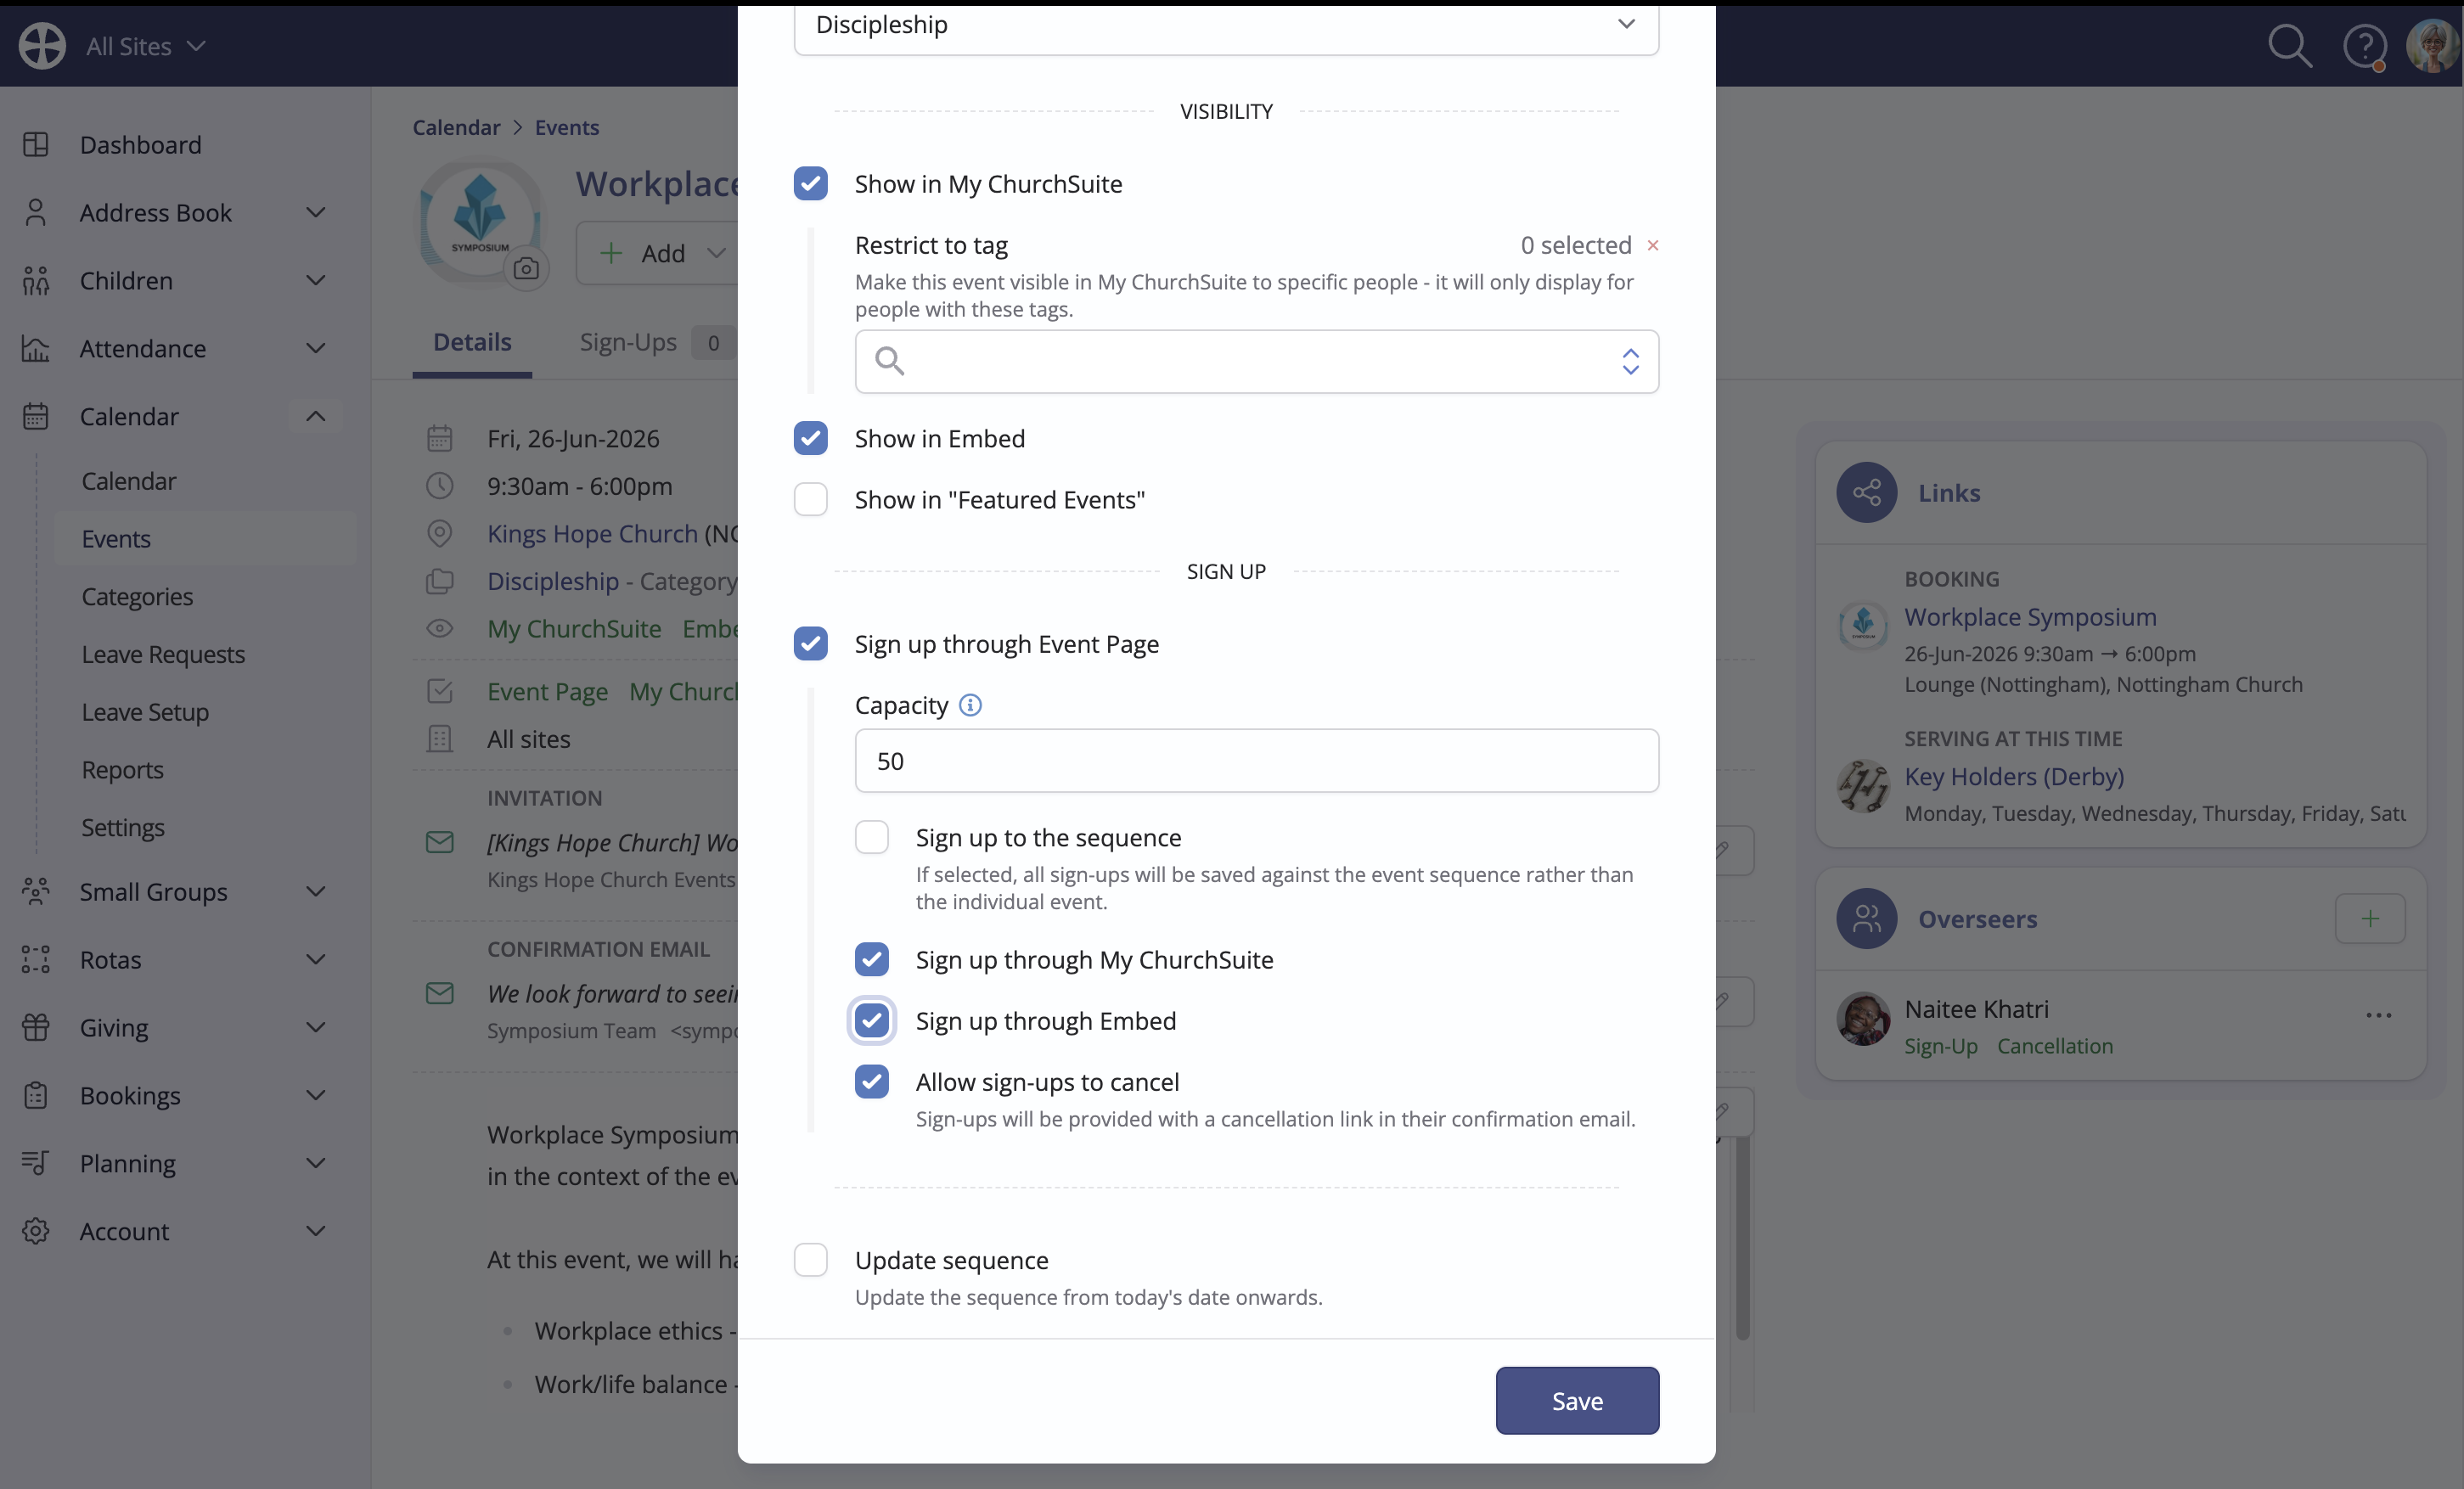
You can also have mixed Visibility events; sending invitations to a targeted audience and more widely visible in My ChurchSuite and on your website (Embed), with the Sign-Up settings determining where people can sign up from. This may be useful for a training event where you have invited guests in mind and where you want others beyond the invitation list to see and sign up for the event. In the following example, the event is visible in My ChurchSuite and Embed, people can sign up through both places, and invitees can sign up from their event invitation.
The system matches people's sign-up details against the invitation list to keep everything up to date. Those who sign up outside of their invitation email - perhaps via the website - have their invitation response status automatically updated to Accepted.
Sending invitations
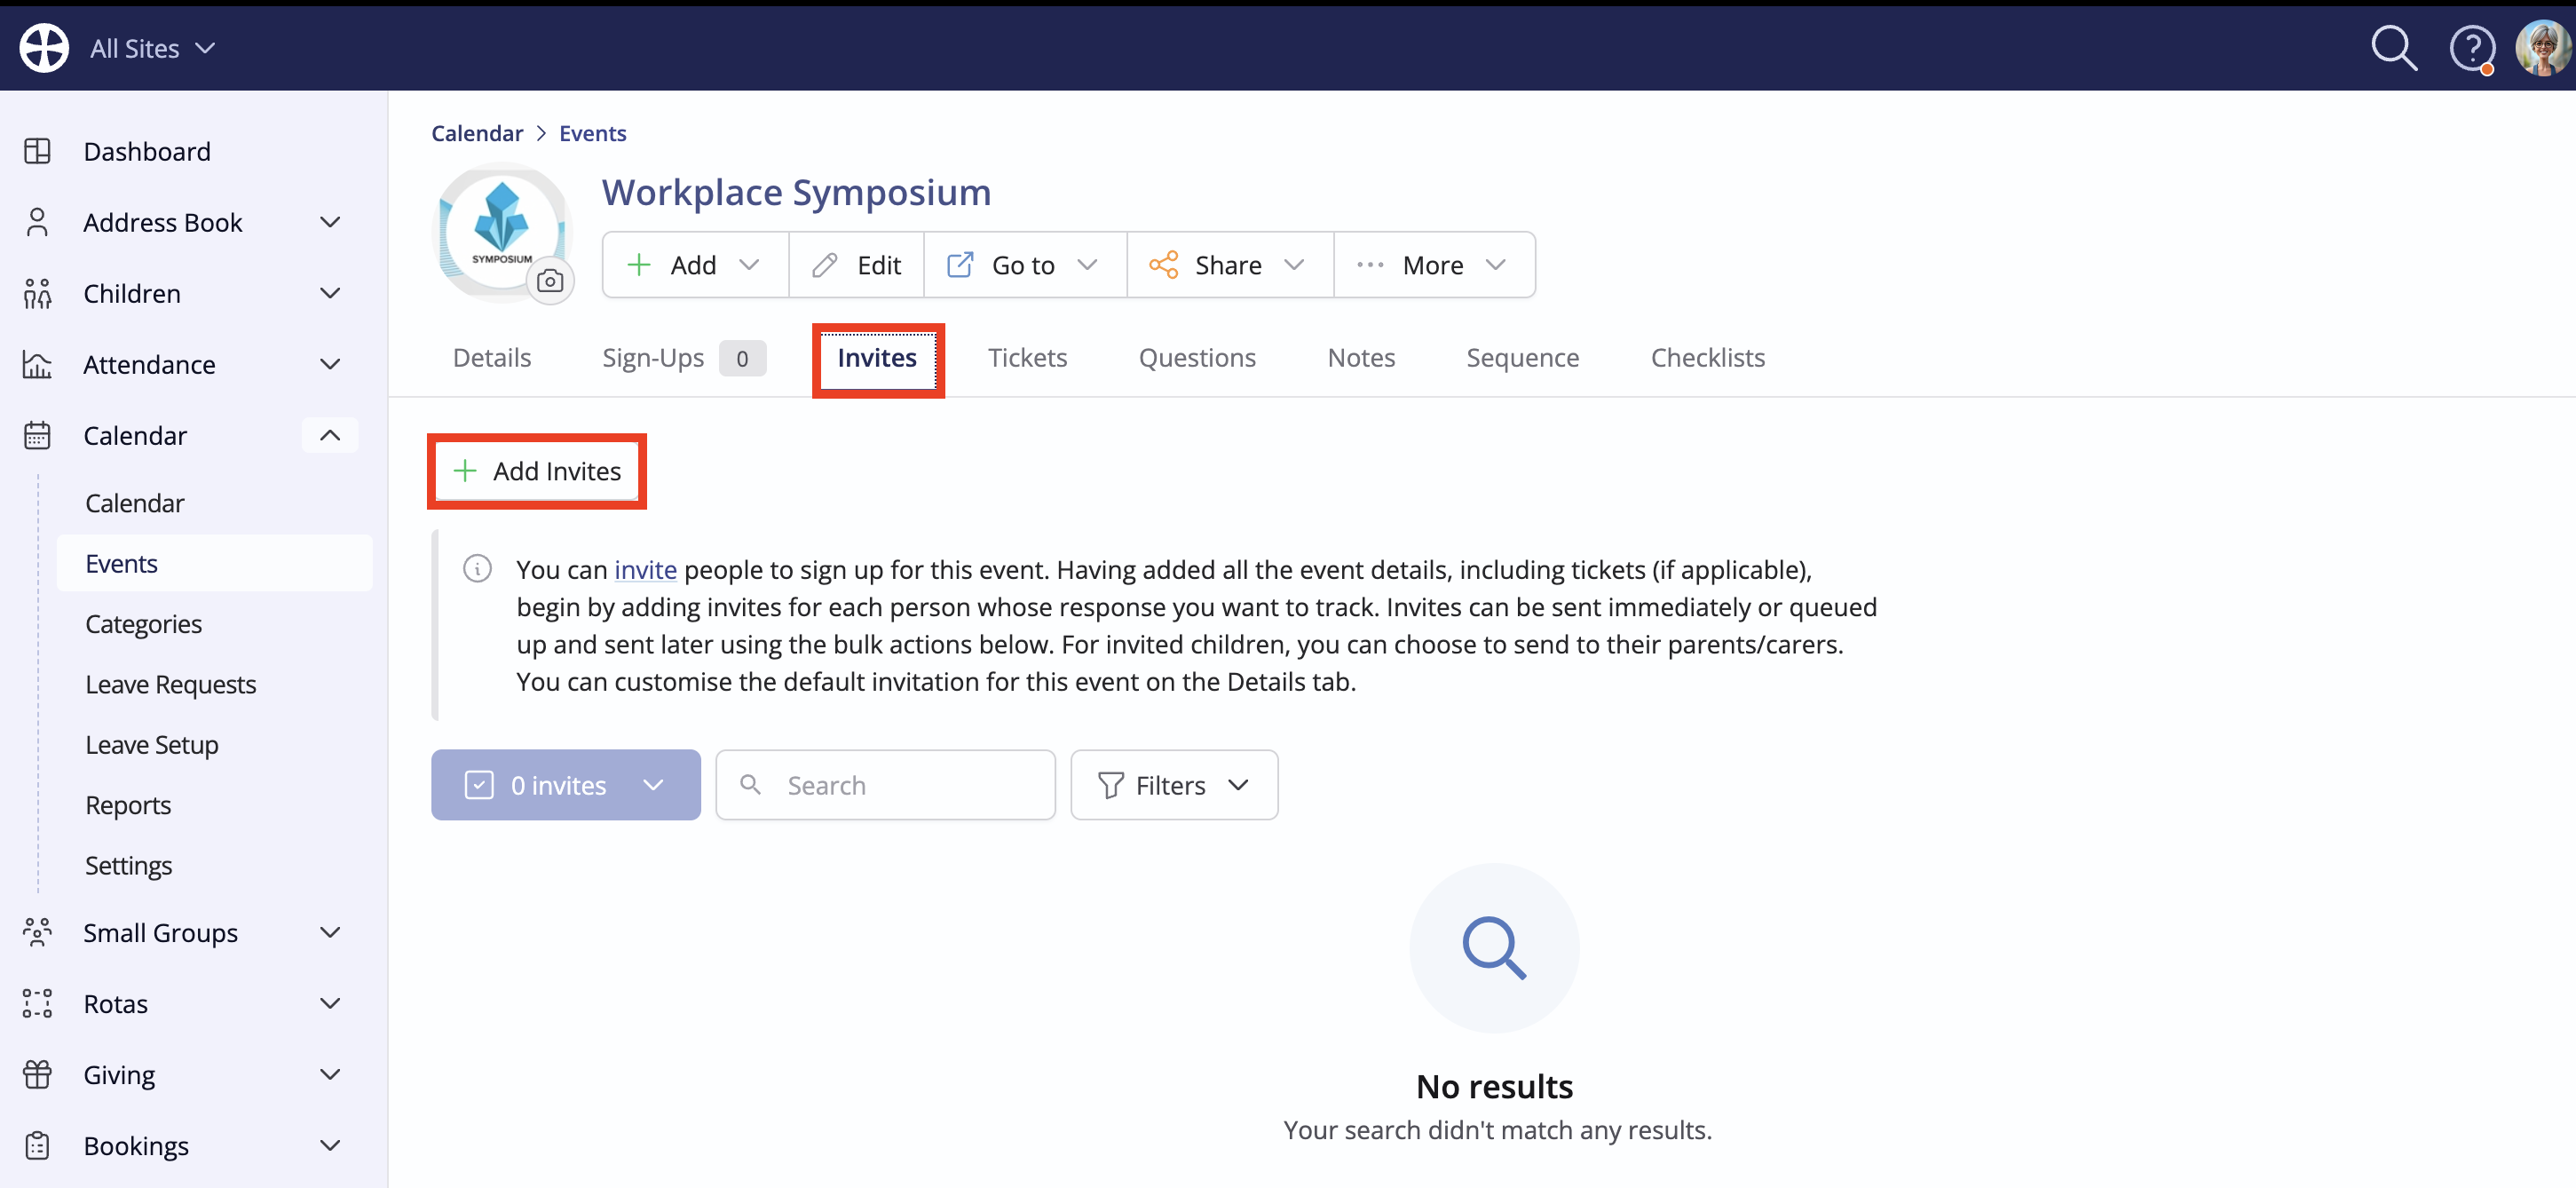
From the event's Invites tab, click Add invites. This action is only shown for future-dated events with a Confirmed or Pending status, with Sign up through Event Page enabled. If the event status is later cancelled, invitees will no longer be able to respond, but existing sign-ups will persist and can be optionally cancelled and refunded as appropriate to the event and your refund policy.
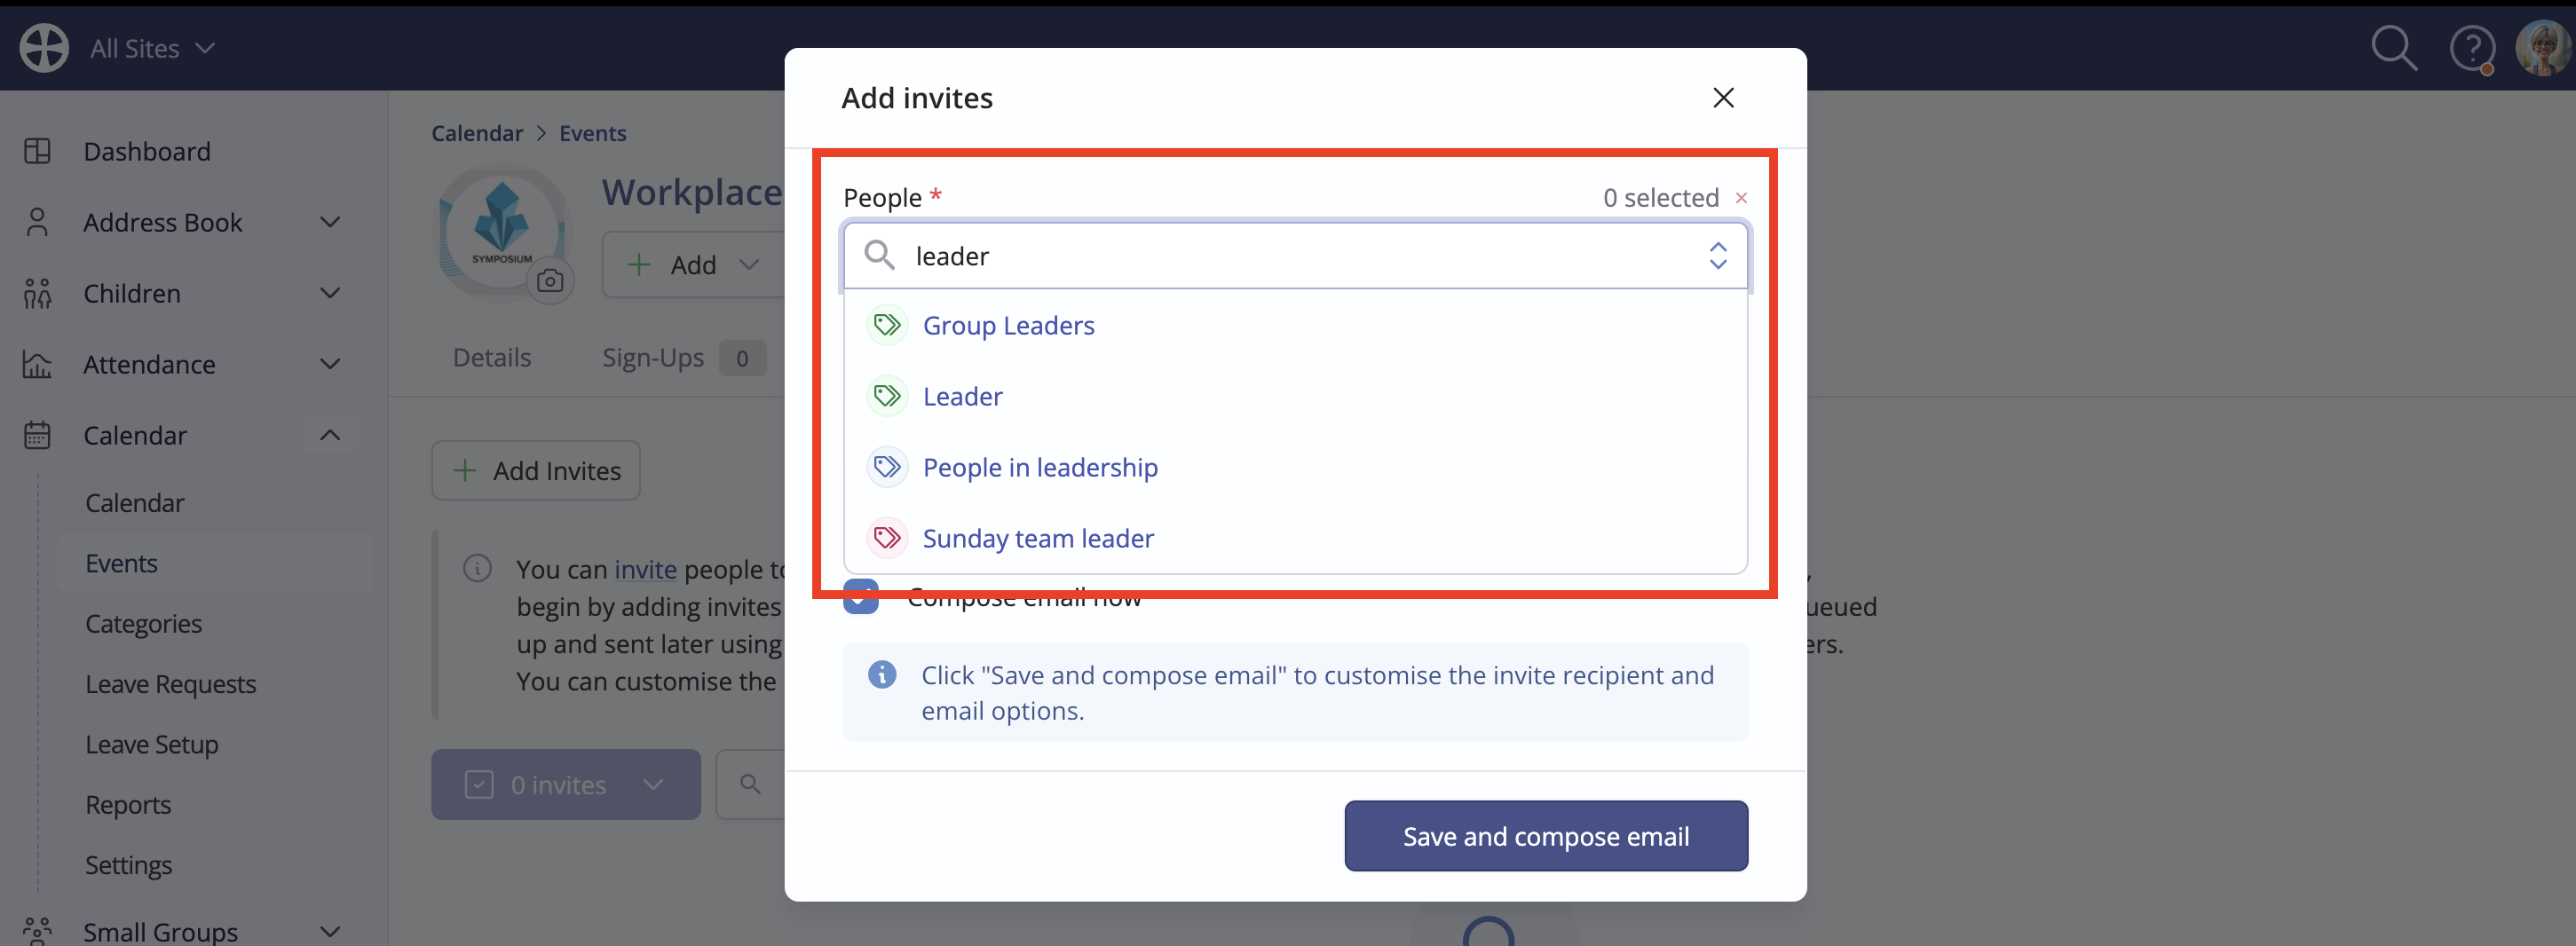
On the Add invites pop-up, select the People you wish to invite, searching and selecting individual names or bulk-selecting multiple people in tags. When adding invites for children, you'll be able to choose the invitation recipients in the next step, i.e. the child and/or their parents/carers.
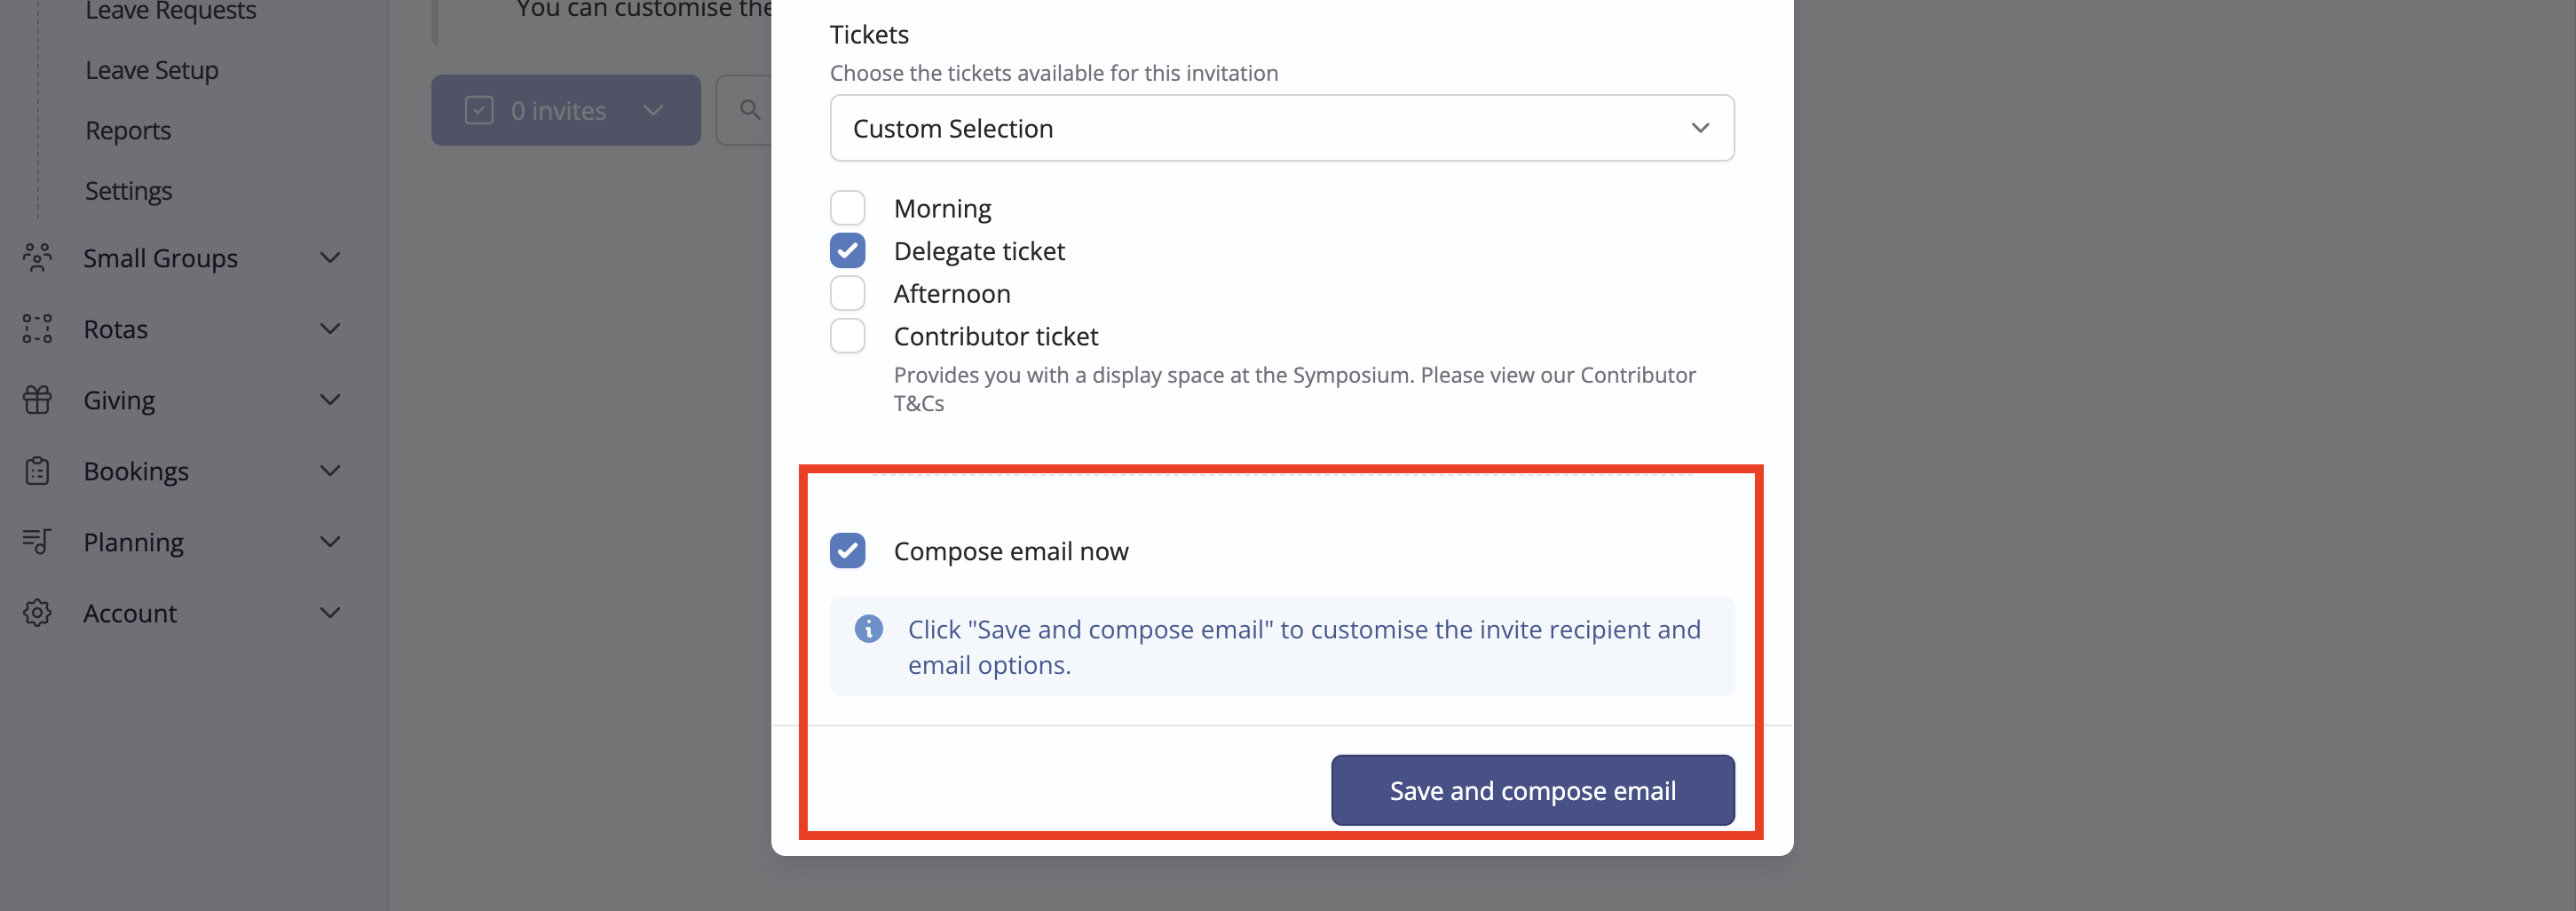
Next, choose the Tickets you wish to be included in the invitation. Any live ticket is selected by default, but you can use Custom Selection to target specific ticket types for your invitation:

Note that, if you wish, you can select to simply save the invitee list at this point by deselecting Compose new email now.

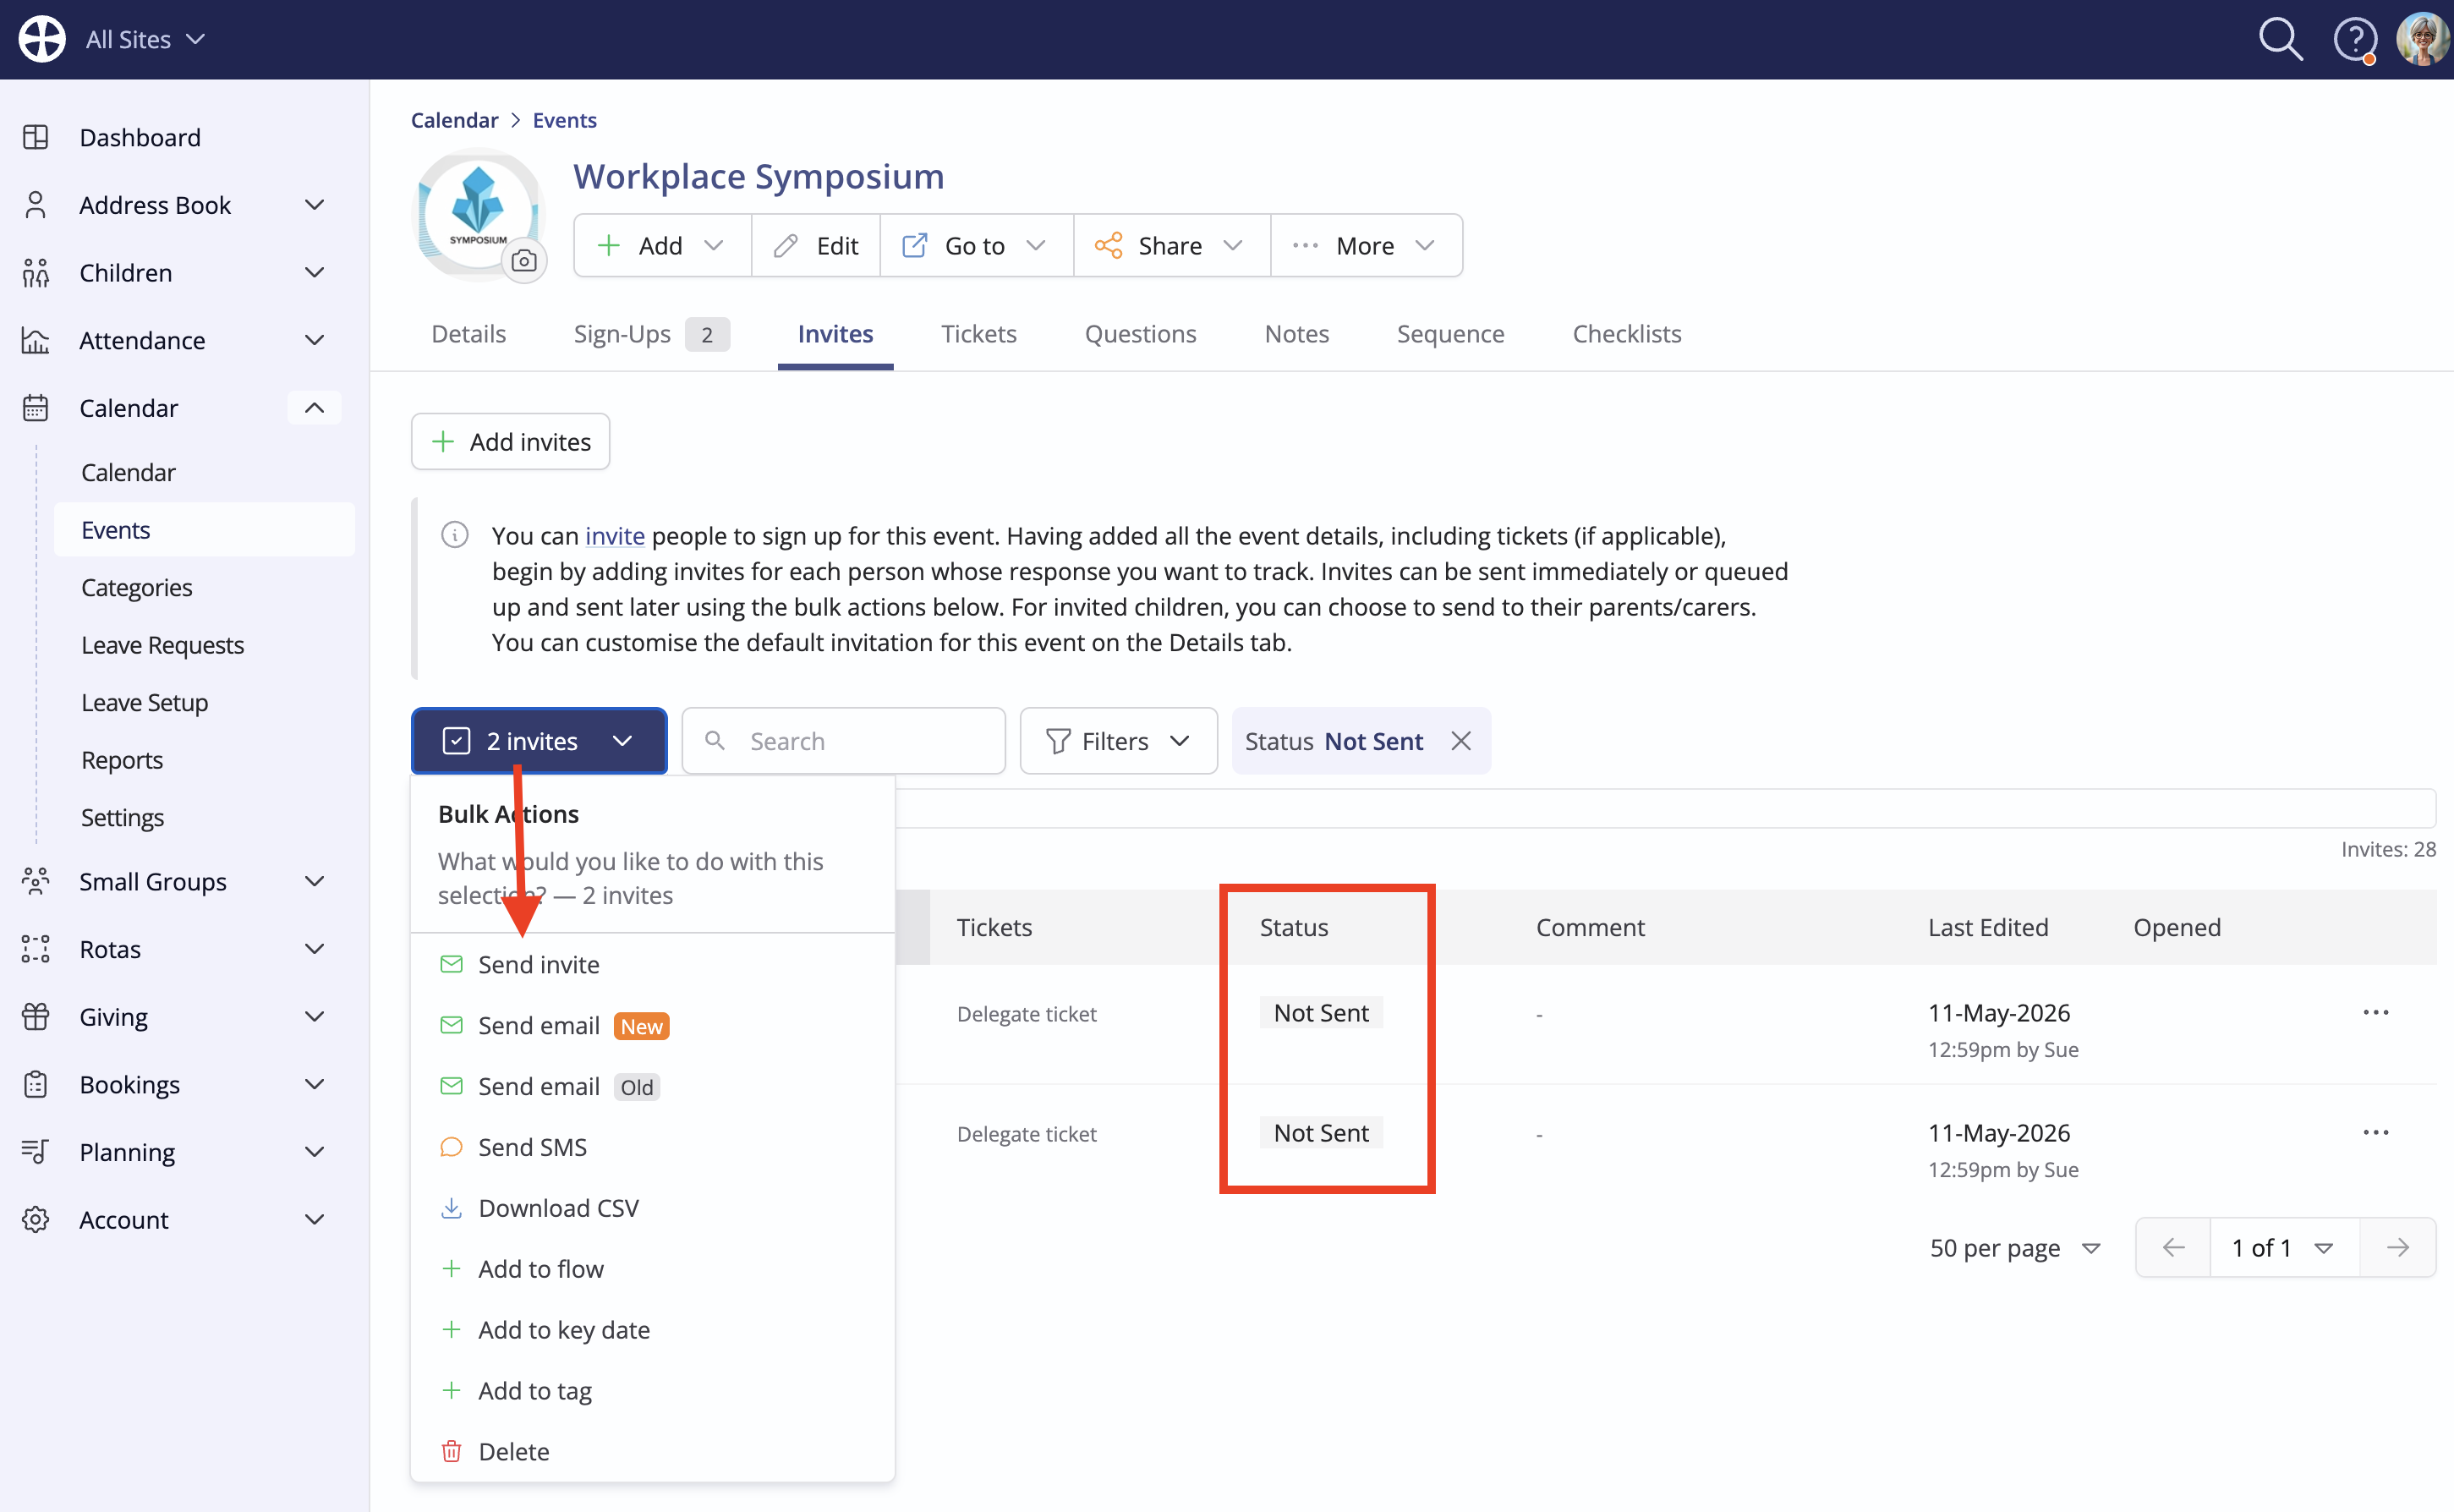
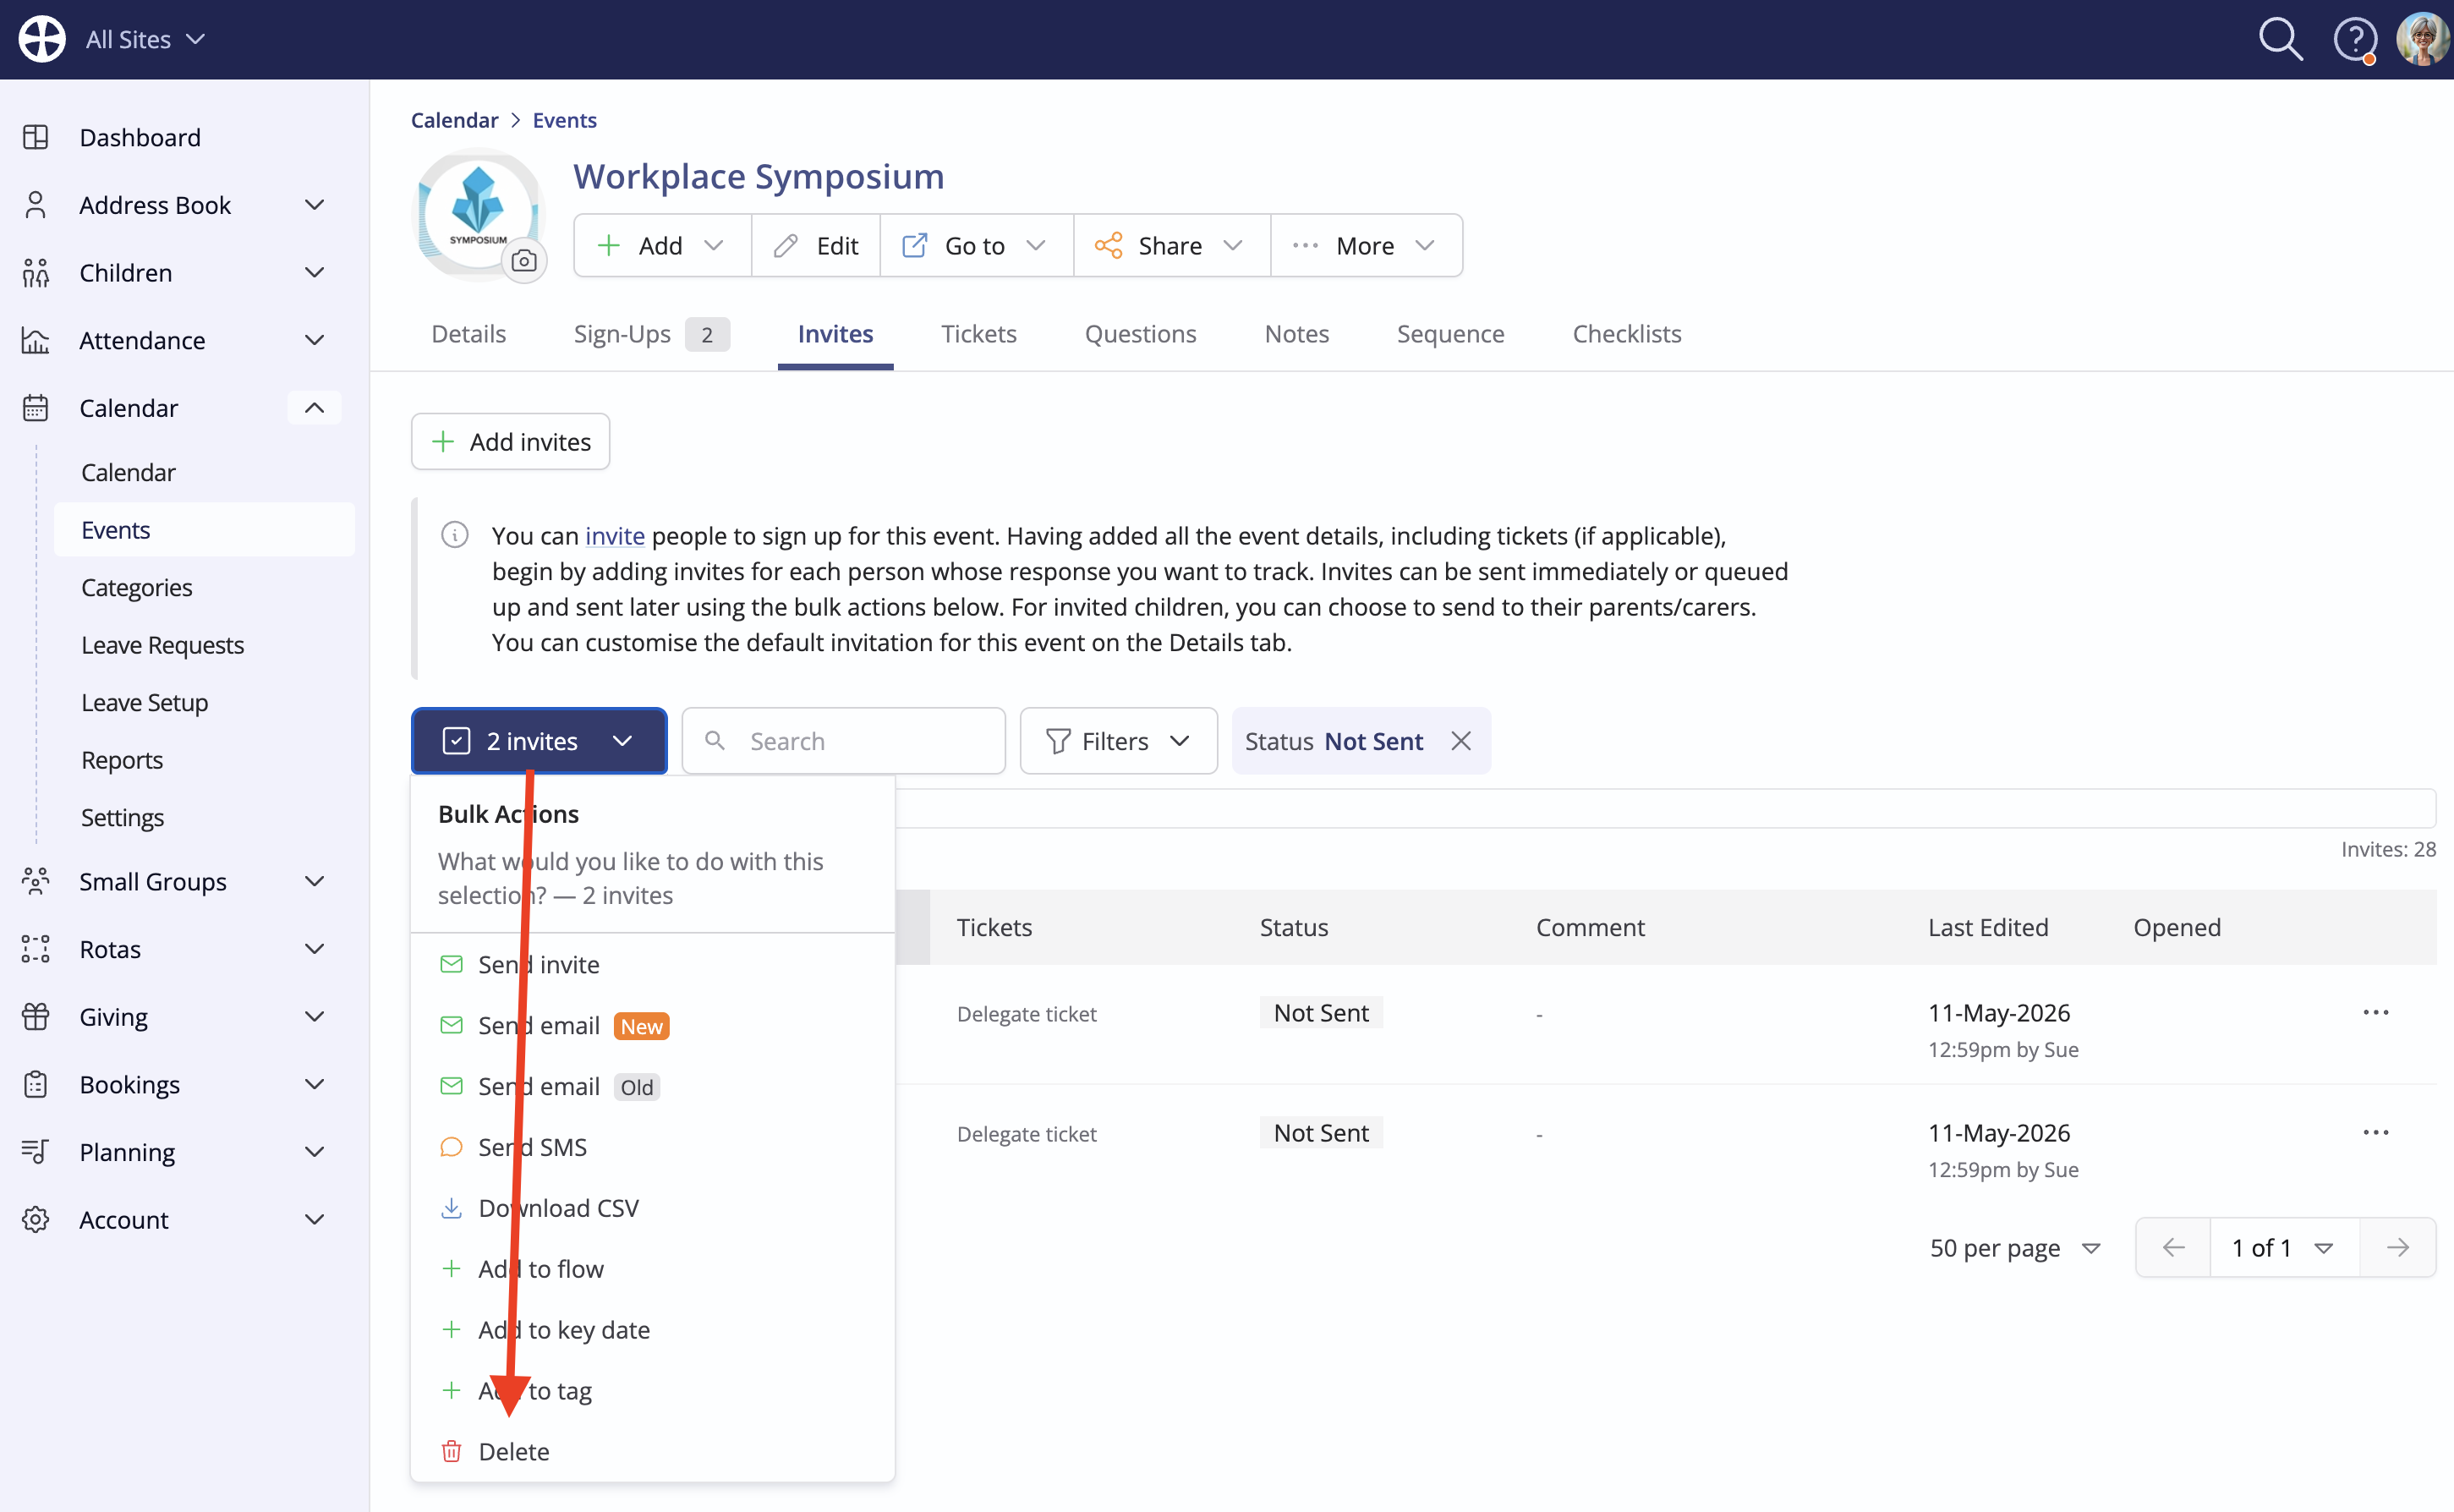
Clicking Save in this context will save those in the invite list with a Not sent status so that you can then choose Send invite from the bulk actions at a later date:
Usually, though, you will likely want to select the default Save and compose email option:
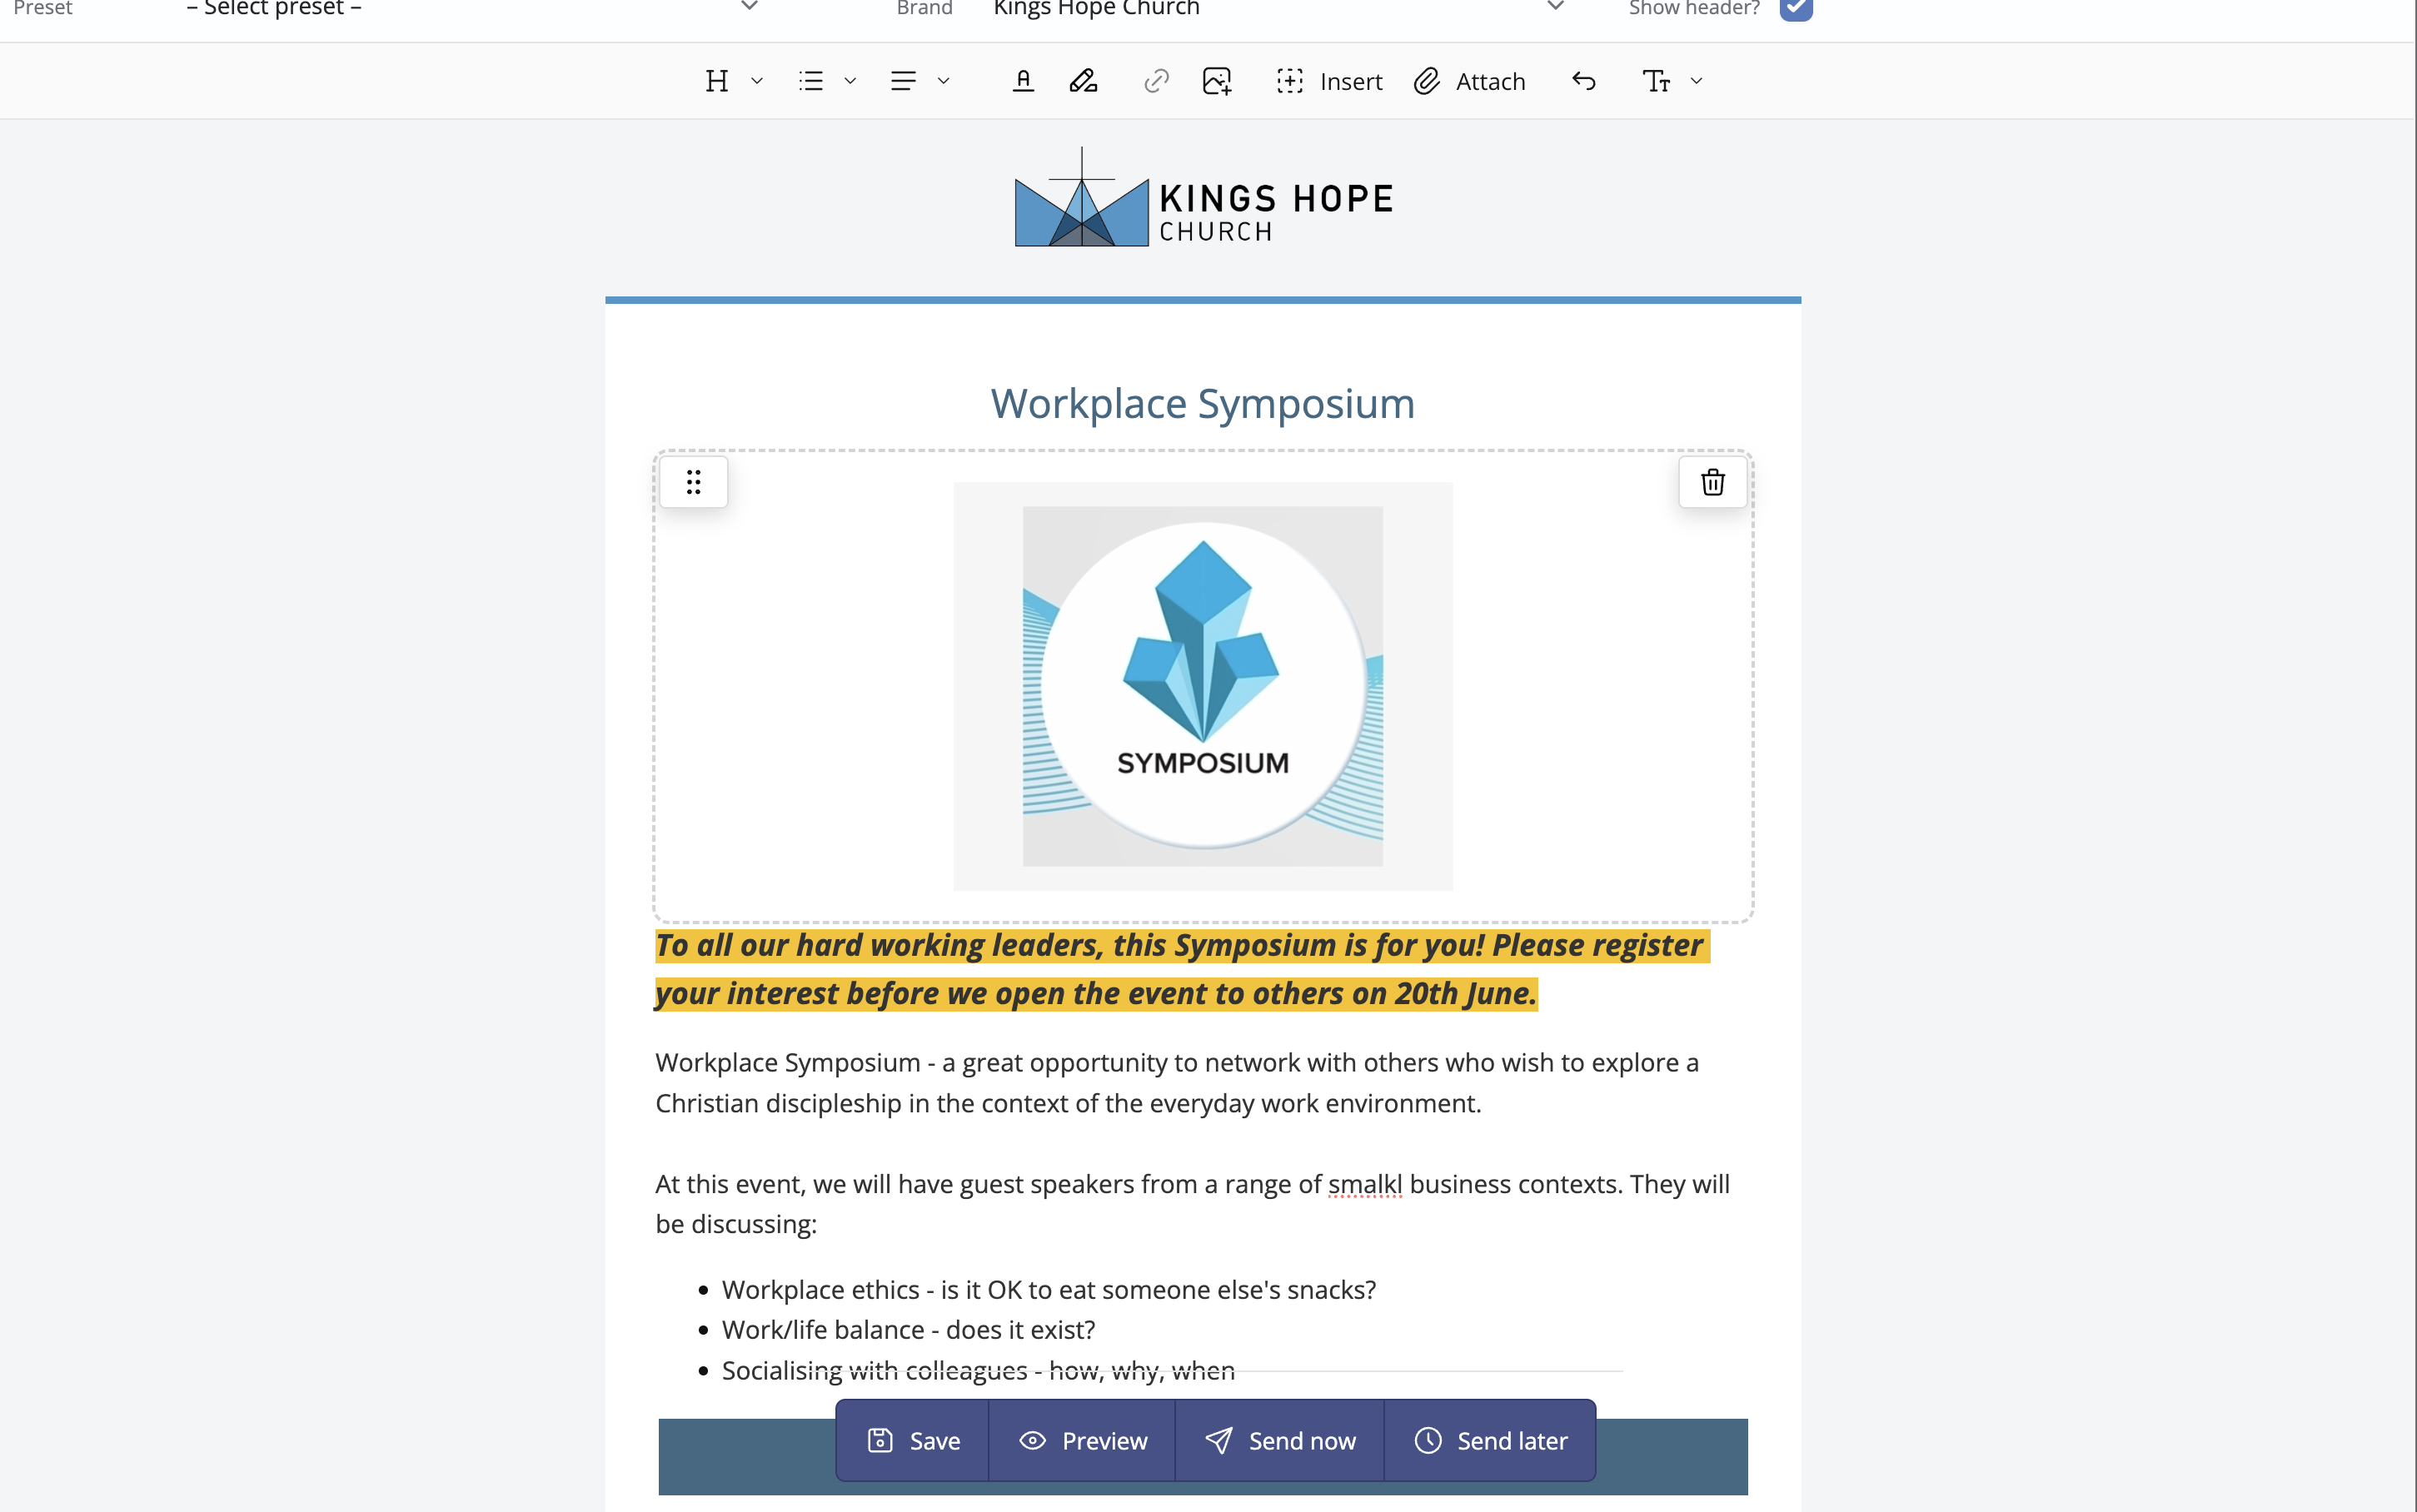
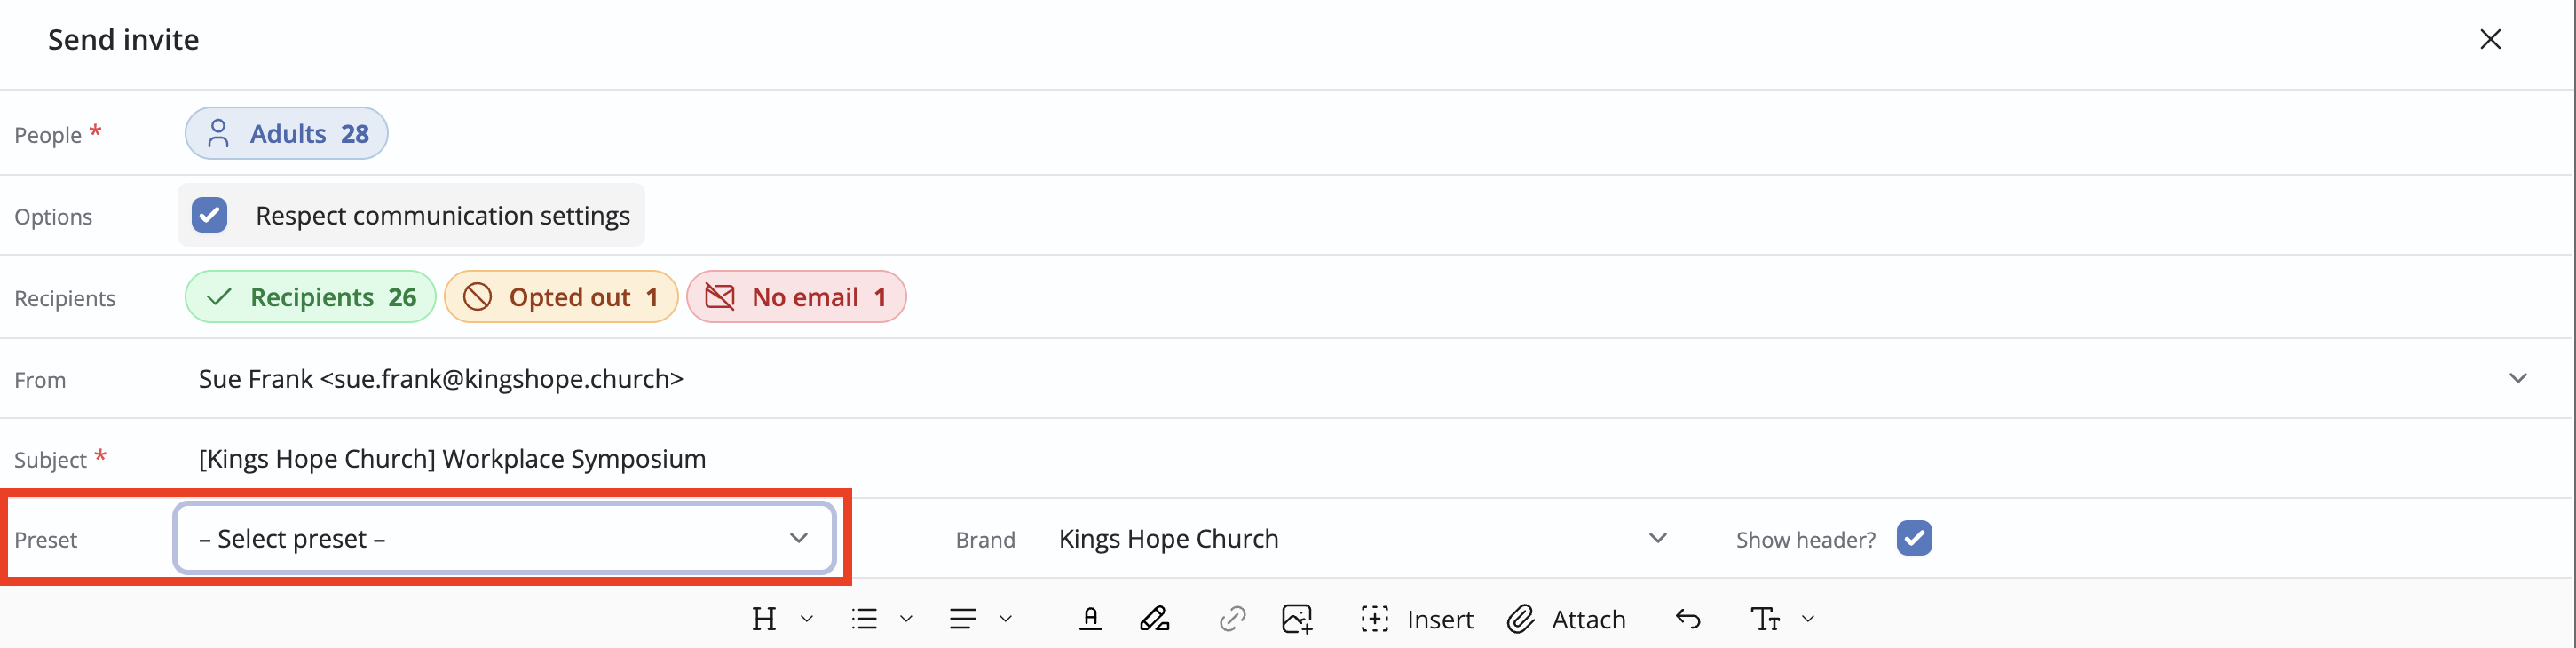
The invitation generated will sport the event Category branding. Note that you are able to change the From sender, the Subject and also select to override Communication settings, which can be used to send the invitation to opted-out recipients where you have a permitted reason to do so without a recipient's consent.
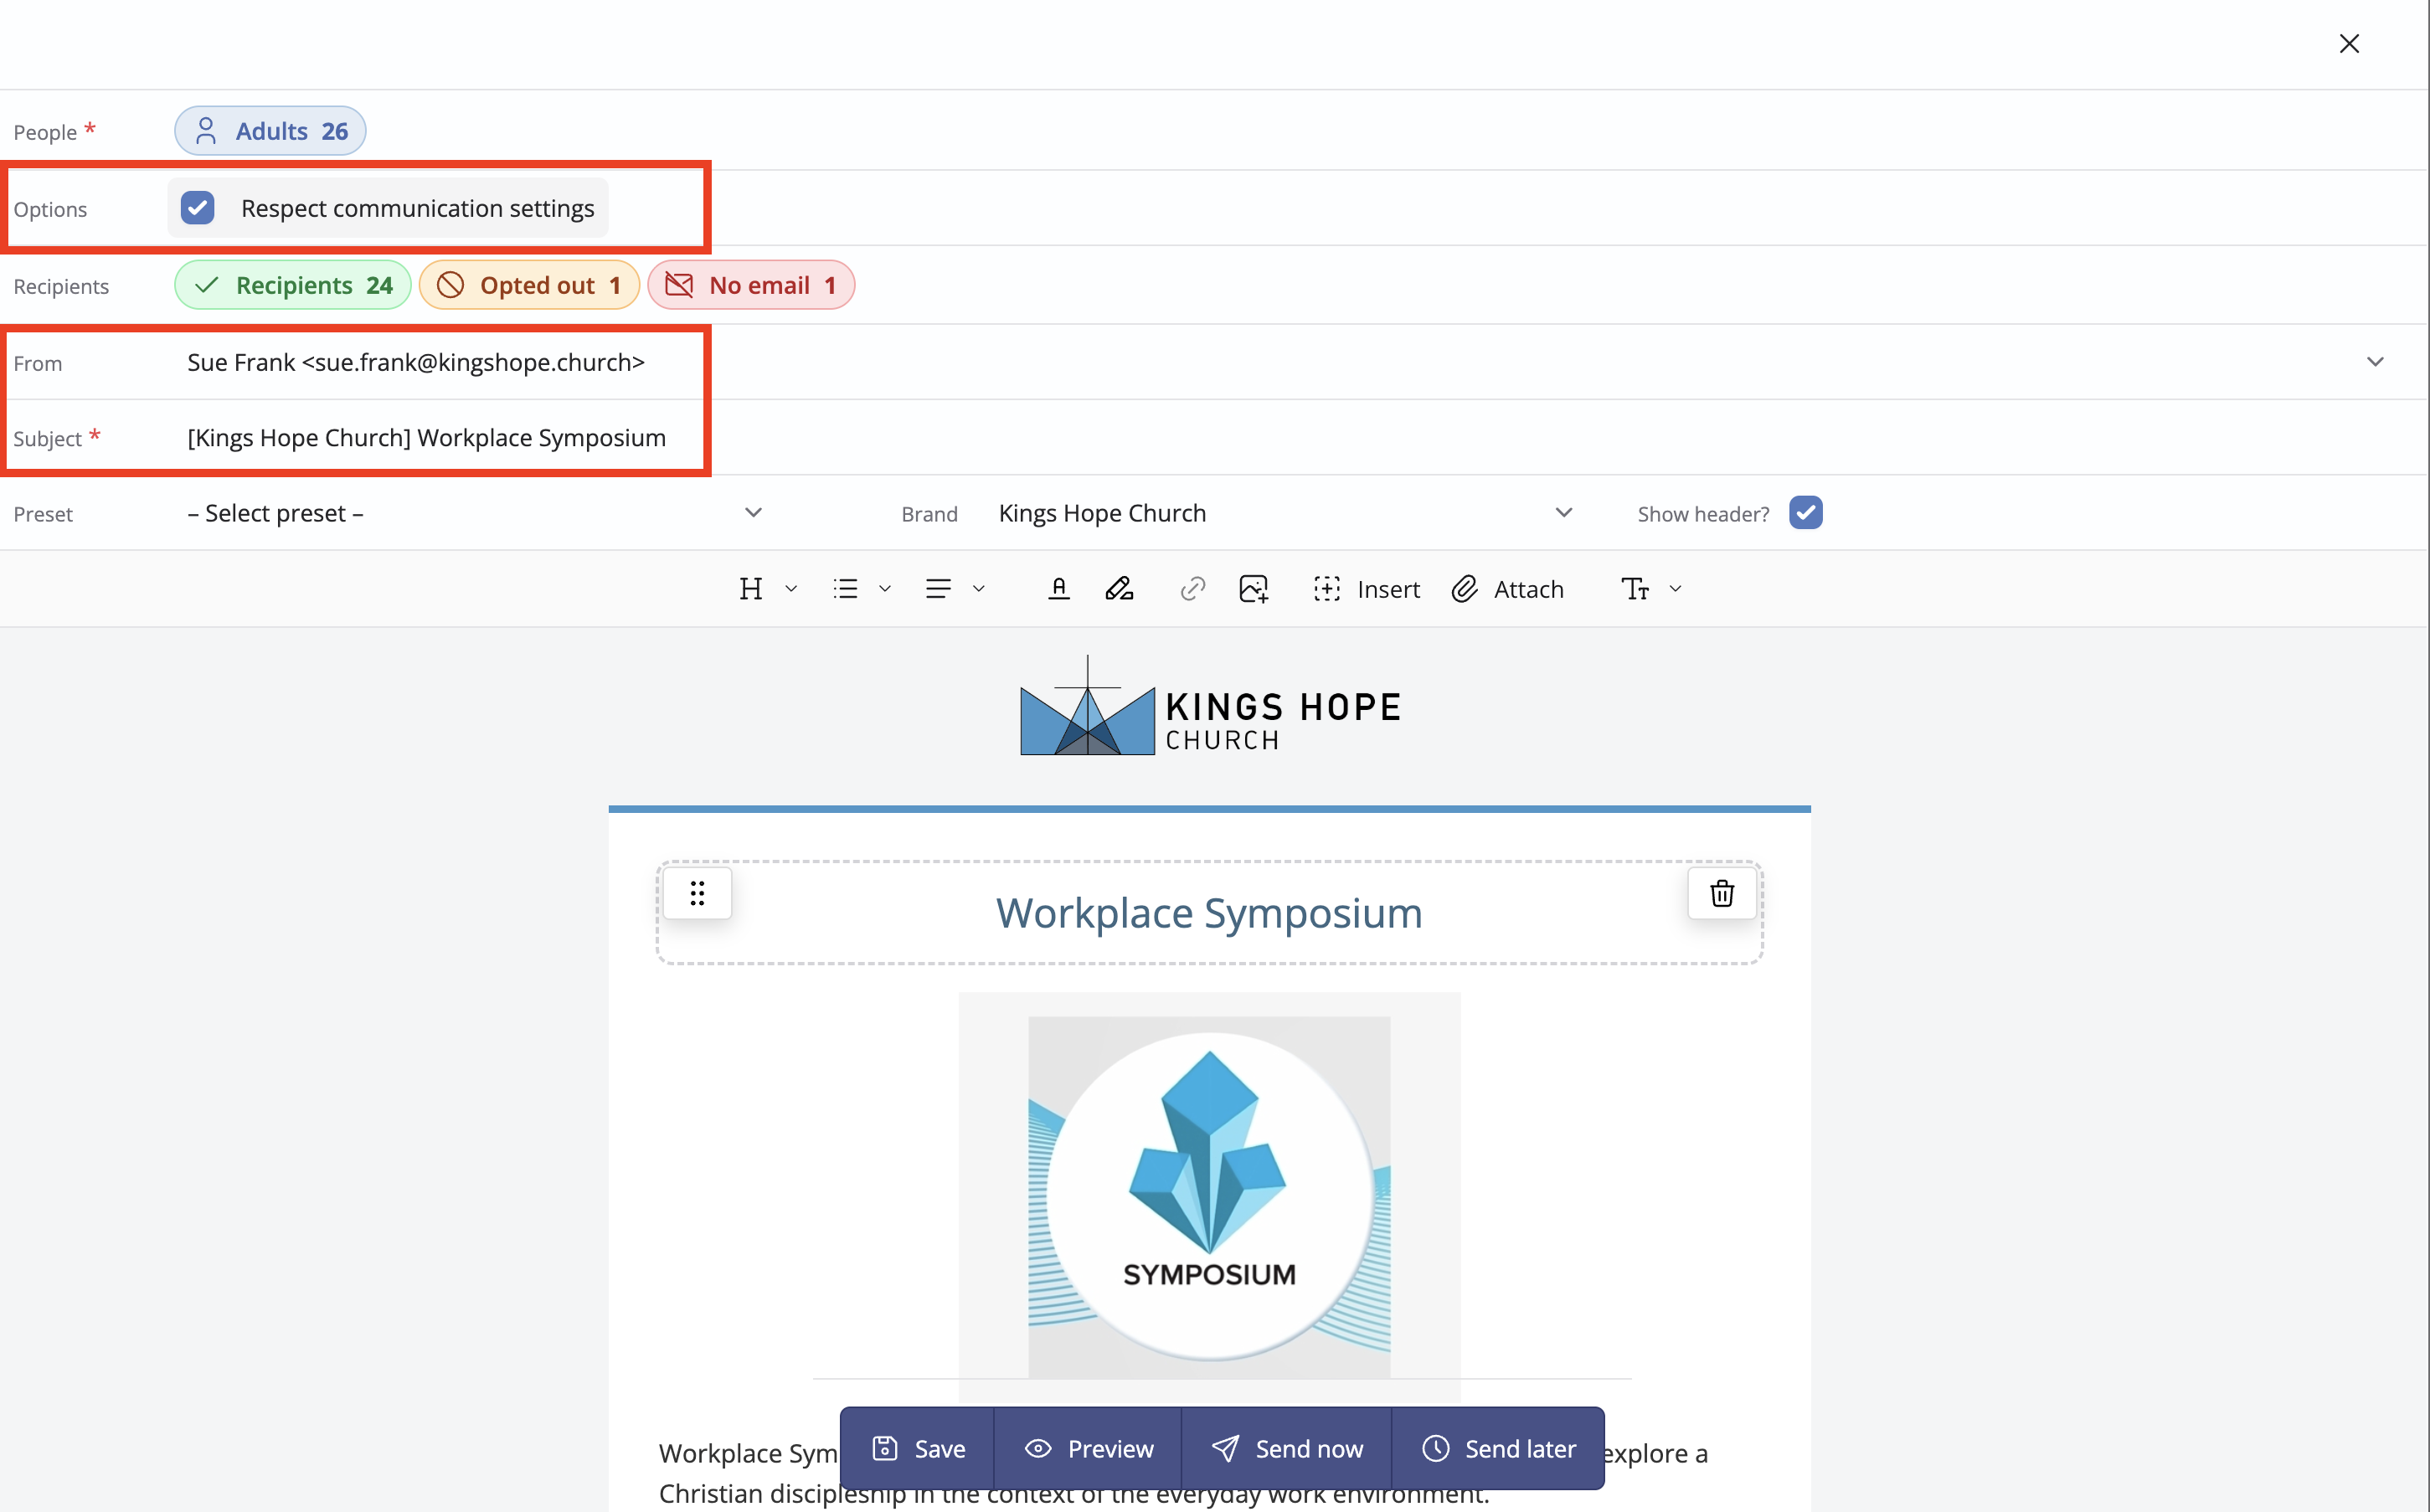
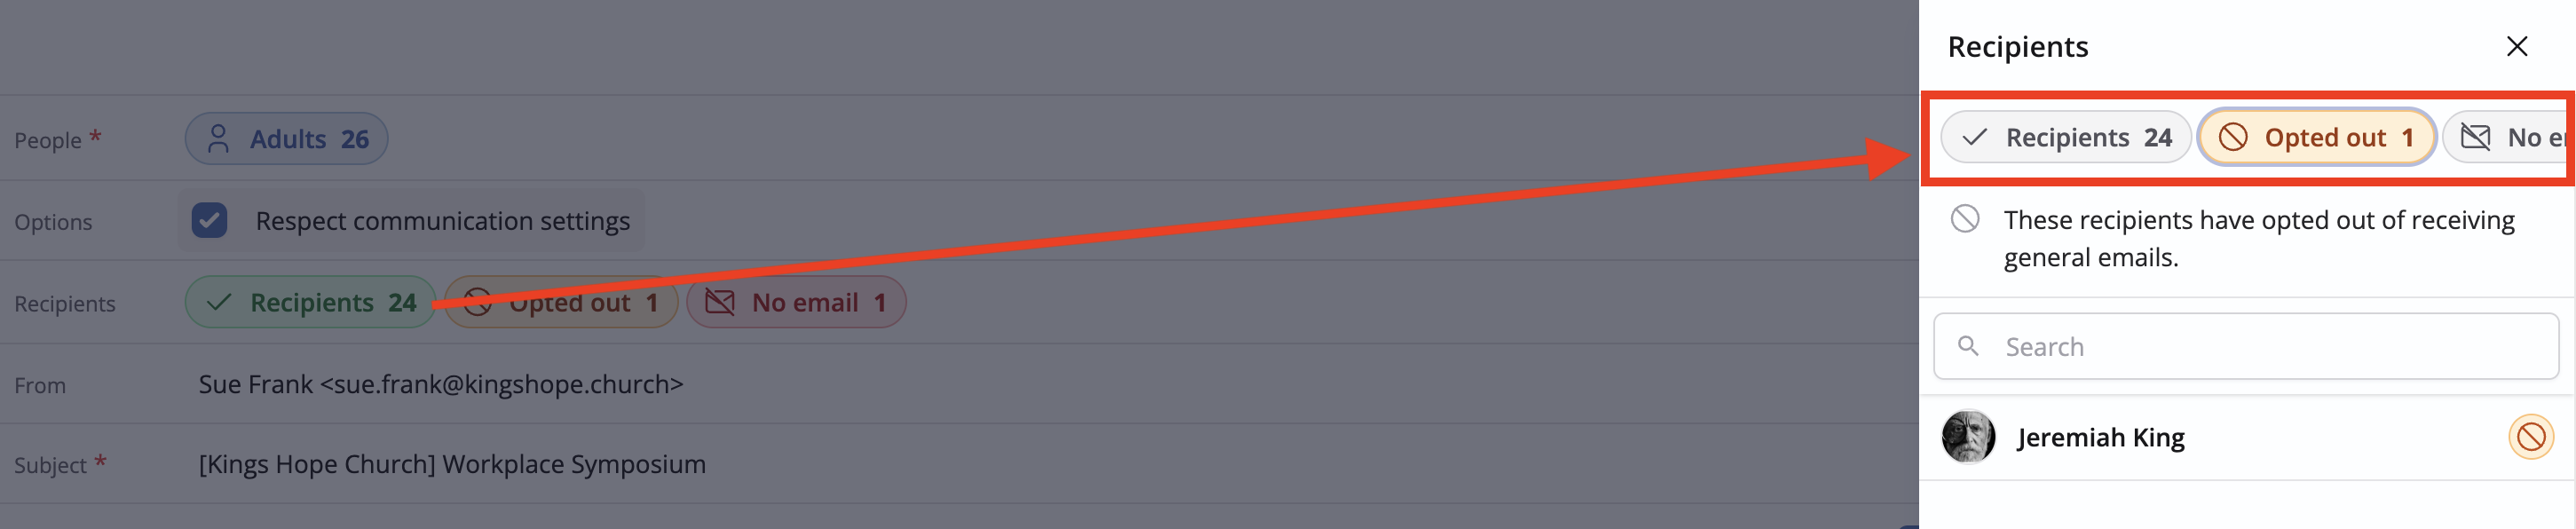
To help you visualise who has opted out or has no email address, click the Recipient pill and select the appropriate tab:
The invitation can be edited if required, perhaps to add a personalised note to the event description or to move the event image:
You now have four options:
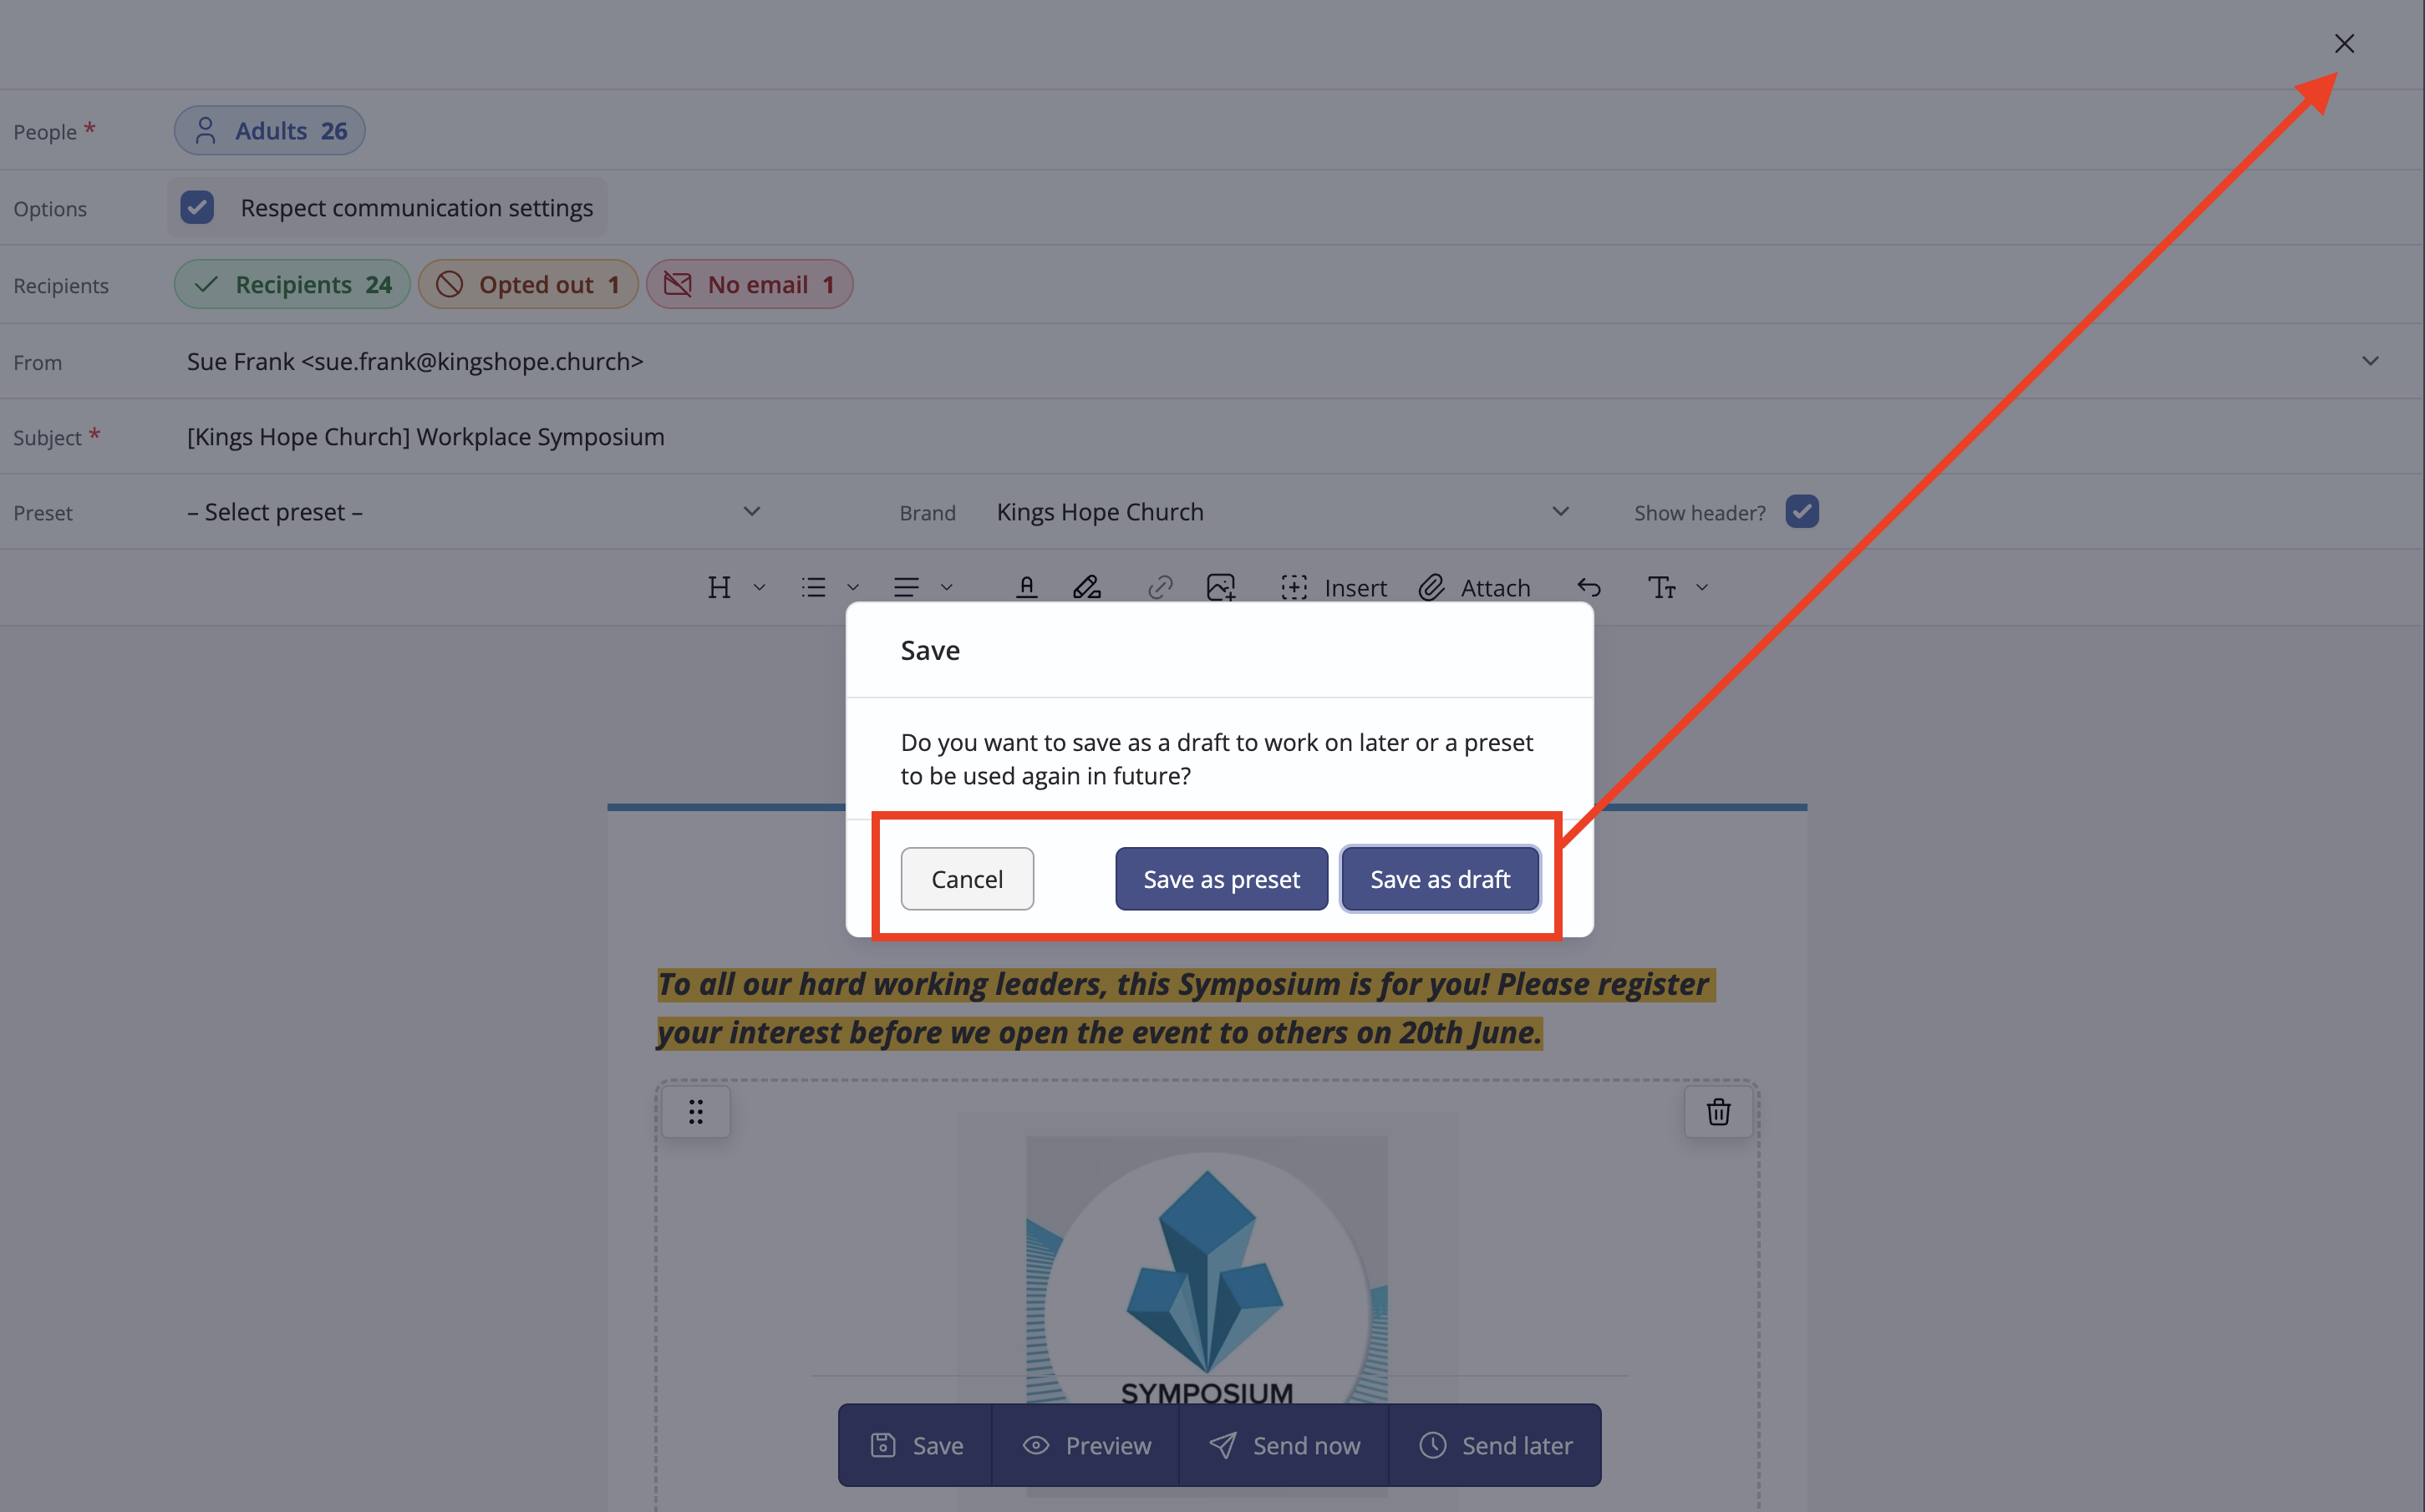
Save - save the invitation without sending, perhaps to clarify something you need to mention in it; you are offered the option to Save as a preset or Save as draft; you can safely close the invitation once saved.
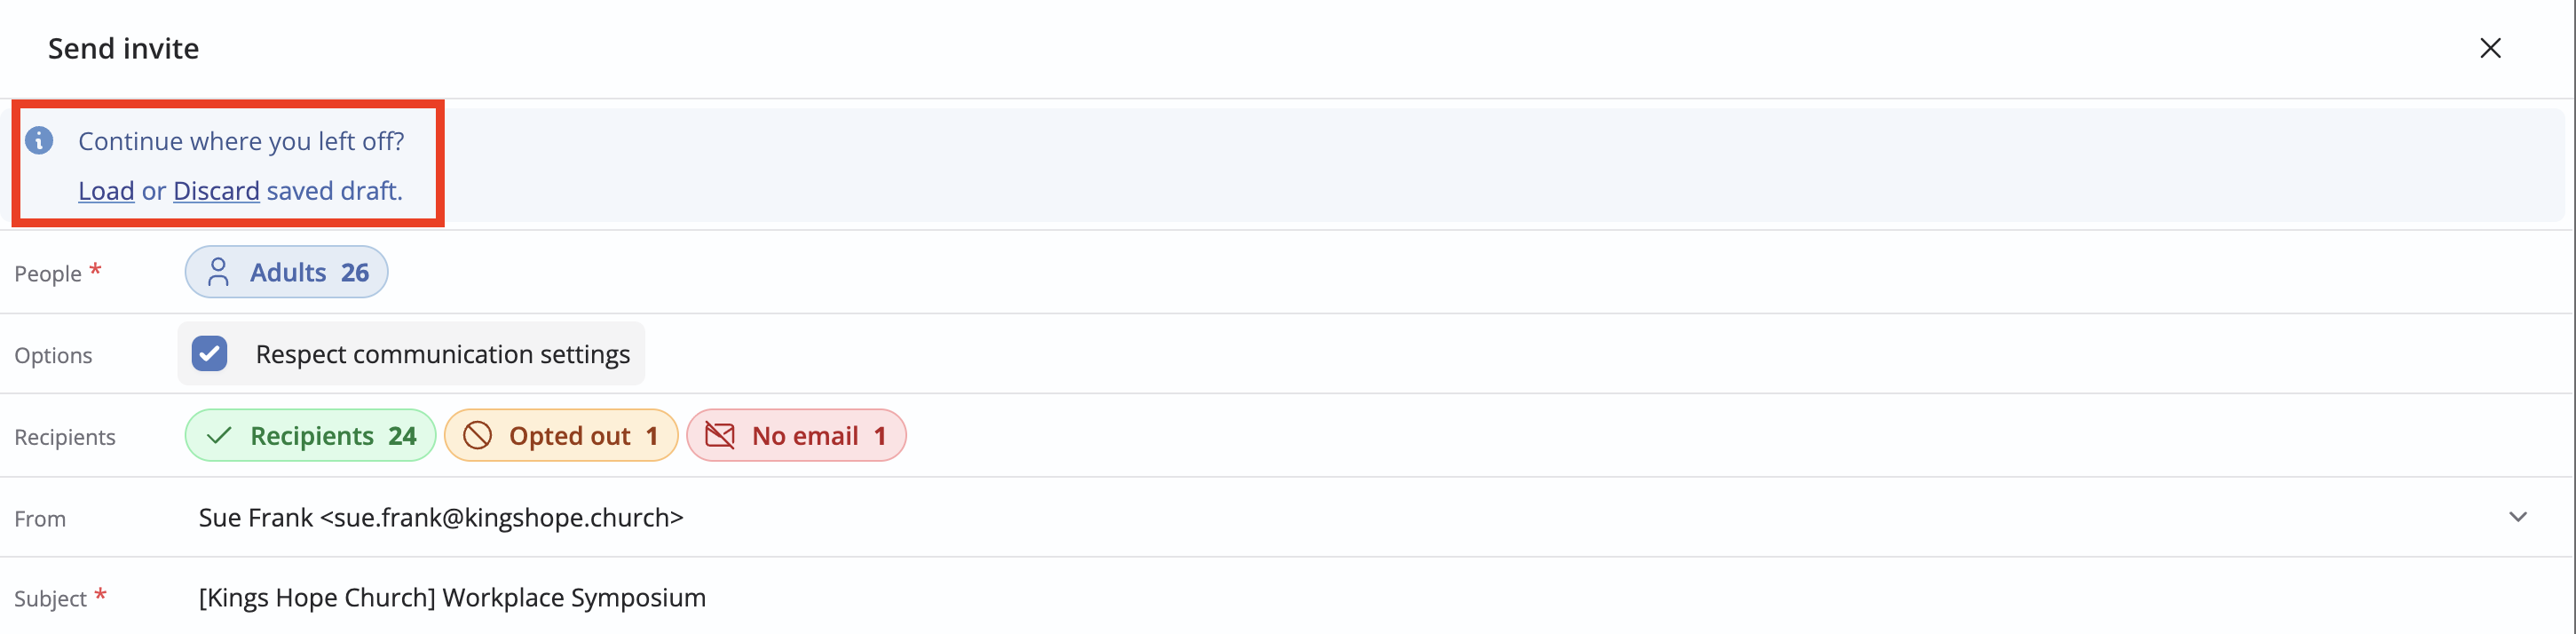
When you later select to Send invite (as previously described above), you can then choose to use the saved draft if you wish:
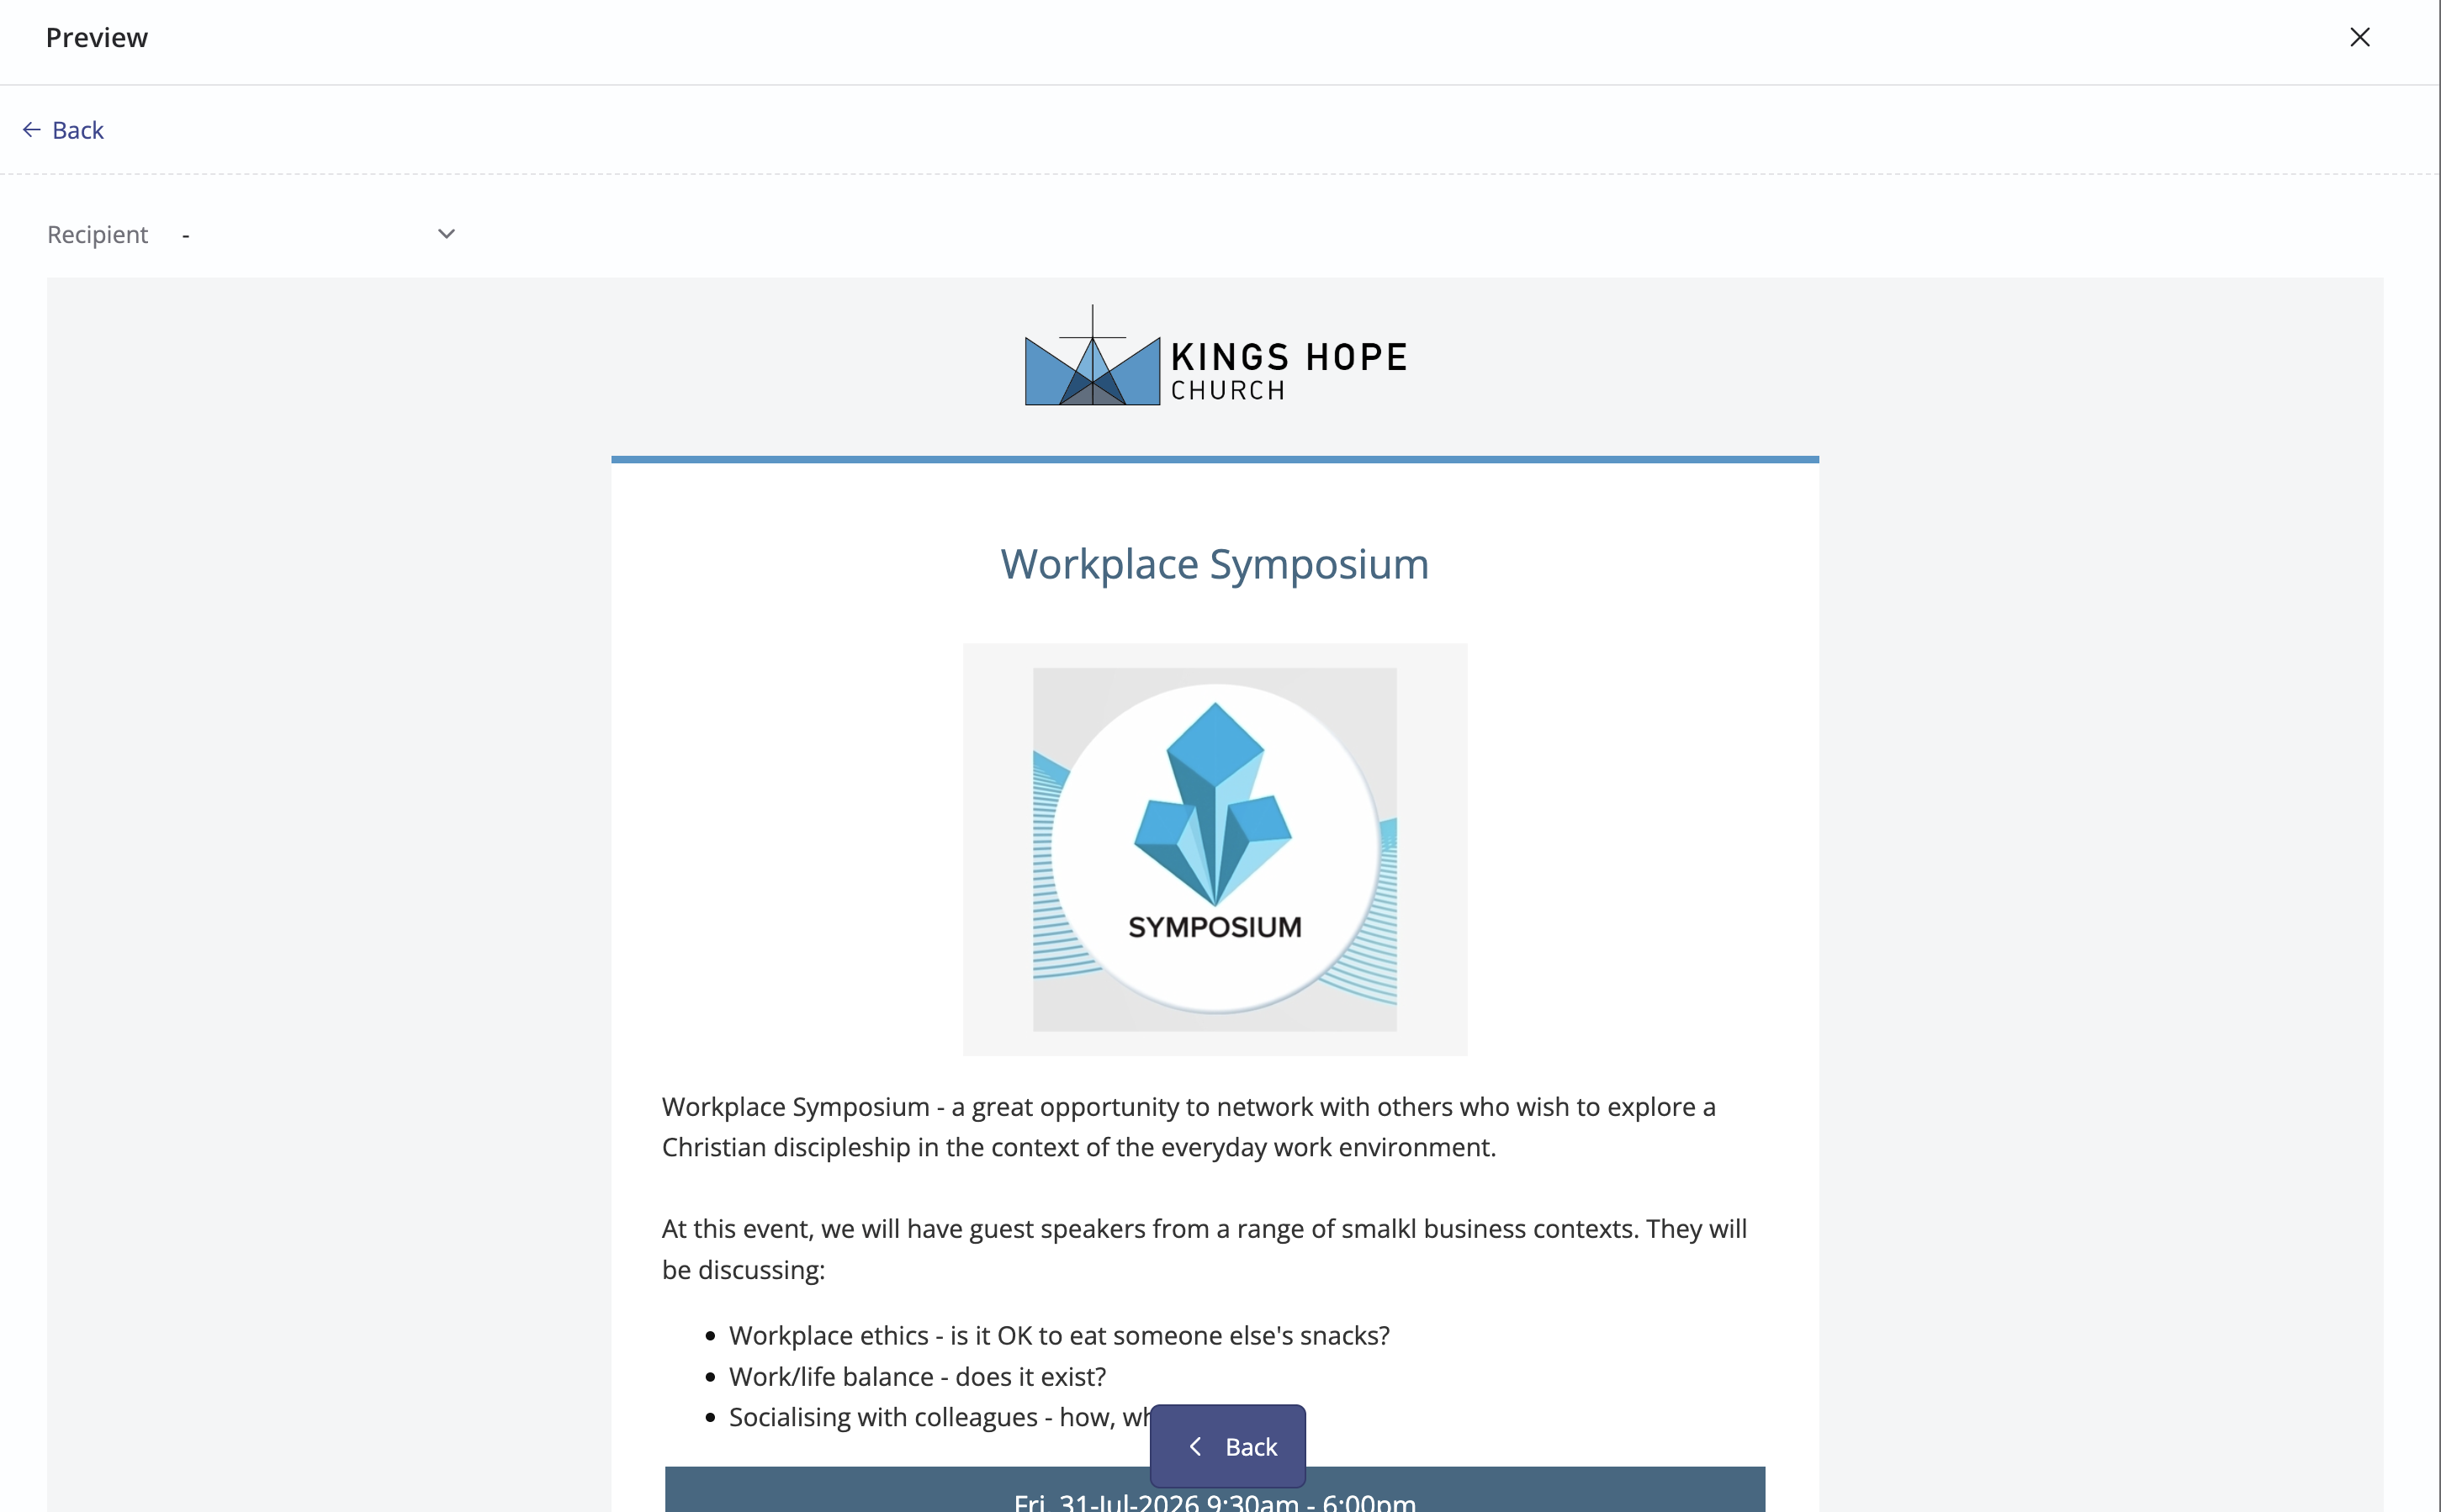
Preview - view the invitation as it will look when opened by a recipient - click Back to return to the draft:
Send now - send the invitation immediately to all recipients.
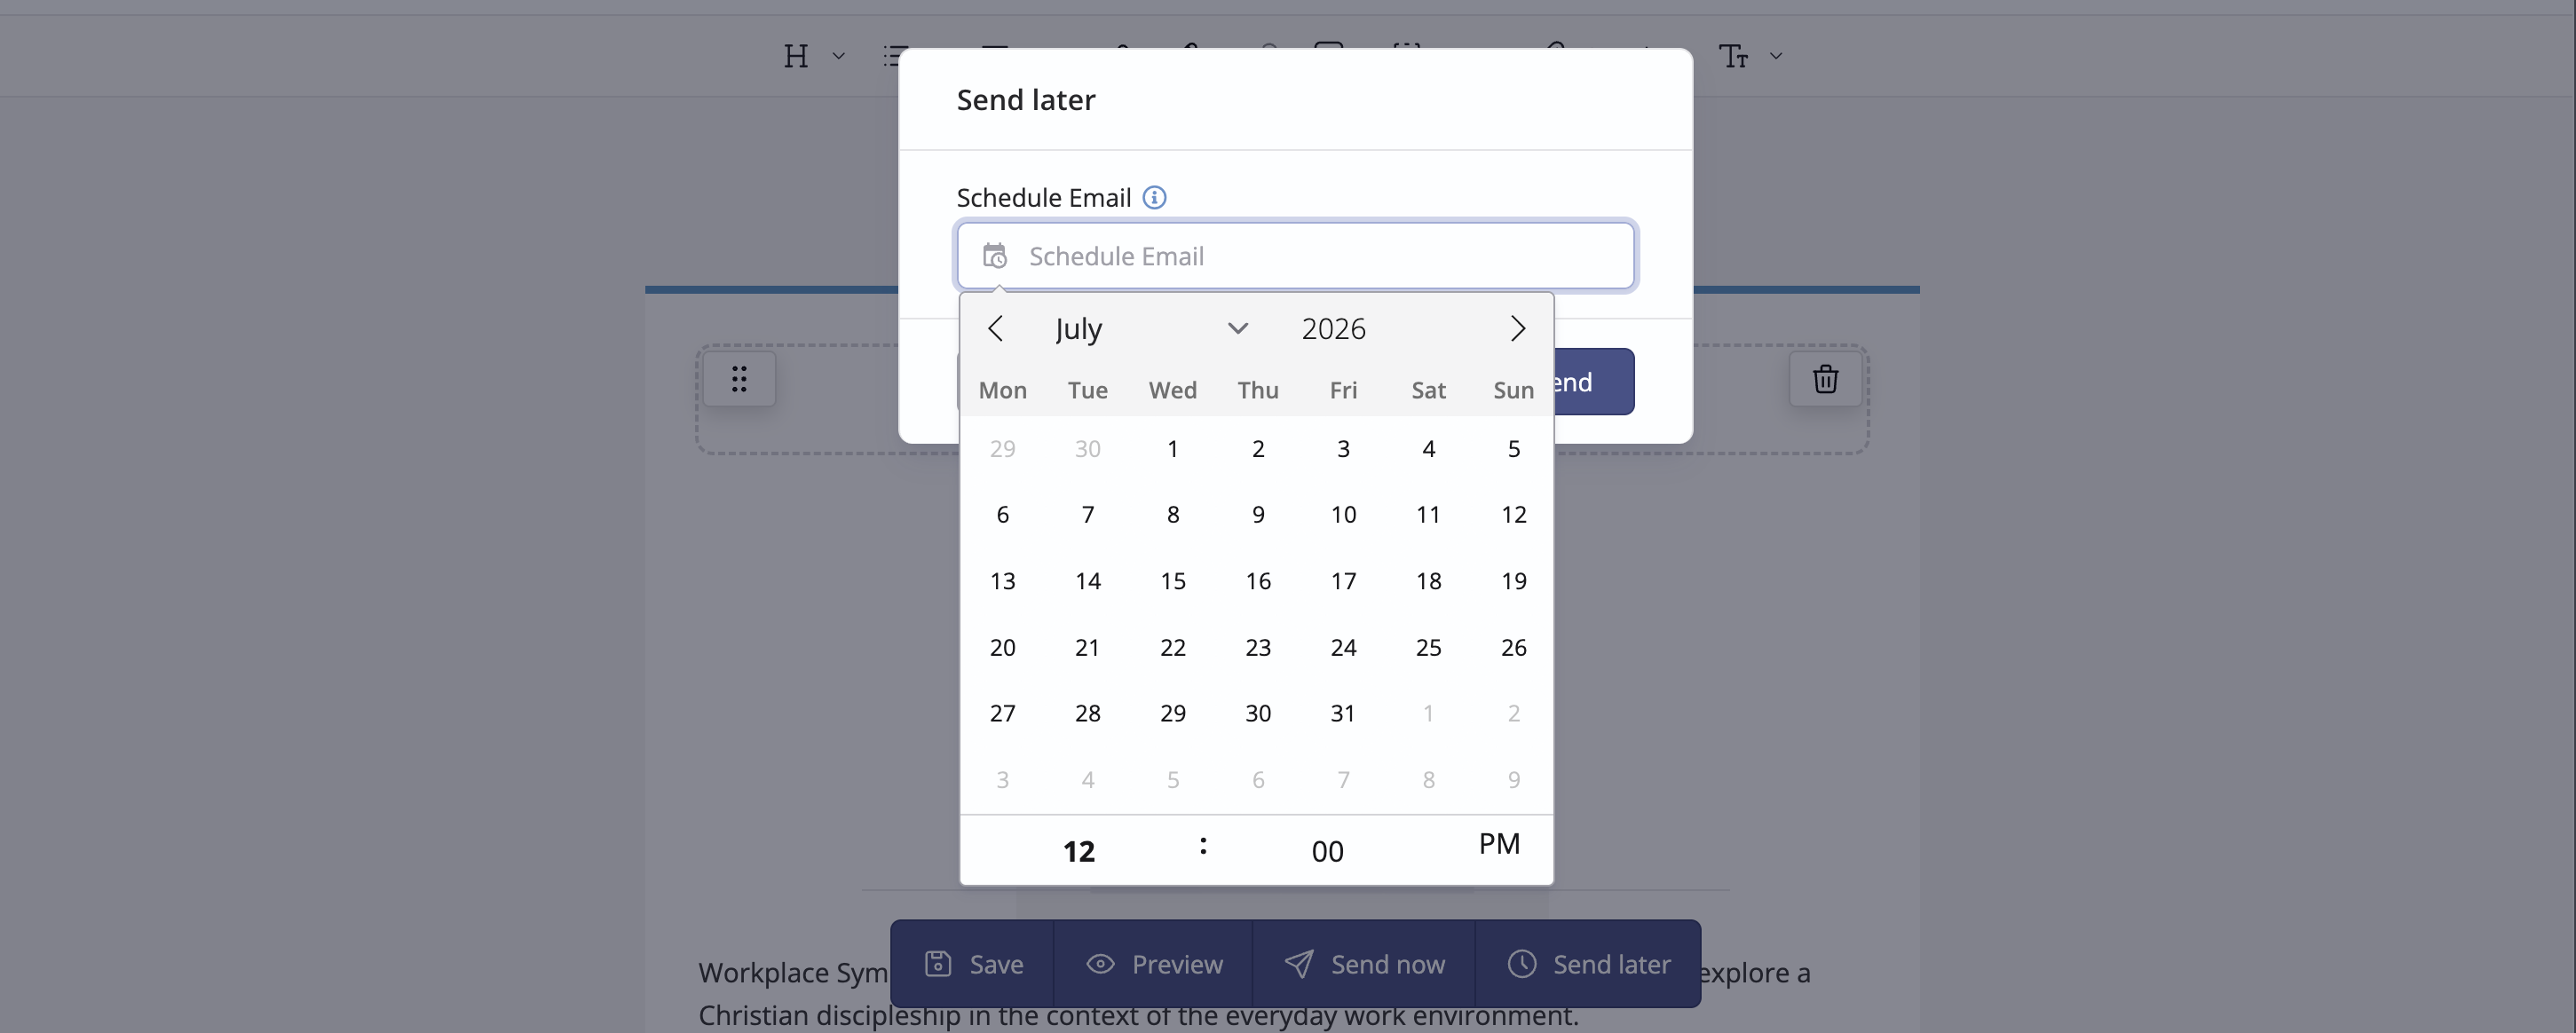
Send later - schedule the invitation to be sent at a later date:
Using preset invitation emails
Using the method above, ChurchSuite generates a formatted invitation email with embedded merge fields that are later used to generate each recipient's personal Accept and Decline links when the message is sent. As an alternative to sending the system-generated email, you can also create your own invitation emails styled to your preferred layout and content, saved as a Preset email, that can be used time and again in the future when sending event invitations. When previewing the system-generated invitation, you can select a previously prepared Preset, which will replace the system-created message.
Note: The sending of event invitations can only be actioned from the Send invite action from an event Invites tab - it's not possible to send event invitations from any other context.
A Preset invitation can contain any text or email body content. However, the email must include an ::invite_rsvp:: merge field within the email body. You will be unable to send the invitation if this merge field is not present in the message. This merge field becomes each recipient's unique Accept and Decline buttons when the invitations are sent.
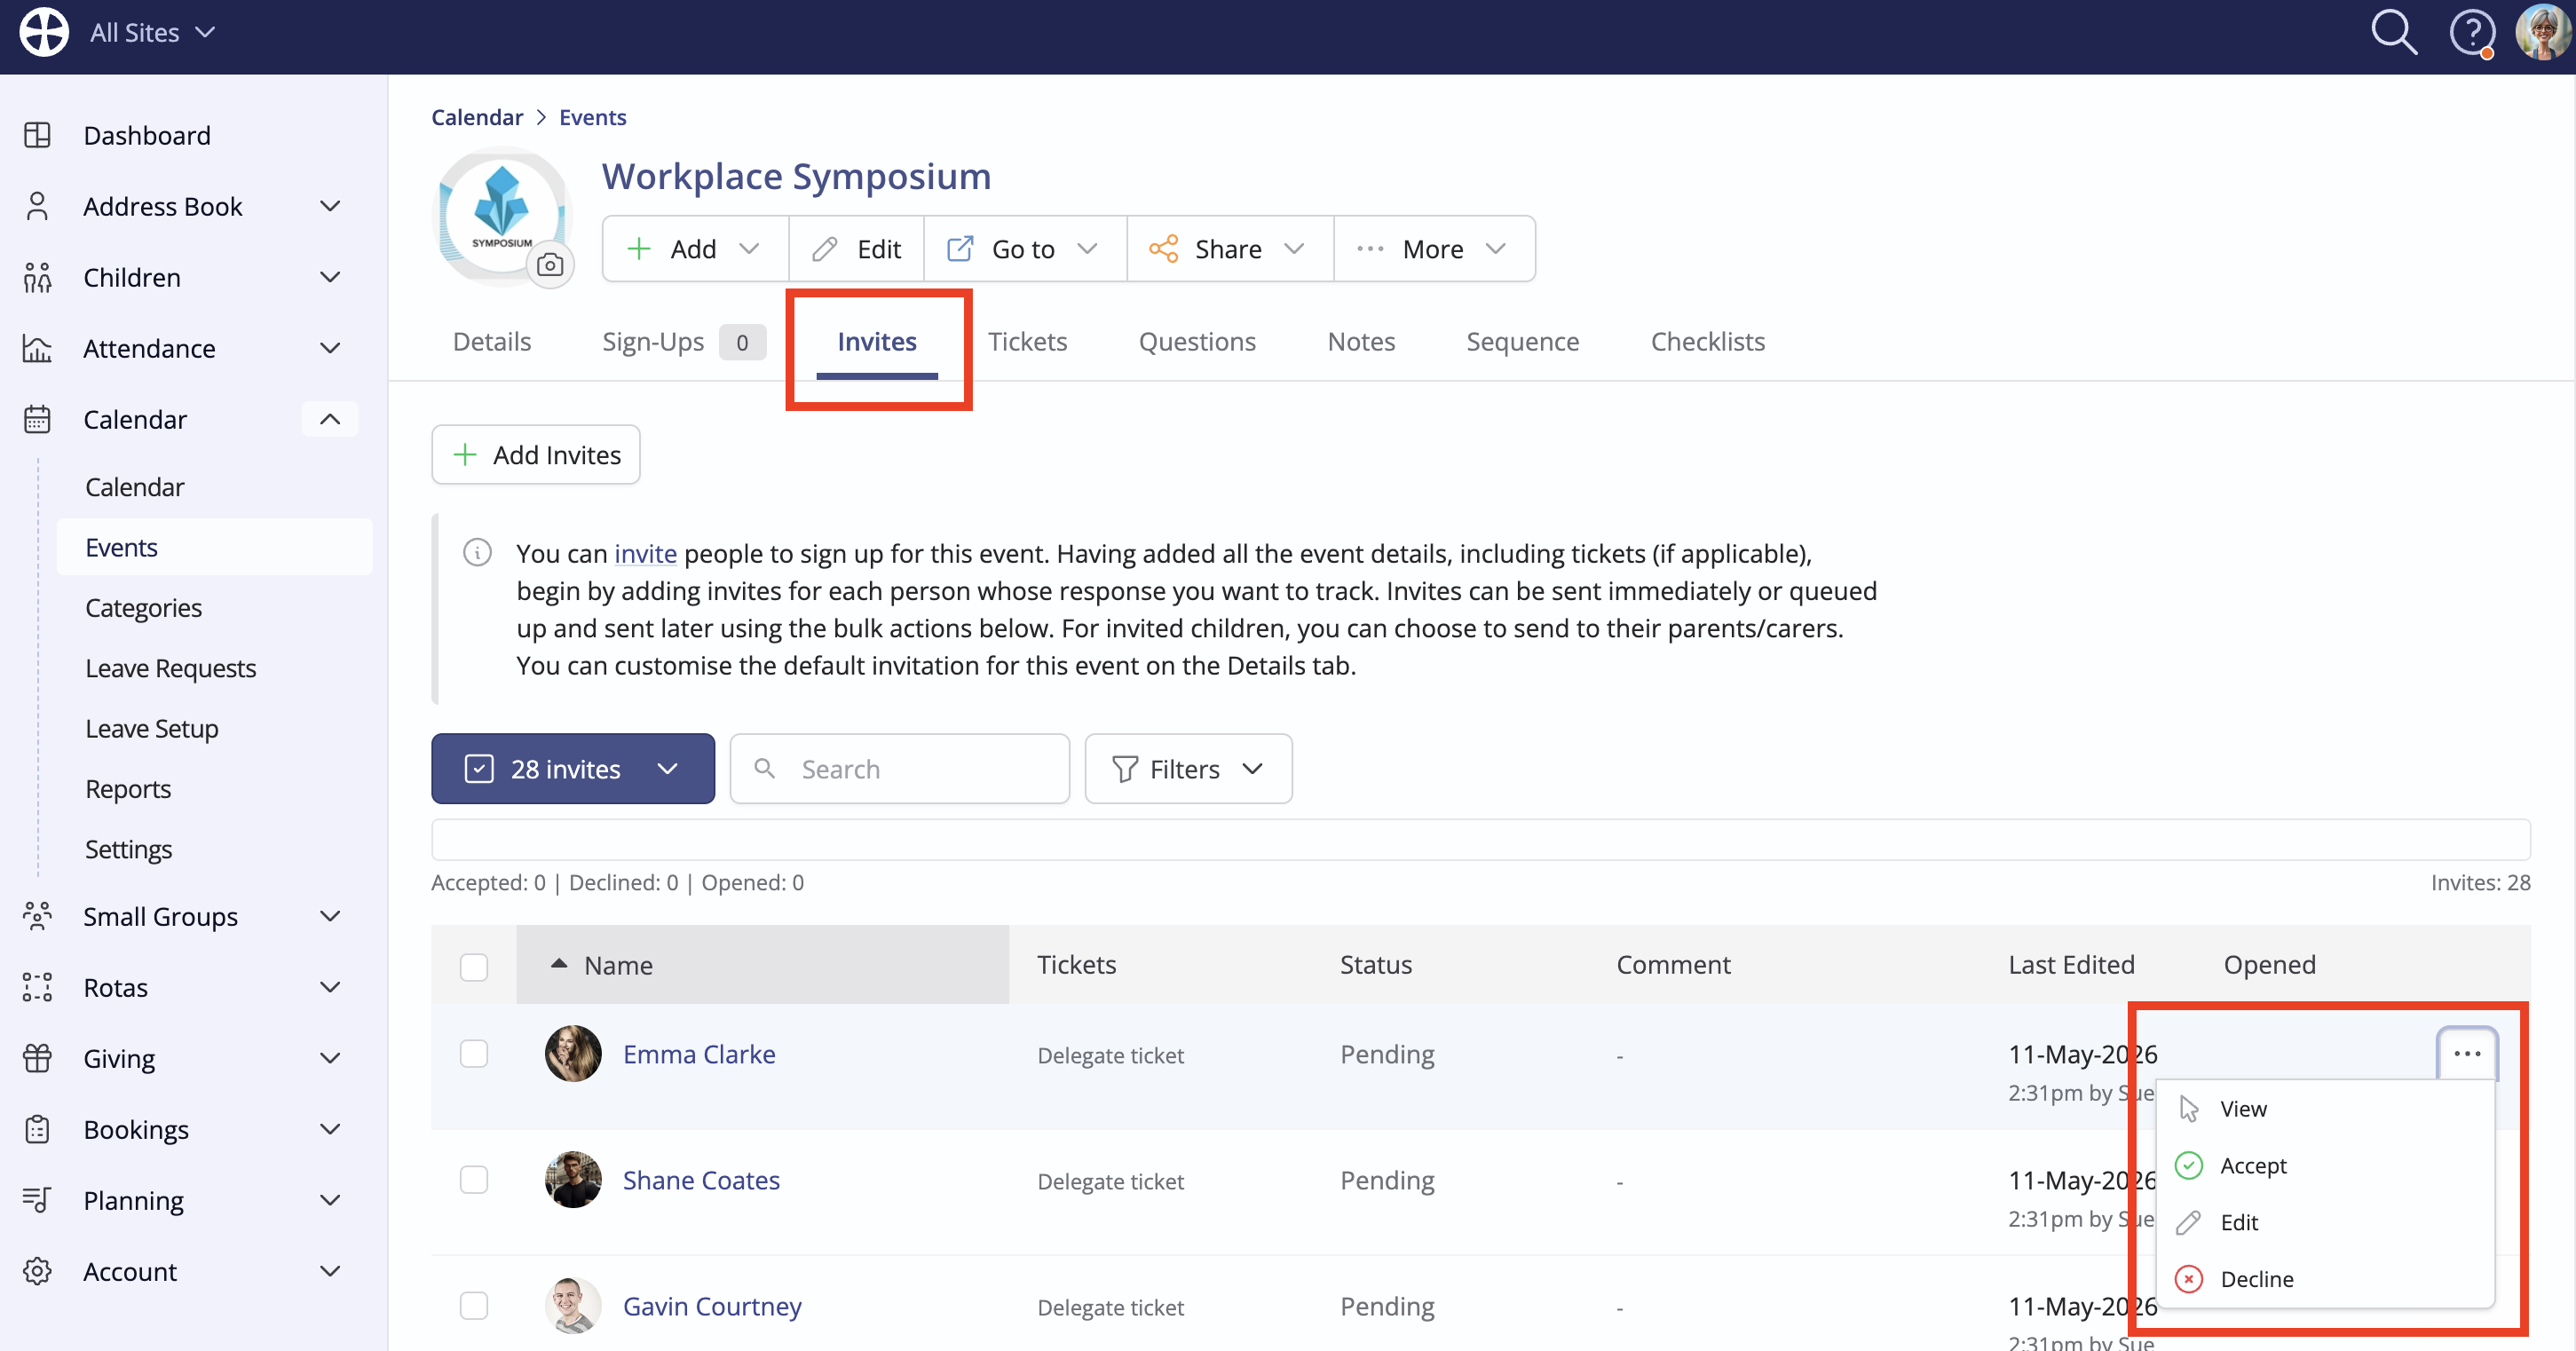
Once the invitation has been sent, the Invites tab lists all invitees and their respective response Status. If an invitee has previously signed up (shown on the Sign-Ups tab) their response status is shown as Accepted, otherwise, a Pending status is shown. Invitees without an email address or who previously opted out of receiving general emails when the invitation was sent are shown as Not Sent, although a module User can manually process responses on behalf of that person. Once sent, an invitation cannot be rescinded but it is possible to delete invitations that still have a Not sent status via the bulk actions:
Note the available actions to View the invitation, Edit which ticket is selected or to Accept or Decline on an invitee's behalf.
In the next sections, we will look at the recipient invitee user experience for each of their response options.
Receiving an invitation
In addition to all the event details, the invitation contains three call-to-action response buttons - Accept, Decline and More information - explained in the next sections of this article.
 For events set as Visible in My ChurchSuite and where Sign up through My ChurchSuite is enabled, invitations awaiting a response are shown in the My Invites section. The Accept and Decline actions available here behave just like the actions in the invitation email.

The invitation response buttons are also shown on an invited person's event "View" within their My Events section when clicking through from an event on the Calendar or event Search.

Accepting an invitation
Clicking Accept opens the invitee's unique Event Page with their basic details pre-filled into the sign-up form. If the invitee's linked spouse/partner is also invited and their response is still pending, they can respond on behalf of their spouse/partner, which adds an additional signup with their details also pre-filled into the same form. The invitee can then answer any event questions on the form, select tickets (where applicable) and pay (where applicable). A success page is shown when the form is completed and submitted, and the invitee will receive the usual signup confirmation email.

Back in the ChurchSuite Calendar module, an Accept response adds a sign-up against the event and updates the invitation response status to Accepted. A linked spouse/partner Accept response updates their invitation response status to Accepted too. If an invitee accepts a previously declined invitation, the invitation response status updates from Declined to Accepted. If an invitee signs up for the event outside of the invitation - perhaps on your website - ChurchSuite will still match the sign-up details against the Invites list (as long as contact details match those held in ChurchSuite) and update the invitation response status to Accepted.
An invitee is unable to accept - but can decline - an invitation after an event's sign-up period has ended.
Declining an invitation
Clicking Decline immediately updates the invitation response status to Declined with no further action required by the invitee. A decline confirmation page is shown asking for an optional decline reason, choosing between two canned reasons or entering a custom 'Other' reason - the decline reason is stored against the invitation response in ChurchSuite. Once declined, an invitee can still change their mind, perhaps if they declined by mistake or if they can later attend. Clicking Didn't mean to decline? Click here to undo and revert the invitation response status to Pending and will remove a previously added decline comment. The invitee is redirected to the Event Page, where they can now respond Accept (or Decline again). Similarly, an invitee can decline on behalf of an invited linked spouse/partner, and their response status is still Pending.

Invitees and their invited linked spouse/partner are unable to subsequently decline a previously accepted invitation. In this scenario, and since refunds or a cancellation policy may be involved, the invitees will need to contact the event organiser, who can decline their invitation/s to the event View in the Calendar module or process a sign-up cancellation and refund as appropriate. See our related support article for further information about Managing event sign-up cancellations.
If an invited linked spouse/partner has previously accepted, it cannot subsequently be declined. If a linked spouse/partner has previously declined, that decline can be subsequently reversed and accepted. An invitee is unable to accept - but can decline - an invitation after an event's sign-up period has ended.
Selecting 'More information'
When an invitee clicks the More Information button from their invitation, they are redirected to the Event Page to view further information about the event. Their contact details are still pre-filled into the sign-up form - just like the Accept workflow - and they will need to accept your privacy notice and click Proceed to complete a sign-up. If a linked spouse/partner is also invited and their response status is still Pending, the invitee can respond on their behalf:

If an invitee has previously accepted or declined, the More information button opens a summarised Event Page showing the event date, time and location and the ticket details and, for a previously declined invitation, the option to undo the Decline or add a decline reason.
Managing event invitations and responses
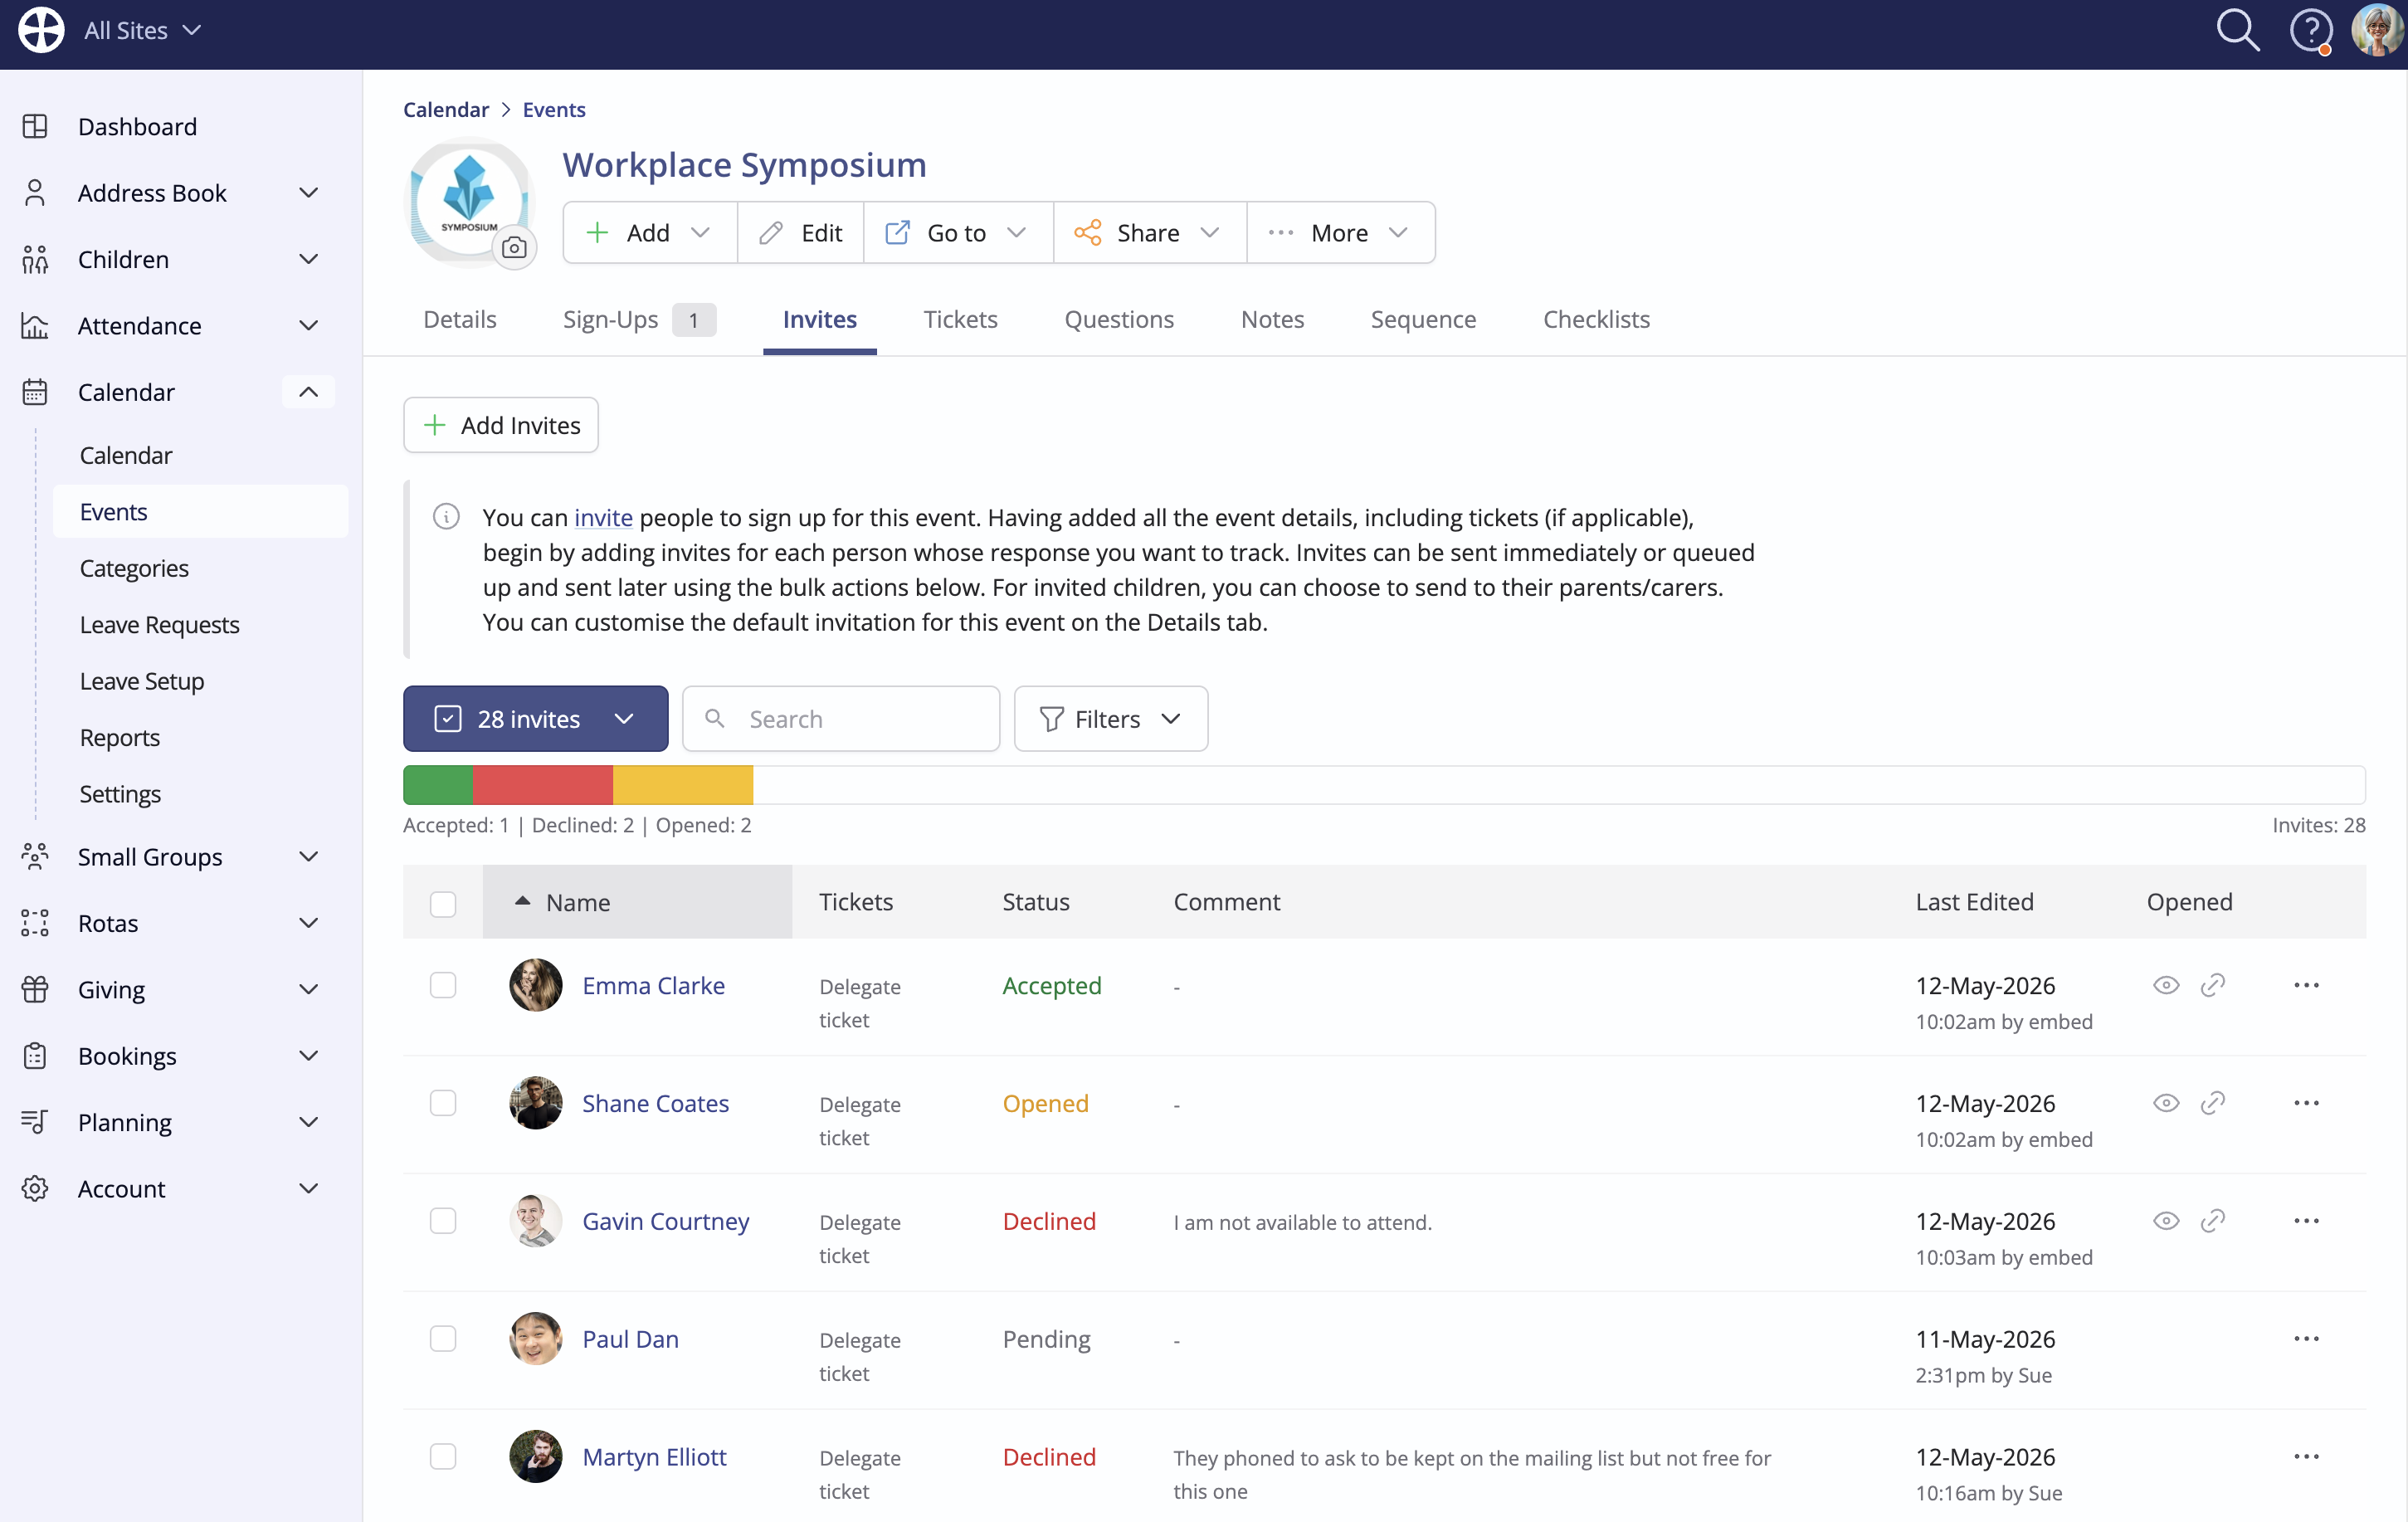
Calendar module Users can manually process responses on behalf of invitees; for example, where an invitee contacts the office to respond by telephone, accepting or declining invitations or setting a response status back to Pending (which will delete any associated sign-up, if previously accepted or any decline reason is previously declined). Reverting a response to Pending will revert the status to Pending or Opened as applicable. Invited sign-ups with paid tickets must first be refunded before the response status can be changed to Declined or Pending.
If a module User manually adds a sign-up through the event View - on the Sign Ups tab - ChurchSuite will attempt to match the sign-up to the Invites list and, if matched, update the response status to Accepted. It is not possible to change the response status to Accepted without a sign-up being added - a sign-up is always present for an Accepted invitation.
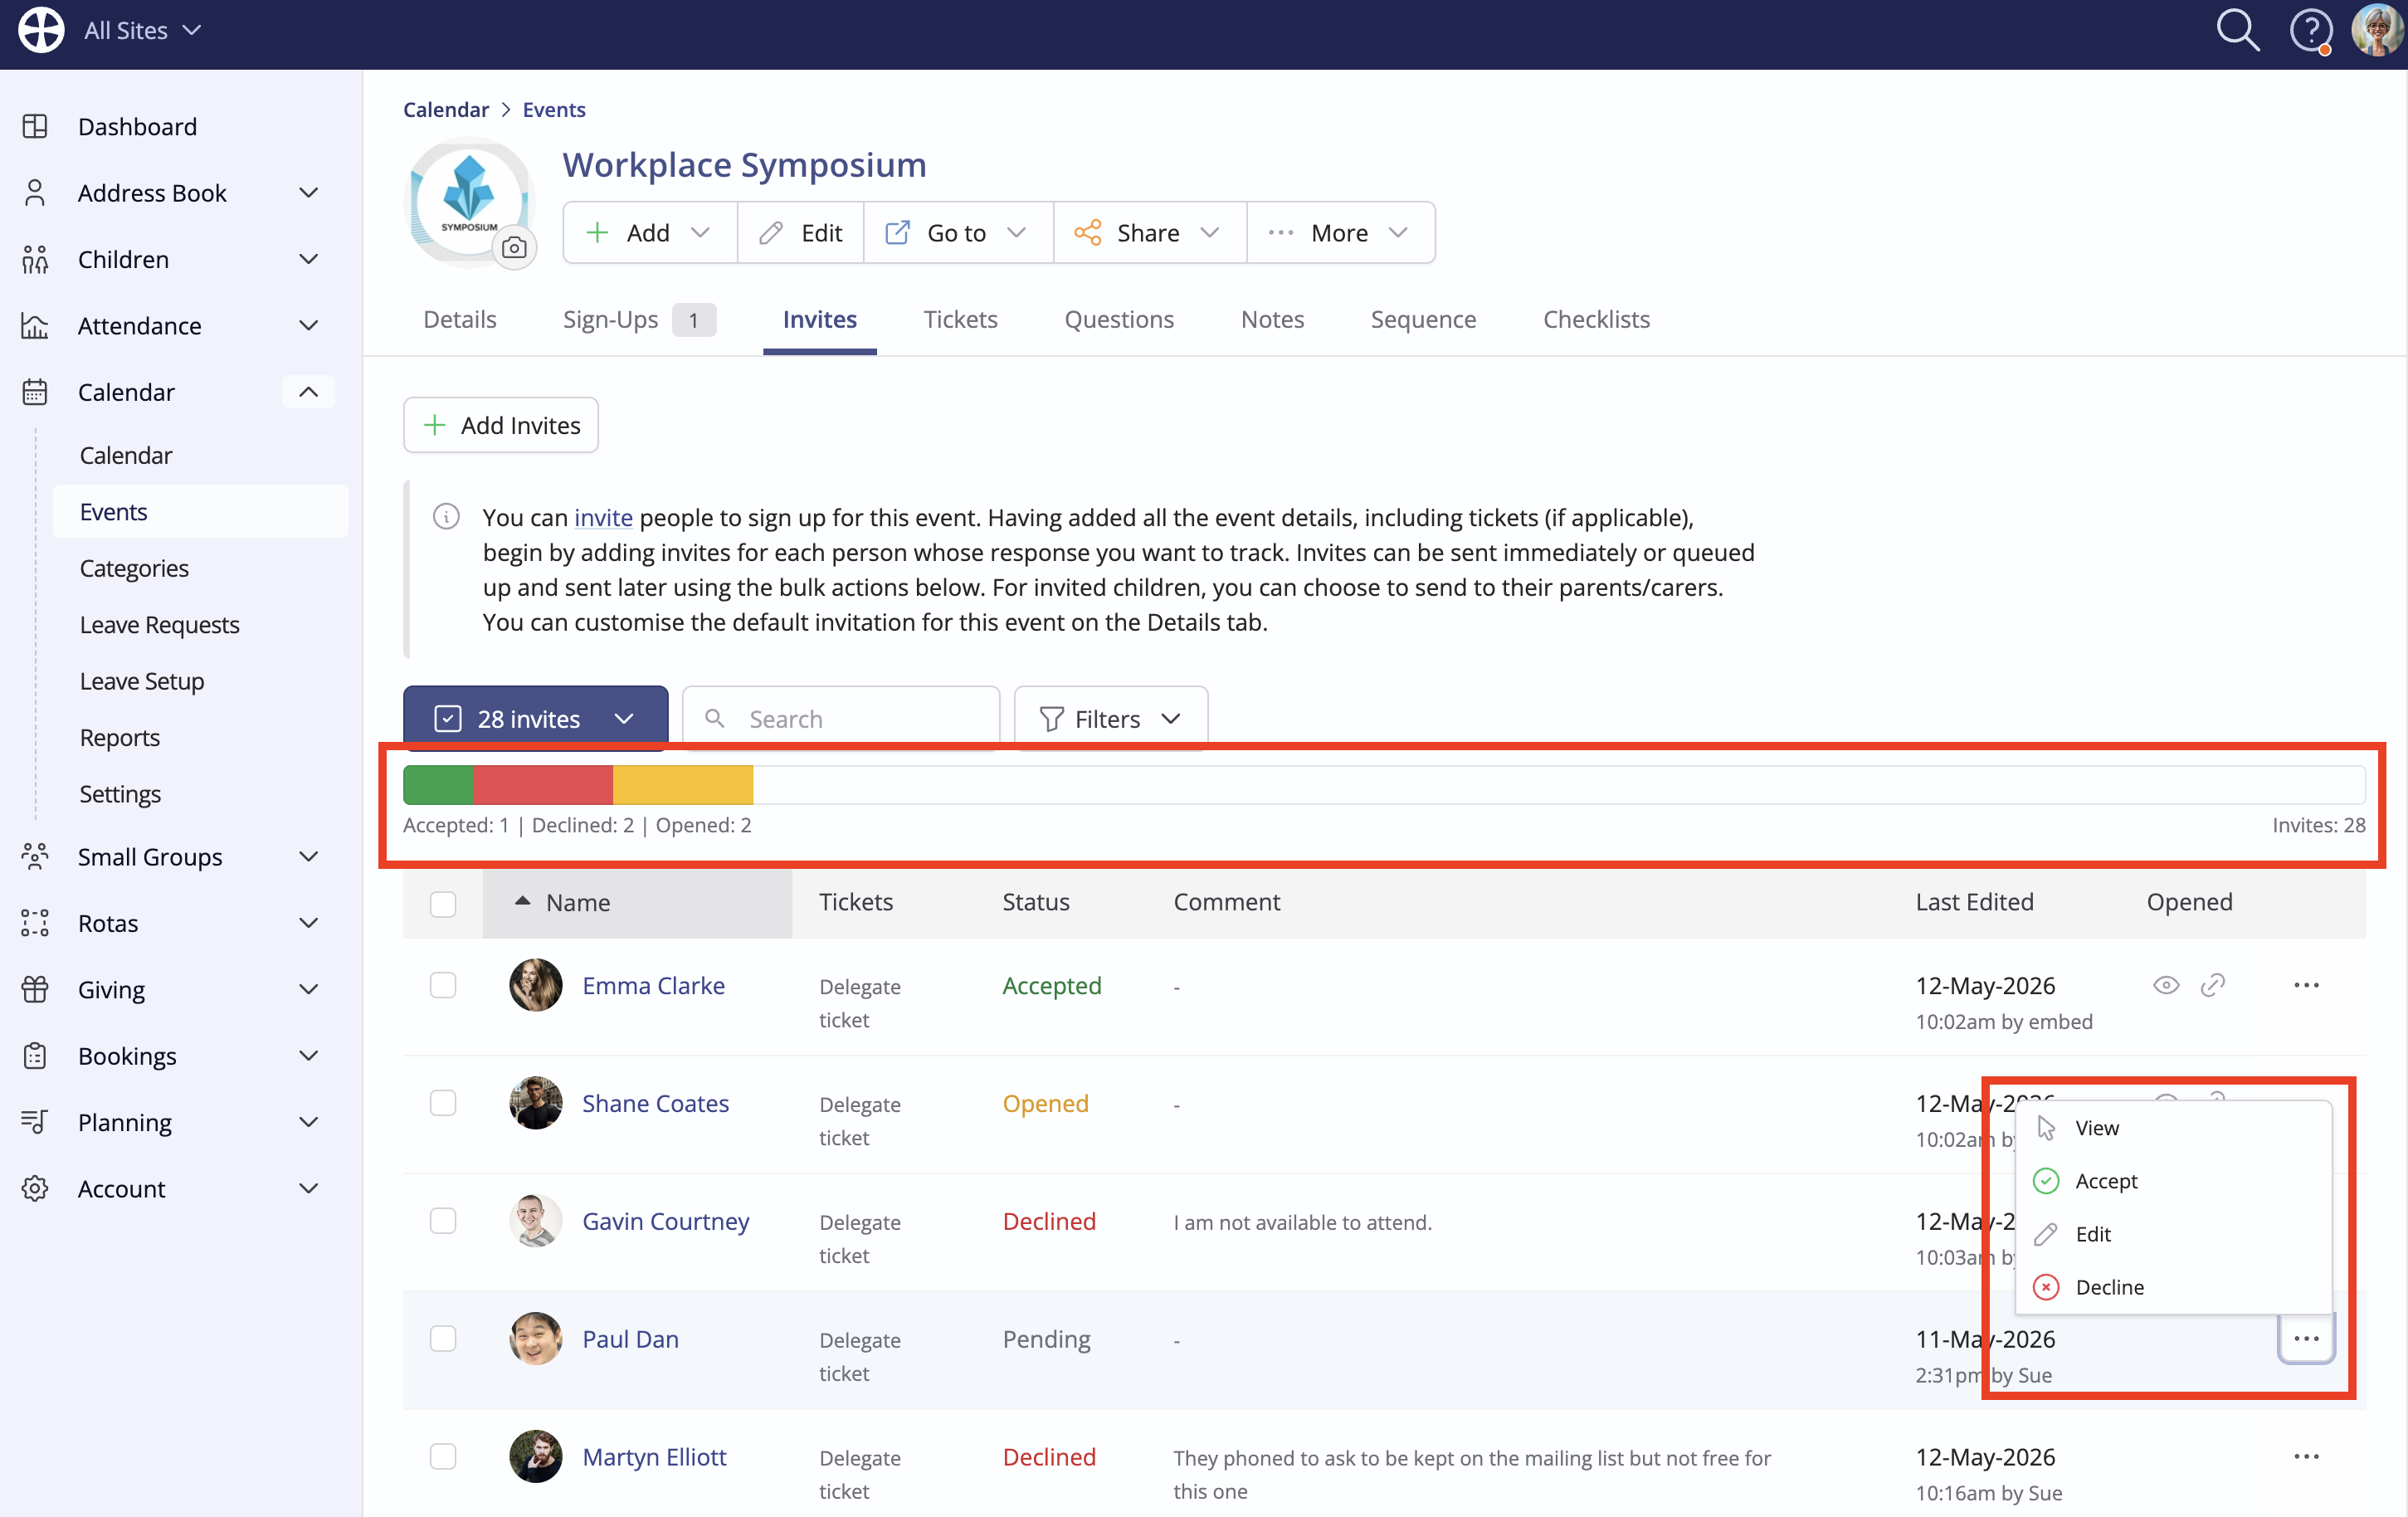
The Invites tab includes a response progress indicator with metrics for Accepted (green) i.e. those who have accepted the invitation and have a sign-up on the Sign-Ups tab, Declined (red) and Opened (yellow) i.e. those who have opened the invitation or have clicked but not yet submitted a response.
Top Tip! Resending invitations
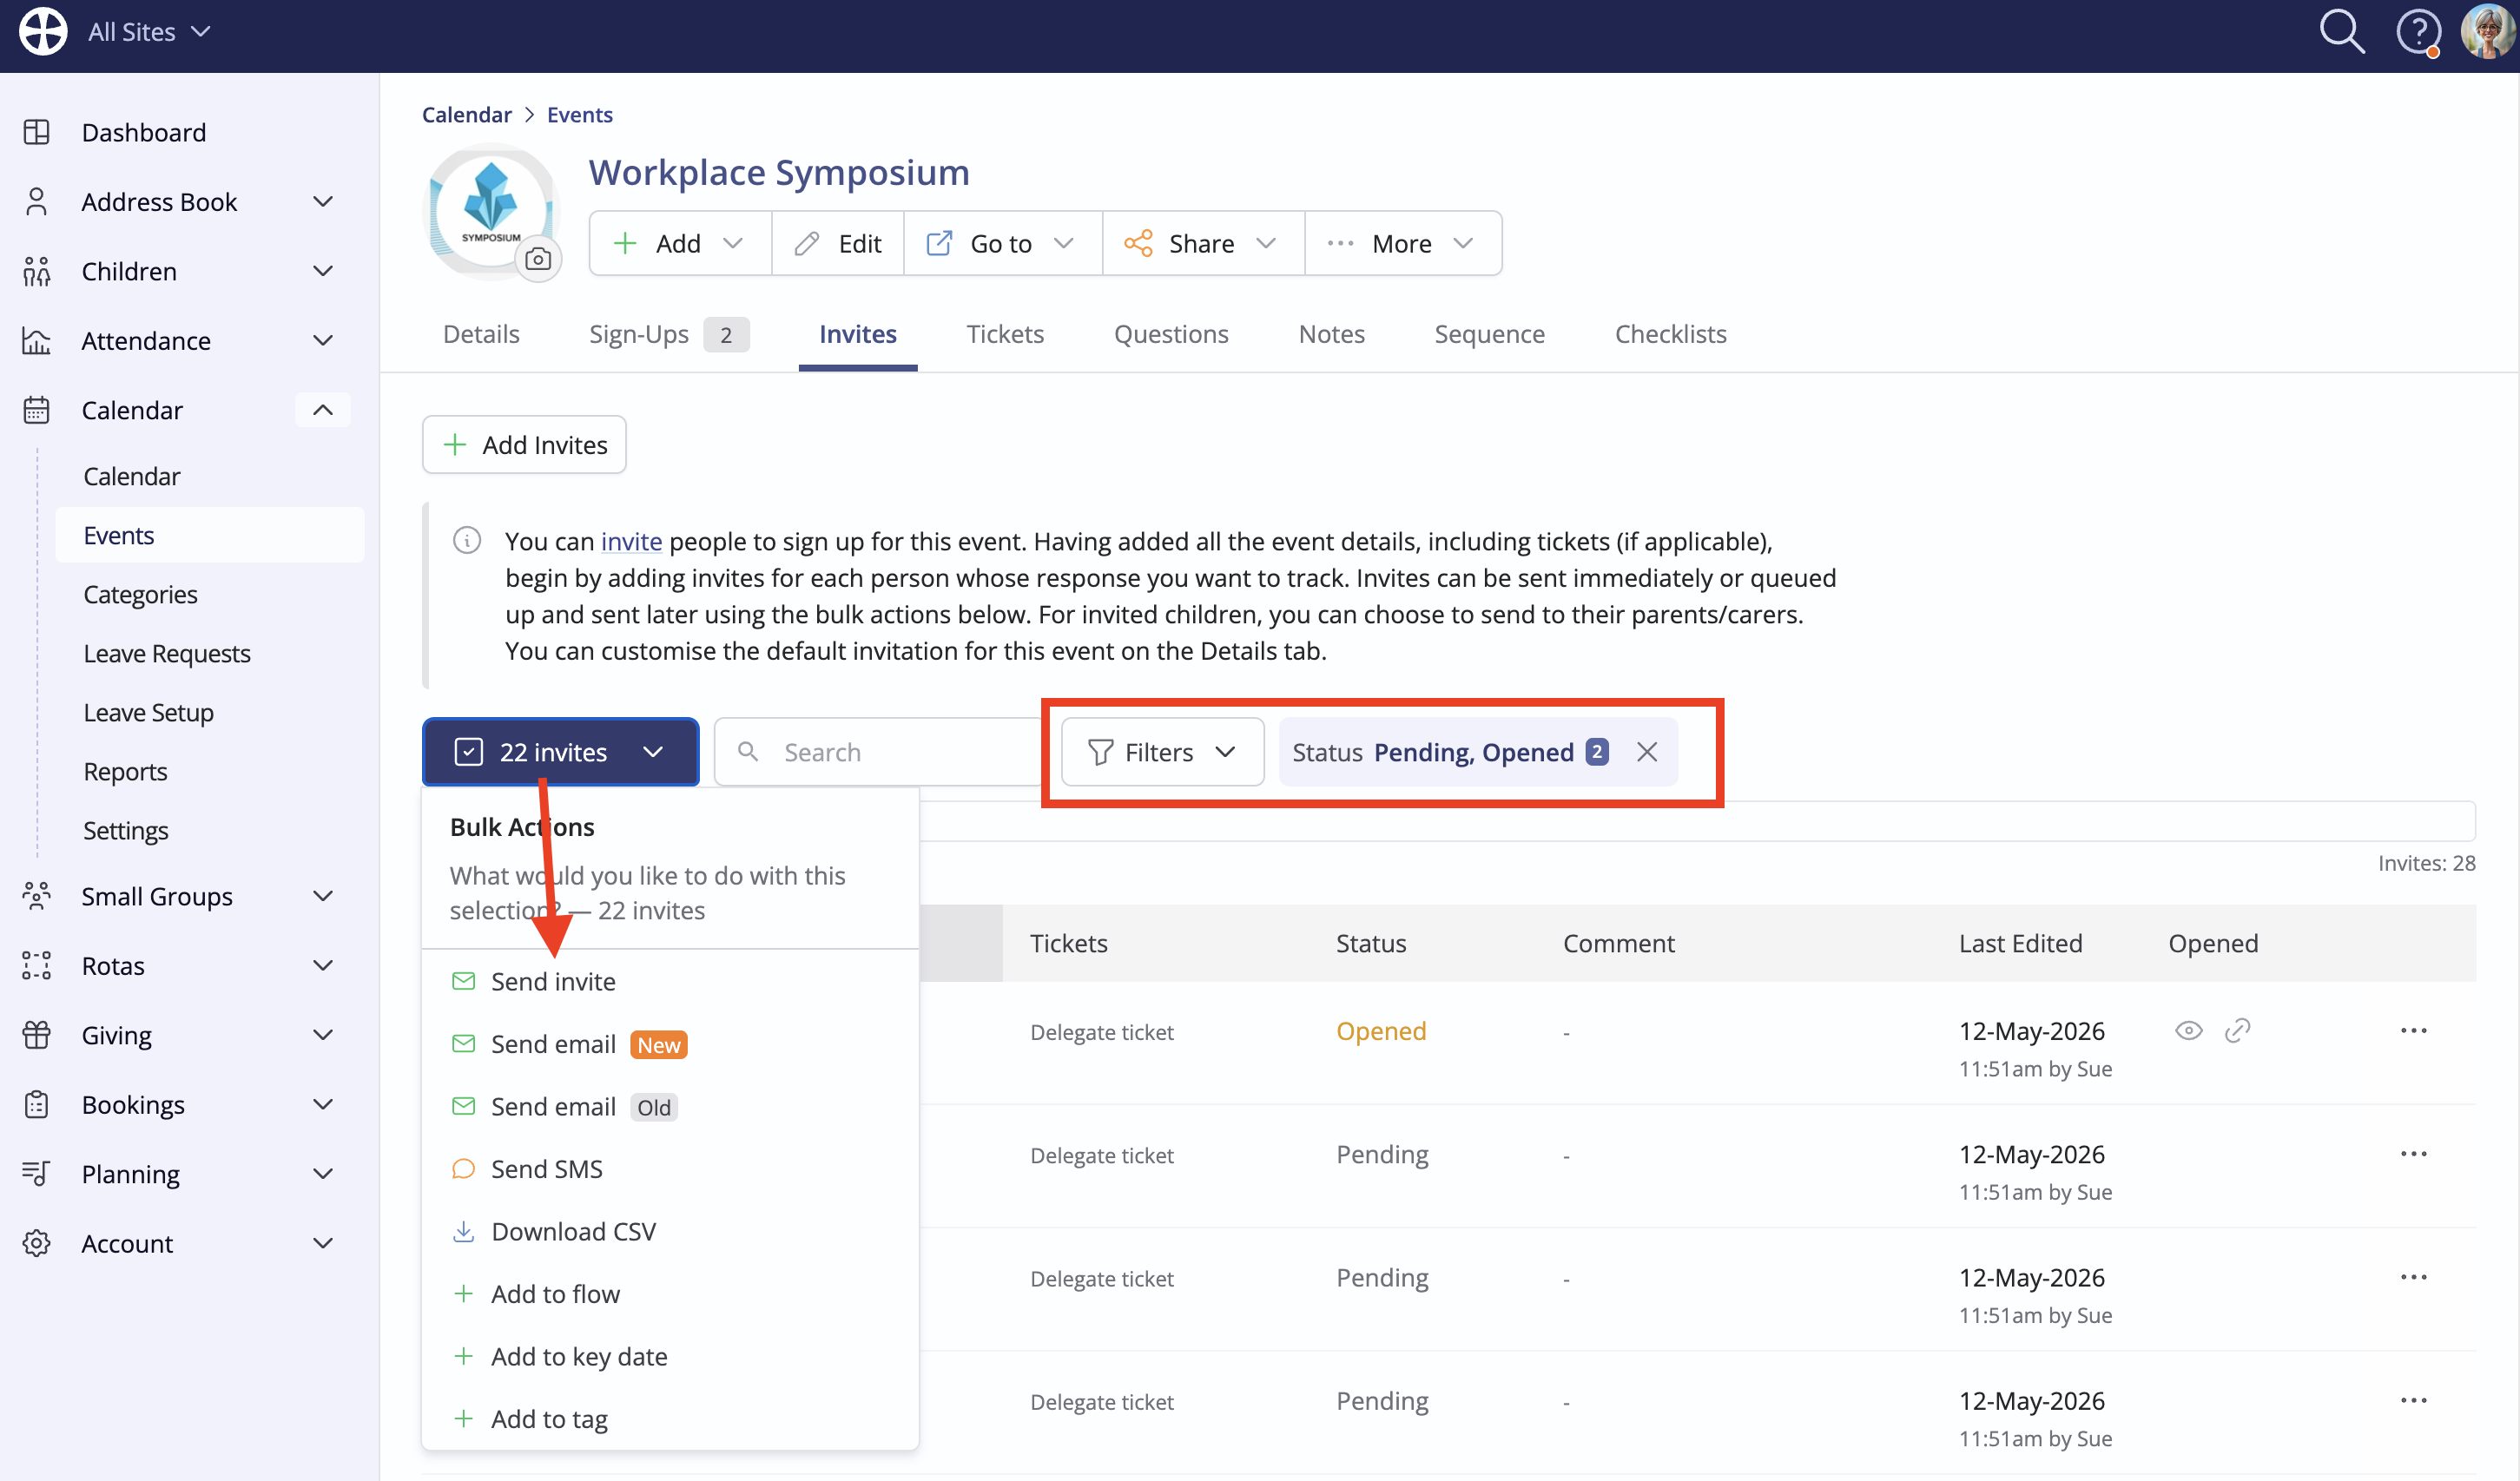
Users can send a fresh invitation to all those who have previously been invited but have yet to sign up. Filter the invite list - perhaps to just those with a Pending or Opened status - and click the invites pill:
The same invitation workflow described above can then be followed, perhaps editing the invitation text to highlight it is a reminder to sign-up.
Communicating with invitees
A vital part of event management is timely communication before and after an event. As an alternative to resending invitations to those who have not yet responded, you may prefer to send a reminder message directing recipients to their invitation email to respond. Or you may wish to communicate just with those who have Accepted, to share vital event information.
Filter the Invites list as required, click the invites pill and select Send email (or Send SMS):
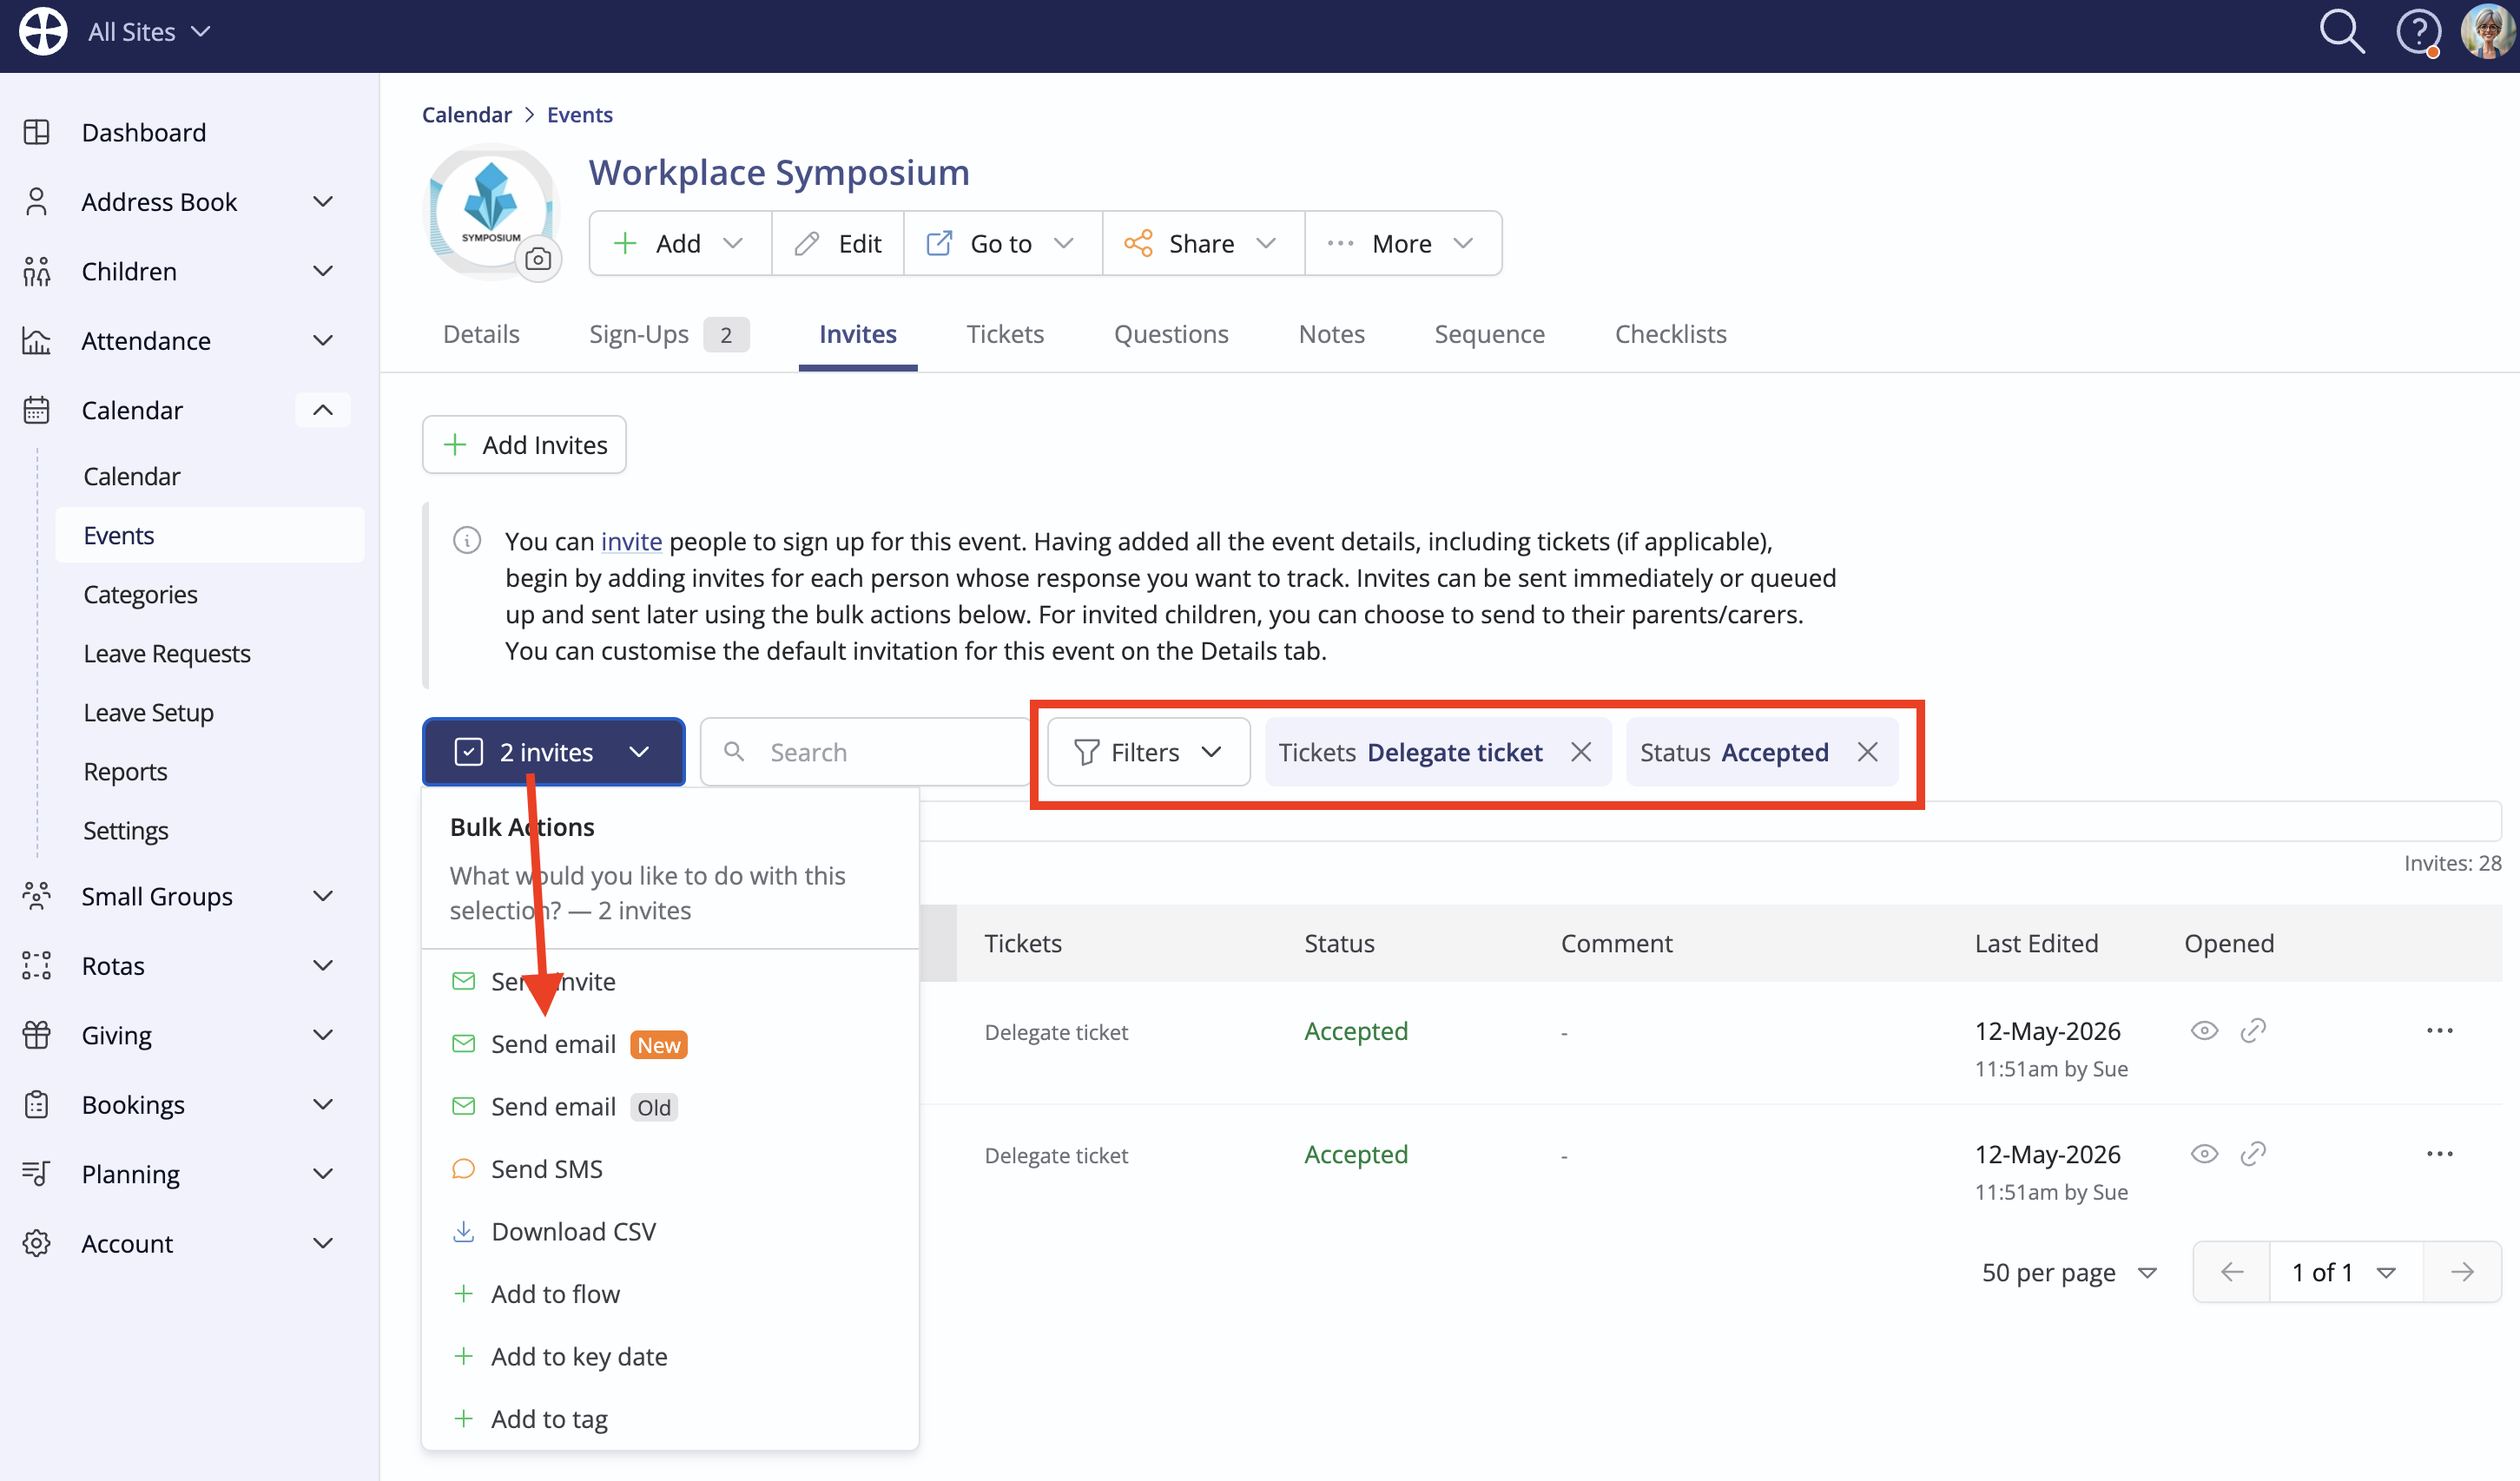
The compose window is surfaced, ready for you to compose and send your email (or SMS), pre-populated with the relevant recipients. Where you have not applied a filter, all invitees will be included.
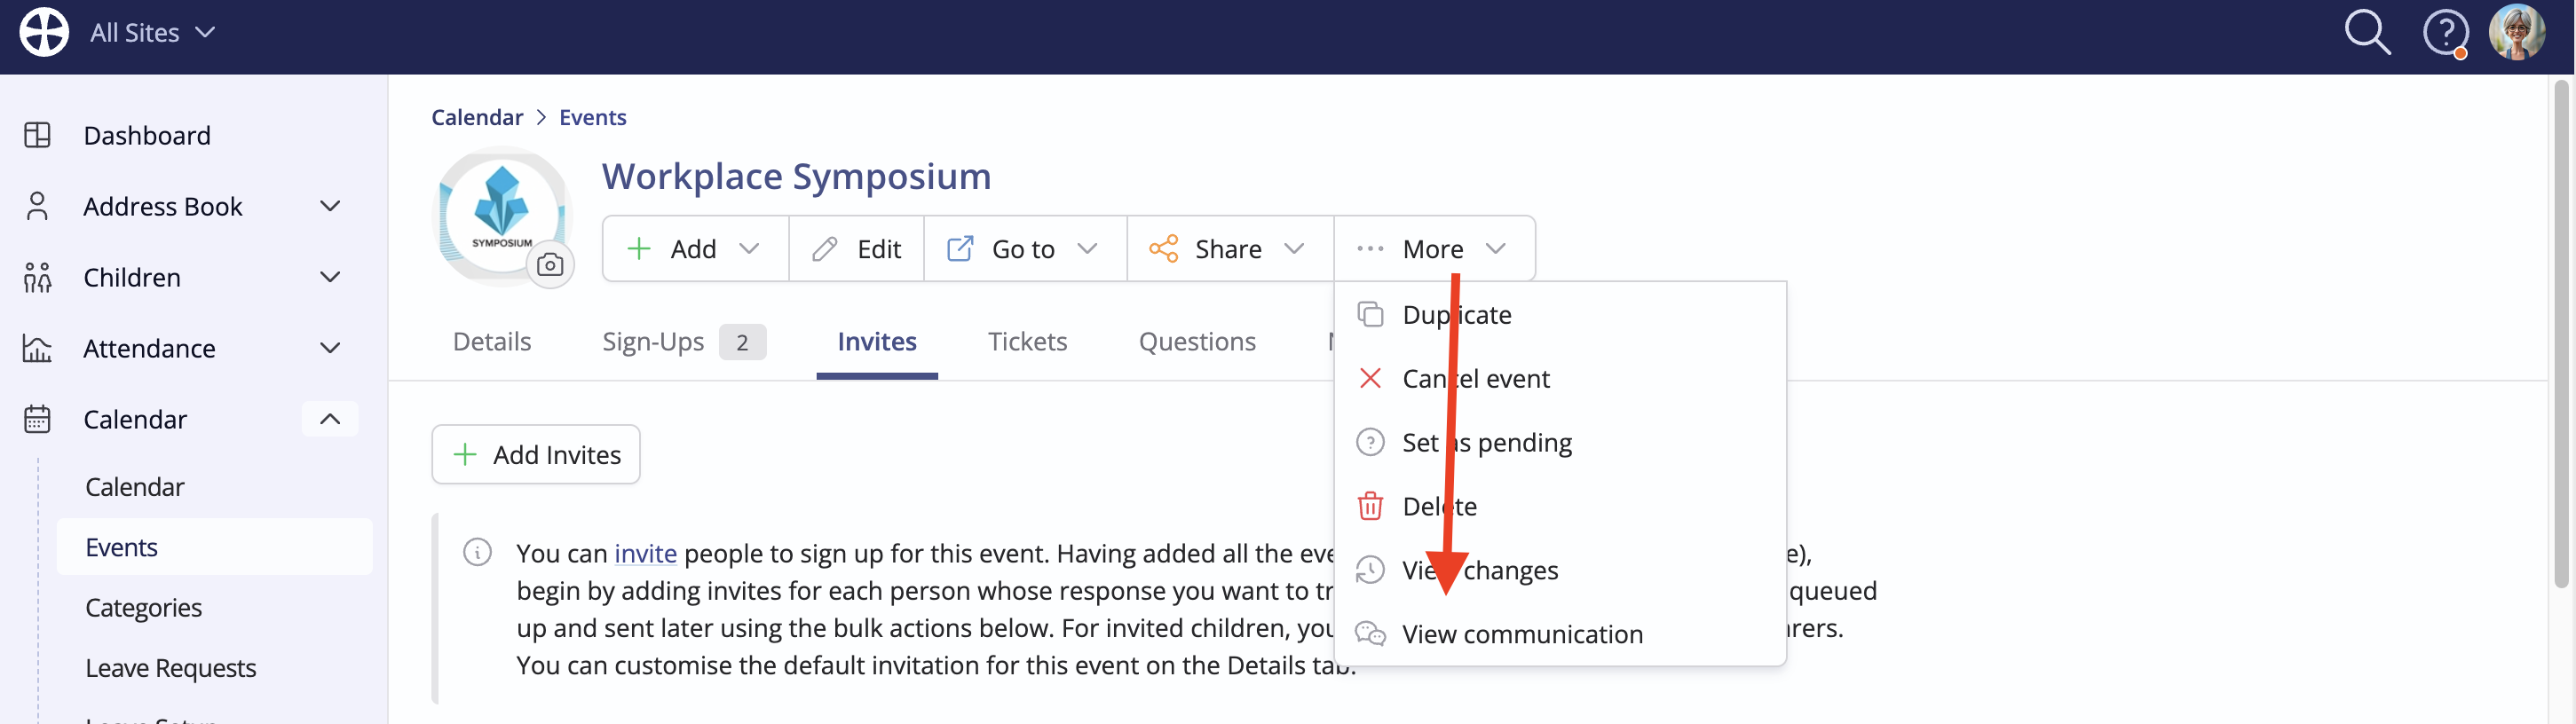
To view communication sent in this way, select View communication from the More options: