Sending form invitations
In this article
Introduction
Customising the default invitation email
Customising the submission success message and confirmation email
Sending invitations
Resending invitations
Introduction
Having created and published a form, you'll want to make it accessible to prospective respondents. One way is to send invitations to those in your Address Book or Children module, enabling you to keep track of who has responded and whose response is outstanding. Invitees will enjoy a simple, intuitive user experience with any smart-linked form fields pre-populated with their existing details, making it easy for them to respond to a form they've been invited to complete. For further information on smart linking, see the related support article: Connecting form fields to people fields.
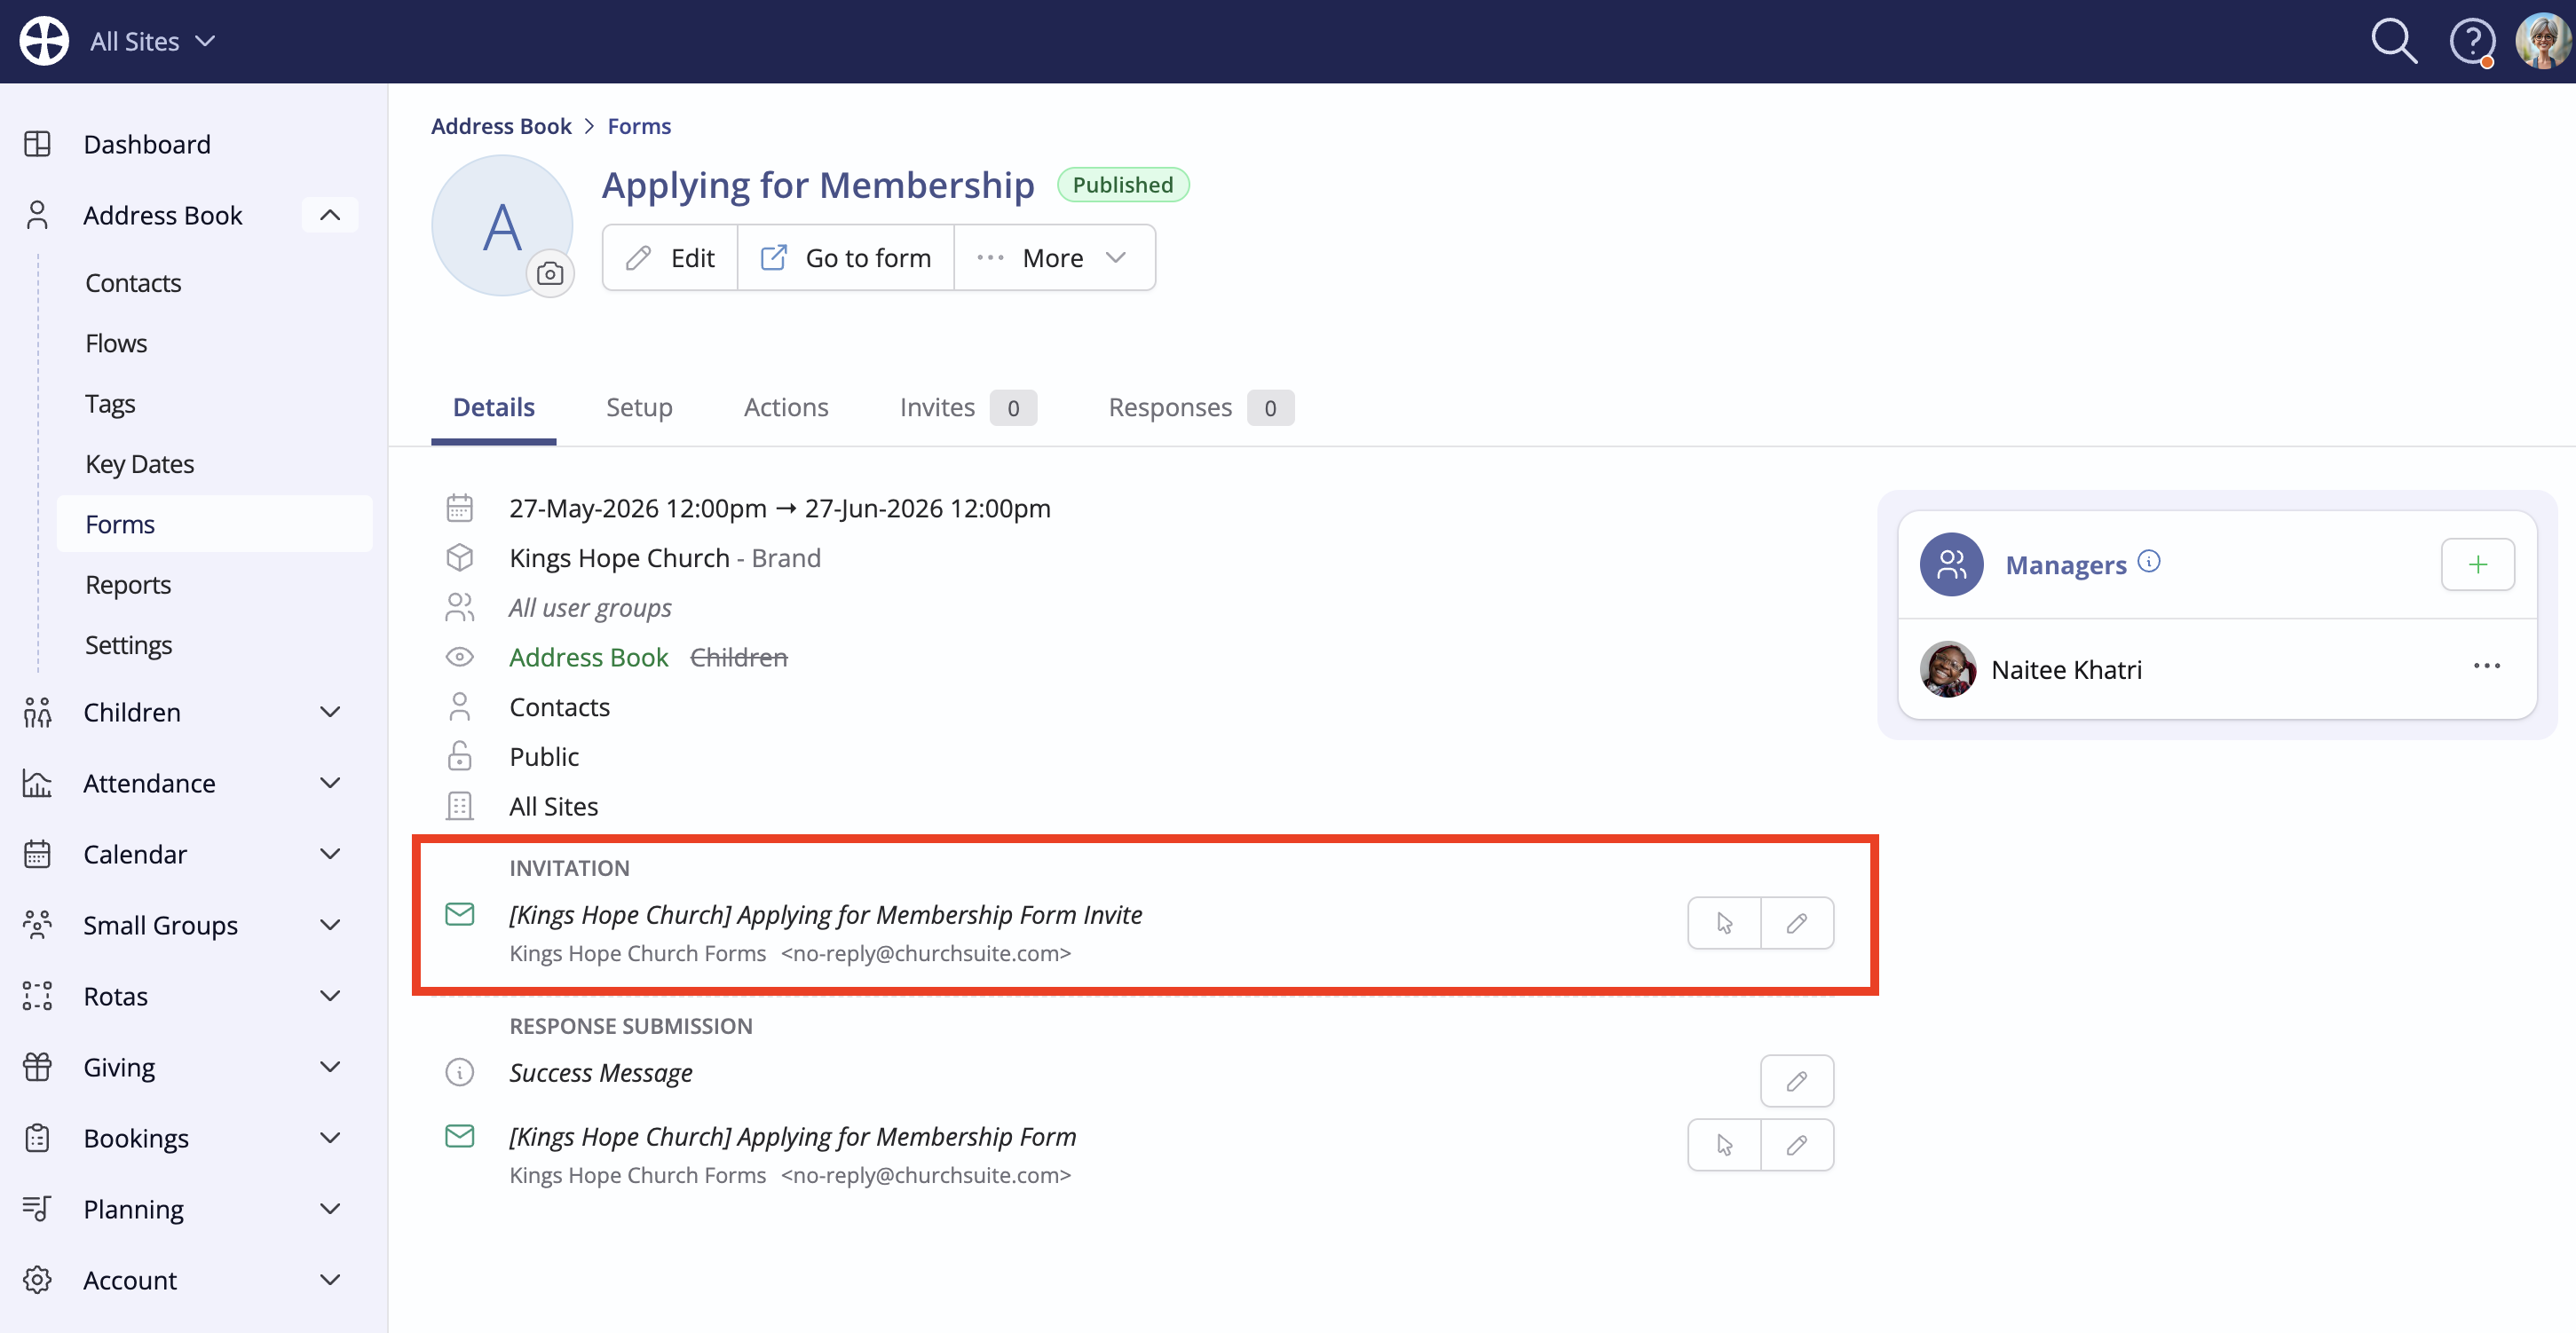
Customising the default invitation email
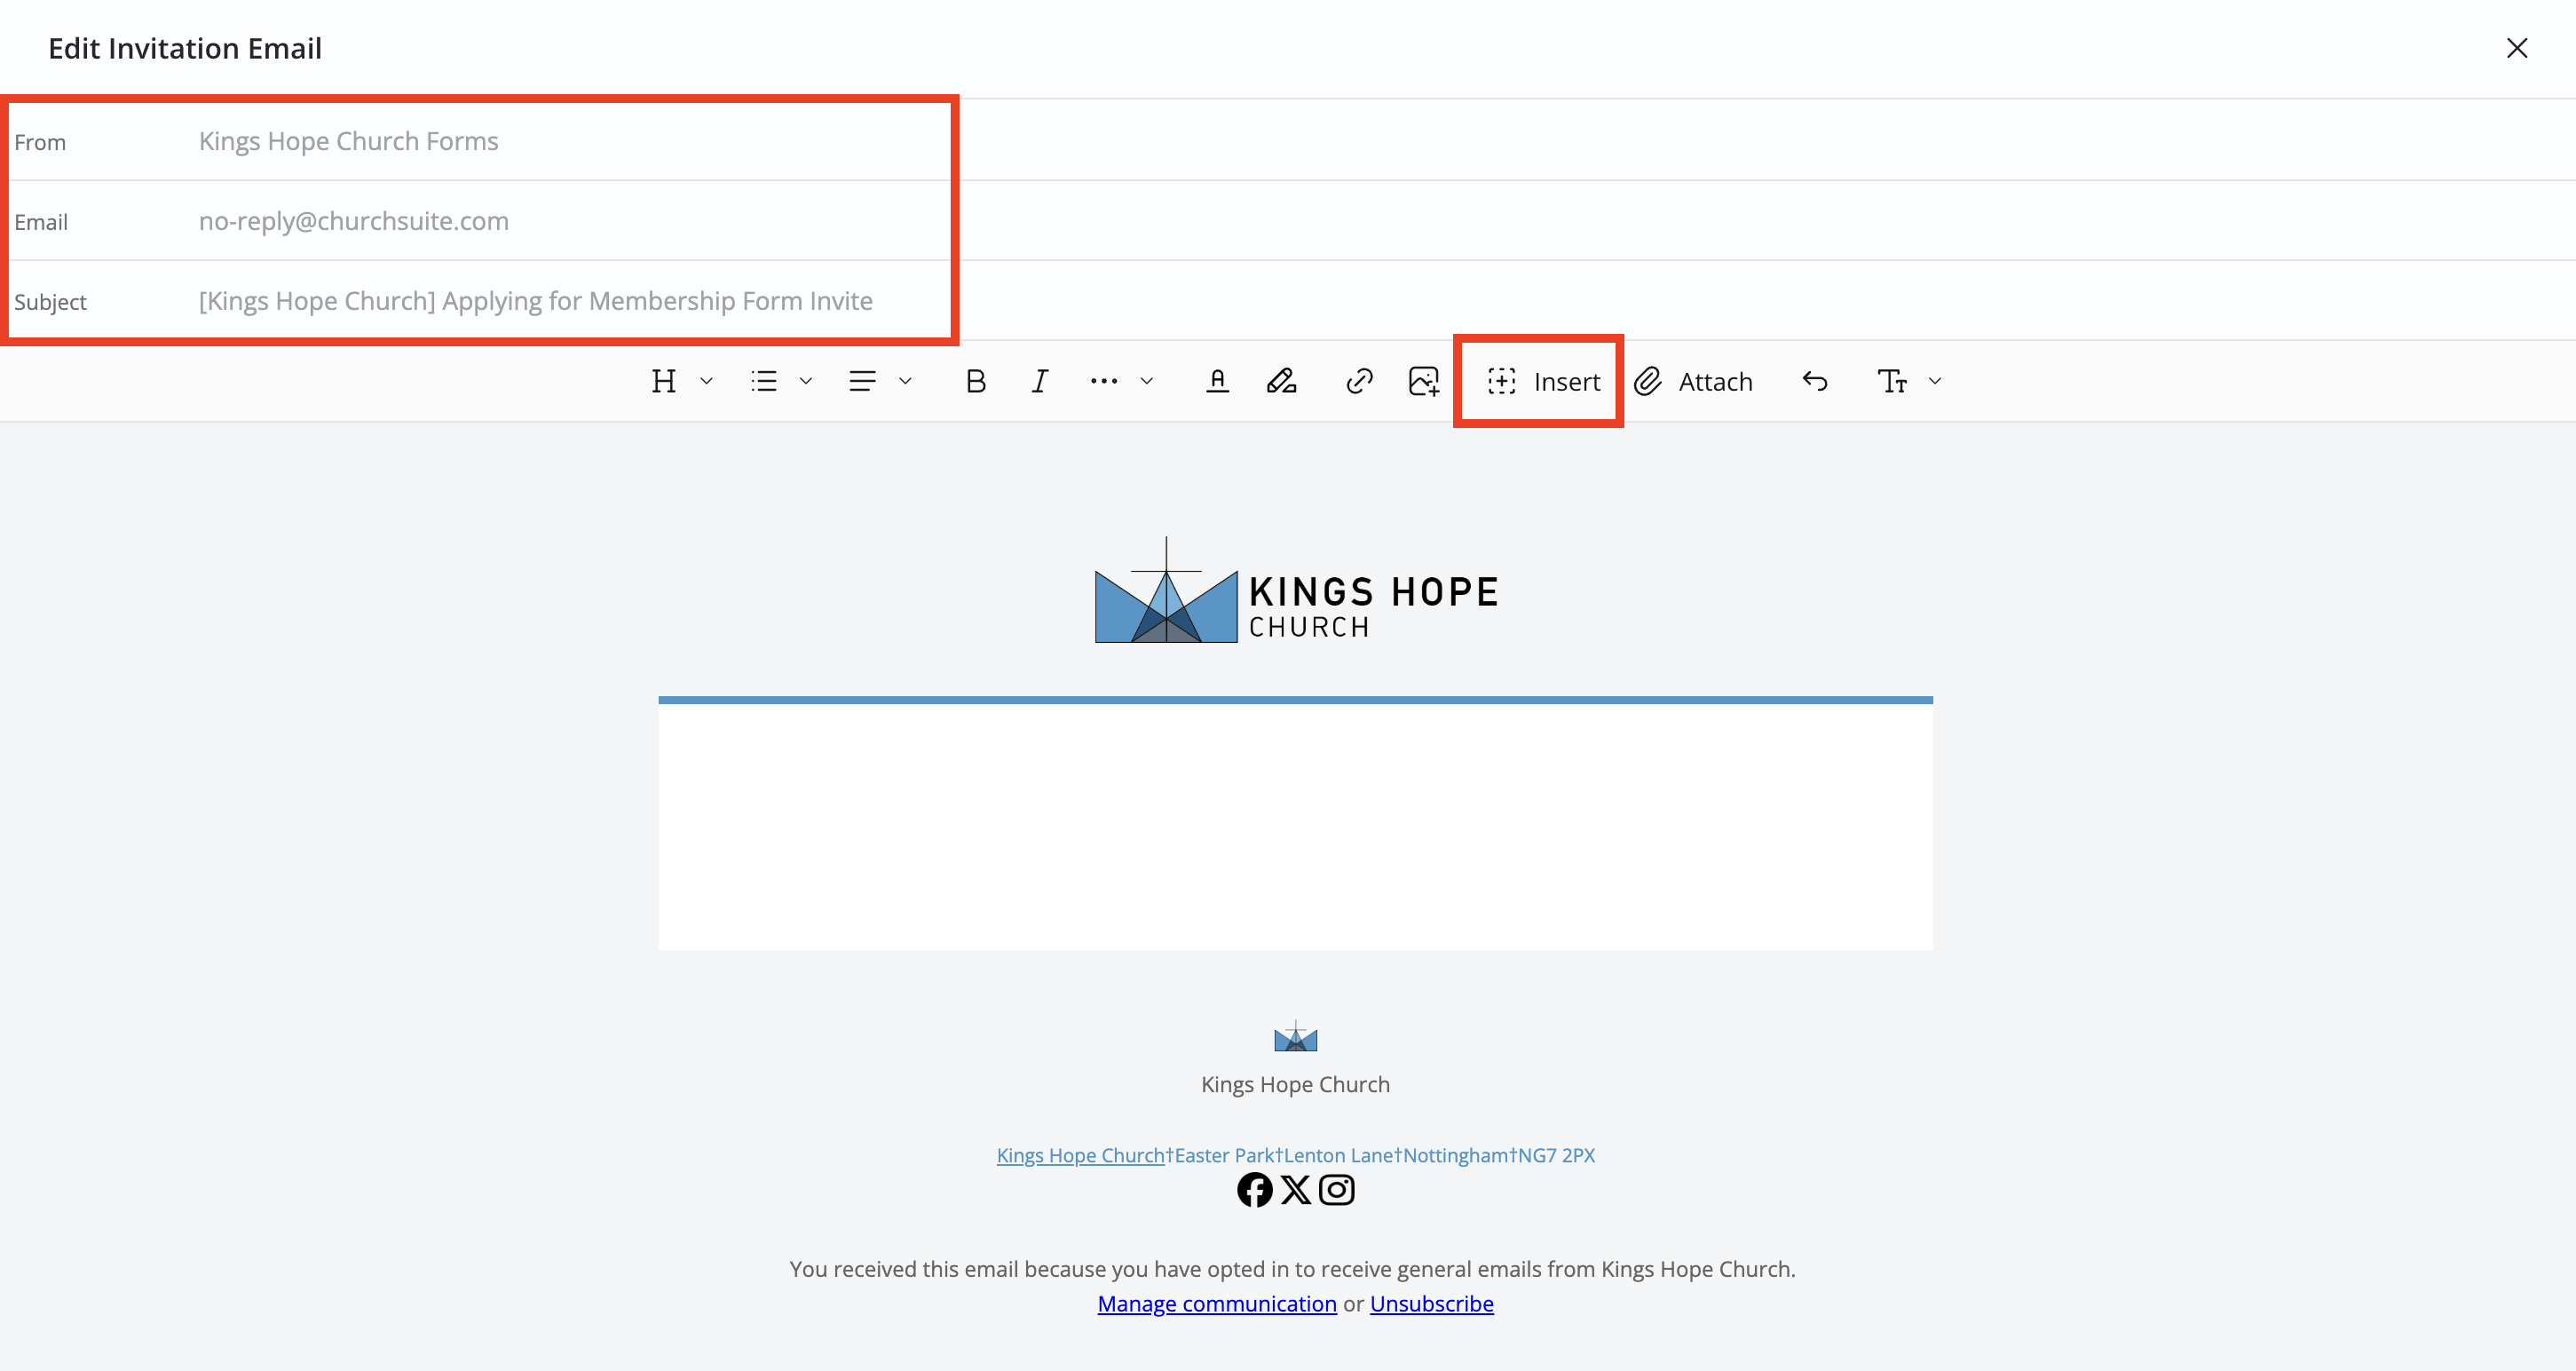
You can customise a form's default Invitation email. On a form View, note the invitation actions to Preview and Edit the default invitation email.
On the Edit Invitation Email page, you can add custom sender details that are used when invitations are automatically sent by the system, such as when a "Send form invite" Flow action is automatically processed. It is also possible to customise the Subject line and insert various merge fields and content blocks from the Insert menu:
It is important to include the Button block, found in the Insert menu, so that your invitees can quickly access the form directly from the invitation:
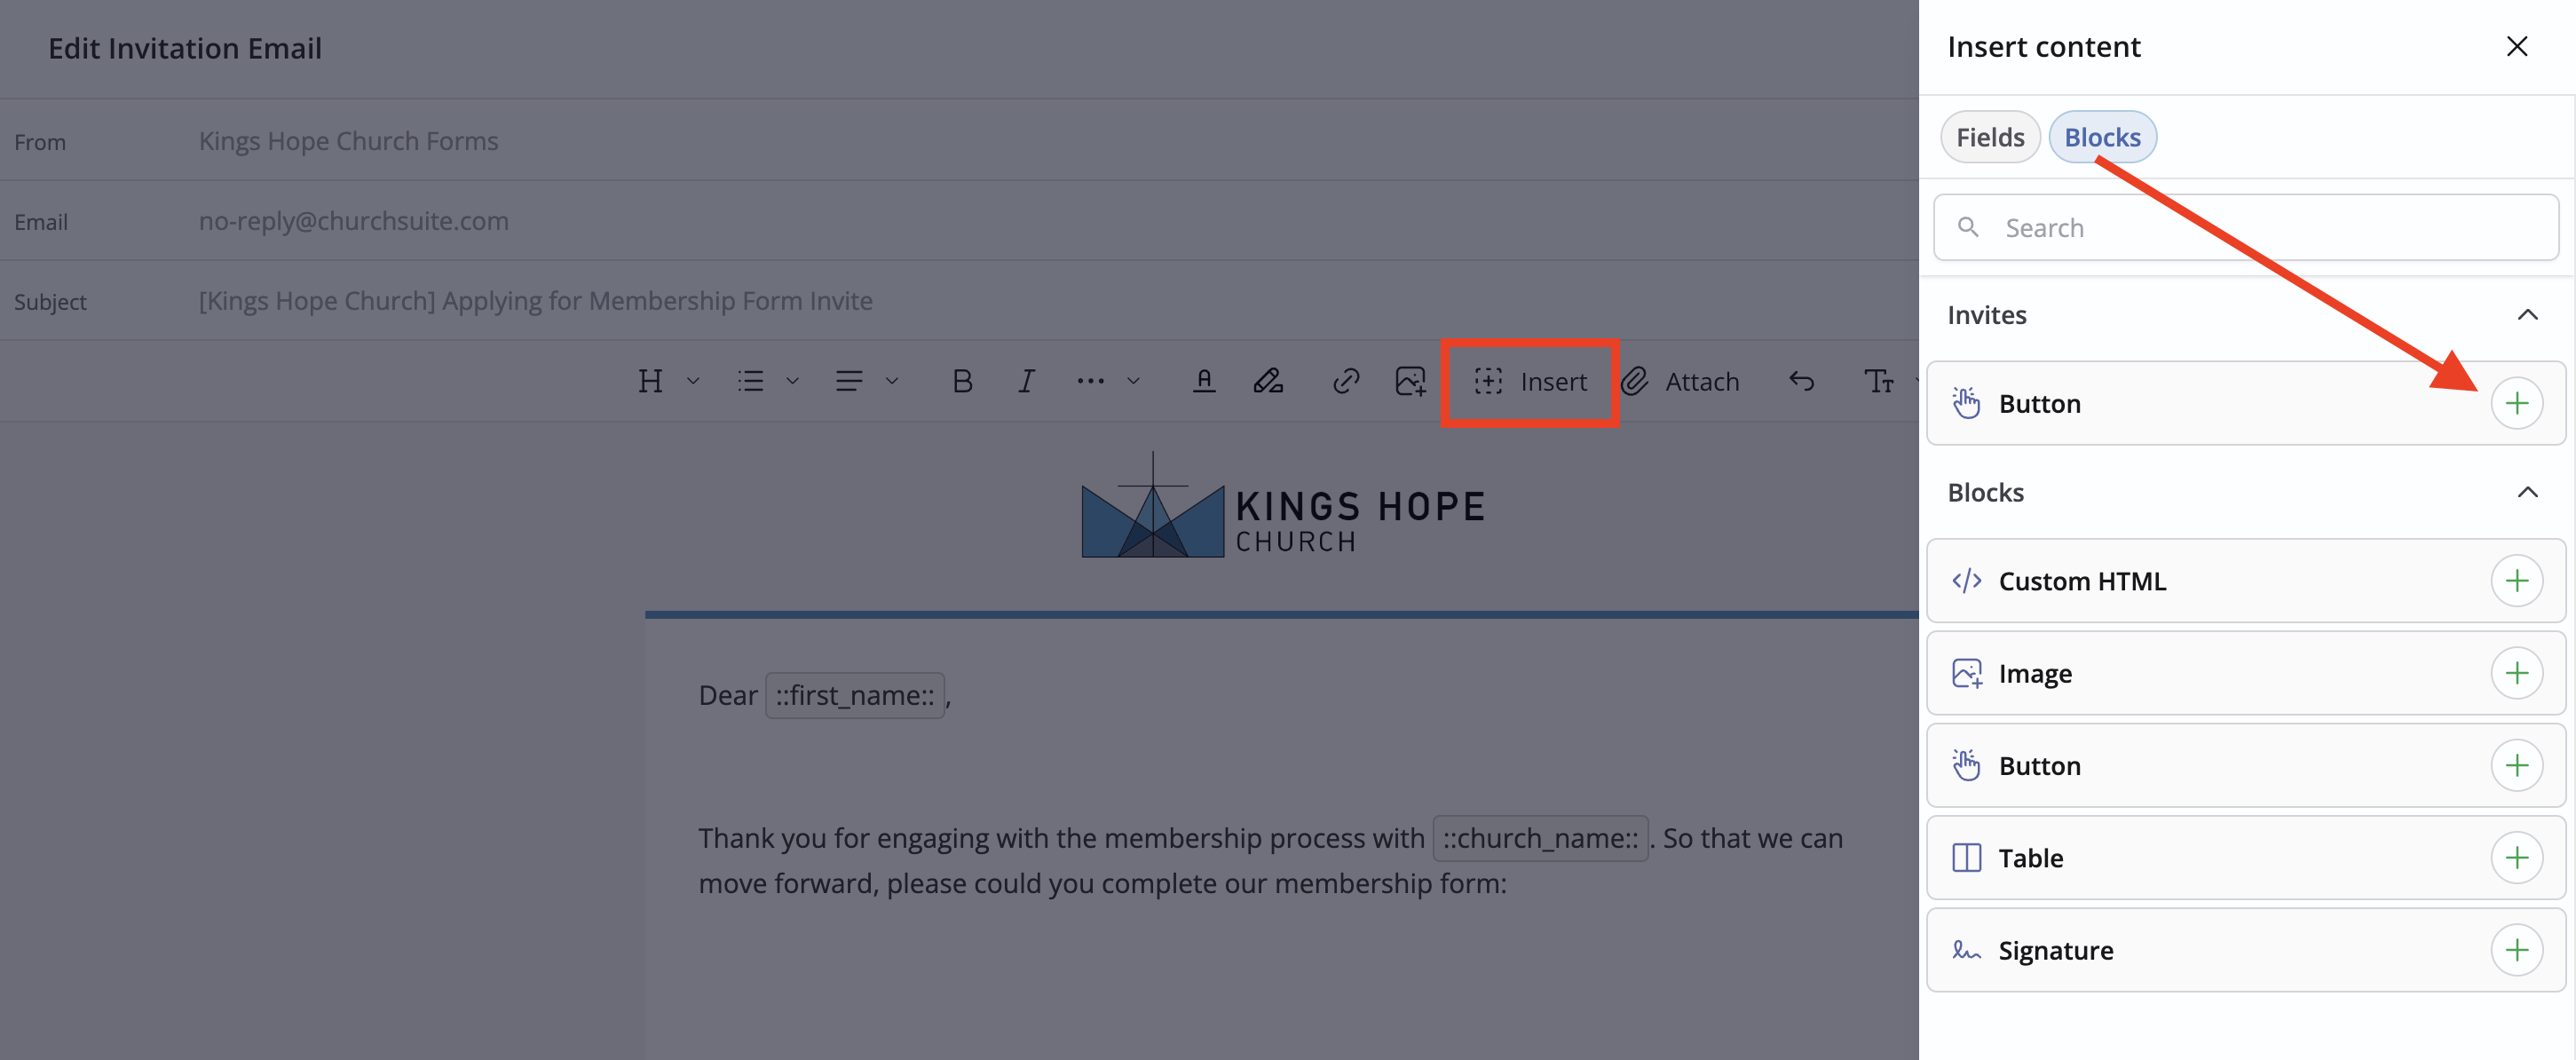
Note that you can, if you wish, edit the text on the button by clicking the gear icon. When you are happy, Save your changes.

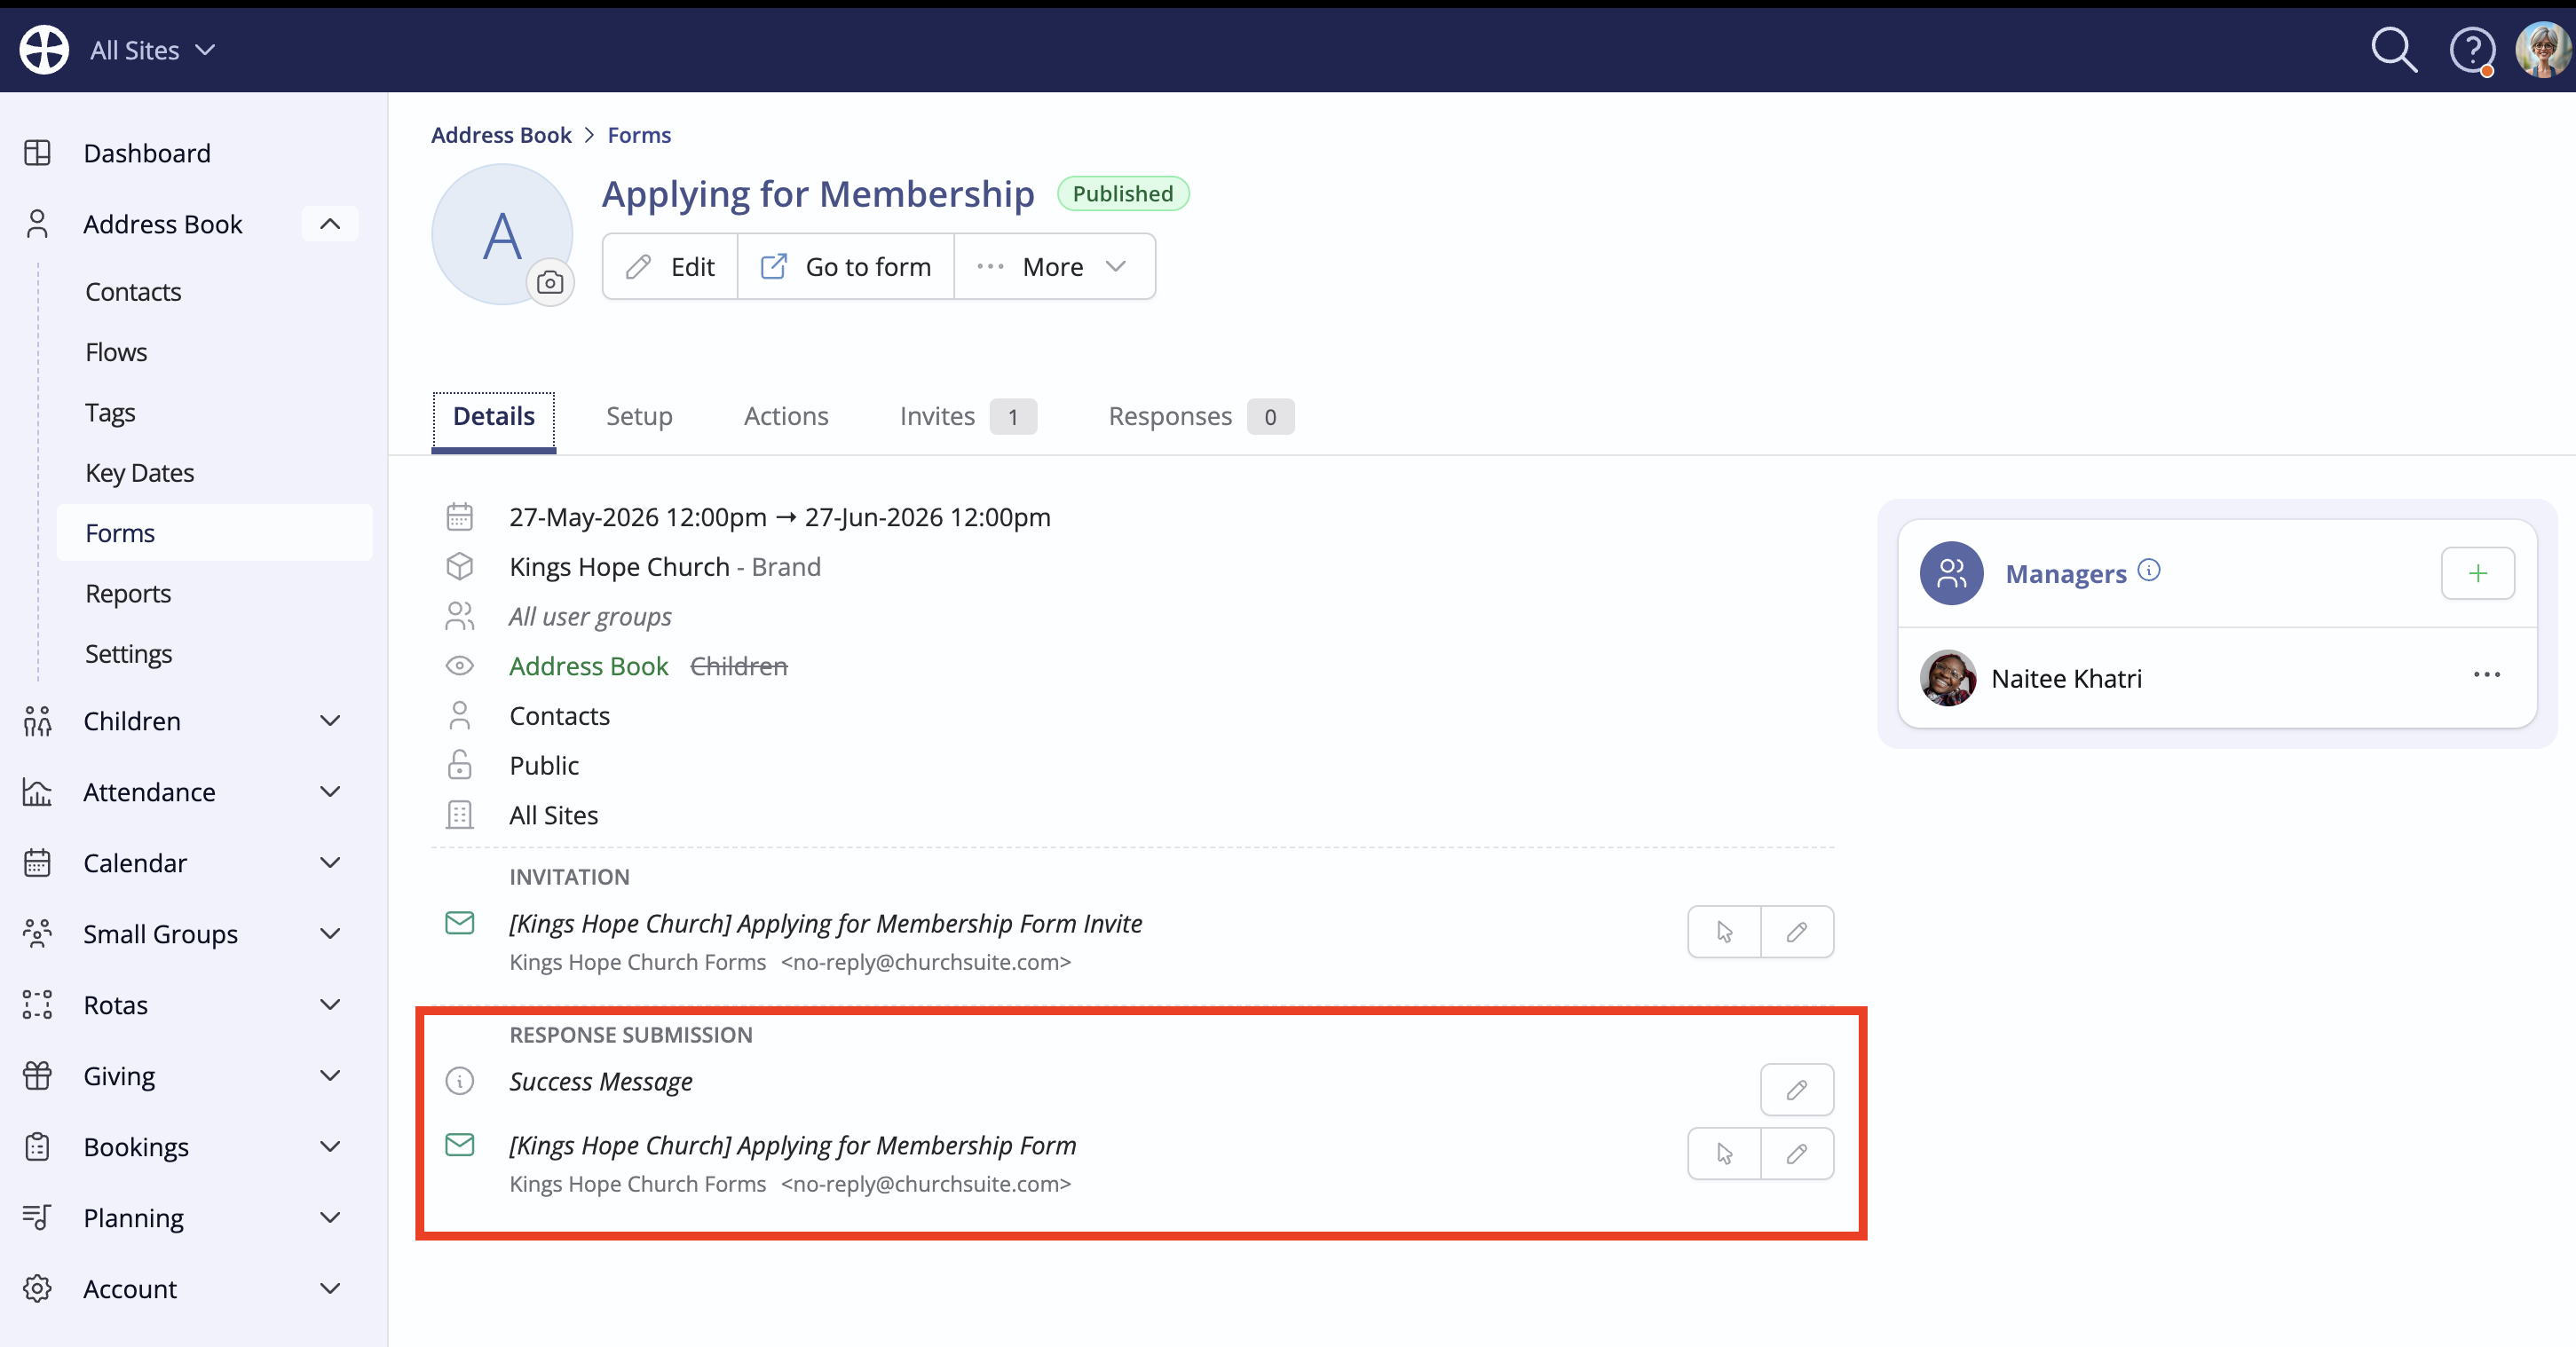
Customising the submission success message and confirmation email
As with the default invitation email, you can also customise the Response Submission success message that respondents see on their screens and the confirmation email they receive when they submit a response. Note the response submission actions to Preview and Edit the success message and submission confirmation email.
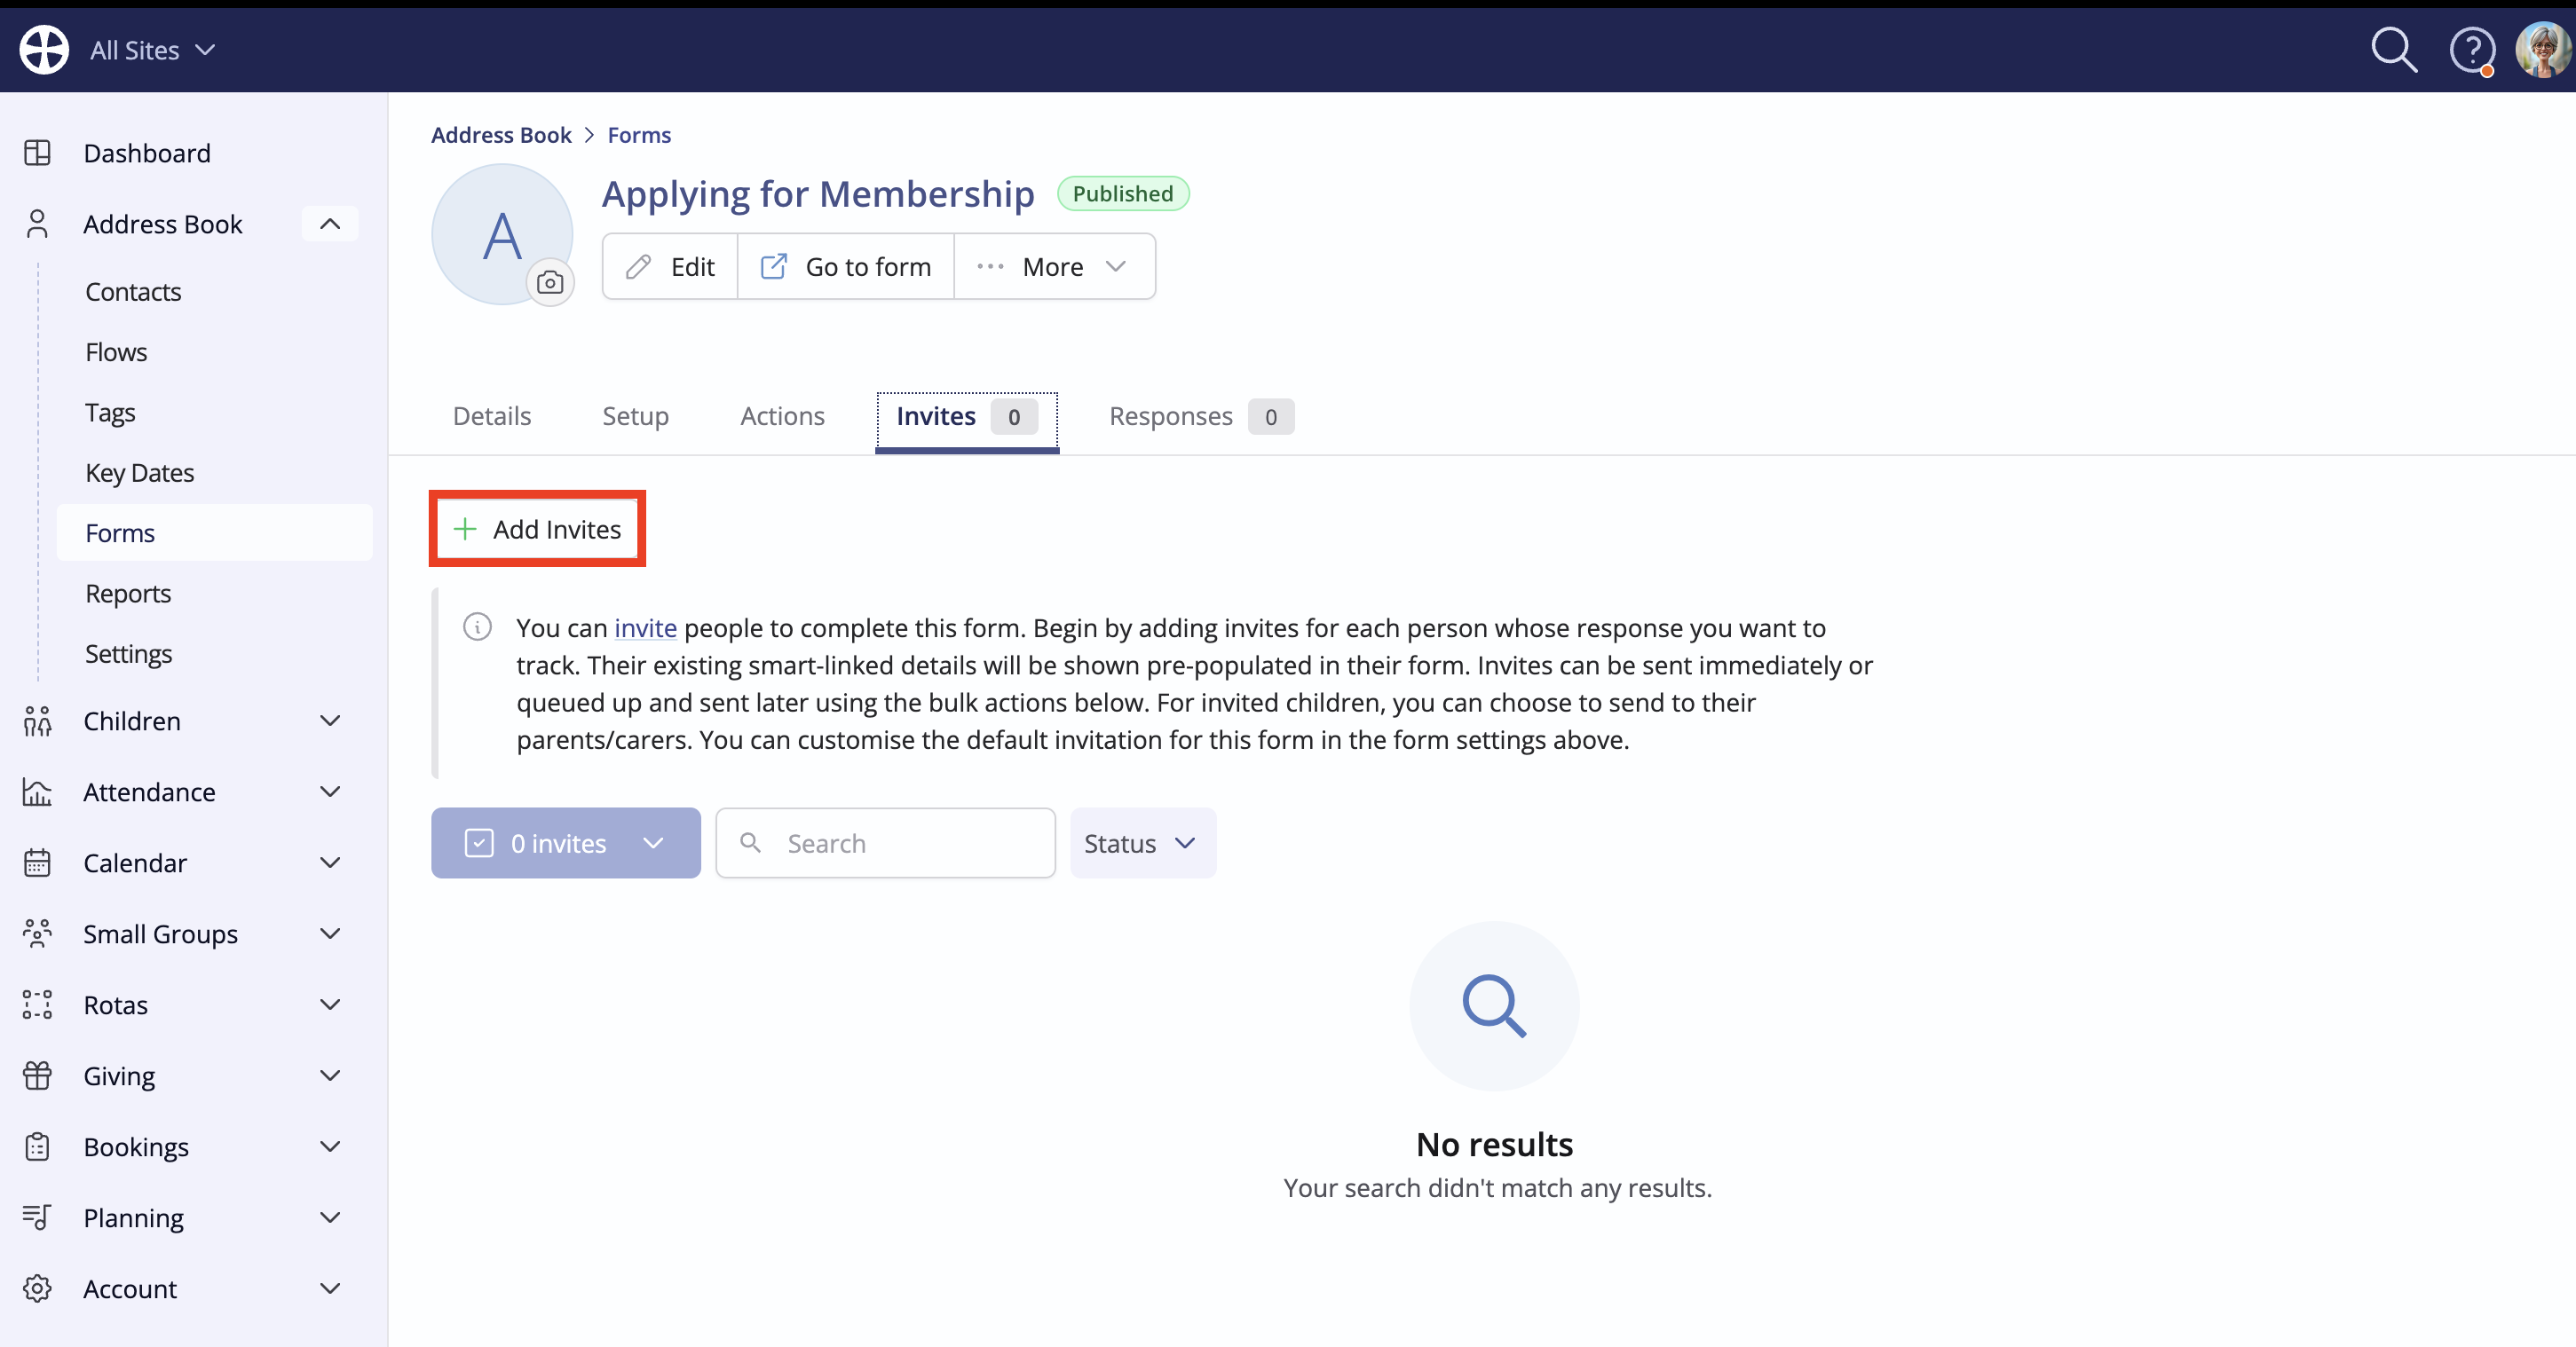
Sending invitations
From the Invites page of a published form, click Add Invites:
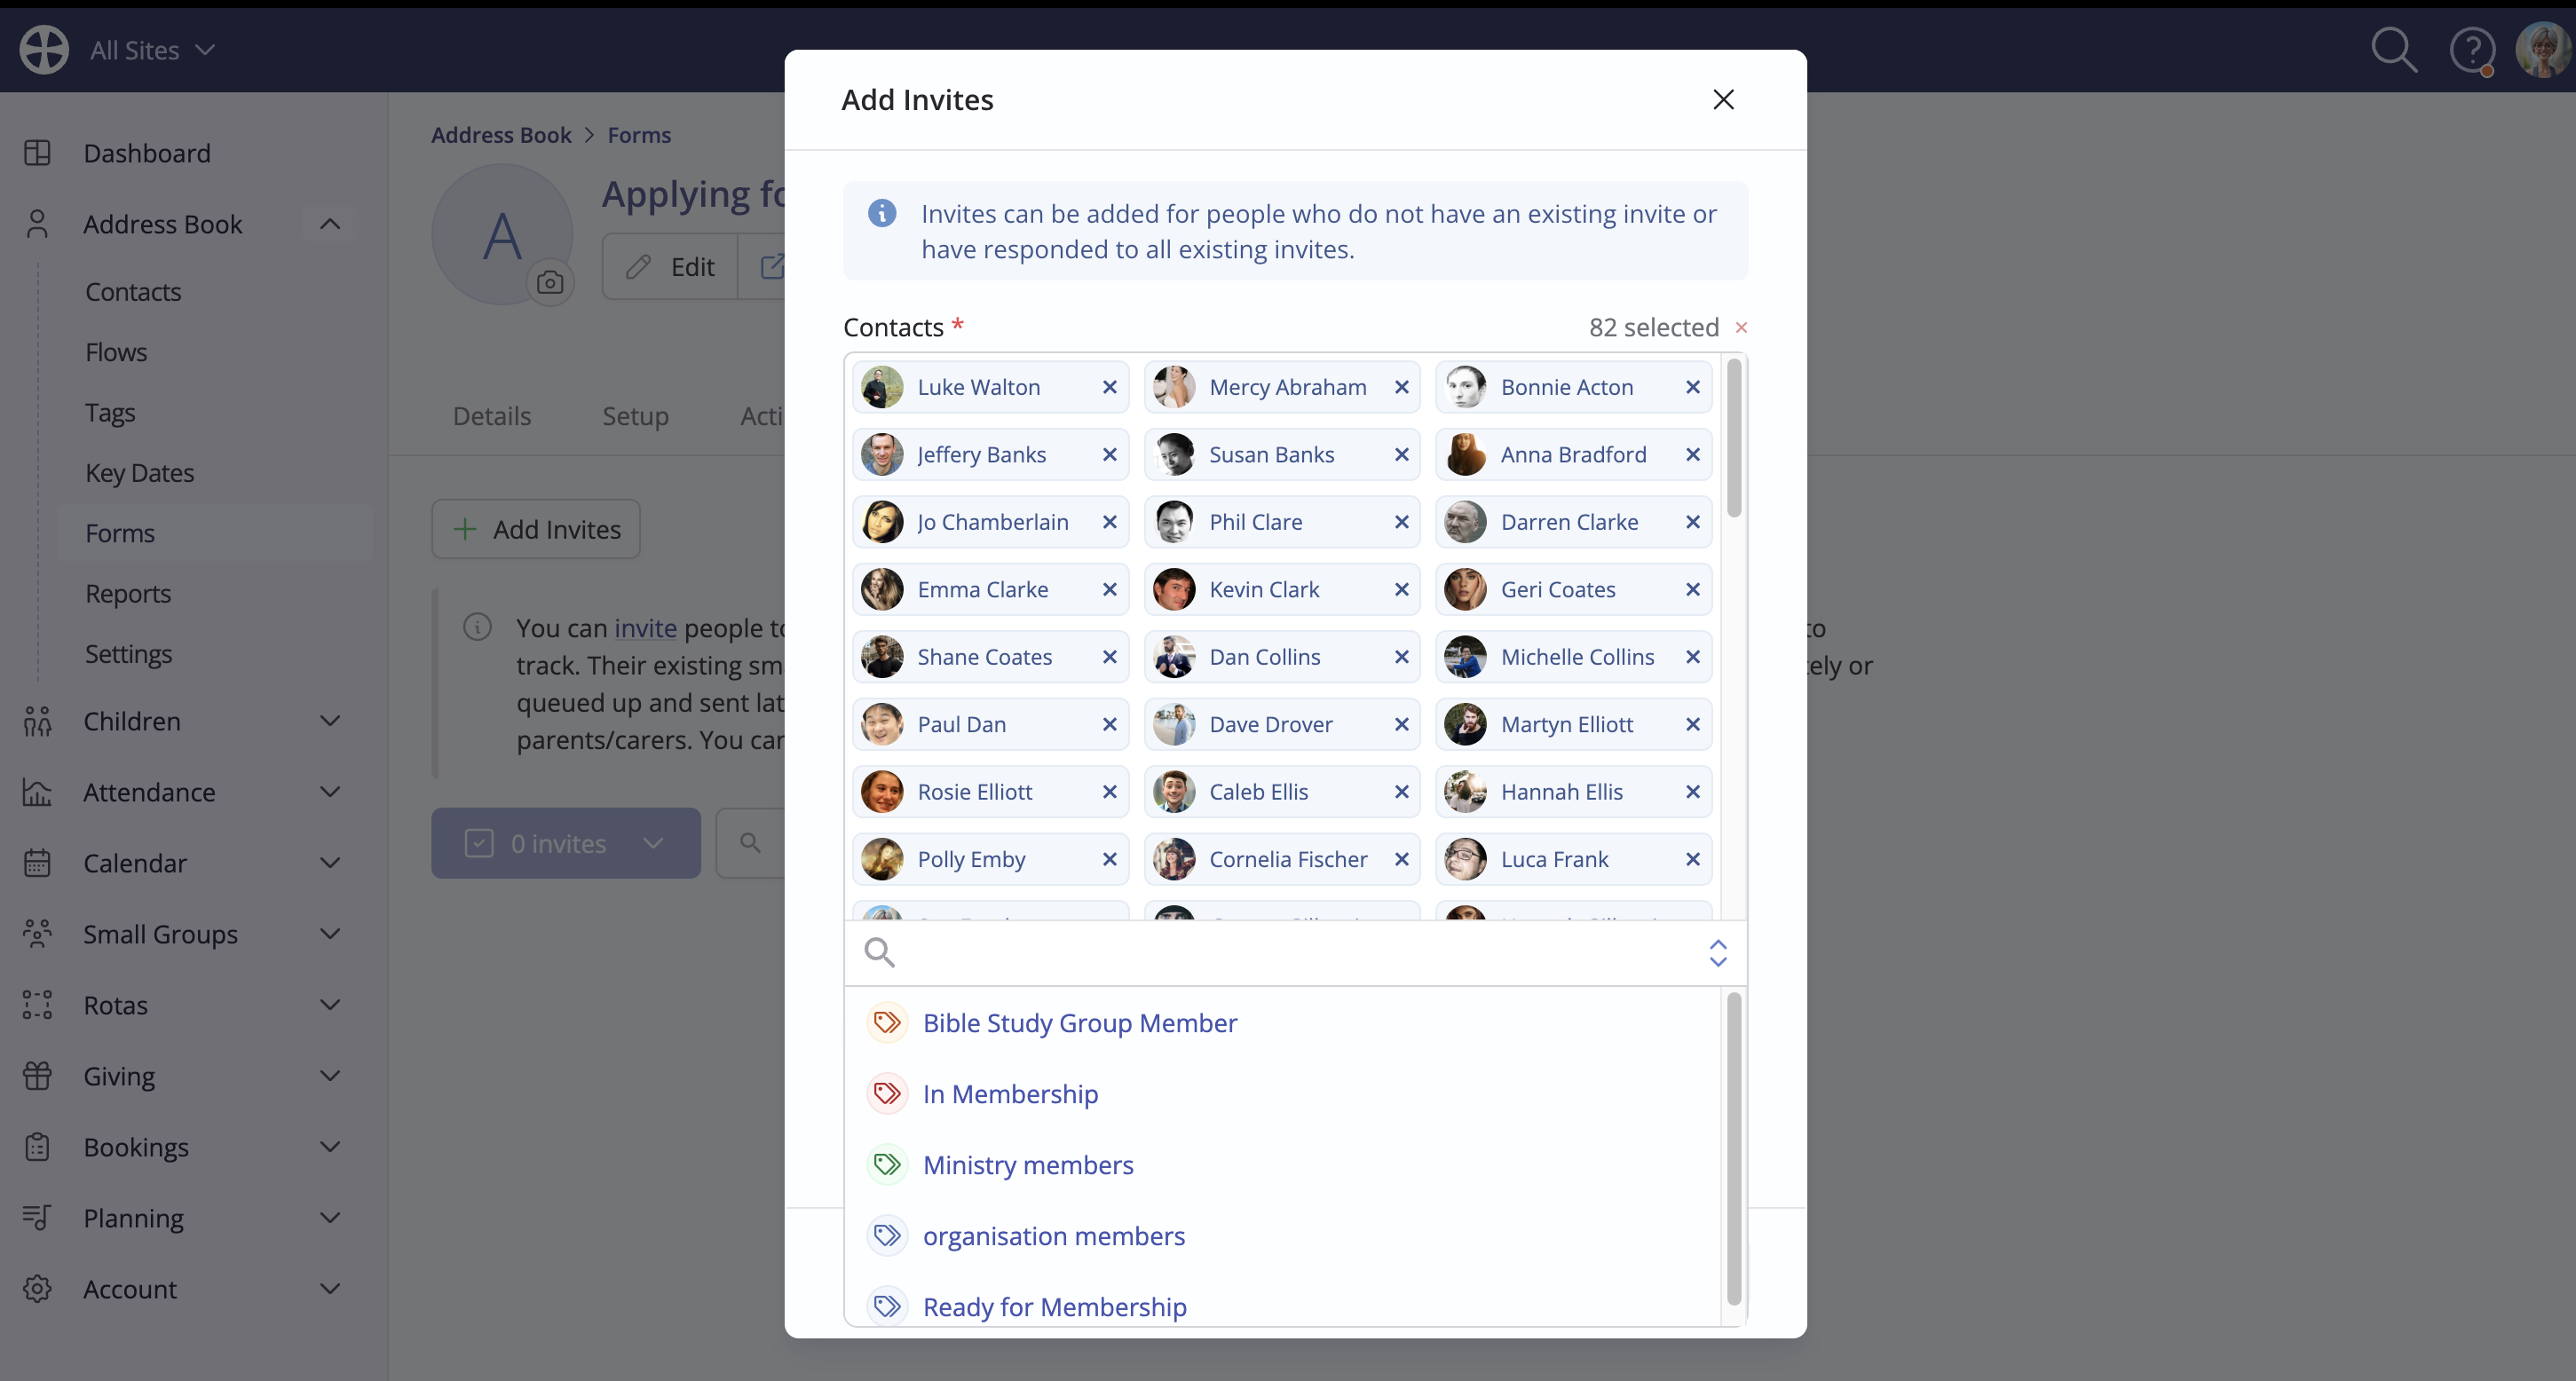
Search for and select the contacts you wish to invite - you can search by person name or by tag:
Click Save and compose to select the default option, Compose email now. This will surface the invitation email created as described in the previous section. You can optionally edit this email, perhaps to personalise in the context of your selected tag.
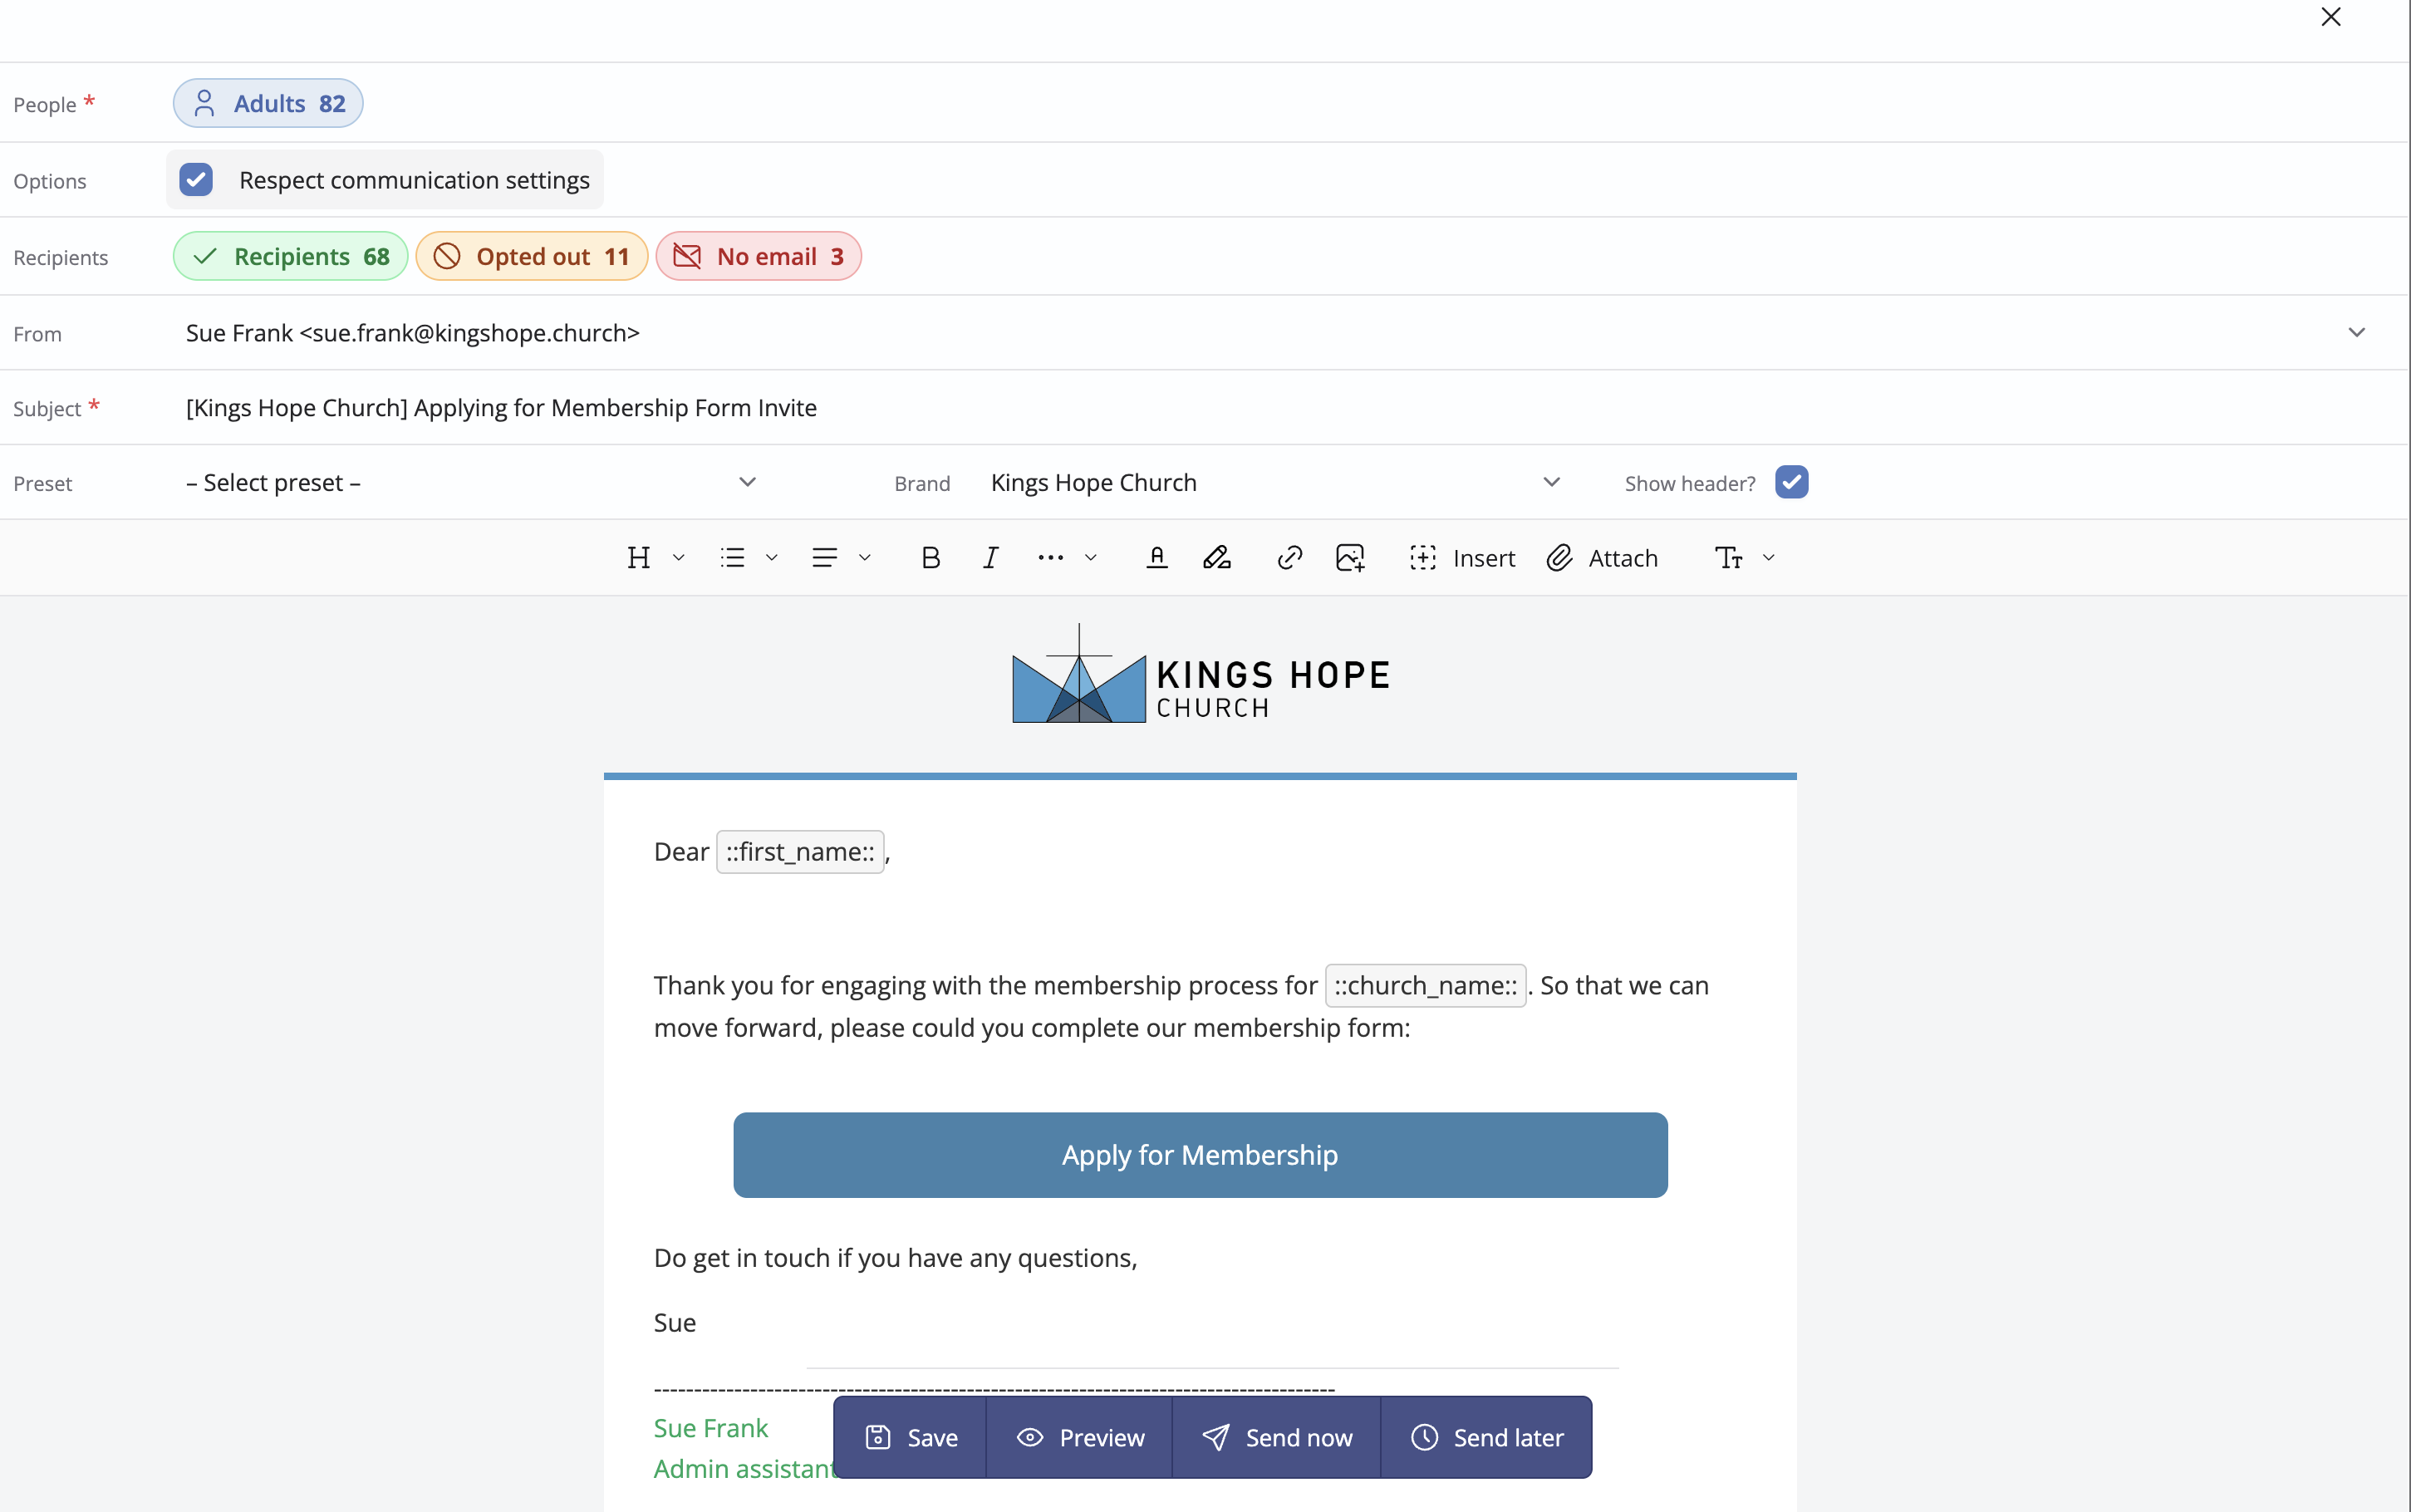
Note that, as with sending general emails, you are able to Save a draft of your invitation to return to later, Preview the invitation, Send immediately or schedule the email to Send later
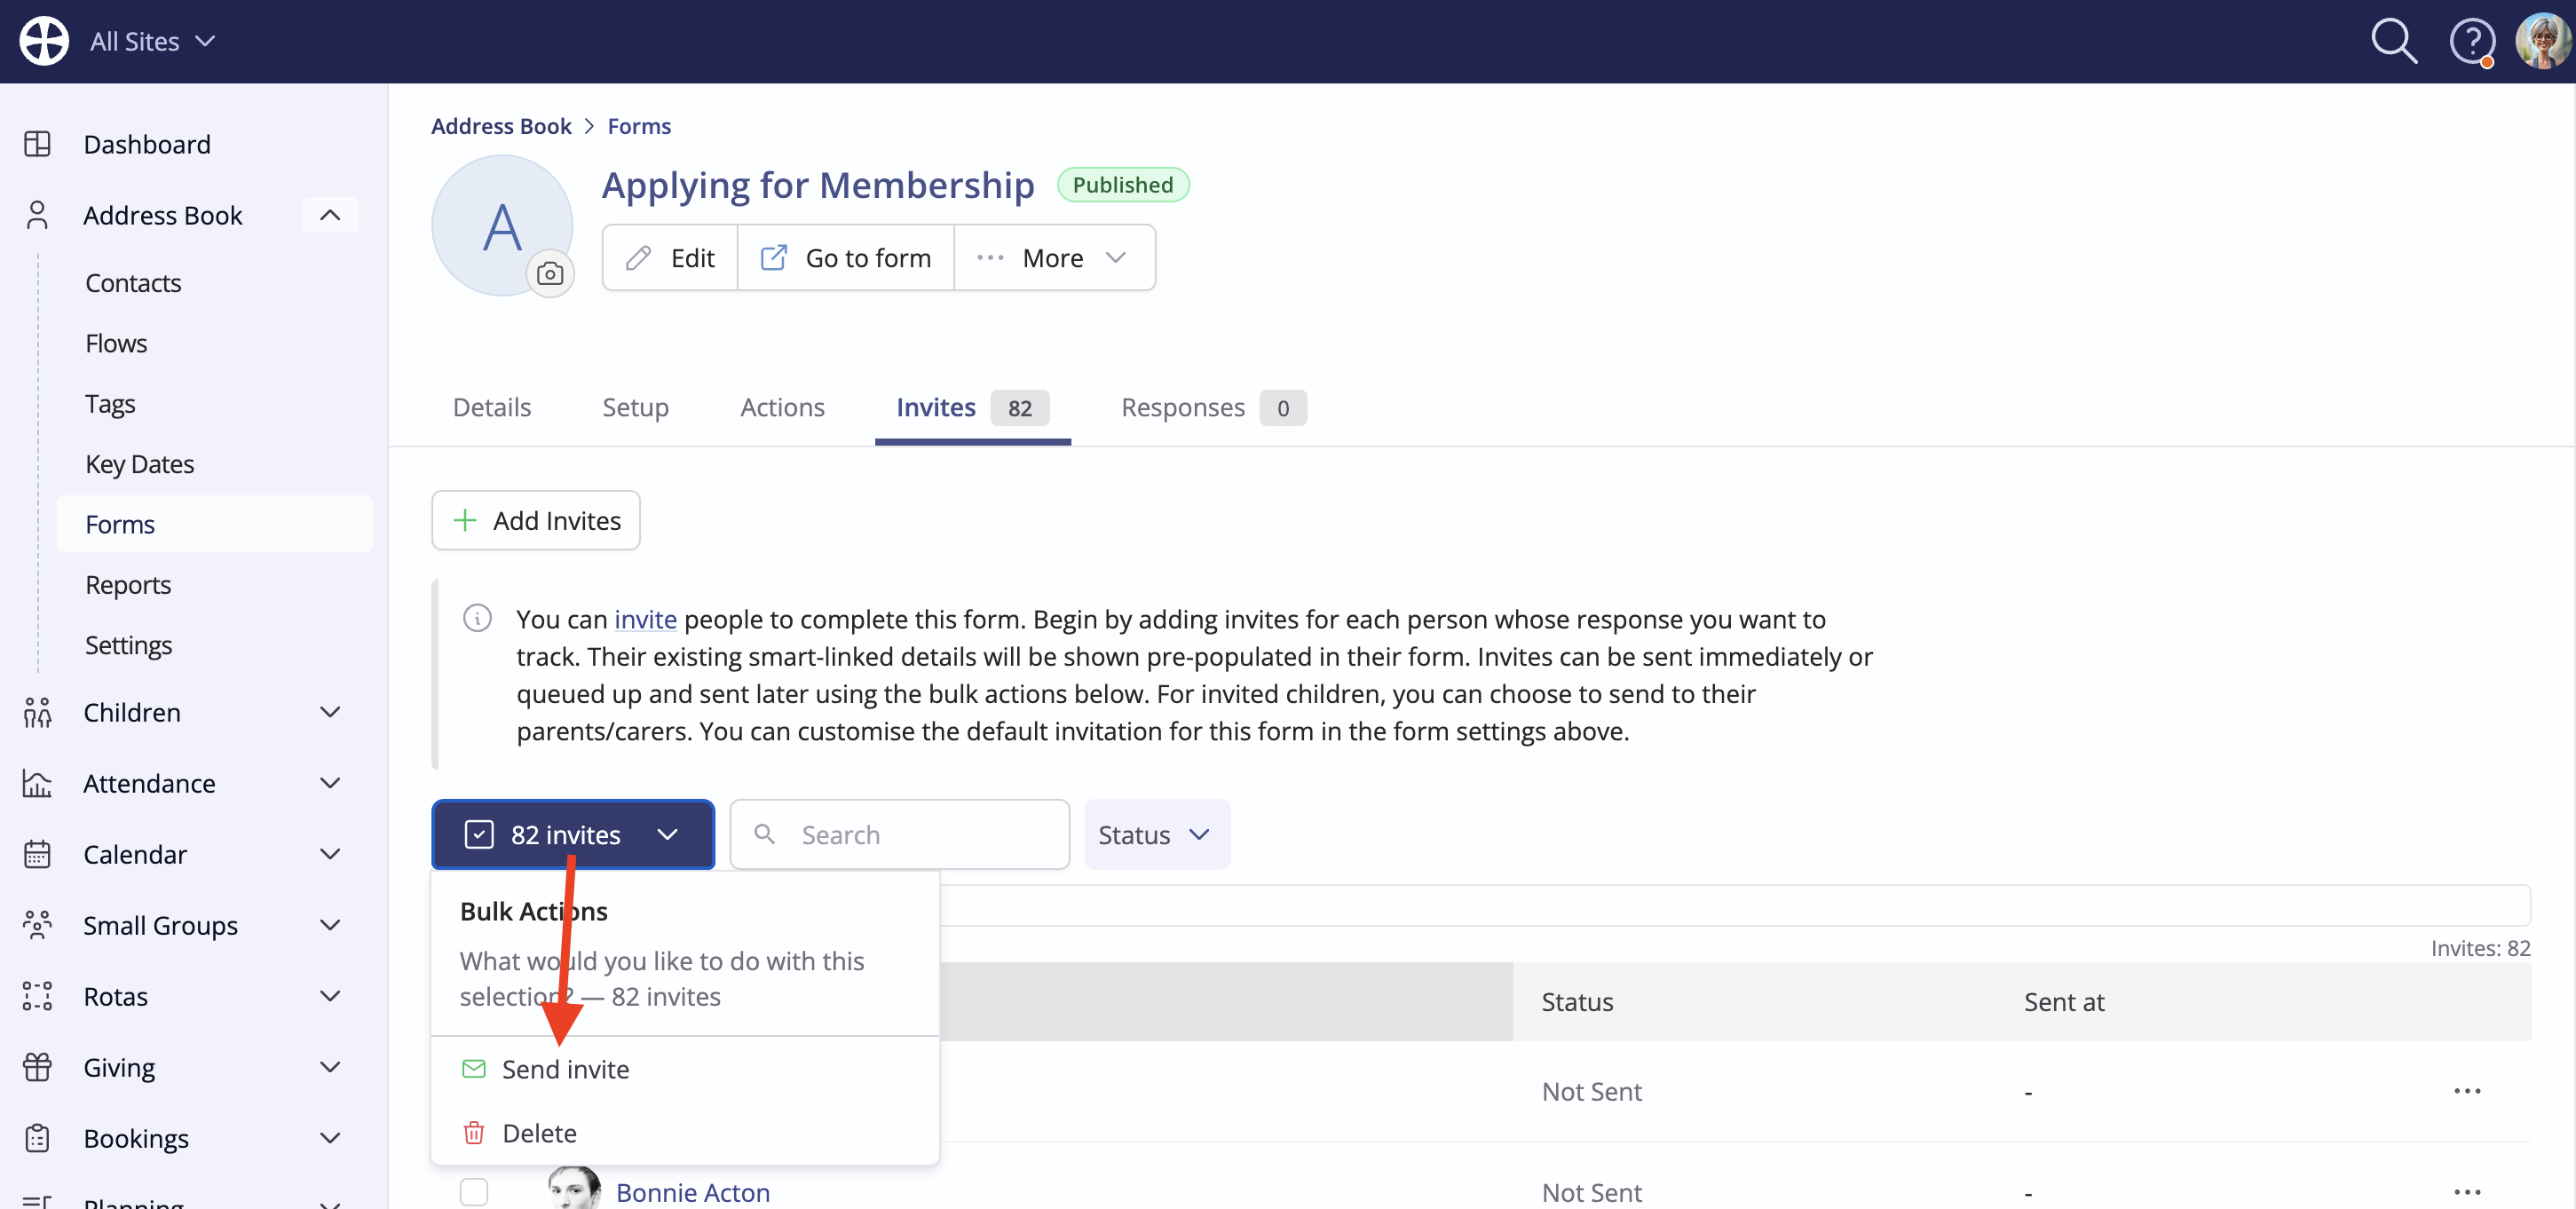
If you deselect the Compose email now option, your invite will remain in the Form Invites page, with the status "Not Sent". At a later date, you can select Send invite from the Bulk Actions to continue the invite process.
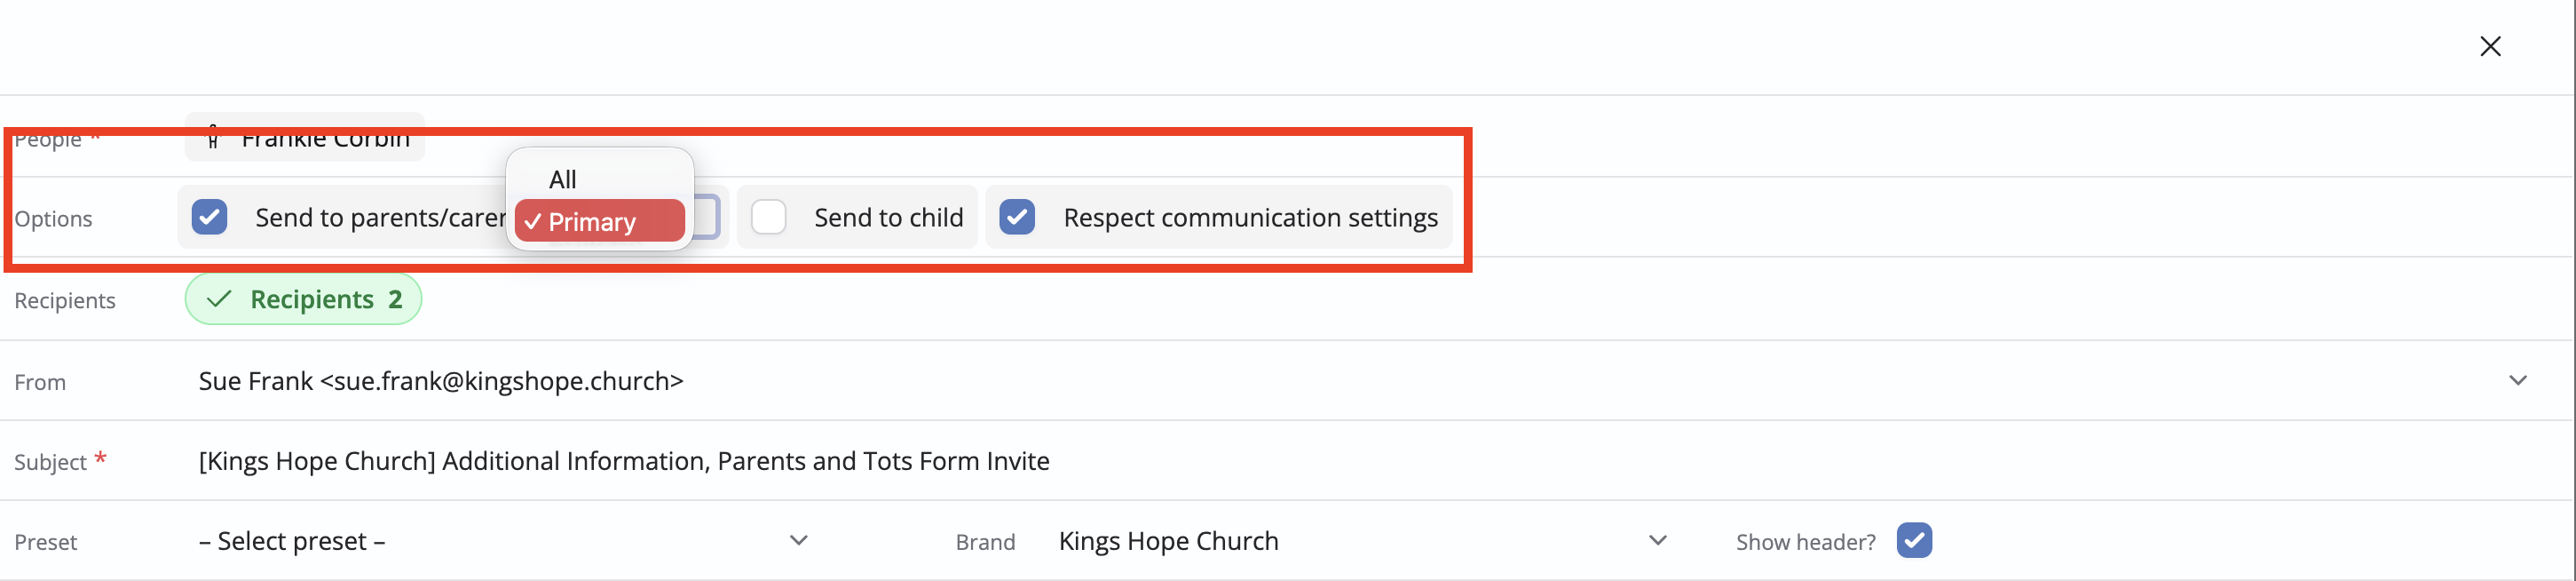
When sending a form invite through the Children module, for a form where the Primary response type is set to Children, you can opt to send the invitation to the child themselves, the child's parents/carers or both. Note the option to send to Primary parents/carers or all parents/carers.
Once sent, the Invites tab shows a list of all invitees and their current response Status - "Not Responded", in the first instance. Use the Status filter at the top of the list to view only Responded or Not Responded invitees. A response Status is not shown for anonymous forms. As each invitee submits their response, the invitation status updates to "Responded" and their response is added to the Responses tab. Note the invite Actions to Resend a "Not Responded" invitation or to Delete an invitation, which prevents the invitee from accessing their invitation form to submit a response or edit a previous one. Deleting an invitation does not delete a response that has already been received.
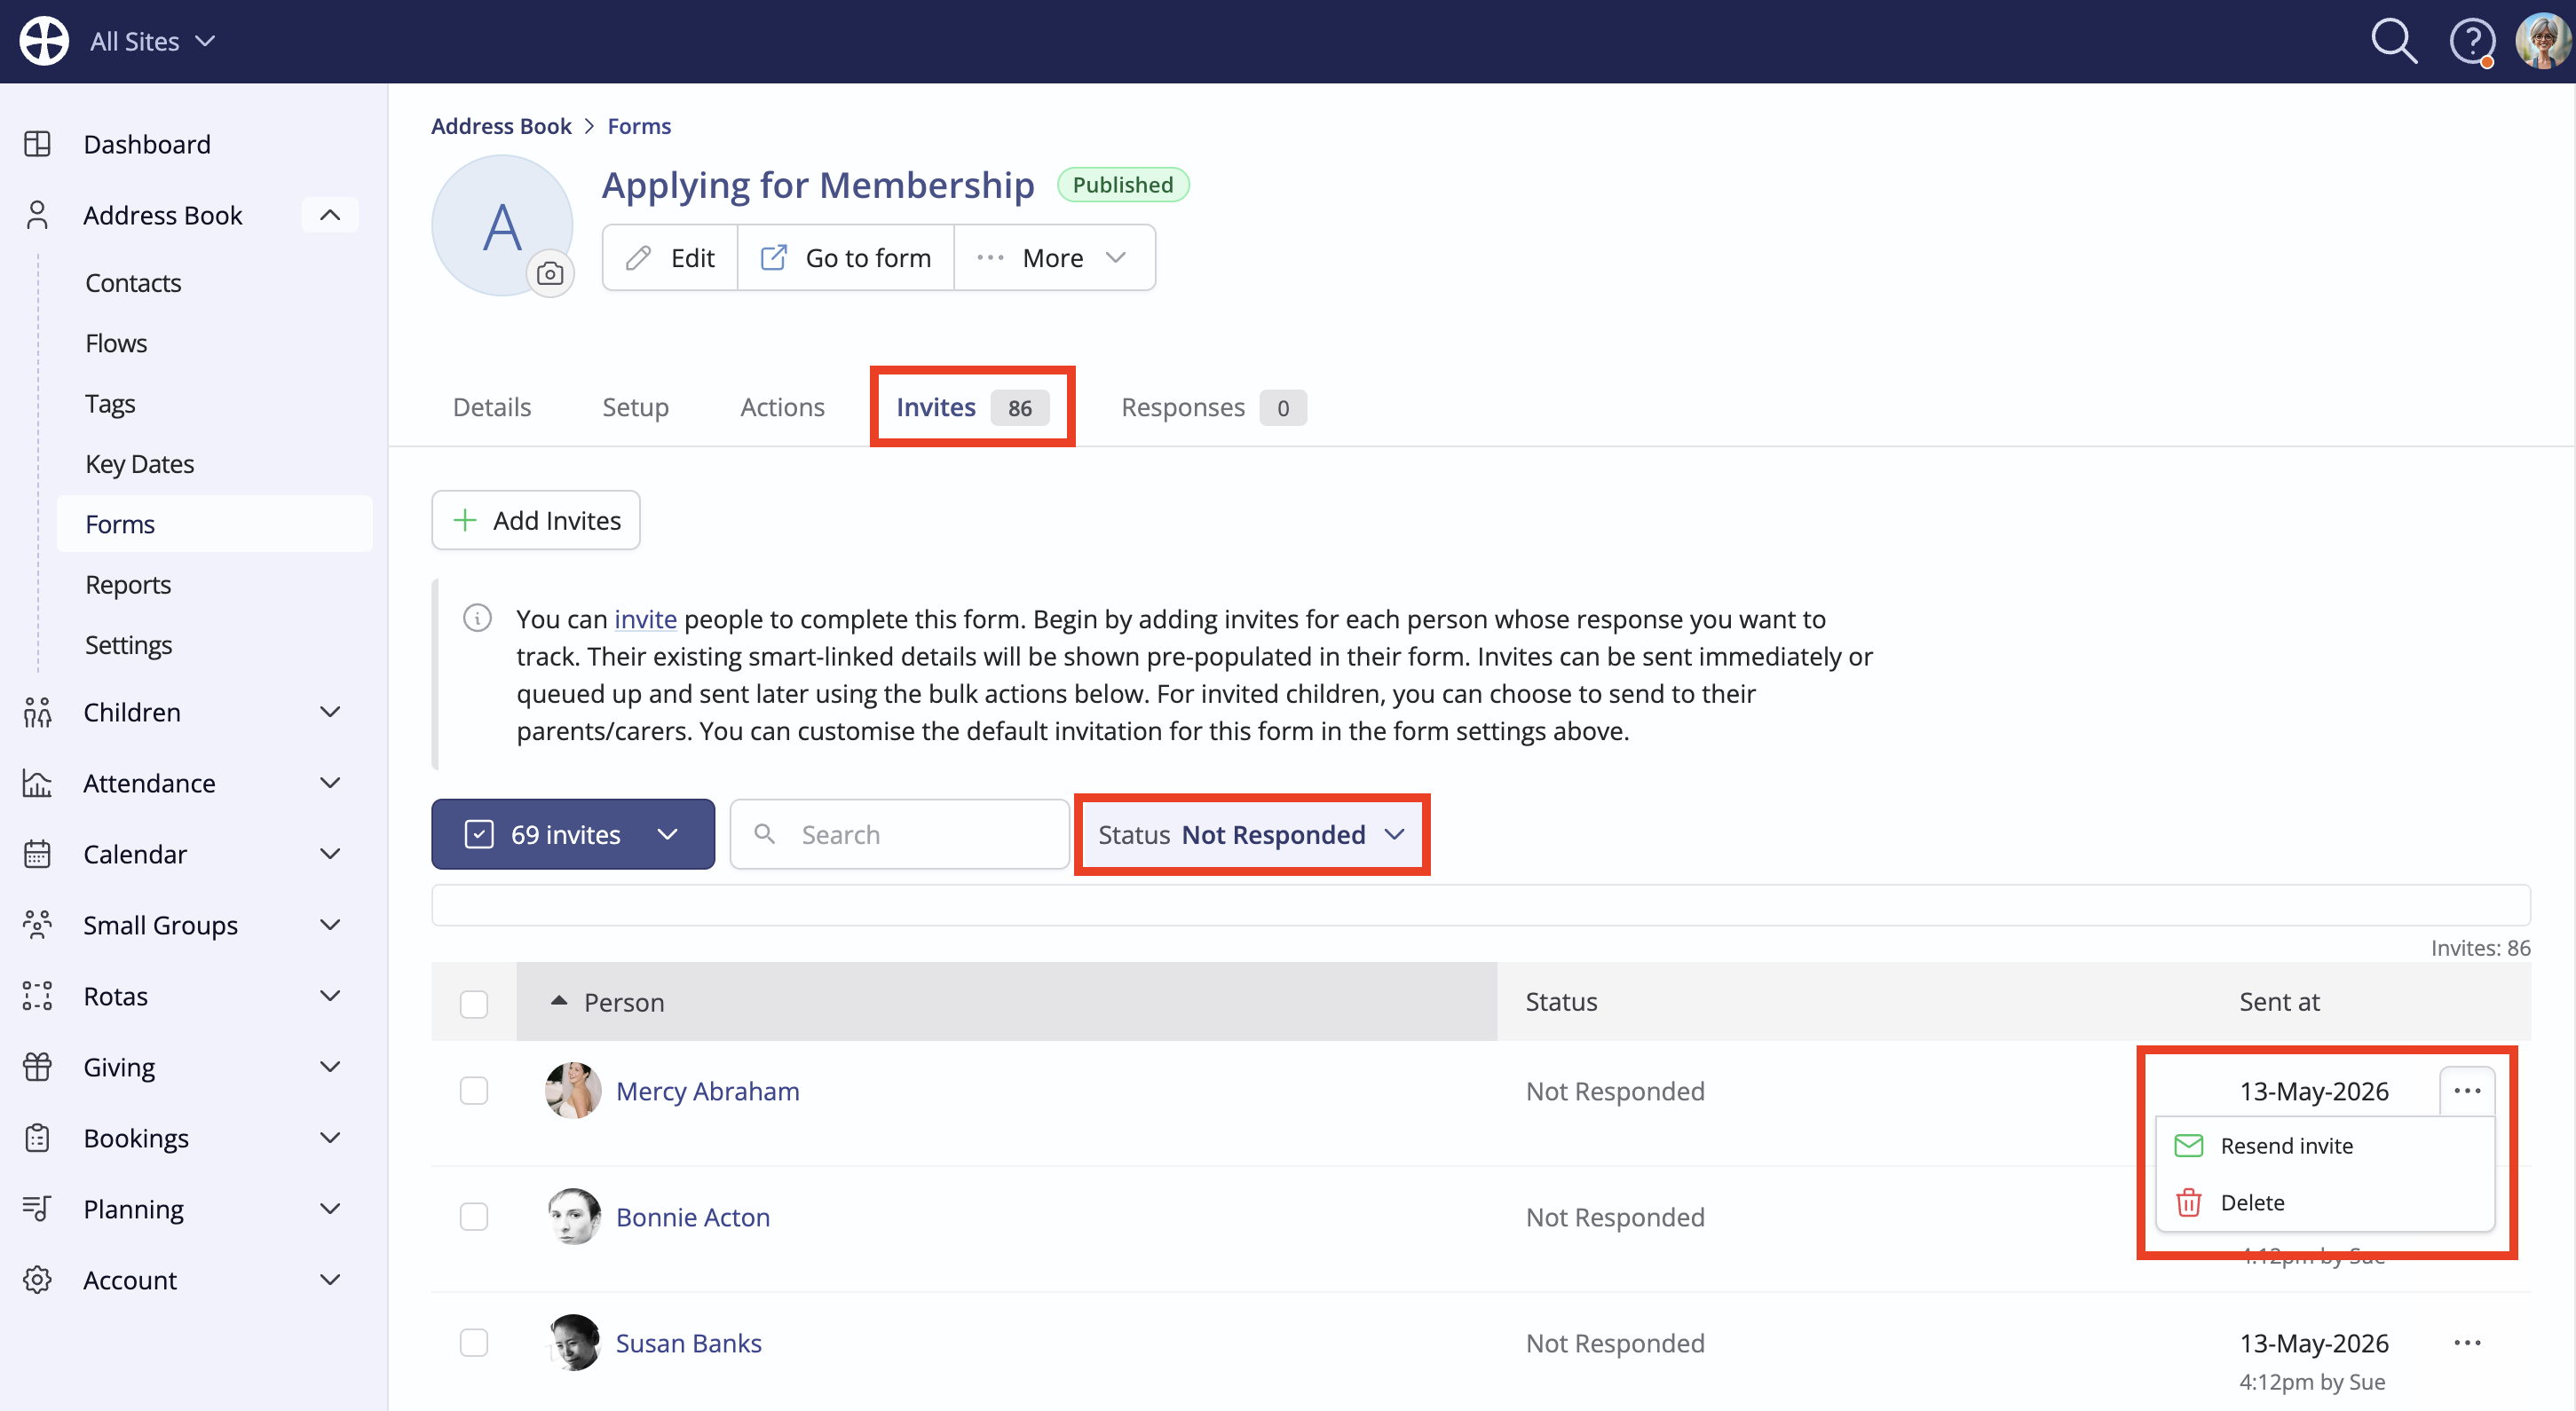
Also note the bulk actions to Send invite see below) or to Delete invitations.

When an invitee submits their response, a response Notification email is sent to the form Managers and a submission Confirmation email is sent to the invitee. The invitation email and the submission confirmation email are shown in the person's communication log on their profile.
As invitees begin to respond, we encourage you to read our related support article for further information on Managing form responses.
Resending invitations
You can send repeat invitations and reminders. There are two workflows for resending form invites, dependant on the status of the original invitation.
1. Not Responded
For invitees who have an existing invitation with a " Not Responded" status, use the Send invite bulk action to send a repeat invitation containing a link to their existing invitation, essentially serving as a reminder.

2. Responded
For invitees who have an existing invitation with a "Responded" status, a new invitation will need to be created and sent, following the steps in the Sending invitations section of this article. The new invitation will contain a new link, which will create a new response when the form is submitted. This is ideal for example, if someone submitted a Church Survey response last year, you can use the Add Invites workflow to invite the person to submit a new response for the current year using the same form.

NB: Using the Send Invite bulk action will not send a new invite to those who have a "Responded" status to an existing invite - you may wish to use to filter by invite status when considering who to send invites to.
