Domain verification with Mandrill
Mandrill integration availability
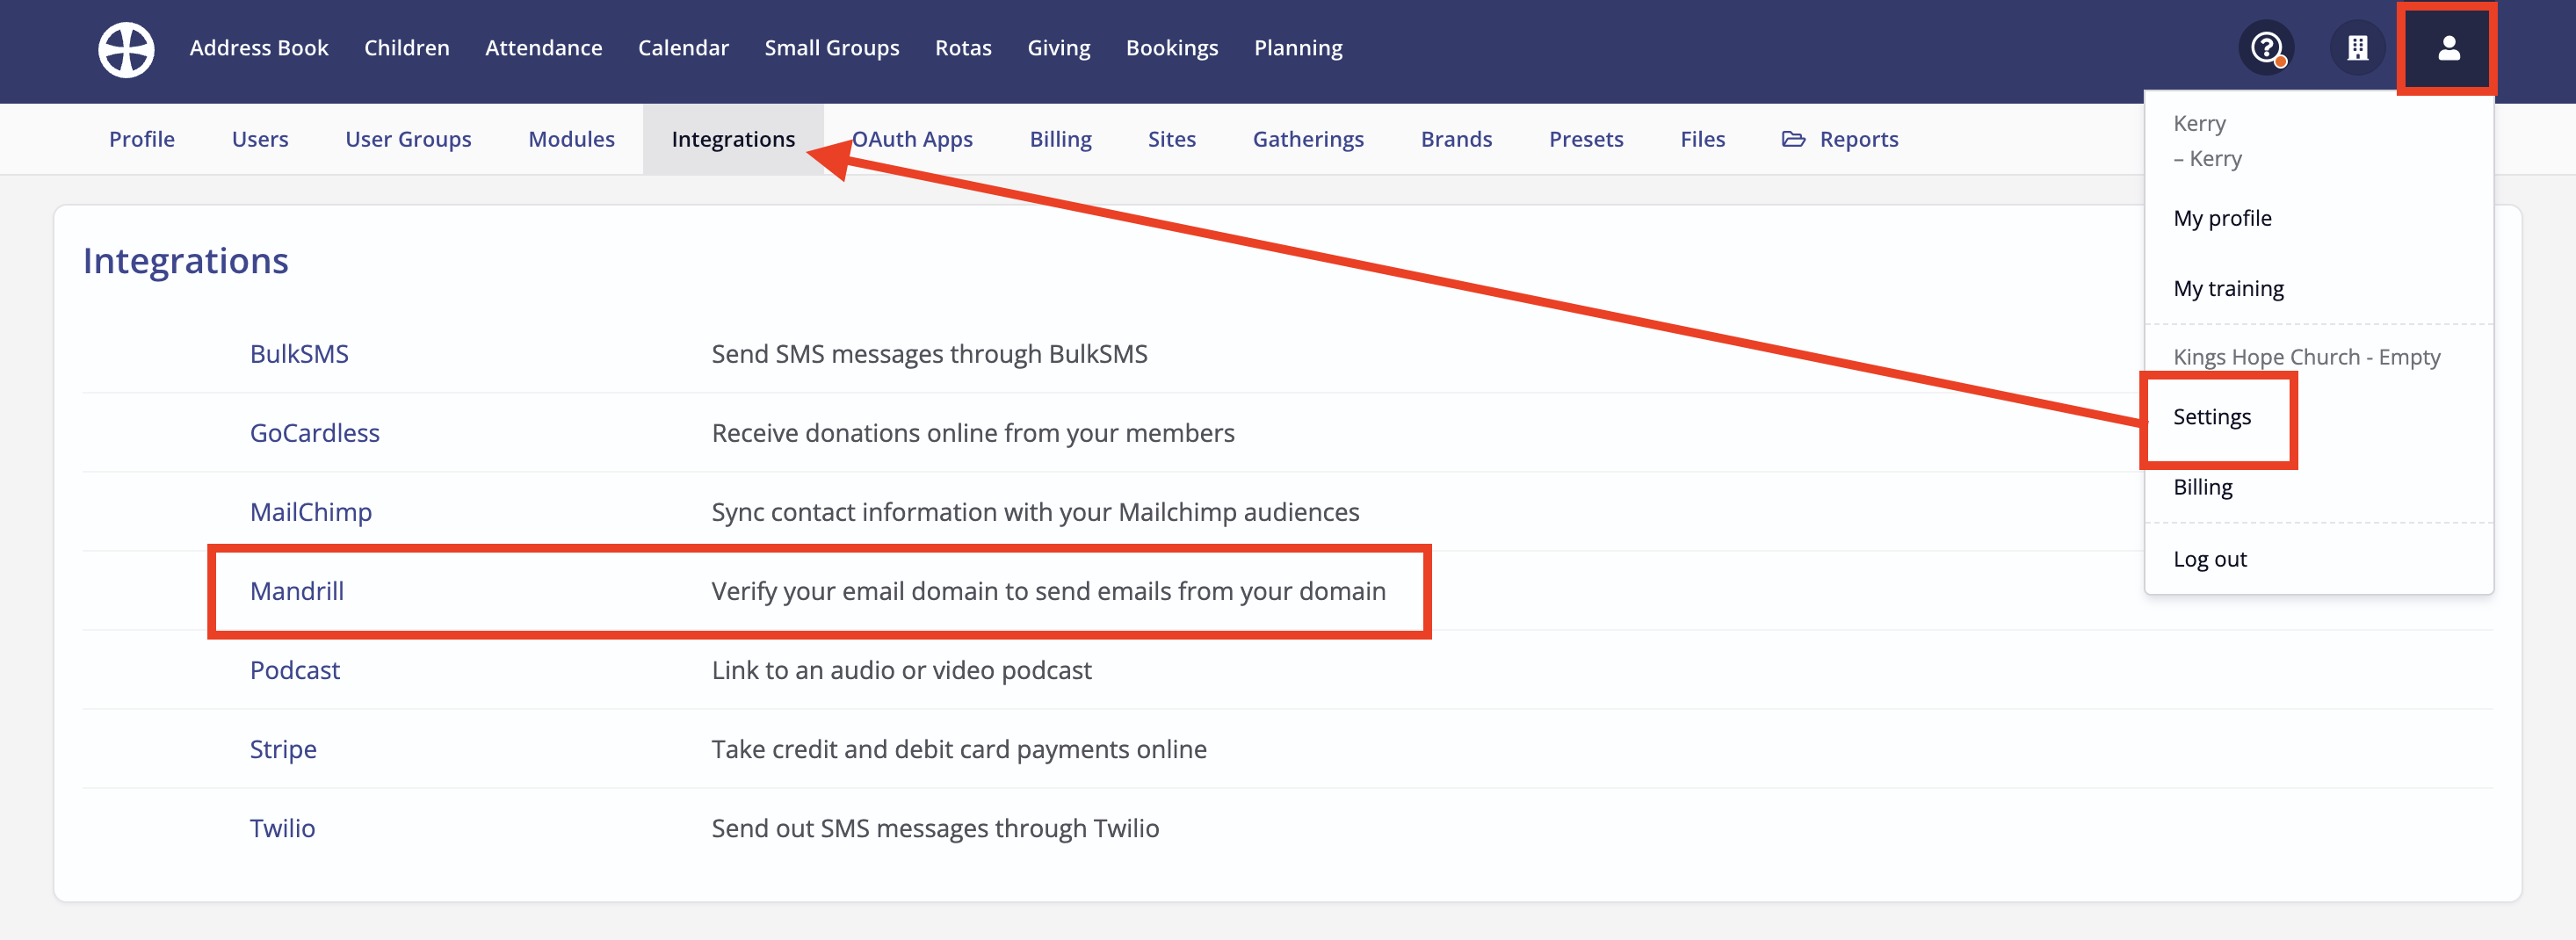
ChurchSuite changed its email service provider from Mandrill to Mailgun in 2019 and, as such, the domain verification process outlined in this article is no longer needed and the Mandrill integration is no longer available to customers. However, older customers who opted to continue sending their ChurchSuite emails through their previously verified domain can continue to self-manage their domain verification using the Mandrill integration. This article is for those customers only.
This article explains how to complete a domain verification process so that ChurchSuite can send emails using your organisation's verified domain rather than sending via the ChurchSuite verified domain. Domain verification, in both contexts, increases email security and deliverability.
Overview of domain verification
Introduction
Whether your ChurchSuite emails are sent through Mandrill or Mailgun, the Reply-to email address is always the sending User's, meaning replies are always routed back to the sender's mailbox.
Domain verification is best explained with an example. Imagine sending an email through ChurchSuite from a personal Hotmail address. Each recipient's email provider will know that the email didn't originate from the Hotmail email server - it originated from the ChurchSuite email server. The practice of sending an email purporting to be from another person or organisation's domain is called 'spoofing', and it's this disparity that increases the risk of recipient email providers marking emails as spam or rejecting the emails entirely and will adversely affect the true sender's domain reputation. Domain verification is a process that authorises ChurchSuite to send emails legitimately through our email servers on behalf of the verified domain.
In the remainder of this article, we explain how existing Mandrill integration customers can verify additional domains - it's only possible to verify a domain that you own and manage.
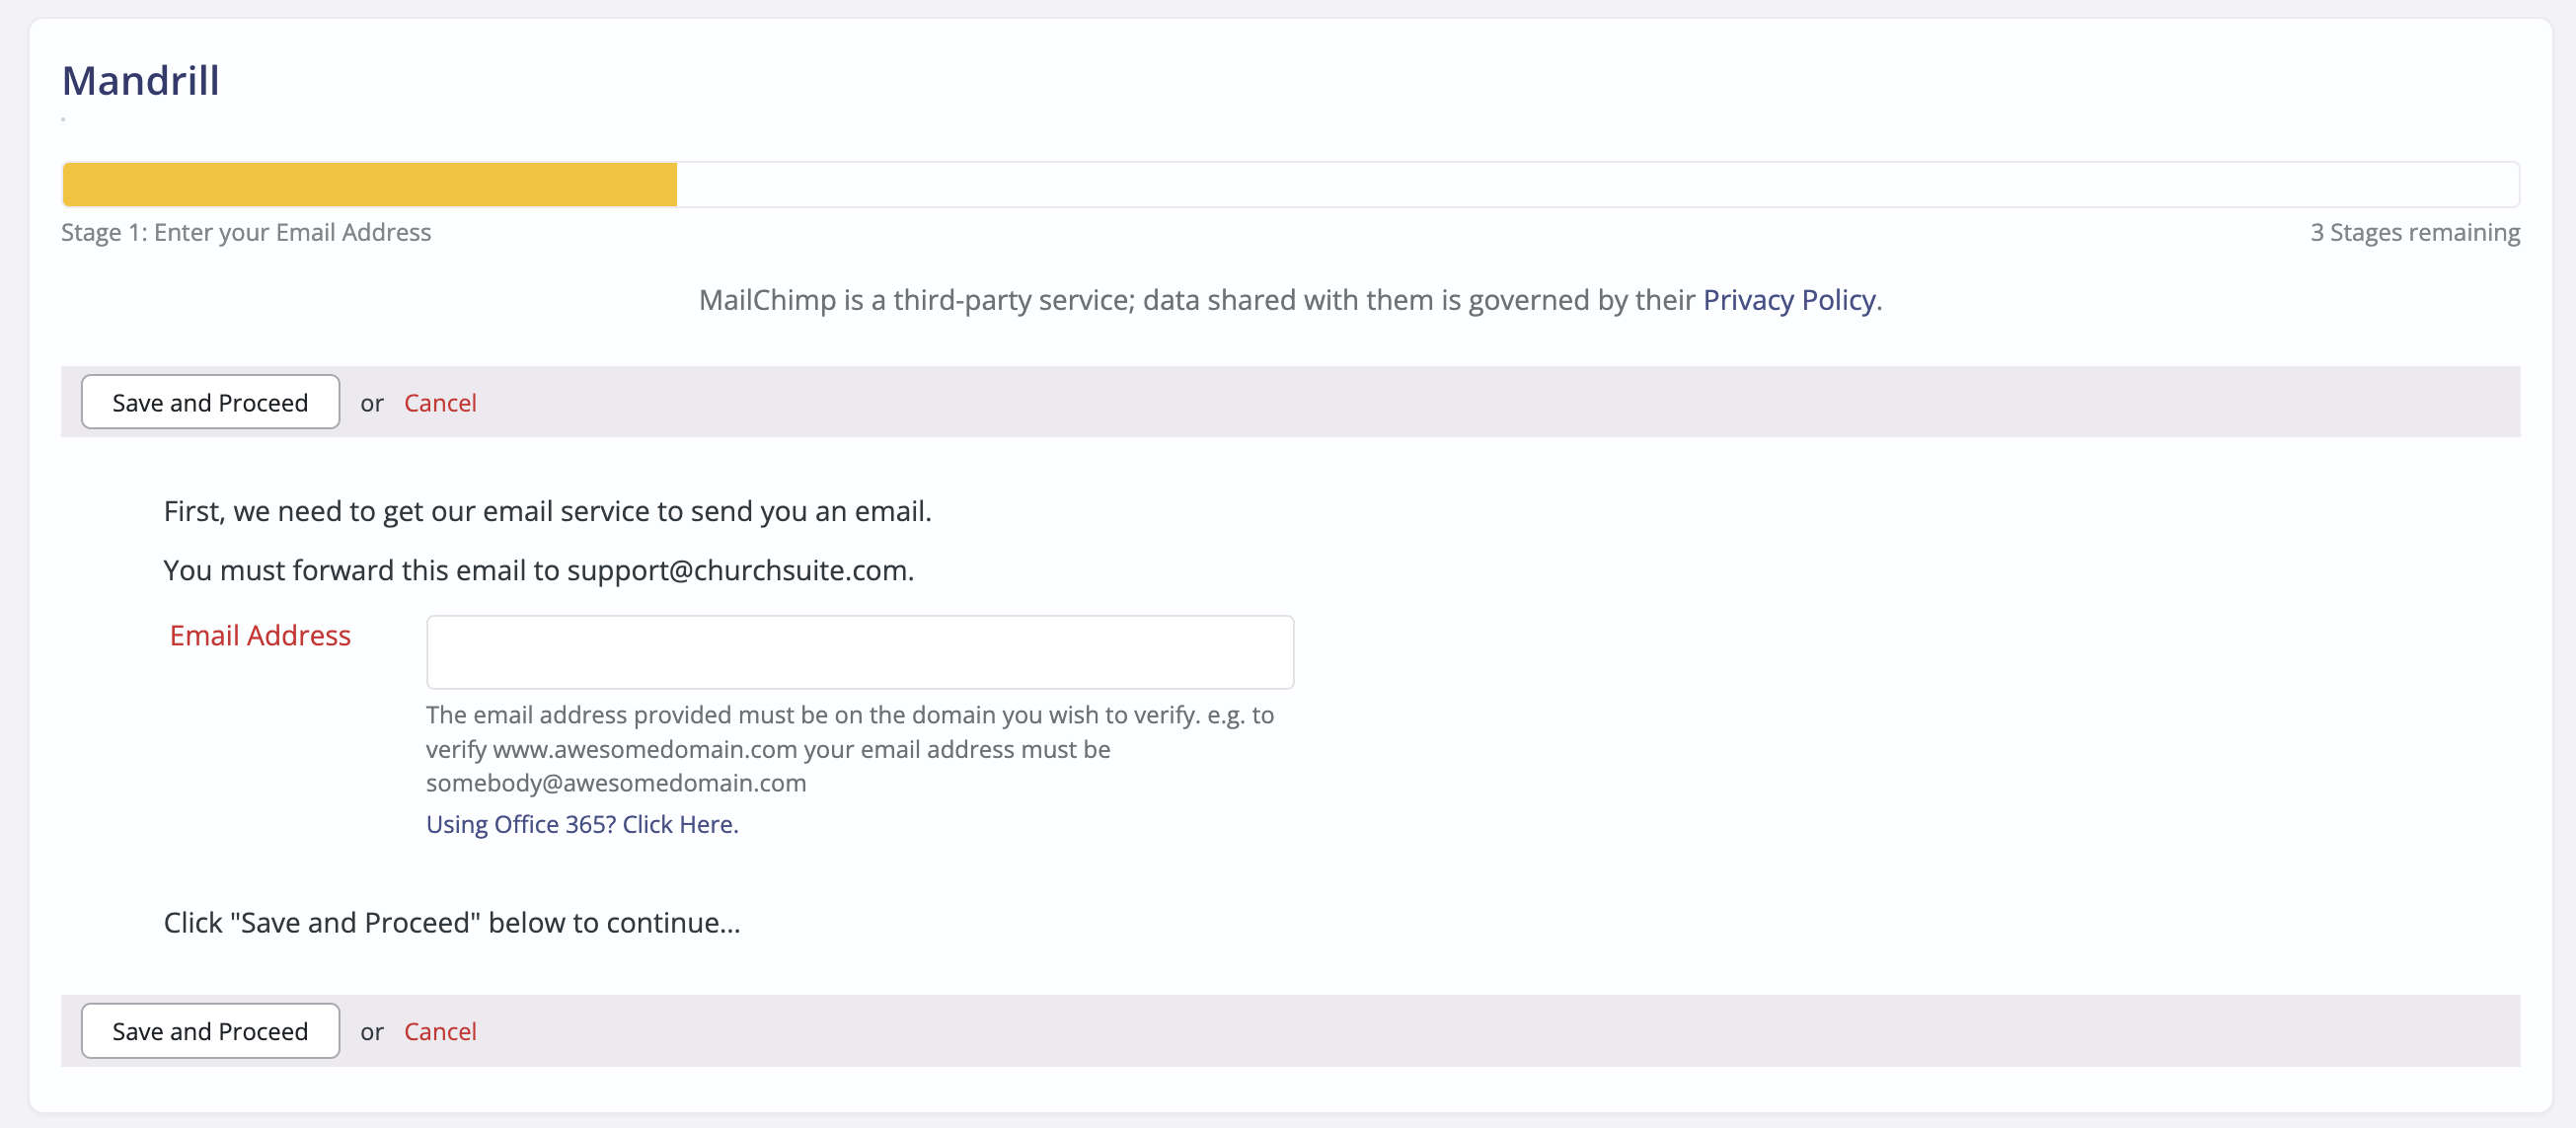
Stage 1 - Enter your email address
Begin by entering a valid Email Address for the domain being verified. Click Save and Proceed. Now check your email inbox - Mandrill Client Services sends a domain verification email that must now be forwarded to us at support@churchsuite.com so that we can verify your domain name with Mandrill - the content of that email is not something that you can action. If the email doesn't arrive, check your spam folder - the email comes from help@mandrill.com. Each Mandrill verification email causes all previously requested emails to expire, so you must send us the latest email version that you receive.
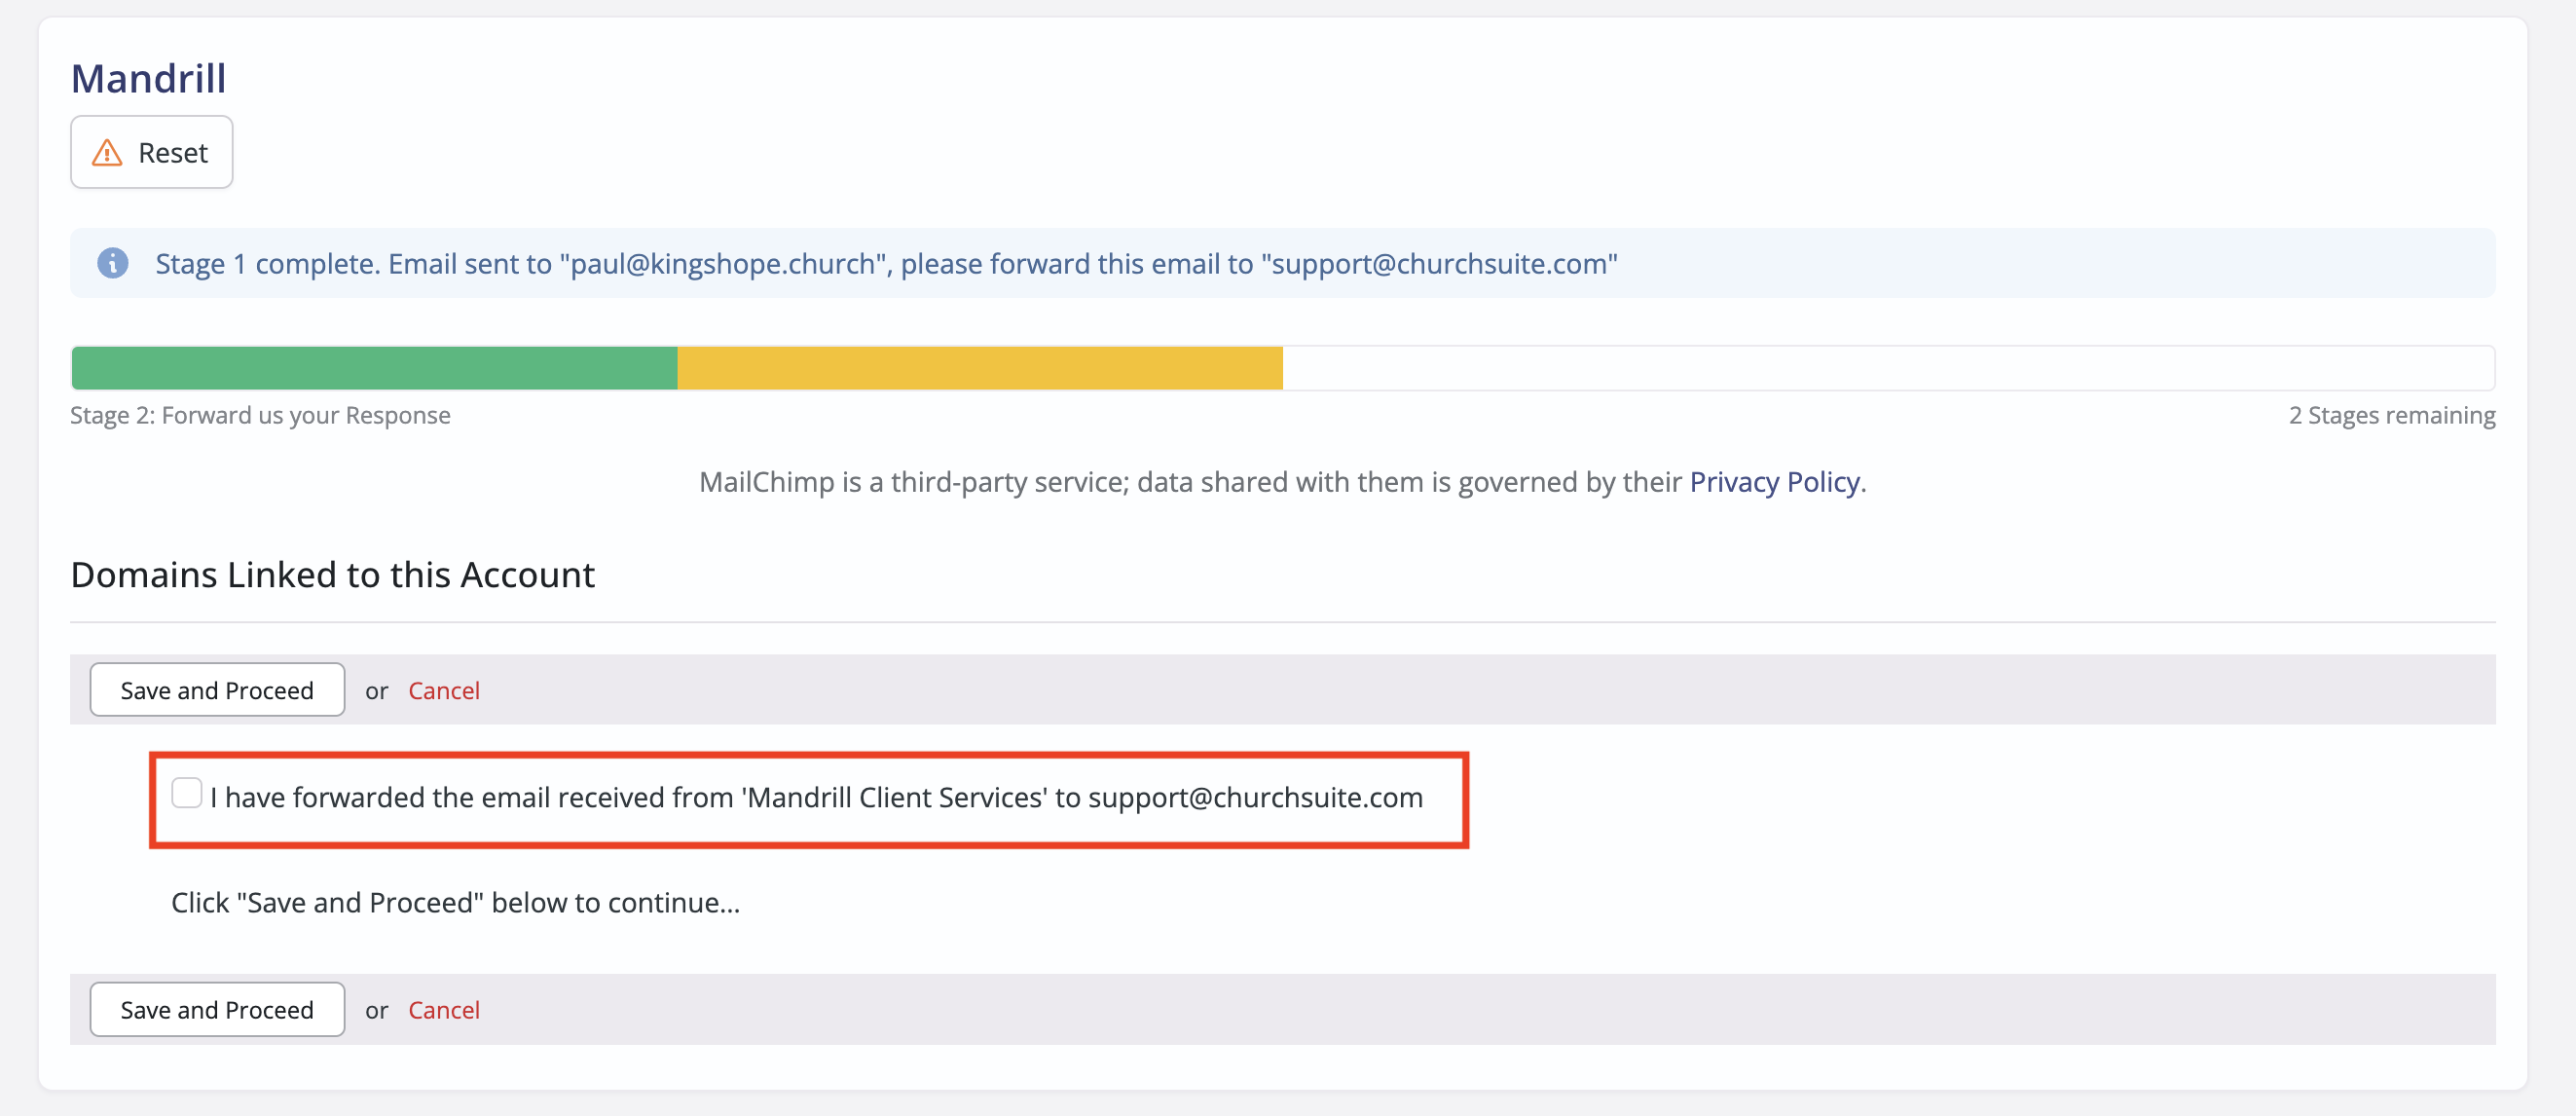
Stage 2 - Forward your Mandrill email to ChurchSuite Support
This stage involves confirming that you have forwarded the Mandrill Client Services email to ChurchSuite Support. Once we receive that email and process it, we'll send a confirmation email to you confirming that you can proceed to the final stage. You can now tick the box in Stage 2 and click Save and Proceed.
Stage 3 - Configure the DKIM and DMARC records in your DNS settings
This stage can be trickier as it requires a little technical know-how and access to the DNS settings for your domain - typically accessed through some sort of control panel or dashboard. Essentially, you are going to add three new text records (TXT) to your DNS. Once logged in to your domain provider account, navigate to the advanced DNS settings. Follow your domain host's instructions for adding the following two DNS records. Your domain host will provide support articles on how to add DNS records; alternatively, you may wish to reach out to their online support for help with this.
Add the DKIM and DMARC records as shown on the integration page (like this example):

DNS changes can sometimes take a few hours to propagate. However, if you've done everything correctly, the Mandrill integration will show four green ticks, and the progress bar will be 100% green. You can safely navigate away from the page—you're all done, and your domain has been verified!
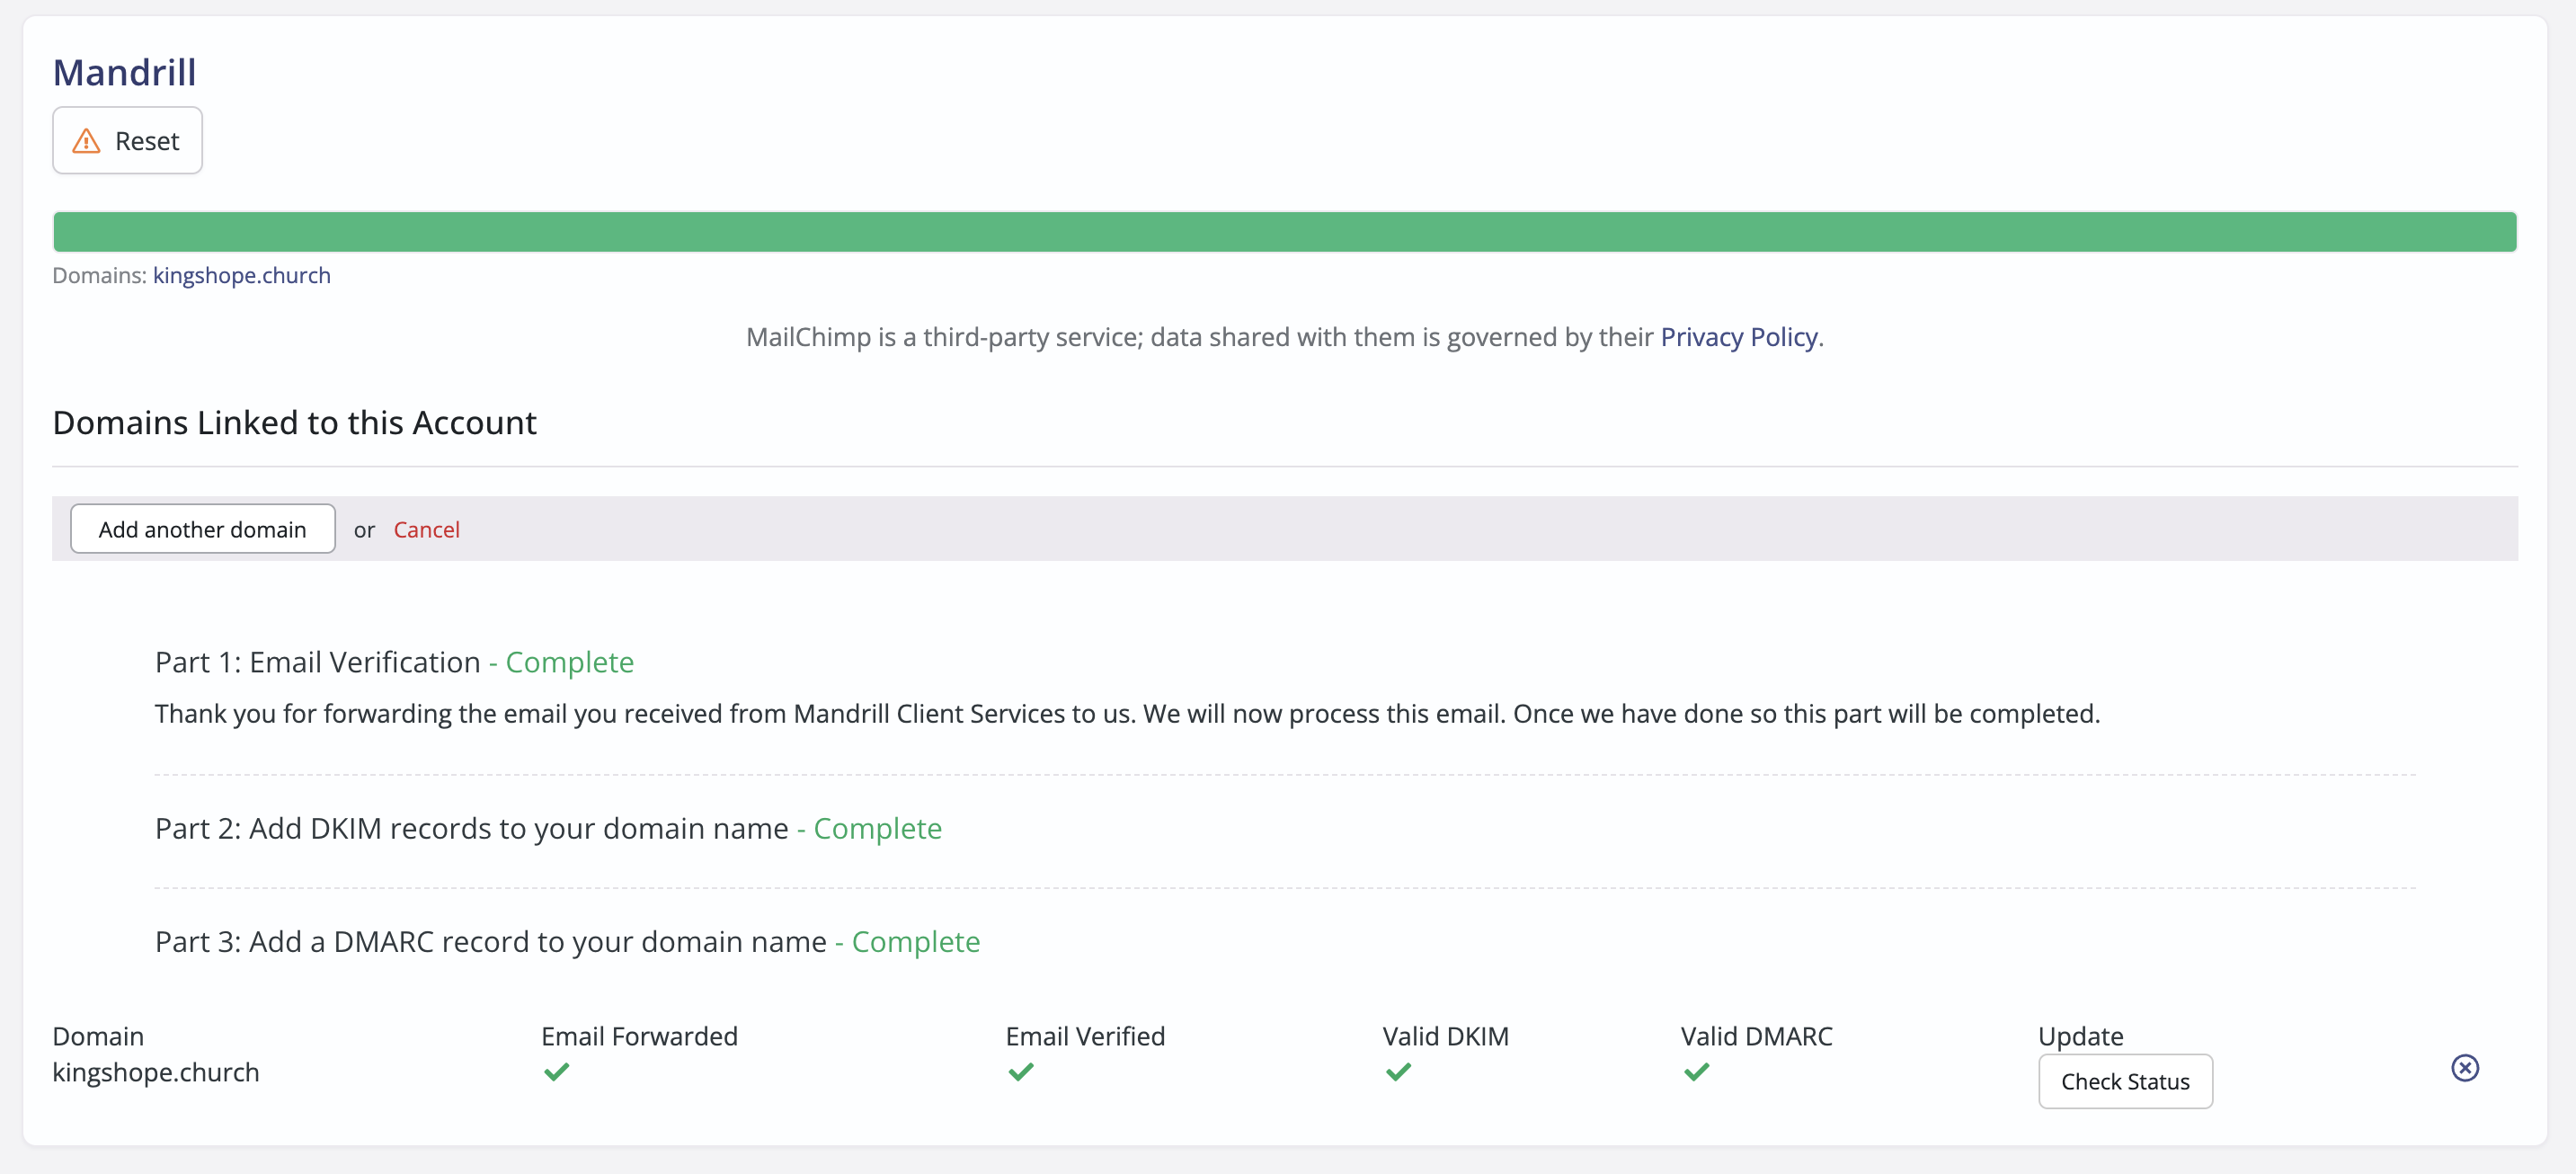
If you have more than one domain to verify - perhaps because your organisation sends emails through more than one email domain name - you can click Add another domain and repeat Stage 1. ChurchSuite tracks the progress of each domain's verification through each stage.