Plan templates
Many churches use the Planning module to plan the same or similar events and services that happen repeatedly. For instance, you might produce plans for weekly weekend services that follow a similar pattern or order of service each week, or perhaps you produce plans for the various Alpha Course or Marriage Course sessions you periodically run, or maybe the plans are for life events like weddings and funerals, where the content is mostly unchanged.
By creating plan Templates for each of these use cases - and many others besides - you can produce plans much more quickly, with all of the standard plan content and "plan people" rota linking pre-populated, meaning that you only need to add the plan-specific details, perhaps songs and announcements.
Creating a template from an existing plan
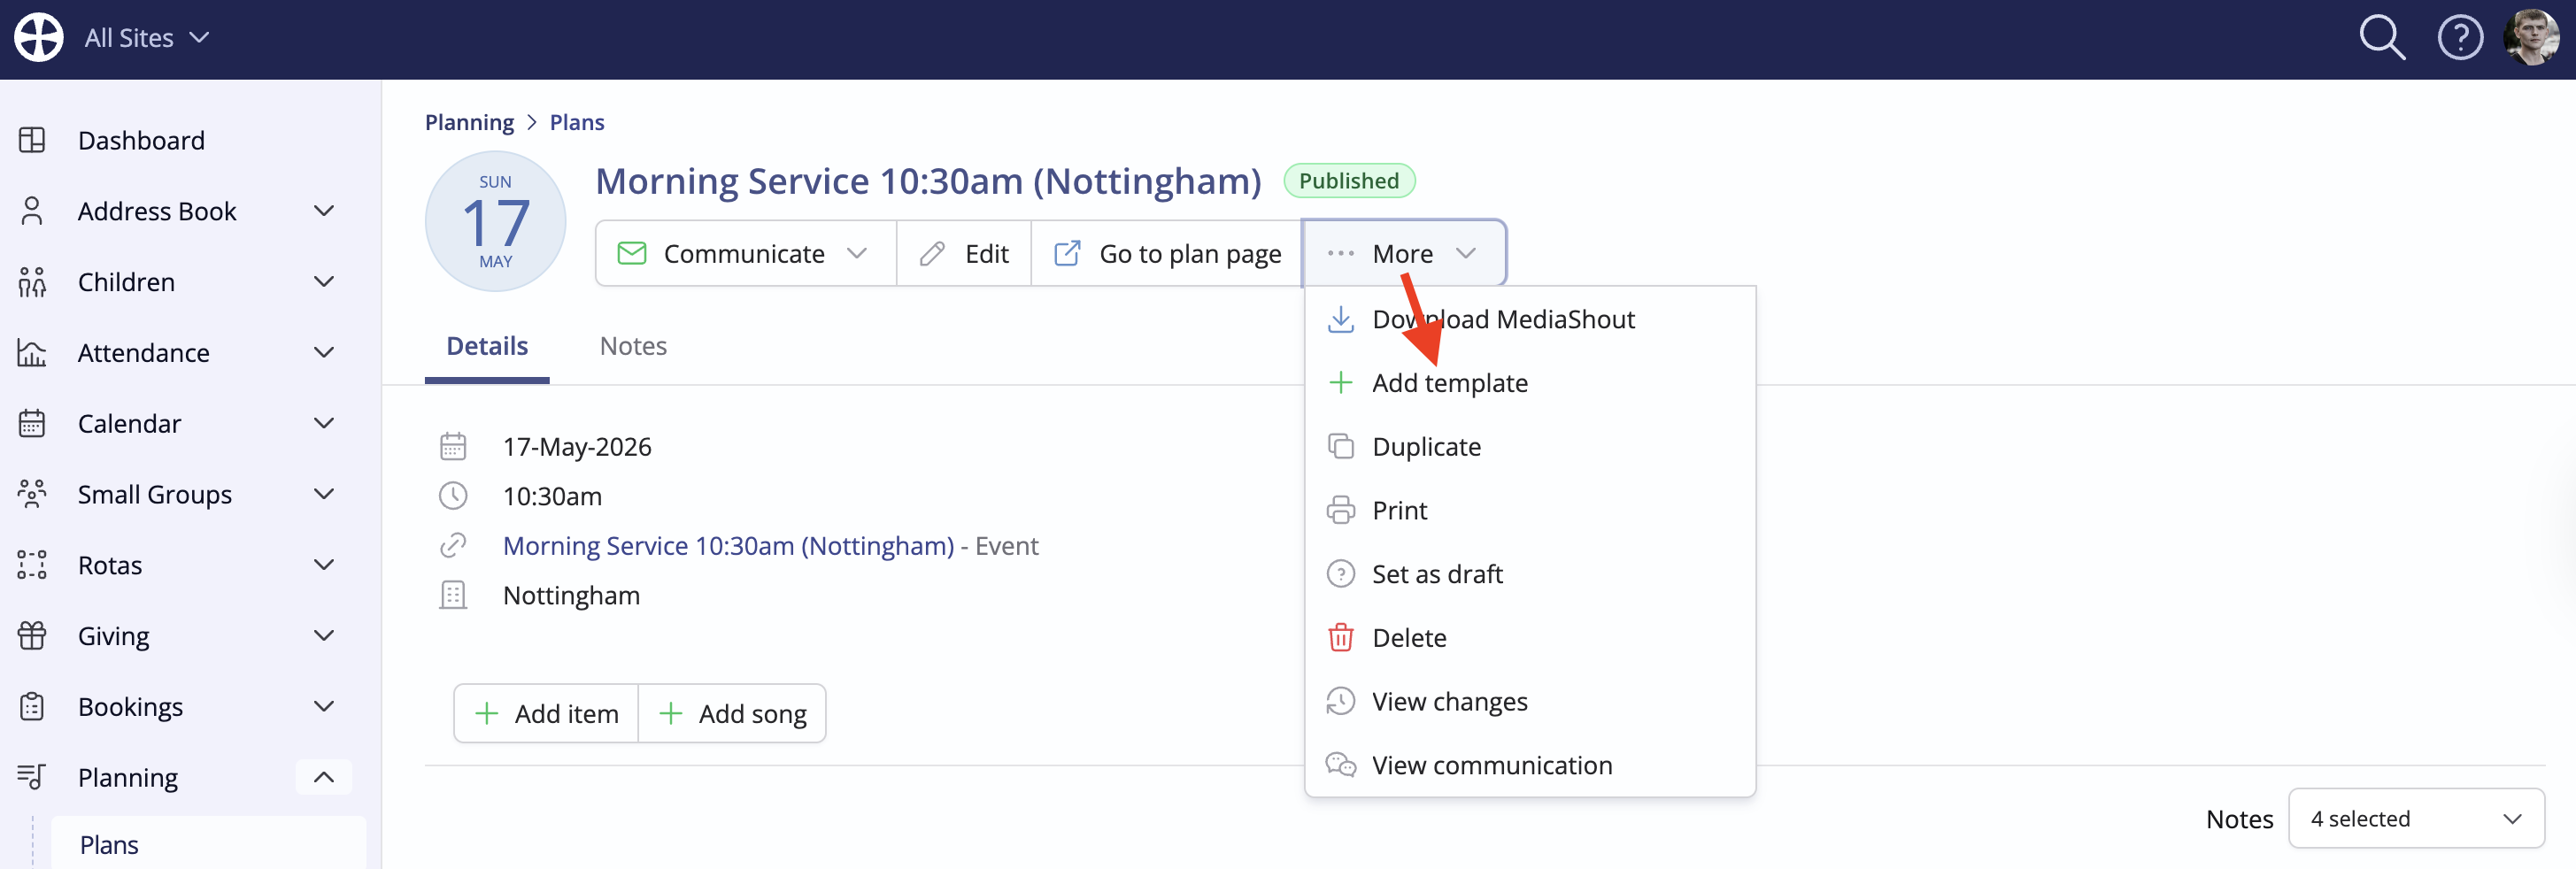
It may be that you've previously created some great plans! You can maximise all the hard work by saving a plan as a Template and removing any unwanted plan items not needed for the template. Working in the Plans section of the module, click Add template from the More actions at the top of a Plan "View" page.
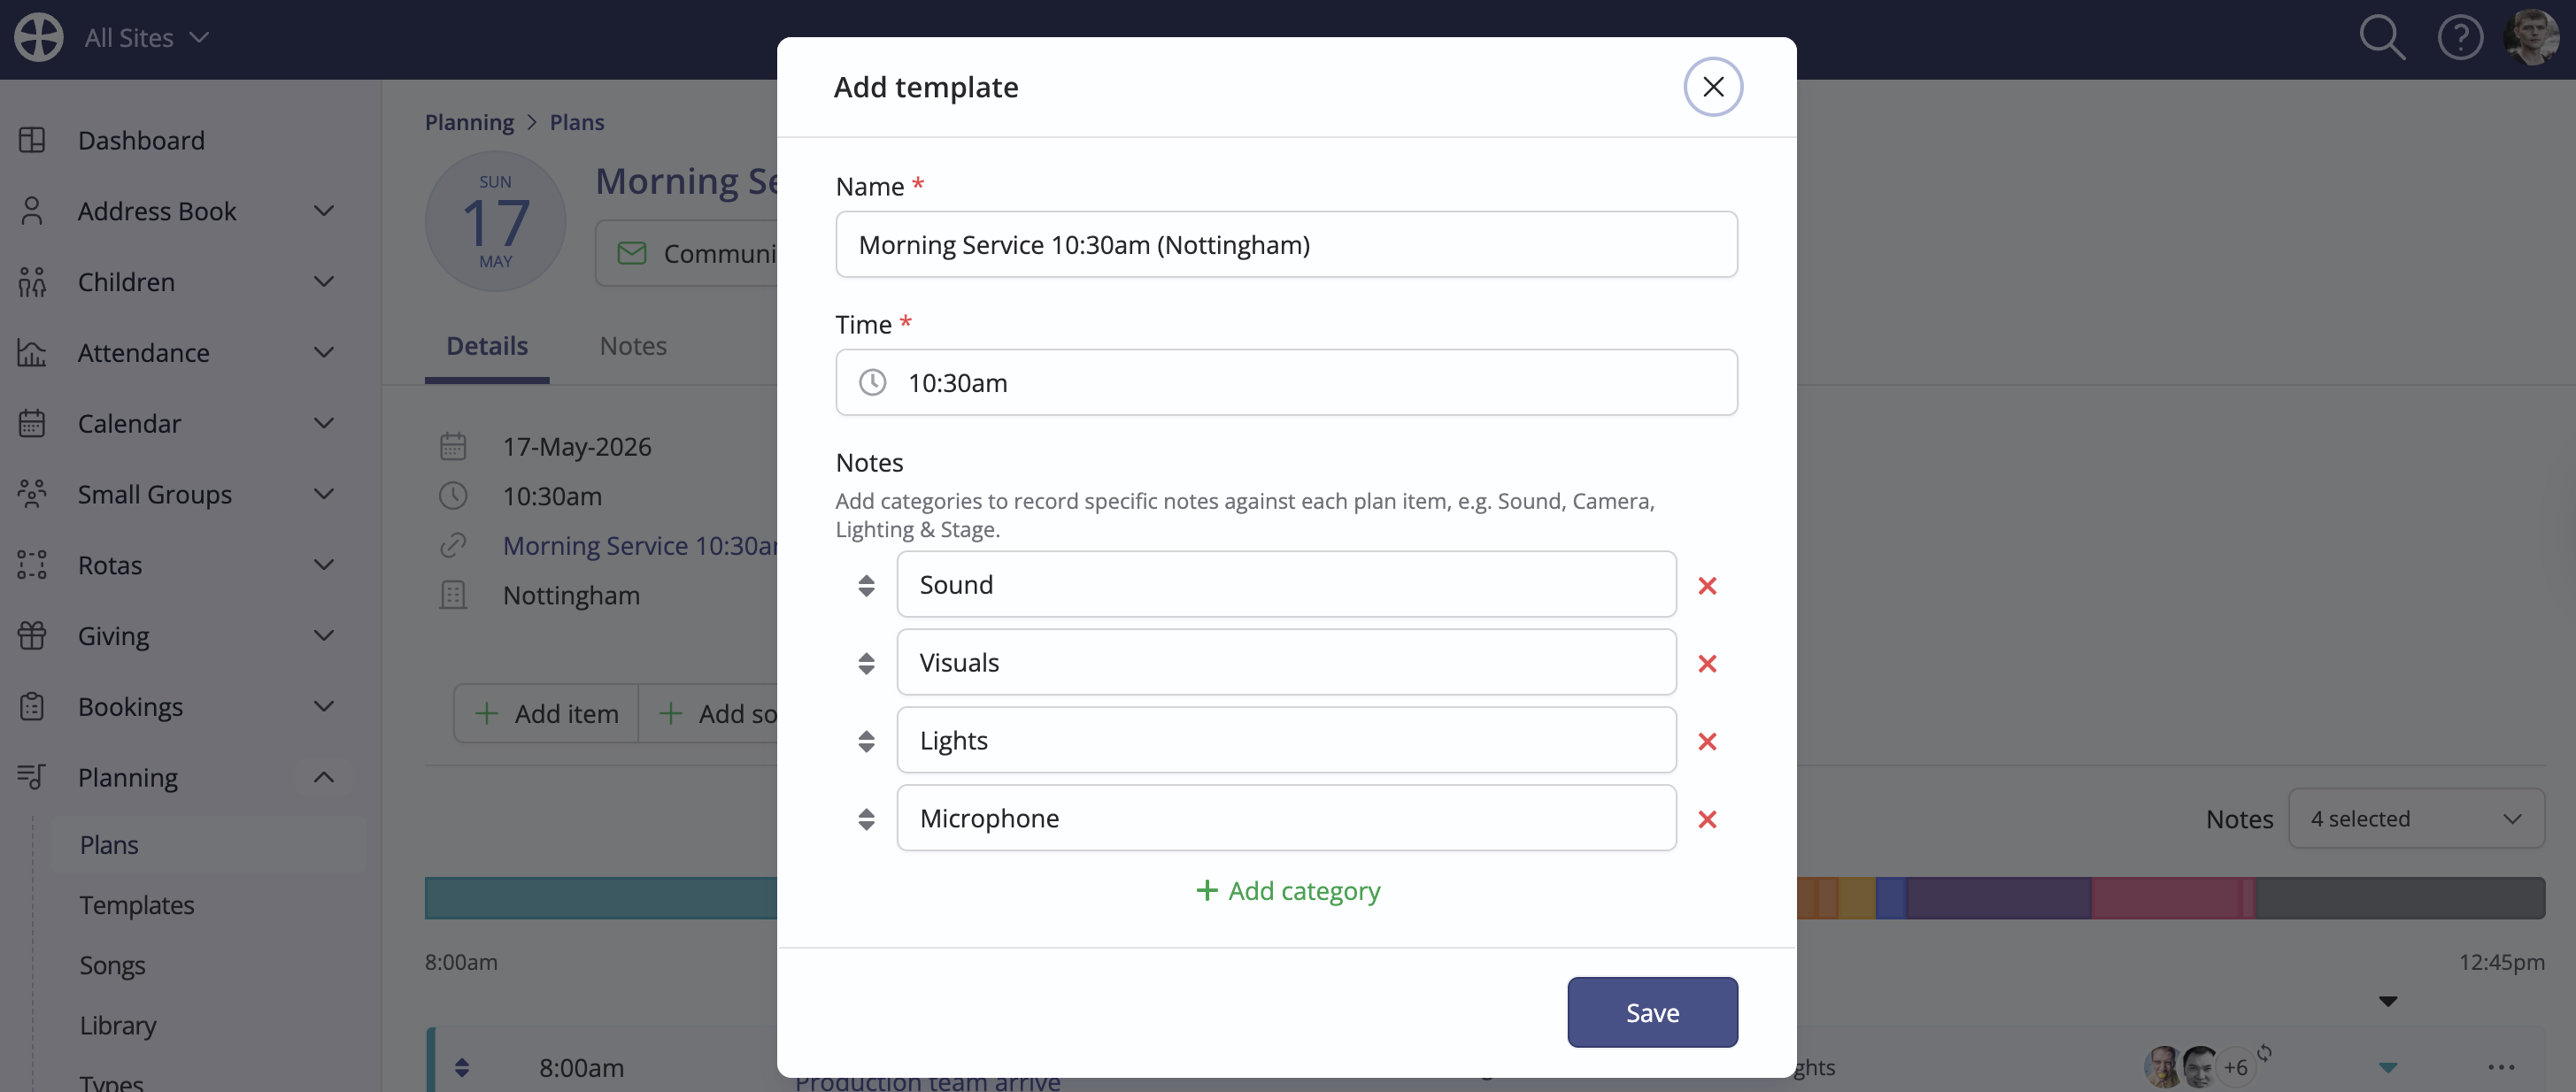
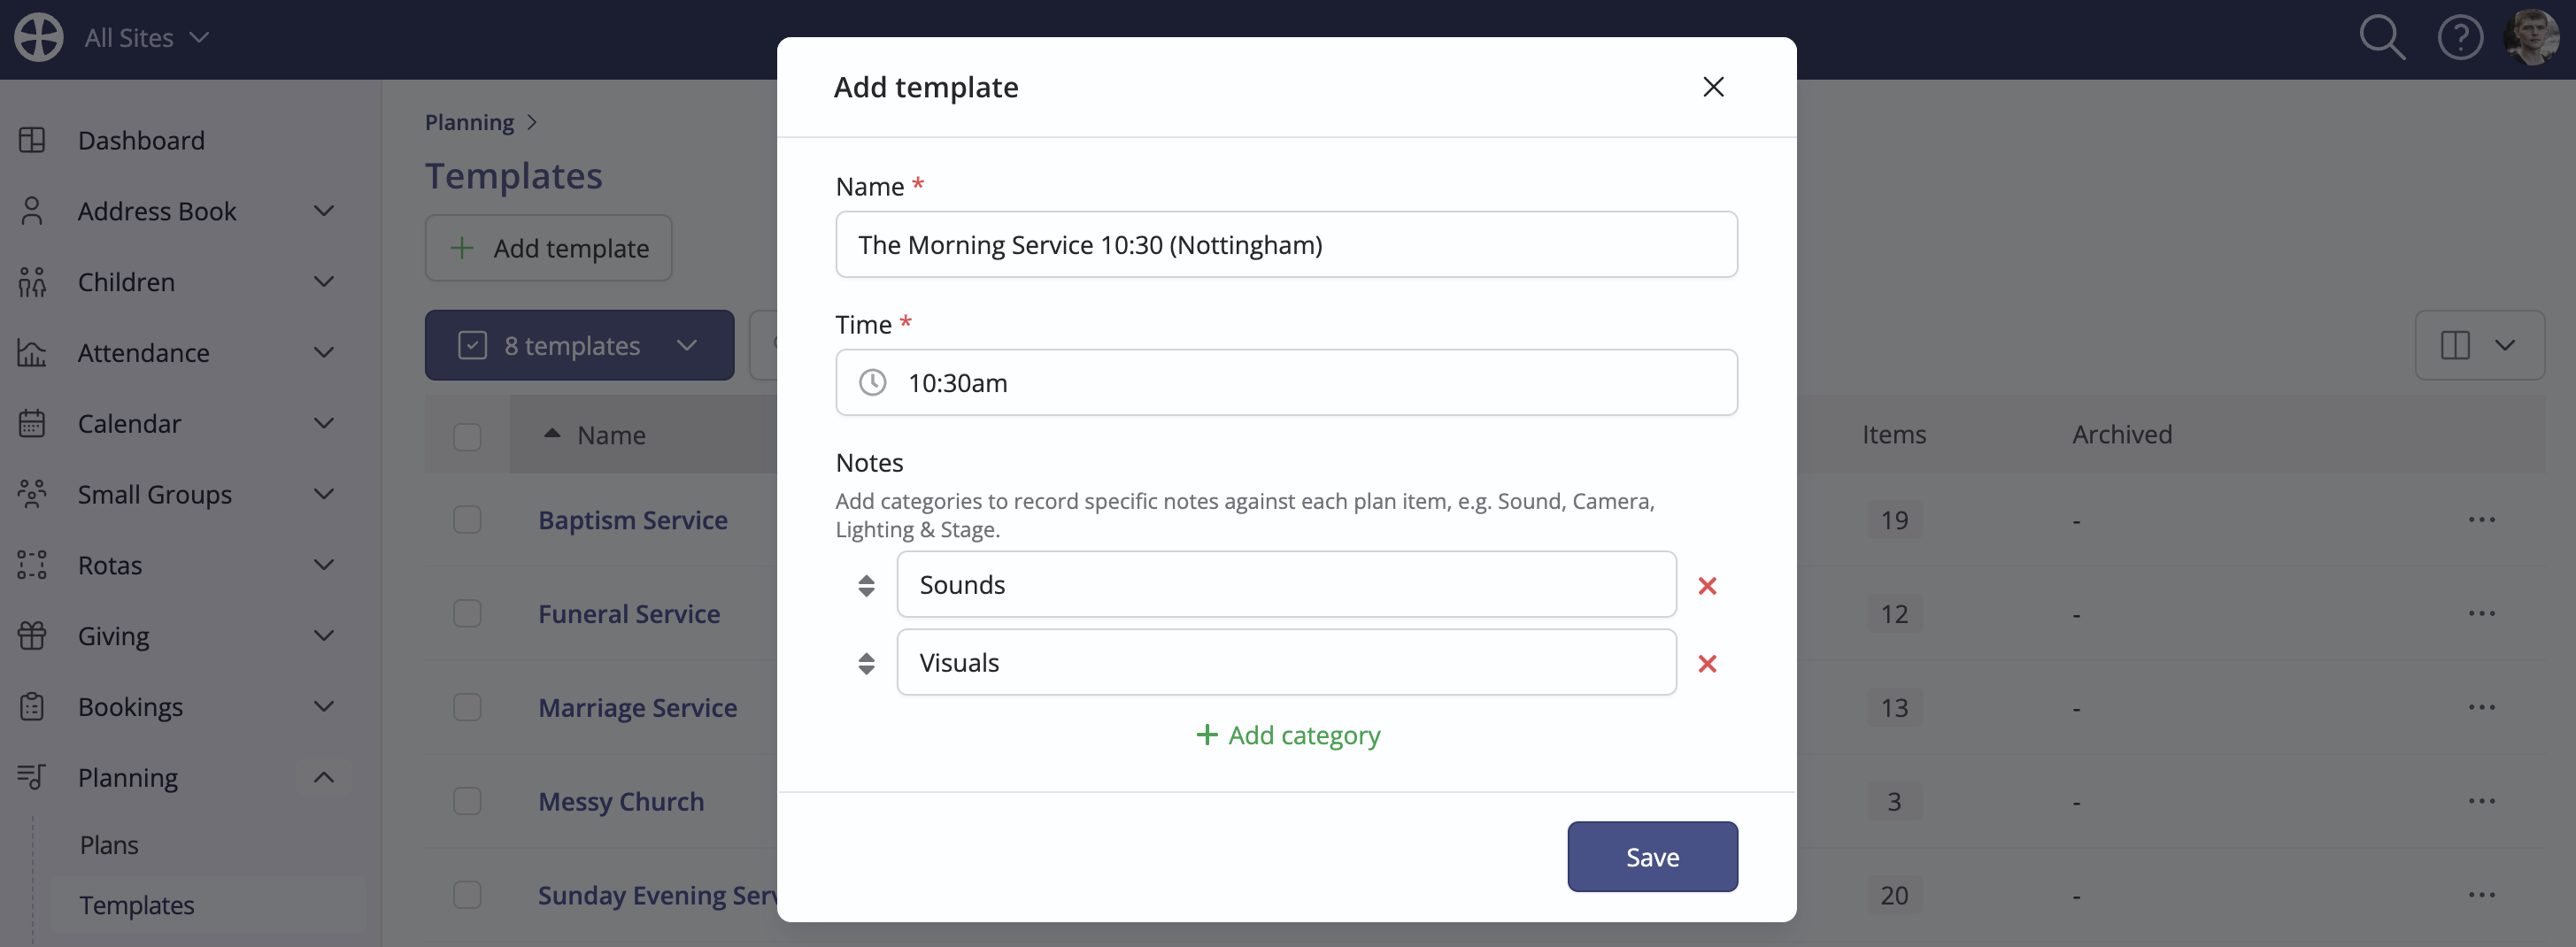
On the Add template pop-up, enter a suitable Name and set the template start Time as necessary. The plan Notes categories and the associated plan item notes are preserved on the template, but you can optionally add or remove note categories as appropriate for the template. Click Save to save the Template, which will be populated with all the same items as the original plan.
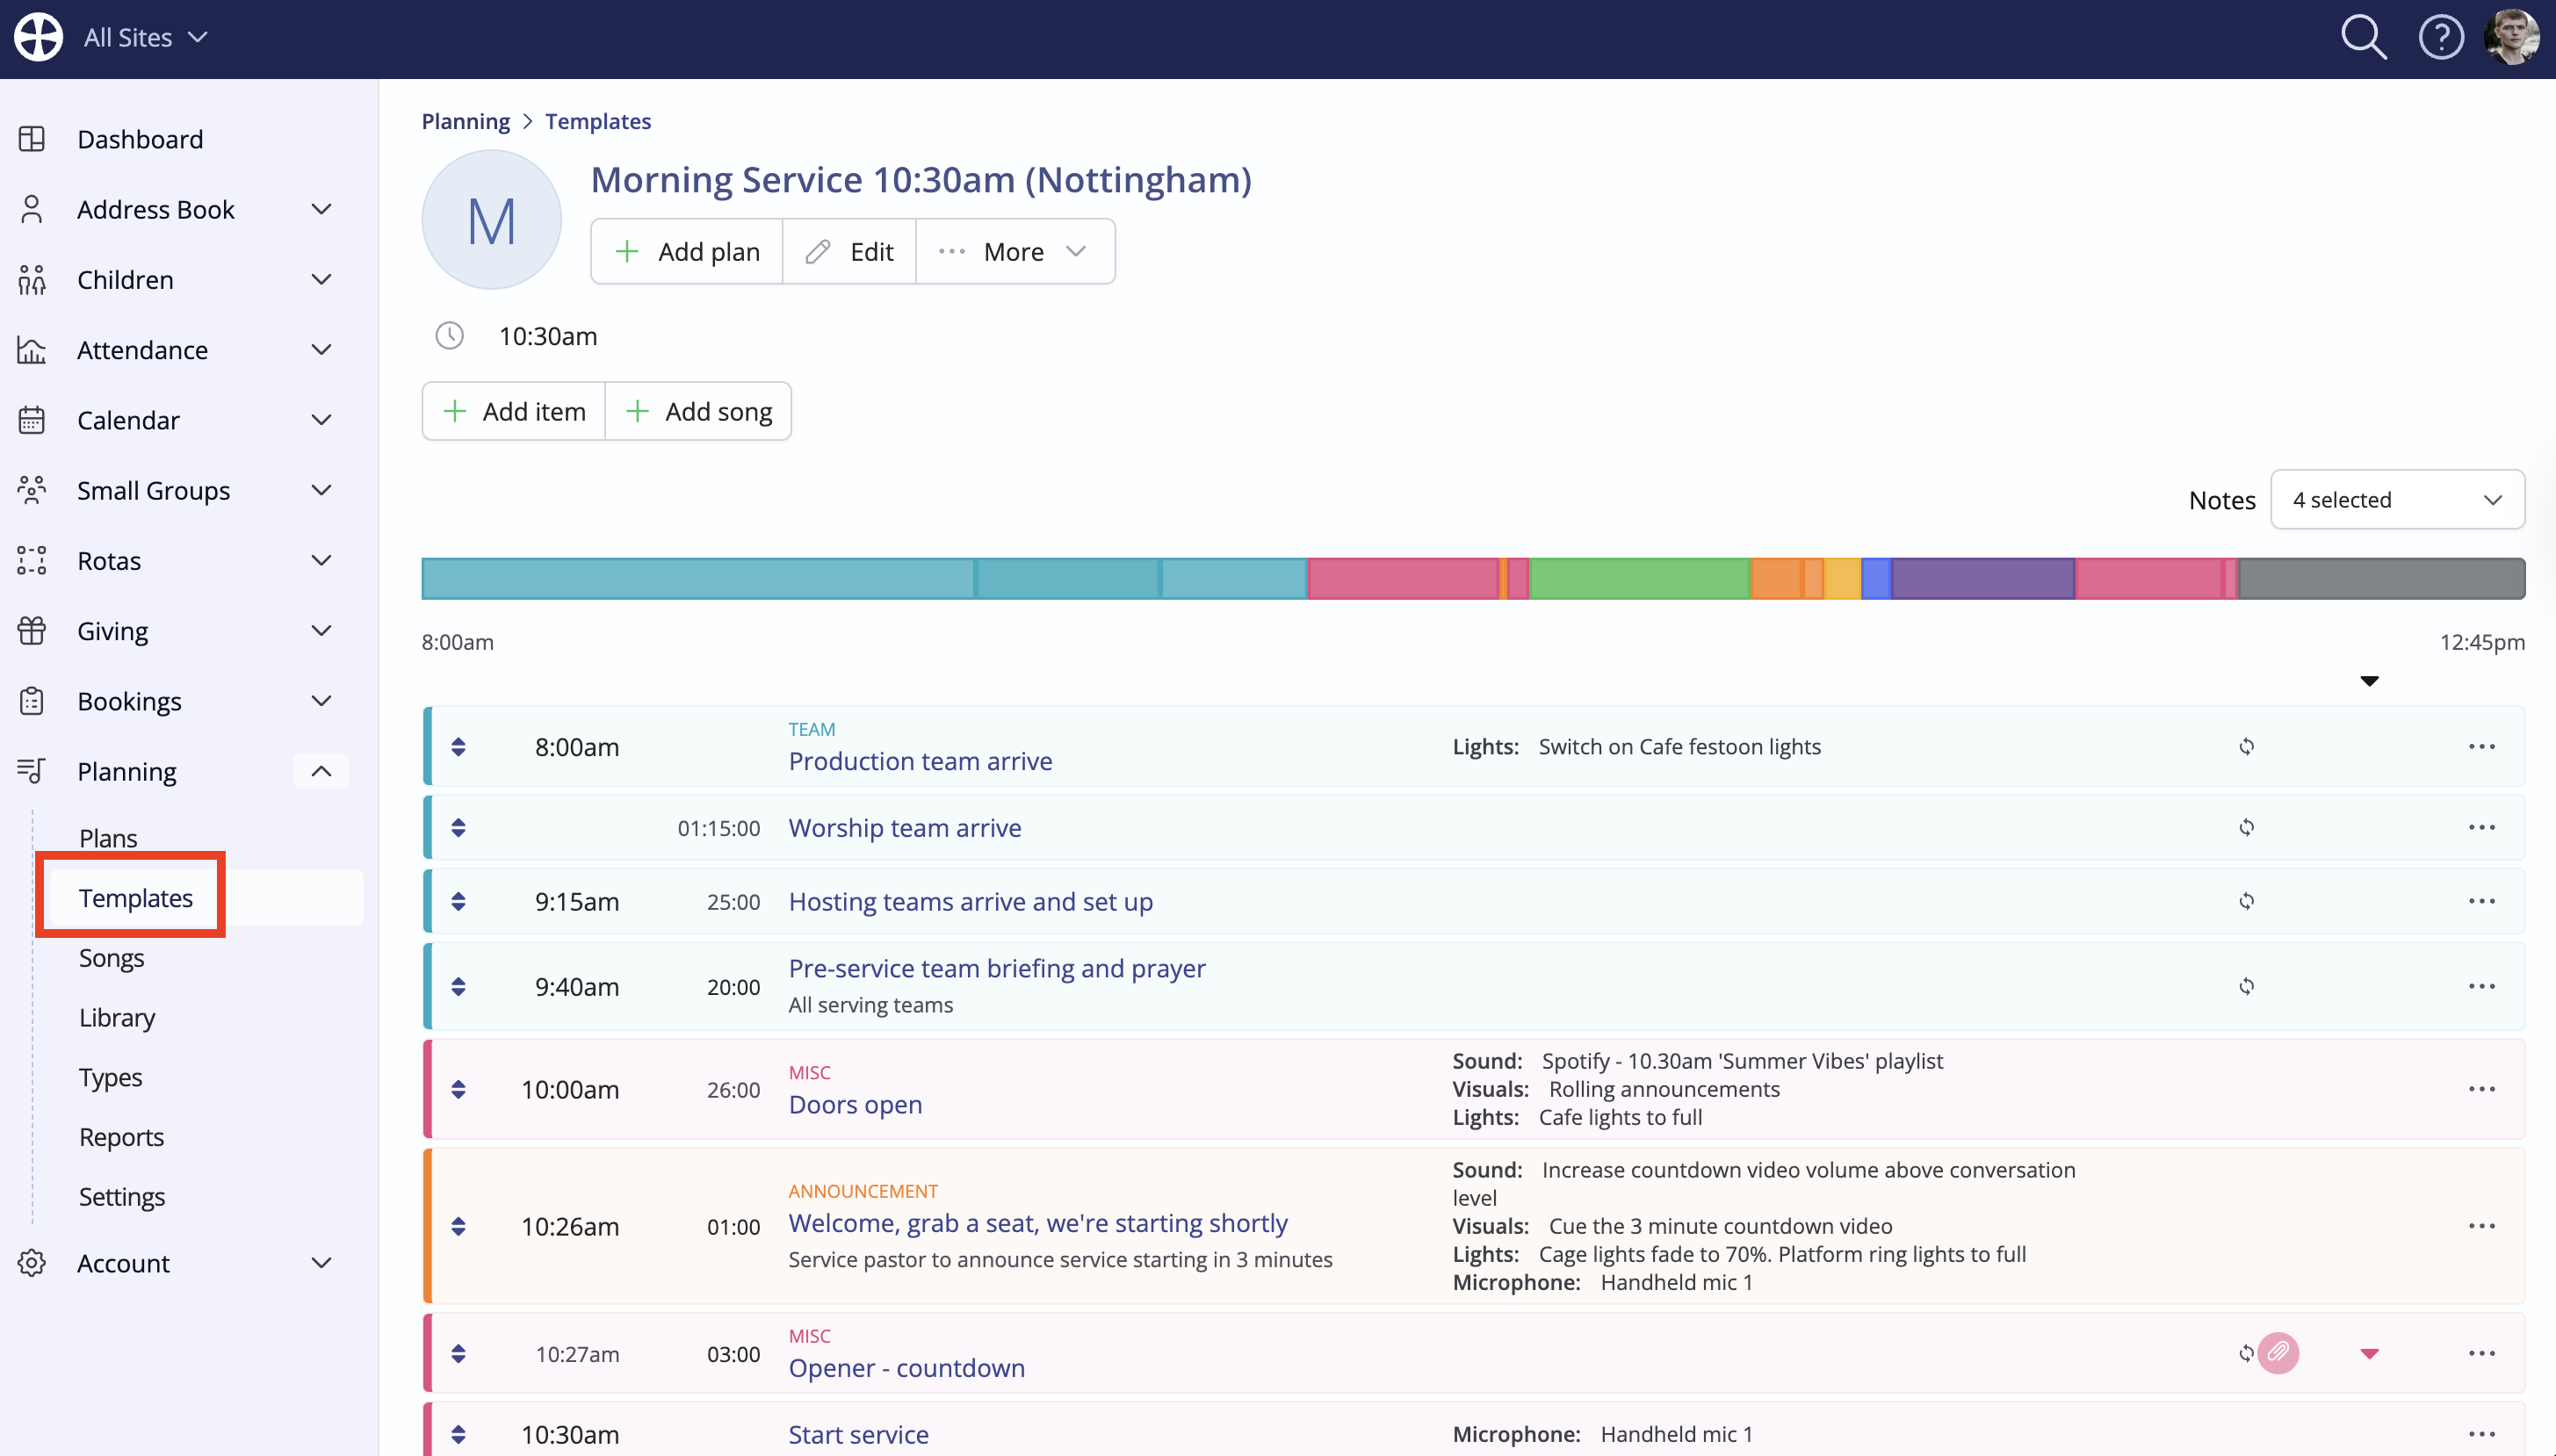
You are then redirected to the newly-added Template 'View' page - the template has been saved to the Templates section of the module. Before navigating away, take a moment to review each of the template items, removing any items that should not be part of the template or making any other applicable changes.
Creating a brand new template
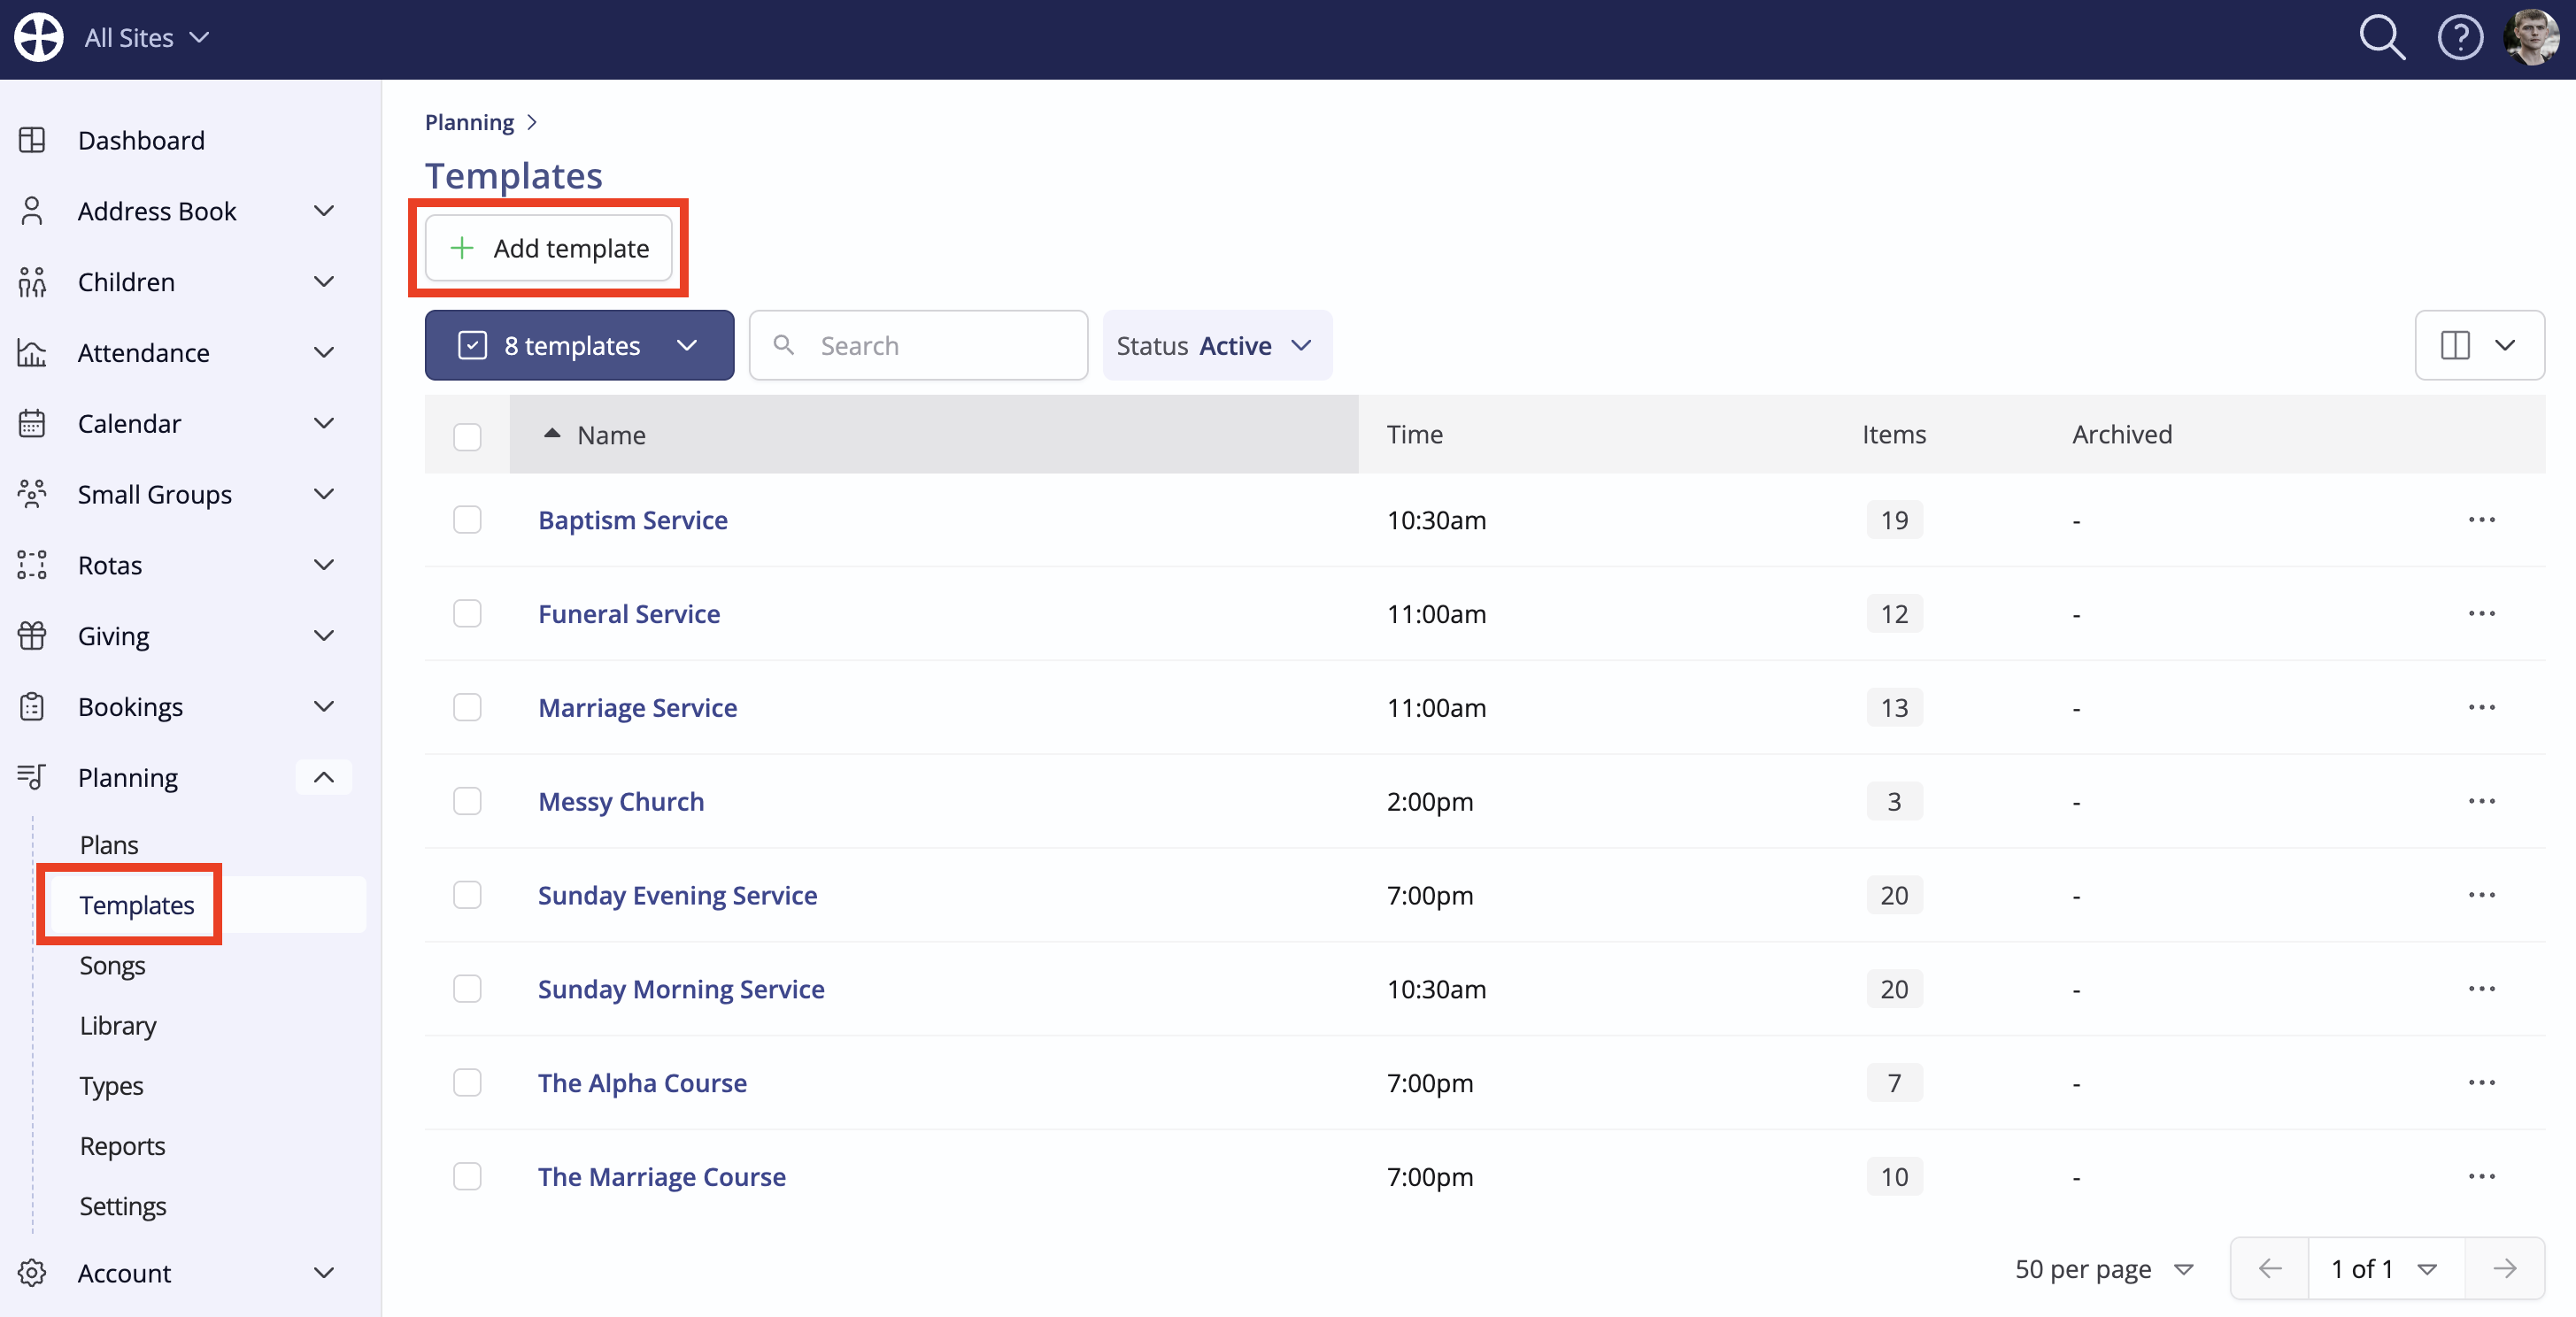
Working from the Templates section of the module, click Add template.
On the Add template pop-up, give the template a suitable Name and set the template start Time - typically, the start time of the service, event or booking. Optionally add note Categories, against which you'll later be able to add any plan-specific instructions or cues for those serving on the plan. For example, you may wish to add team-specific notes for the Sound or Visuals Team. Click Save to add the new template.
The newly-added template "View" page is shown. The process of populating template items is the same as populating plan items - clicking Add item or Add song - typically, you'll add songs later once a plan has been created from a template.

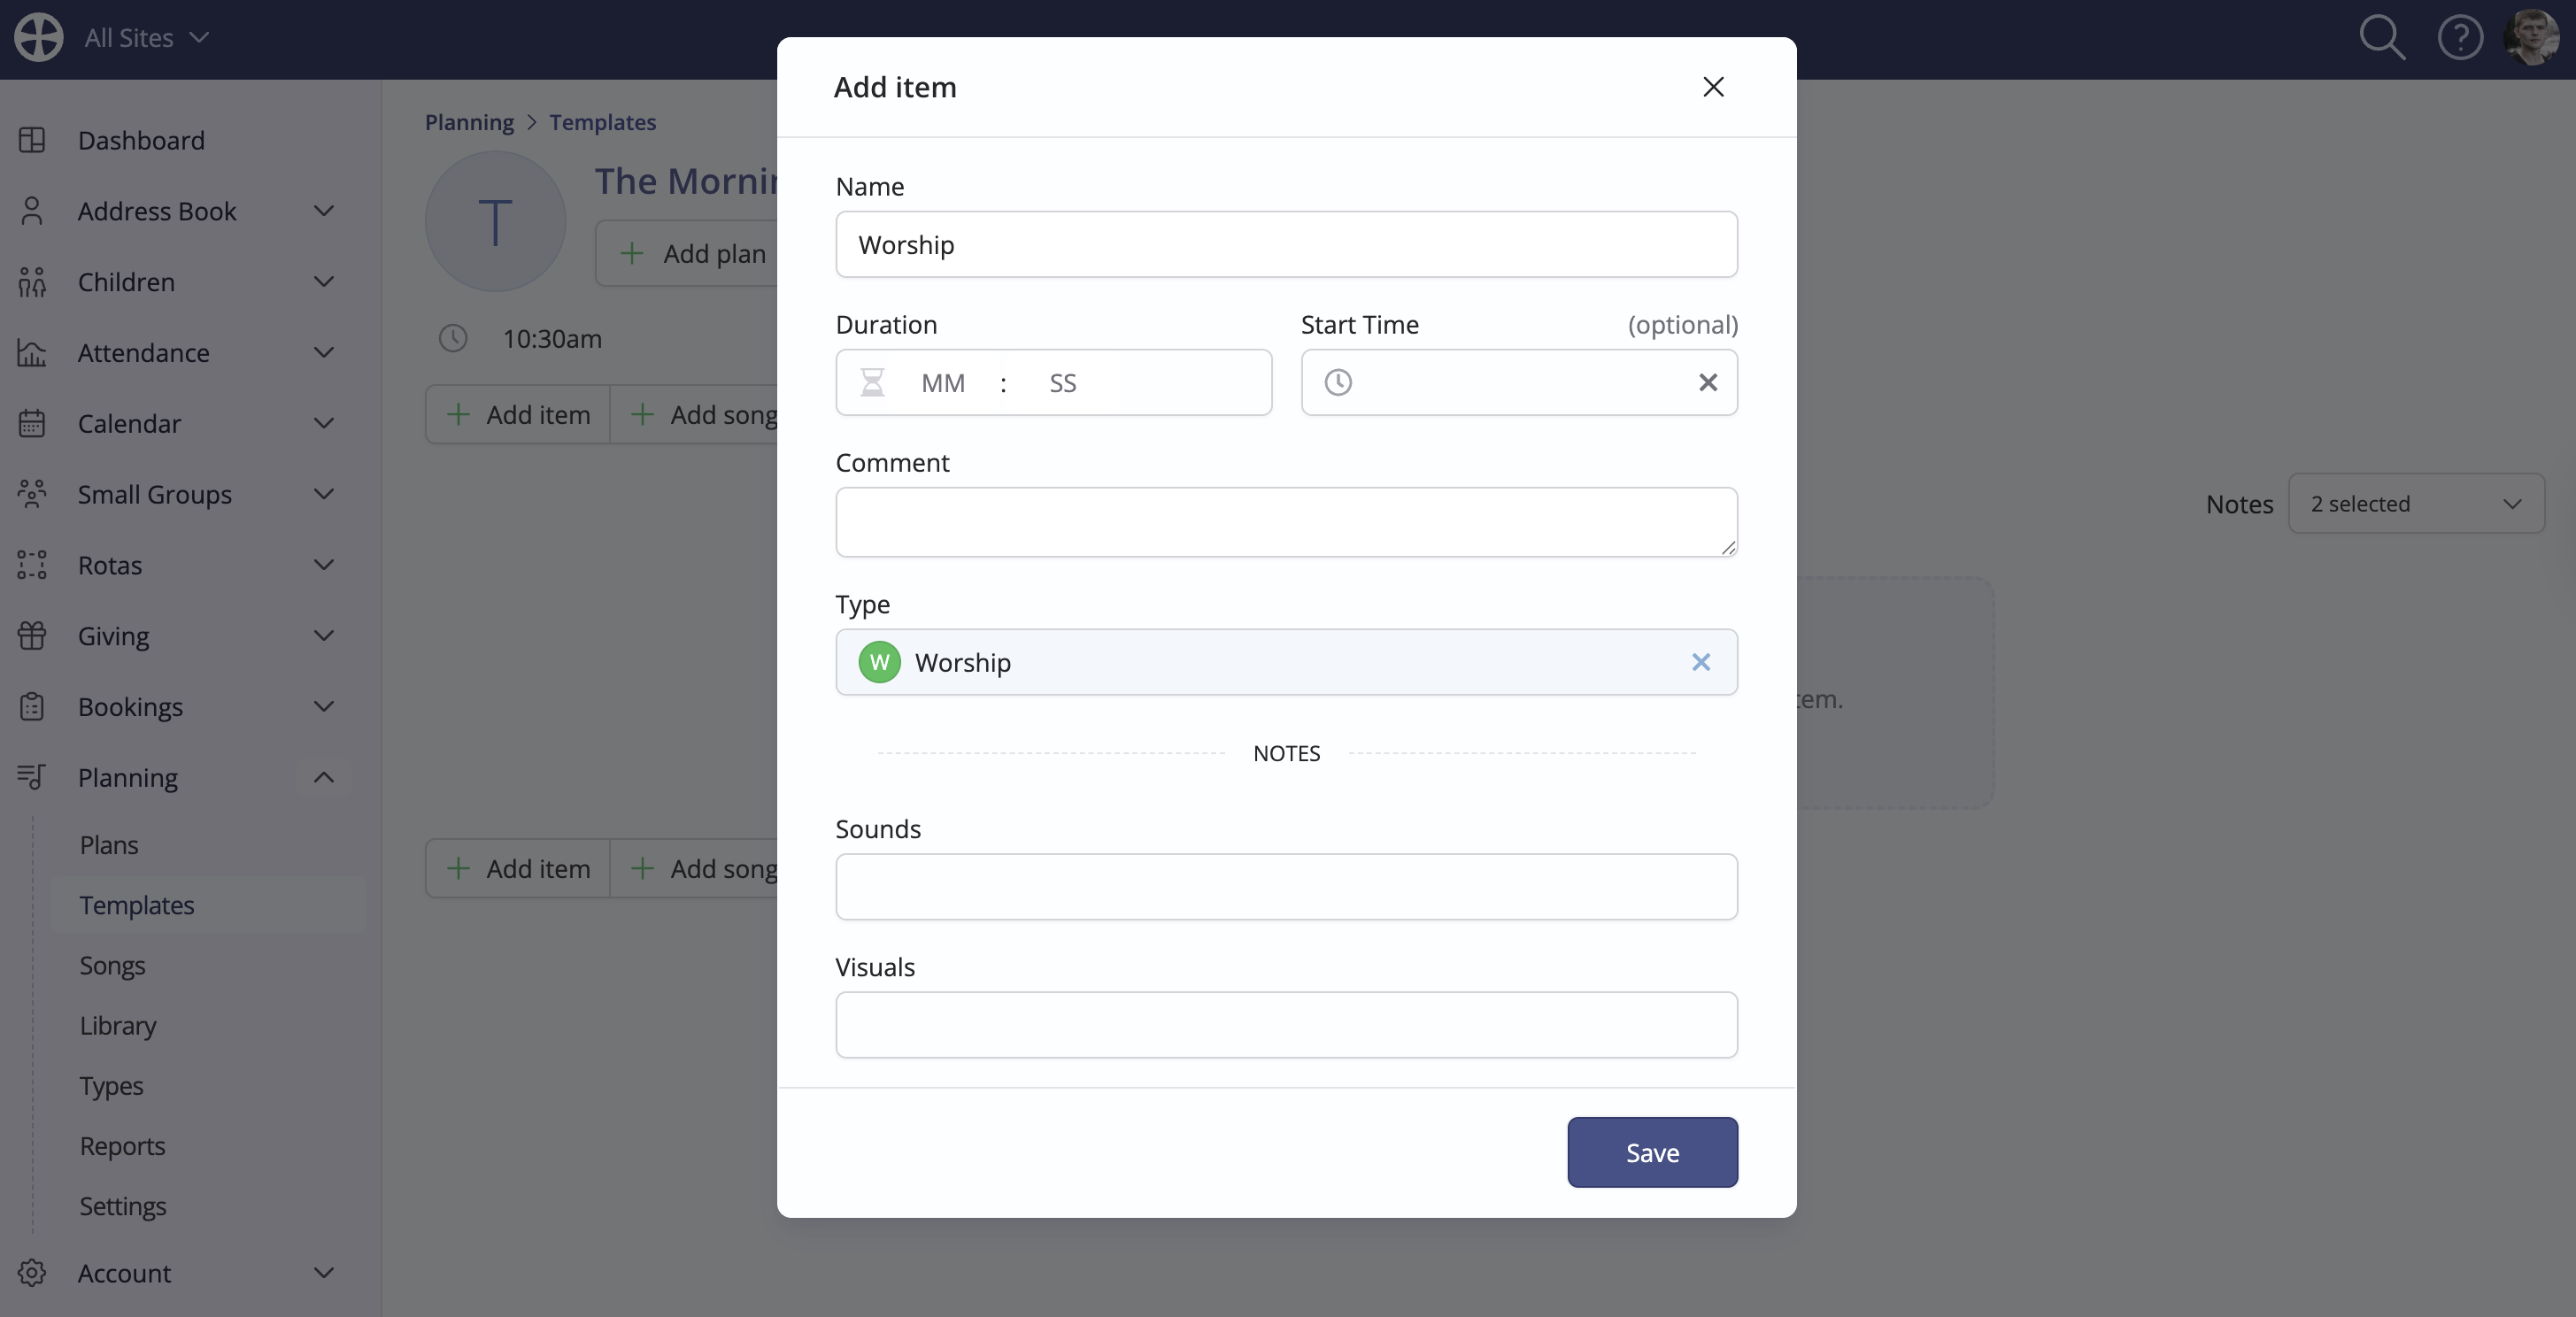
On the Add item pop-up, type the item Name. Matching suggestions from your Library are shown as you type or enter a new item name - see the related support article for further information about Managing library items. Optionally specify the item Duration - items flow from the template start time and consecutively thereafter. You can also pin certain template items to a fixed point within the order by setting the item Start Time. Optionally search and select the item Type, which determines the item colour on the template - the item Type is pre-selected for Library items.
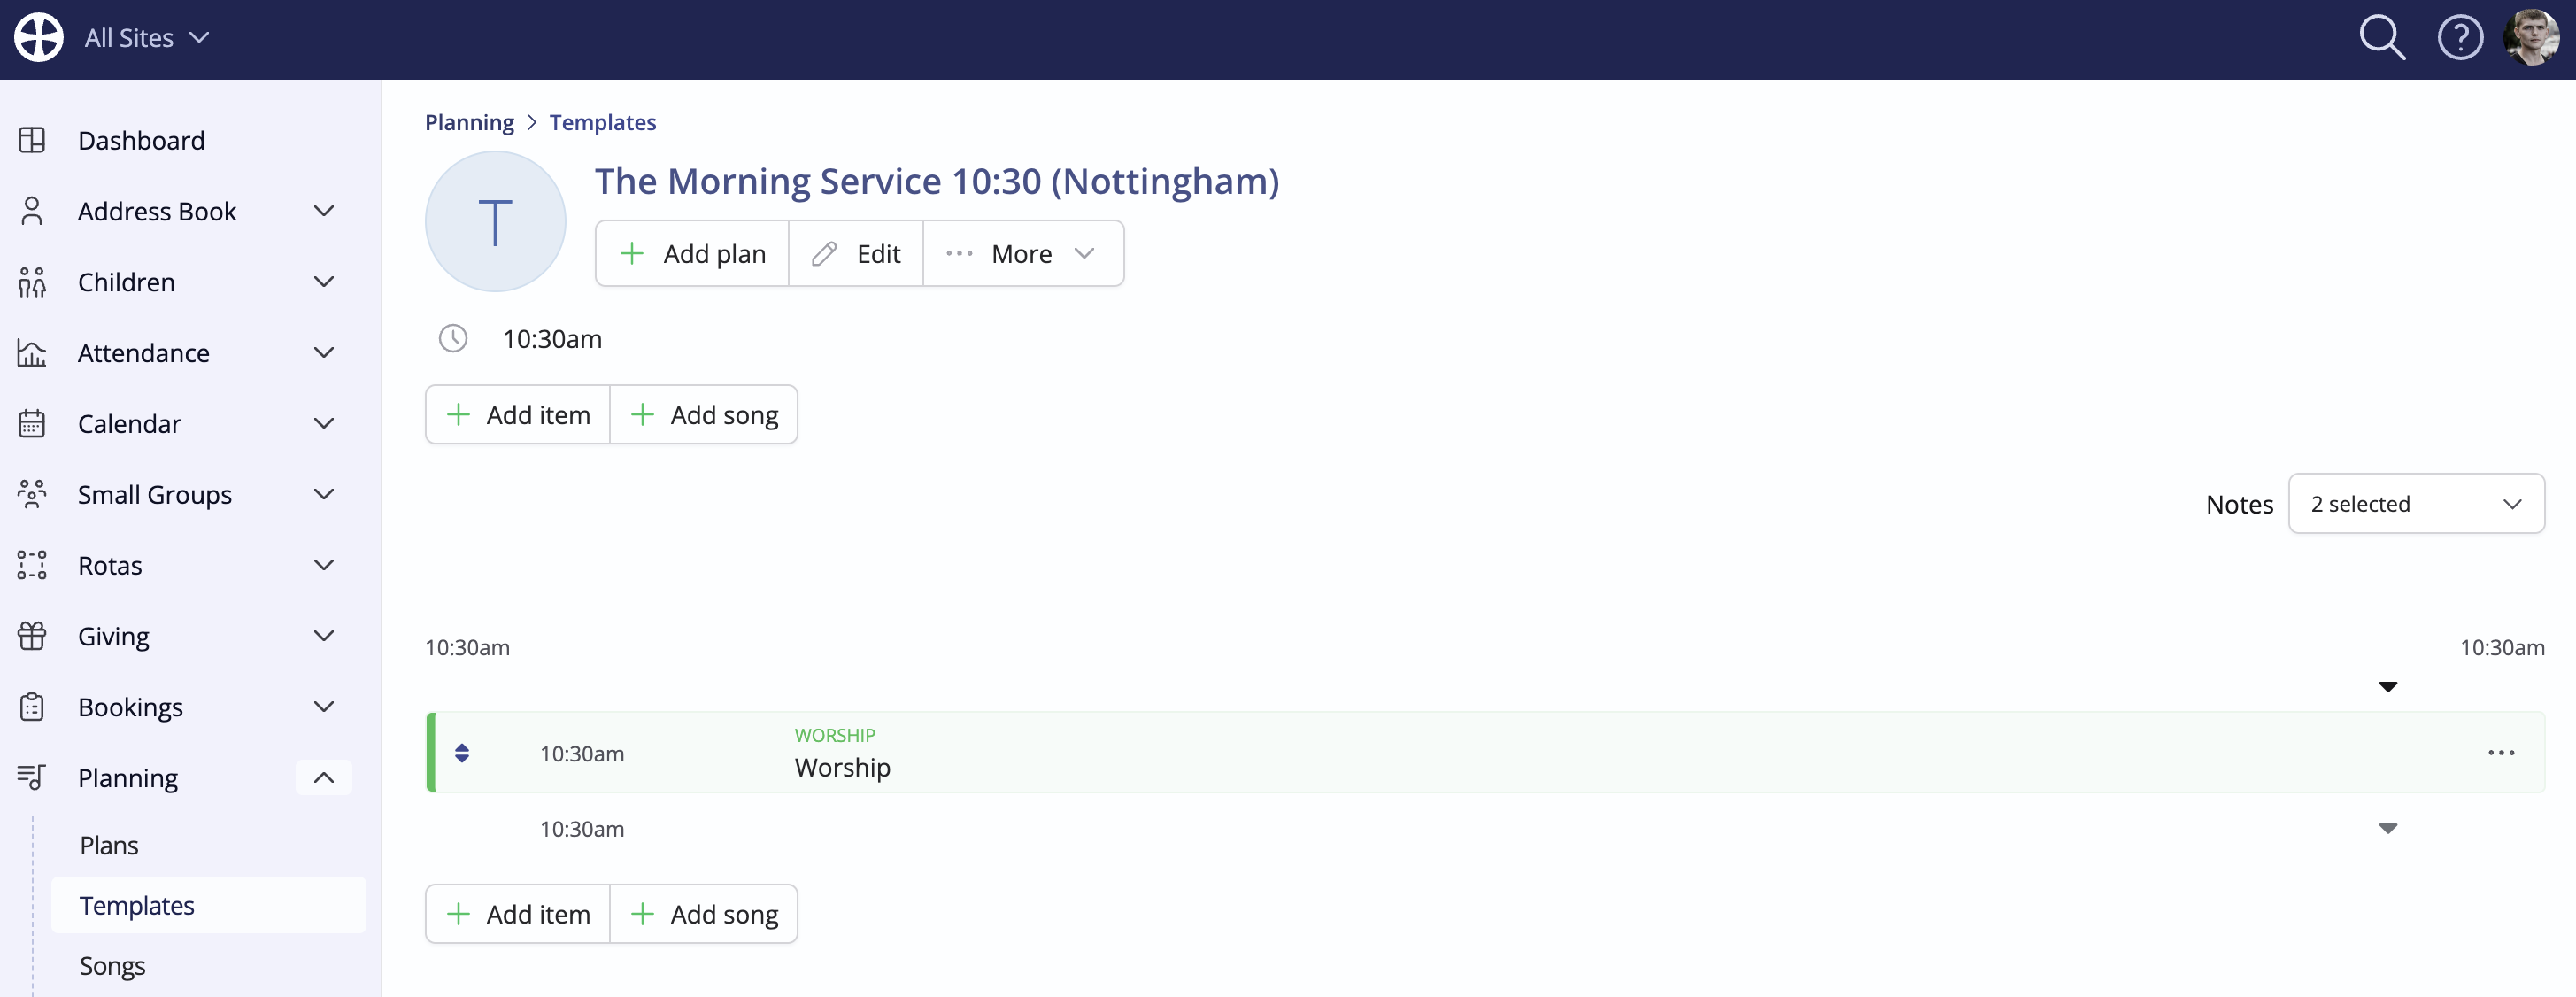
Click Save to complete the process. The newly-added item is shown. Continue adding other items as appropriate - for example, you might begin by defining the broader elements and timings. Later, when producing plans based on the template, you'll add songs and other items representing all the plan-specific details.
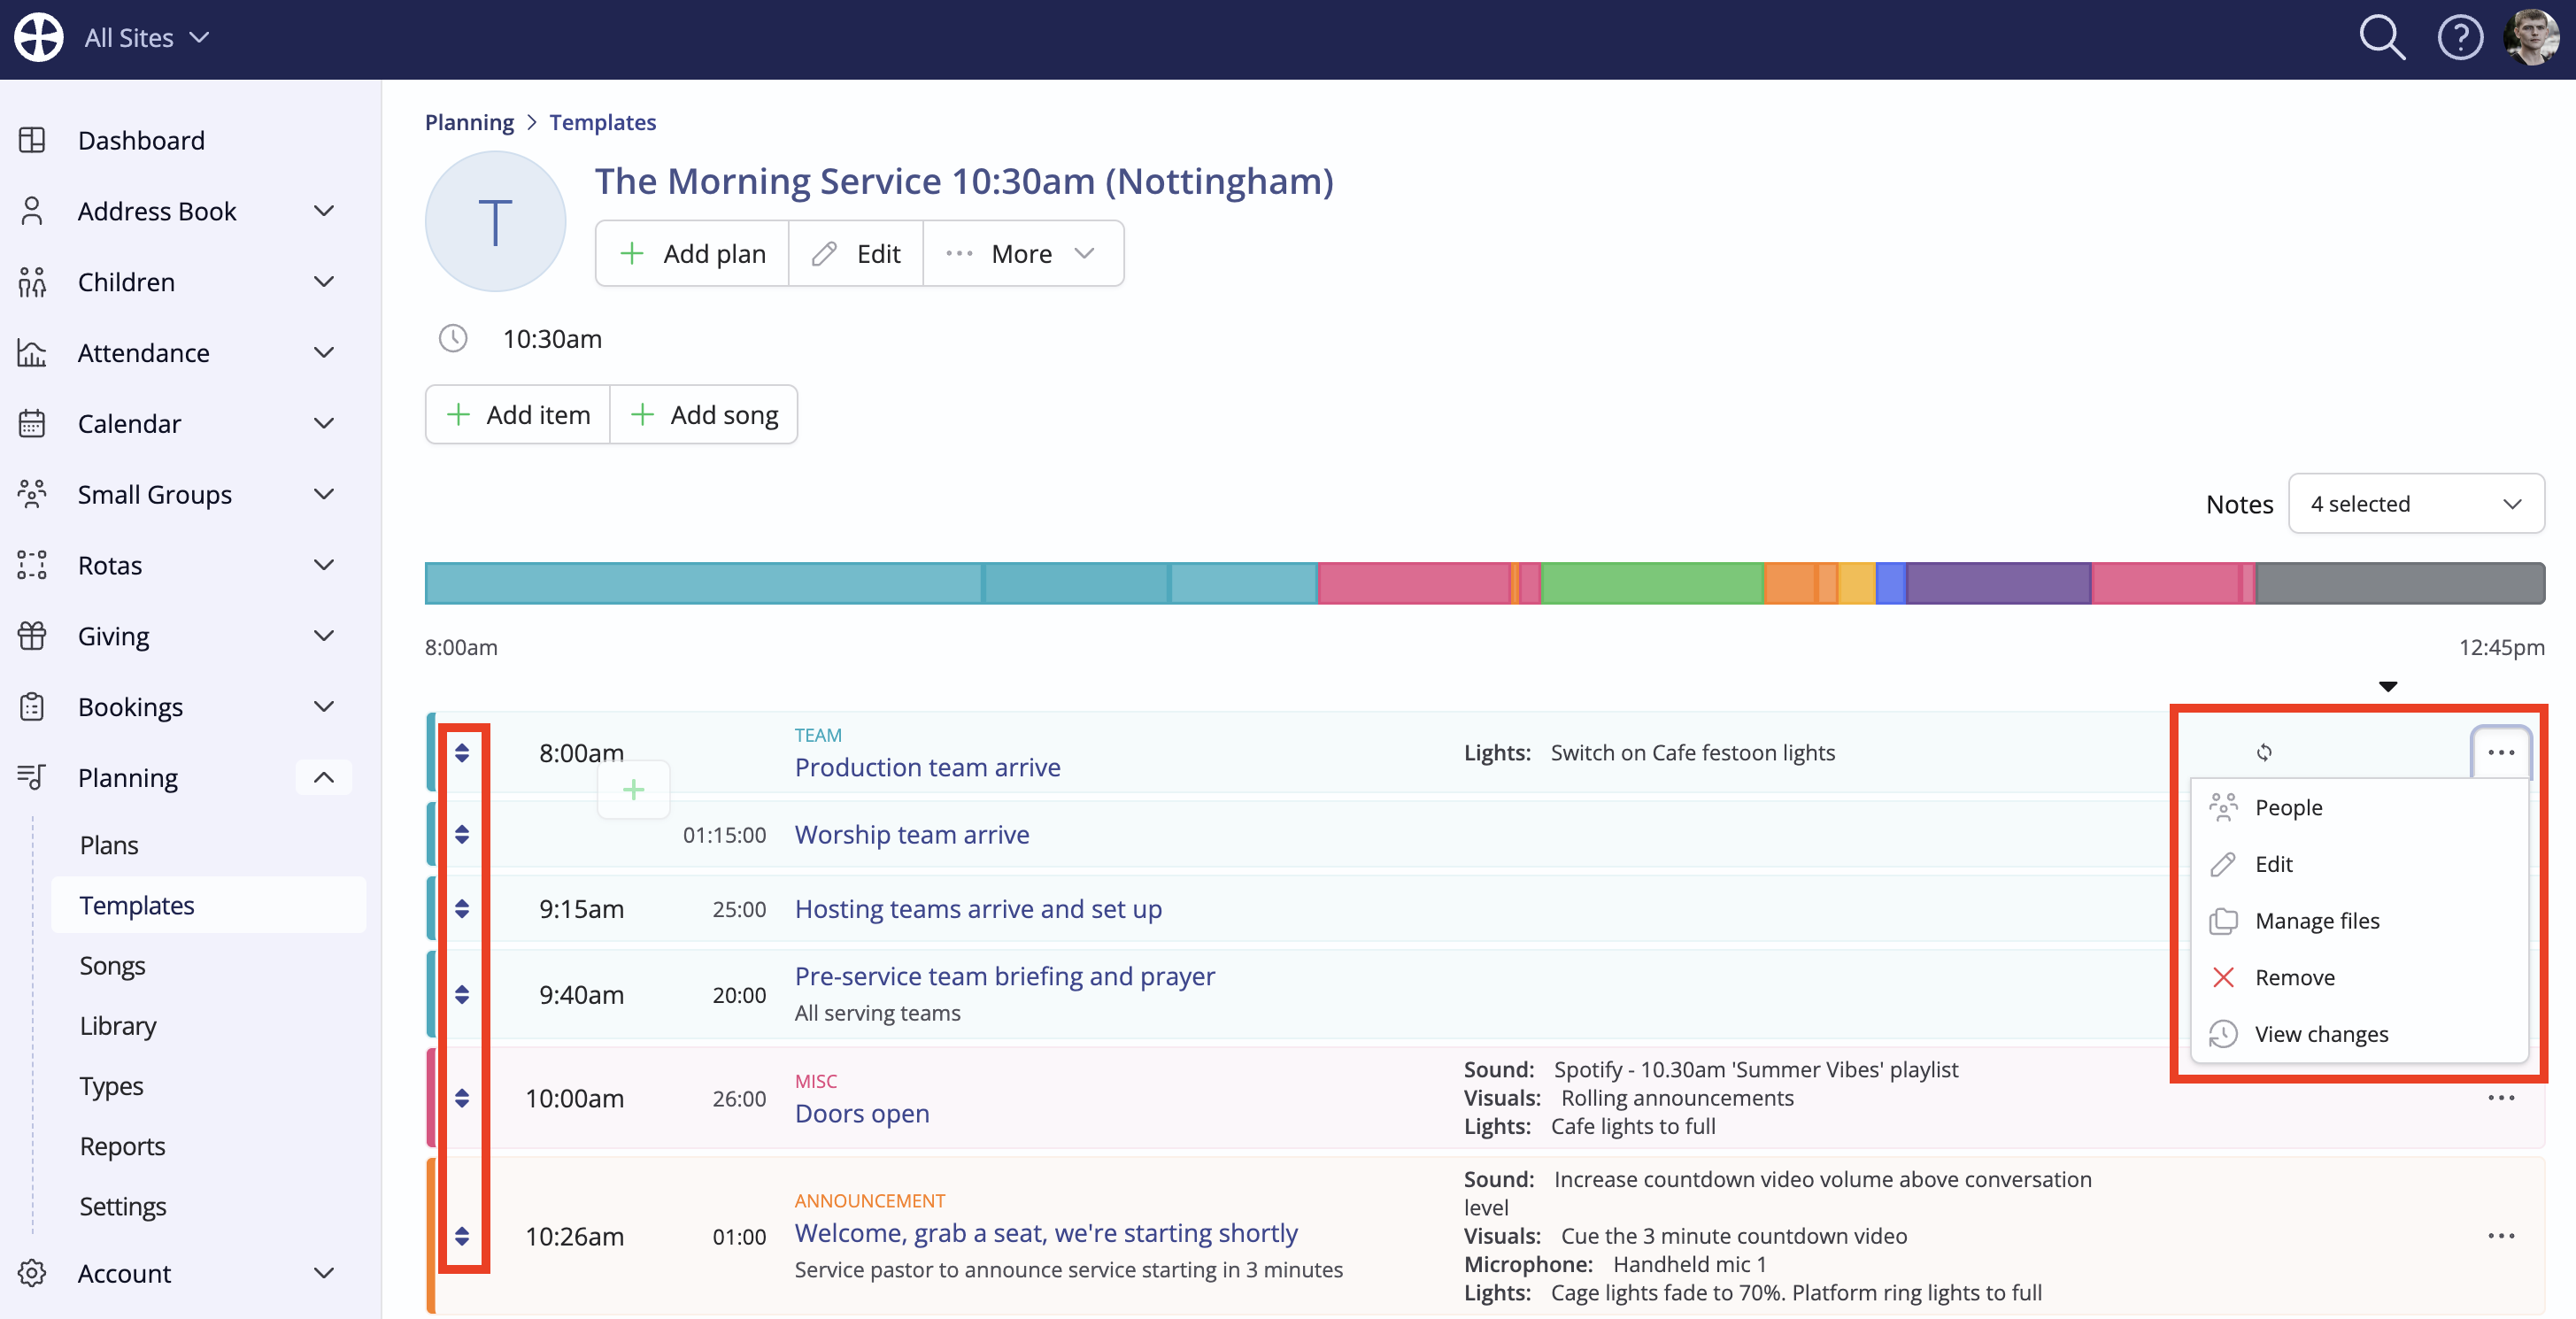
As you build your template with more items, note the item order controls on the left-hand side to drag and re-order items. Item Actions on the right enable you to perform common item-related tasks. For template items that you might wish to use again, choose to Add to library and follow the on-screen instructions. You can further Edit an item at any time, or Remove it if no longer needed. Through the People action, you can link items to rotas (or assign items to specific people), and Manage files allows you to upload and add files to a template item. See the related support articles on Linking people to plans and Adding files to library items and plans.
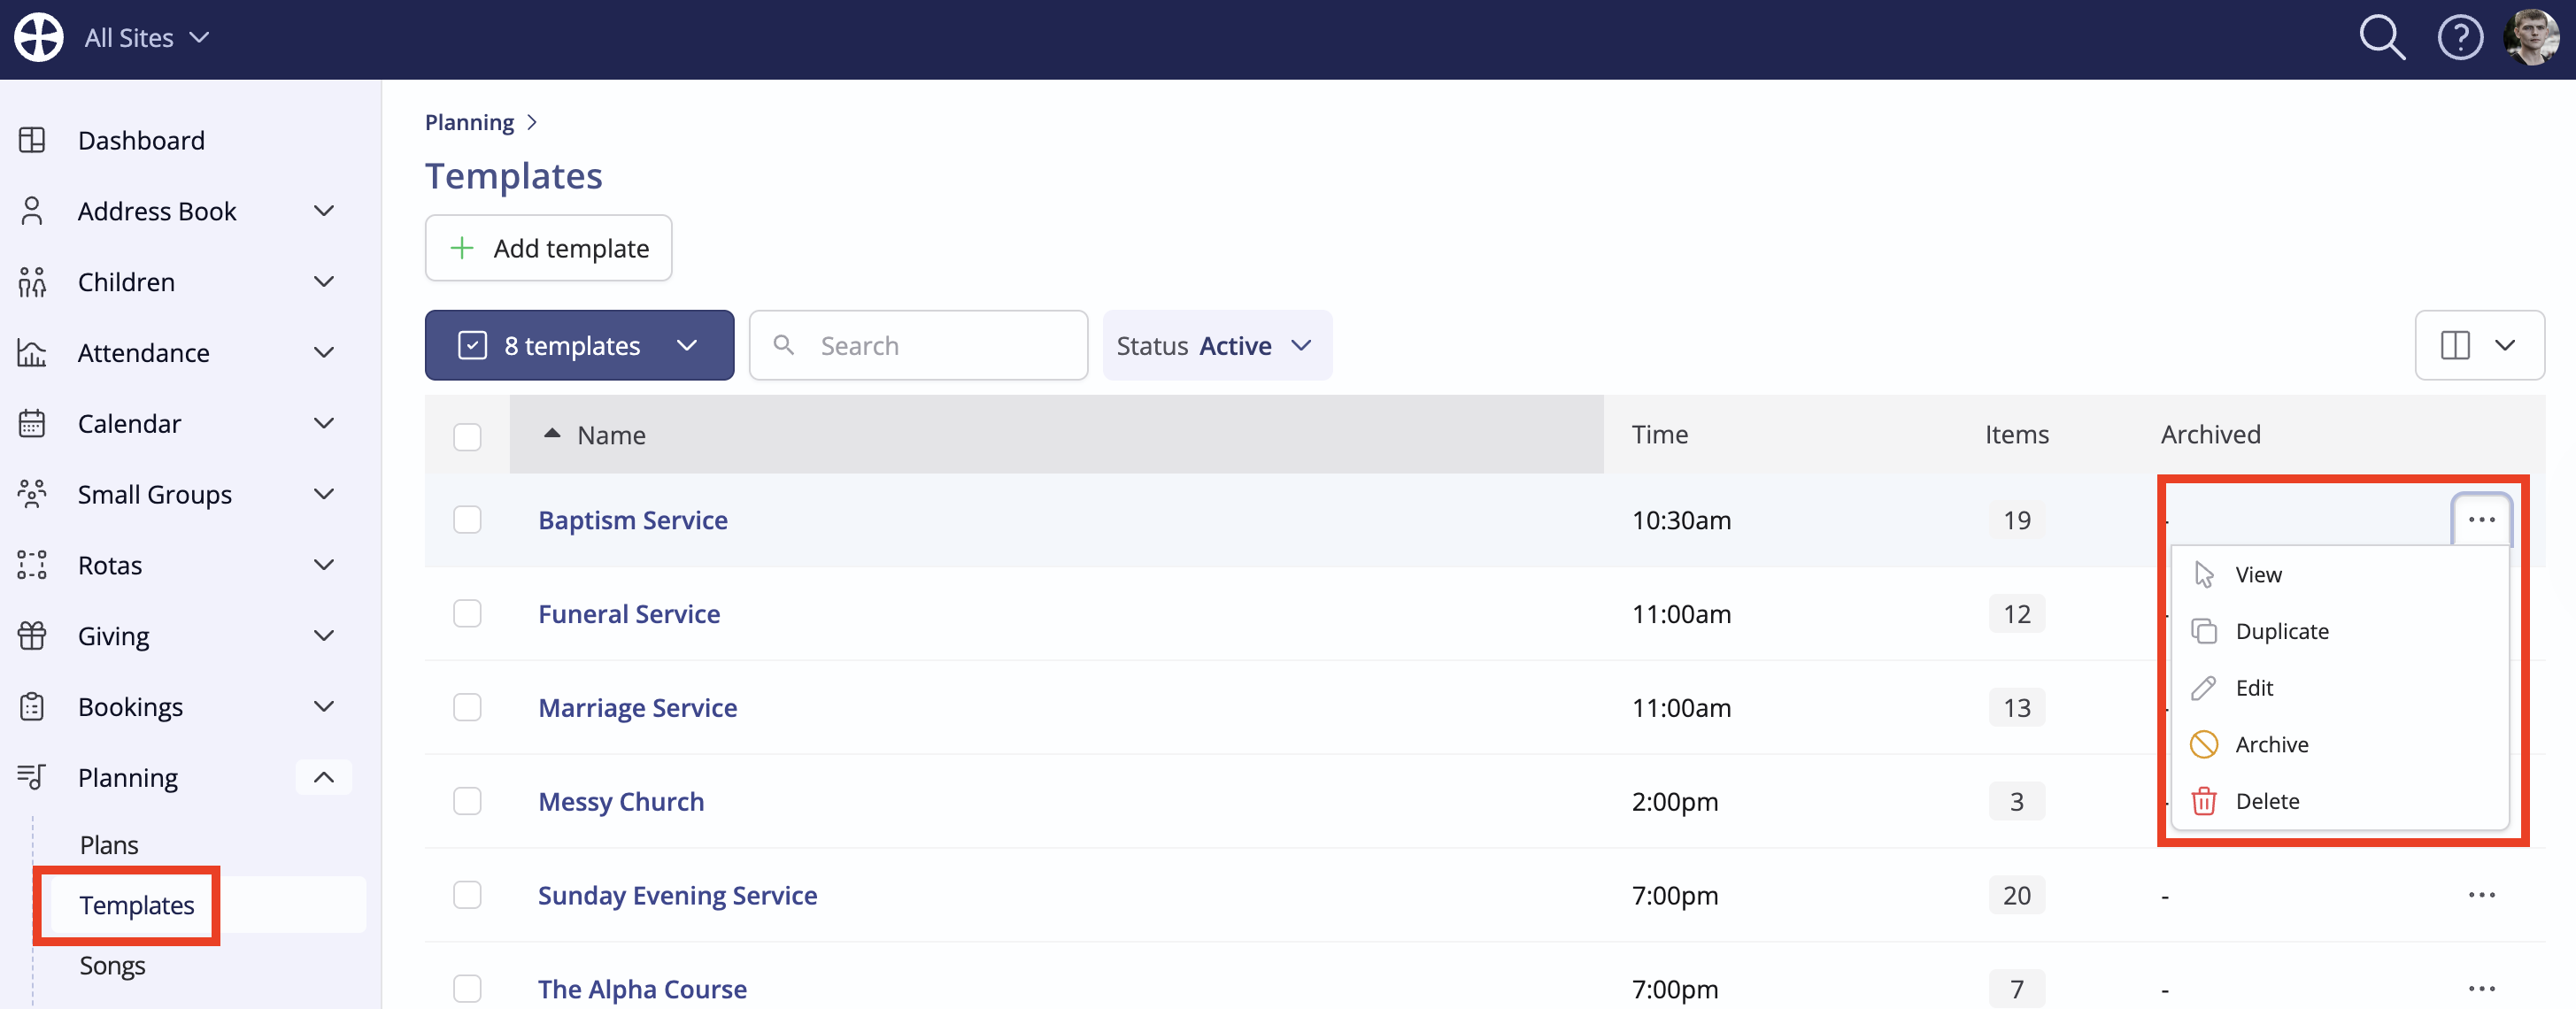
Template management
From the Templates section of the module, you can View, Duplicate, Edit, Archive or Delete a template from the template Actions and switch between viewing Active and Archived templates. Archived templates can be later Set as active again if necessary. Deleting a template is a destructive and irreversible action but does not impact any historical or future plans - once a plan is produced based on a template it does not remain connected to the template. Similarly, any changes to templates will have no impact on plans that were previously produced from the template.
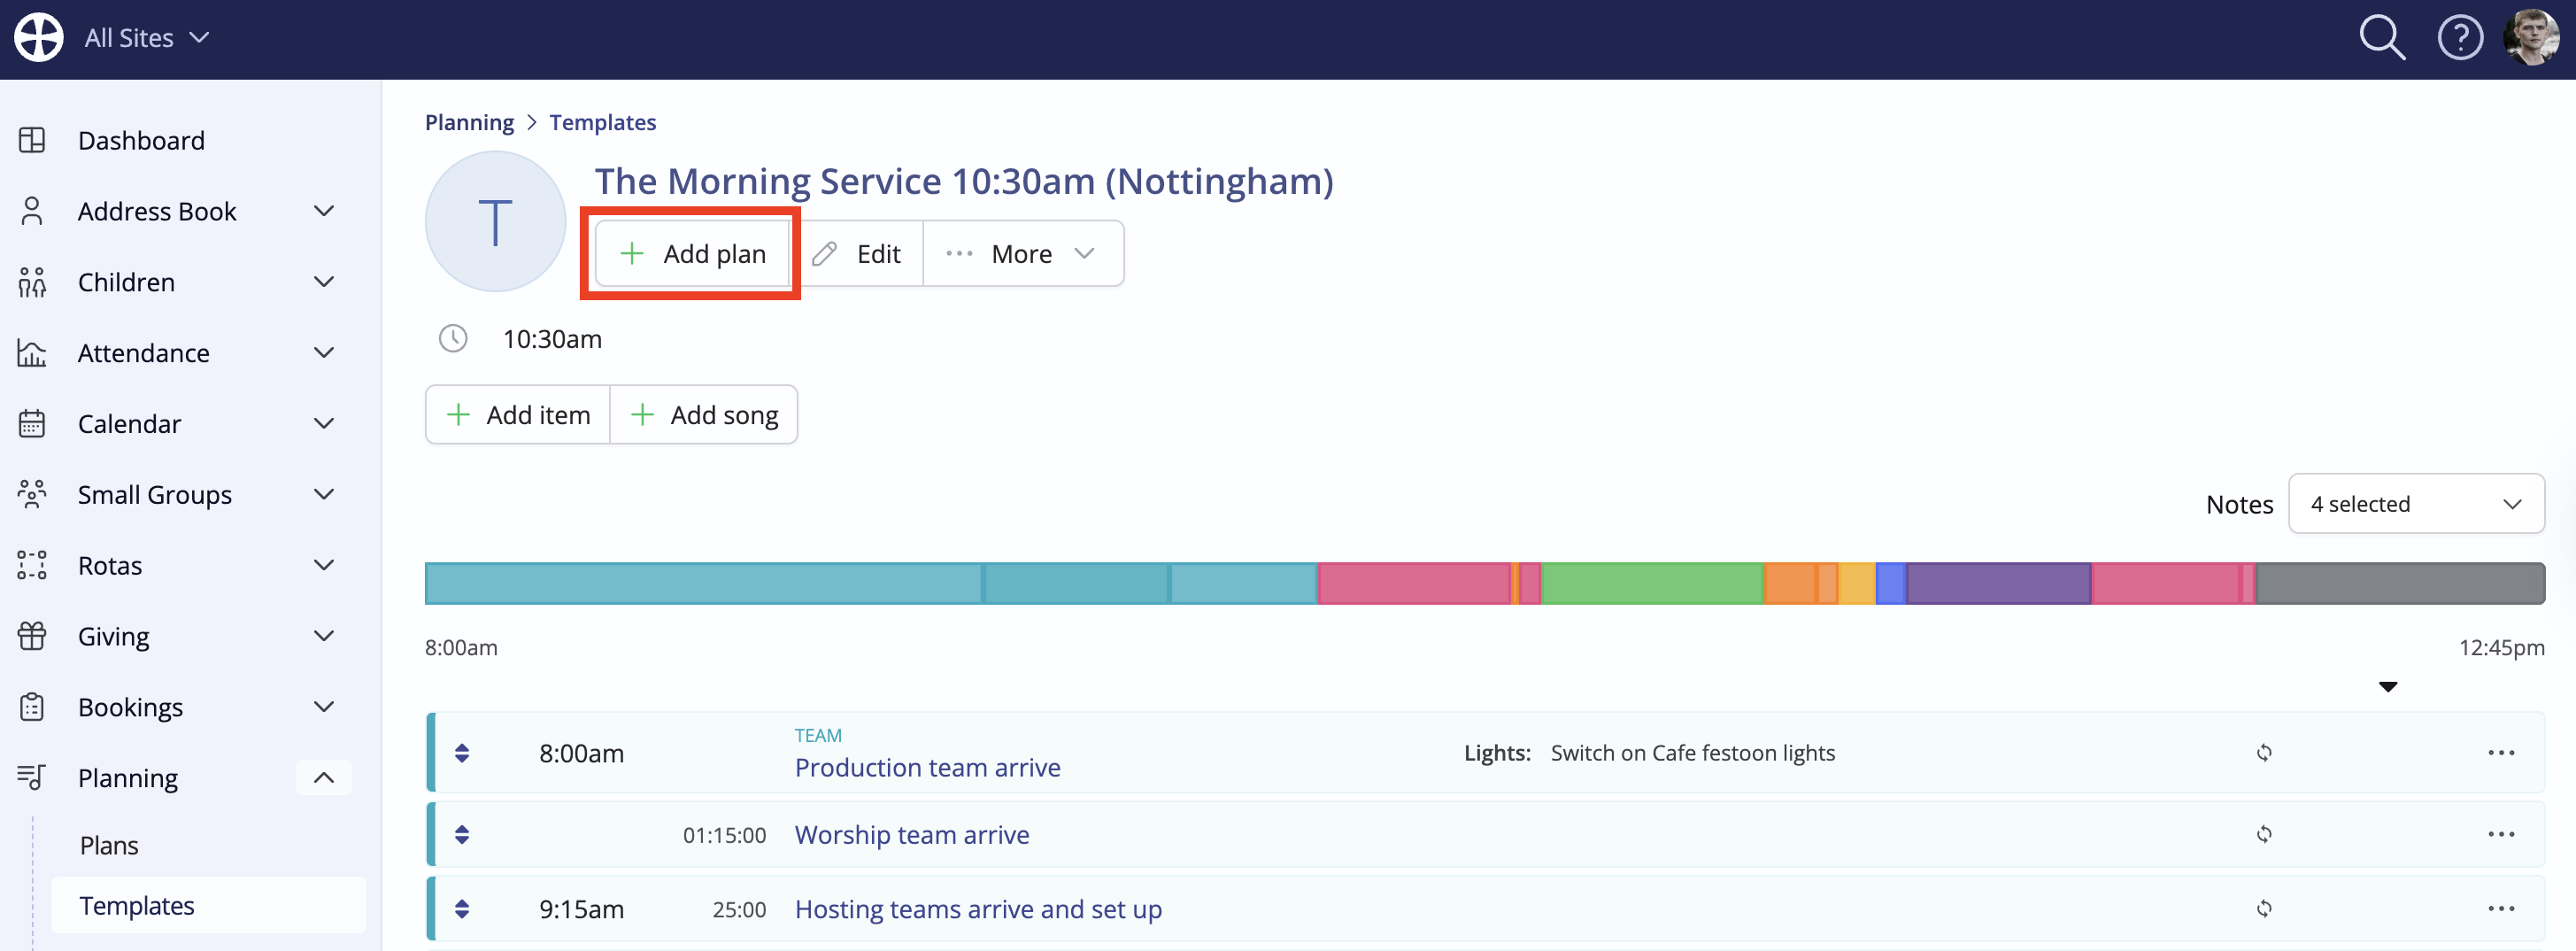
Producing plans using a template
Depending on where you prefer to work within the module, there are two ways to produce a plan using a template. One way is from a Template's 'View' page, clicking Add plan.
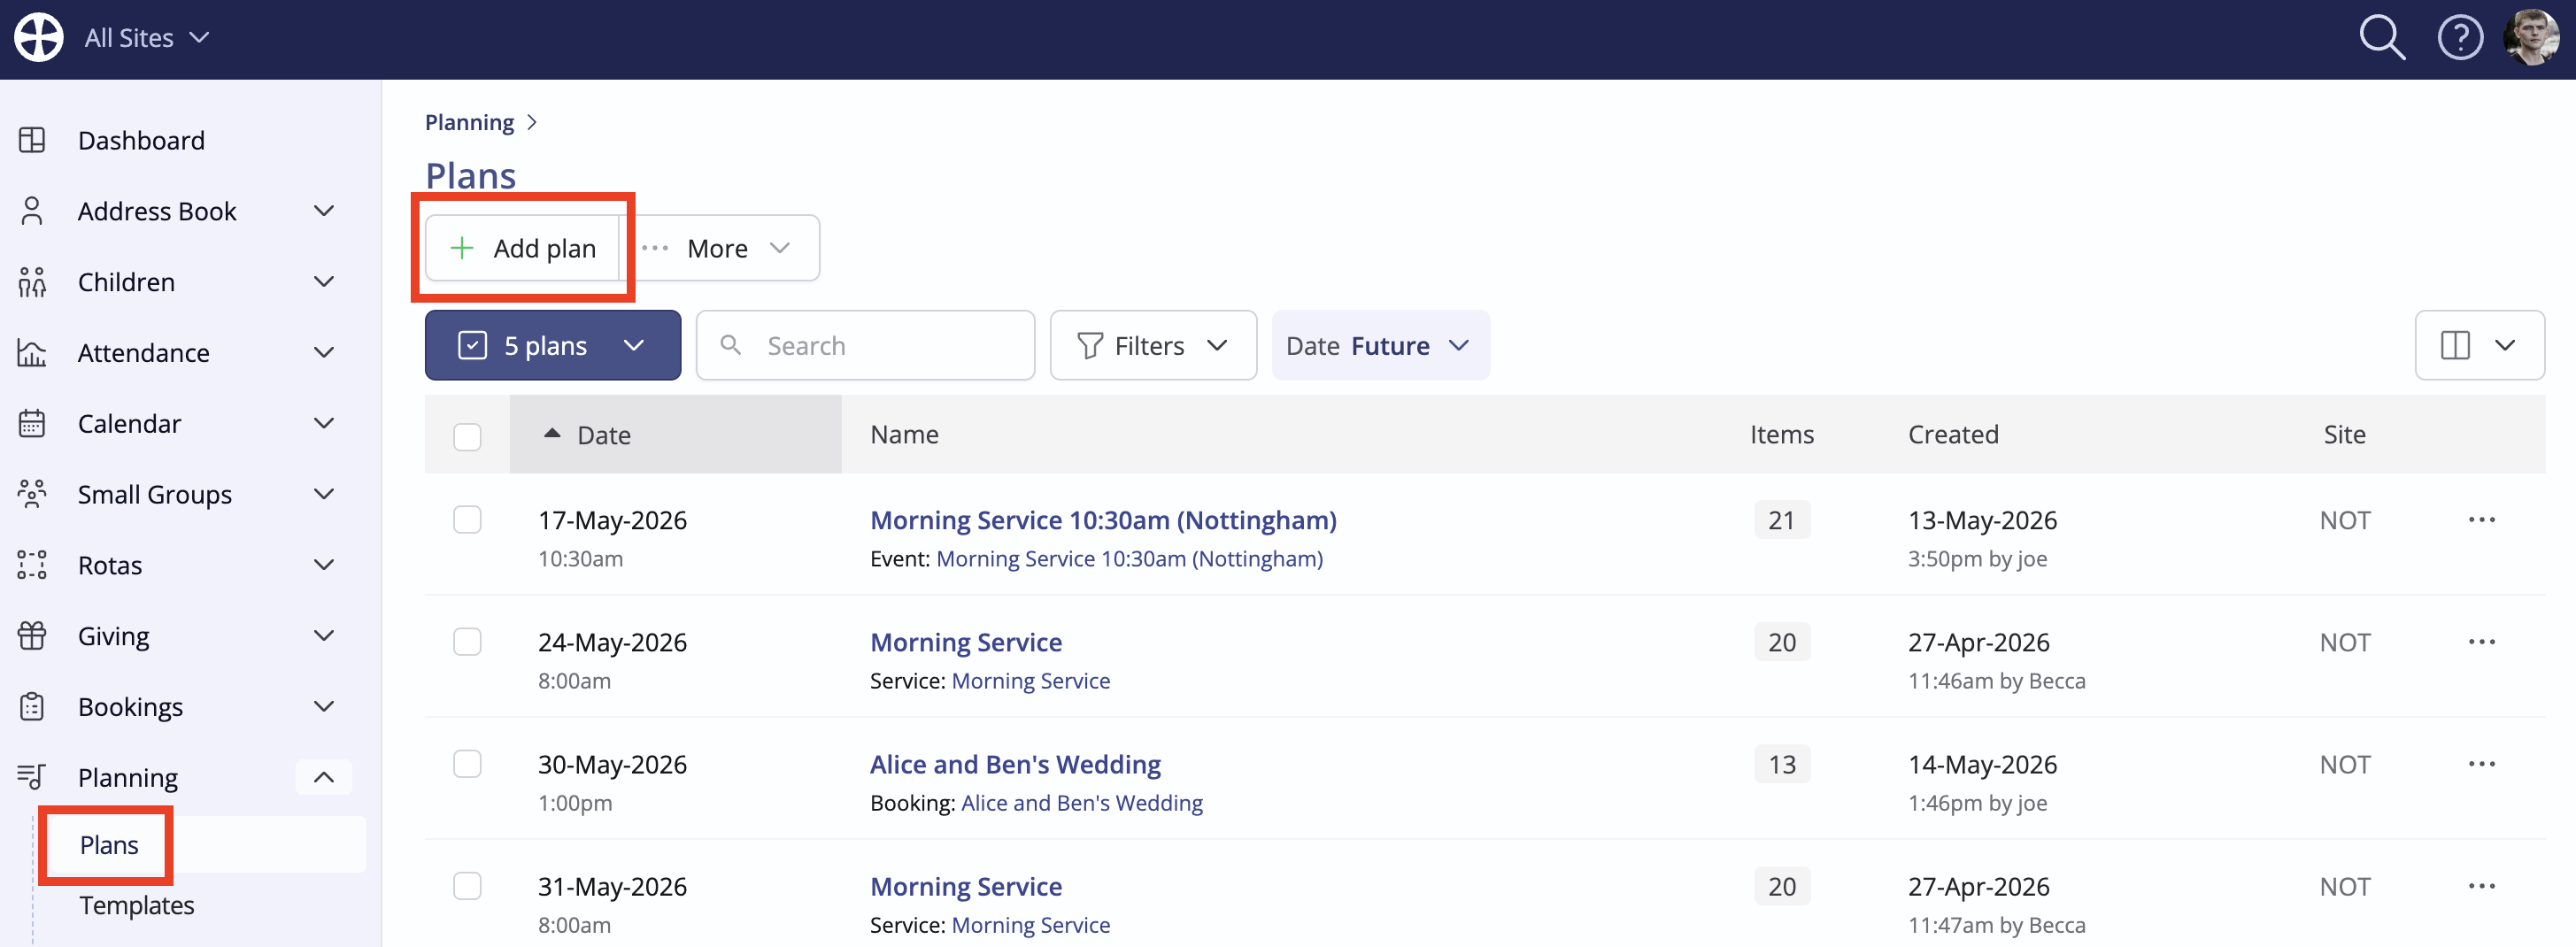
The other, and more commonly used method, is when working in the Plans section of the module, click Add plan.
In both methods, the Add plan pop-up opens. Begin by choosing the appropriate Template from the drop-down list, which will populate some of the other fields on the pop-up. Finally, specify the plan Date and click Save to create the plan.
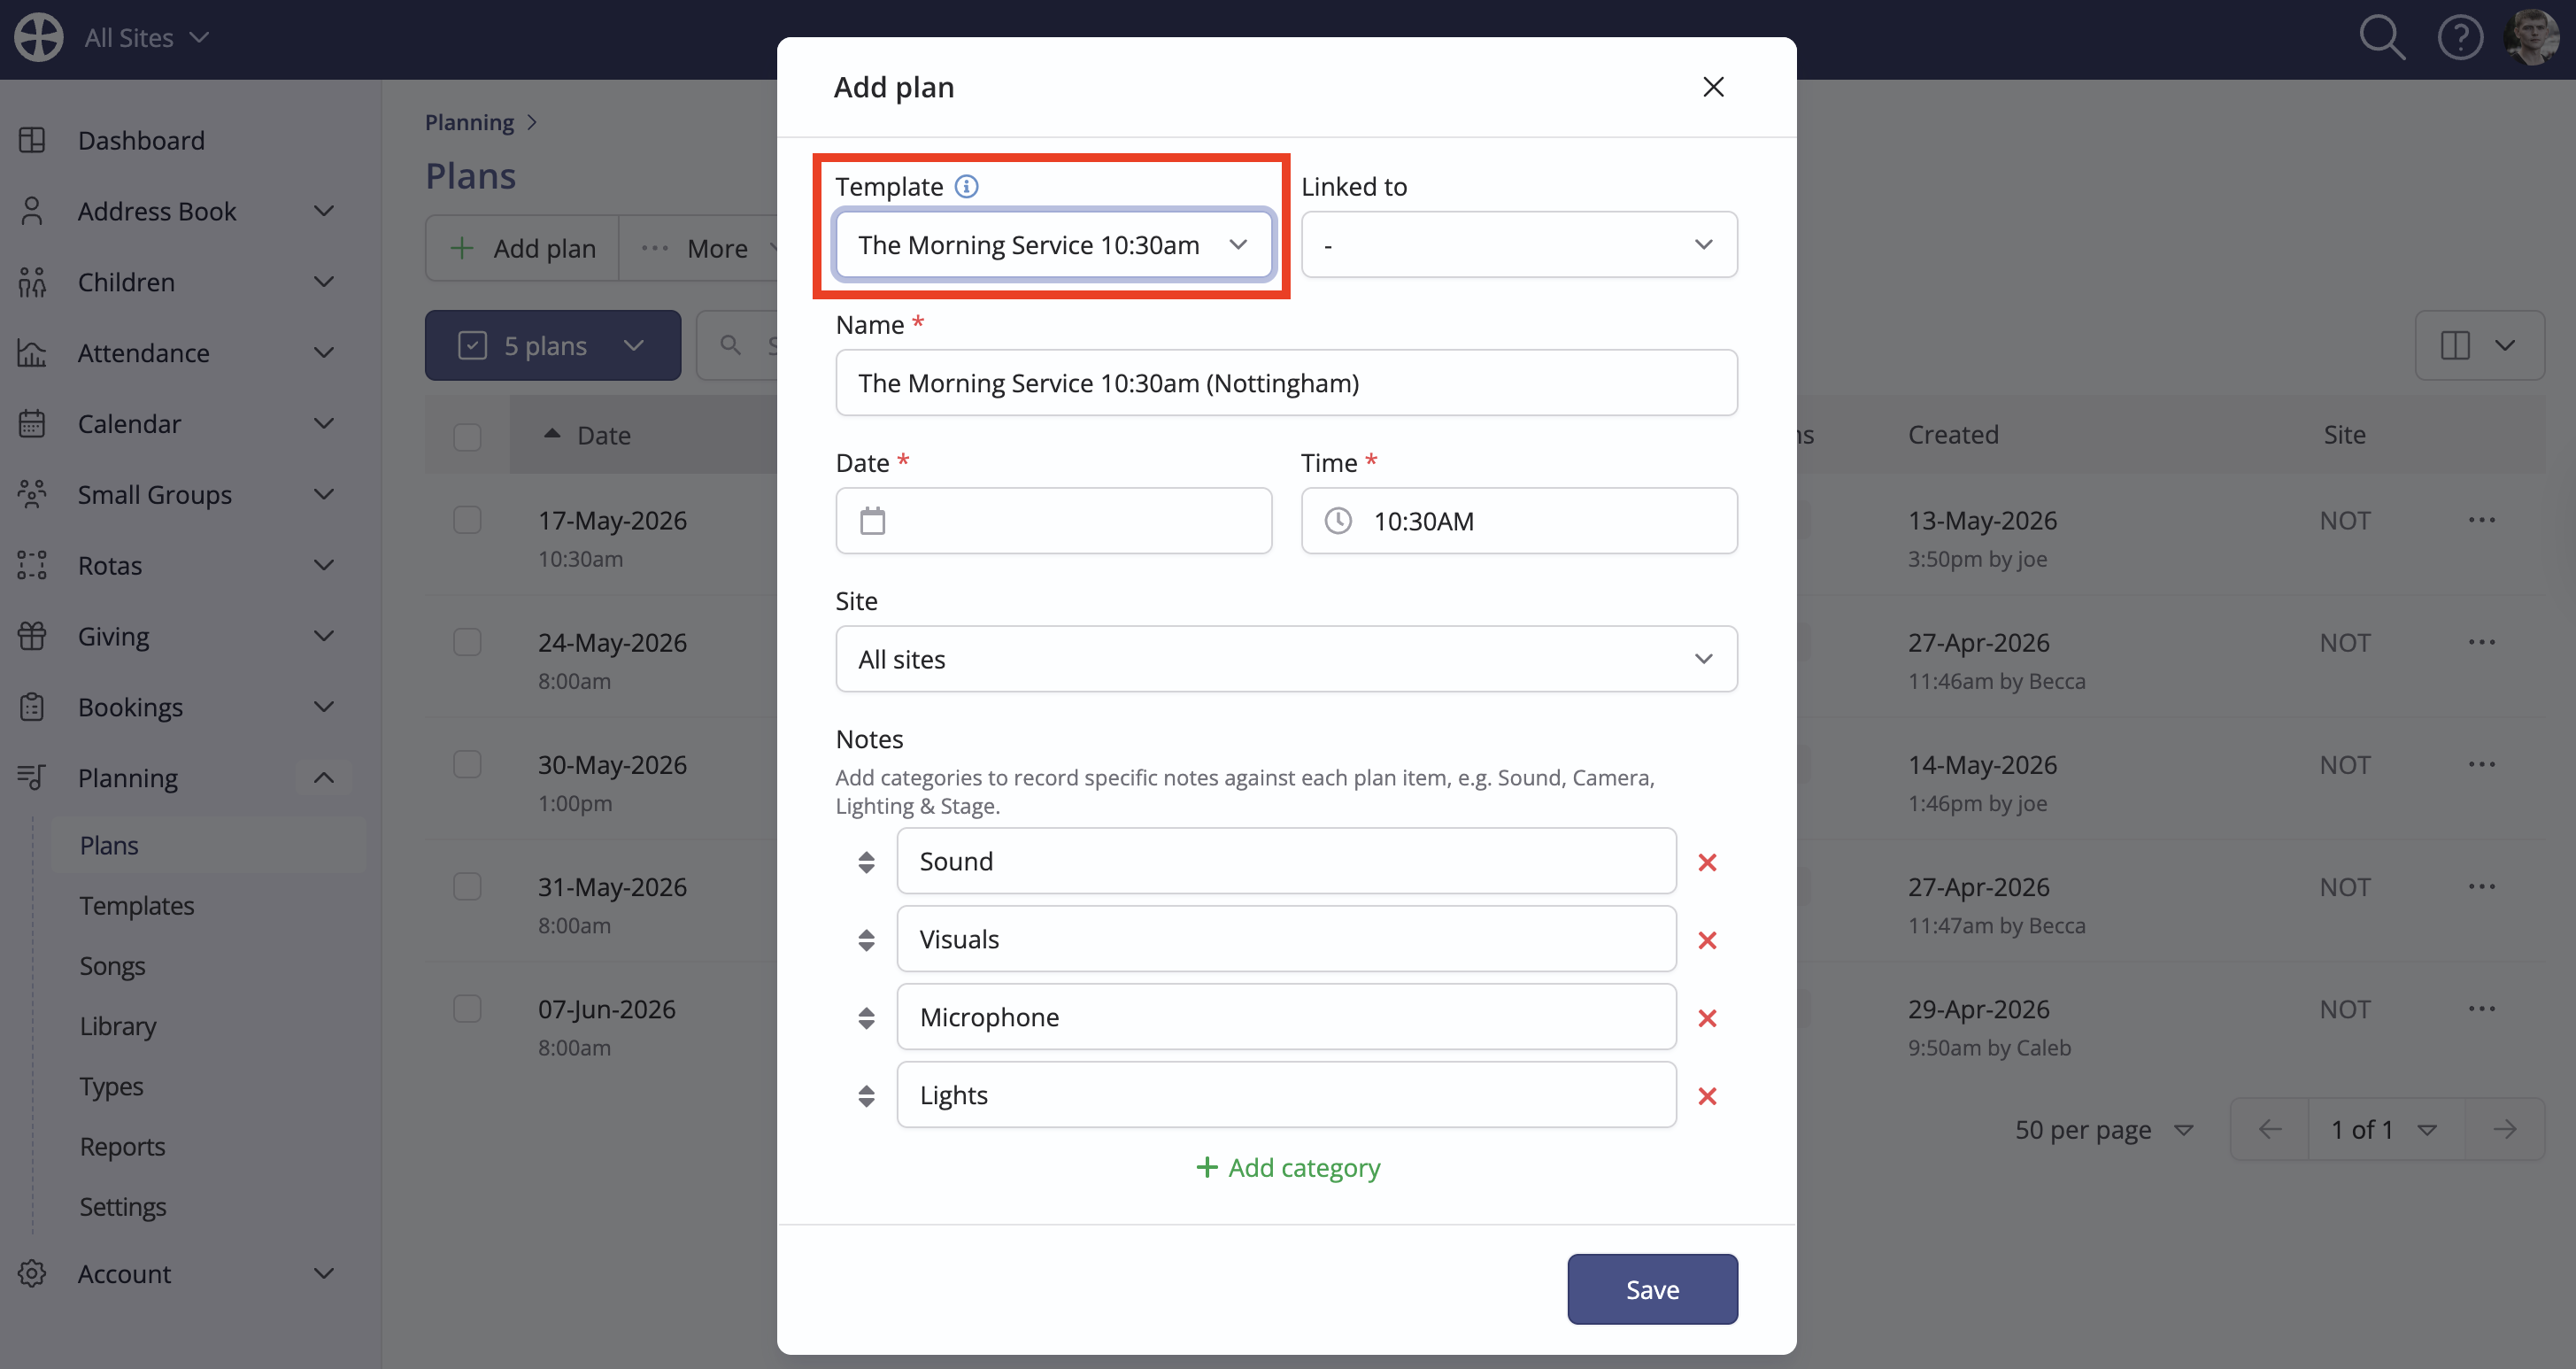
We've produced a related support article called Adding plans which explains the full process of producing plans (including plans based on templates) in full detail.