Adding plans
It's really easy to begin producing Plans for your various services, events and bookings. You can jump straight into creating plans but you may find it helpful to read two related support articles on Managing library items and Managing songs, which will make the process of populating plans with commonly used library items and songs an altogether simpler and quicker process. You can also save time by saving a plan as a template or you can begin by creating a plan template ready to produce plans from the template - it's entirely up to you; the process of adding plans and templates is identical.
In this article
Creating a plan
Adding items to plans
Sharing your plans with others
Printing plans
Plans linked to a service (Rotas)
Plans linked to an event
Plans linked to a booking
Creating a plan
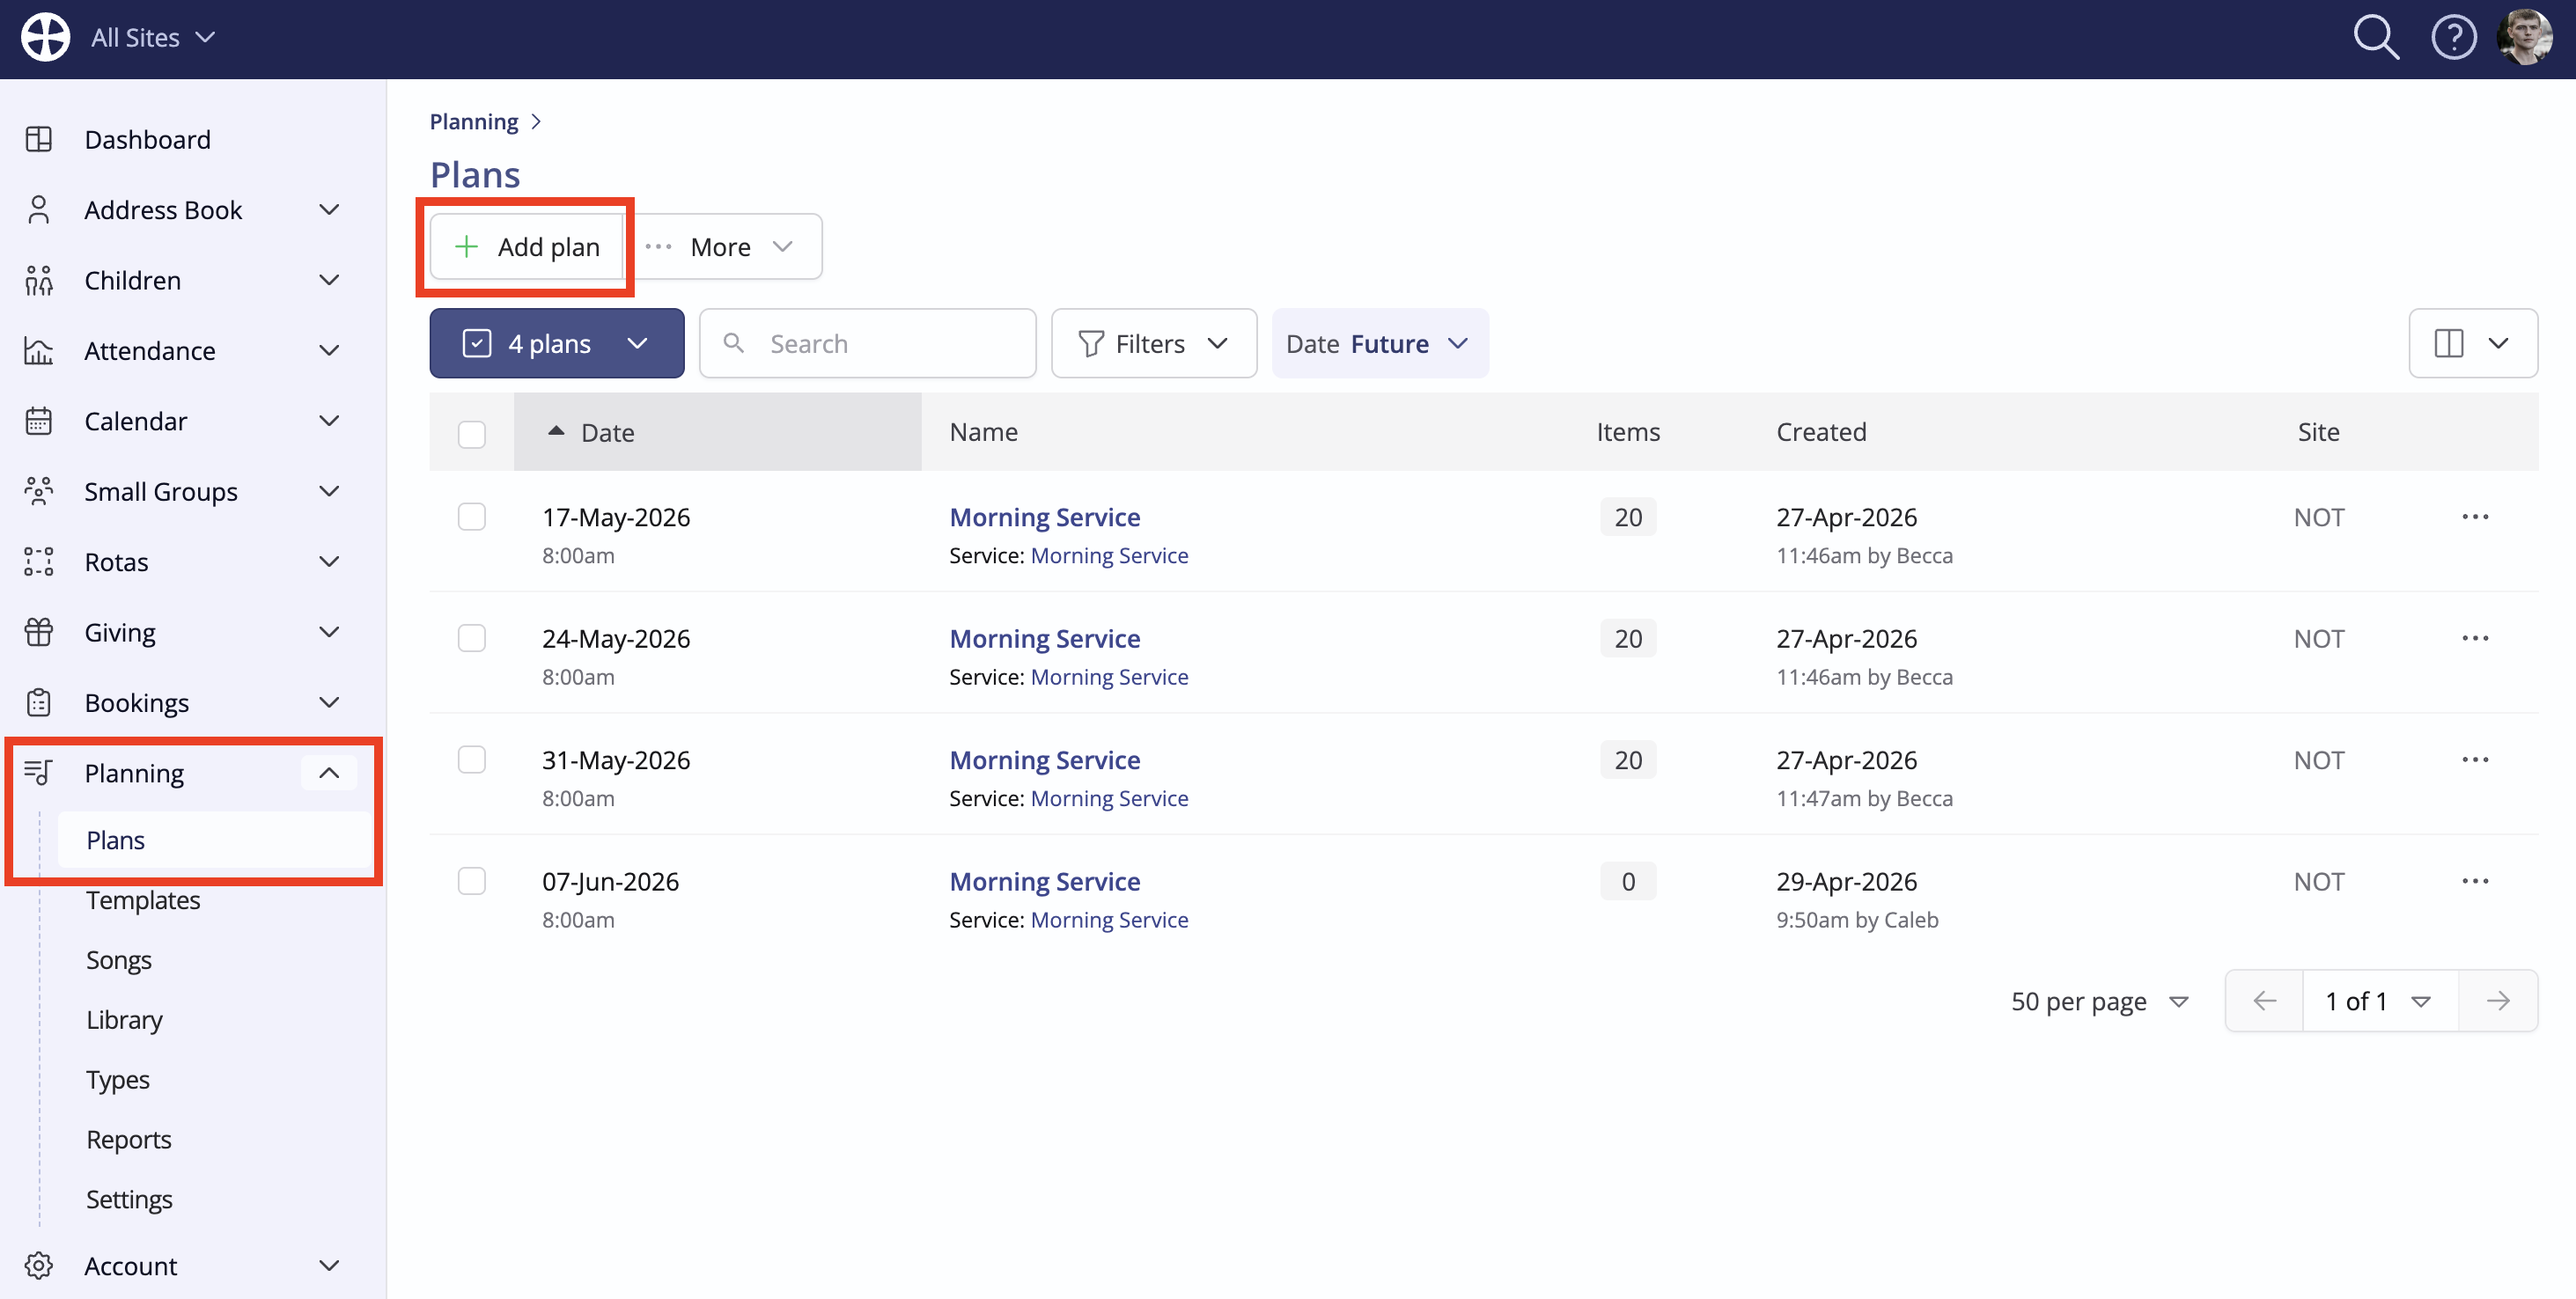
From the Plans section of the module, click Add plan.
On the Add plan pop-up, notice the option to create a plan from a Template - see our related support article for further information on Plan templates. Selecting a template populates the plan Name from the template name. If you don't yet have any templates, you can continue adding a plan.
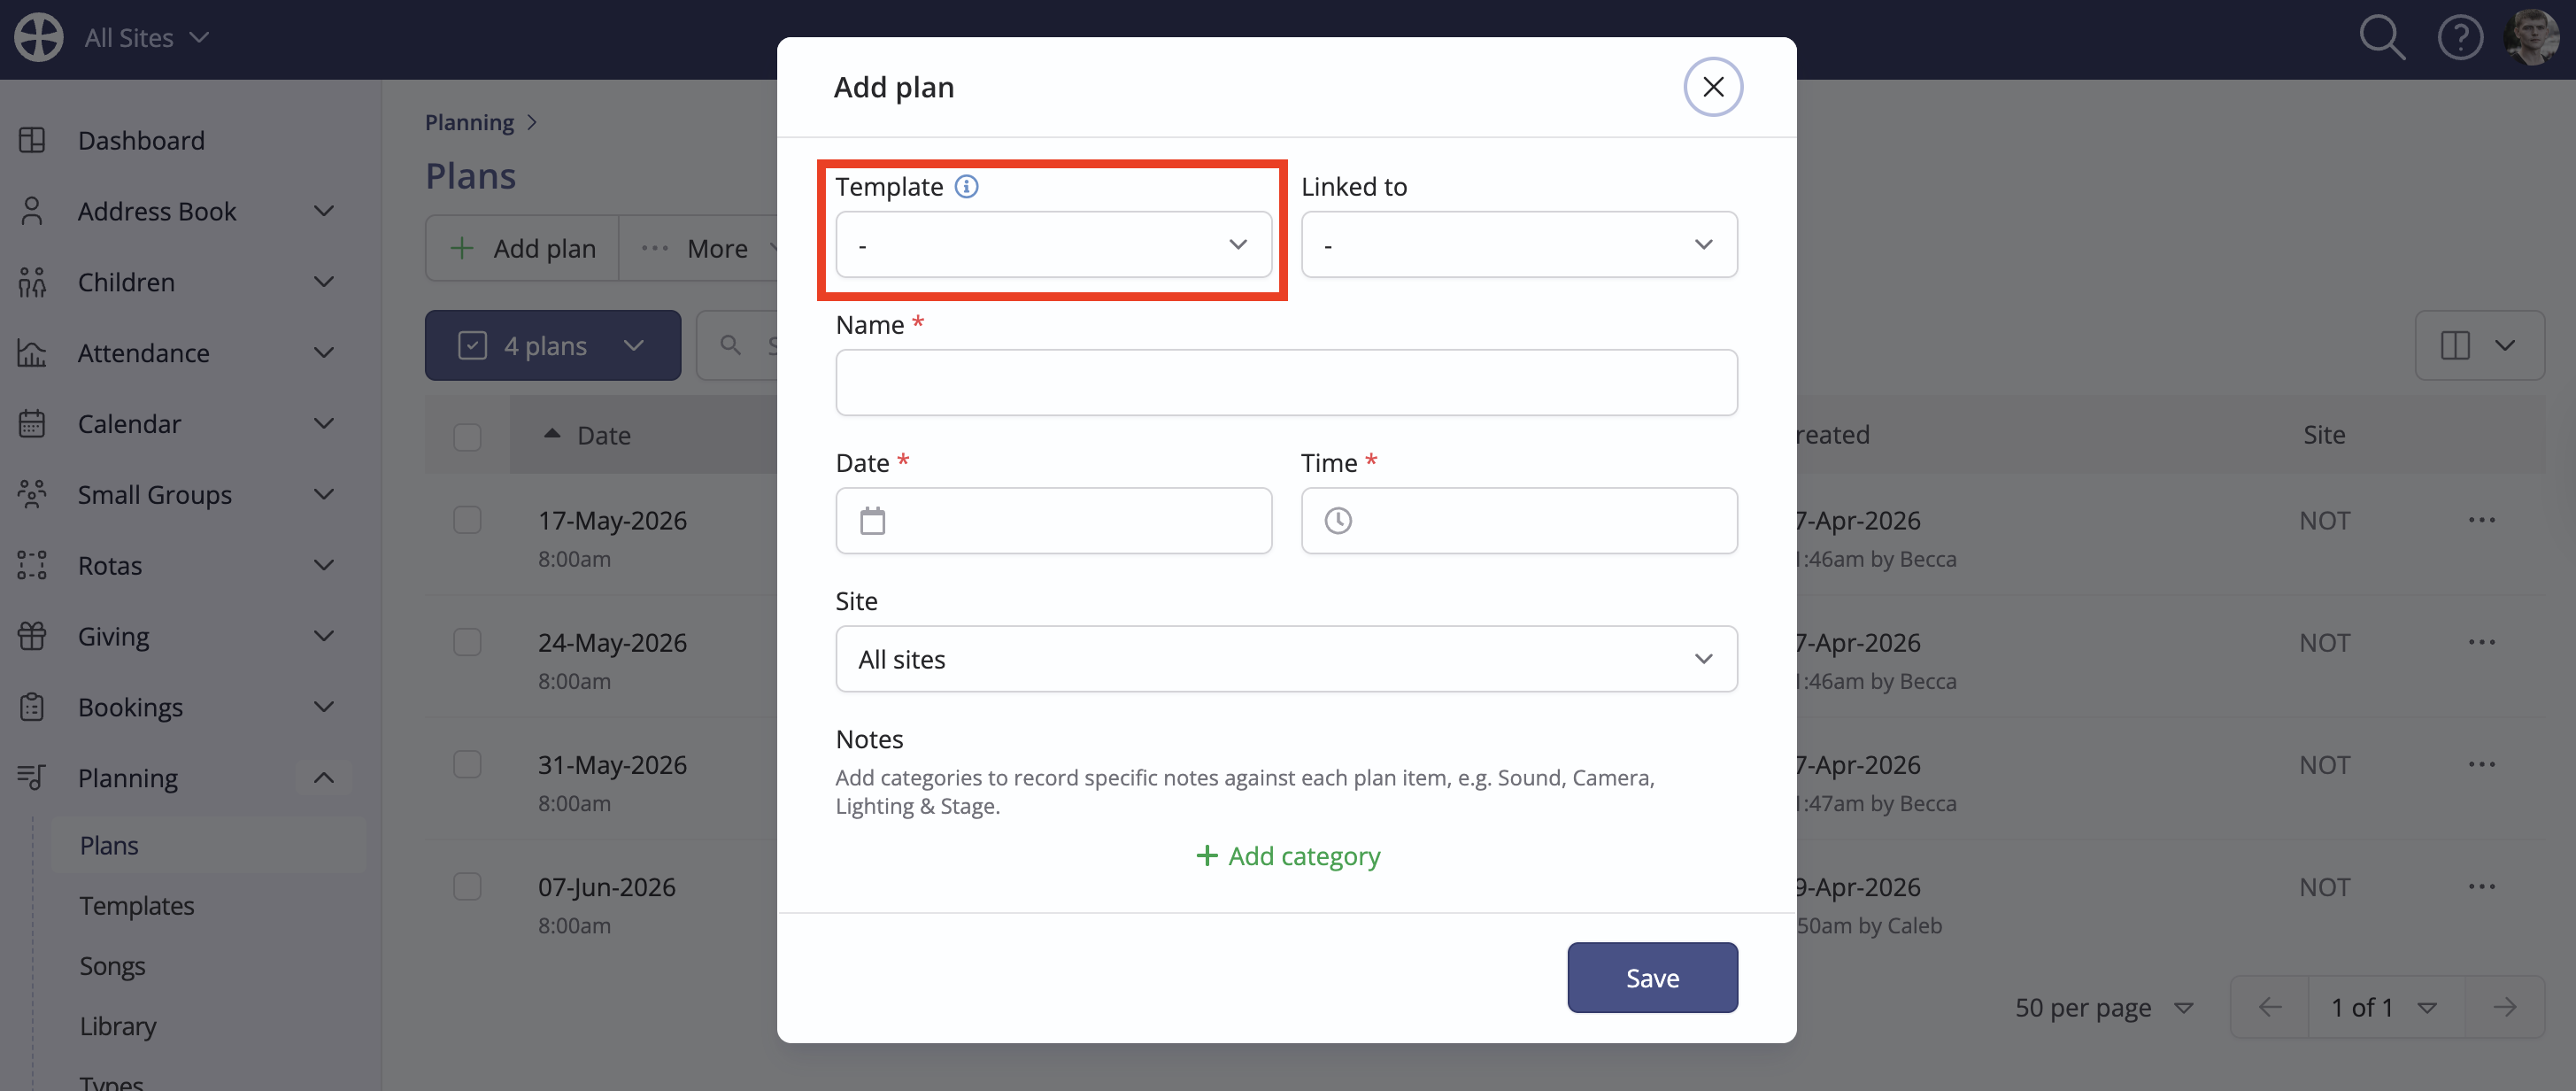
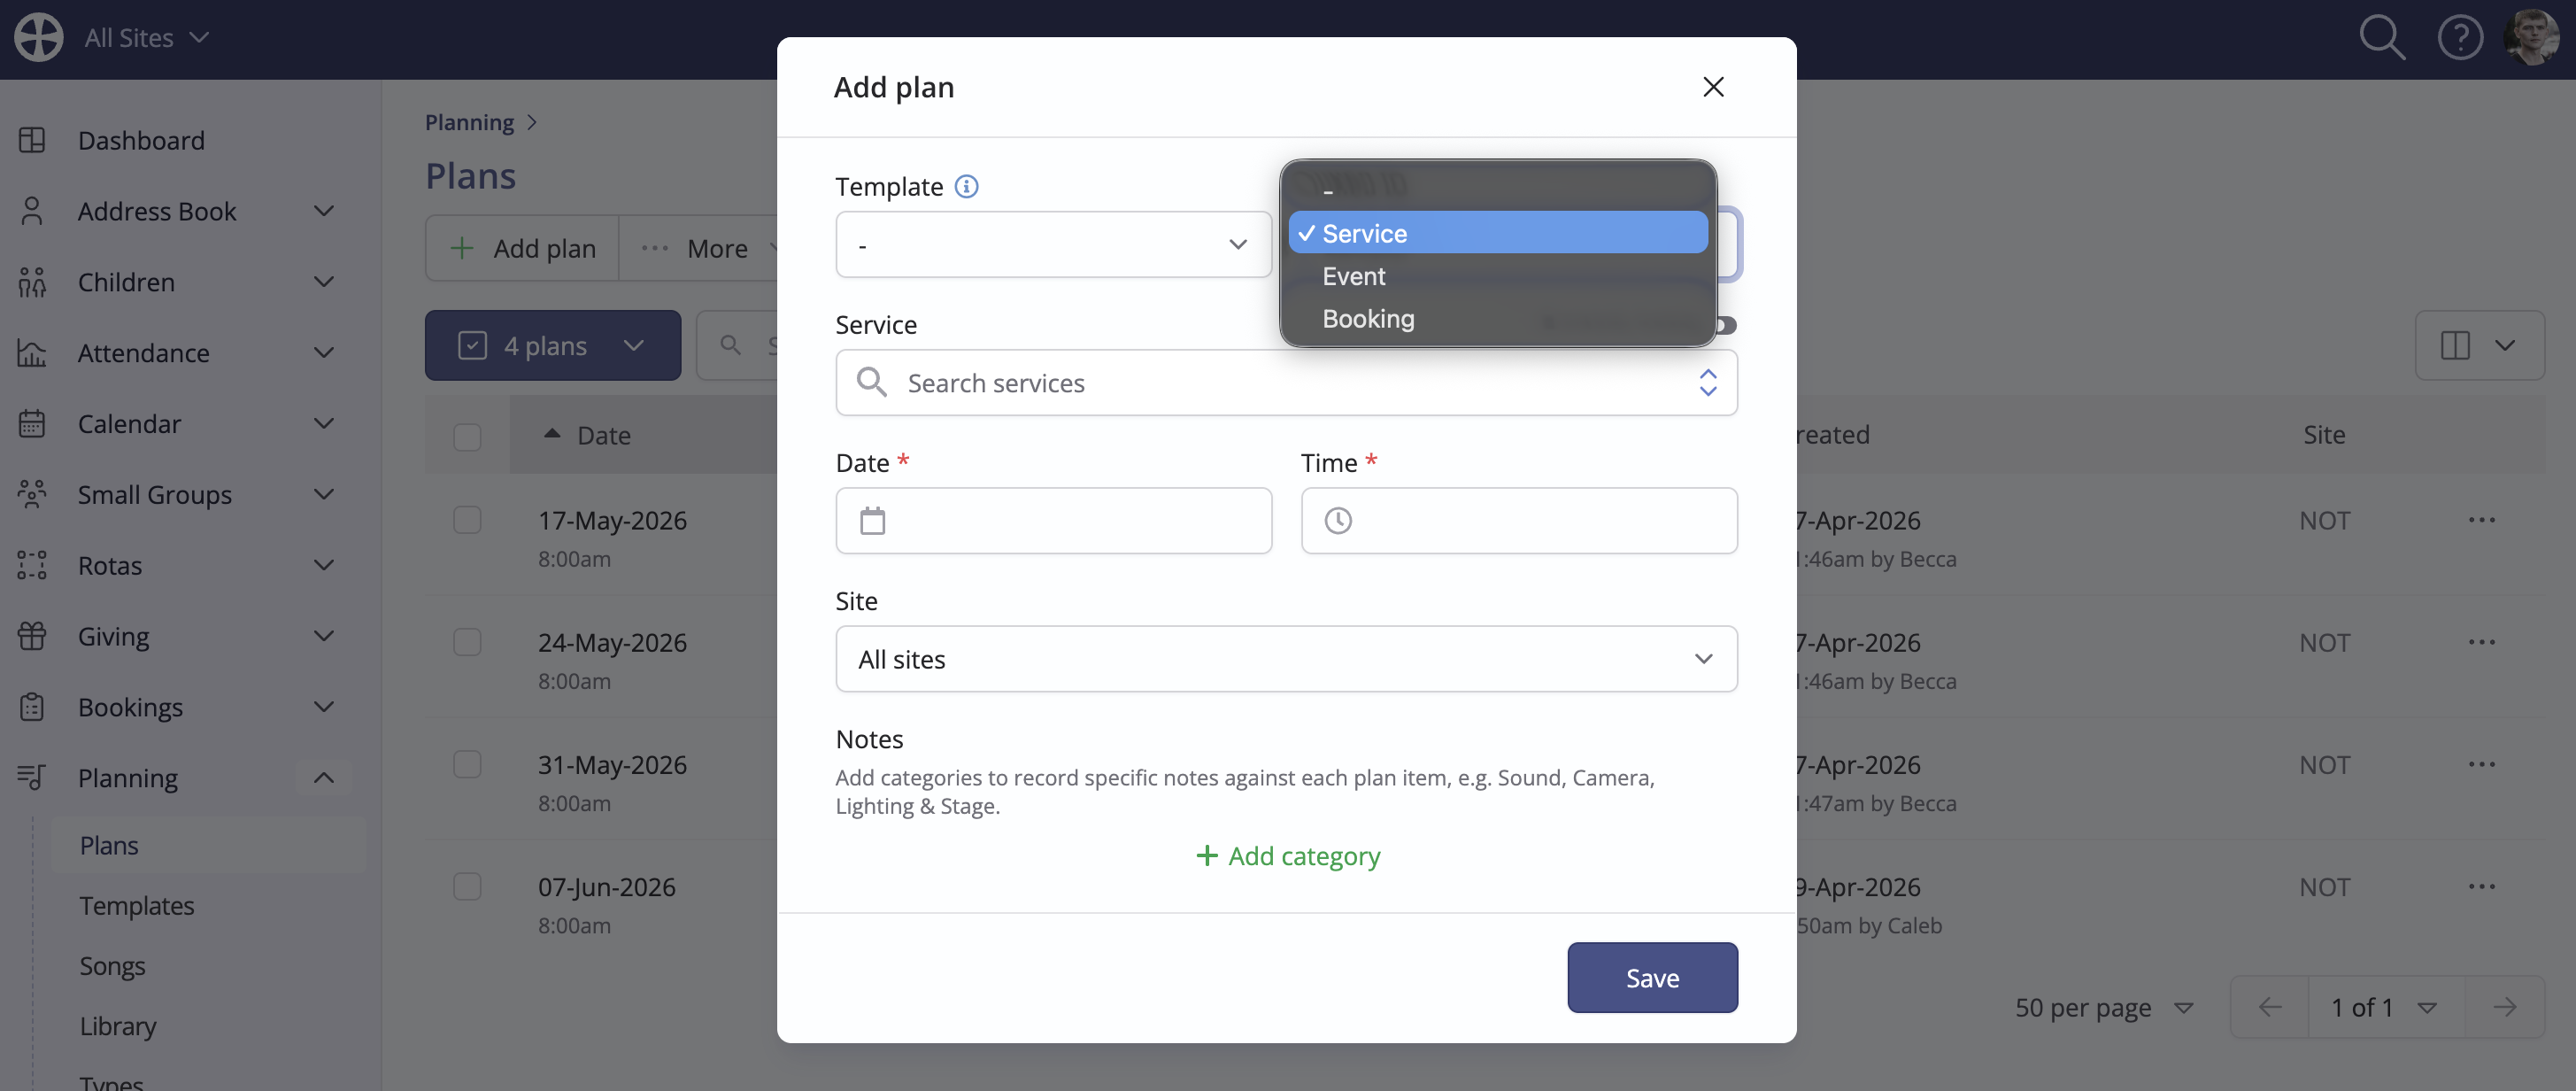
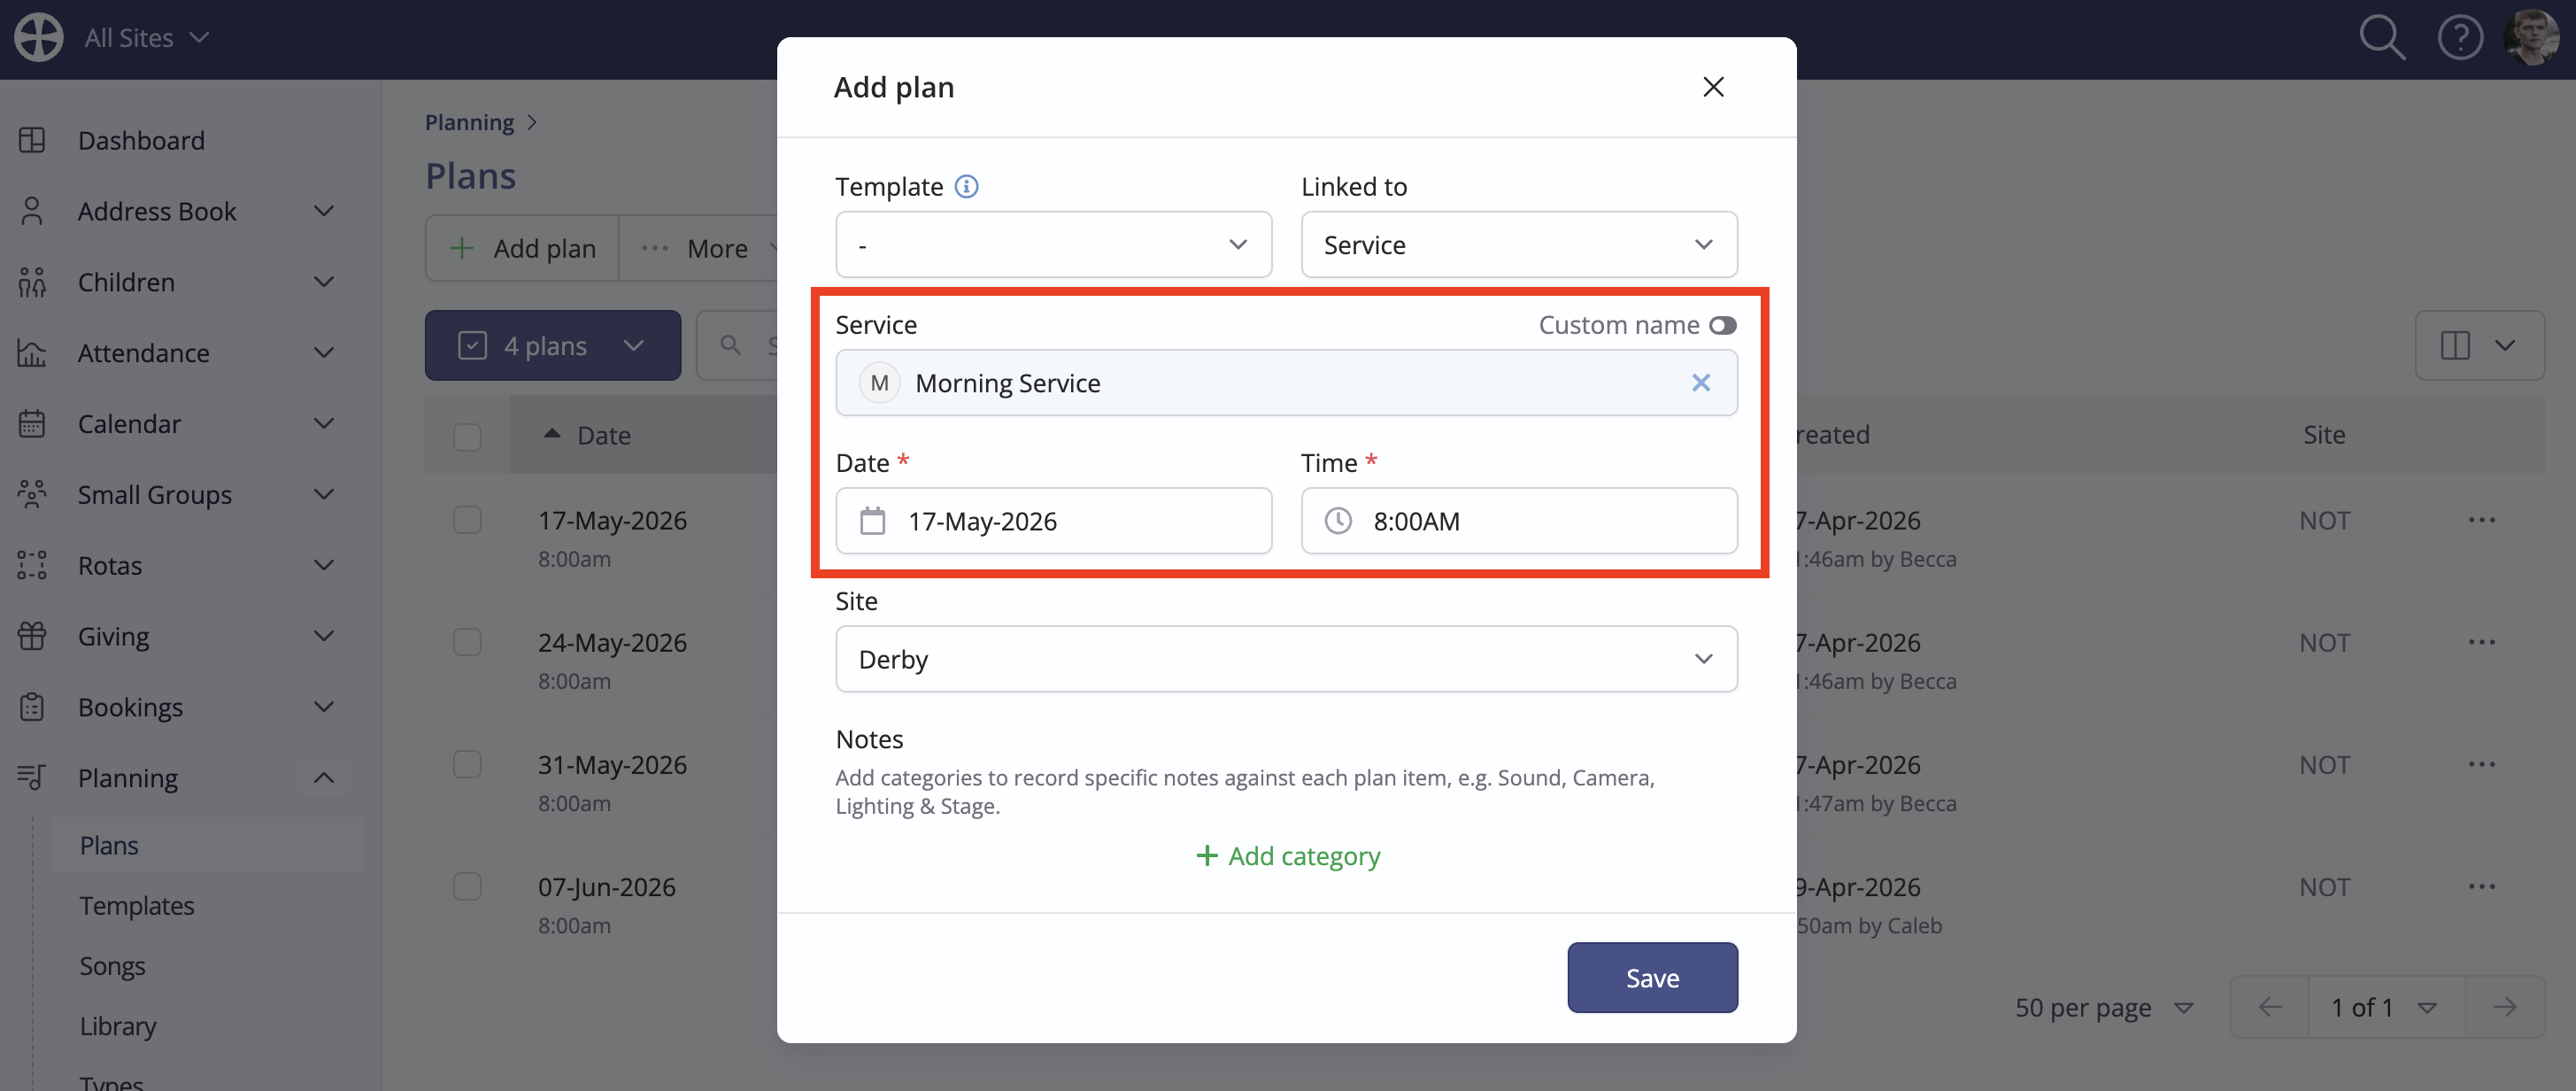
A plan can be optionally Linked to a service, event or booking - see the related sections later in this article for further explanation about plan linking. If linking to a service, search and select the Service - the service name is used for the plan name but you can optionally add a Custom name if you wish. Similarly, if linking to an event or booking, search and select the event or booking of interest.
Next, set the plan Date and Start Time. While the plan Time is typically the start time of the occasion, service, event or booking, you can still add plan items timed before the plan start time. Multi-site customers can choose the plan Site.
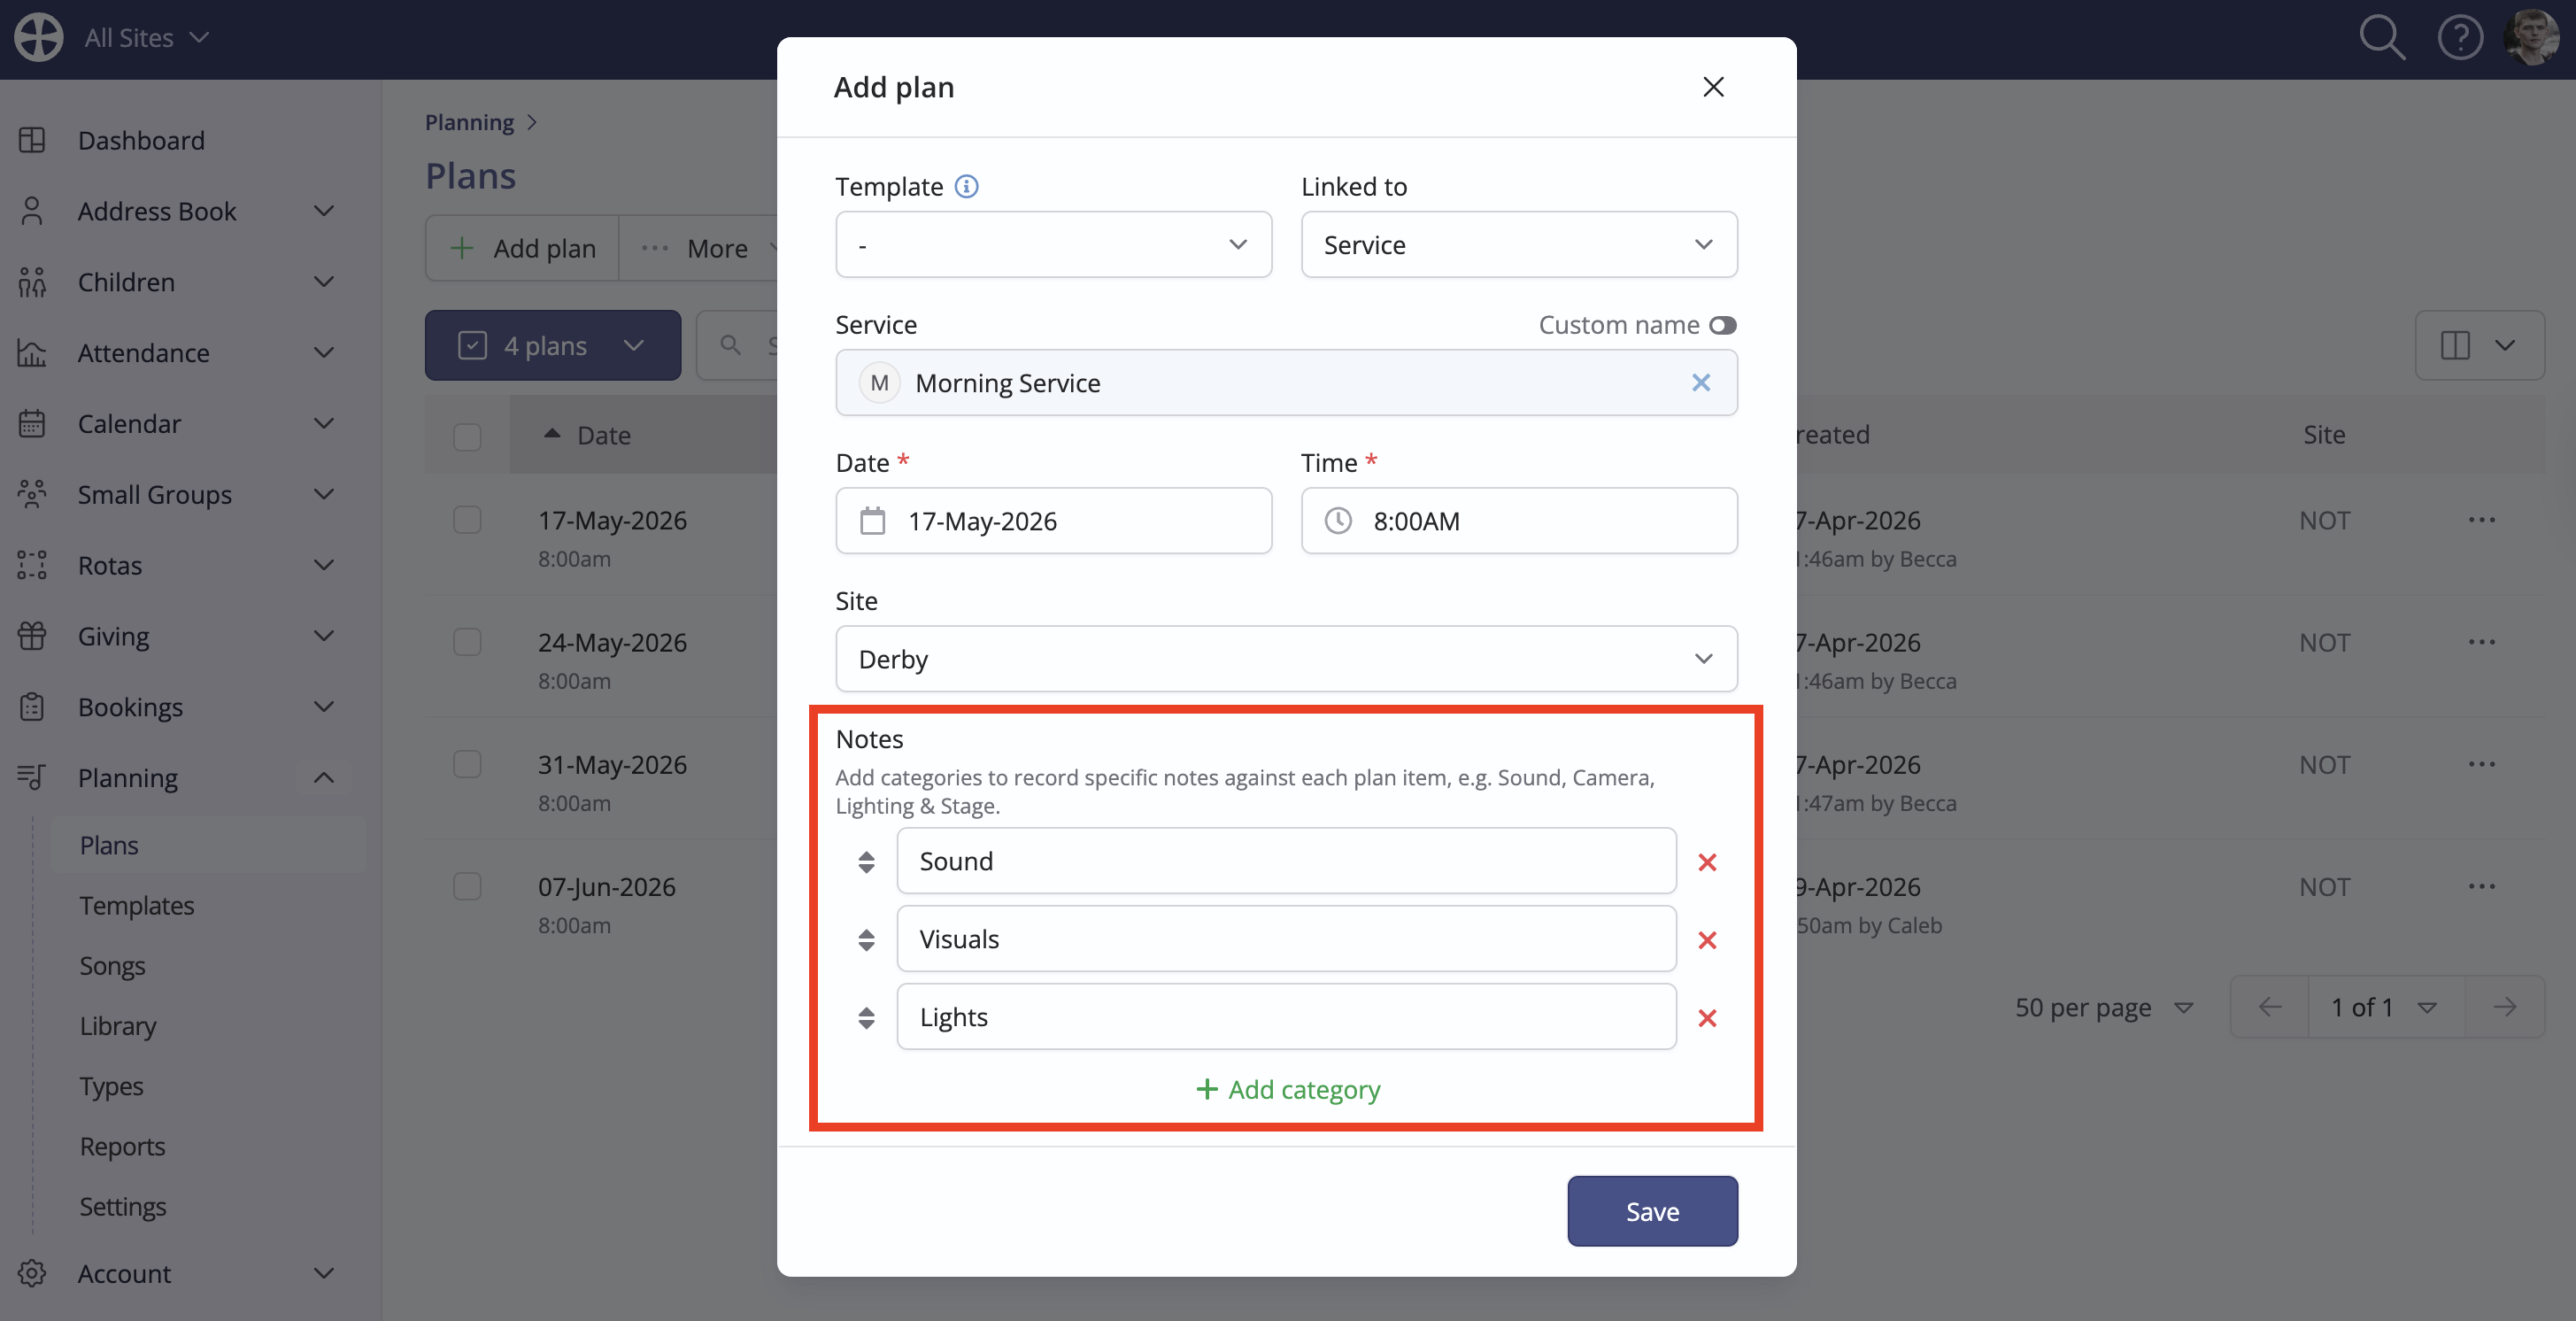
You can define categories for plan Notes (or remove unwanted categories pre-populated from a Template). Plan notes are ideal for giving additional stage directions or prompts to those viewing the plan. In the example below, we've added three categories. Later, when adding or editing plan items, we'll see how category-specific notes are added to give instructions to the respective teams viewing your plan. You can later edit a plan to add/remove/re-order these note categories. Note category changes only apply to this plan - see our related support article for adding note categories to Plan templates. Click Save to add the new plan.
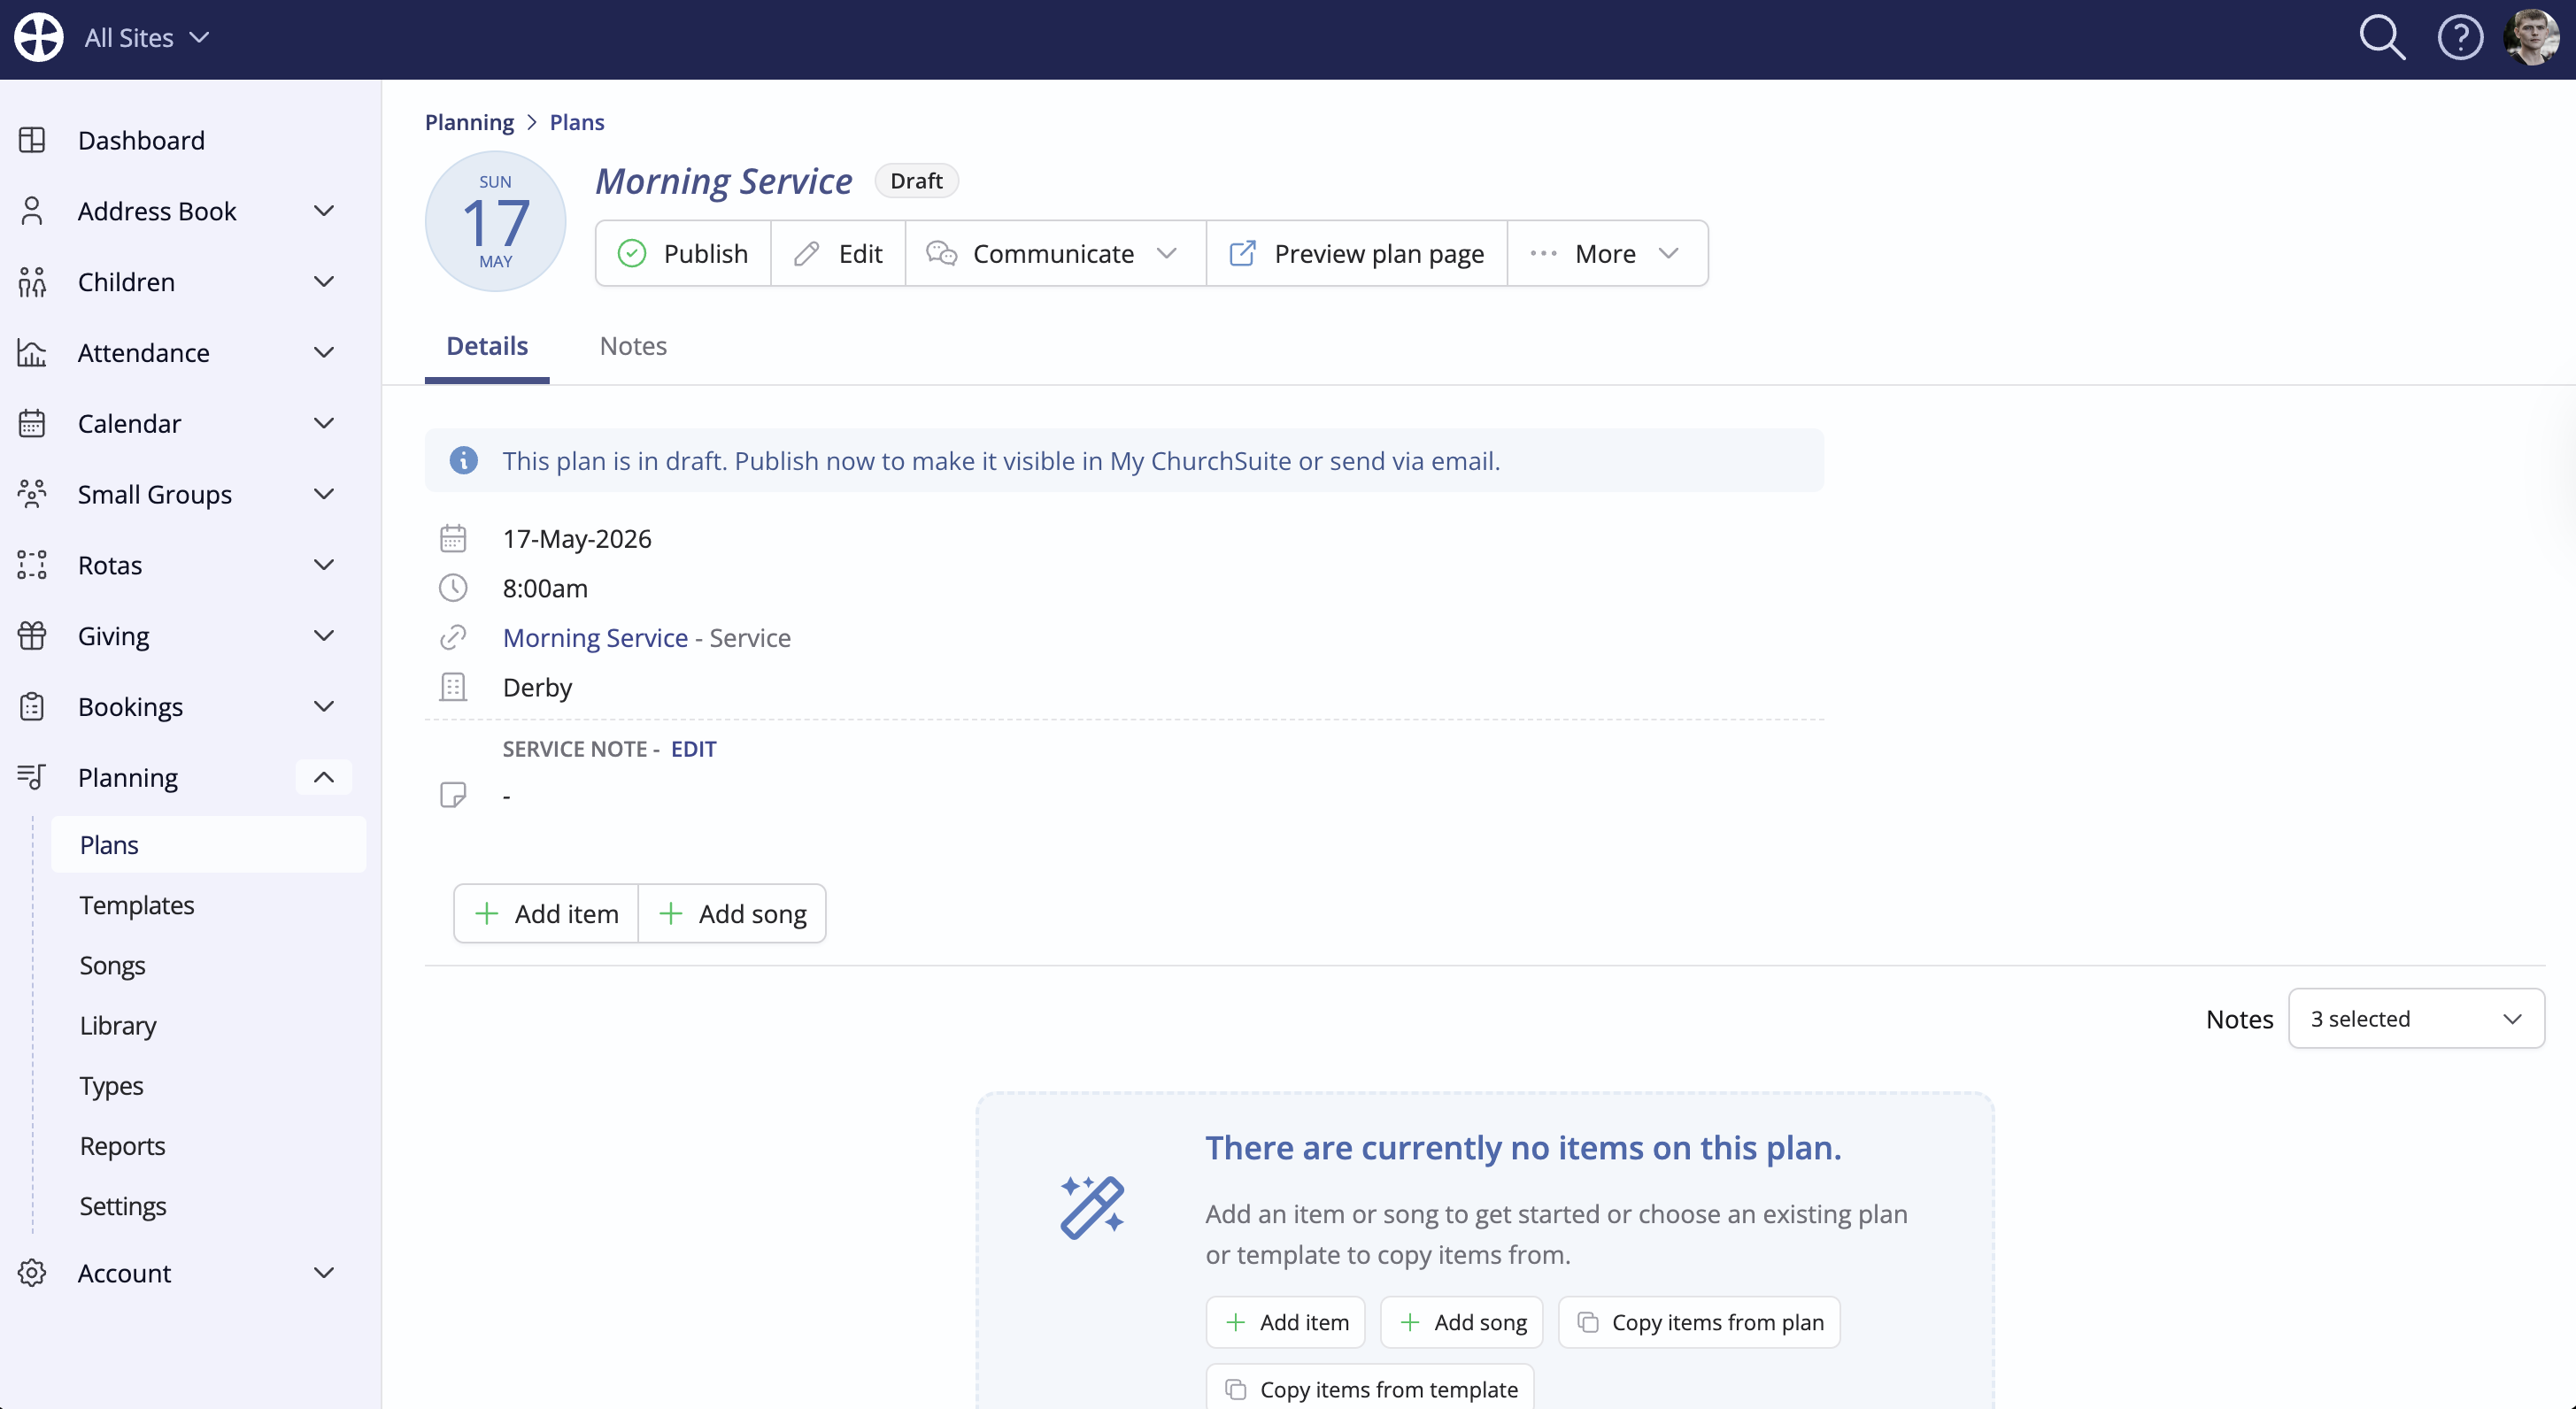
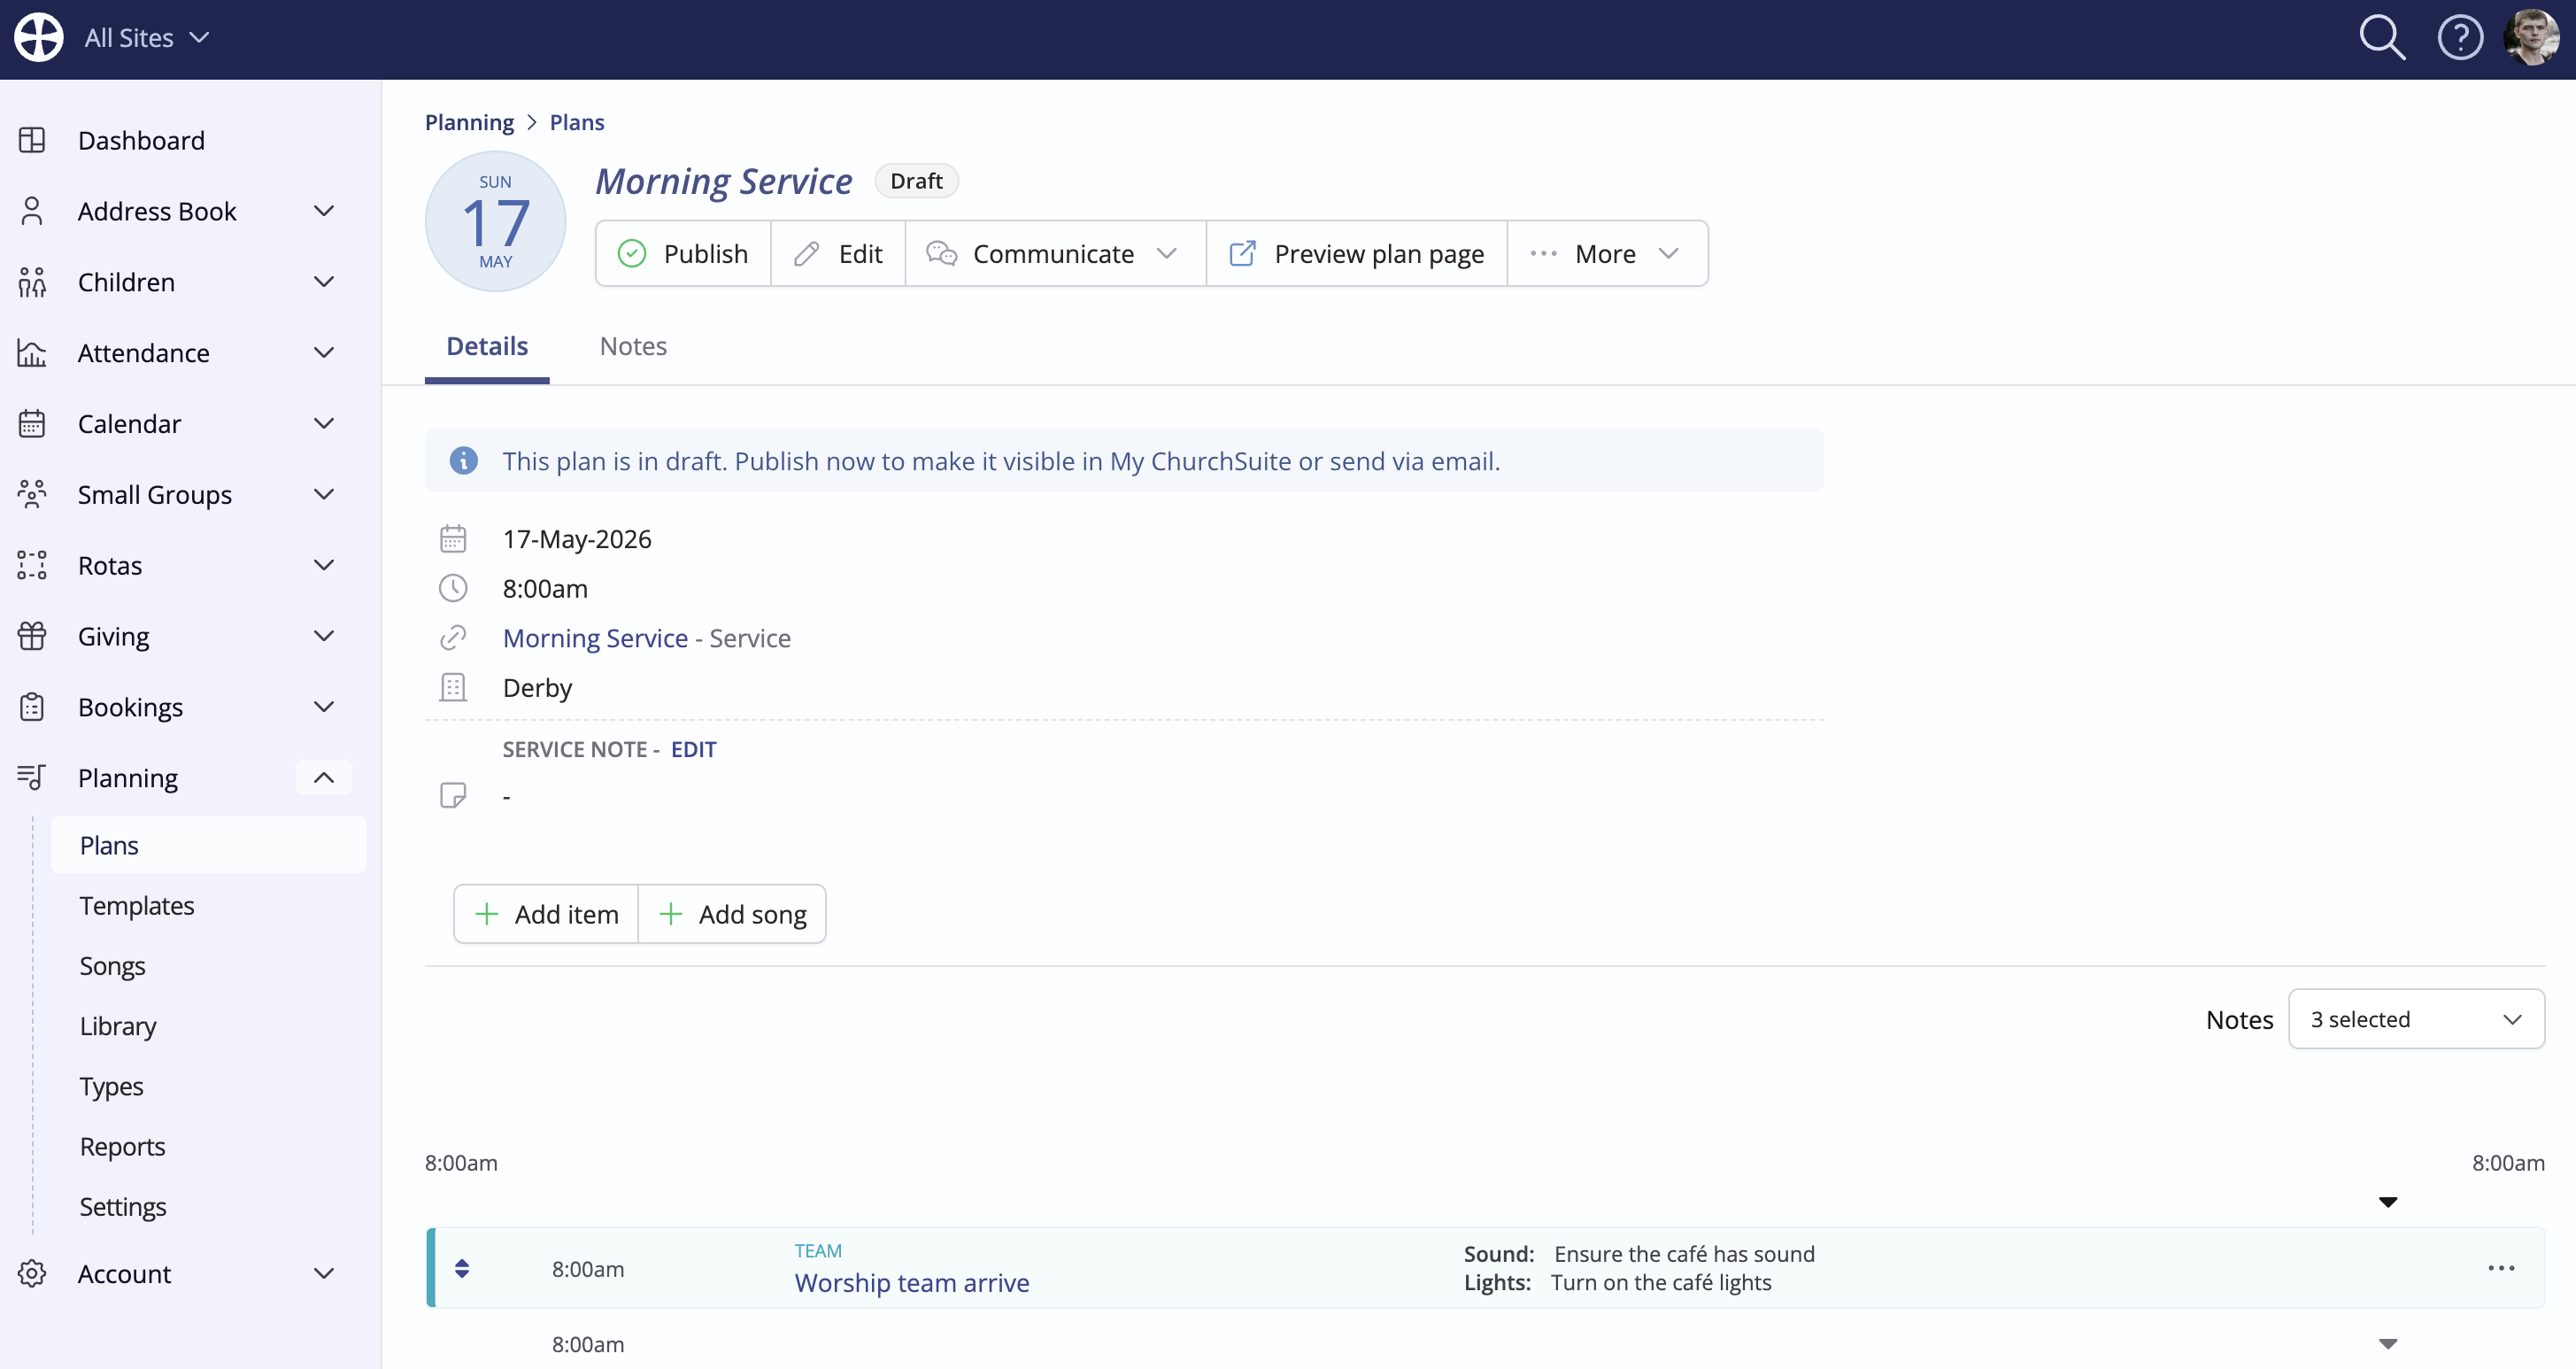
The newly added Plan View is shown, ready to be populated with plan items. The Plan has a Draft status. Later, we'll see how to Publish and distribute the plan—you won't be able to share it until it is published.
Adding items to plans
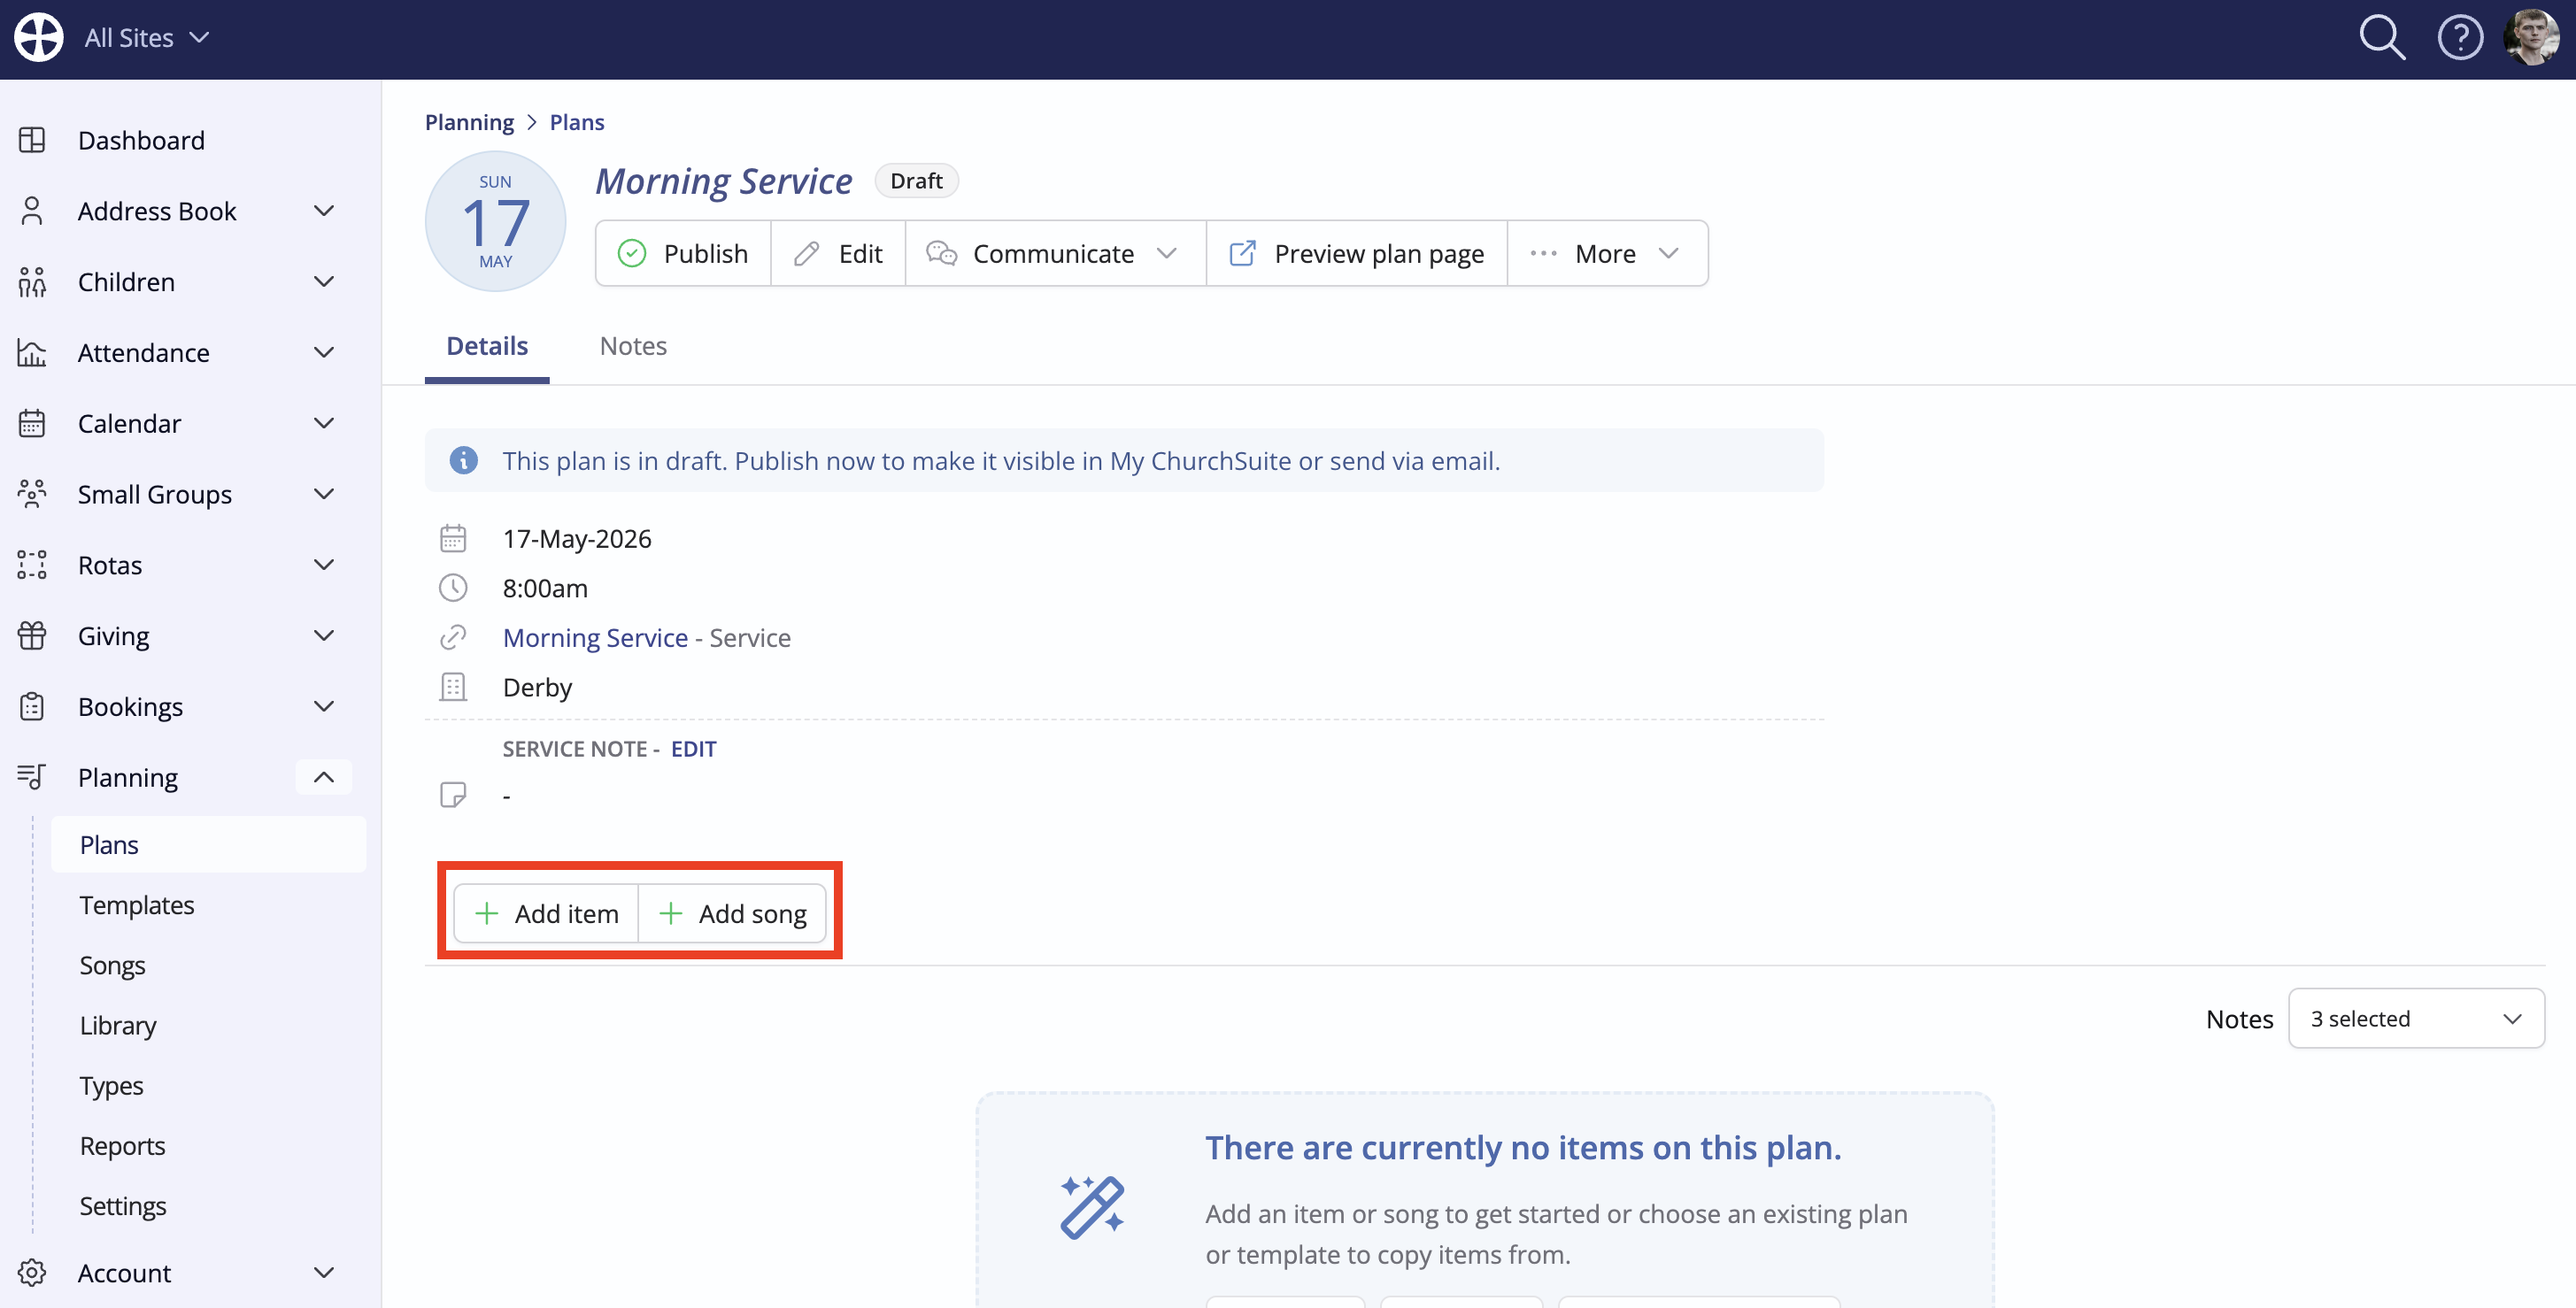
A plan is an ordered list of items that happen consecutively or at preset times during the plan. If you've produced a plan from a template, the plan will likely have some plan items already shown or perhaps you're starting with an empty plan. To add new items to a plan, click Add item. Note also the option to Add song, which can be used to add song items to the plan directly from the Songs library - see our related support article for further information on Managing songs. Let's look at both...
Adding items
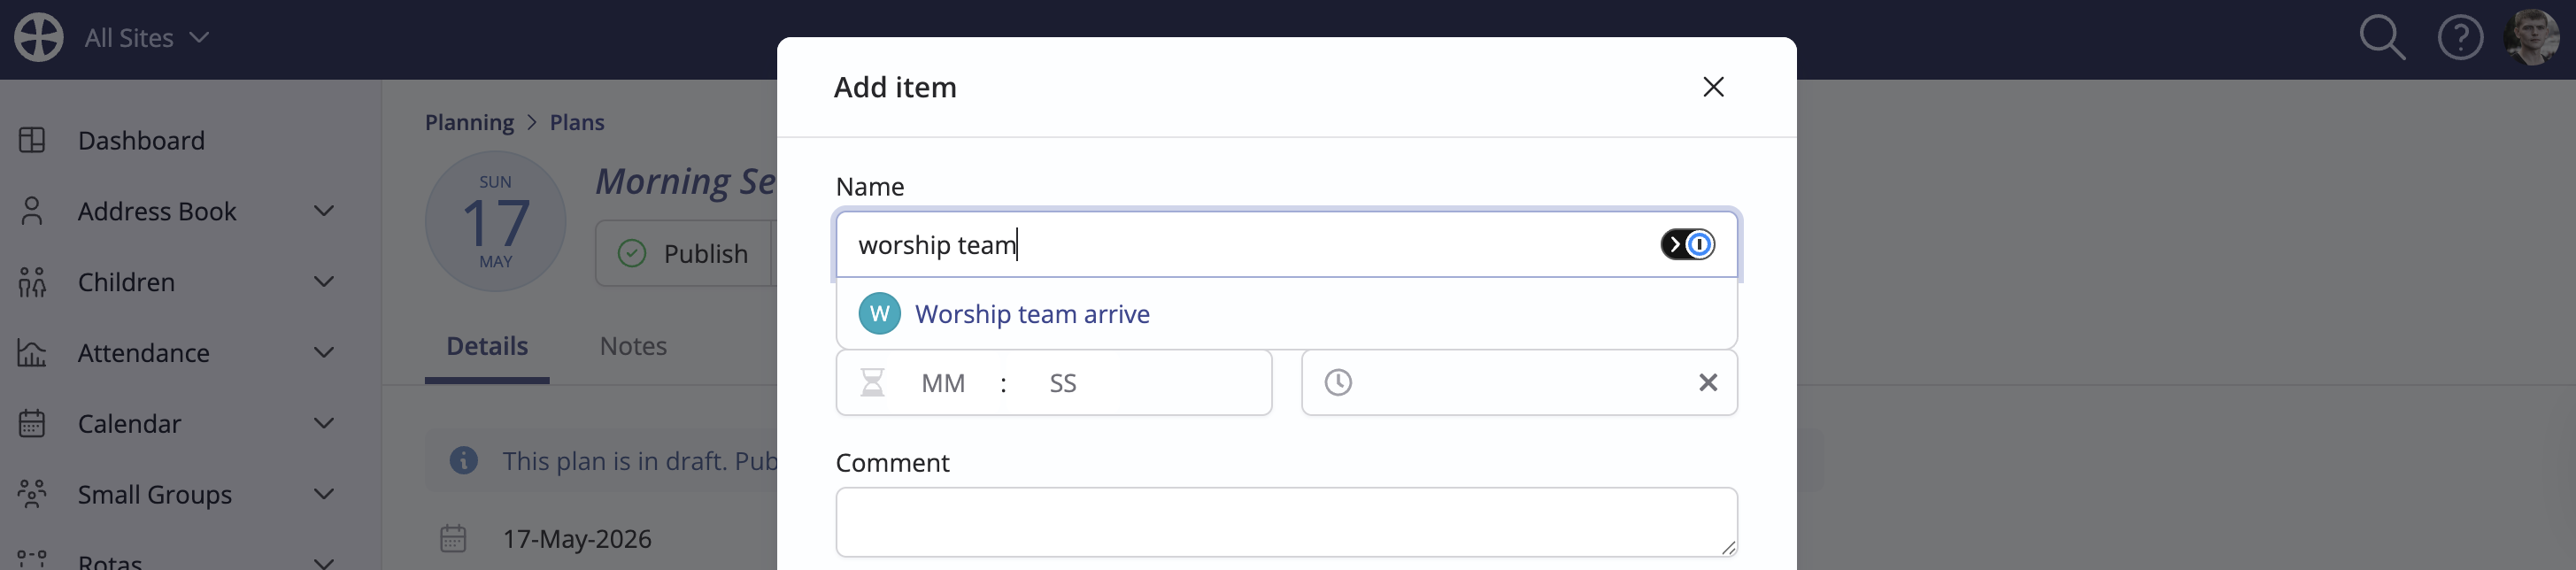
On the Add item pop-up, enter the item Name. As you type, matching suggestions from your Library are shown or you can enter a new item name where it doesn't already exist. Later, you can add any non-library items to the Library if you wish, which will make the process of adding library items to plans easier in the future.
While most plan items will likely run consecutively based on the plan order and Duration (running from the plan start time), you can optionally pin a plan item to a fixed Start Time, with other items flowing around it. Fixed-start-time plan items are helpful for things that need to happen before the Plan starting time, e.g. pre-service items or to mark a non-moveable point within the plan order. In this example, the plan/service start time is 10.30am but this item relates to something happening before the service, so a fixed Start Time has been specified. Optionally add a Duration and Comment - perhaps some additional information about the plan item.

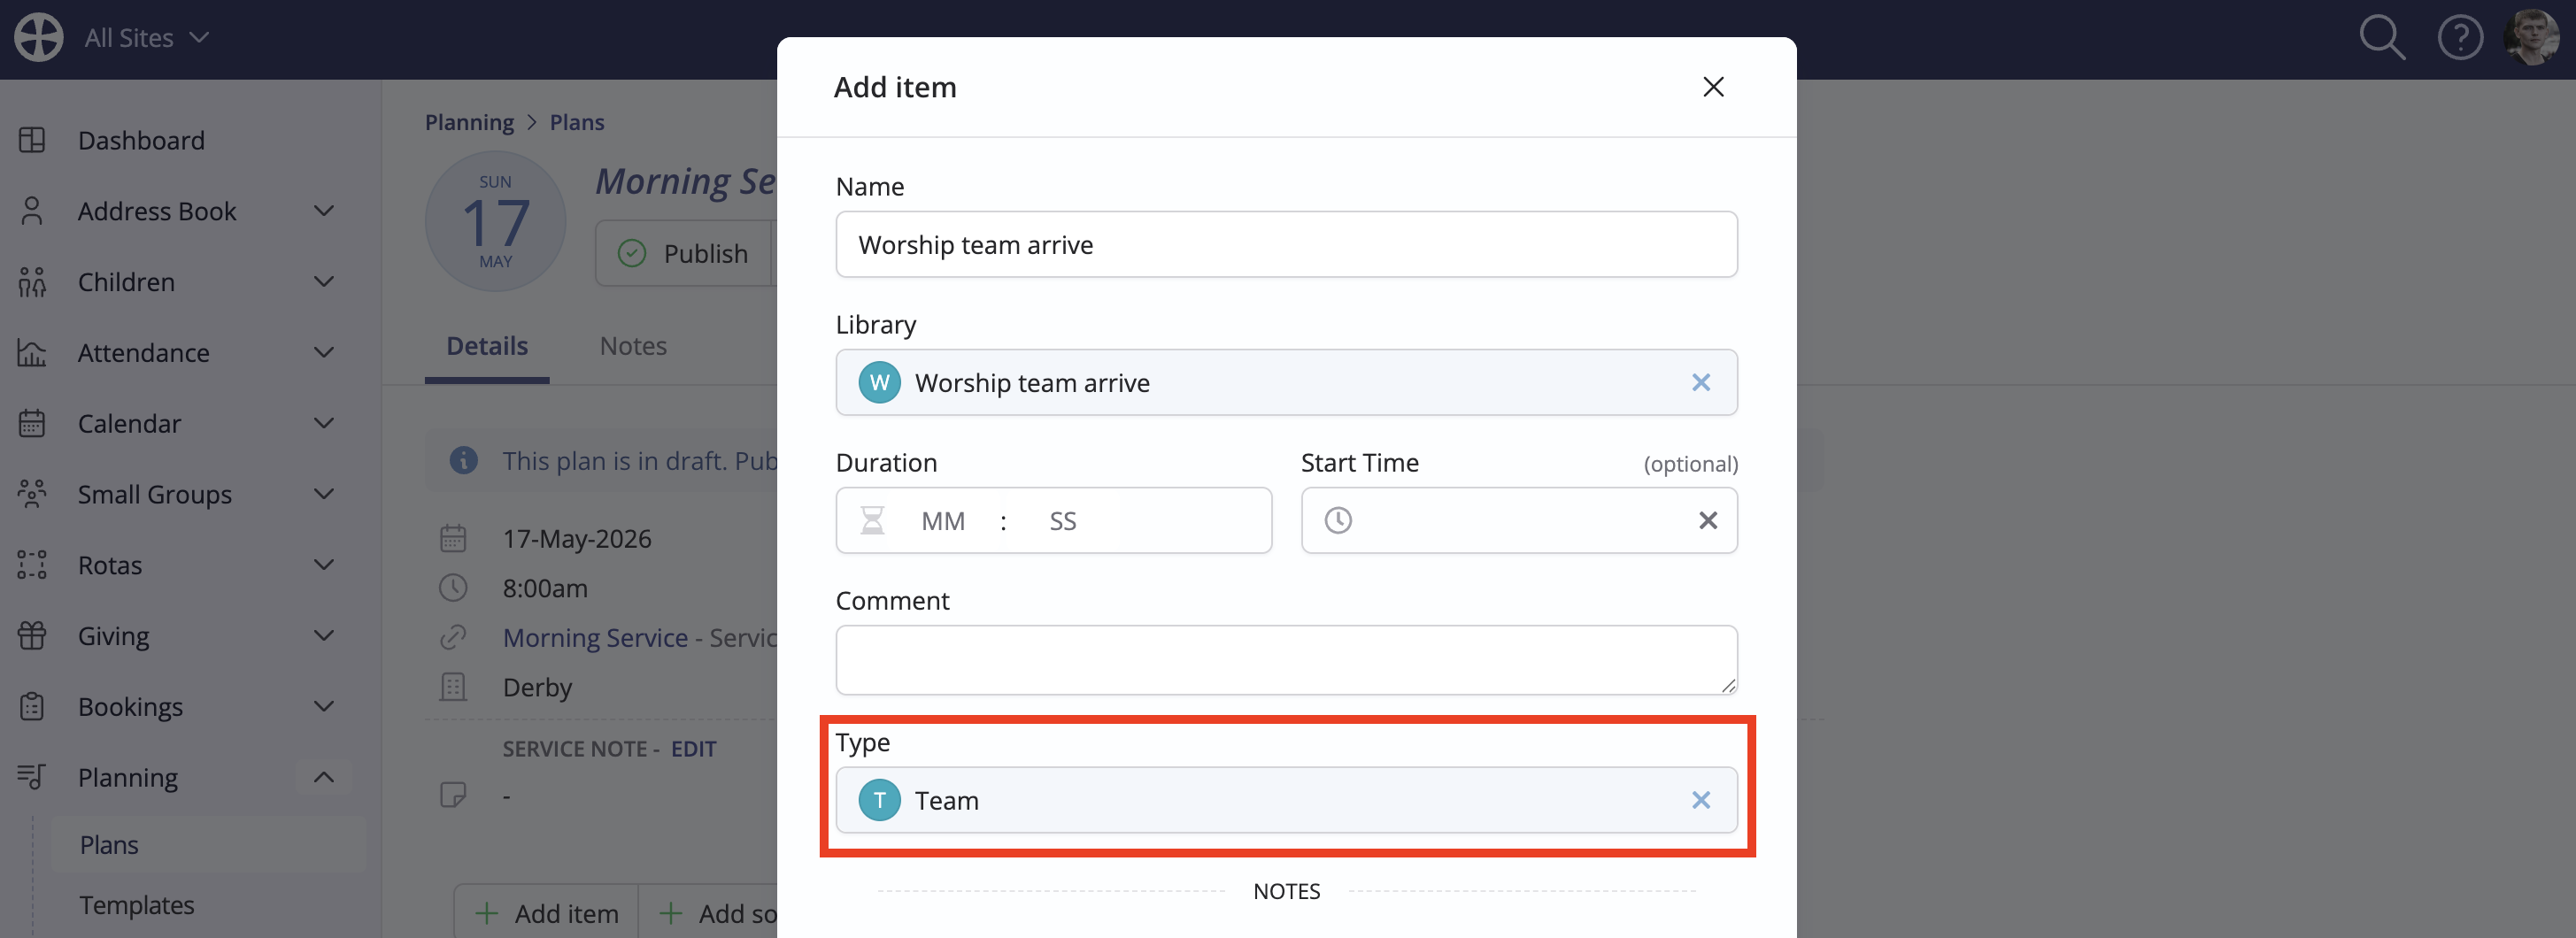
Library items are grouped by Type and sport a type colour on plans and templates. For plan items added from the library, the type will be pre-selected. For new plan items not in the library, you can optionally specify one of your existing types or leave the type empty. If you later add the plan item to the Library, and where a type has not been specified, you'll be asked to choose the Type under which the new library item will be grouped. Our related support article on Managing library items explains how to create library item Types and how to add items to the Library.
Finally, if you've specified note Categories for the plan, enter any applicable item-specific Notes. As a reminder, notes are ideal for adding additional stage directions or team prompts for those later viewing your plan.

Click Save to add the plan item. If a Start Time for the item was specified, the item is inserted into the appropriate place within the plan, otherwise, the new item is added consecutively following the last plan item. Plan items can be re-ordered by dragging the up/down re-order control on the left-hand side of each plan item. Plan items sport their type colour or show in grey if they are not assigned to a type.
Continue adding other plan items, following the steps outlined above.
Top Tip - Adding a Bible Verse / Scripture Reference to a plan
To add a Bible verse to a plan, click Add Item, then enter the item Name. Set your Duration and add any comments, if required. Next, select your Bible Reading Type in the Type field - this will then surface a related question which allows you to add your Bible reference:
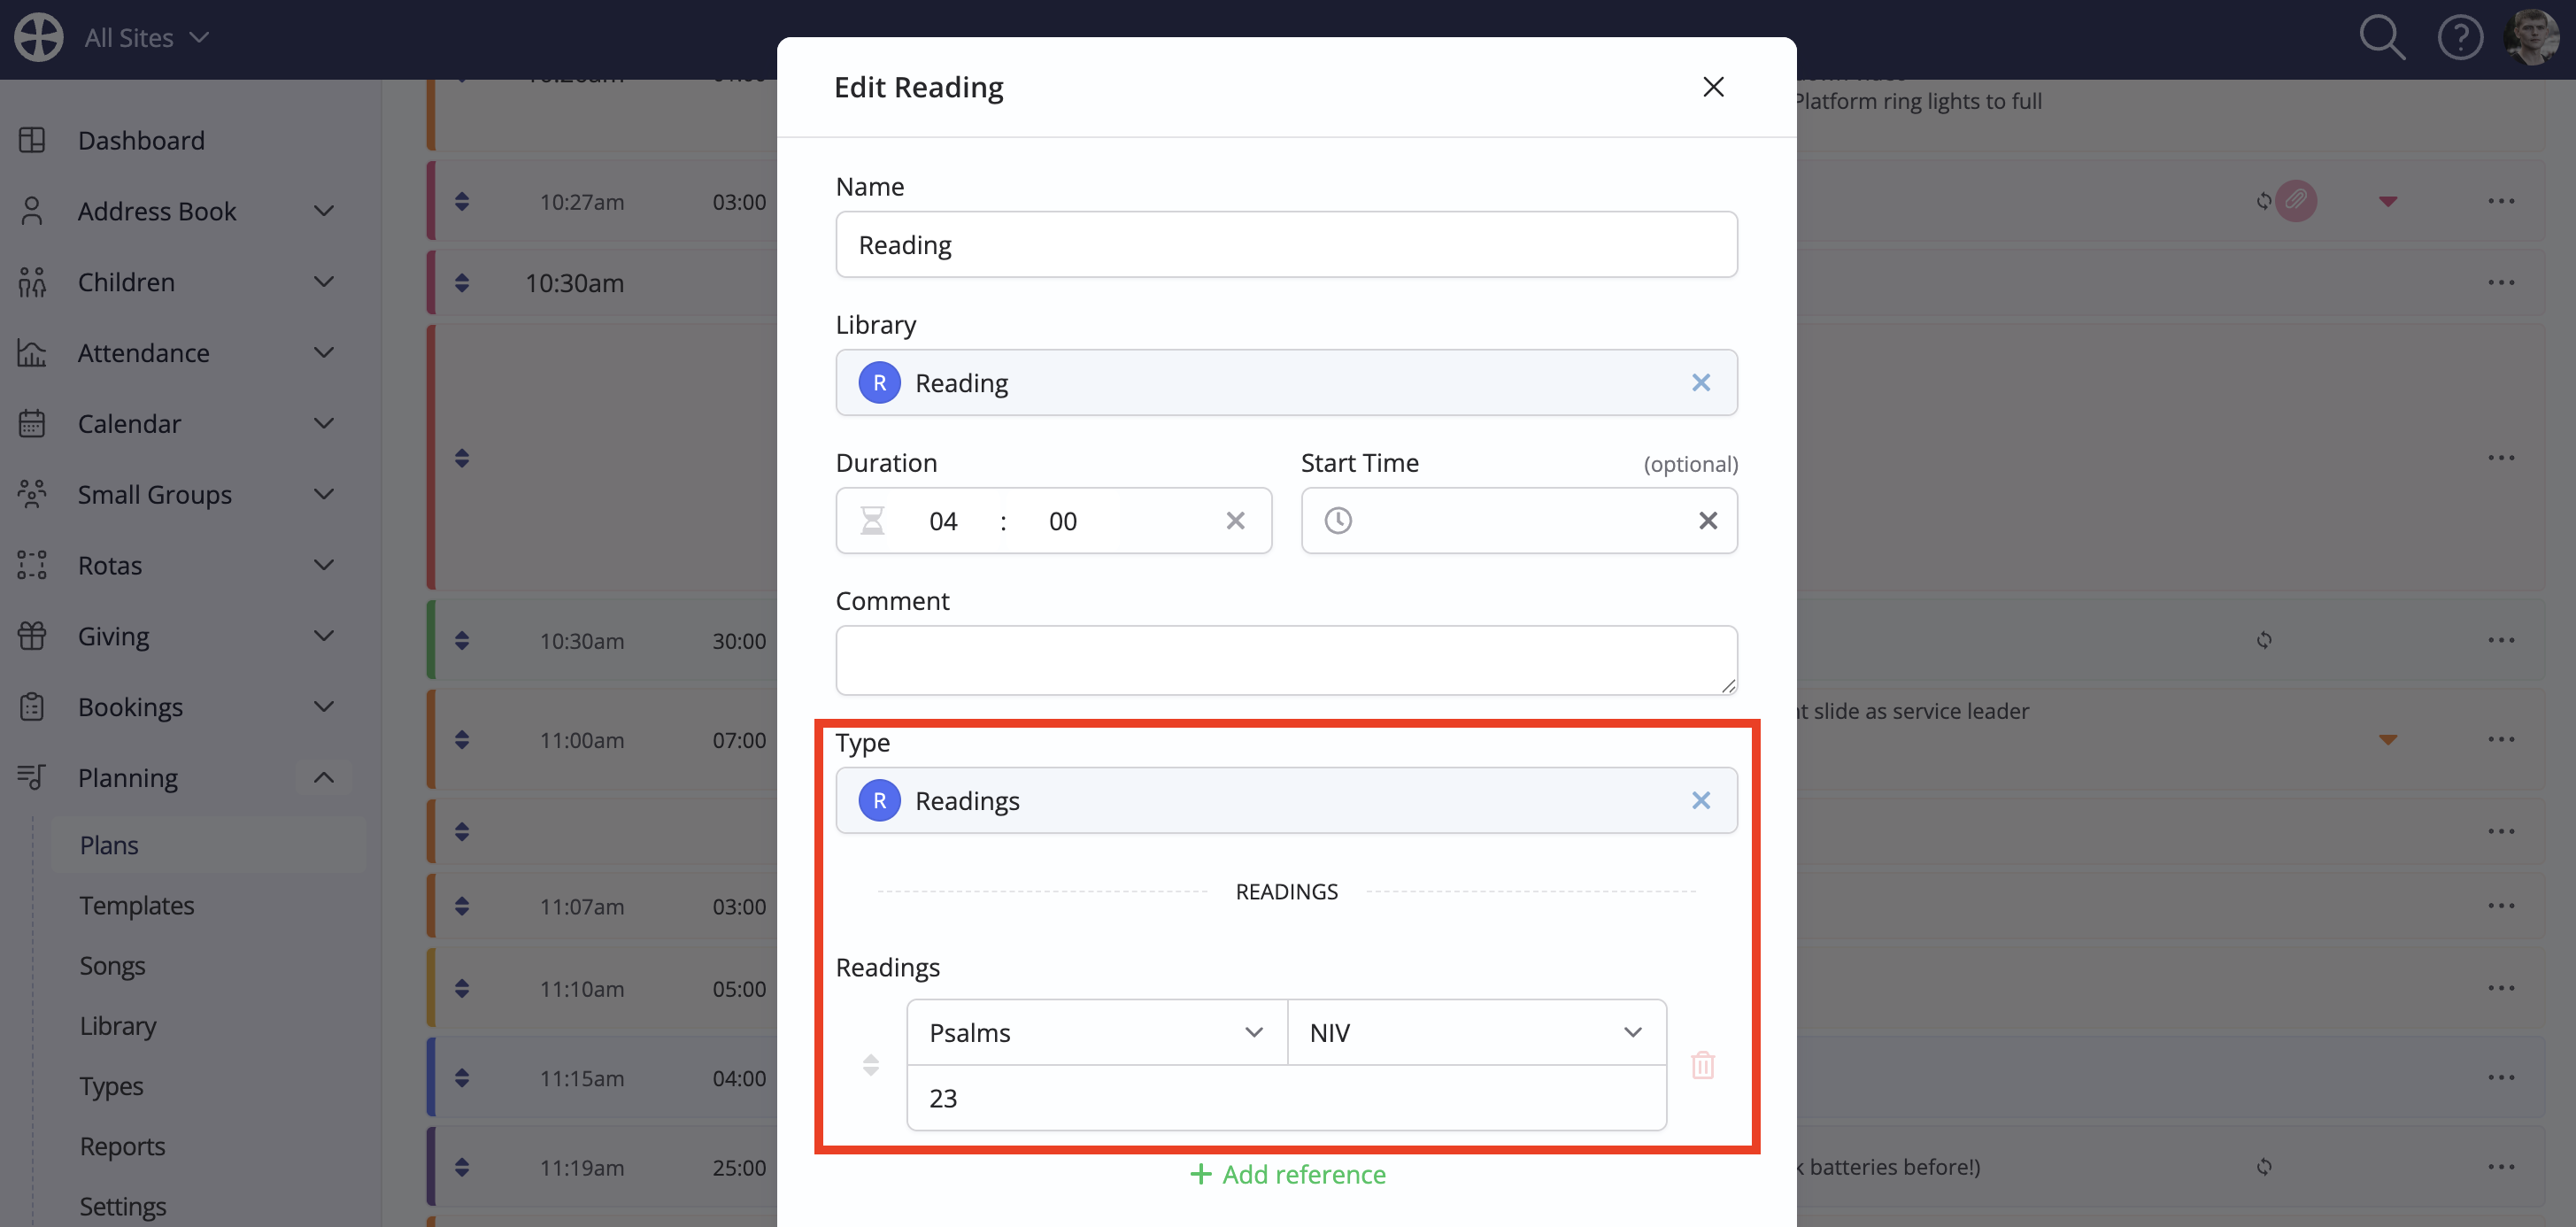
When you Save this, the item will appear in your plan with a link to the Bible verse on the YouVersion website, allowing you to access the correct Bible verse easily:

Adding songs
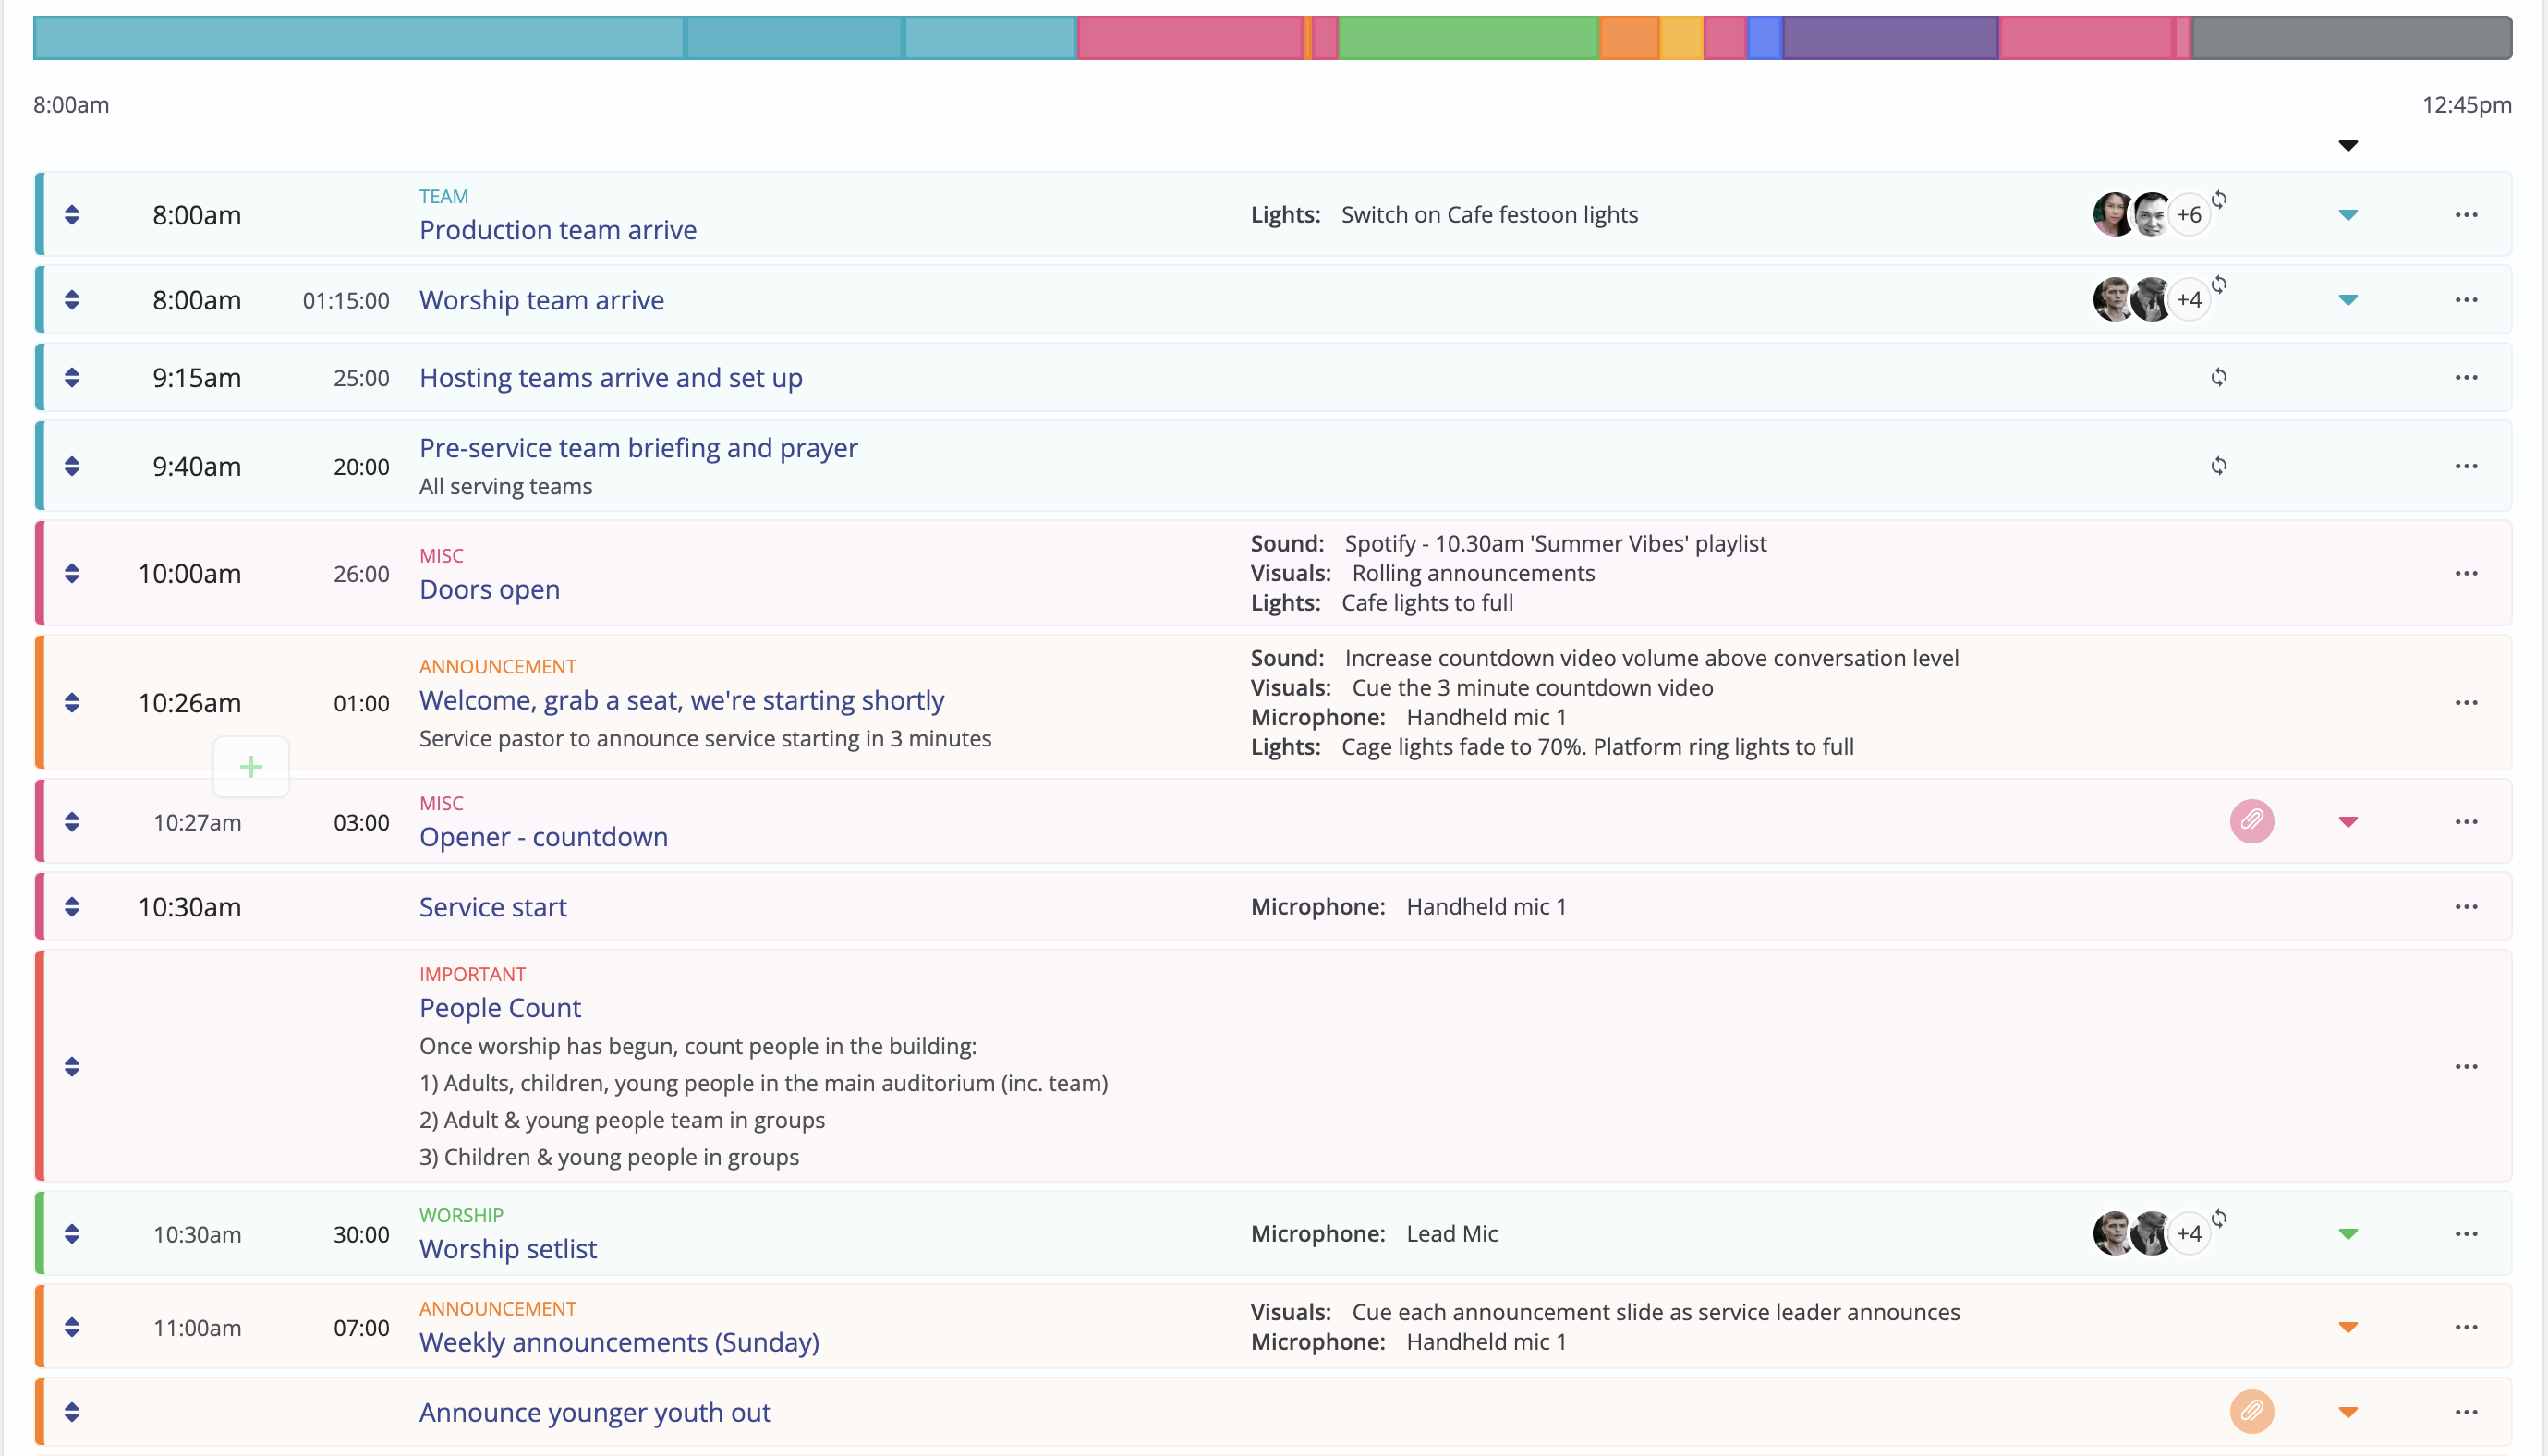
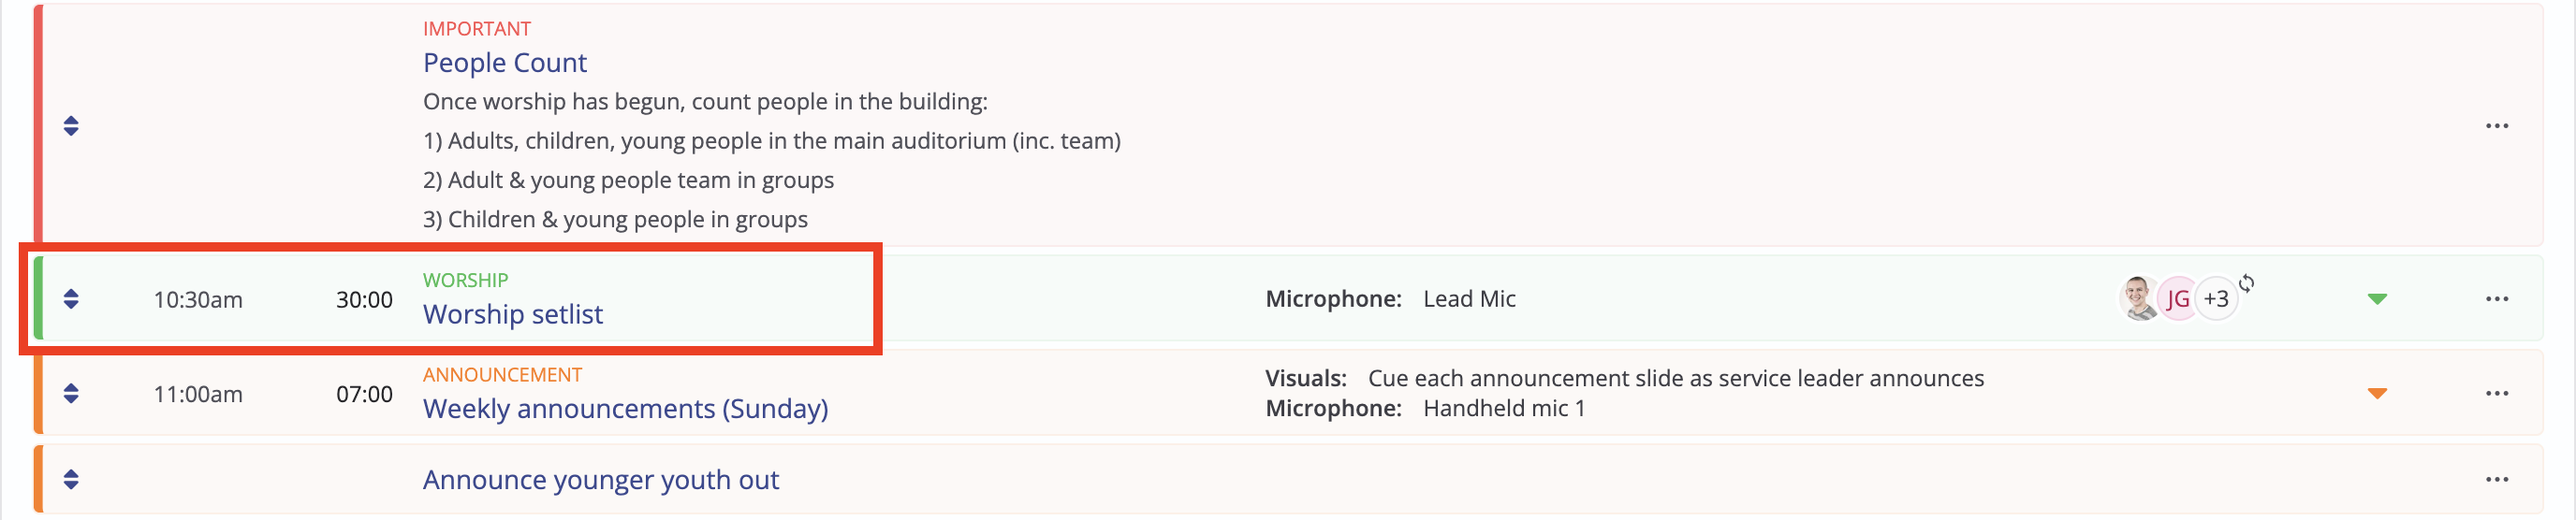
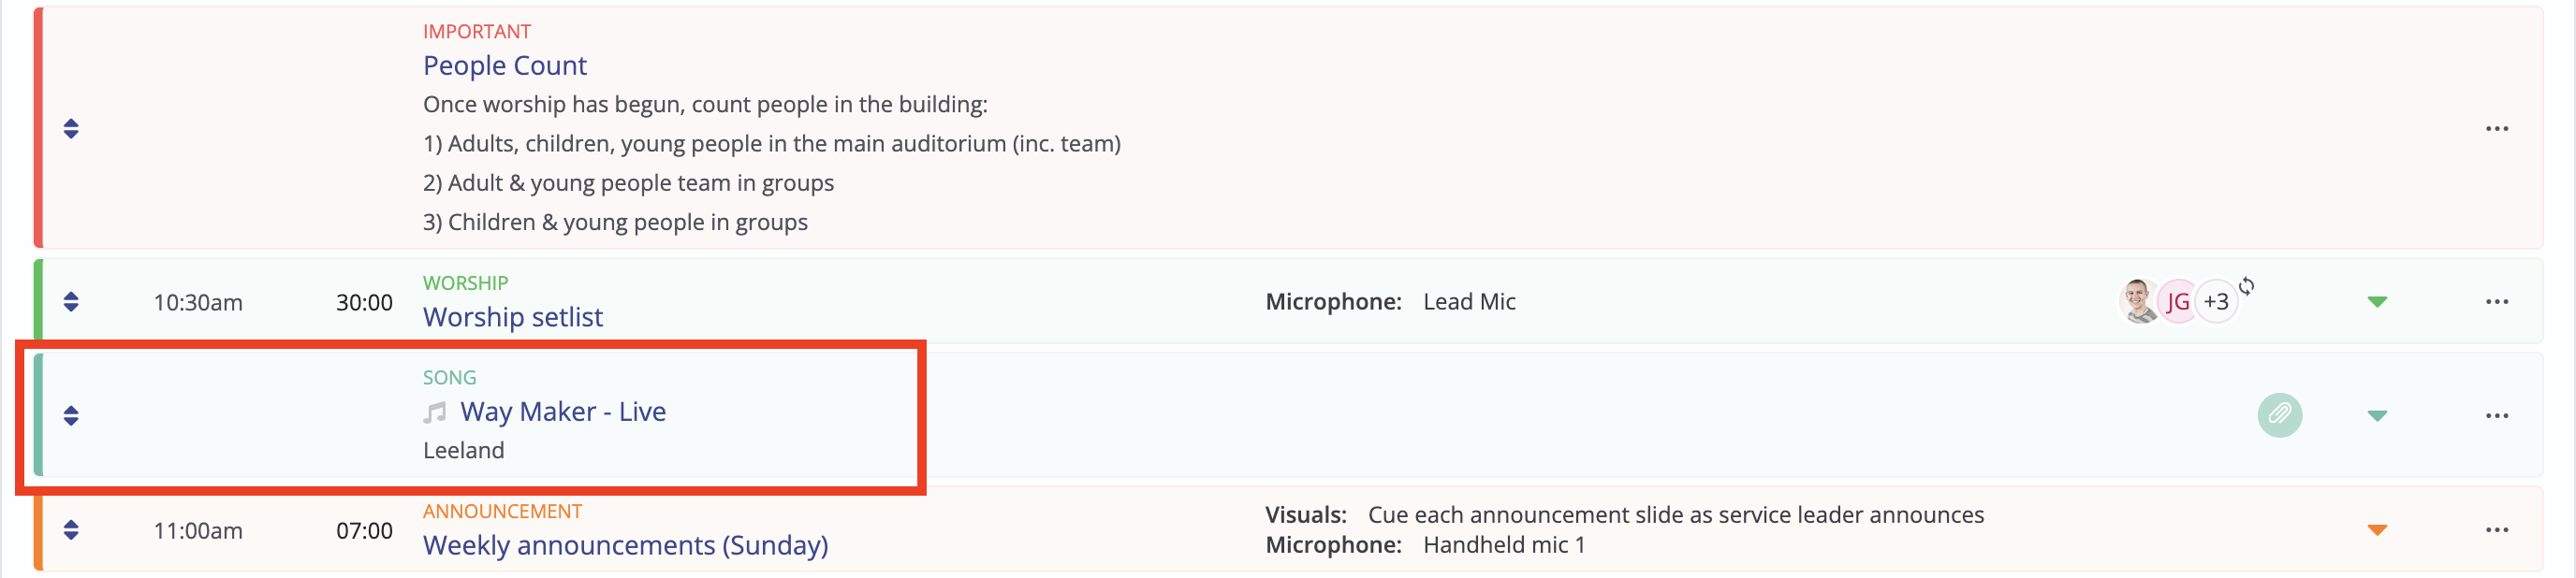
Plans often evolve as the occasion date nears. A typical 'Sunday service' plan may begin with broad headings representing the main elements of the service, with the specific details being added later. For example, songs are often added much closer to the service date. In the example below, the plan contains a placeholder item for a 30-minute worship setlist. Some churches have songs interspersed across the plan, so you could use 'song' placeholder items that you now wish to 'Edit' and substitute in the actual known songs that will be used. Let's begin by adding specific songs and then look at how to edit a placeholder song plan item to change it to an actual song...
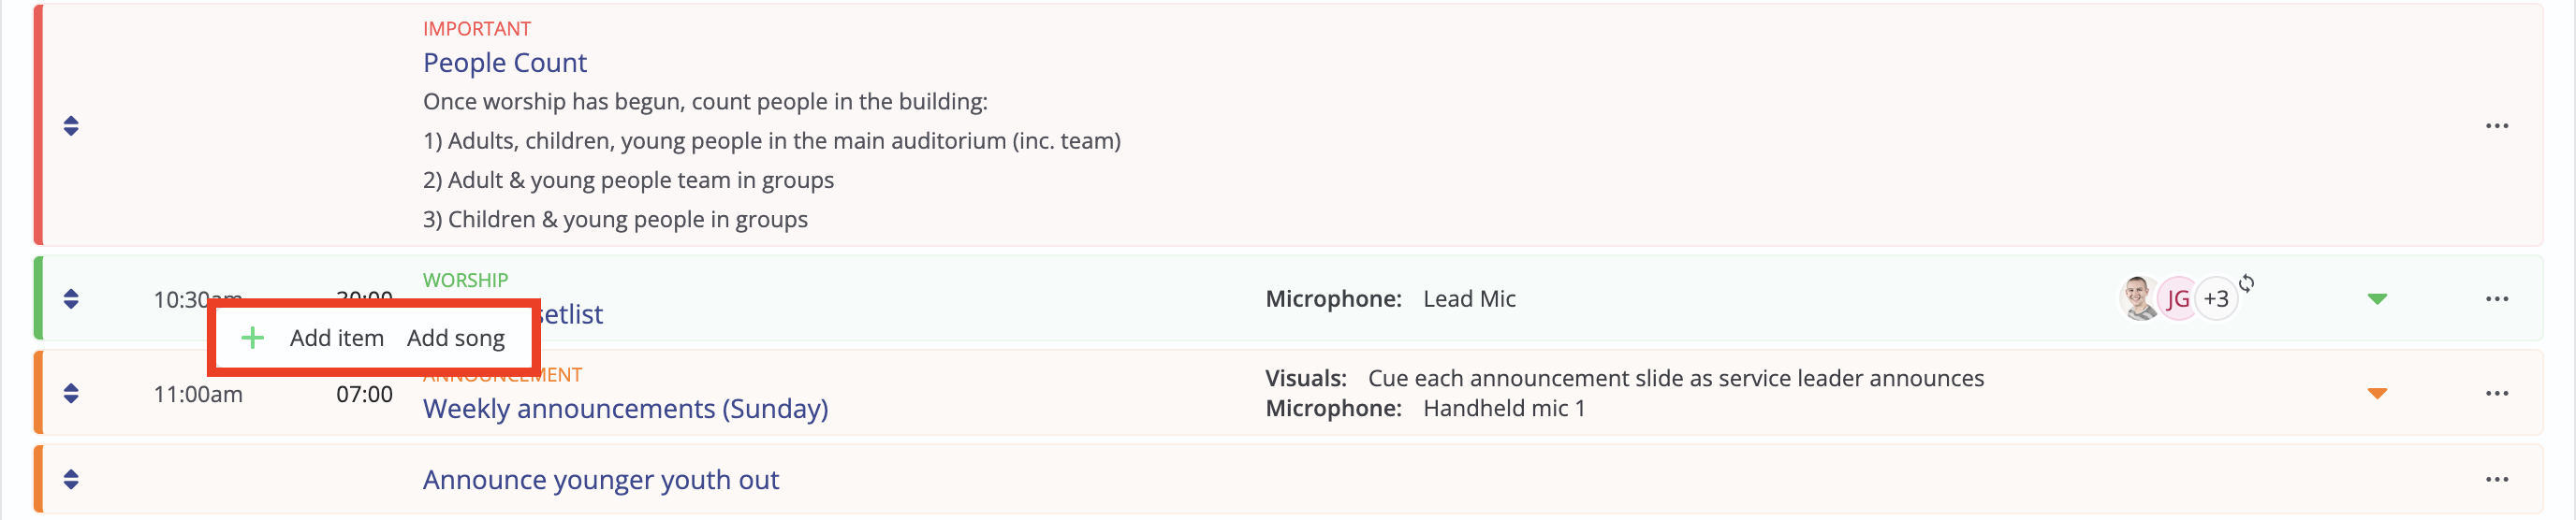
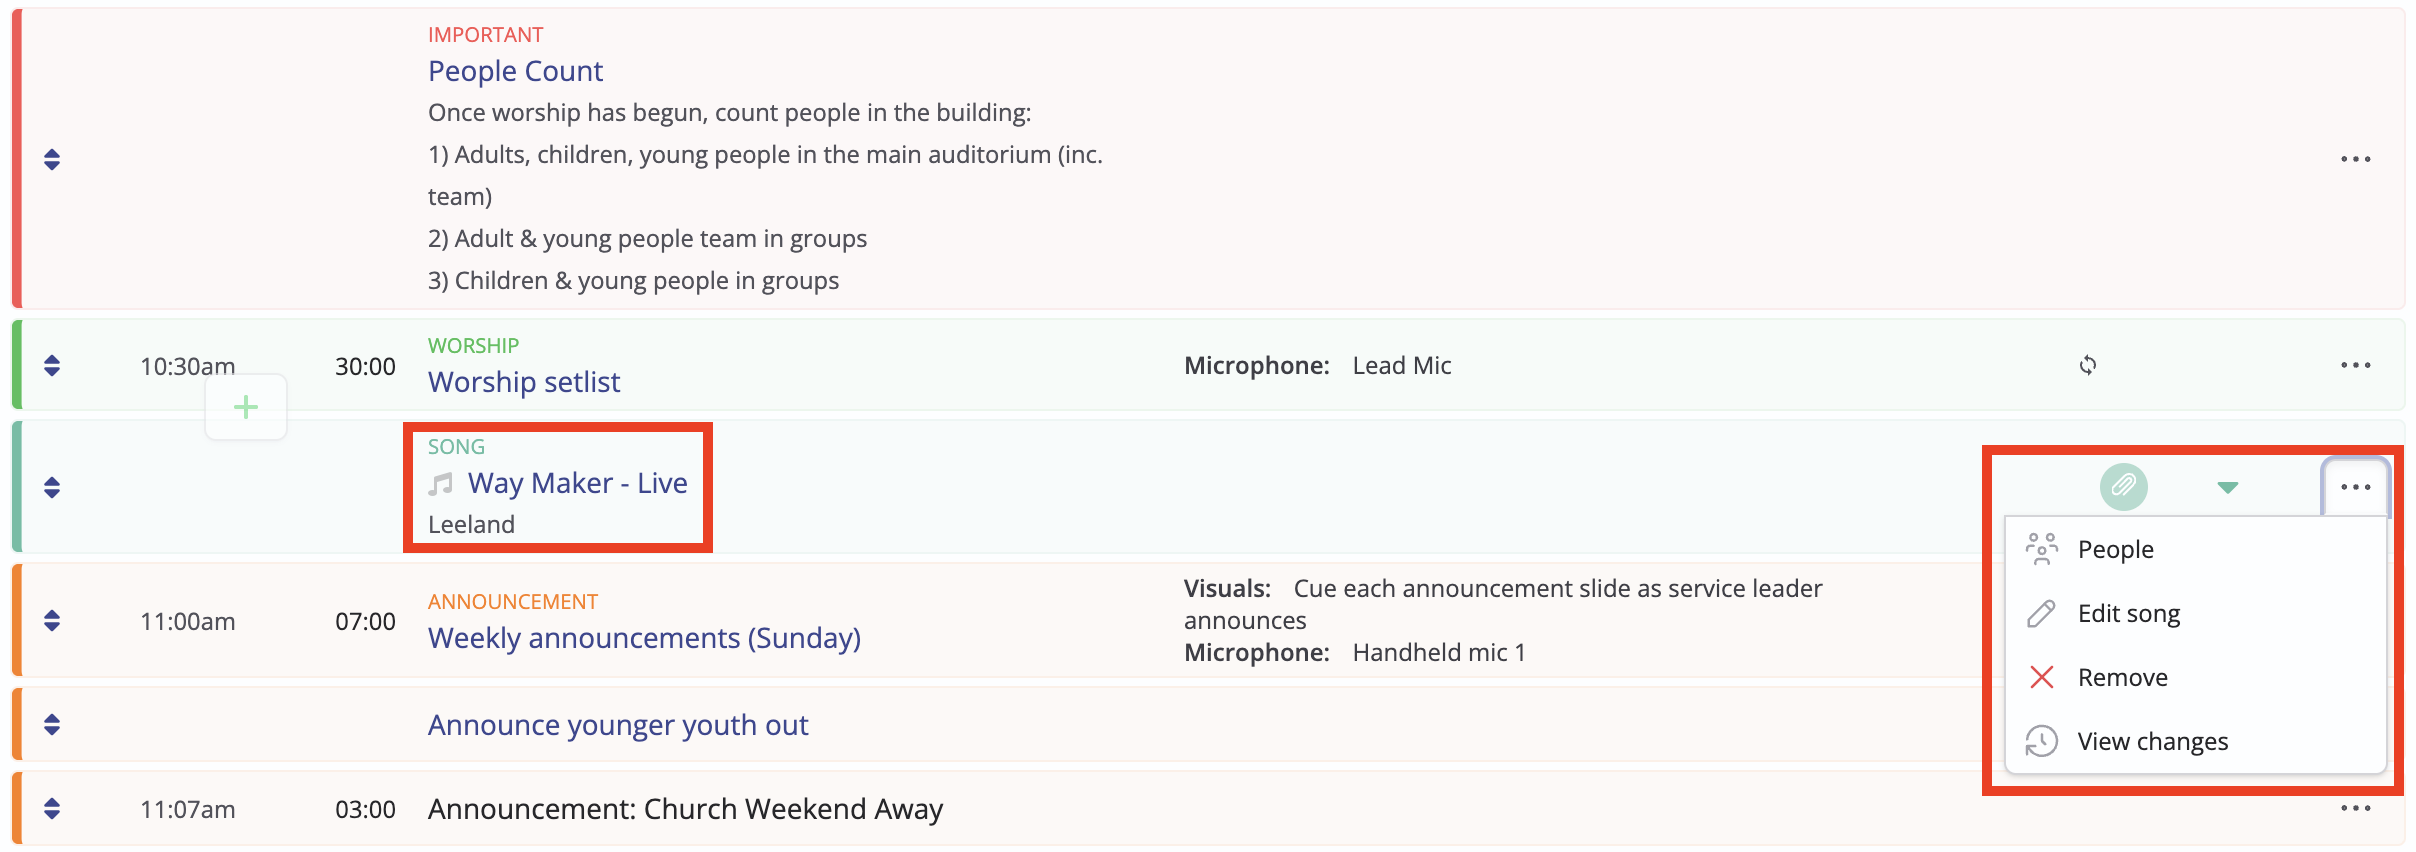
Hovering your cursor between two plan item times surfaces the Add item and Add song actions, enabling you to insert an item or song. Click Add song.
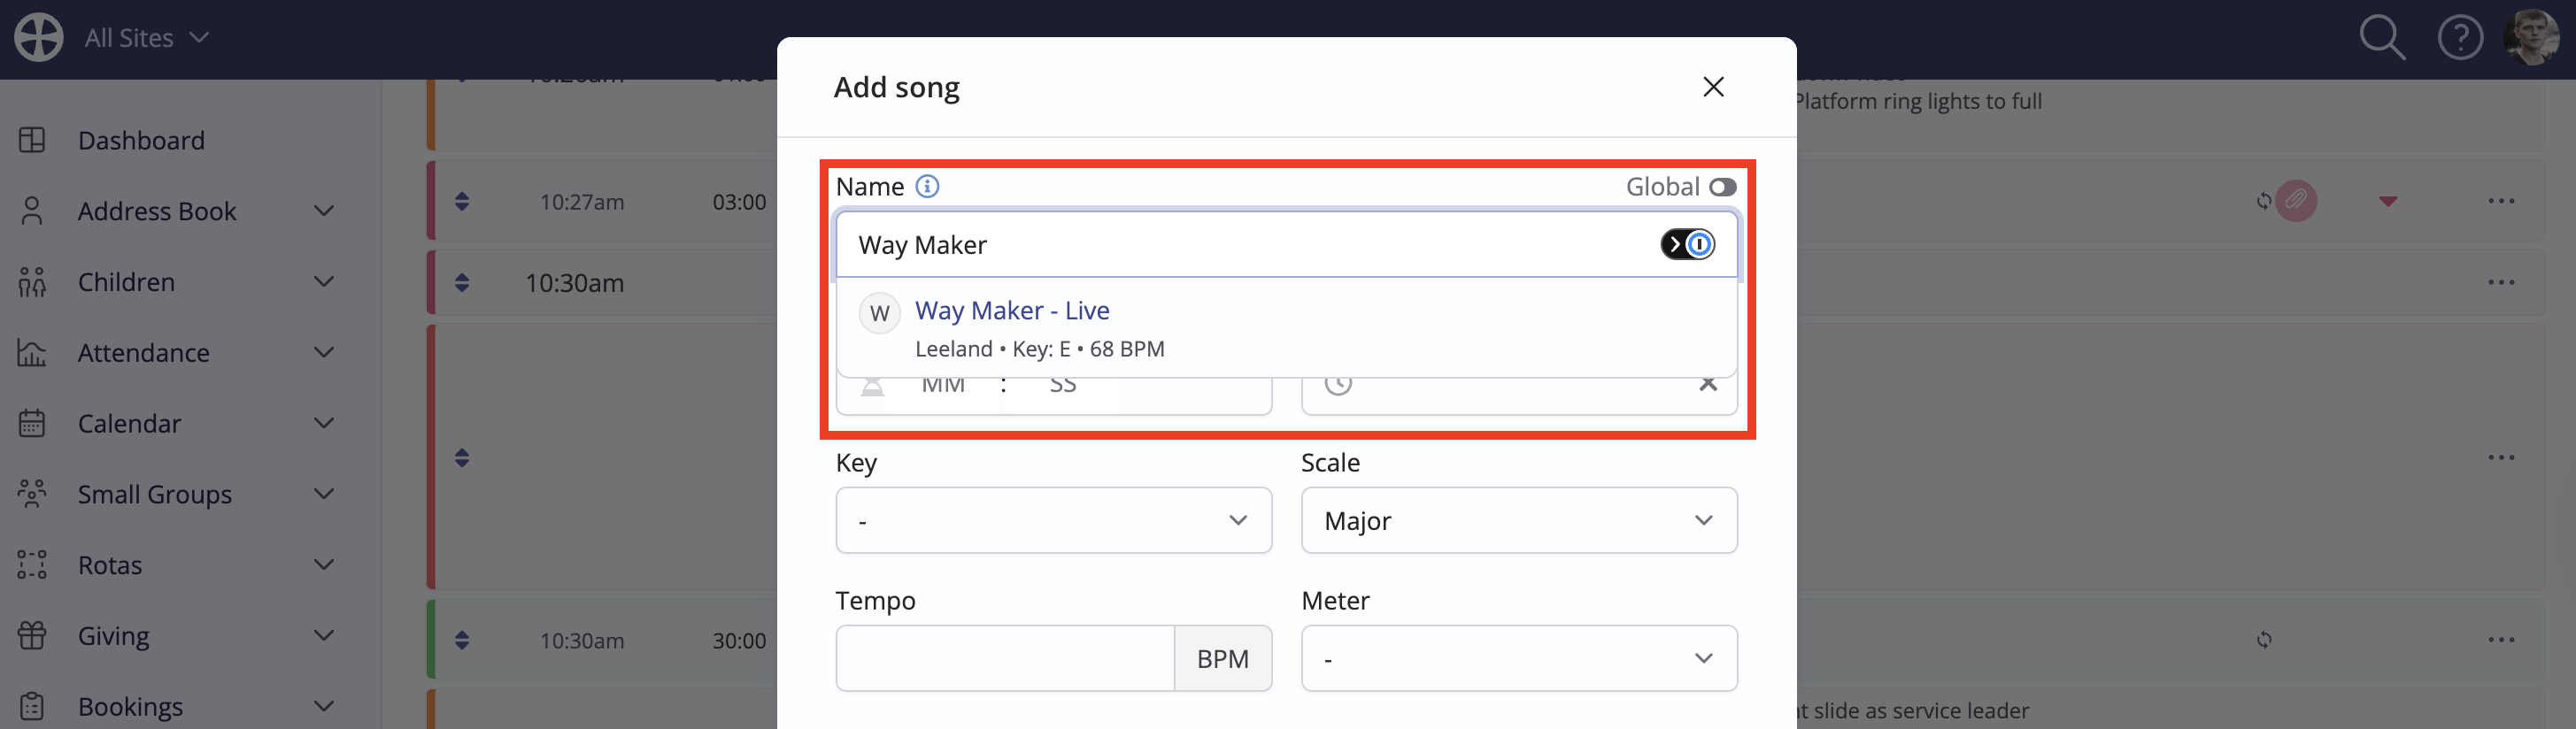
On the Add song pop-up, and following the same process as adding items, enter the song Name. As you type, matching songs from your Songs database are suggested. Where a song has more than one arrangement, these are also listed. If no results are found, you can type the new song name and complete the other optional song-related fields as desired. You can also widen the search beyond your own Songs database to do a Global search across ChurchSuite's database of over 100,000 songs and hymns. Further information can also be found in our related support article on Managing songs. Note the option to optionally specify the (estimated) song Duration or to leave the Duration empty where the 'Worship setlist' item reflects an overall duration of worship time within which your worship leaders will perform the chosen songs.
Click Save to add or insert the song and the plan is updated. Continue adding or inserting songs as desired. Remember, songs and plan items can be easily reordered by dragging the up/down re-order control on the left-hand side of each plan item or song.
Finally, in this section, where you have individual song placeholders within a plan, choose Edit song from the item Actions to edit and update the placeholder to a specific song - you'll have the same options described above when searching and selecting songs from your own Songs database - or perform a global search across ChurchSuite's song database or replace it with an entirely new song if you wish.
Top Tip - Copy Items
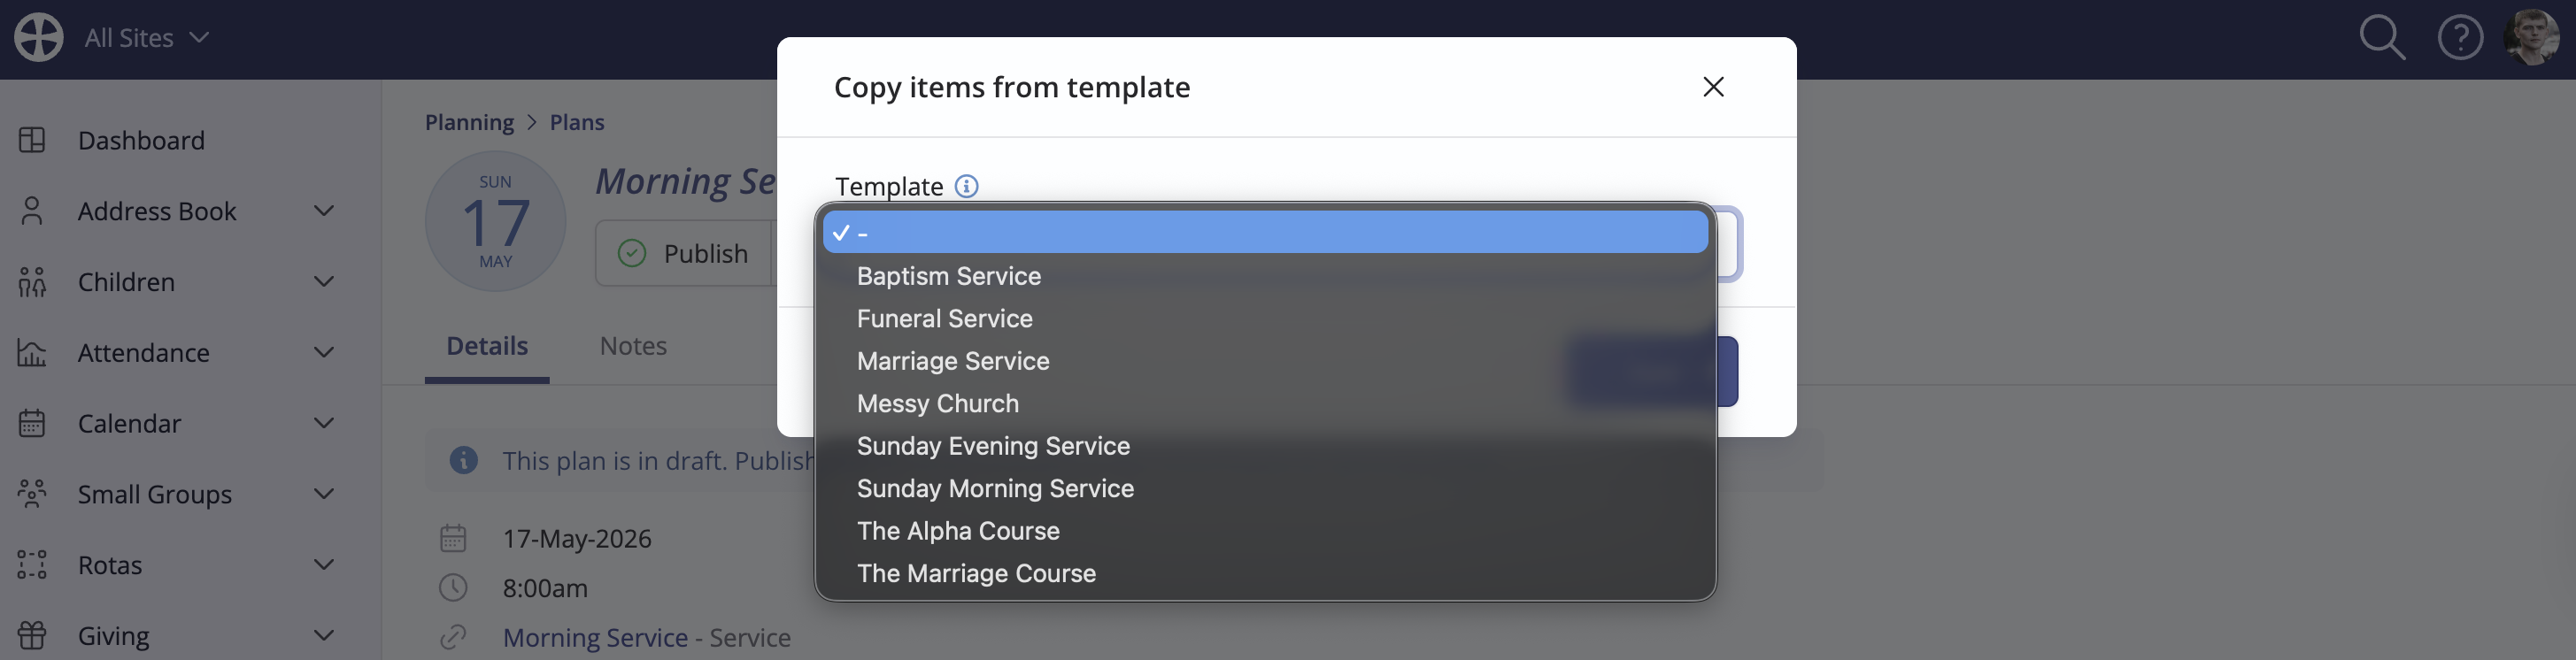
When viewing an empty plan, you can choose to Copy items from plan to copy all plan items and songs from an existing plan or you can choose Copy items from template to copy all items from a plan template into your empty plan.
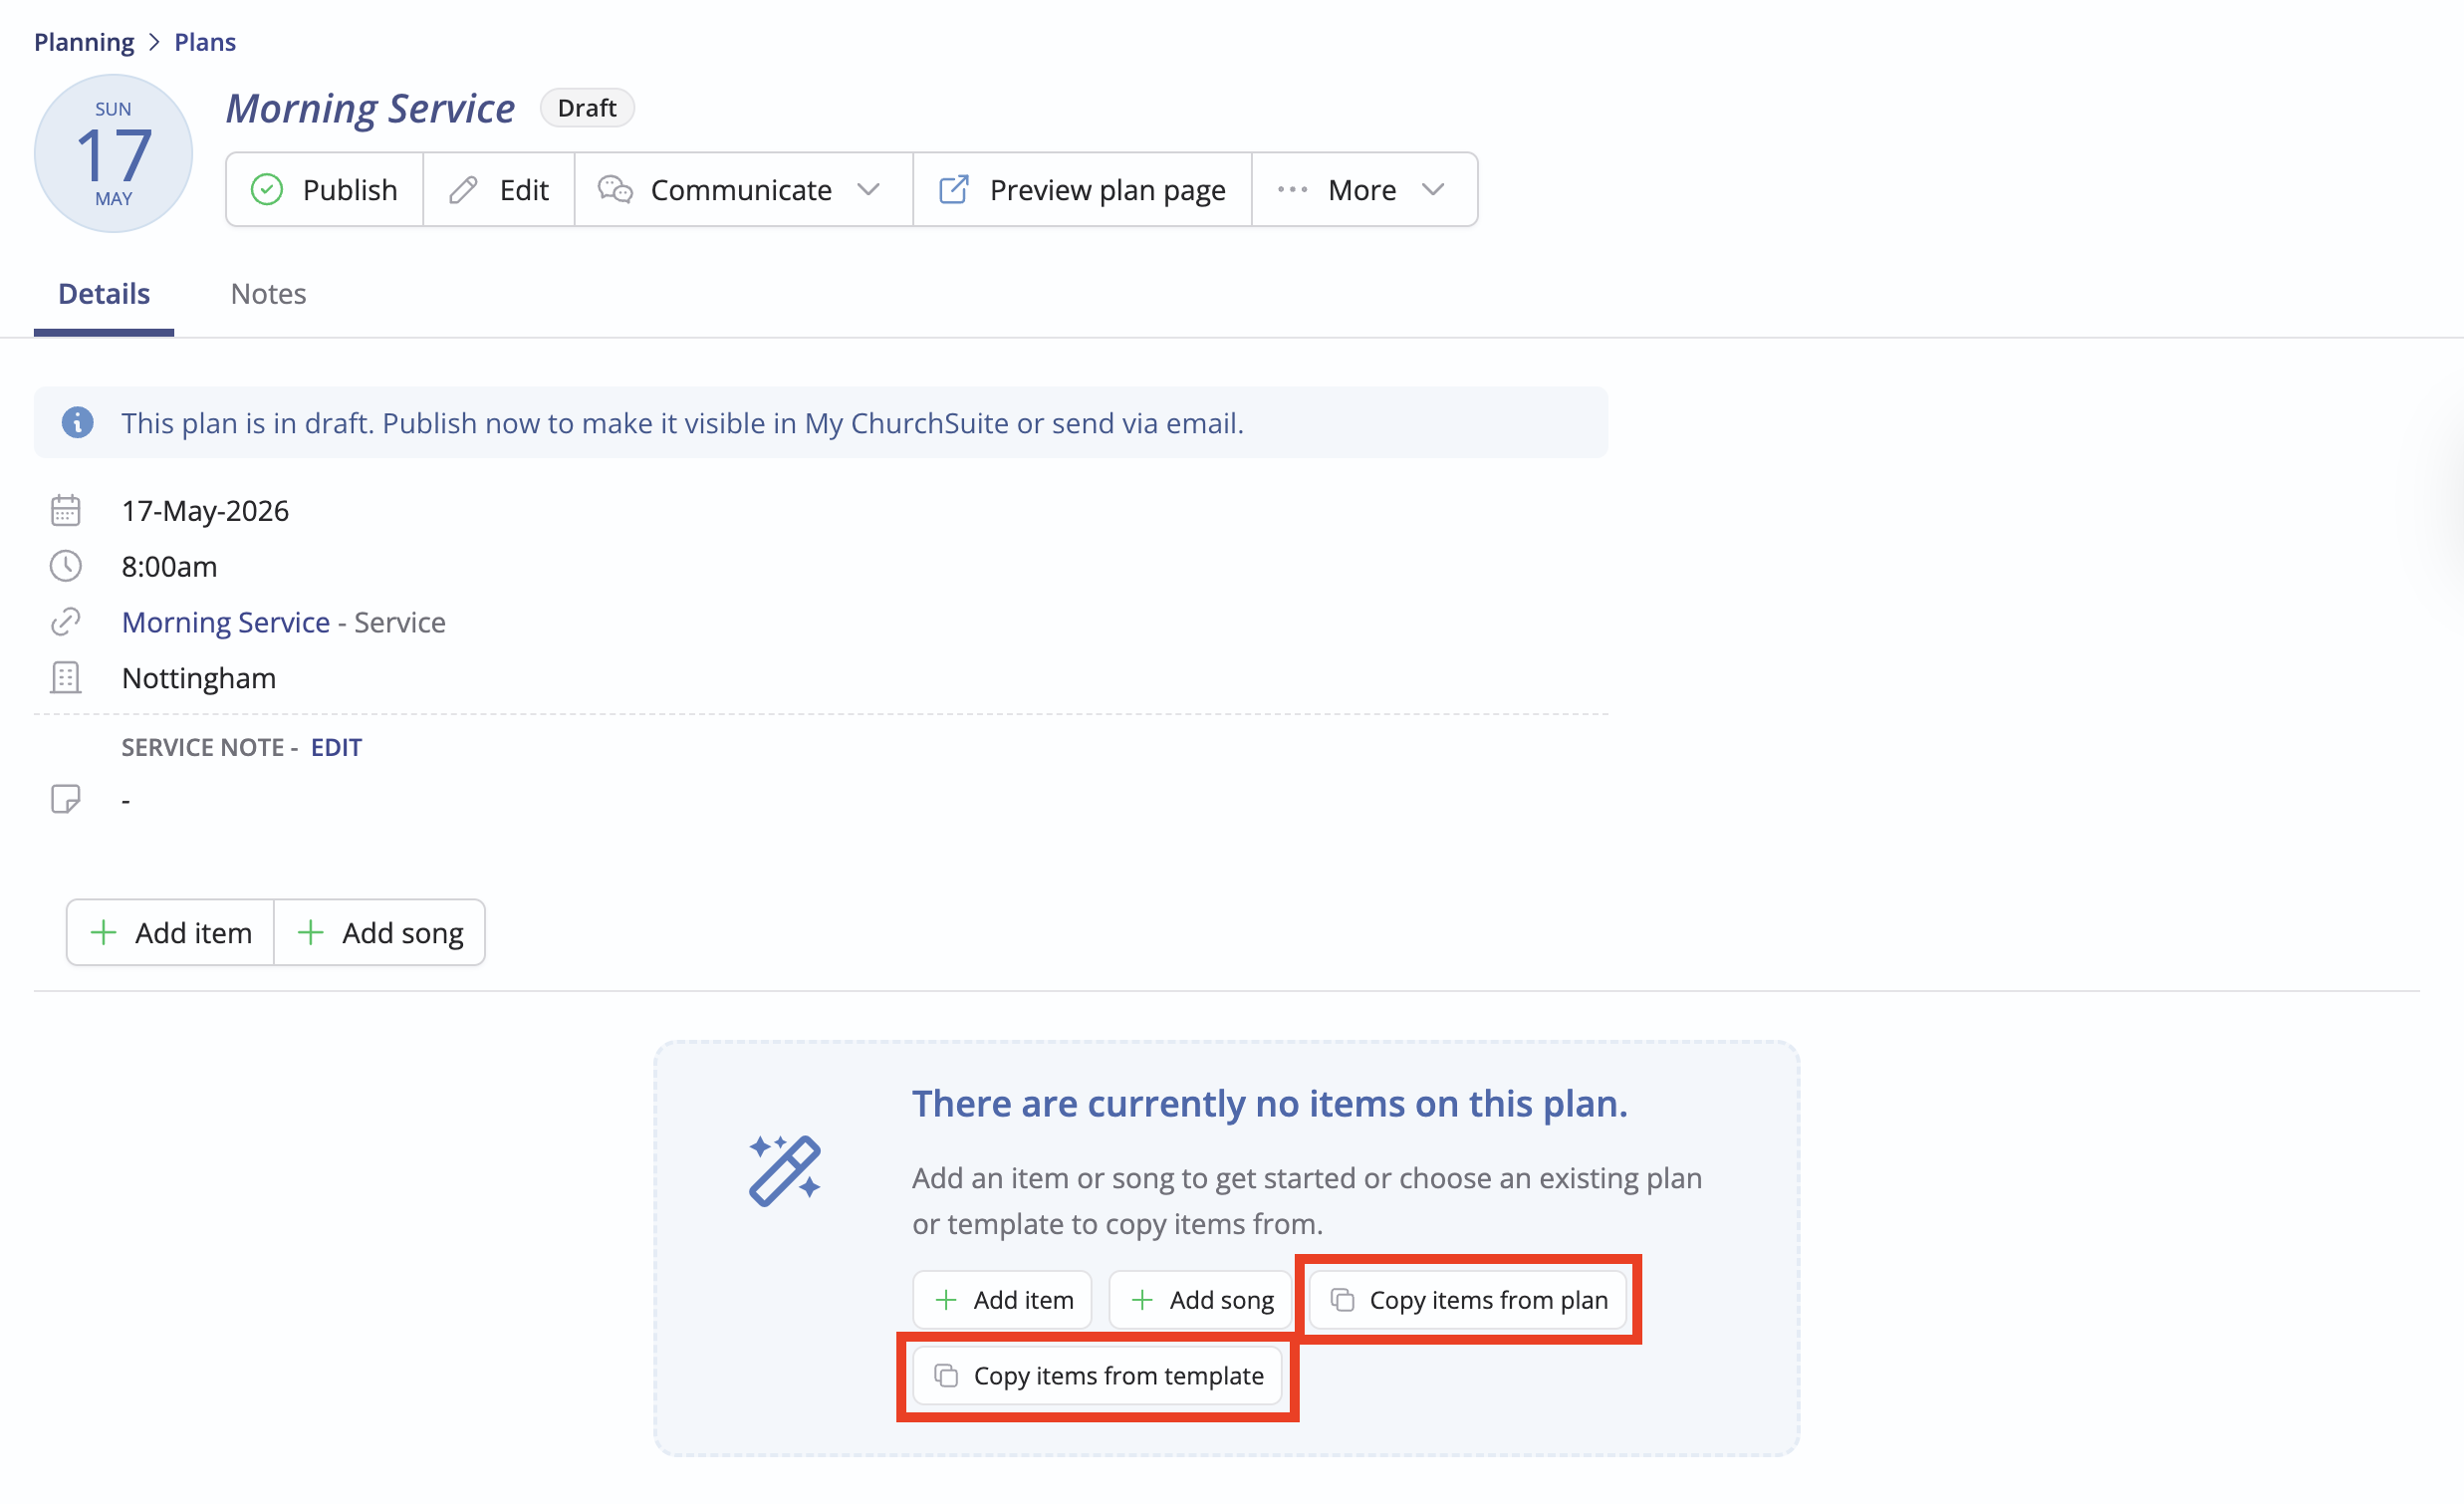
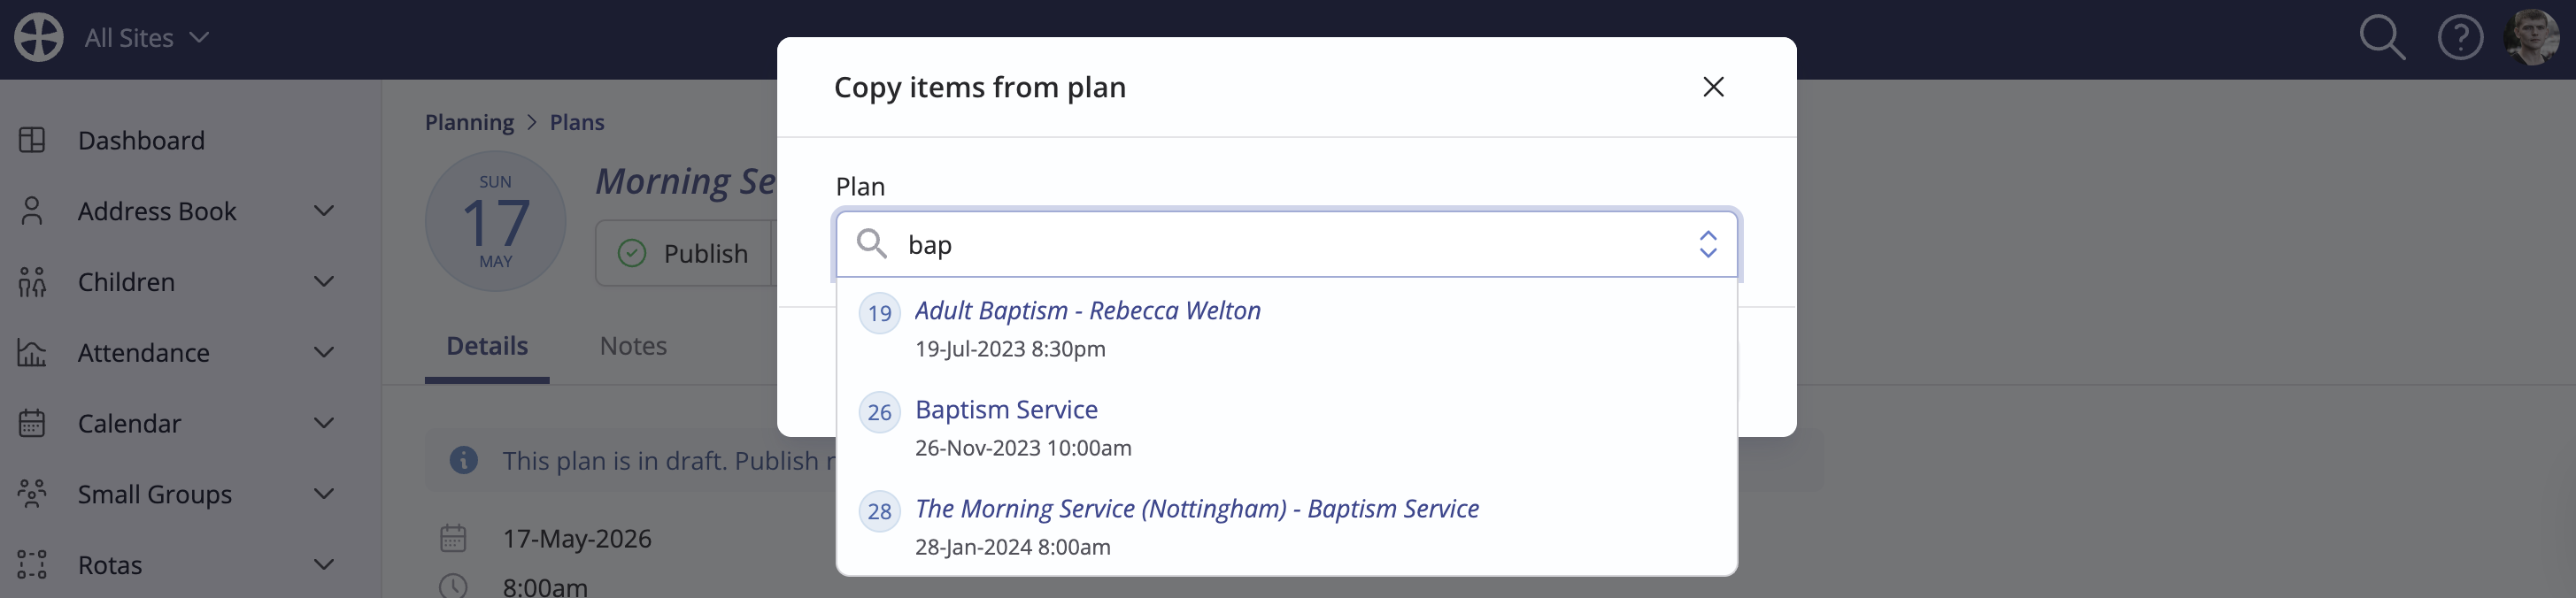
Simply click the relevant Copy items button and search for the plan or select the template you'd like to copy the items from and click Save.
Click to see a larger version
All of your items and songs from the selected plan/templates will be copied to your new plan, including notes, people and files associated with the items.
Sharing your plans with others
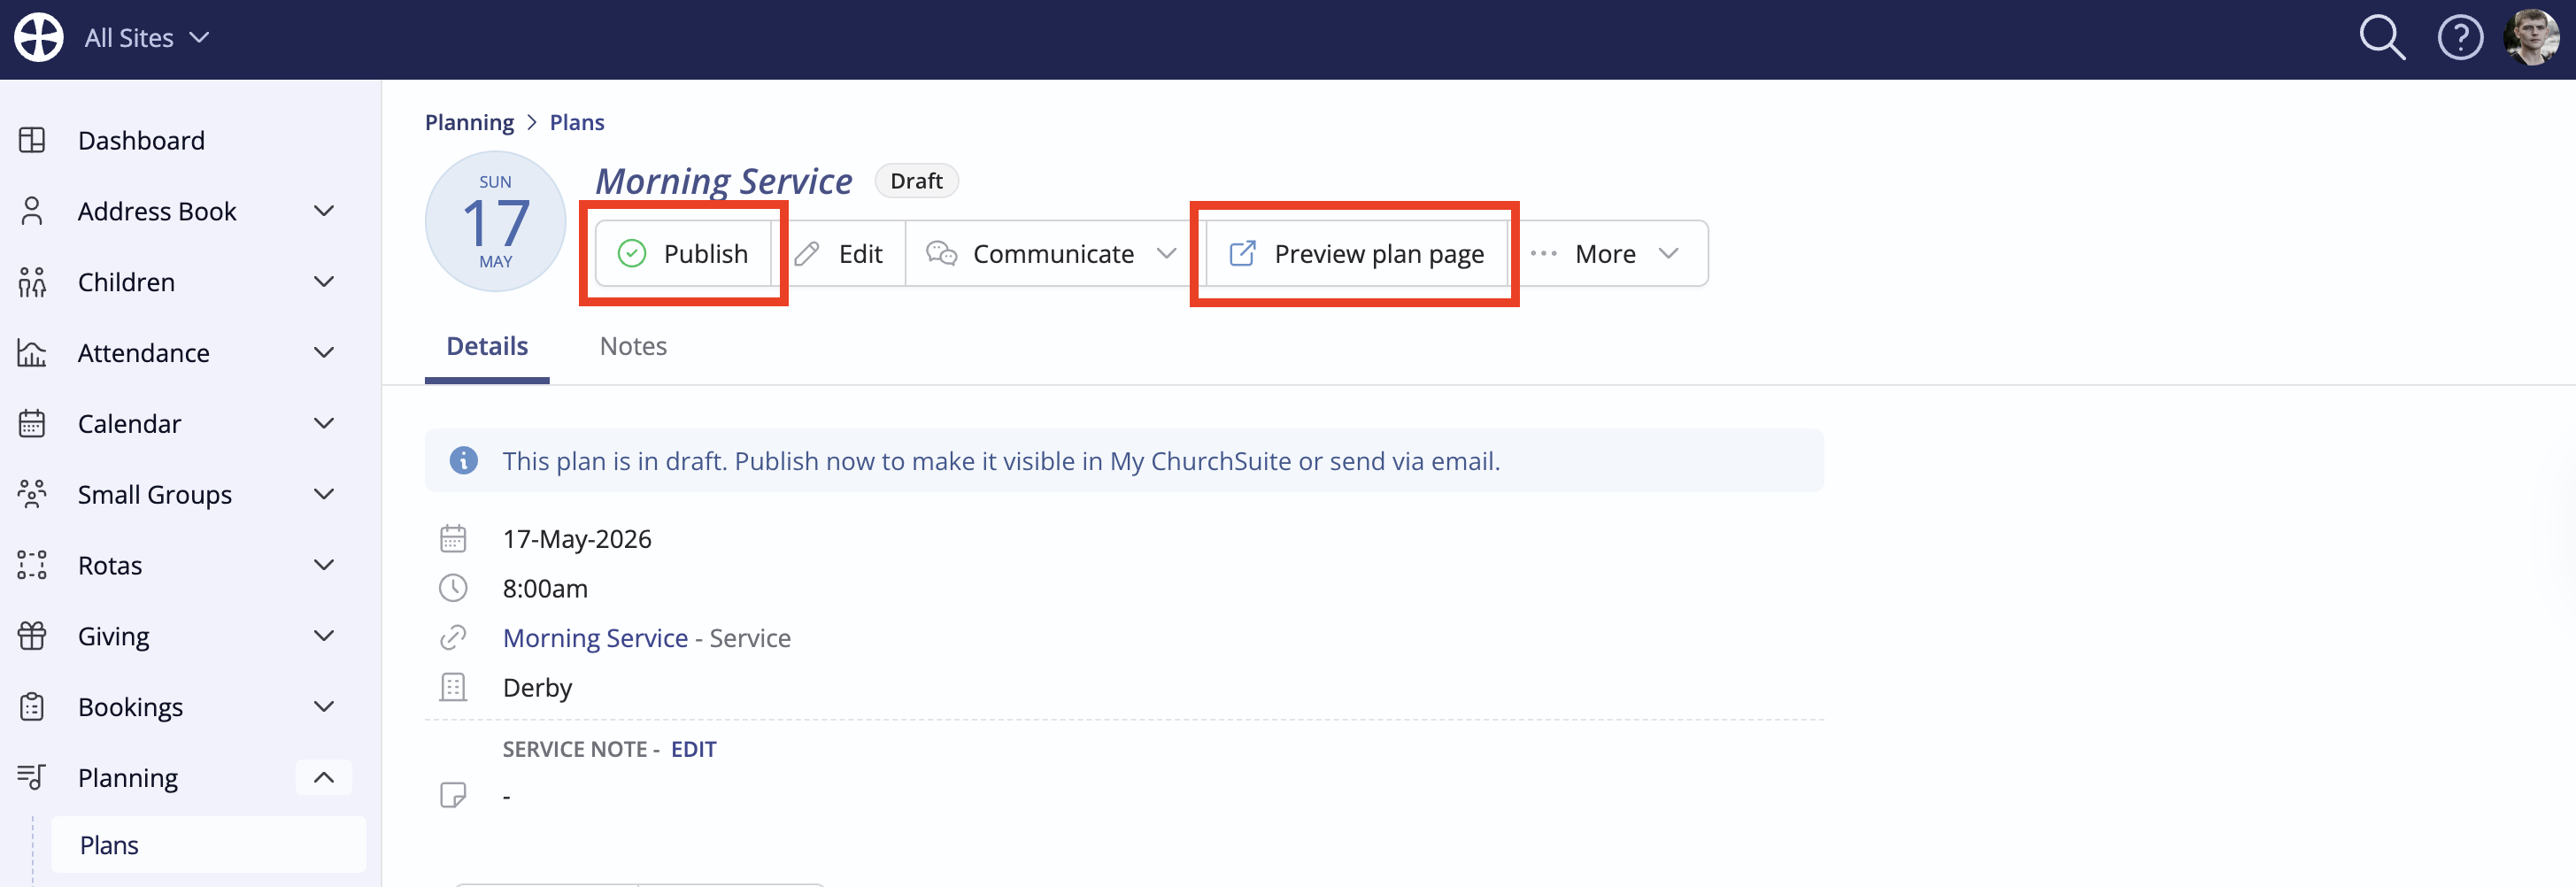
At a certain point in your plan-creation process, you'll want to publish and share your plan. Every plan has a Plan Page—a read-only page that can be shared with those who need to know what's going on—even if the plan is still subject to change. You can Preview the plan page at any time. When you are ready, click Publish.
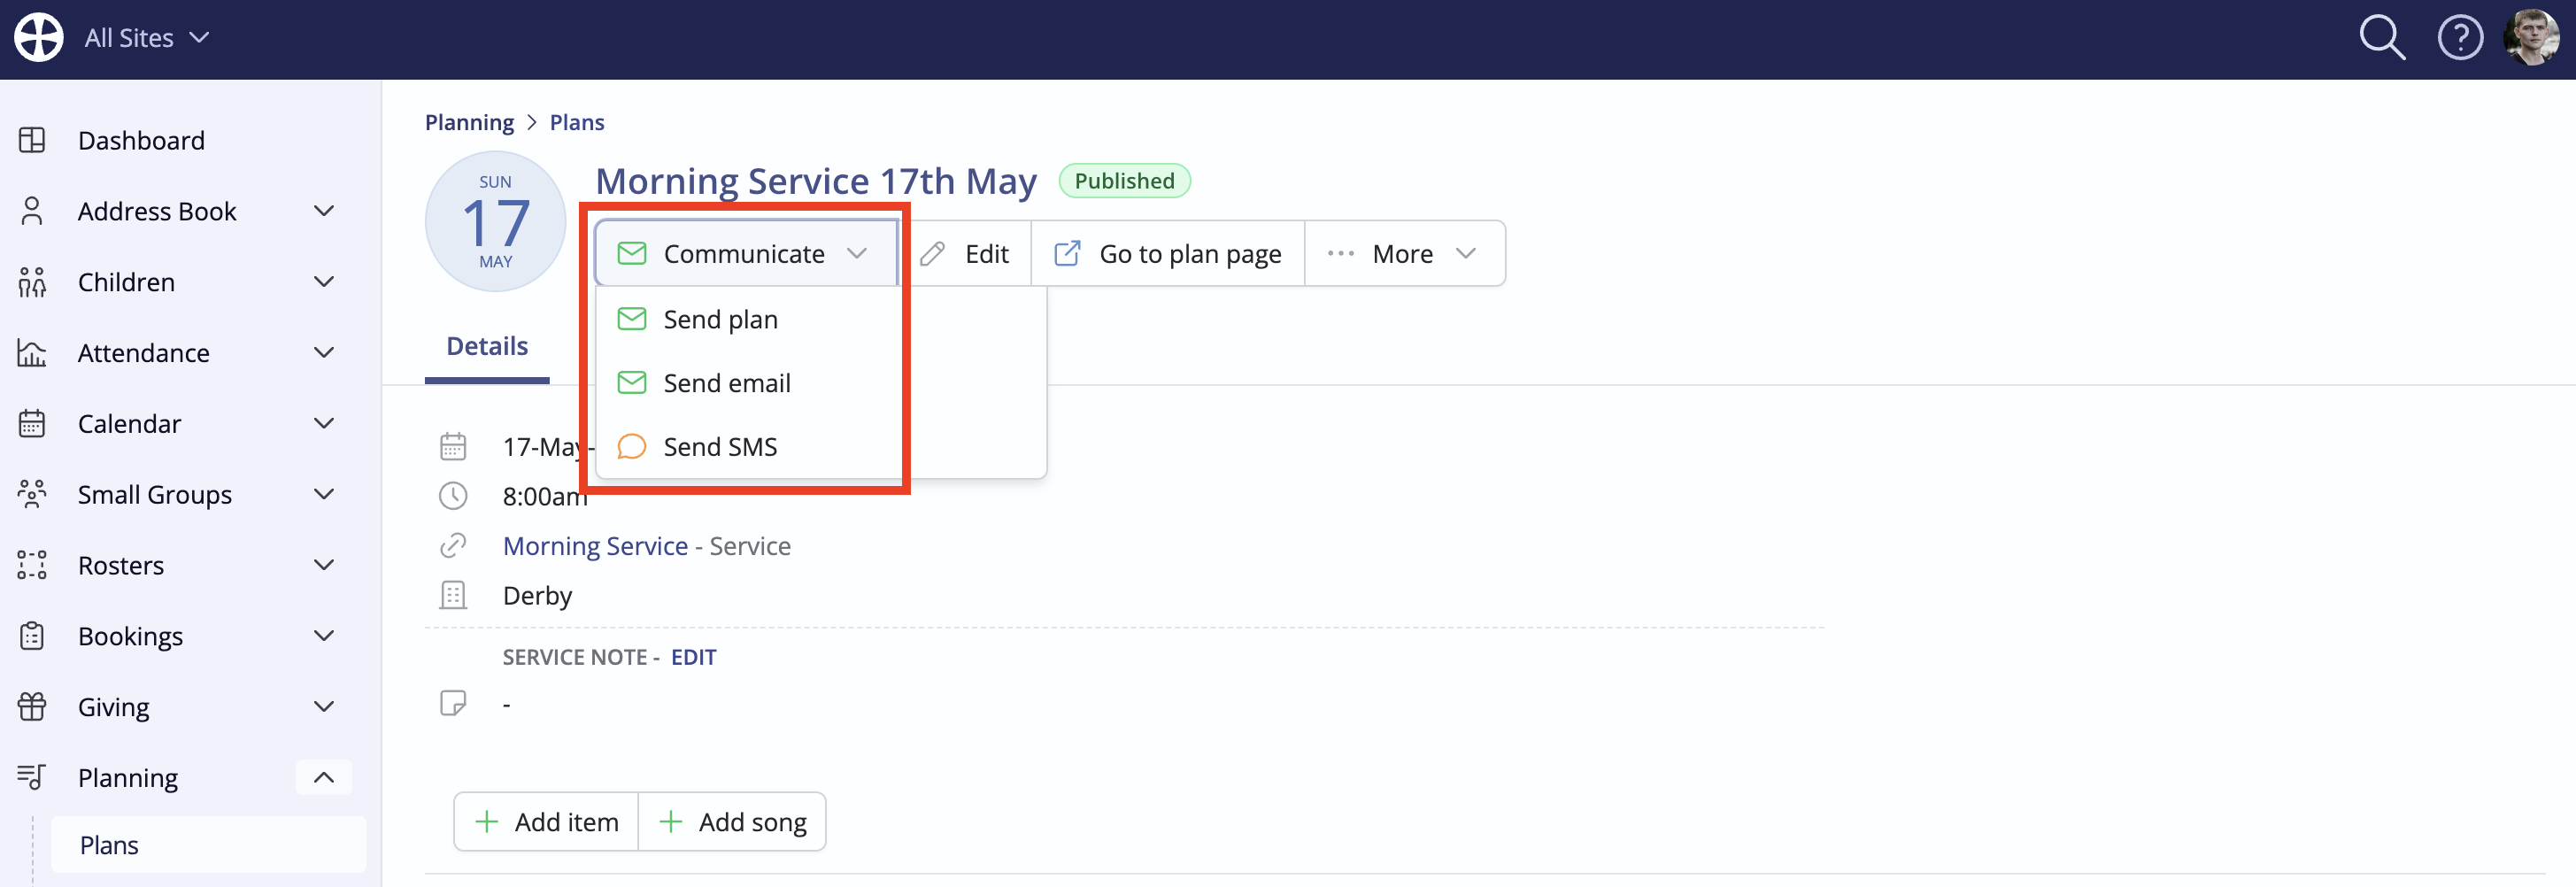
Once published, you can share the plan with the plan's people - those assigned to plan items - and with others. See our related support article on Adding people to plans, which explains how to link plan and template items to your various rotas. Once published, the Send plan action becomes available, which will take you through simple steps to send the plan to the plan people and any other recipients you may wish to add.
We've produced a separate support article called Plan pages that further explains how to publish and share your plans with everyone that needs to know. That article describes how people can access plans in the member-facing My ChurchSuite and rota reminder emails.
Top Tip - communicating team instructions with plan notes
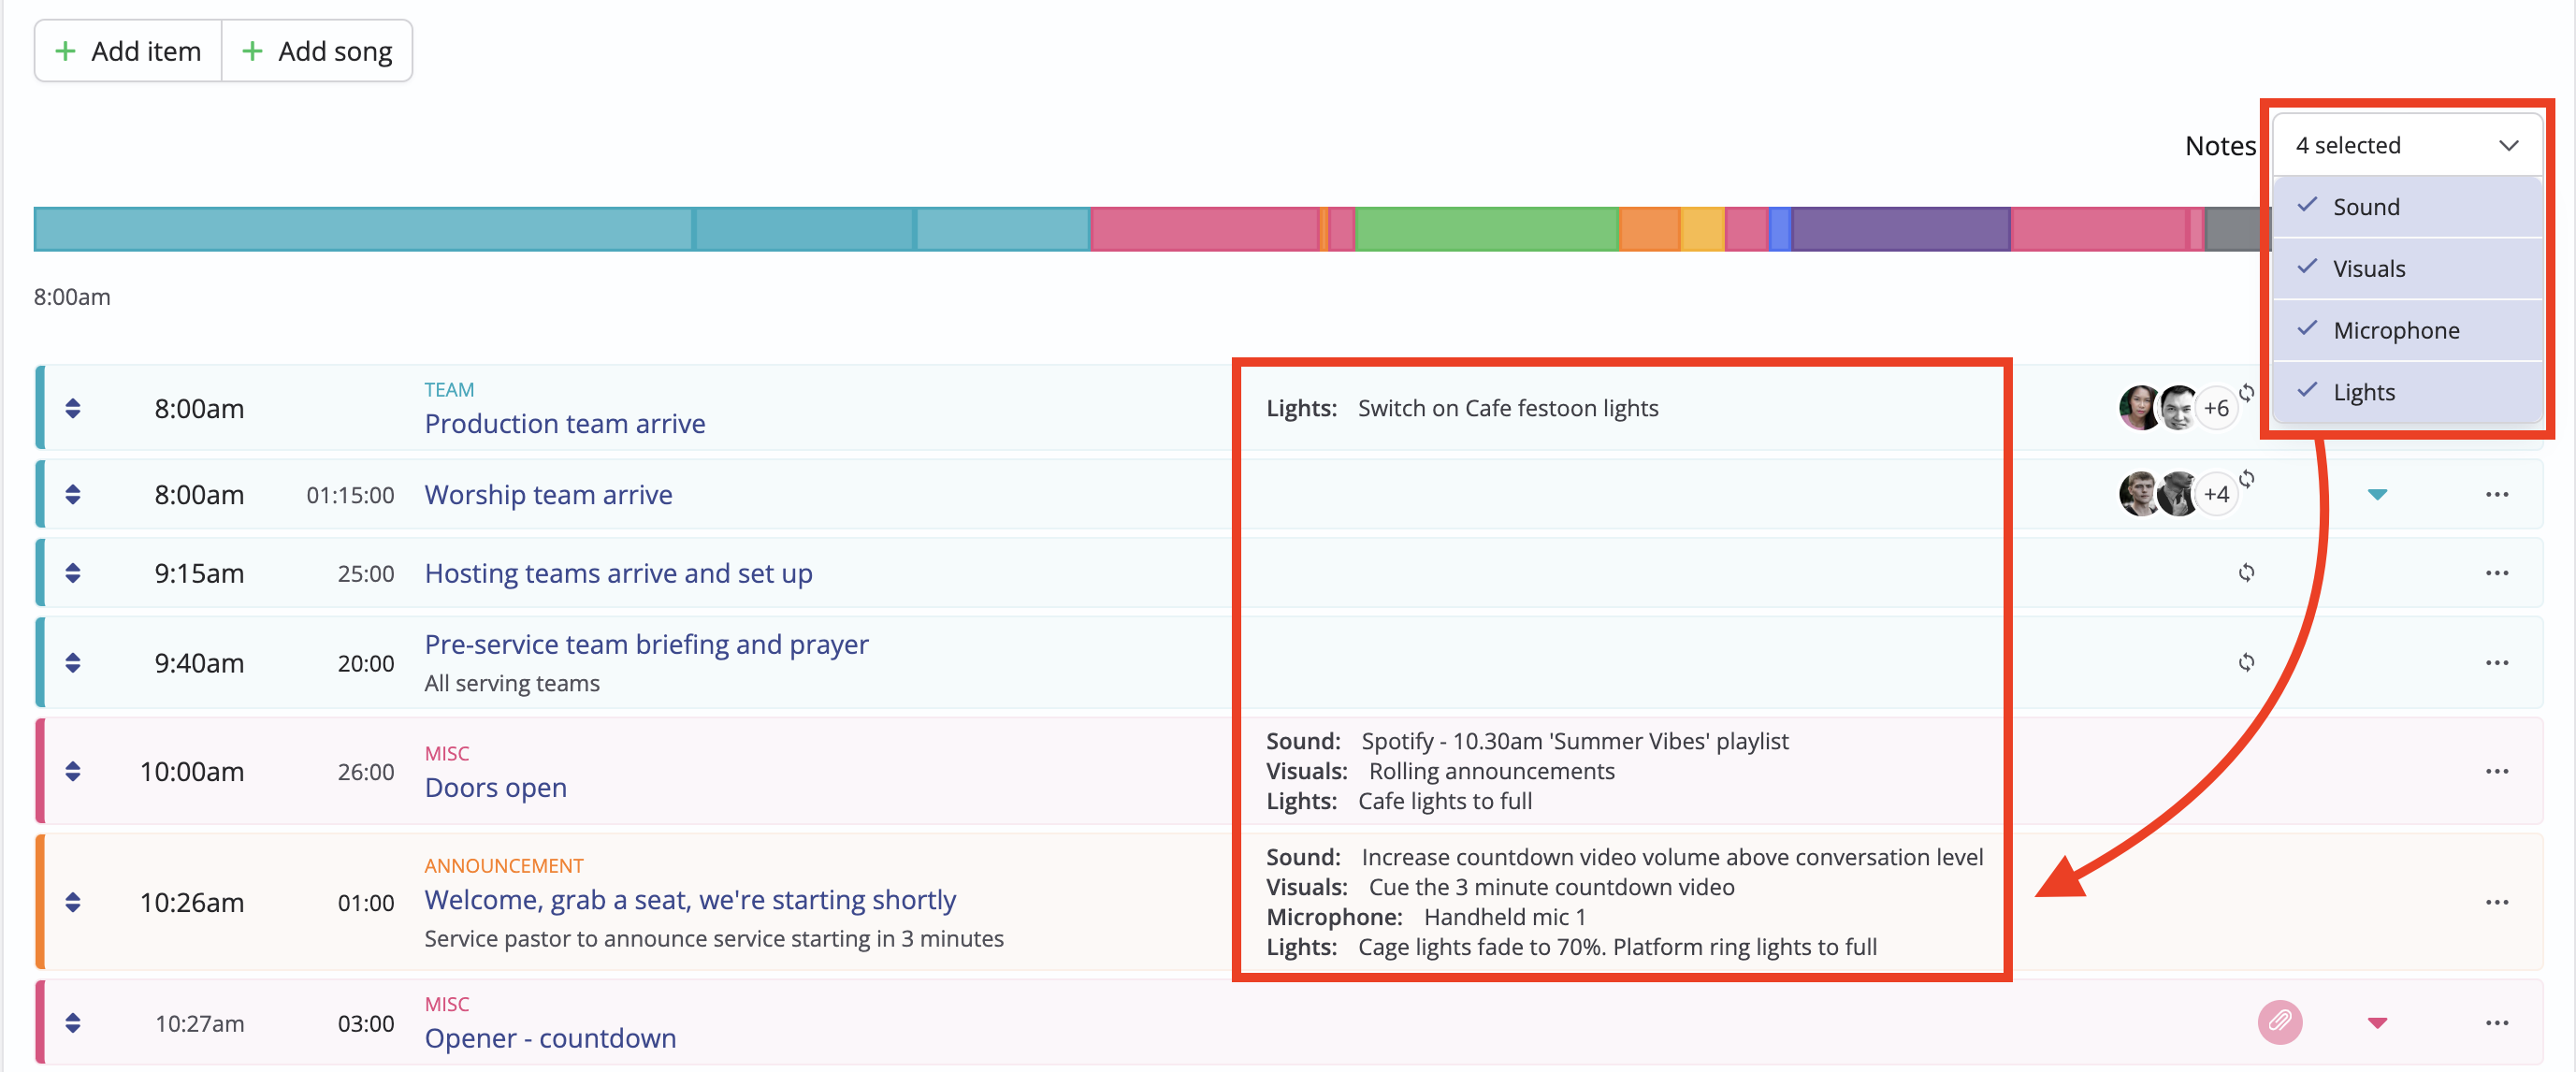
As seen in the previous section, when adding or editing plan items, you can add categorised notes - perhaps directions for the Visuals team, instructions for the Service Pastor or a note for the Sound team about which microphones are being used for different elements of a service. Those viewing the plan in ChurchSuite and those accessing the Plan Page outside of ChurchSuite can filter Notes by category to see just the notes that are important to them.
Top Tip - plan items with linked files
When library or song items that include linked files are added to a plan or template, that item and its linked files become independent of the Library or Song database, giving you the flexibility to make custom changes to plan items without the changes affecting the underlying Library or Song database. Consequently, adding a file directly to a plan or template will not add the file to the underlying Library item or Song database. Similarly, adding files to Library items will not add those files to existing plans or templates where the item is already in use. Therefore, if you are adding new files to ChurchSuite, add them to the appropriate Library items first and also to any templates and future-dated plans where that Library item has already been added.
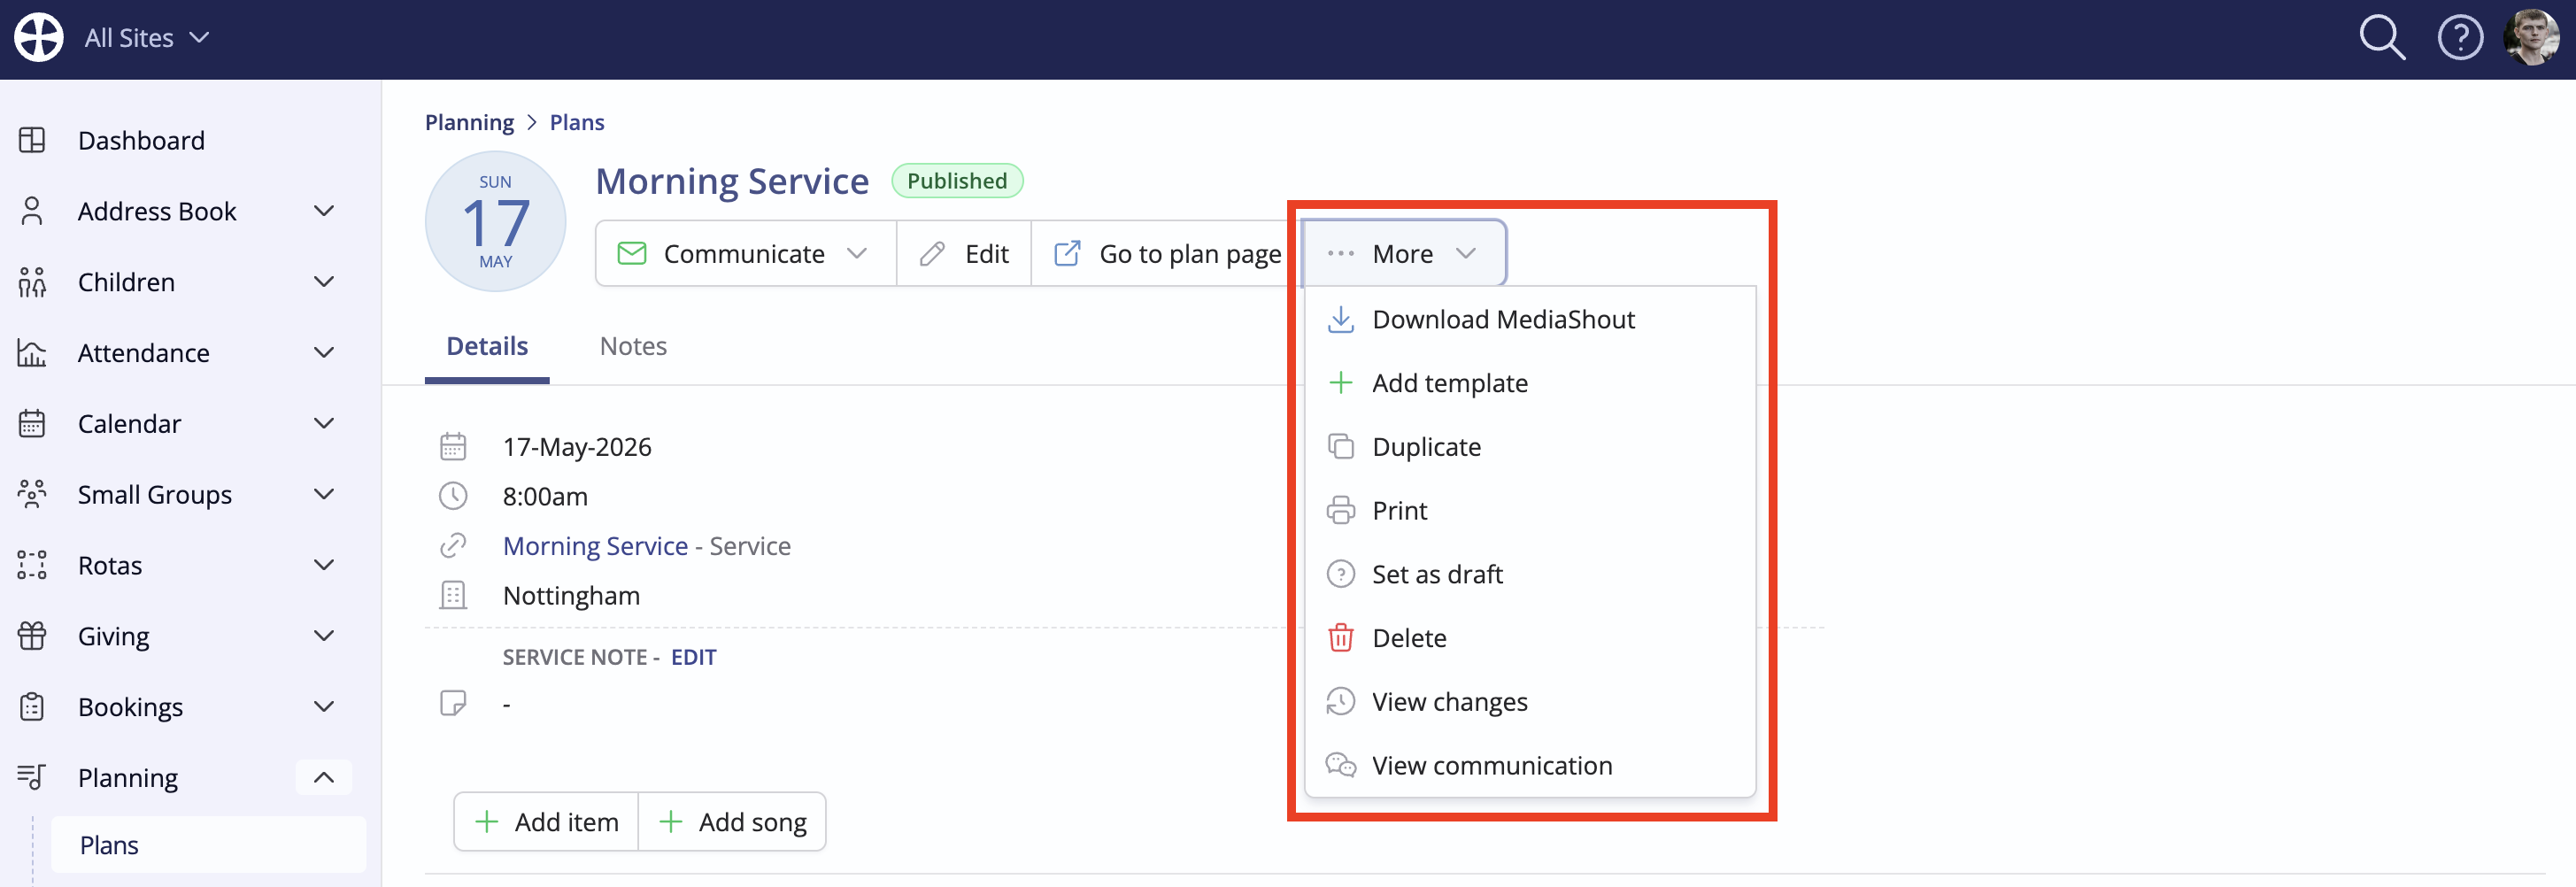
Printing plans
The Print action provides a customisable printing experience with a live preview so that the User can customise the output before printing.
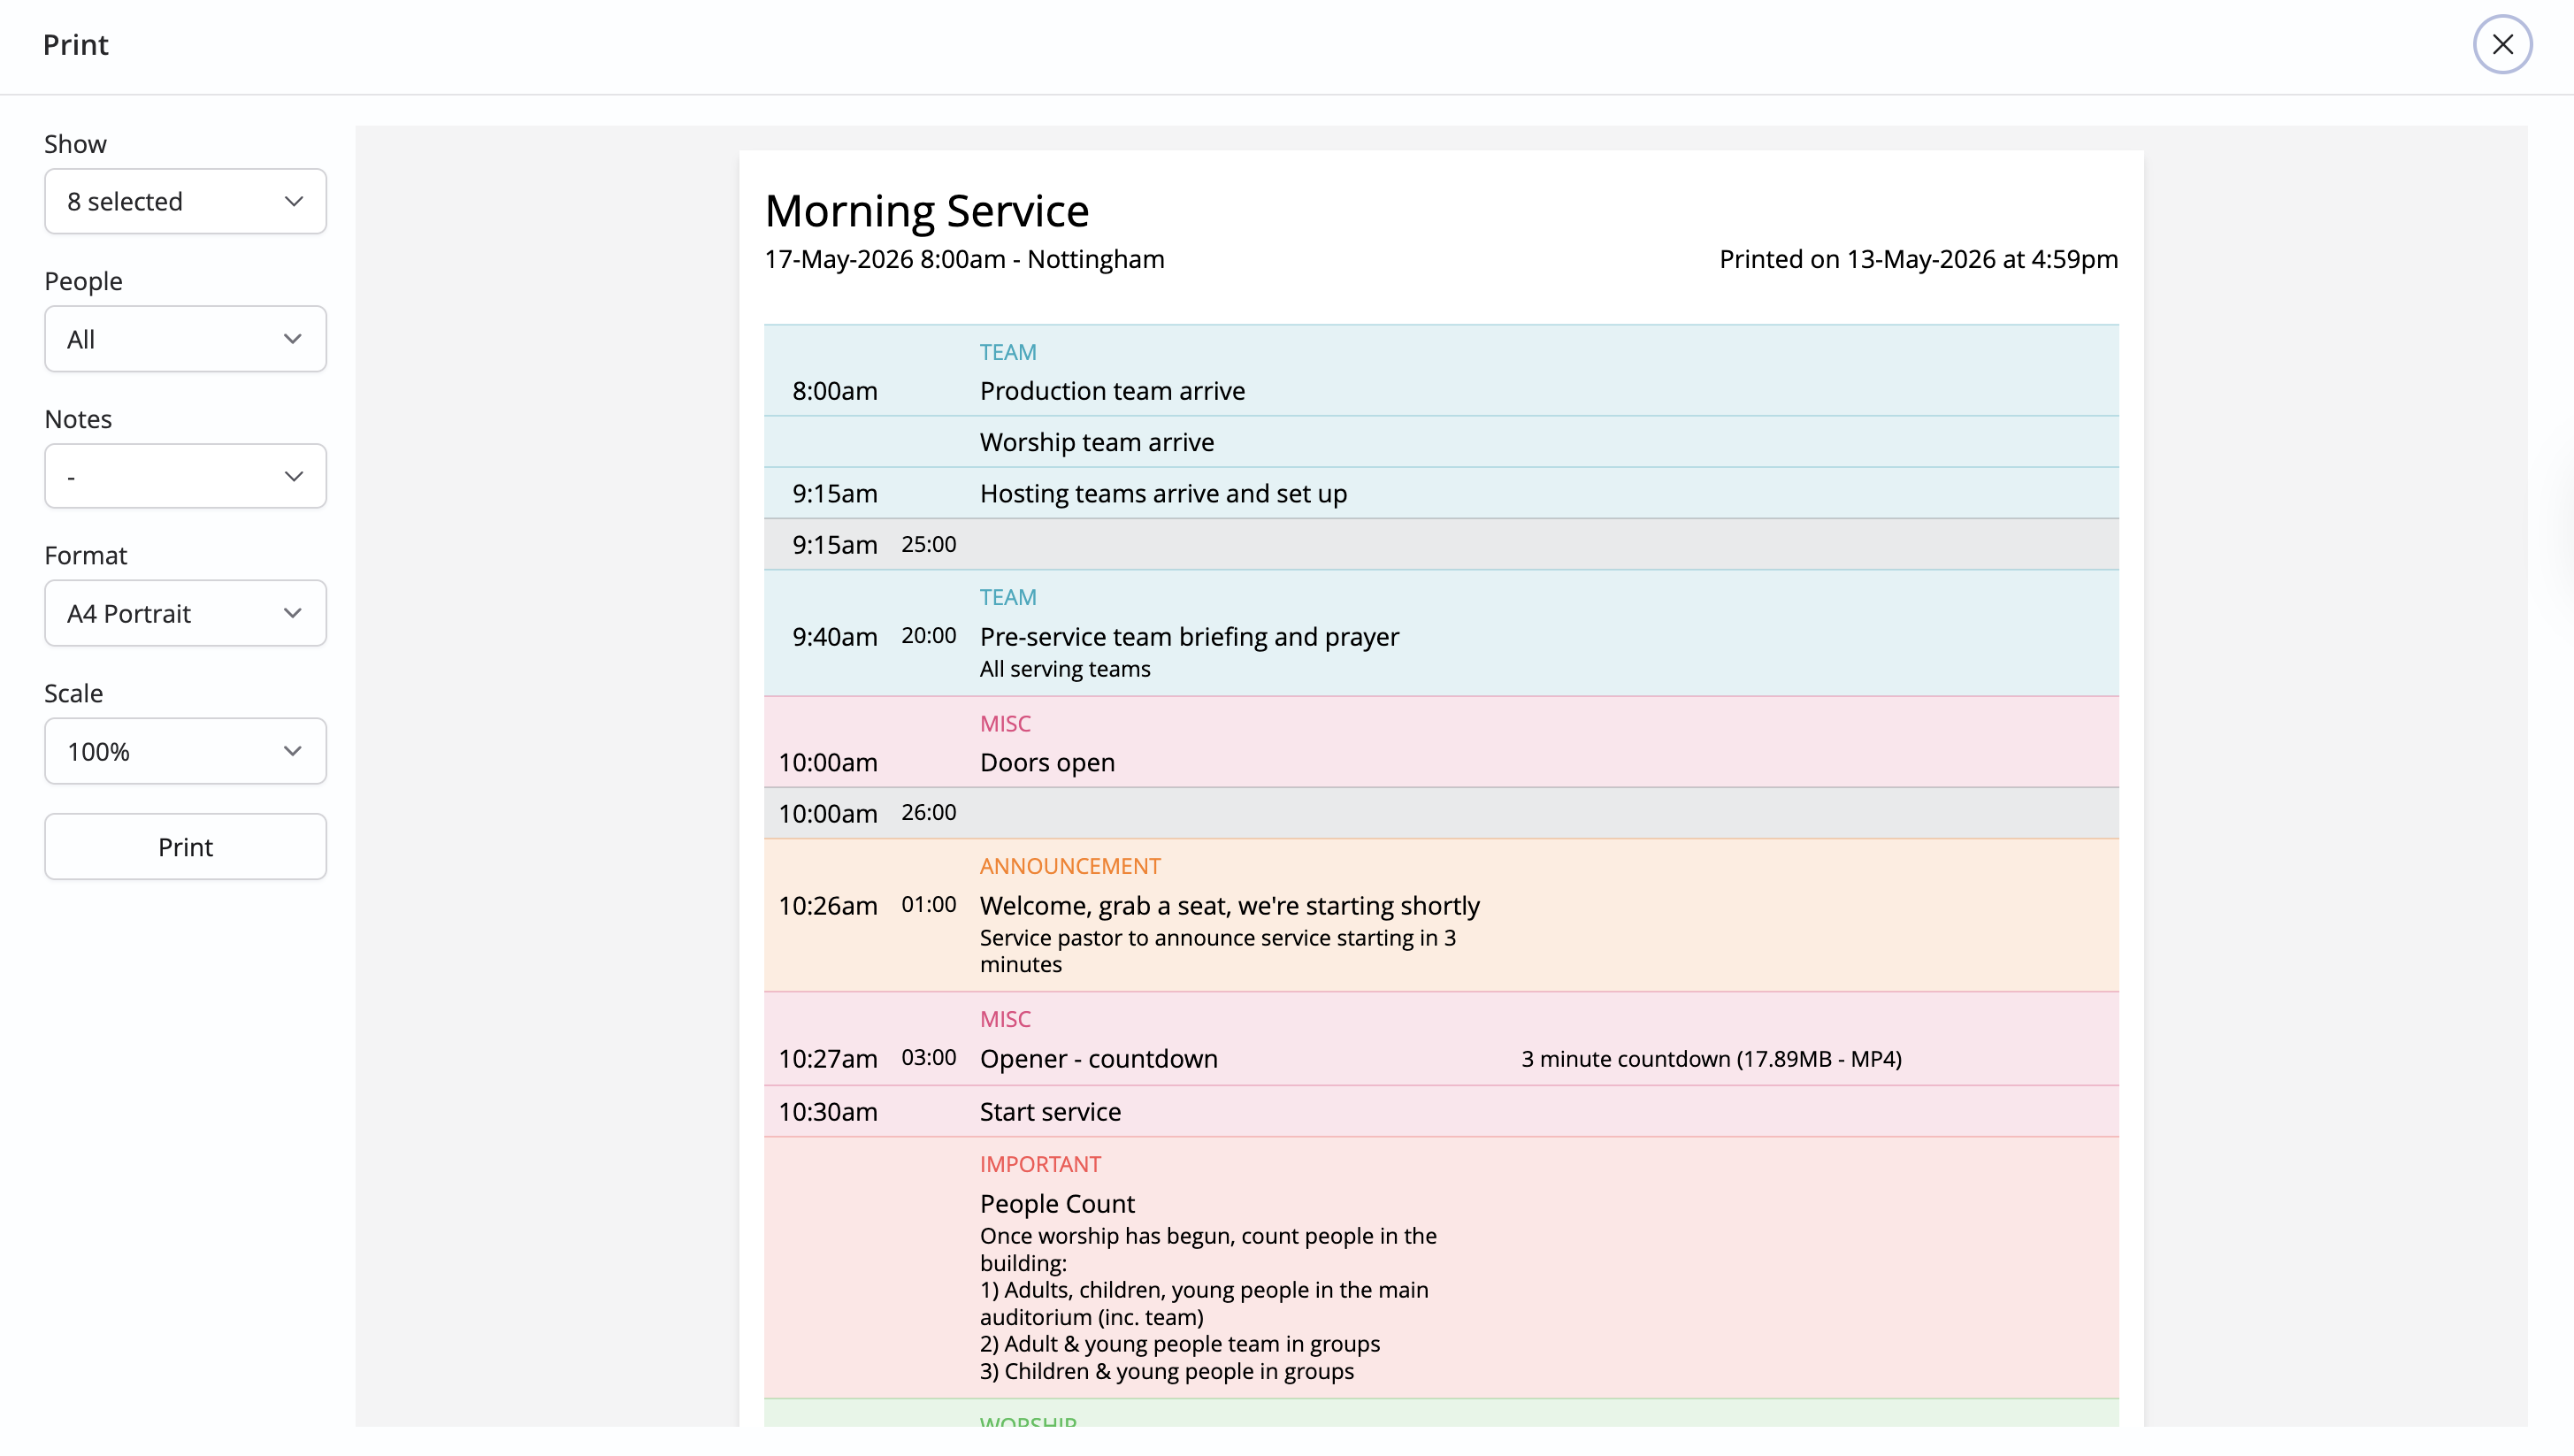
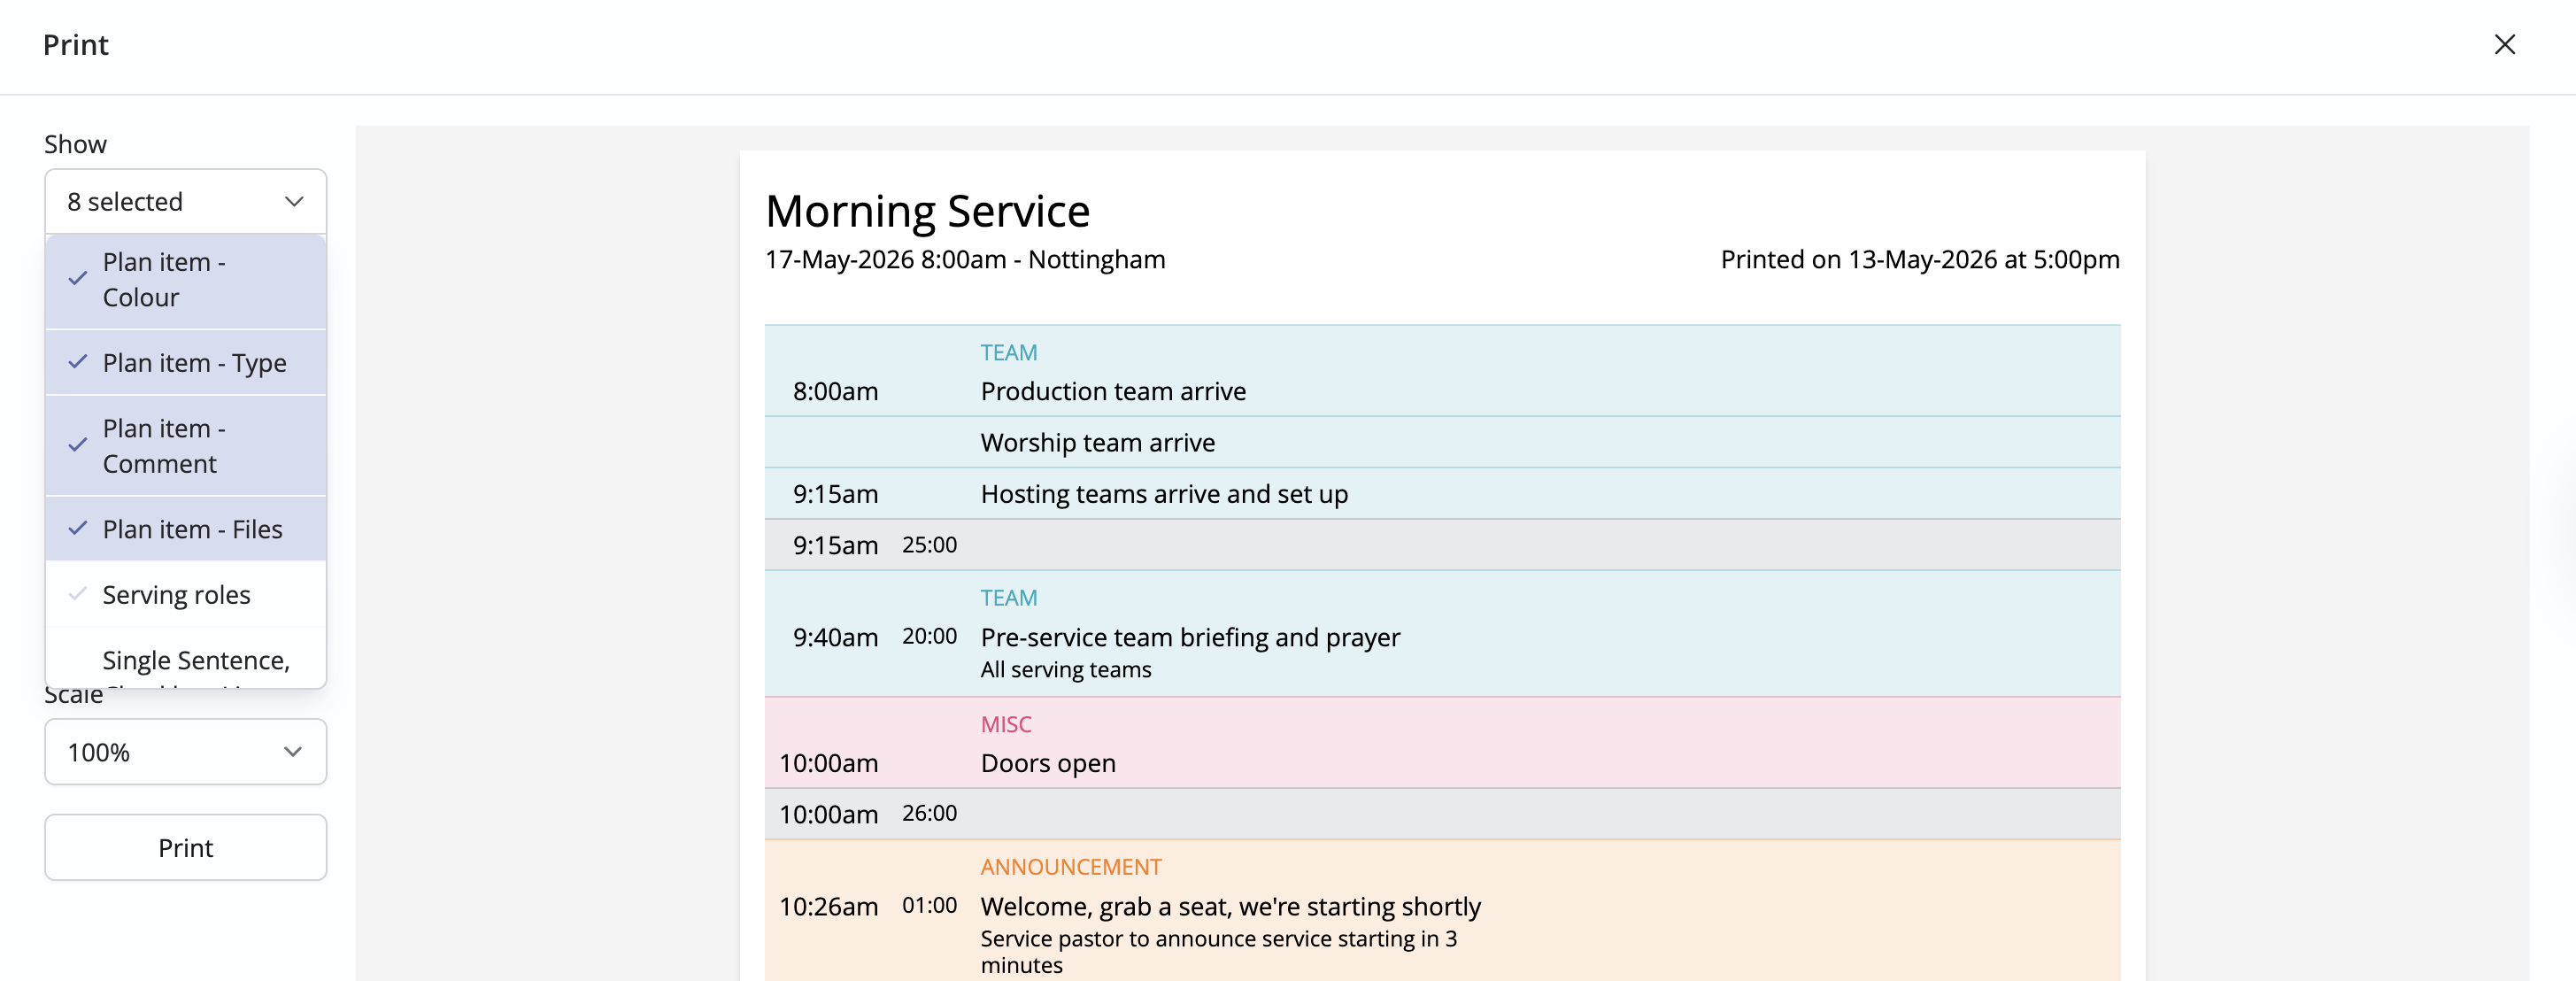
The Print "live preview" opens to view. From here, you can select which elements of the plan you wish to Show in the output and whether plan People are to be displayed in Condensed format (the default) or whether All plan people are shown or Hidden. The Format controls the paper size. Use the Orientation and Scale options to determine the layout and font size as desired.
Whenever the Show field options are changed the values are stored within the browser. This means that when the User returns to the print page on the same device, the same settings are remembered - ideal where plan printing is a weekly task!
Once you are happy with the live preview, click Print to launch the browser's print dialogue. It may be necessary to select specific browser print dialogue settings to match the live preview - for example, a 'landscape' live preview will require a 'landscape' print dialogue setting for the plan to print as per the preview. Similarly, the print dialogue paper will need scaling set to 100% for the live preview Scale to be maintained in the final printed plan.
When you have finished printing, click X to dismiss the pop-up and return to the plan View.
Plans linked to a service
Whenever you're working in a Service View in the Rotas module, linked service Plans for a service date are shown...
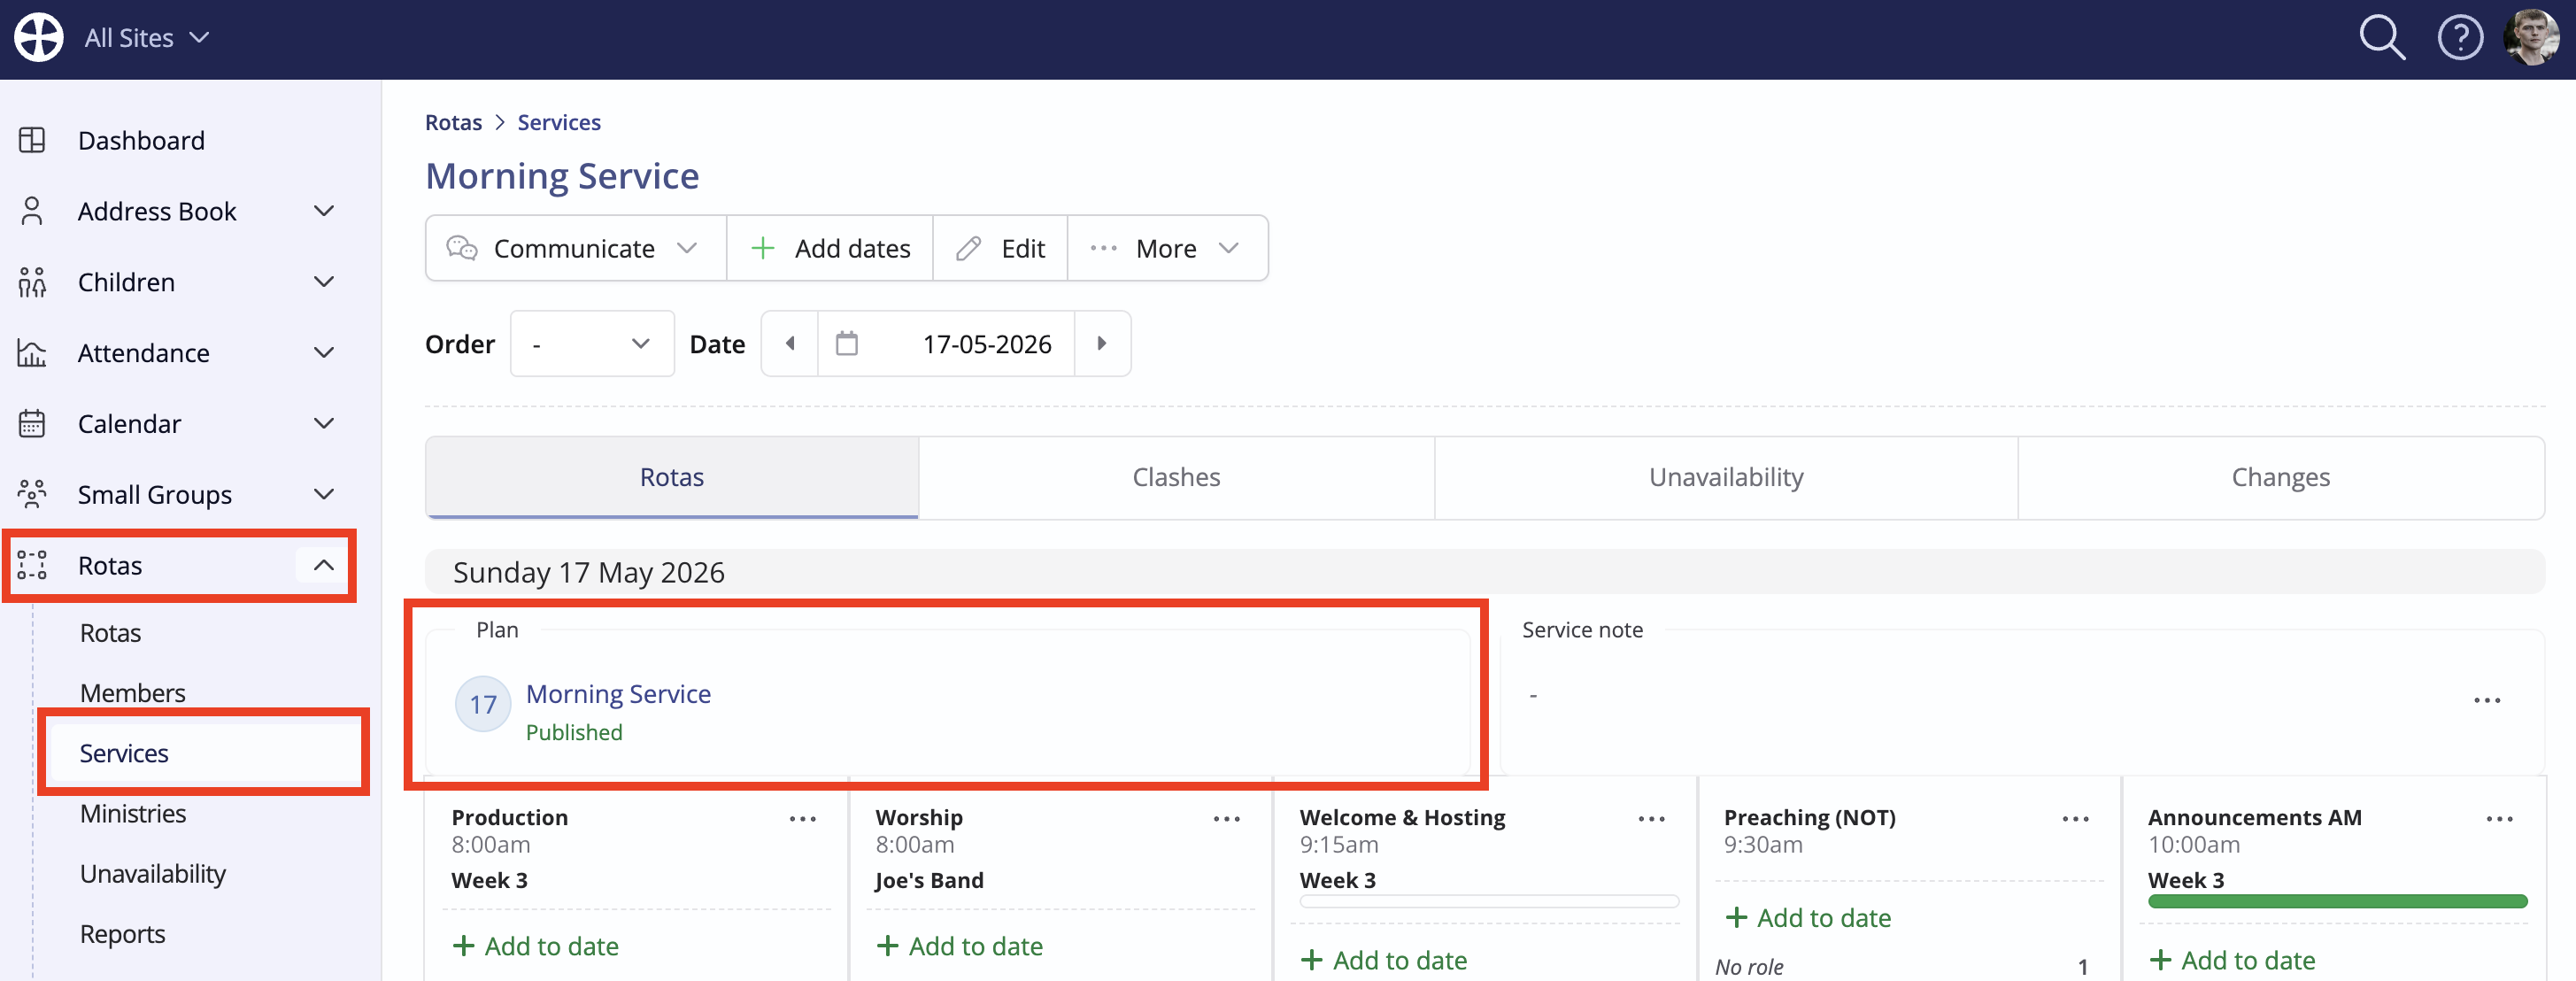
...with the option to Add plan for a service date that doesn't yet have a linked Plan.
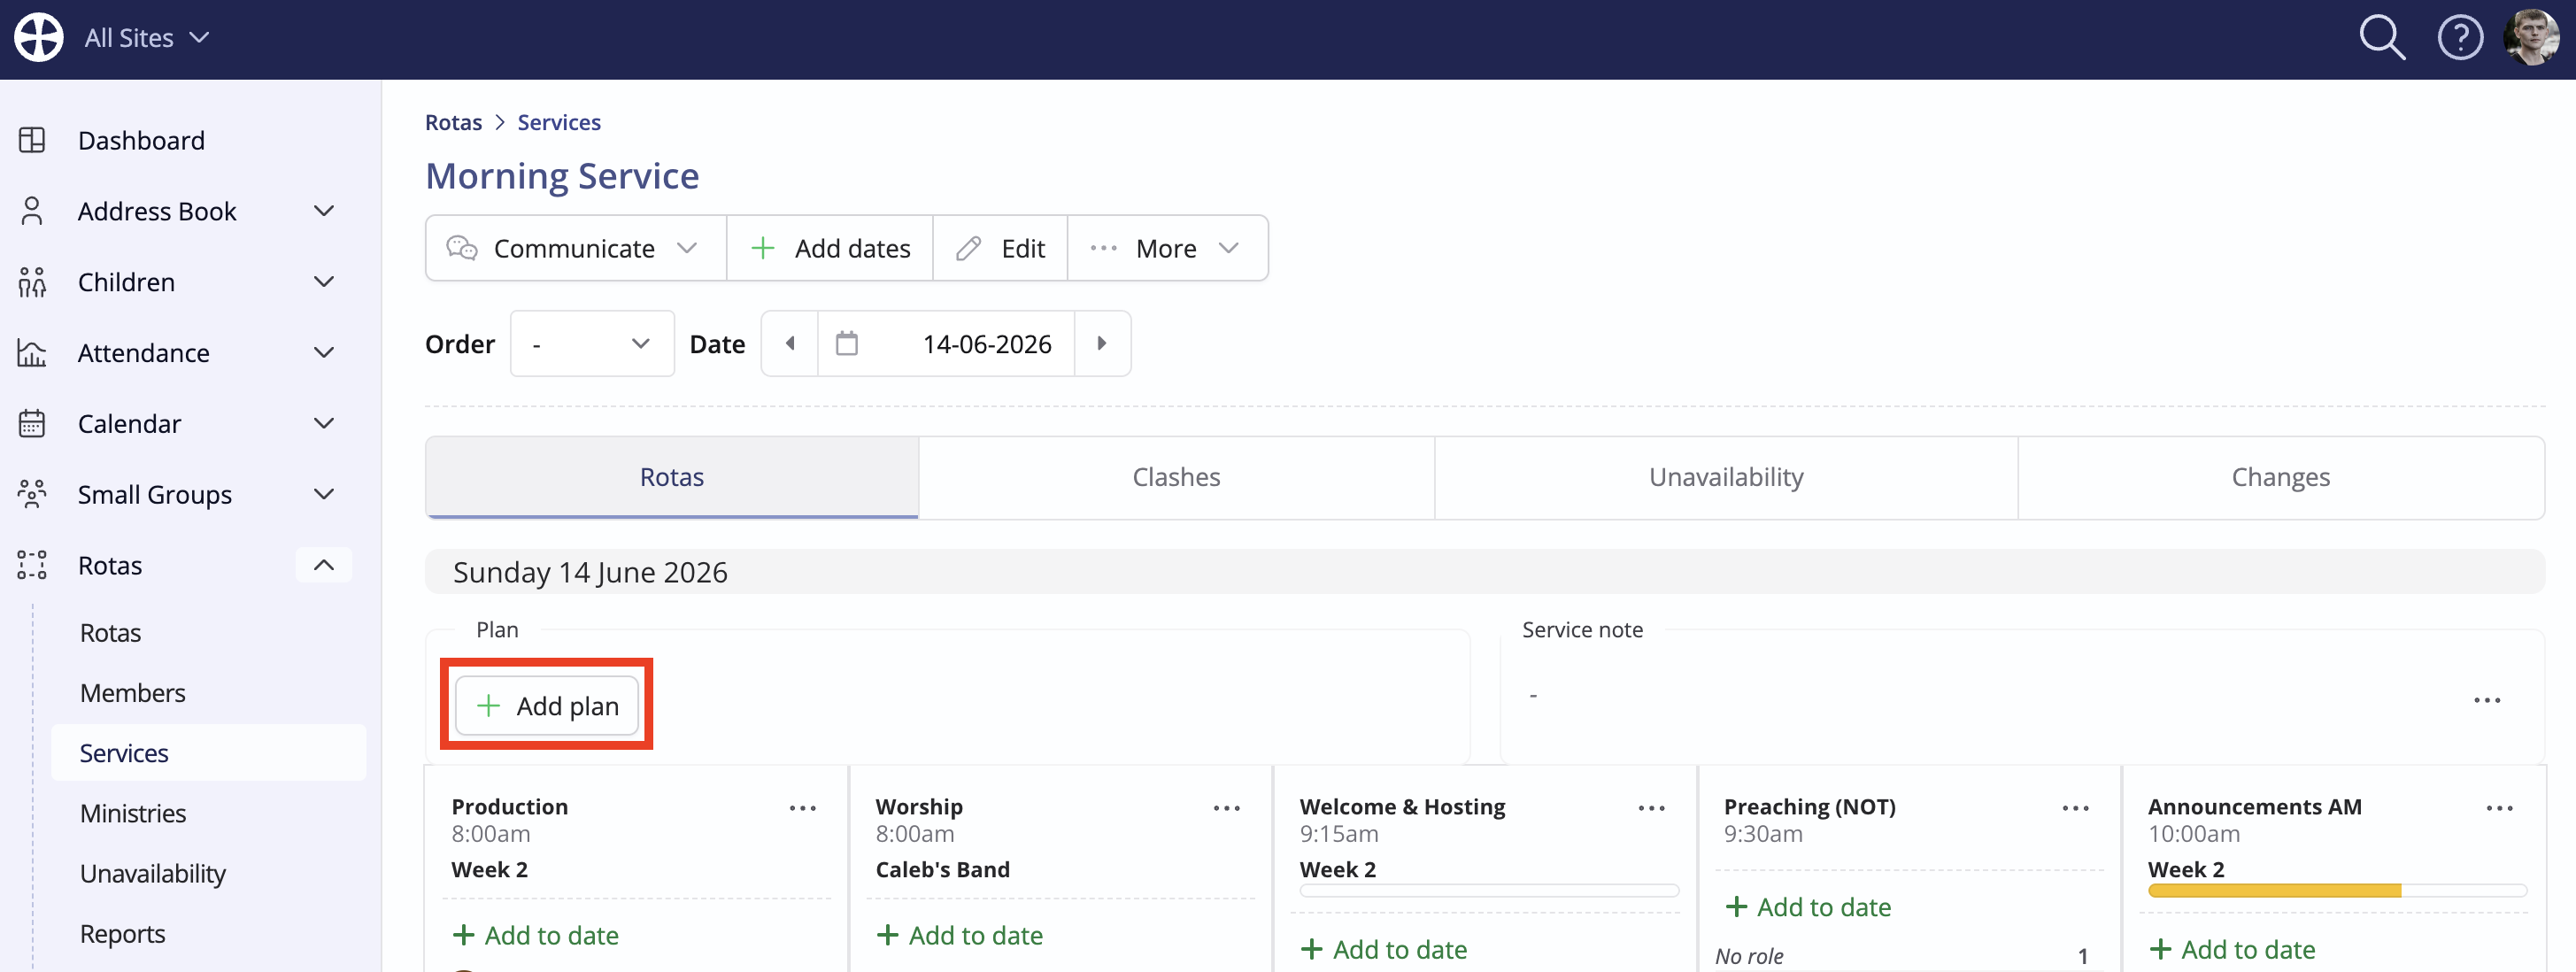
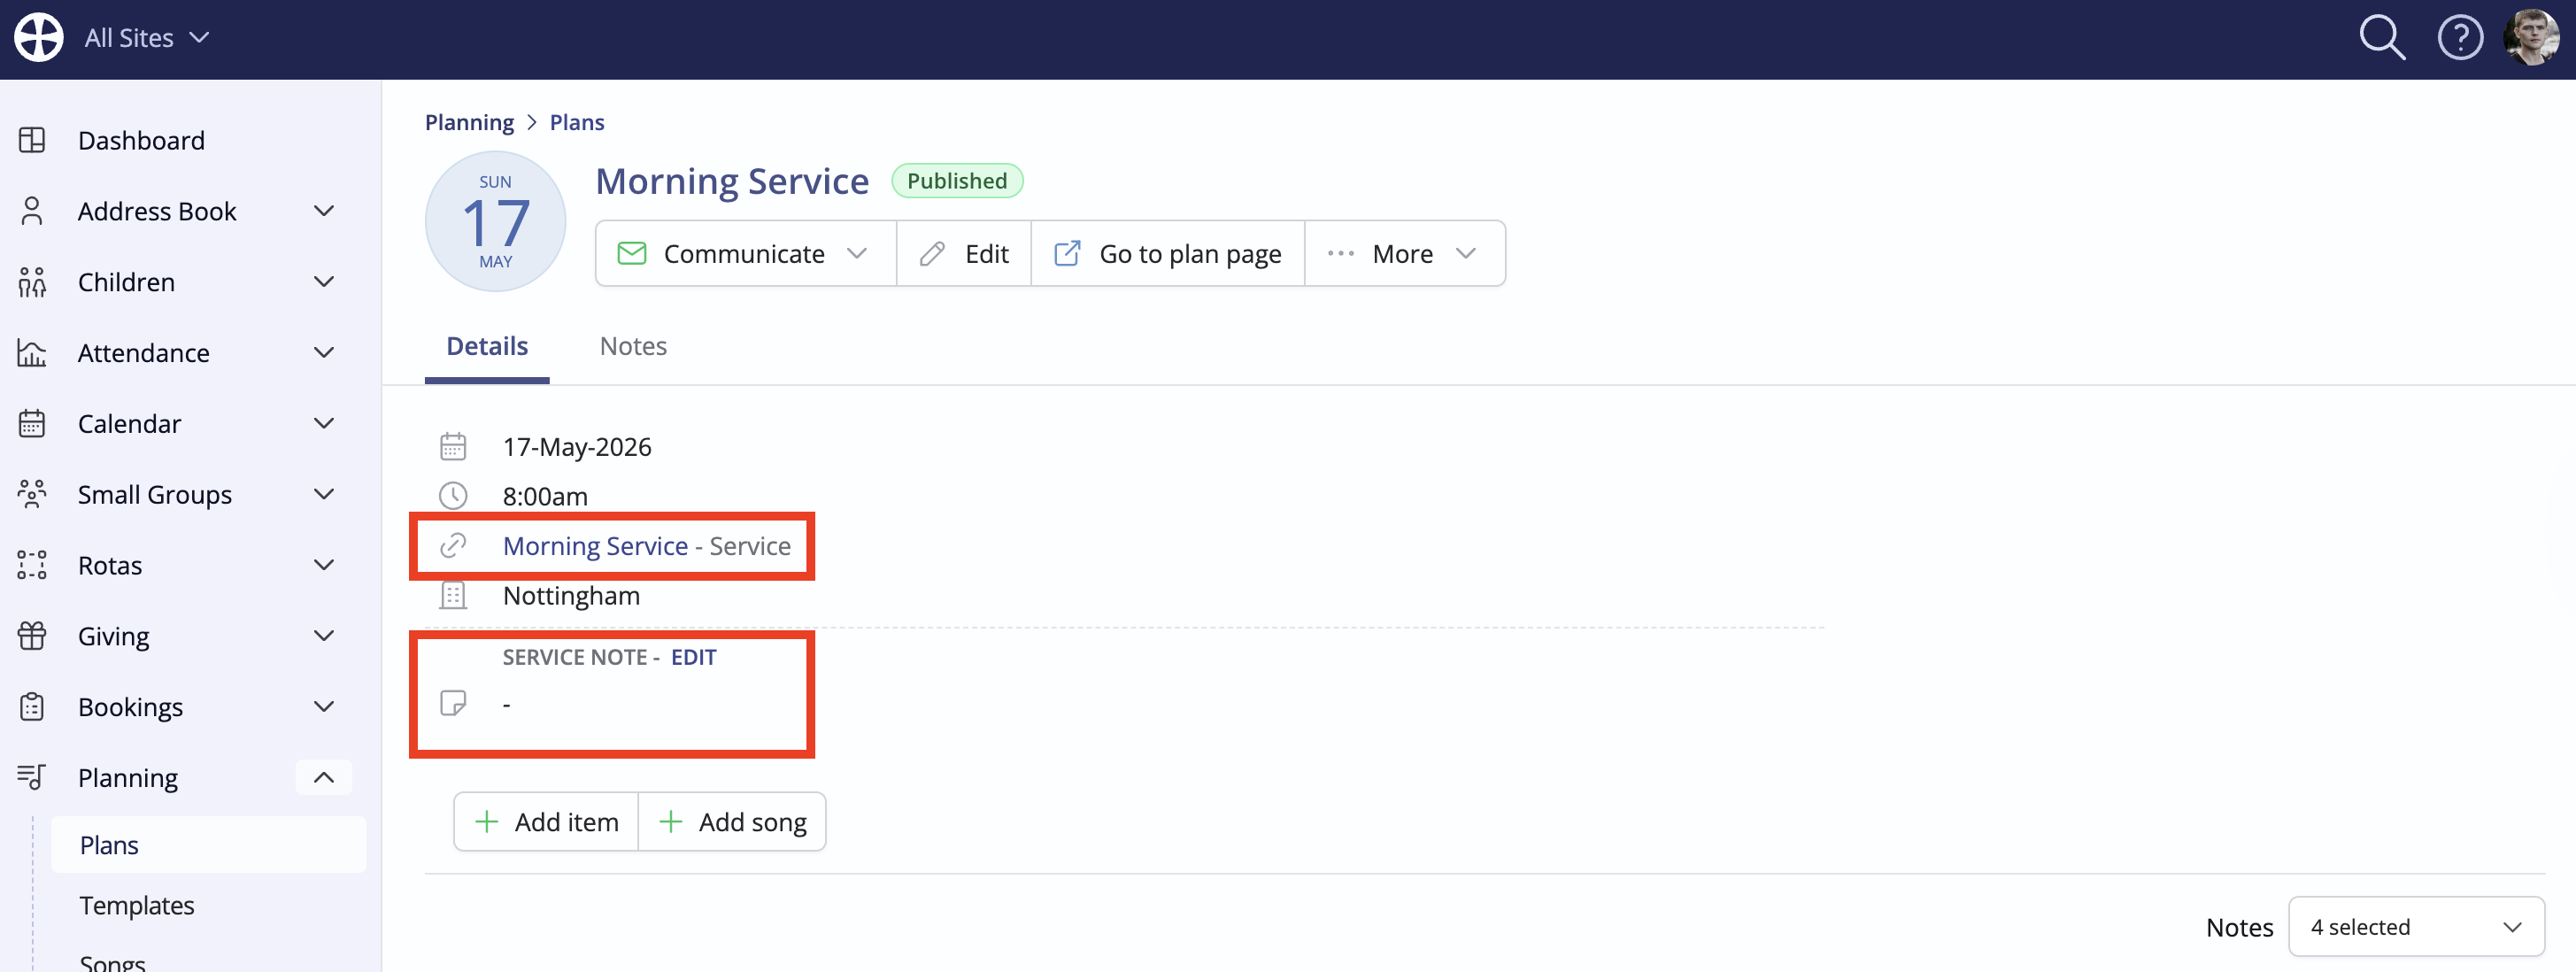
Plans linked to a Service include a clickable link to the Service View in the Rotas module. From a Plan View, service notes can be added or edited.
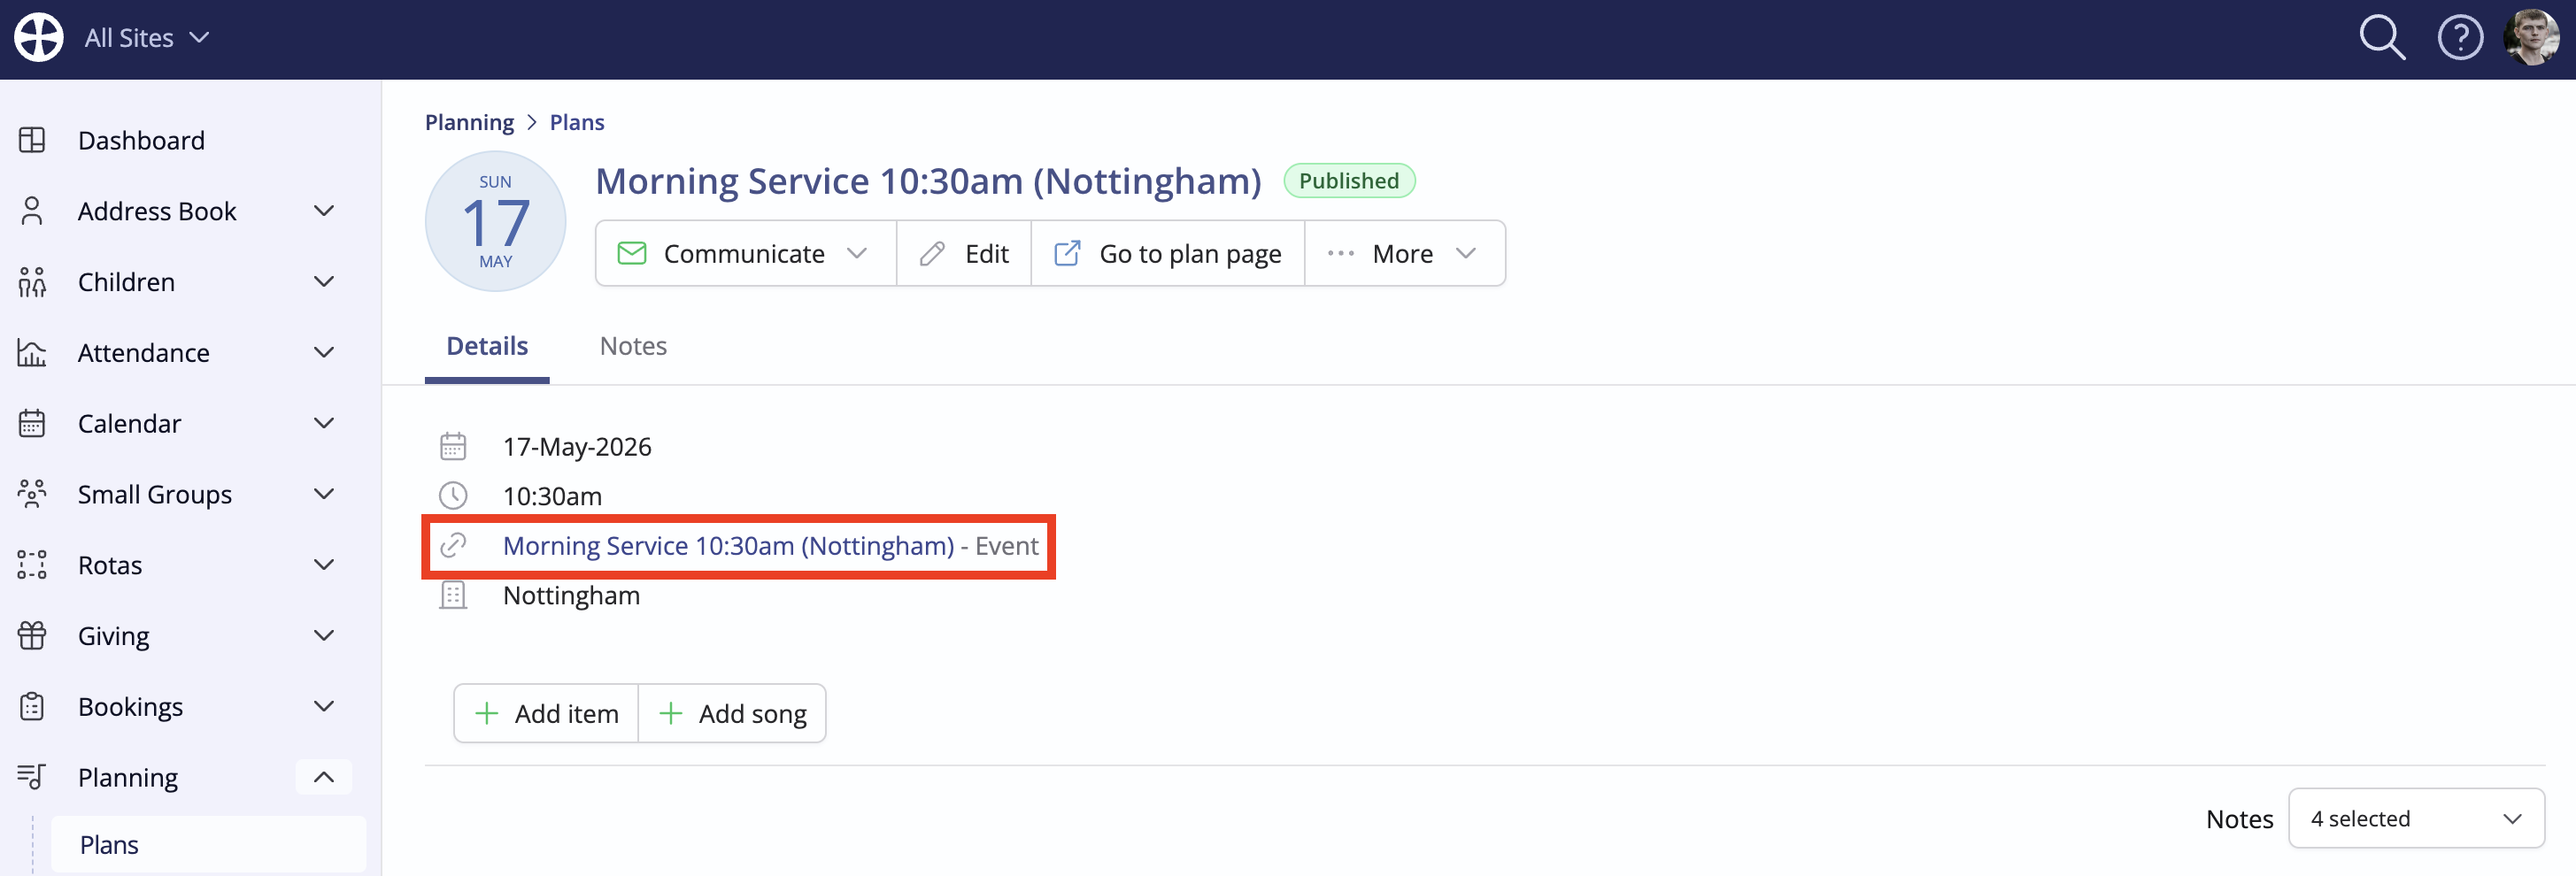
Plans linked to an event
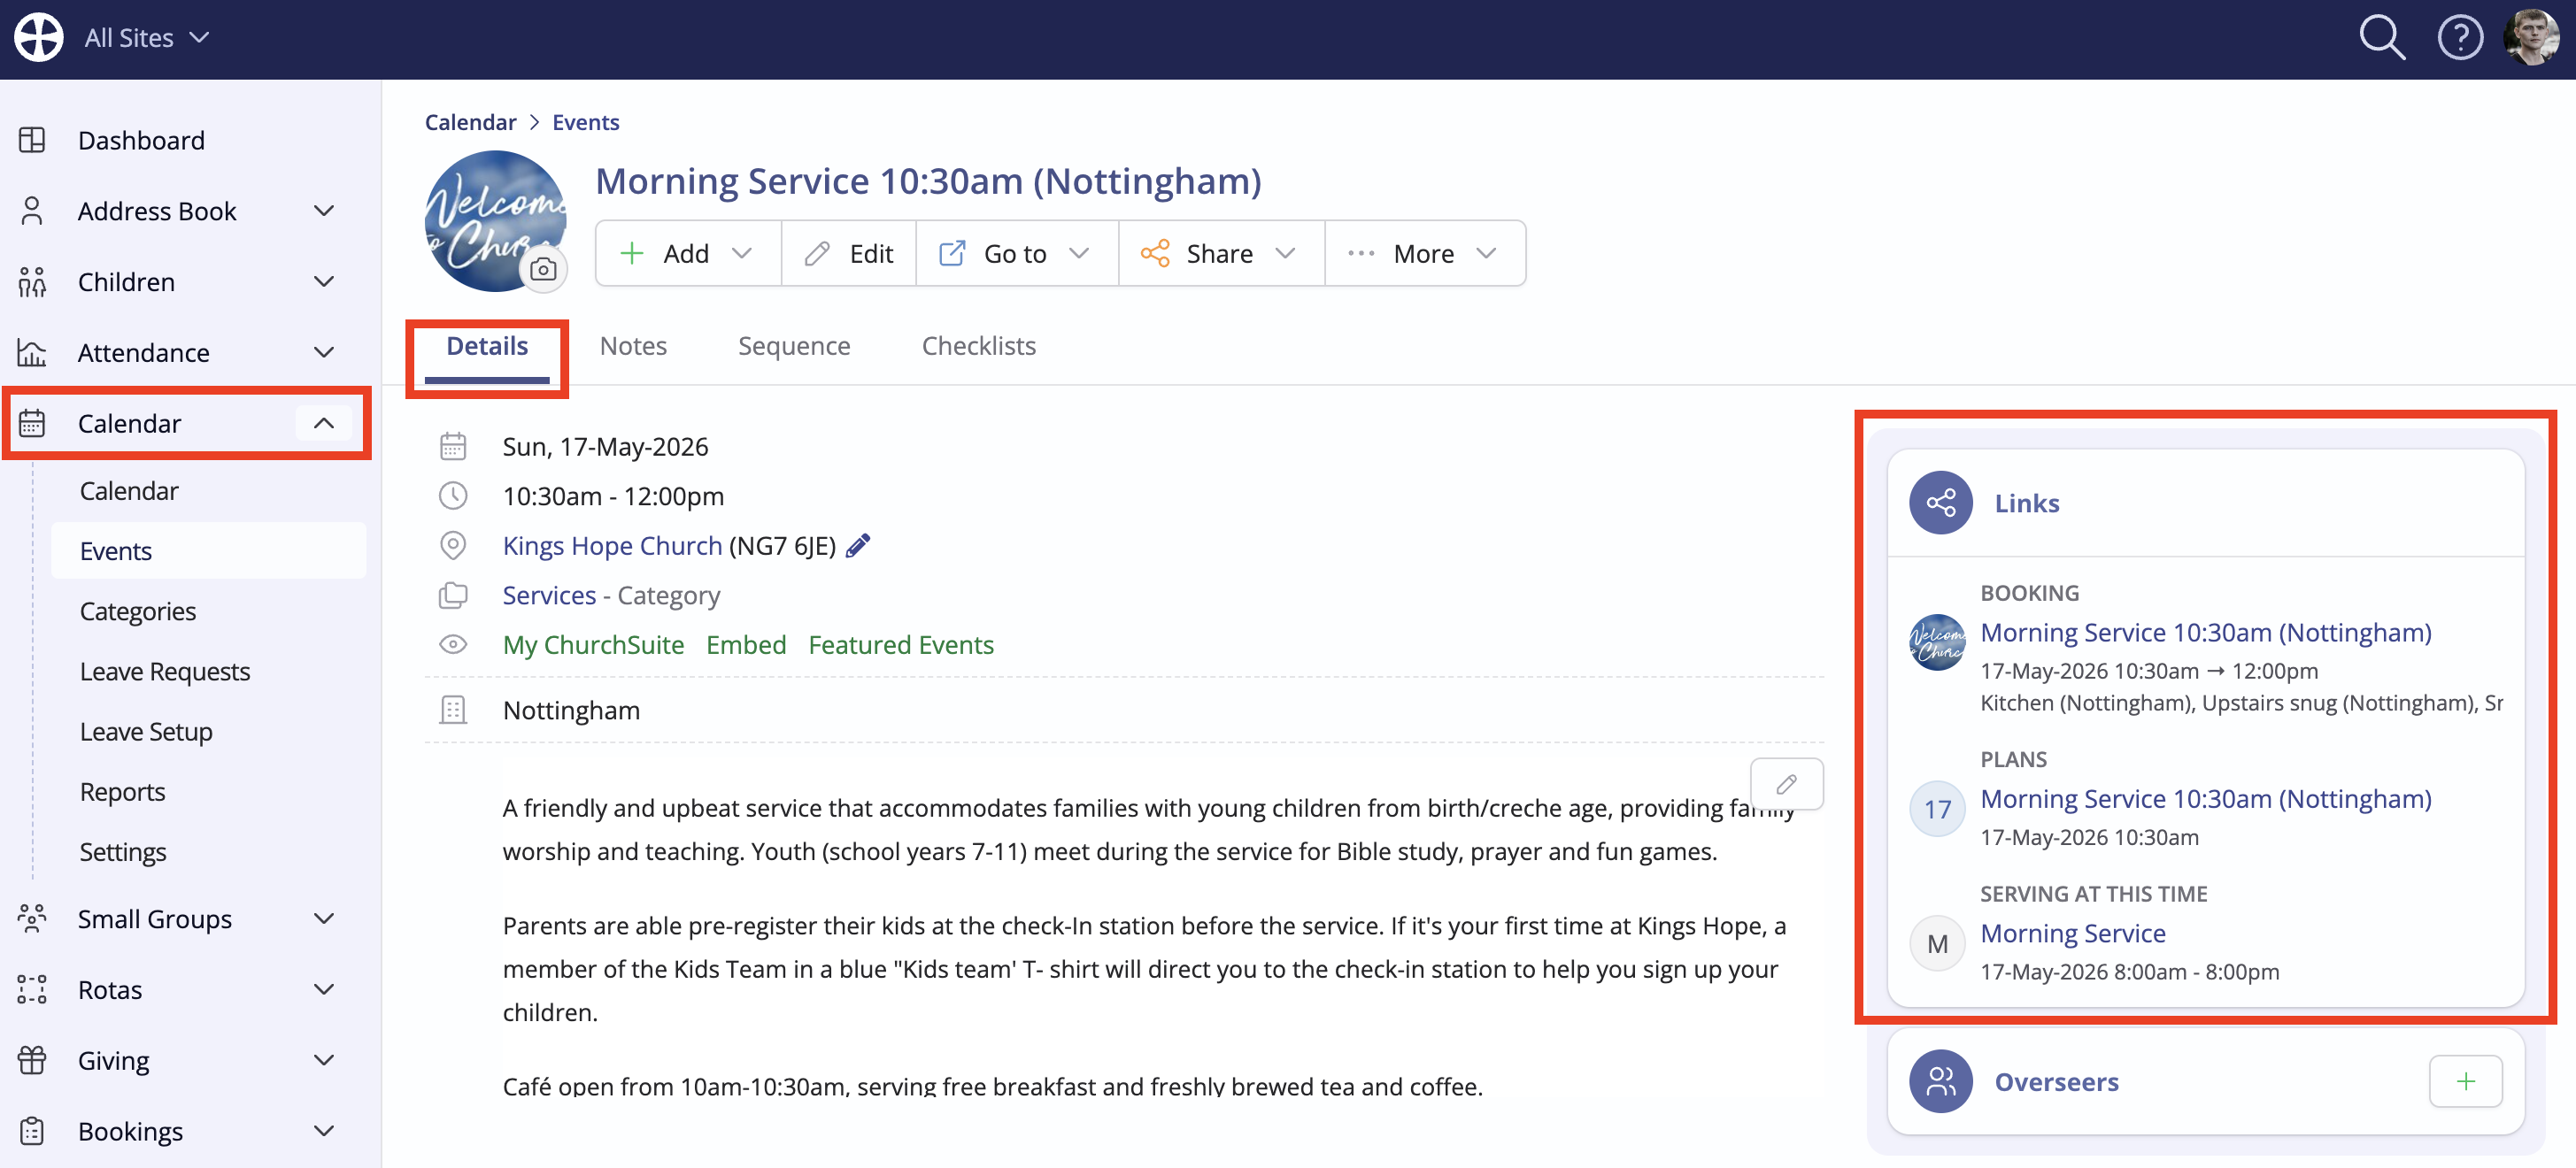
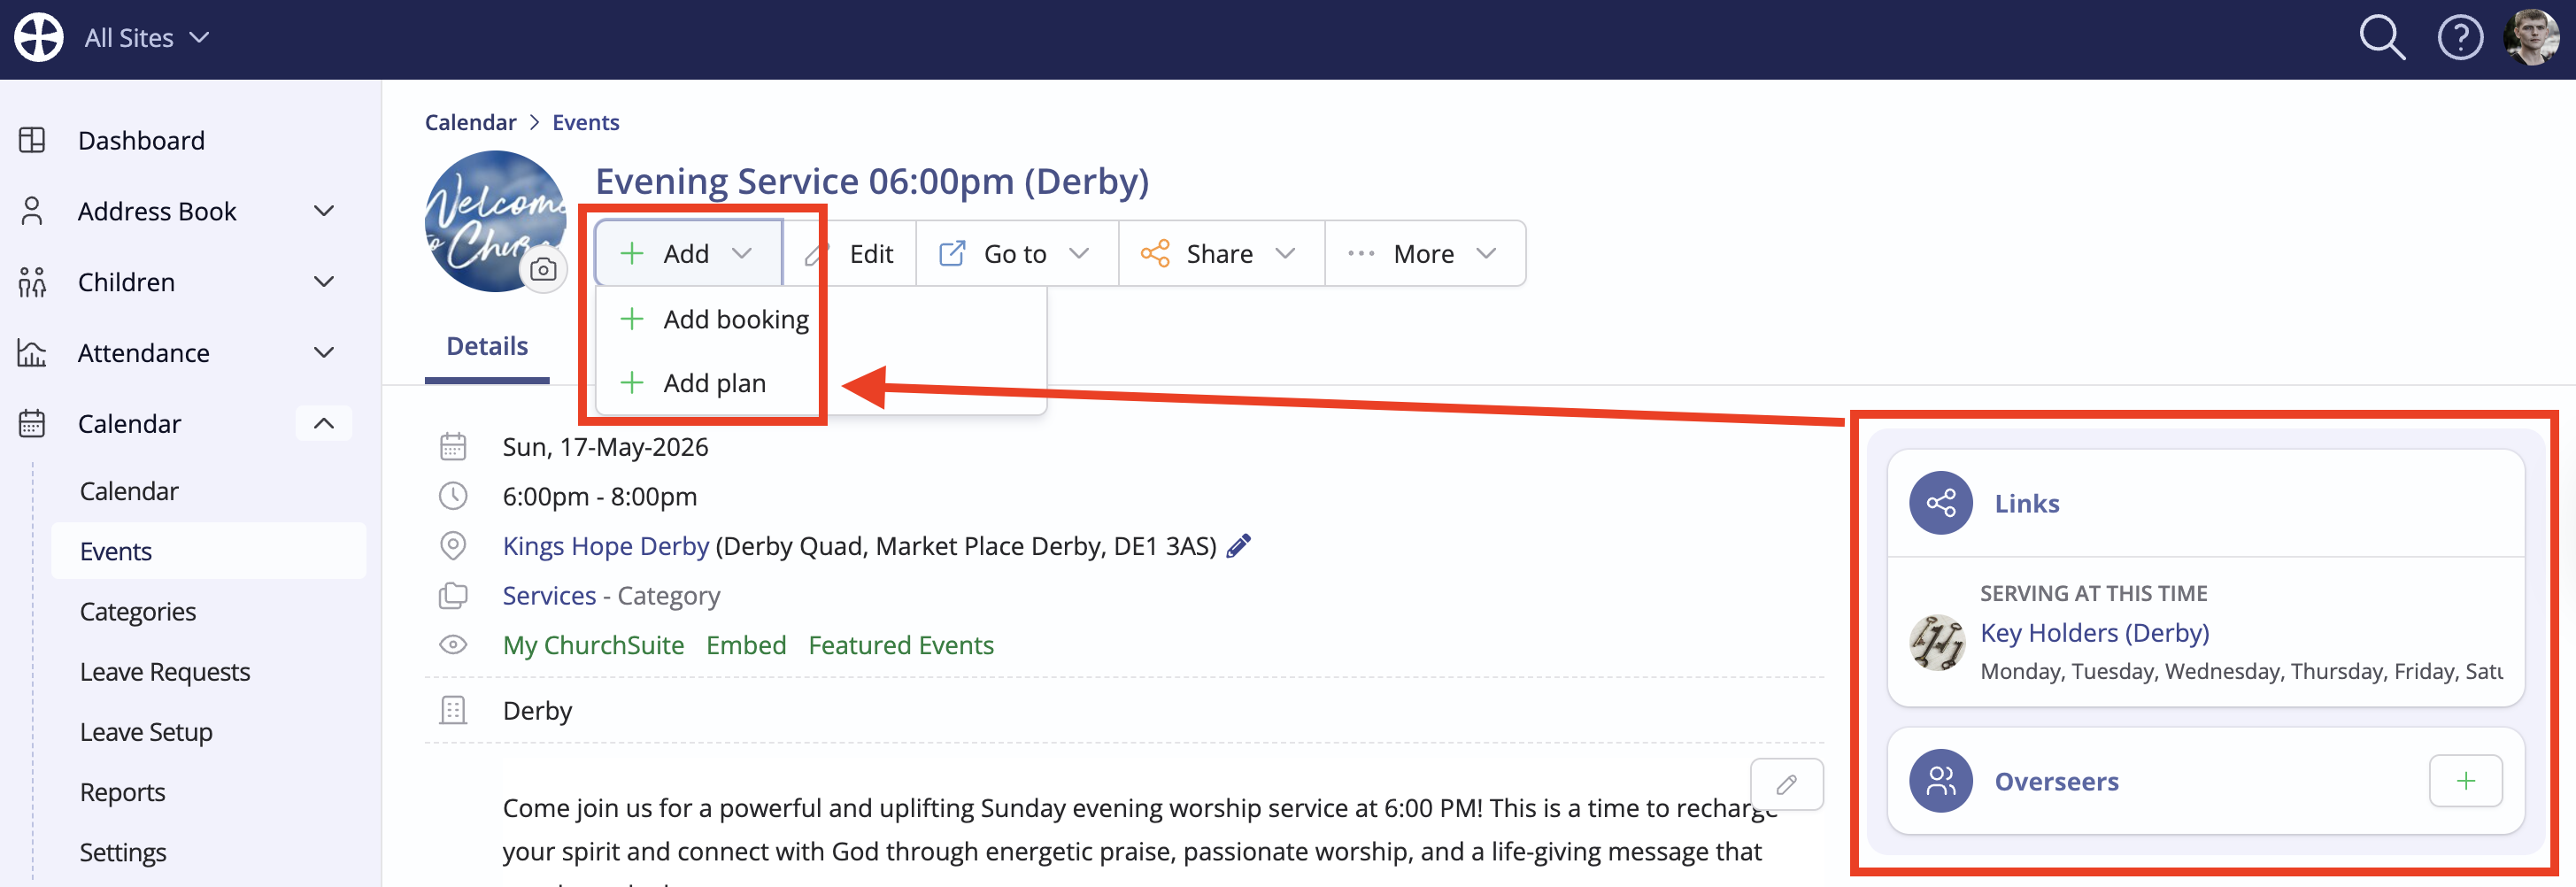
Whenever you're working with Events in the Calendar module, the linked Bookings, Plans and rotas Serving at this time for the event are shown in the Links section of the event View.
The Add plan option is shown if the event doesn't yet have a linked Plan.
You can navigate between events and linked plans using the clickable links on the respective event or plan View.
Plans linked to a booking
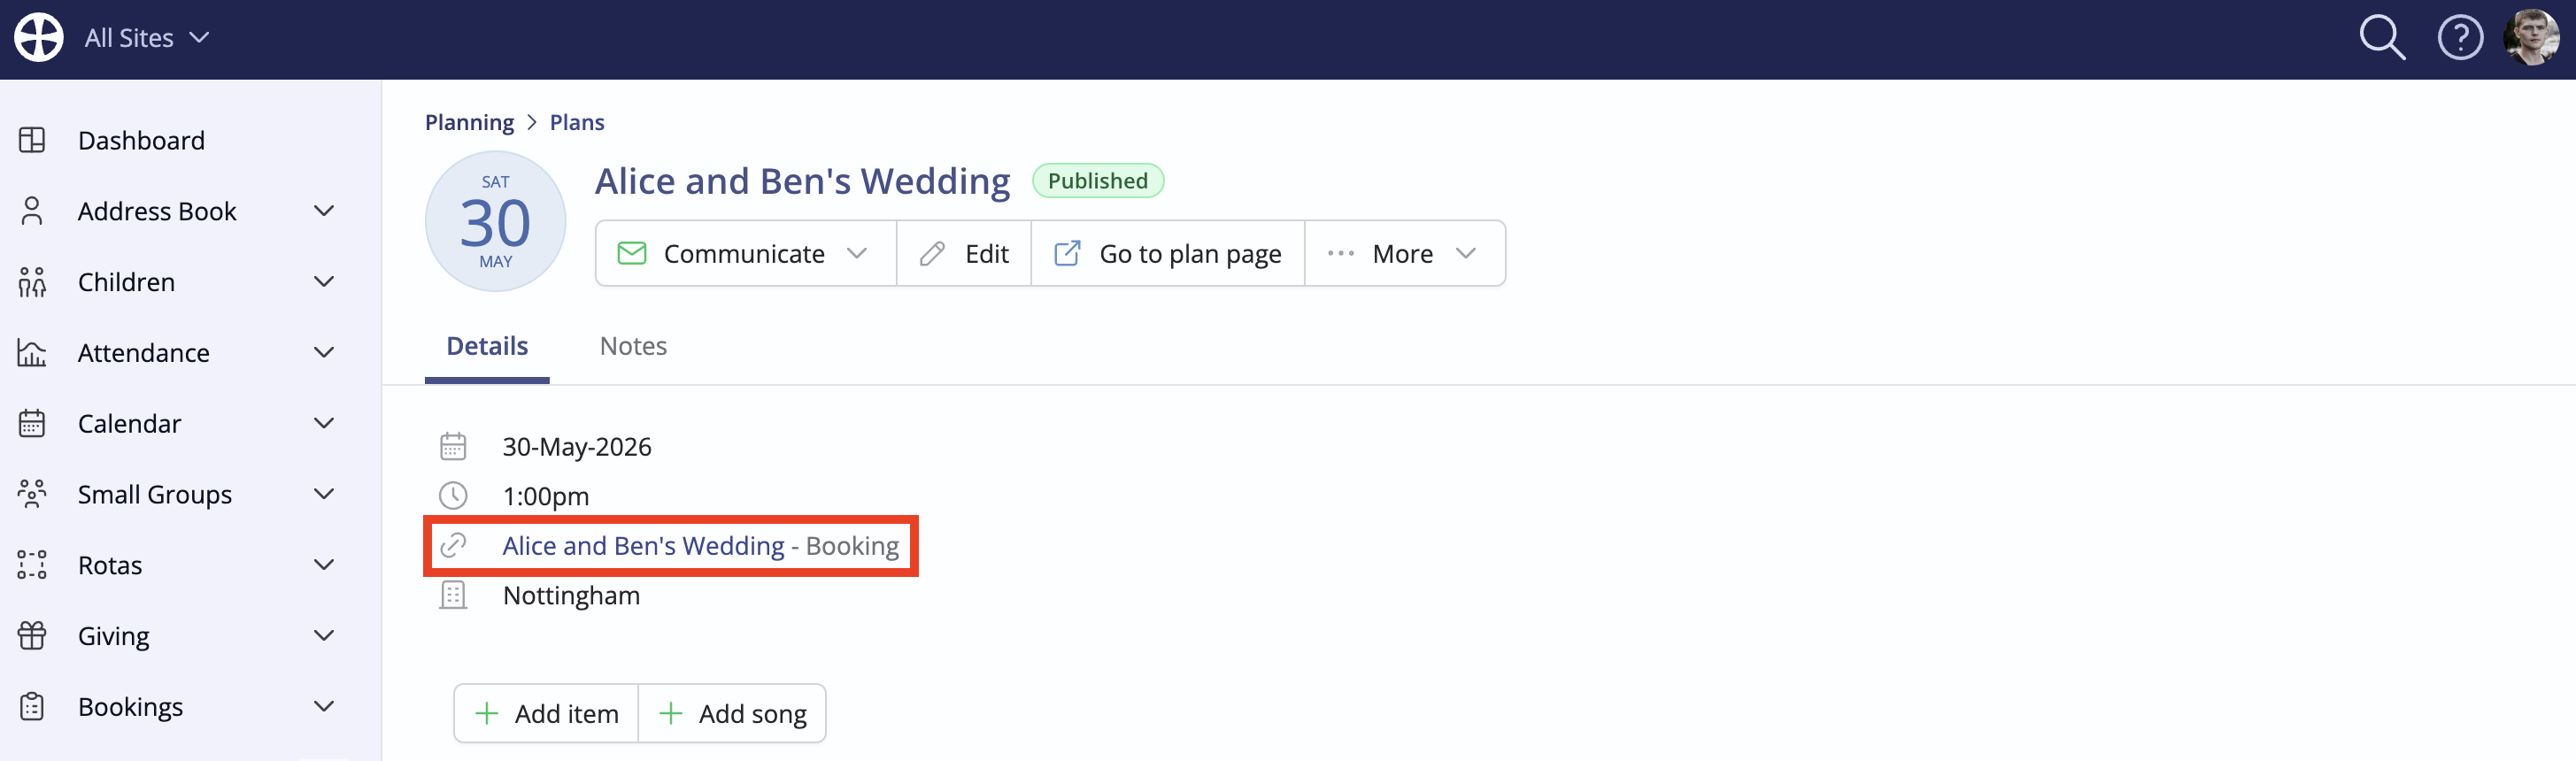
Whenever you're working with bookings in the Bookings module, linked Plans are shown on the booking's Details tab...
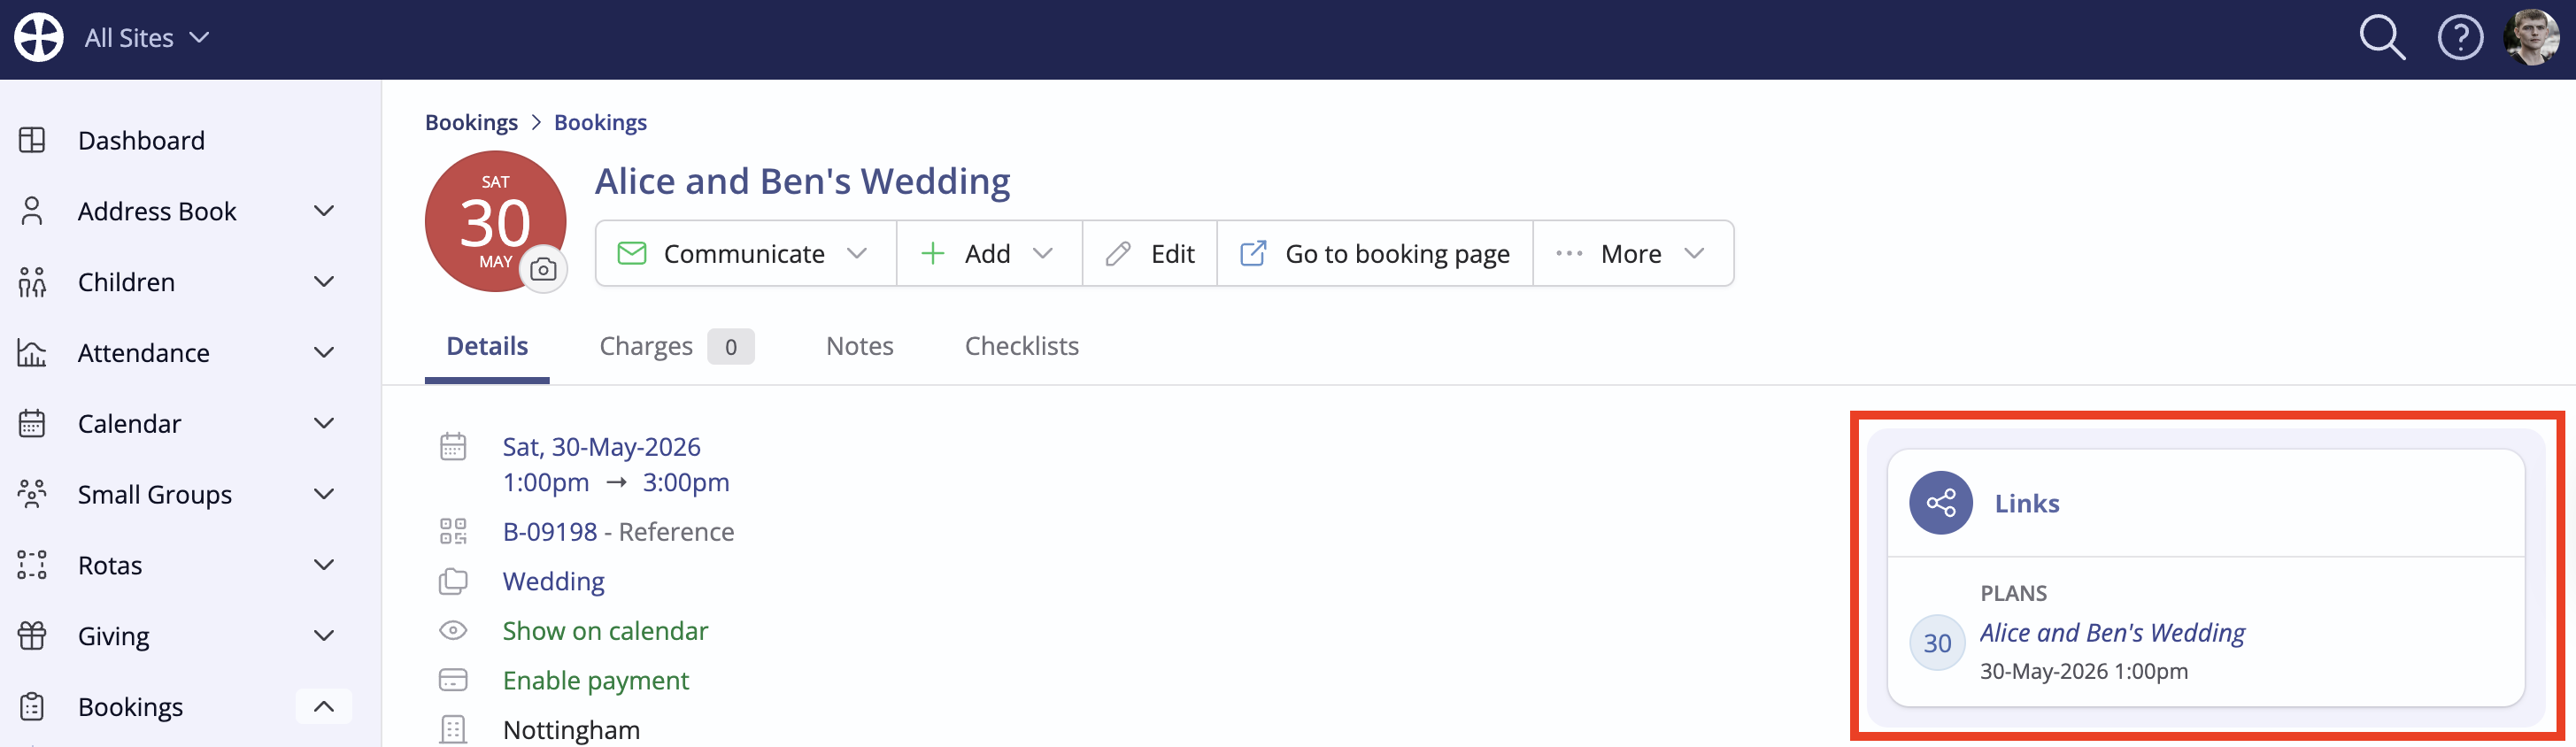
...with the option to Add plan where the booking doesn't yet have a linked Plan.

You can navigate between bookings and linked plans using the clickable links on the respective booking or plan View.