Adding custom fields for organisations
In this article
Overview of intended functionality
Adding custom fields
Changing existing custom fields and response options
Bulk-updating custom field response data
Custom fields in action
Overview of intended functionality
While we've tried to anticipate the most common information needs when storing details of Organisations in the Network module, you may want to record additional information that doesn't fit neatly into any of the standard fields. You can add your own Custom fields.
You can select from a variety of data formats for custom fields - Text fields (single sentence, paragraph, email, phone), List fields (checkbox for multi-select, drop-down for single select, radio) and a Date field. Each field's Name and Option labels have a 250 max. character limit and responses for Single sentence and Paragraph type fields also have a 250 max. character length. Each custom field can be optionally set as required in ChurchSuite (affecting Network module Users).
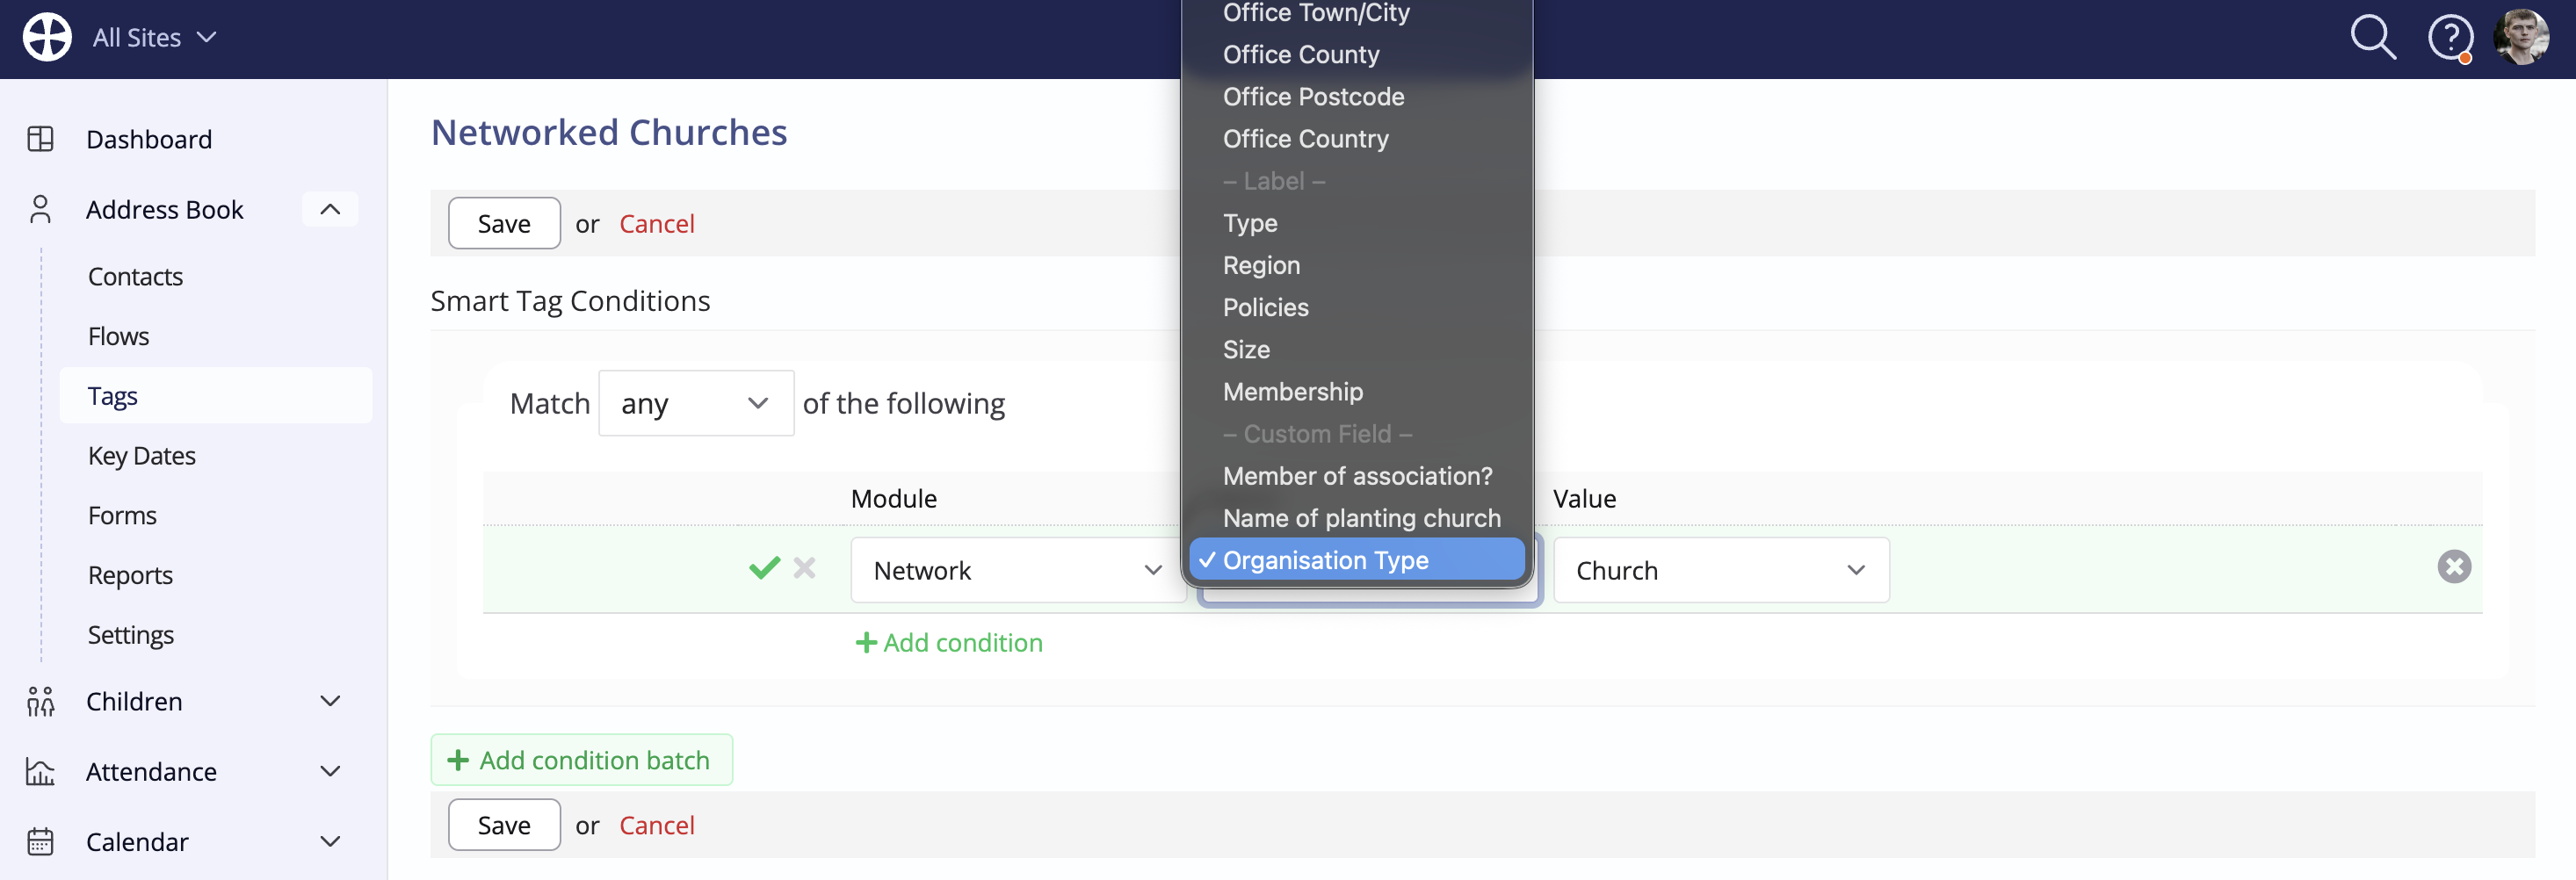
Custom fields are fully searchable using the module's Filters and as conditions in Address Book Smart Tags.
Adding custom fields
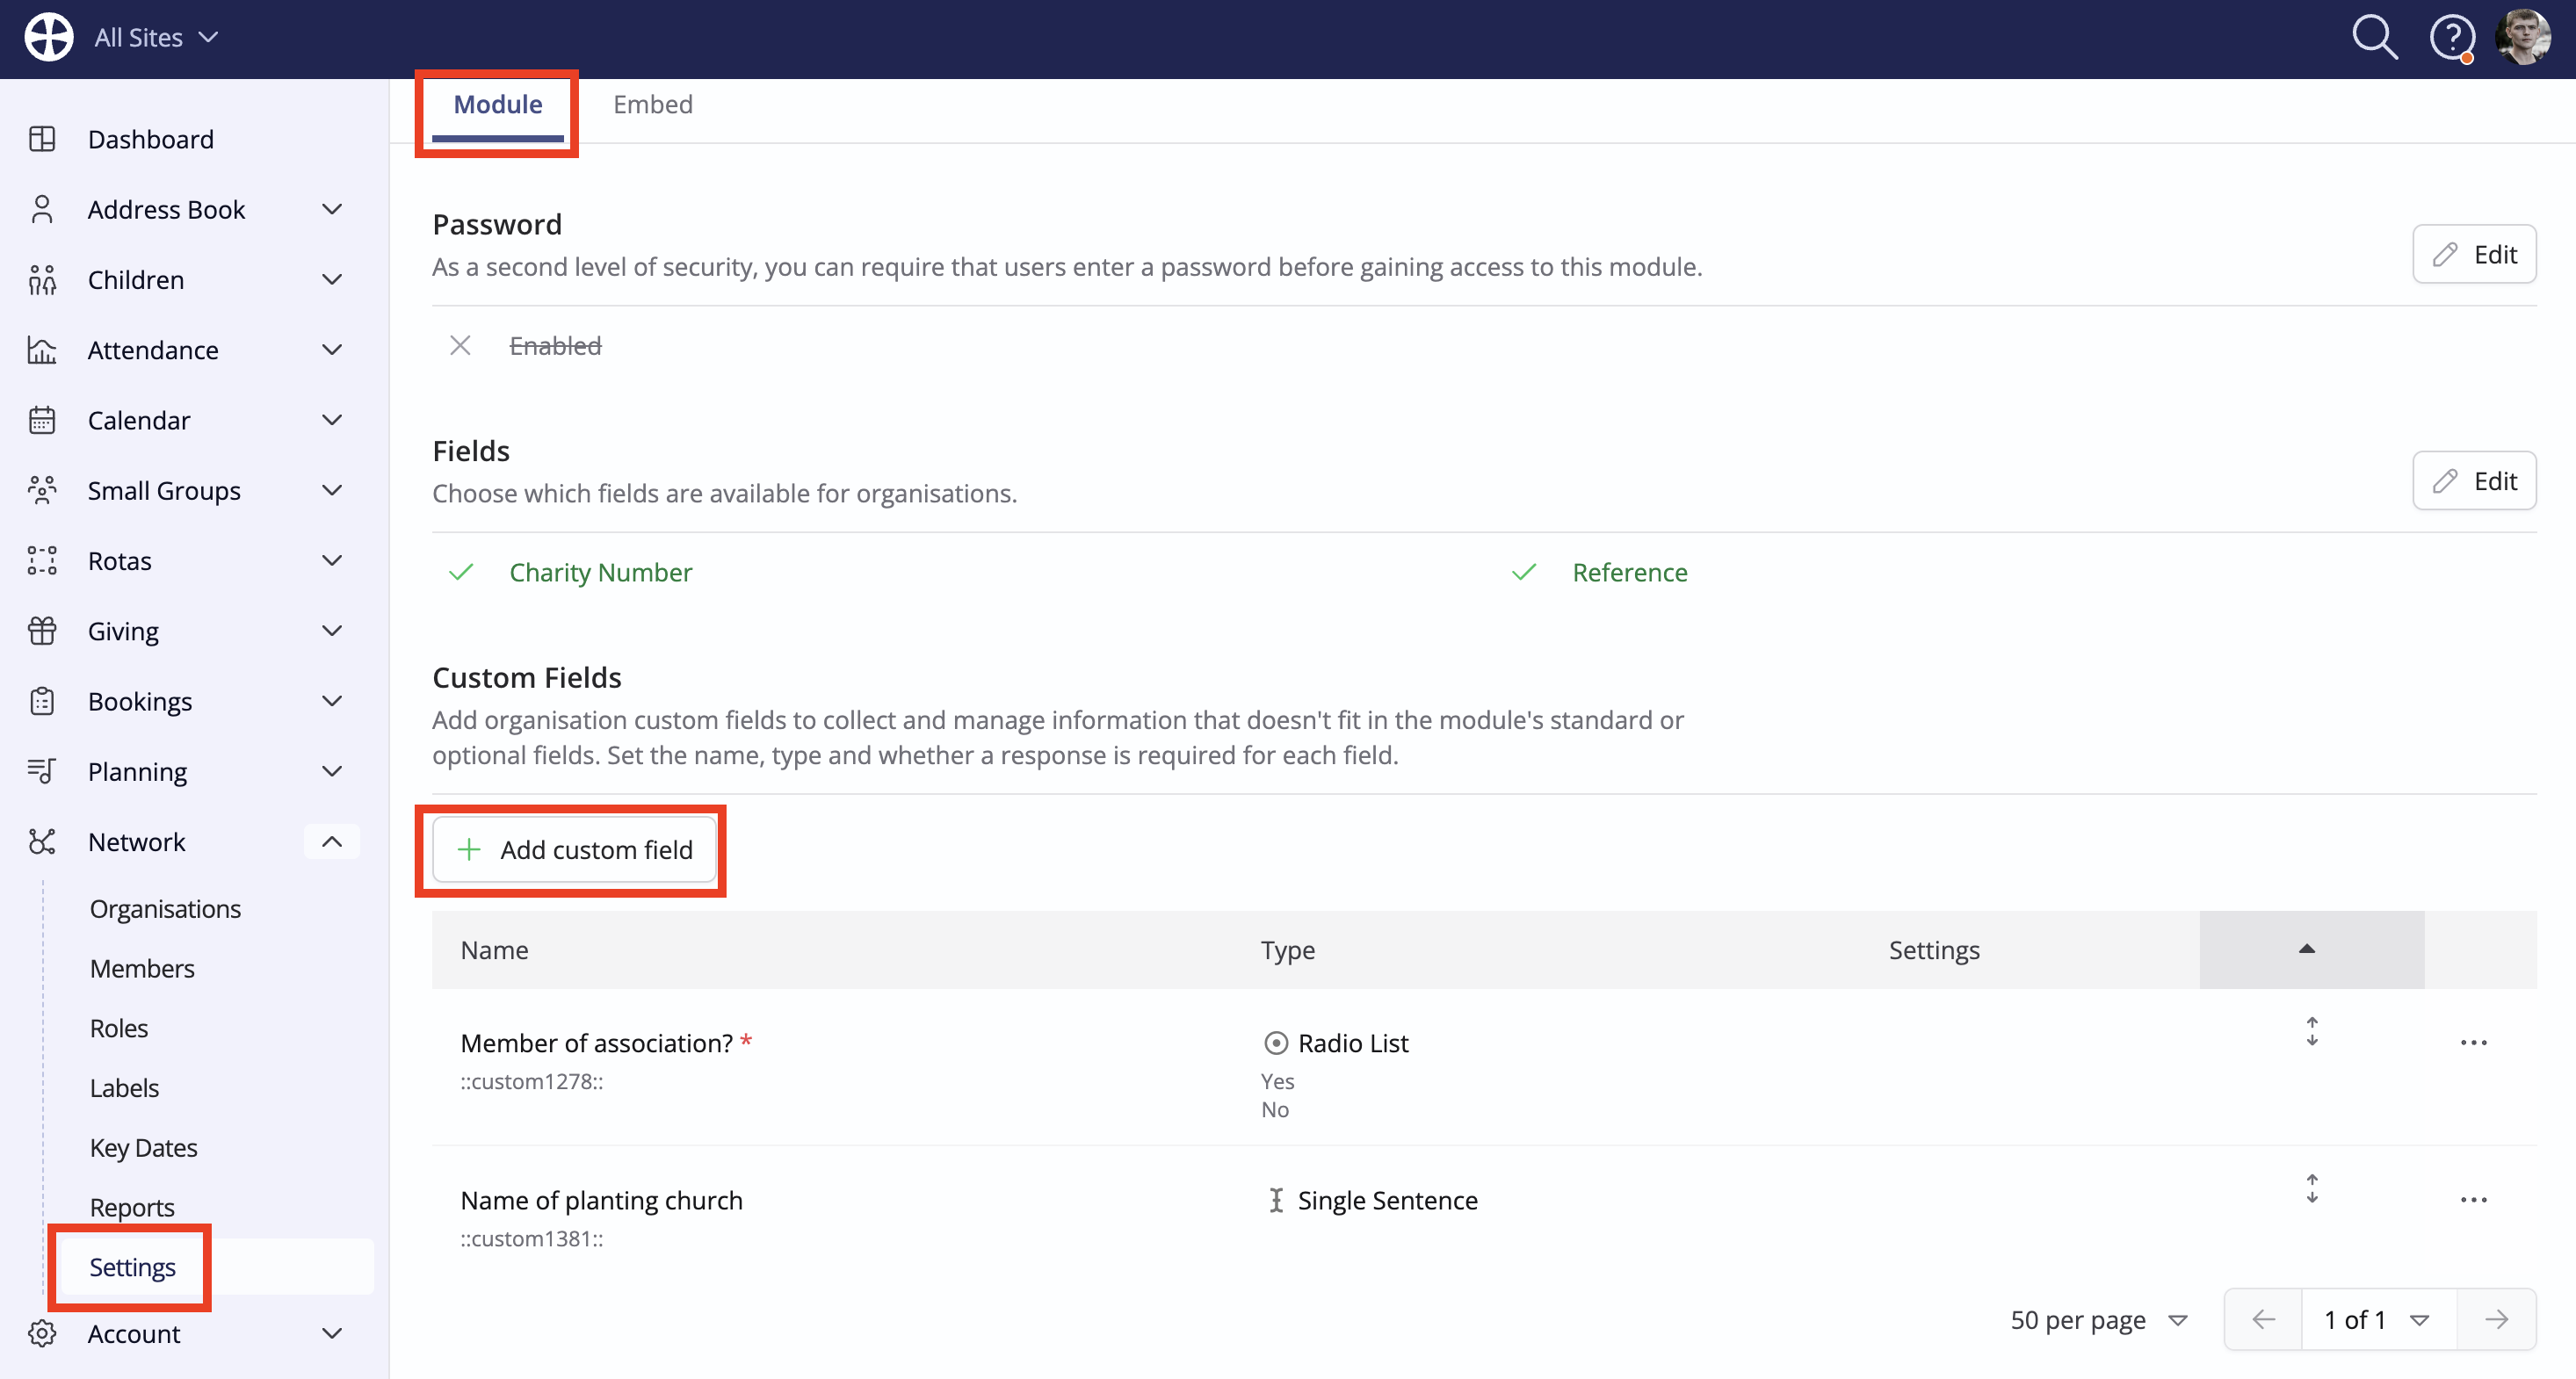
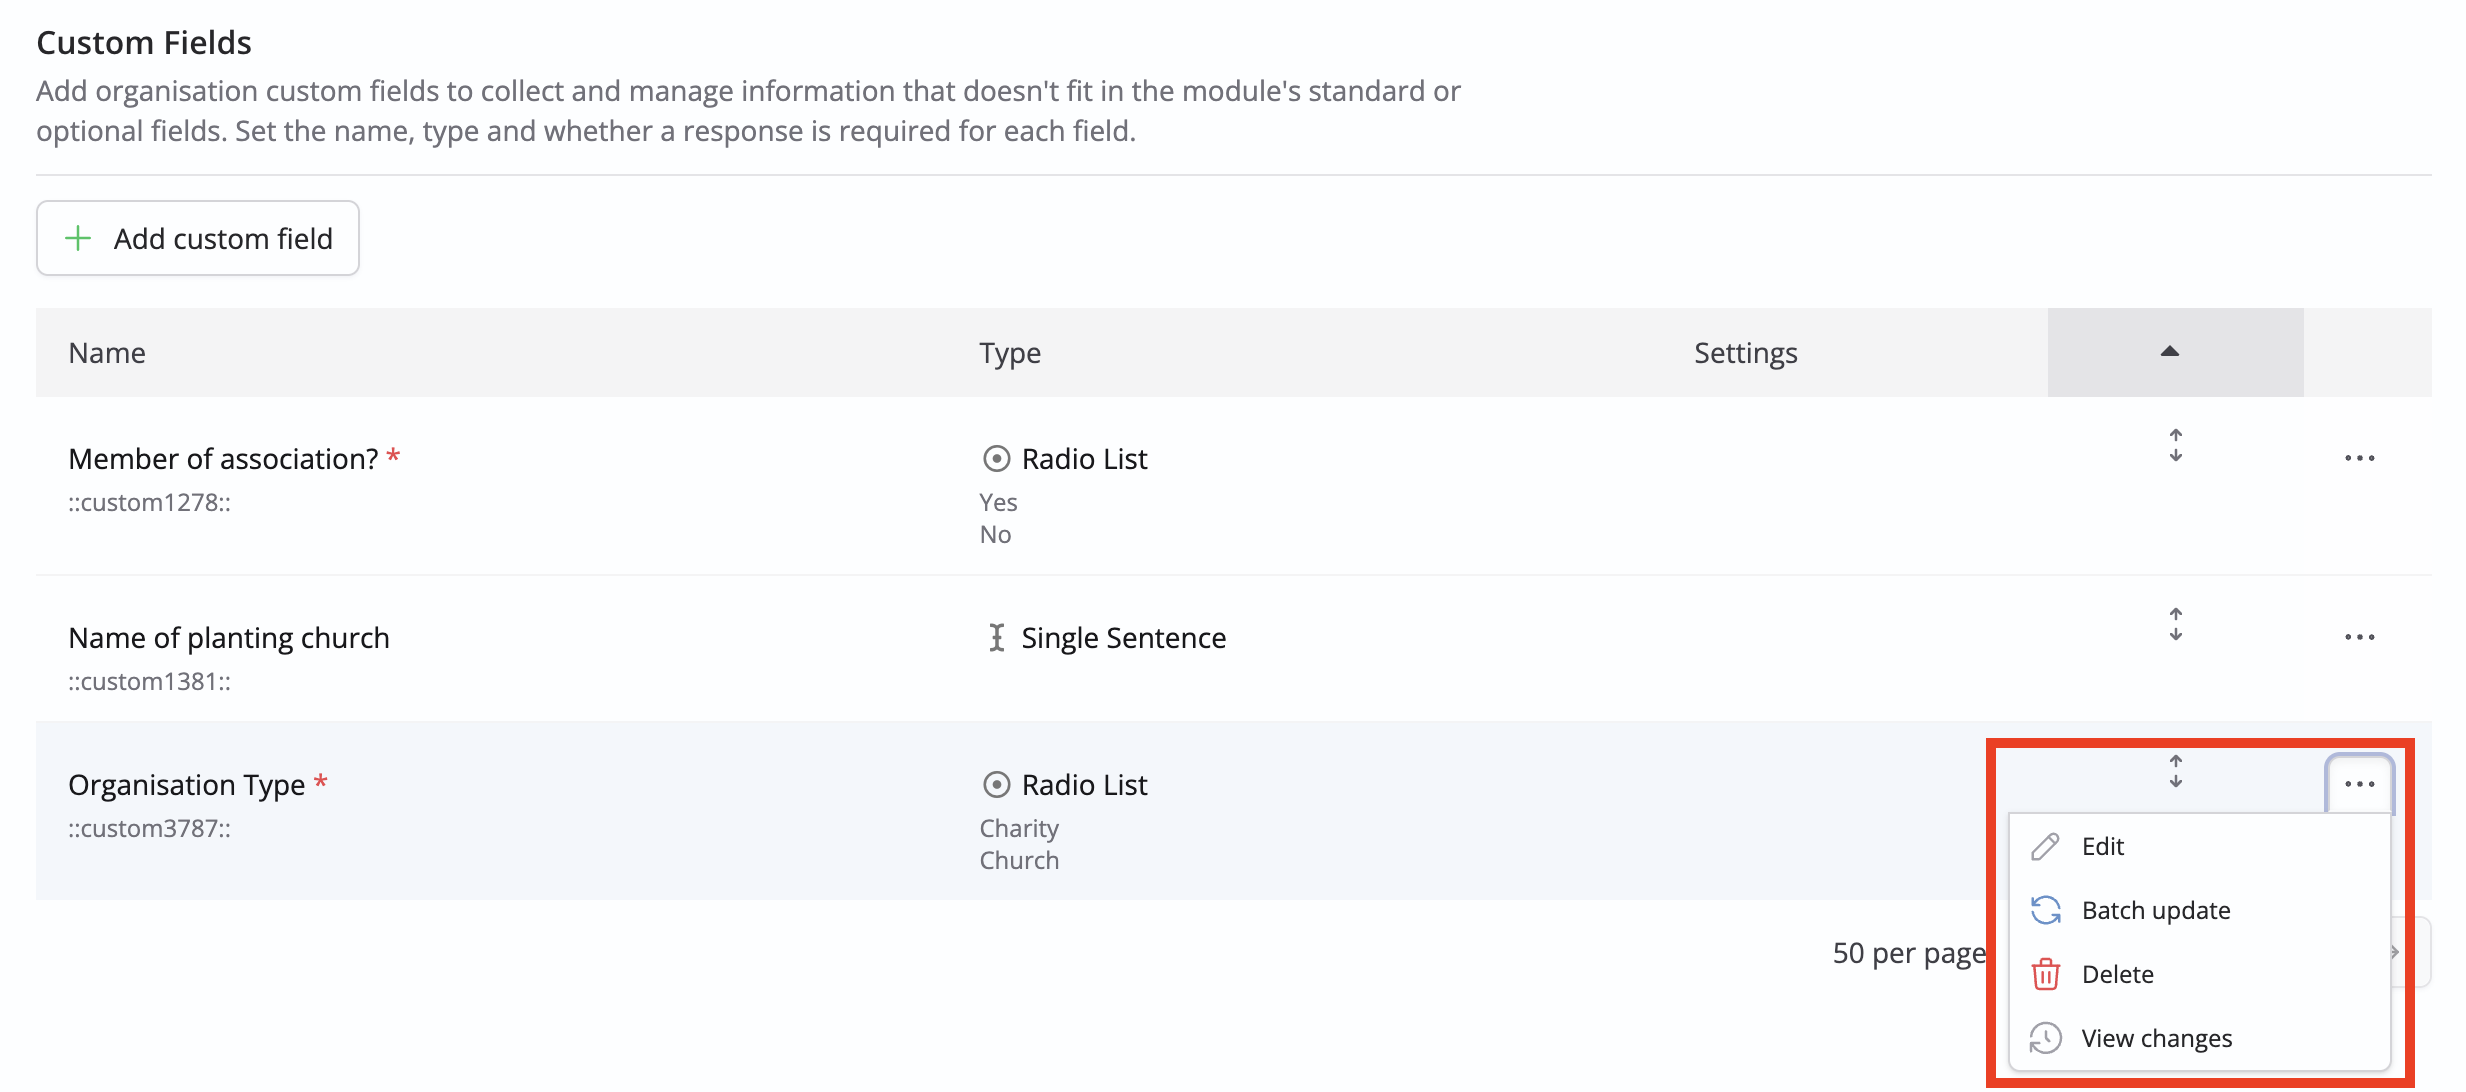
To add a custom field, go to the Network module settings. On the Module Options tab, scroll down to the Custom Fields section and click Add custom field.
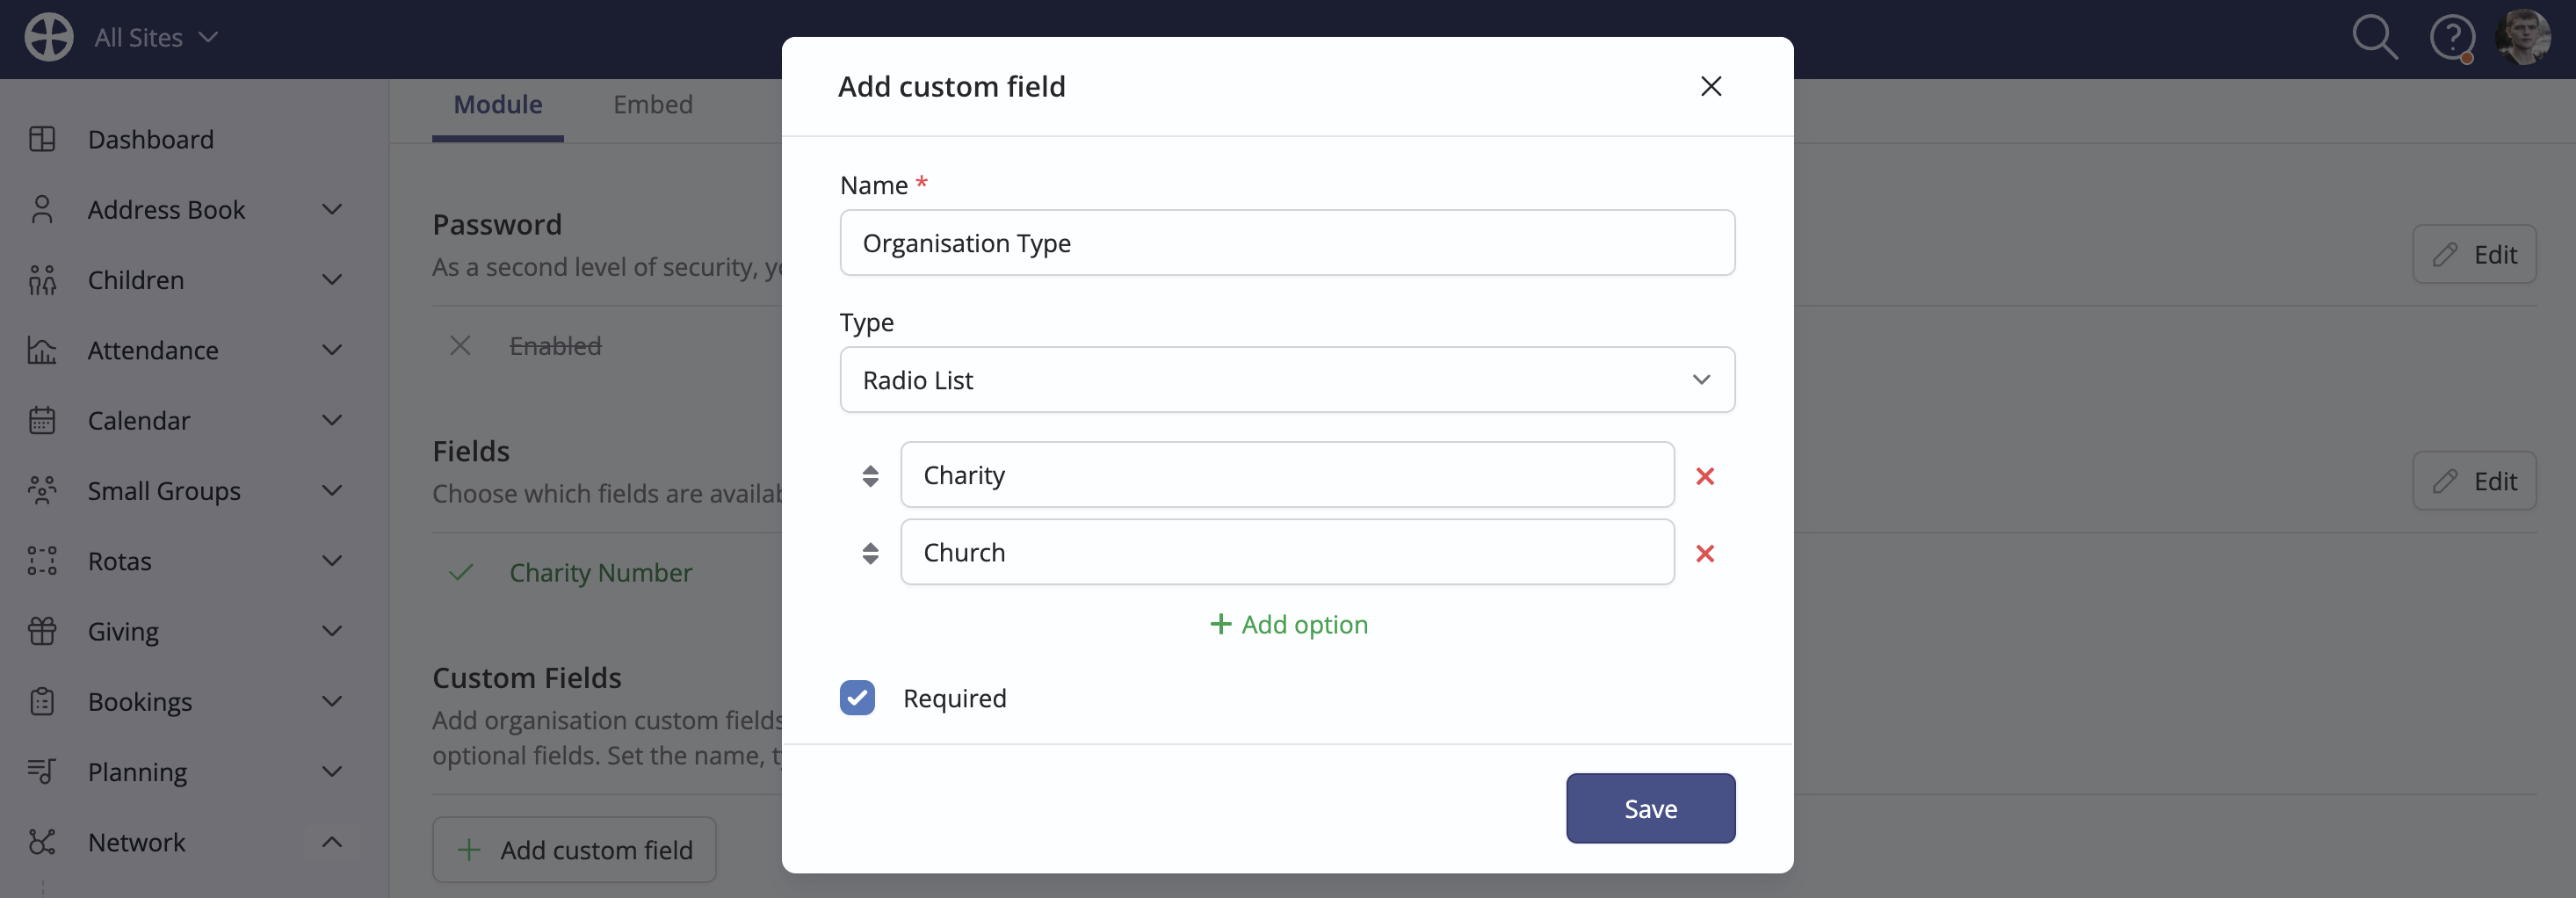
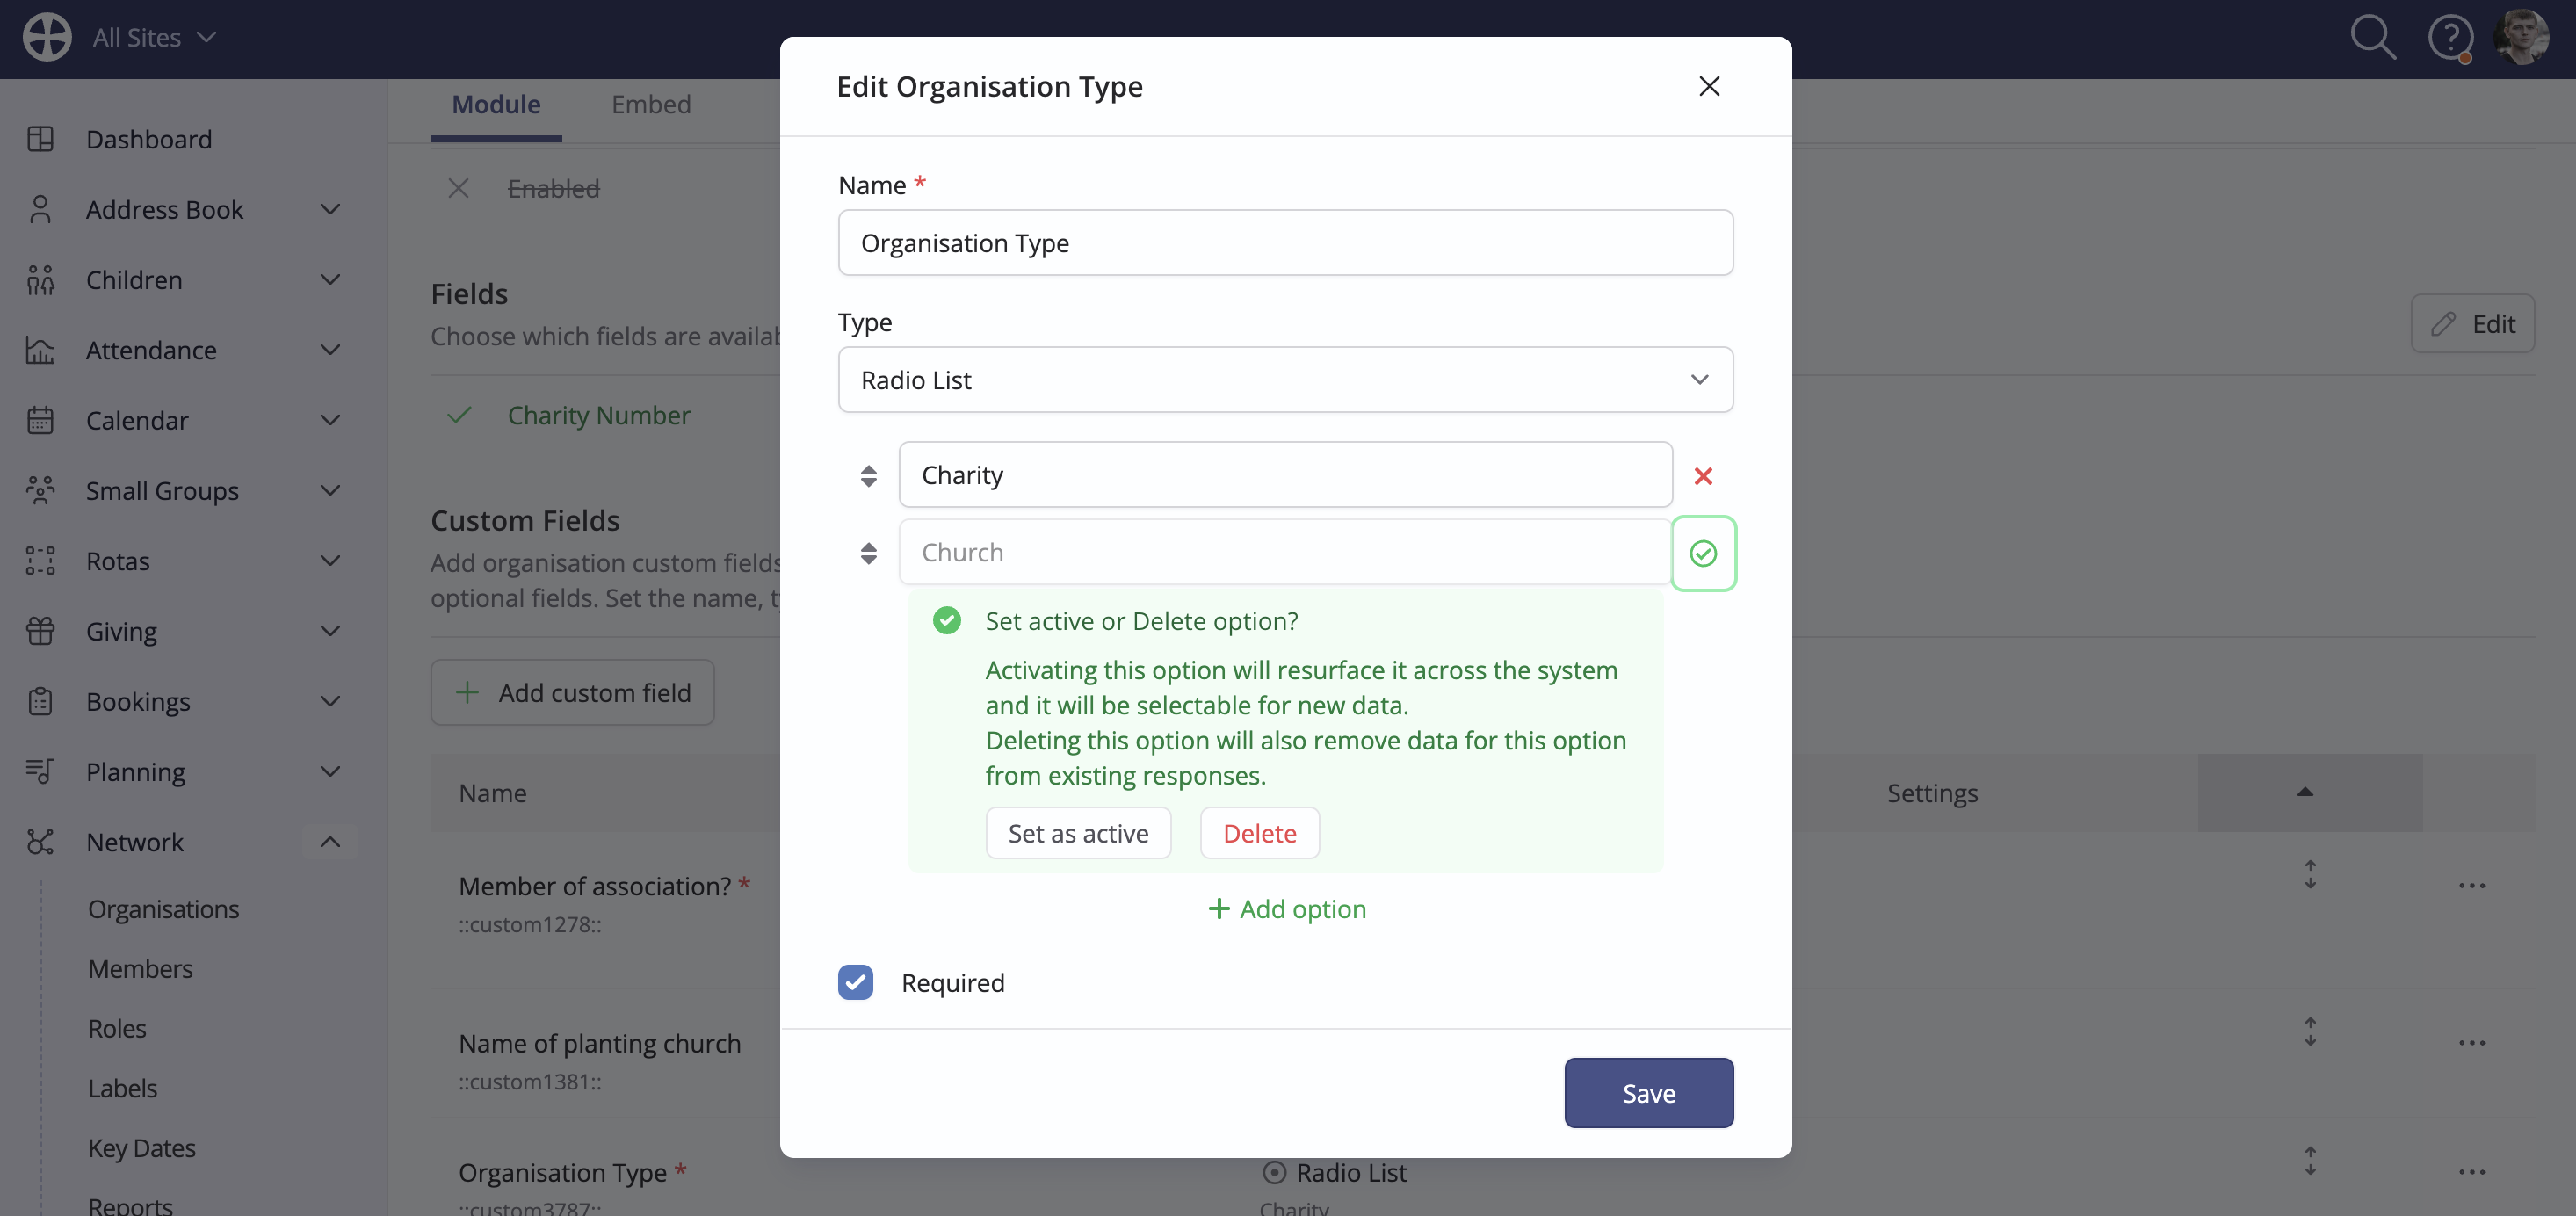
On the Add custom field pop-up, enter an appropriate field Name and select the response Type. Depending on the response type, you can set response options by clicking Add option. You can re-order response options using the re-ordering control to the left of each option or remove an unwanted option entirely using the red cross to the right of each option. You can also set whether the field is Required in ChurchSuite - module Users will be required to provide a custom field response when adding or editing organisations. Click Save to add the custom field.
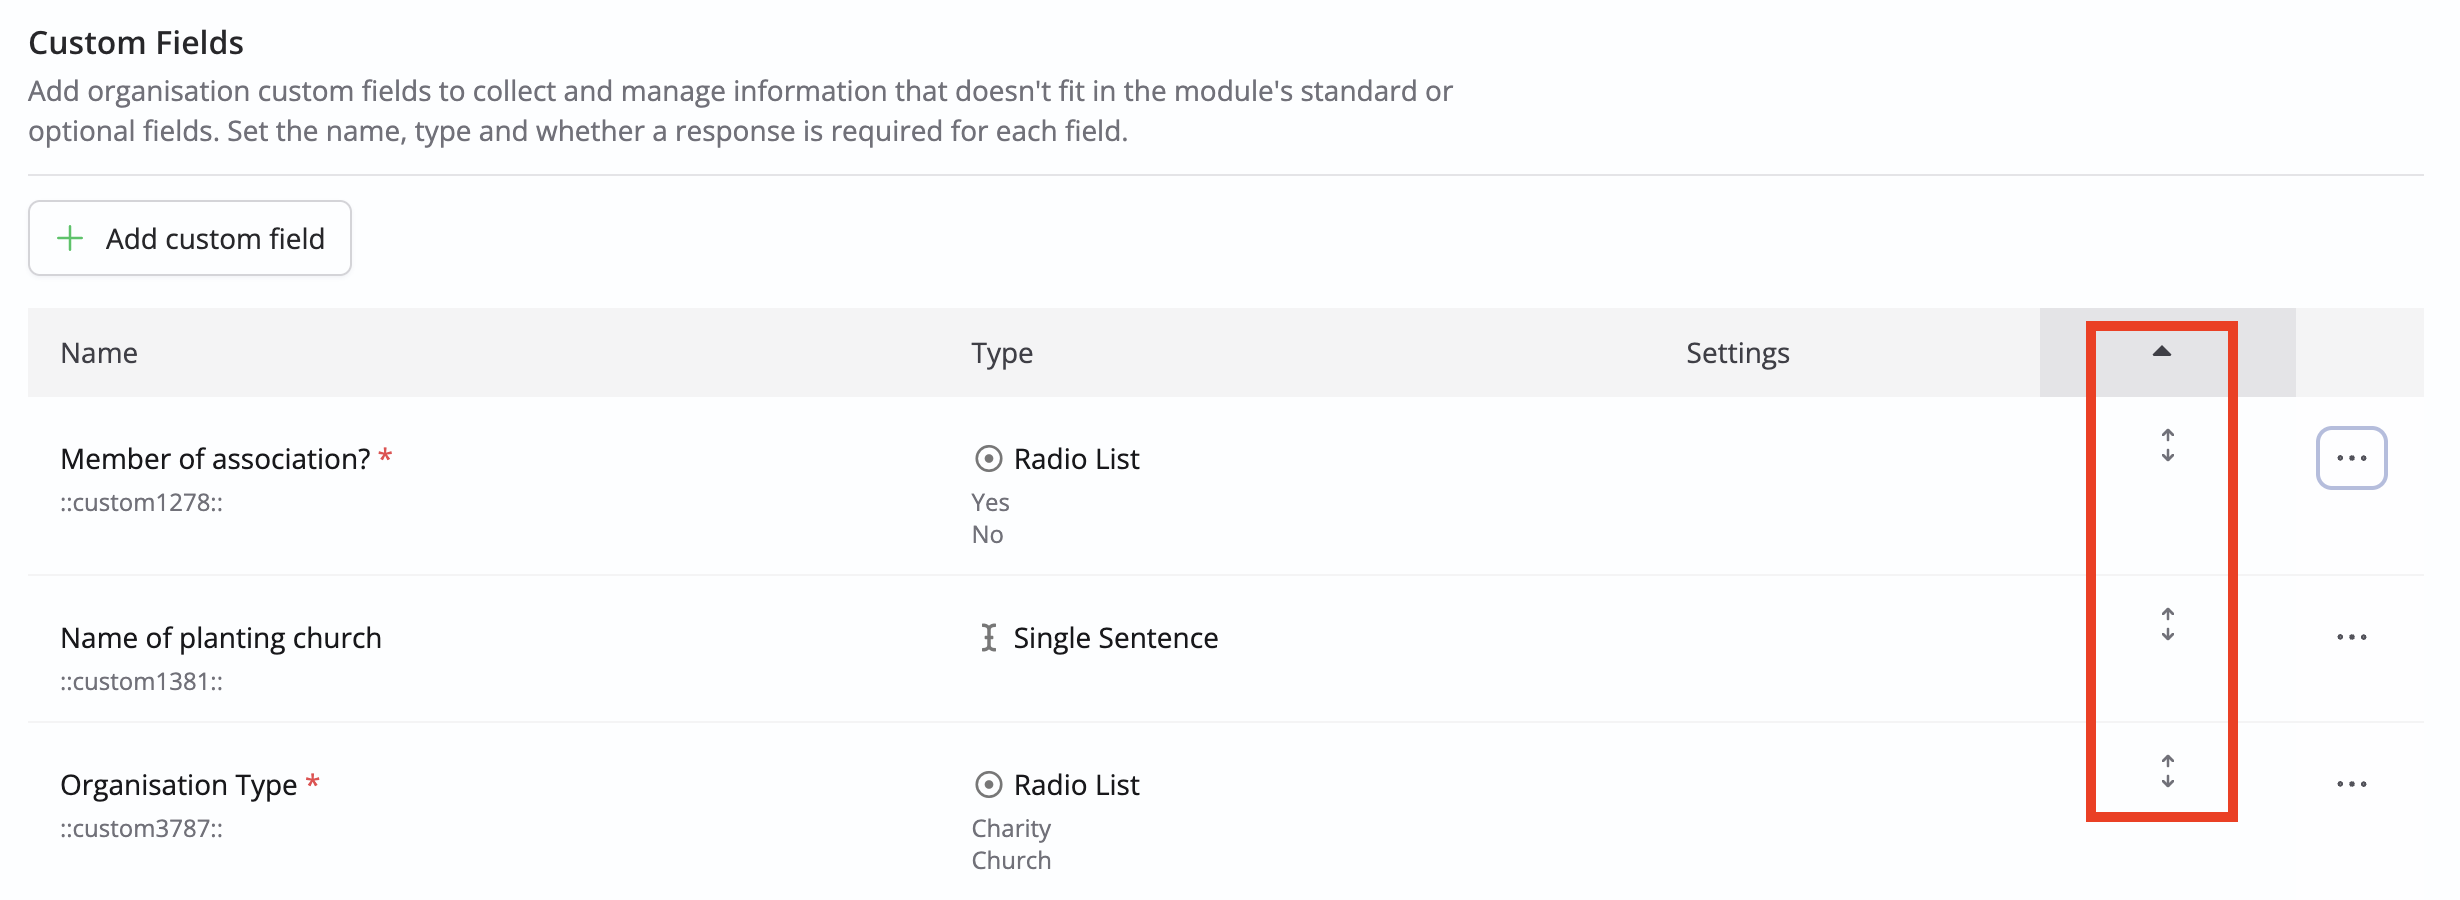
The newly-added custom field is added to the end of the list, but note the re-order controls.
See custom fields in action later in this article.
Changing existing custom fields and response options
You can make certain changes to custom fields and response options using the Edit action. A View changes log is maintained for all changes subsequently made to a new custom field. You can also permanently Delete an unwanted custom field, which will irreversibly and immediately remove all field responses for all organisations.
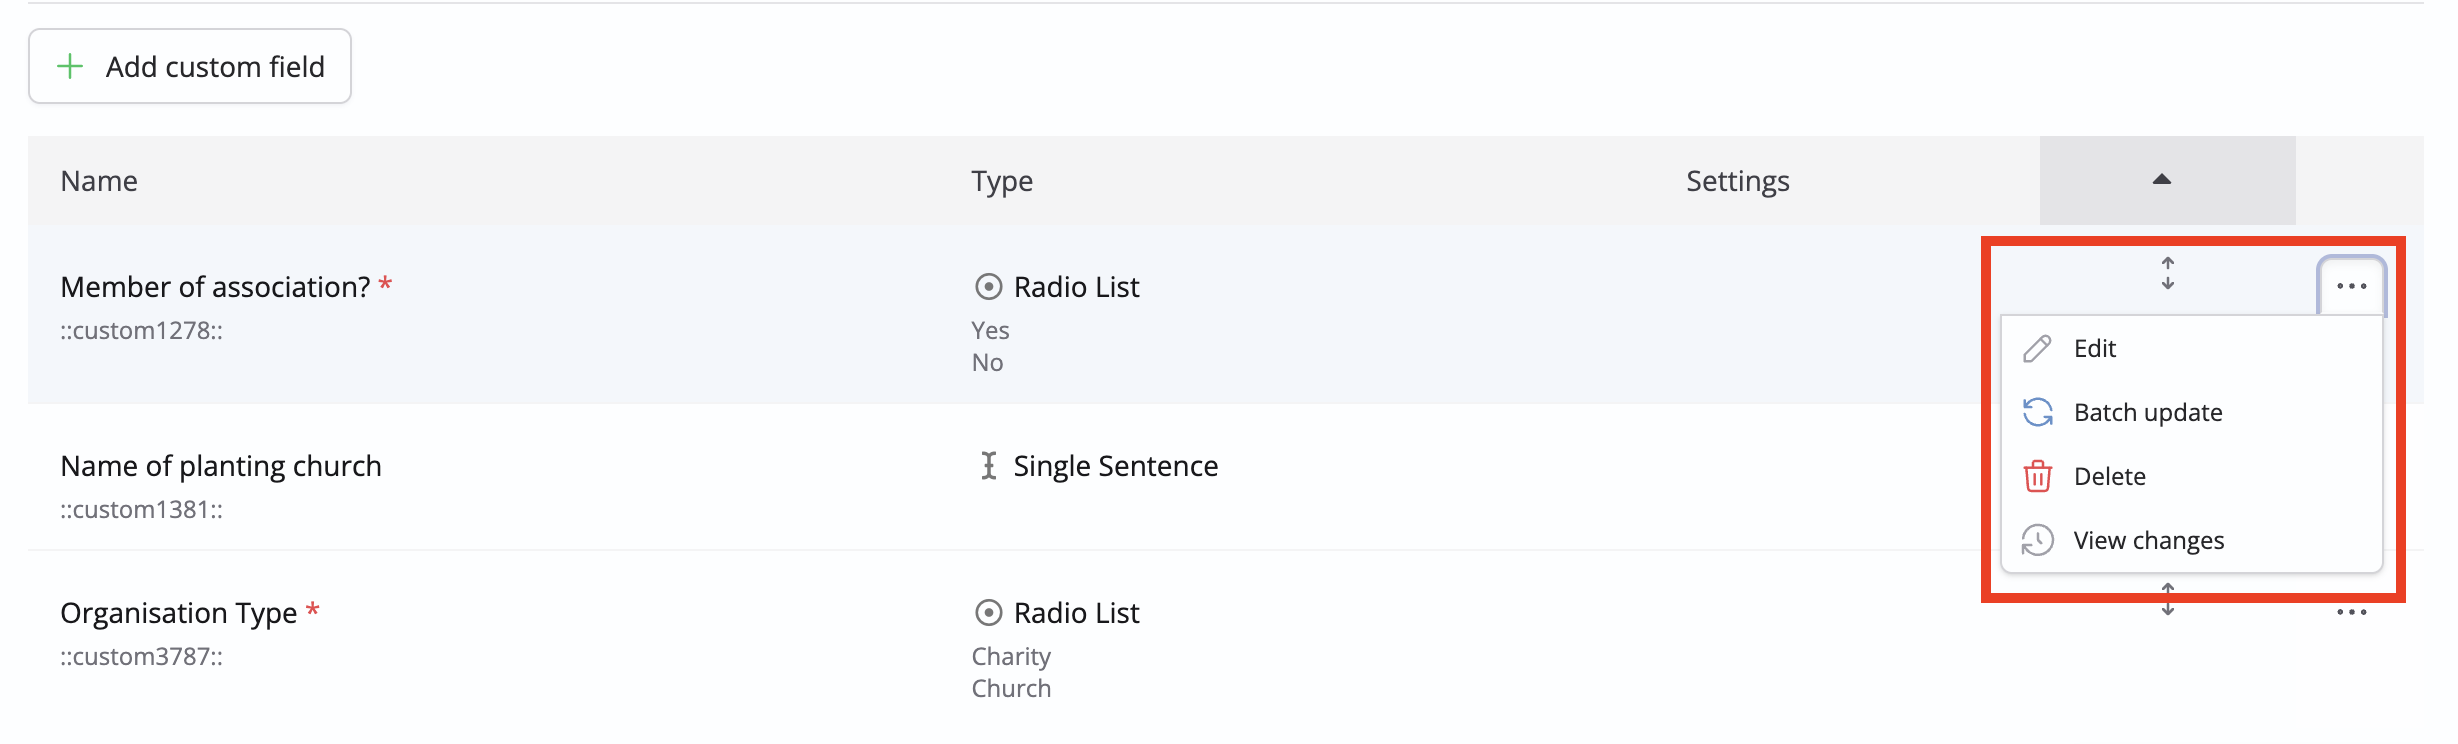
When editing a custom field, you can change the Order of options in the list. Click the re-order control to the left of the option name. The option order is respected across ChurchSuite. Additionally, making a change to a custom field Name or Option label will immediately apply that change across the system.
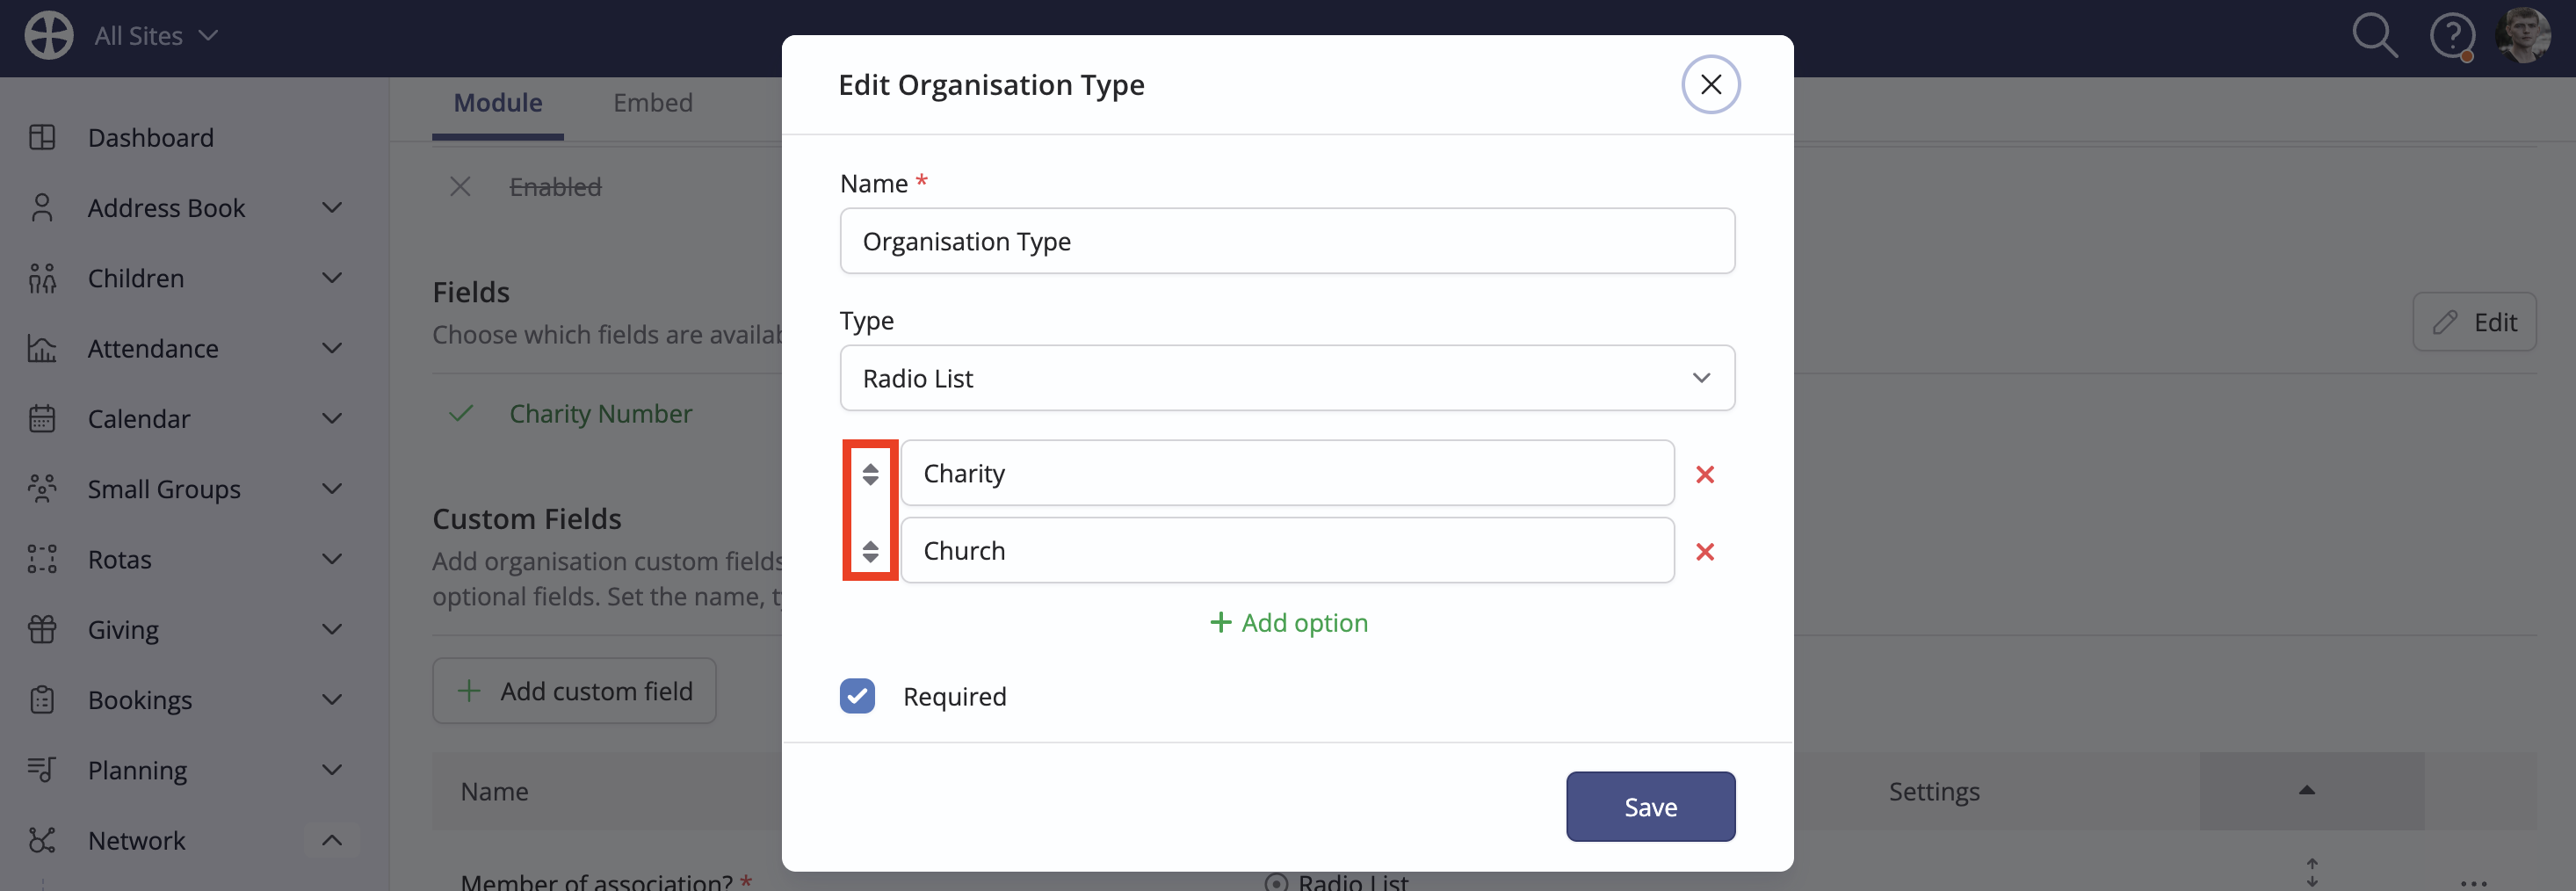
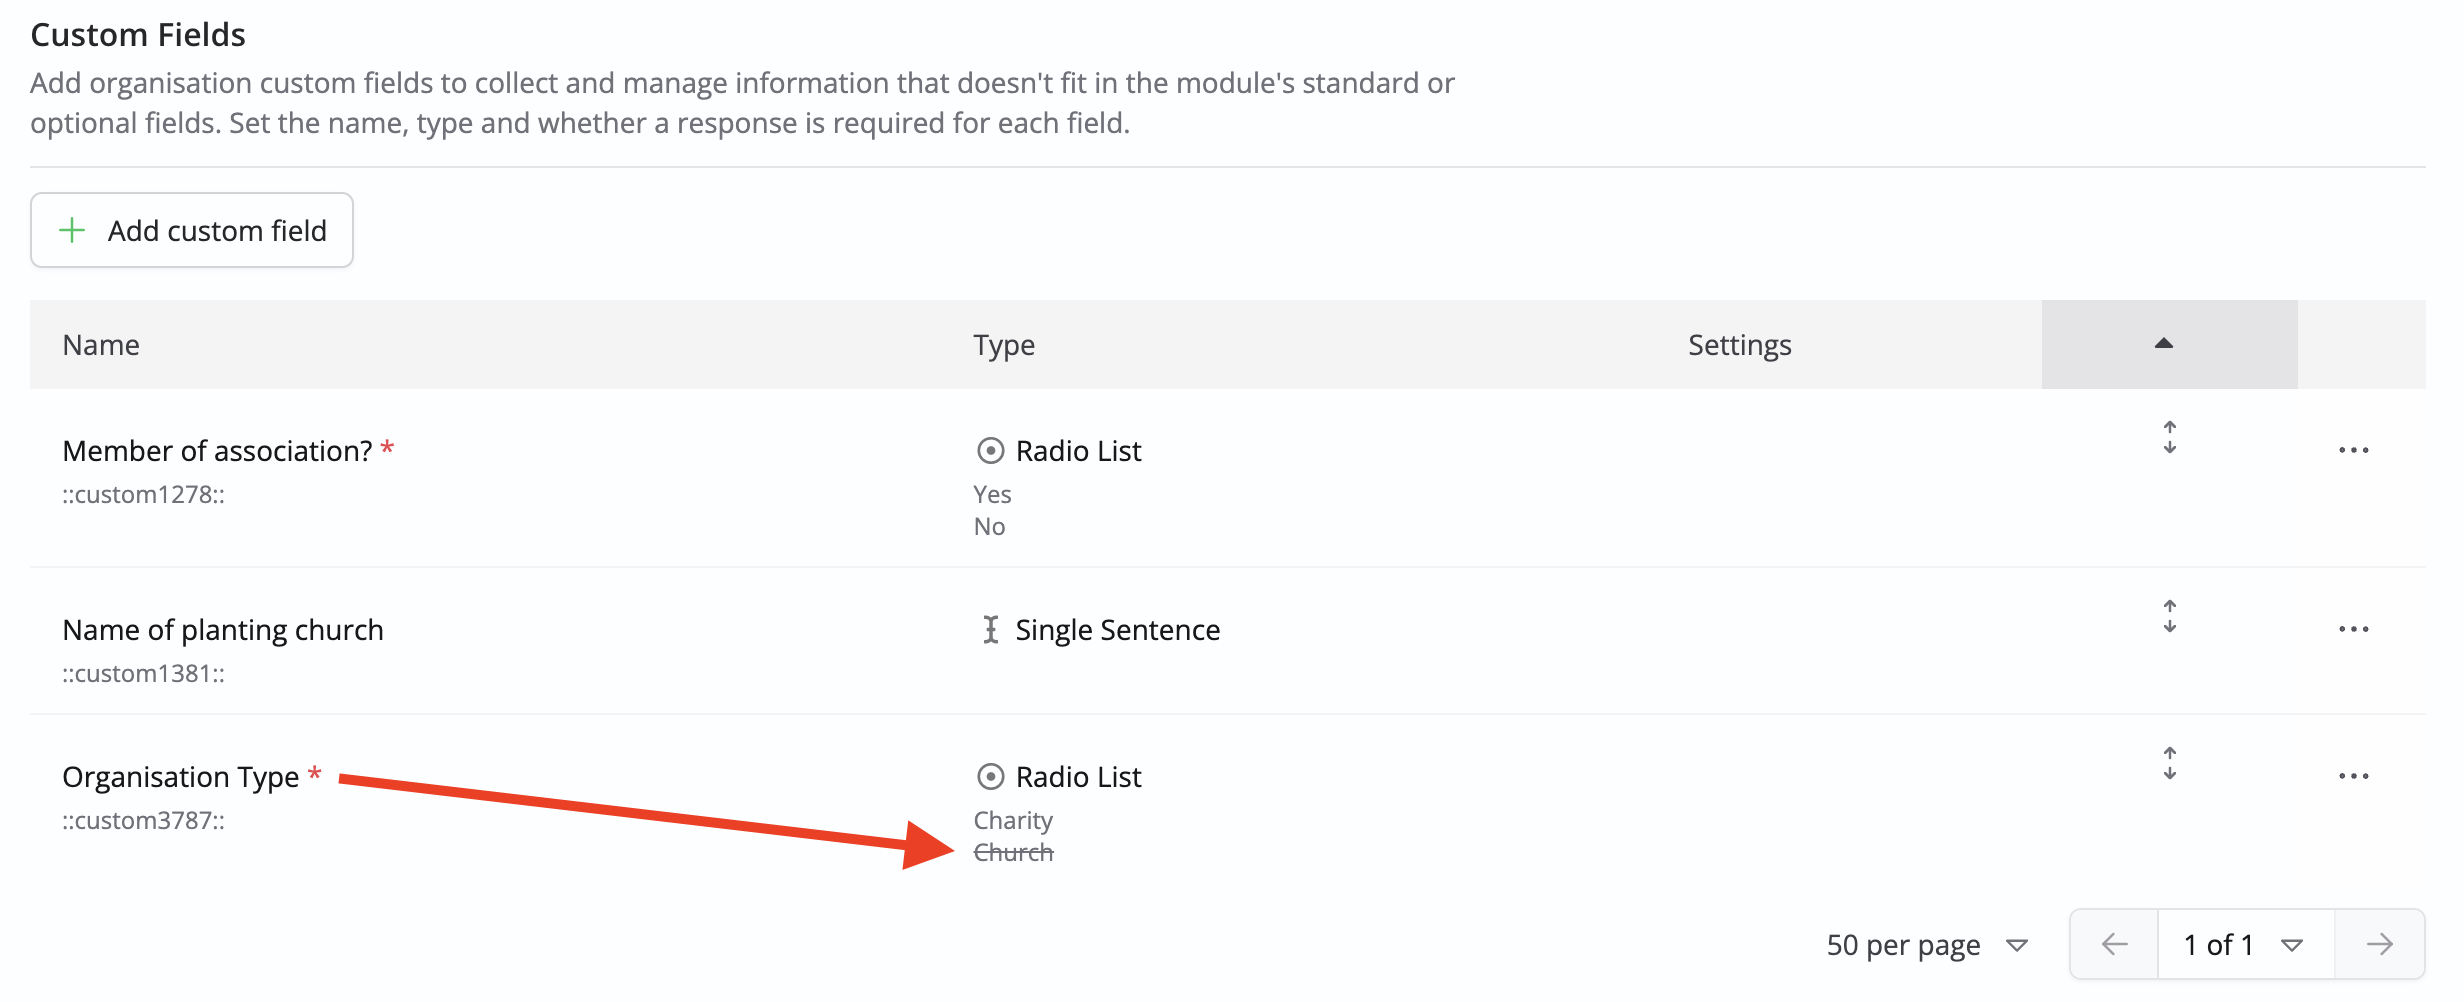
From time to time, you may wish to remove response options that no longer serve a useful purpose. Clicking the X next to a response option will give you a choice to permanently Delete the option - which will delete all knowledge of that response from all organisations - or to Archive the response option.
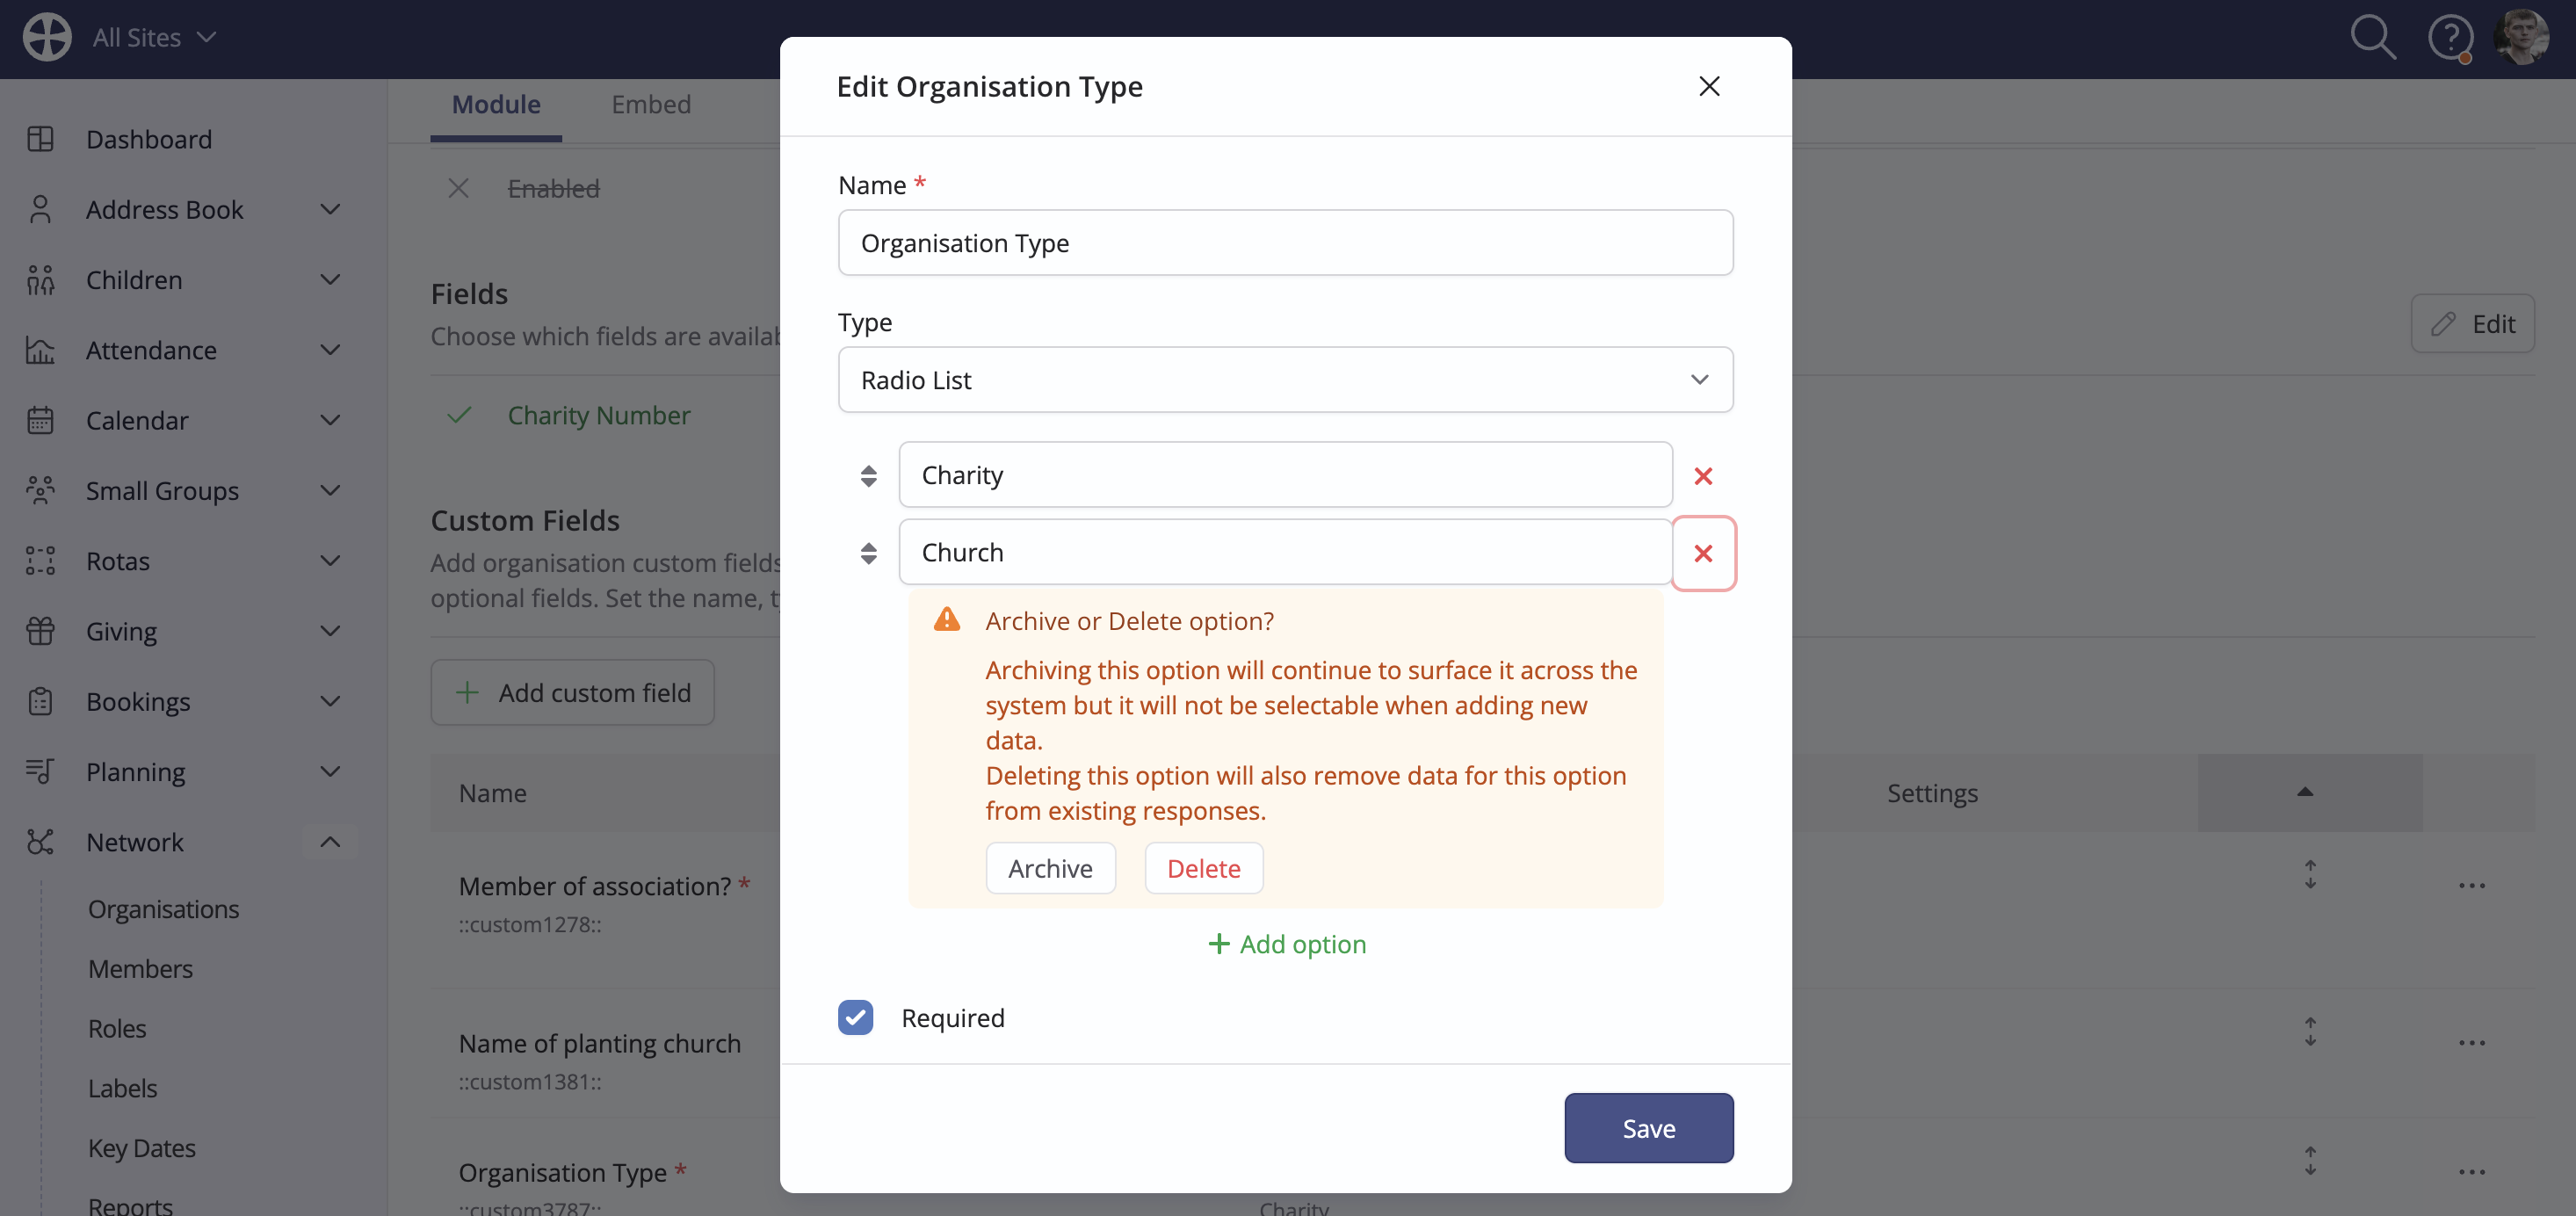
Archived response options can later be Set active again if needed. Archiving an option will cause it to no longer be available to select when adding new data but will continue to show (with strike-through) at the bottom of the list of response options in the module settings and remain as the selected option against any organisation that has previously chosen it. Therefore, it's possible to edit an organisation that has an archived custom field response option and make an unrelated change. The archived field option will persist against that organisation when it is saved. Archived response options remain fully searchable in Smart Tags.
Archived response options can be Set as active again or permanently Deleted. Remember to Save your changes.
Note that it's only possible to change a custom field's response Type to another within the same subtype, as follows:
- List subtype: Checkbox List, Drop-Down List, Radio List
- Non-list subtype: Email, Phone, Single Sentence, Paragraph
- Date subtype: Date

Bulk-updating custom field response data
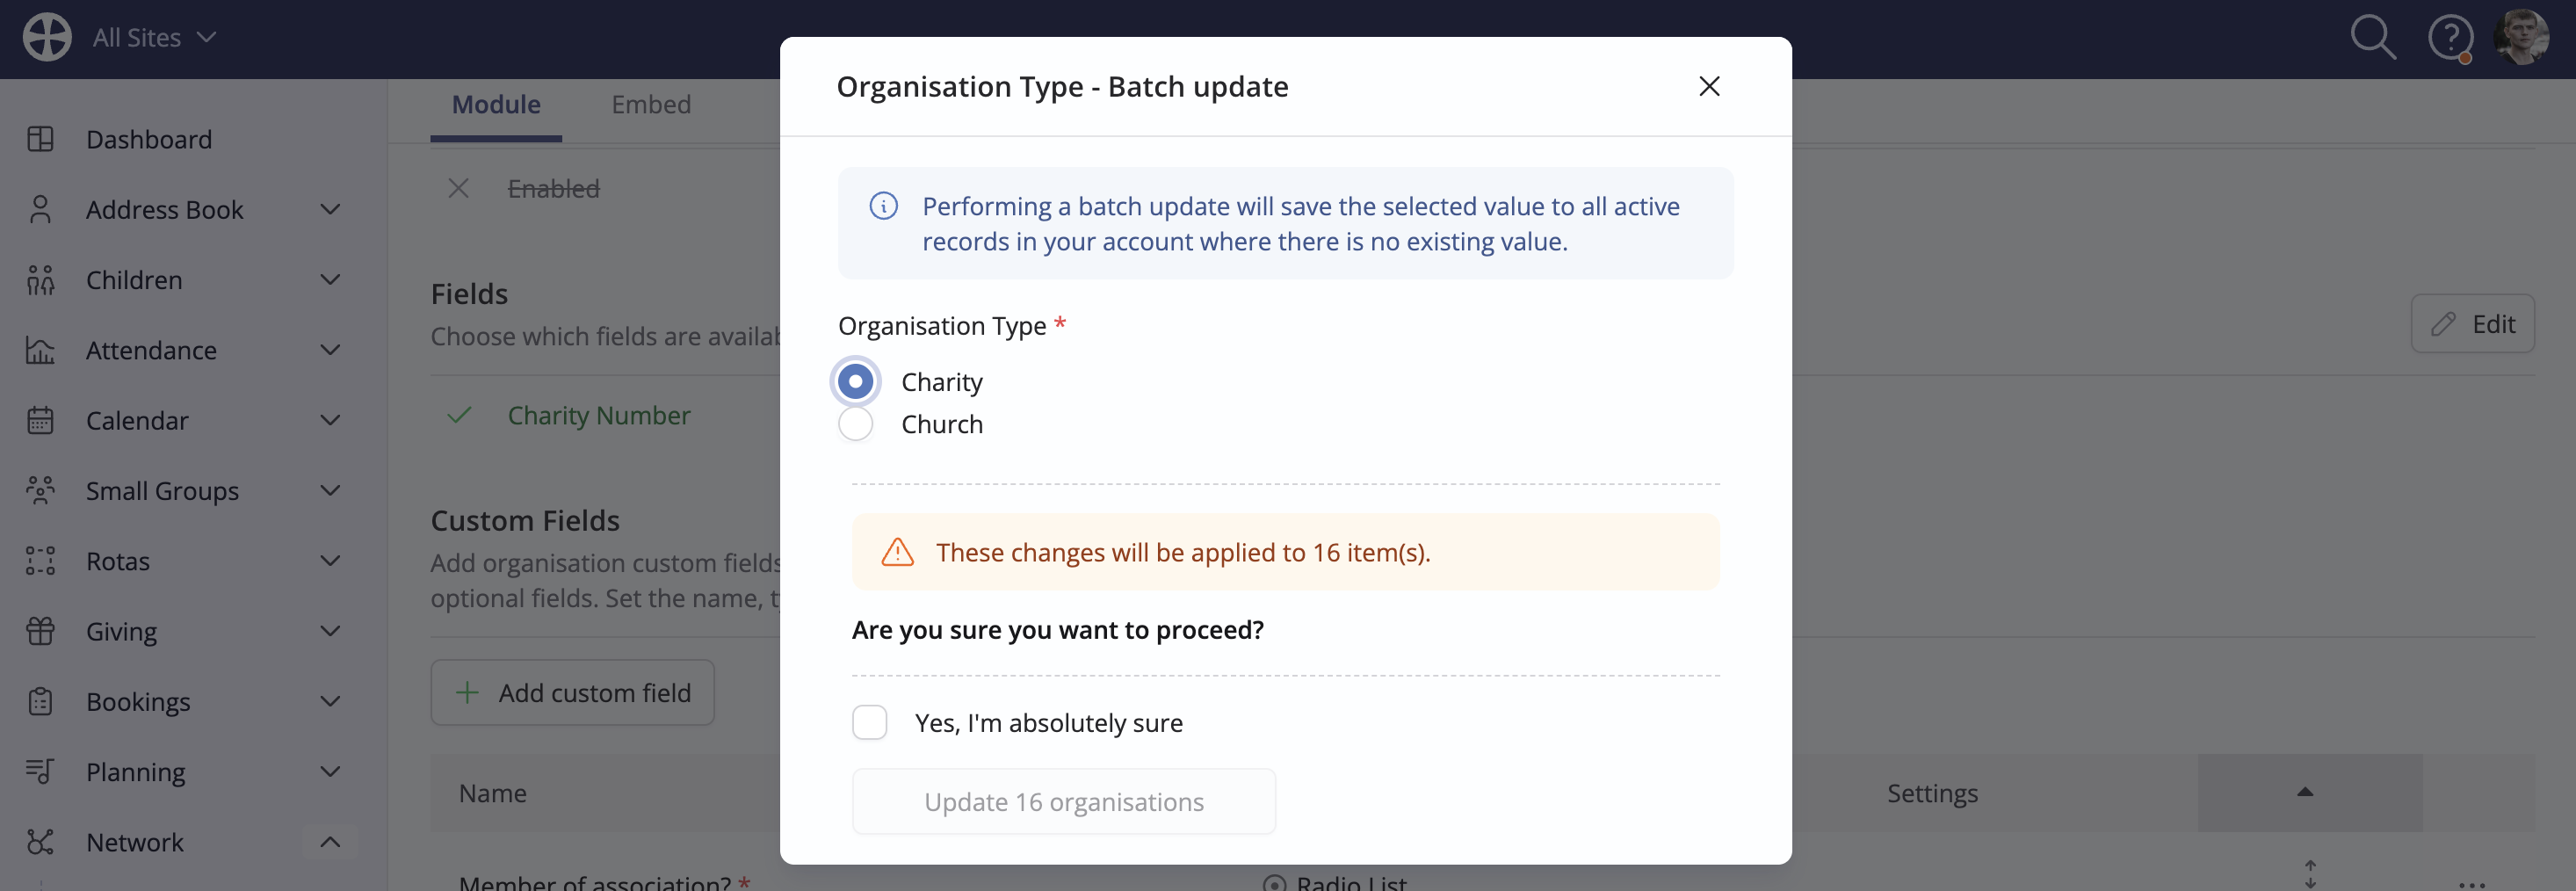
For any custom field set as Required - and where you have existing organisations - a Batch Update action can be used to assign a default value to all organisations. This action is only available for required fields, but you could temporarily set a field as required to perform a batch update and assign a default value and then un-require the field afterwards.
Selecting Batch update opens a pop-up enabling you to choose the default response option to be applied to all organisations. Note that this will update all organisations for the Site being viewed. Only organisations without an existing custom field response value will be updated - those with an existing response value (active or archived) will not be updated.
Custom fields in action
Custom Field responses can be assigned when adding or editing an Organisation. Any custom fields set as required are distinguished by a red asterisk. Module Users will be able to save the pop-up once all the required fields have a valid response.
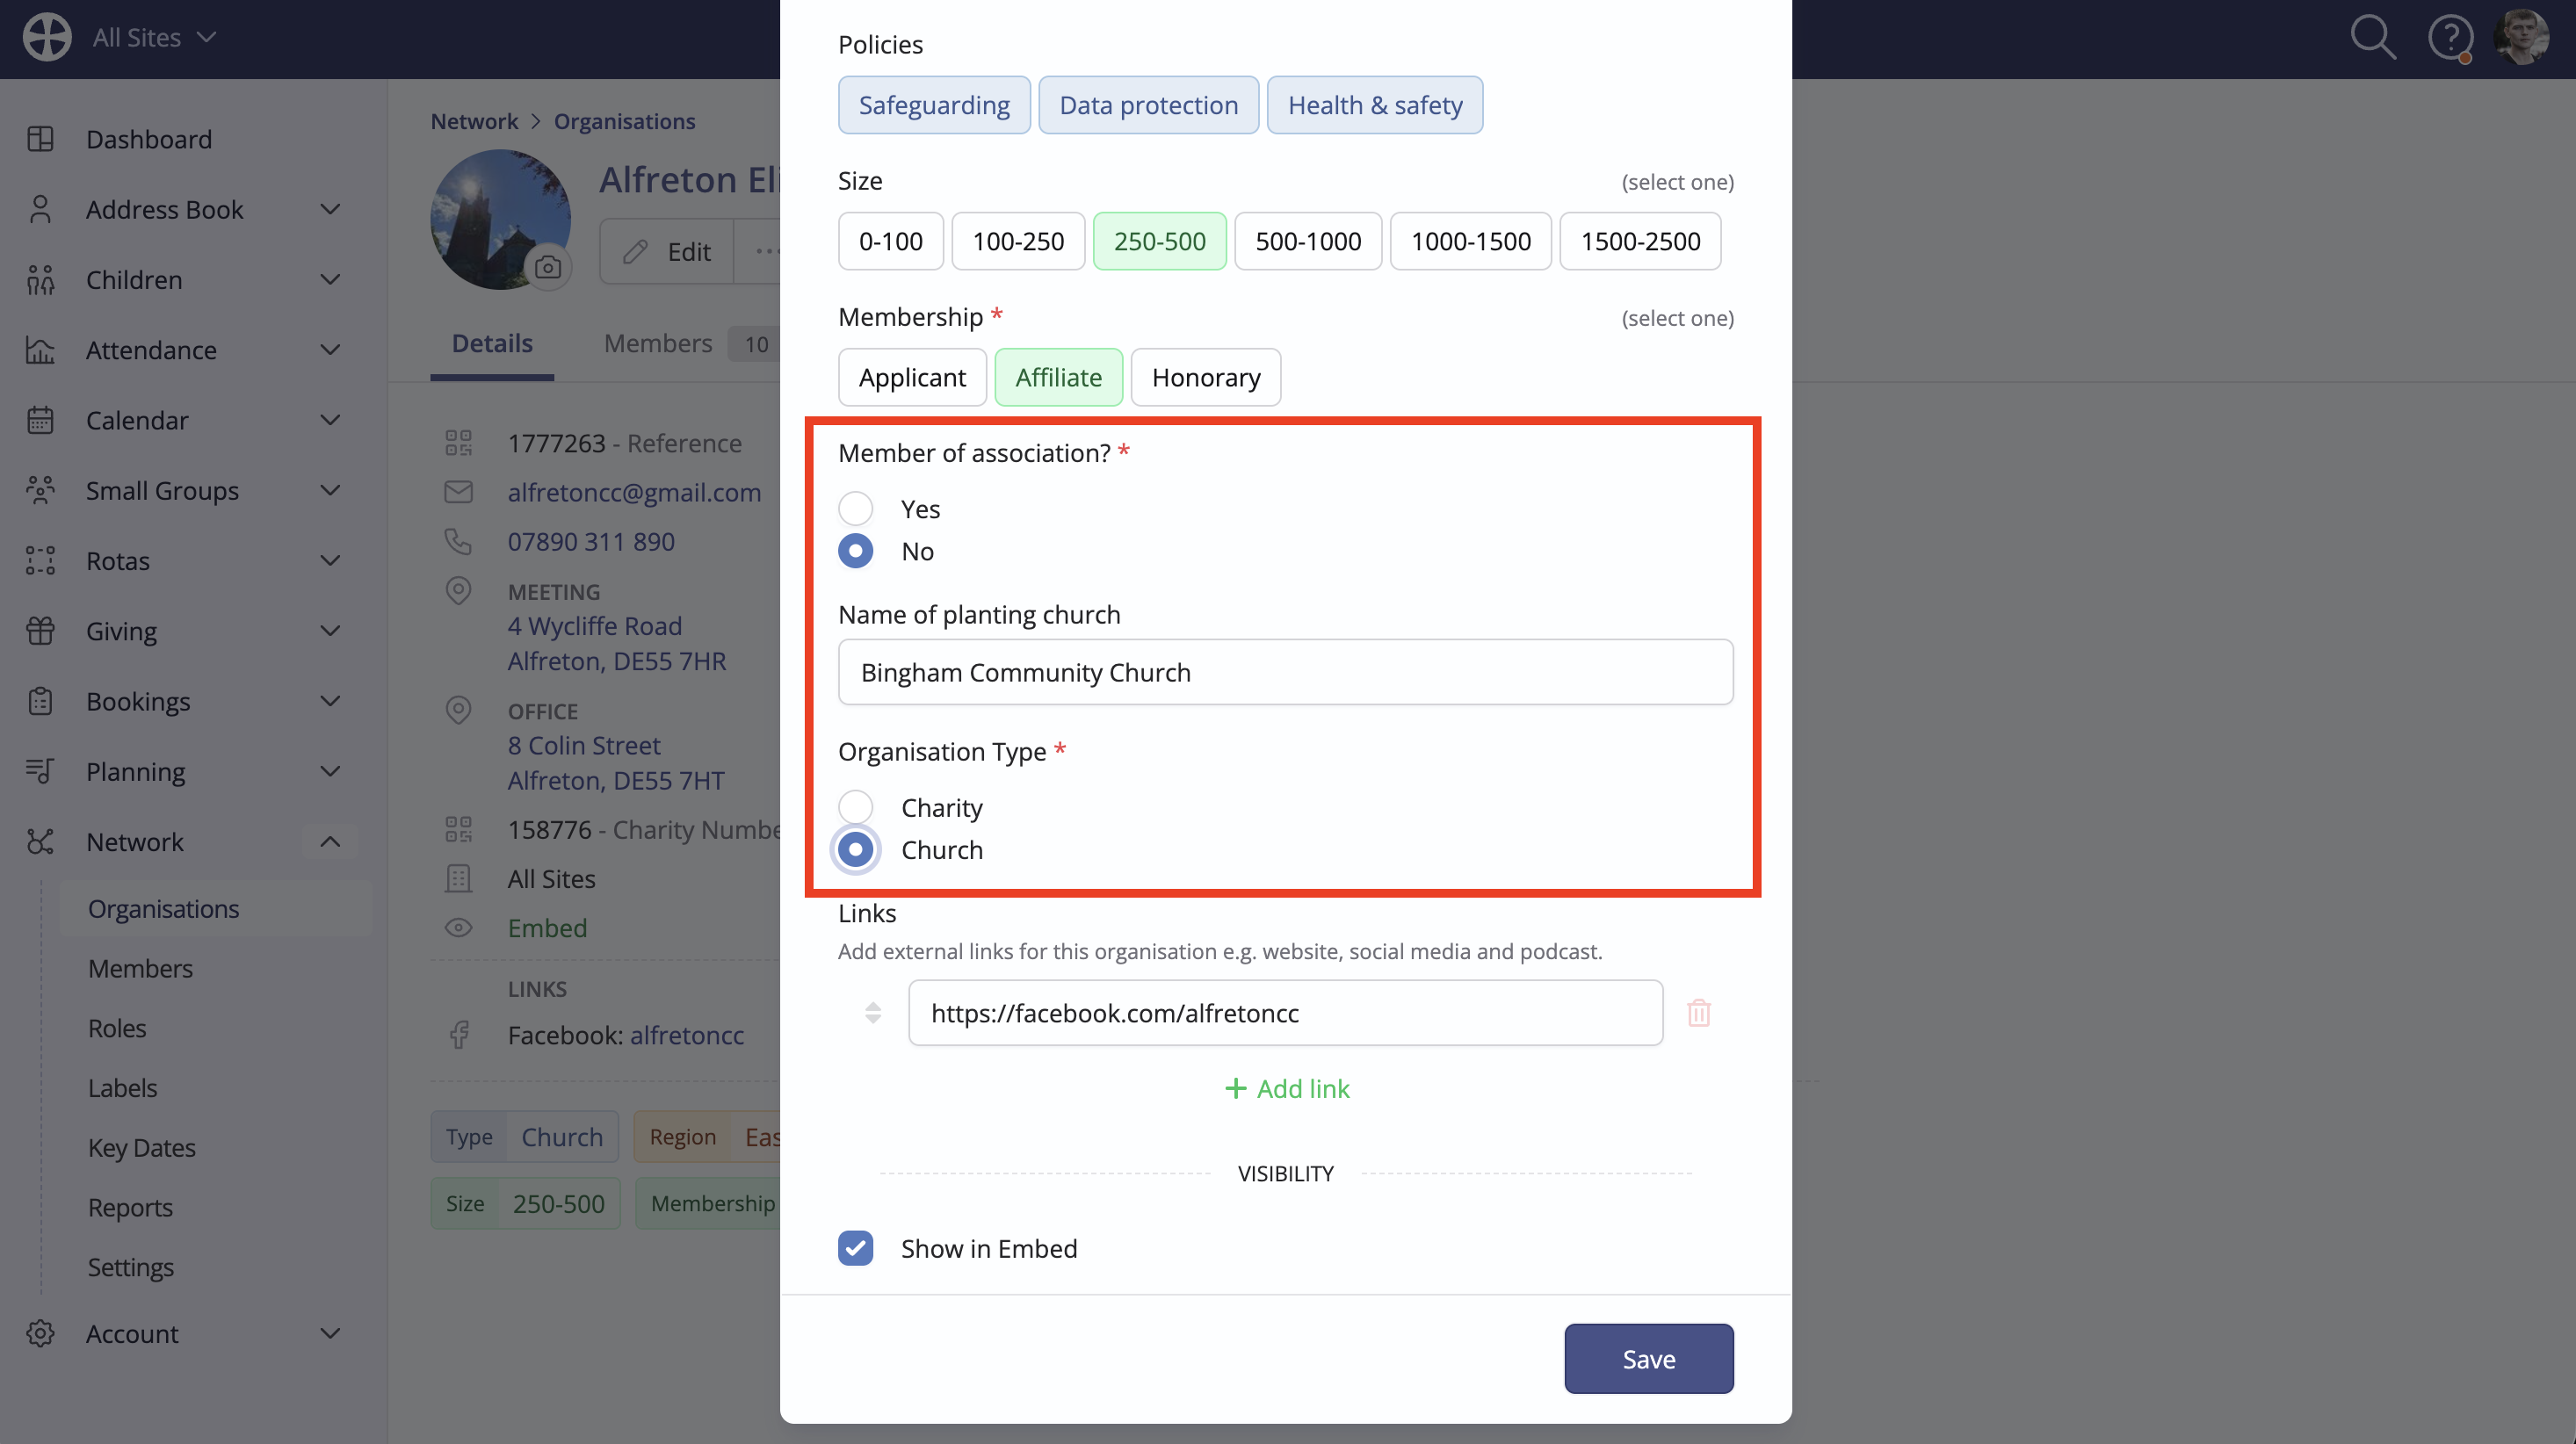
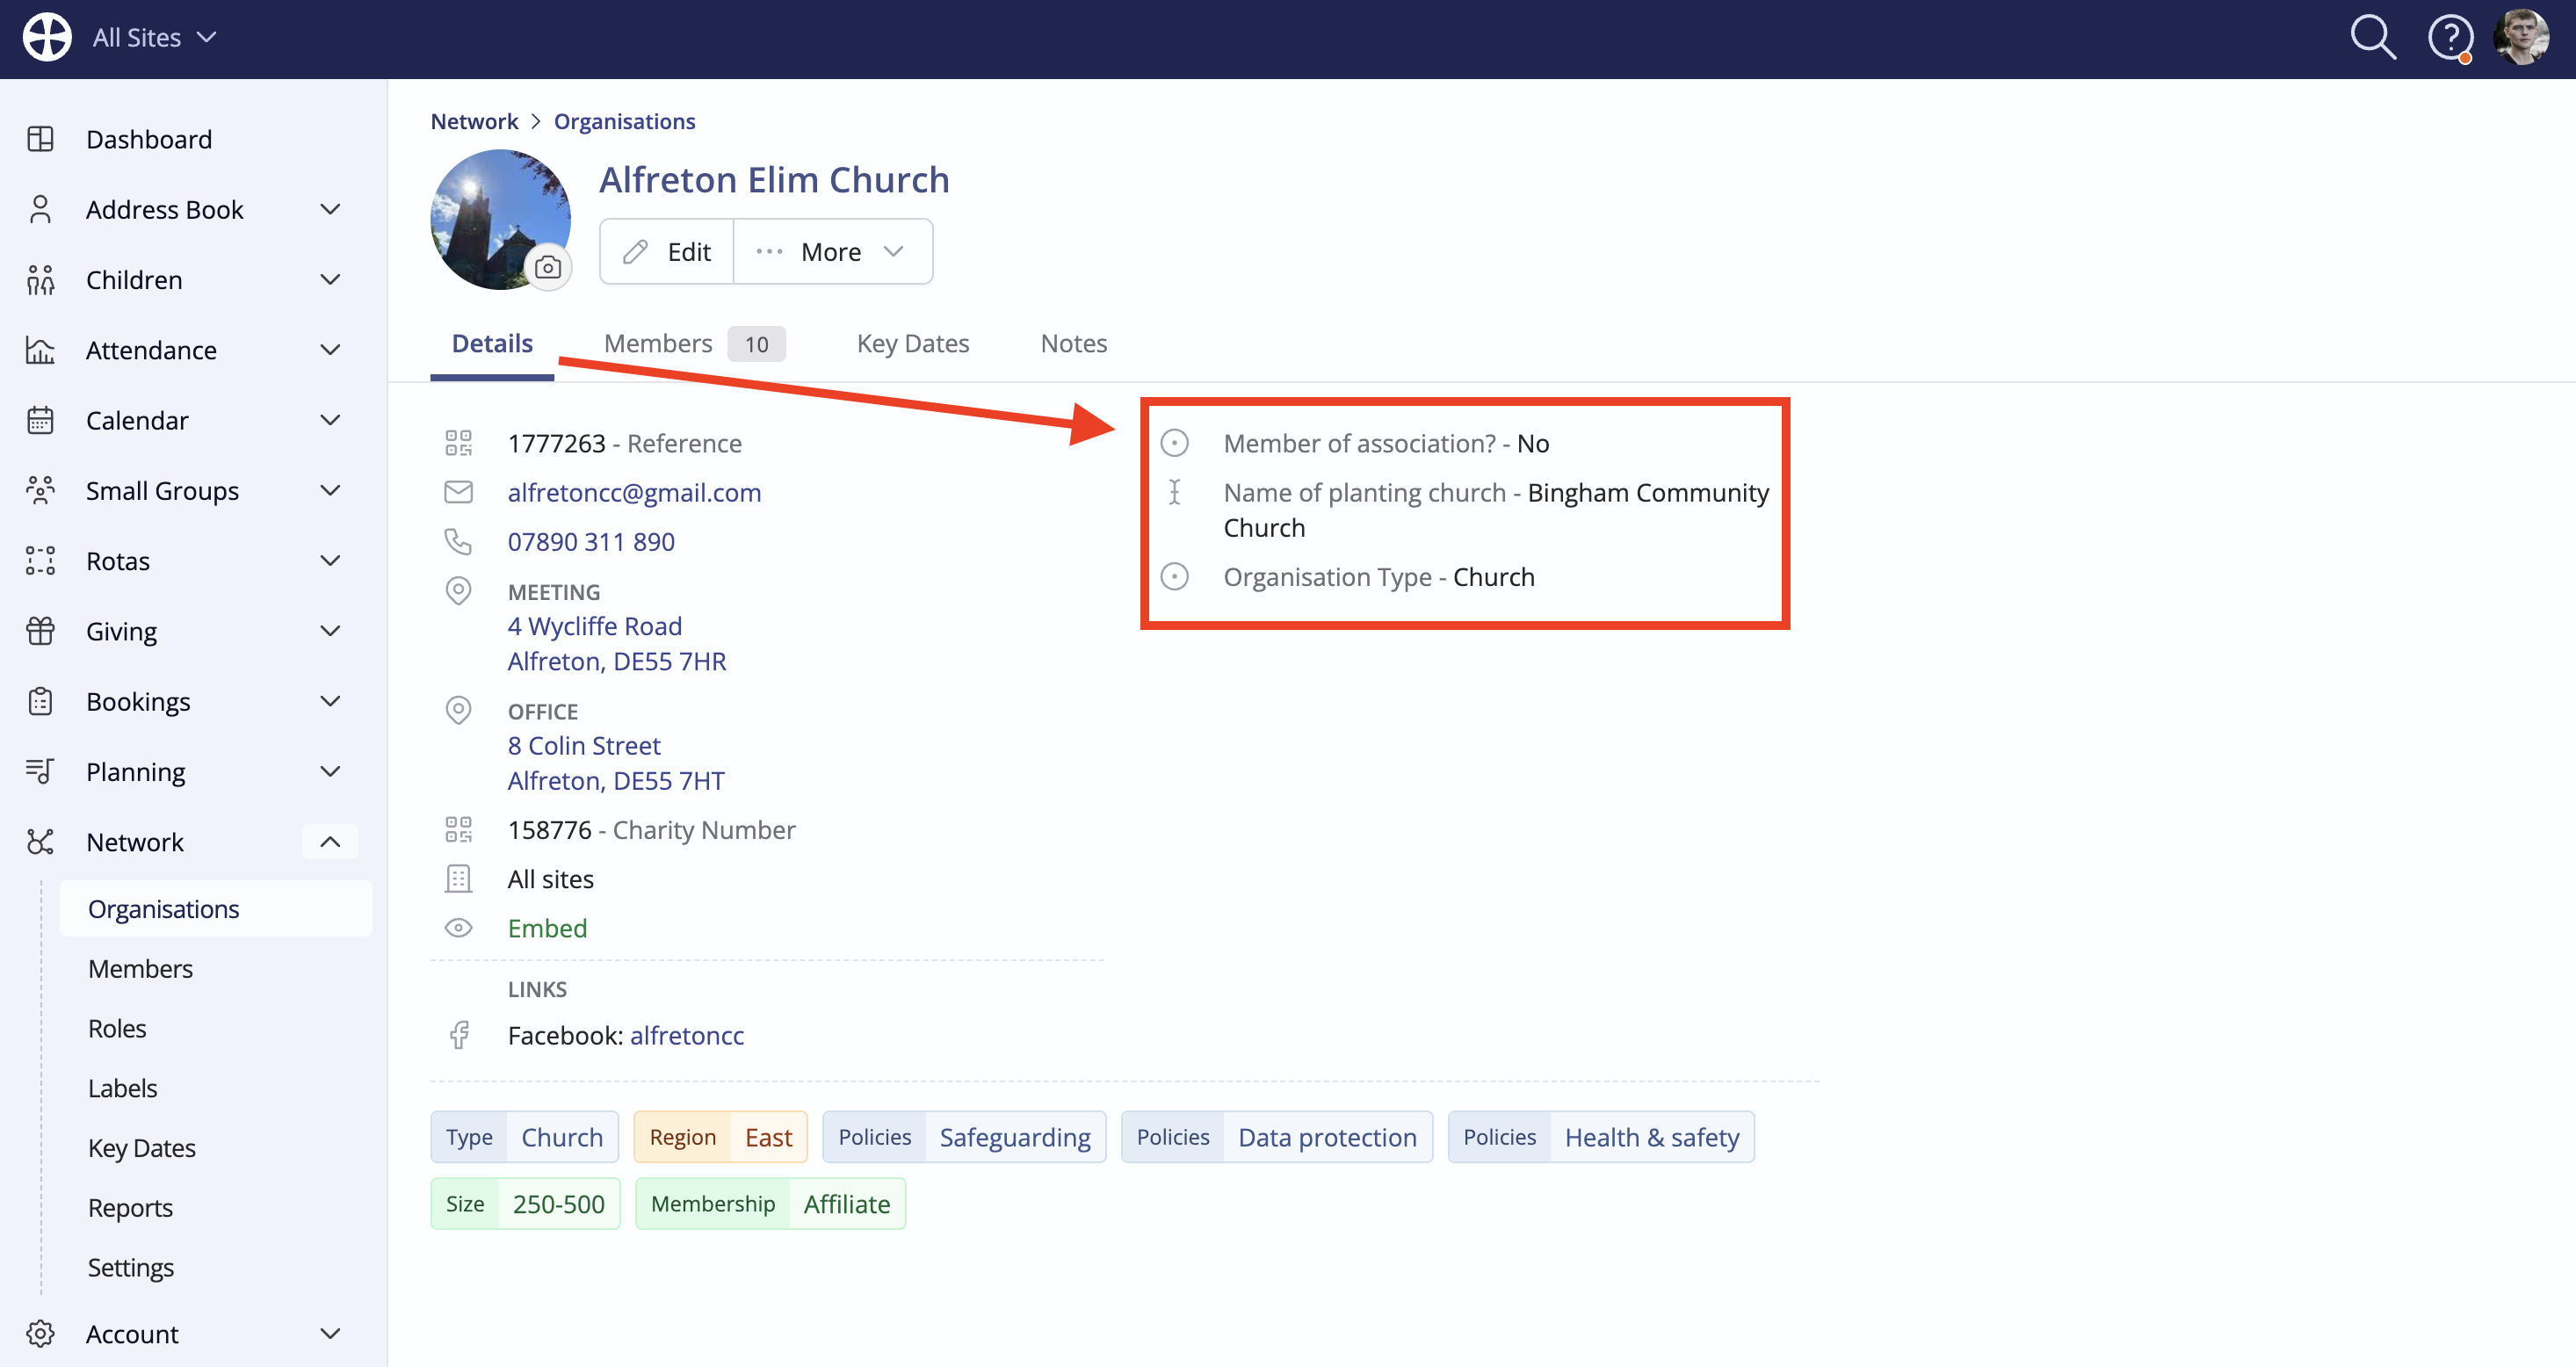
Custom fields are shown on the Details tab of an organisation's profile page.
Custom fields can be used as Smart Tag conditions to match Address Book contacts who have or do not have a certain custom field response.