Adding organisations to your network
In this article
Introduction
Adding an organisation
Importing organisations
Overview of the organisation profile page
Introduction
The Network module is designed to help you manage the various external organisations in your network with which you partner—clubs, charities, churches, and businesses. Whether you're a denomination or diocesan head office managing the local churches in your region or a charity managing your various outlets or franchised groups, the Network module includes everything you need to help maintain those all-important organisational relationships.
The module is the core repository for all the organisations in your network and their respective key member contacts. For each organisation, you can manage its contact details, assign key member contacts from the Address Book, optionally assign roles to members, and maintain pertinent key dates.
You can group similar organisations using labels and even embed organisation lists and maps in a website—ideal if you wish to make organisation contact details available to others and give a visual representation of the connected organisations in a network. The Network module comes installed with all the standard fields for an organisation that you might typically wish to manage, but you can also add custom fields for any organisation details that don't fit naturally in one of the standard fields.
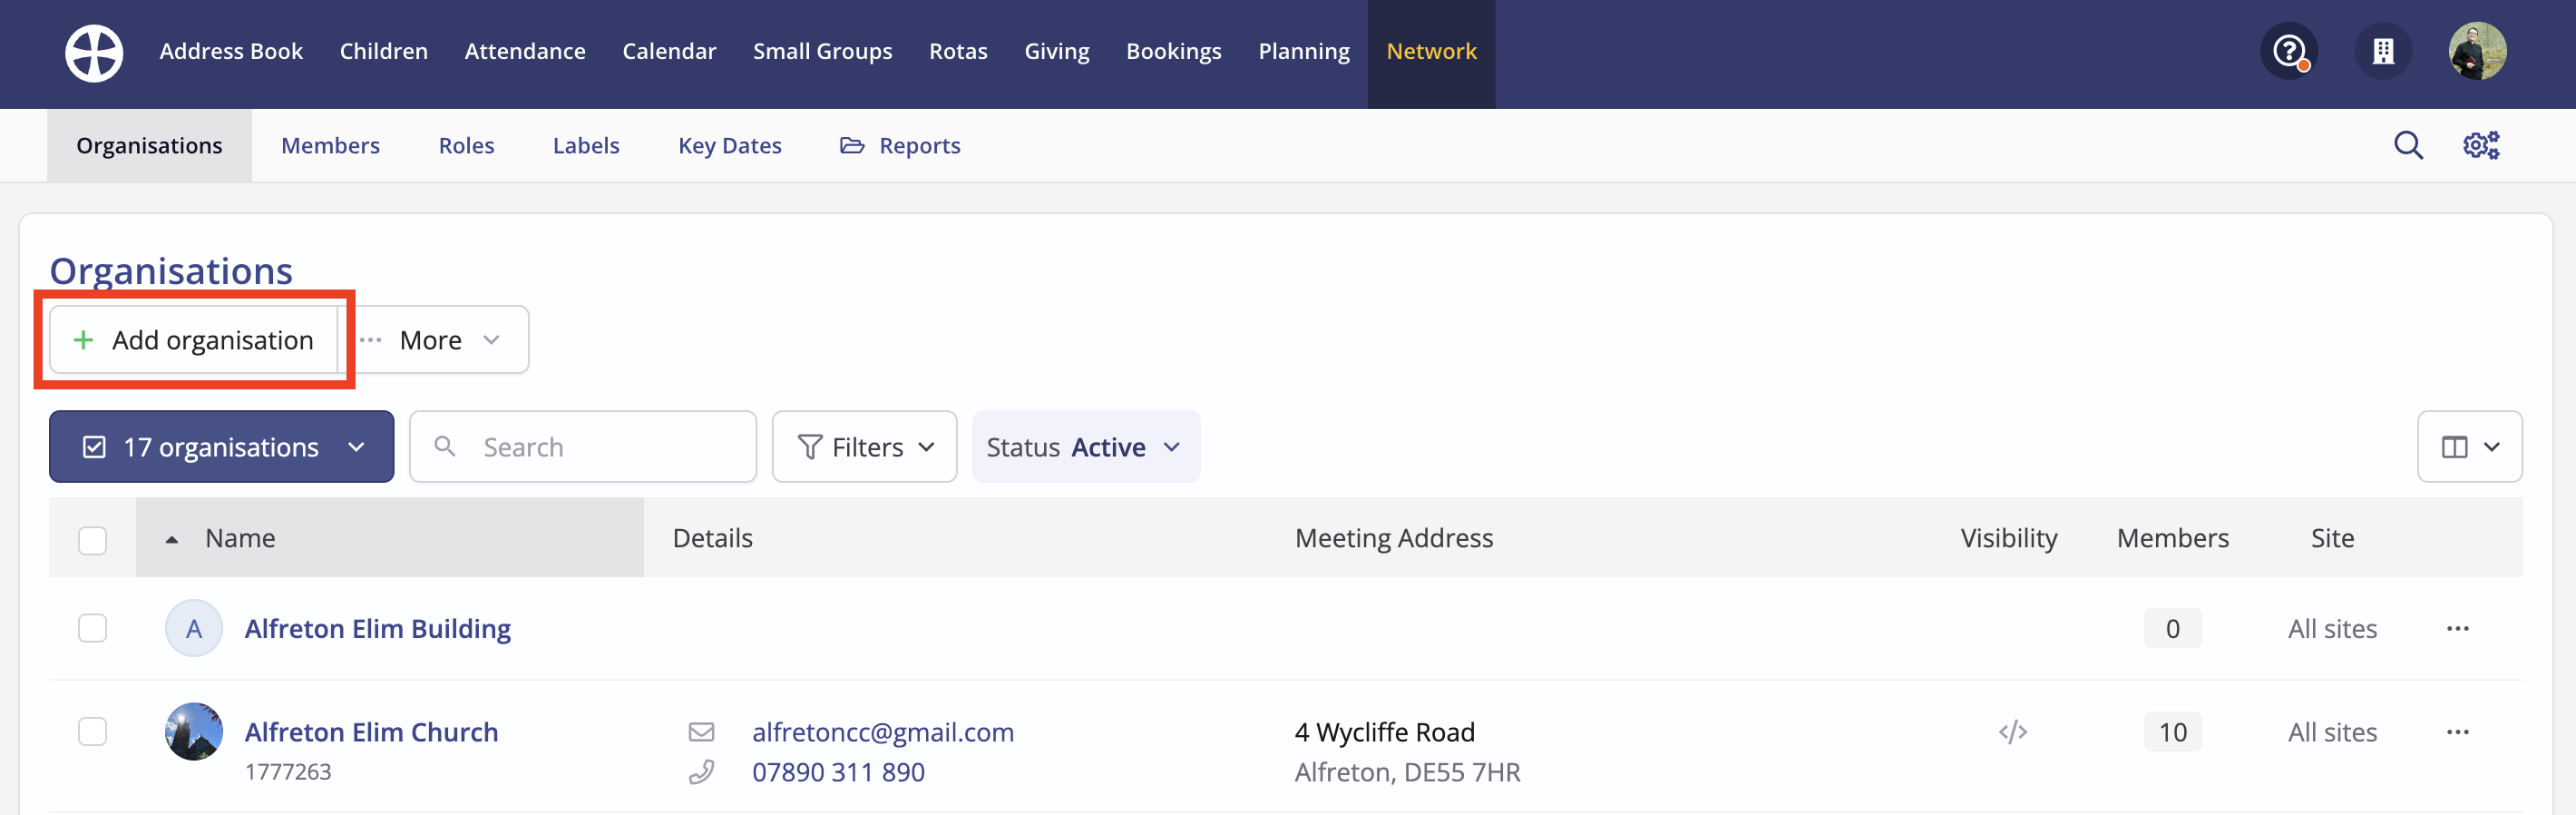
Adding an organisation
From the Organisations section of the Network module, click Add organisation.
On the Add organisation pop-up, complete the relevant details. The organisation Name is a required field. The Reference is an optional internal-use identifier field - enabled in the module settings.
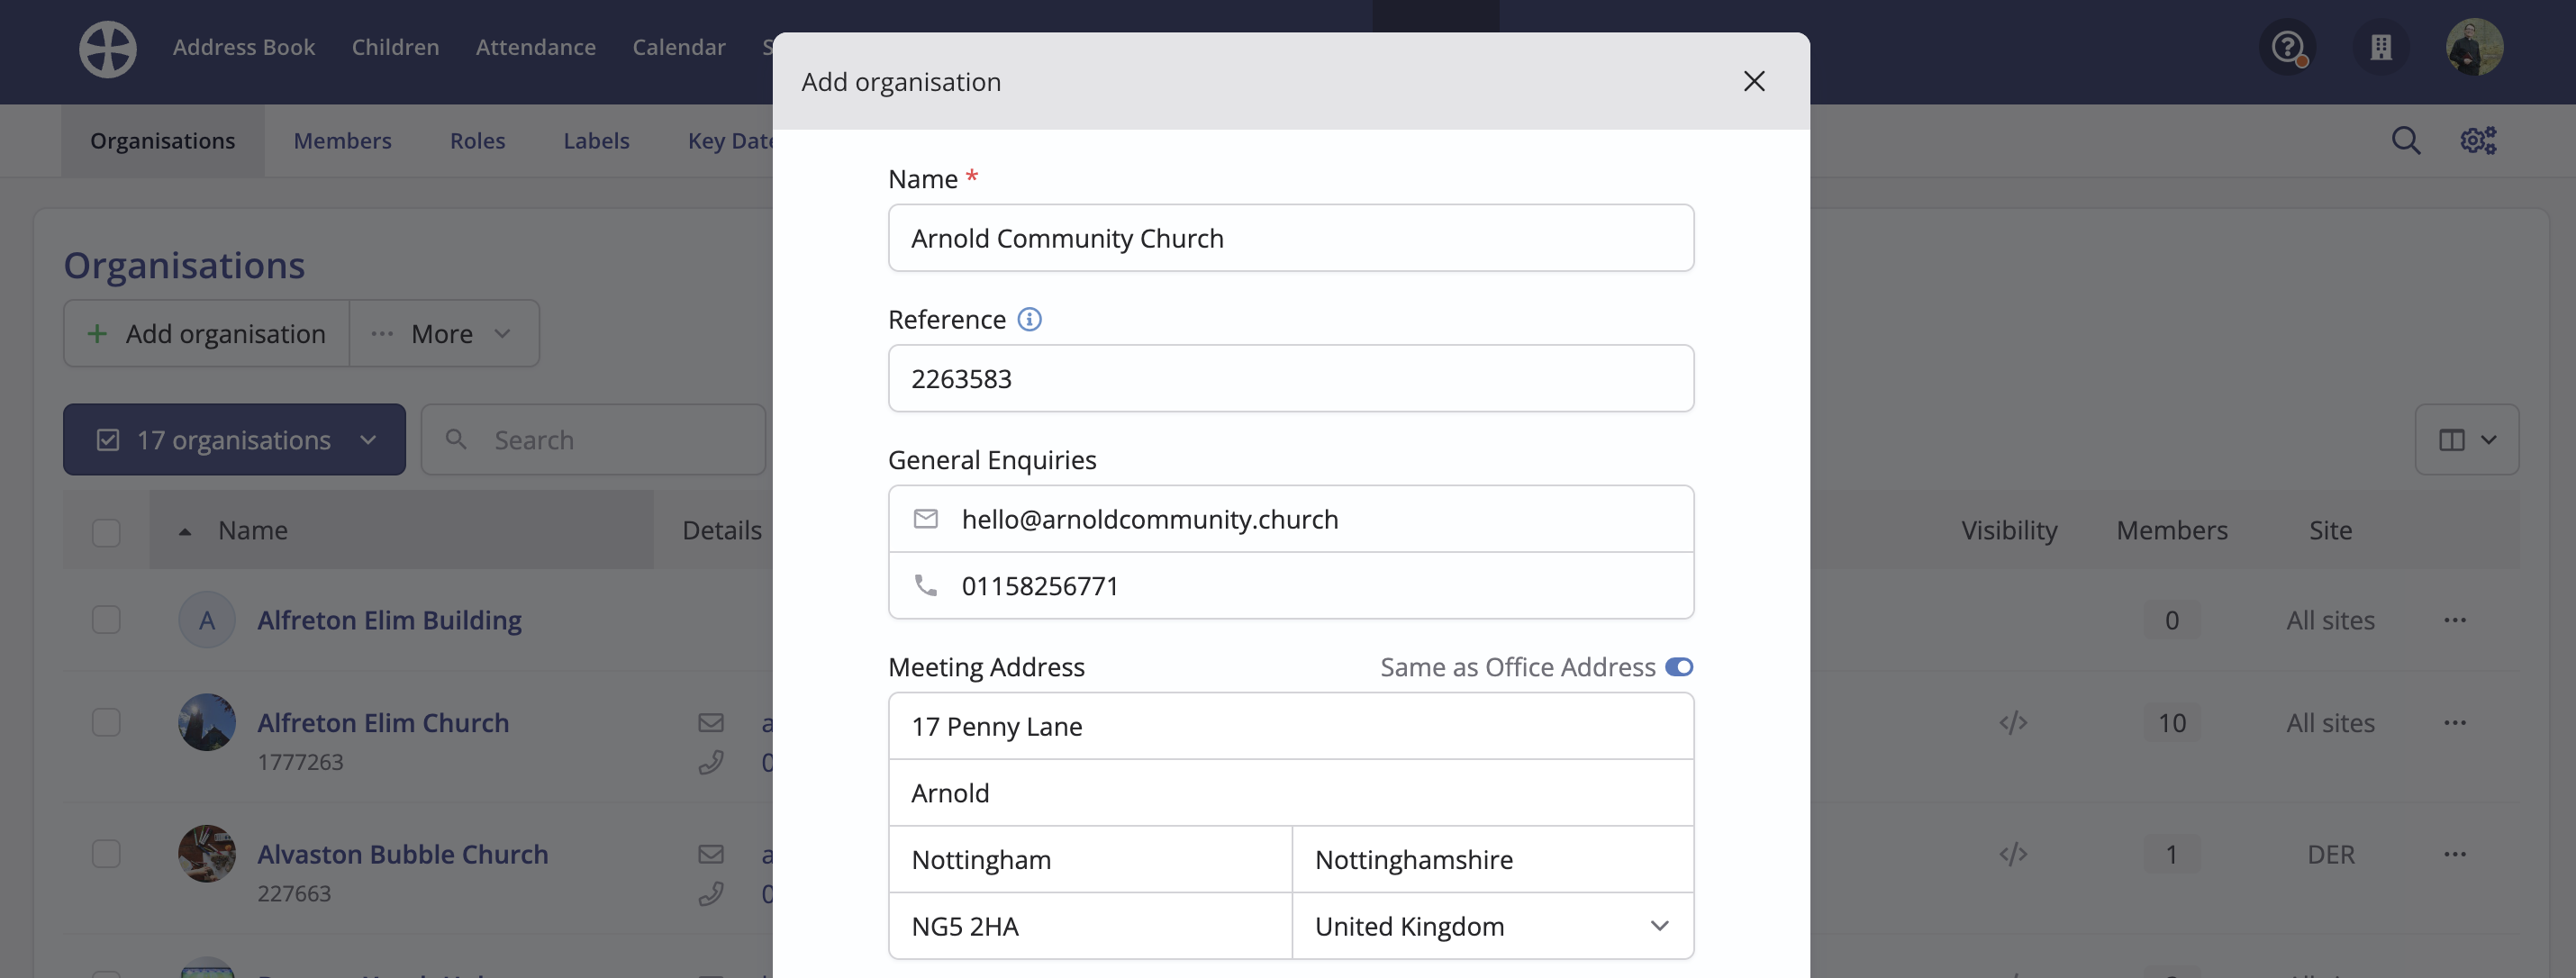
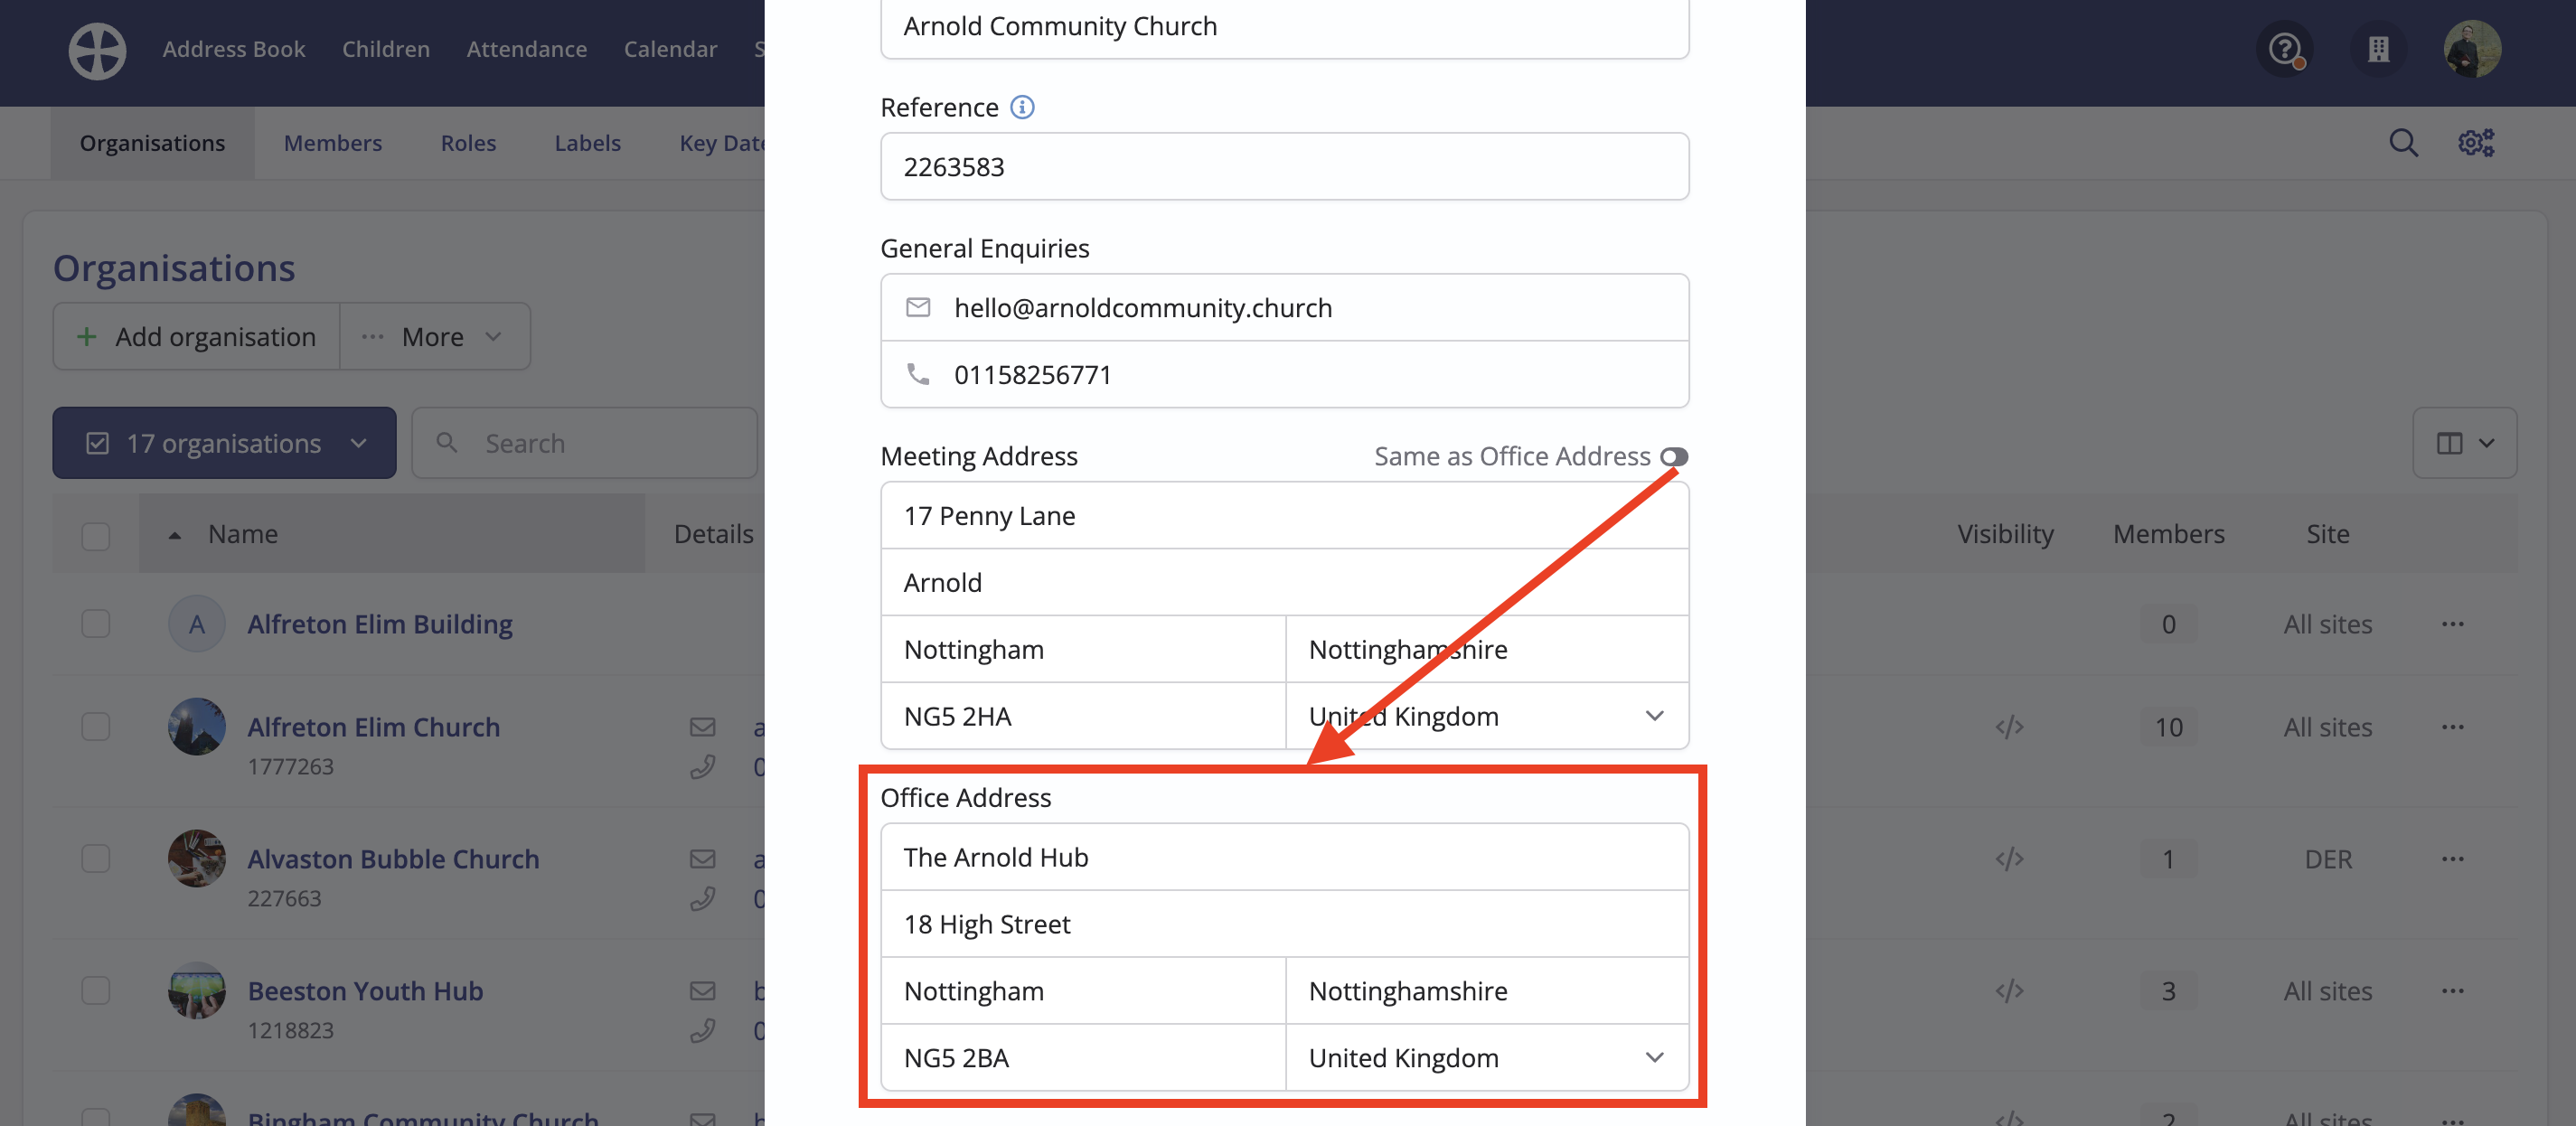
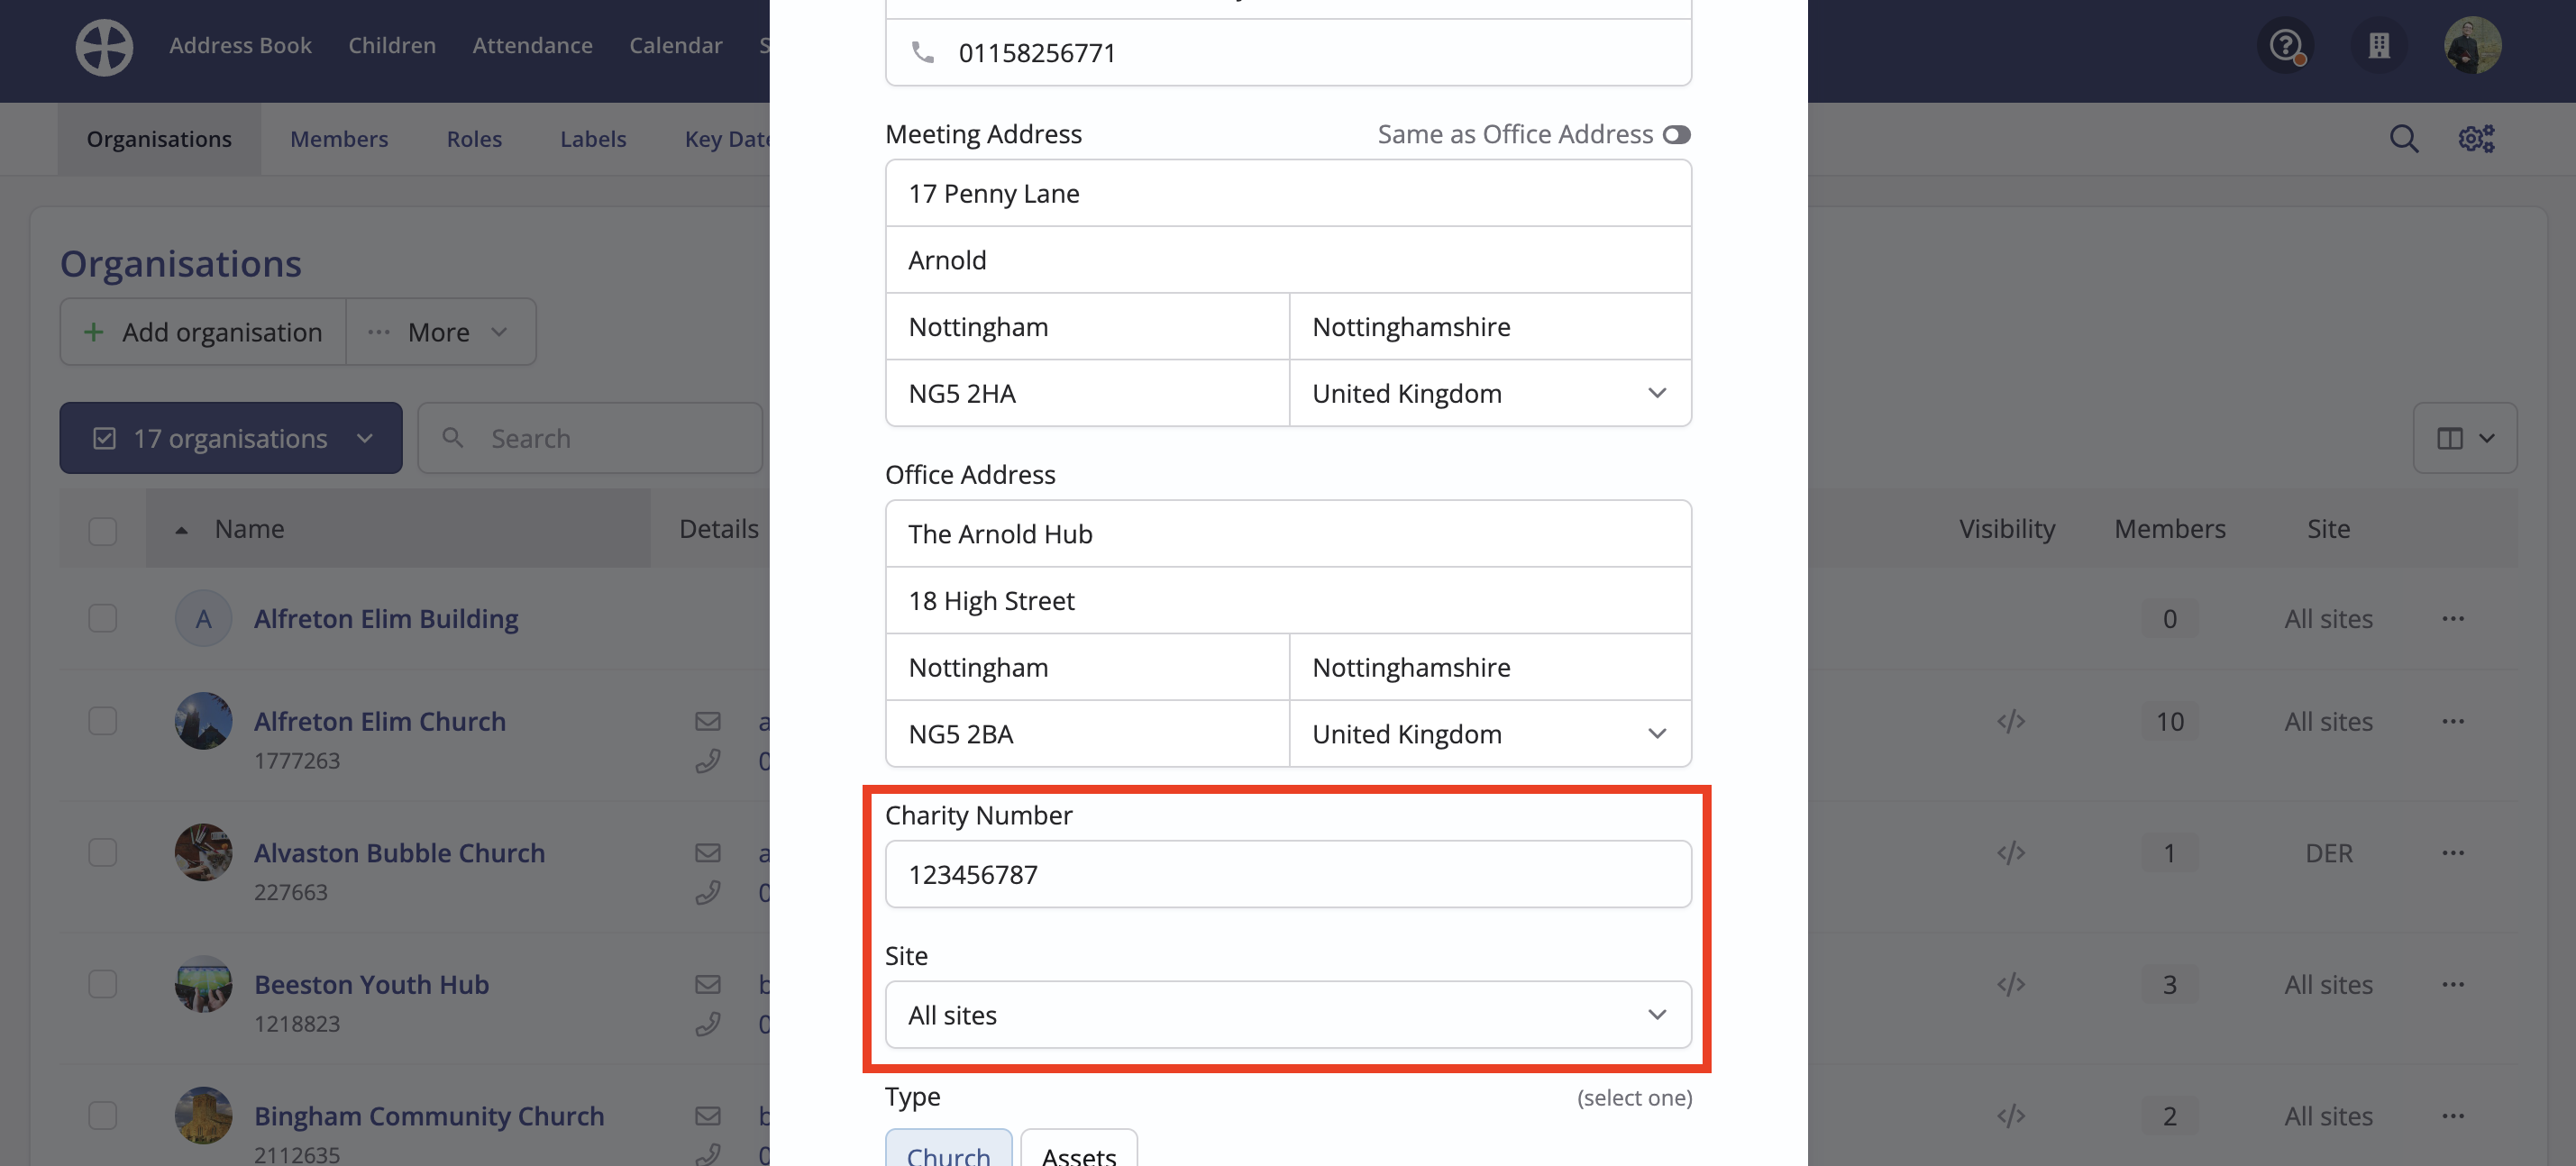
In addition to the Meeting Address, you can optionally specify a different Office Address - toggle the Same as Office Address option to reveal the Office Address fields.
You can optionally add a Charity Number, an optional field enabled in the module settings. For multi-site customers, select the organisation Site. Organisations can be site-specific or all sites.
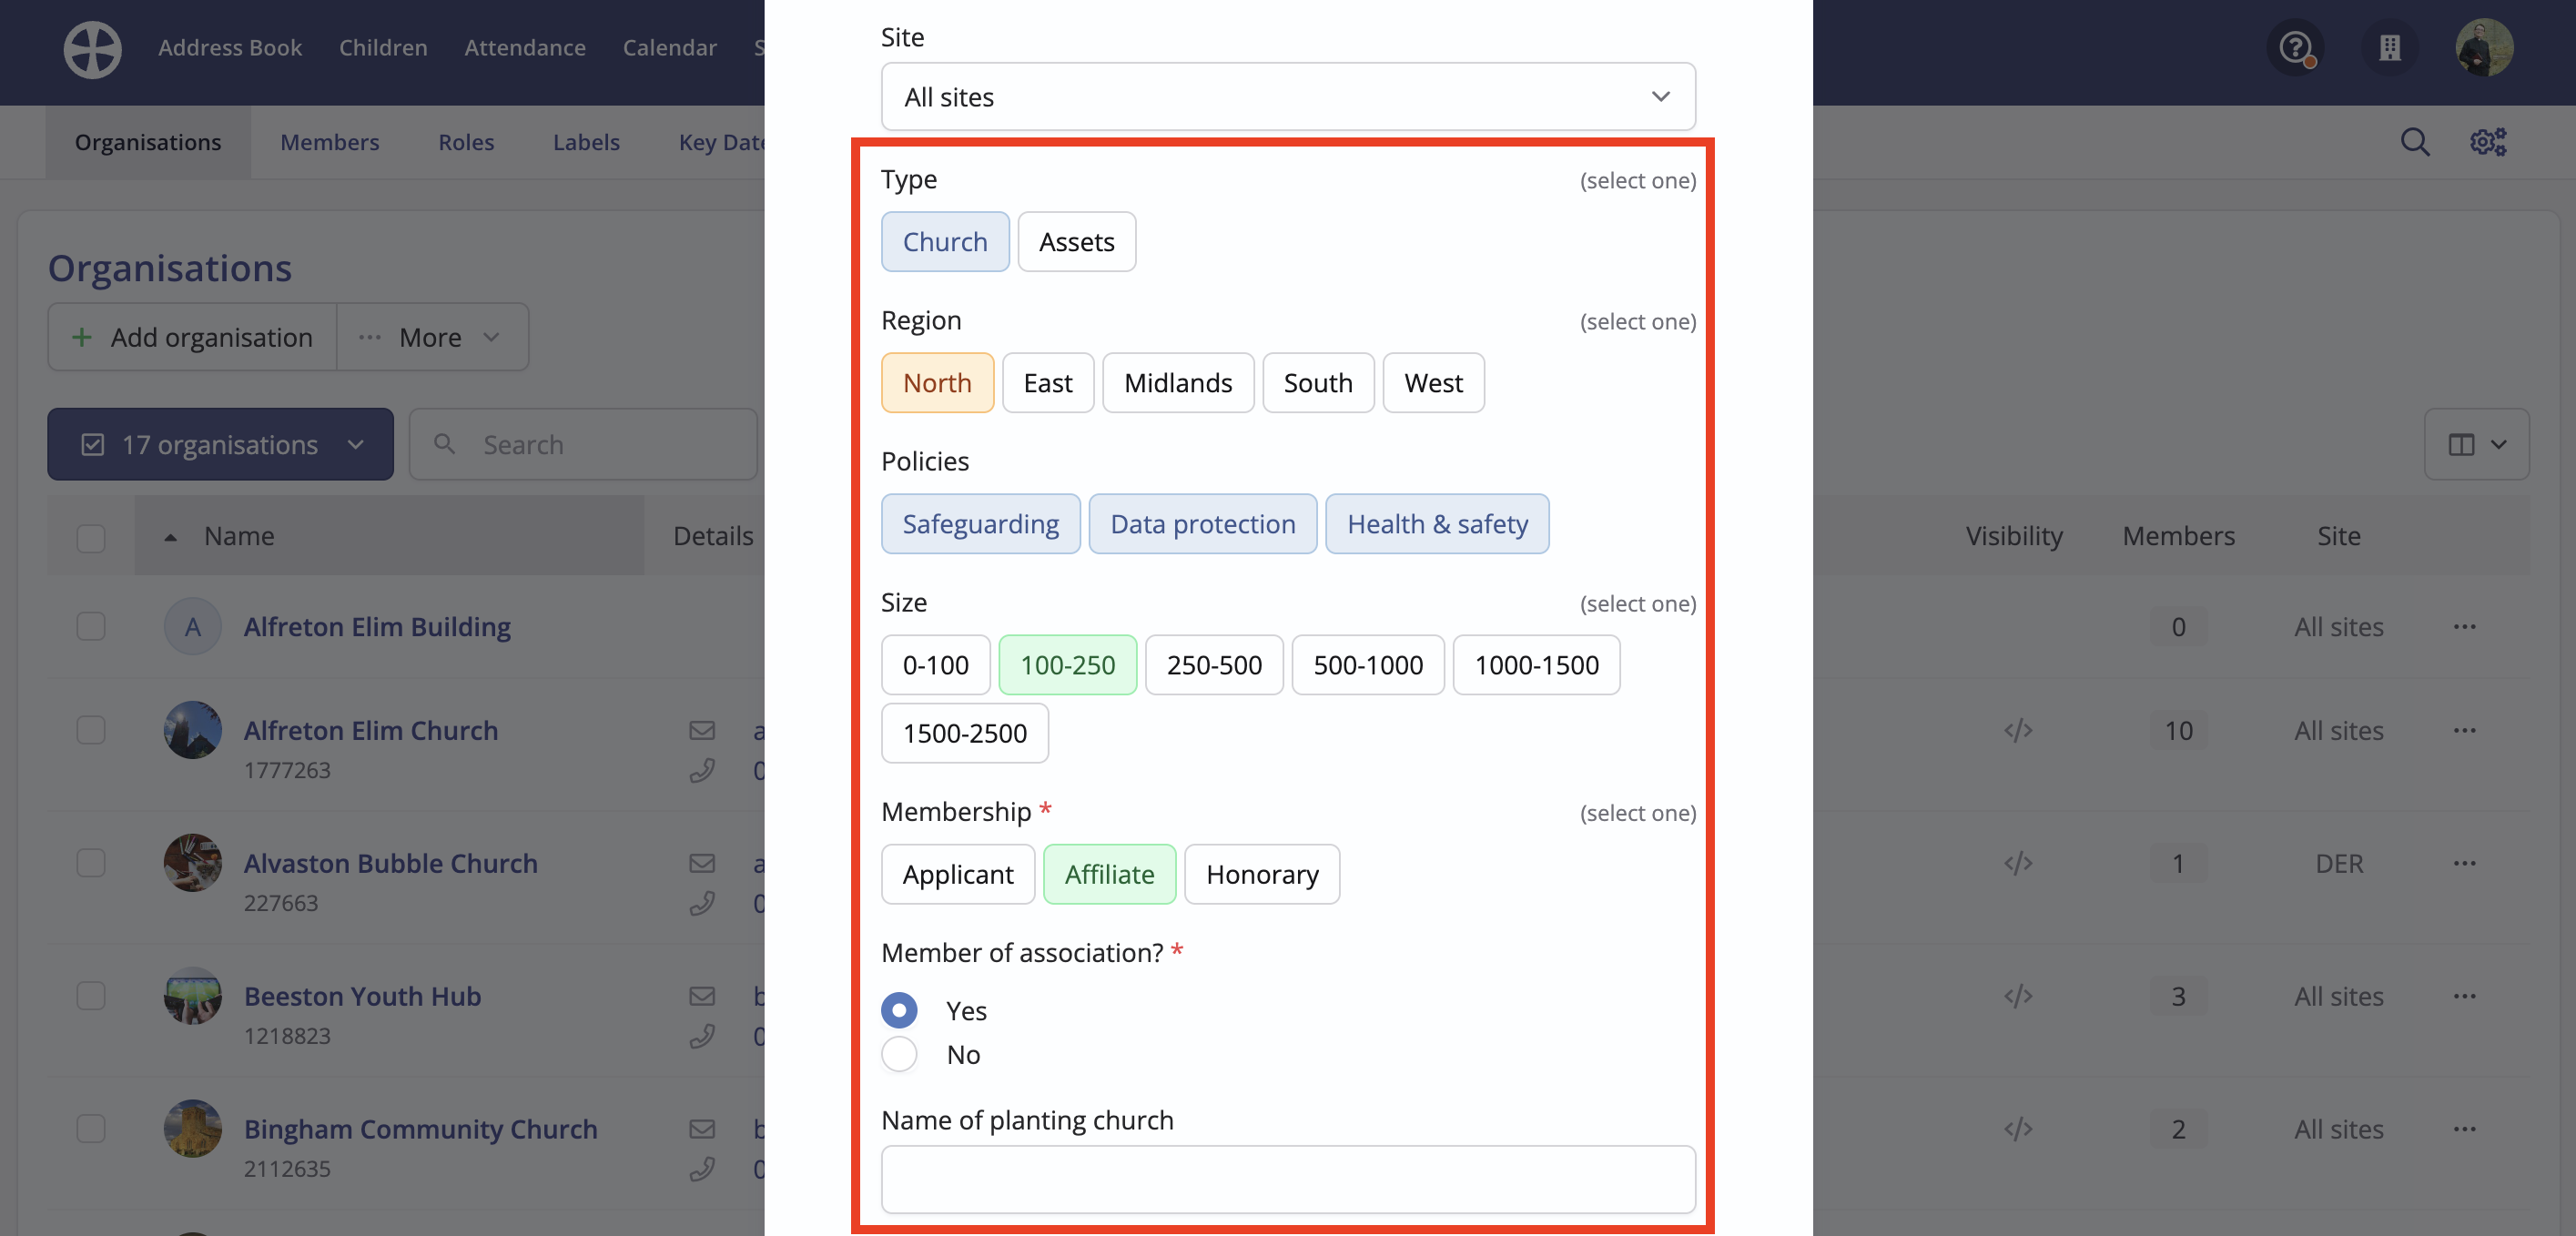
Select Label responses - distinguished as coloured pills when selected - and add any Custom field responses as appropriate. See the related support articles for further information on Adding custom fields for organisations and Categorising organisations using labels.
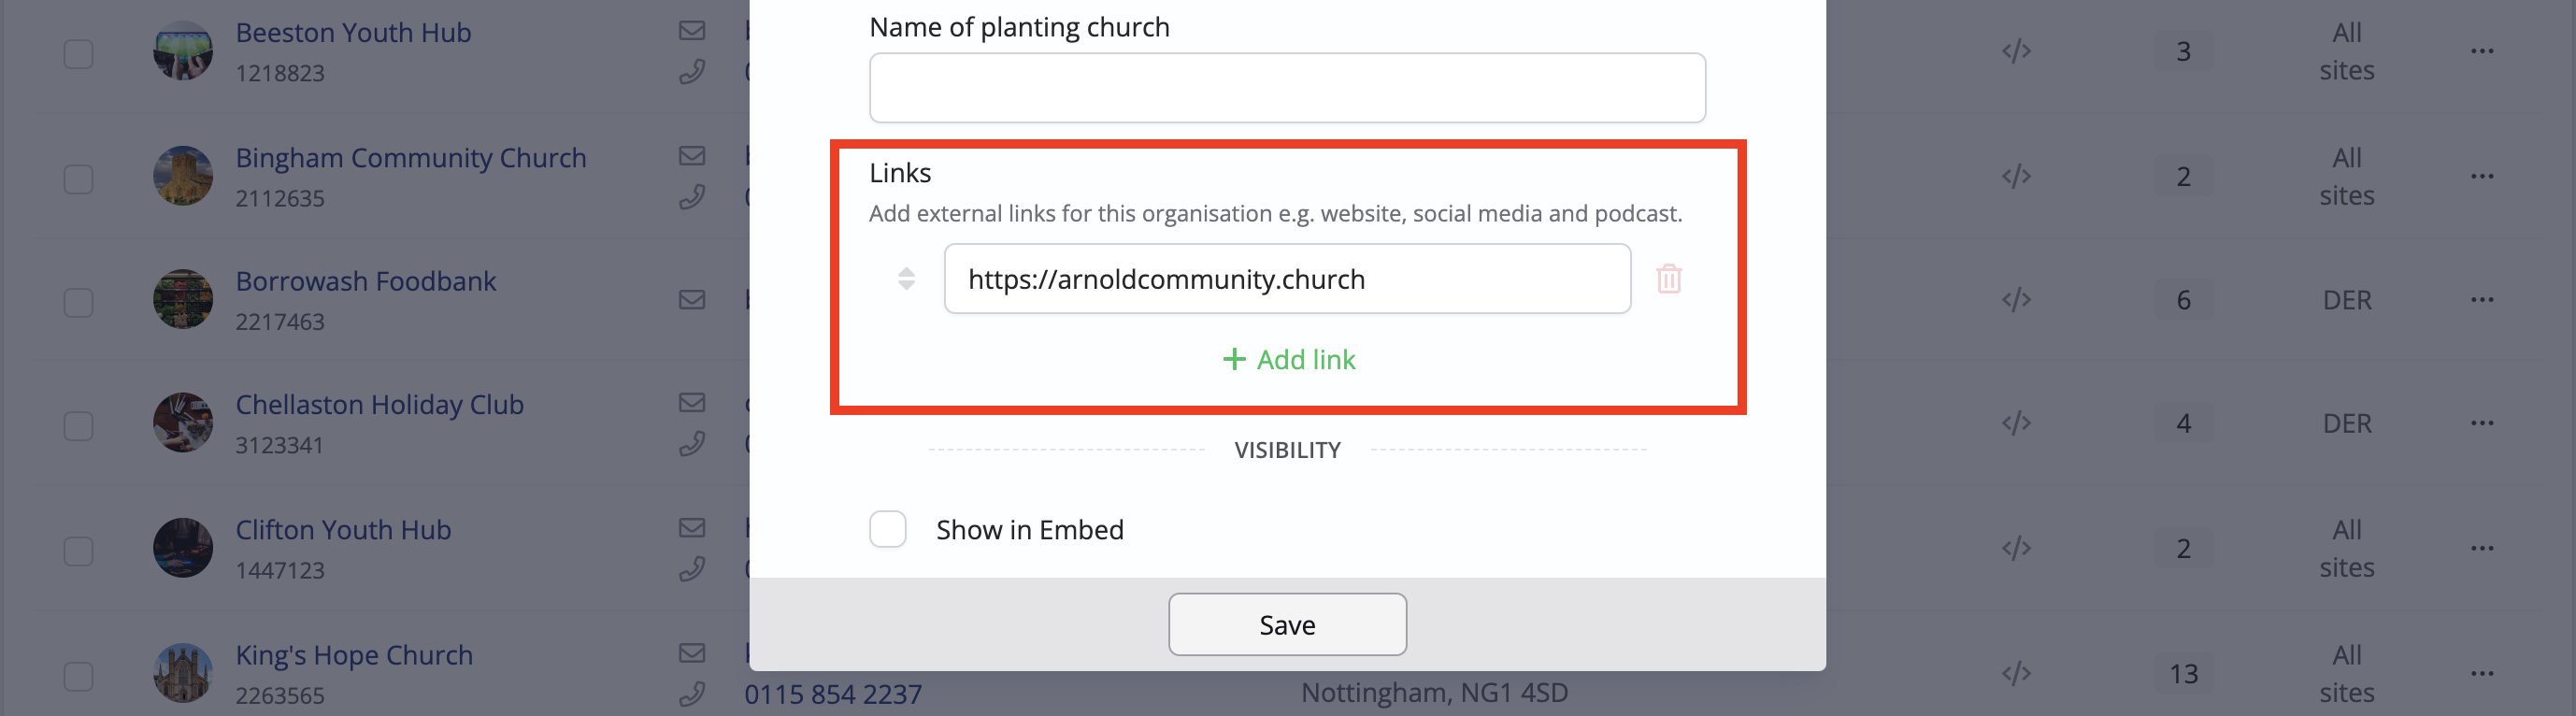
Finally, you can optionally add organisation Links—ideal for recording details of the organisation's website address, social media links, or podcast feed URL. Clickable links are shown on the organisation View page. Click Save to complete the process and add the organisation. You'll be redirected to the organisation View page, which is explored in the next section.
Importing organisations
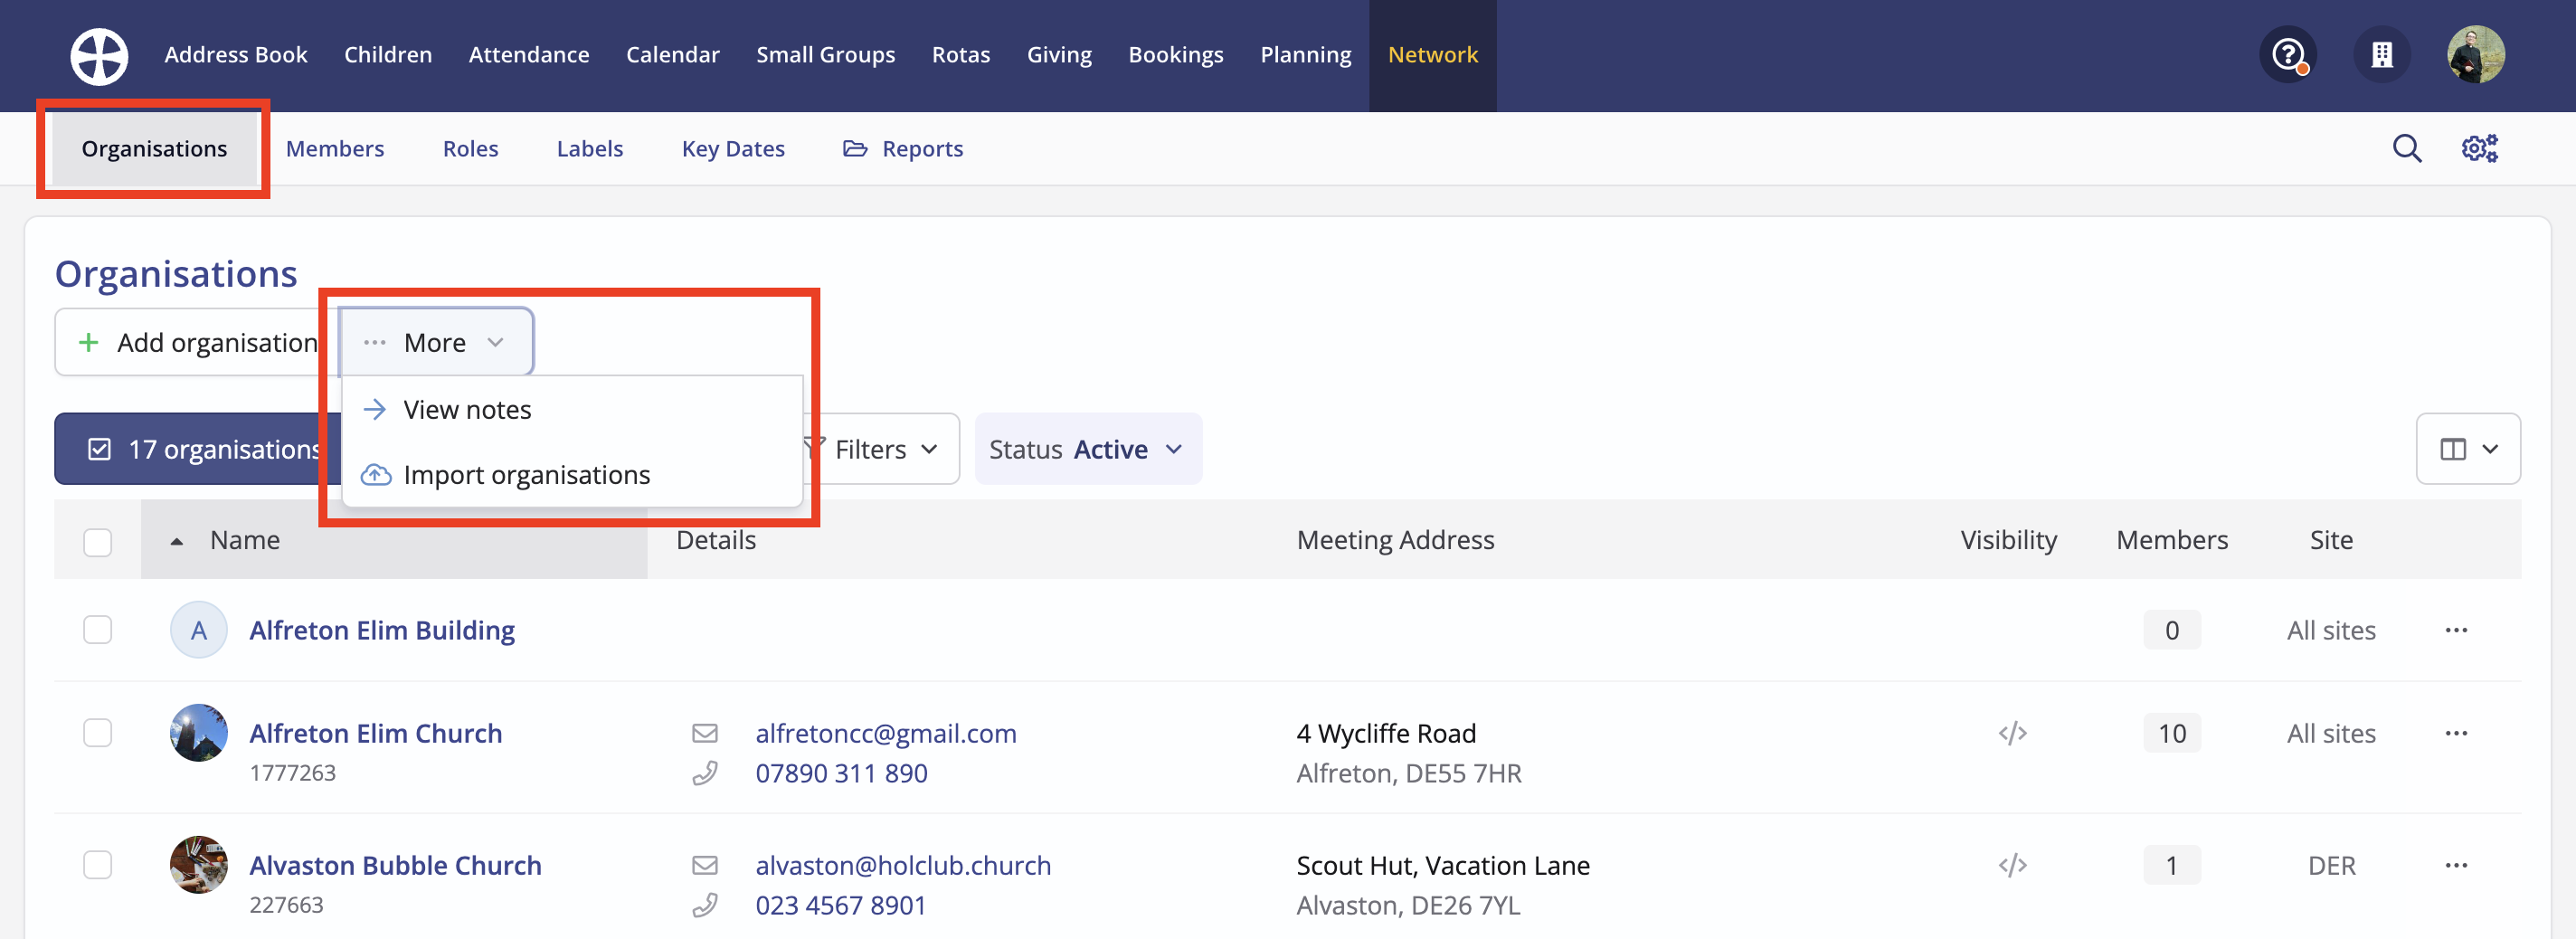
You can easily import existing organisation data that has been exported from another system - you'll need the data in a CSV format file. From the Organisations section of the module, click More and then Import organisations:
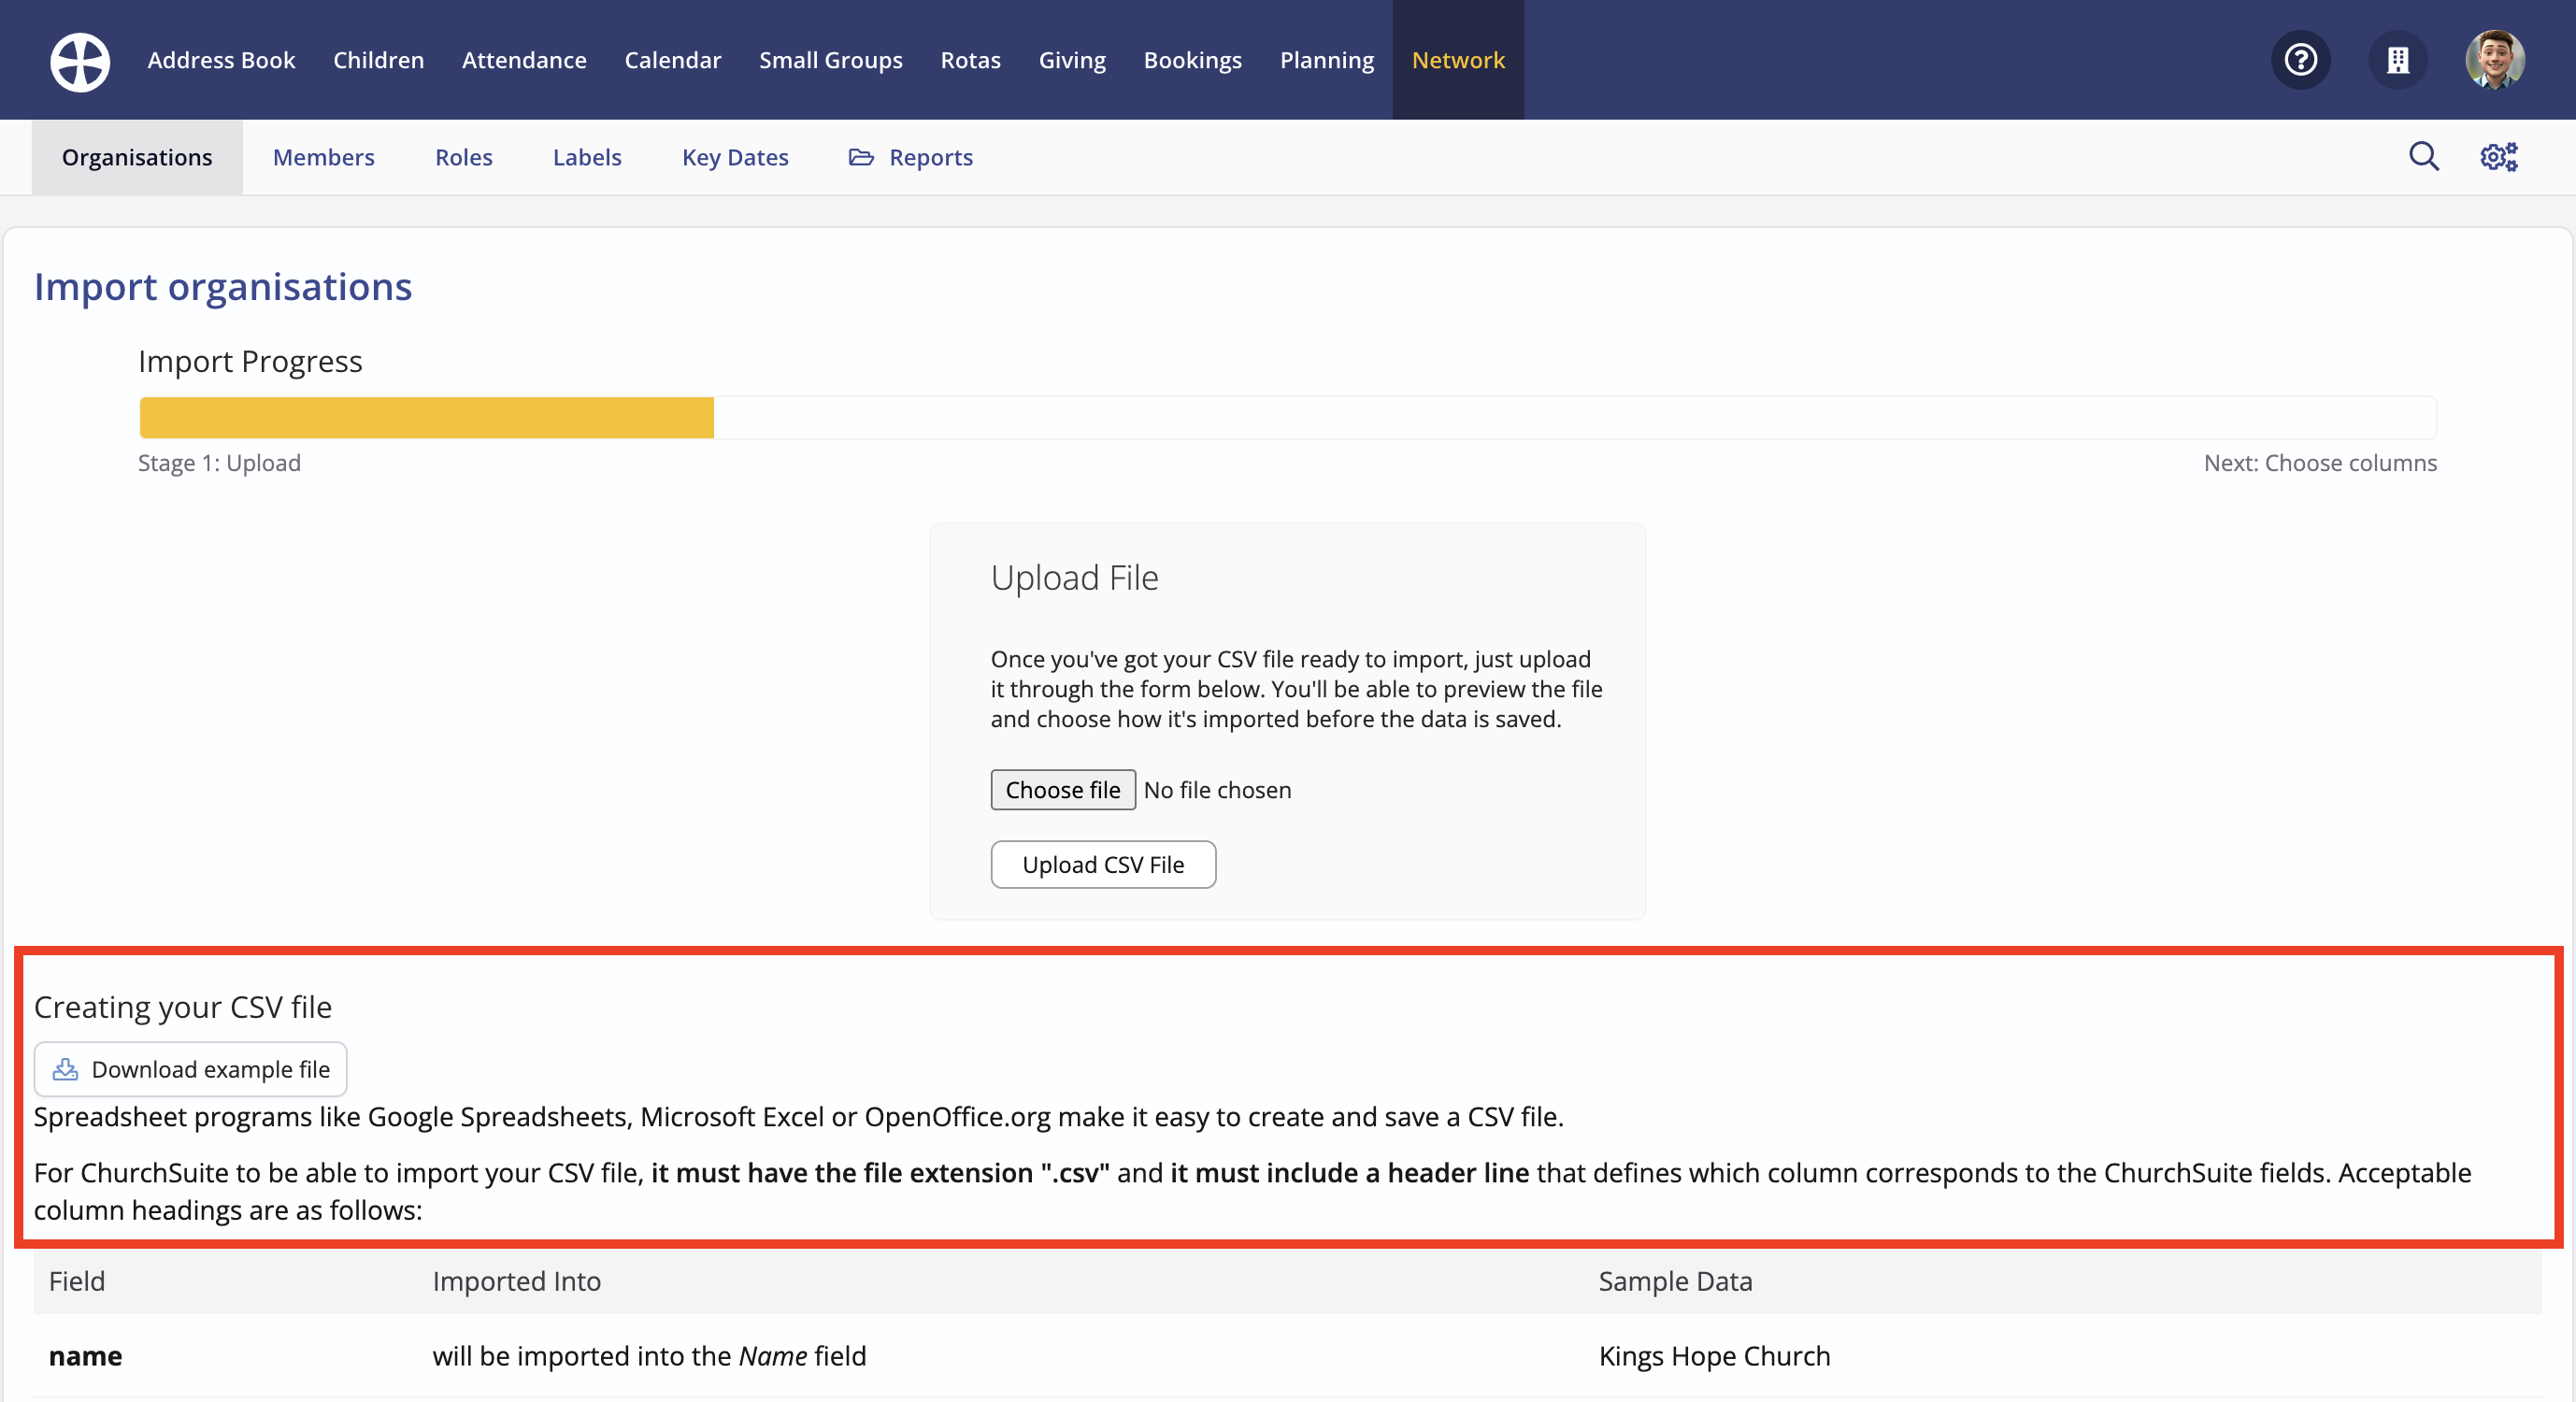
The Import organisations page opens and contains helpful guidance on how to prepare your data - a CSV format file with each field of information in a separate column and a single header in the first row that describes the data in each column. The header row is used to correctly map each column in the CSV file with the corresponding field in the Network module. An Example CSV file is available to download and view, and a full list of supported fields is shown. Not every organisation field is required - ChurchSuite will only import those fields which you supply in the CSV file; however, you must ensure every incoming field in your file is assigned to a ChurchSuite field; otherwise, it won't be imported.
Top tip - importing organisations with custom fields and labels
Custom fields
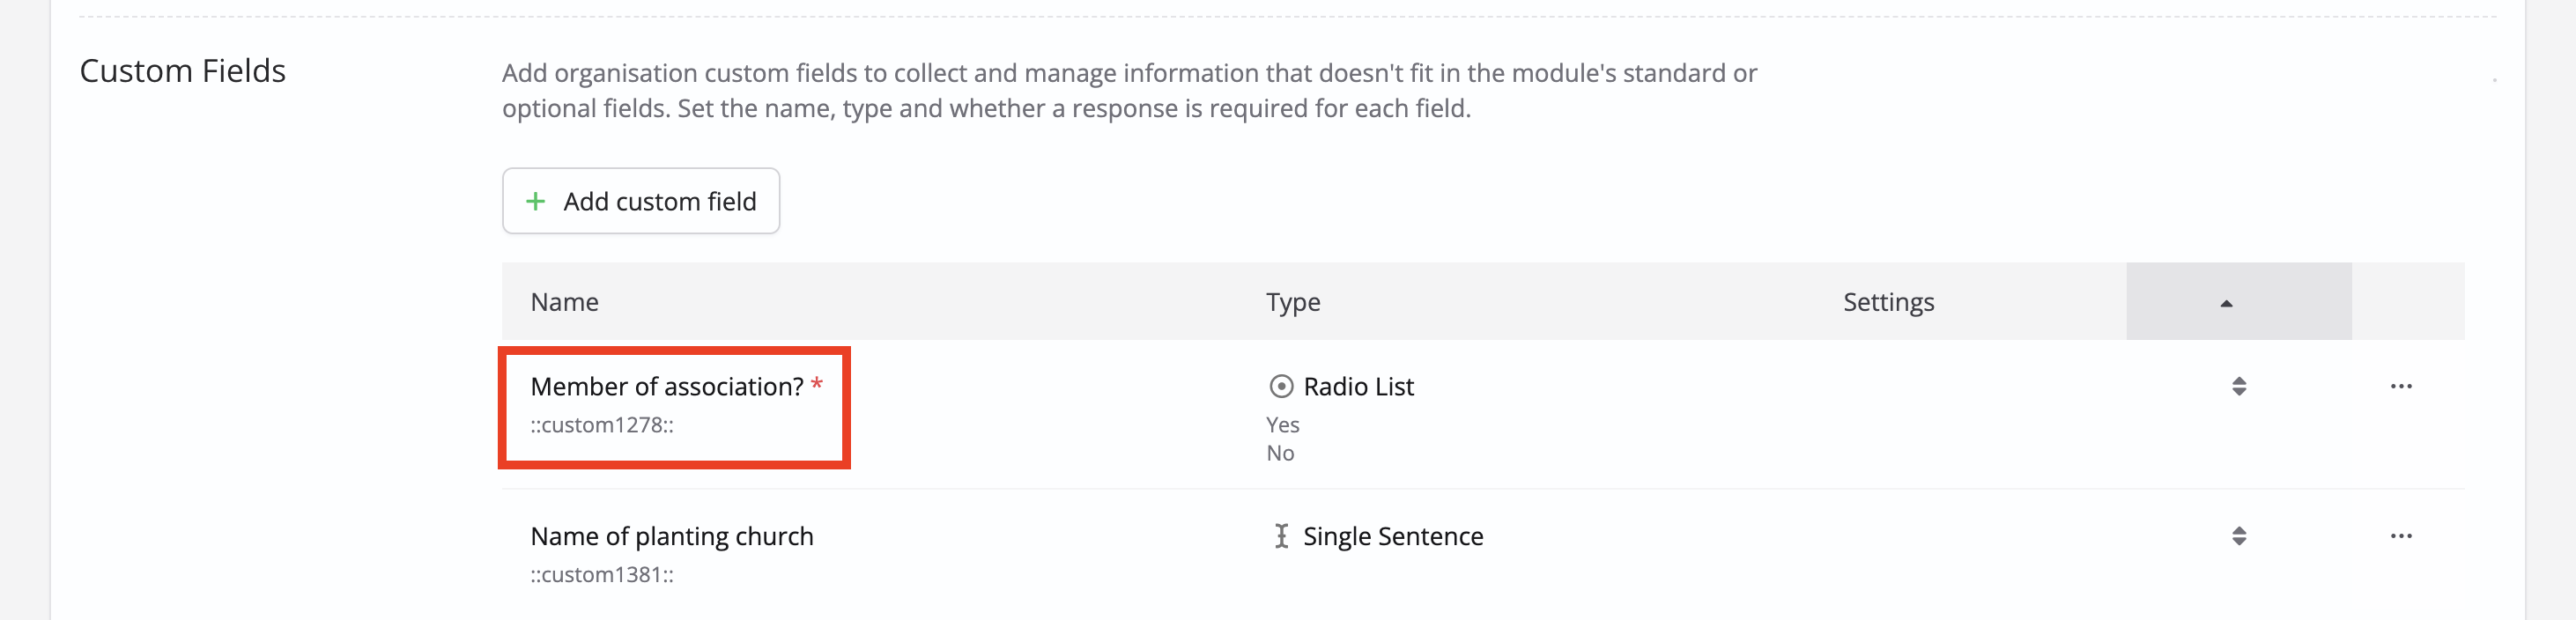
Organisation custom fields should be set up in the Network module before performing an import. On your import CSV, use a special column header label prefix to denote custom fields, showing the word custom, followed by the corresponding number of the custom field shown in your Address Book module settings and "_". In the example below, the custom field for "Member of association?" would have a CSV header row of custom1278_:
Labels
Organisation labels should be set up in the Network module before performing an import. On your import CSV, use a special column header label prefix to denote a label, showing the word label, followed by the corresponding name of the label. In the example below, the label "Type" would have a CSV header row of label_Type:
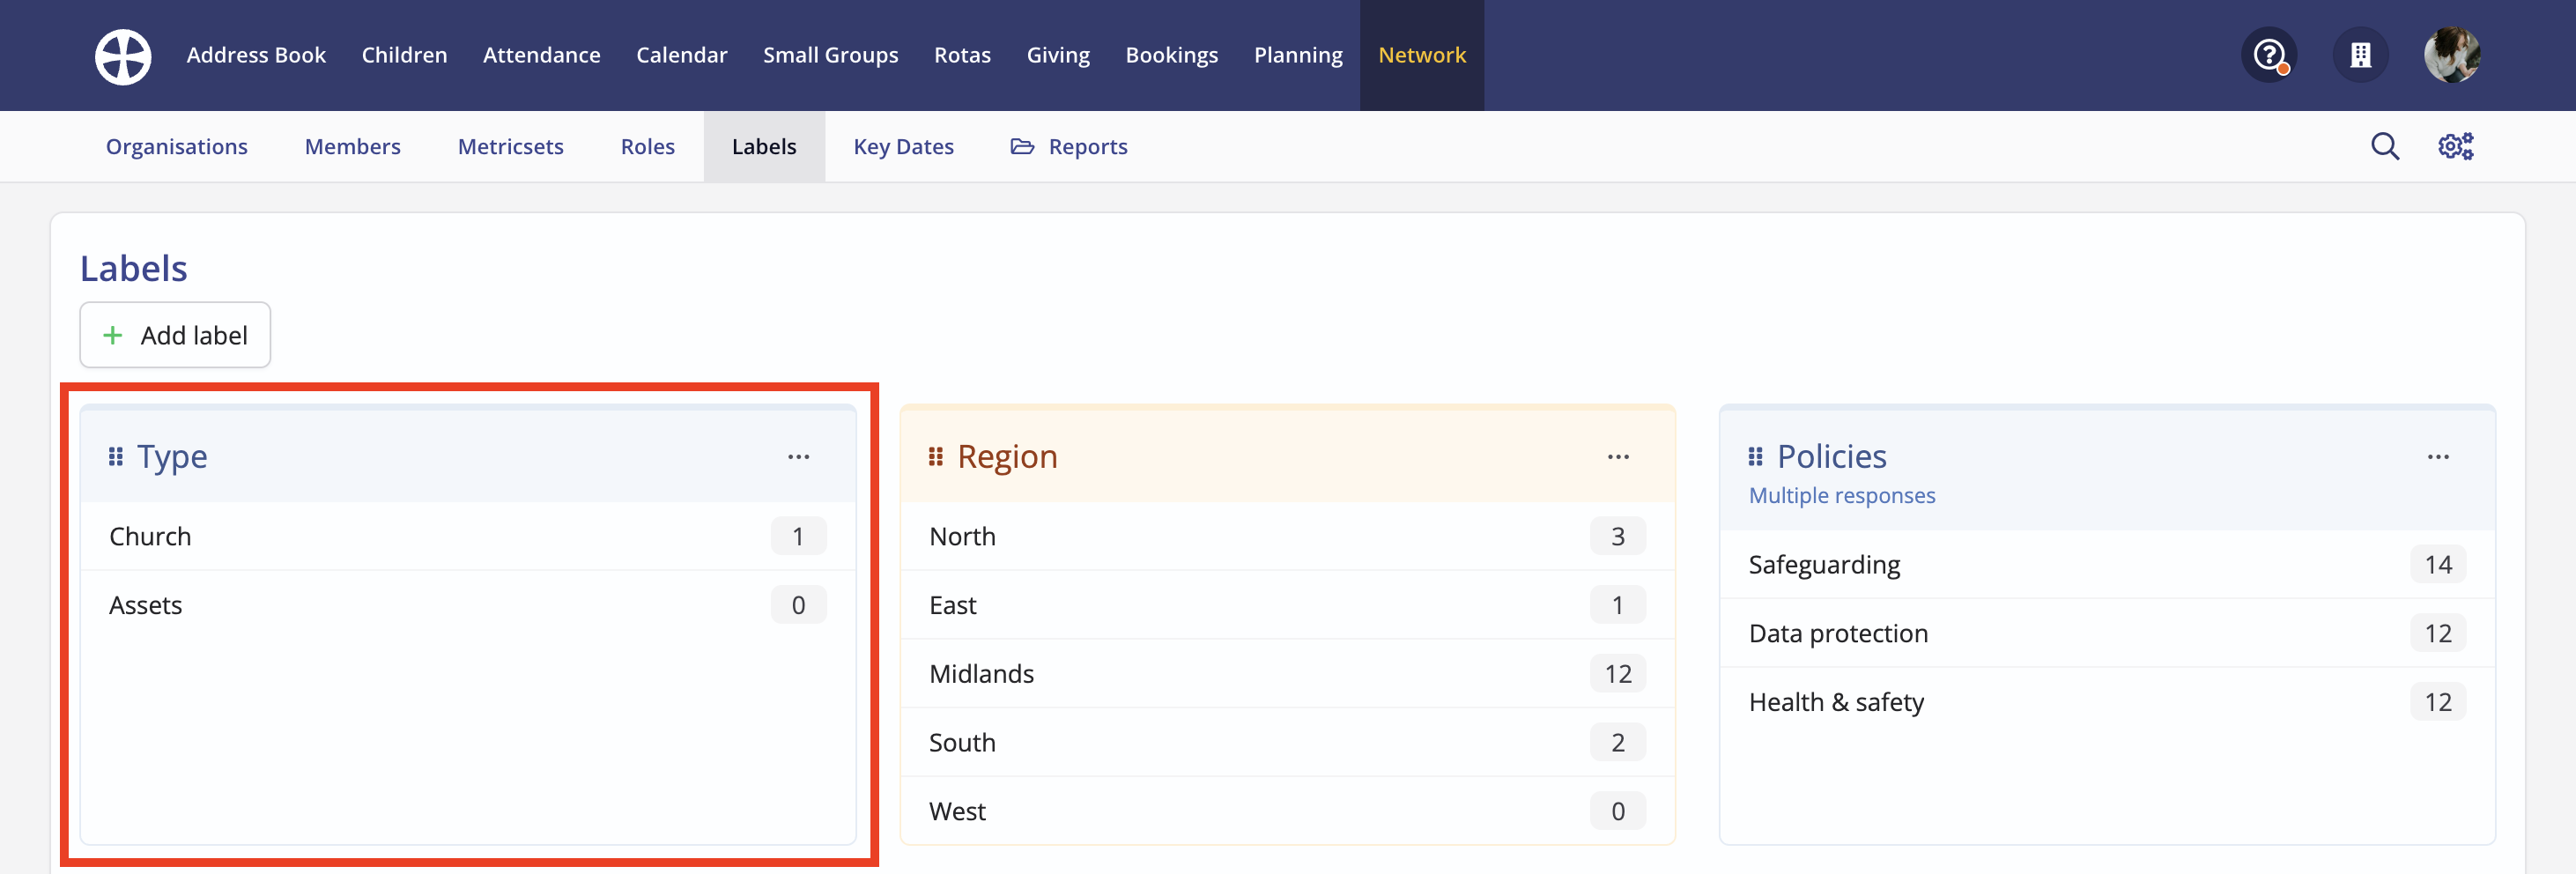
The label response name within the cells should exactly match the response options in the module.
Let's look at the import process:
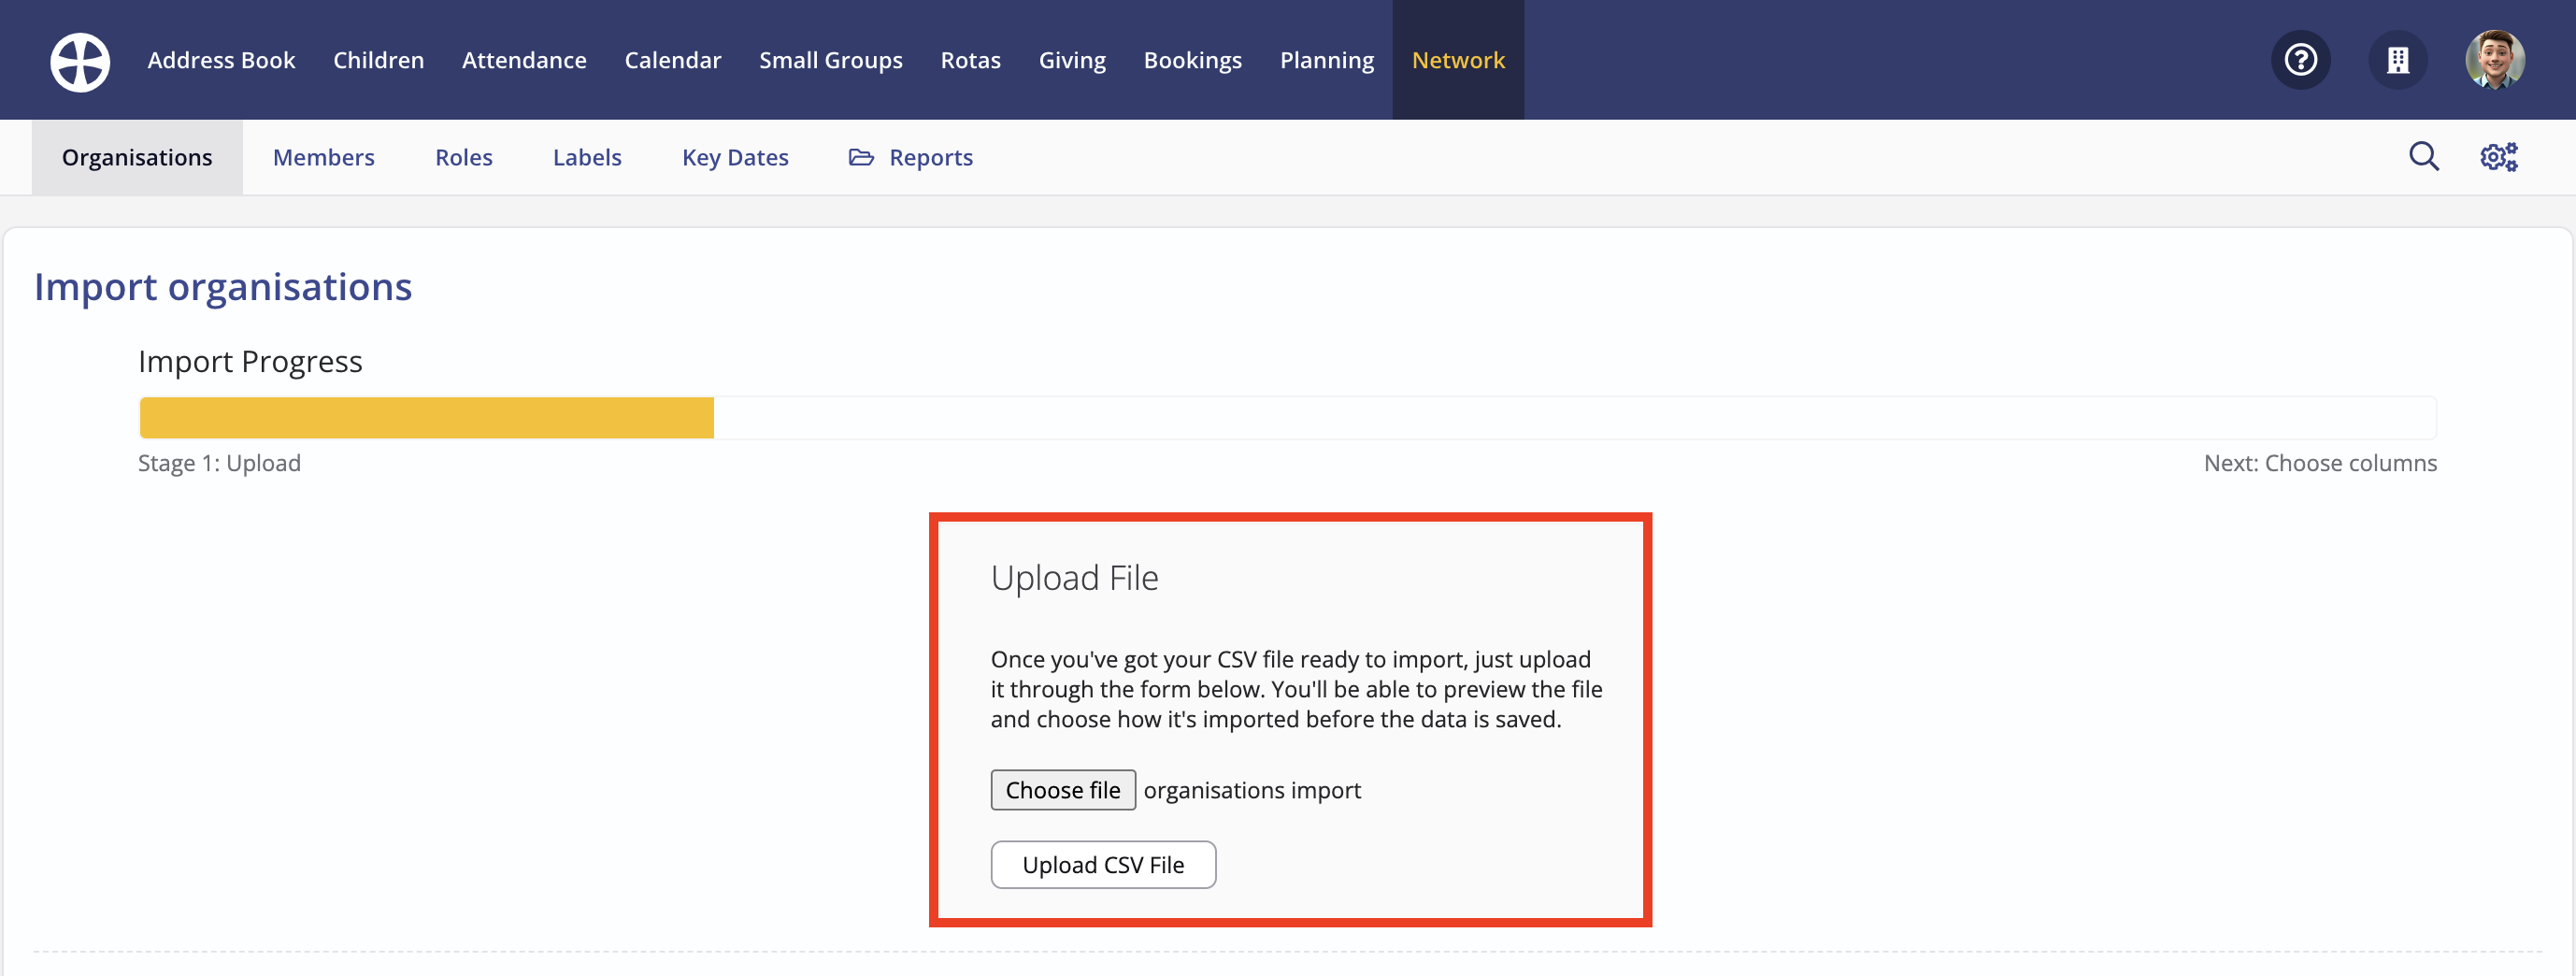
Select Choose file to browse and select your CSV file. Click Upload CSV File to upload the file for review.
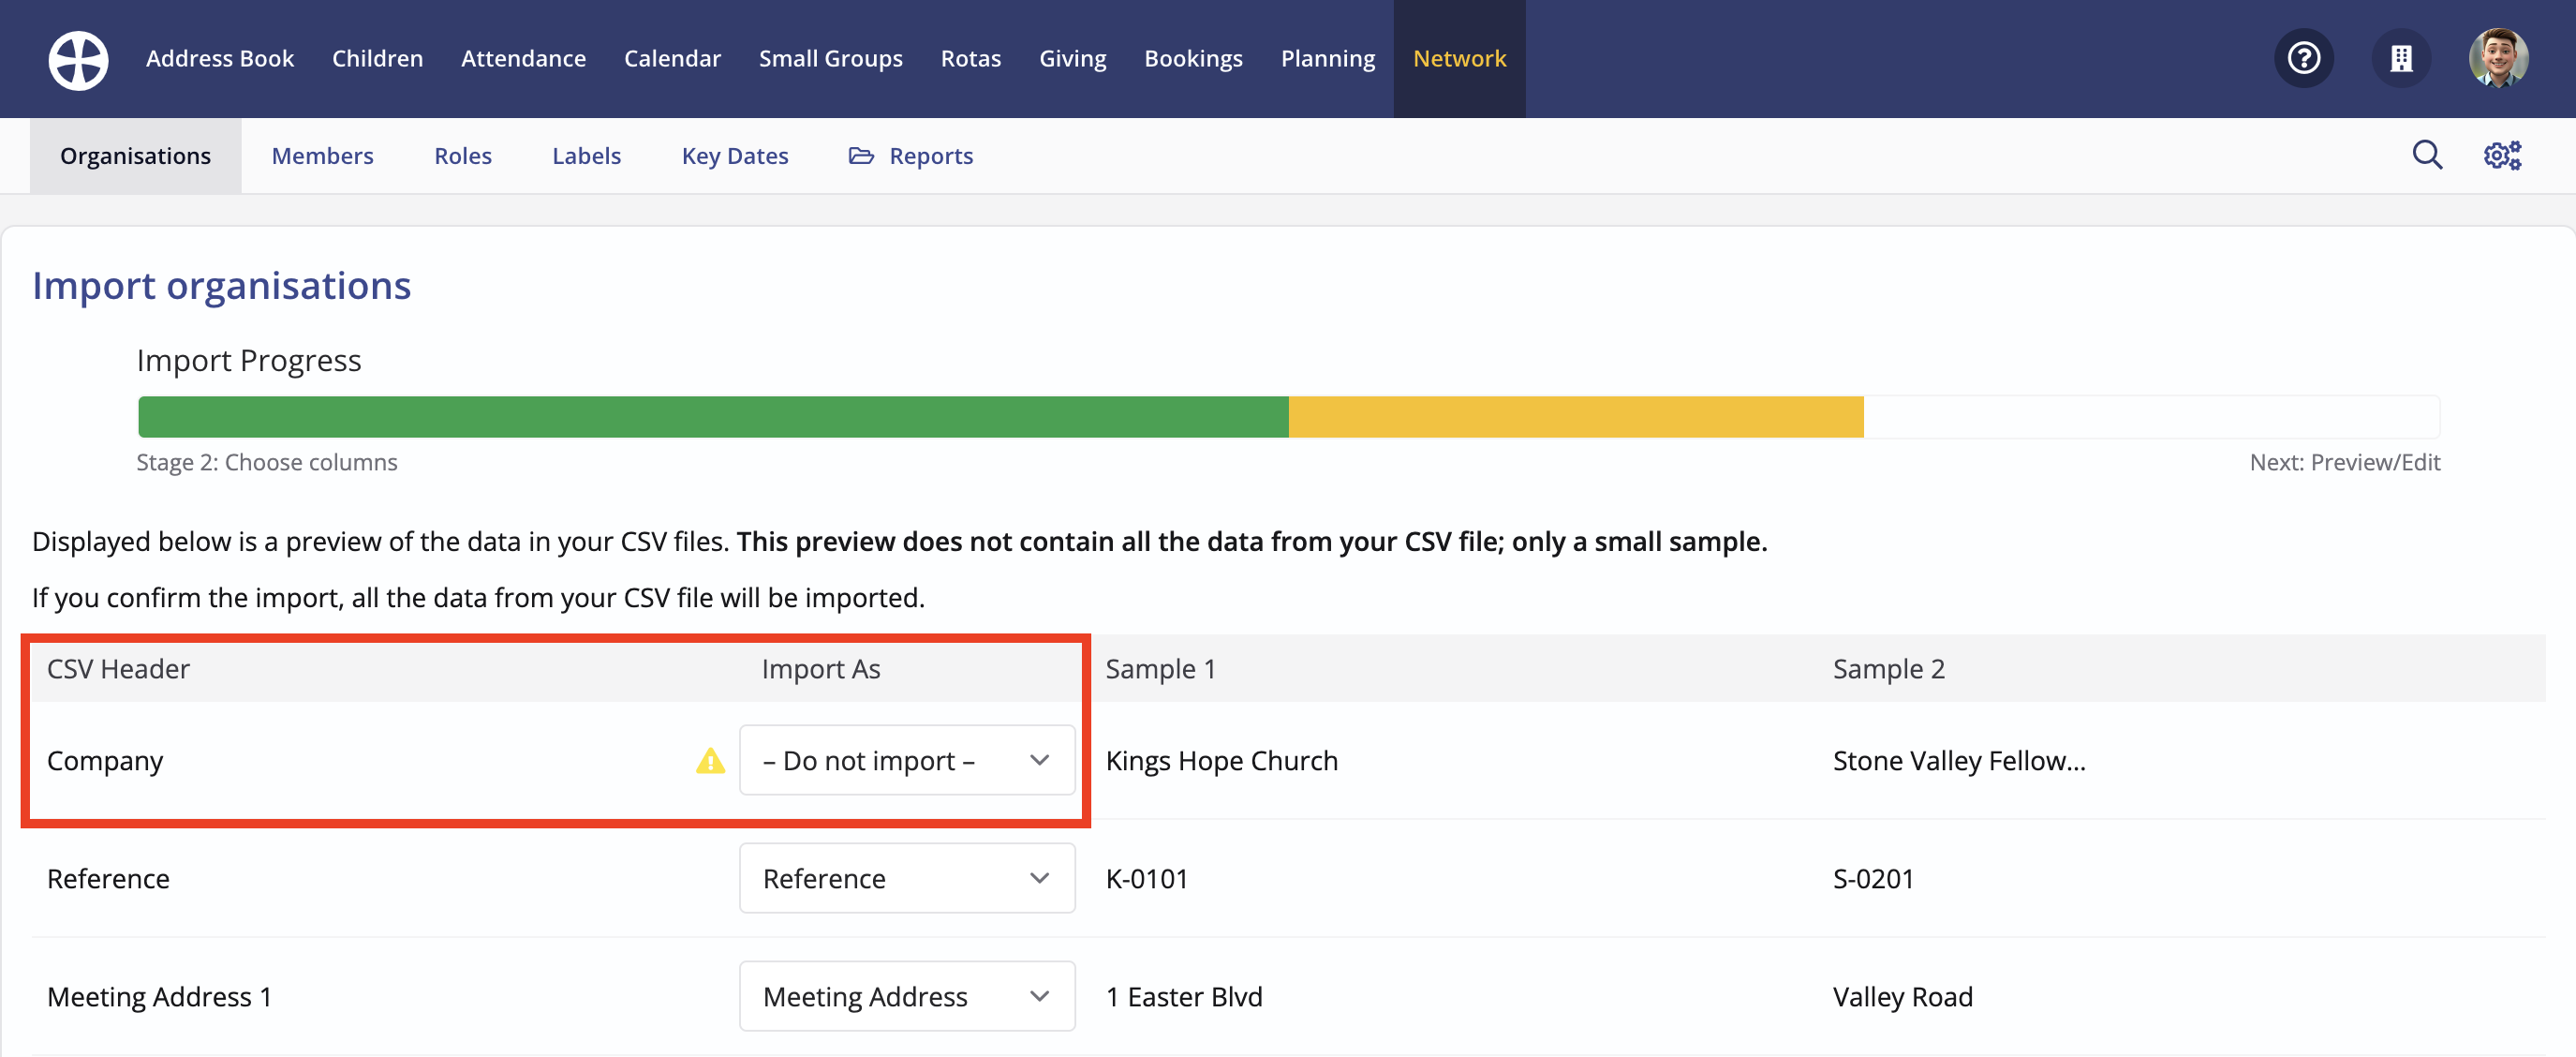
After upload, a sample of the first five records from your CSV file is shown. The first column shown is the CSV Header names from your CSV file. The Import As column is the field in ChurchSuite that data will be imported into. Check each field in your data is correctly mapped to a field in ChurchSuite. A yellow warning triangle icon alerts you to any field that will not be imported - typically because the CSV Header isn't recognised. You can select the appropriate ChurchSuite organisation field from the drop-down list. Those using ChurchSuite's multi-site functionality should include a Site column in the CSV file so that imported organisations are added to the appropriate site.
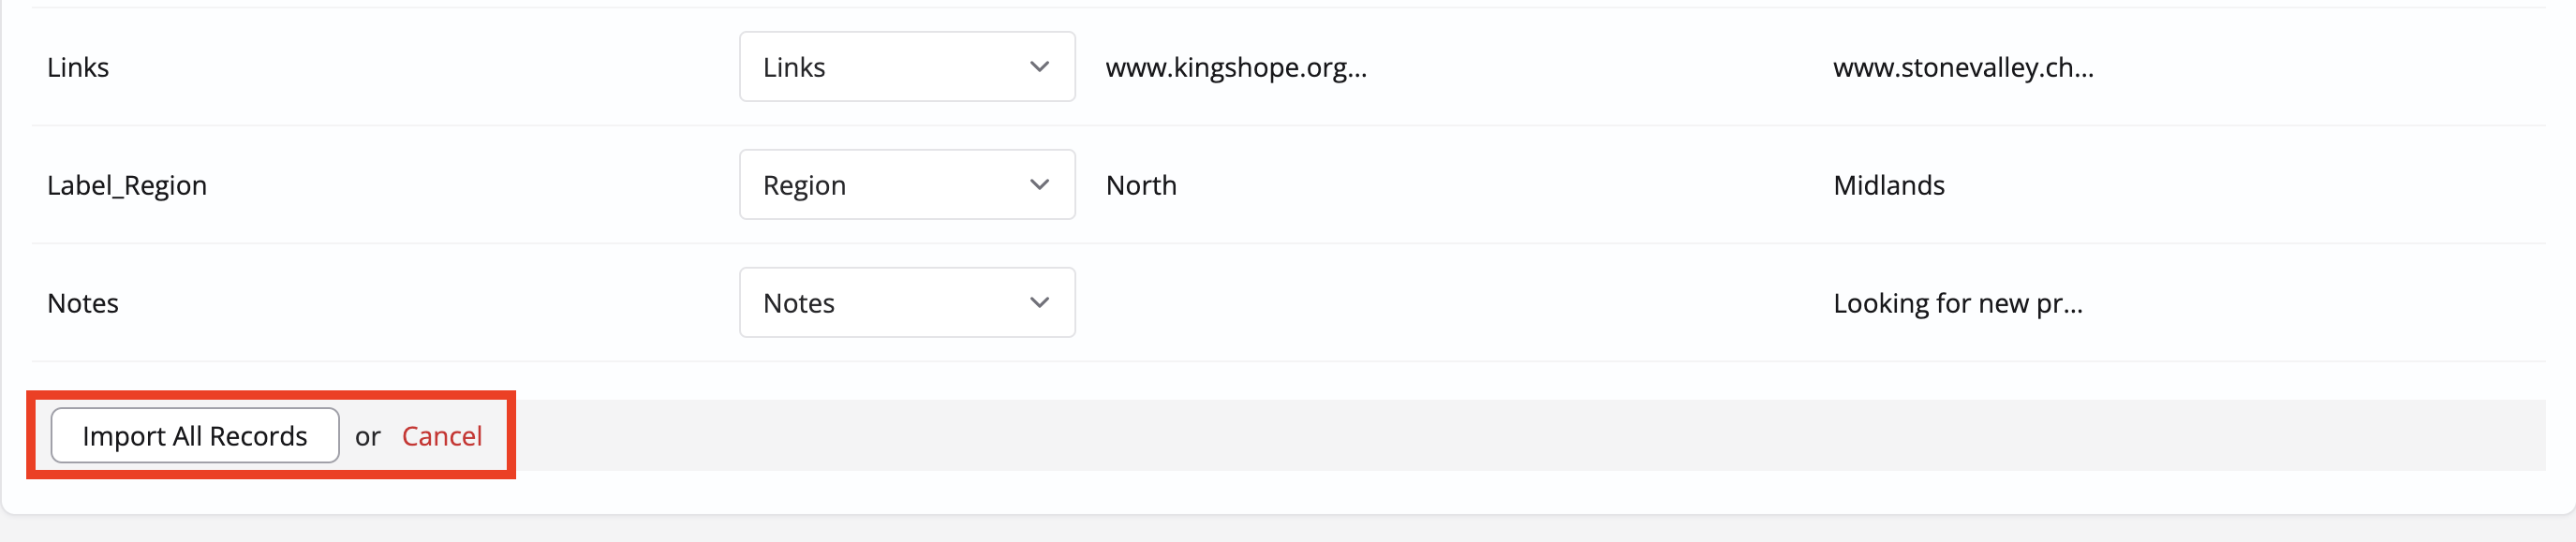
When satisfied, click Import All Records or select Cancel if you need to abort and make further changes to your CSV file.
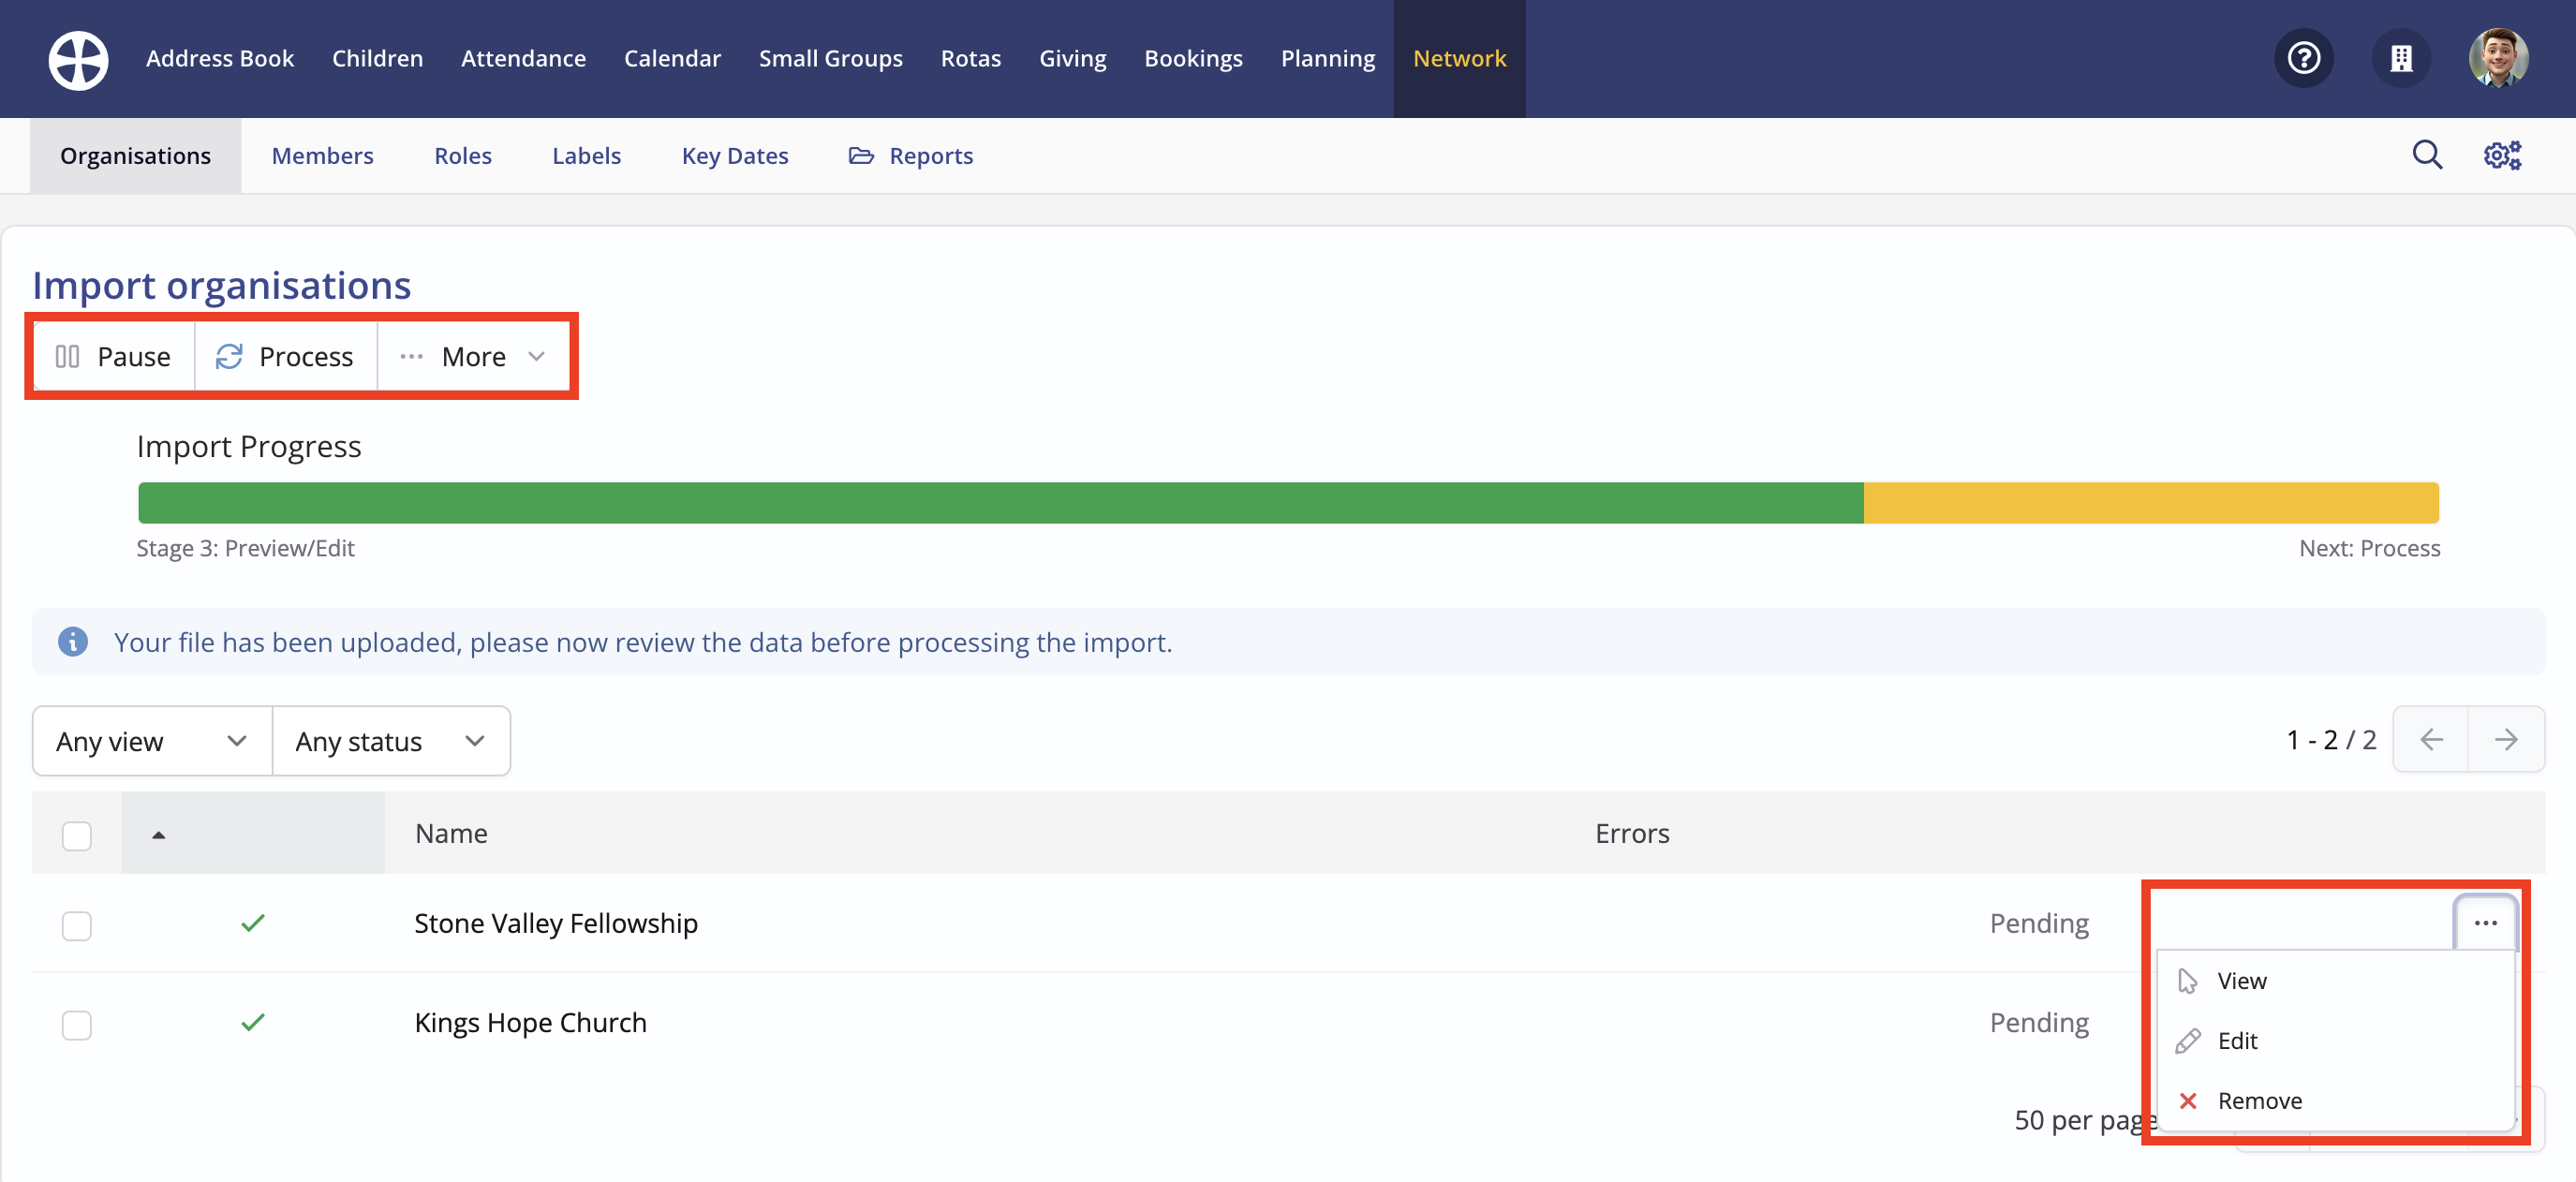
The import progresses to the Preview/Edit stage, where you can review the individual organisations being imported - perhaps to Edit and correct an error that's been identified. You can Pause (and later Resume) or Delete the import. You can also Process at any time - only valid records, distinguished by a green tick icon, will be processed - invalid records, distinguished by a yellow warning triangle icon, remain in the list until they are either edited and fixed or removed from the import list.
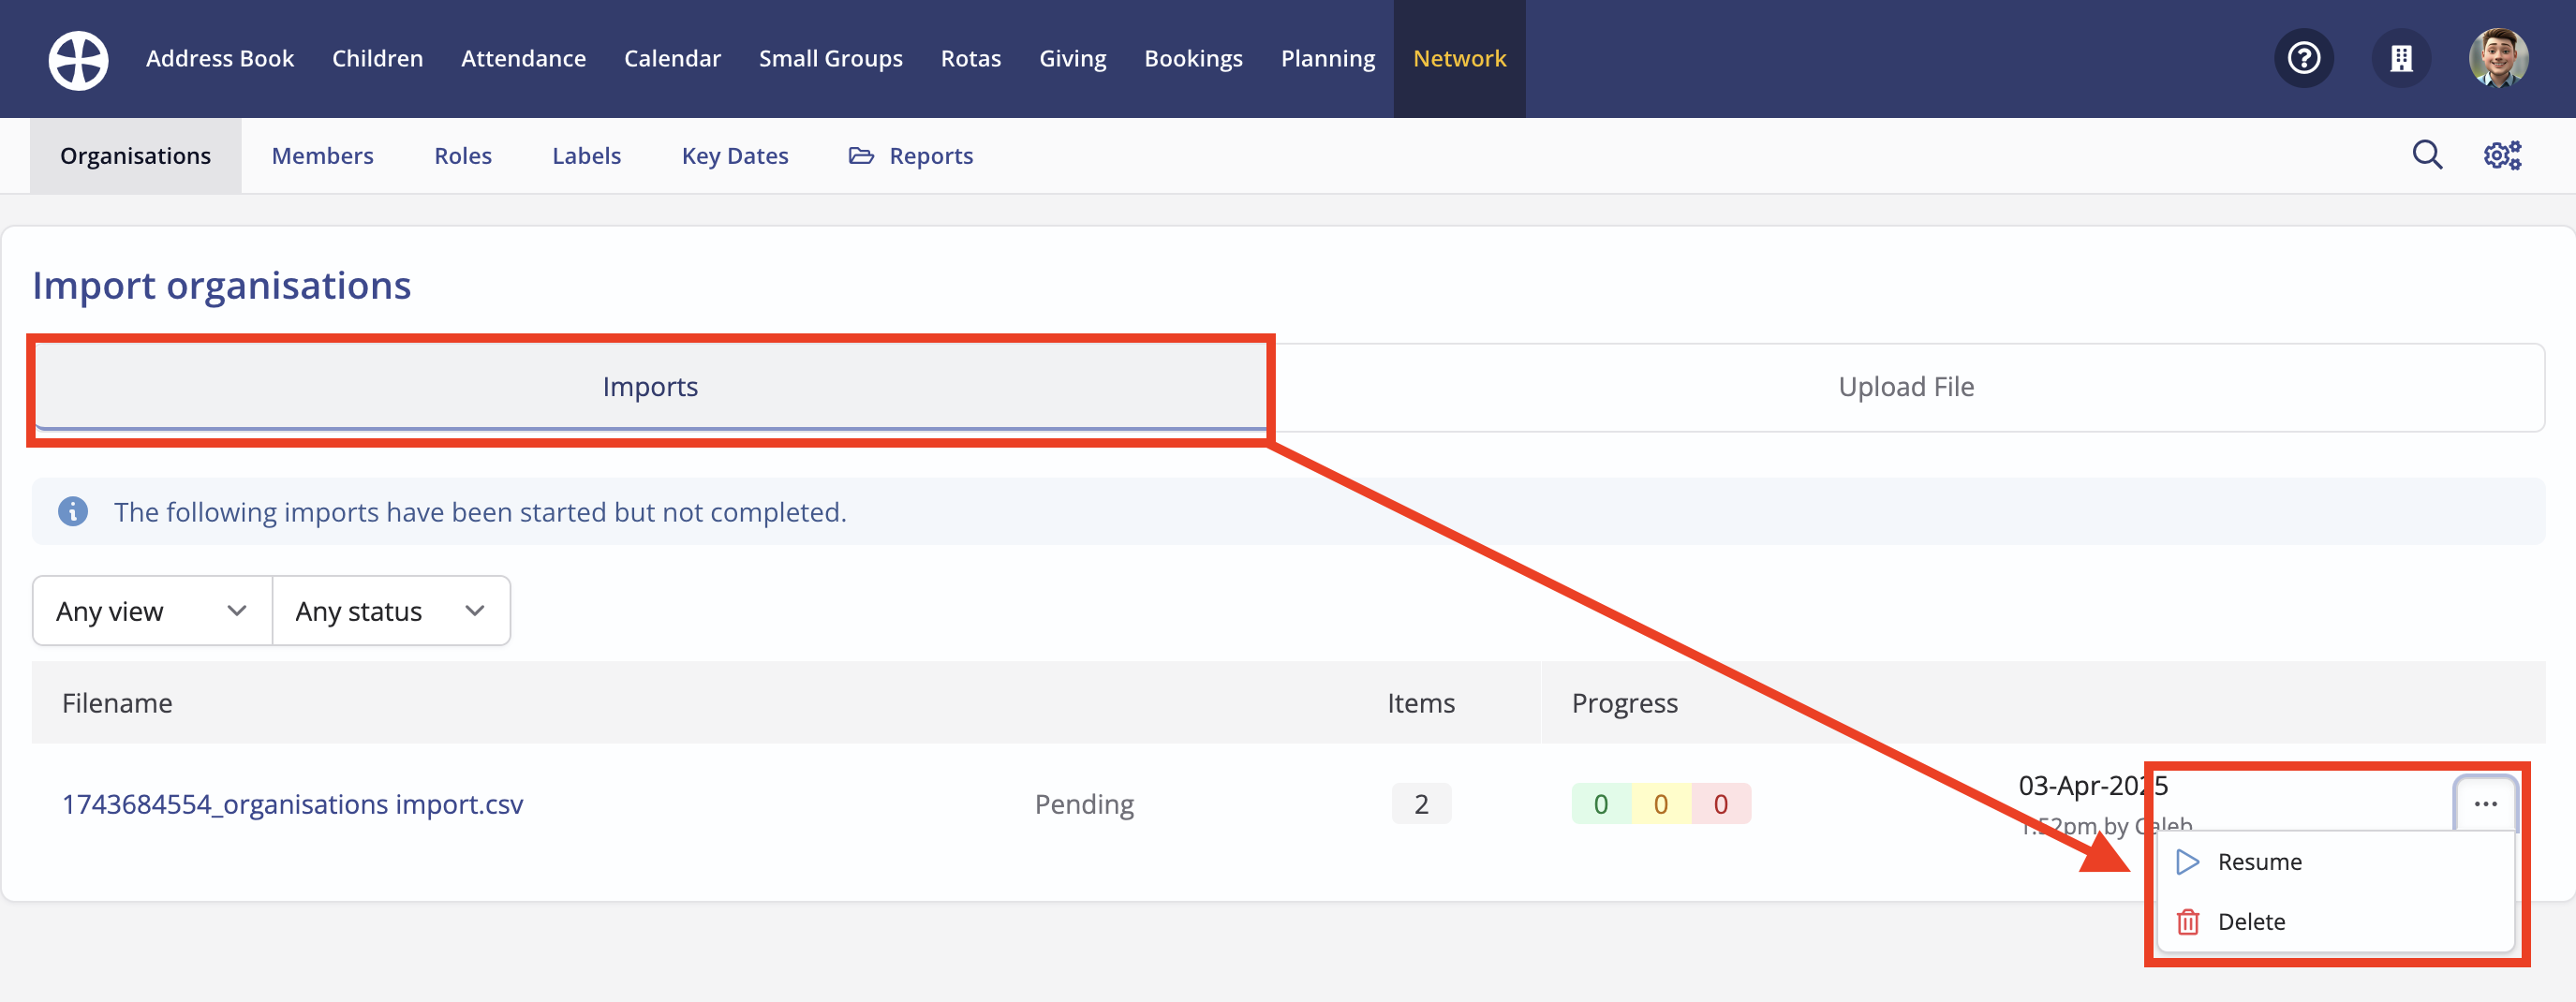
You can return to a partial/incomplete import by navigating back to the Import organisations page and selecting Resume or Delete.
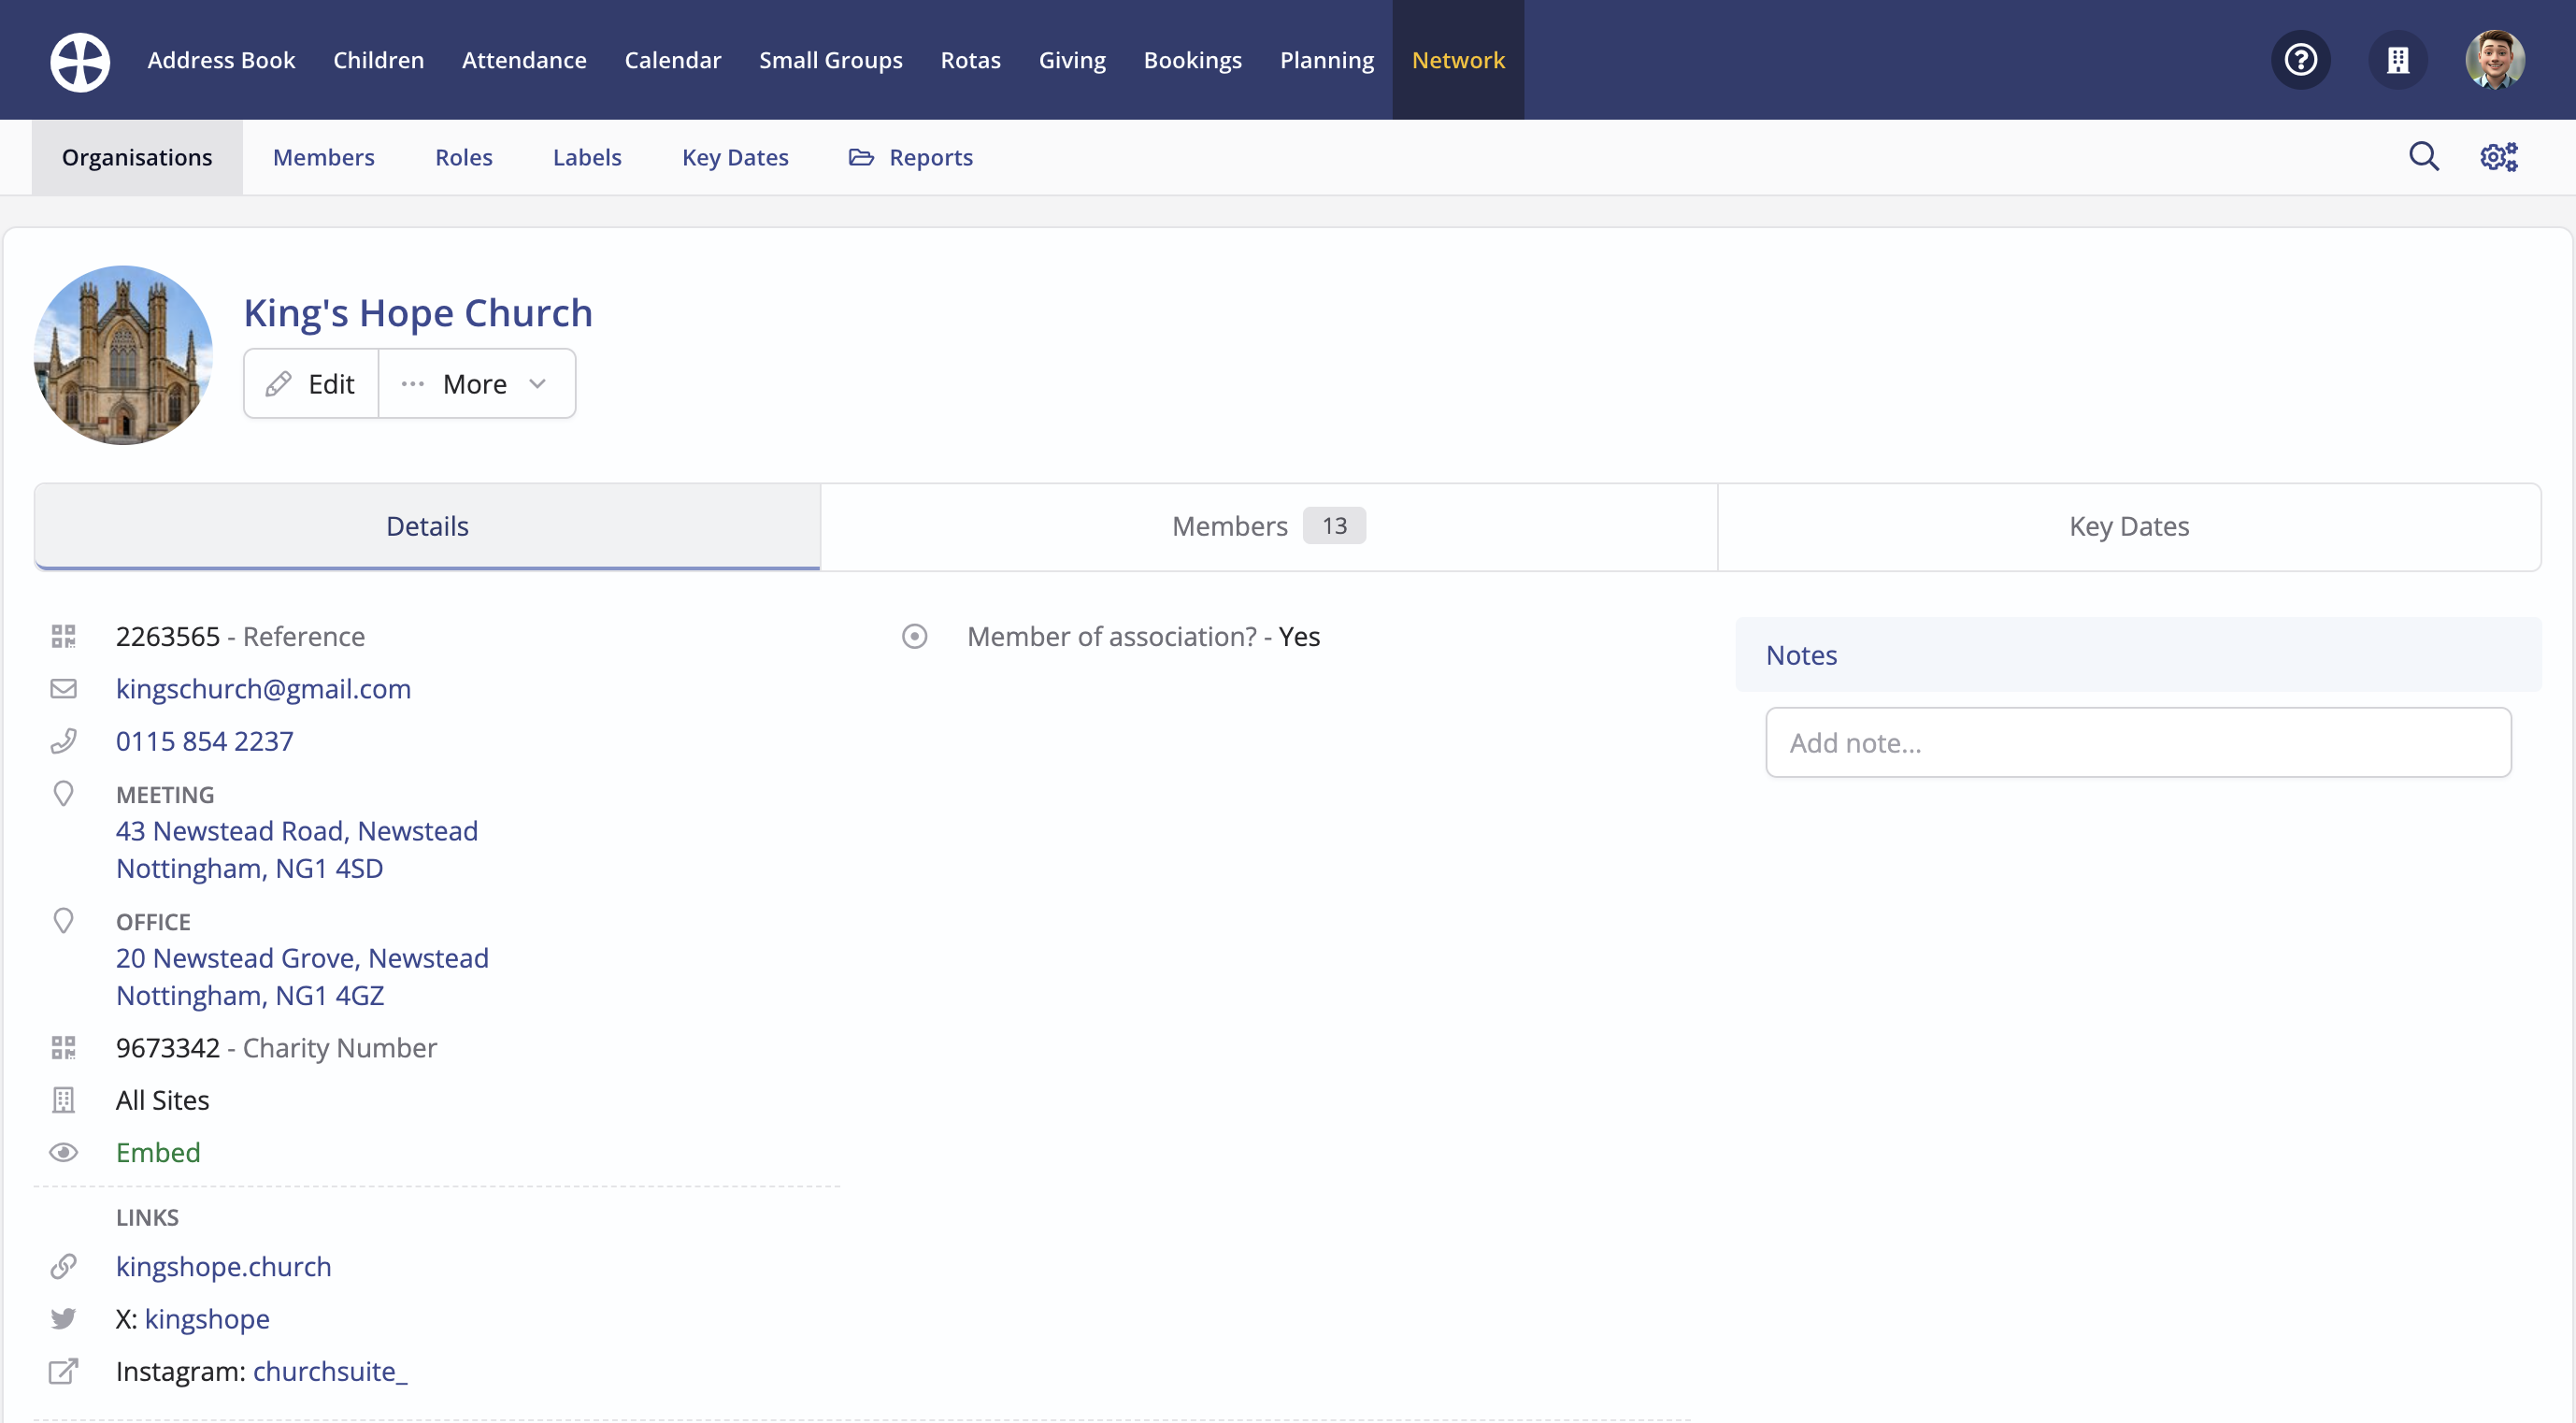
Overview of the organisation profile page
The organisation profile page is divided into tabs - Details, Members, Key Dates and Metrics (if enabled in the module settings). The Details tab shows all the information previously added about the organisation. Labels are displayed as coloured pills. Note the options to add and maintain organisation Notes. Notice the action to Edit the organisation detail with More actions to Duplicate, Archive or Delete an organisation, or to View changes made to the organisation's details over time. While deleting an organisation is permanent and deletes all associated organisation data, archived organisations can later be set as active again if necessary. Duplicating an organisation will duplicate all the main details but does not duplicate the member's list or key dates. See the related support articles for further information on Adding members to organisations, Managing organisation key dates and Collecting organisation metrics.
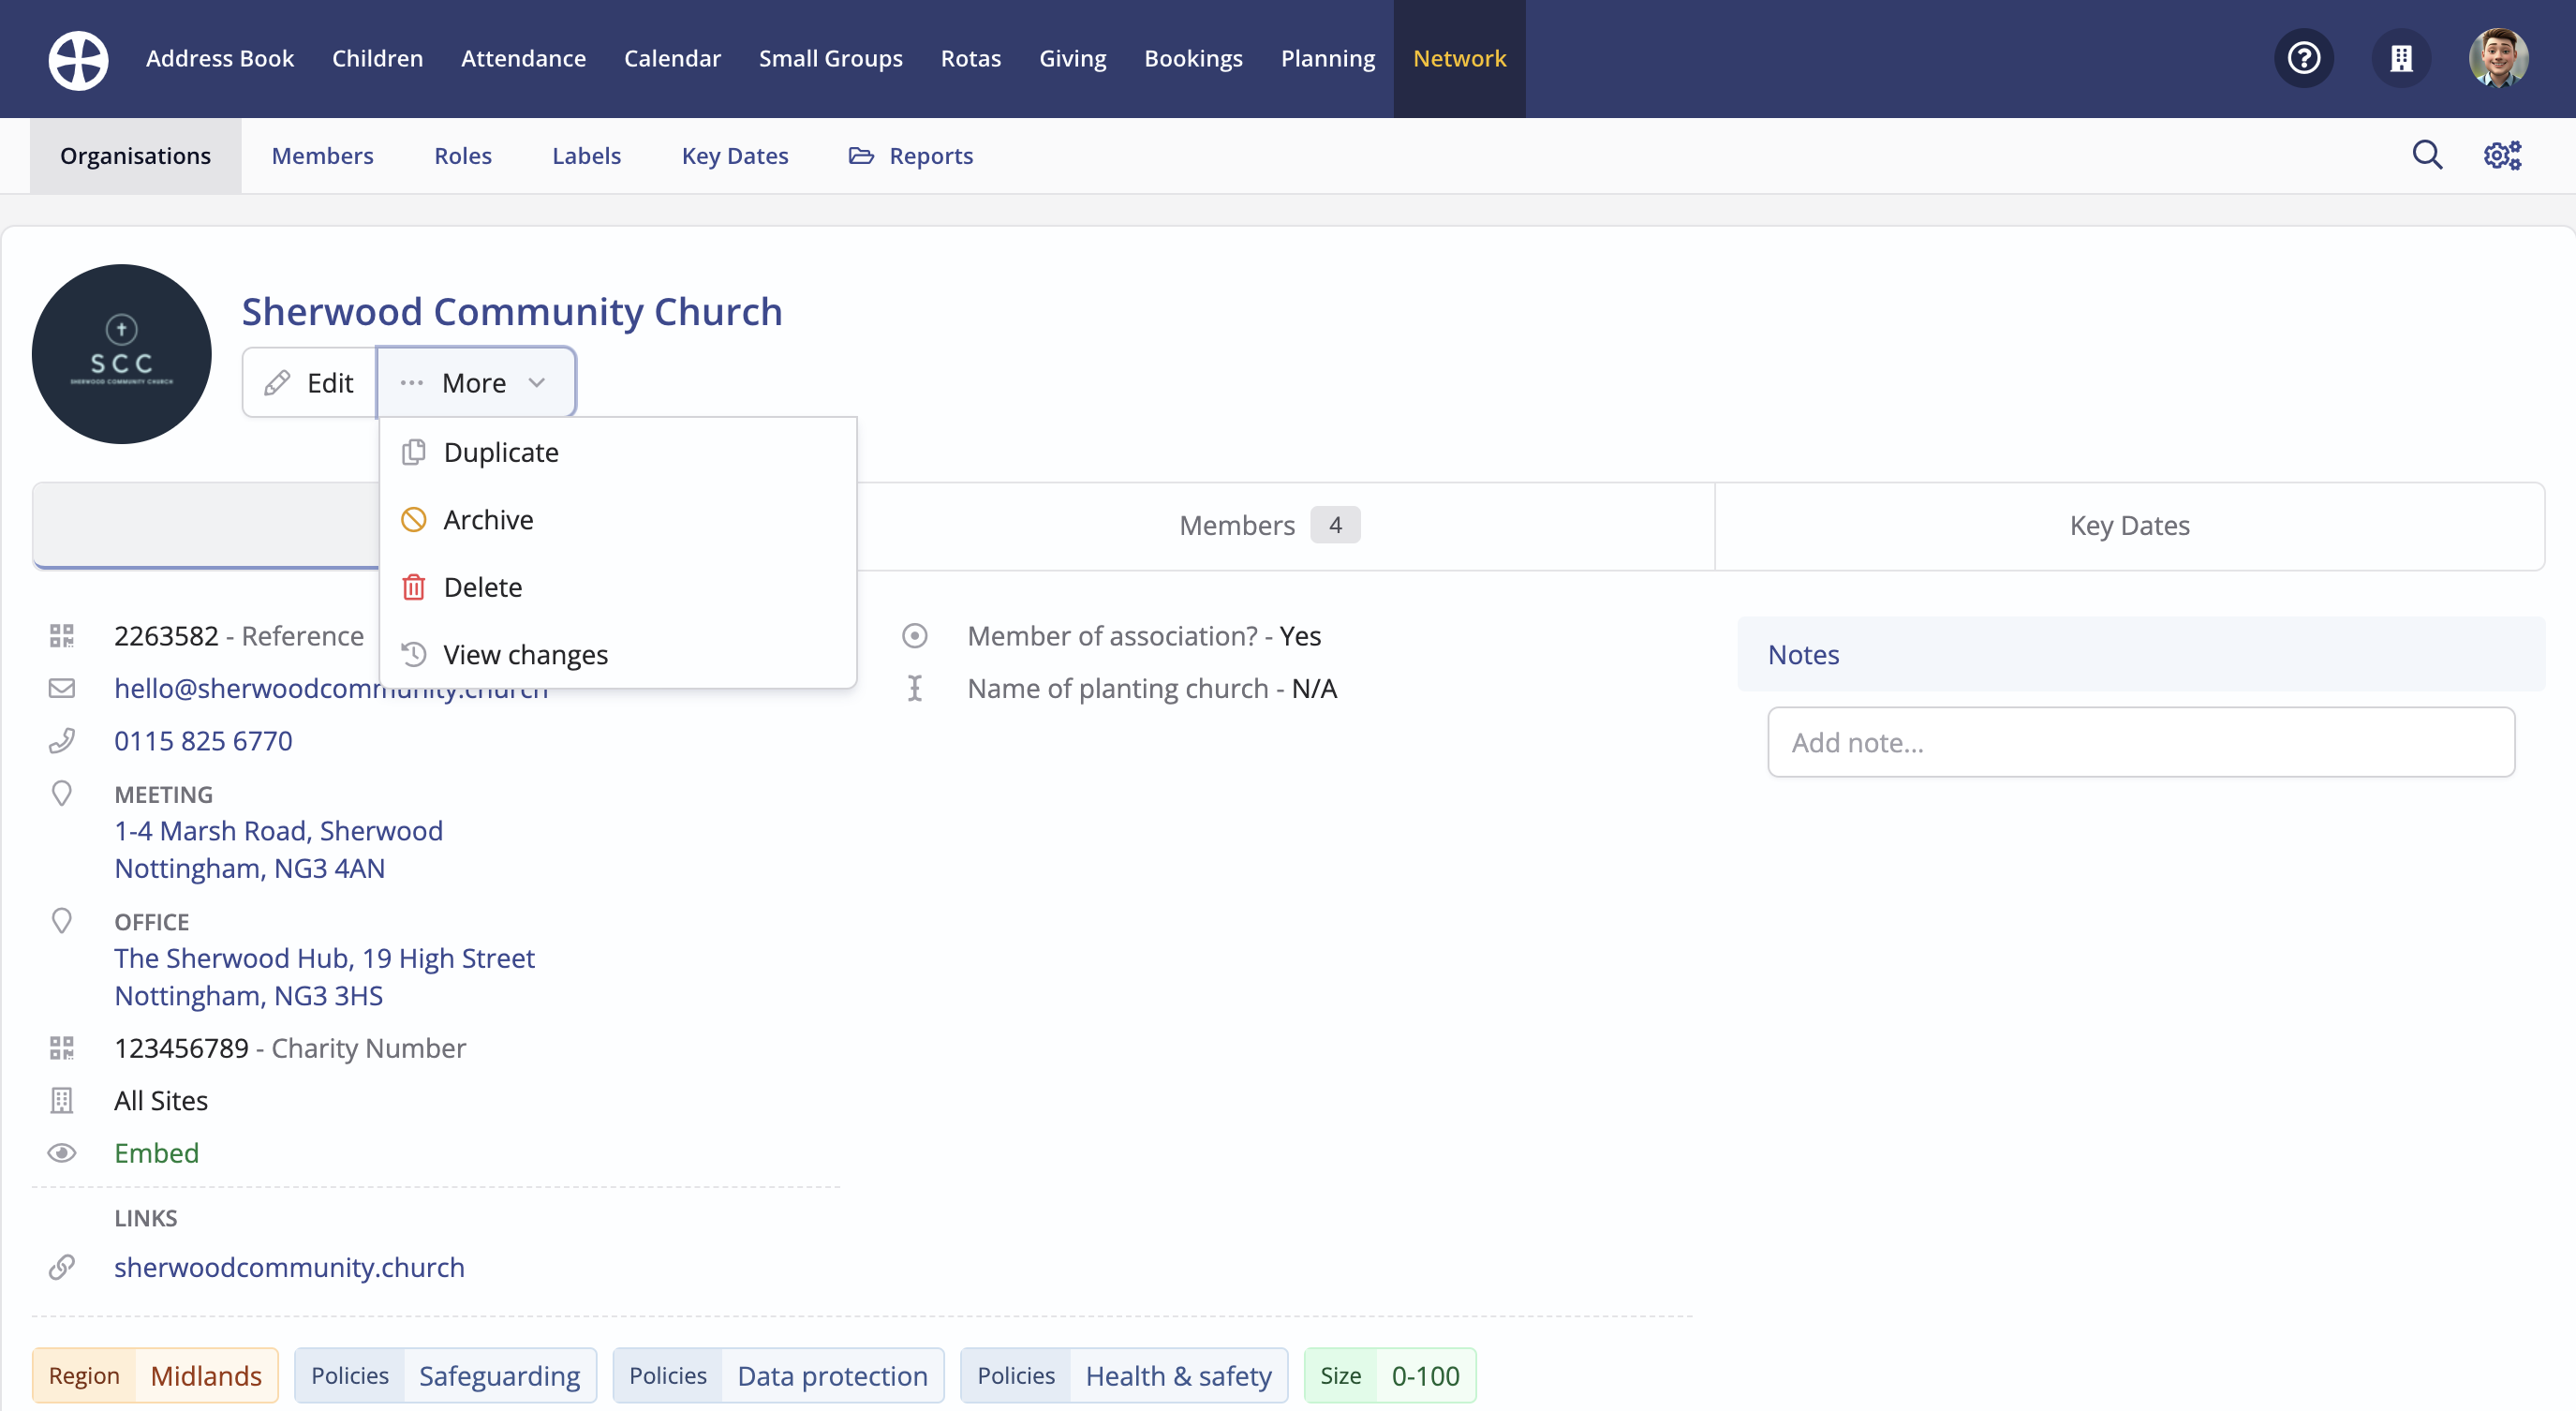
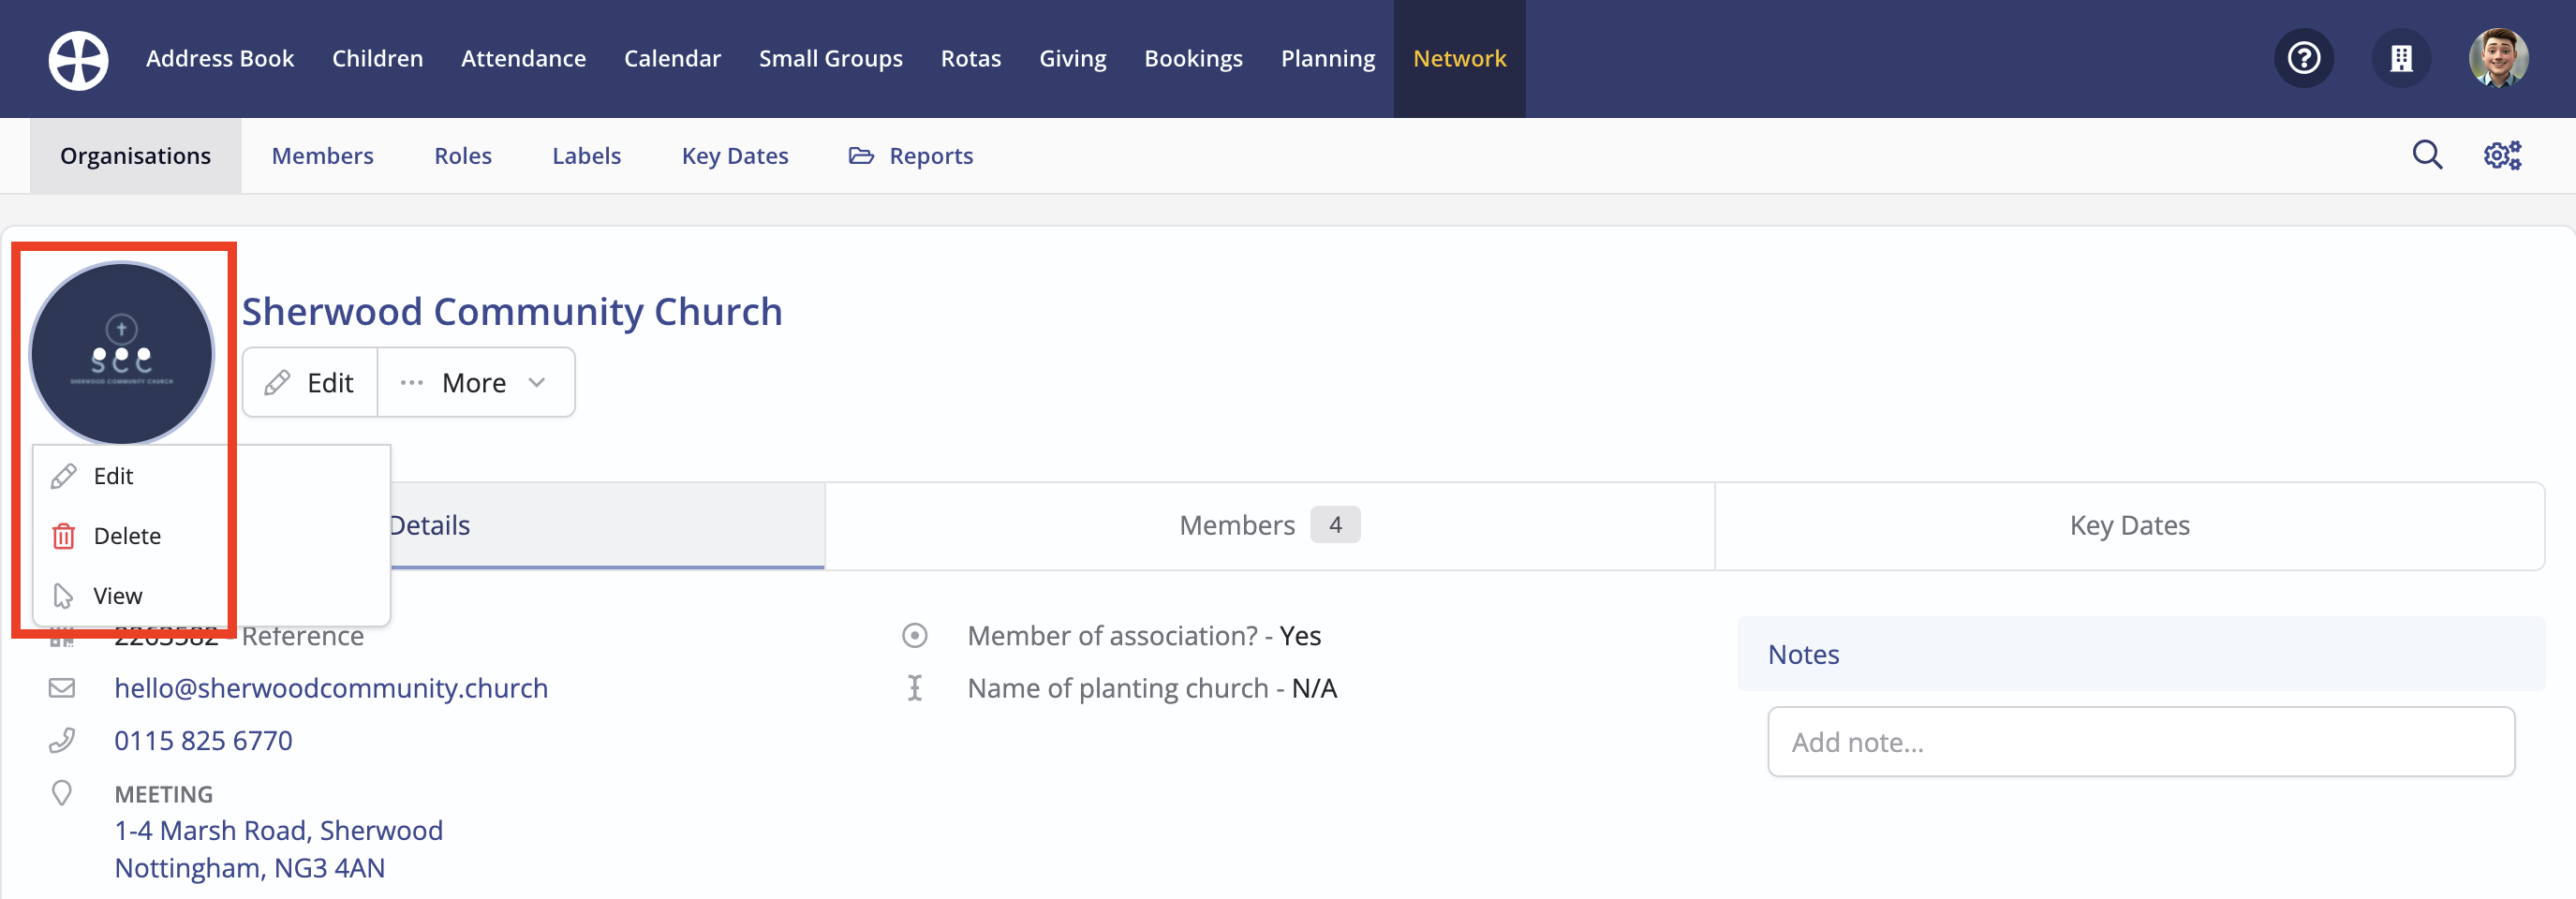
You can optionally upload an organisation Image. Click the image avatar and select Edit. The Upload image pop-up opens enabling you to search and select an image to upload. You can also drag and drop a suitably-prepared image into the pop-up drop-zone.
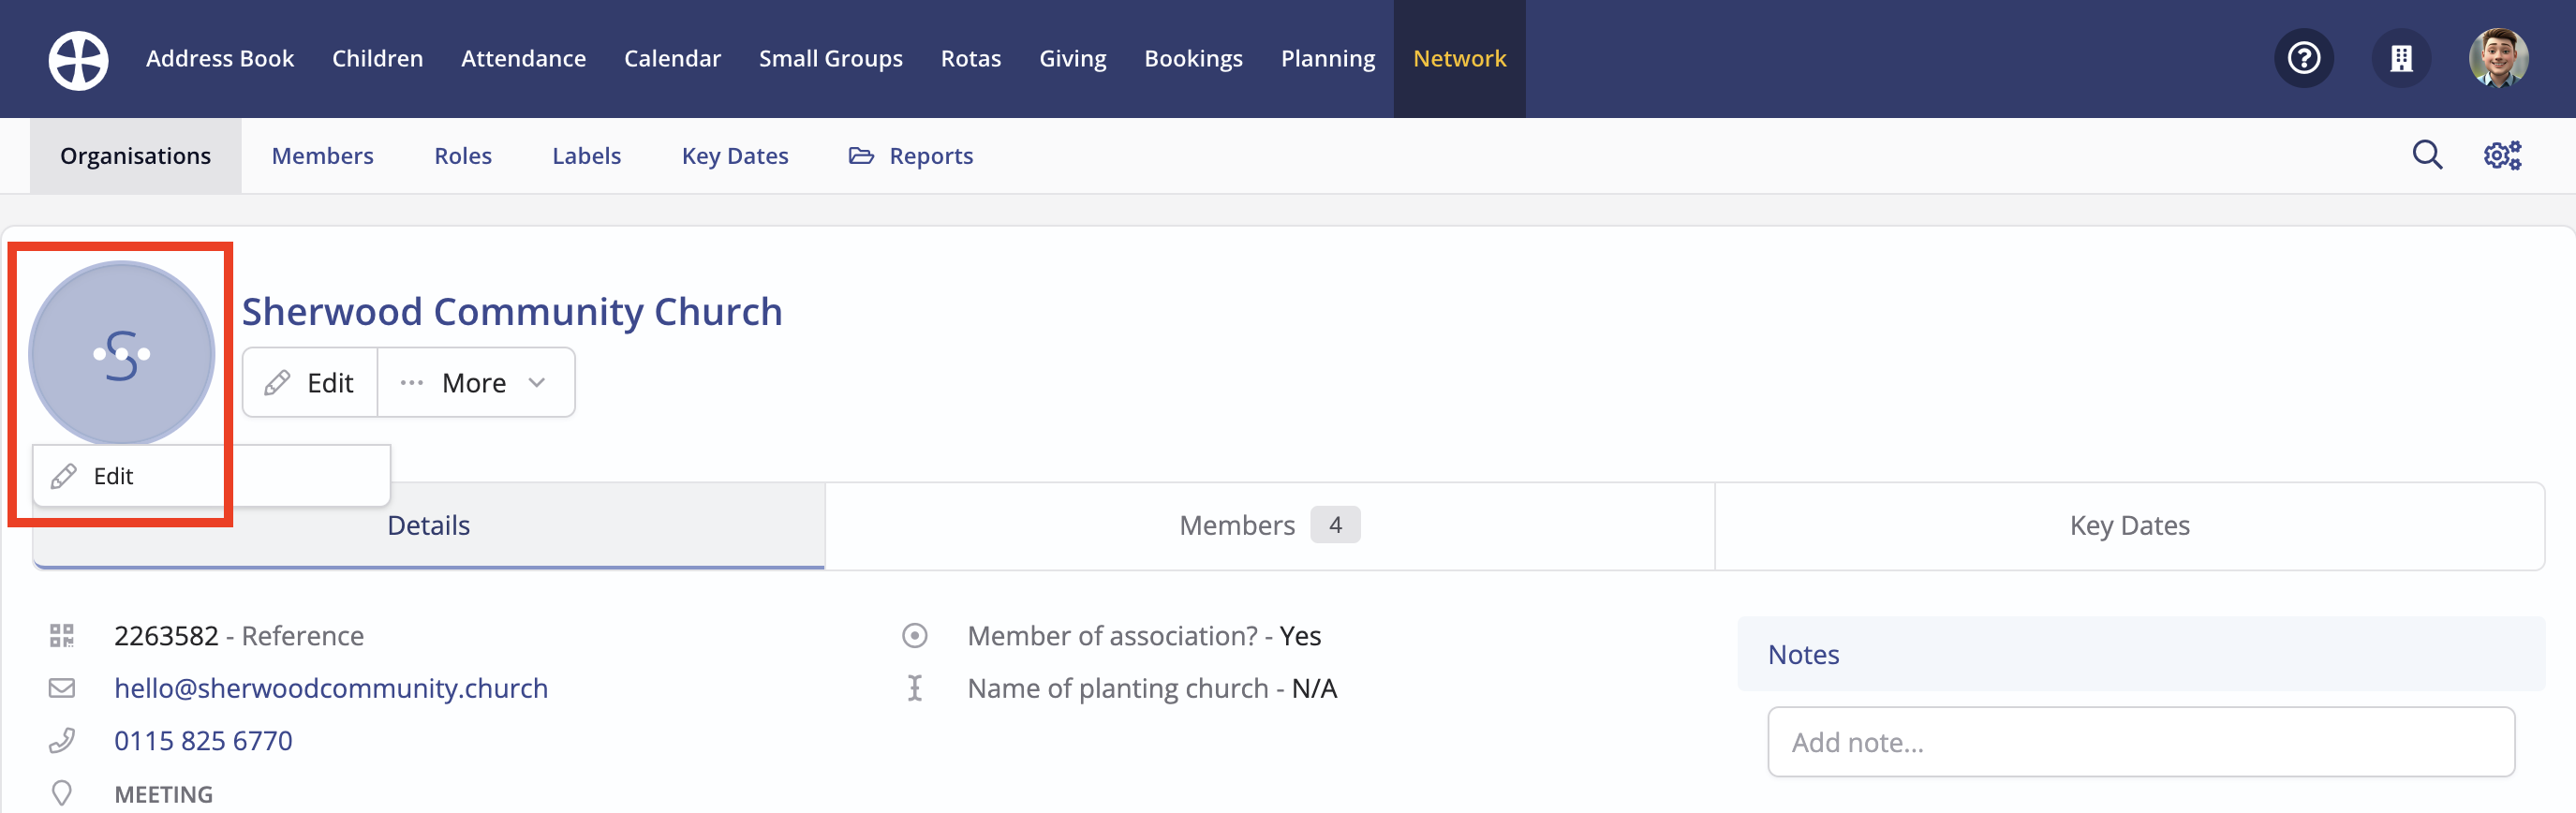
Once uploaded, the image is applied immediately. Note the options to then Edit, Delete or View the organisation image.
Returning to the Organisations section of the module, note the organisation Actions.

The Search bar and Filters can be used to find a particular organisation in a long list - the list filters as you type a Name or Reference in the search. You can also switch between viewing Active and Archived organisations.

Clicking the columns icon enables you to select which details appear on the Organisations page, including any custom fields you have created. For more information on adding custom fields for organisations, see our related support article.

Bulk Actions enable you to Edit, Archive or Delete multiple selected/filtered organisations or bulk assign a key date.
