Managing booking customers
In this article
Adding customers
Importing existing customers
Deleting a customer
Managing customer bookings and charges
Communicating with customers
You can manage all your booking contacts from the Customers section of the Bookings module. For those managing bookings for internal and external resource users, a customer profile can be linked to a contact In the Address Book or be unlinked as Not in the Address Book.
Adding customers
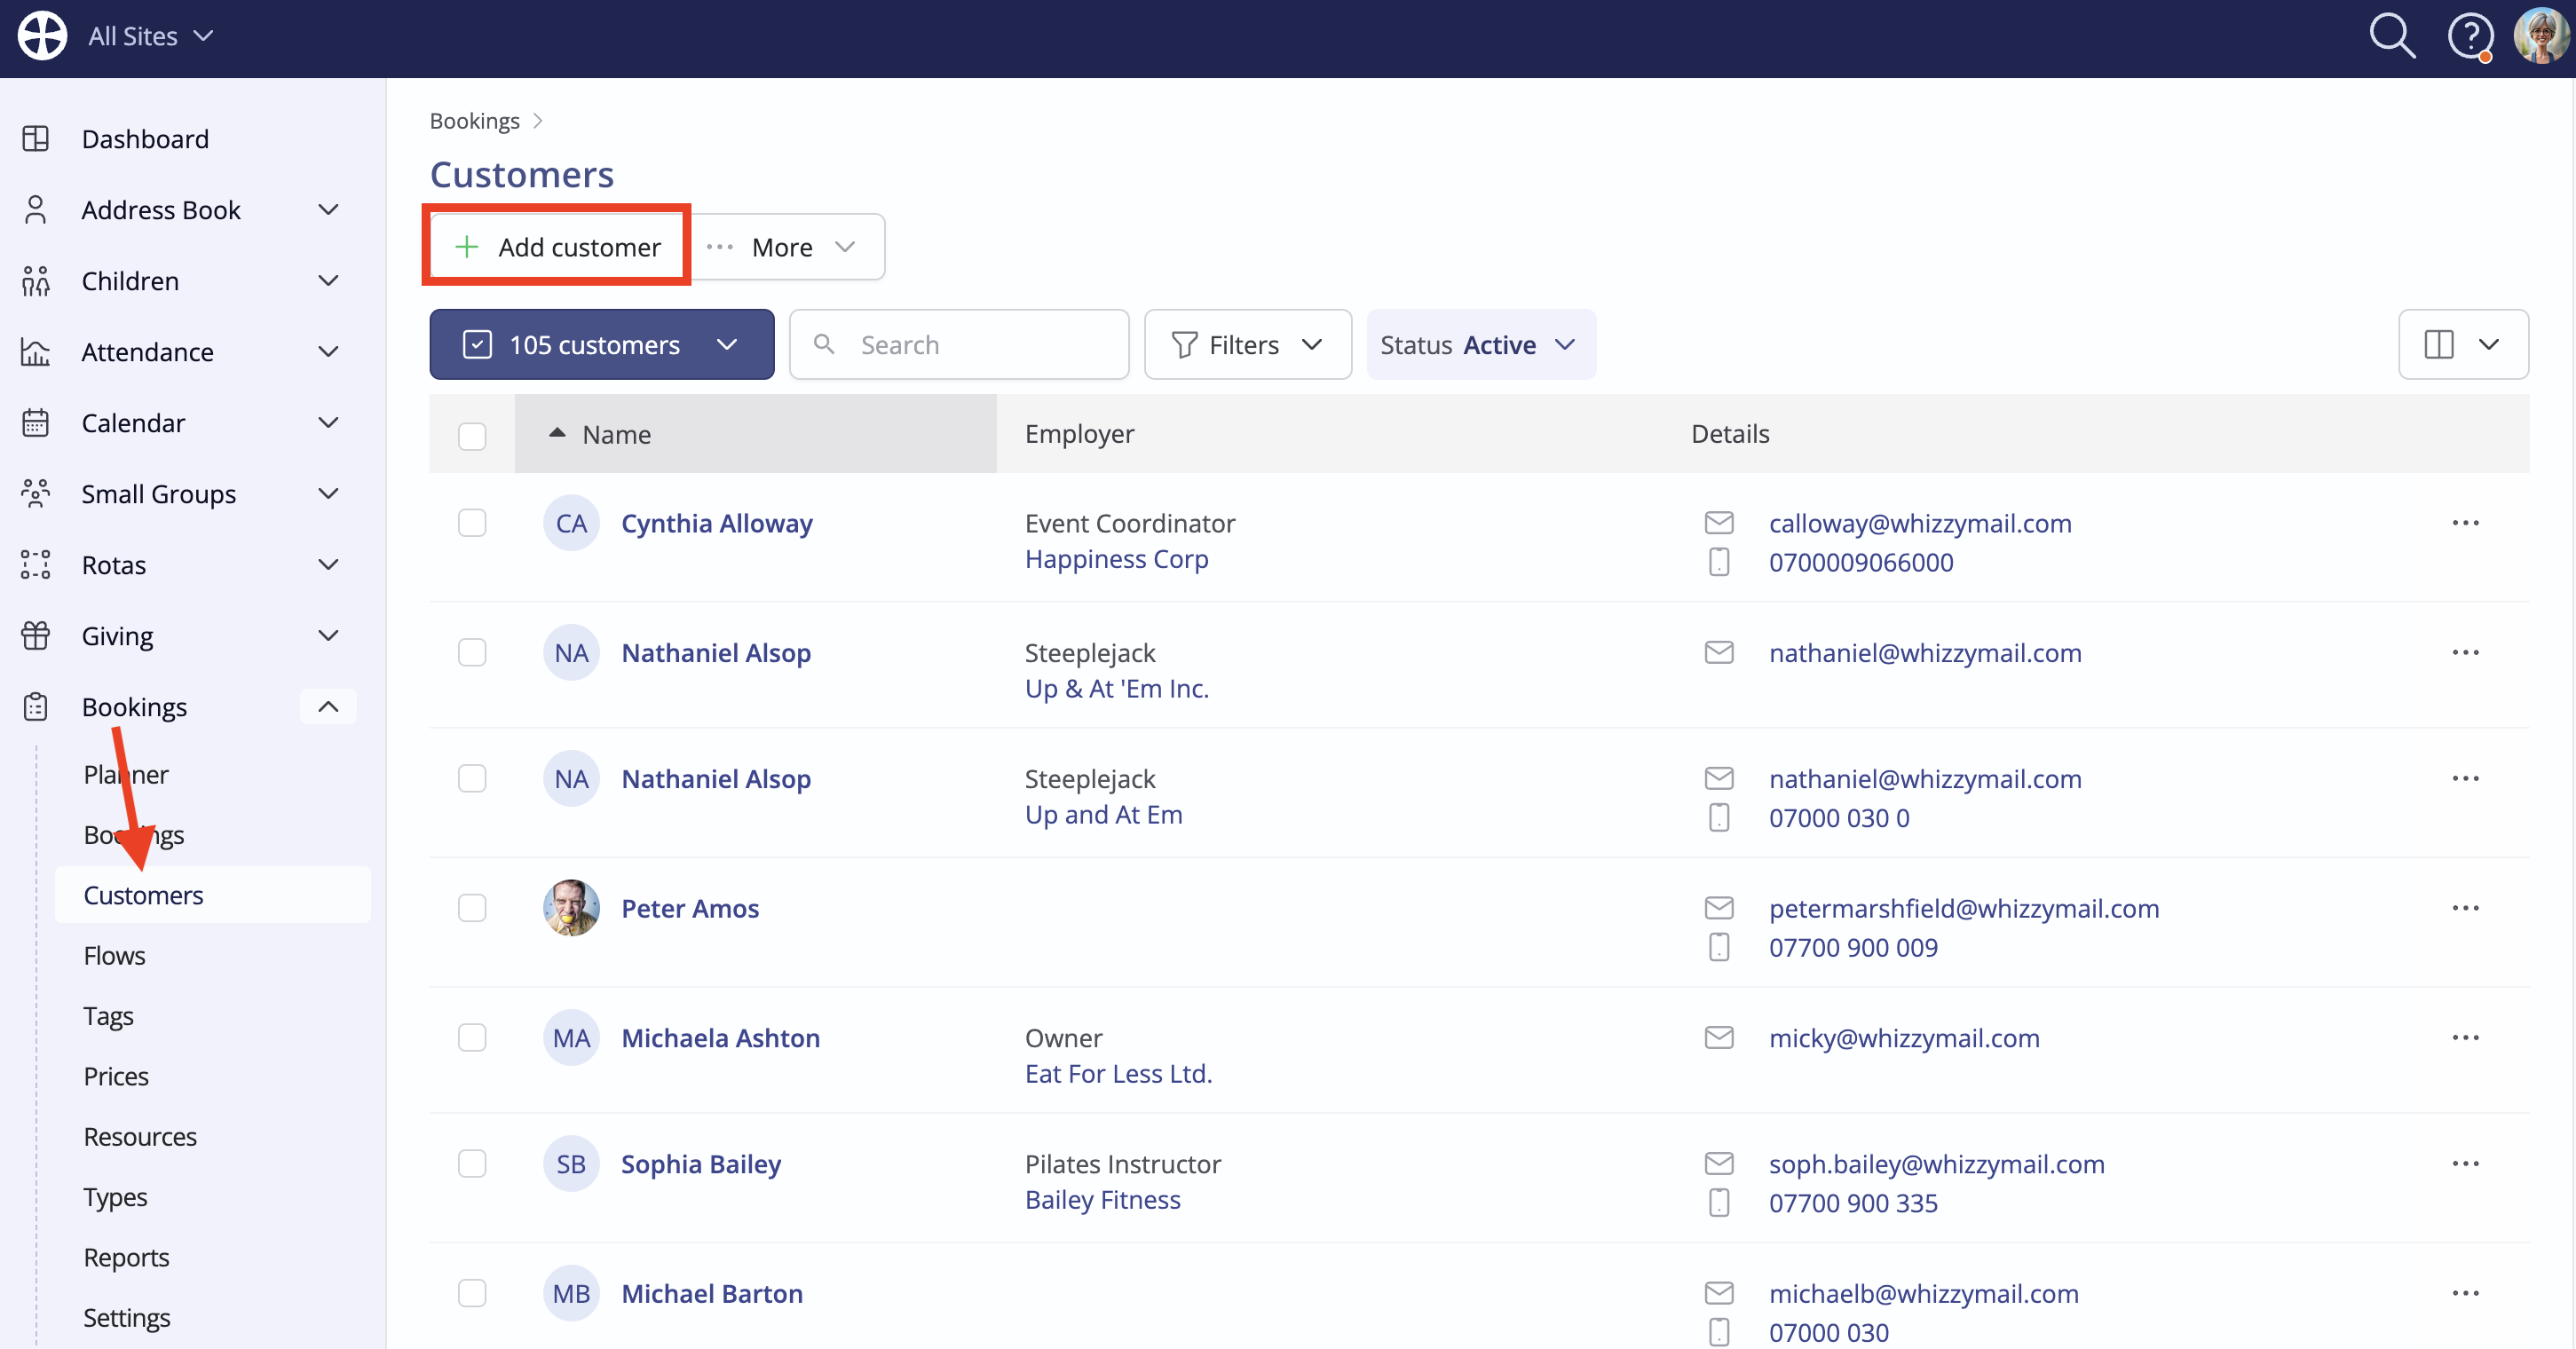
Navigate into the Customers section of the Bookings module and click Add customer.
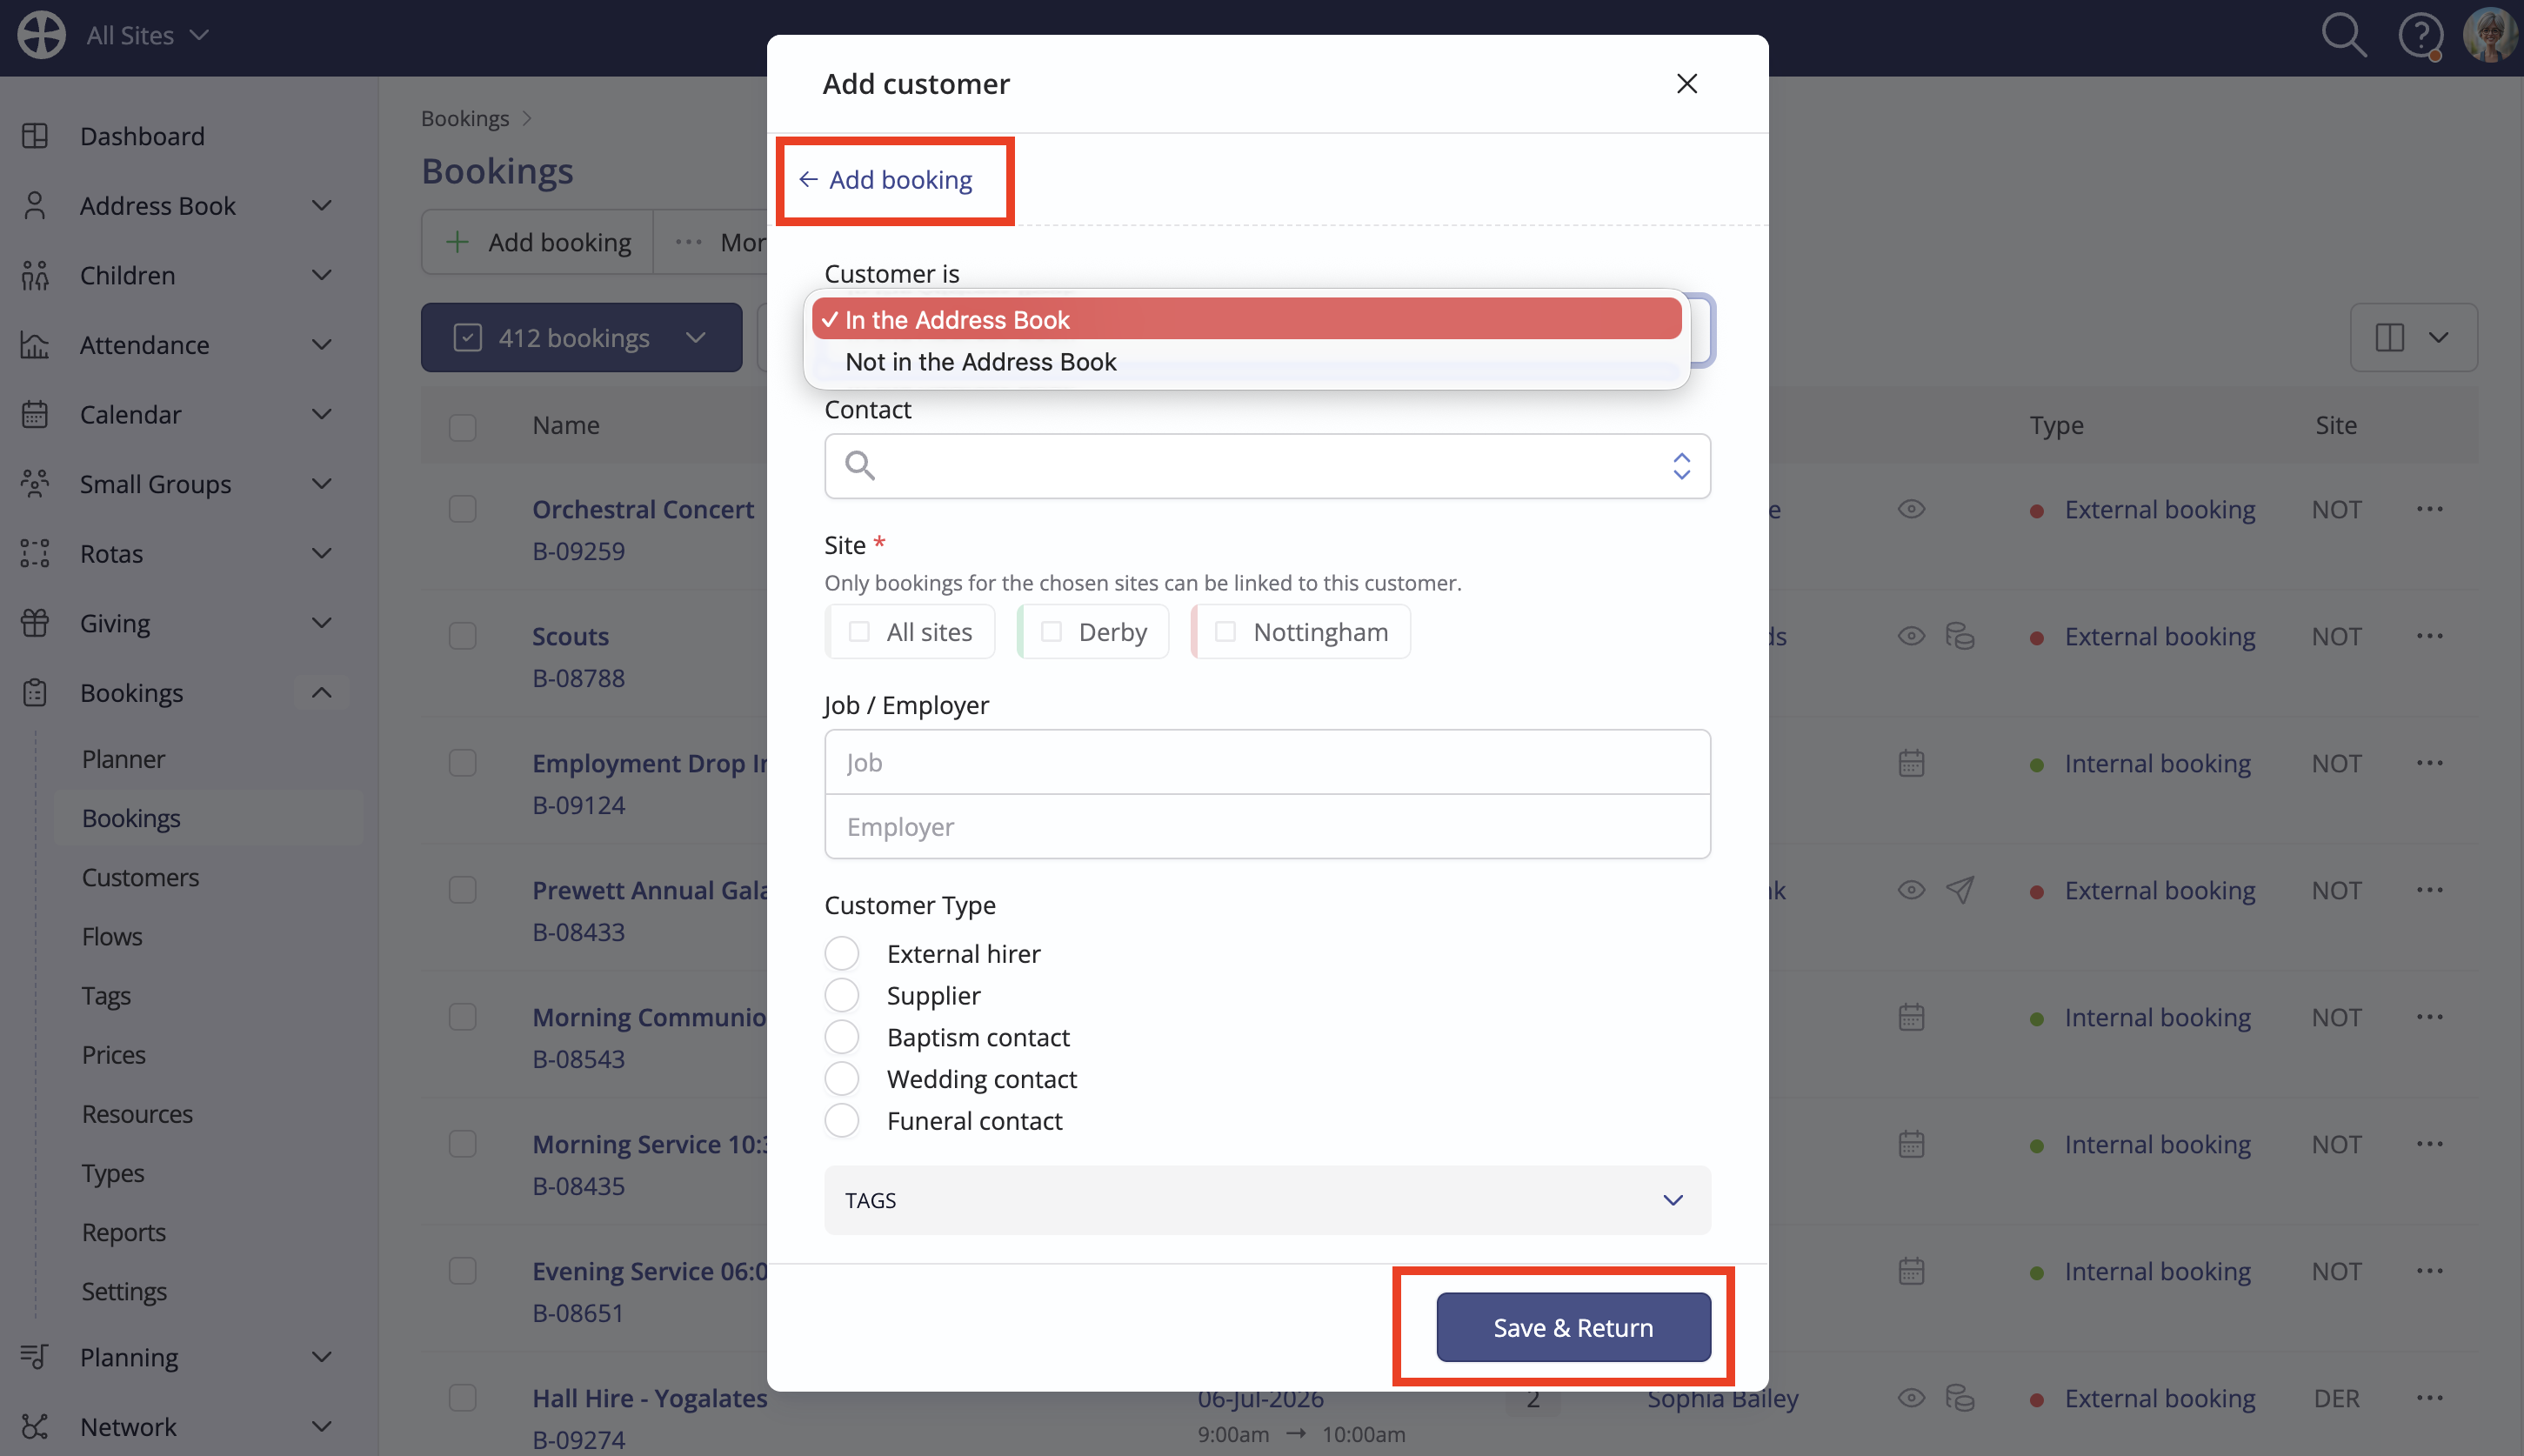
On the Add customer pop-up, begin by selecting whether the customer being added is In the Address Book or Not in the Address Book.
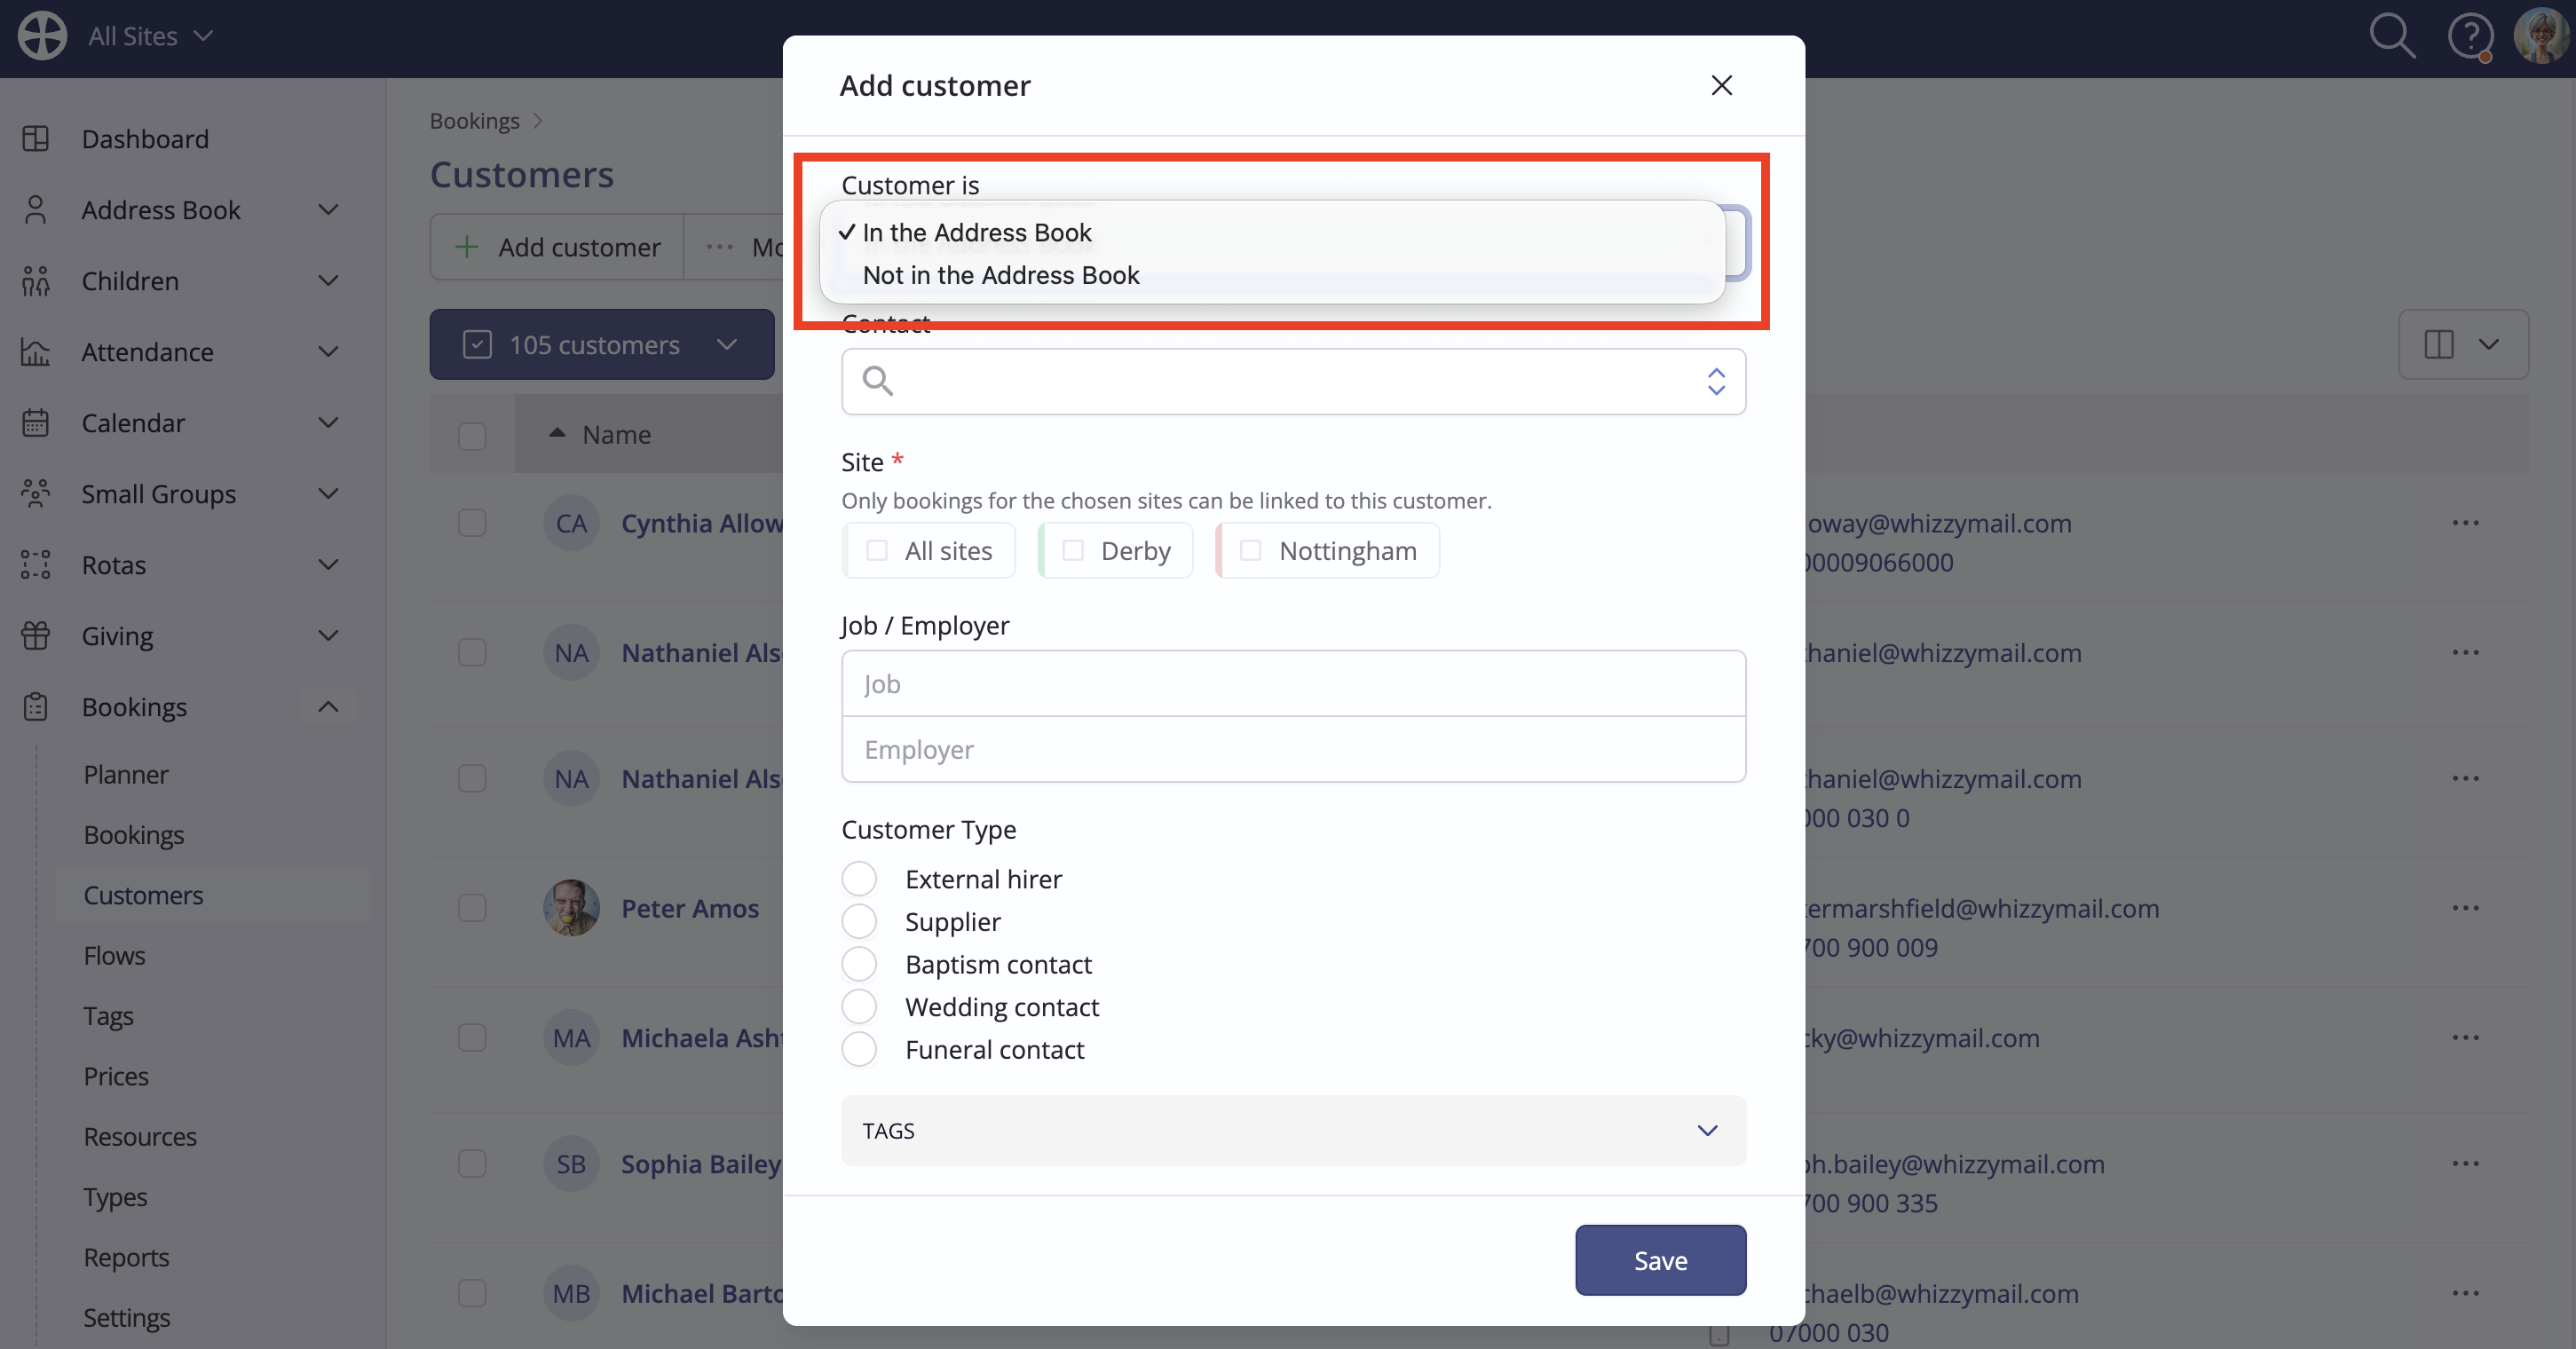
For a new customer In the Address Book, use the contact search to find the Address Book contact and optionally add the other contact customer details.

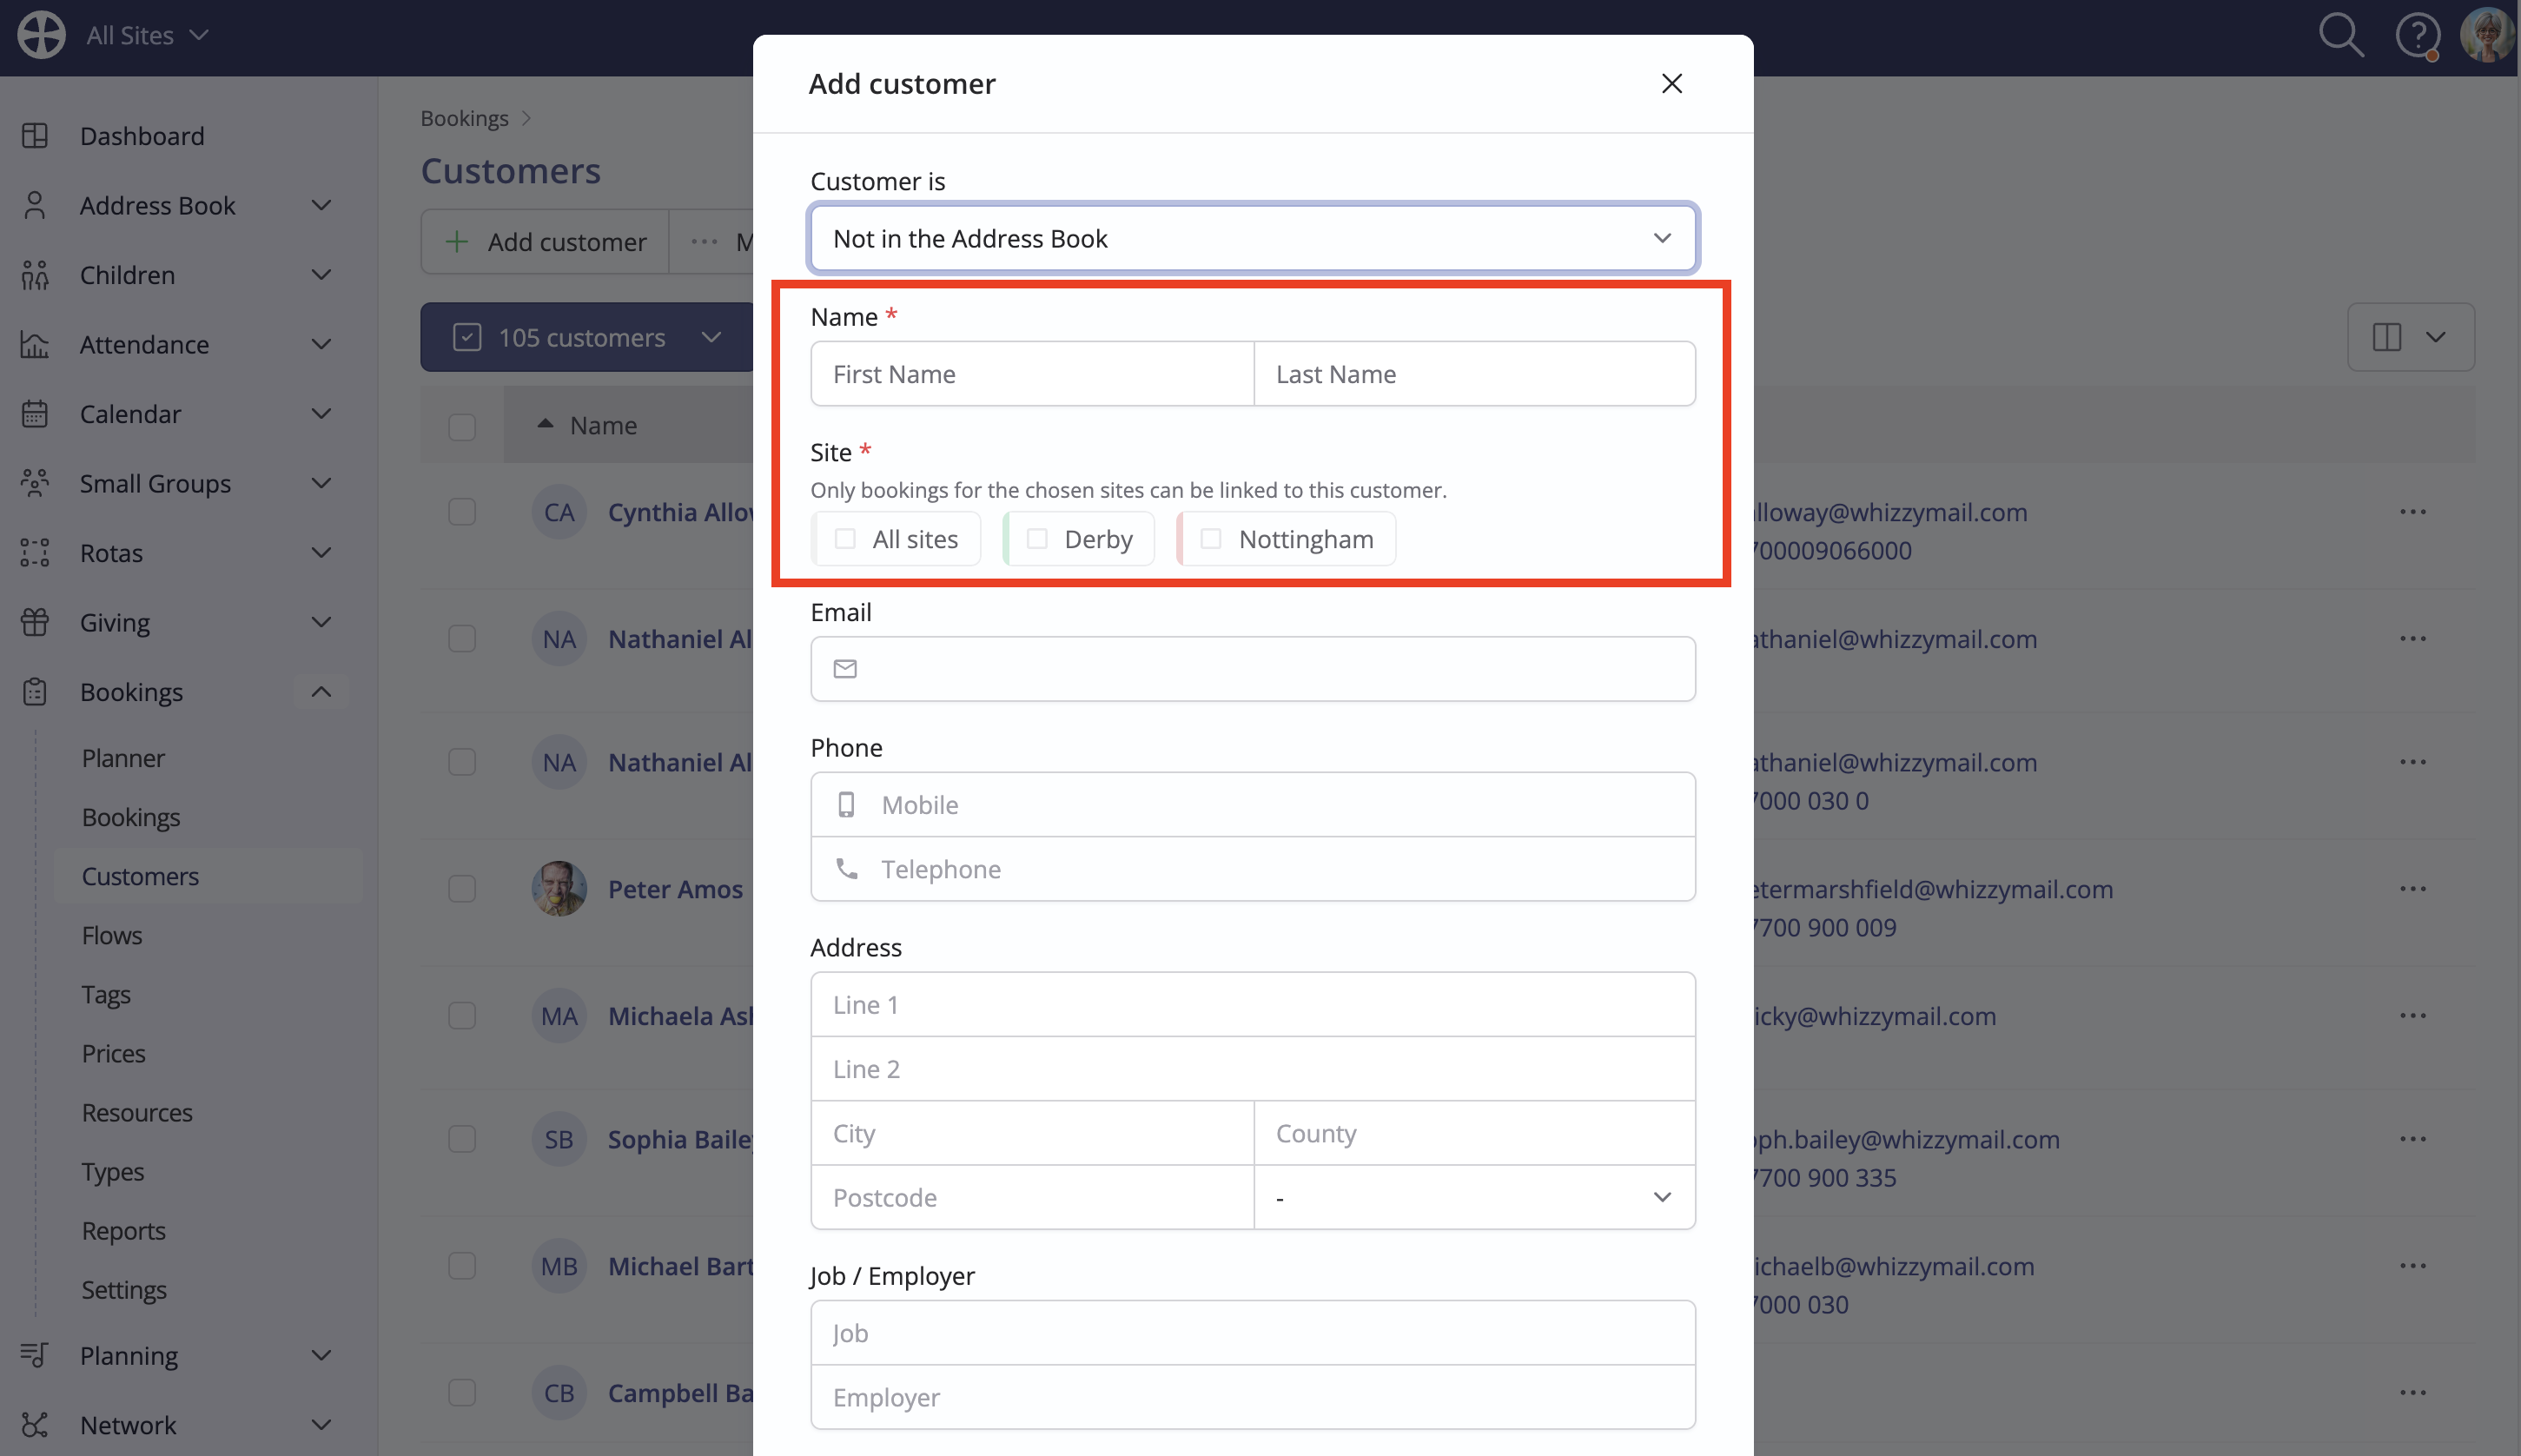
Or, for a new customer Not in the Address Book, complete the various customer detail fields. The customer Name and for those using multi-site, Site are required fields. Note that you can only link a customer who belongs to the same site as the booking.
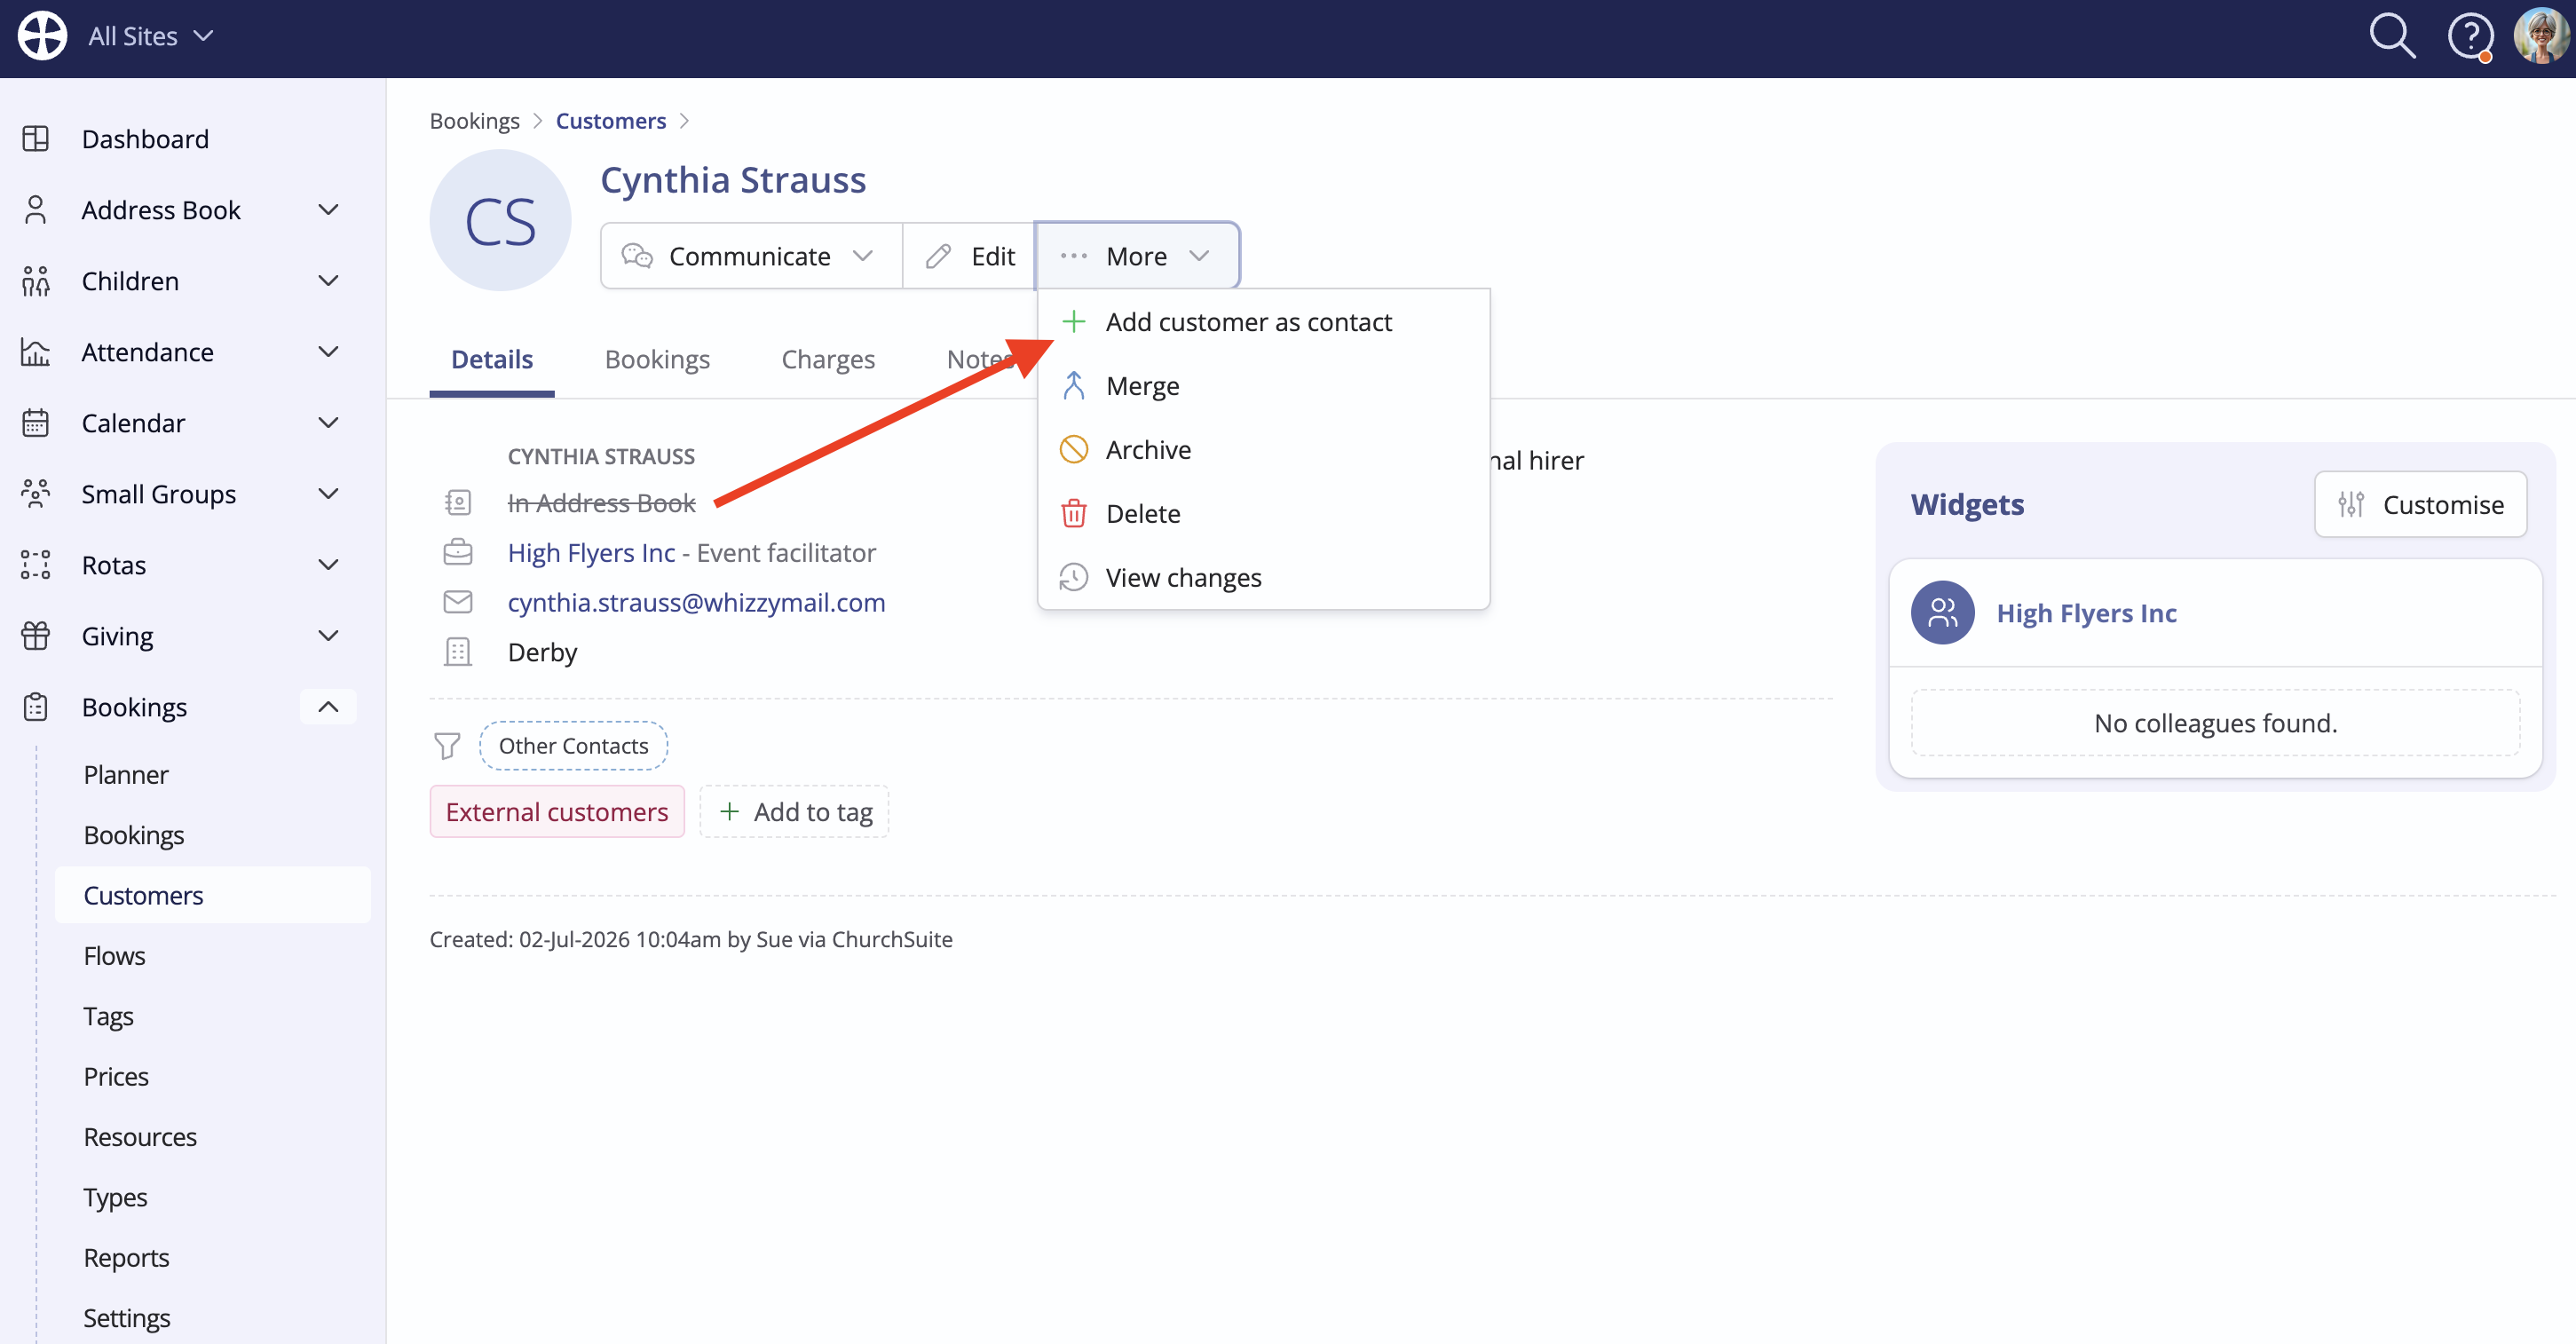
Saving a new customer takes you to the customer View, showing all the details you just entered. The customer profile has four tabs showing the customer's Details, Bookings, Charges and Engagement. See later in this article for further details about the Bookings tab and the related support article about Booking charges. For customers Not in the Address Book, note the option to Add customer as contact, which can be used where you wish to add a customer to your Address Book while preserving all their linked booking history.
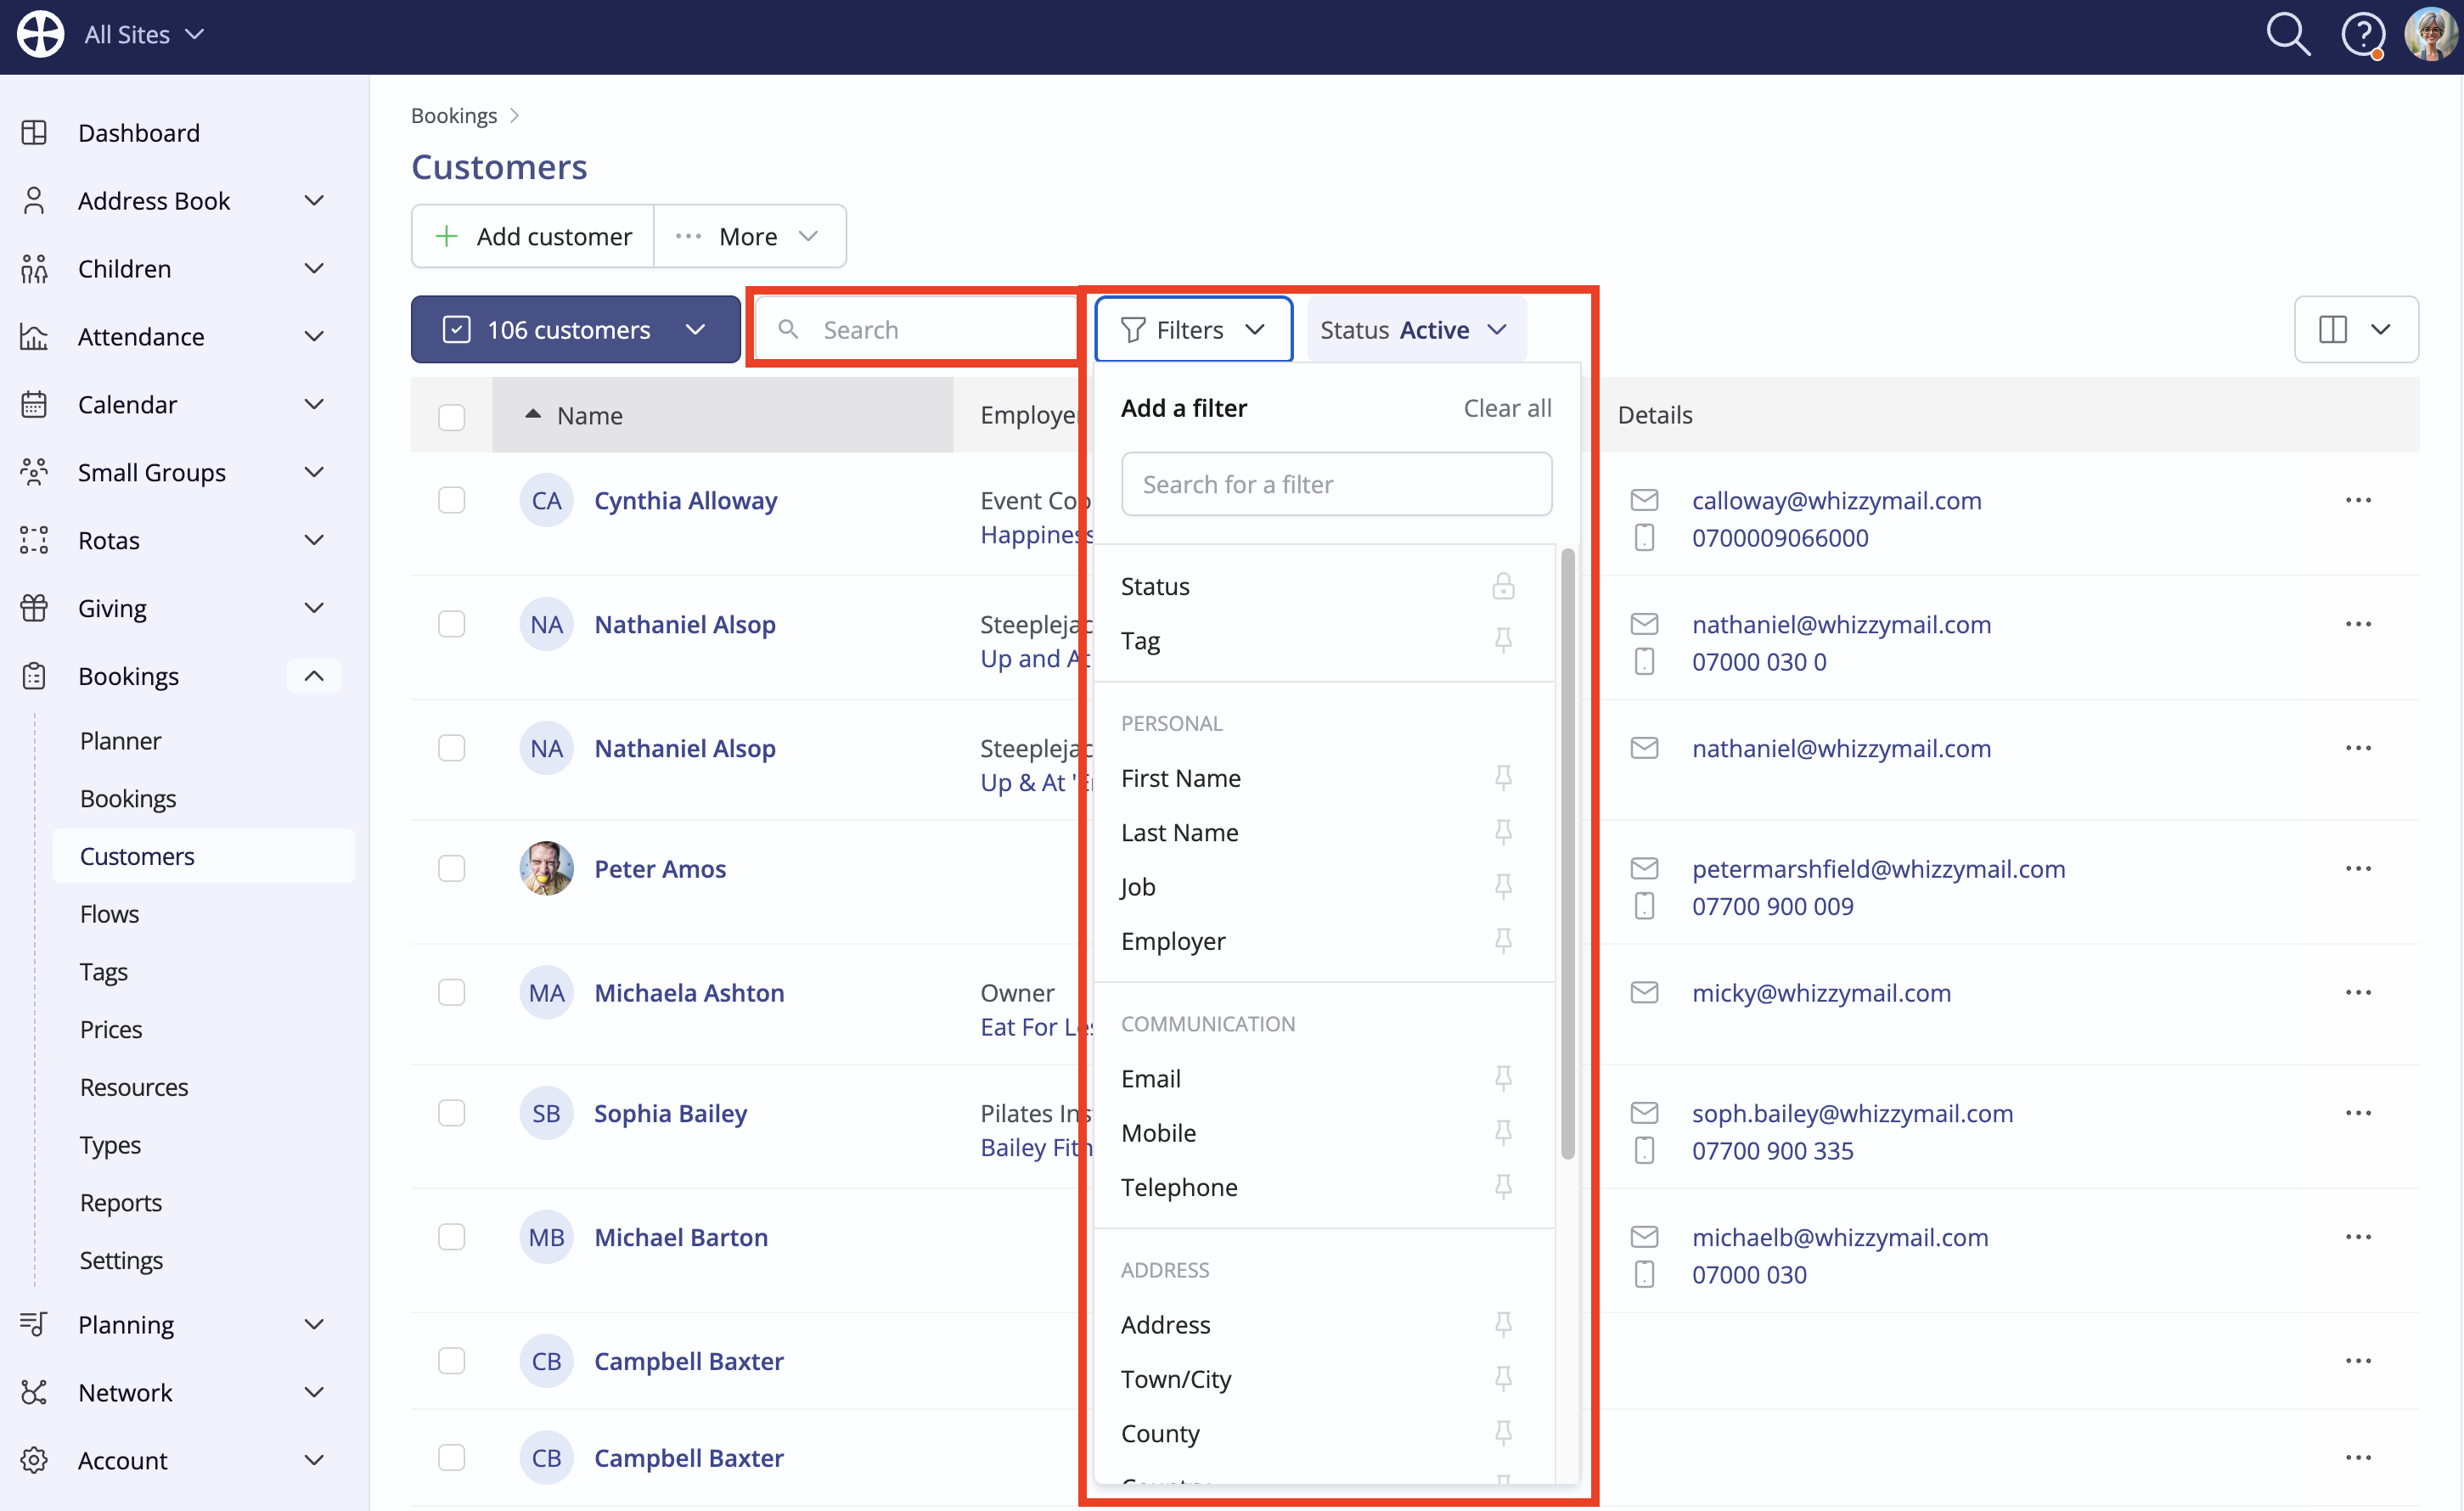
Returning to your list of Customers, you can easily switch between viewing Active or Archived customers (archived customers can be set as active again); use Search to locate a specific customer in a long list - the list of matching results filters as you type - or use the available Filters to locate a particular grouping of customers.
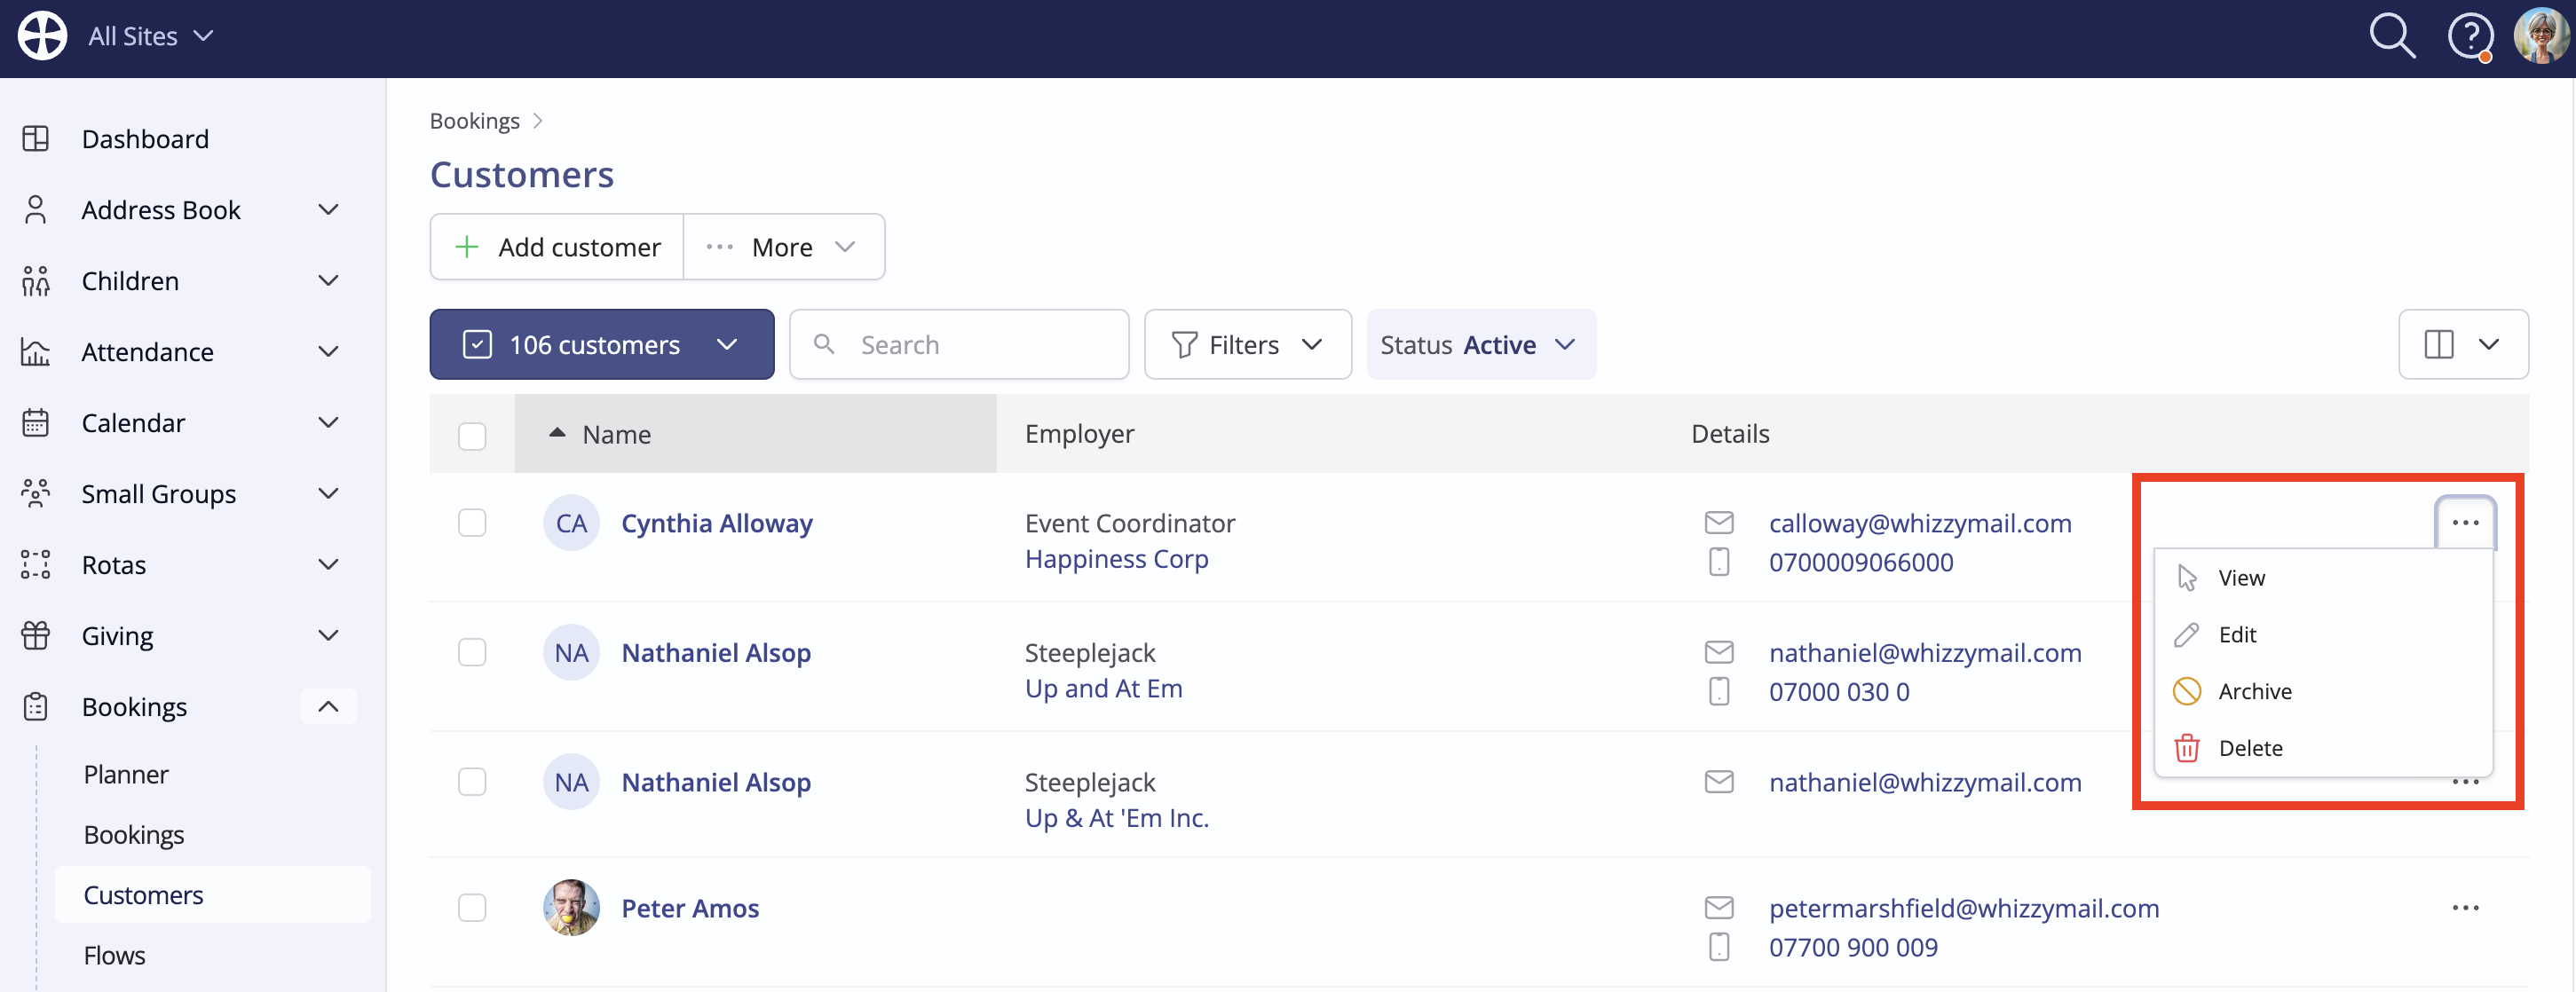
Customer Actions enable you to View, Edit, Archive or Delete a customer.
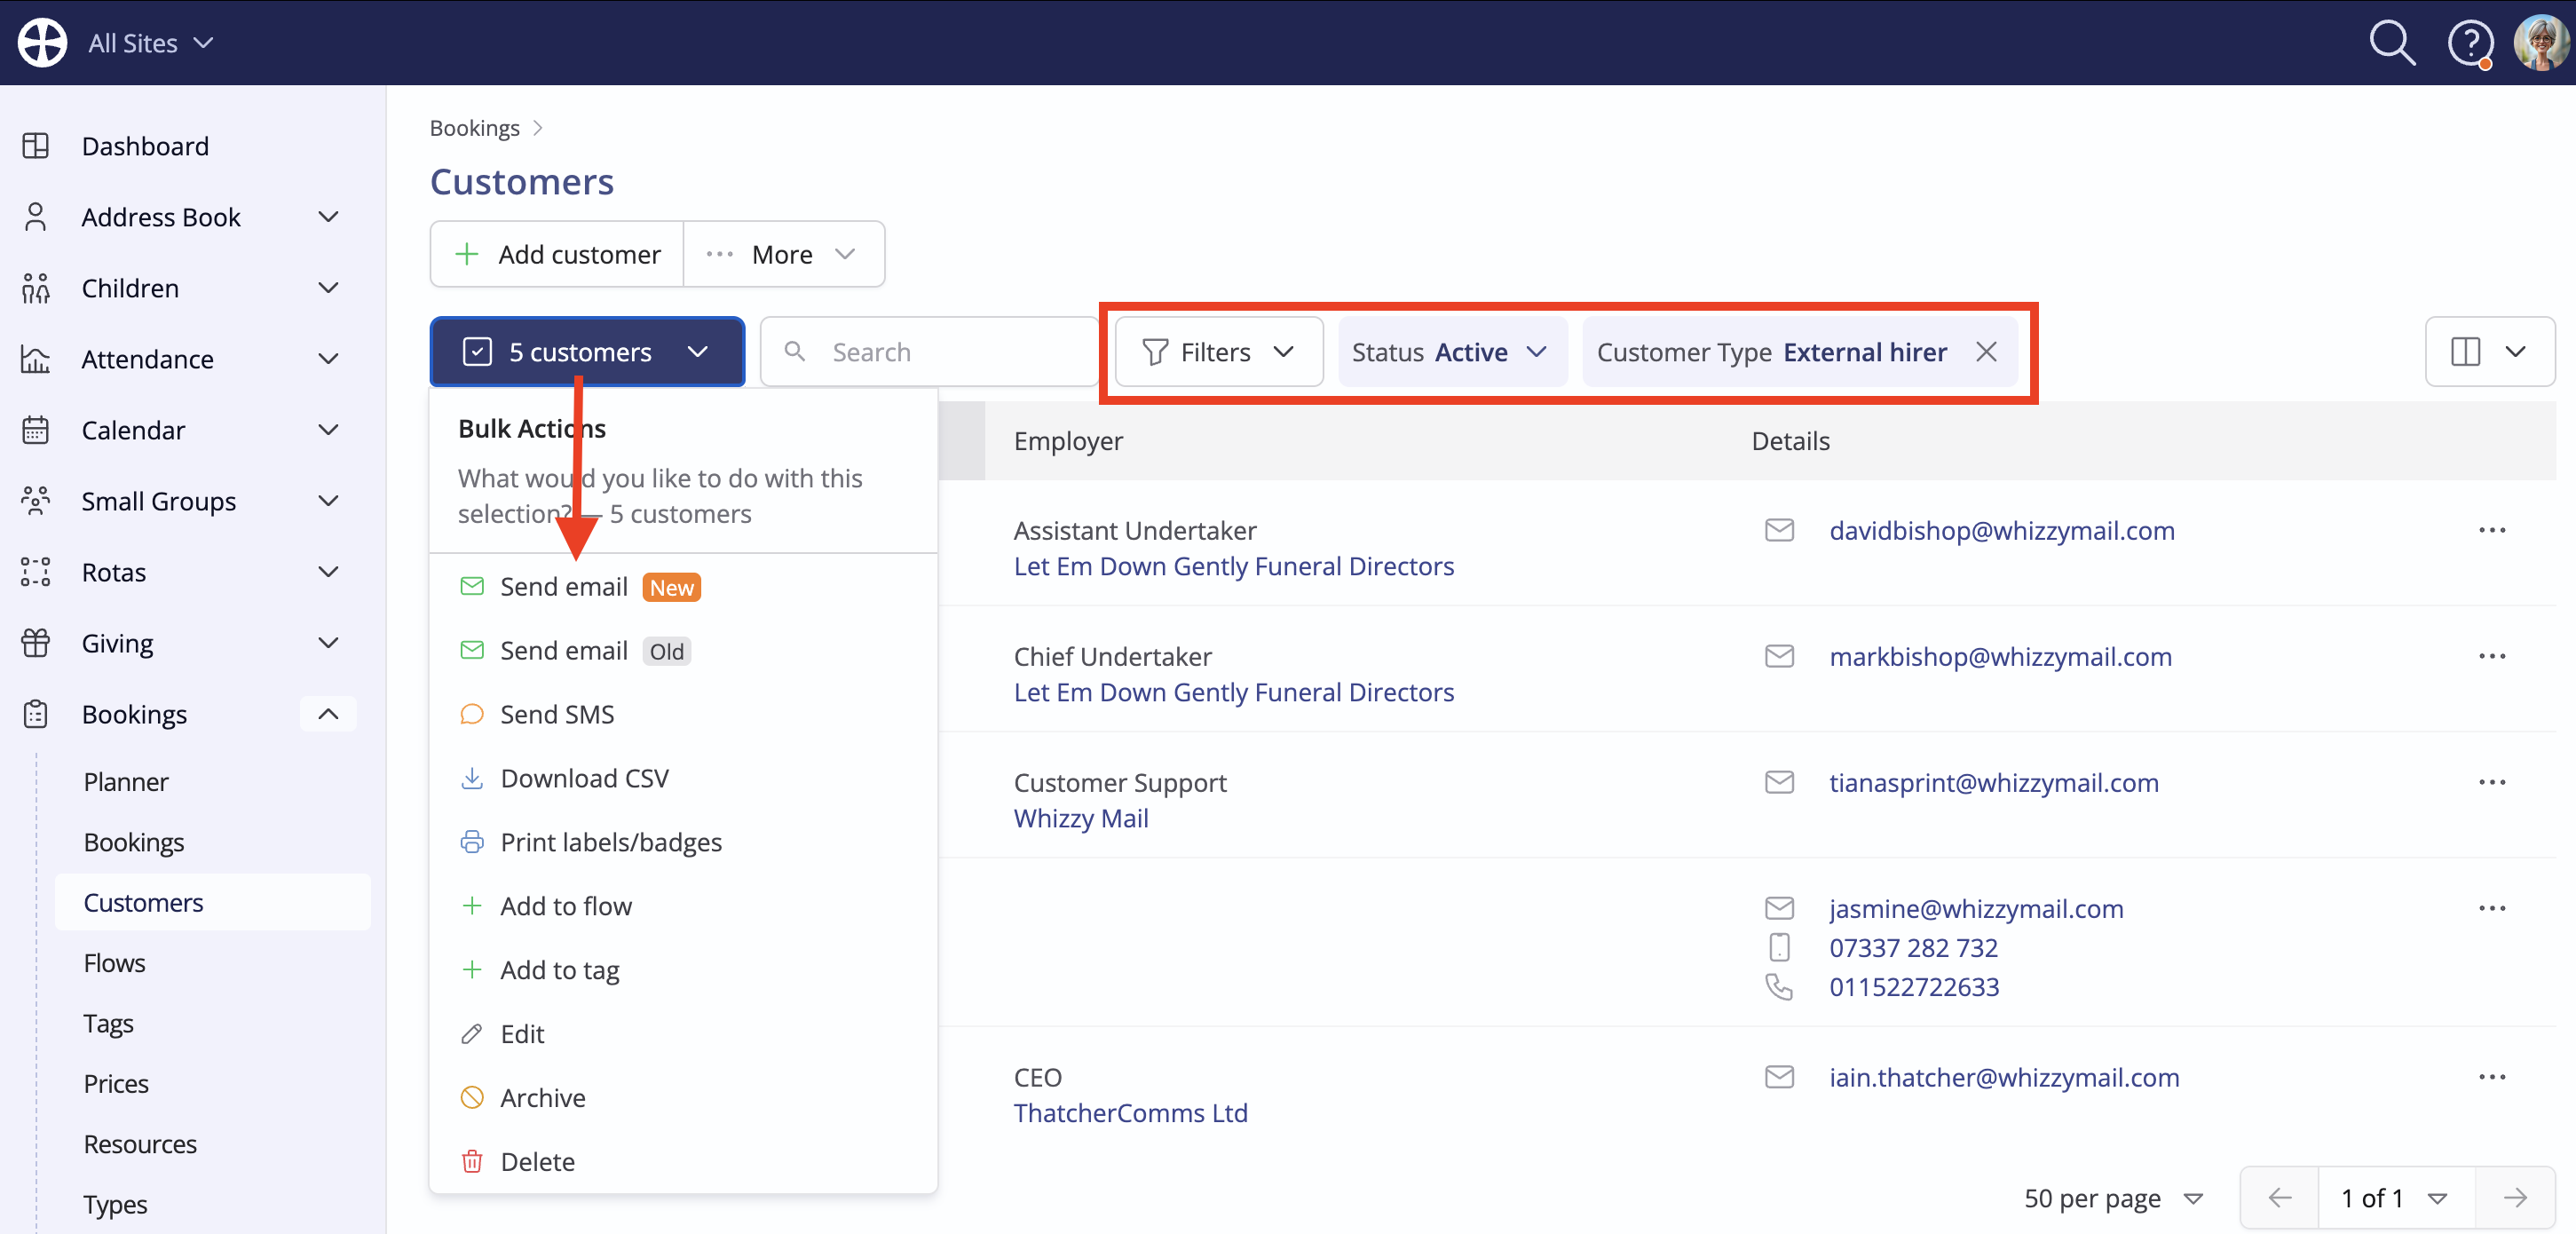
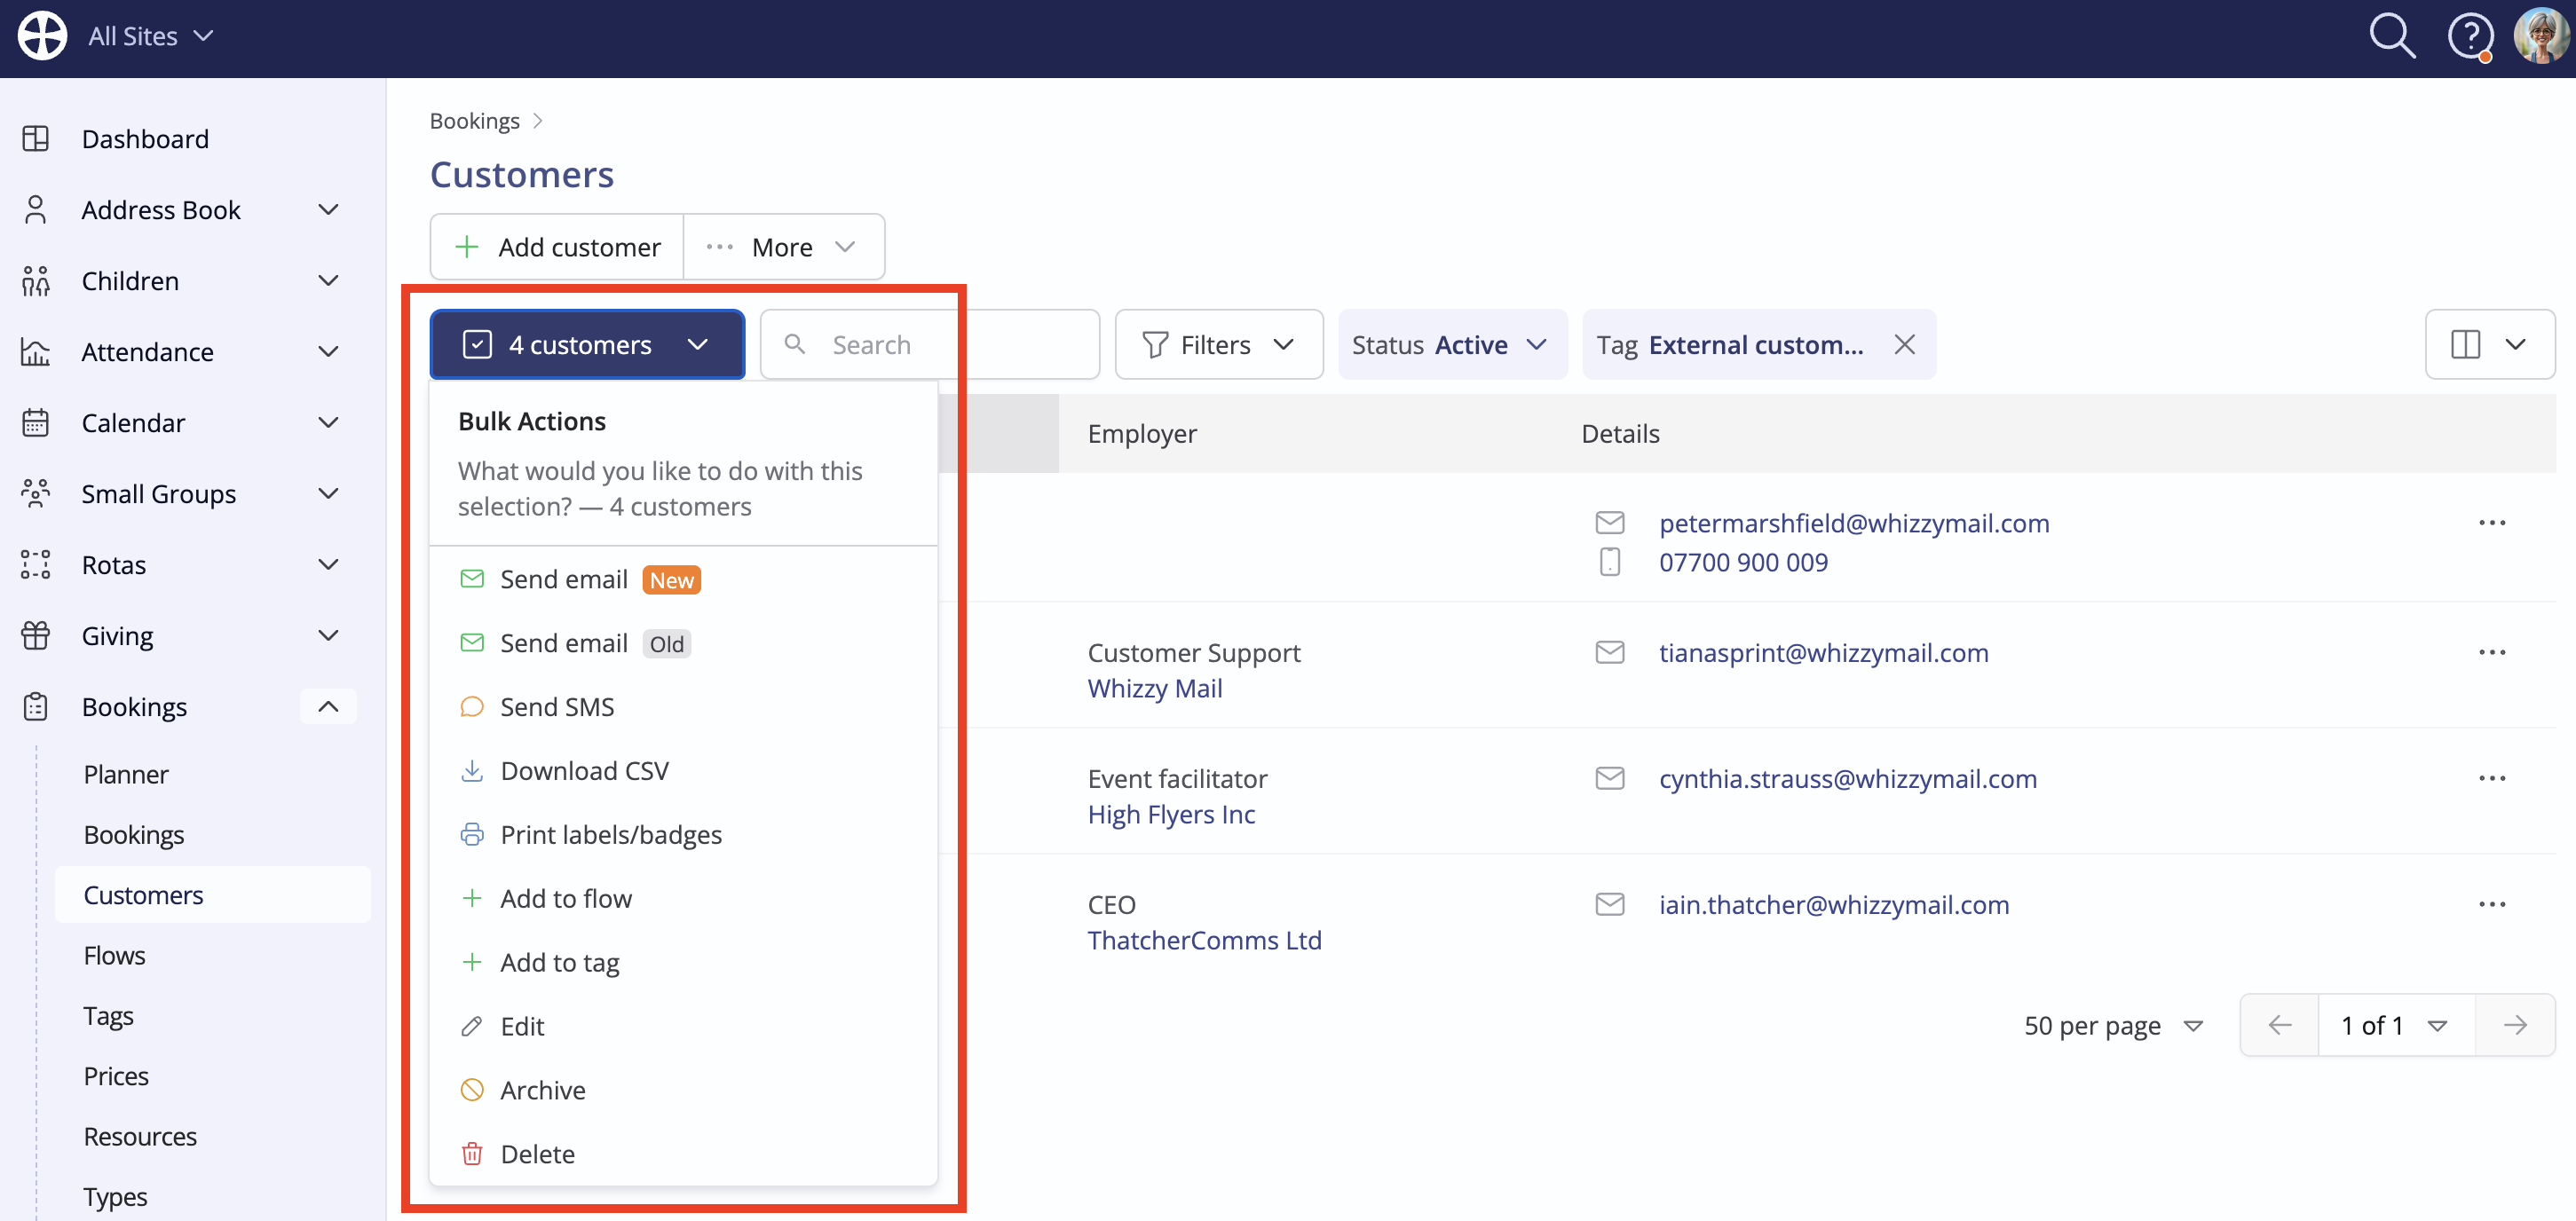
Customer bulk Actions enable you to perform common tasks with multiple selected customers. Note that these bulk actions will respect any filter that has been applied:
Top Tip - Adding a new customer when adding a booking
You can easily add a new customer when adding a booking without losing the booking details you've started adding - click +Add
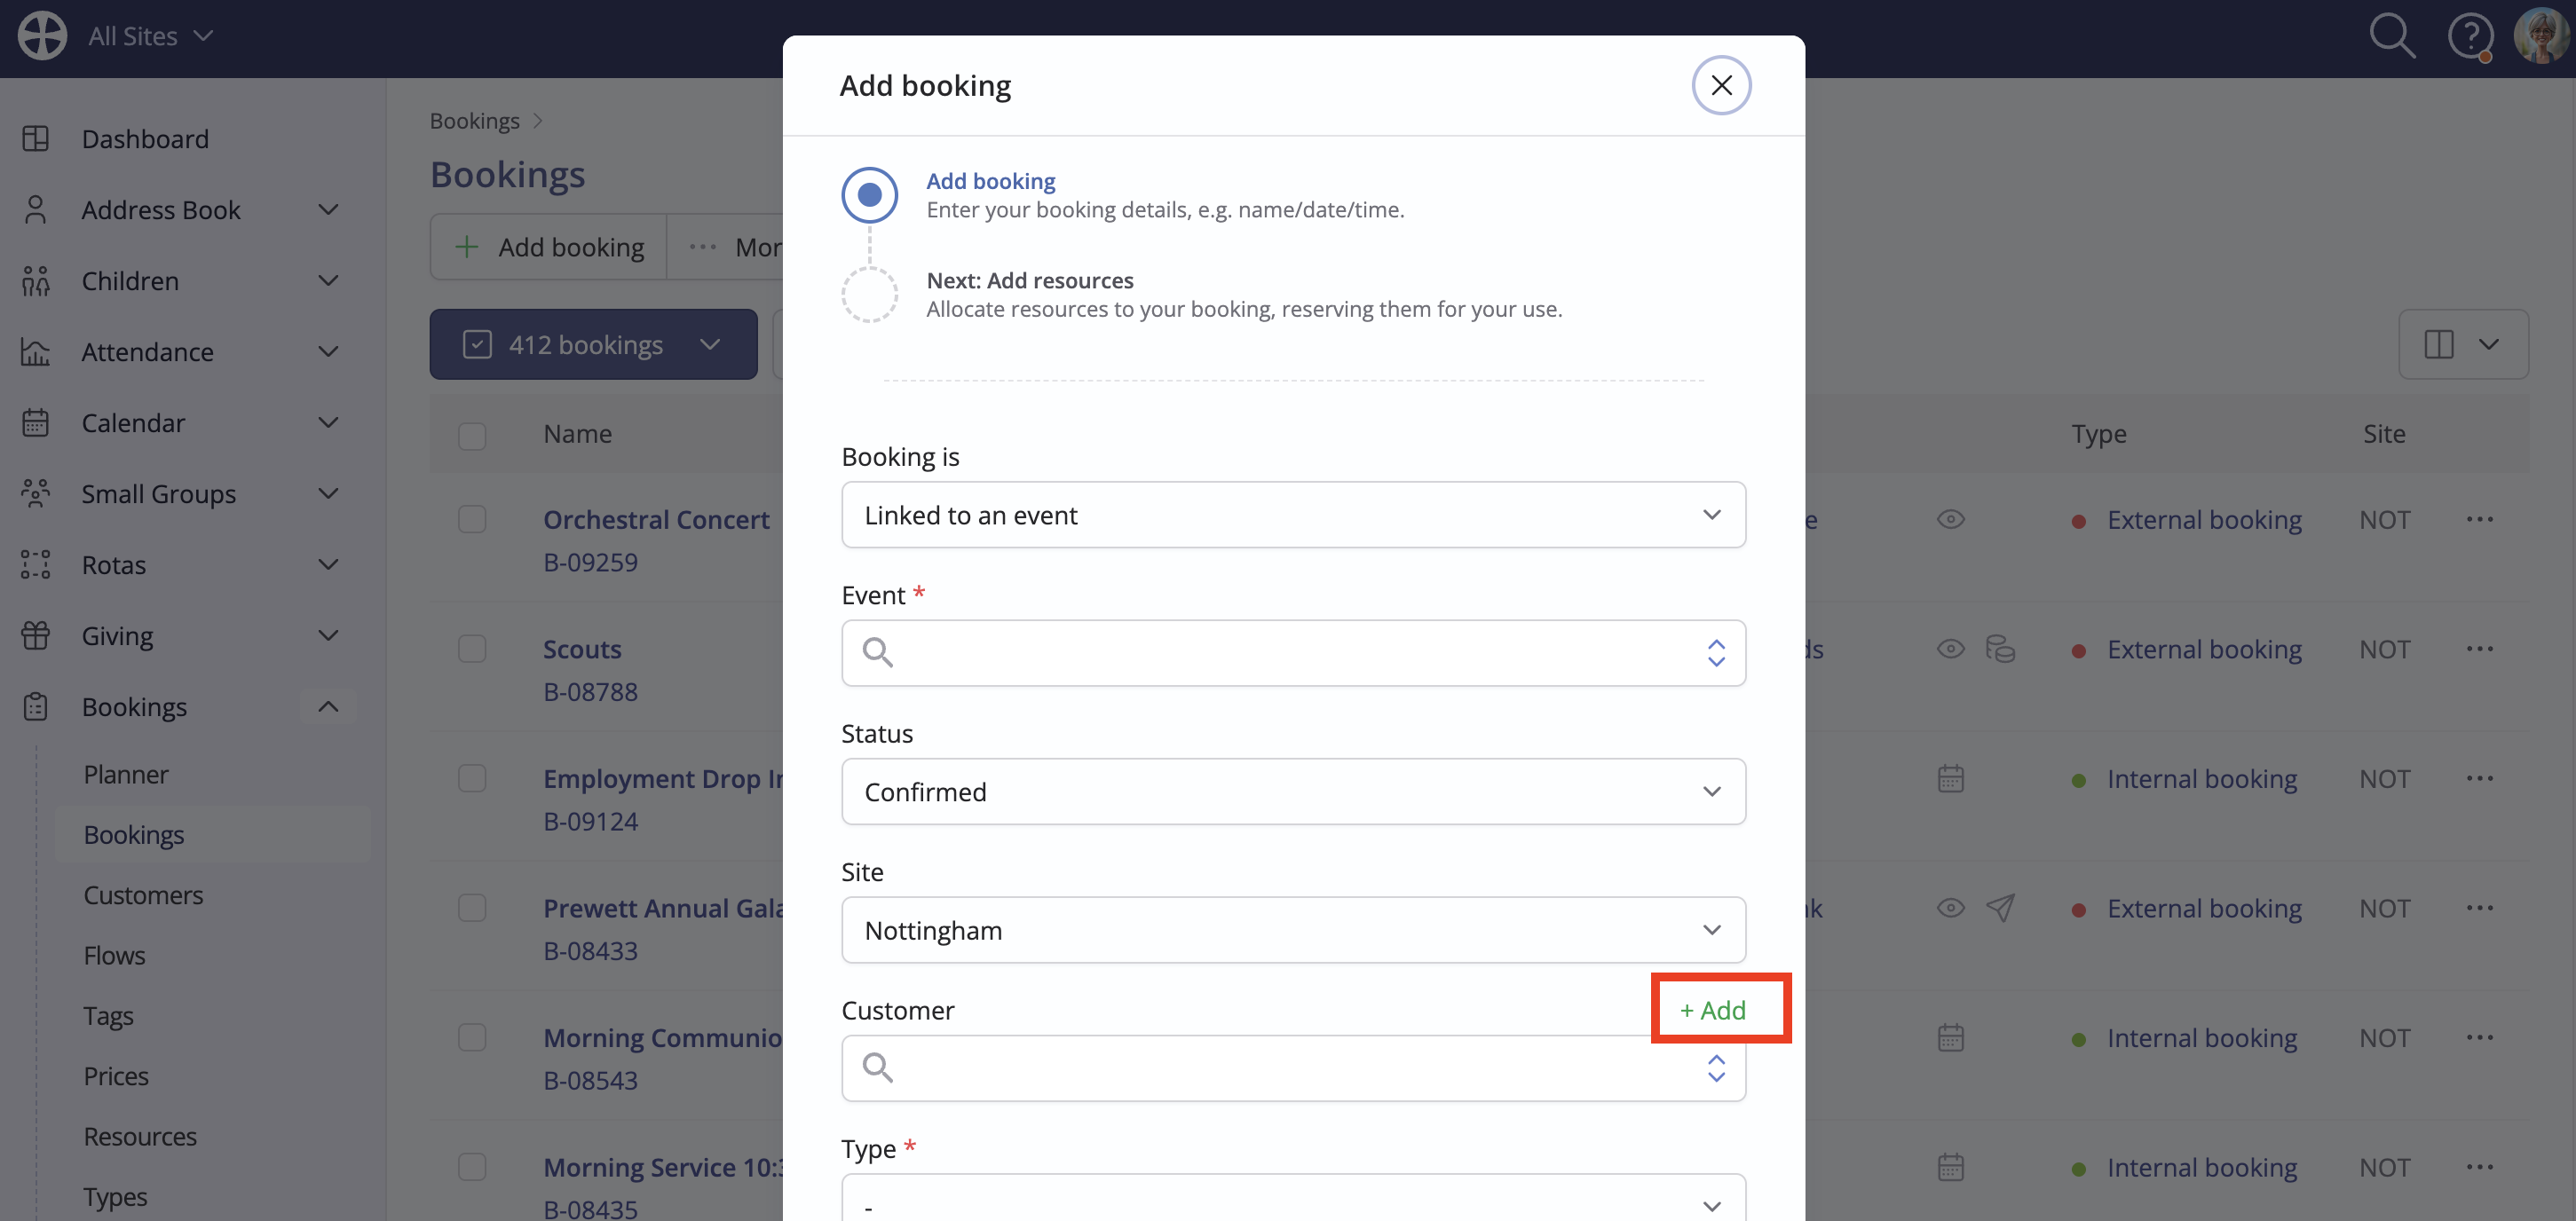
The pop-up switches focus to a new customer form. Enter the new customer details, following the same process described above, and click Save & Return to continue adding the remaining booking details (or click to return to Add booking).
Importing existing customers
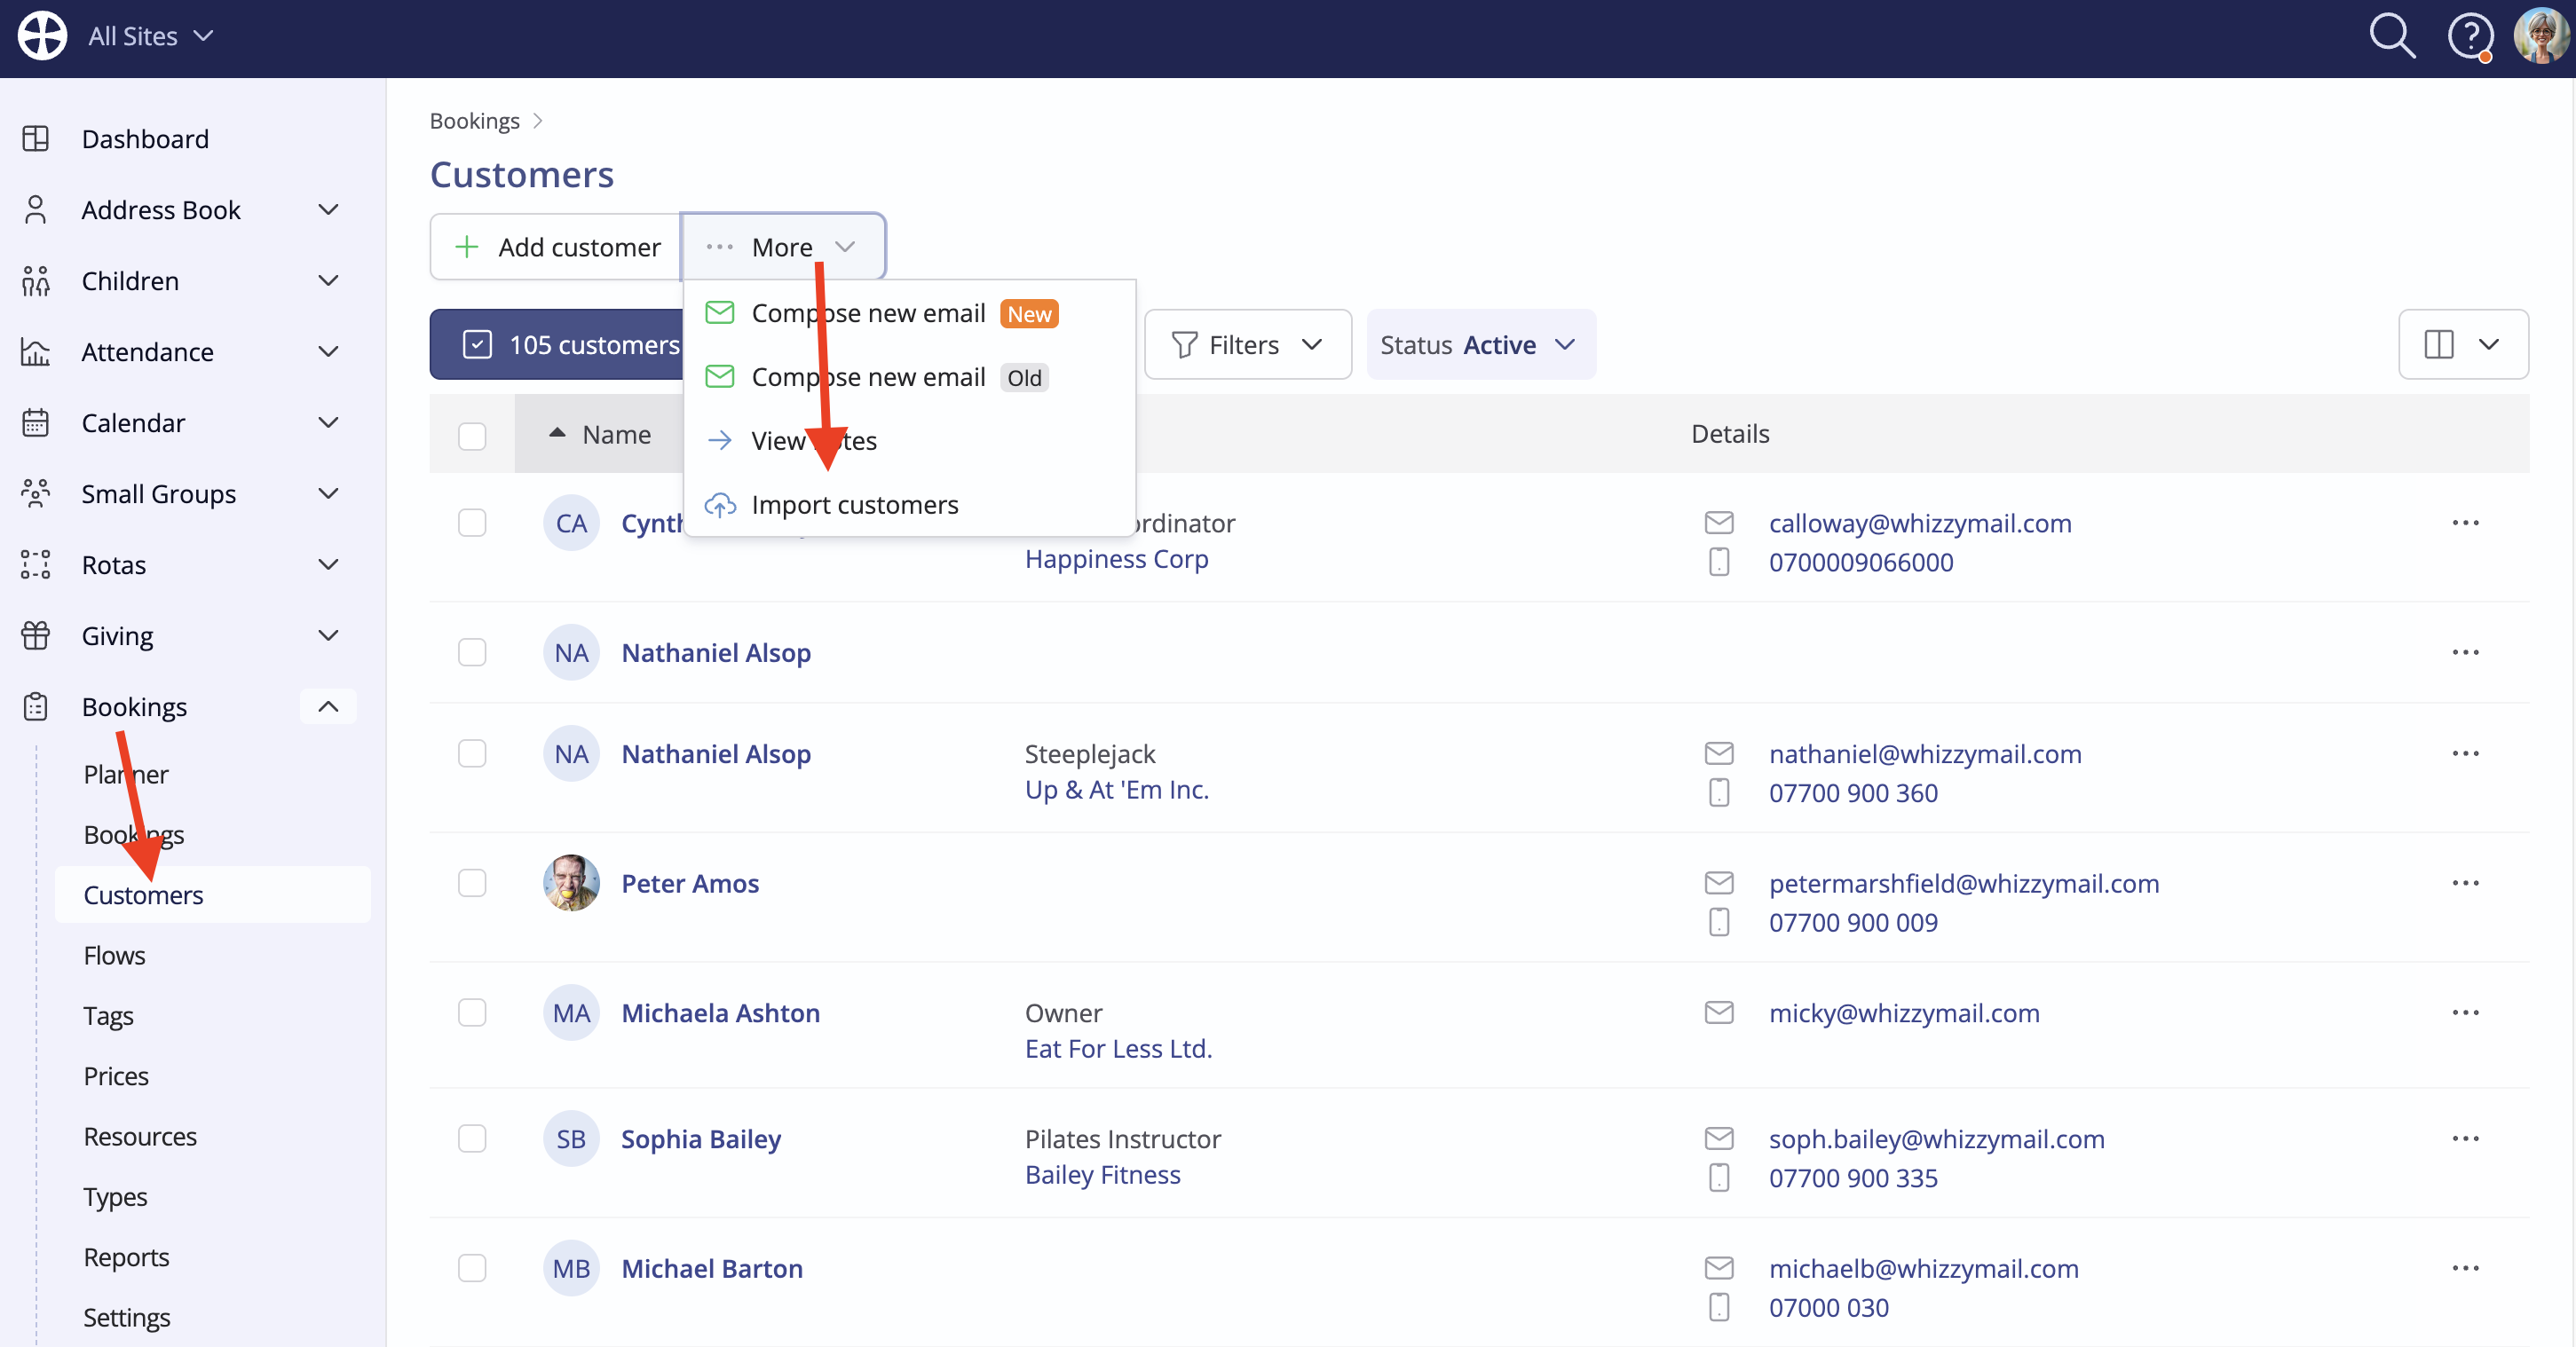
You can easily import an existing customer list. Perhaps if migrating from another resource management or invoicing system, you will need to export a customer list from that system and then prepare the list into a CSV format file, ready for import into ChurchSuite. When you are ready to import, navigate to the Customers section and click Import customers.
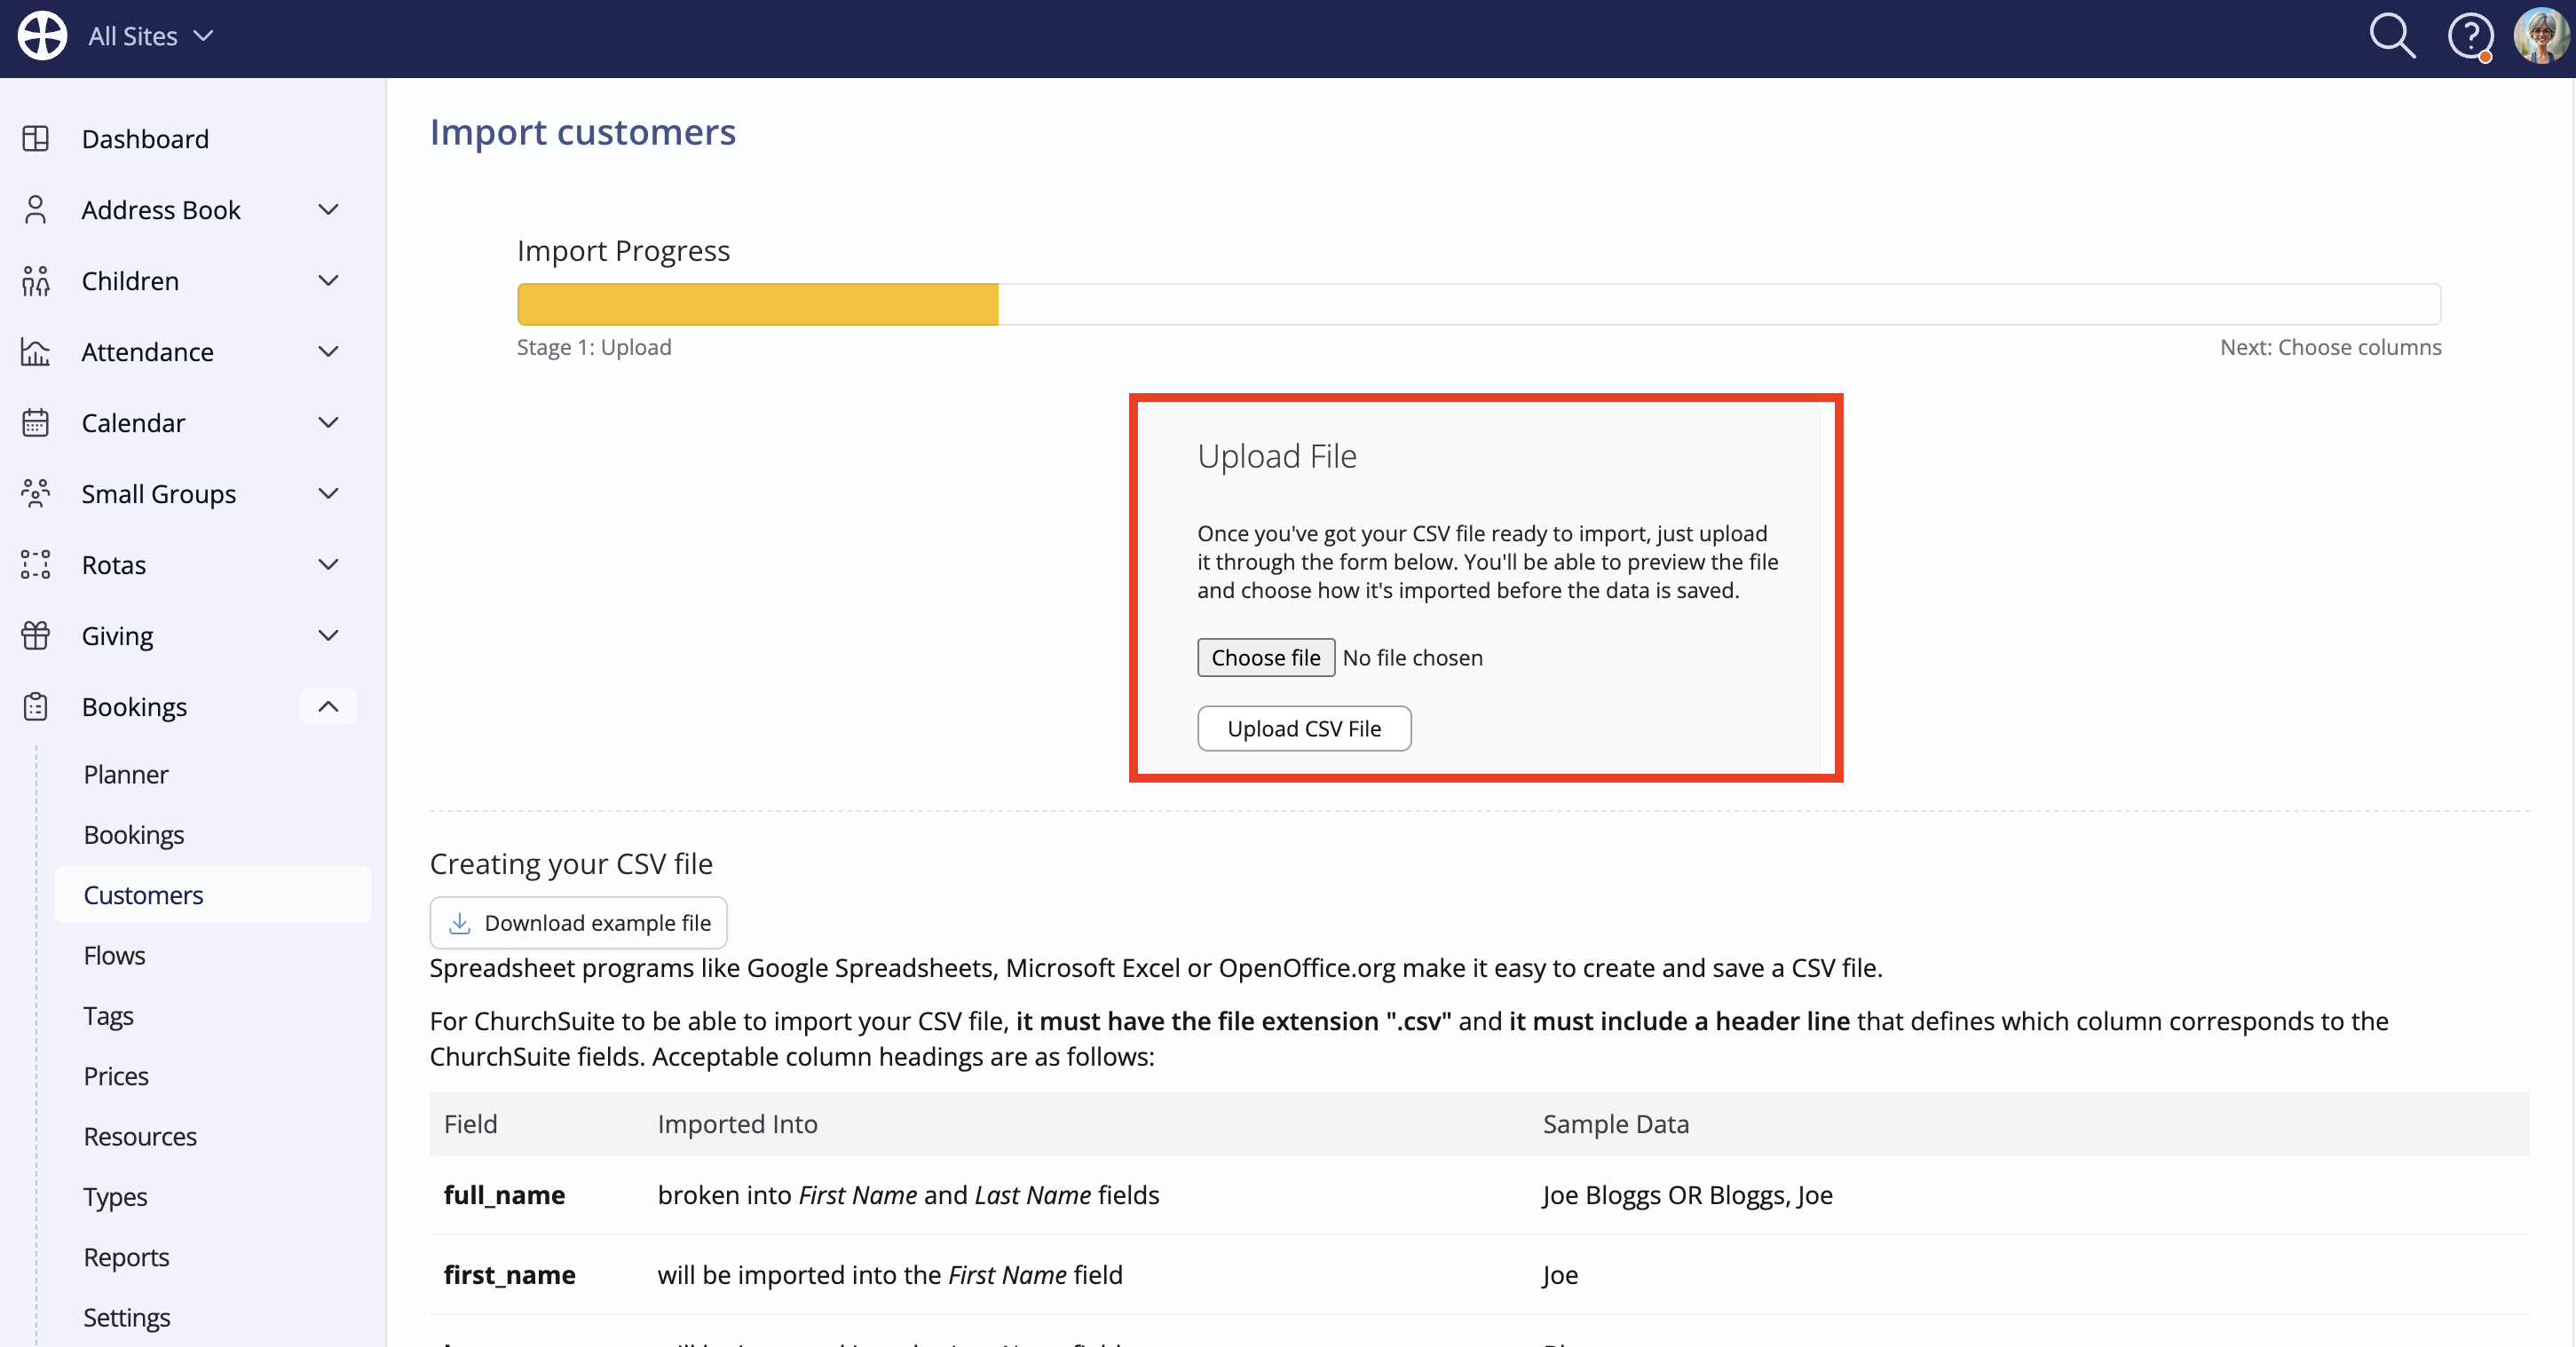
The Import customers page opens and includes helpful guidance on how to prepare your data - a CSV format file with each field of information in a separate column and a row header in the first row that describes the data in that column. The row header is used to correctly map each column in your CSV file with the corresponding field in the Customers section of the Bookings module. There's also an Example CSV file that you can download and view and a full list of supported fields that can be imported to help you prepare your CSV file. Not every customer field is required - ChurchSuite will only import those fields which you supply in your CSV file; however, you must ensure every incoming field in your file is assigned to a ChurchSuite field (otherwise, it won't be imported). Let's look at the process...
Select Choose file to browse and select your CSV file. Click Upload CSV File to upload the file for review.
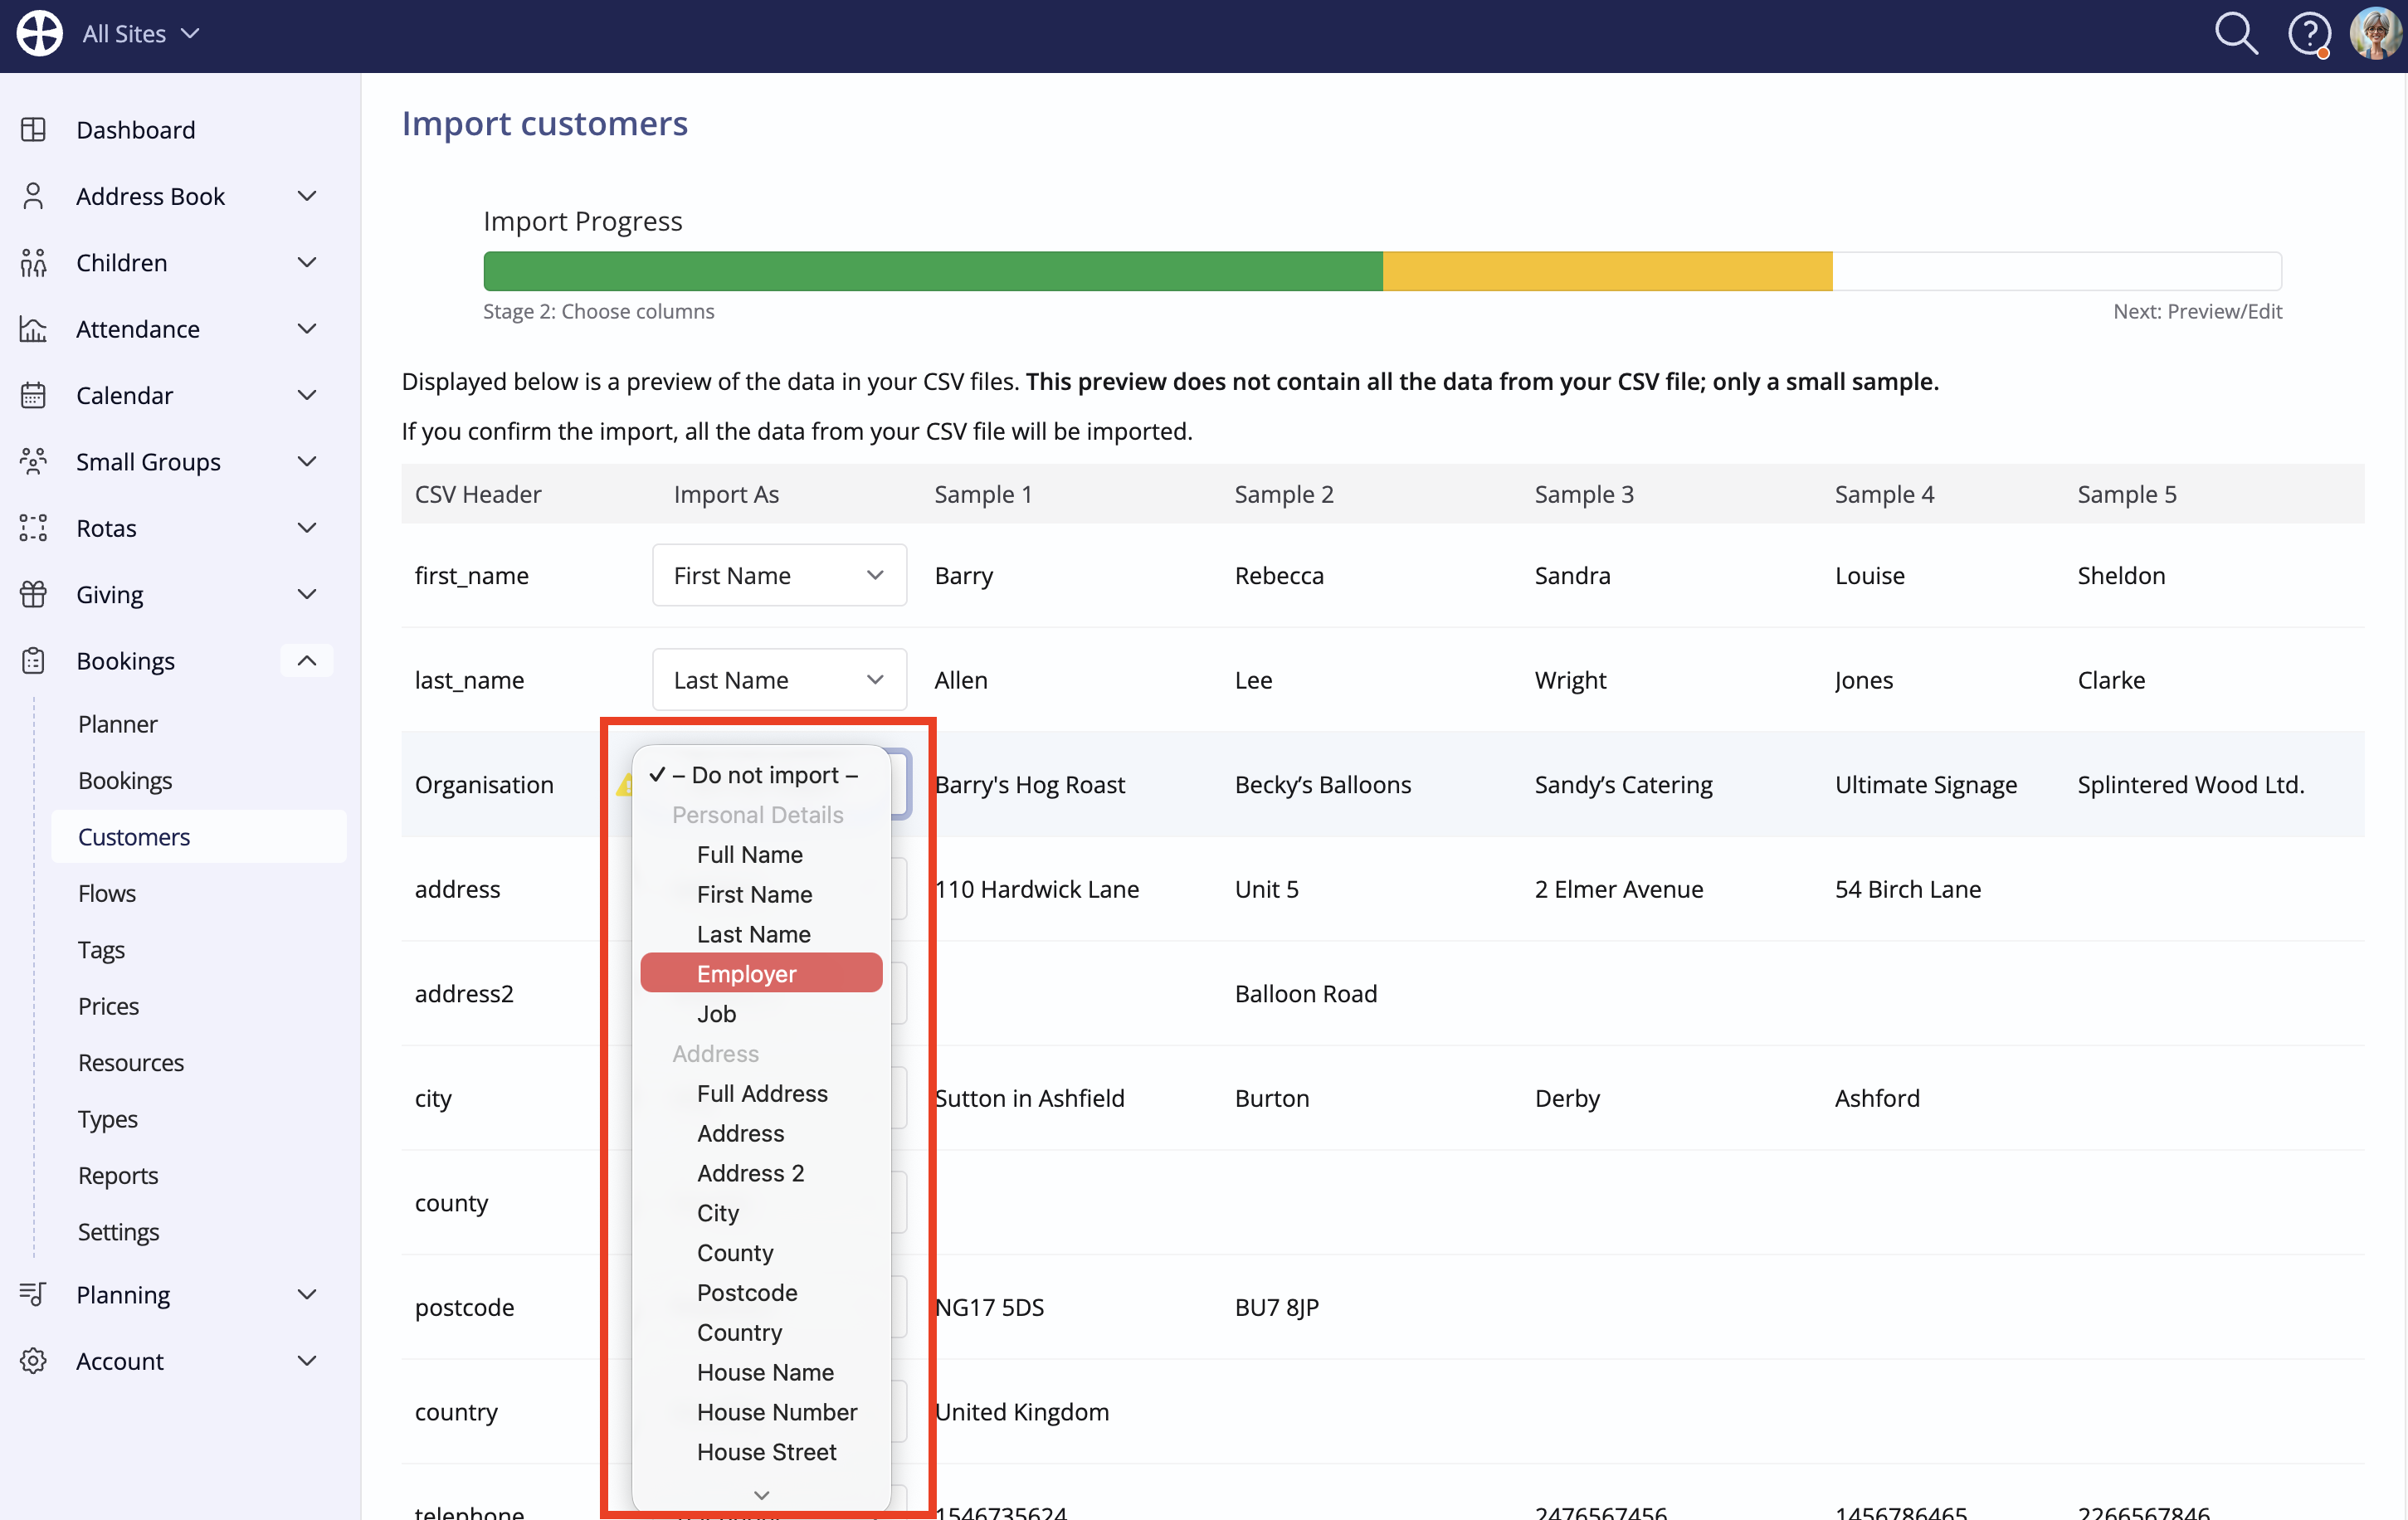
After upload, a sample of the first five records from your CSV file is shown. The first column shown is the CSV Header names from your CSV file. The Import As column is the field in ChurchSuite that data will be imported into. Check each field in your data is correctly mapped to a field in ChurchSuite. A yellow warning triangle icon alerts you to any field that will not be imported - typically because the CSV Header isn't recognised. You can select the appropriate ChurchSuite customer field from the drop-down list. Those using ChurchSuite's multi-site functionality should include a Site column in the CSV file so that imported customers are added to the appropriate site for their future bookings.
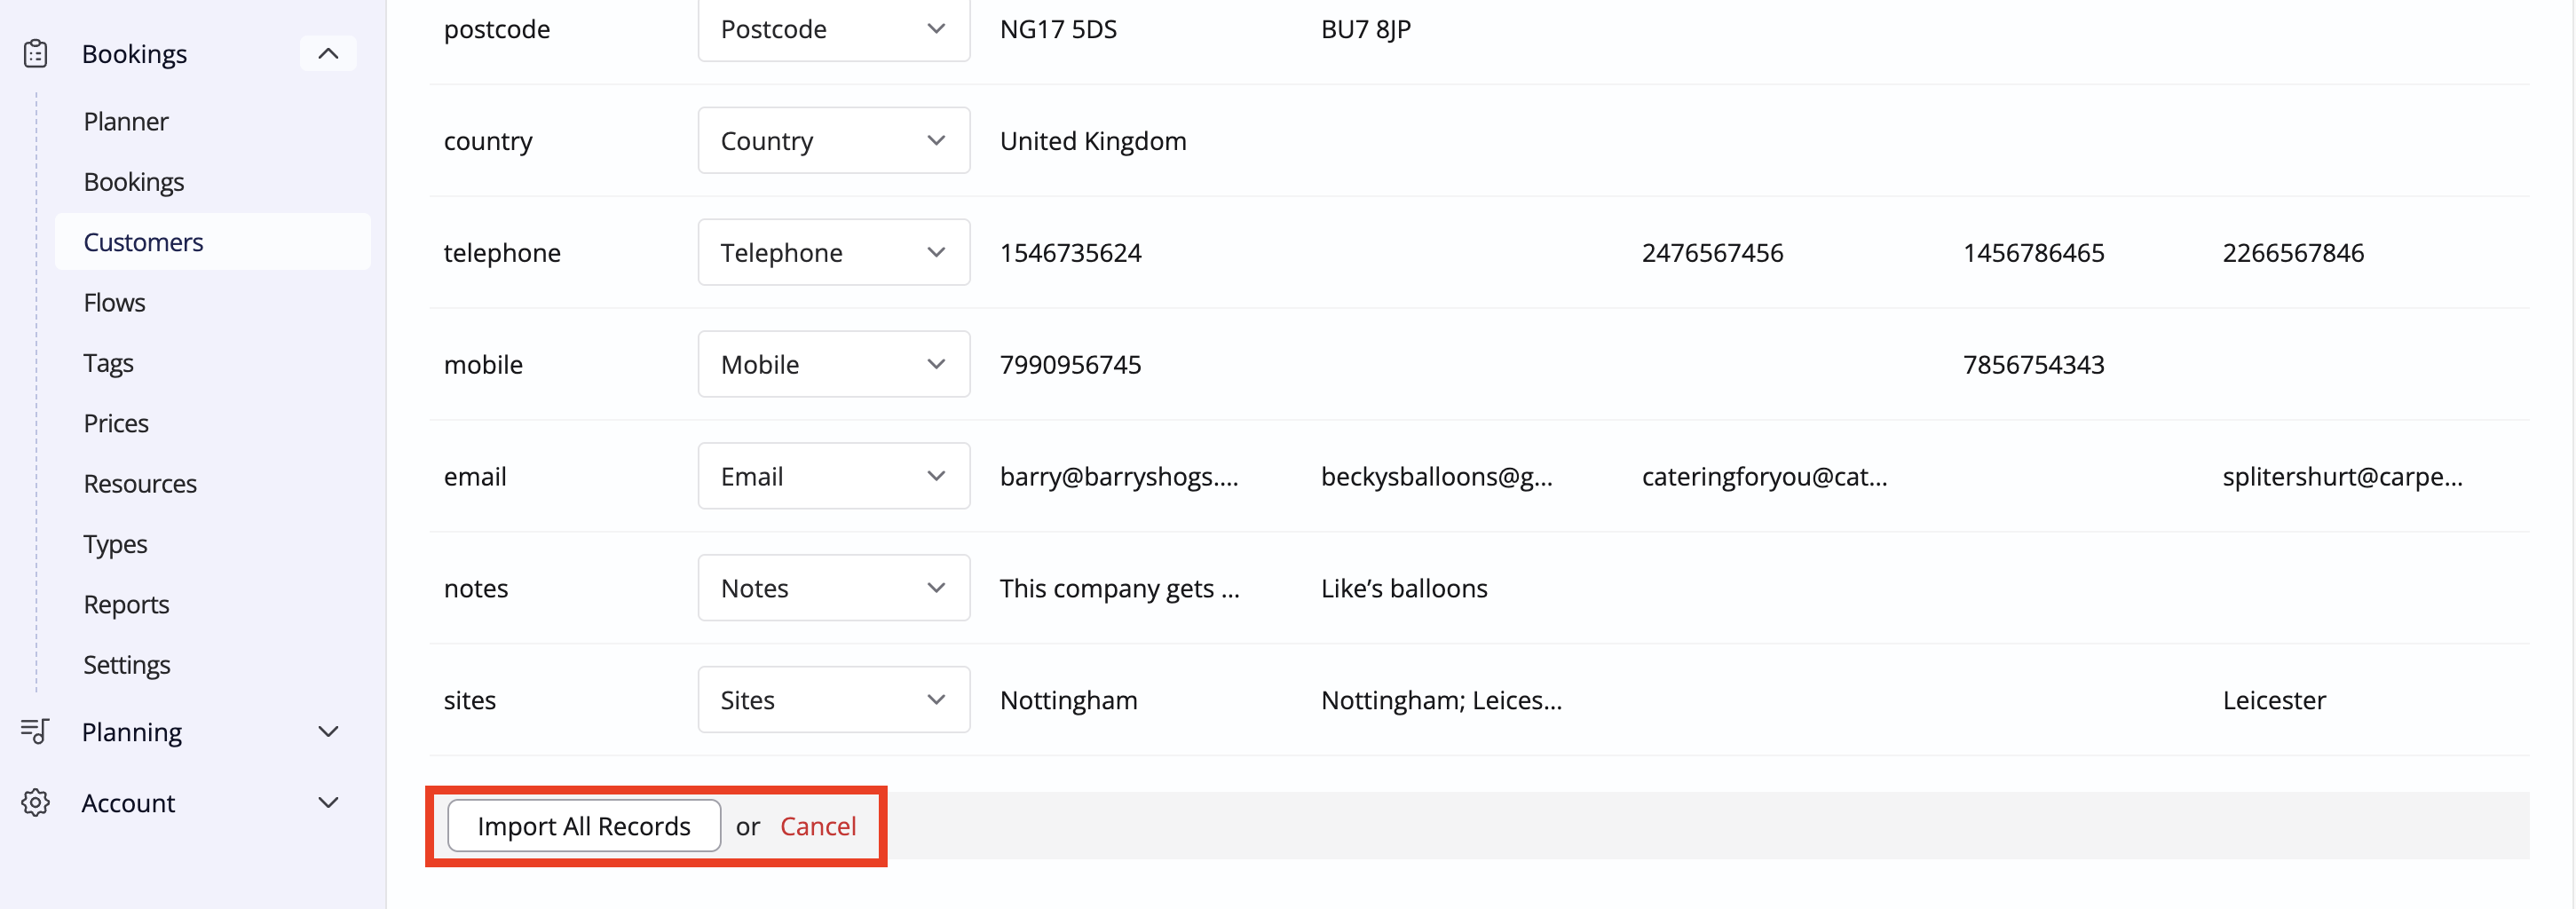
When satisfied, click Import All Records or select Cancel if you need to abort and make further changes to your CSV file.
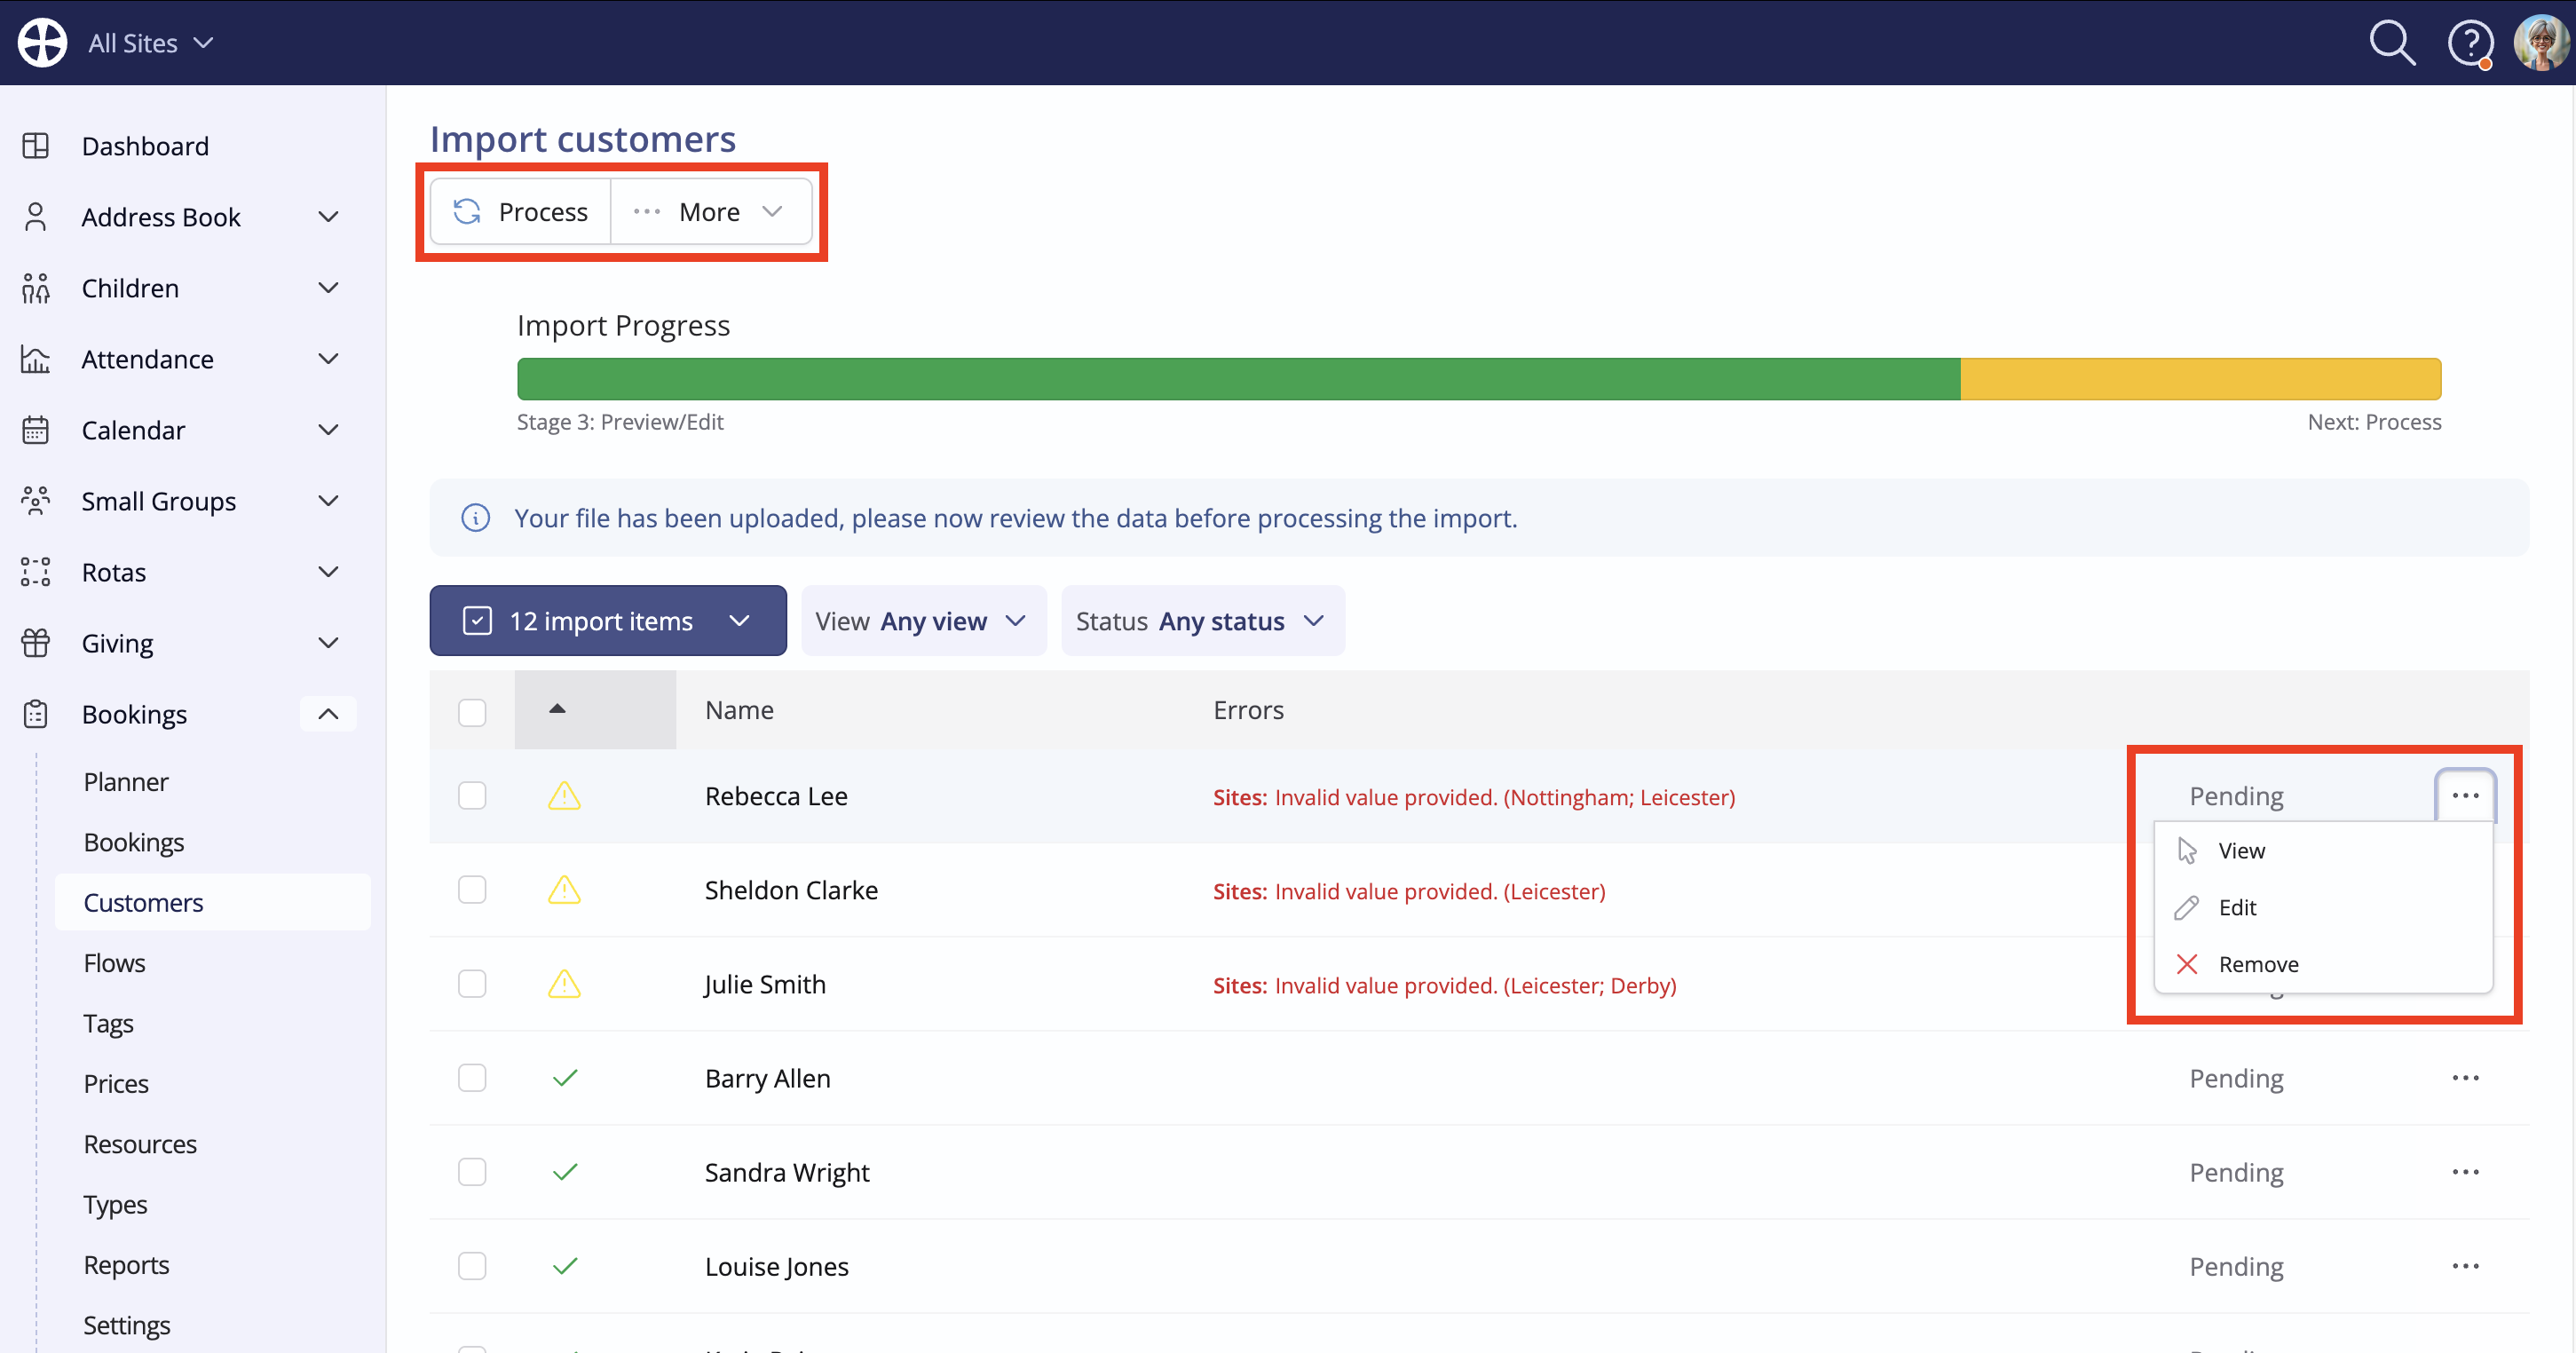
The import progresses to the Preview/Edit stage, where you can review the individual customers being imported - perhaps to Edit and correct an error that's been identified. You can Pause (and later Resume) or Delete the import. You can also Process at any time - only valid records, distinguished by a green tick icon, will be processed - invalid records, distinguished by a yellow warning triangle icon, remain in the list until they are either edited and fixed or removed from the import list.
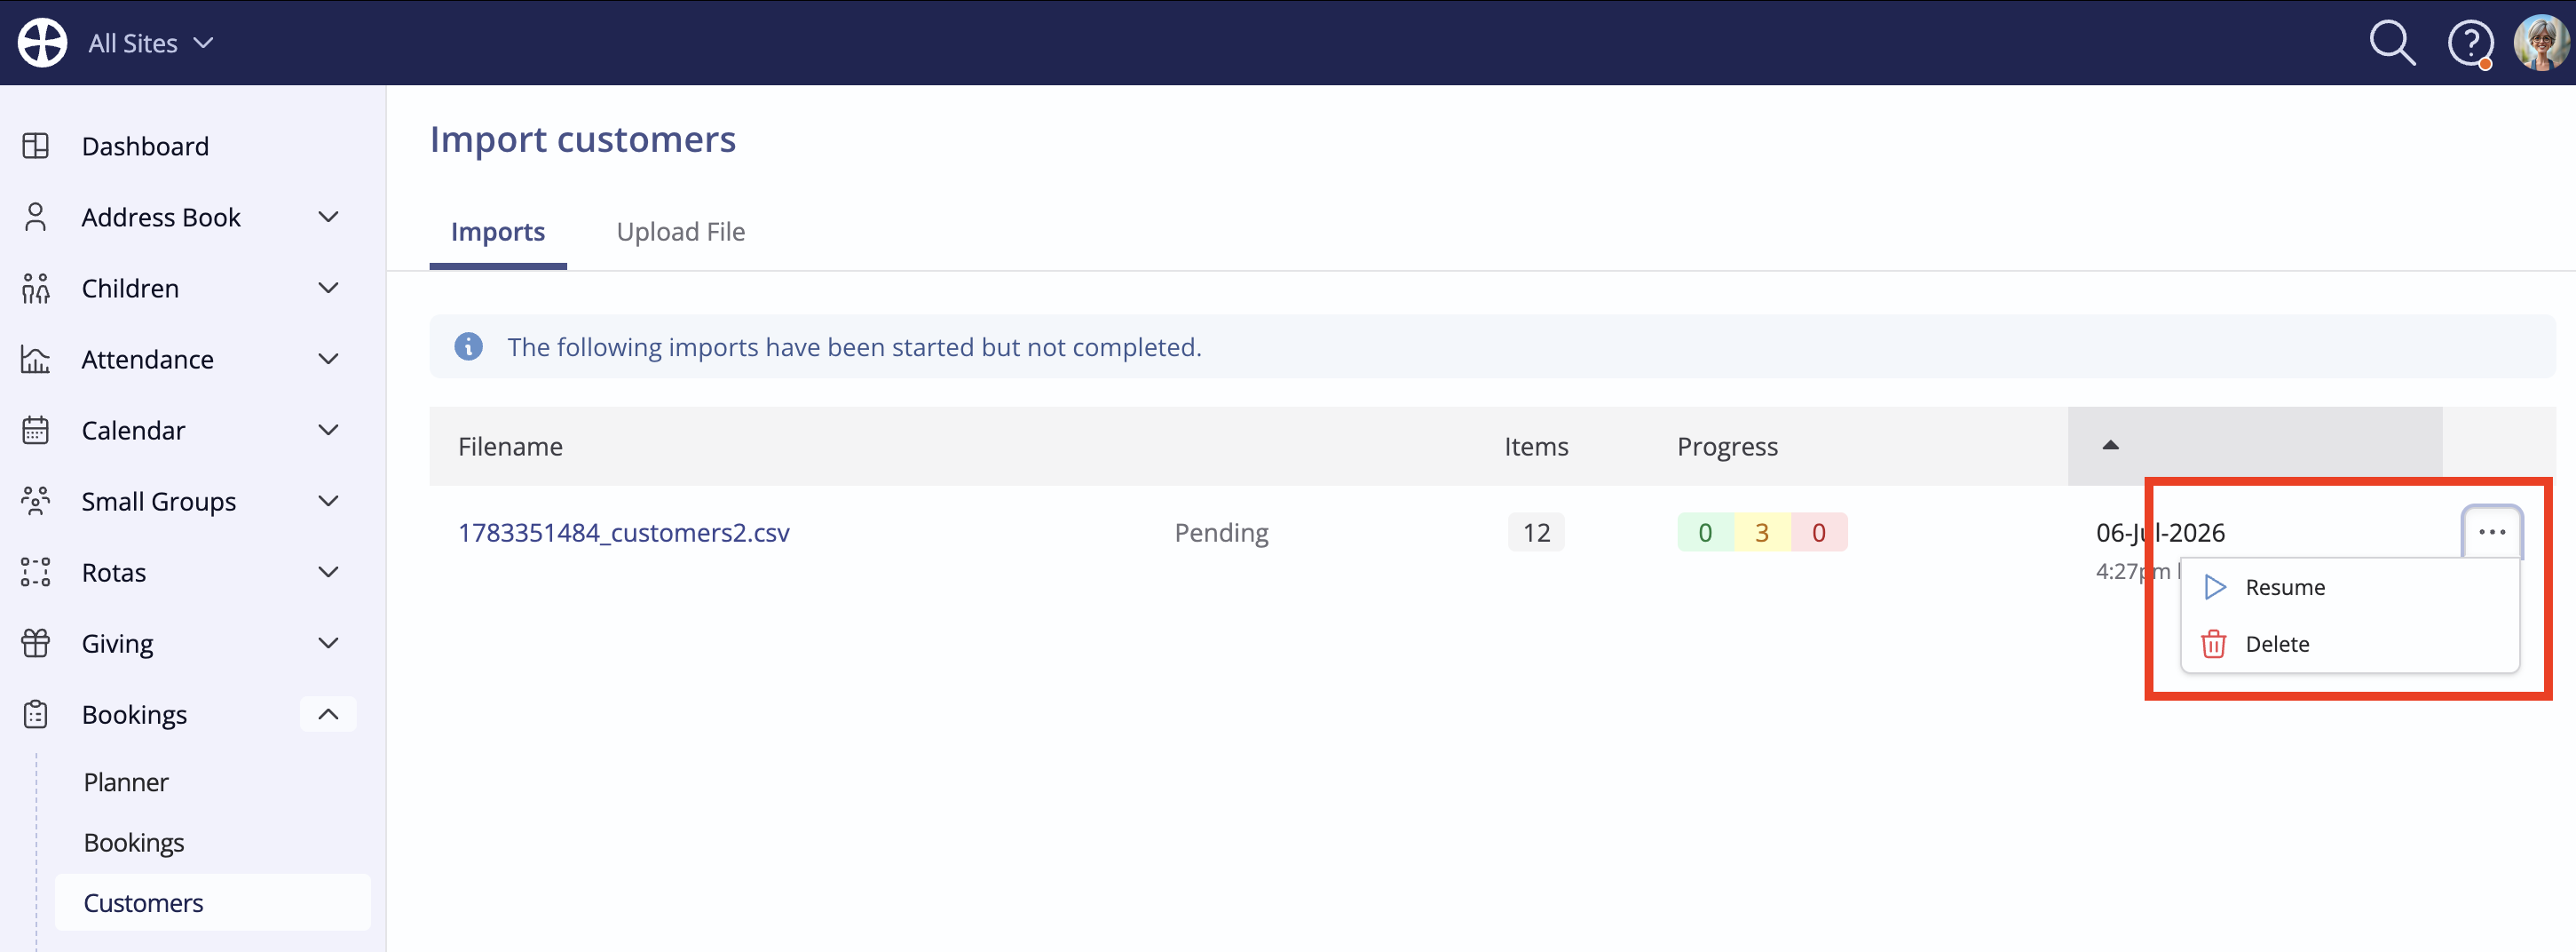
You can return a partial or incomplete import by navigating back to the Import customers page and selecting Resume or Delete.
Deleting a customer
You can Archive customers when their details are no longer needed. Archiving a customer will preserve the customer's details against all past and future bookings; however, only Active customers can be assigned to new bookings. Importantly, archived customers can later be Set as active again if needed.
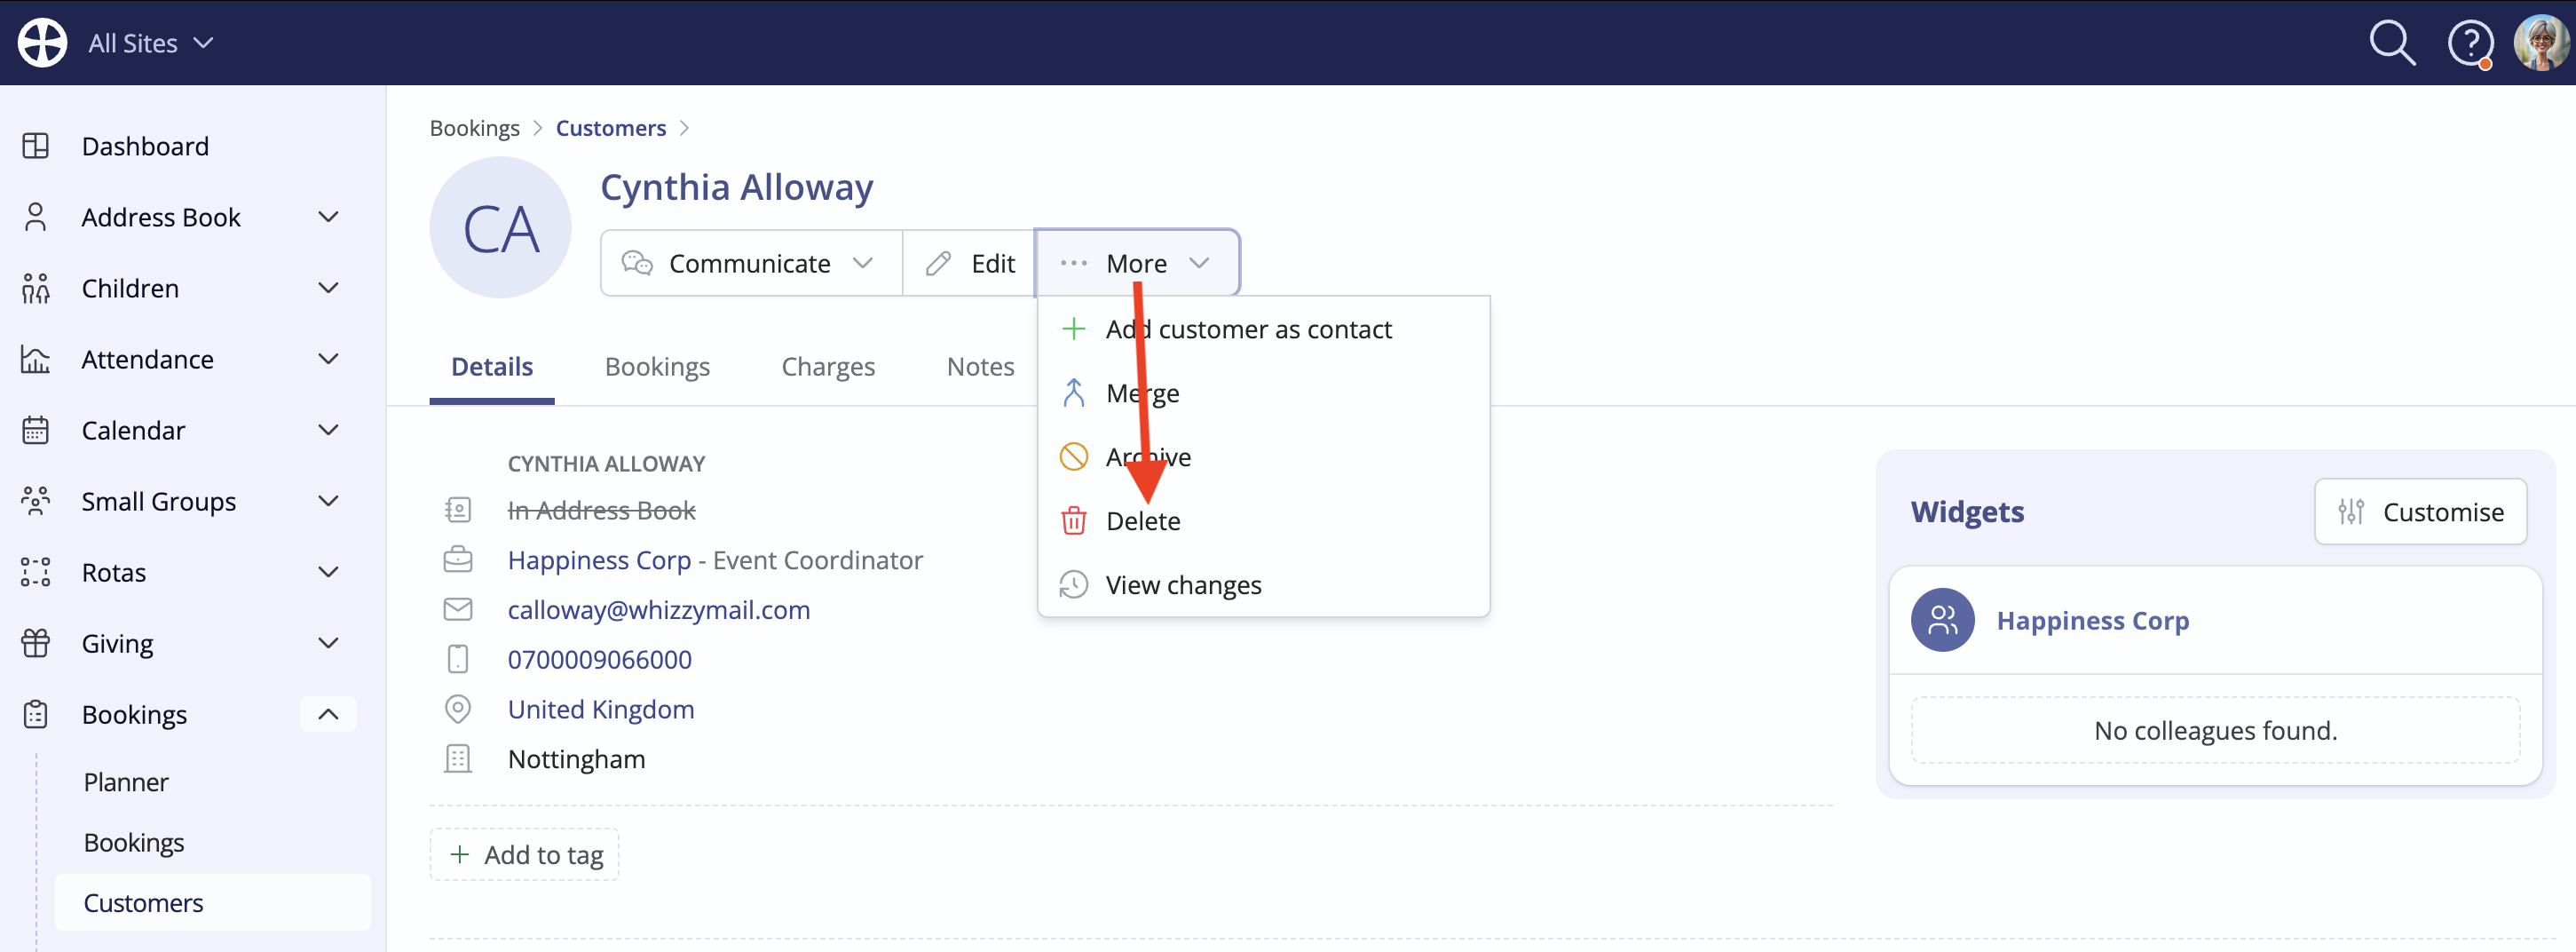
Deleting a customer is a destructive action that will unlink the deleted customer from all past and future bookings and is irreversible. The deleted customer's bookings and charges are preserved - only the customer profile is deleted. To delete a customer, select Delete from the More actions list at the top of the customer profile page and follow the on-screen instructions to confirm the deletion.
Managing customer bookings and charges
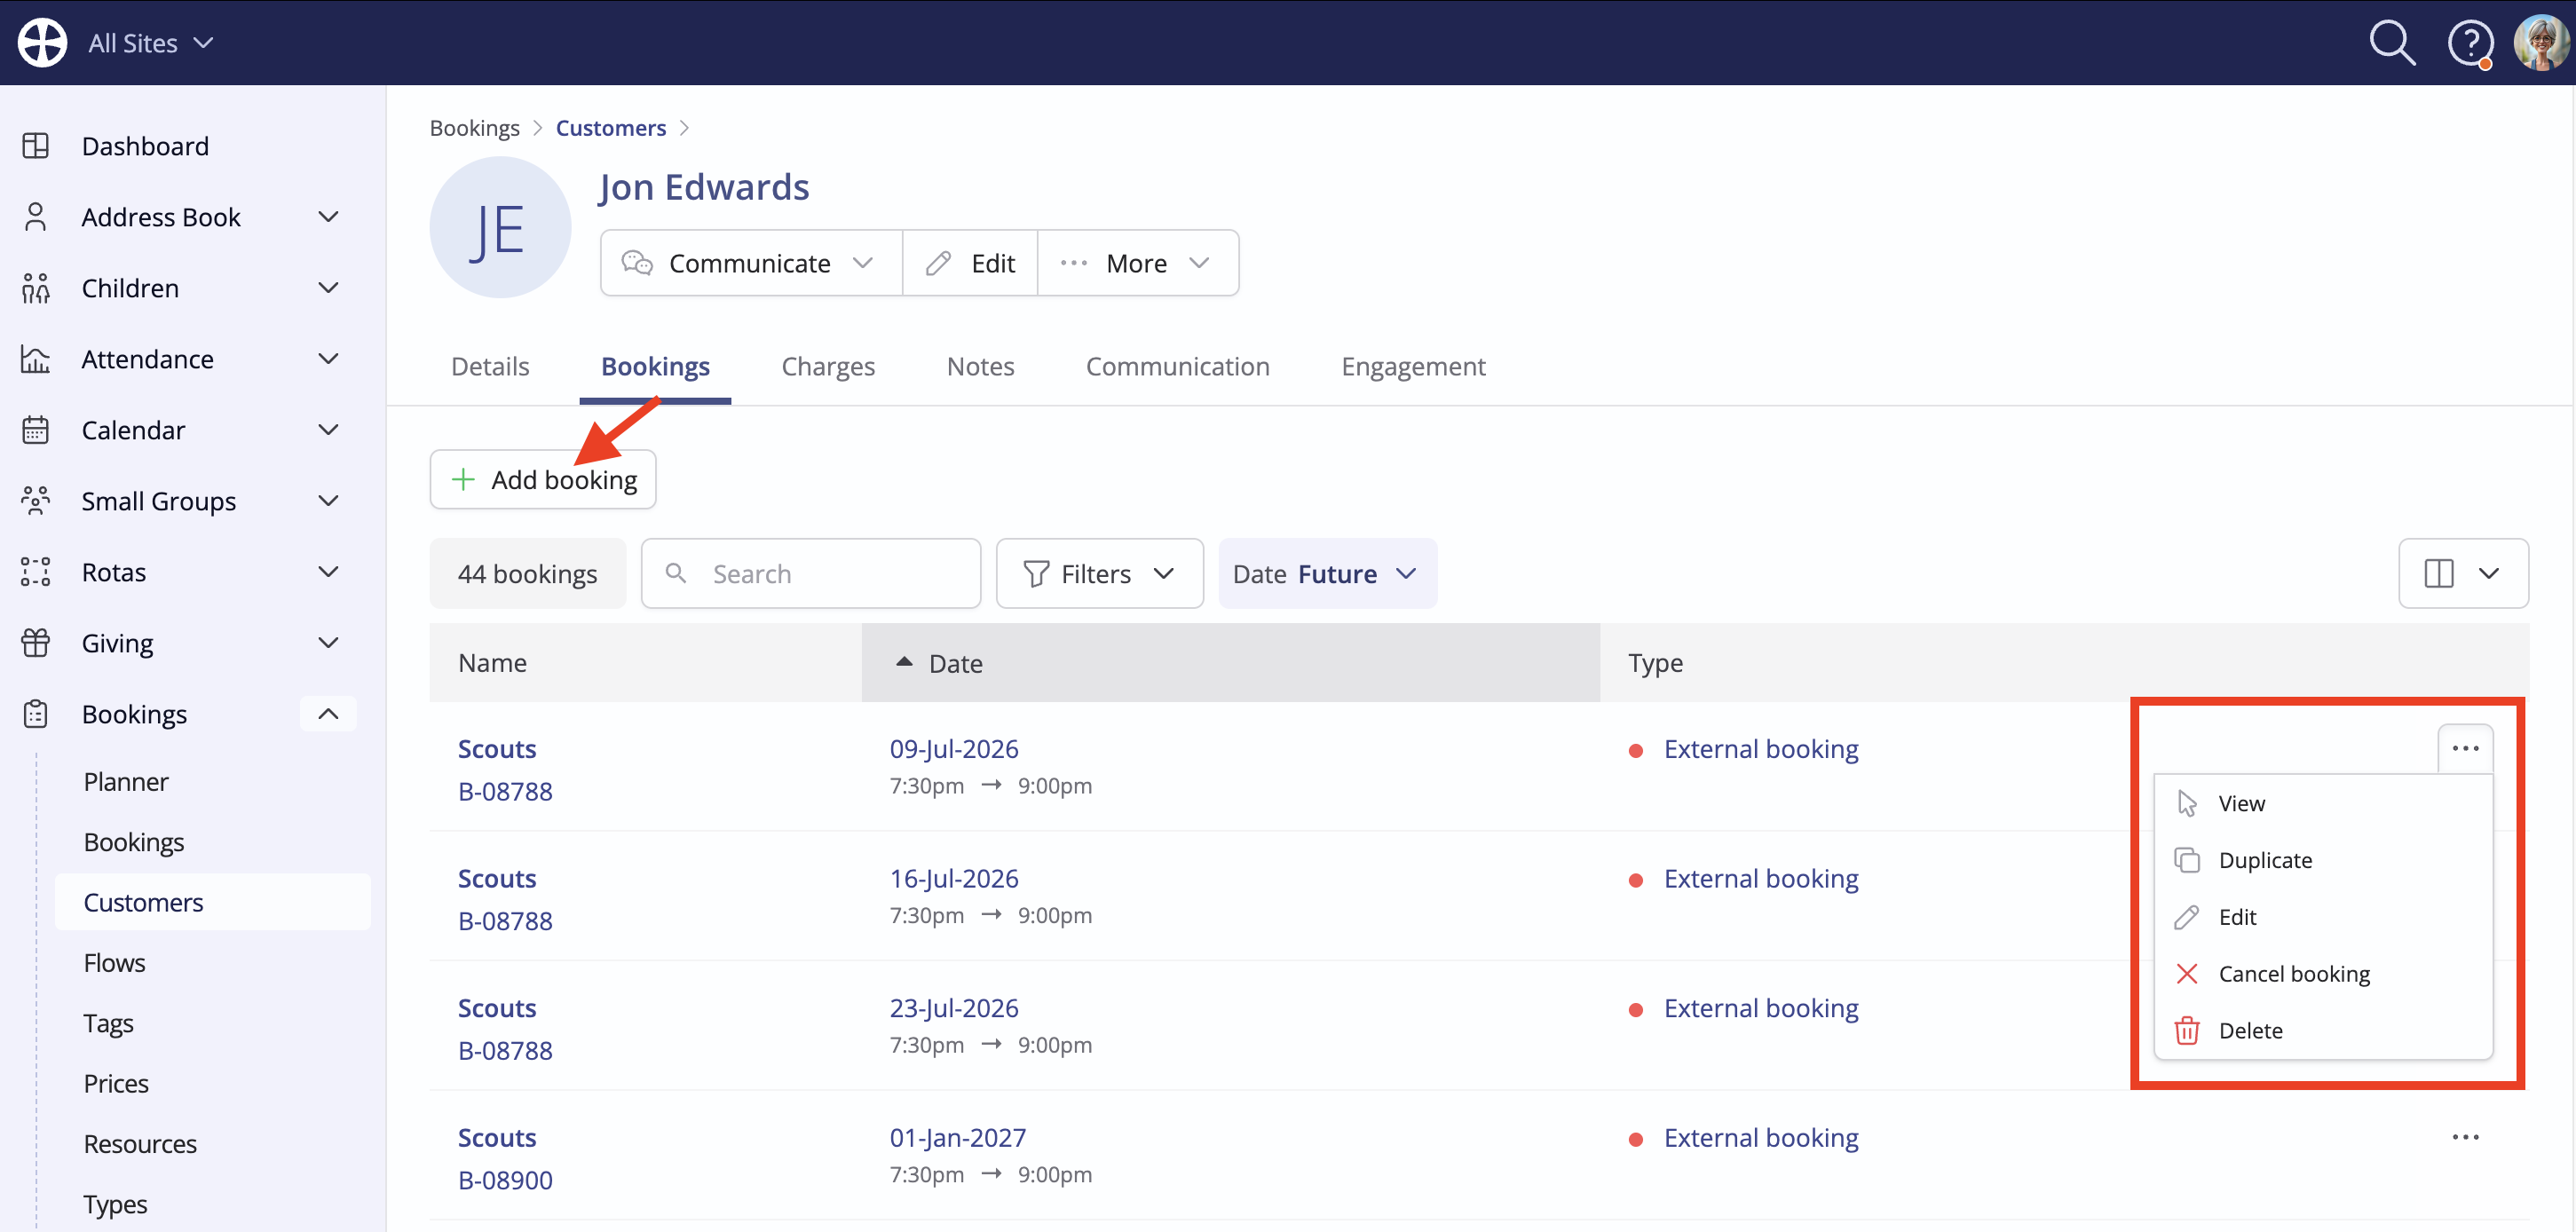
From the Bookings tab of a customer profile, you can see a full history of their Future and Past bookings. From here, you can further filter the list by booking Status or Search for a specific booking within a long list. Notice the booking Actions to View, Duplicate, Edit, Cancel or Delete a booking. You can also Add new bookings for the customer.
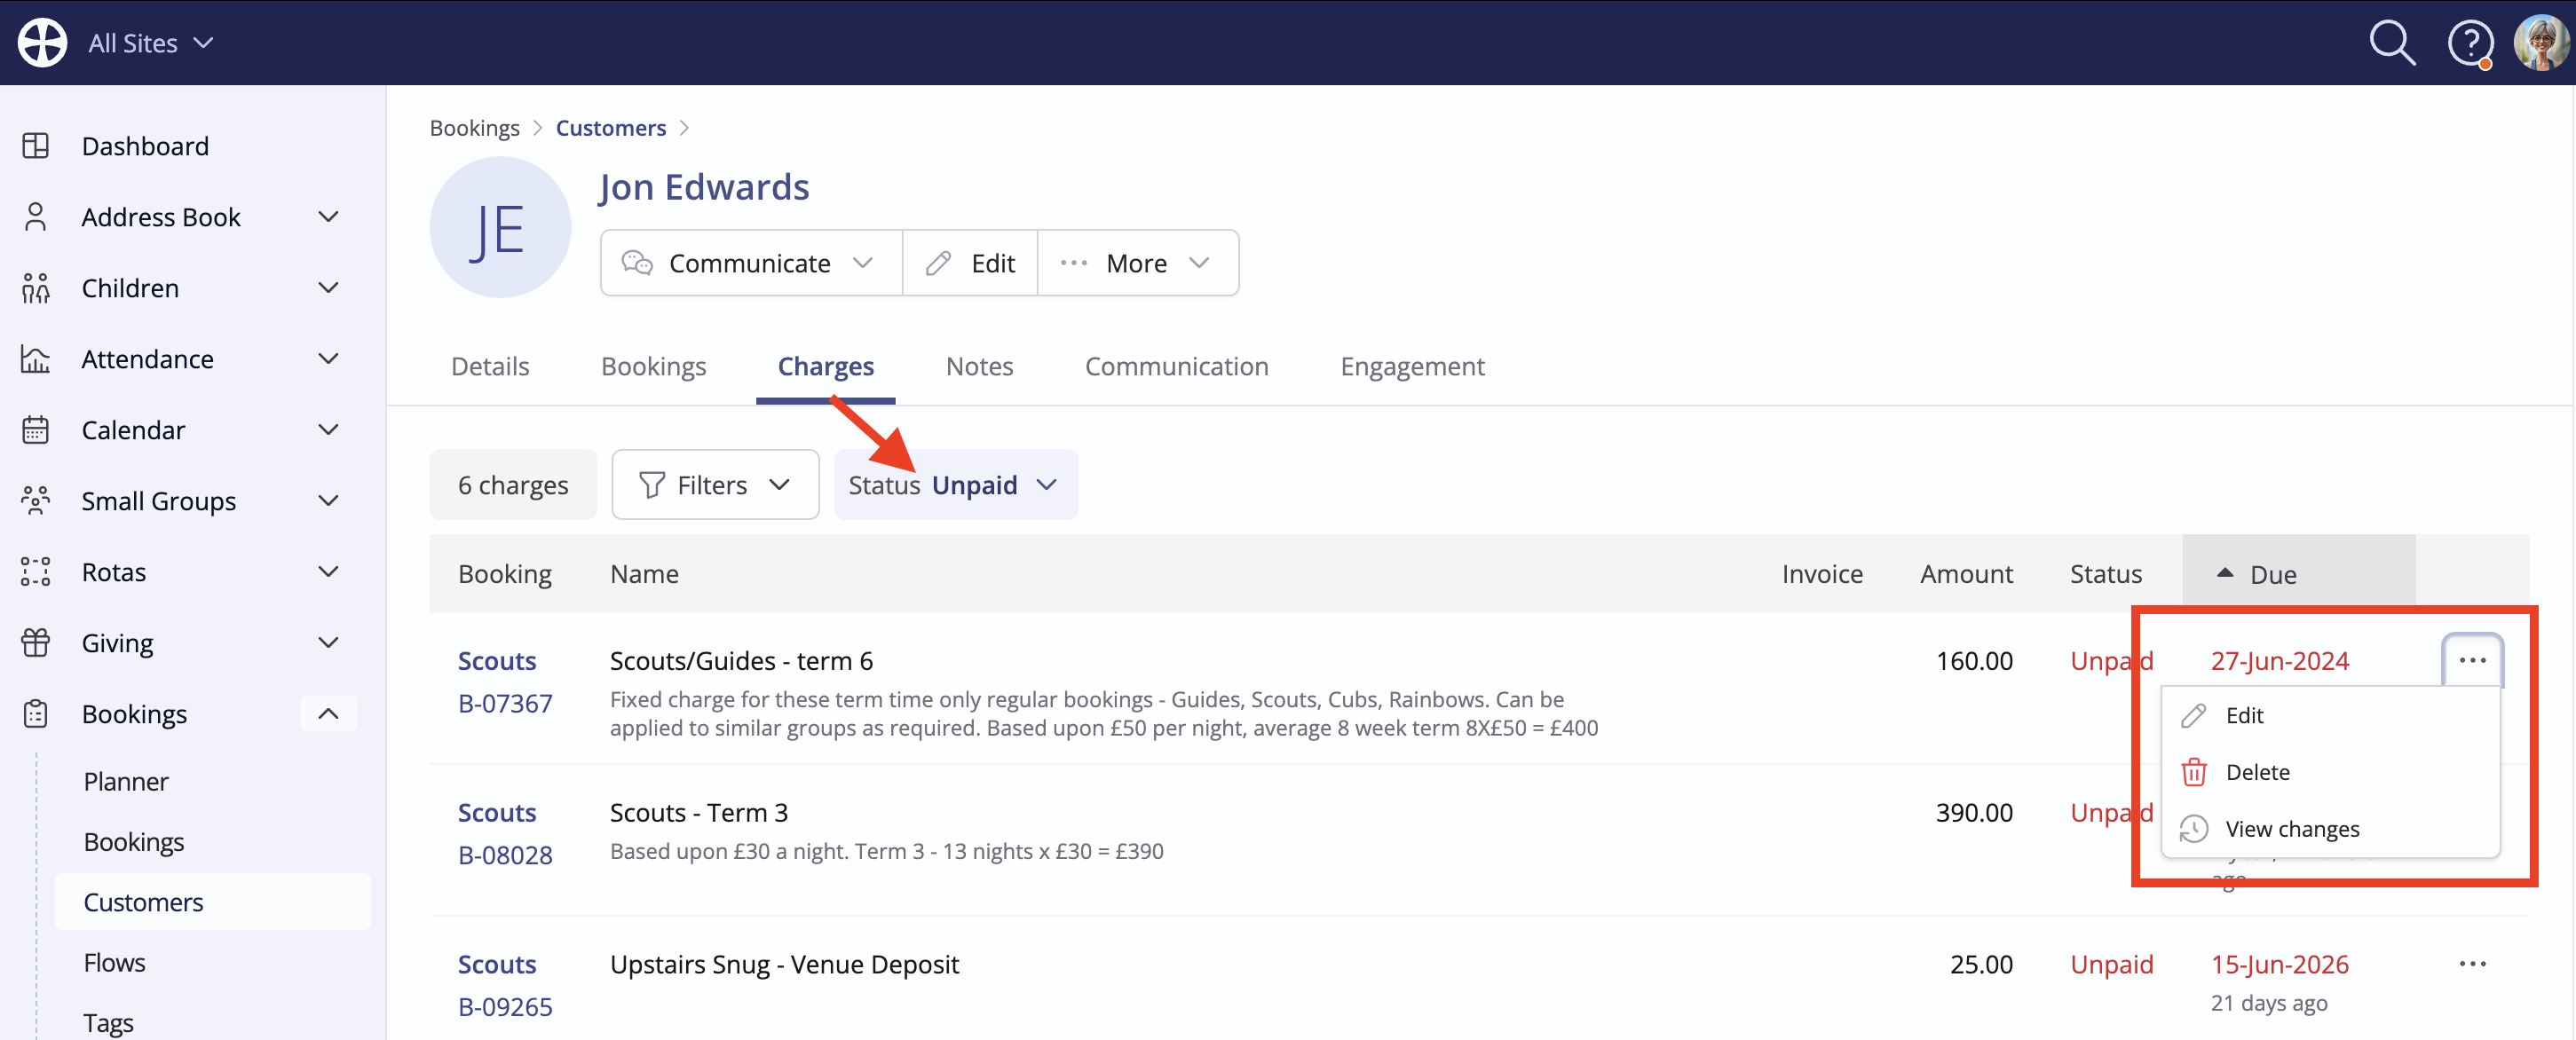
Similarly, the Charges tab provides a full history of charges, showing the related booking, the amount, payment status and due date. From here, you can further filter the list by charge payment Status to see just Unpaid or Paid charges or use the Actions to Edit or Delete a charge. Note that you can only delete an unpaid charge.
Communicating with customers
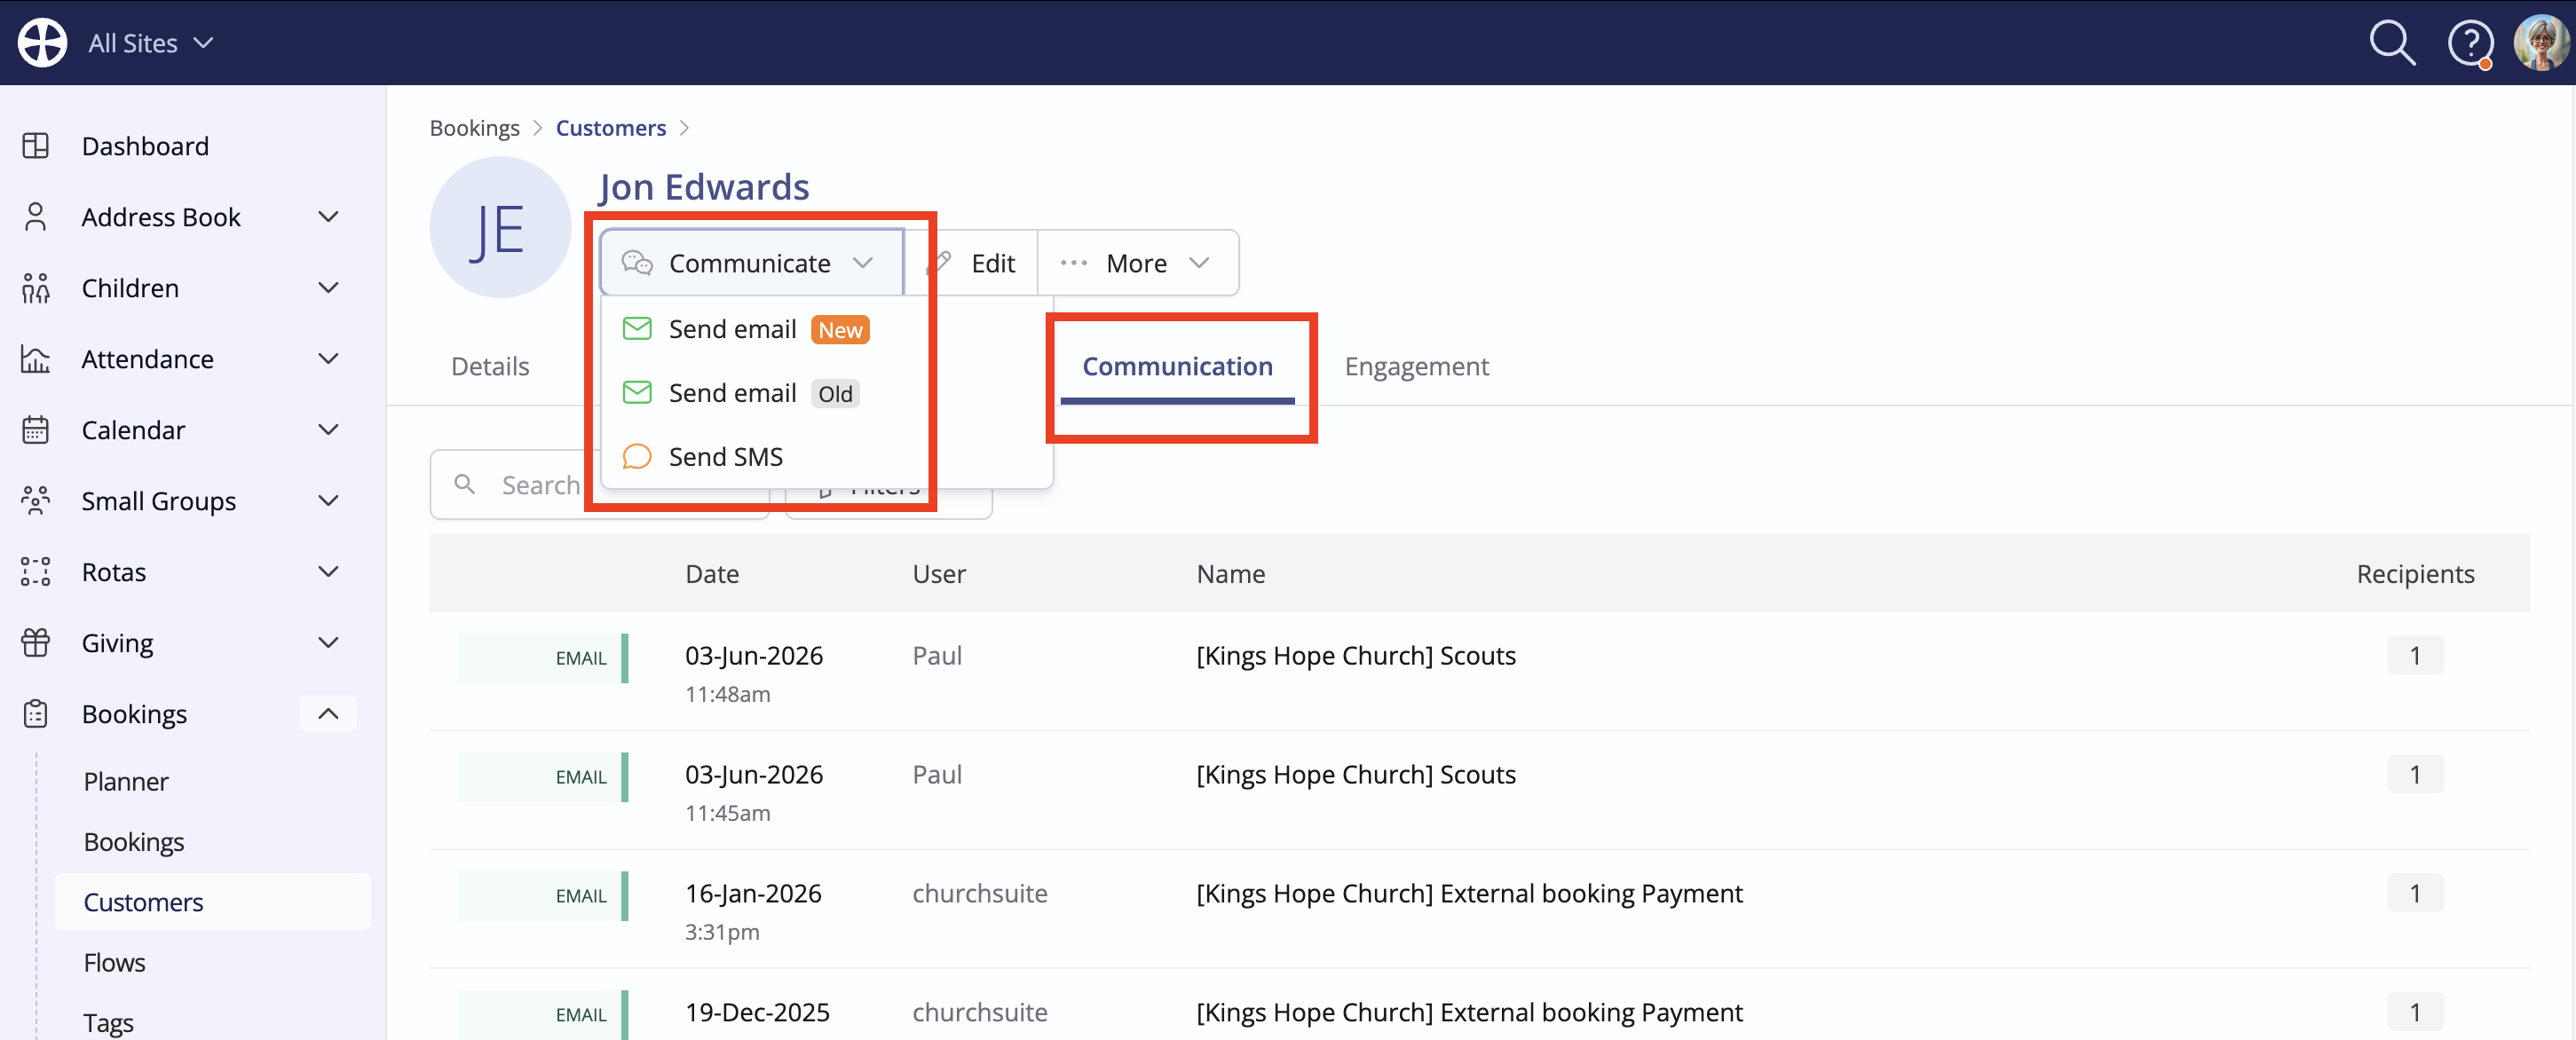
You can communicate directly with individual customers from their profile page using the communication options on the Communicate drop-down button. Communication options are only active if the customer has a valid email address or mobile number. Sent communications are recorded in the Communication tab located at the bottom of the customer profile.
As mentioned earlier in this article, you can also use a Bulk Action to communicate with multiple customers at the same time. Filter your customers as required, using Search and the available Filters to select the customers you wish to communicate with: