Linking bookings and events
In this article
Introduction
Adding a linked booking for an event
Adding a linked event for a booking
Identifying mismatches between bookings and booked resources
Introduction
While resource bookings may be for external customers for their events, you'll also use the Bookings module to book rooms and resources for your church's events to ensure your internal and external resource bookings don't conflict.
The Bookings module Planner is designed to help you visualise all your pending and confirmed bookings. However, for Users responsible for managing your internal events (who may not necessarily have Bookings module permissions), it's especially helpful that they can easily identify which events have resource bookings and which don't. Adding linked resource bookings for your internal church events is easy.
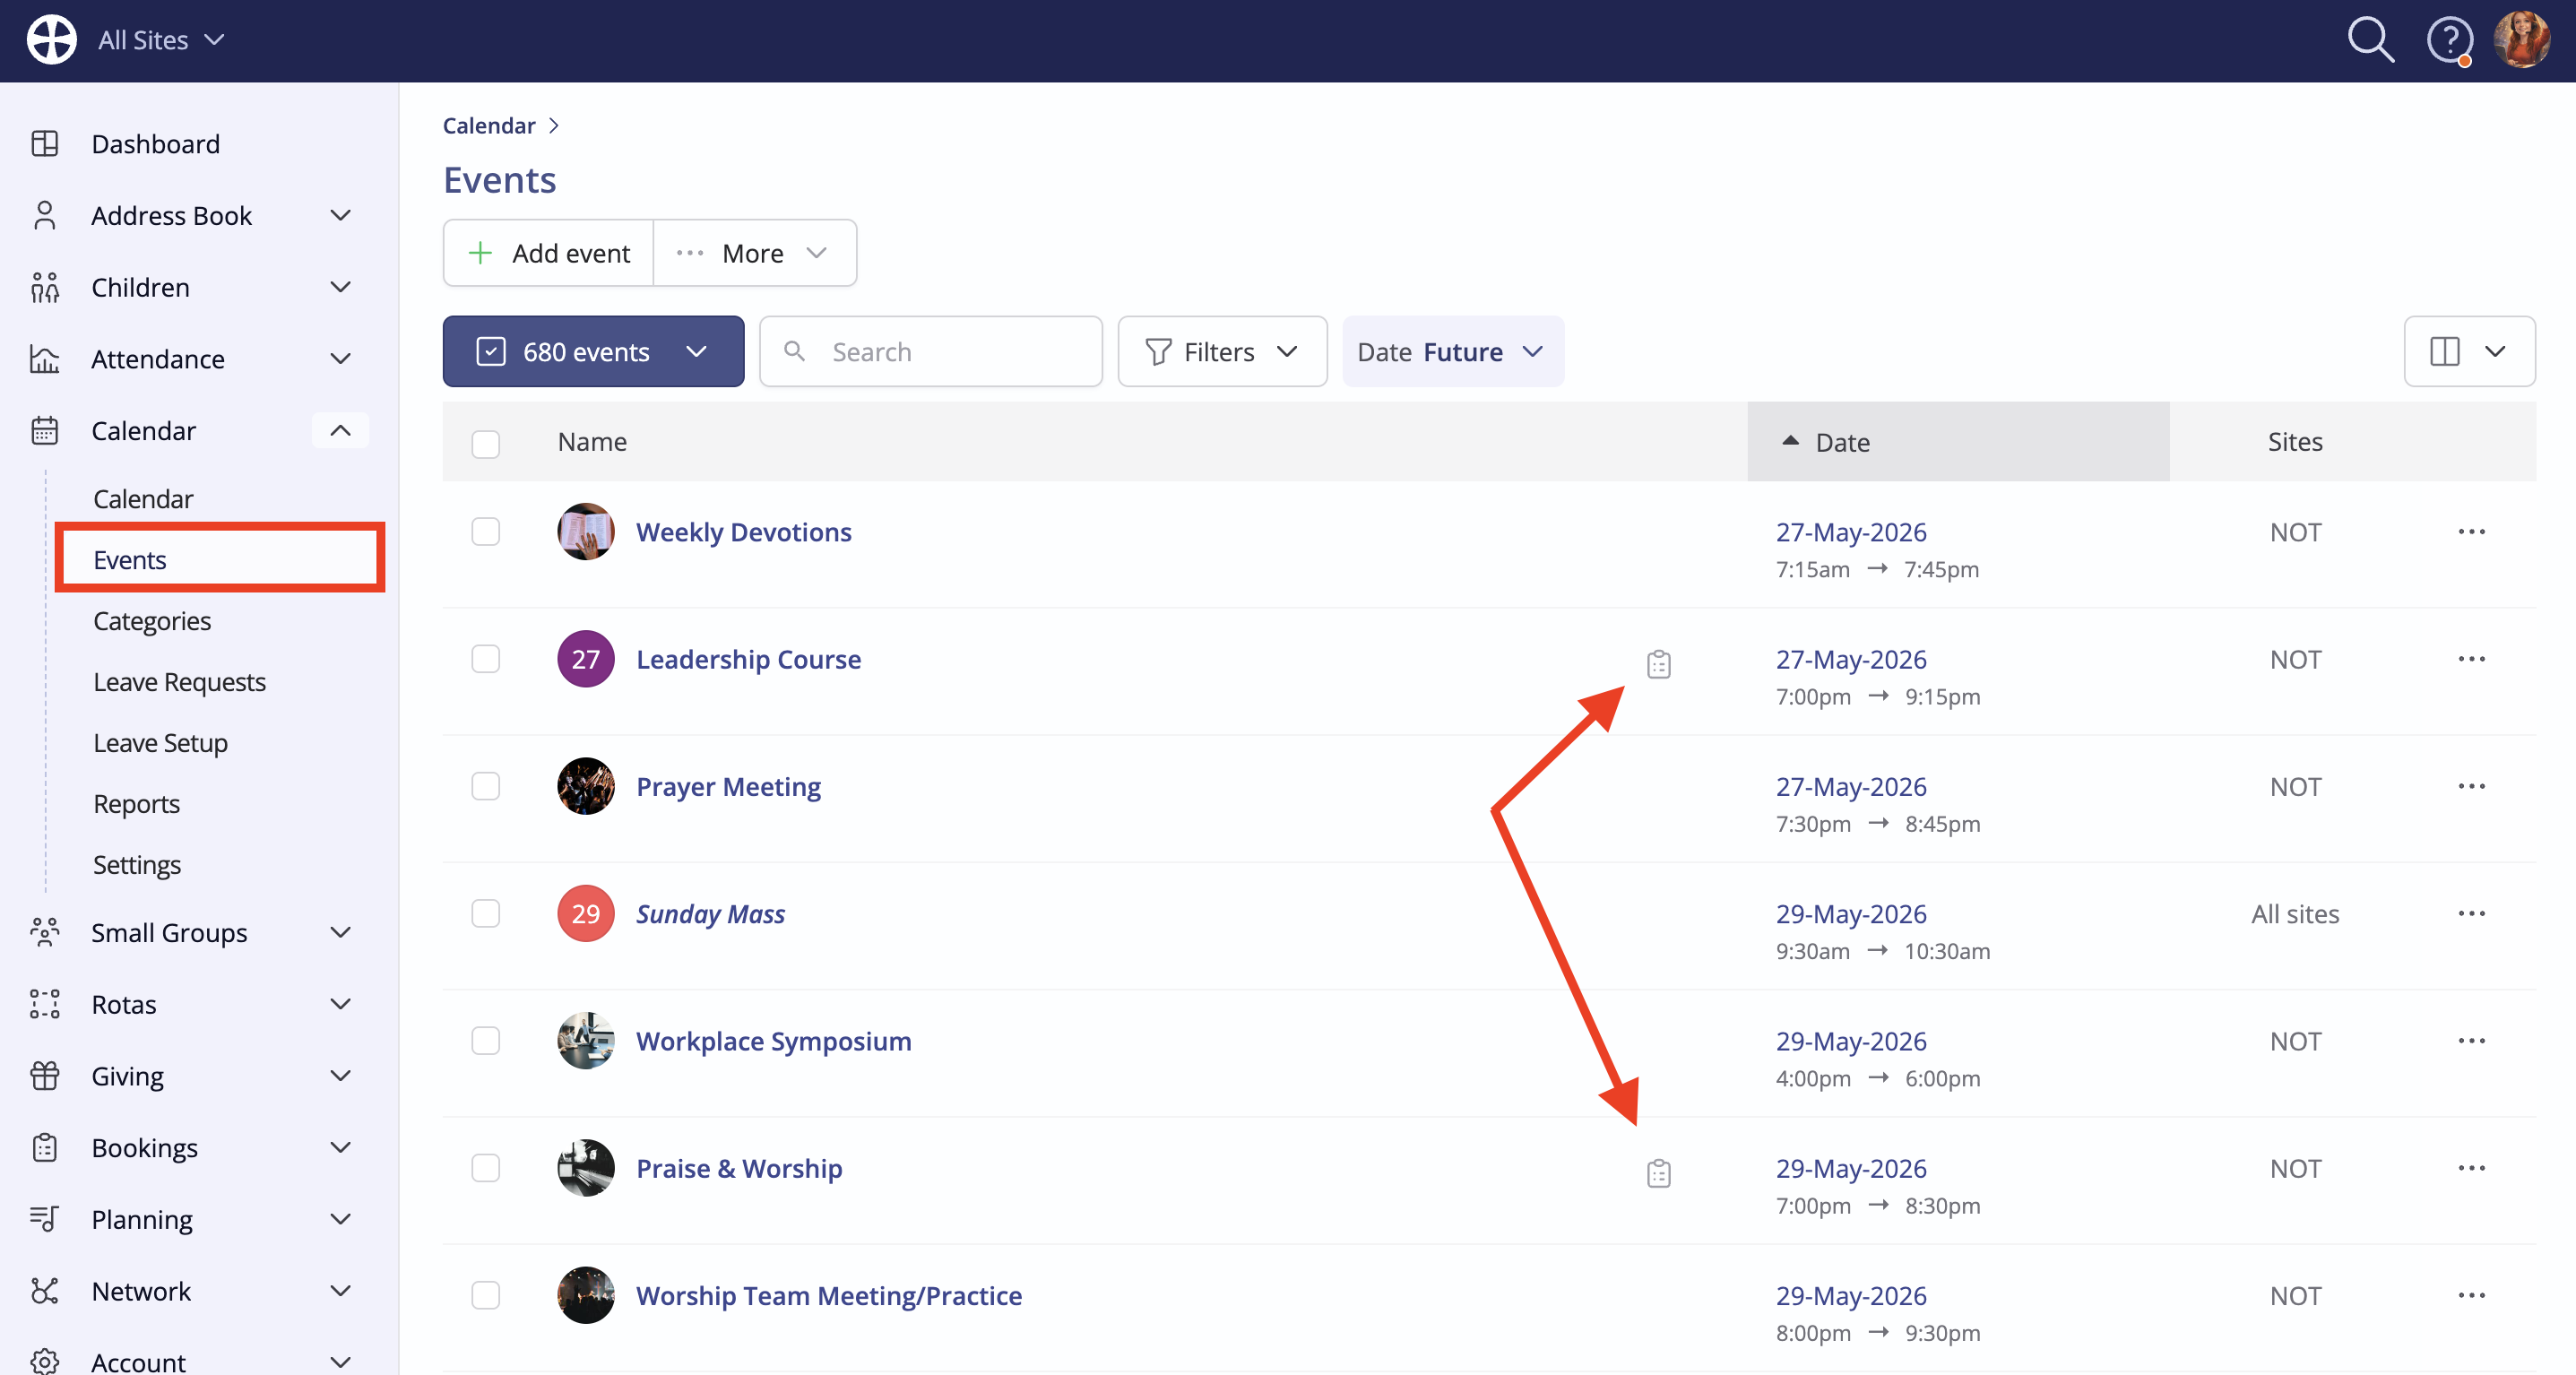
The Calendar module Events list shows a visual clipboard icon for events that have a linked booking already created. Events without a clipboard icon do not yet have a linked resource booking.
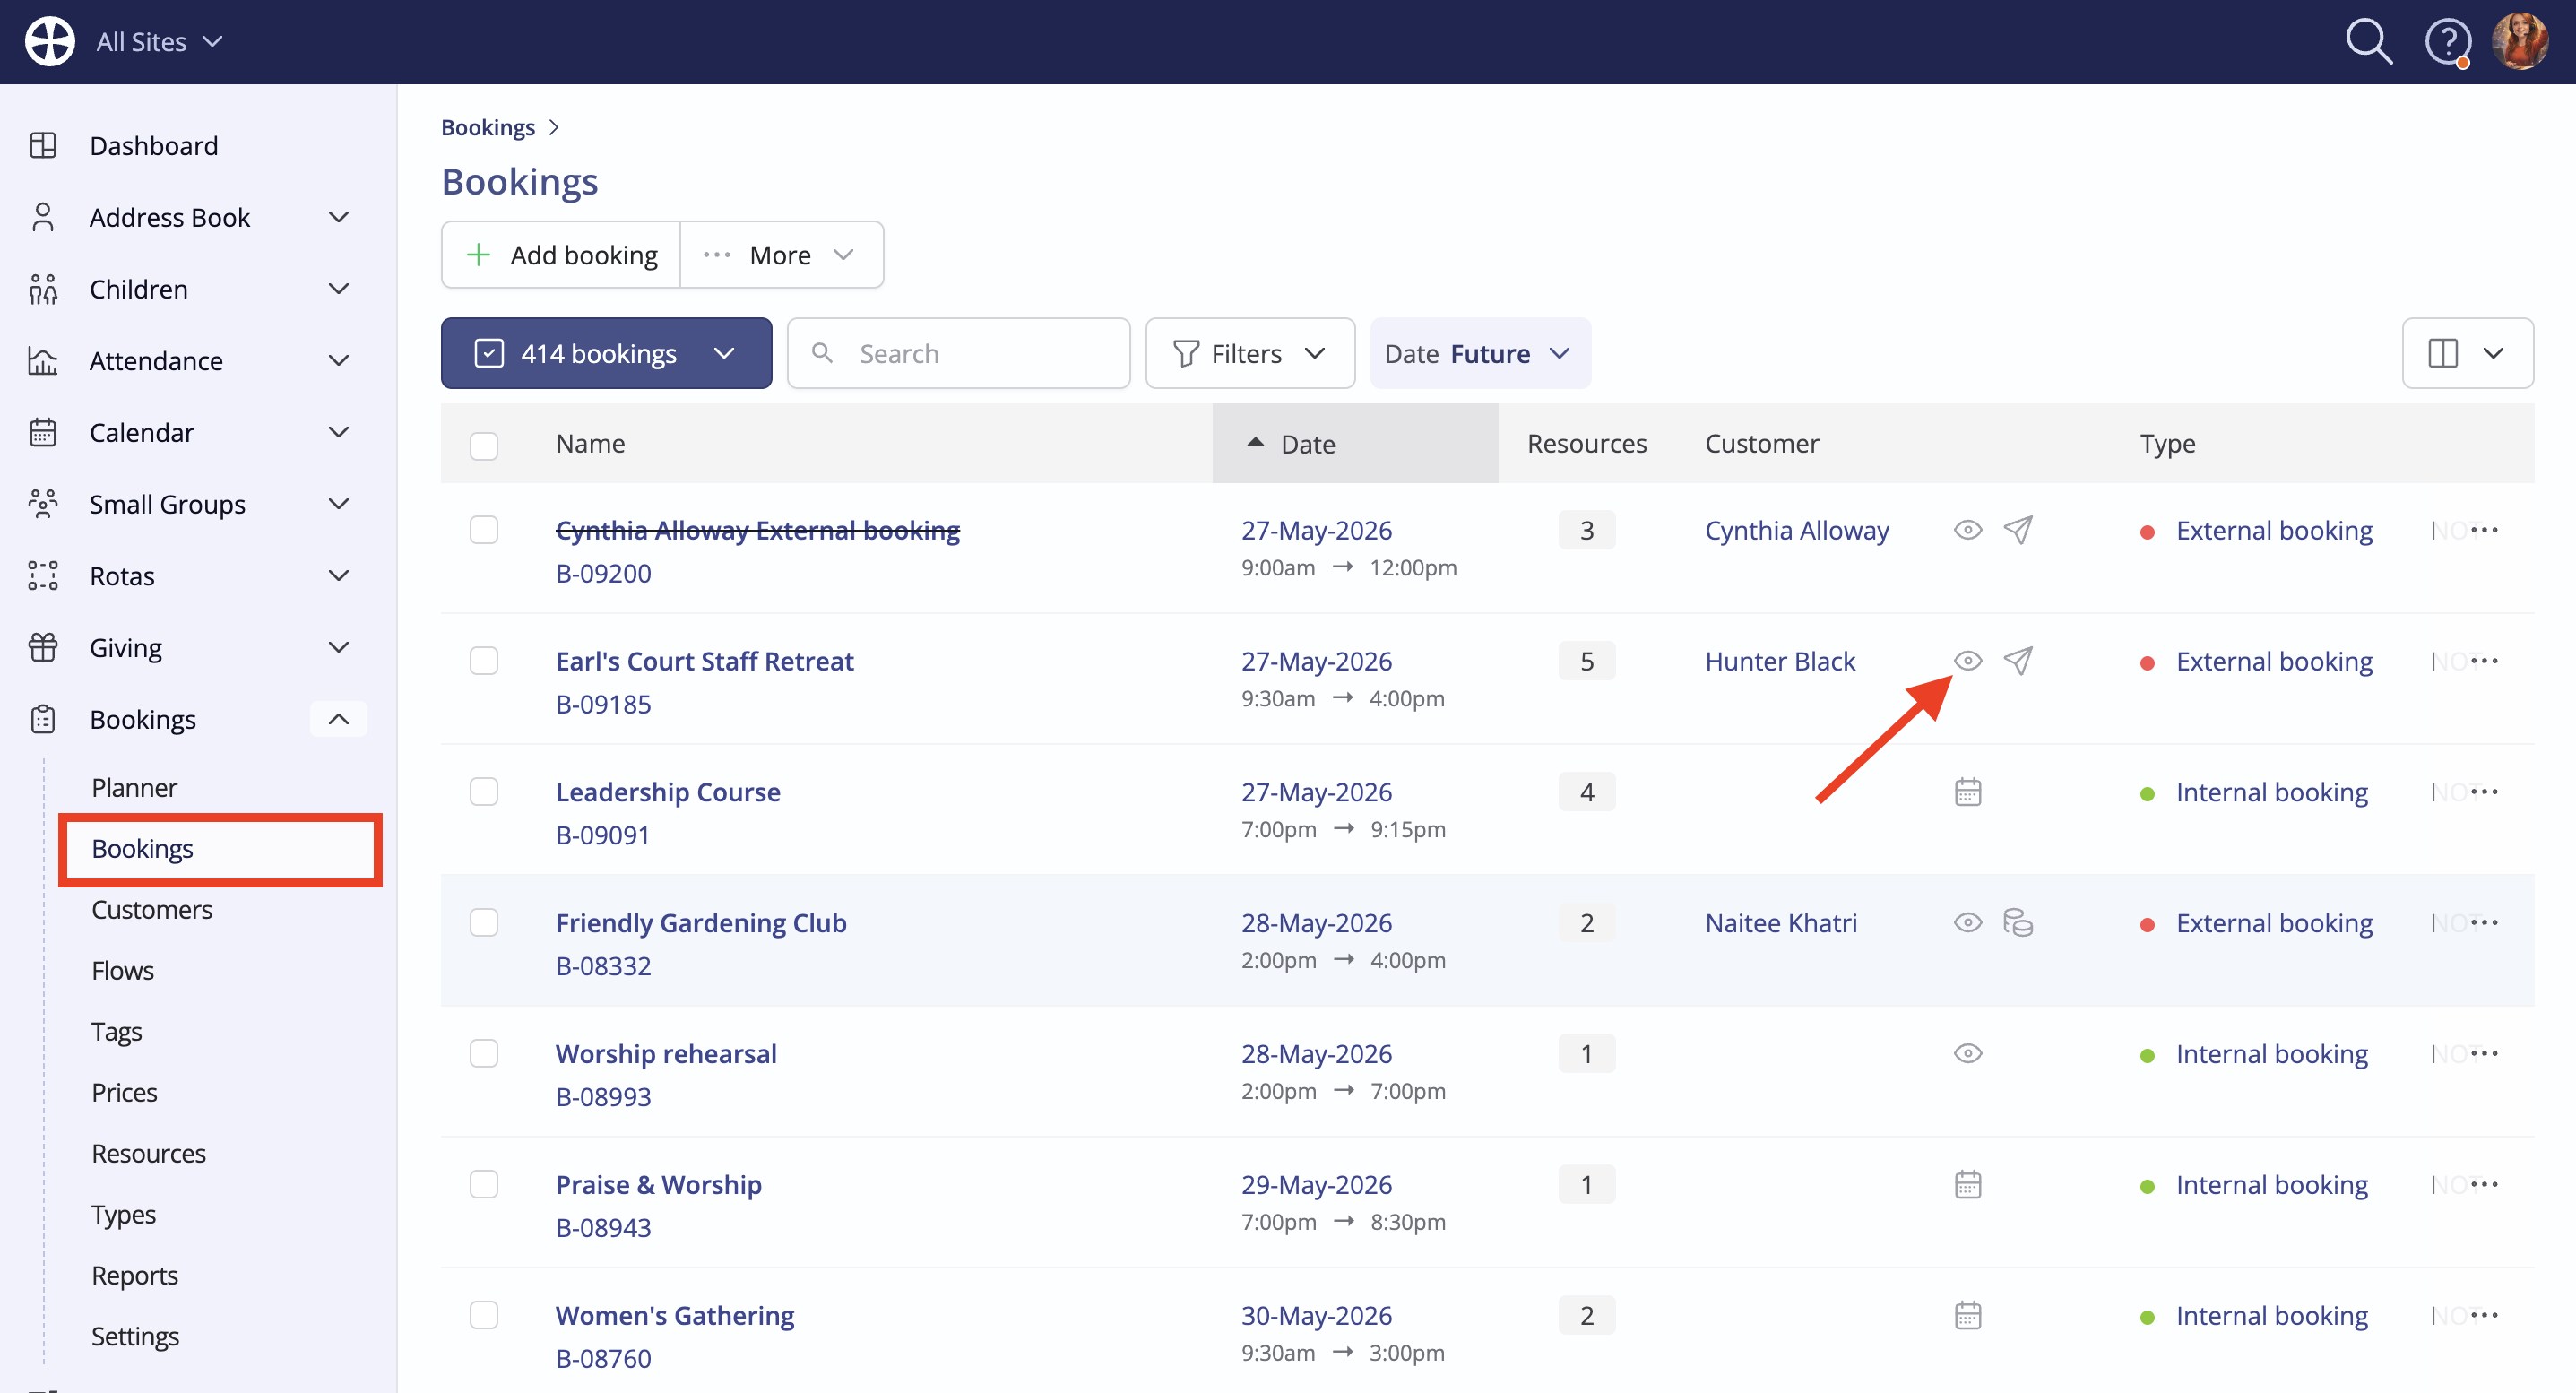
Similarly, the Bookings module Bookings list shows an eye icon for each unlinked booking set to Show on the calendar:
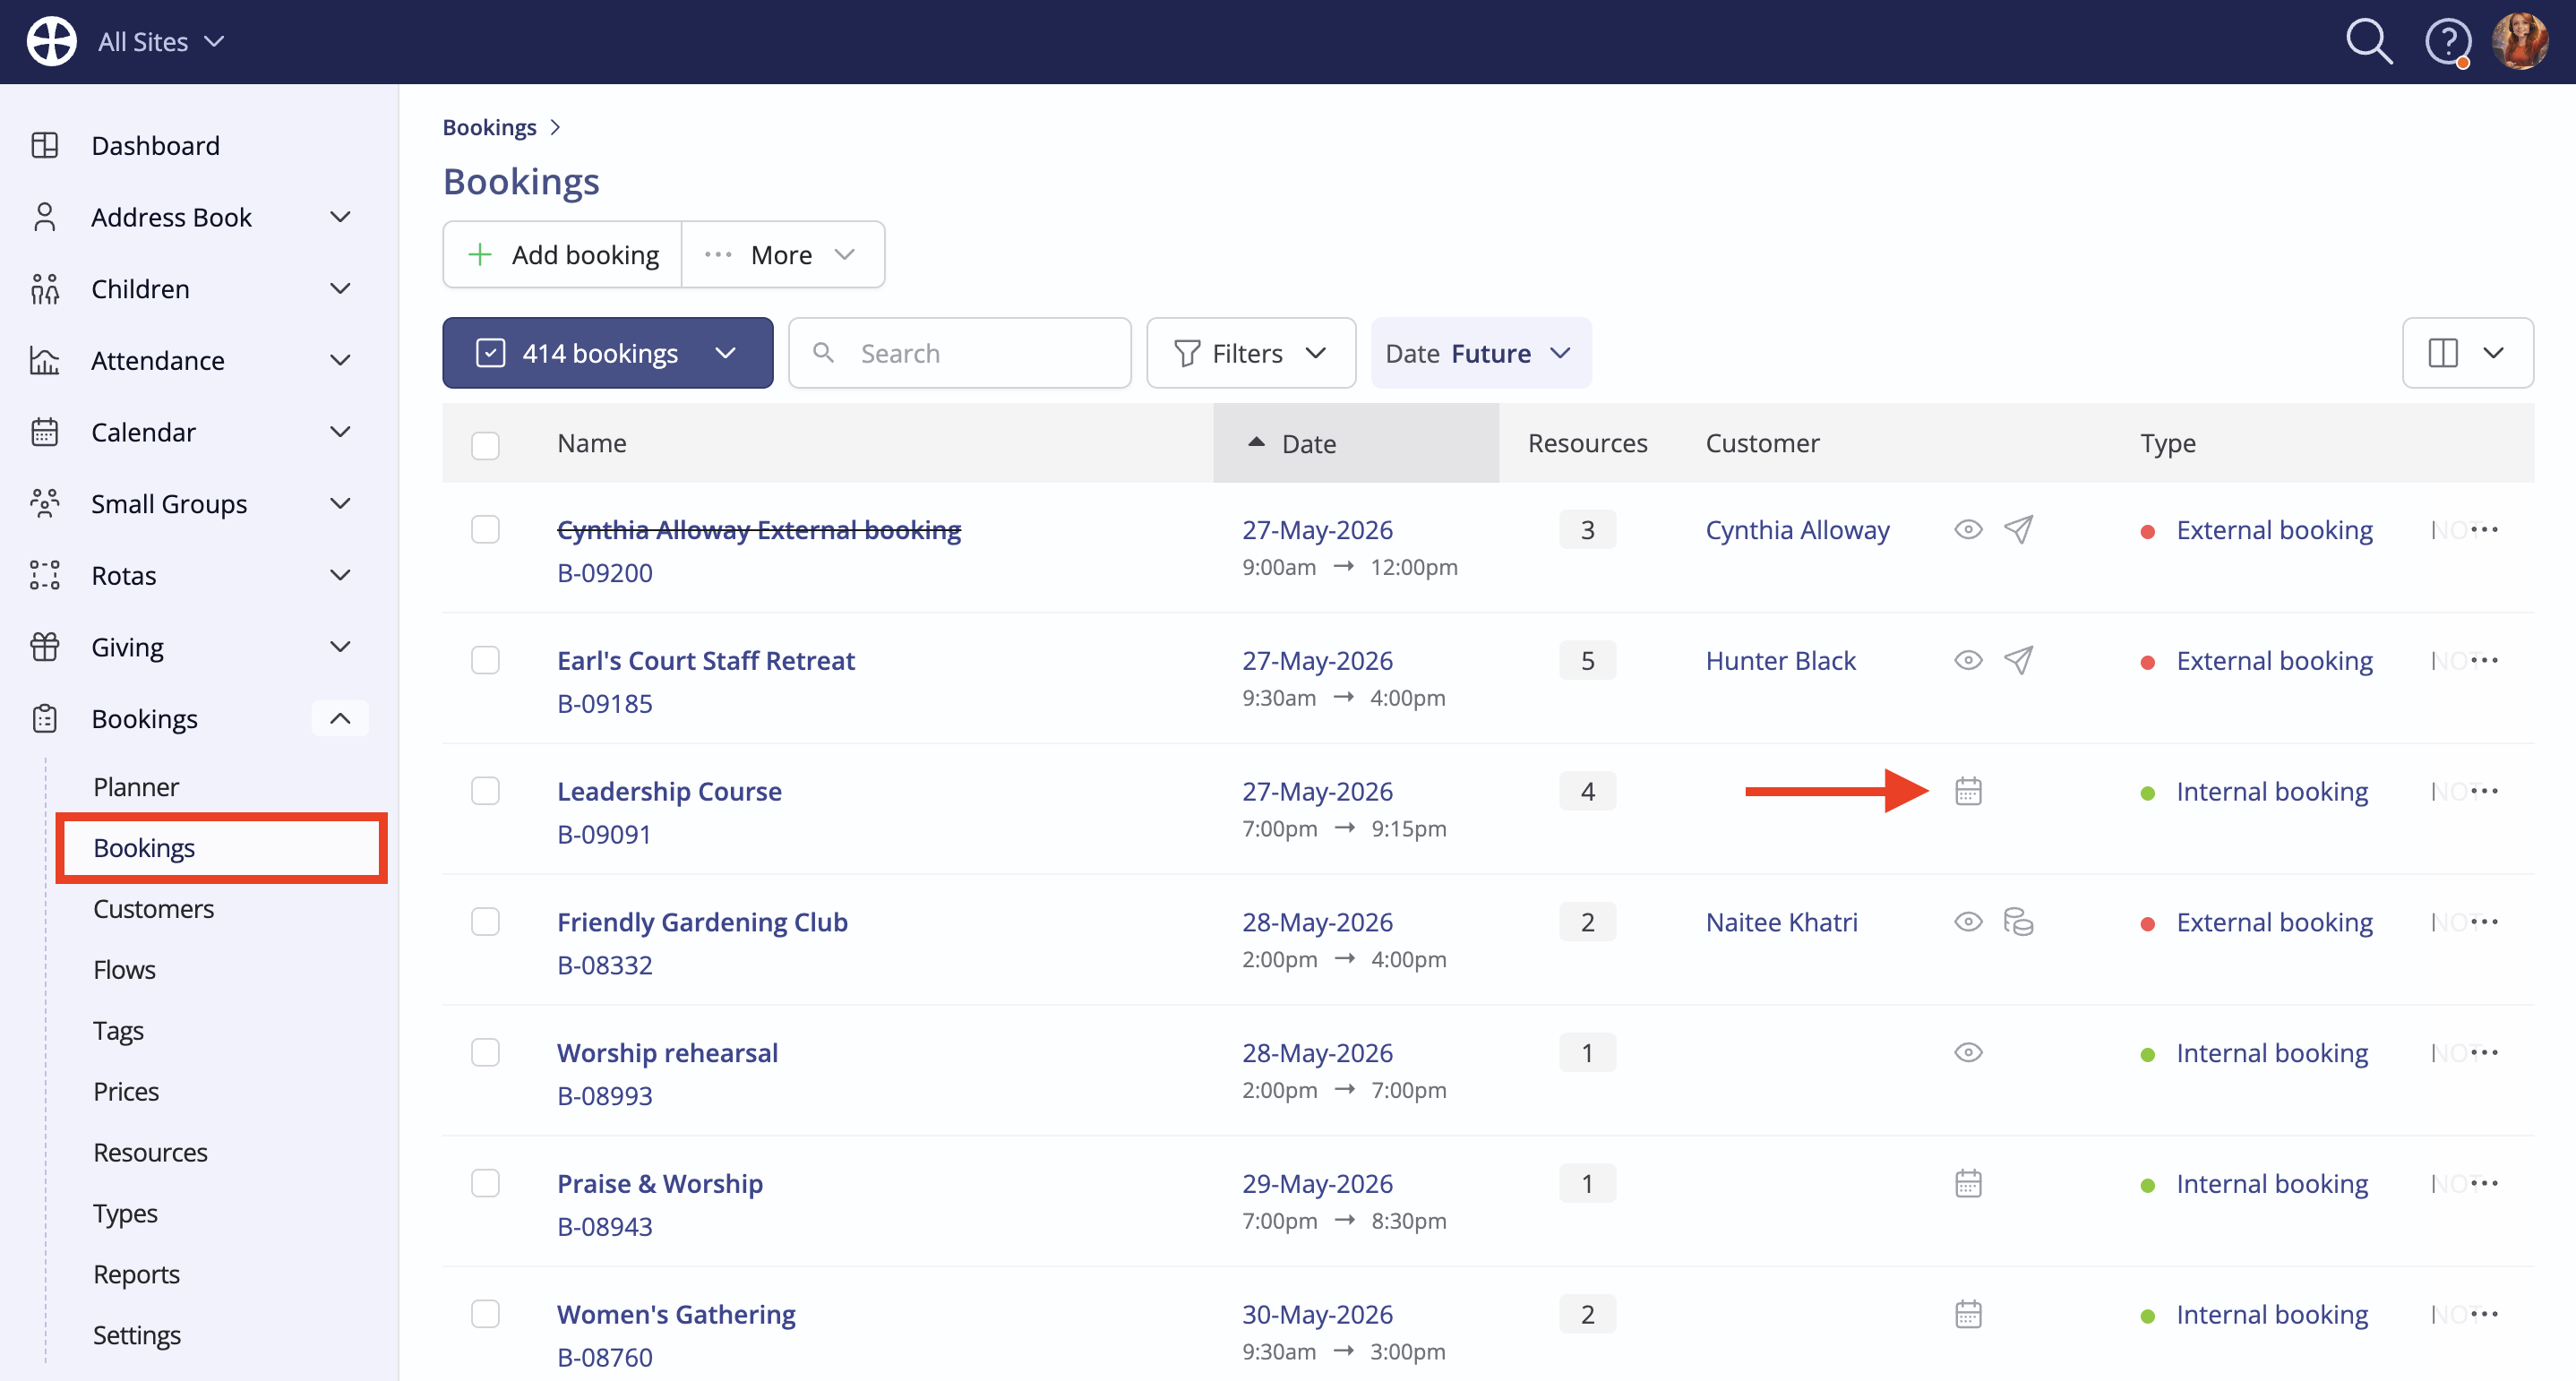
A calendar icon is shown for bookings linked to events in the Calendar module:
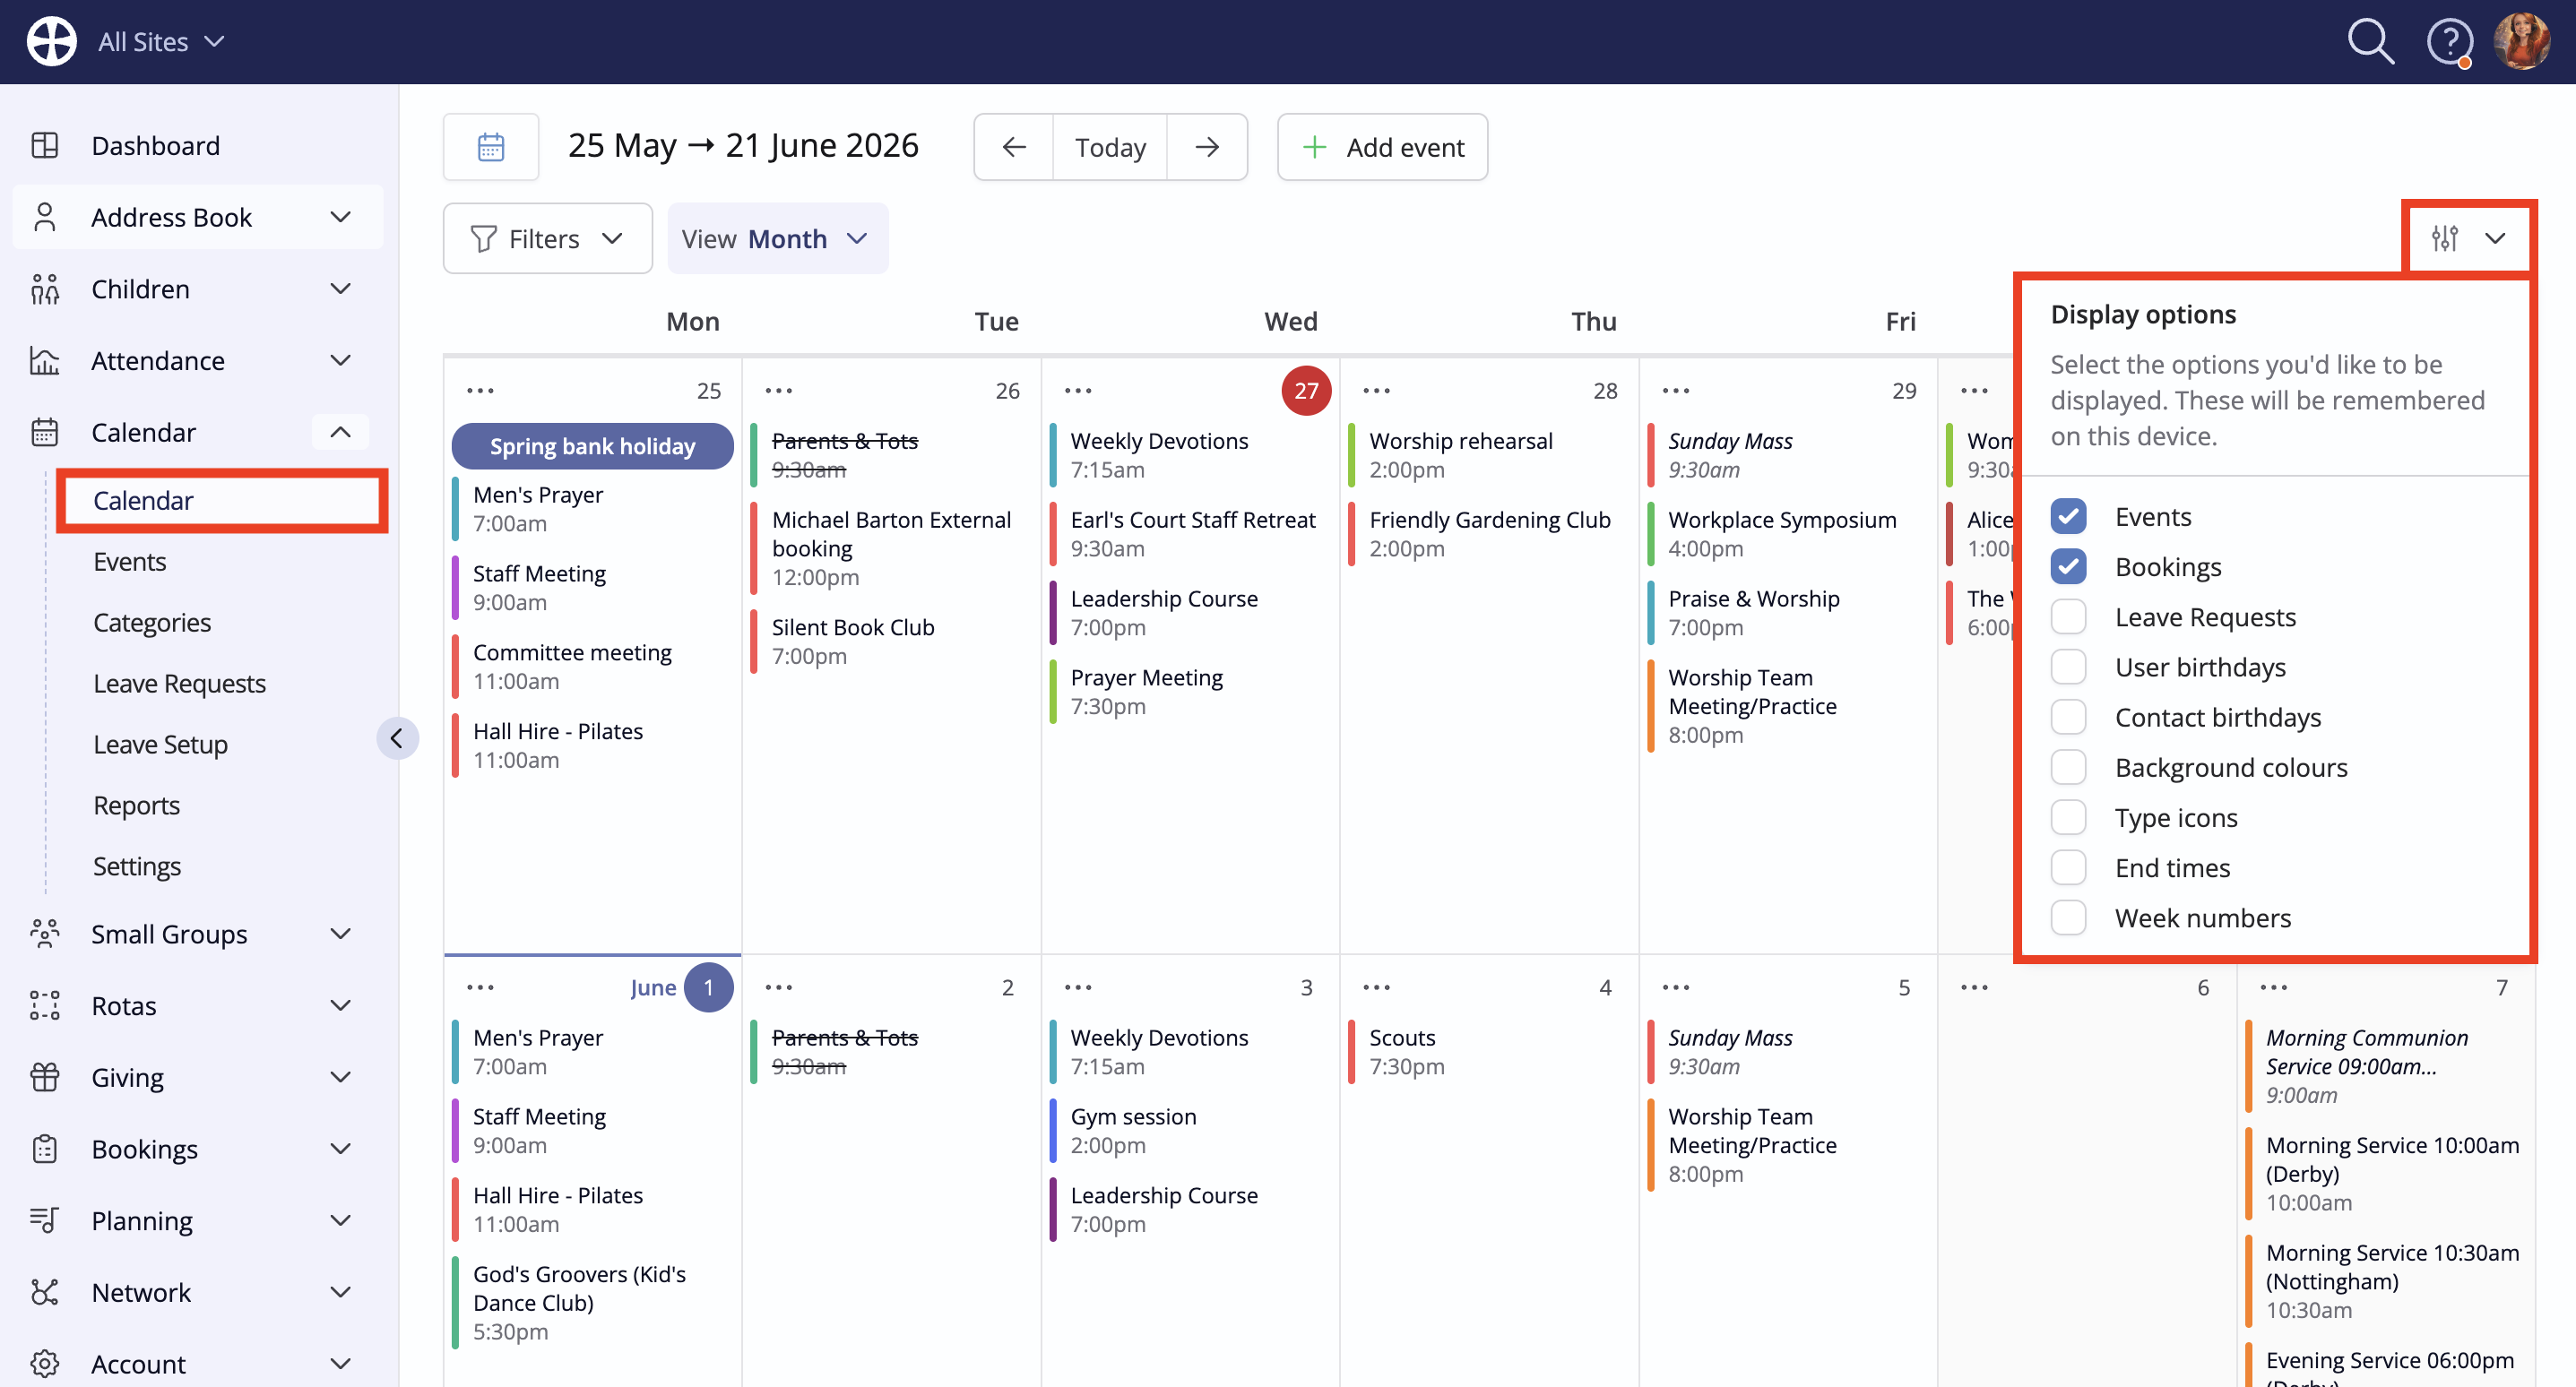
It's not necessary to set all unlinked bookings to Show on the calendar, but many organisations find it helpful for Calendar module users, who may not have Planner access, to be able to visualise external bookings in the Calendar alongside their internal events. You can view Bookings set to Show on the calendar by selecting Bookings in the Display options in the Calendar module
Depending on your workflow, you may wish to add bookings to events you have already created, or you may have pending bookings that have now been confirmed, meaning you are ready to add the linked event. We will explore both scenarios below.
Adding a linked booking for an event
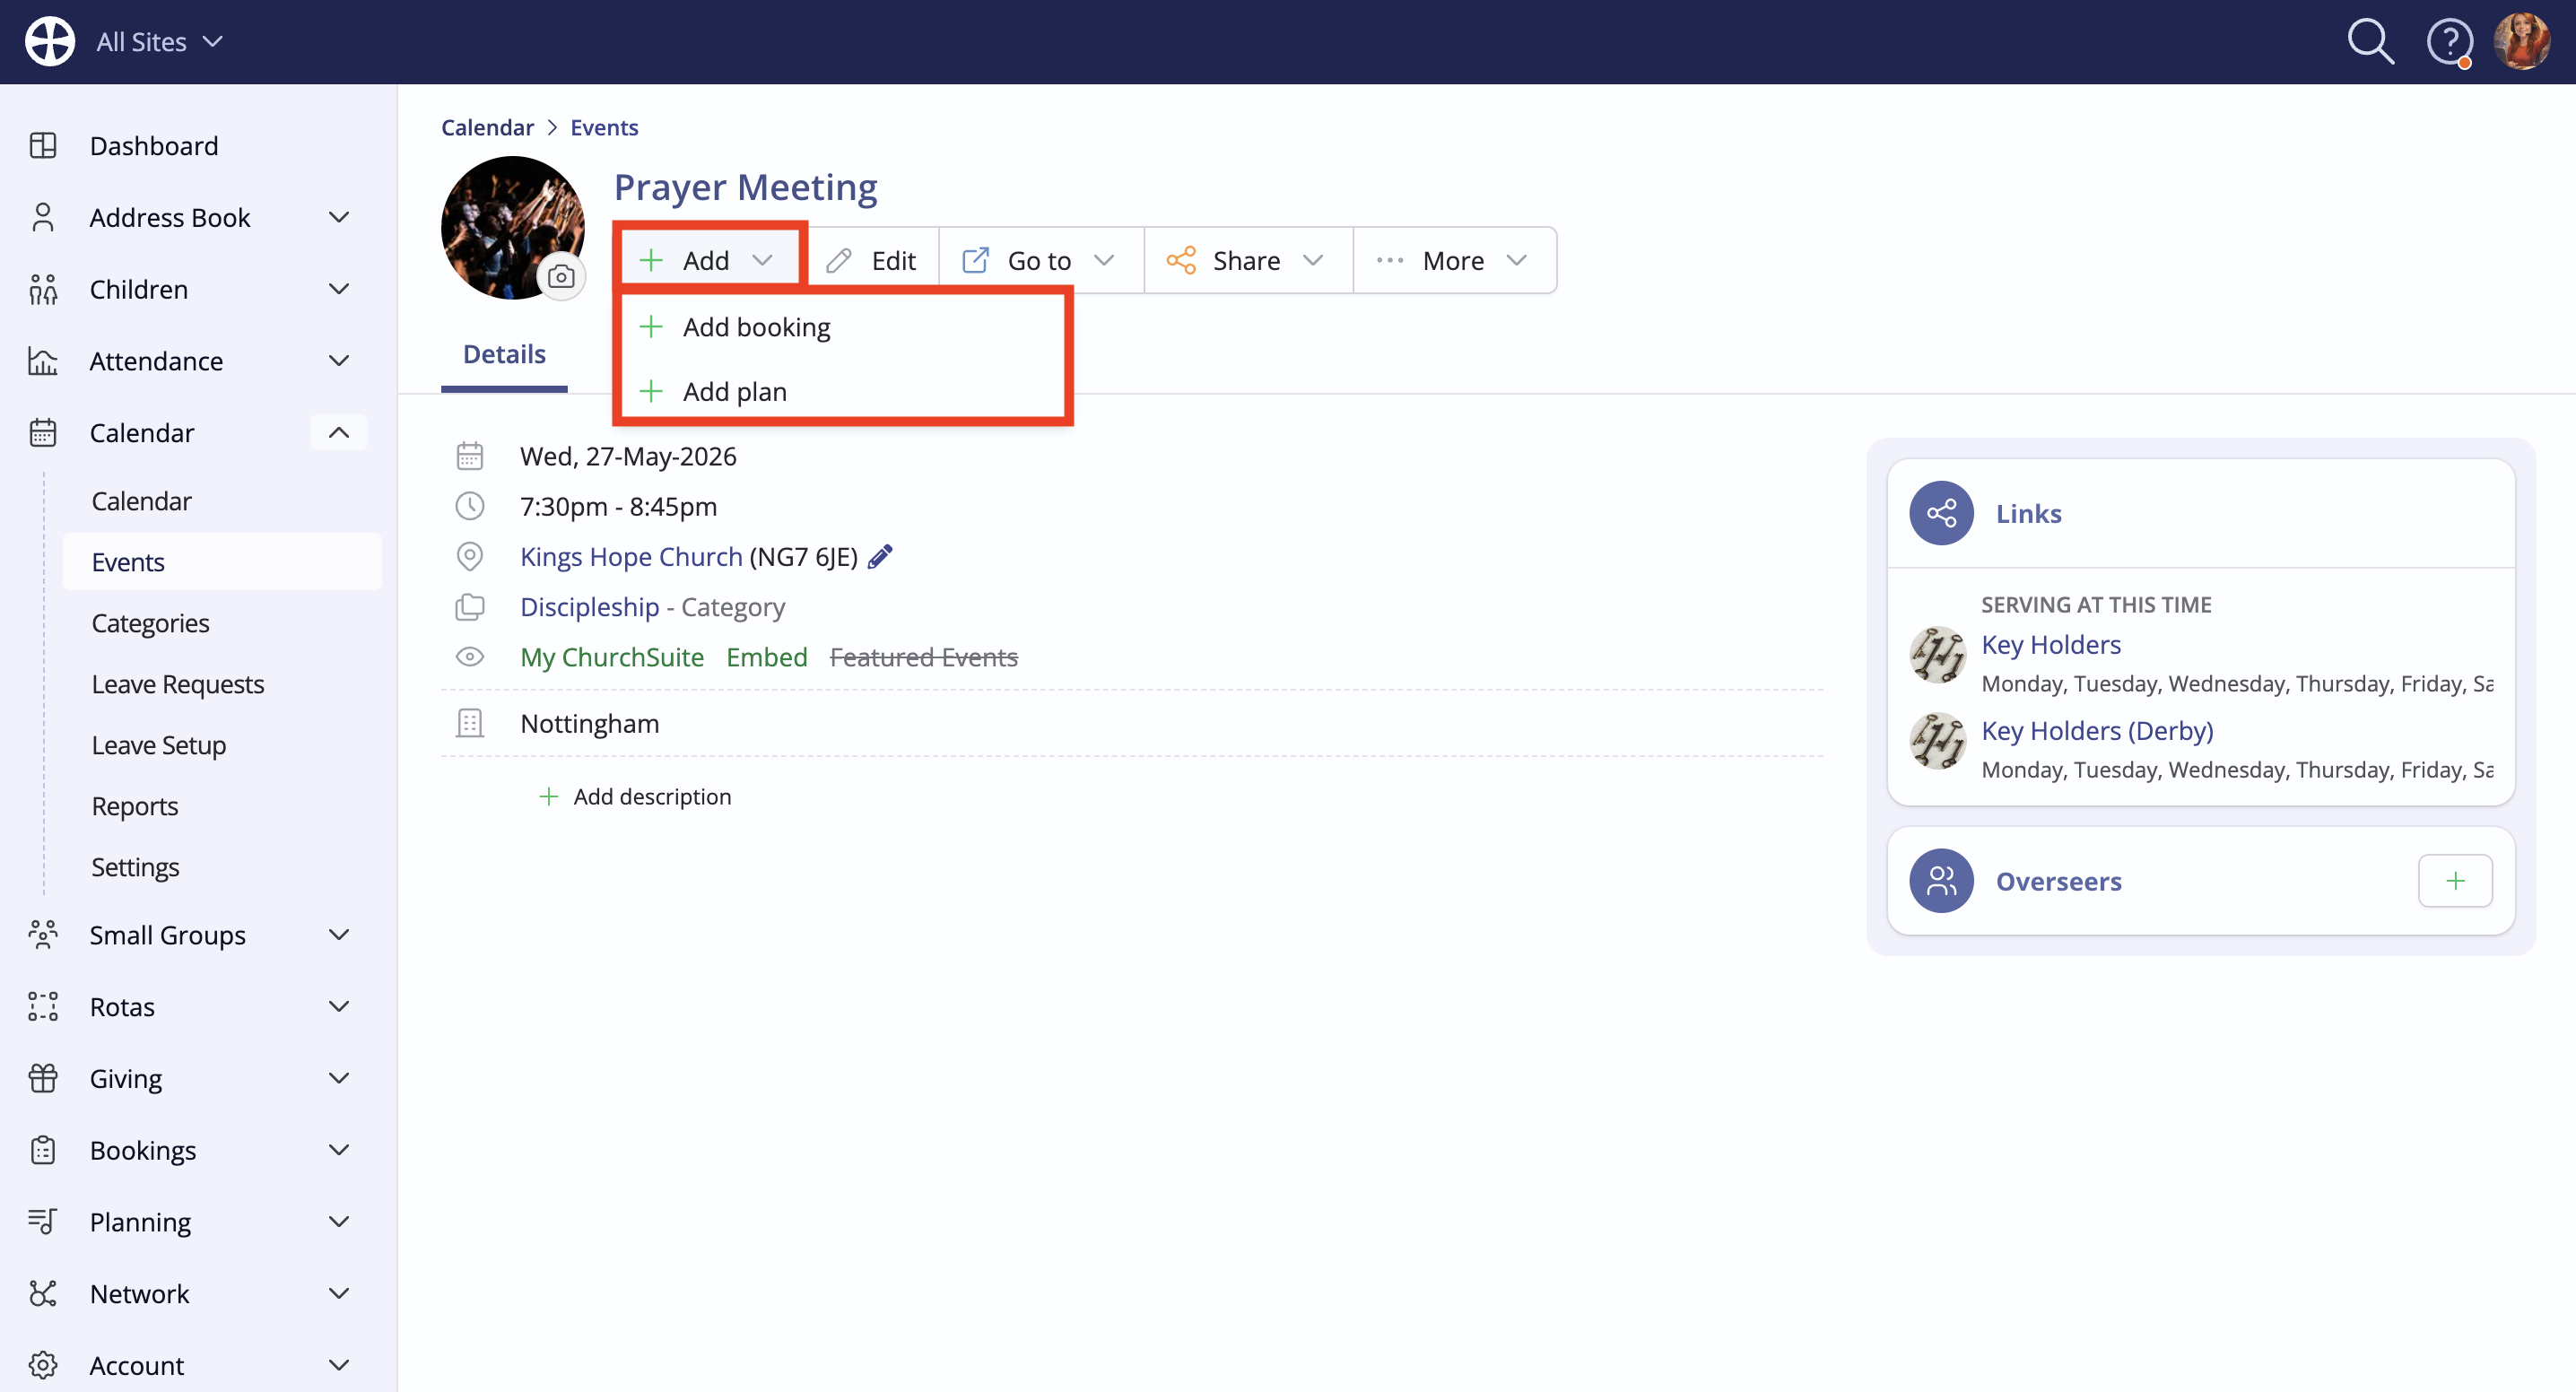
Navigate to the event, click the Add button and select Add booking (this option is only available if a booking has not already been linked):
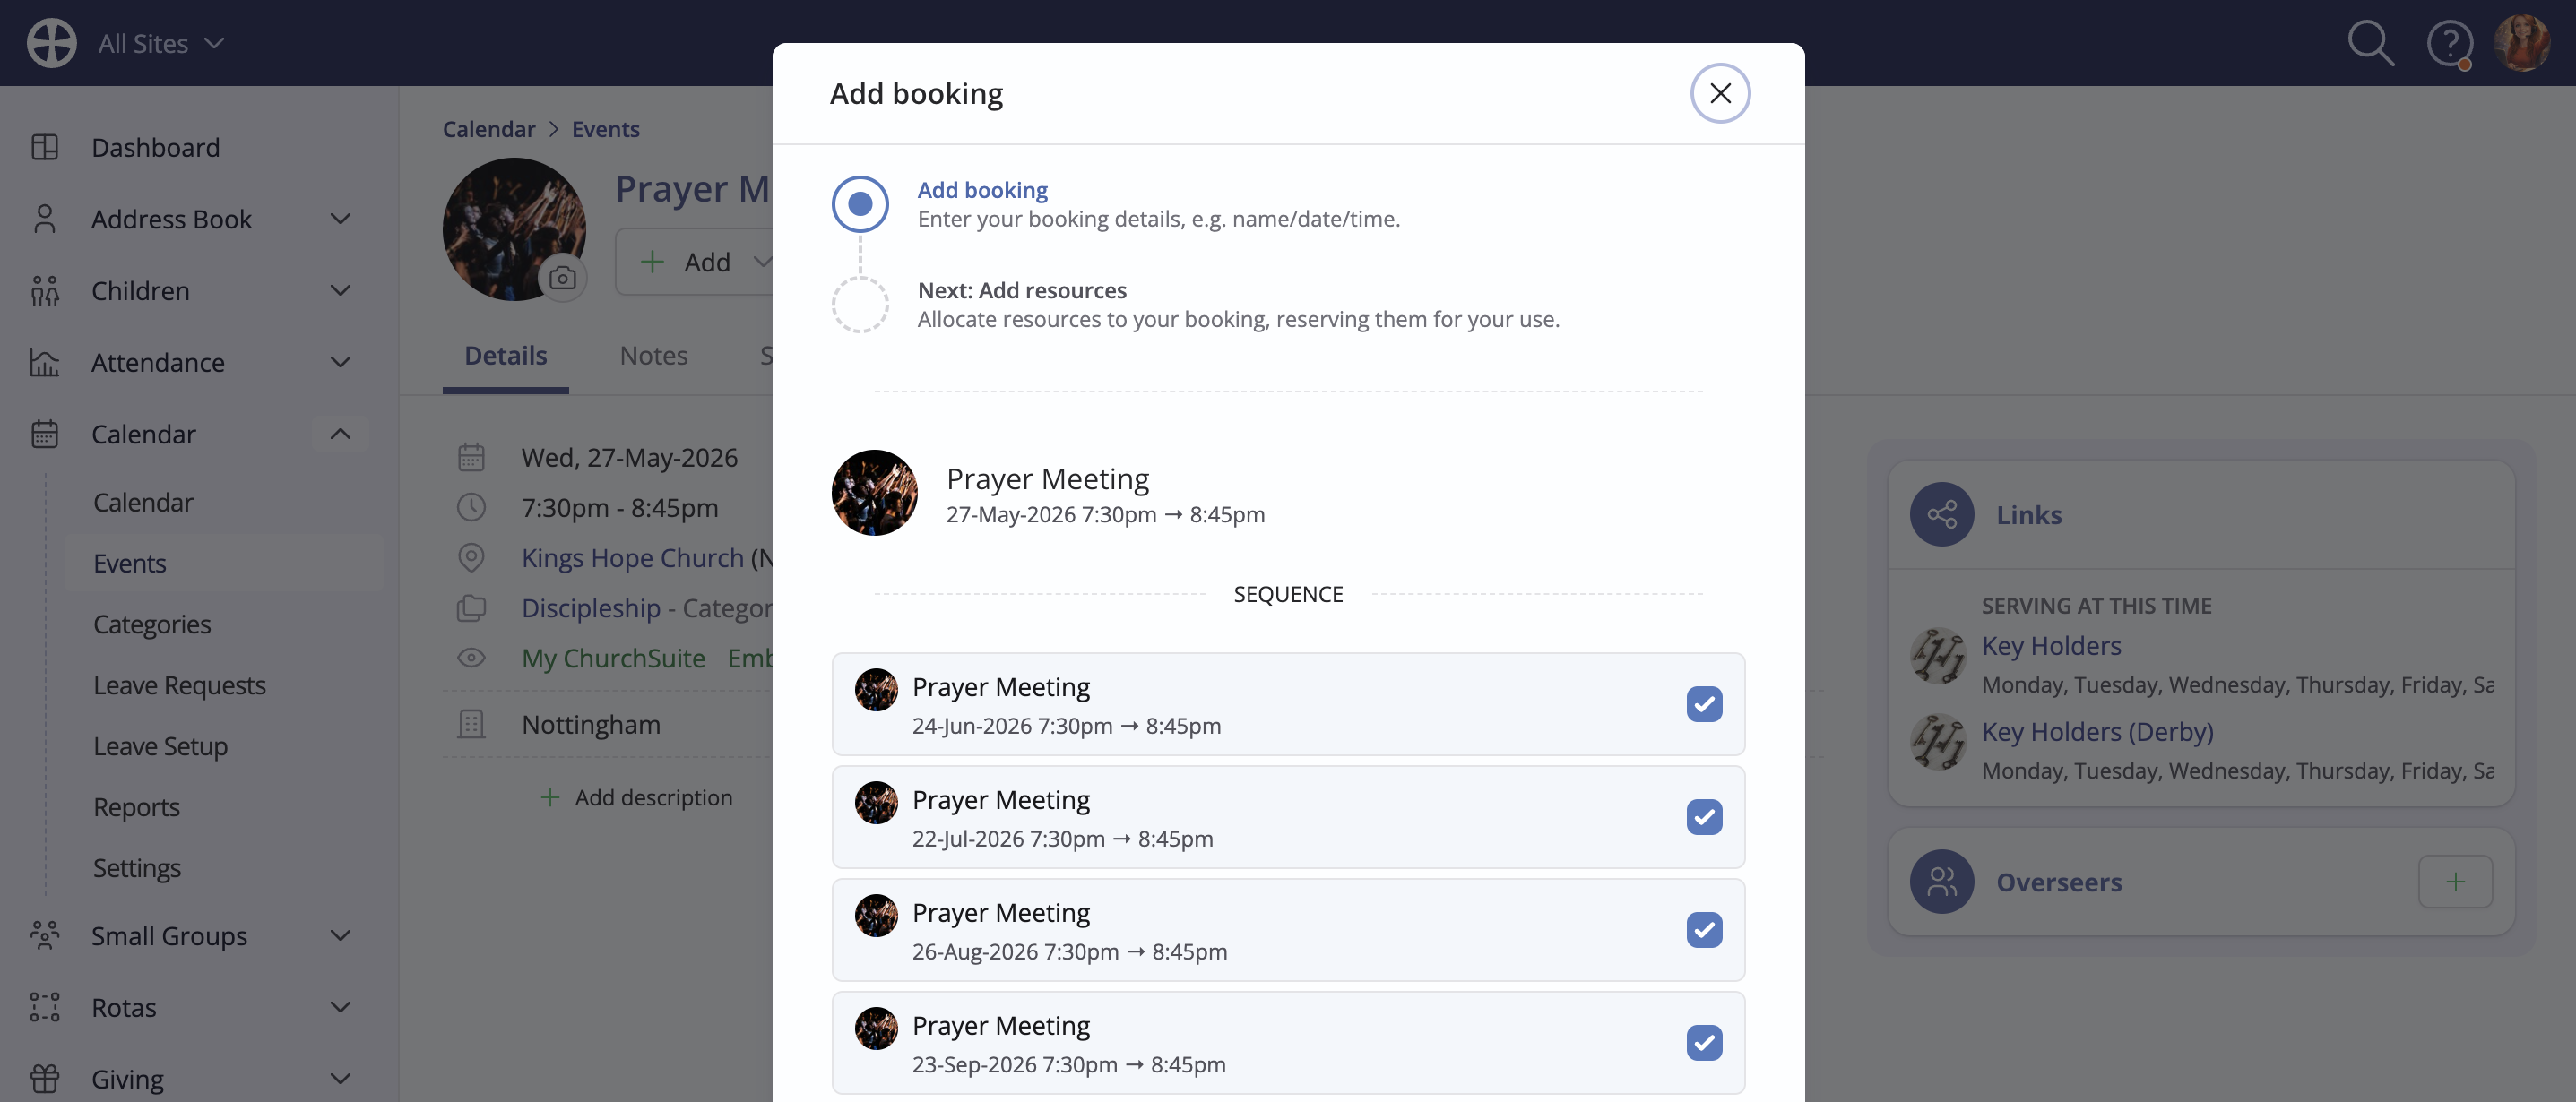
The Add booking pop-up opens. If the event is part of a multi-date sequence - like the example below - the pop-up will list all the event sequence dates so that you can easily create linked bookings for one, some, or all events in the same sequence. Untick any event dates for which you don't want to create linked bookings; typically, though, you would likely want to create linked bookings for all events in the sequence.
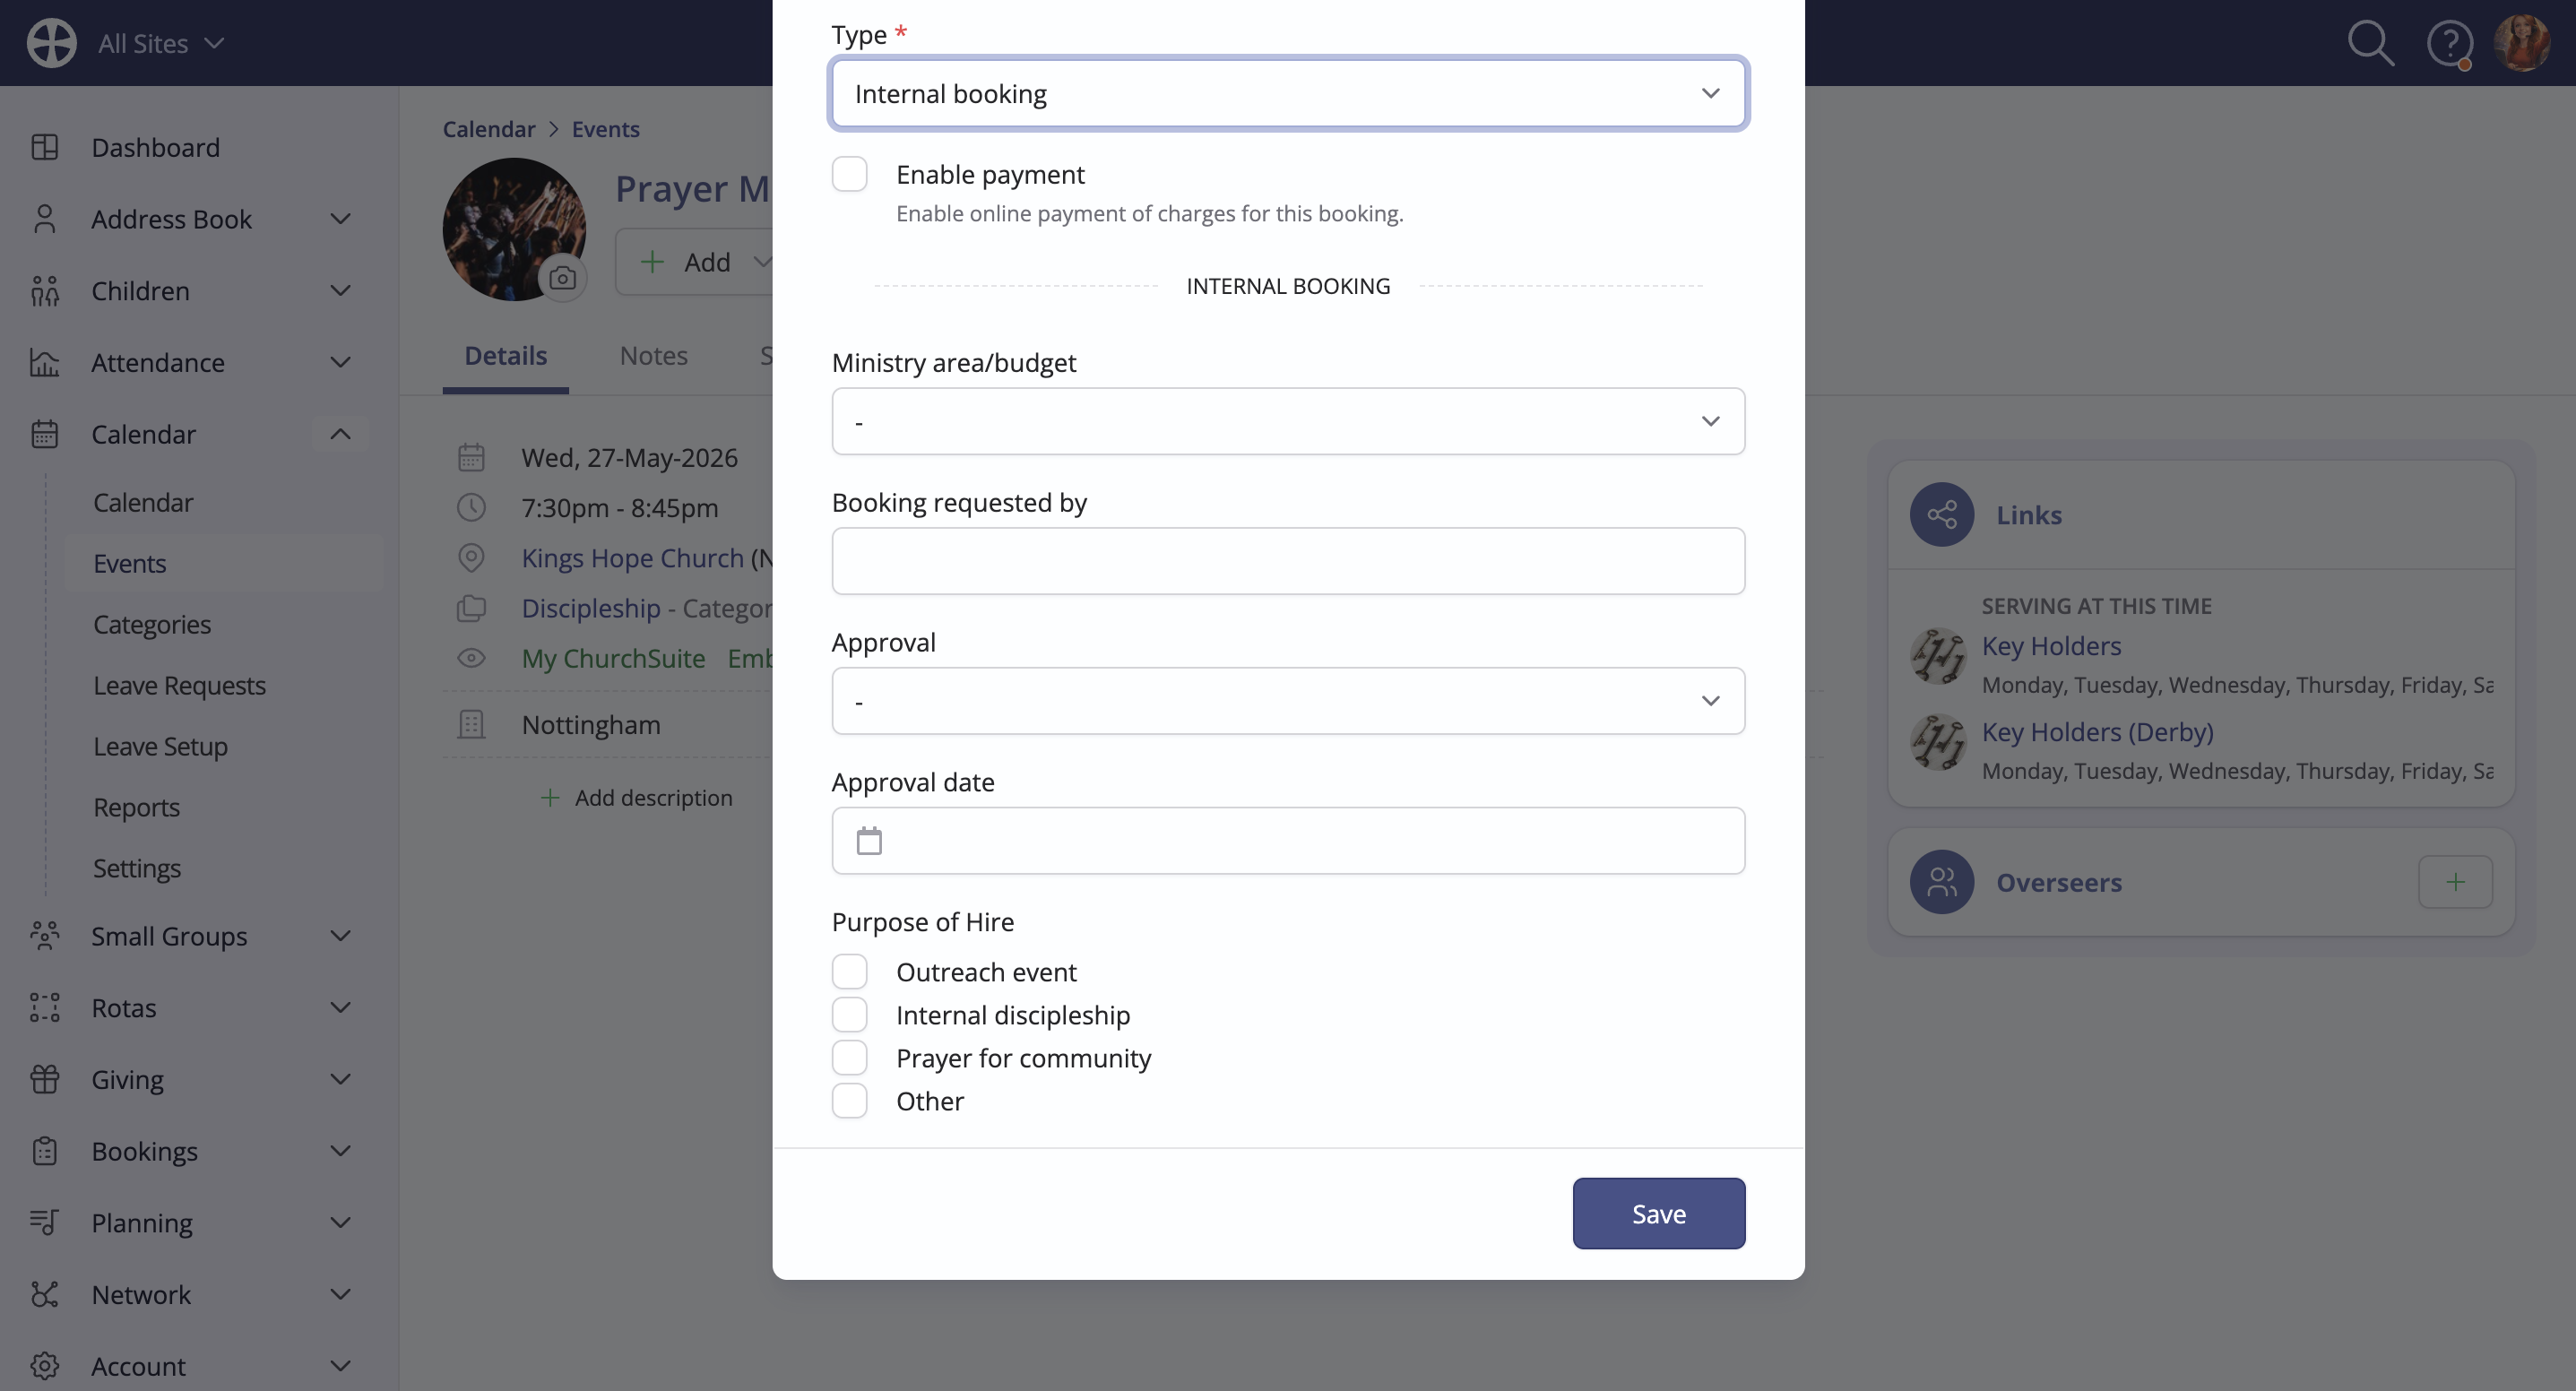
Review and update the other booking details, optionally adding a Customer if appropriate and selecting the booking Type. Respond to any associated booking-type questions that are set as Required - it is not possible to save a booking until all required questions are completed. Click Save.
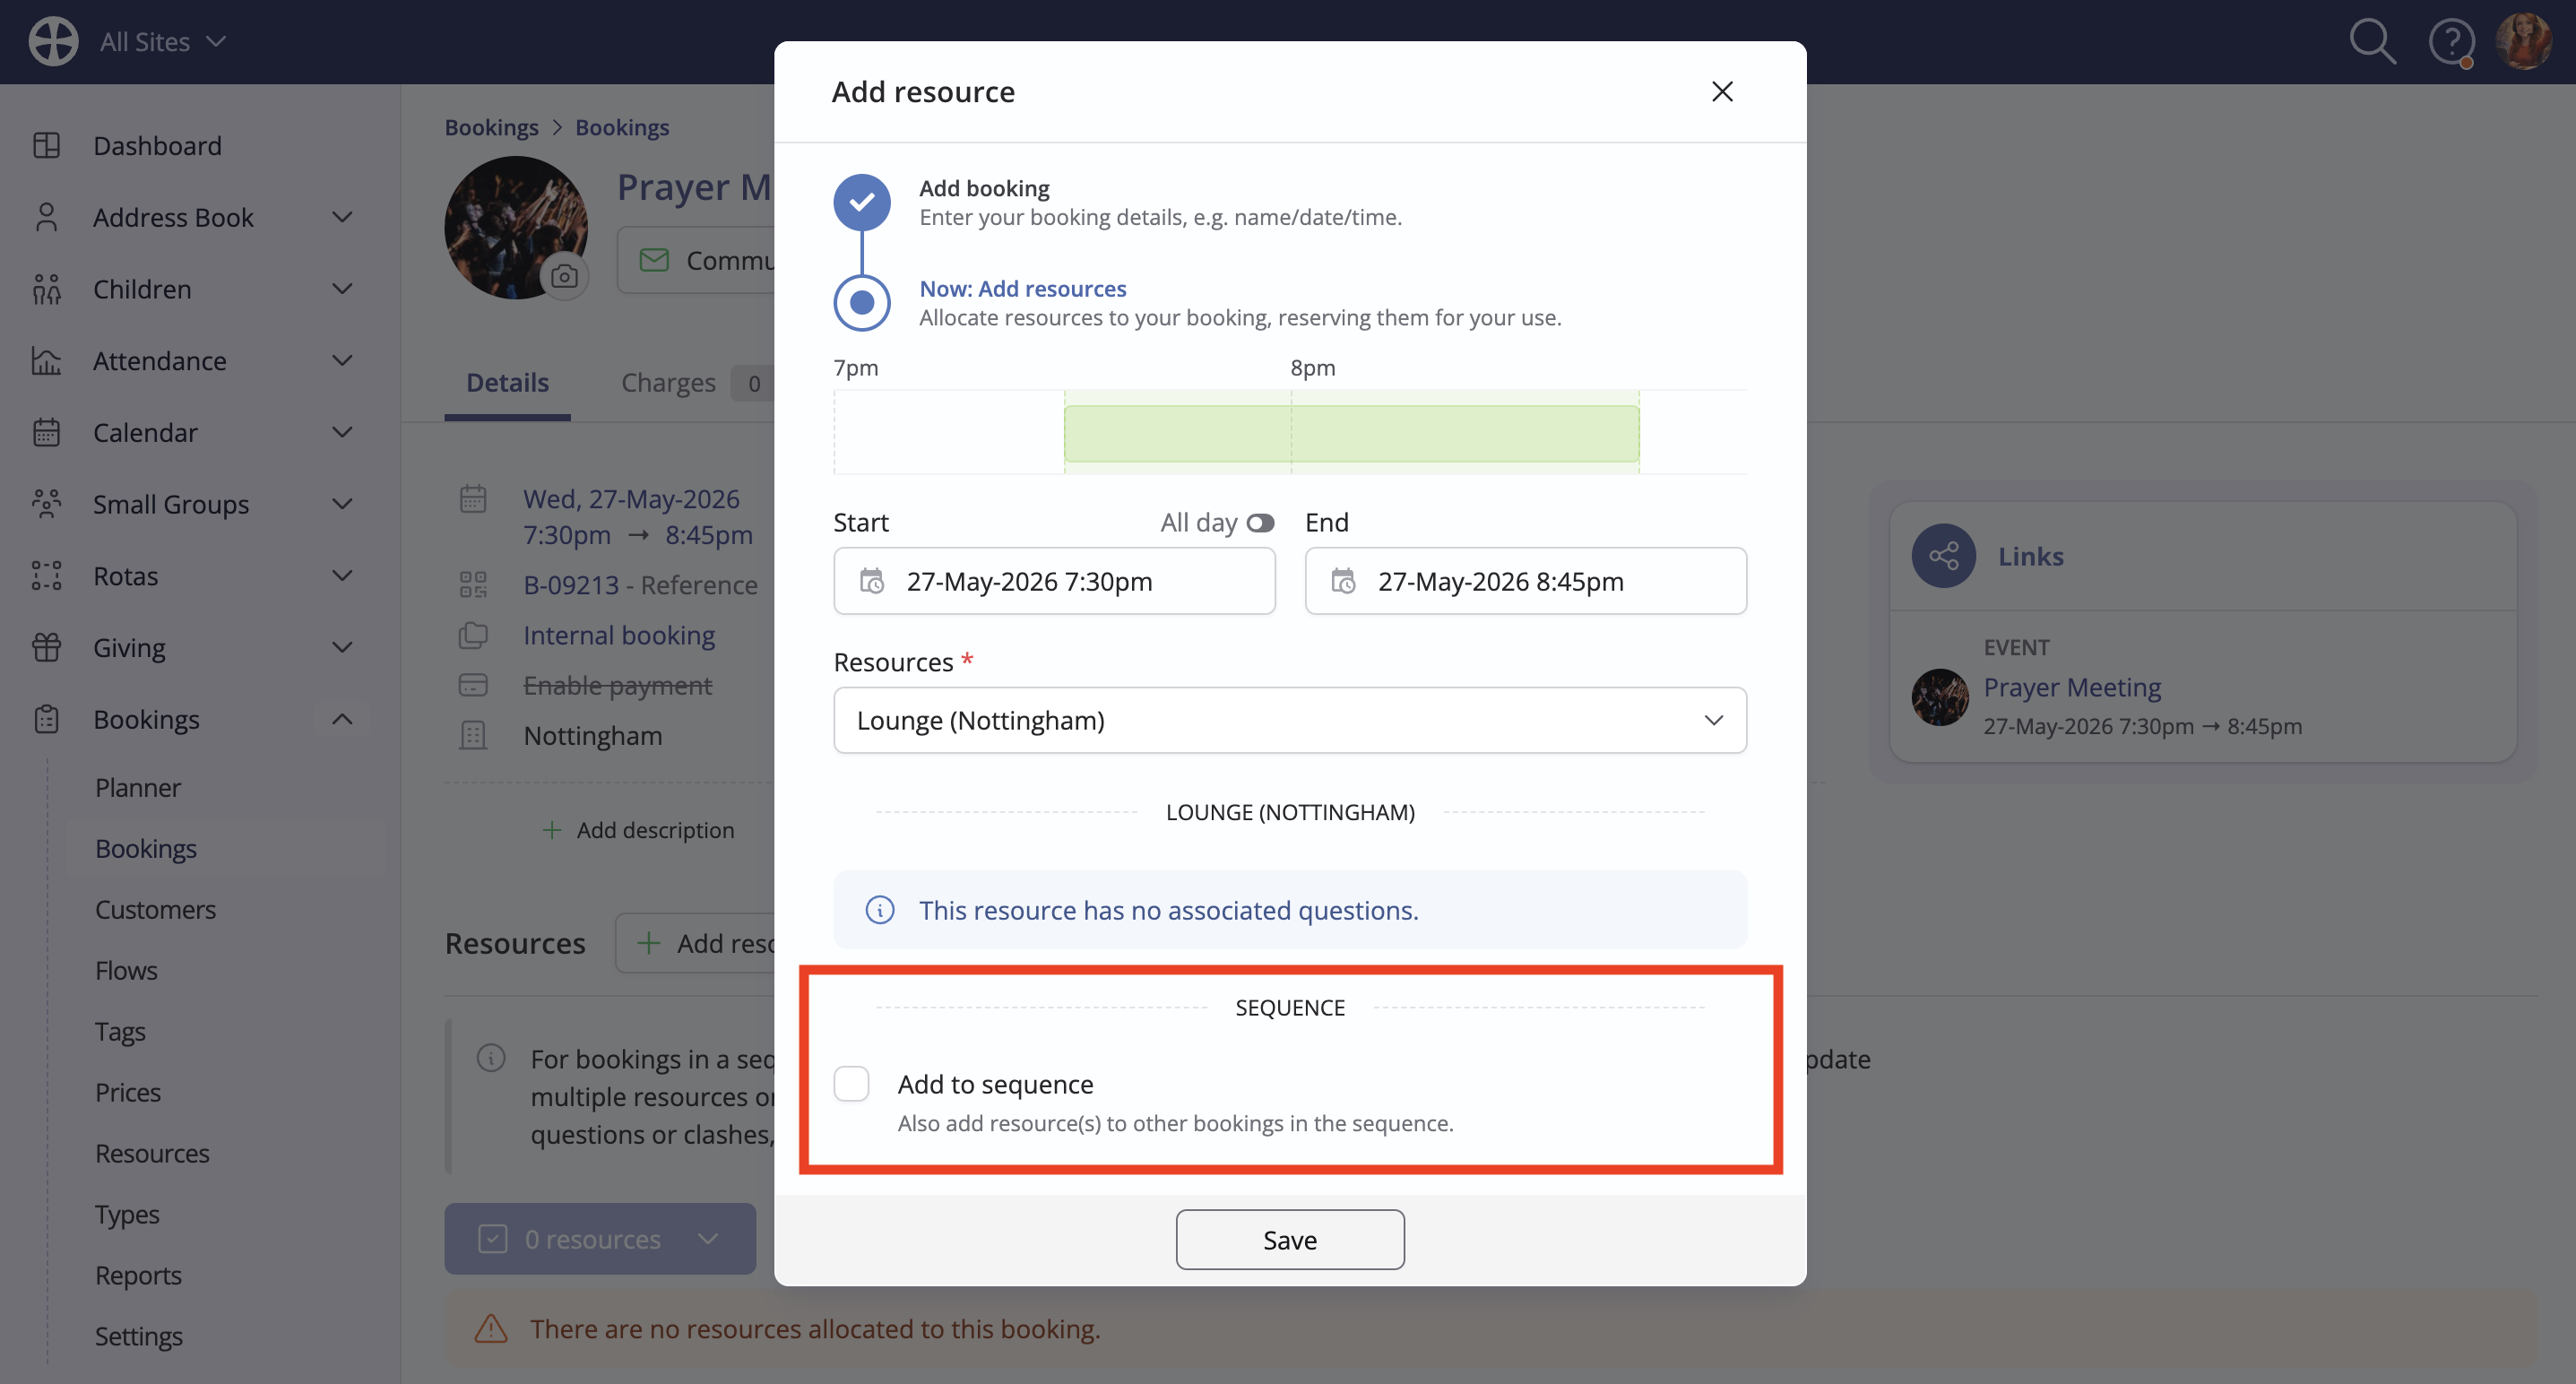
The booking View opens with the Add resource pop-up shown. You can now assign the relevant Resources required for this booking. If the booking is part of a multi-date sequence, the Add to sequence option is surfaced and will allow you to add each Resource to every booking in the sequence. Click Save to add your selected Resource(s).
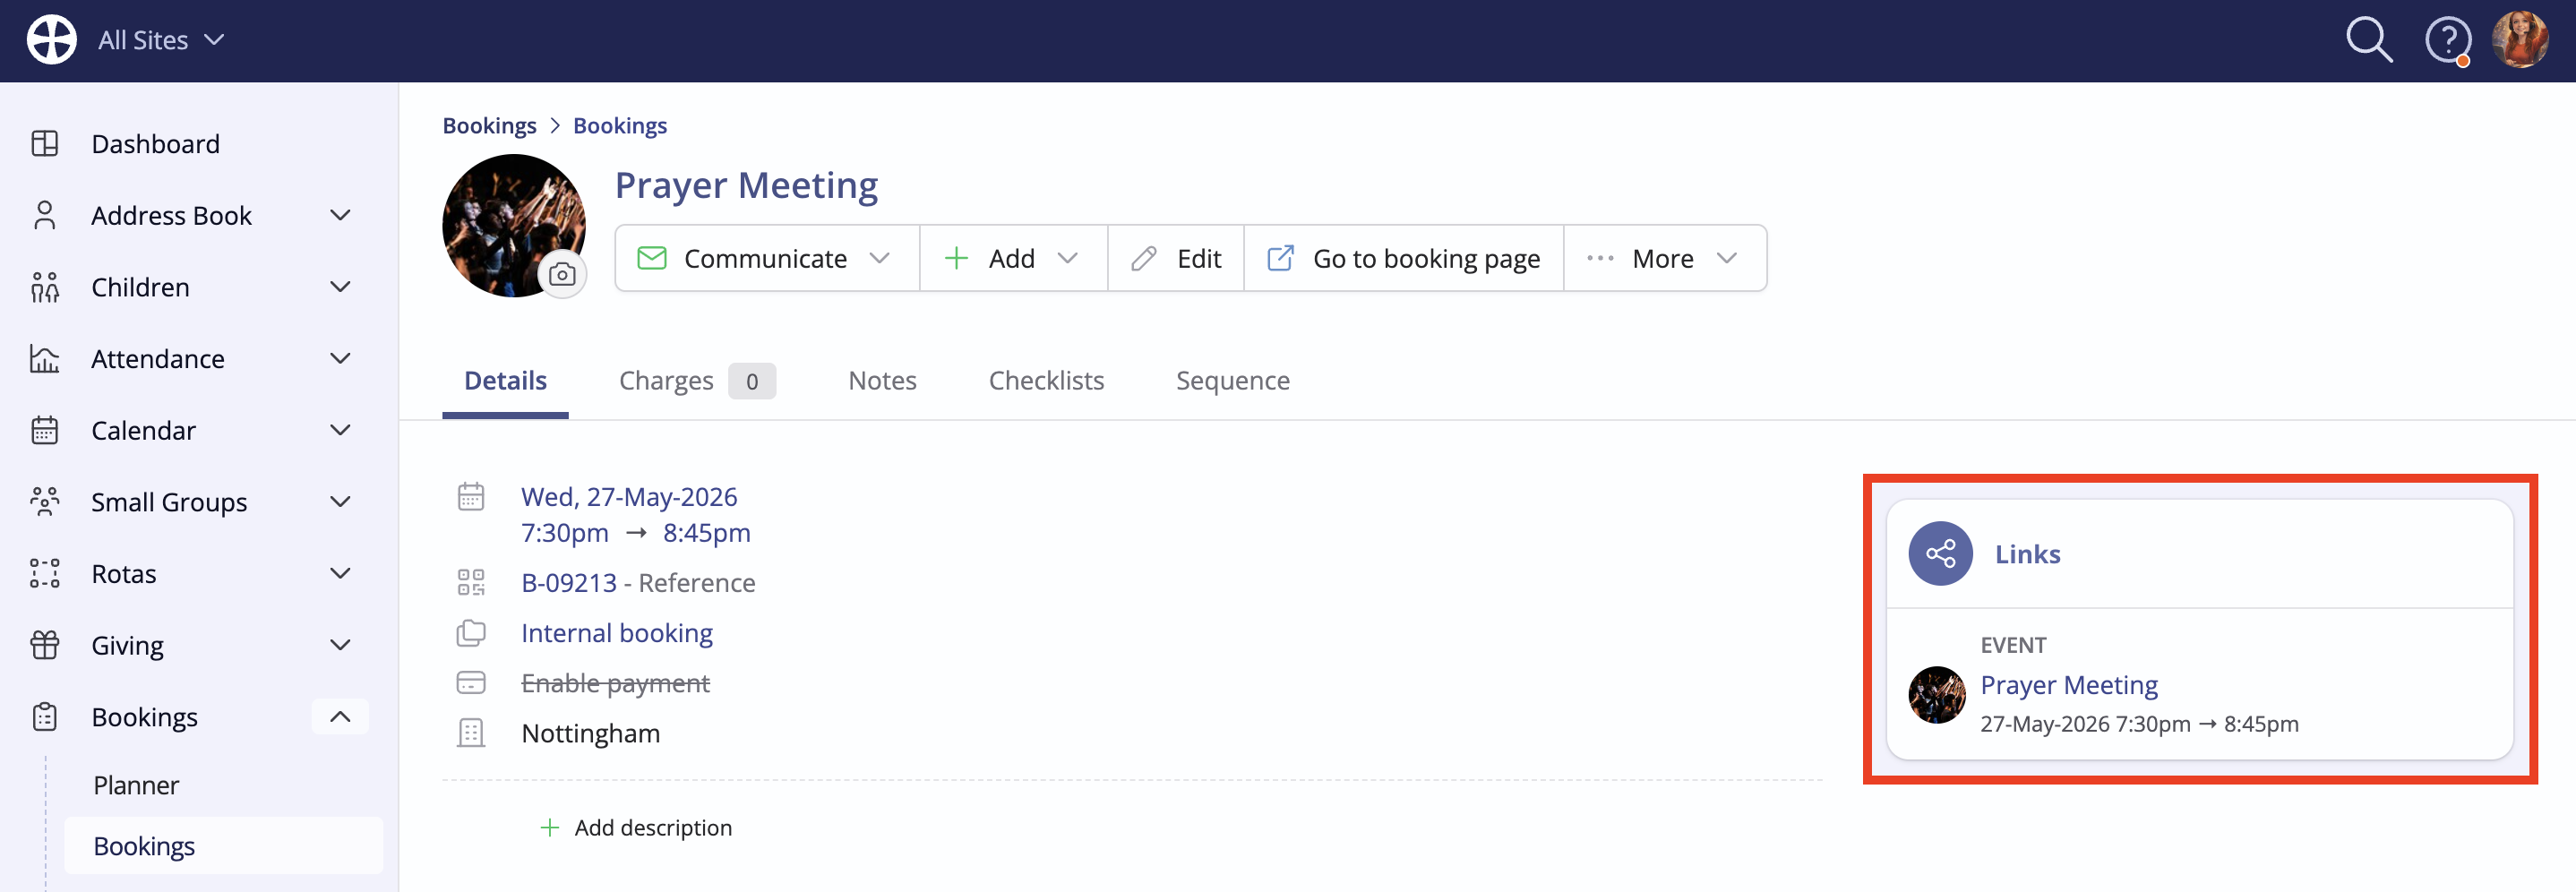
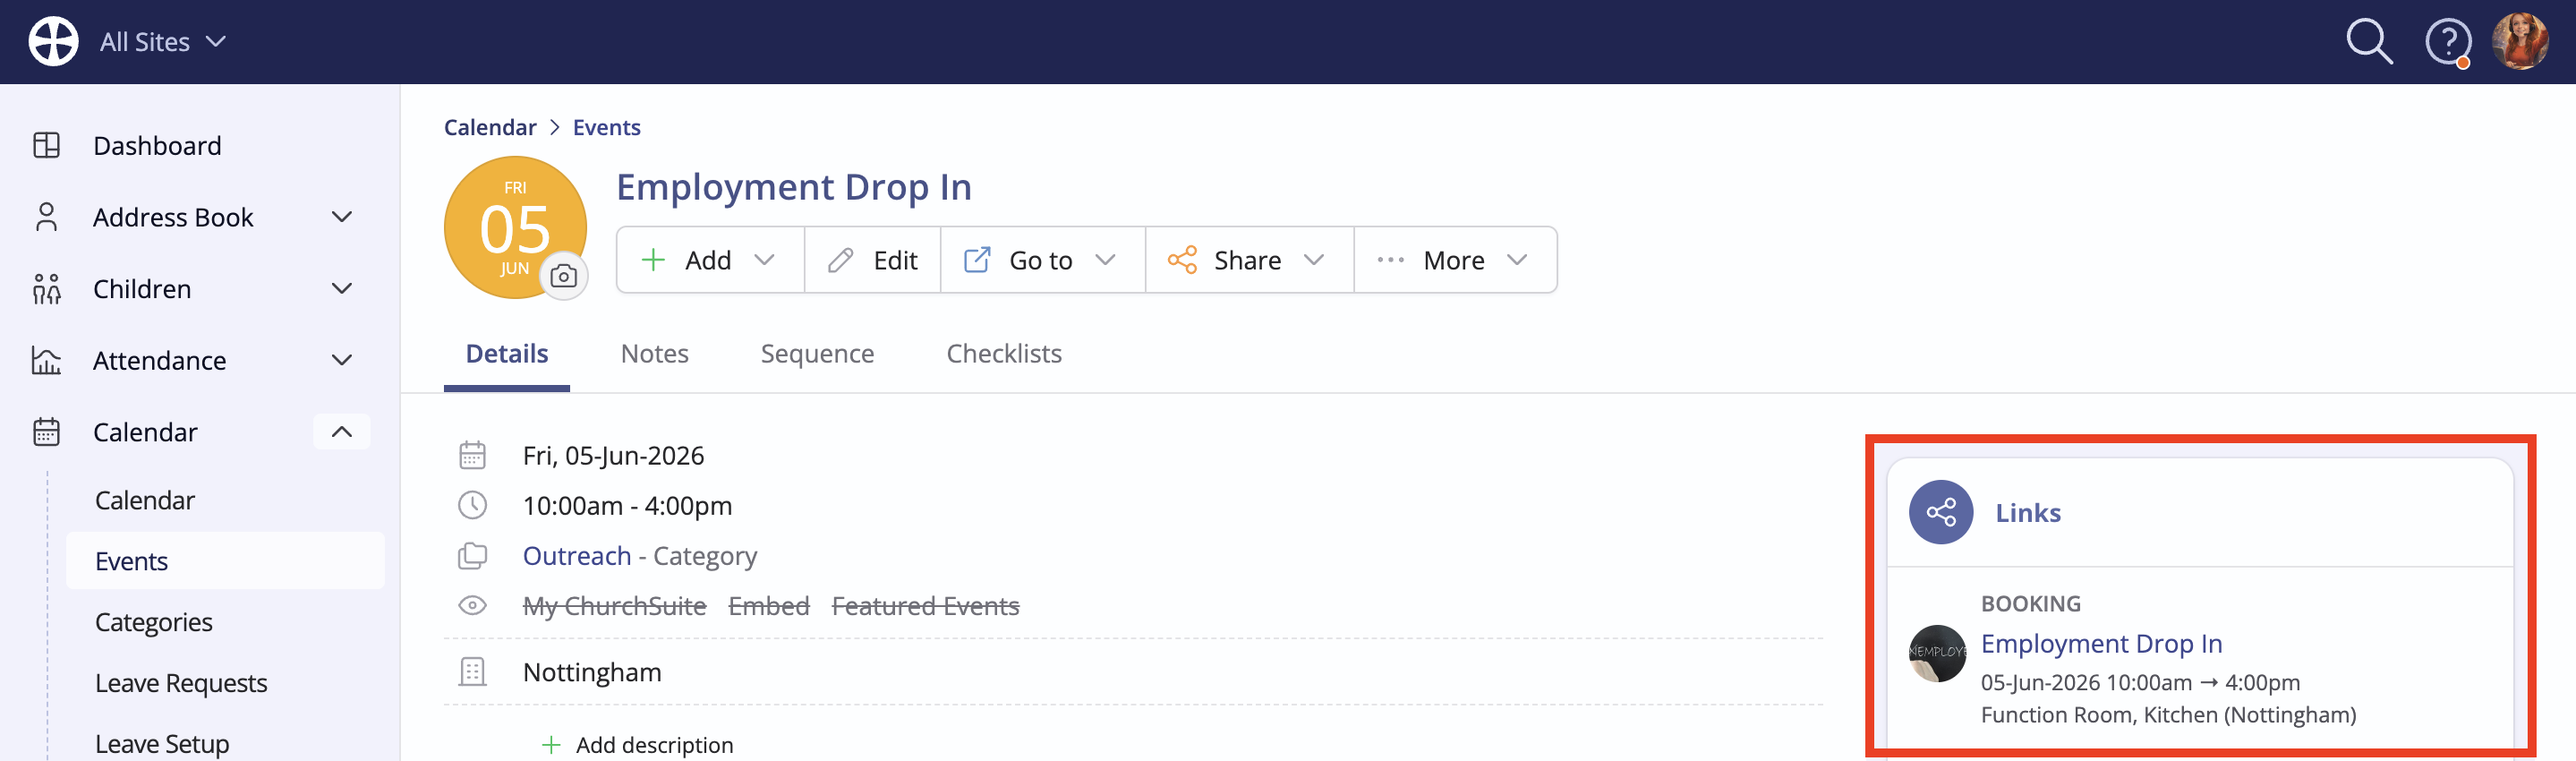
Once you've added your Resources, the booking View is in fully visible. If the booking is part of a multi-date sequence, the Sequence tab is shown. Notice also the clickable link to the linked event, which provides a quick navigation link back to the linked event in the Calendar module:
Note that if you need to change the Status of a booking - for example, the booking date needs to be changed, so the booking needs to be Set as pending, or you need to Cancel [the] booking - you can do this from the More menu.
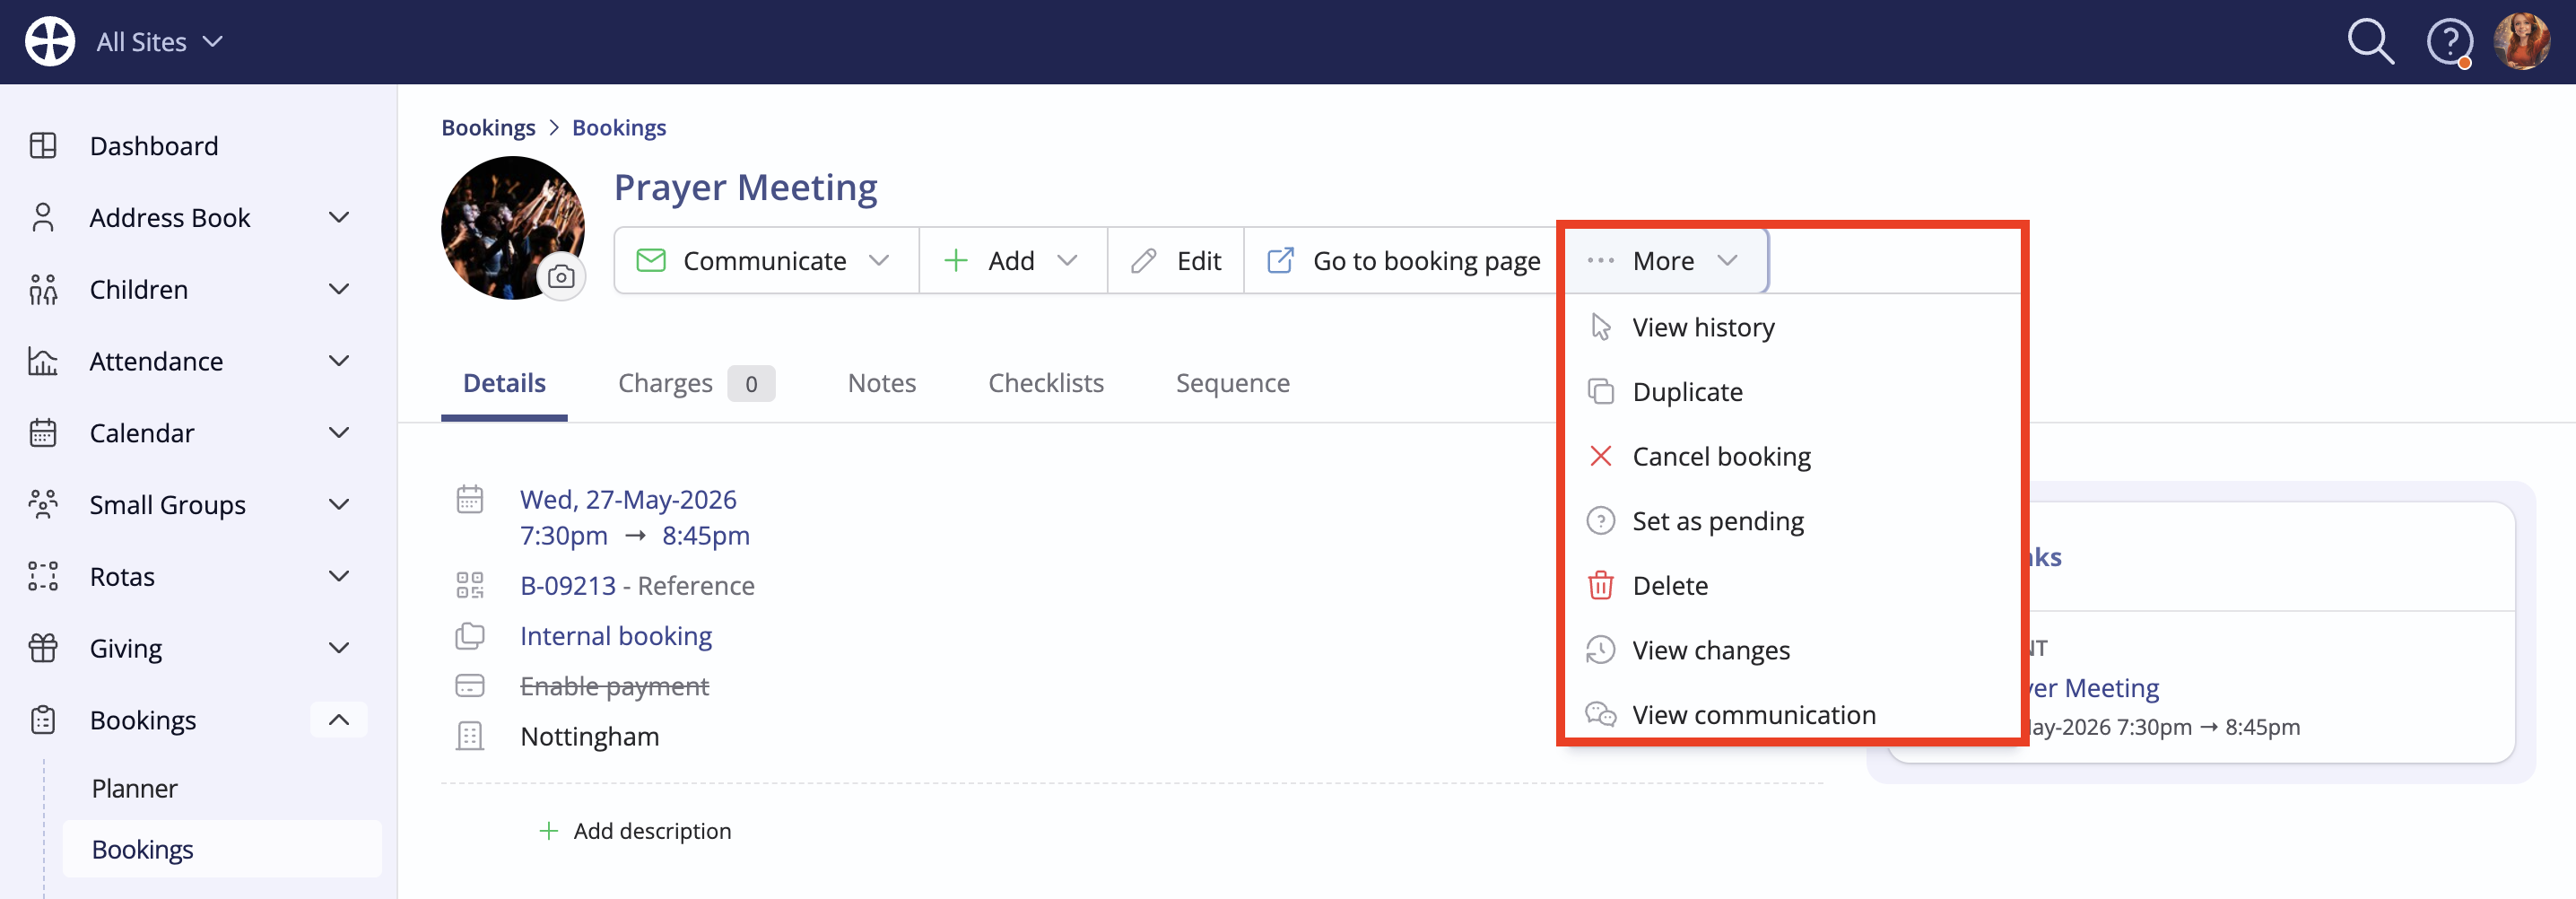
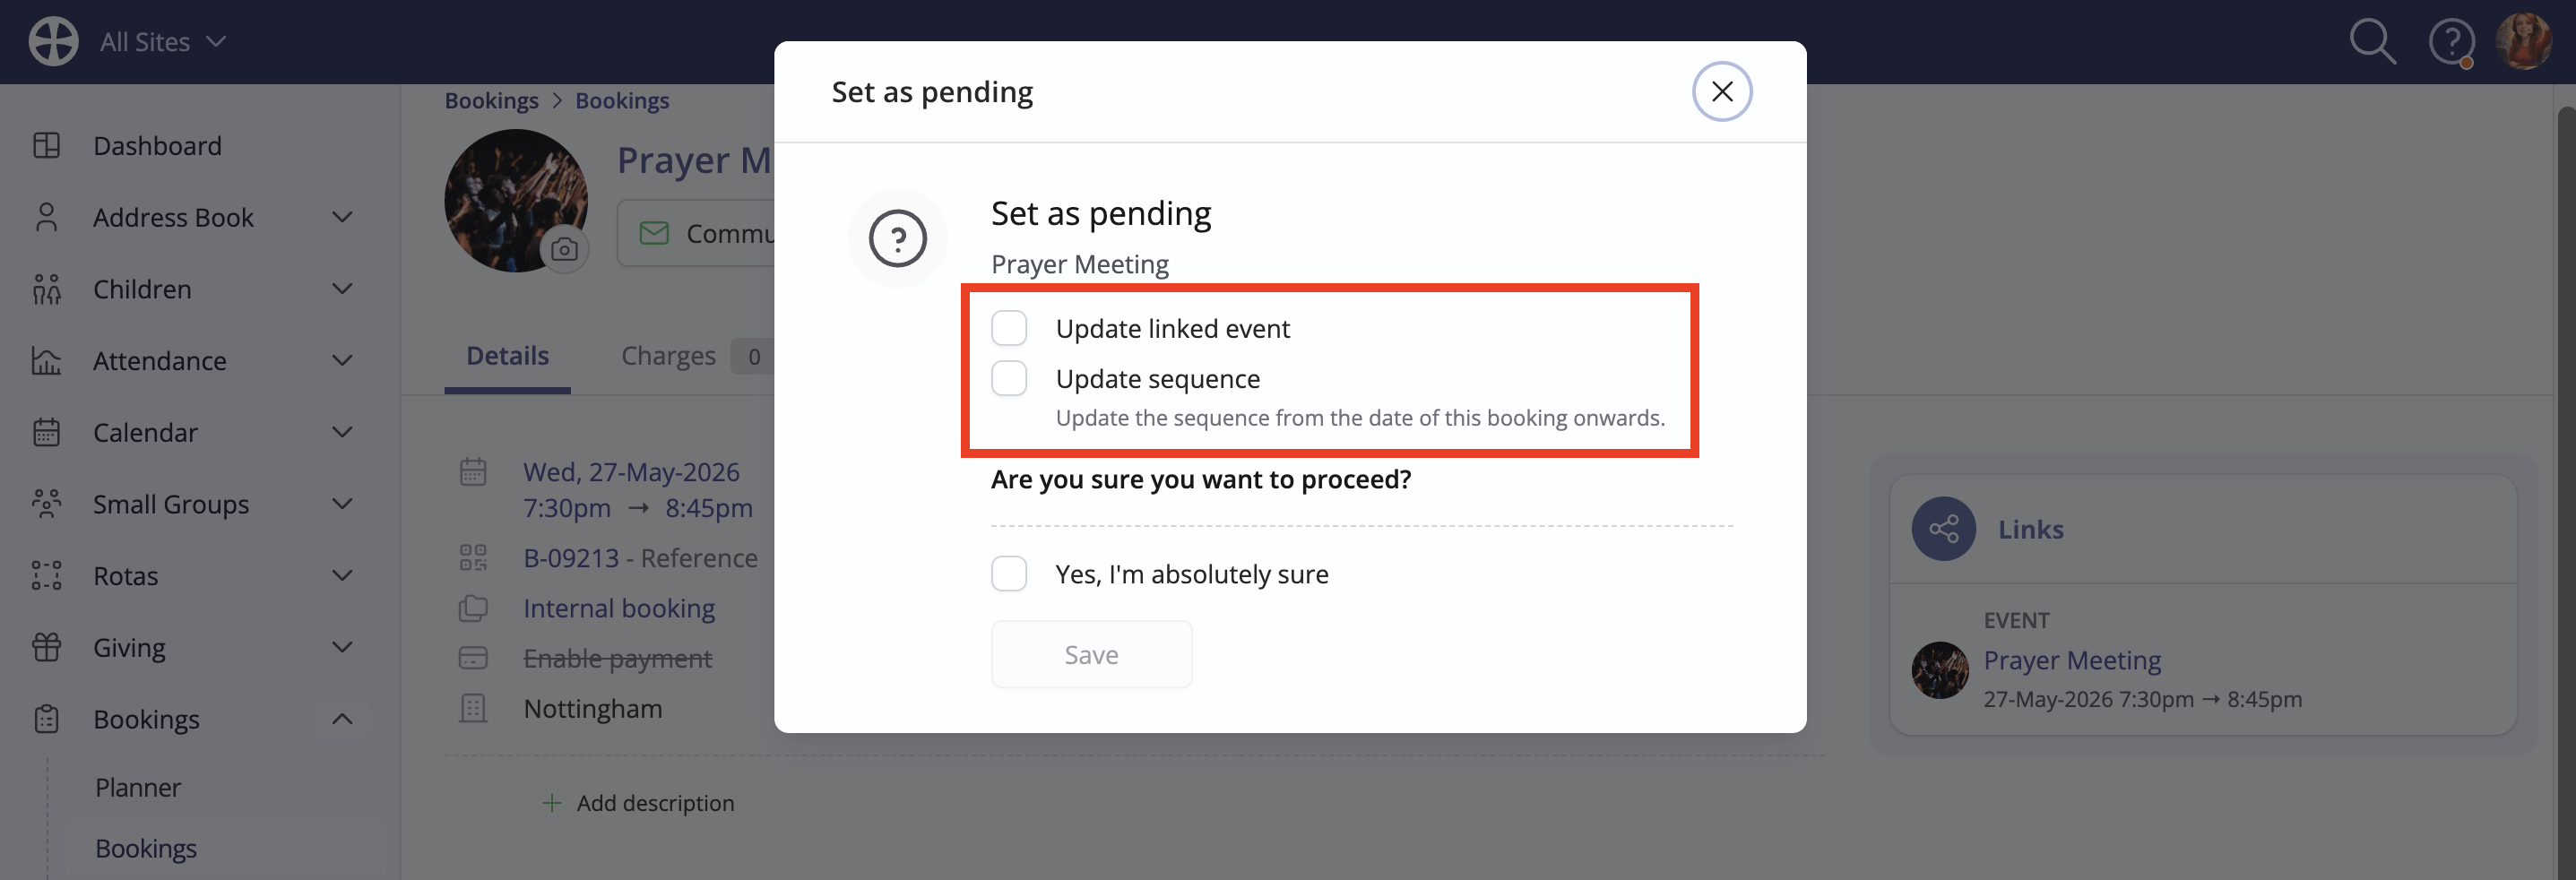
Selecting either Set as pending or Cancel [the] booking opens a pop-up that also enables you to apply the same status change to the linked event:
Adding a linked event for a booking
You may find that you have a series of events planned for which the dates have yet to be fixed. In this scenario, you could add the pending-status bookings to ensure the resources are reserved, but only later add the Calendar module events when everything is confirmed. Here's how:
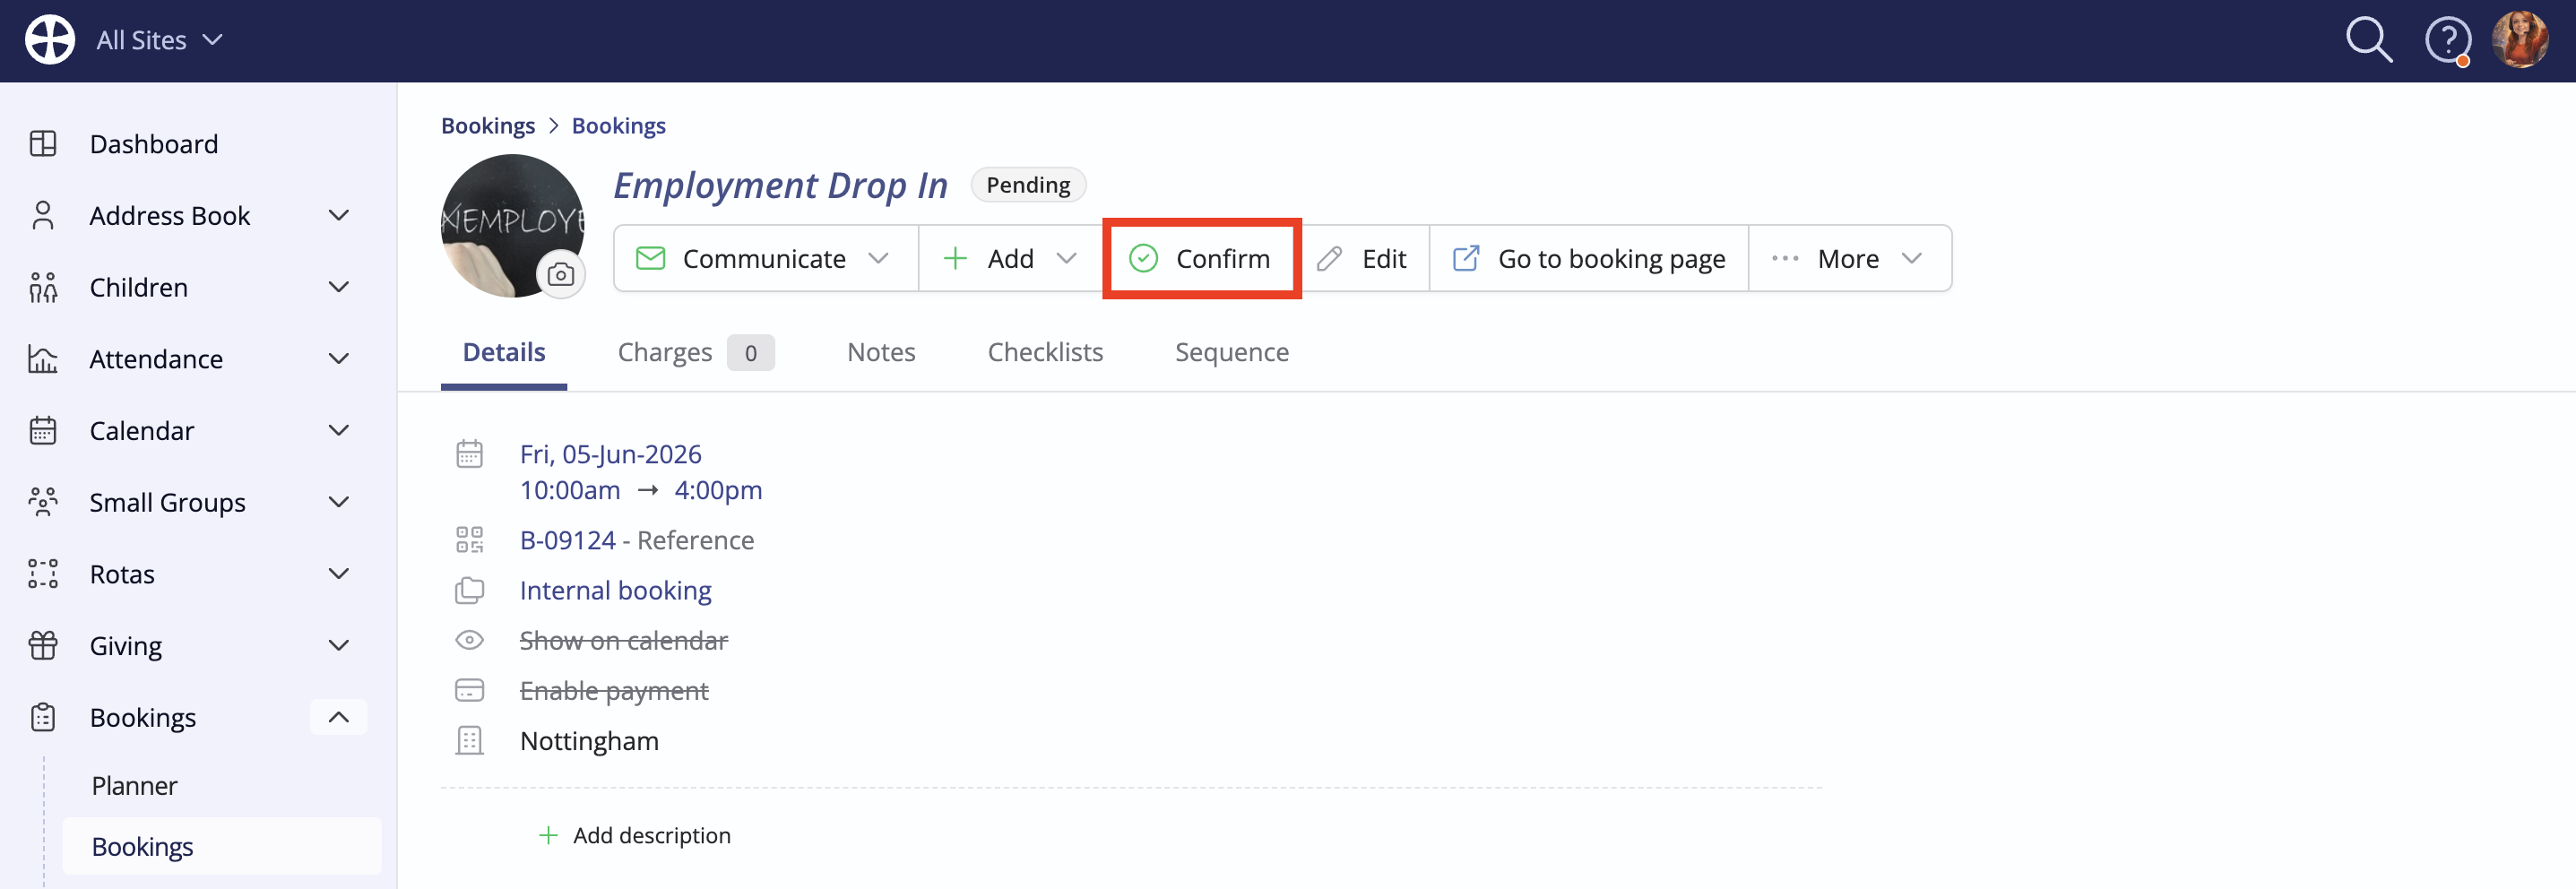
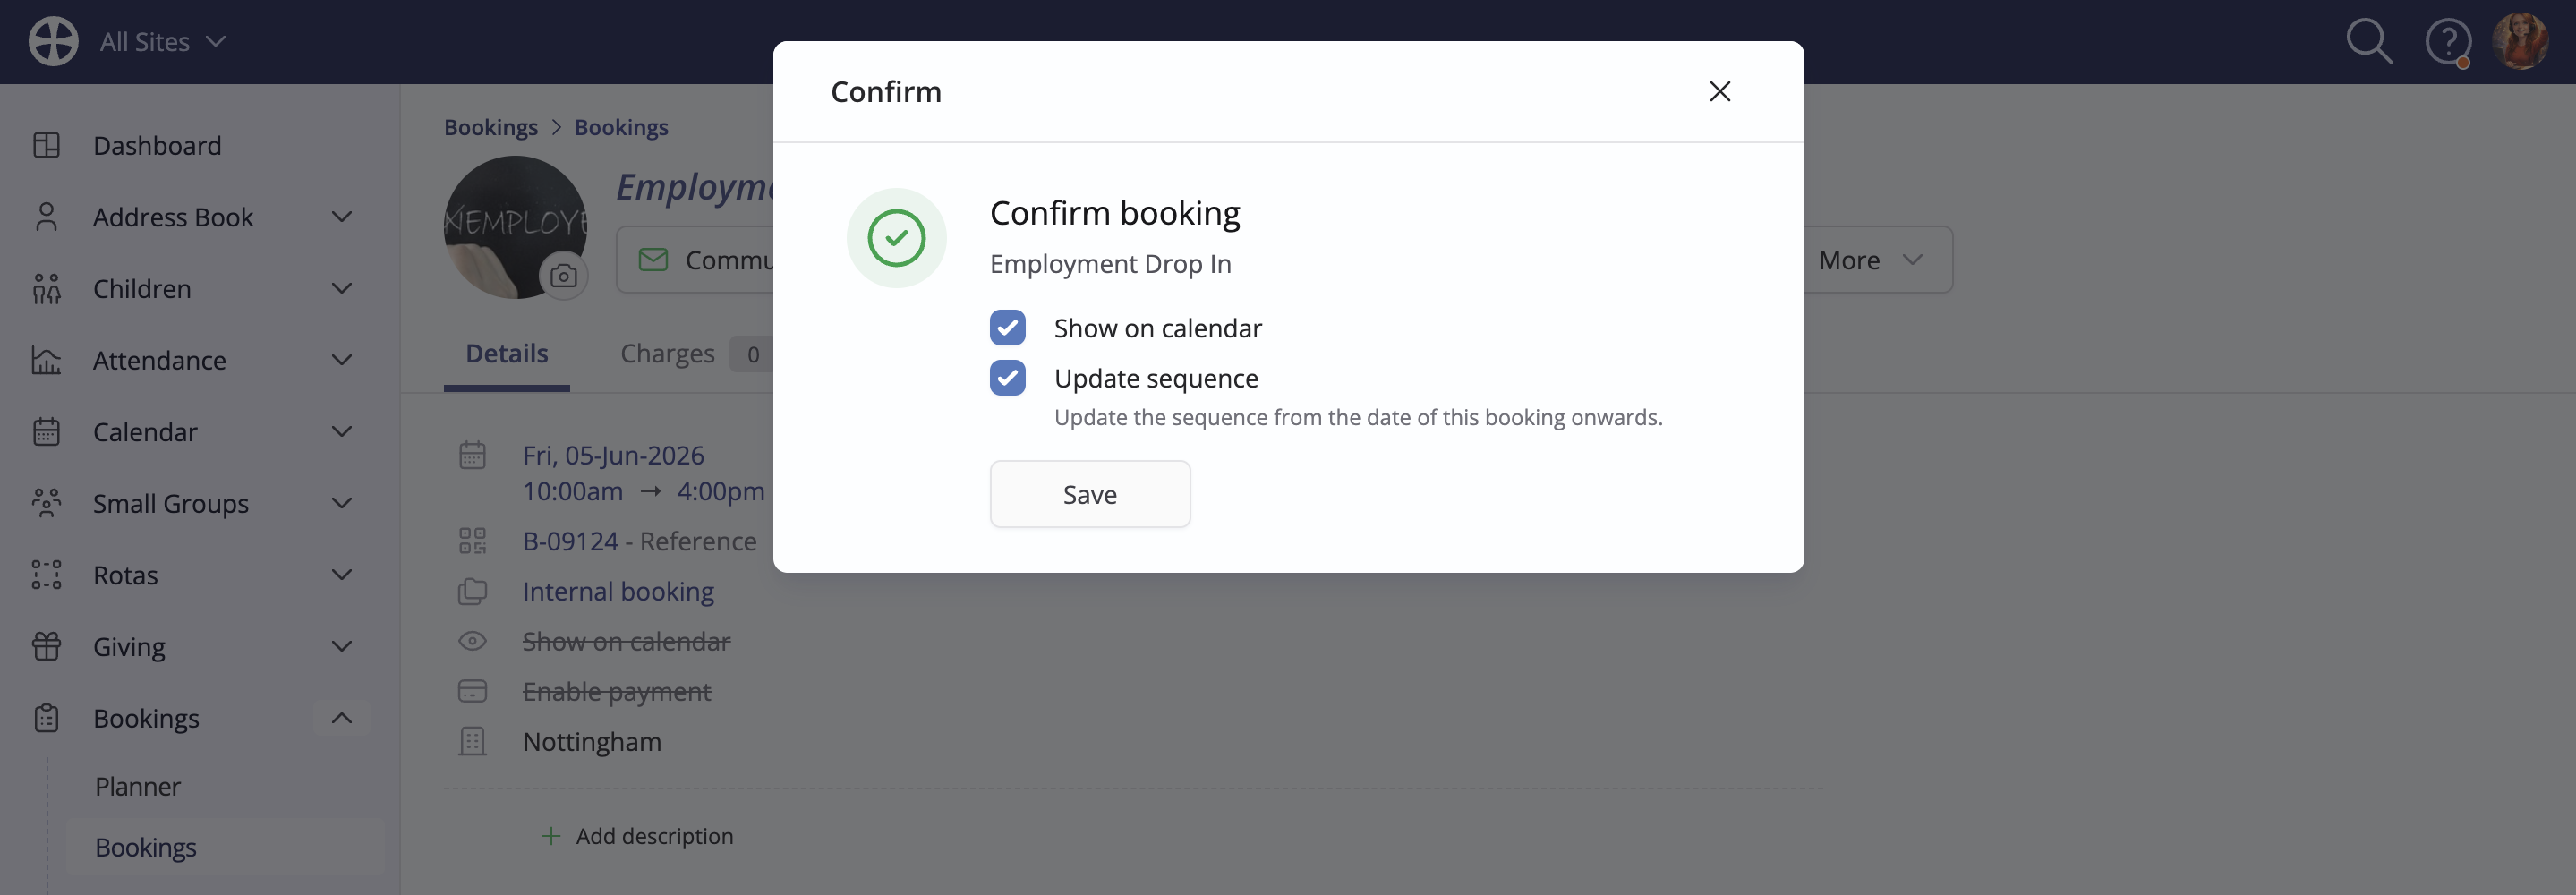
From the pending-status booking, click Confirm to update the booking status:
Where applicable, the Confirm pop-up includes the option also to update the status of other bookings in the sequence:
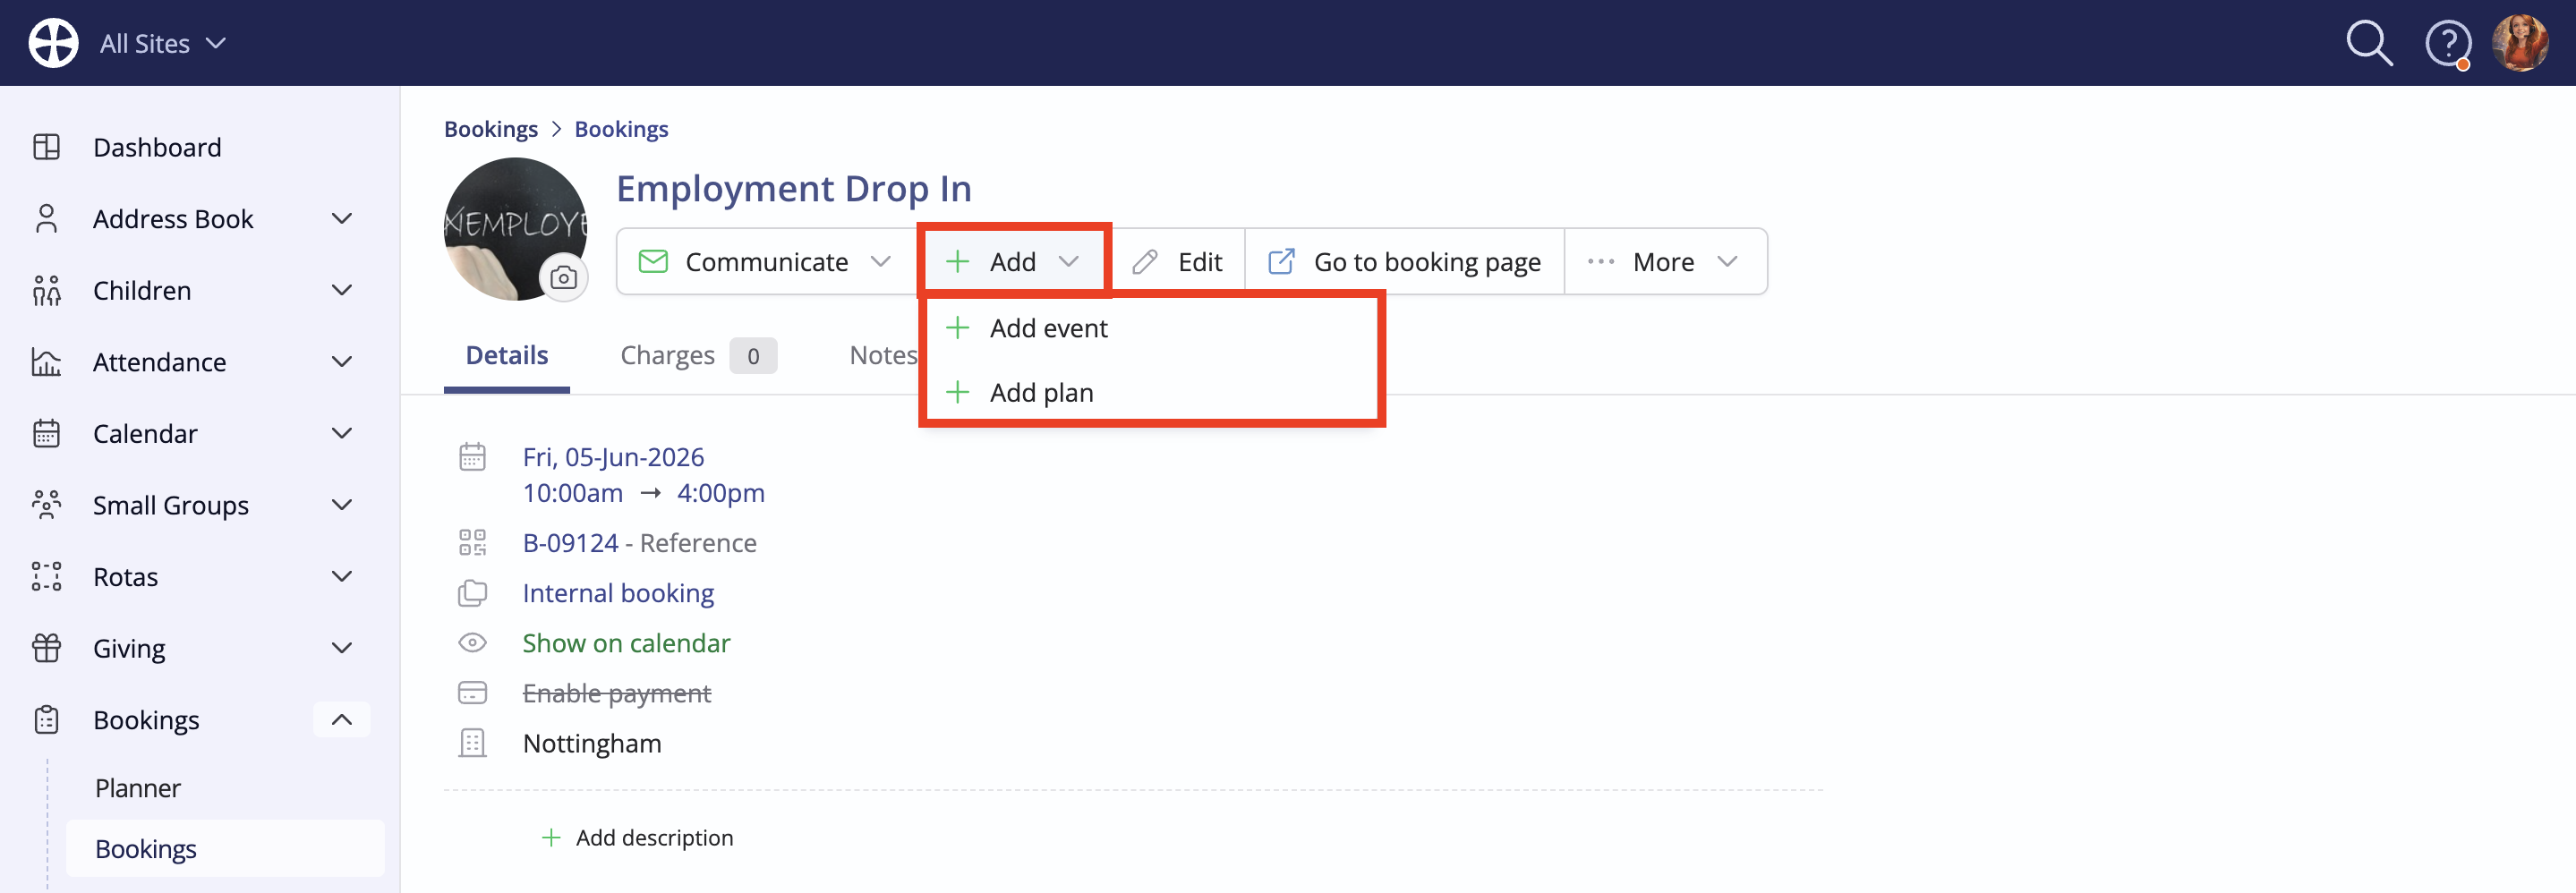
To add the event, select Add event from the Add menu:
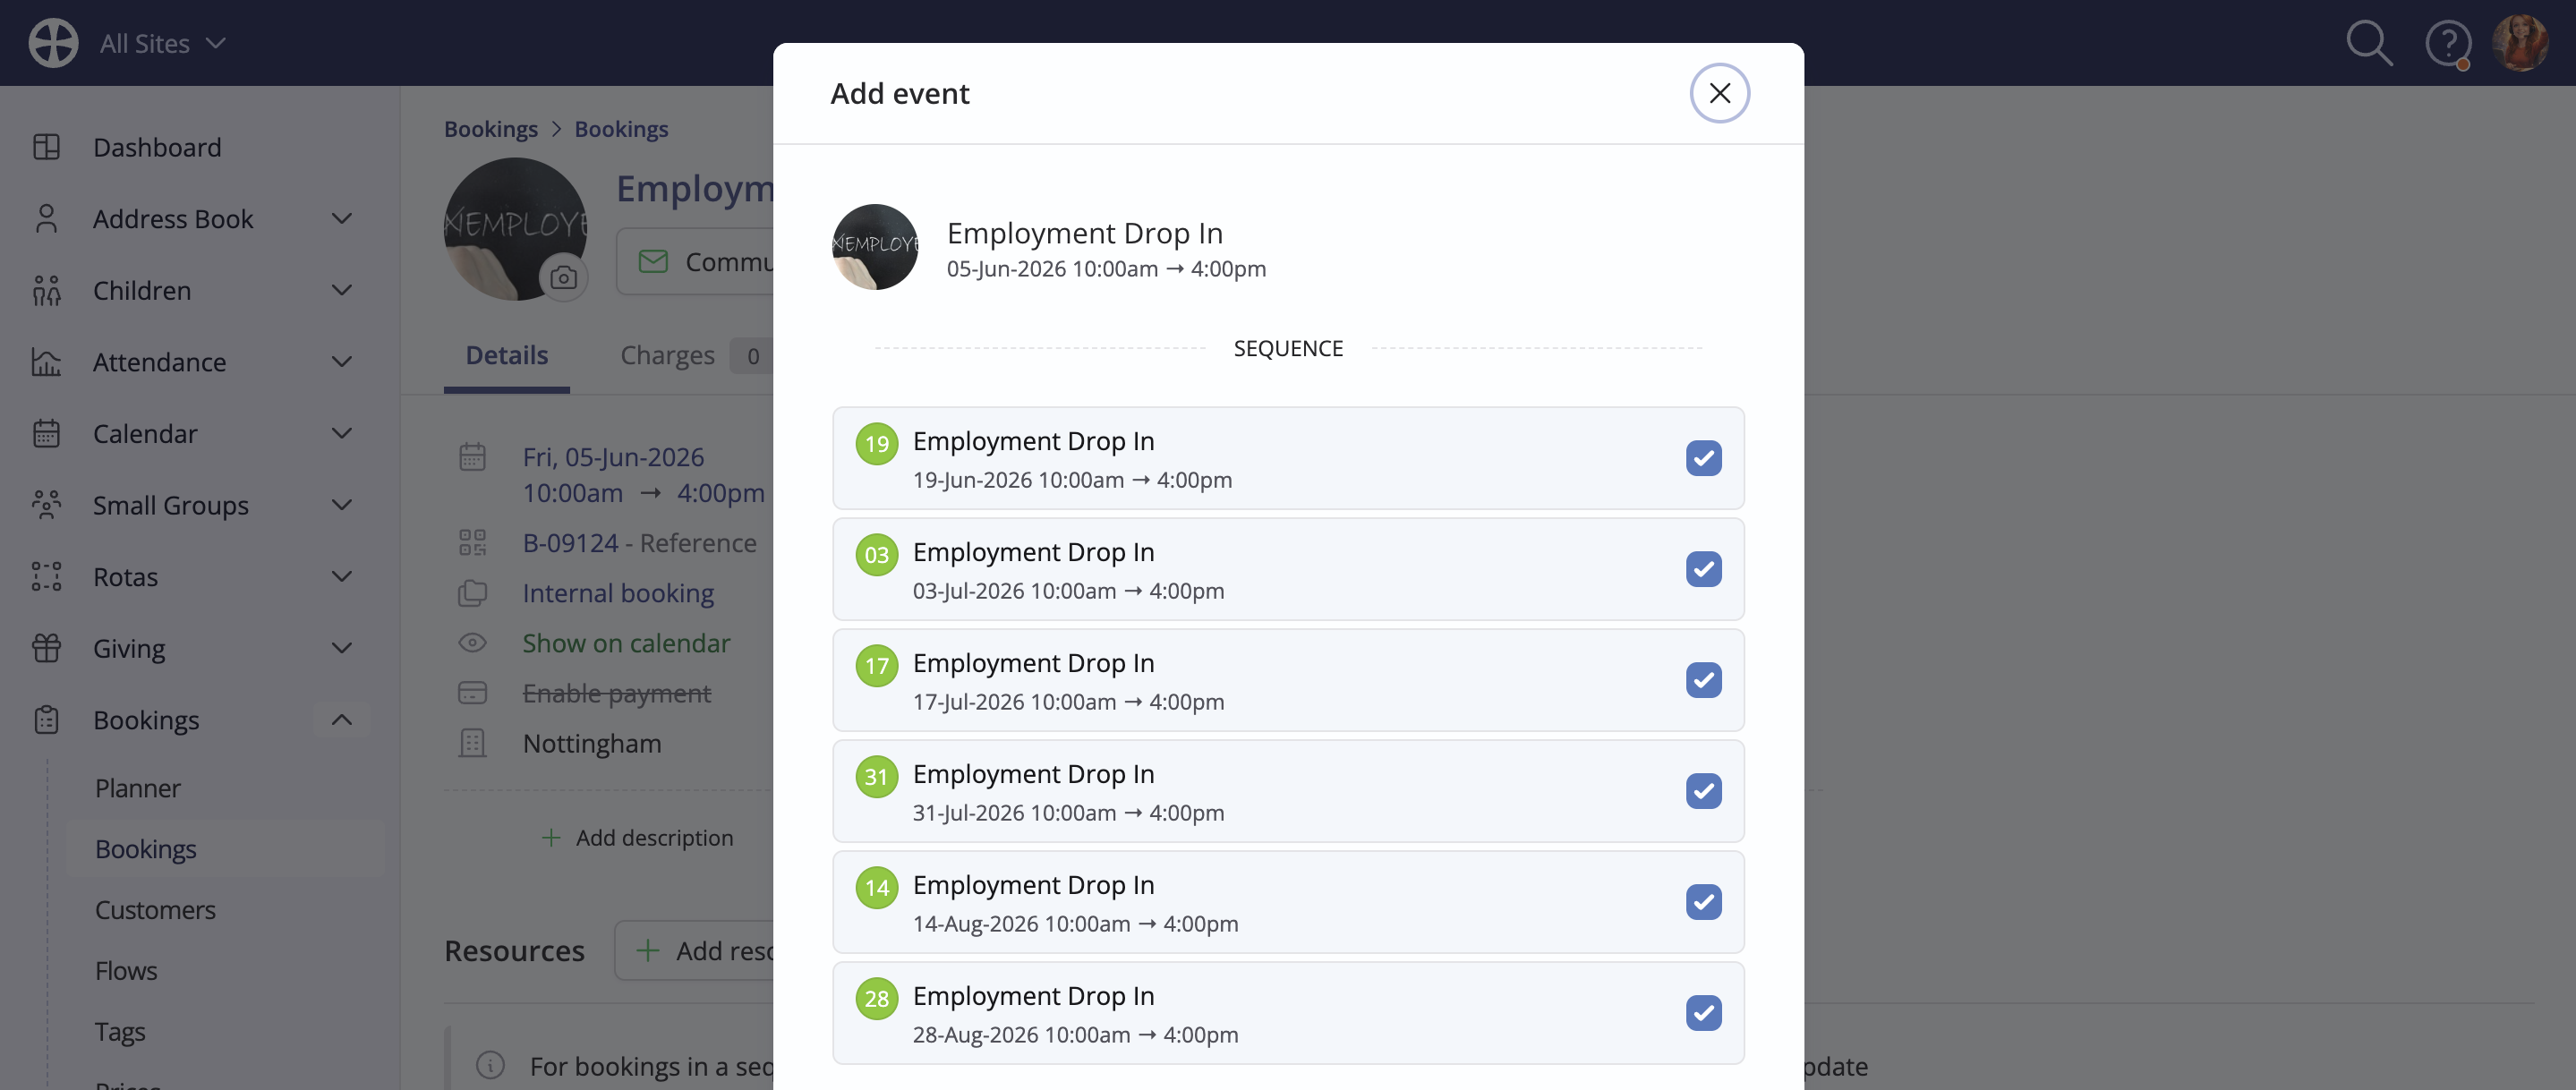
The Add event pop-up is shown. For a sequence booking, all the sequence dates are surfaced, allowing you to unselect any bookings for which a linked event is not required.
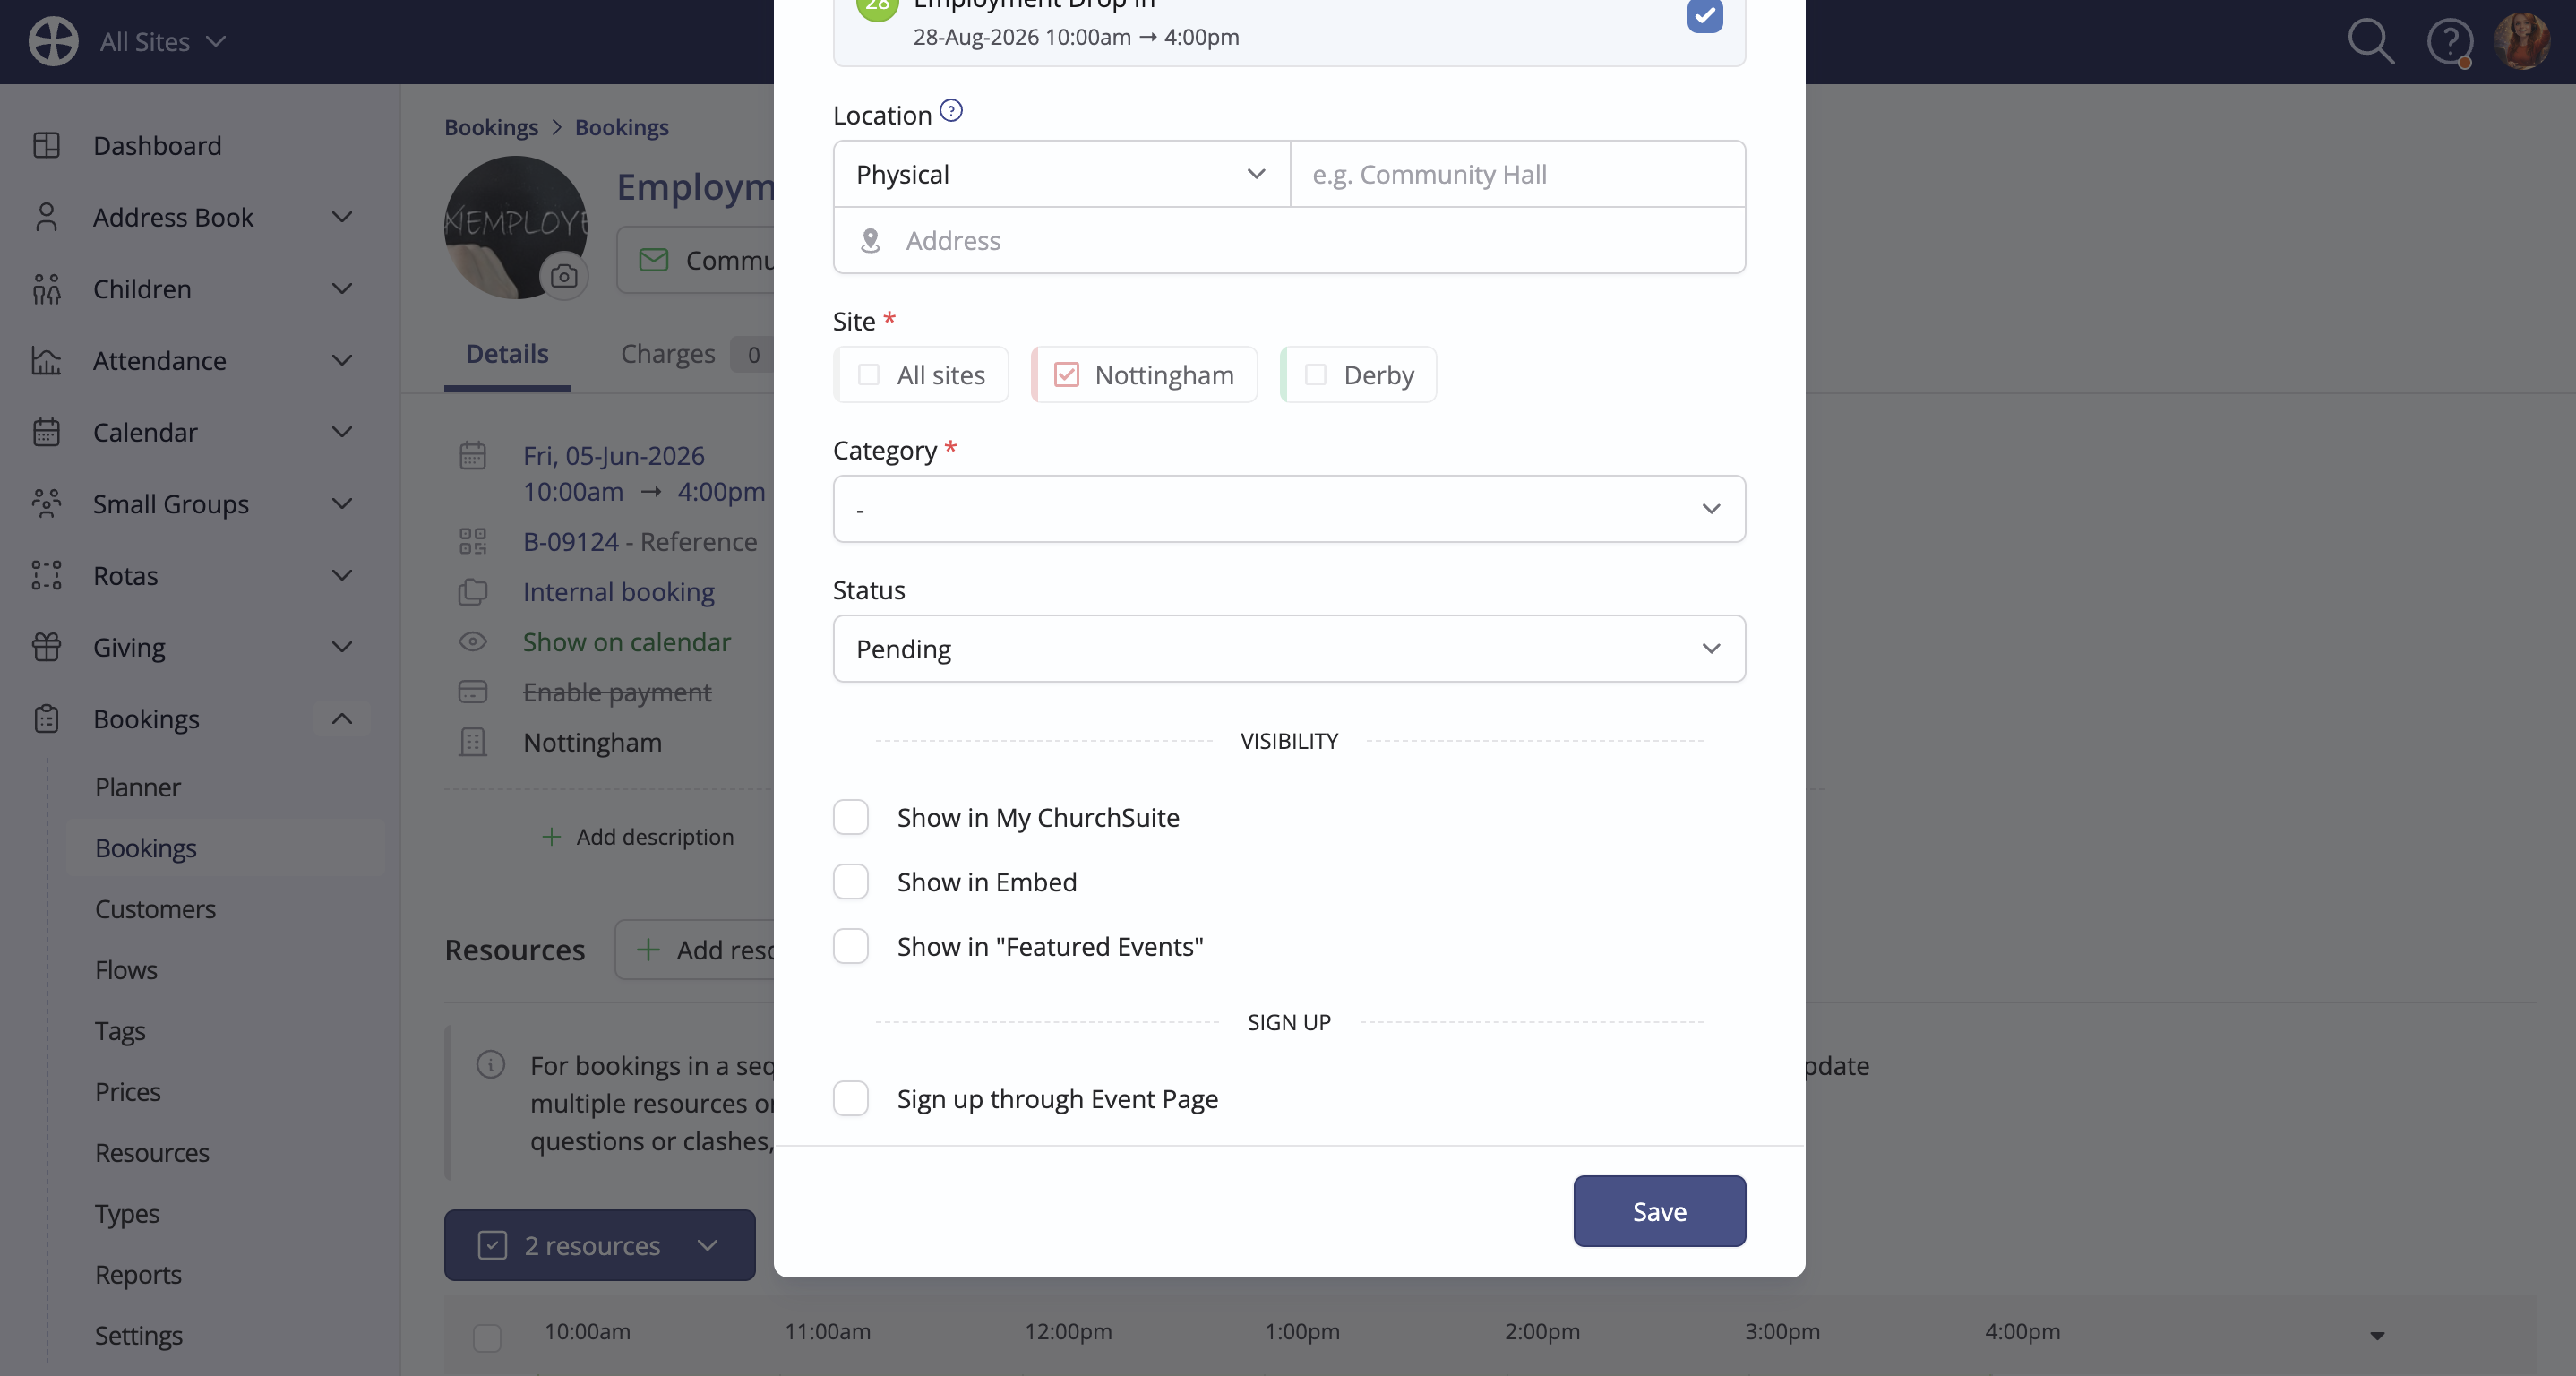
Scroll down the pop-up to complete any relevant information. Note that event Category is a required field, as is Site for multisite customers. When you have made all the appropriate updates, remember to click Save.
The event View page is now shown. Note that you can easily navigate back to the linked booking by clicking on the link to it on the right of the screen:
Identifying mismatches between bookings and booked resources
When editing and making changes to the date or time of an unlinked booking, you can choose to update the booked resource dates and times to match. However, for linked bookings, changes to an event date or time will not automatically update the booked resource dates and times, resulting in a mismatch.
In the example below, the Wednesday Morning Kids Club event date has changed, but the previously booked resources remain for the original date, resulting in a resource mismatch. A mismatch occurs when ALL the booked resource times are outside the booking time range.
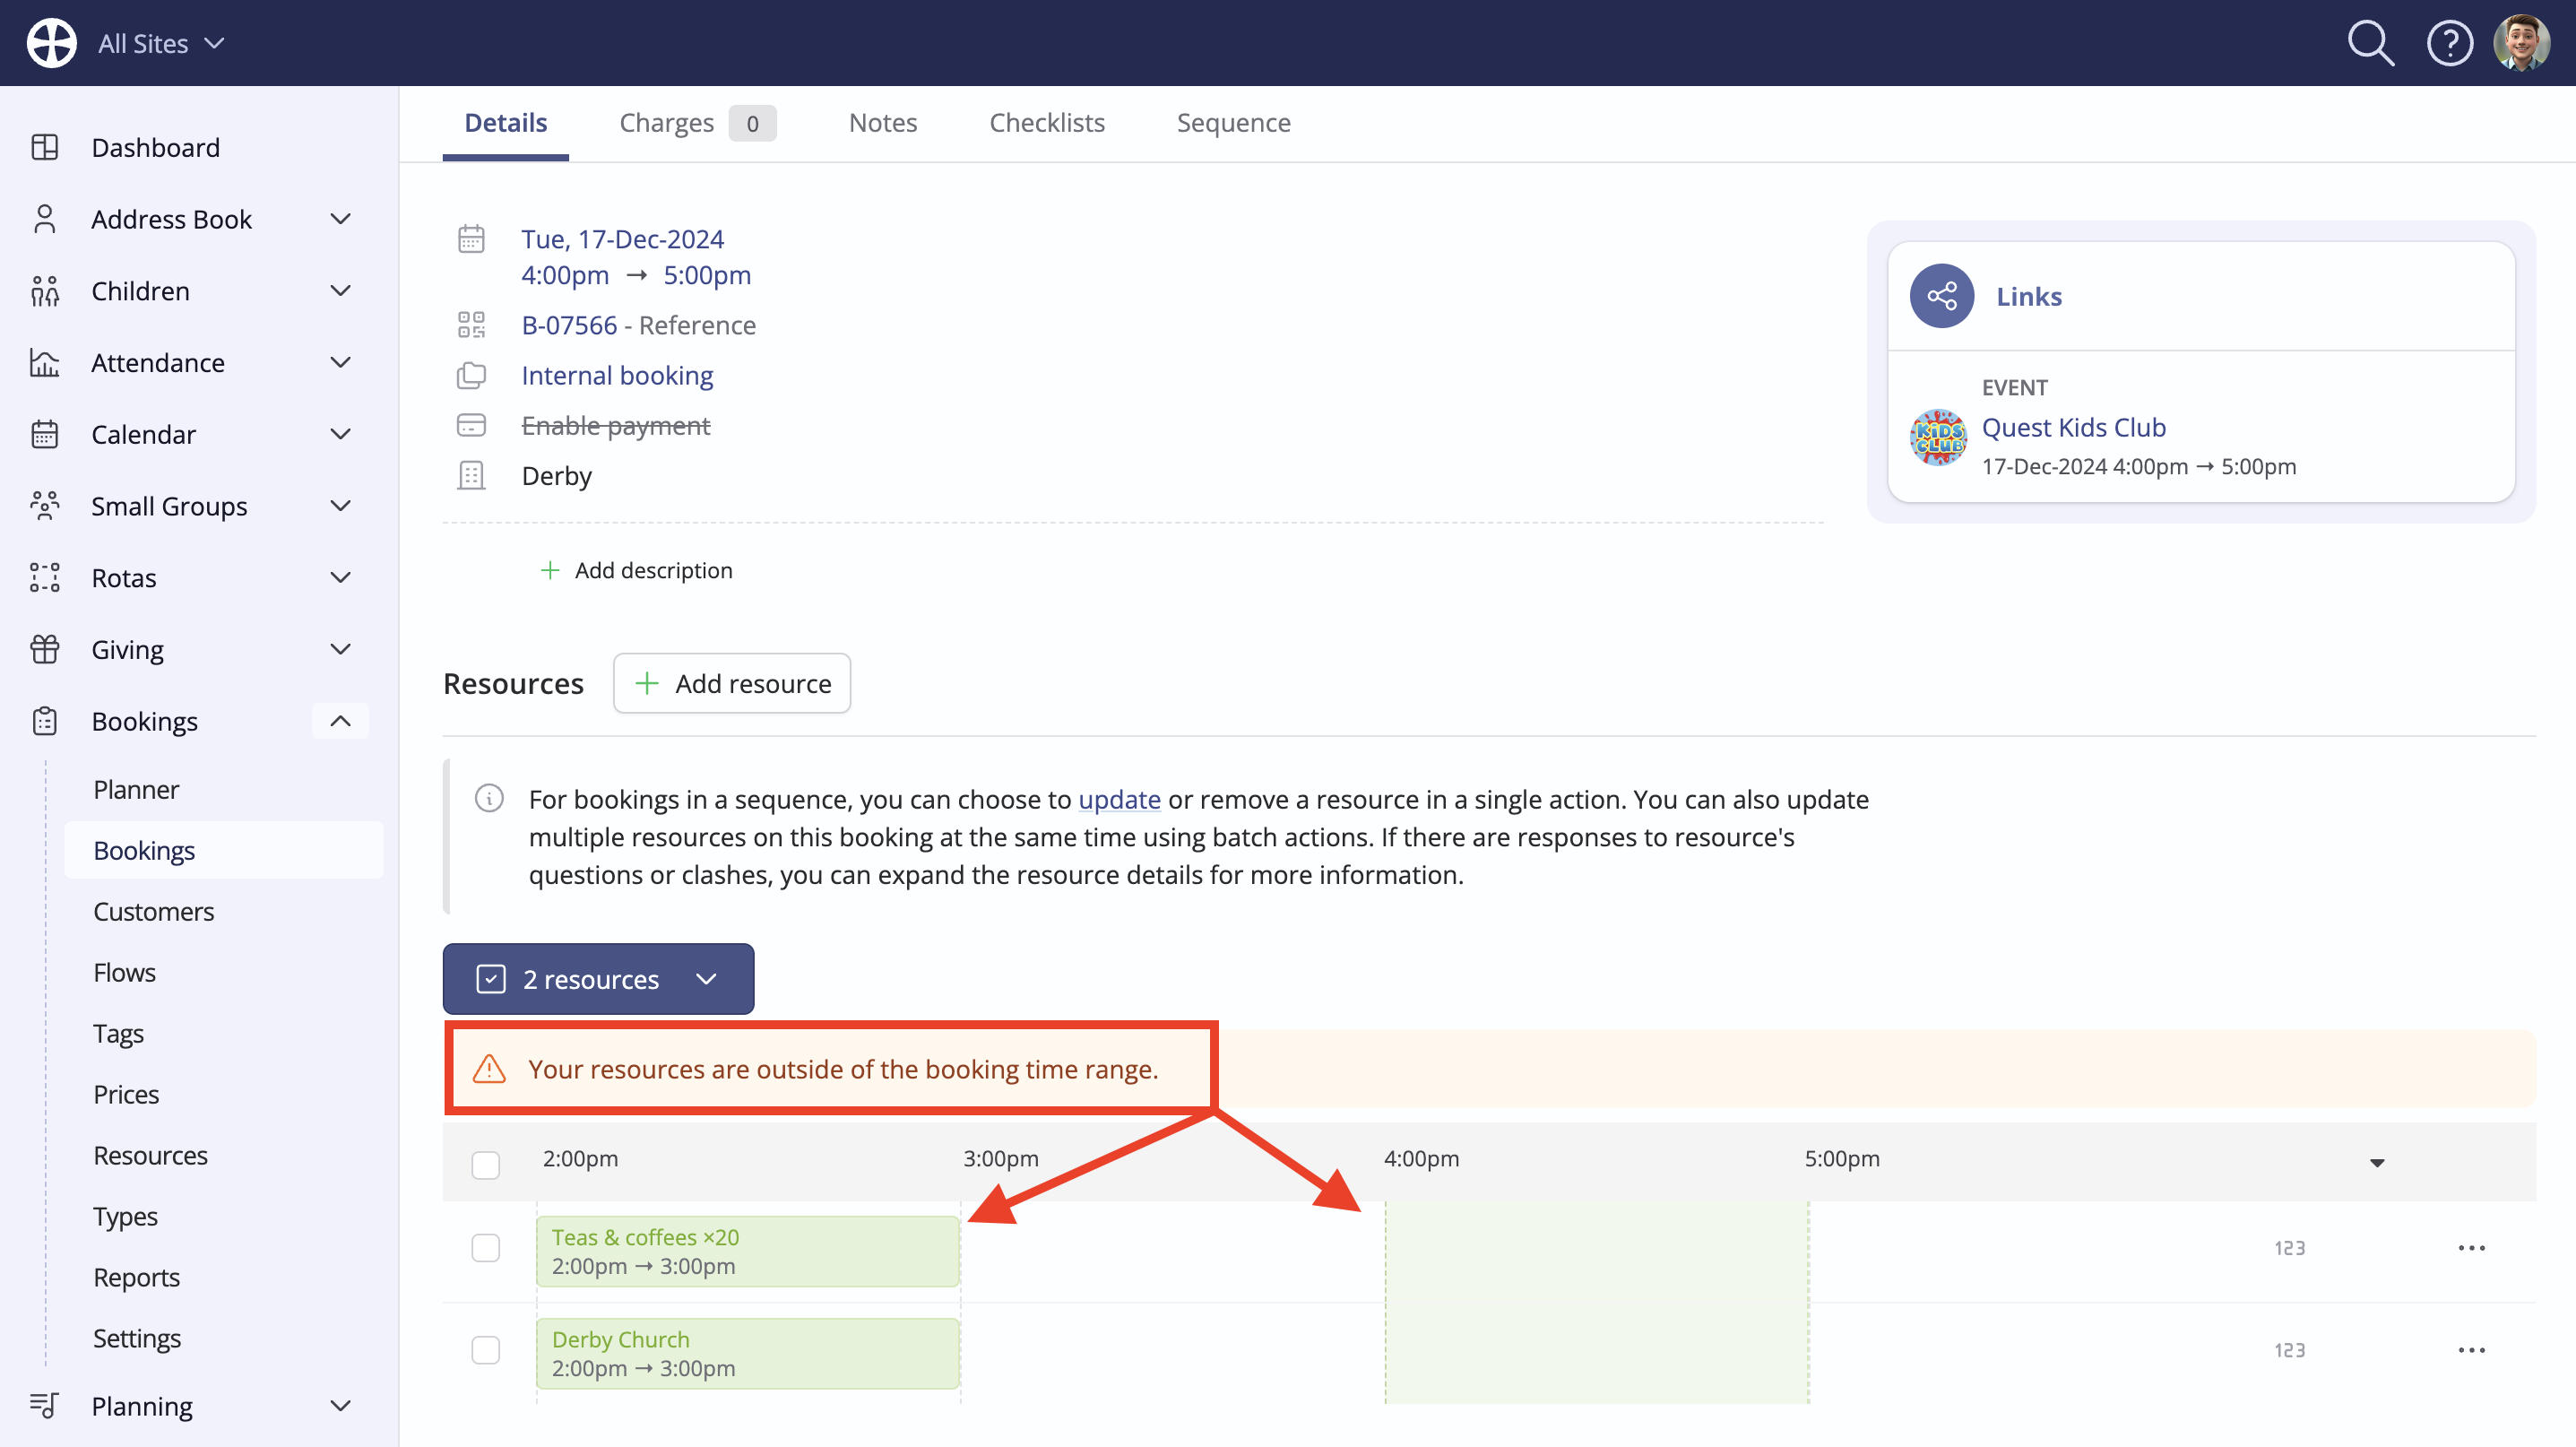
To resolve this, Edit each booked resource in turn to set the correct times. Any clashes arising will be alerted, and where applicable, you can apply the change to the booking sequence.
