Restricting visibility and access with user groups
In this article
Overview
Adding a user group
Restricting visibility to a user group
Overview
It's sometimes the case that you want to restrict the visibility of content of certain features in ChurchSuite so that information added is private and only visible to certain 'groups' of users - what we call User Groups - and not visible to other users who are not members of the user group. It's possible to restrict the visibility of Notes, Tags, Key Dates, Forms, Flows, Leave Setup, Preset emails and SMSs and Resources in the Bookings module.
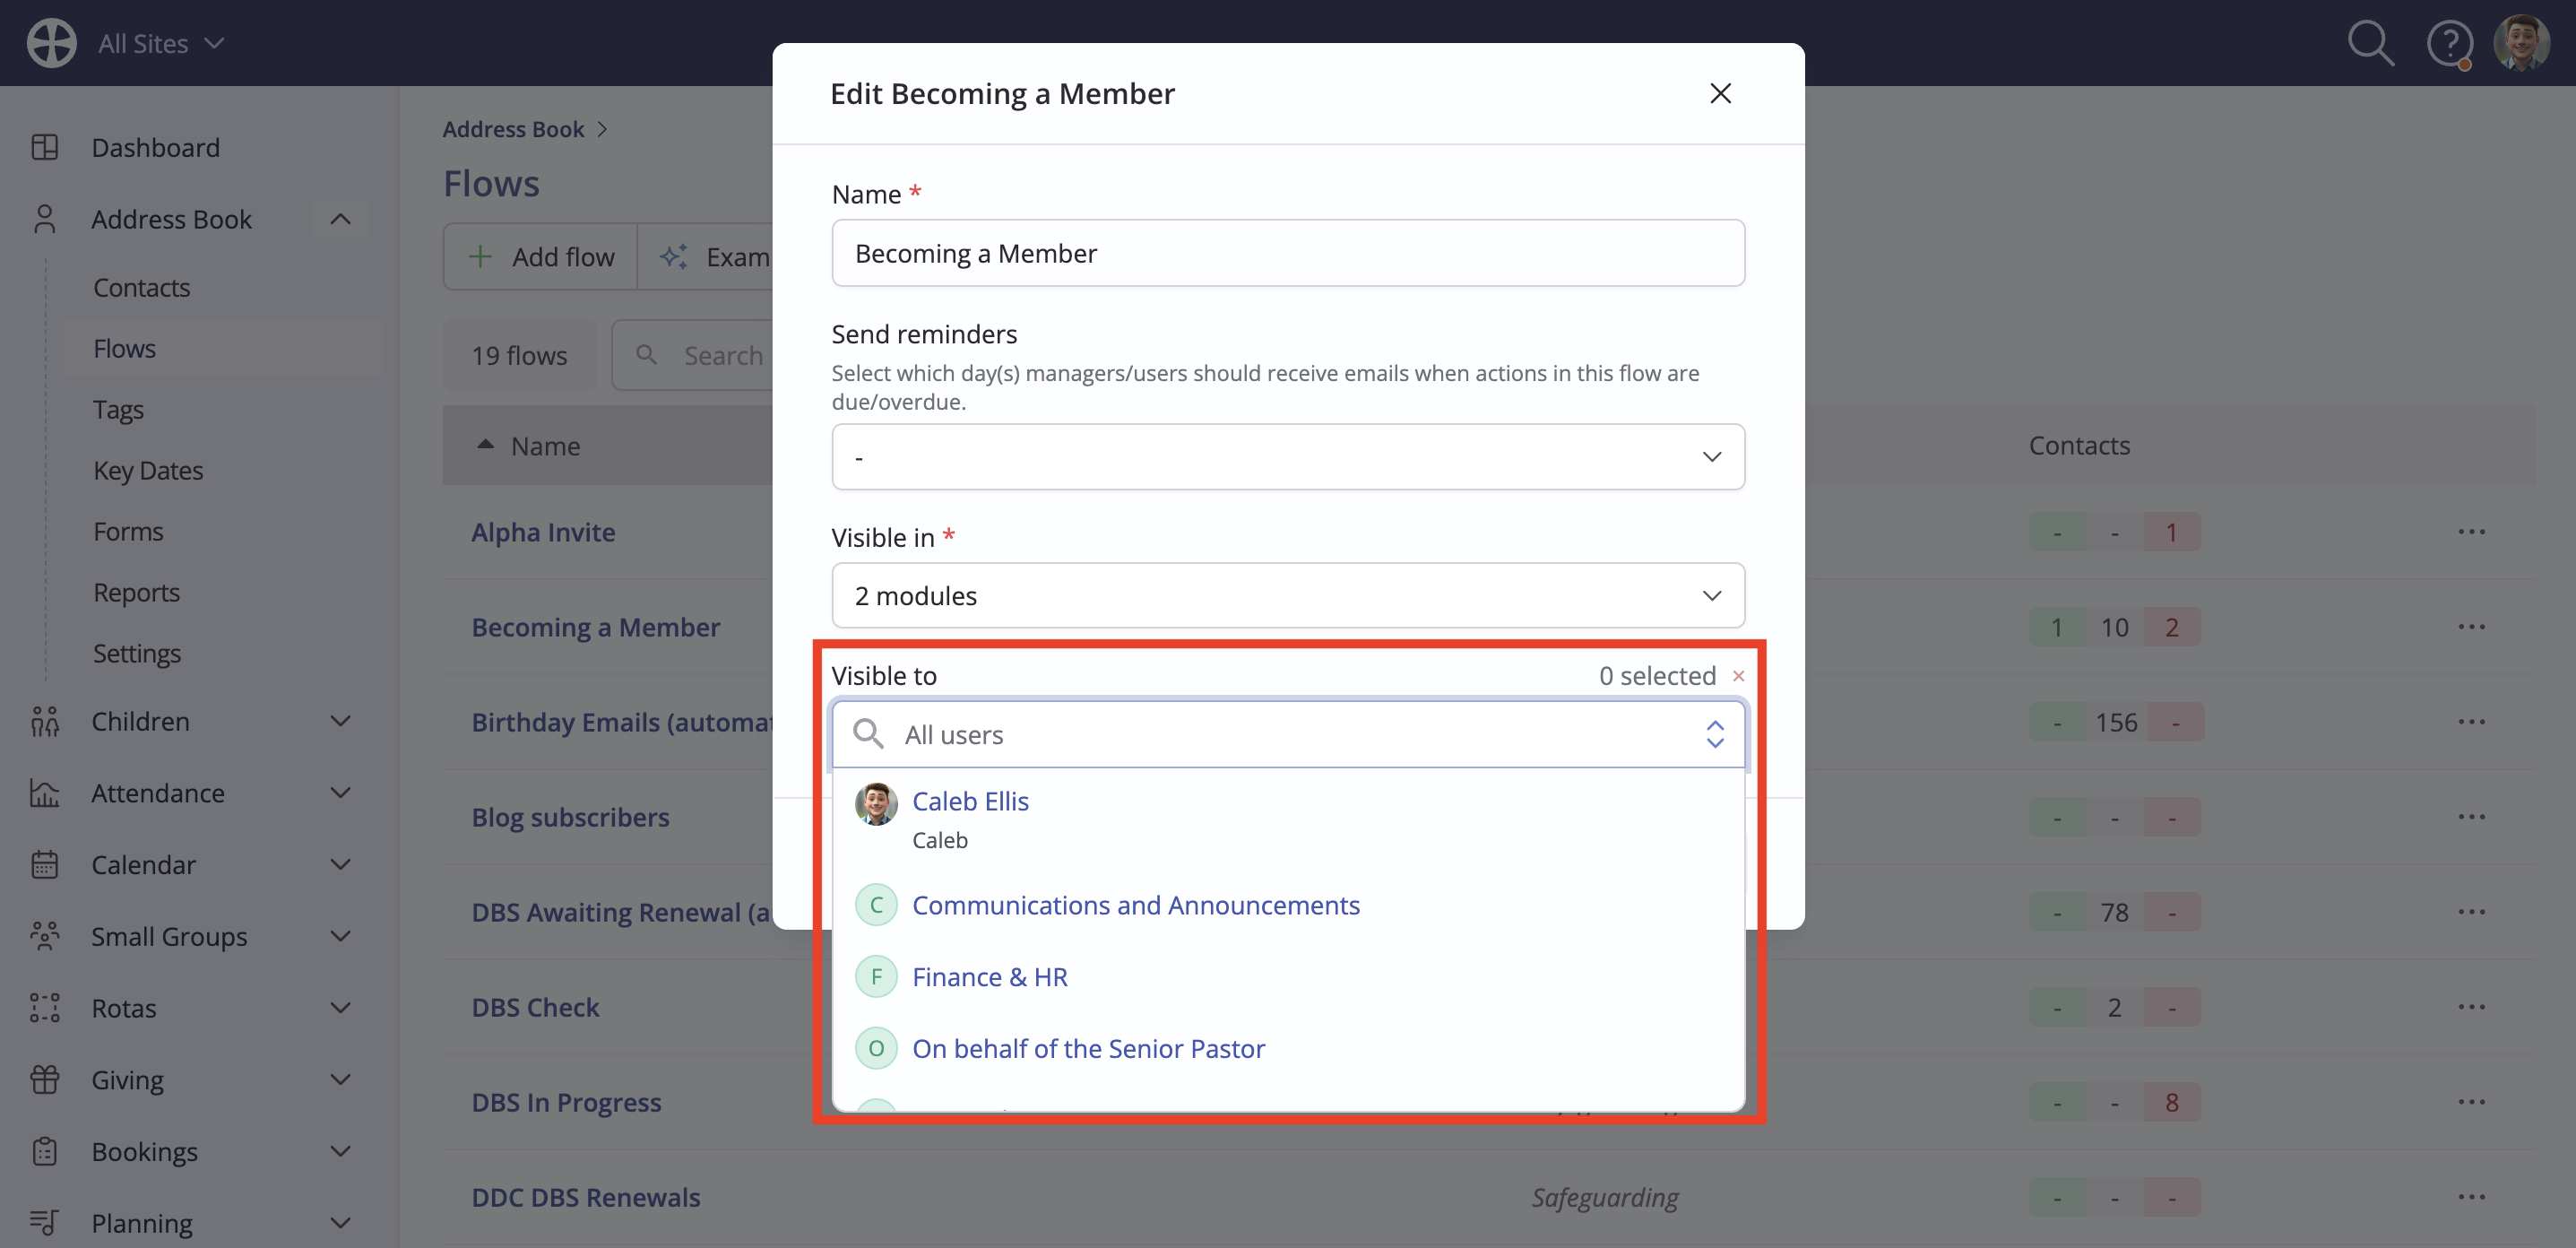
For each of the above features, you can restrict the visibility to All Users (i.e. all module users, not all members), your own user, (private to the creator/author user) or to one or more user groups. In the example below, "Communications & Announcements" is a user group.
You can also set user group Visibility. By default, a user group's visibility is not restricted, which means that those not in the user group can view the user group in the Group sections of your Account Settings, and can add notes that are restricted to that user group. User groups that do have their visibility restricted will only show in the Groups section of your Account Settings to users who are members of the group, and only user who are members of the group can add notes that are restricted to that group.
For example, you could have a "Safeguarding" user group that is visible to all users so that any user can add a restricted Note visible to that user group. While any user can add the restricted note, they are prevented from viewing other restricted notes for that user group, including the note they have just added - only "Safeguarding" user group members can view restricted notes.
Adding a user group
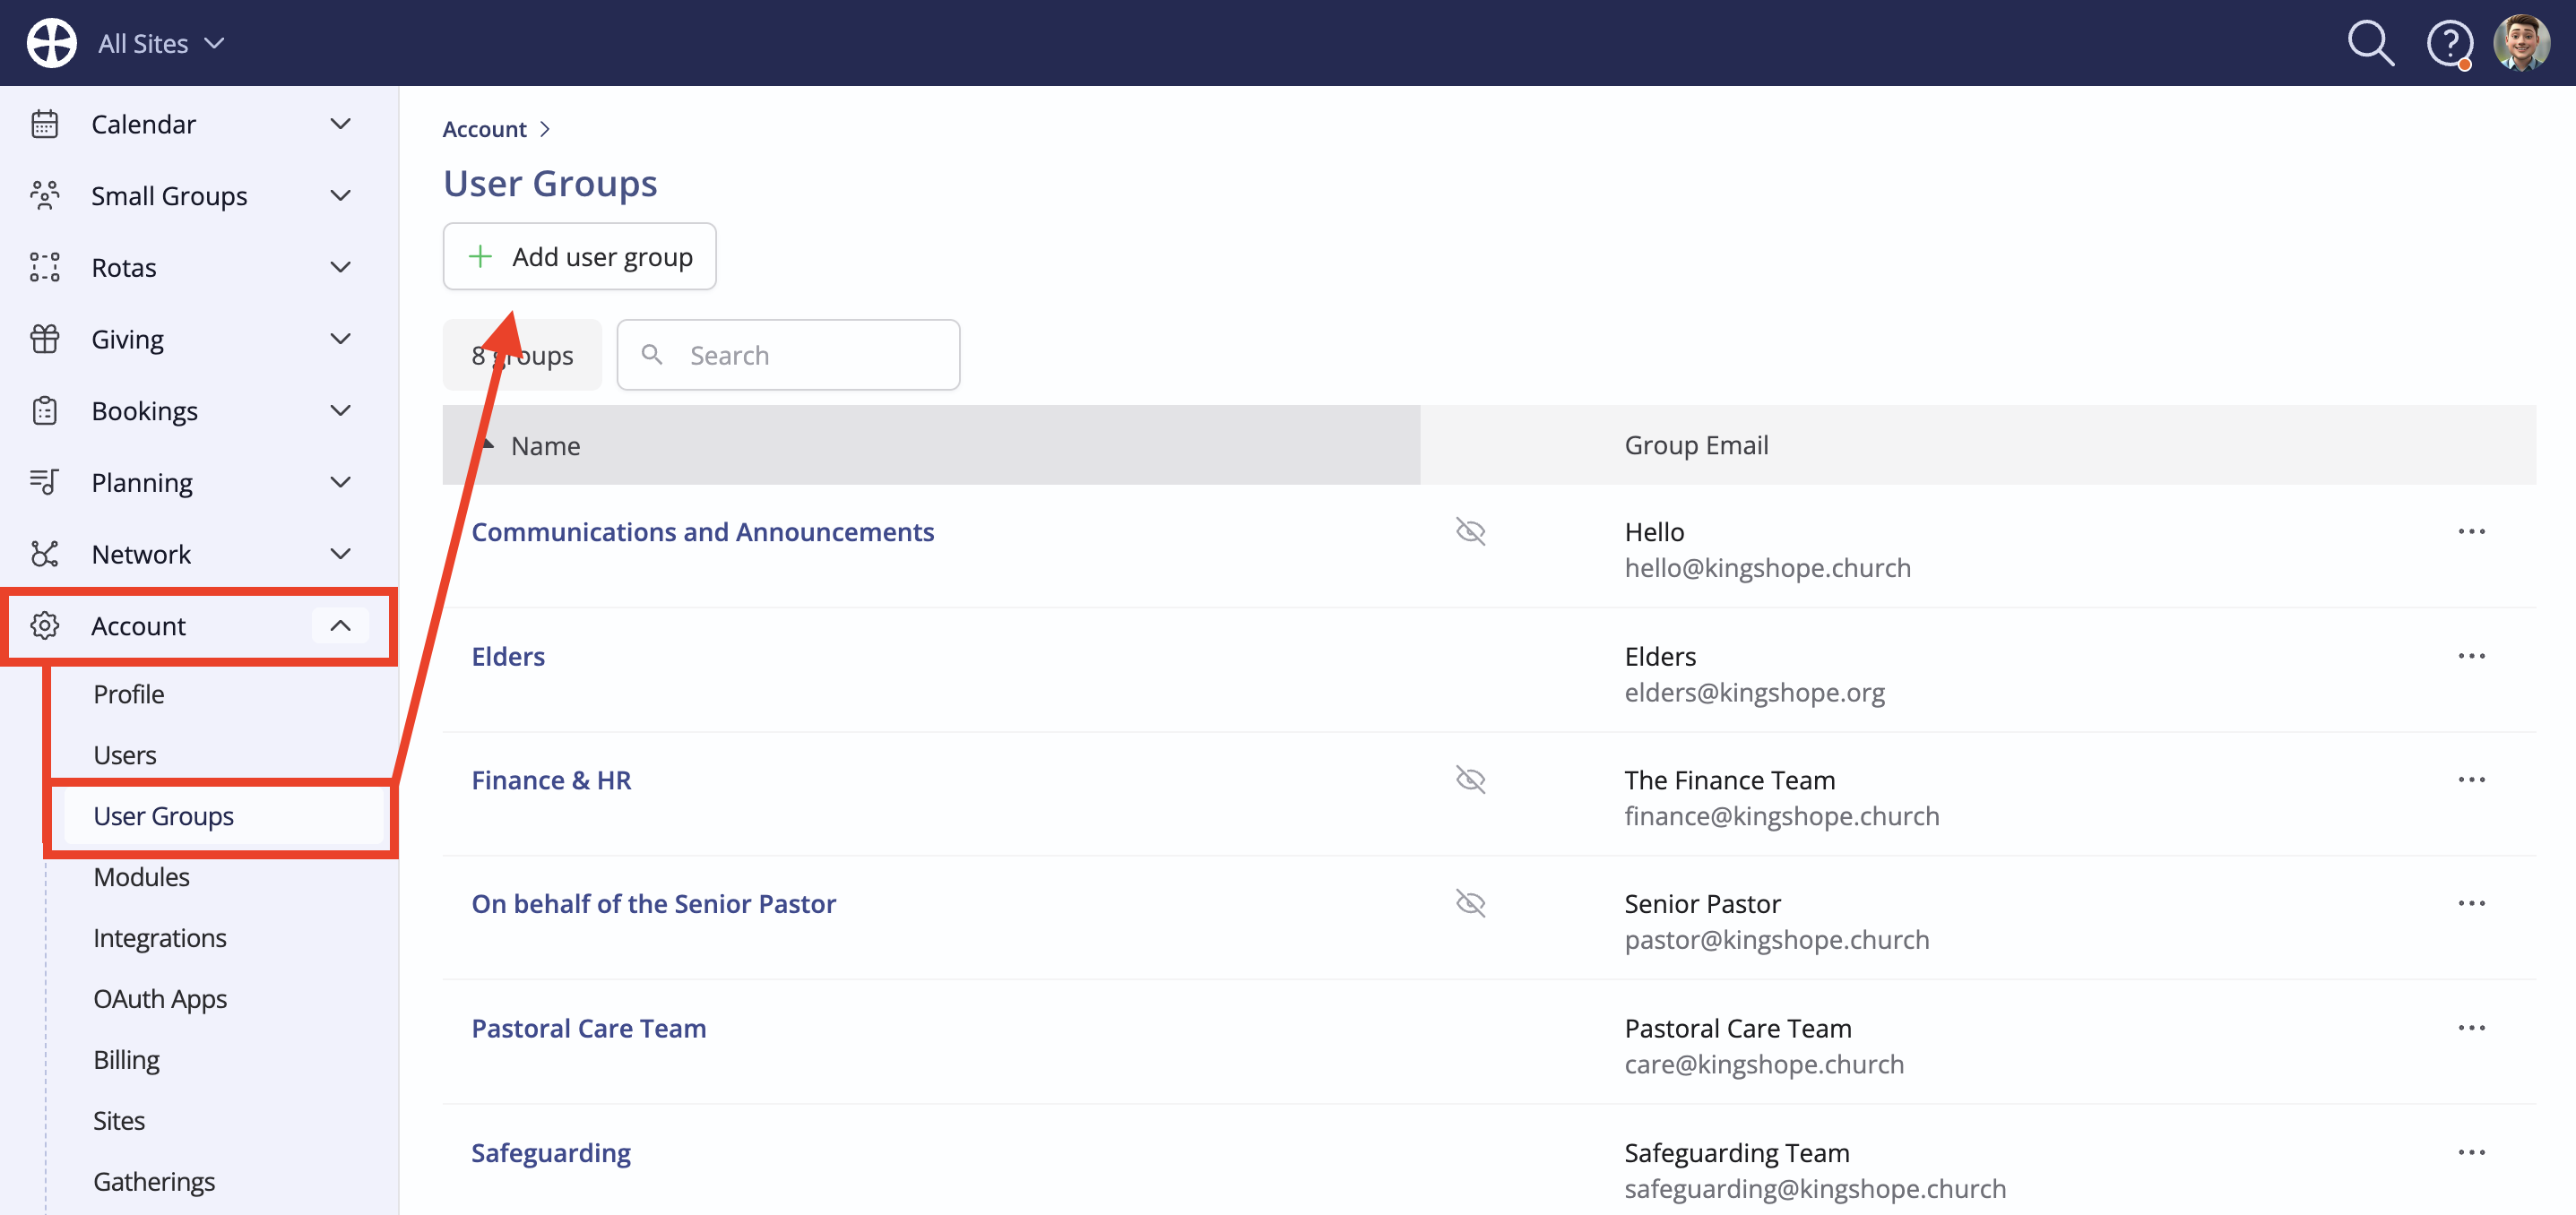
In the User Groups section of your Account Settings, click Add user group...
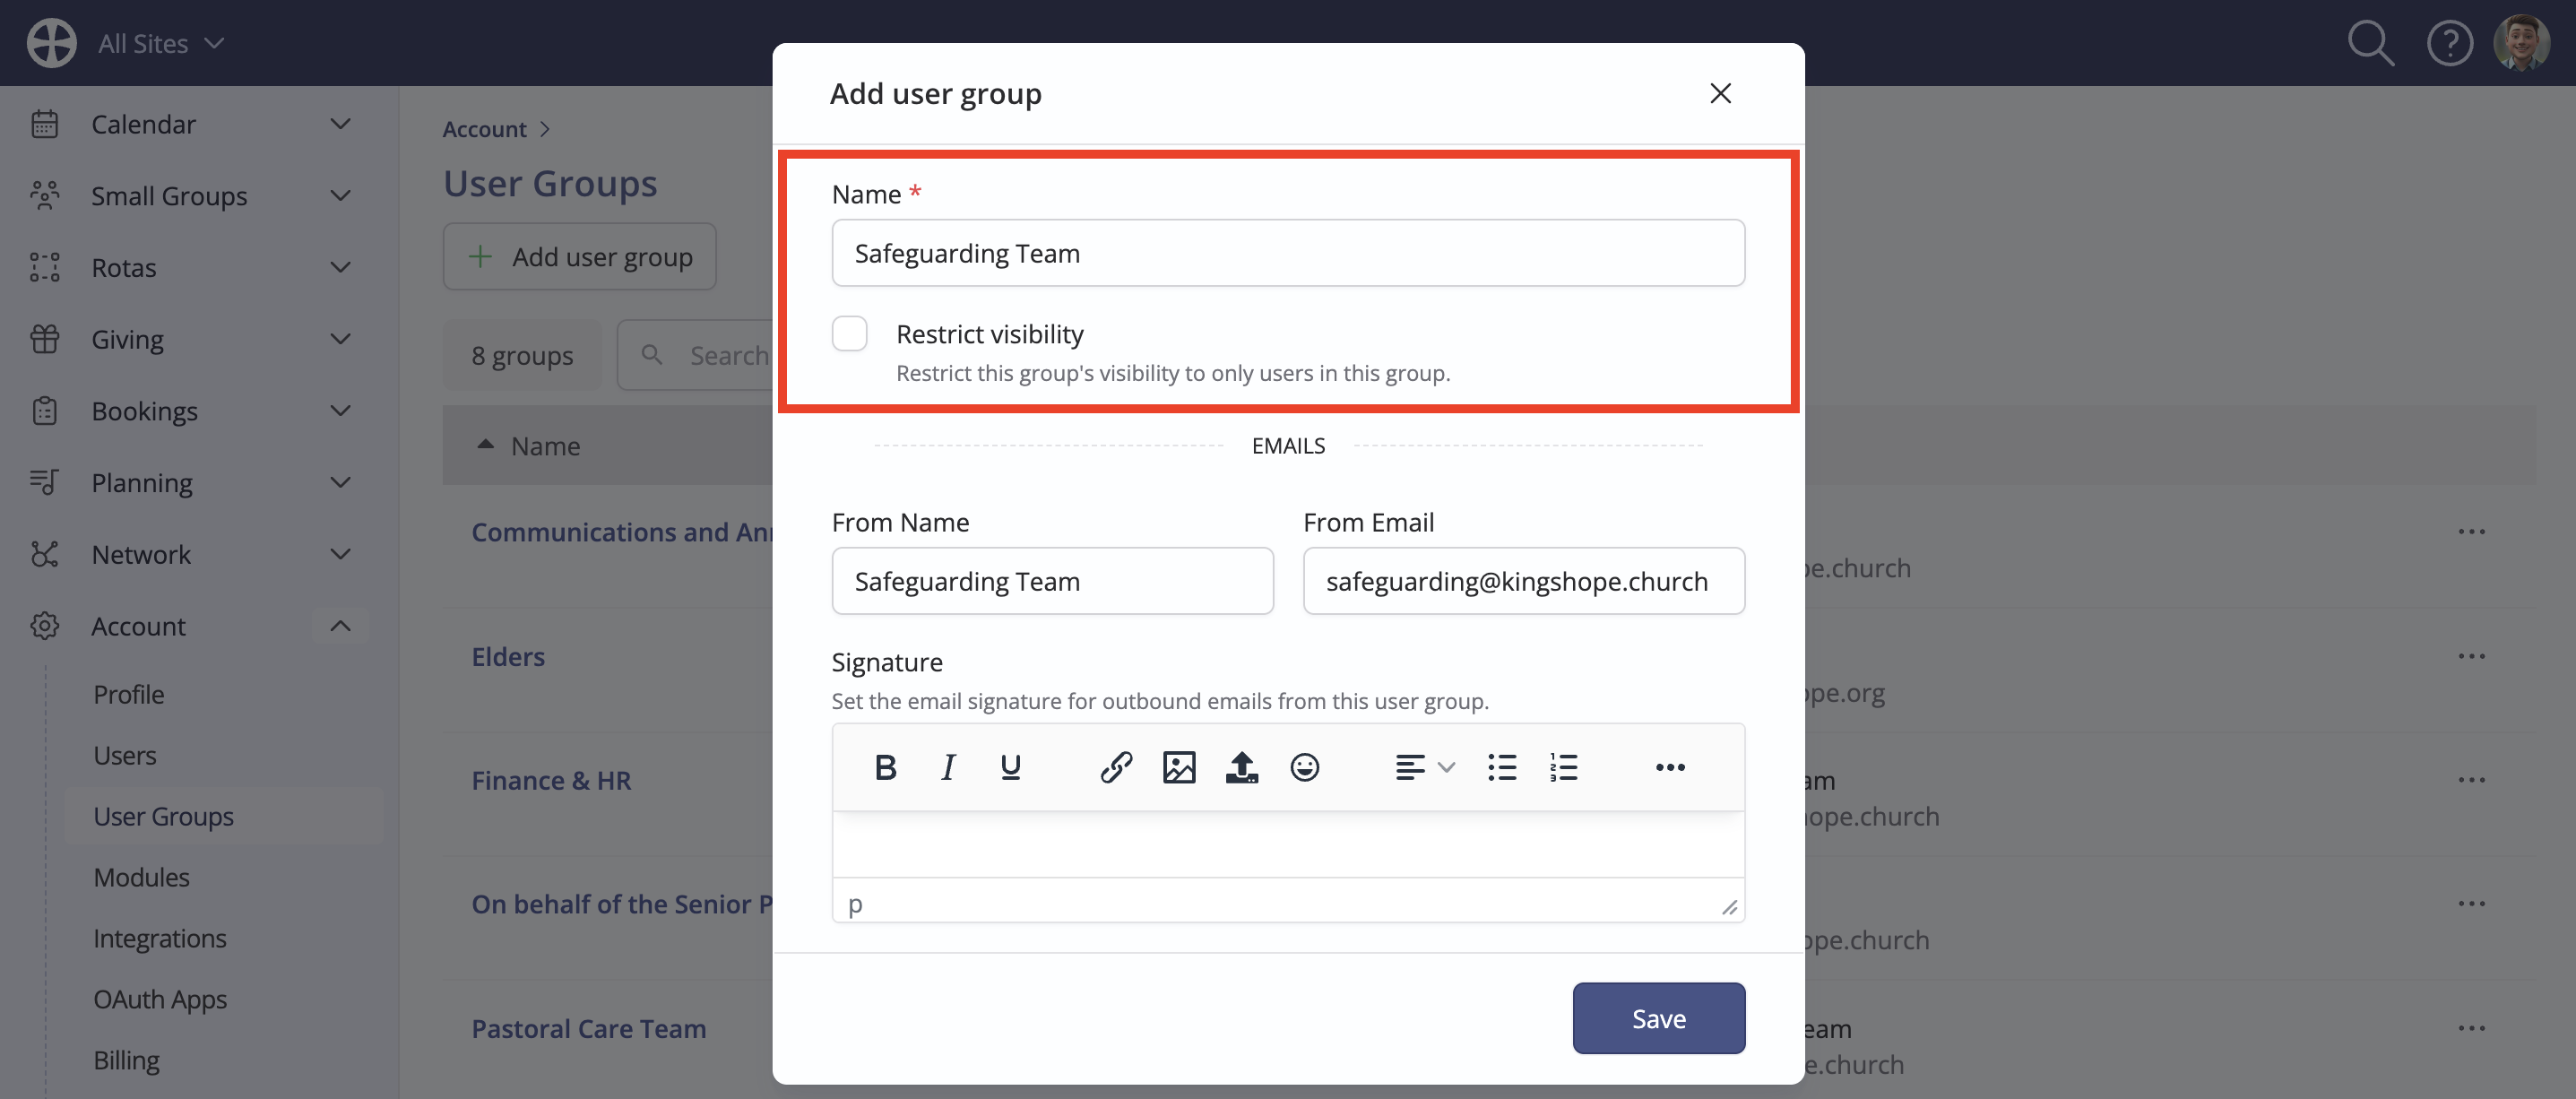
On the Add user group pop-up, enter a suitable Name and set whether to Restrict visibility to only users in the group. Optionally assign a shared Email address to the group - when sending emails, user group members will be able to send on behalf of the user group shared email address (as an alternative to their User email address) - for more information, see the related support article Shared email addresses for user groups. Click Save to add the user group.
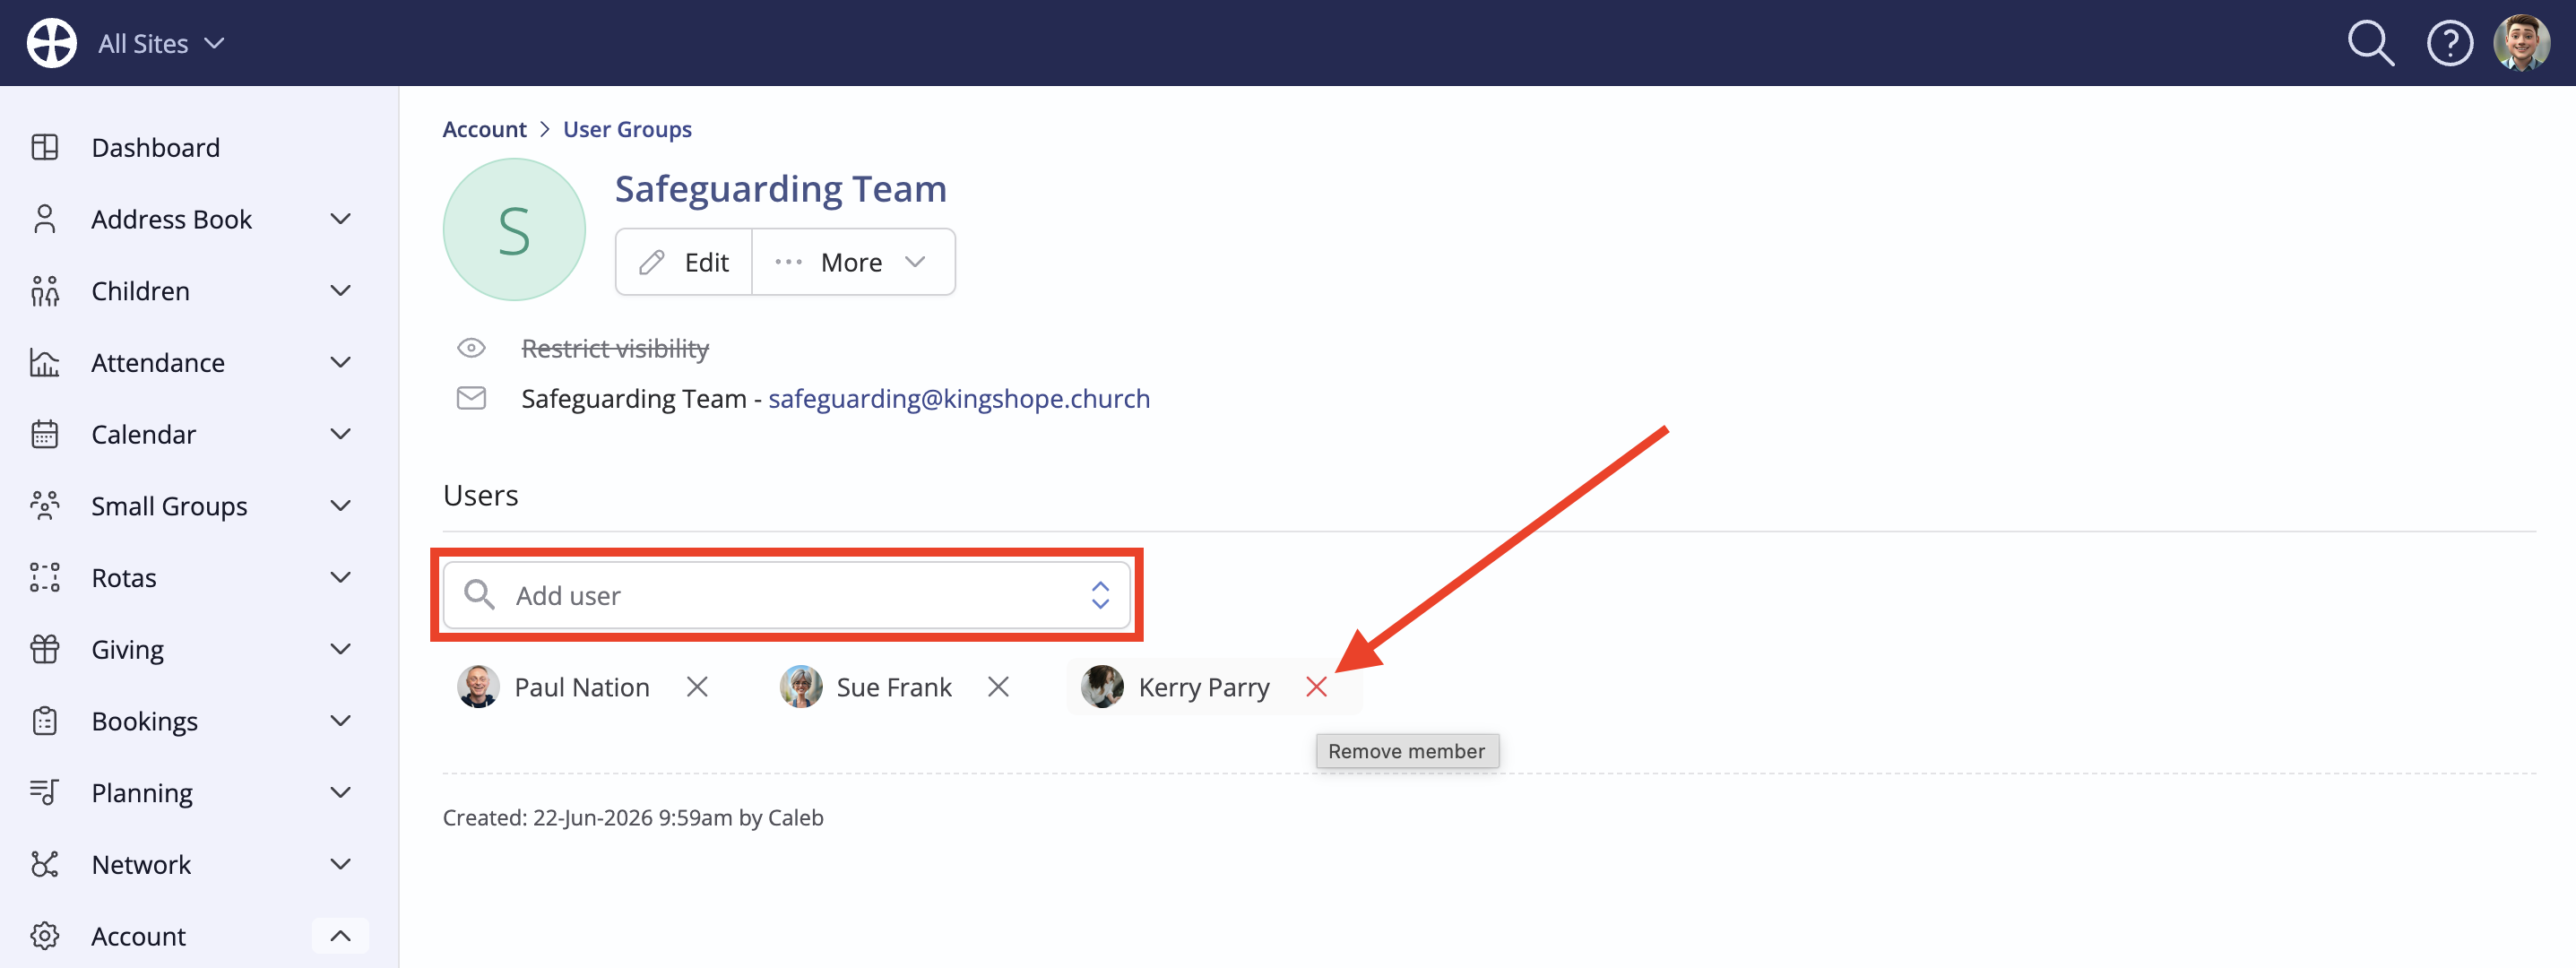
From the user group View, click Add user to add one or more users to the group. Don't forget to add your own user account if you need to see any content restricted to this user group. You can also assign users to the group from a user profile.
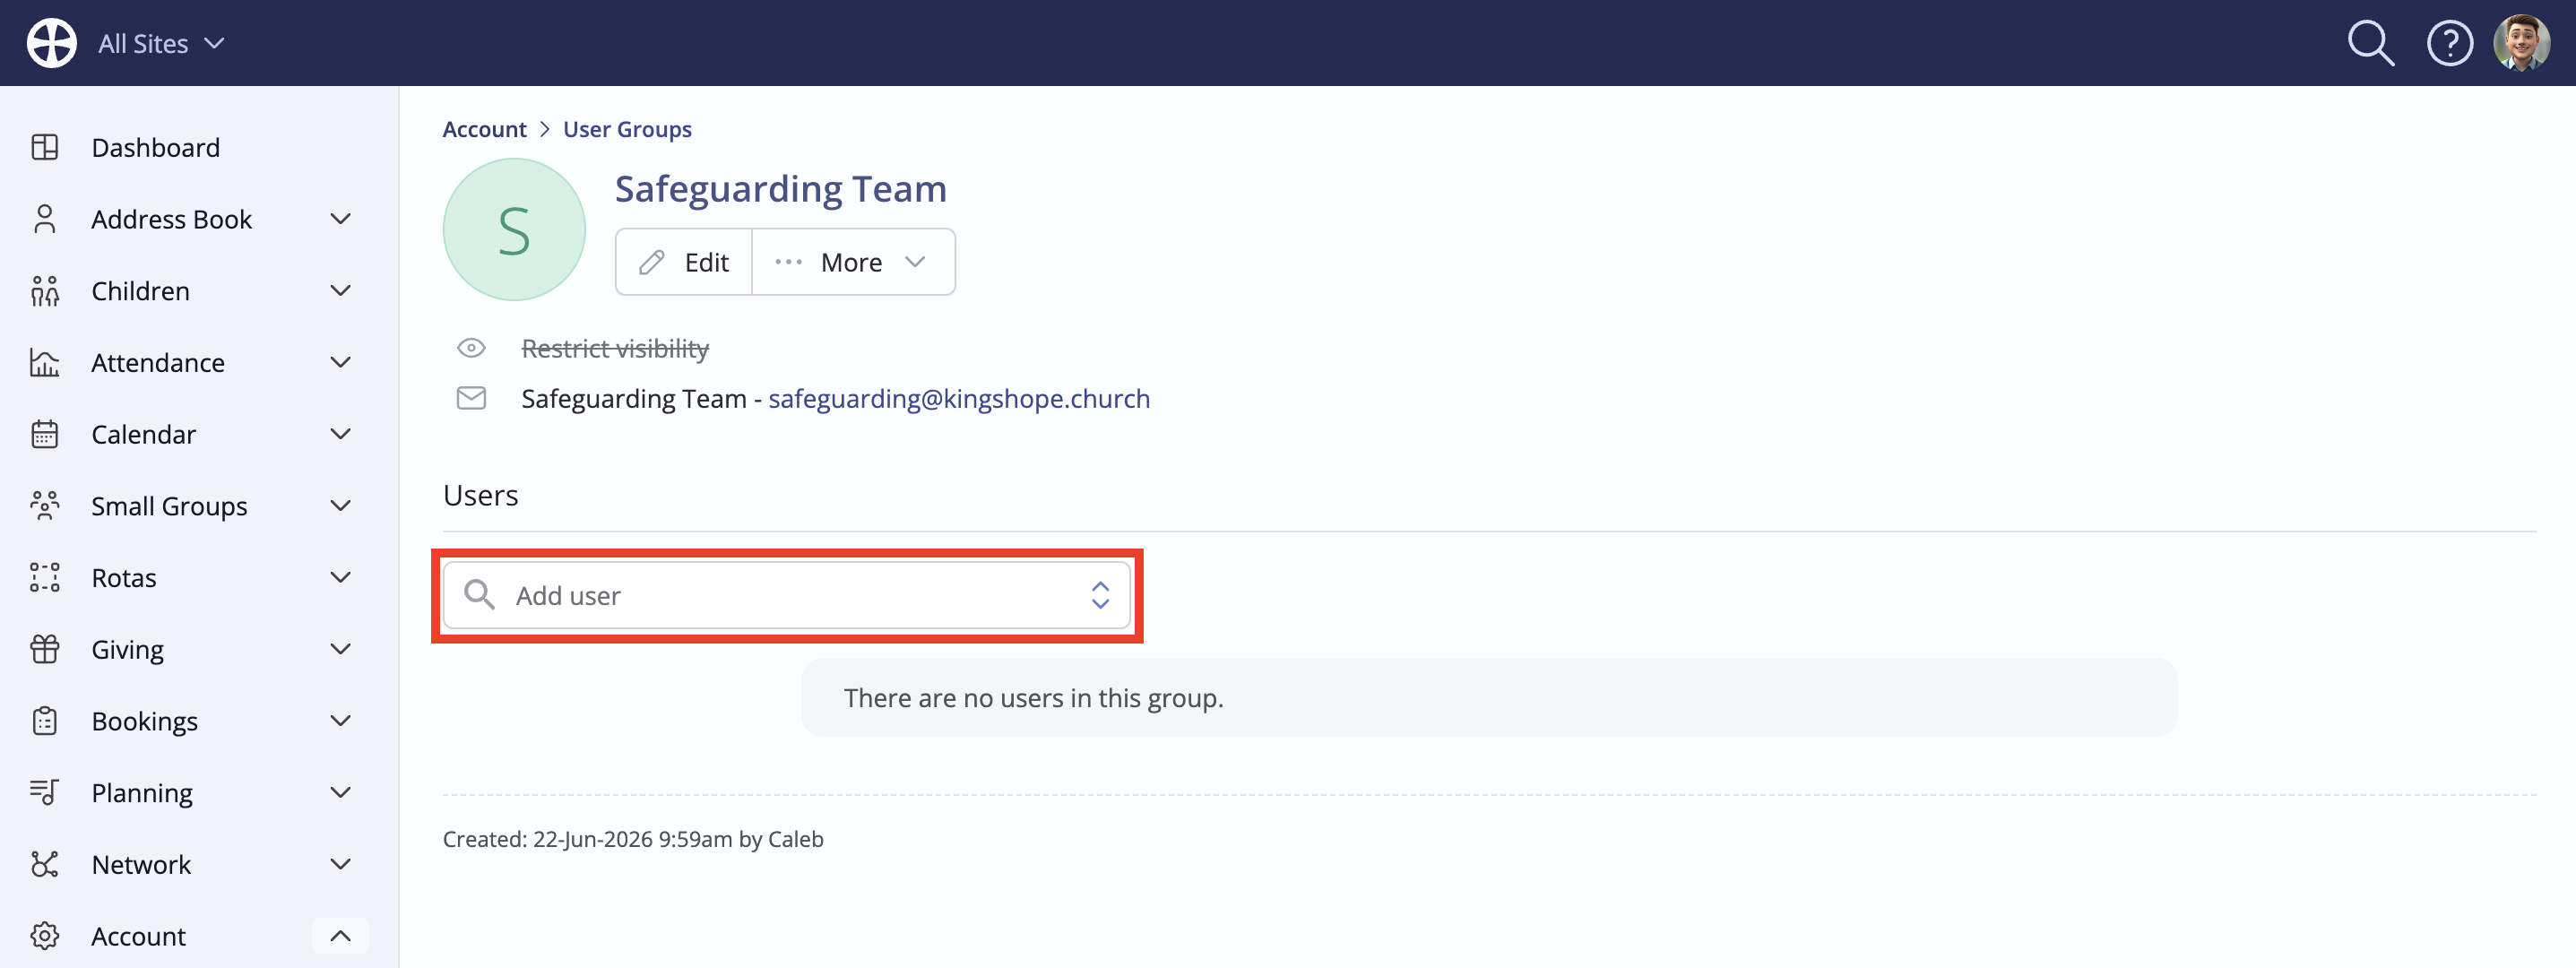
You can return to a user group View at any time to Add or Remove users from the user group.
Restricting visibility of content to a user group
When adding or editing any of the features listed earlier in this article - like a Flow - you can restrict its visibility to a user group. Only user groups that you belong to are shown in the list.
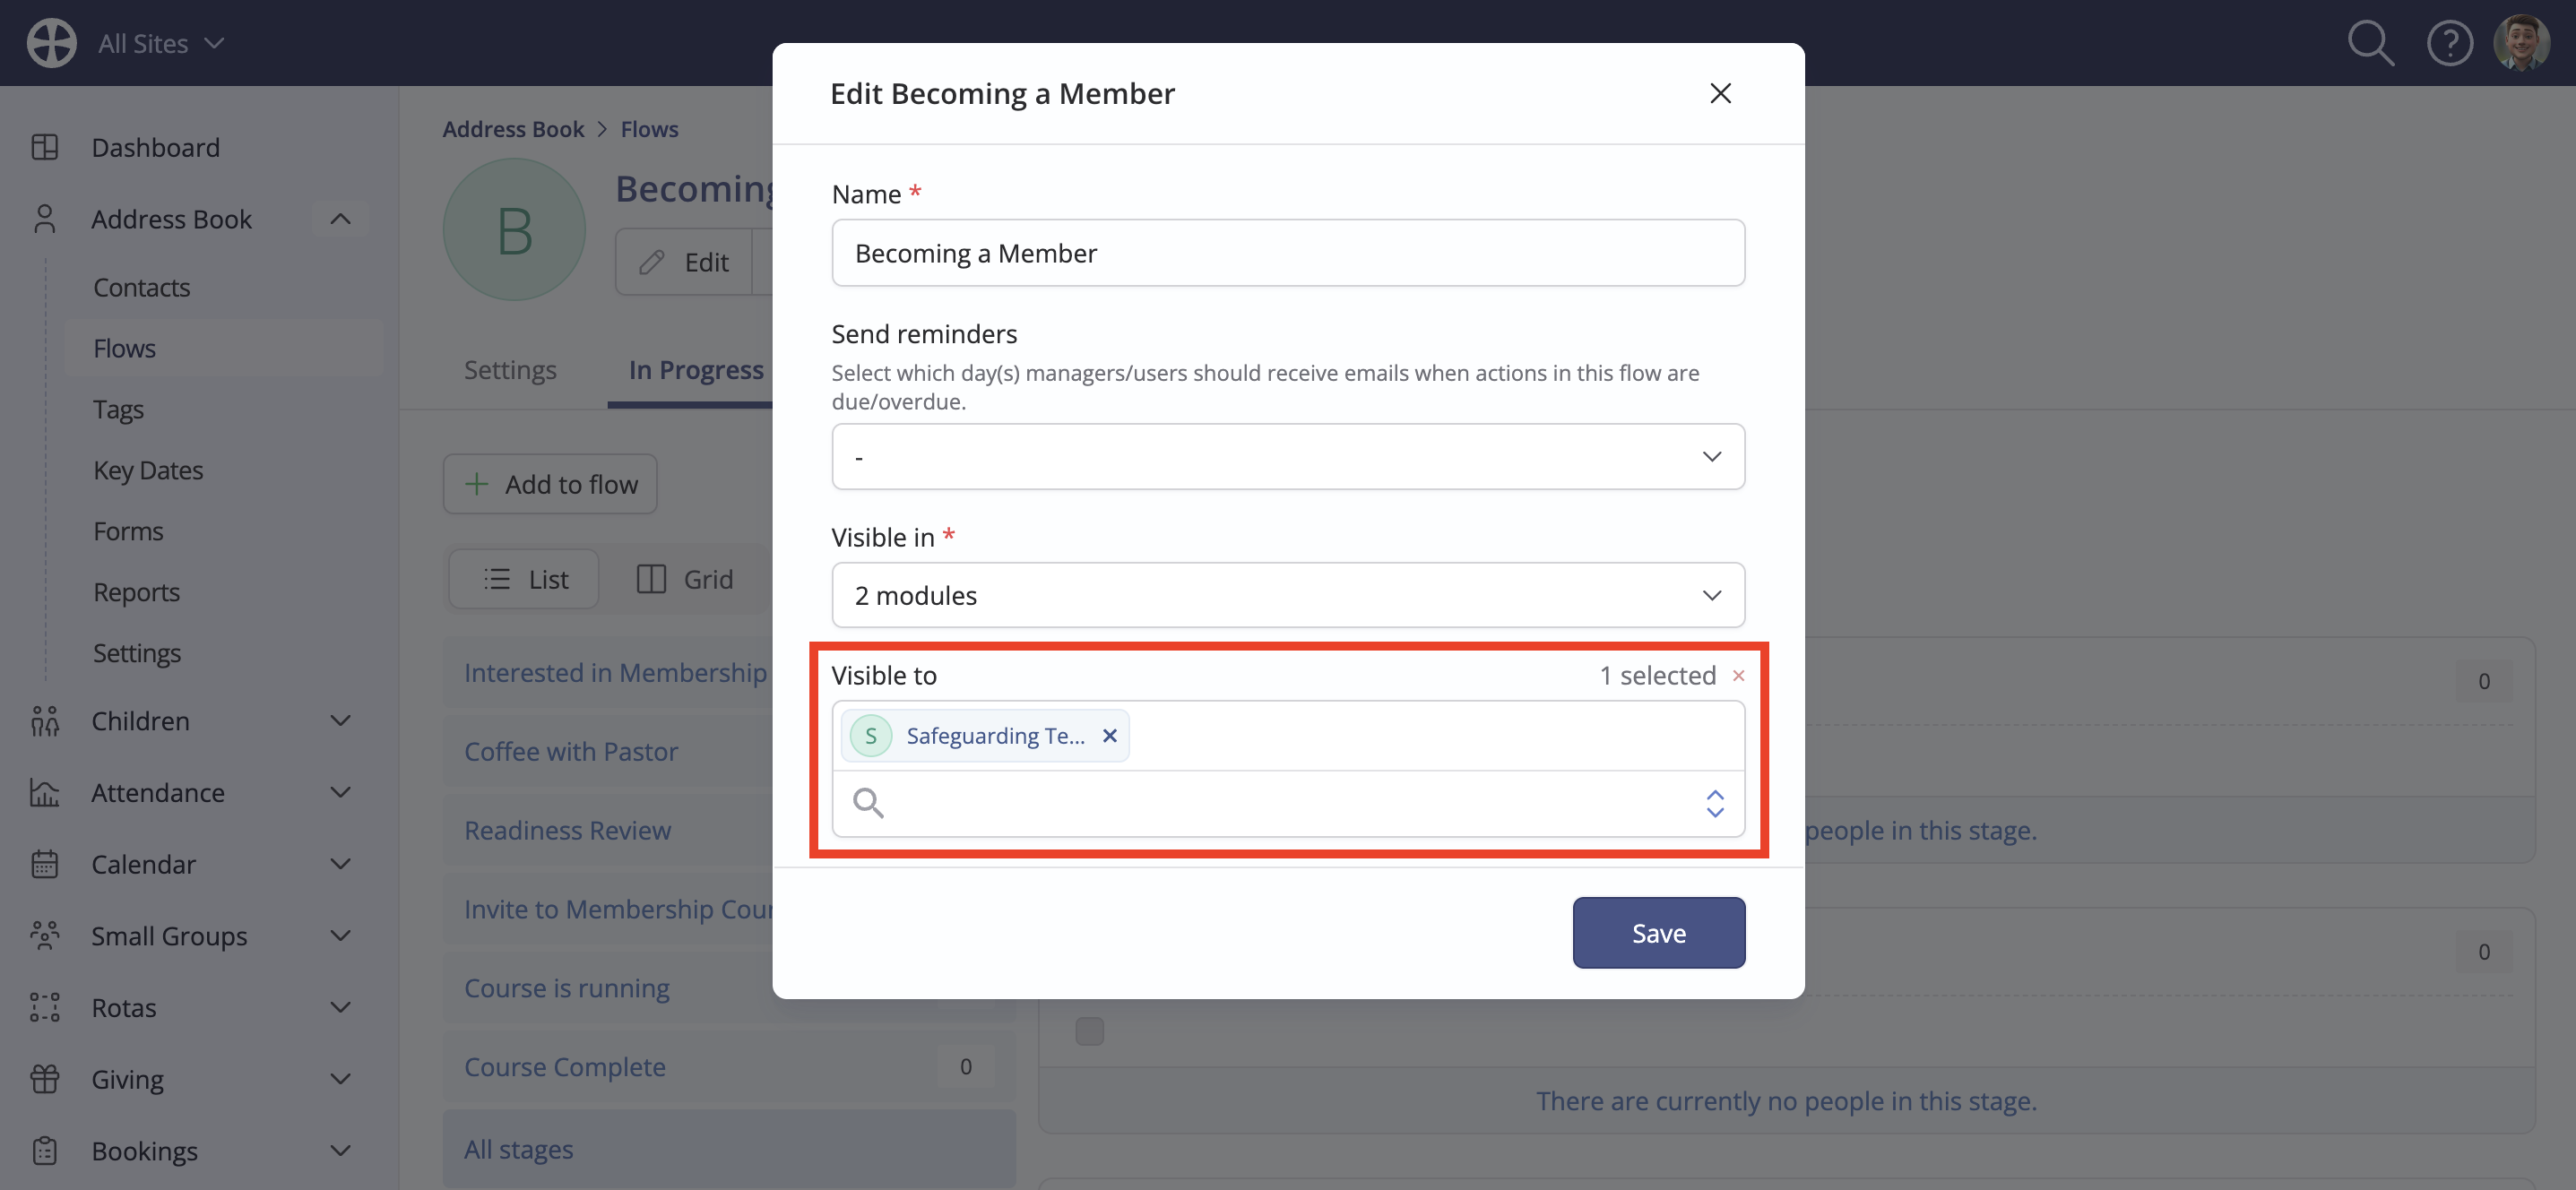
When adding notes, you'll be able to restrict the note visibility to any user group that's visible to all users - even if you're not a member of that user group.
Deleting users and user groups - warning!
While removing user group members is non-destructive, deleting a user or user group has destructive consequences. Consider whether any notes, tags, key dates, flows, forms, booking resources, leave setup or presets have restricted visibility to just that user or user group. If you delete the user or user group, no users or administrators can access those things - they will still exist but will be permanently hidden from view. This is intentional to respect the original visibility restrictions that were intentionally added to ensure the privacy of those things.
Therefore, before deleting a user or user group, update the visibility restrictions of your notes, tags and flows - either to "All Users", "Just me" or an alternative user group; then proceed with the user or user group deletion. Once a user or user group is deleted, only the ChurchSuite Support team can restore the visibility of hidden items.