Adding and managing users
In this article
User types explained
Adding a new user
Linking a user to their Address Book contact profile
Duplicating an existing user
Changing a username
Resetting a user password
Reporting for Administrators
Archiving and deleting users
User types explained
Two types of users can access ChurchSuite: Administrators and Users.
Administrators
Administrators have full access to all ChurchSuite modules. There must always be at least one Administrator on the account - administrators cannot archive or delete their user profile. There is no limit to the number of administrators you can have. Multi-site customers who assign Site access permissions (permitted sites) might choose to give Administrator access to some, but not all, sites. Permitted sites could be a single site, a combination of multiple sites or "All sites". All sites mean all current sites AND any new ones you add in the future.
Module passwords
While Administrators have full access to all modules, you can optionally add a password to any module as an additional layer of security to deny access to any User or Administrator unless they know the module password. A good example is your Giving module, where you restrict access to authorised finance team users only. See our related support article for further information on Setting a password for a module.
Administrators uniquely have access to your ChurchSuite Account Settings, where they can manage Users, [User] Groups, Modules, Files, the account Profile, Sites, Presets, Brands and Integrations and access Administrator Reports. Only an Administrator can add and manage other users.
Users
Users only have access to permitted modules specified on a user-by-user basis. For each module, permitted access can be set as None, Use, Write or Manage, as explained below. Multi-site customers who assign Site access permissions (permitted sites) might choose to give users access to some, but not all, sites. Permitted sites could be a single site, a combination of multiple sites or "All sites". All sites mean all current sites AND any new ones you add in the future. Module permissions apply to all permitted sites - it's not possible to grant site-specific module access.

Access to Check-In can also be granted independently of module permissions. For example, you can give a user access to Use Check-In without necessarily needing to grant permission to Add session or Close session. For more information about Check-In, see the related support article.
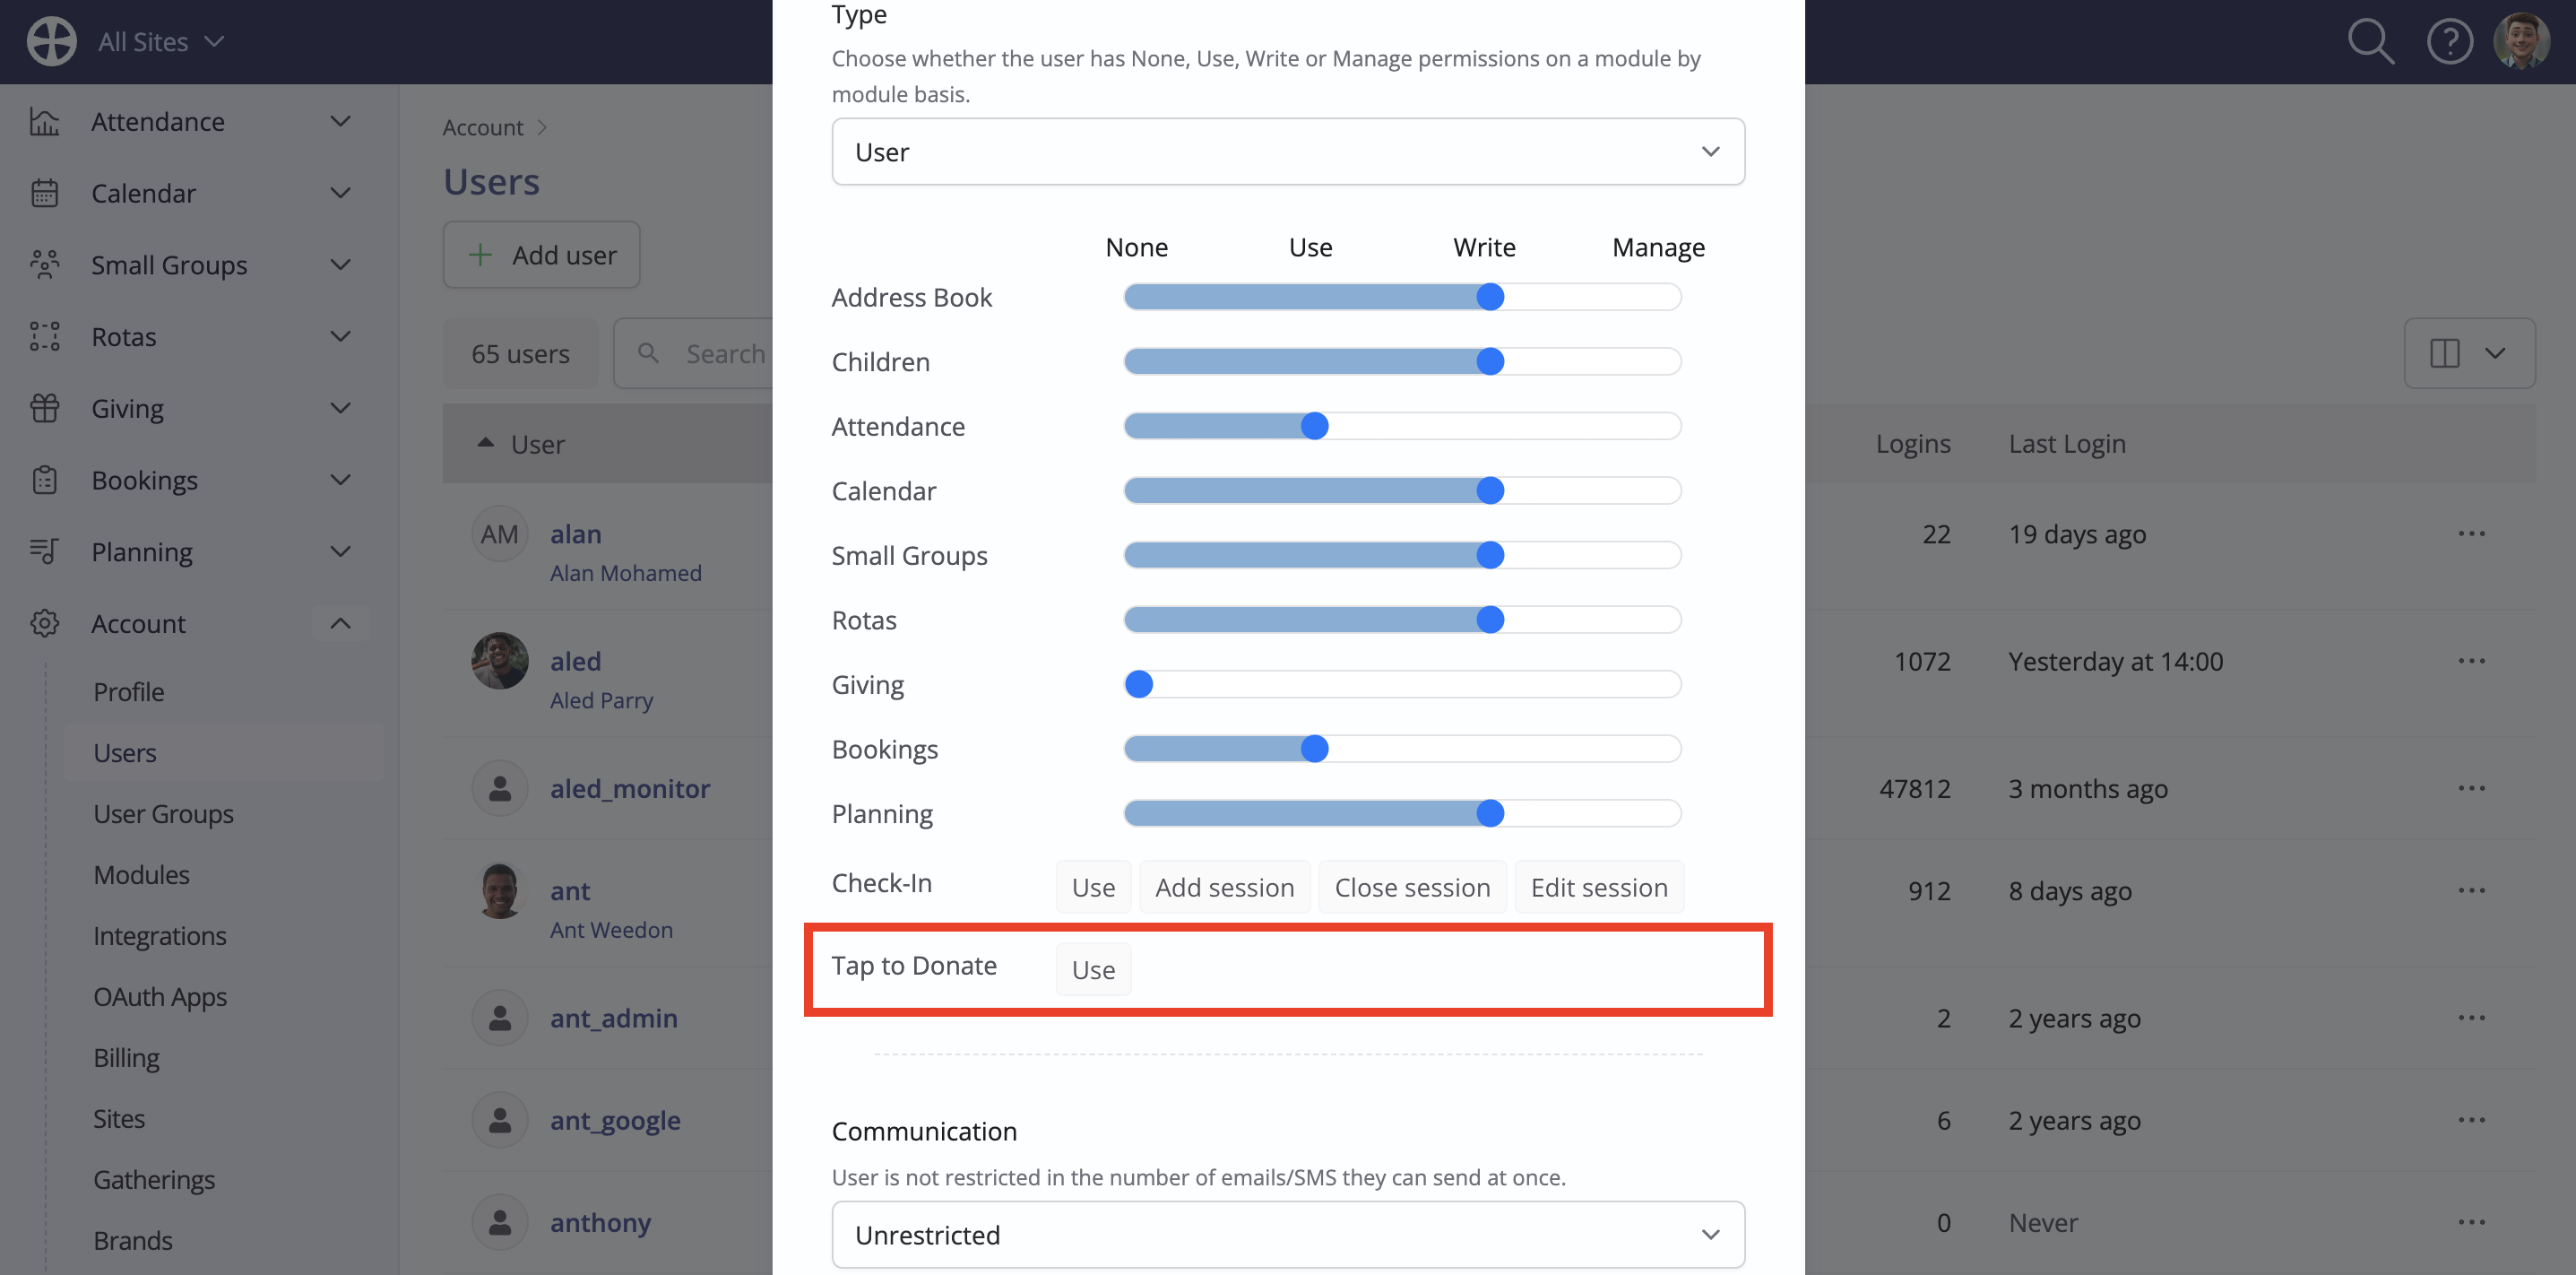
Access to Tap to Donate can also be granted independently of module permissions. For example, you can give a user access to the Tap to Donate feature without necessarily needing to grant Giving module access. For more information about Tap to Donate, see the related support article.
The four incremental levels of user access
None - the User has no access, and so the module isn't shown in the navigation. A user with no module access for any module can log into ChurchSuite but can only manage their User account details. They can only log into Connect if they have permission for one or more Connect applications or Check-In if granted Use permission. For example, a Cleaner could have a user account with no module, Connect, or Check-In permissions to maintain a Leave Setup for that person and to process their leave requests.
Use – broadly speaking, this User can use the data in the module, but cannot make changes - they can't add, import, edit, duplicate, merge, move, archive or delete data anywhere in the module. However, the following limited activities are permitted:
- Compose and send communications, including sending consent requests, My ChurchSuite invitations and password resets, and save a composed message as a Preset.
- export or output data to a CSV file
- Produce reports, including printing and exporting report results.
- Add/remove people to/from existing Fixed Tags and add people to existing Key Dates and Flows.
- Process people through Flows, including running permitted actions for that Flow. Permitted actions include:
- Set as active - if the person is currently in the 'Pending' section of the module.
- Remove from Flow
- Change a person's Flow "Due Date" and "Assigned User"
- Add Key Date
- Add Tag
- Remove Tag
- Add to Flow - if that Flow is visible to the User
- Send Form Invite - if that Form is visible to the User
- Add to Group
- Add to Ministry
- Edit Custom Field
- Move to Stage - within the current Flow
- Send Email - if that Preset email is visible to the User
- Send SMS - if that Preset SMS is visible to the User
- Archive Person
- Delete Person
- Add, pin, unpin, edit and delete Notes they have authored.
- Access Event Check-In and the Event Page from an event View page if they have Calendar module access
- Send event invitations - if they have Calendar module access.
- Submit their leave requests - if they have Calendar module access.
- View the module's settings.
- Access their User area where they can fully manage Preset Emails/SMSs visible to the User and fully manage Files.
- Manage certain aspects of their User profile, including their email signature, email address and password; enable multi-factor authentication and enable/disable 'Getting Started' banner messages
Write – the User has full module access and can add, import, edit, duplicate, import, merge, move, archive and delete data within the module.
Manage – the User has Write permissions but can also manage and make changes to module settings (which affect all module users).
Connect – the User can log into Connect and use the permitted applications.
Check-In - the User can log into Check-In, use it, add a session, edit a session or close a session as permitted.
Tap to Donate - the User can log in to Tap to Donate to accept donations
Sites - your ChurchSuite account has a default single site, but you can add additional sites and grant per-user access to one or more sites - known as their permitted sites. Each User's module permissions apply to all their permitted sites. Users can only access module data for a permitted site and are prevented from navigating from a view in a permitted module to underlying linked data in a non-permitted module. Users can only add, import, edit, duplicate, merge, move, archive or delete data for a permitted site. See our related support article on Multi-site functionality for further information.
Adding a new user
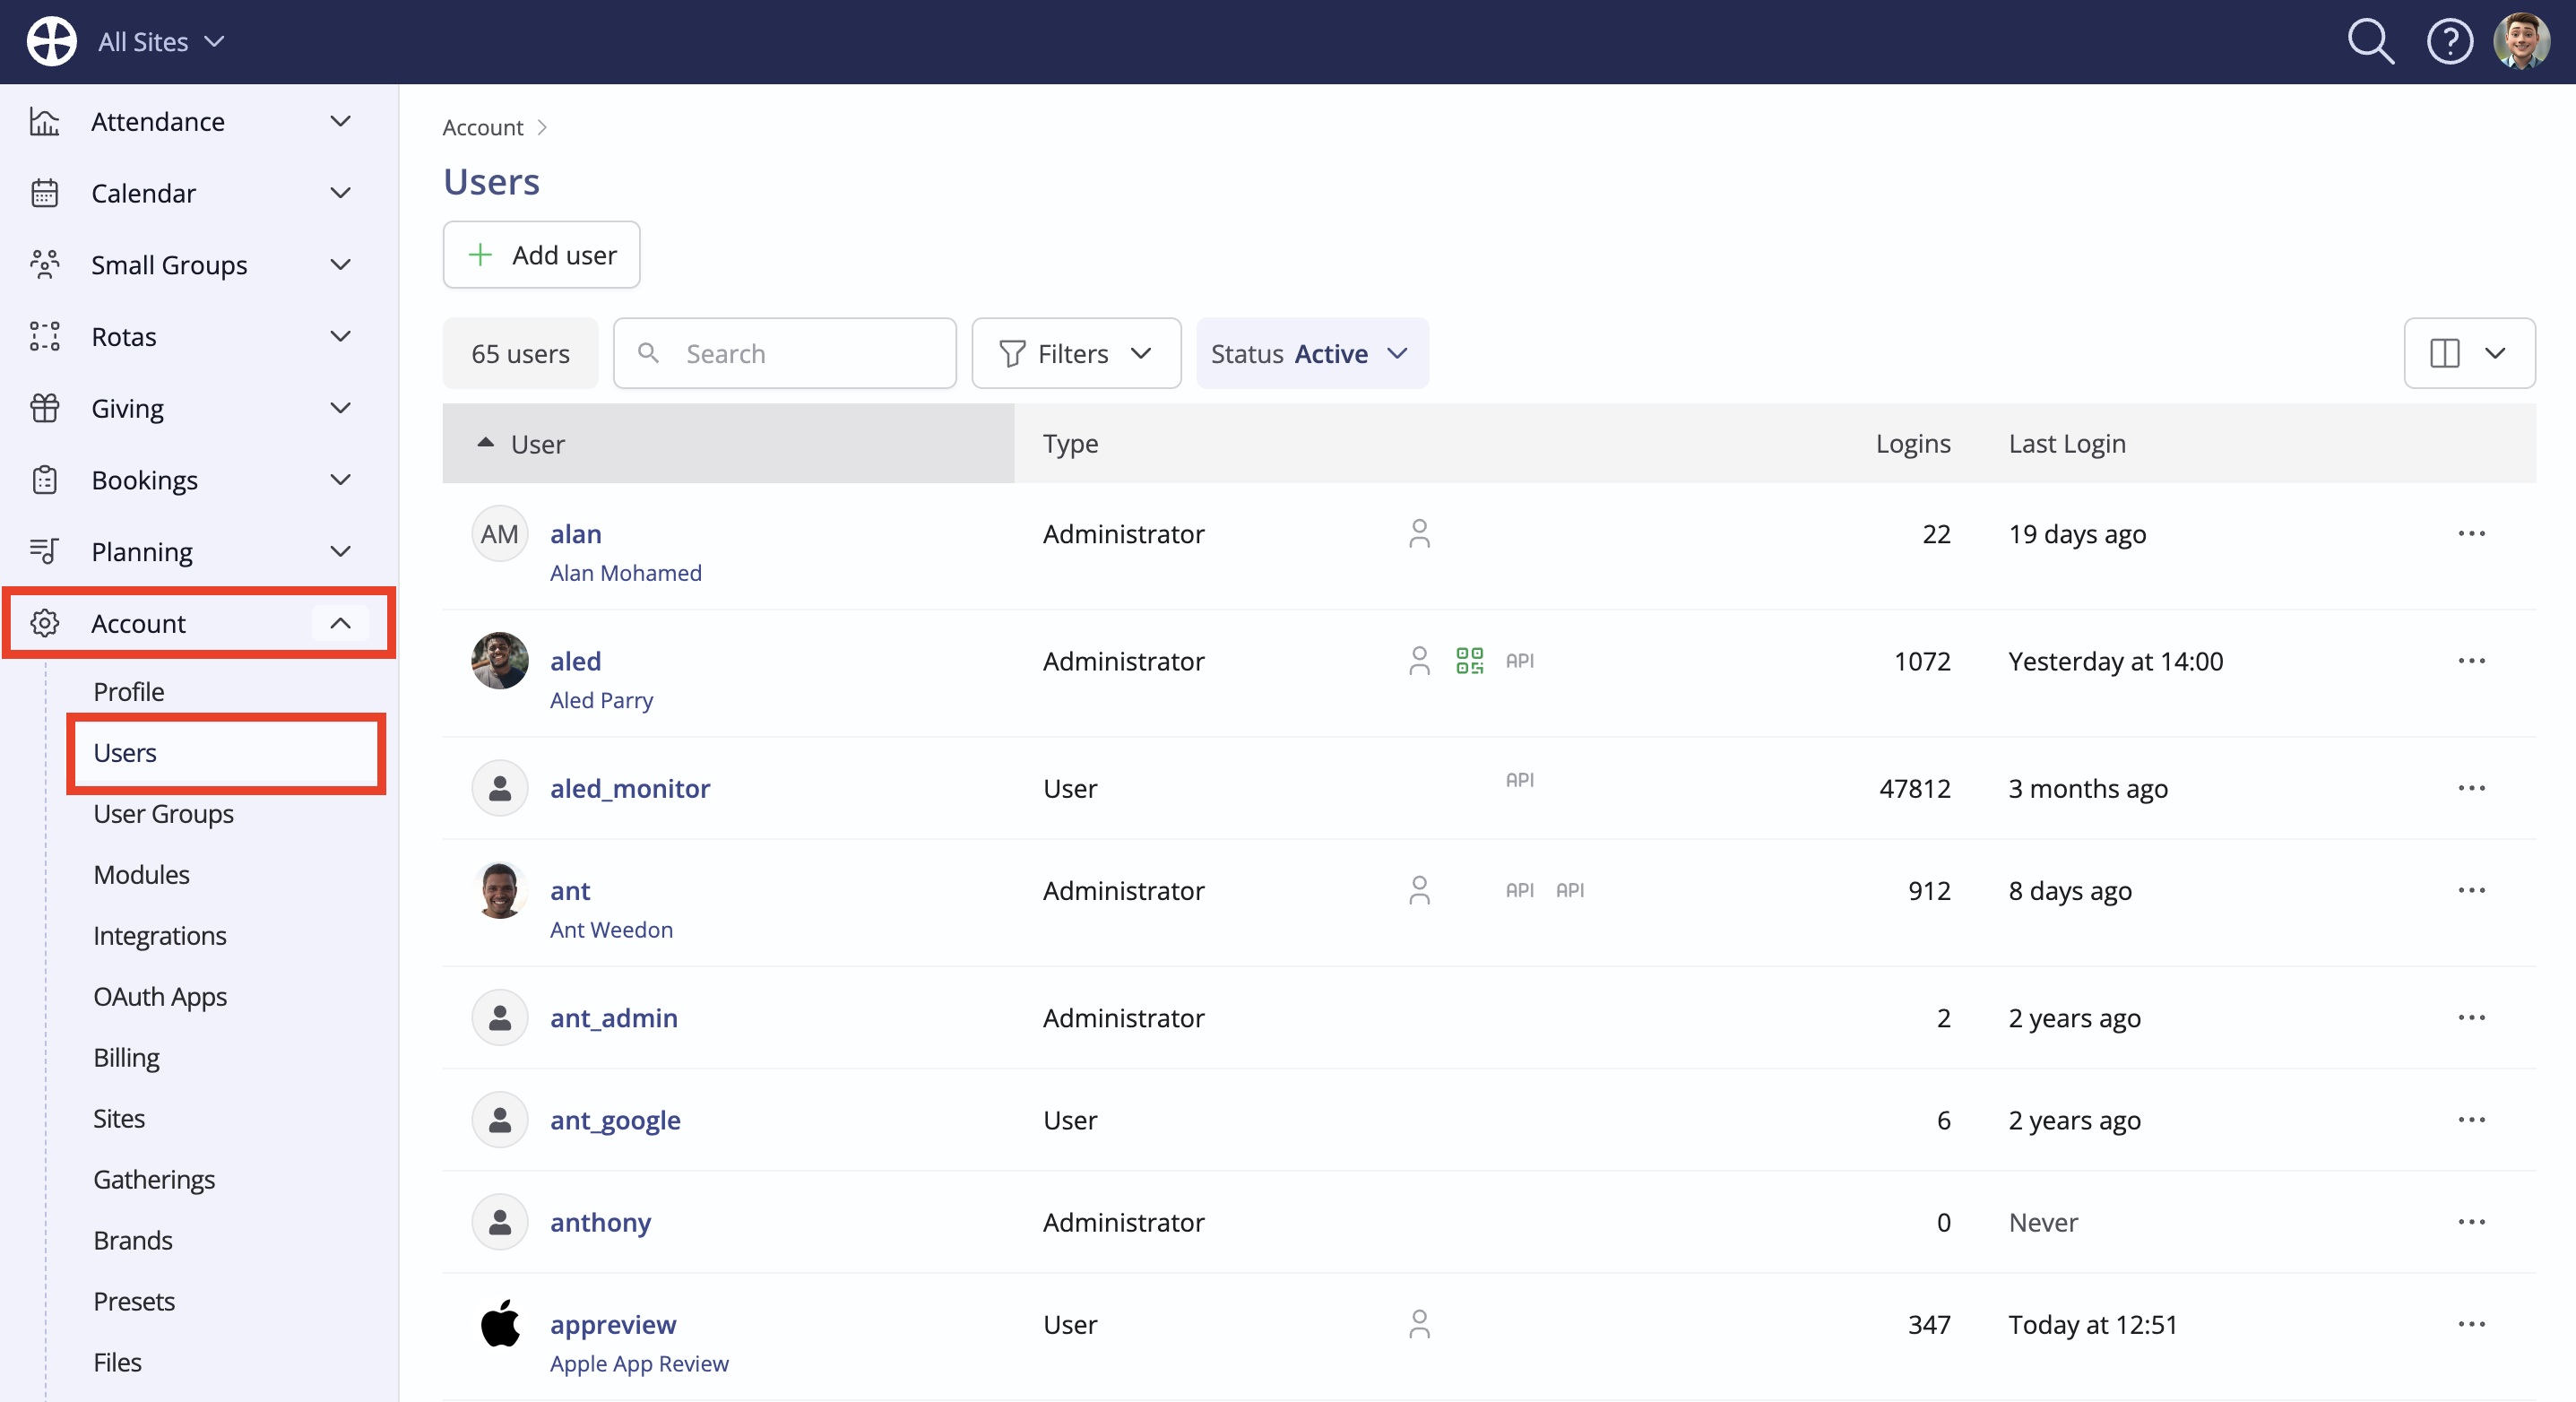
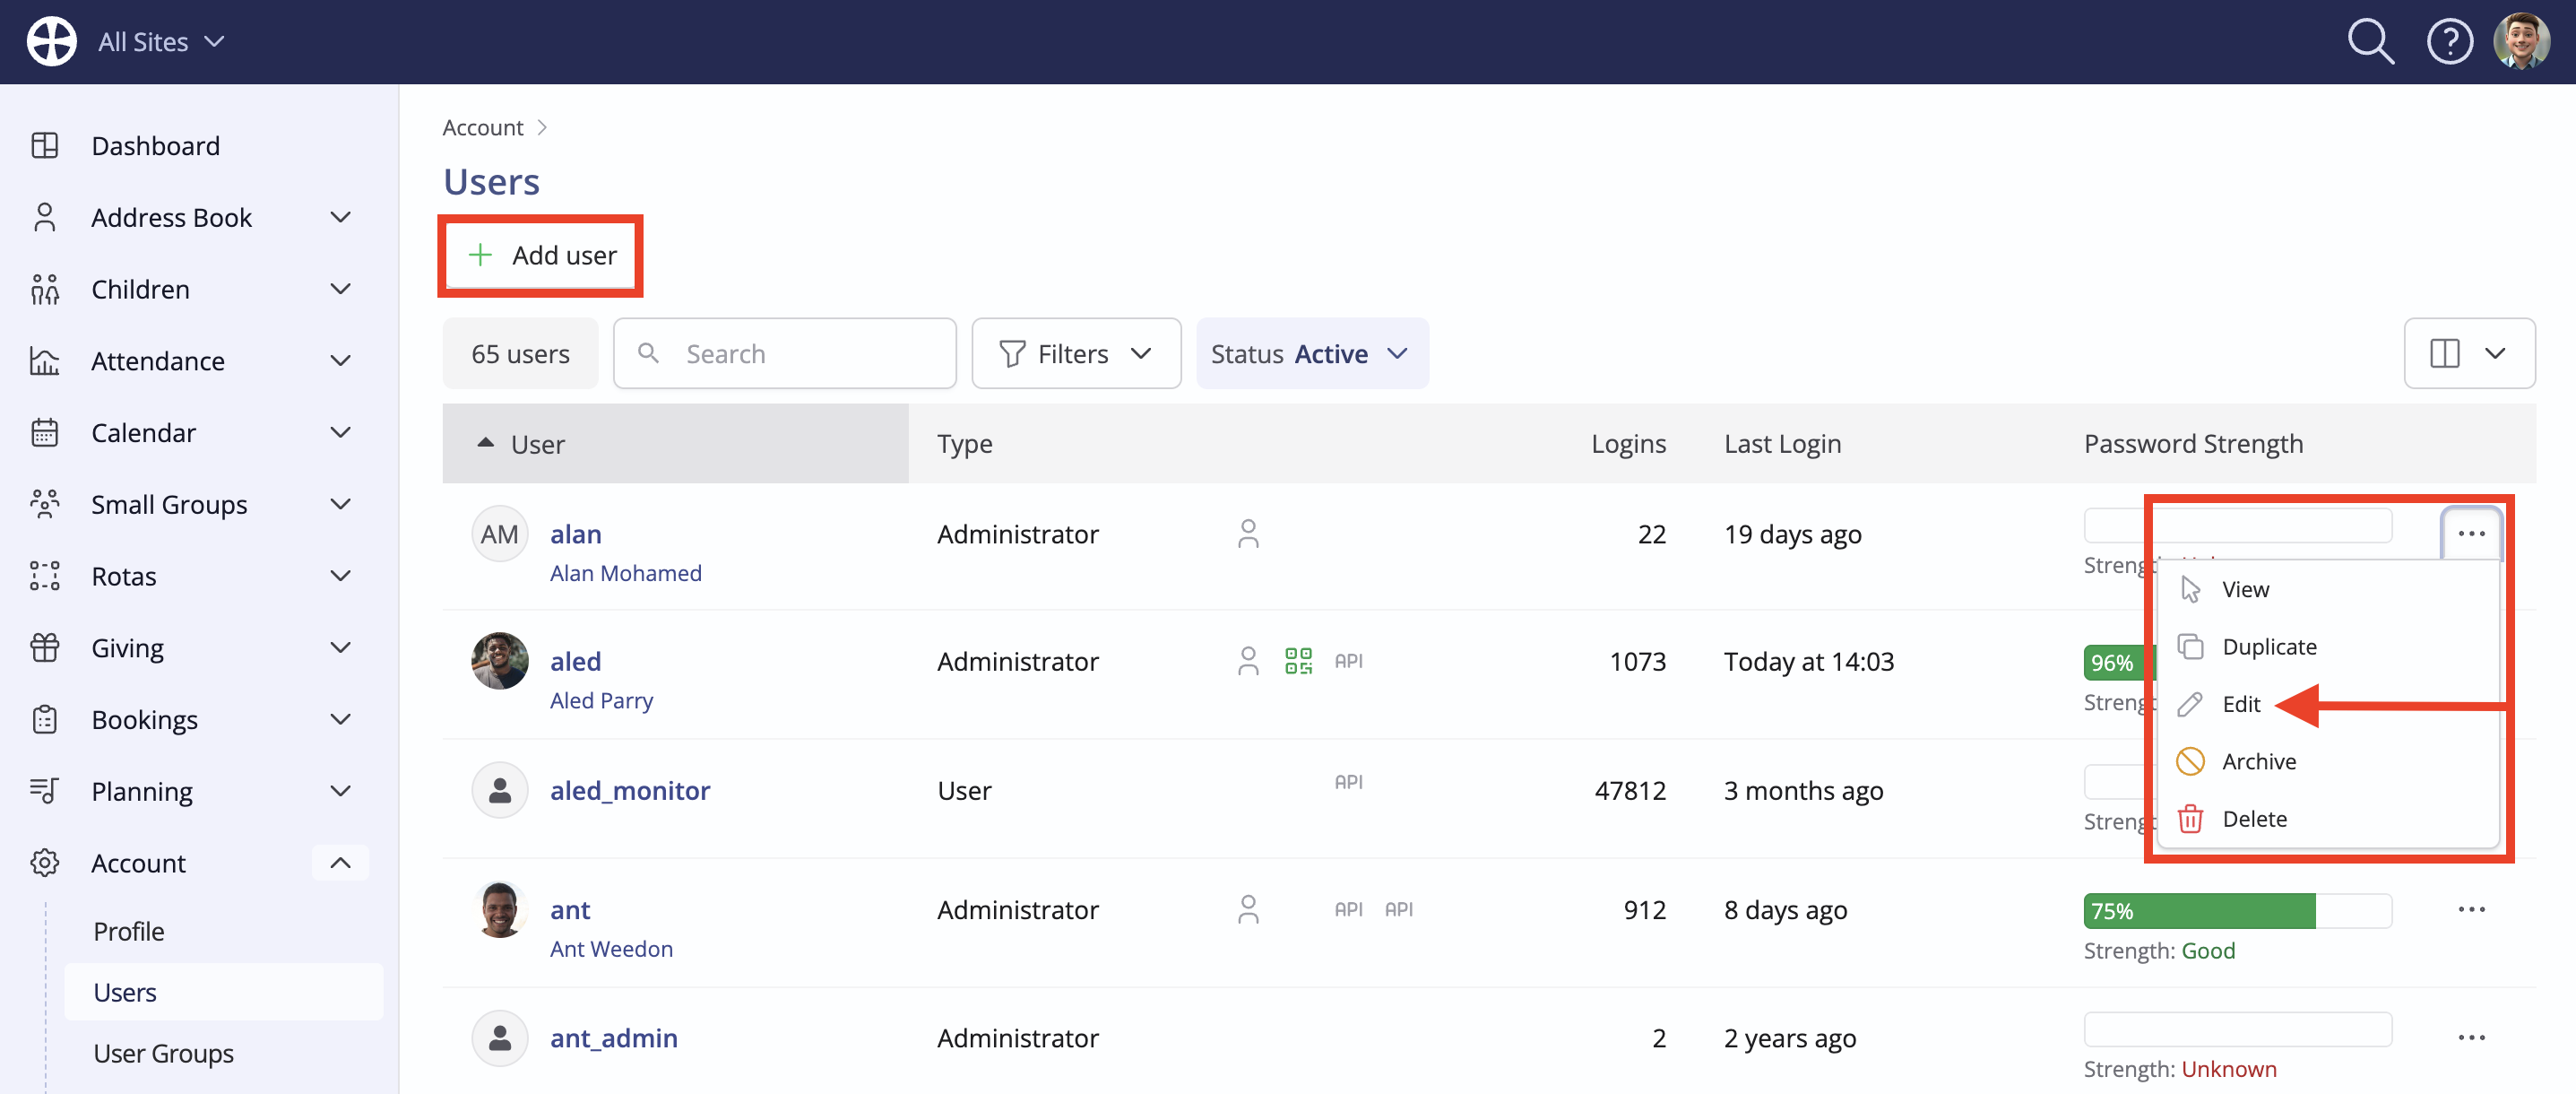
From the User menu, select Settings. Select the Users section, and click Add User. Note the option to switch between viewing Active and Archived users in this section.

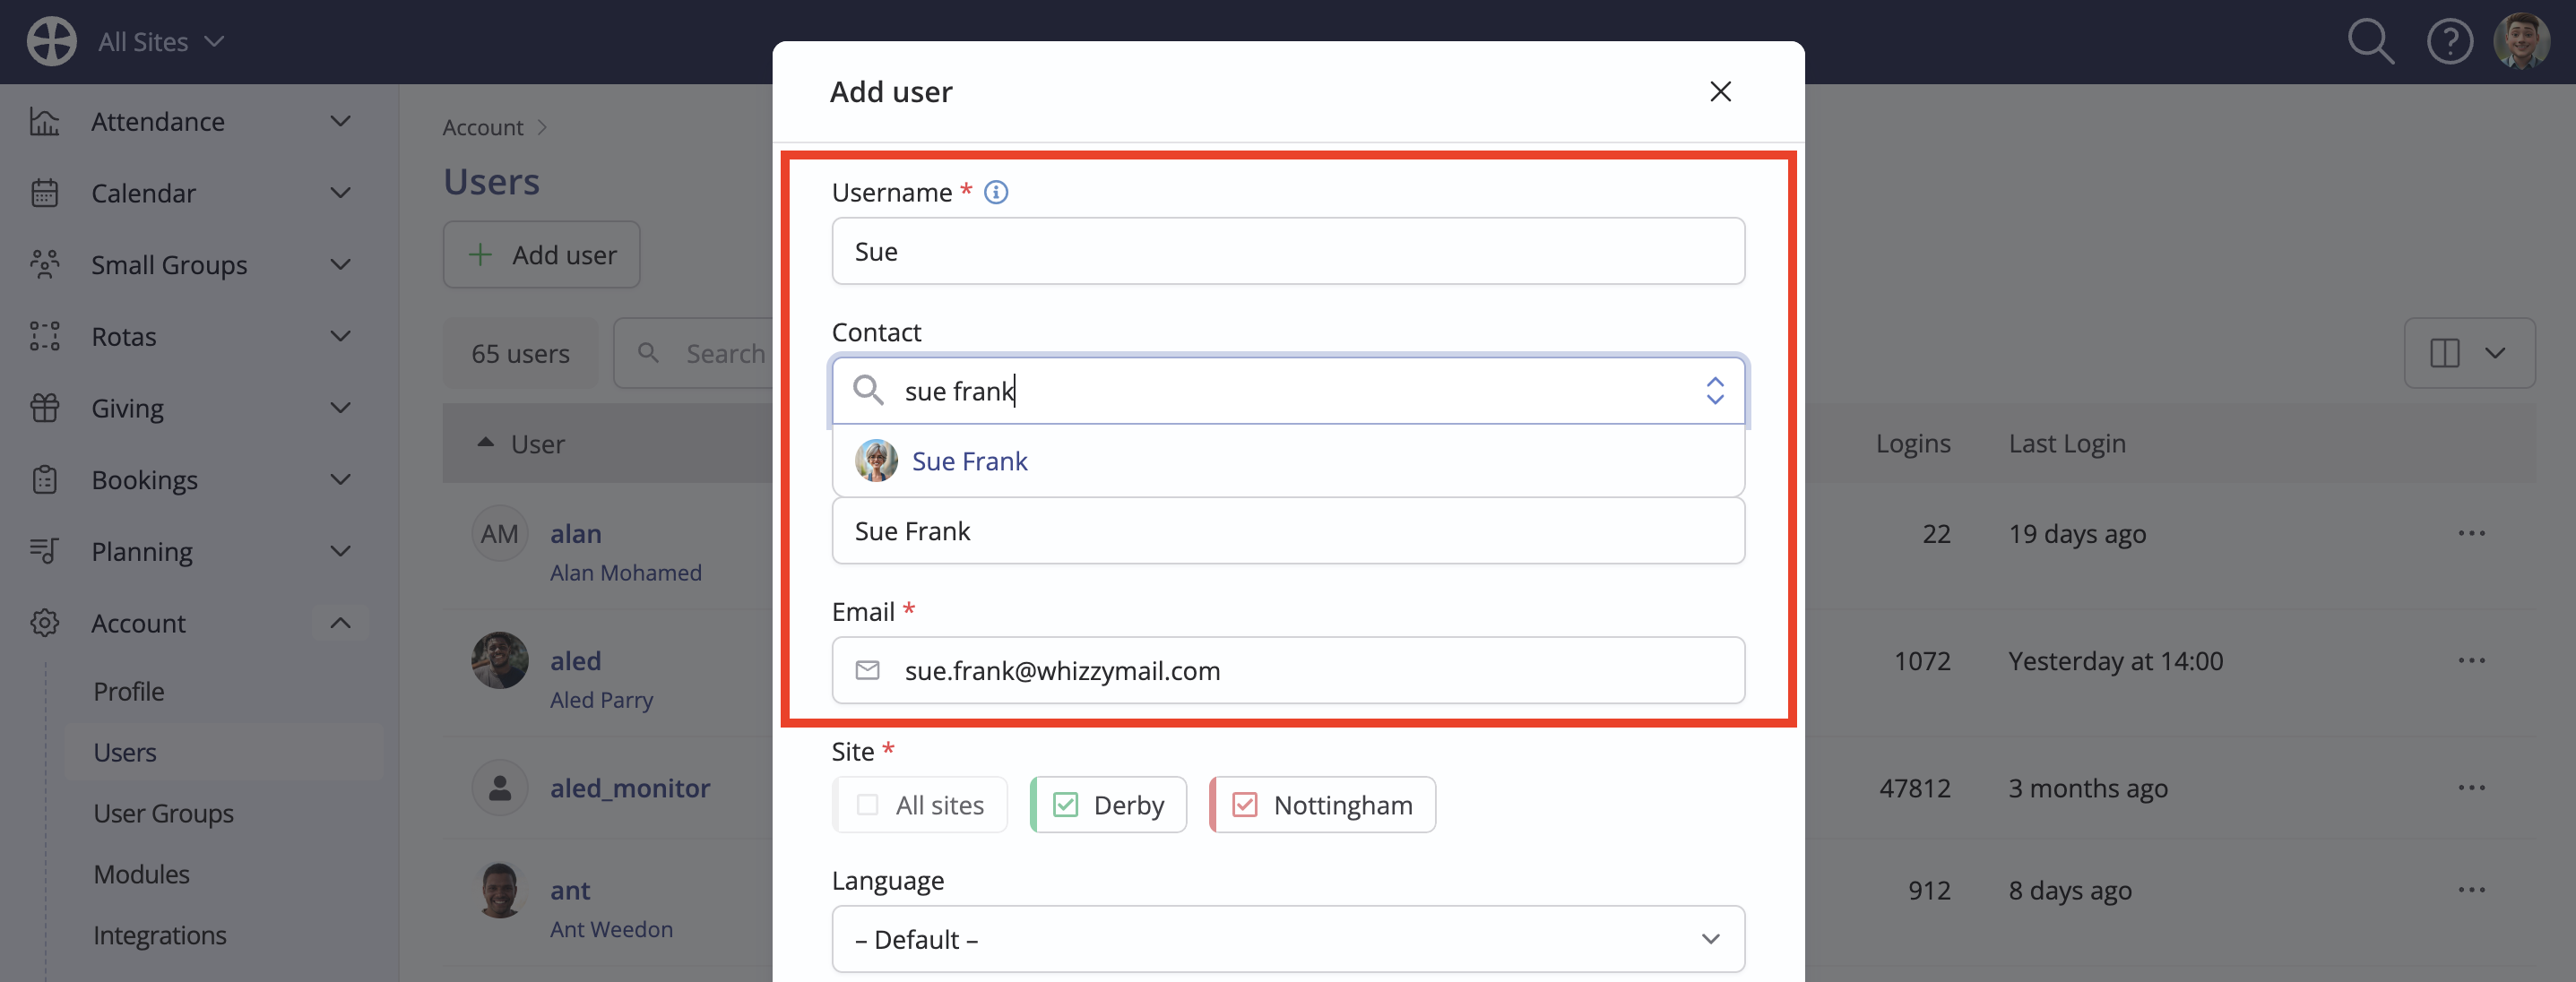
On the Add user pop-up, enter a suitable Username. Usernames must be unique and be between 2-25 characters - letters, numbers, underscores and full stops are accepted; spaces are not permitted. While passwords are always case-sensitive, usernames are not. The Username, user Email and Site(s) are required. User password reset emails will be sent to the User's email address. The user email address is also the default "From" address for sent emails (and the email address to which replies are delivered). Optionally link a User's account to their Contact profile in the Address Book, which is explained in further detail later in this article. As you begin to type in the Contact search, matching names from the Address Book are suggested.
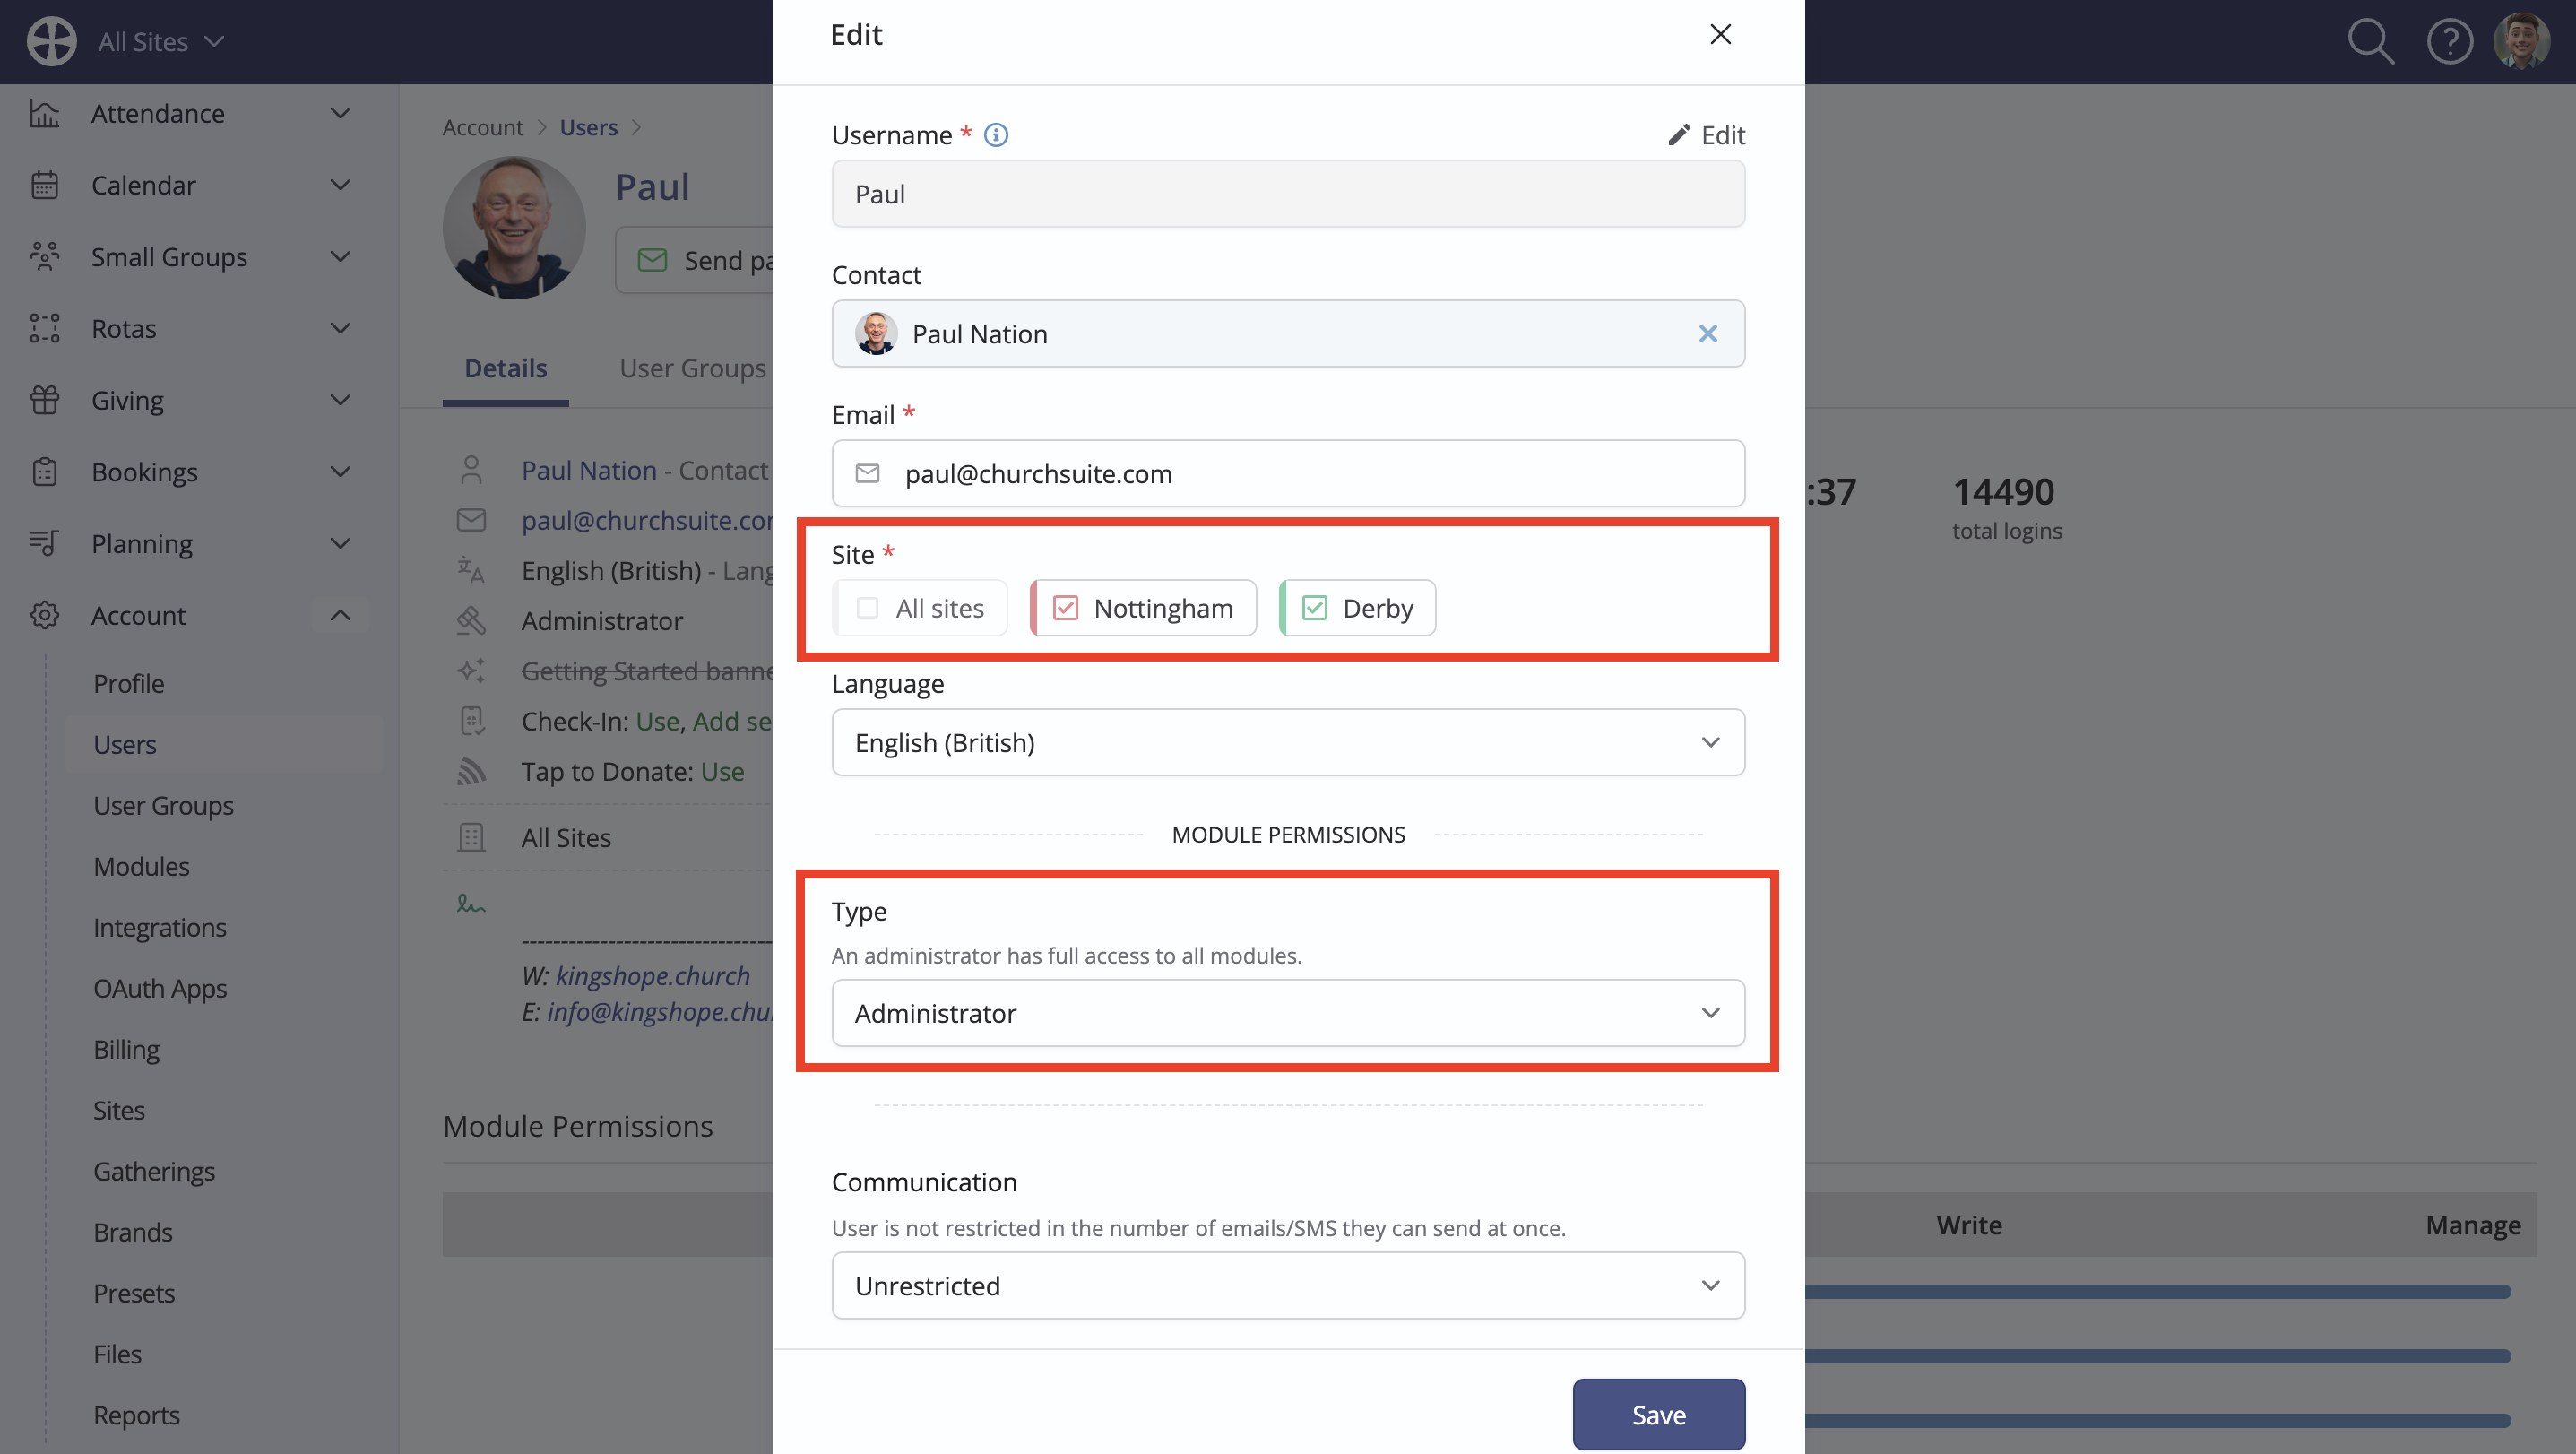
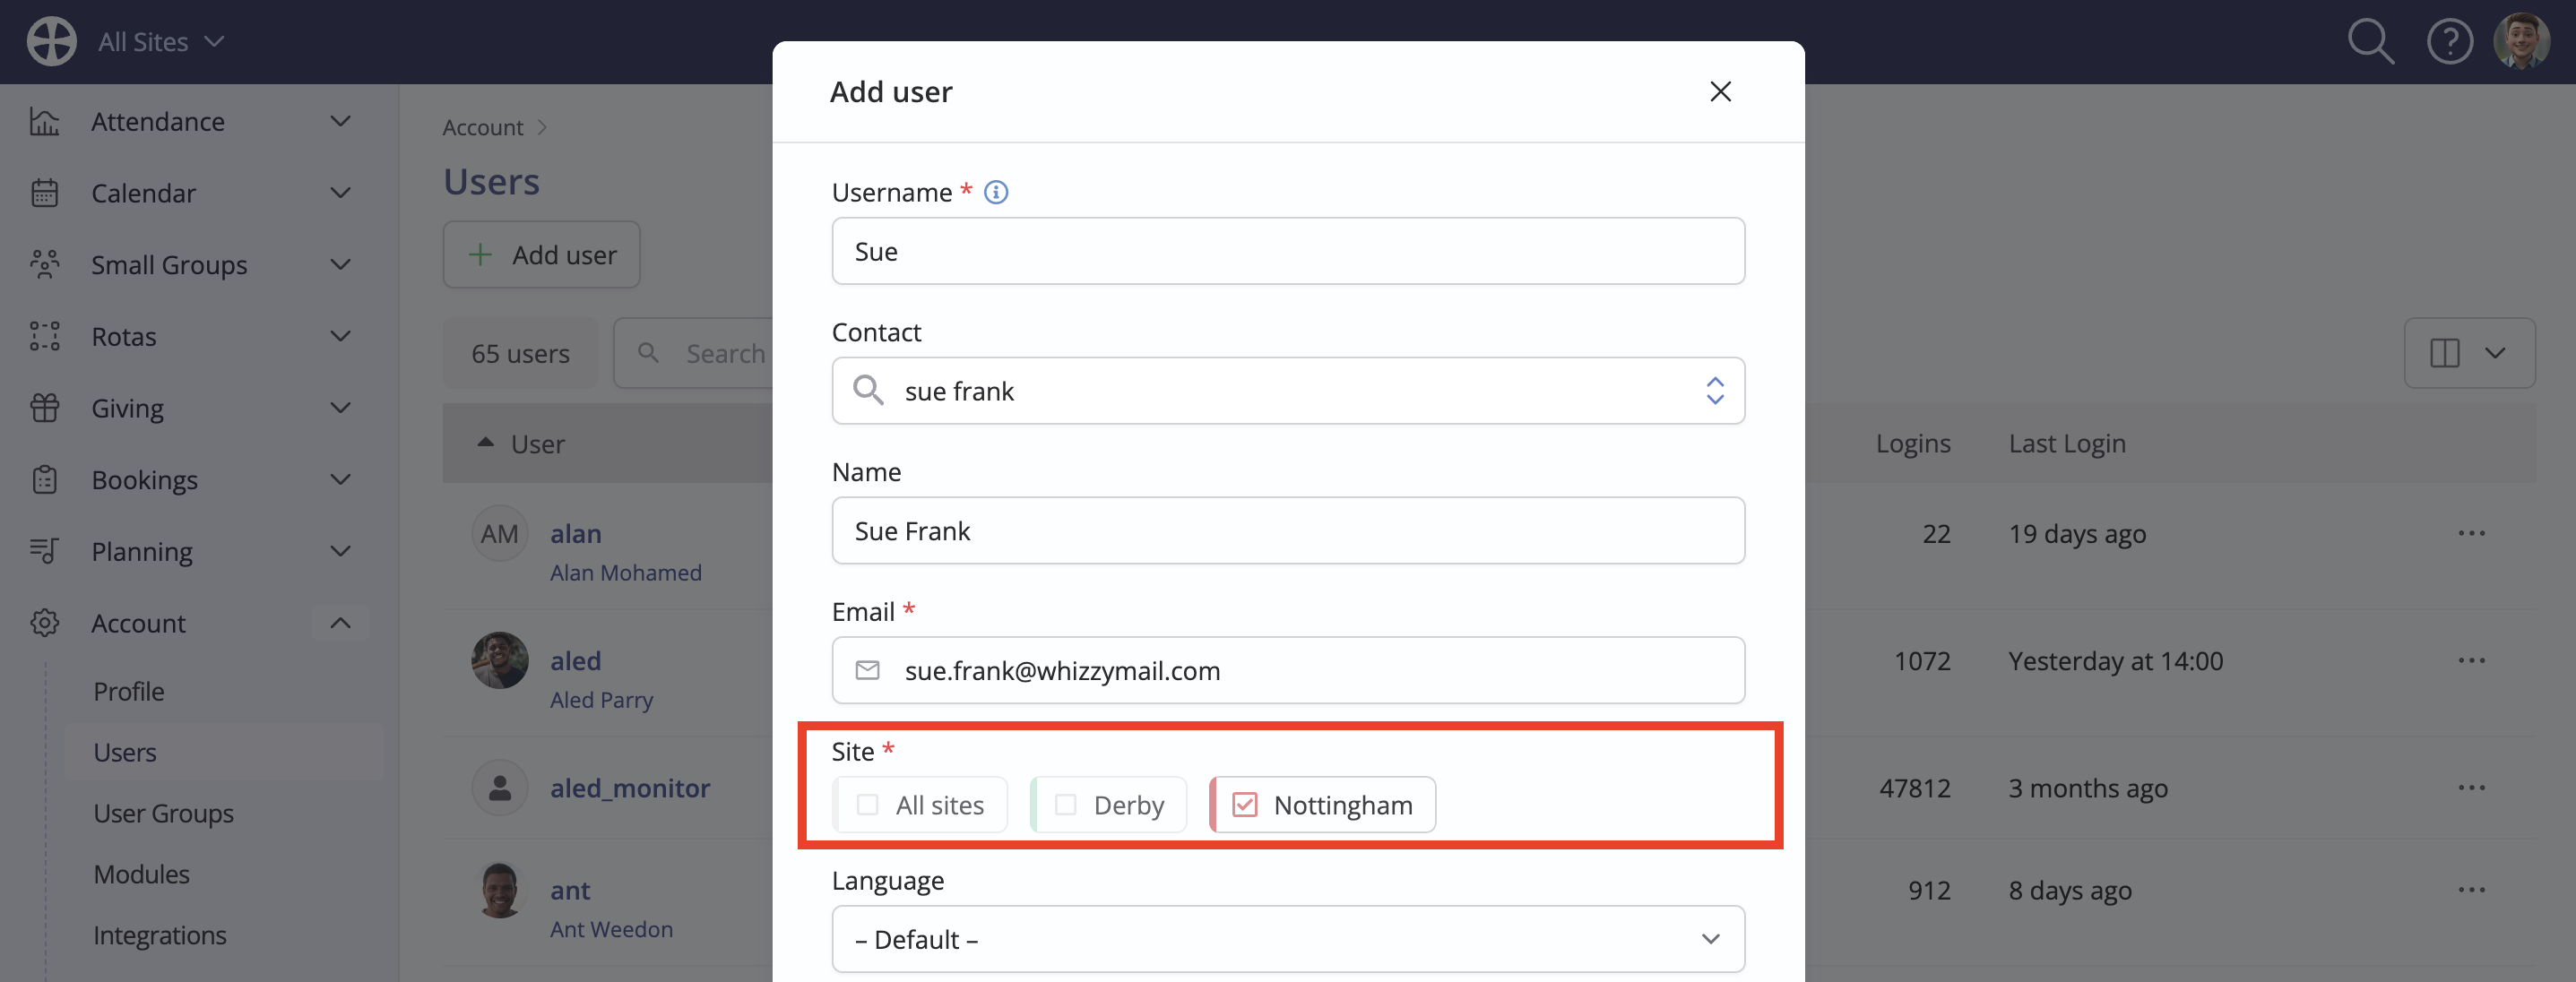
Multi-site customers must specify the User's permitted Sites (required). A user has the same module access for each permitted site selected, but site-specific module access is not supported. All sites means all current sites and any new sites added in the future.
Select the User's Language preference, with the default being the User's browser language. See our International Translation Support article for further information on ChurchSuite supported languages.

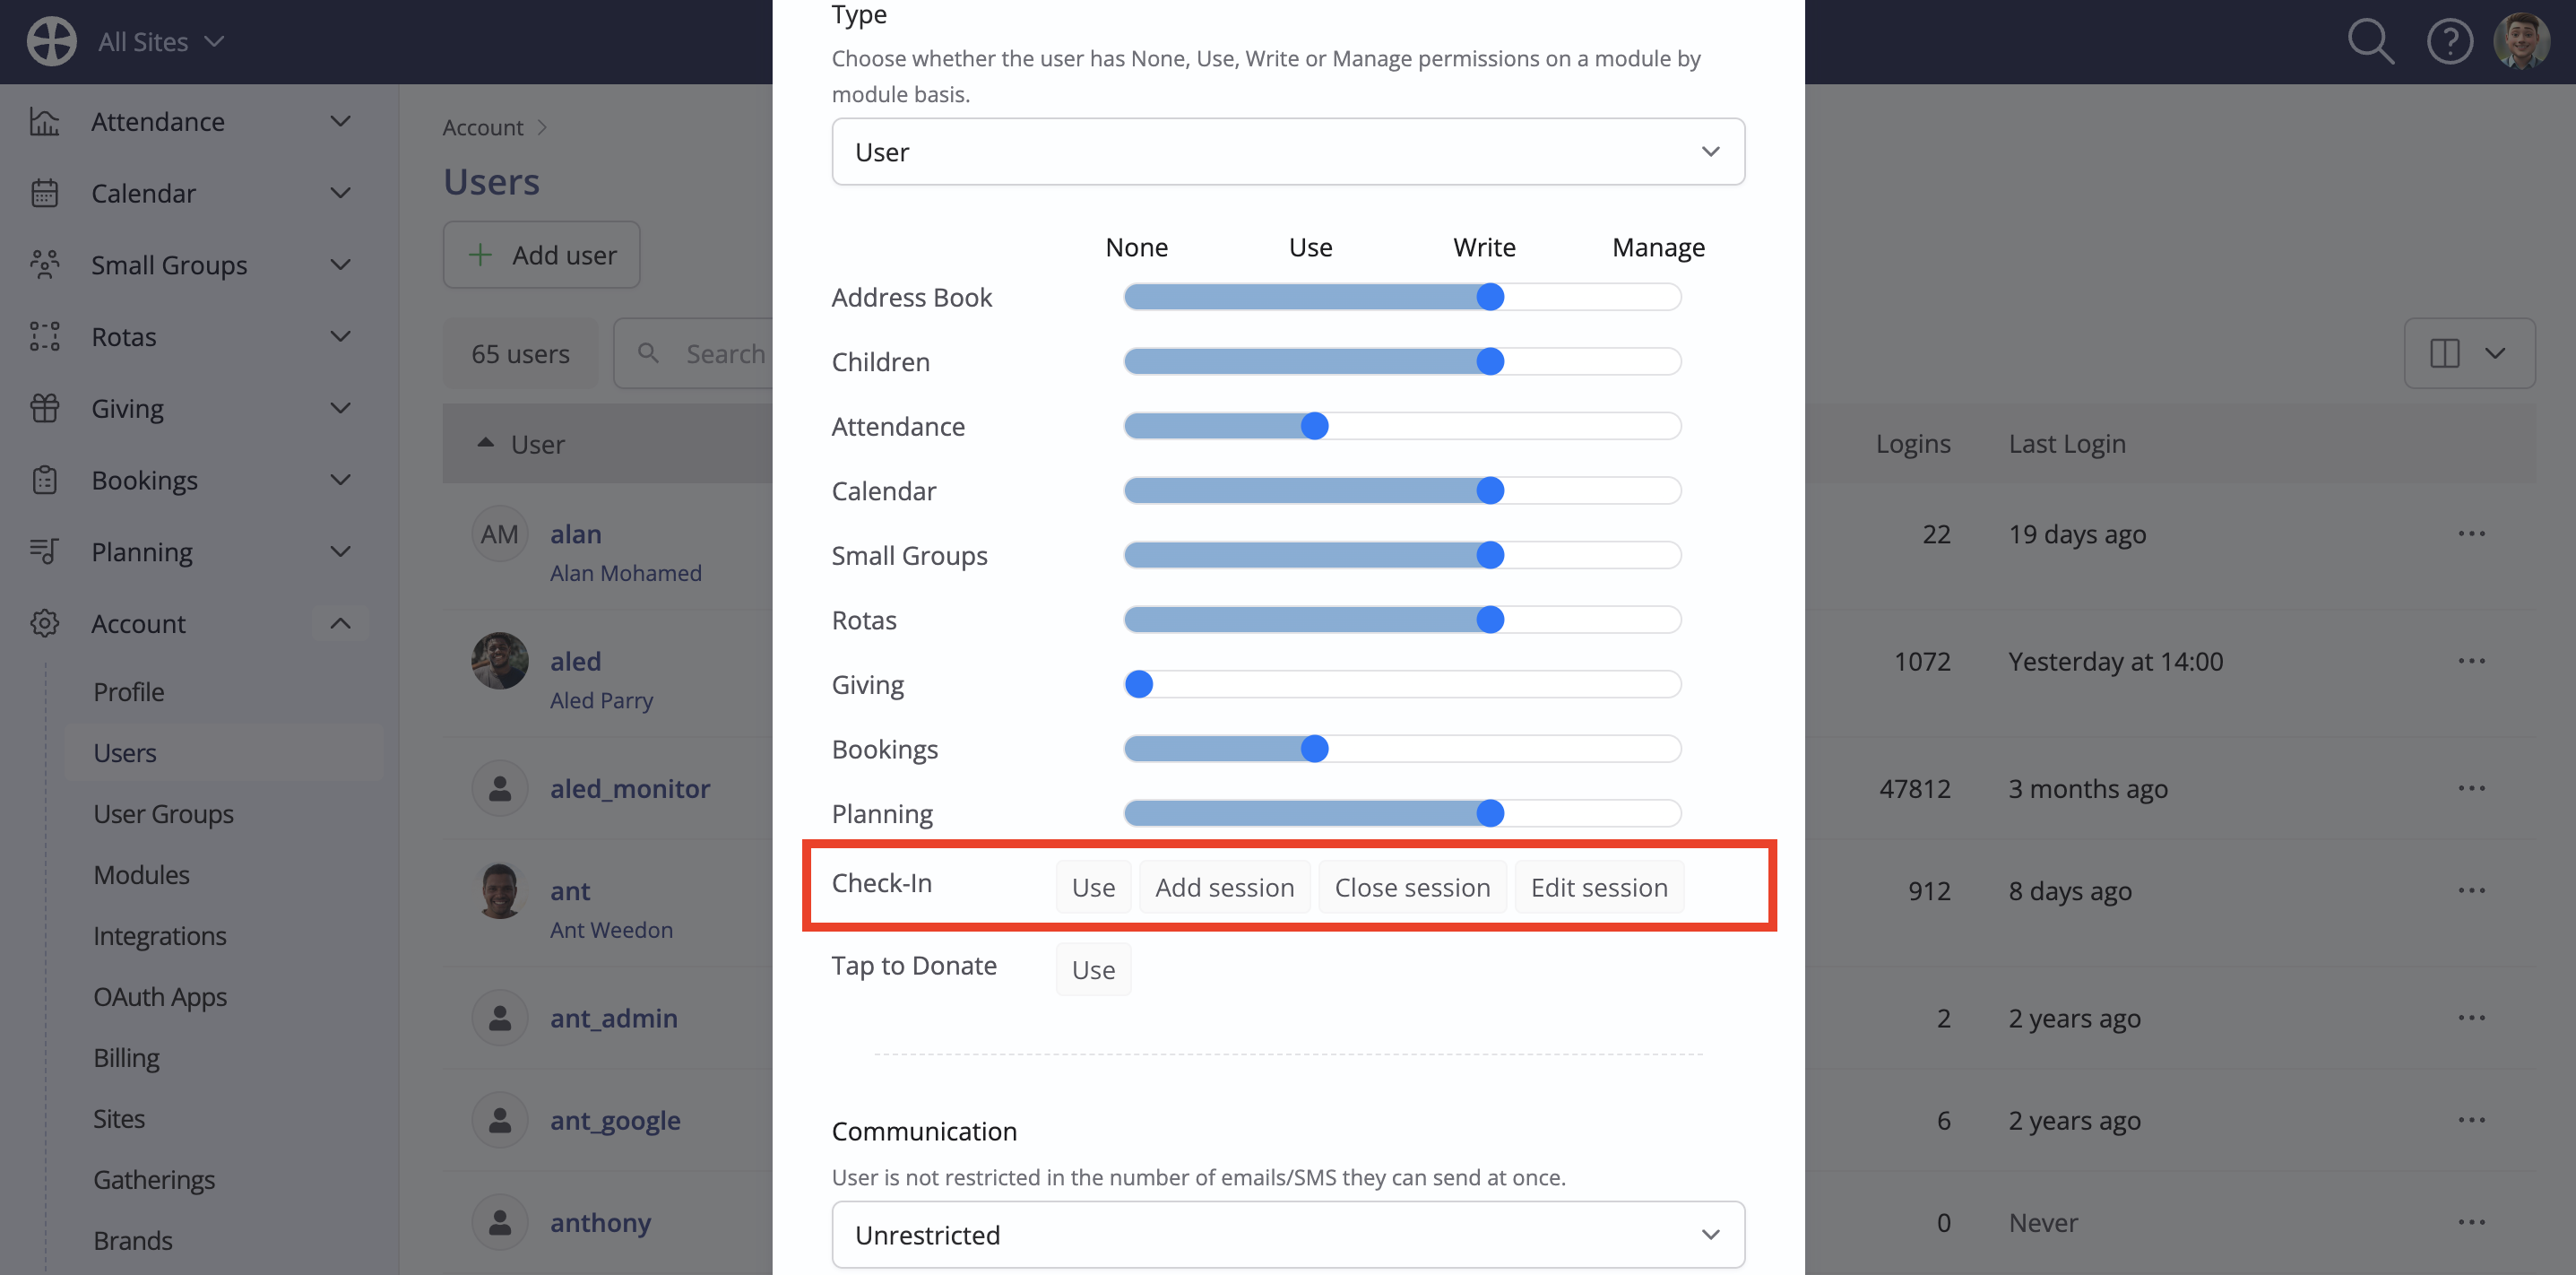
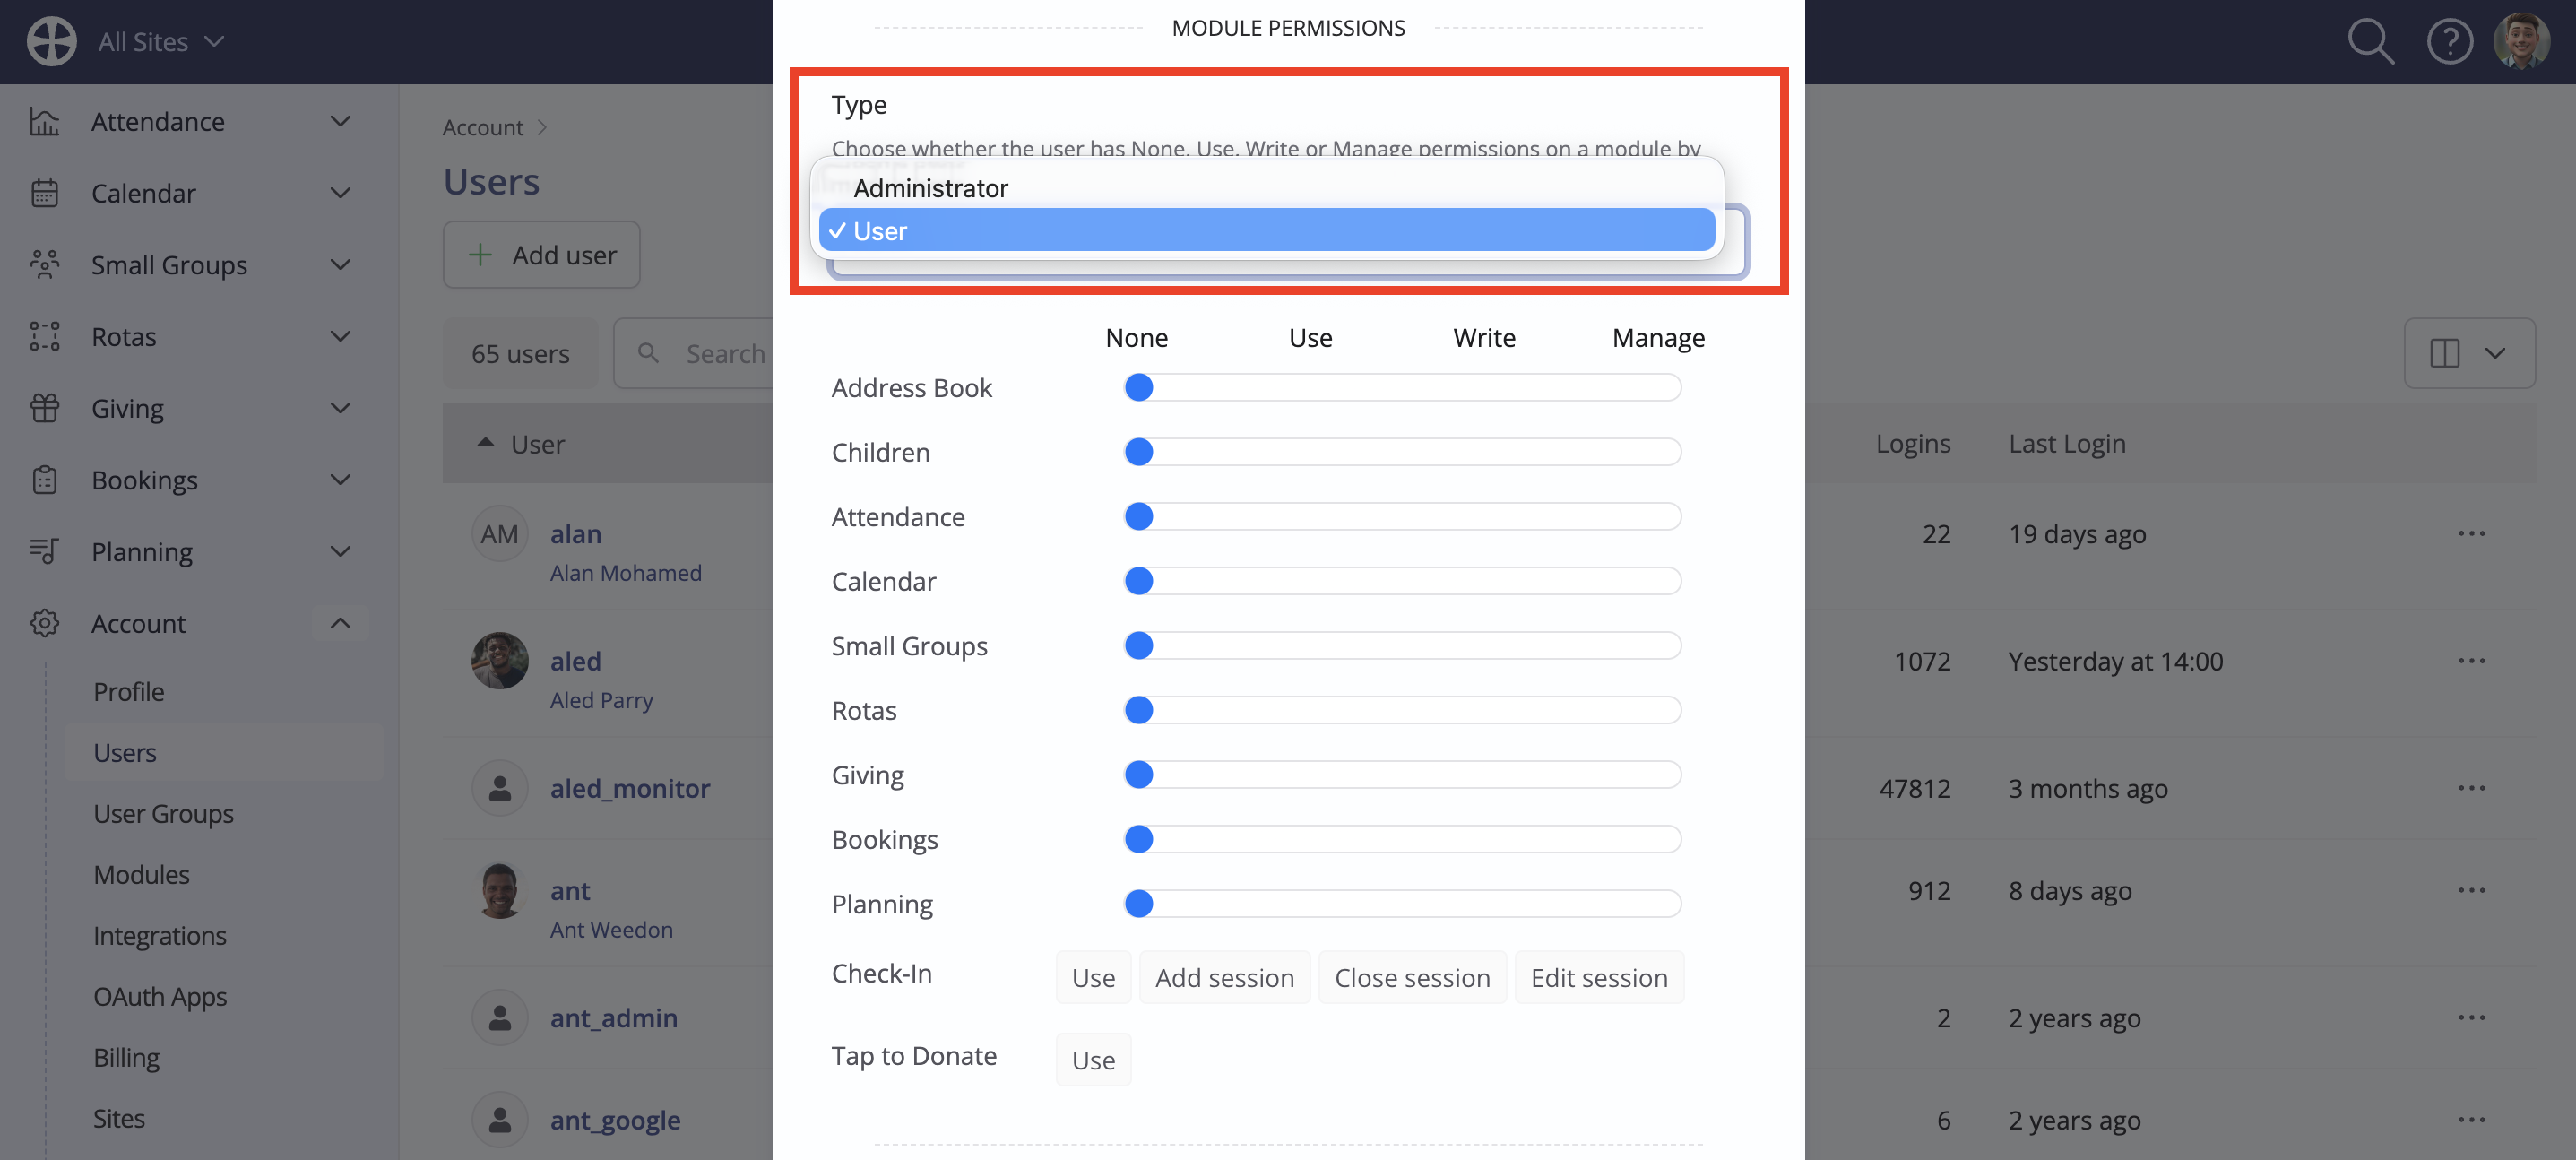
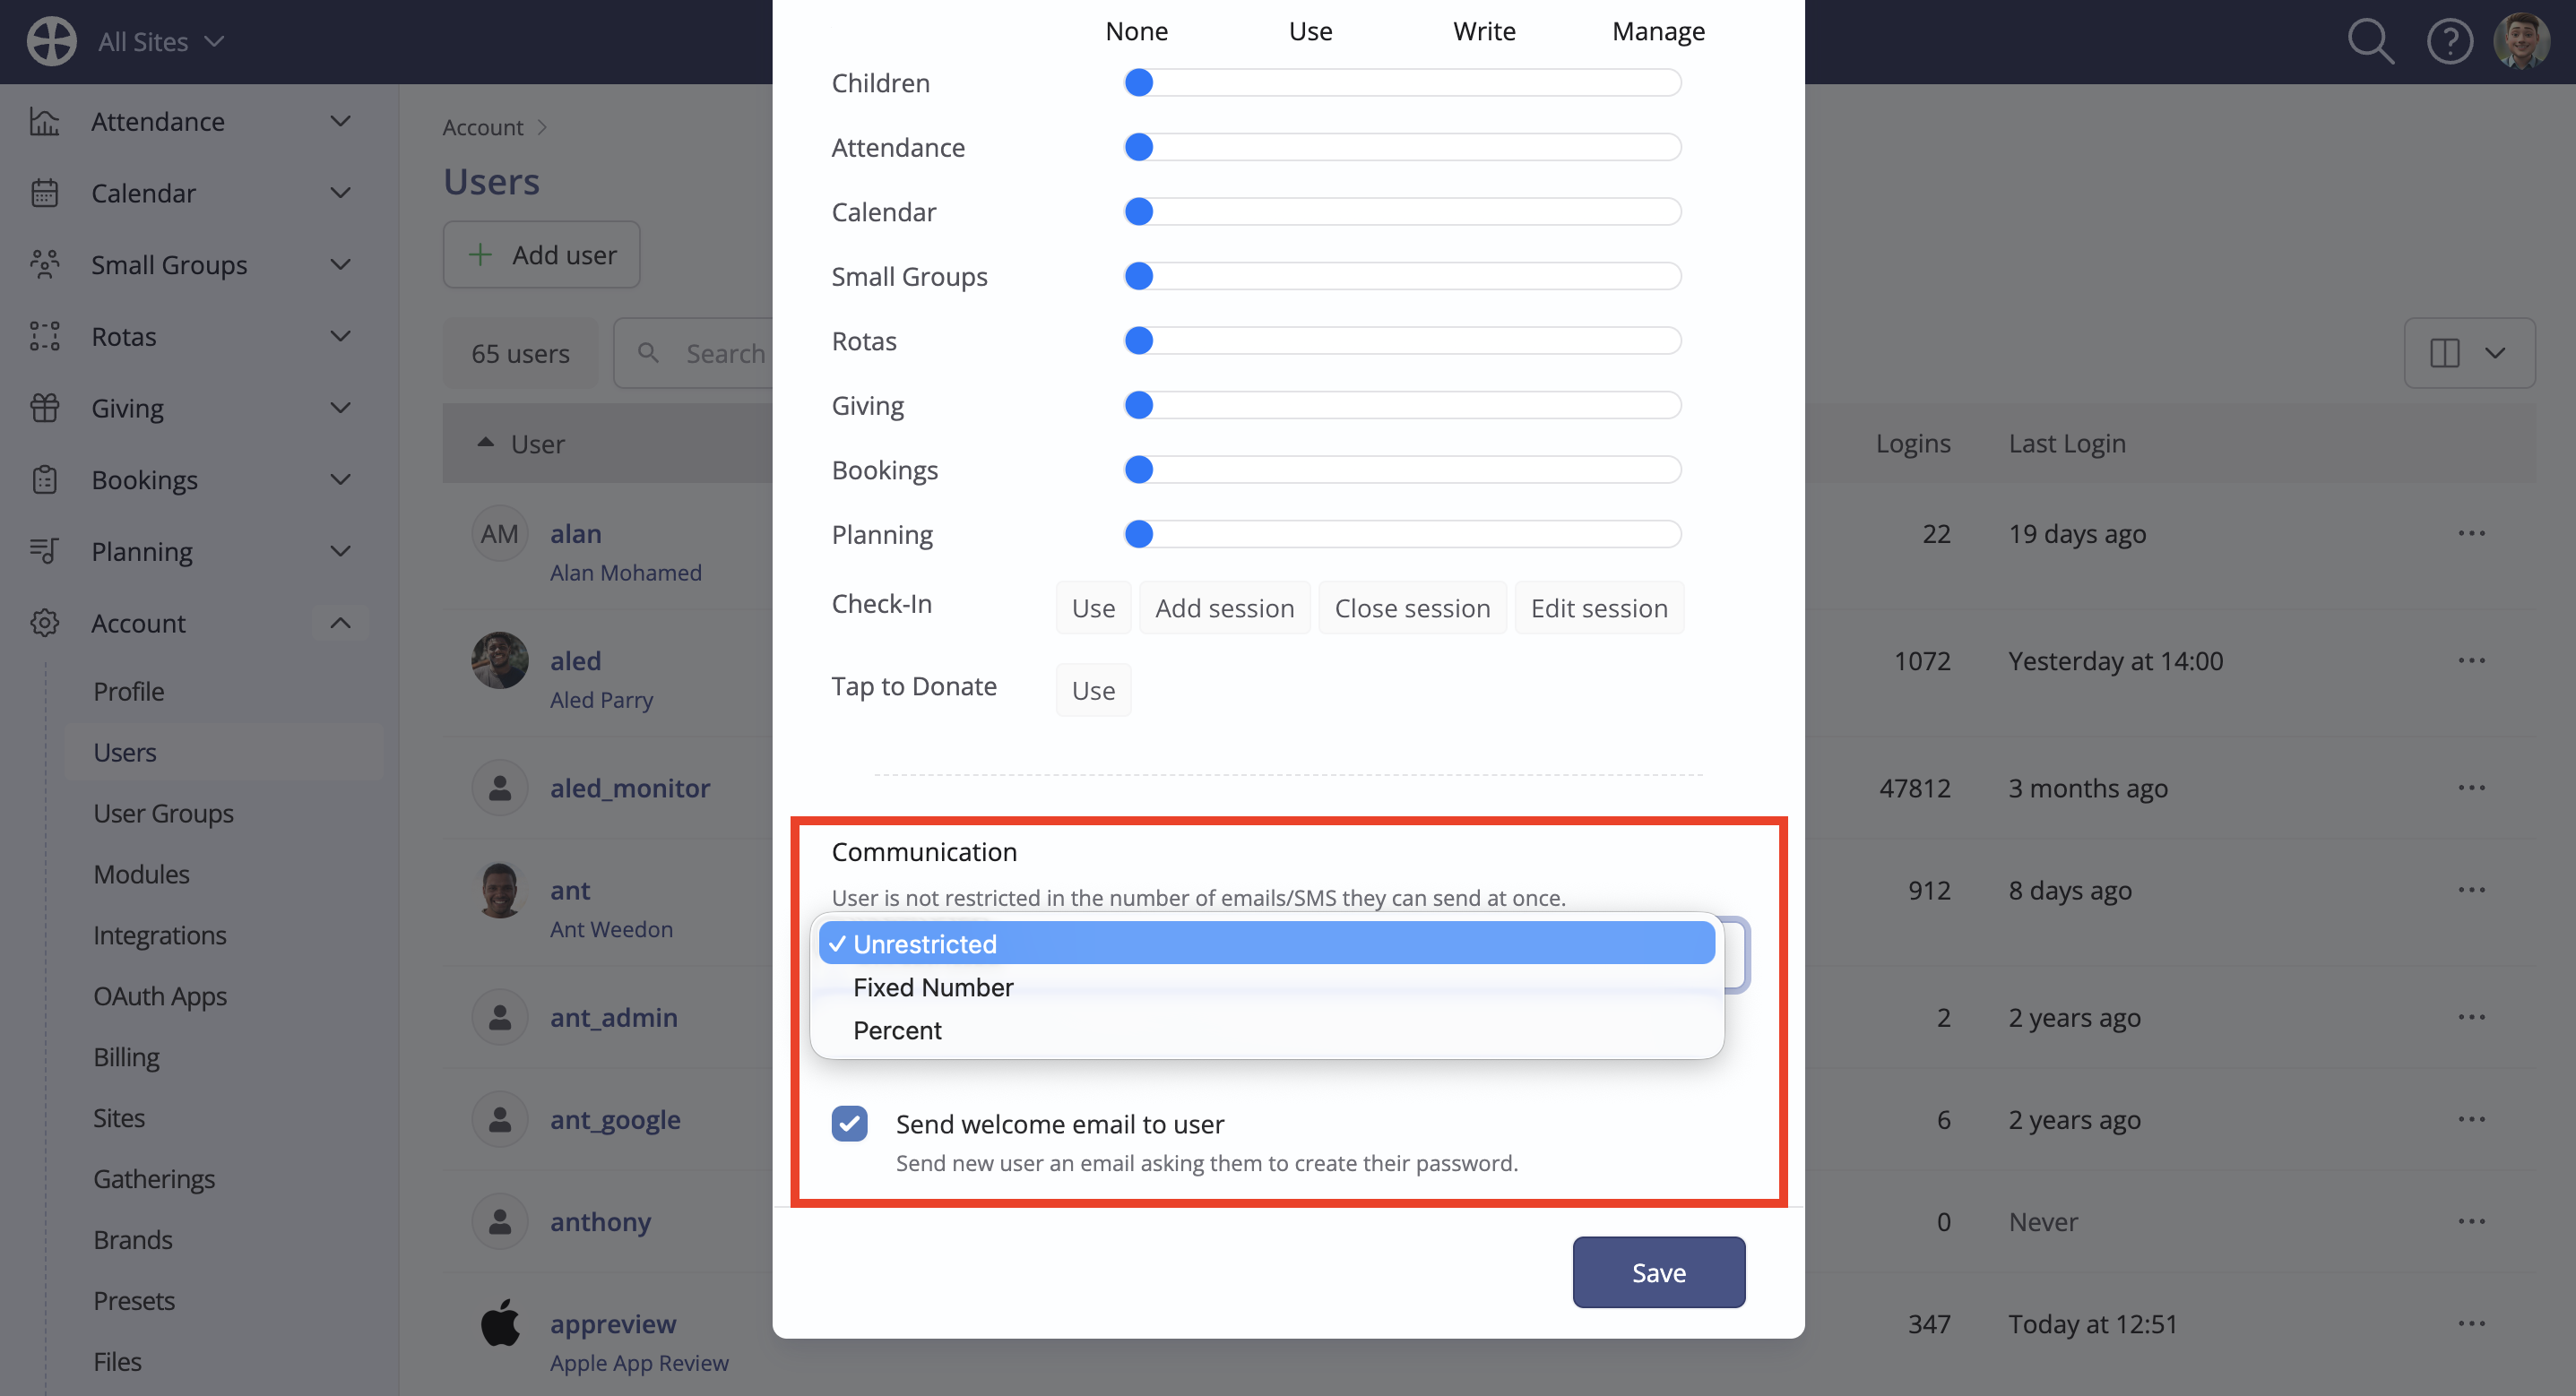
Select the user Type – Administrator or User. If you select a User type, set the permission level for each module by dragging the sliders. See the previous section for further explanation about user types and permission levels.
Next, select permitted Check-In applications. The selected applications will change from grey to blue. See our related support article for further information: Check-In user permissions
Next, select whether the User will have Tap to Donate Use permitted. If selected, the application will change from grey to blue. See our related support article for further information: Tap to Donate
By default, a user has Unrestricted communication ability within their permitted modules. However, you can optionally restrict a user's Communication functionality to a Fixed Number or Percentage of recipients. The restriction applies only to email and SMS across all permitted modules and sites - per-module or per-site restriction is not possible. Finally, new users are sent a Welcome email containing details of their Username and a password registration link. You may untick this option and not send a Welcome email if the user account exists for the sole purpose of having a Leave Setup for leave recording purposes, and where that User does not require any module access. For security, sent Welcome emails containing password registration links are not shown in the User's Communication log.
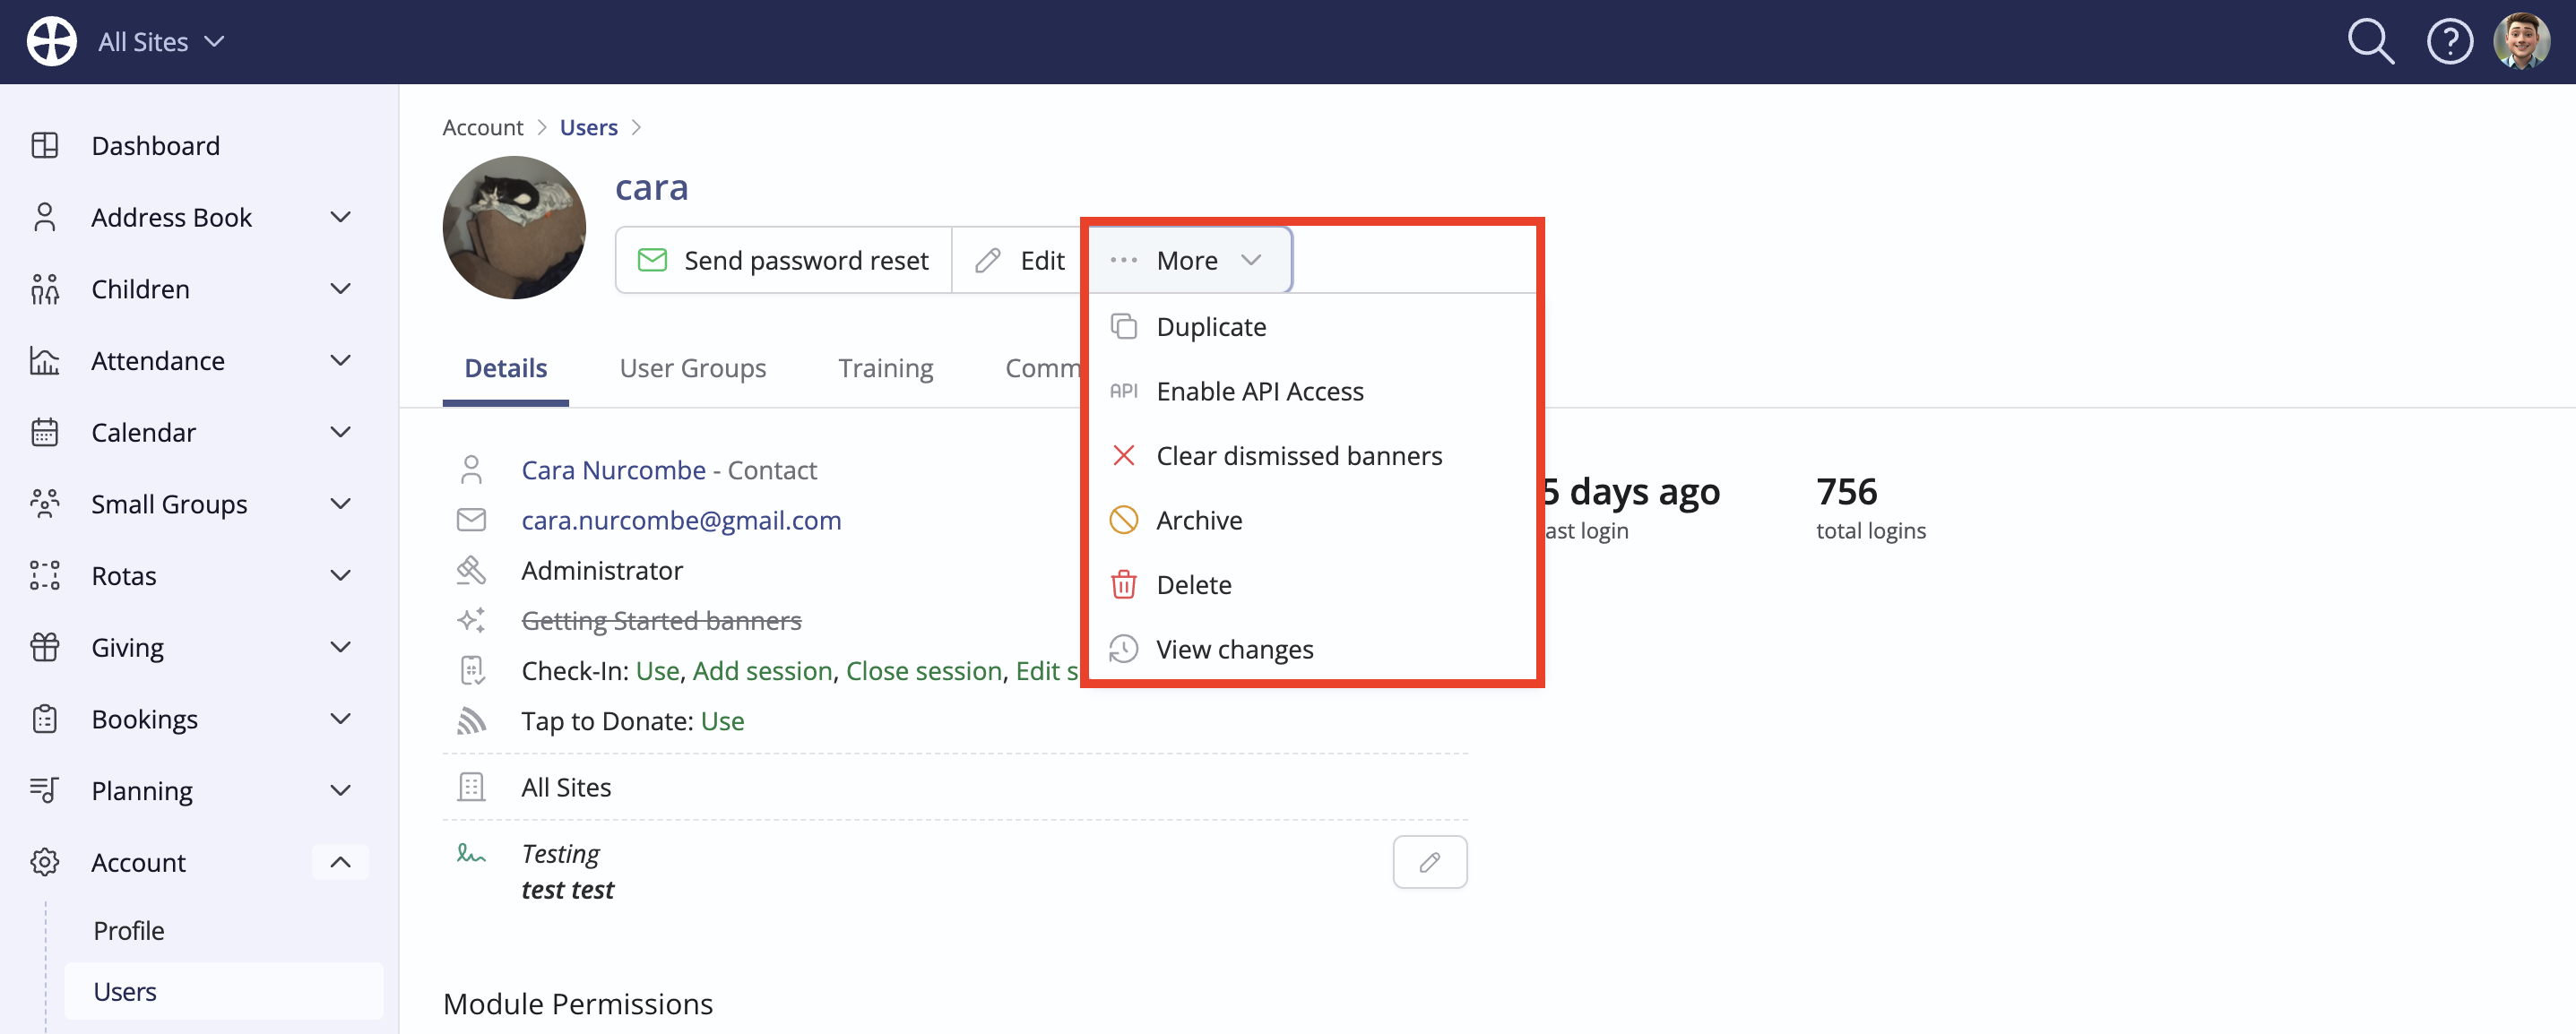
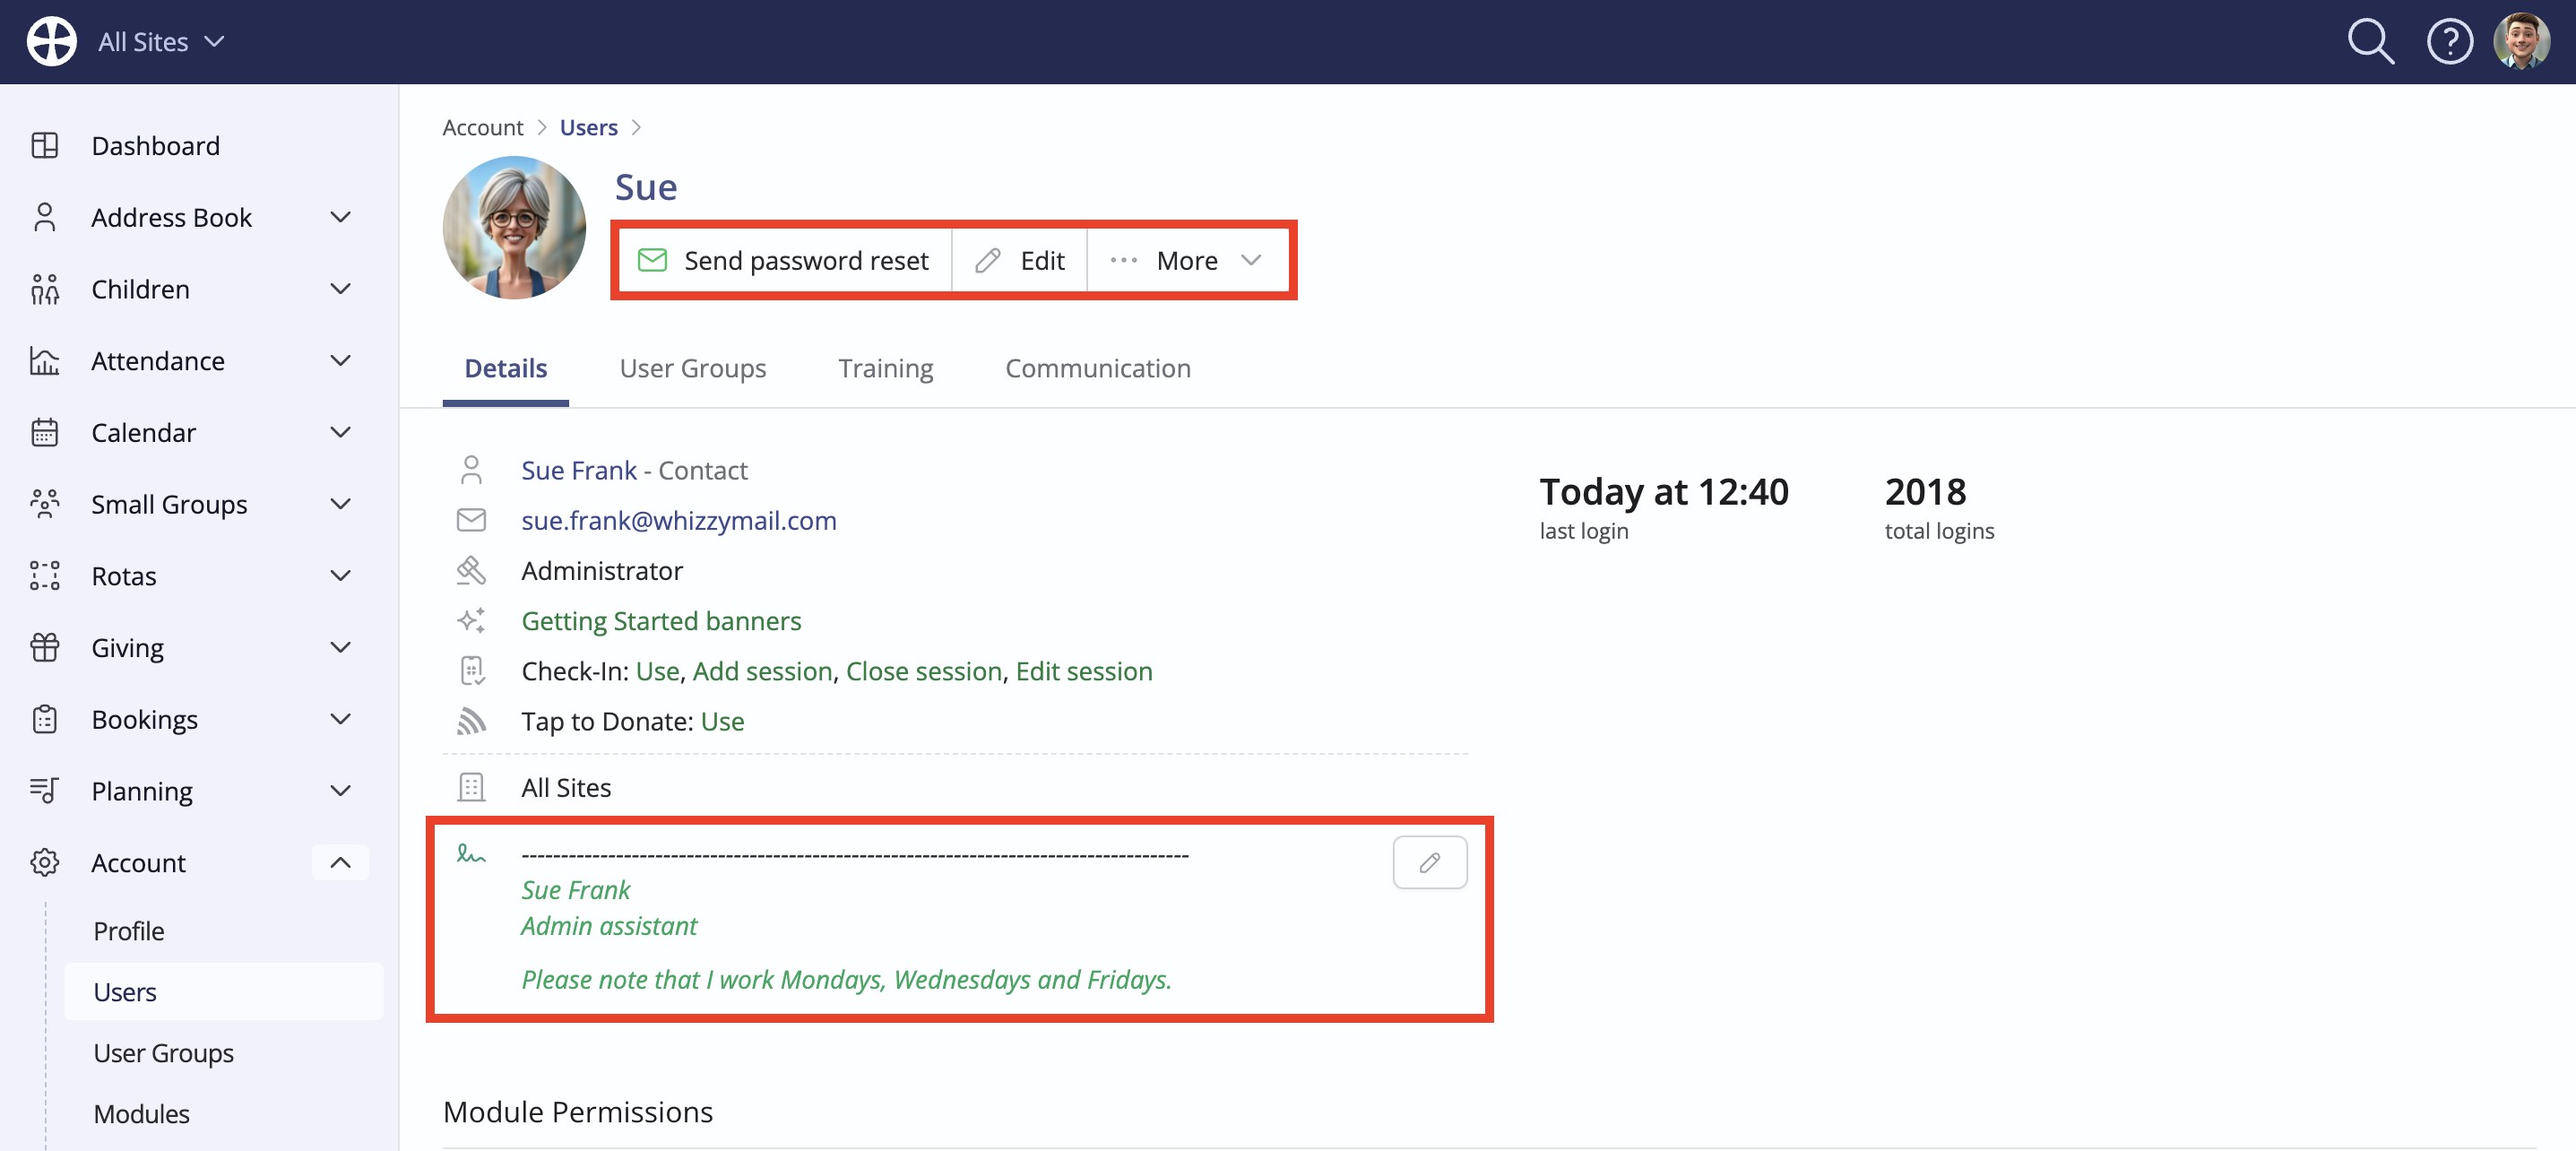
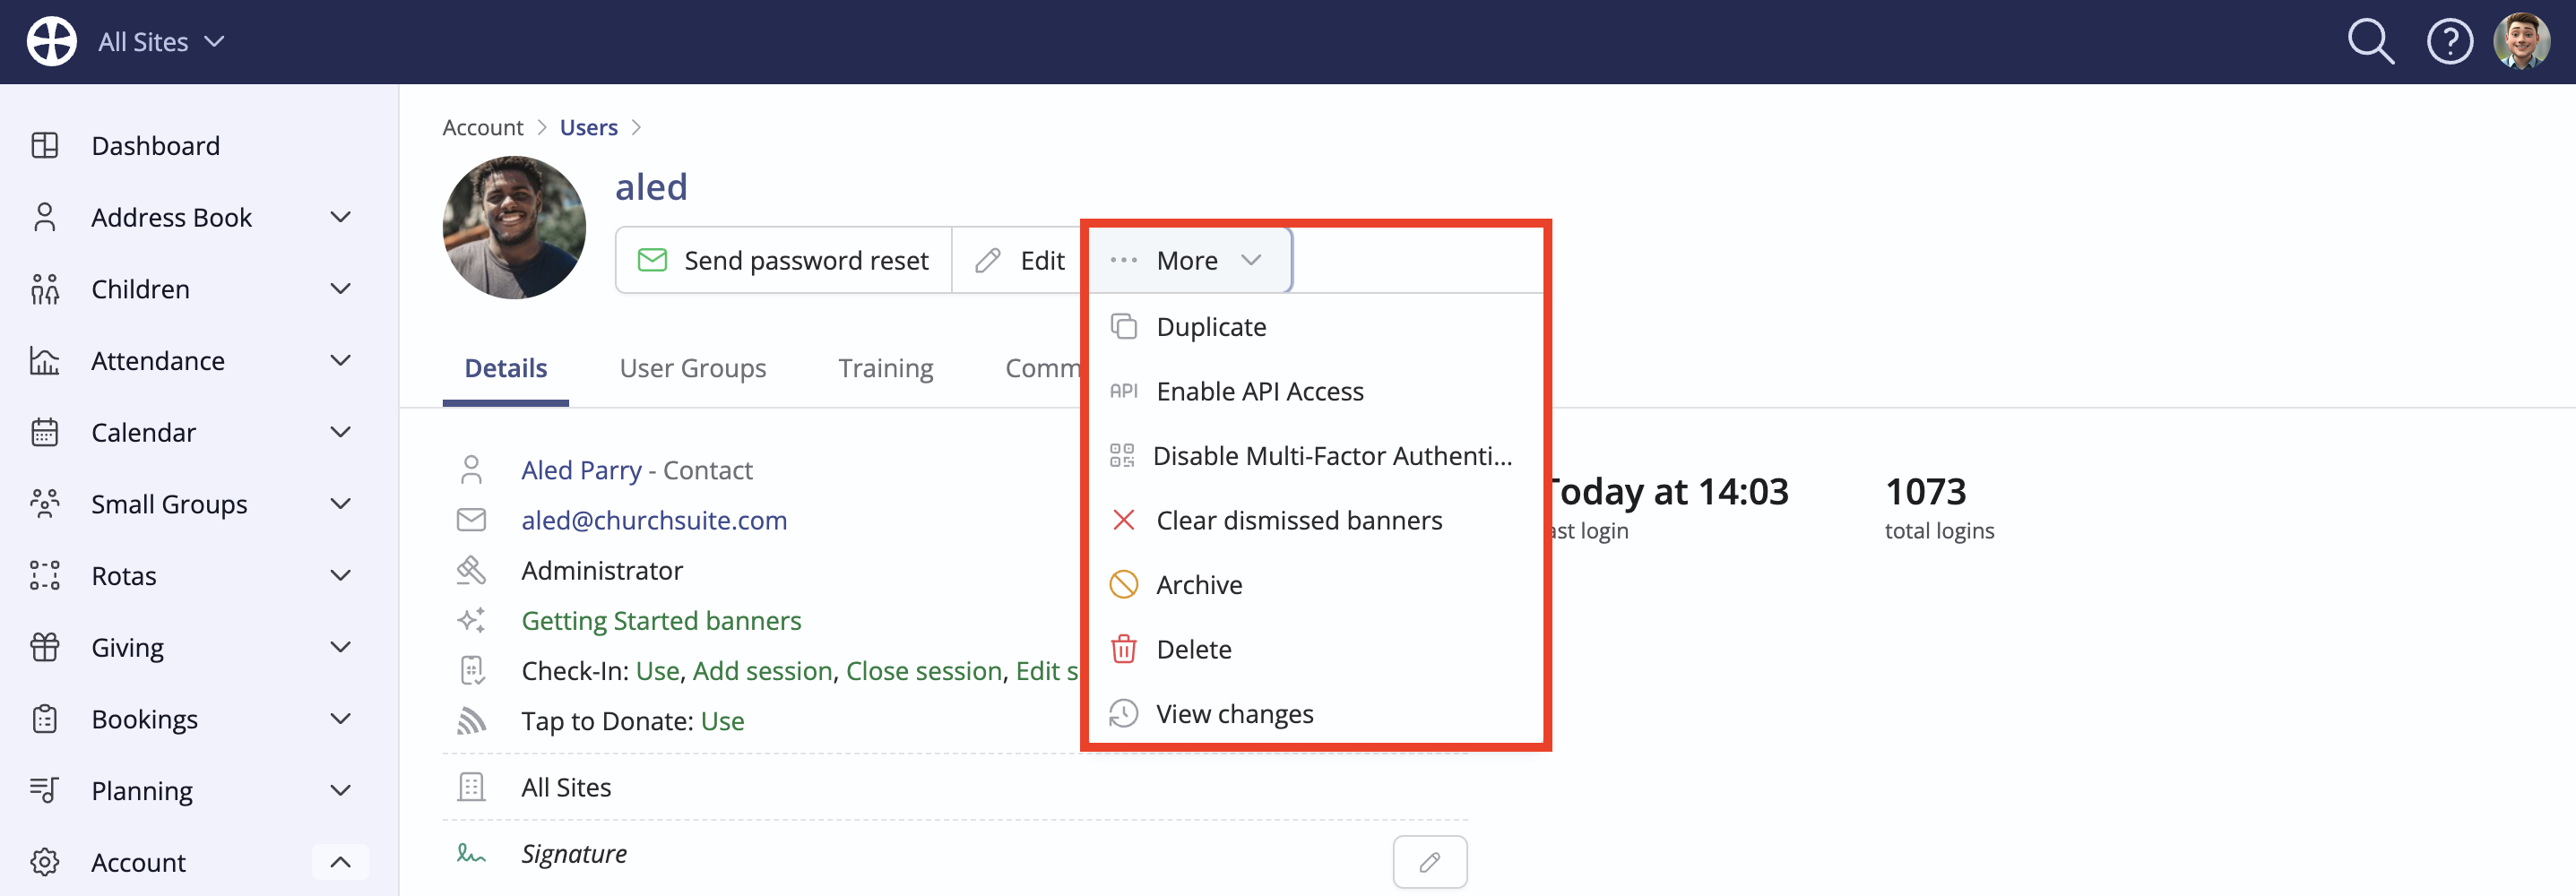
When you are finished, click Save to add the new User and be redirected to the User's "View" page, which shows all the user details you've just set. You can return to this user "View" page at any time, perhaps to Edit and make further changes. Note also the options to Send a password reset, Edit and (within the More options) Duplicate, Archive or Delete a user and, optionally, set a user's Signature.
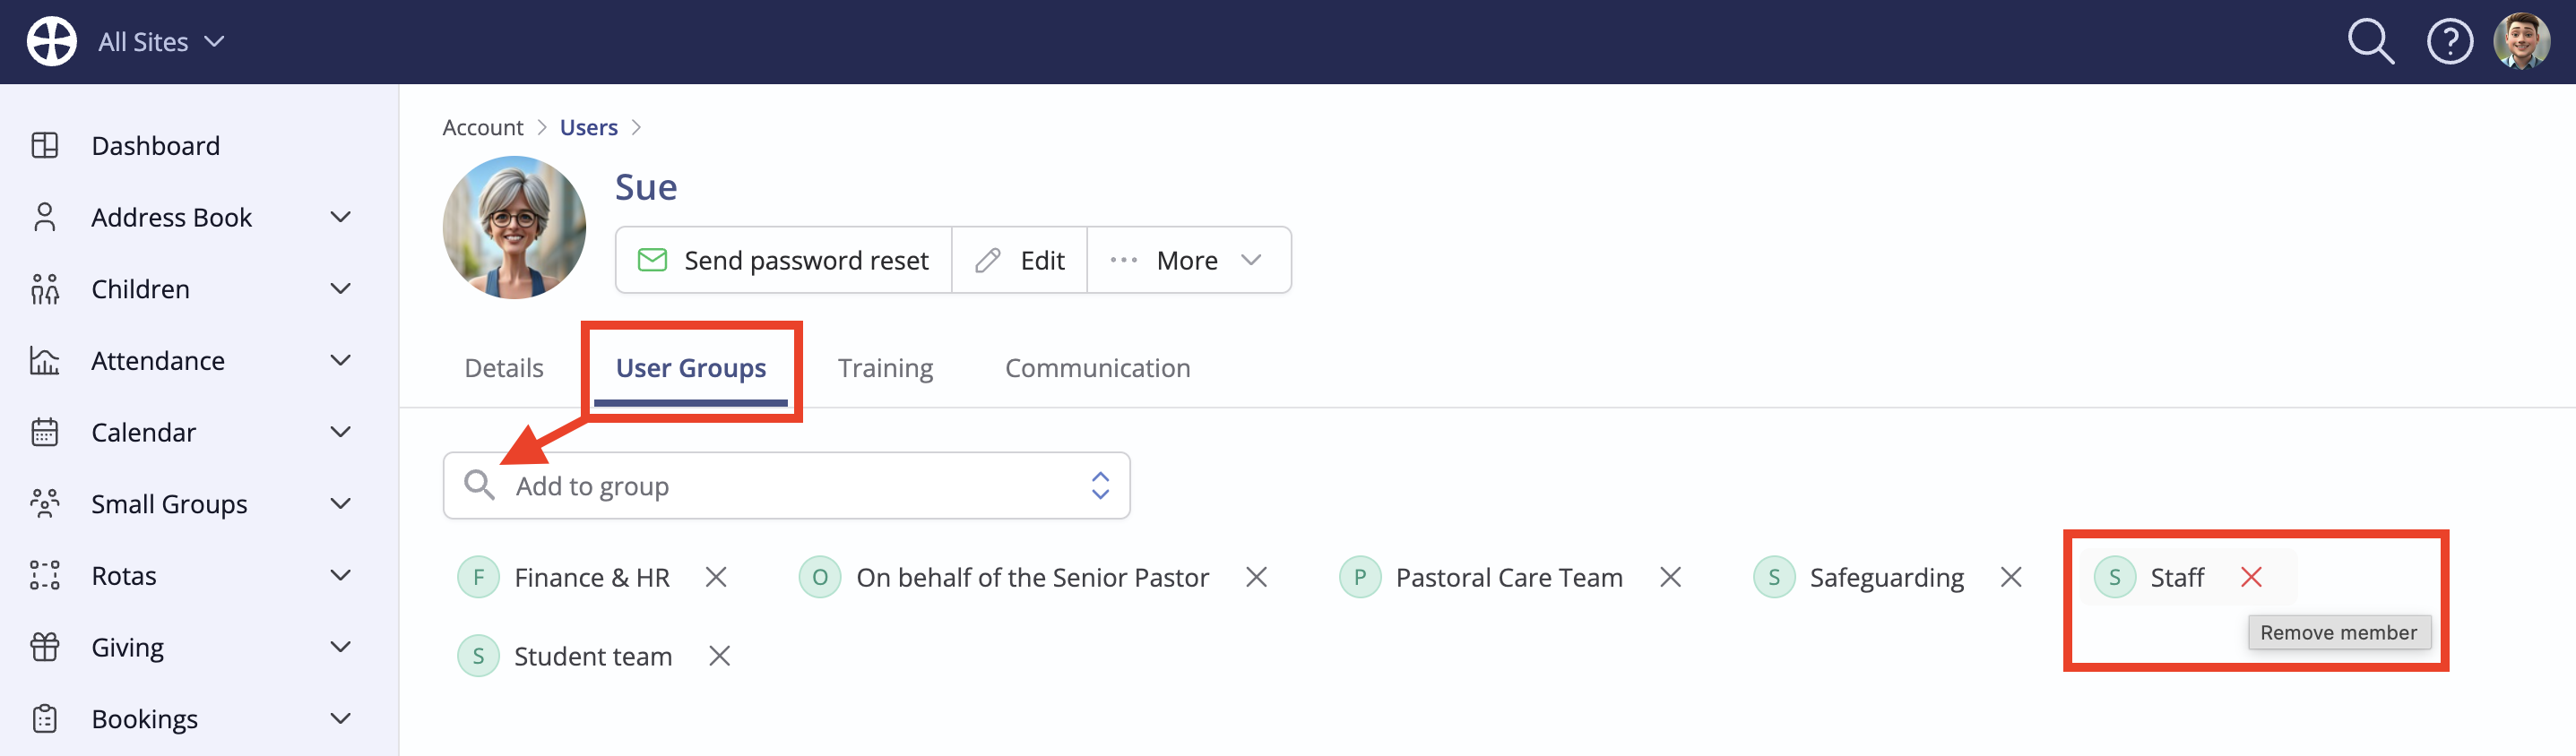
From the User Groups tab, you can manage the User Groups the User belongs to - further information is available in our related support article.
You can return to the Users section at any time to add or make changes to users. Finally, note the option Filter within a long list of users, perhaps to see just those with Multi-Factor Authentication currently enabled or disabled:

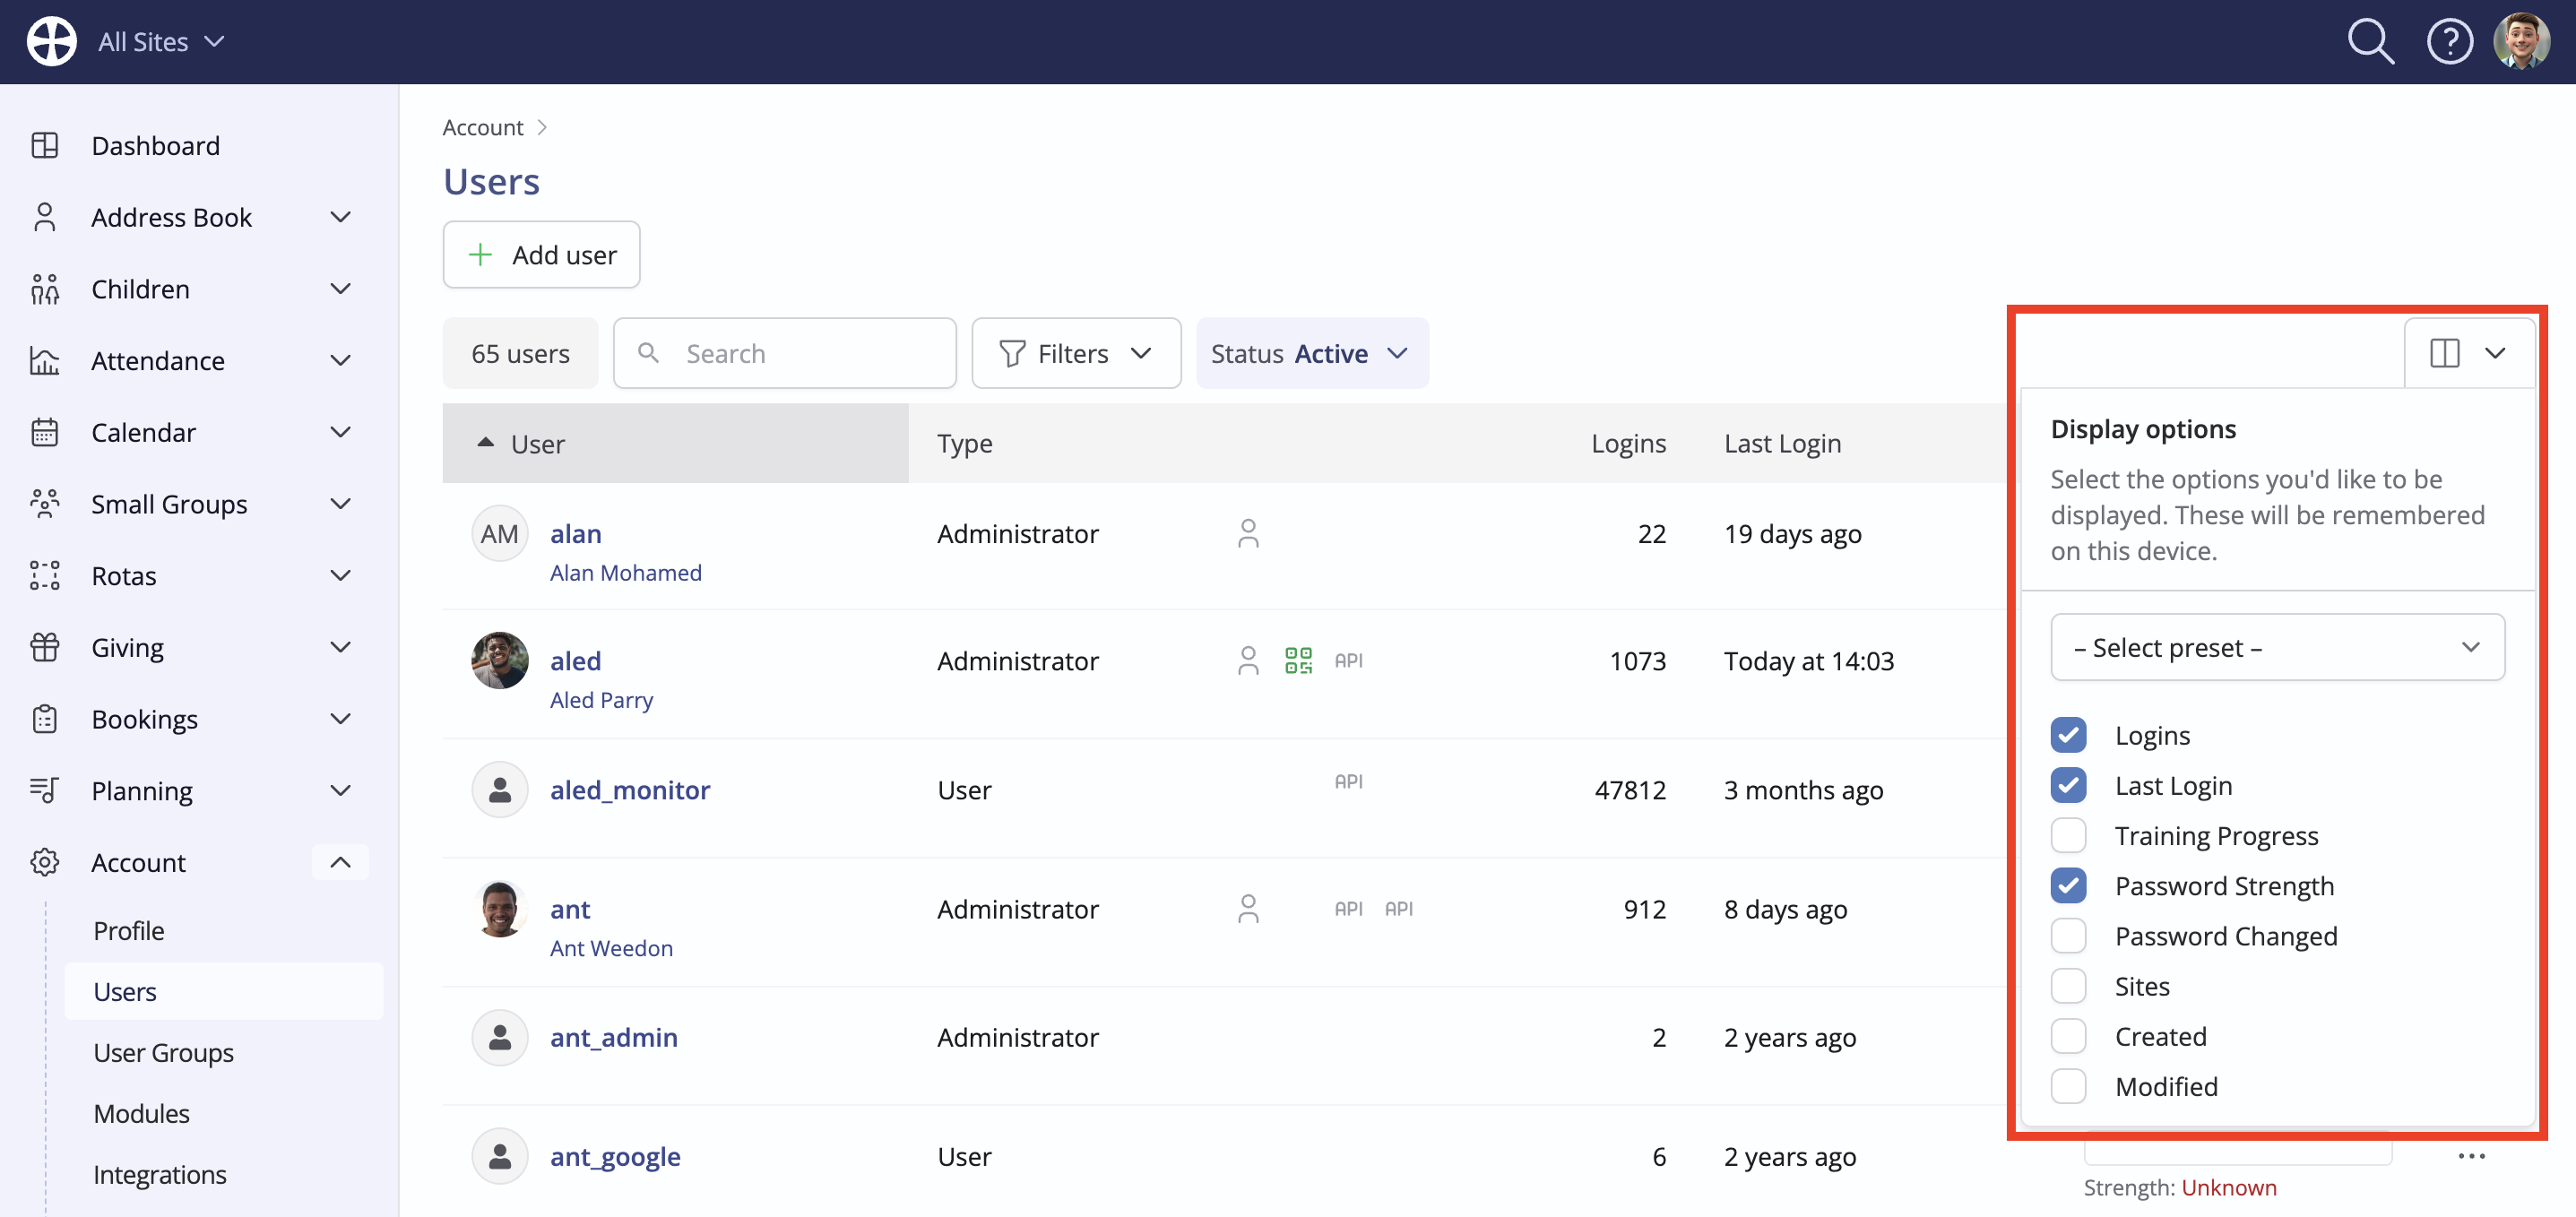
...Or to customise the Columns that are displayed - selected columns will be remembered on your device the next time you log in:
Linking a user to their Address Book contact profile
By linking a user to their Address Book contact profile:
- The User can access My ChurchSuite via the Quick Links widget on their ChurchSuite Dashboard without needing to log in again.
- The User can optionally send emails "From" their Contact email address.
- The User's birthday is shown on the calendar in the Calendar module (where their date of birth is specified on their contact profile), meaning you'll never miss a staff member's birthday!
The Users list shows a visual indicator when linked to a Contact:

You can link to a contact when adding a new user or choose to Edit an existing user:
On the Add or Edit user pop-up, use the Contact search to choose the Address Book contact; names are auto-suggested as you type.
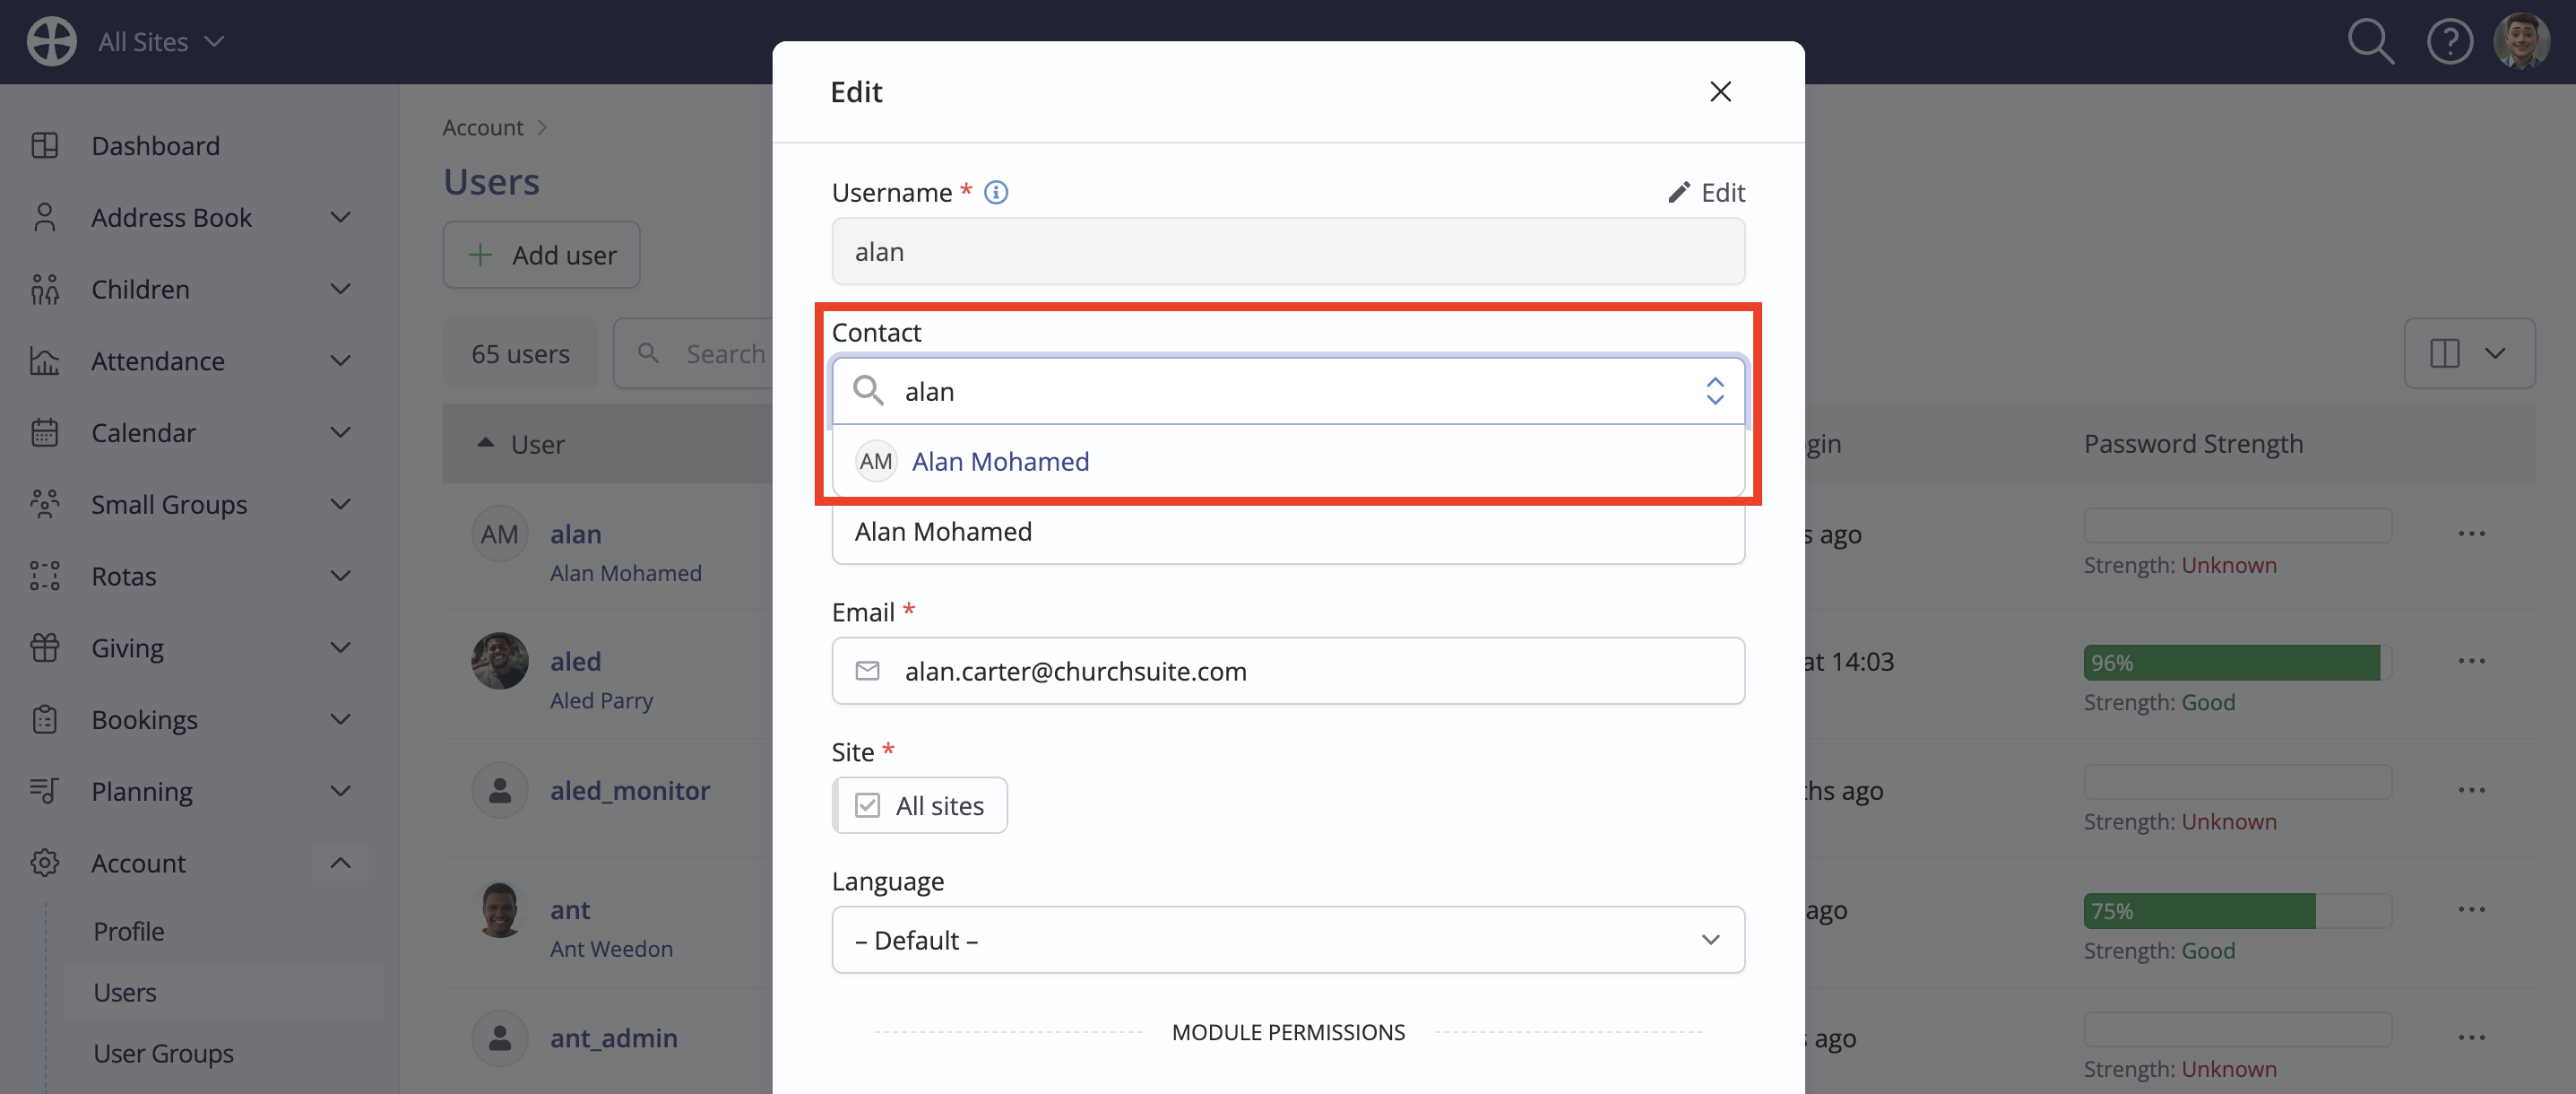
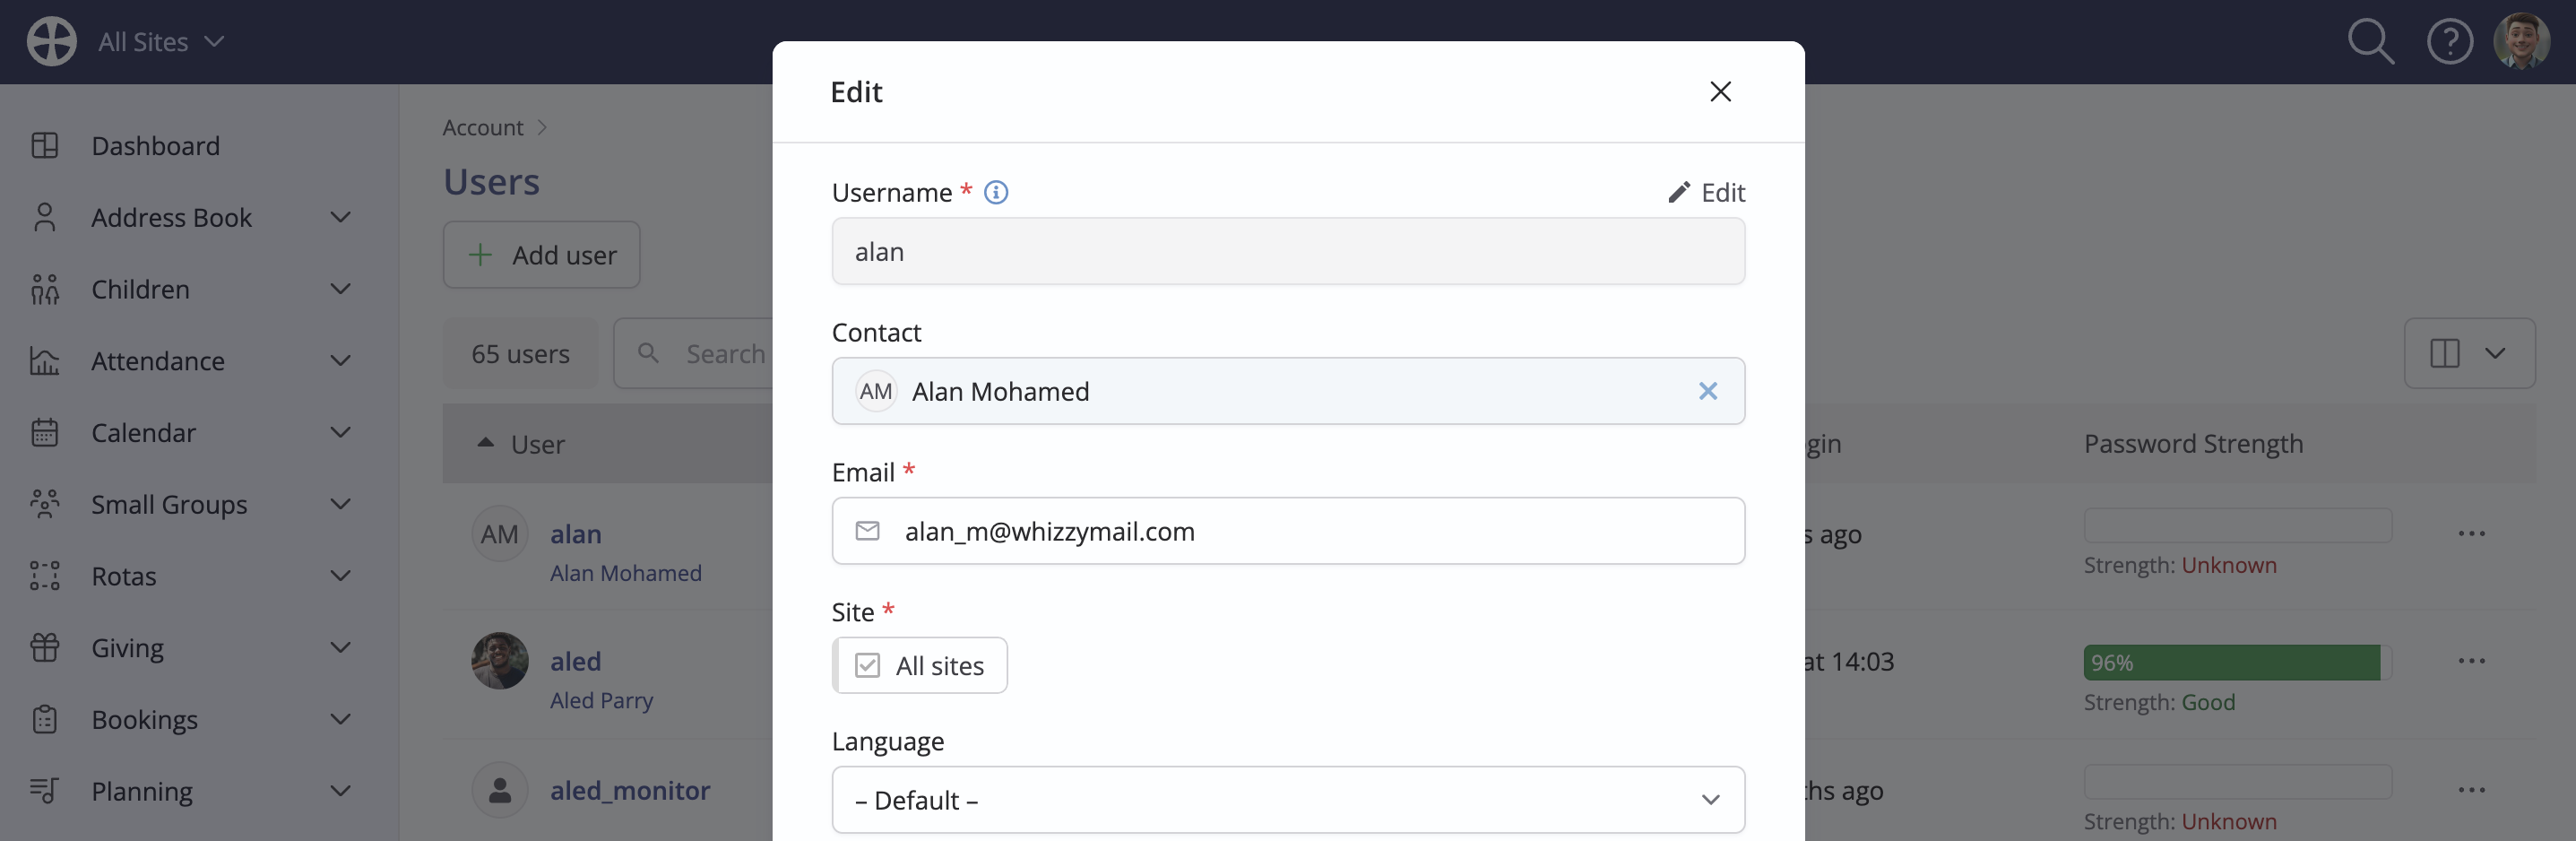
The User's contact Name, Email address and profile image are updated to reflect the linked contact's name, email address and Address Book profile image. You can optionally specify a different User email address, perhaps using a church/organisation domain email address while retaining their 'personal' email address against their Address Book contact profile.
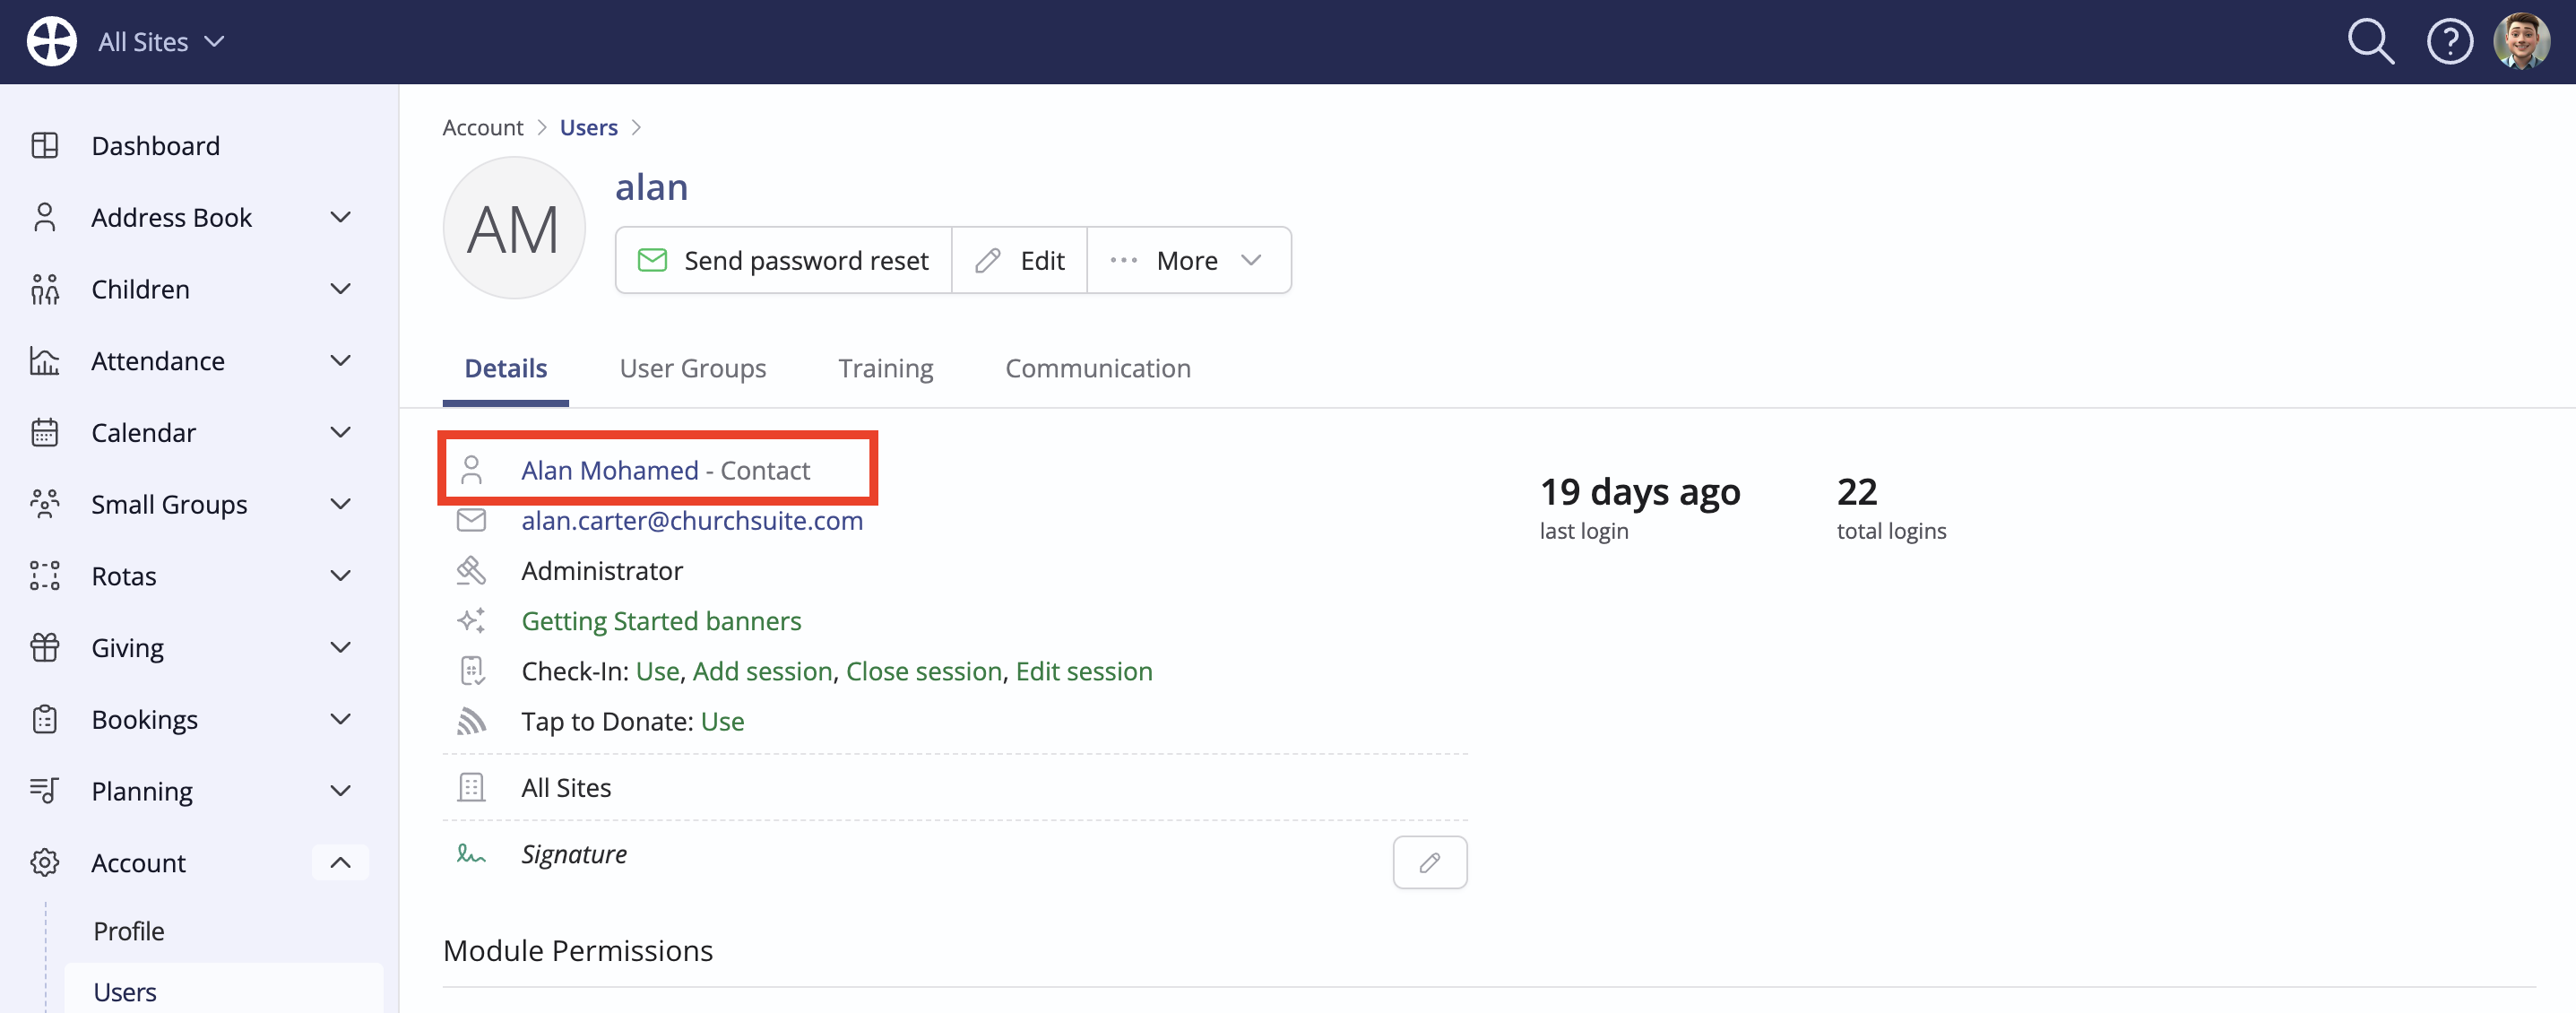
Save the changes, and the User profile will show the linked Address Book Contact.
Duplicating an existing user
It's often the case that the module and/or site permissions being assigned for a new User will be the same or similar to an existing User. You can speed up adding multiple Users by duplicating an existing User - use the Duplicate action on an existing User's profile.
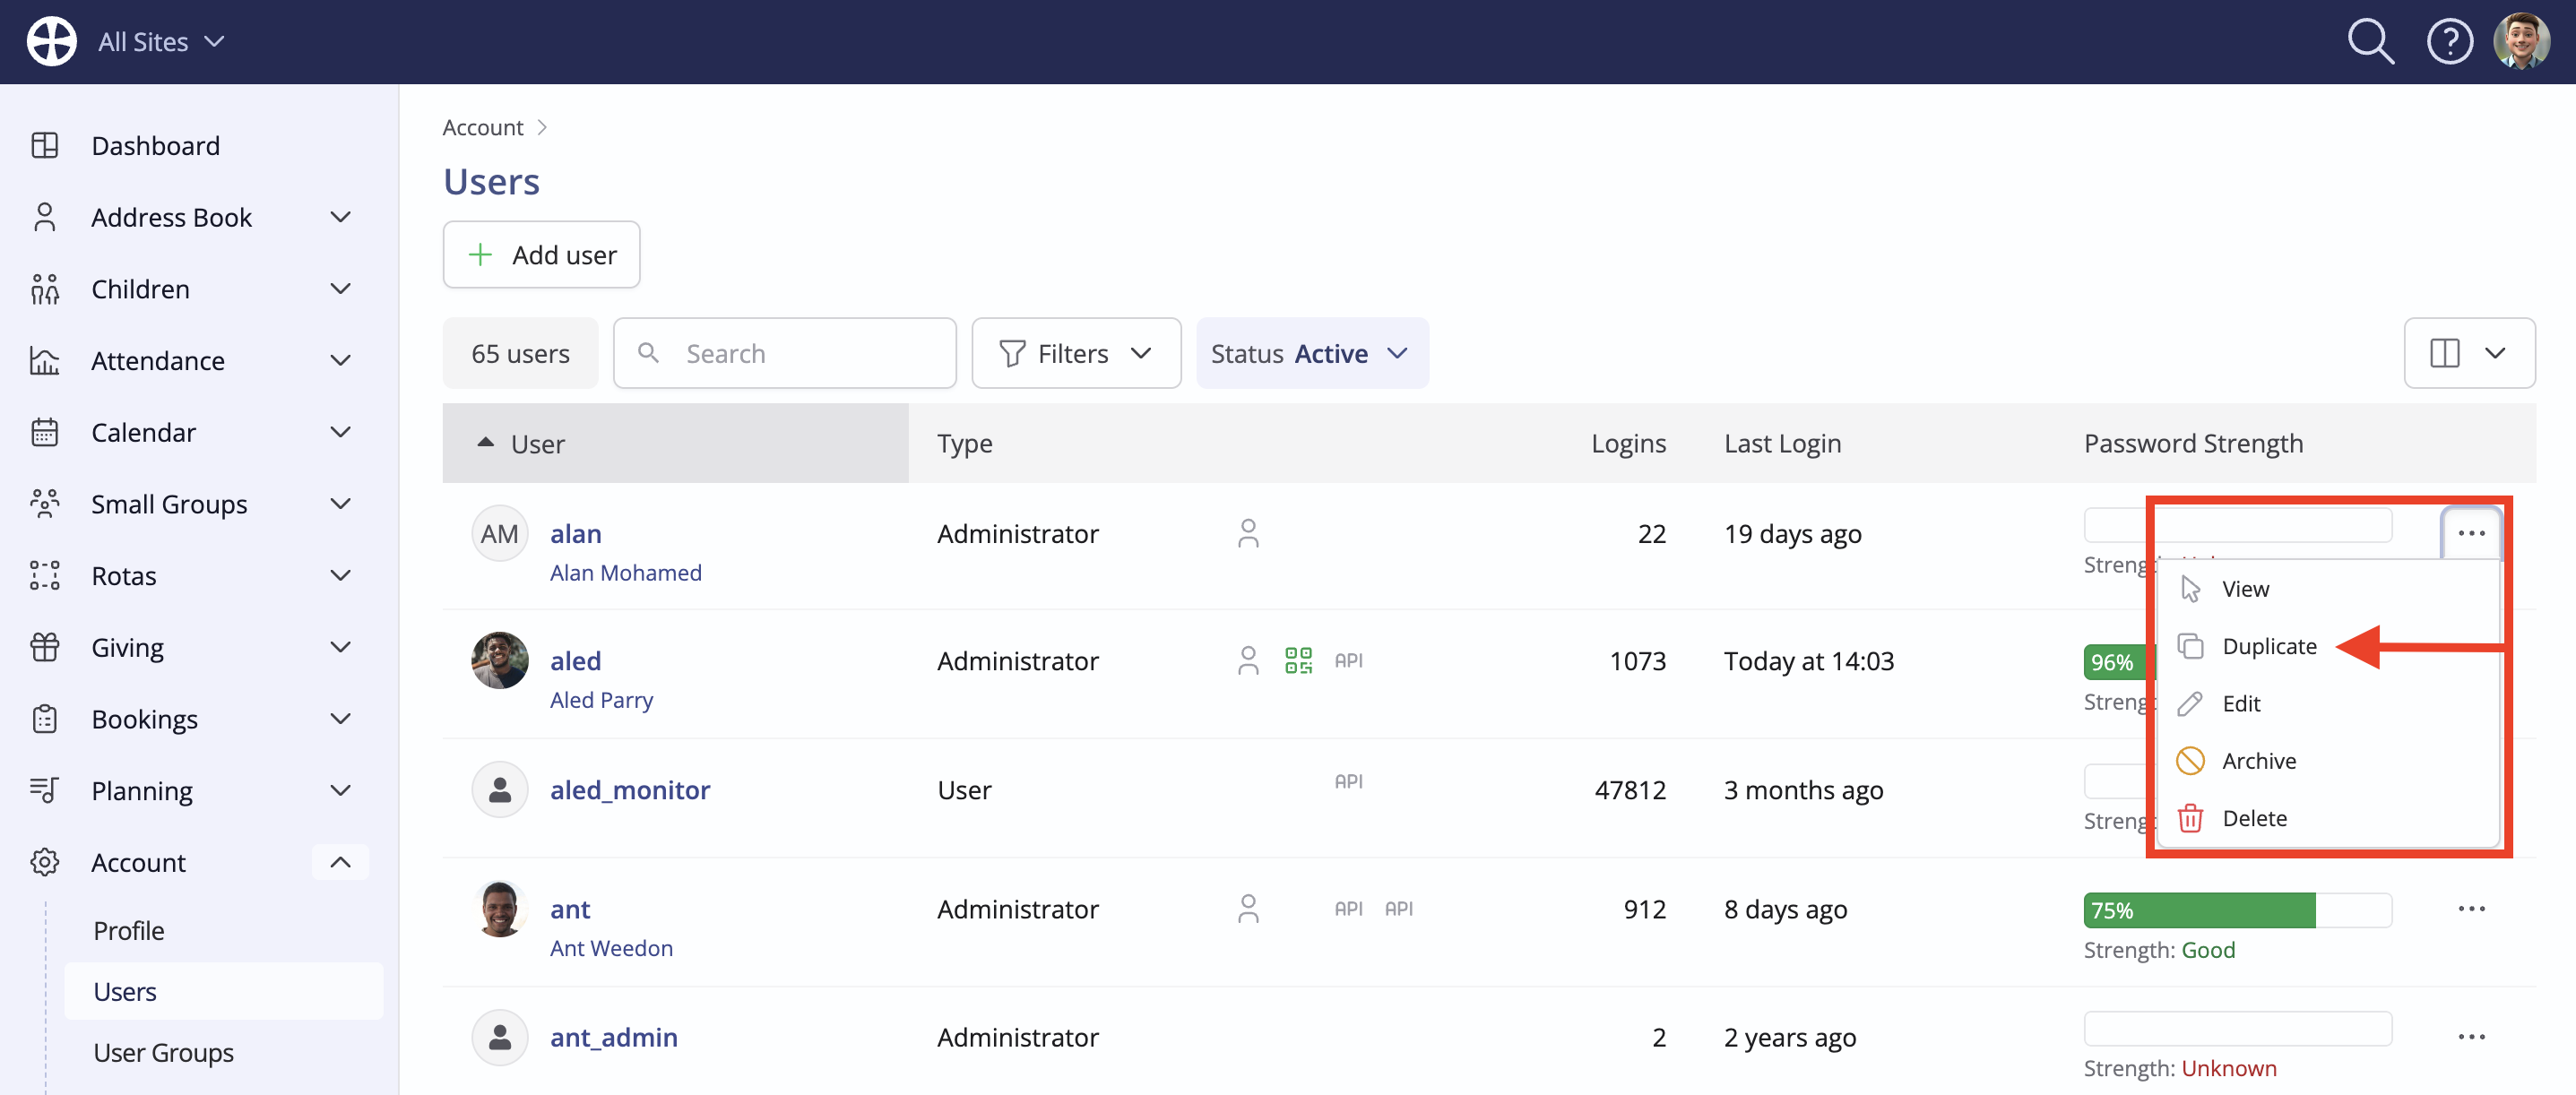
...or by selecting the Duplicate action from the Users section.
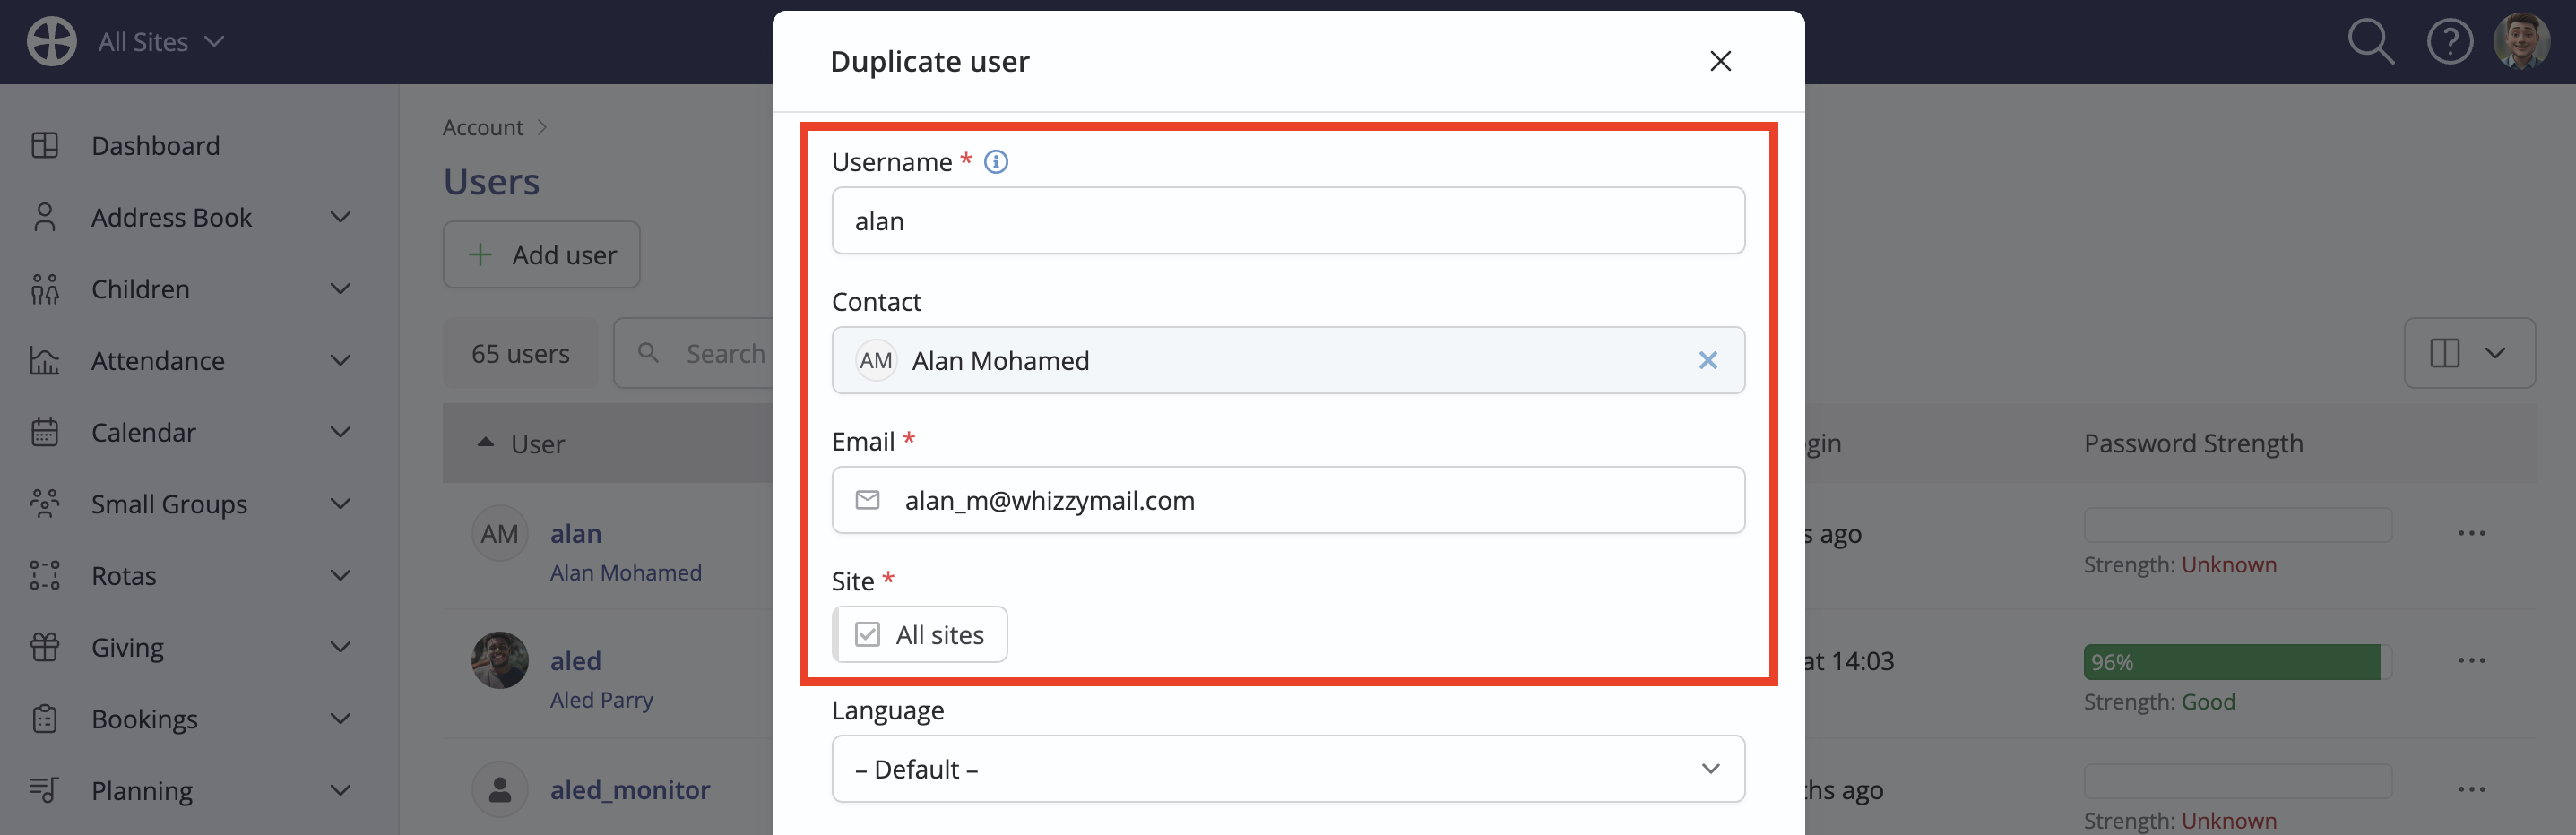
Whichever method you use, selecting Duplicate will open the Duplicate user pop-up, which is pre-populated with all the selected User's details, module permissions, Connect, Check-In and site settings and any communication restrictions. Add the new User's Username and update the other user-specific details as appropriate before saving the changes. Remember to review the new User's Signature and User Group assignments.
Changing a username
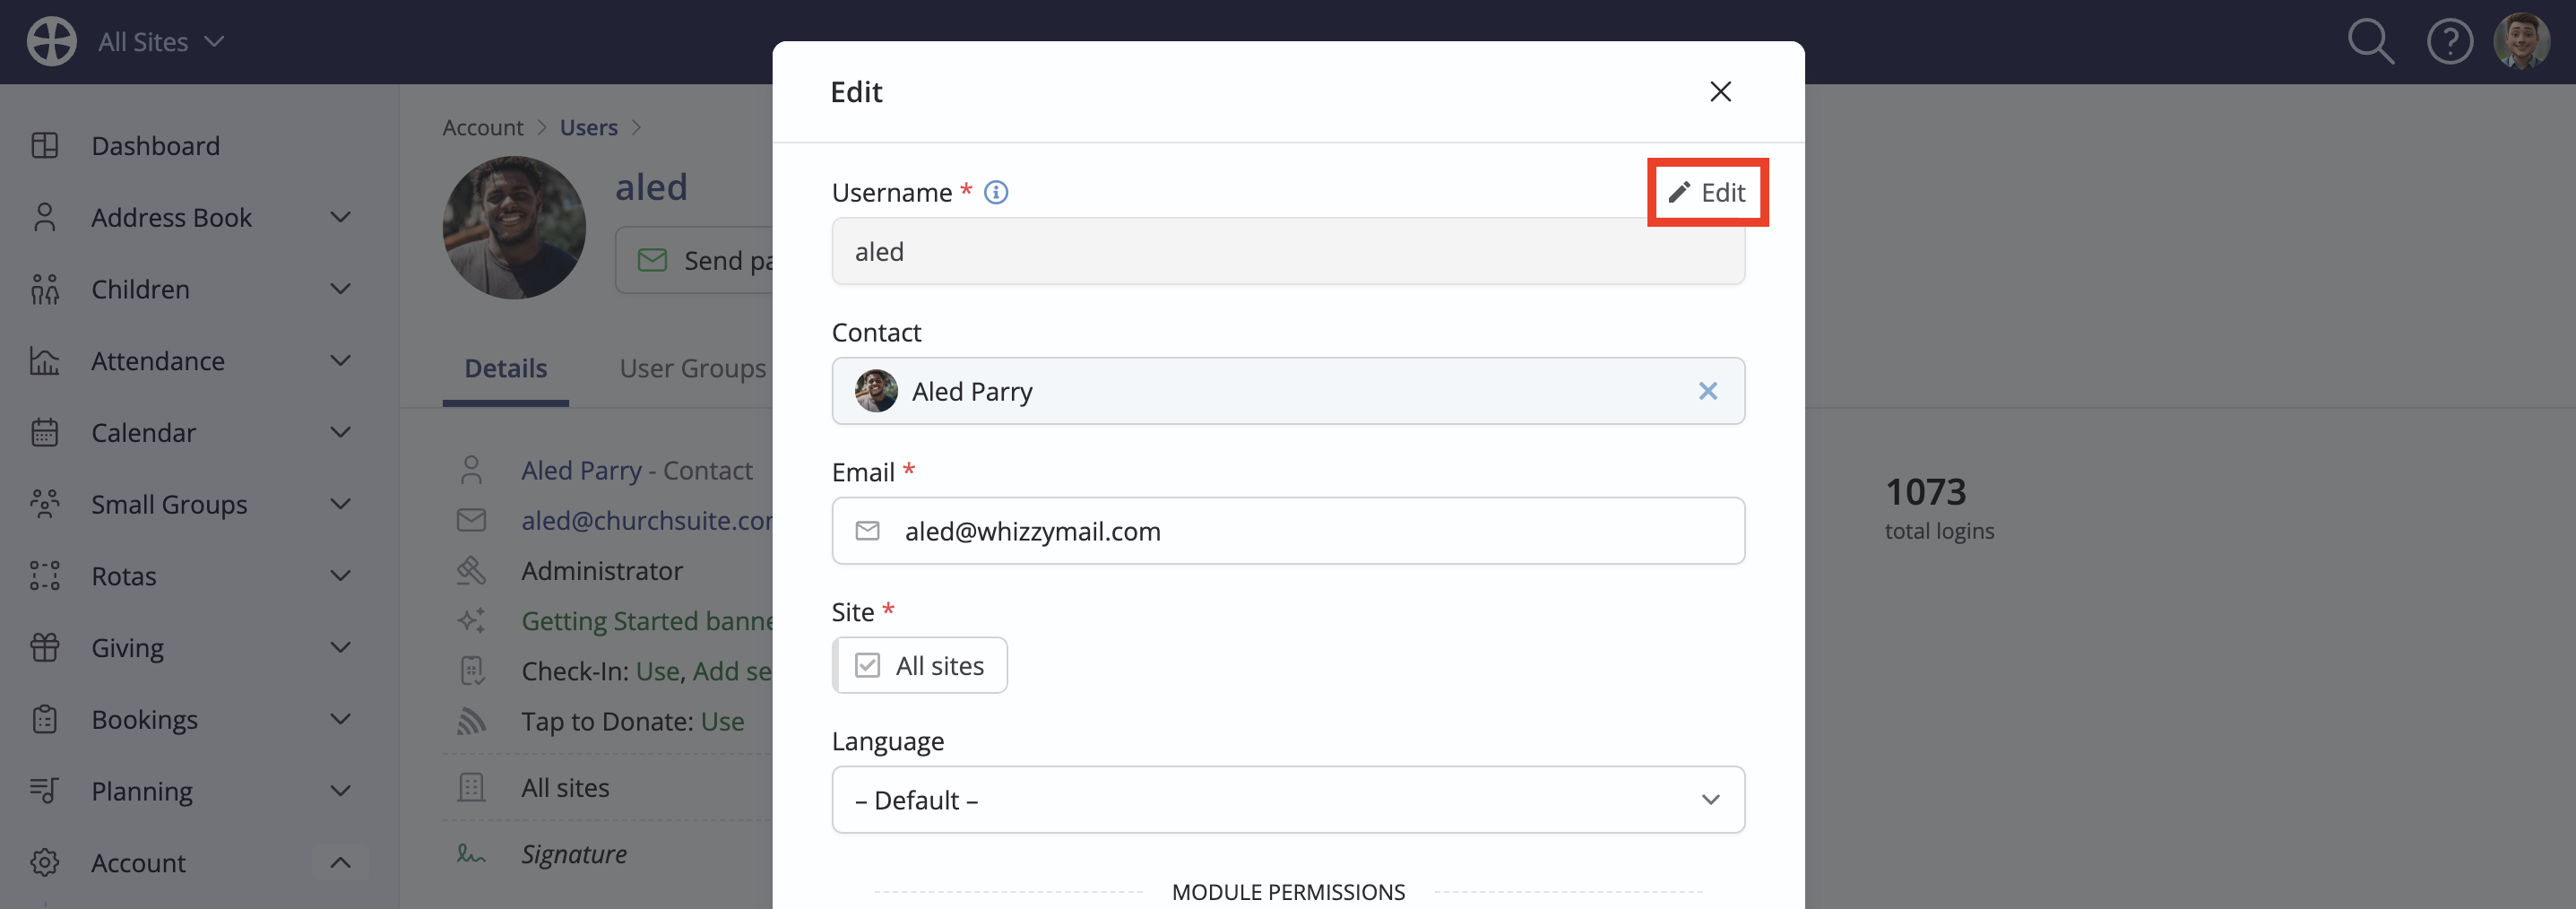
It's sometimes necessary to change a User's username, perhaps if you're changing your user naming convention or if you have two Users with similar names that you wish to distinguish better. Working within the Settings area, navigate to the User's "View" page. Click Edit ...
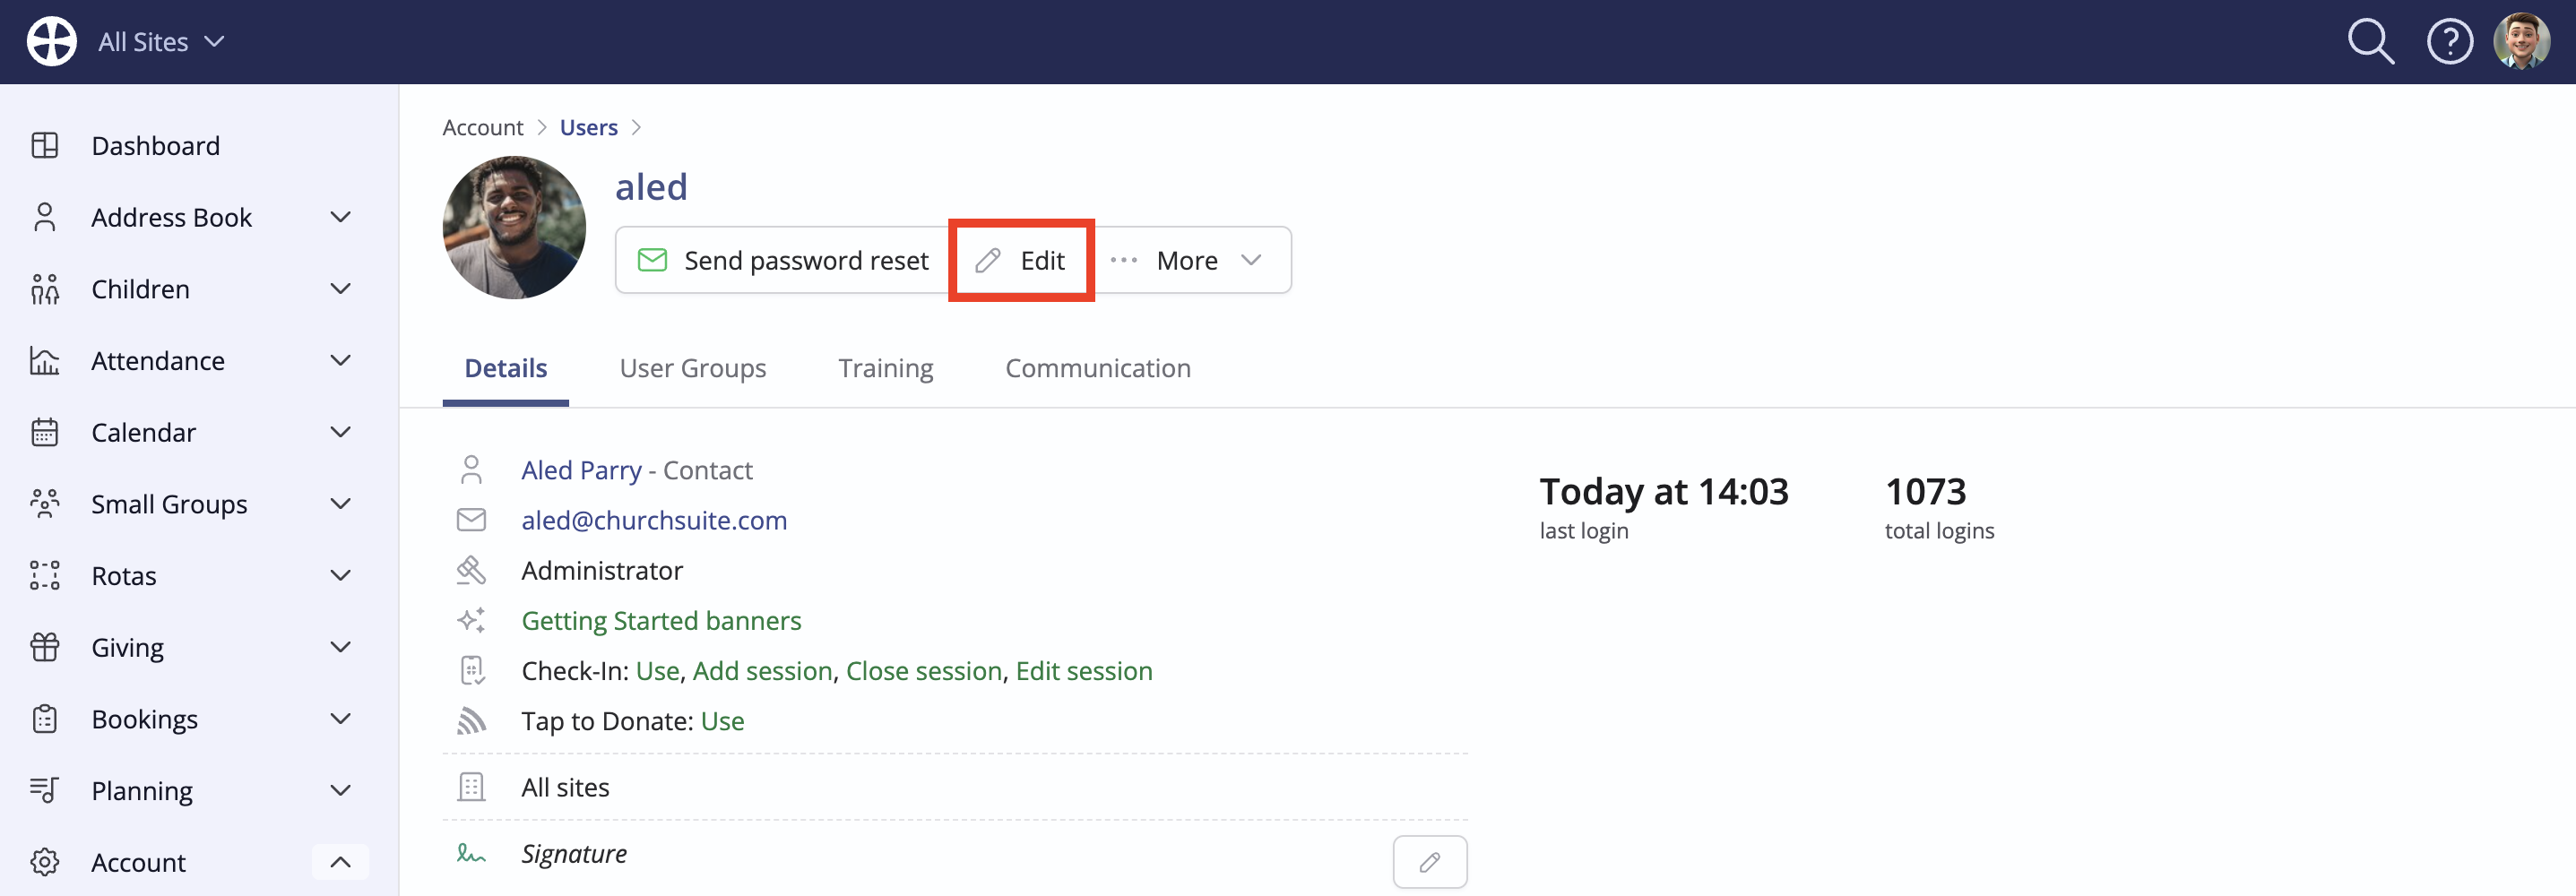
... and then click to Edit the Username:
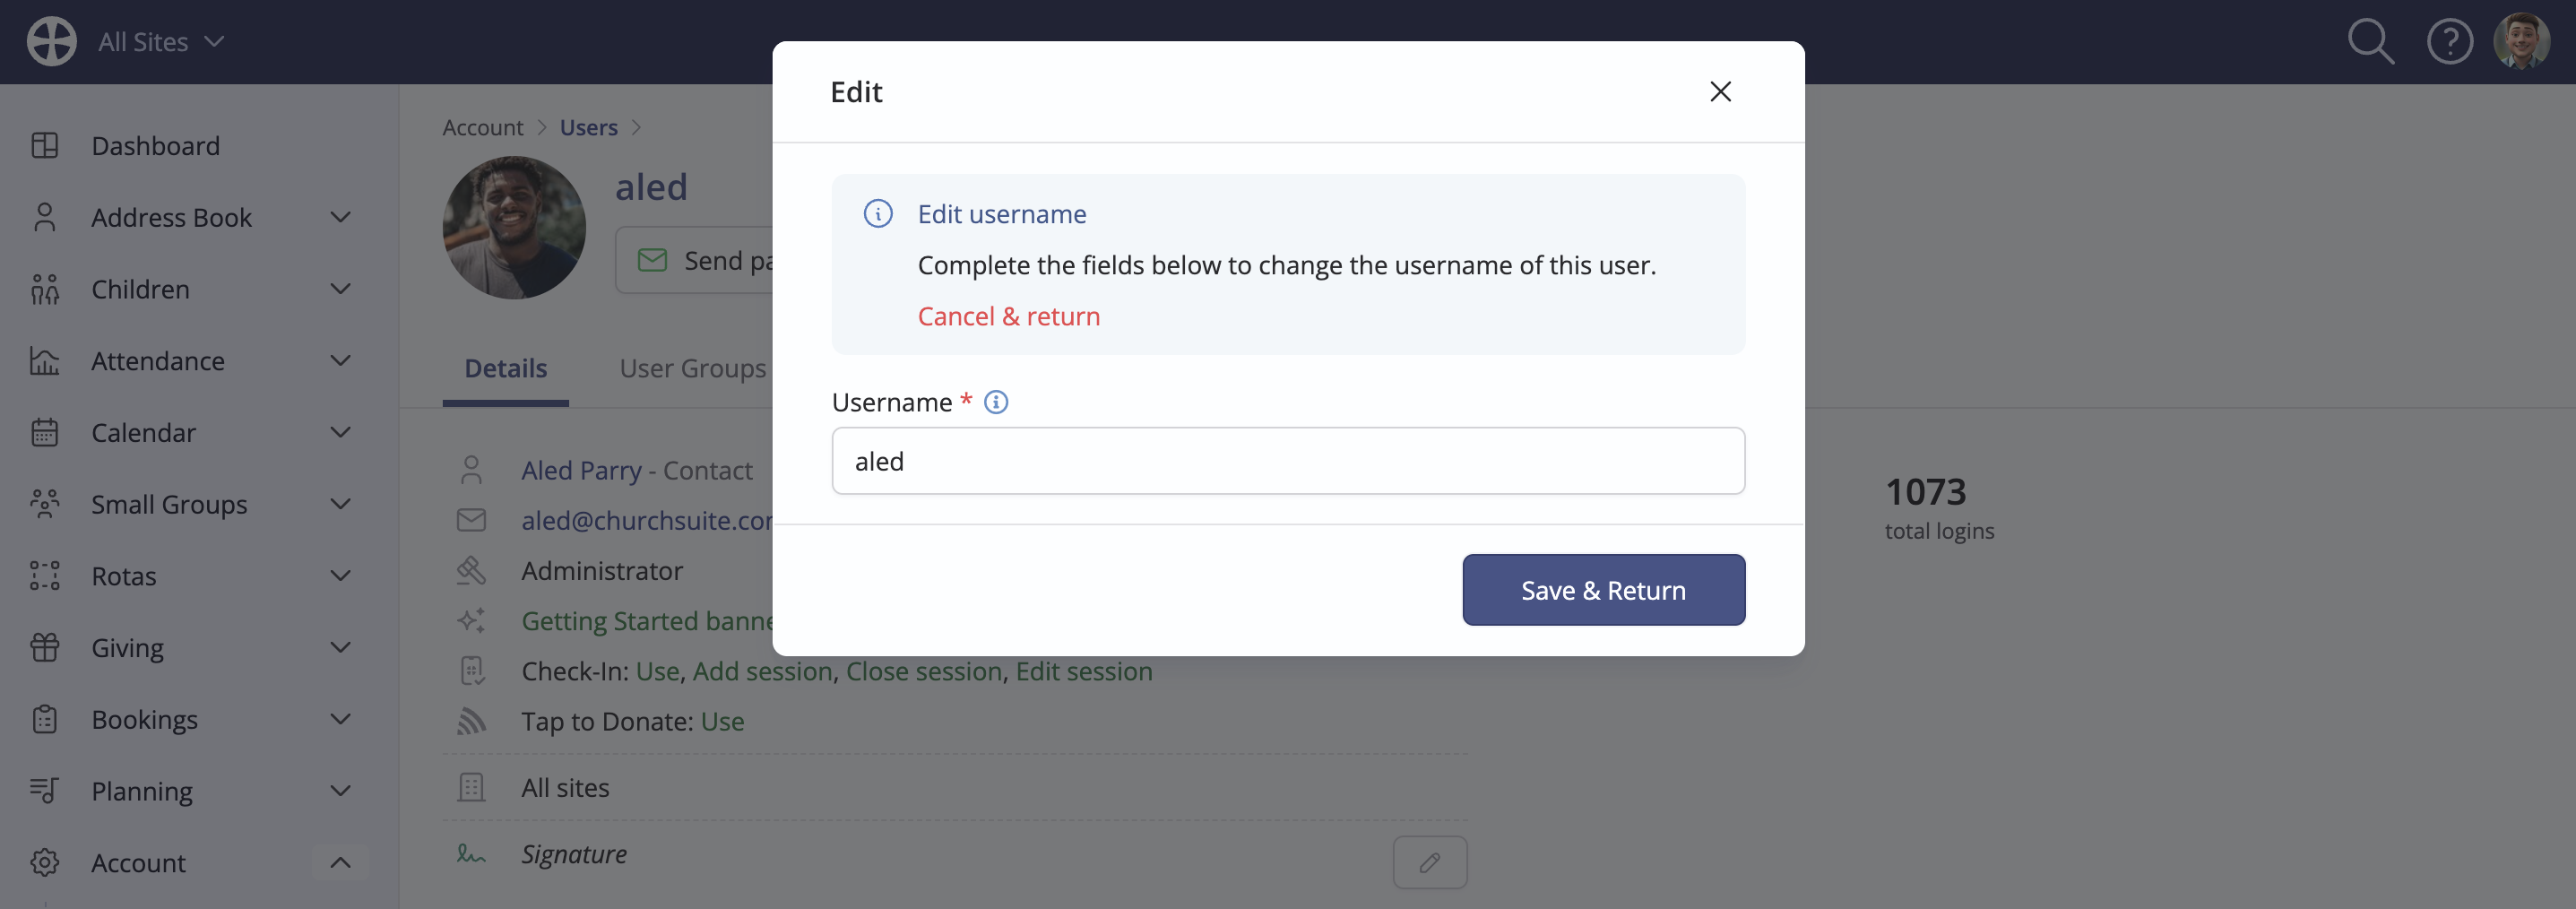
On the Change username pop-up, enter the new username. Usernames must be unique and be between 2-25 characters - letters, numbers, underscores and full stops, no spaces. Click Save & Return to apply the changes and Save the user account. Don't forget to let the User know their new Username! Their password remains unaffected by this change.
Resetting a user password
Important
Password reset emails are valid for 24 hours, after which they expire. If multiple password-reset emails are requested, only the most recent email is valid – each new reset email deactivates a previous reset email.
When setting or resetting a password, ChurchSuite references a database of known compromised passwords and will not allow a previously compromised password to be chosen. For clarity, this does not mean that the User or their email address is on that database; simply that their chosen password is known to have been compromised in another context.
A password reset email can be requested by selecting Reset your password at the "Enter your login details" stage when logging in from a browser:

The User must confirm their User email address (which may differ from the Address Book contact email address used to access My ChurchSuite). If the address is valid, a password reset email is sent to this address, and the sent reset email is logged against the User's profile. An invalid user email address is not further enumerated.

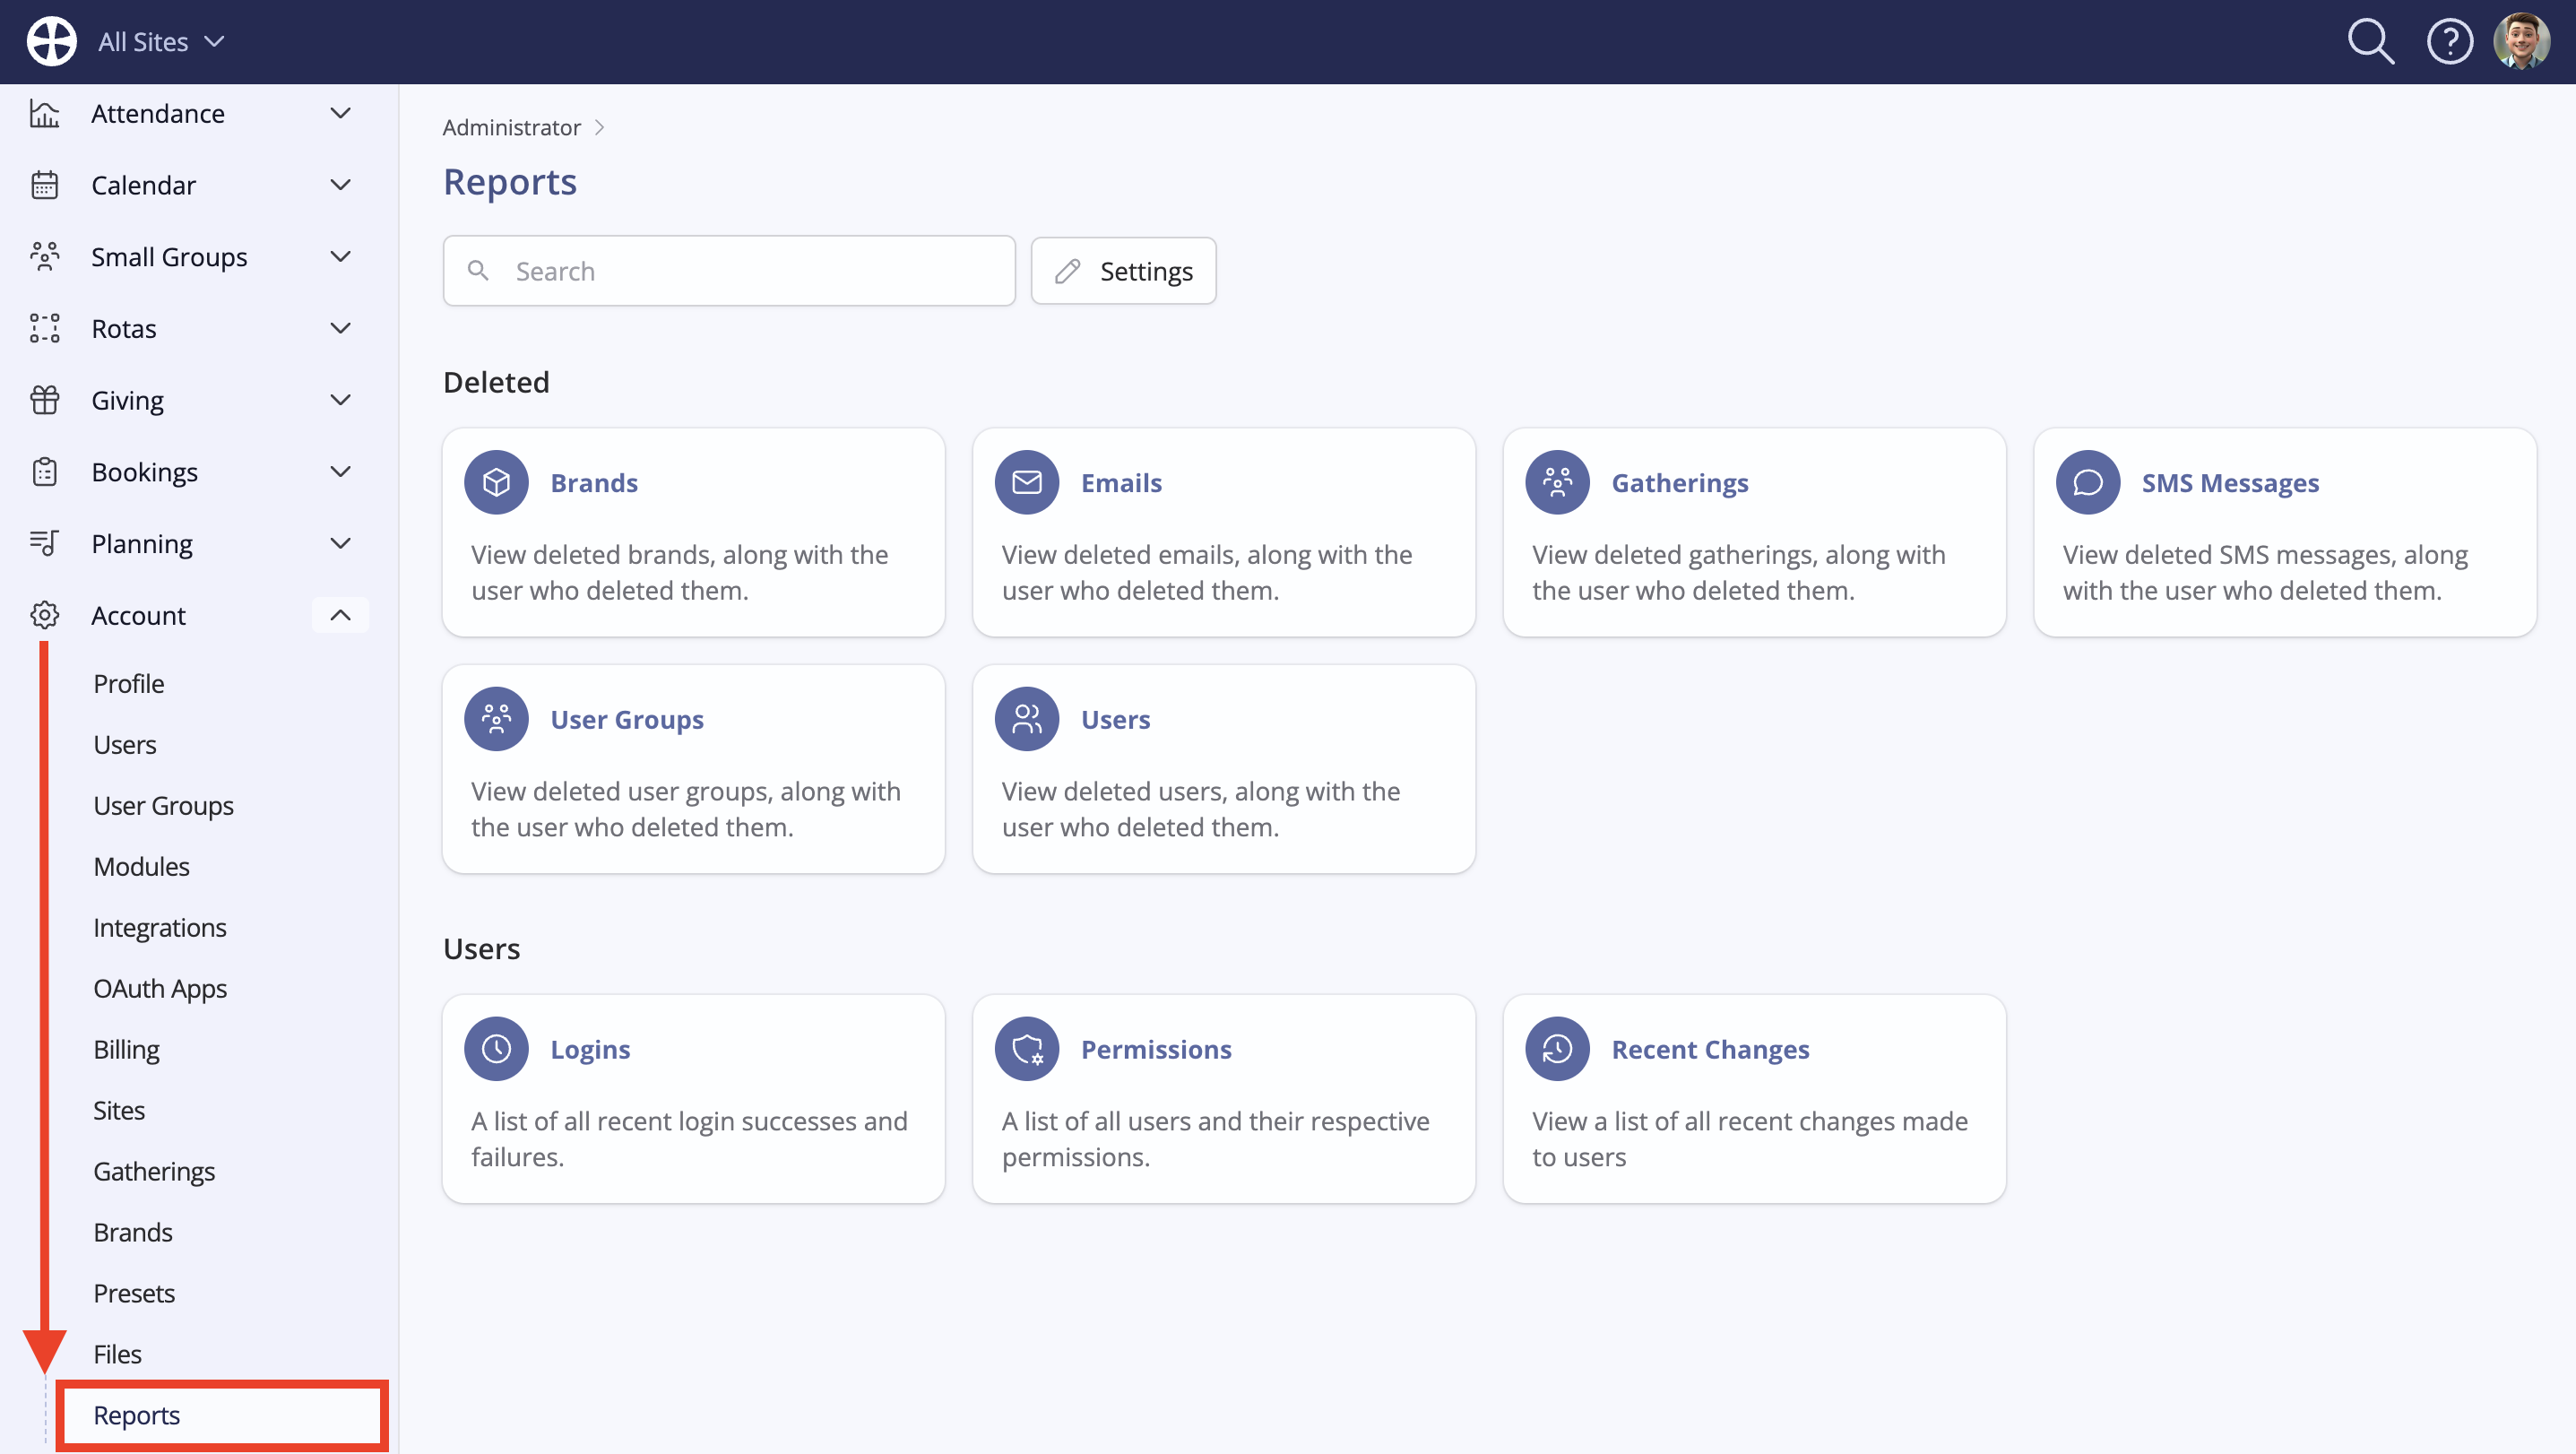
Reporting for Administrators
Administrators can access a range of user-related Reports through the Account Settings.
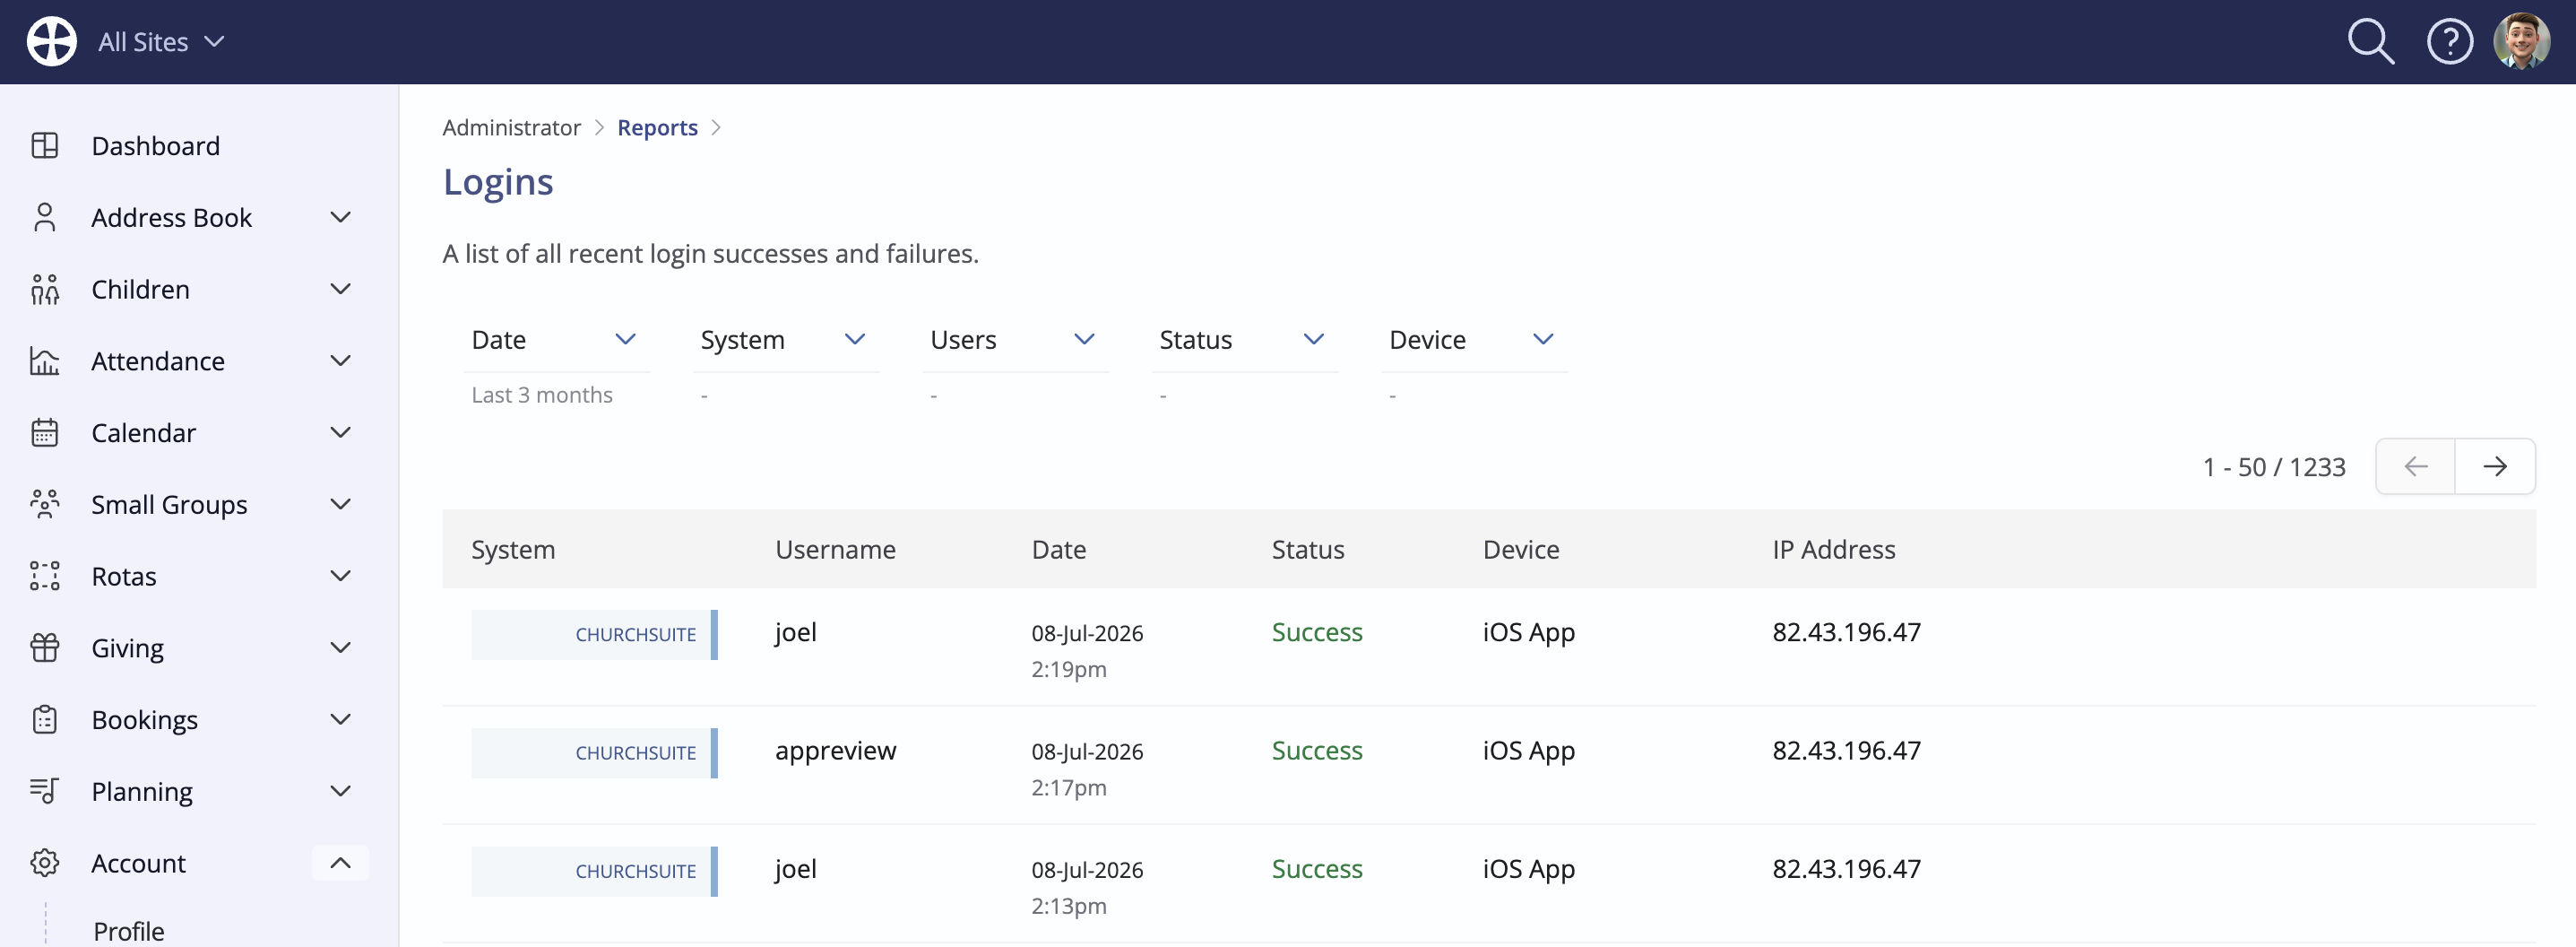
The Logins report shows a list of user login attempts to ChurchSuite, Connect and Check-In within a range of dates. The results include the Date, whether the login was successful (Status), the Username used, the Device used and the IP Address from which the login attempt was made.
A note about the Logins report
Where possible, ChurchSuite logs successful and failed login attempts.
iOS or Android app:
- A login is logged on the first login
- A login is logged when the authentication token is refreshed (approximately every 24 hours)
- A login is logged when switching between accounts within the app, for example, when switching from ChurchSuite to My ChurchSuite and vice versa
Private or non-private session through a browser:
- A login is logged on the first login
- A login is logged when the authentication token is refreshed (approximately every 24 hours)
A login "failure" is only logged against a username for an incorrect password - an incorrect username can't be logged.
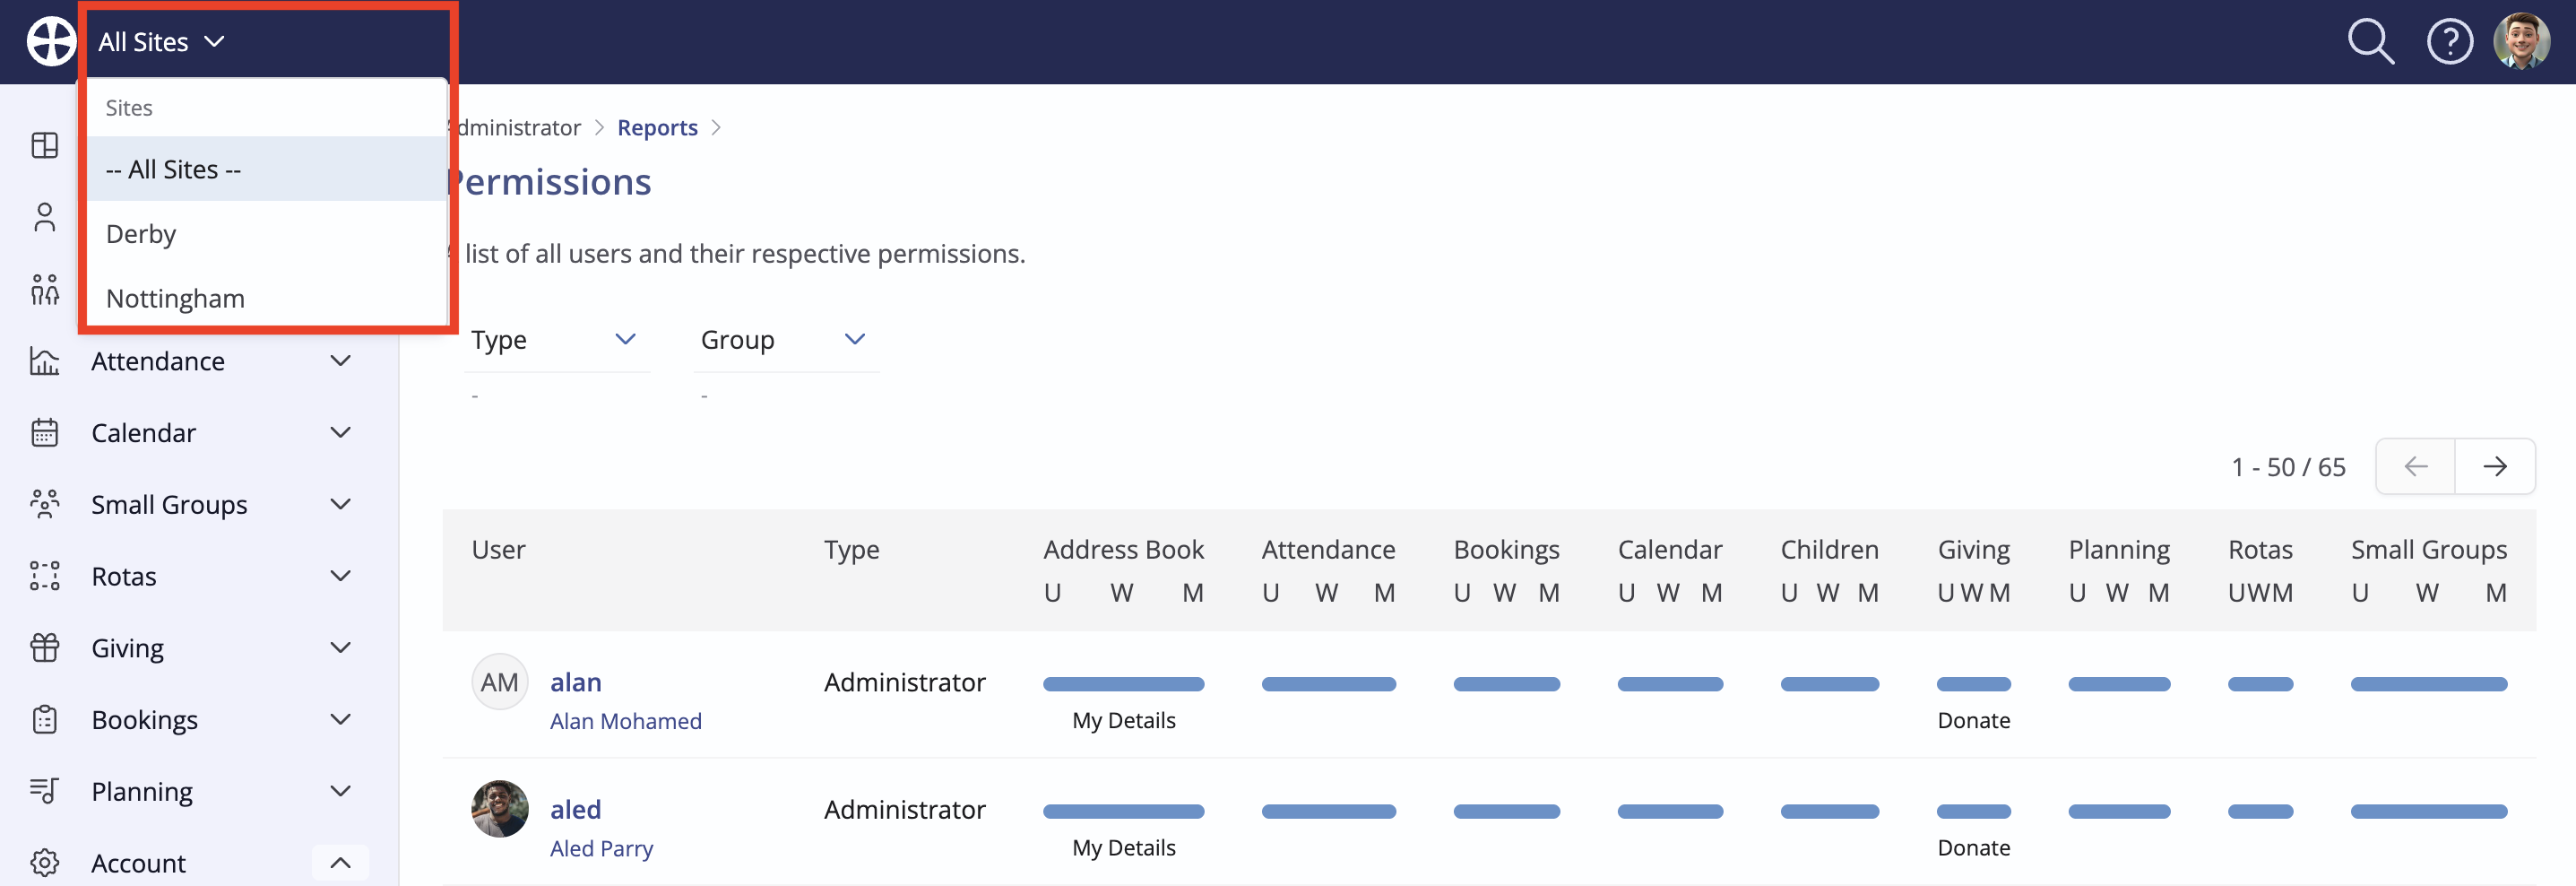
The Permissions report shows module access for all users. Administrators might use this report to review the permissions of each User on the account. For those using multi-site, the report shows permissions for the Site being viewed - use the Sites selector to filter users for "All Sites", "My Sites" or a specific site.
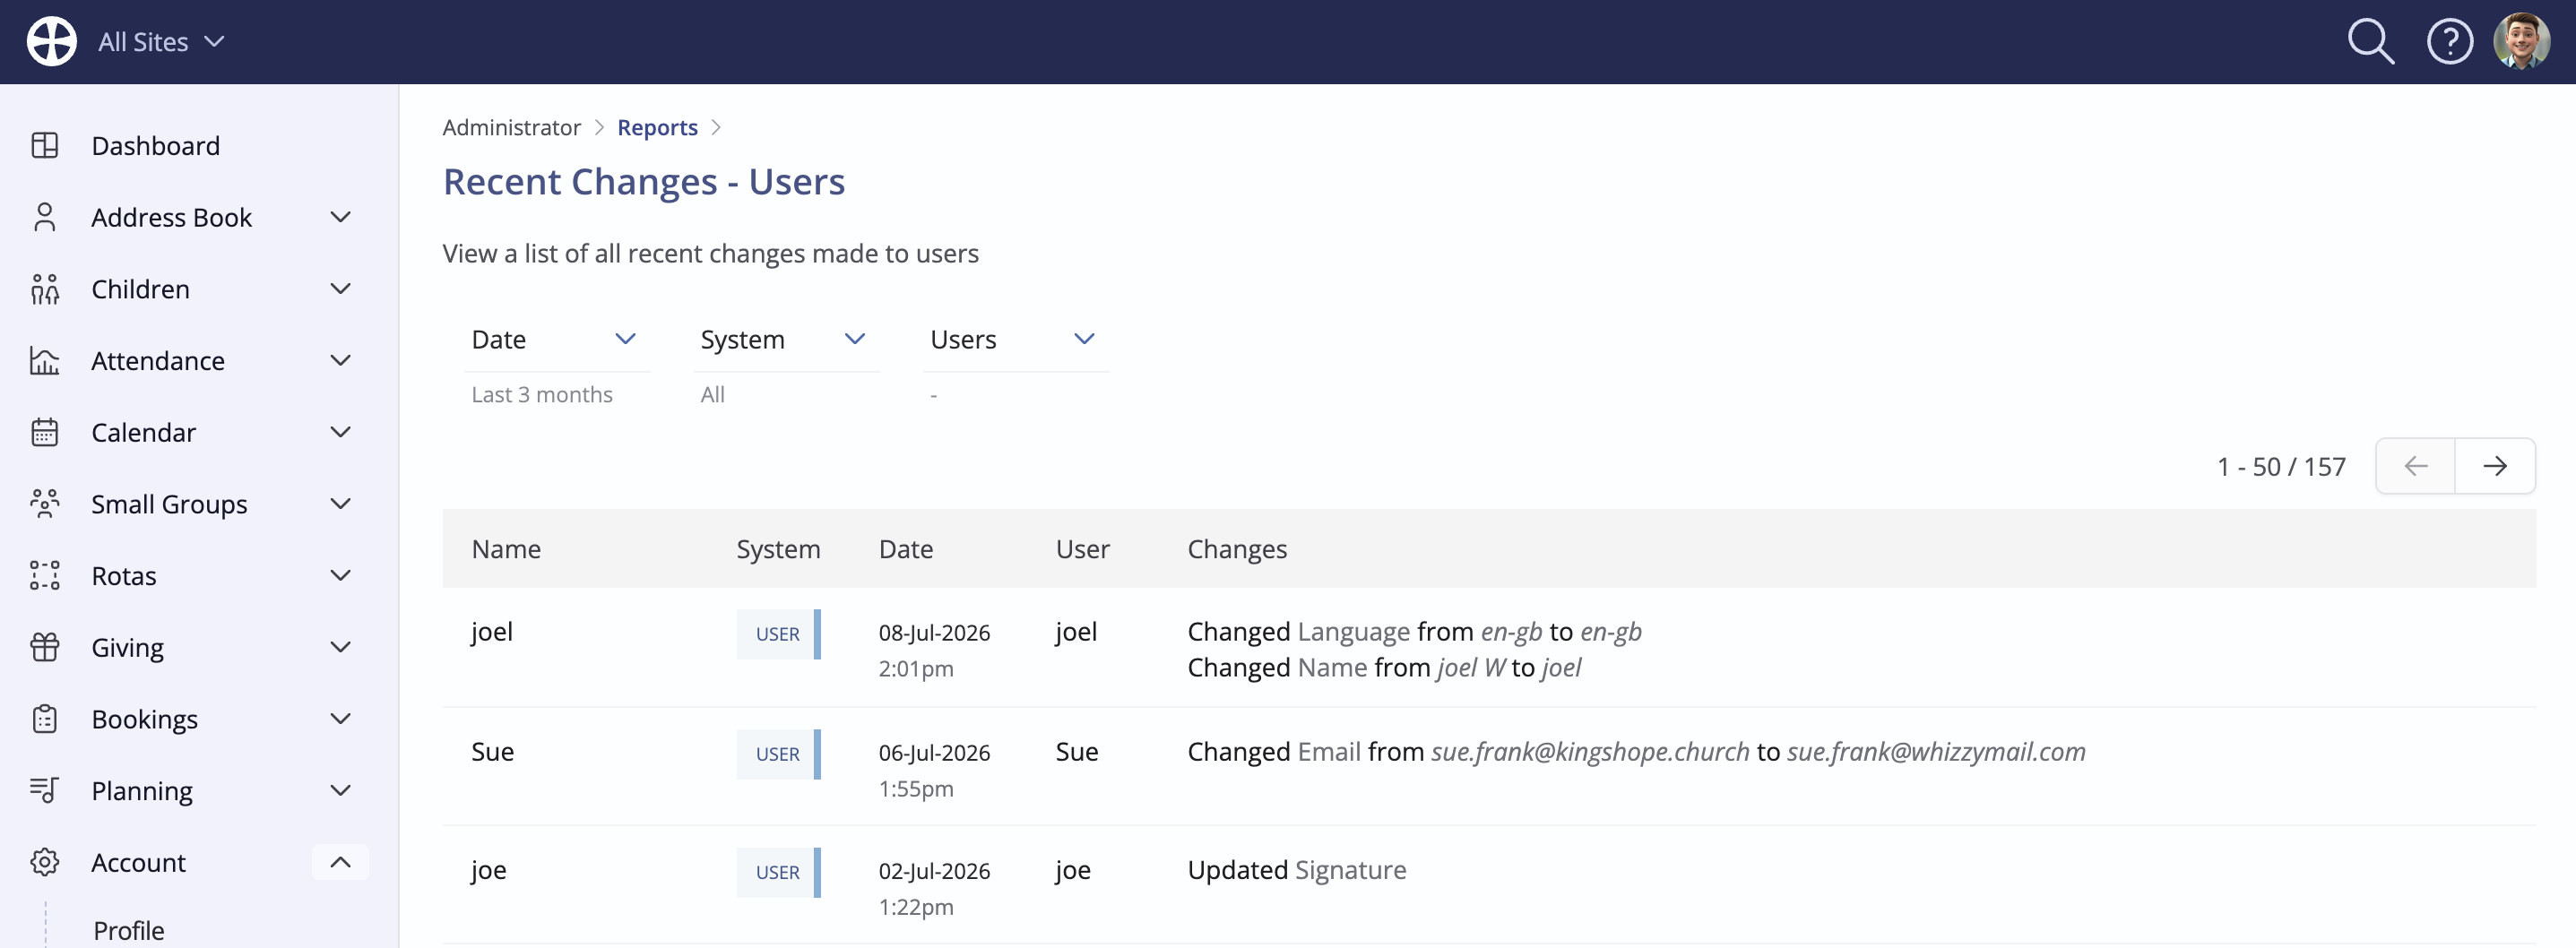
The Recent Changes report lists changes made to users by Administrators or by the users themselves.
Archiving and deleting users
Deleting a User will remove their user profile from ChurchSuite entirely, including the record of their module access, site permissions, password, user change logs, login history and user group membership. The User's leave setup and historic leave requests will be deleted. Any content that has been set visible to "Just me" will be inaccessible to anyone else – this includes private Notes, Flows, Forms, Tags, Key Dates and Resources. Deleting a user is immediate and irreversible! Deleting a User unlinks them from their Address Book contact profile, but does not delete that Address Book profile.
Before you Delete a User, you might Archive them in the first instance to ensure there are no unexpected consequences from losing the User's account. Archived users can be Set active again if necessary. Archived and deleted users cannot log in to ChurchSuite or Connect, but if logged in when their User is Archived or Deleted, they will be logged out as soon as they navigate away from the current page or attempt to process an action on the page.
Navigate to the User's profile in the Users section of your Account Settings and select Archive or Delete.