Check-In user permissions and how to log in
The Check-In system is accessible by permitted users using either the iOS or Android Check-In app or through a web browser.
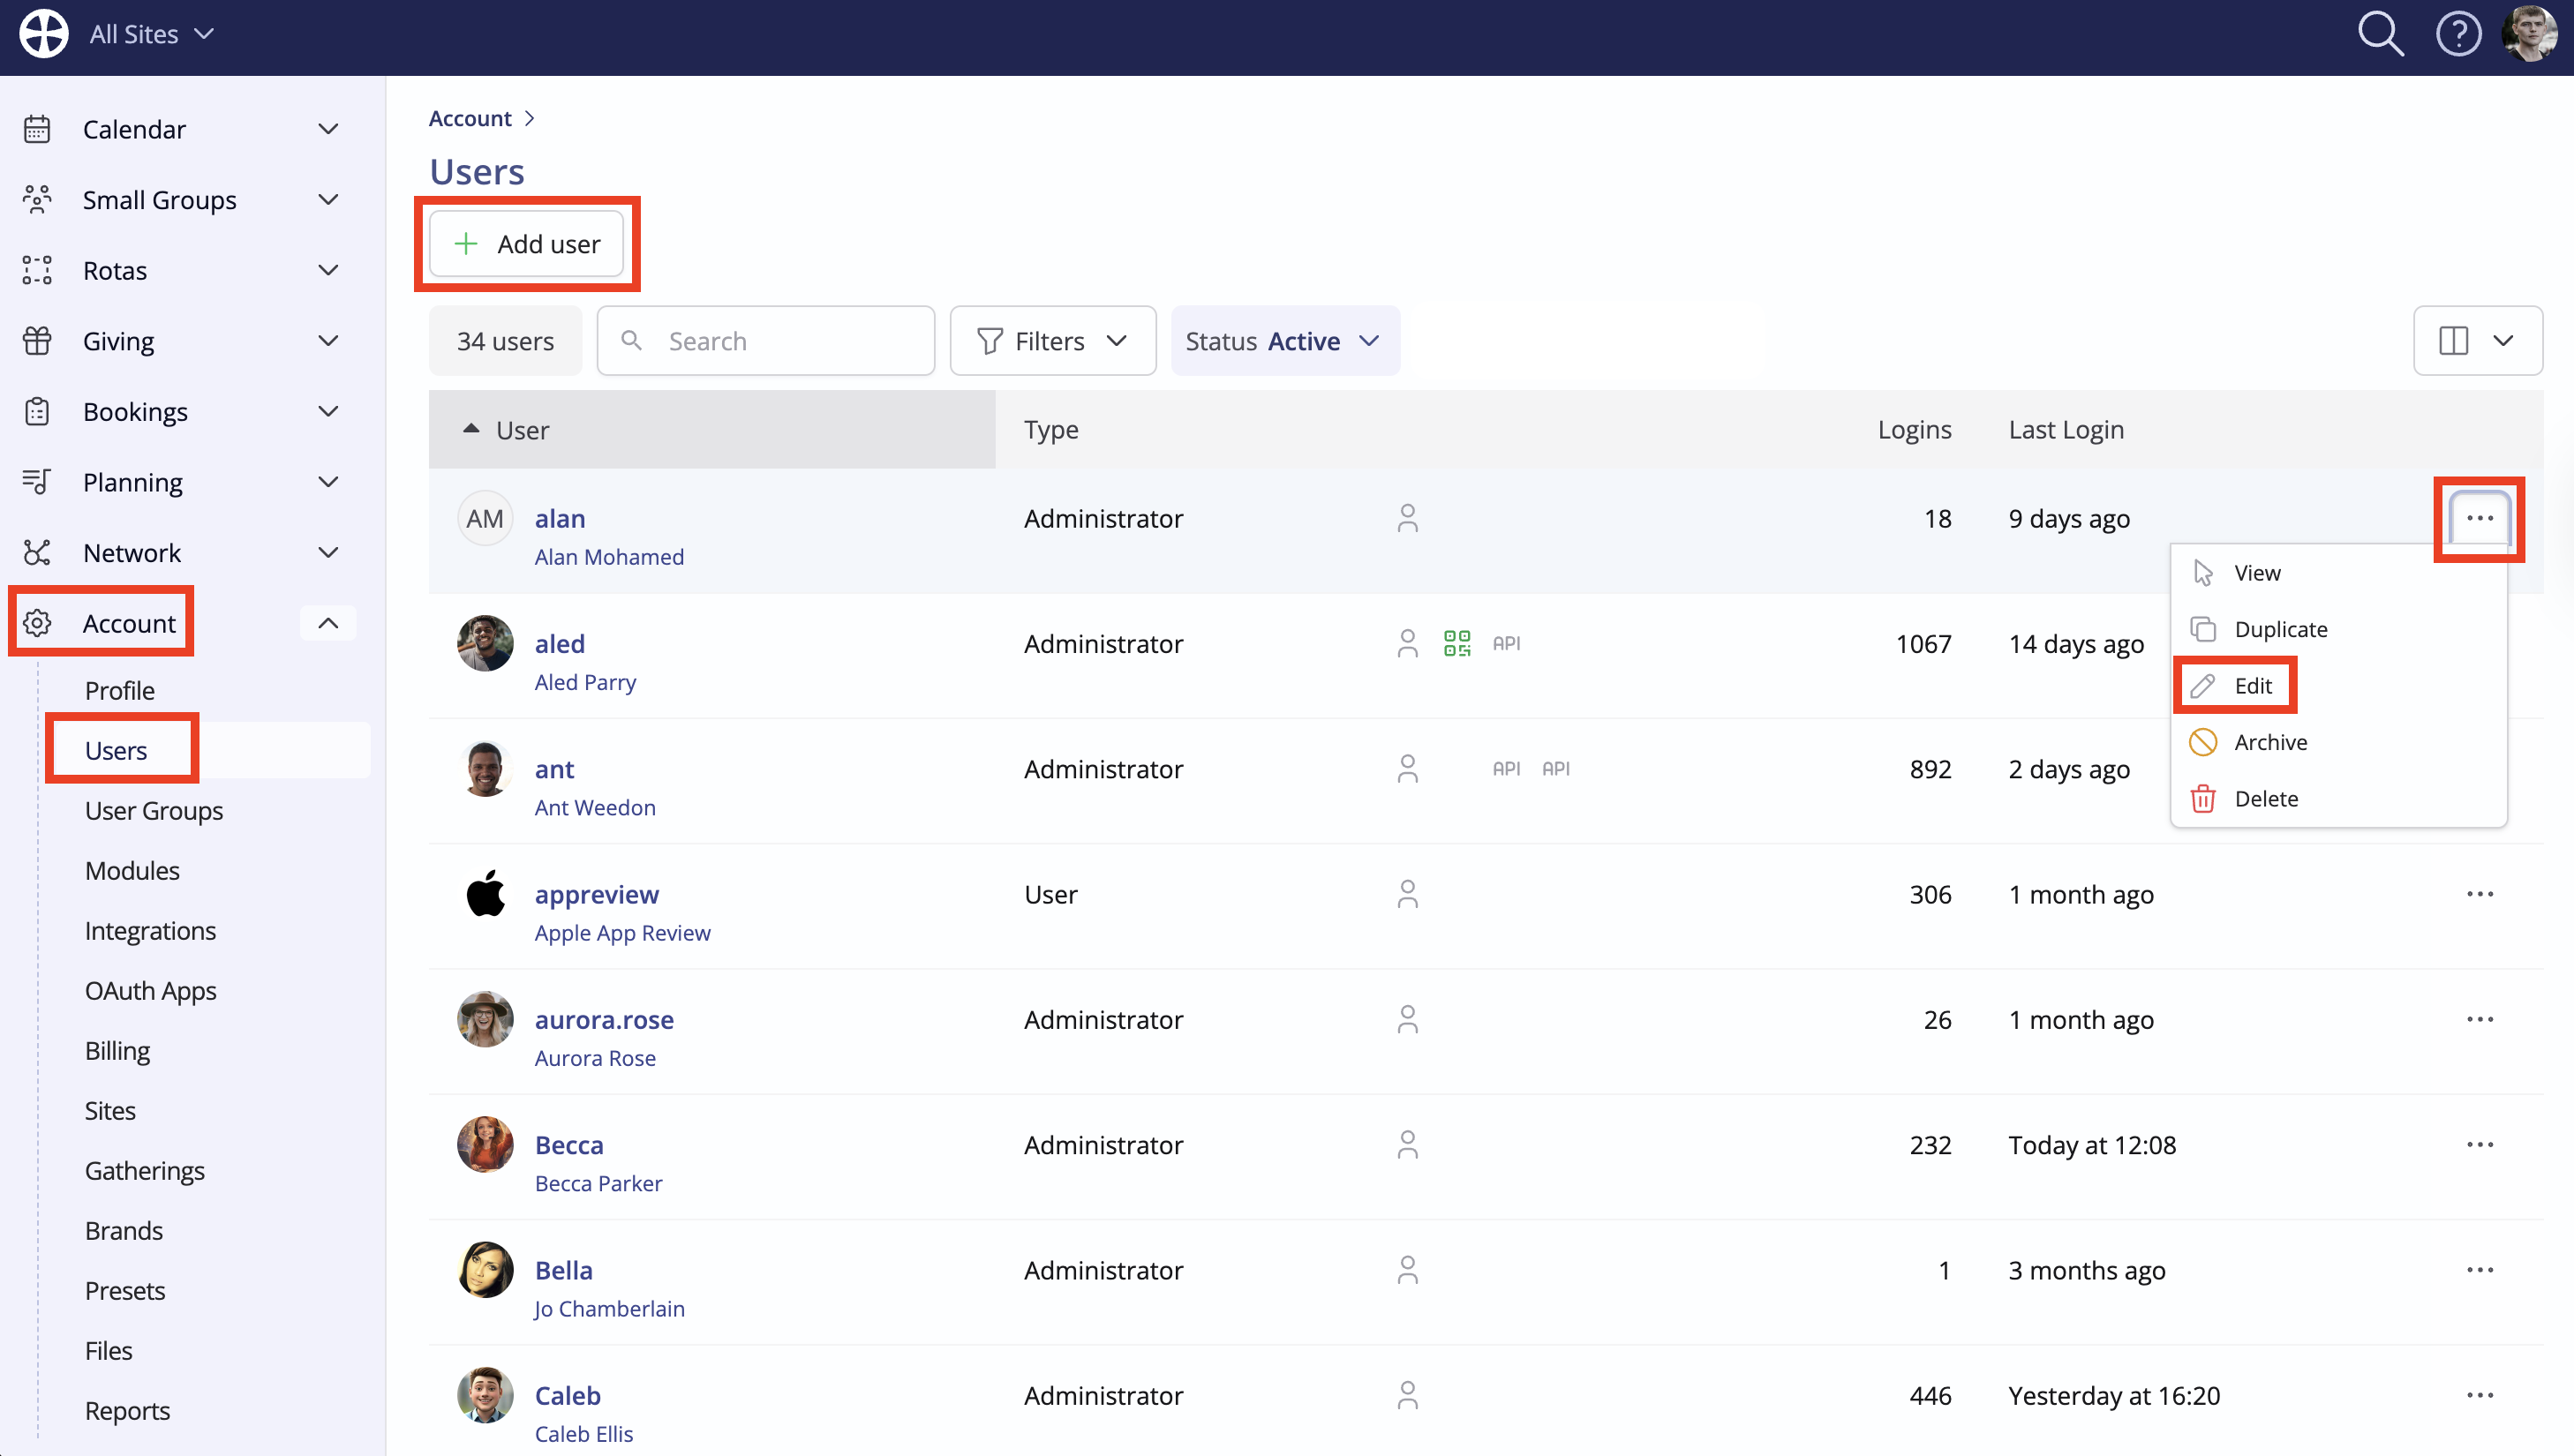
Access is granted on a user-by-user basis. Navigate to the Users section of your Account Settings. Click Add User, or click Edit to make changes to an existing User in the list:
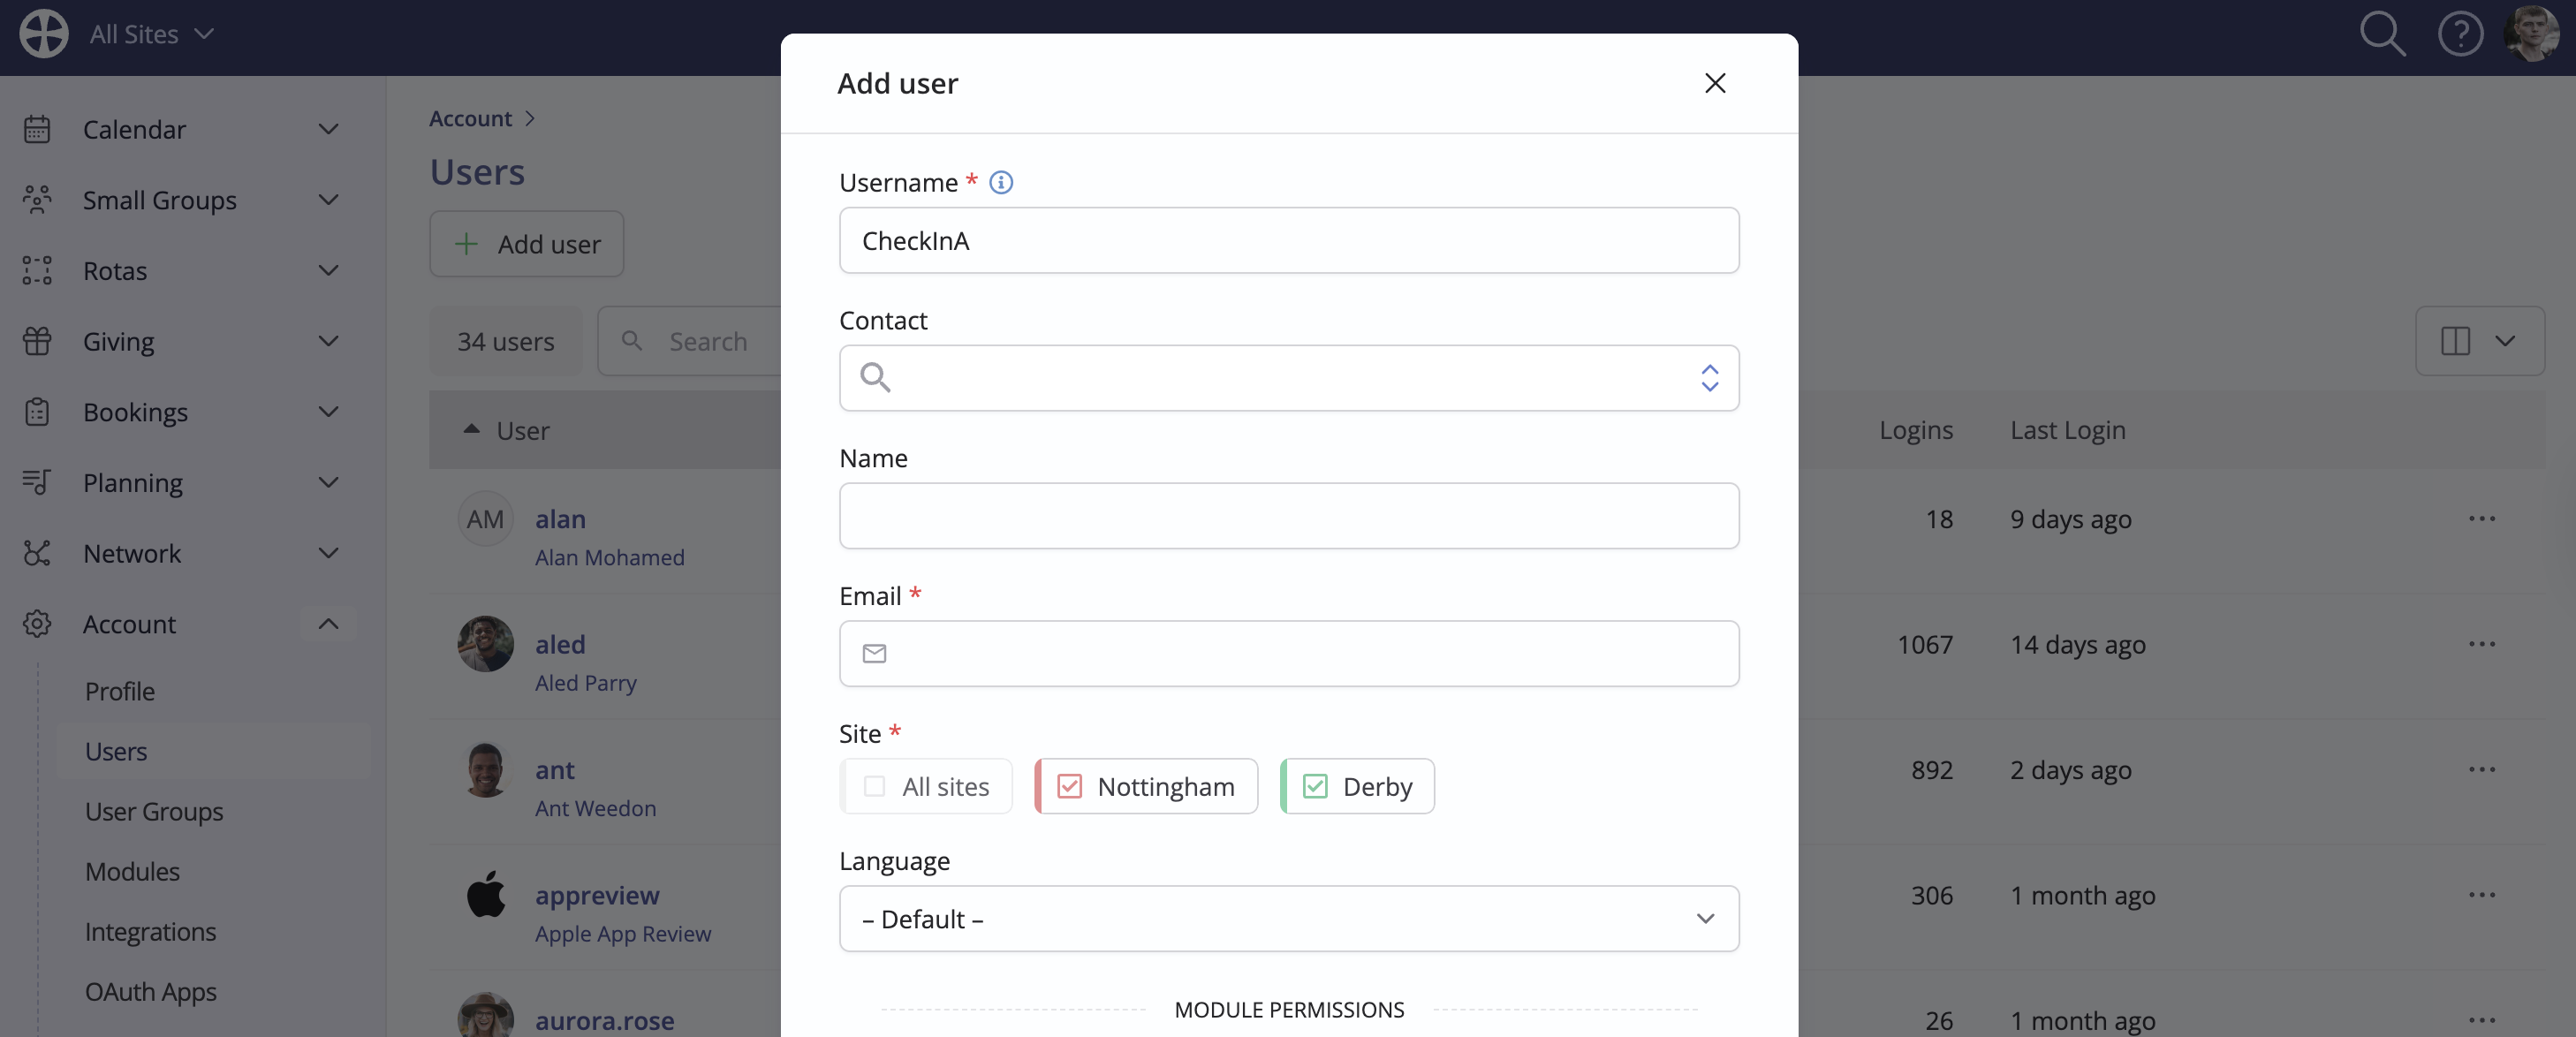
Specify a Username, Name and User Email address - perhaps an email address accessed by the children's team leader, so they can reset the password as required. For those using multi-site, select the permitted Sites. In the example below, this User can run Check-In sessions for 'Nottingham' groups only. In this way, you can create site-specific Check-In users.
Scrolling down the pop-up, note the Module Permissions section. No underlying module access is required to use the Check-In system. In this way, you can prevent module access entirely but grant granular access to the Check-In system only. Note the Check-In permissions available - permissions change from grey to blue when selected/enabled:
- Use - The User can join an active session for one of their permitted sites and fully use the Check-In system for that session. They can leave but not close a session, cannot edit a session and cannot start a new session.
- Add session - The User can leave, but not close or edit a session. They can add or start a new session.
- Close session - The User can leave and close a session, but they cannot add or start a new session, or edit a session.
- Edit session - The User can edit check-in settings during a session. They can leave but not close a session, and cannot start a new session.

Click to Save the changes. If selected, a new User Welcome Email will be sent to the Check-In User email address, which contains a registration link to set their password. The Username and Password are used to authenticate when logging into the iOS or Android ChurchSuite Check-In app or through a web browser. If Single Sign-On has been enabled for the Check-In User, click Continue with Google or Continue with Entra ID as applicable.

Top Tip! Dedicated Check-In User profiles?
Consider creating dedicated Check-In-only User profiles. You can create separate User profiles for each of your Check-In devices or each of your check-in team; or you may prefer to create a single Check-In User profile whose details are shared with all your check-in team, without any risk of those login details being used for broader access to your other modules. No module access is required for use of the Check-In system.