Creating forms
In this article
Introduction to forms
Adding a form
Adding form fields
Other form-building options
Managing forms
Sharing published forms
Adding forms to a website
Introduction to forms
Forms enable you to collect data for a wide range of purposes. Whether you're creating a questionnaire to solicit interest in volunteering, an internship application form or a parental consent form for a youth group trip, Forms provide the tools you need to collect responses.
You can create Forms in the Address Book and Children modules. Response data is collected through a form page. A public form page URL can be shared in your communications, on social media channels or linked to on your website. In addition to public forms, where anyone with the form page link can submit a response, you can also send private form invitations to a selected audience. A private form only accepts responses from invitees. And when response anonymity is needed, you can create anonymous forms, which keep the respondent's identity hidden from module users.
When building a form, you can smart link certain fields on the form to fields in your ChurchSuite modules. Smart-linked response data can be used to add a new person's profile or to update the existing data of the person to whom the response is linked. Imagine the following scenarios:
Lindsey is in your Address Book and has been sent an invitation for an 'Update your contact details' form. Lindsey's form opens with their existing smart-linked details pre-populated into the form. Lindsey uses the form to update their mobile number and email address. The church receives Lindsey's response, which shows that the smart-linked response data for their mobile and email is different from the details currently held by the church. A module user can selectively update Lindsey's existing contact details to match the latest details supplied on the form.
Luke hasn't yet formally connected with the church but, following a recent announcement, they have found your 'Join a team' public form on the website. The form opens empty, ready for Luke to complete it. The form contains smart-linked fields for name and basic contact details, meaning that when Luke's response is received, a module user can add him as a new contact to the Address Book; the personal details in your smart-linked form fields are used to populate Luke's new contact profile without requiring the user to manually re-key all the details.
Rather than showing every field on a form, you can provide respondents with a more personalised user experience using conditional visibility fields that are only revealed based on a response to another field on the form. For example, you can conditionally display different fields on the form based on a "Yes" or "No" response to a particular question.
You can also define form actions that run automatically (always or conditionally) for auto-linked responses or manually when a response is submitted. For example, assigning tags and key dates, adding notes, adding people to flows, sending preset communications or adding people to small groups and ministries.
Designated managers receive a notification when a response is received and module users can track form responses in a Form Response dashboard widget.
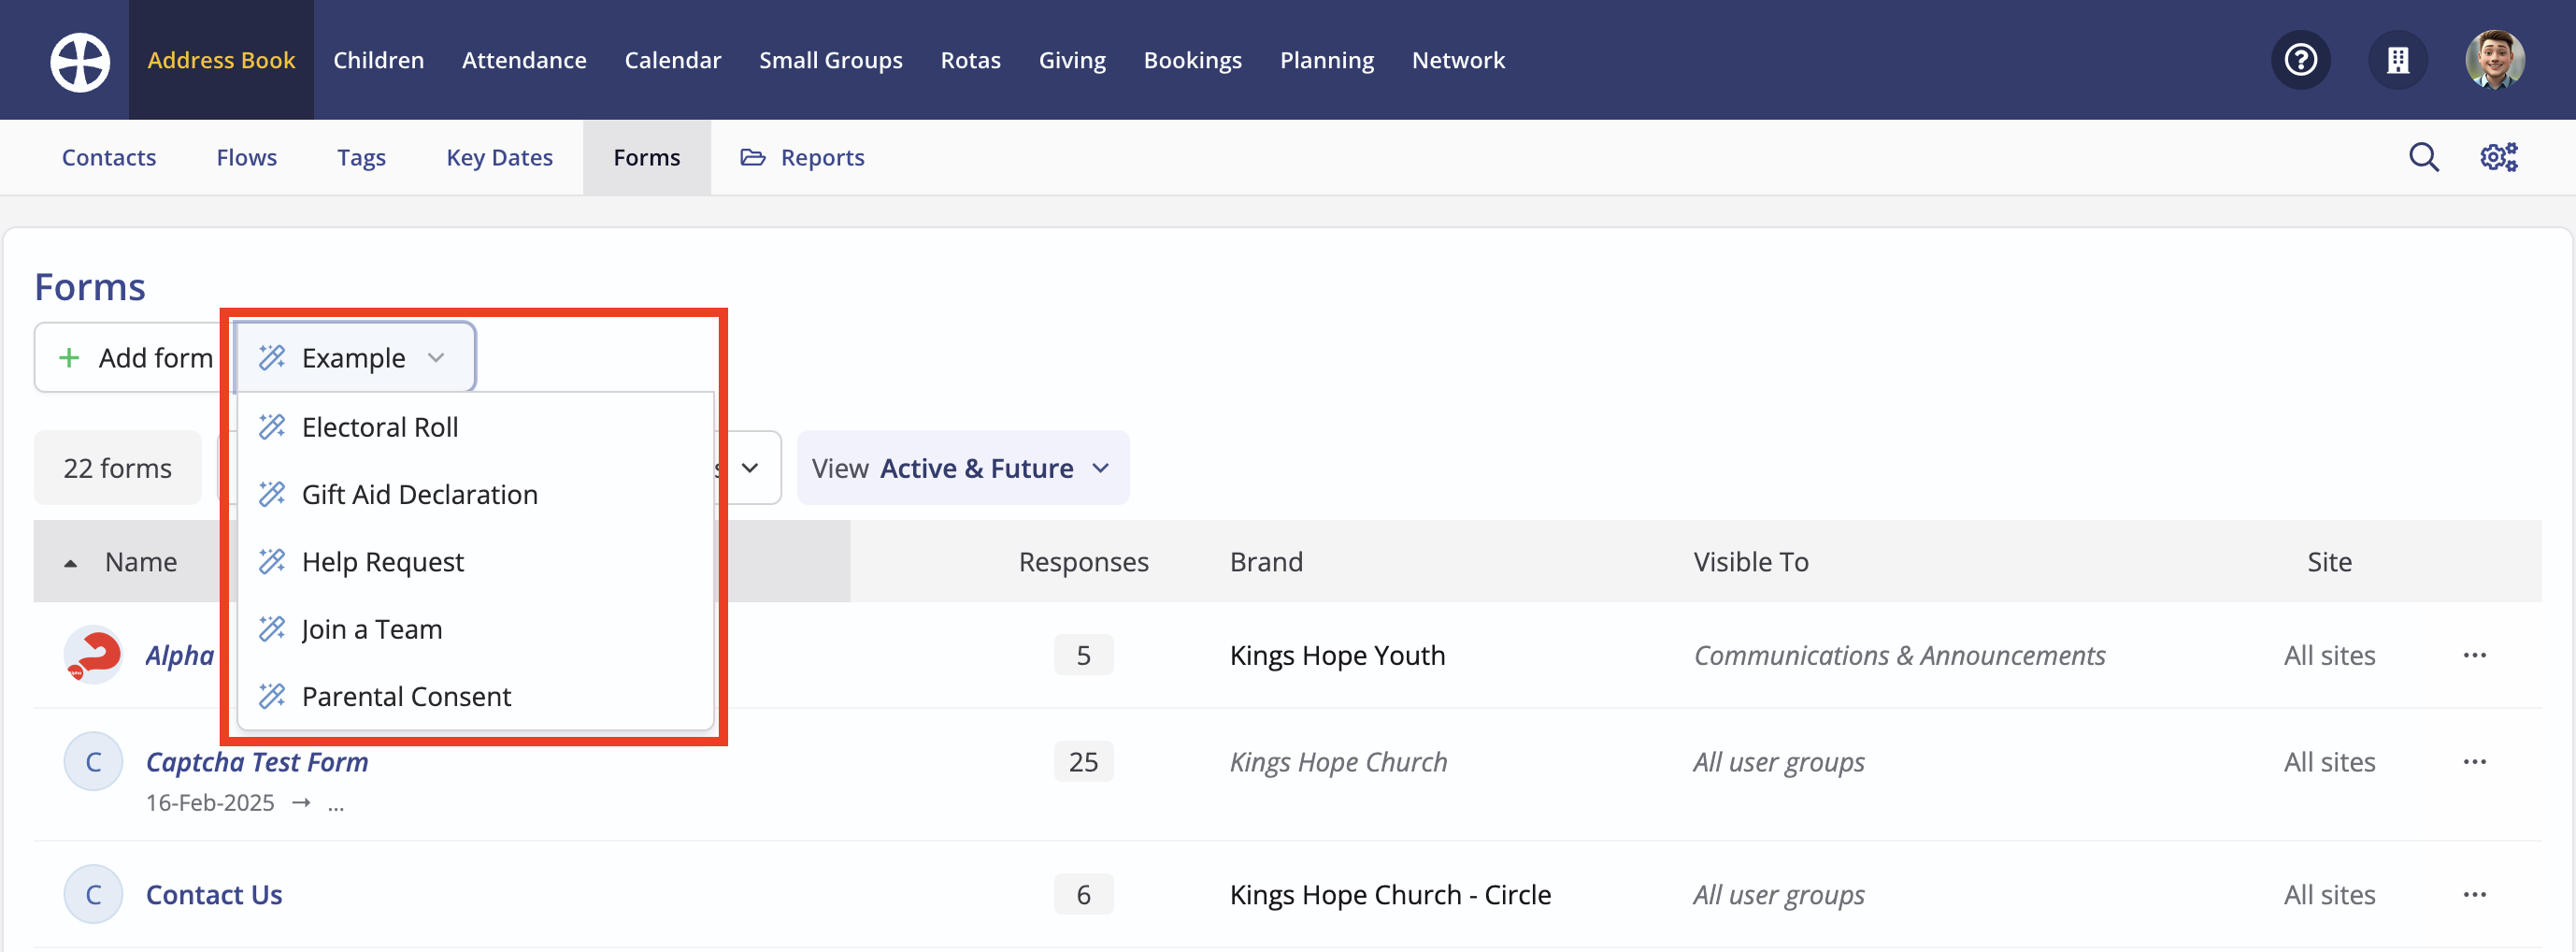
To help you get started, we've provided some Example forms that you can install in a module. These can be used as a starting point for further customisation or to help you visualise and become familiar with how forms work.
This article explains how to add a form and how to add fields and other elements to a form but note the related articles listed at the end of this article for further explanation about form actions, sending form invitations and managing form responses.
Adding a form
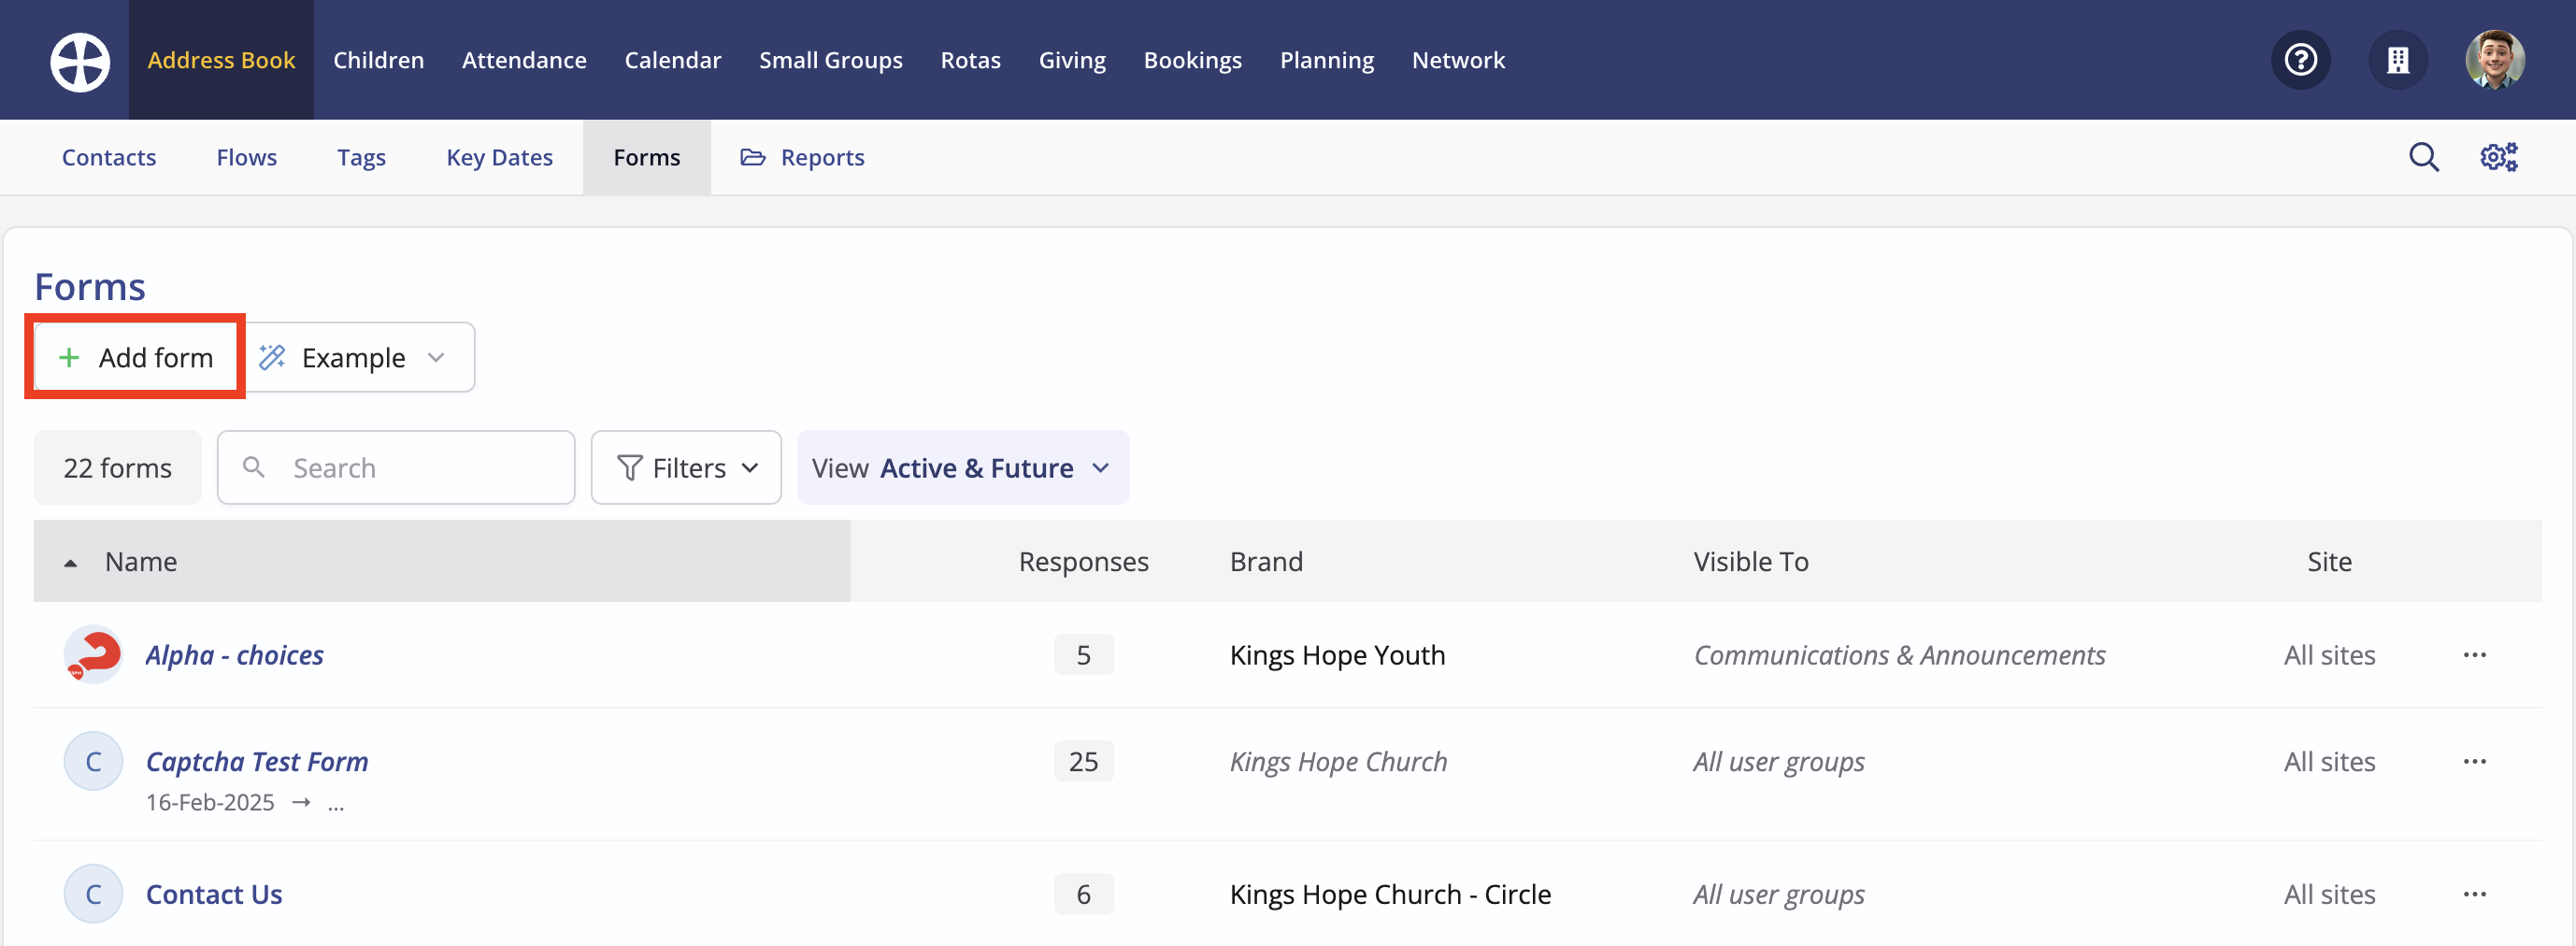
Navigate to the Forms section of the appropriate module - the Address Book, where a contact is the primary subject of a form response or the Children module, where a child is the primary subject of a form response. Forms for parents/carers are typically added in the Children module, allowing them to submit a form response for each of their children. This enables form responses to be linked to each child's respective profile. Click Add form.
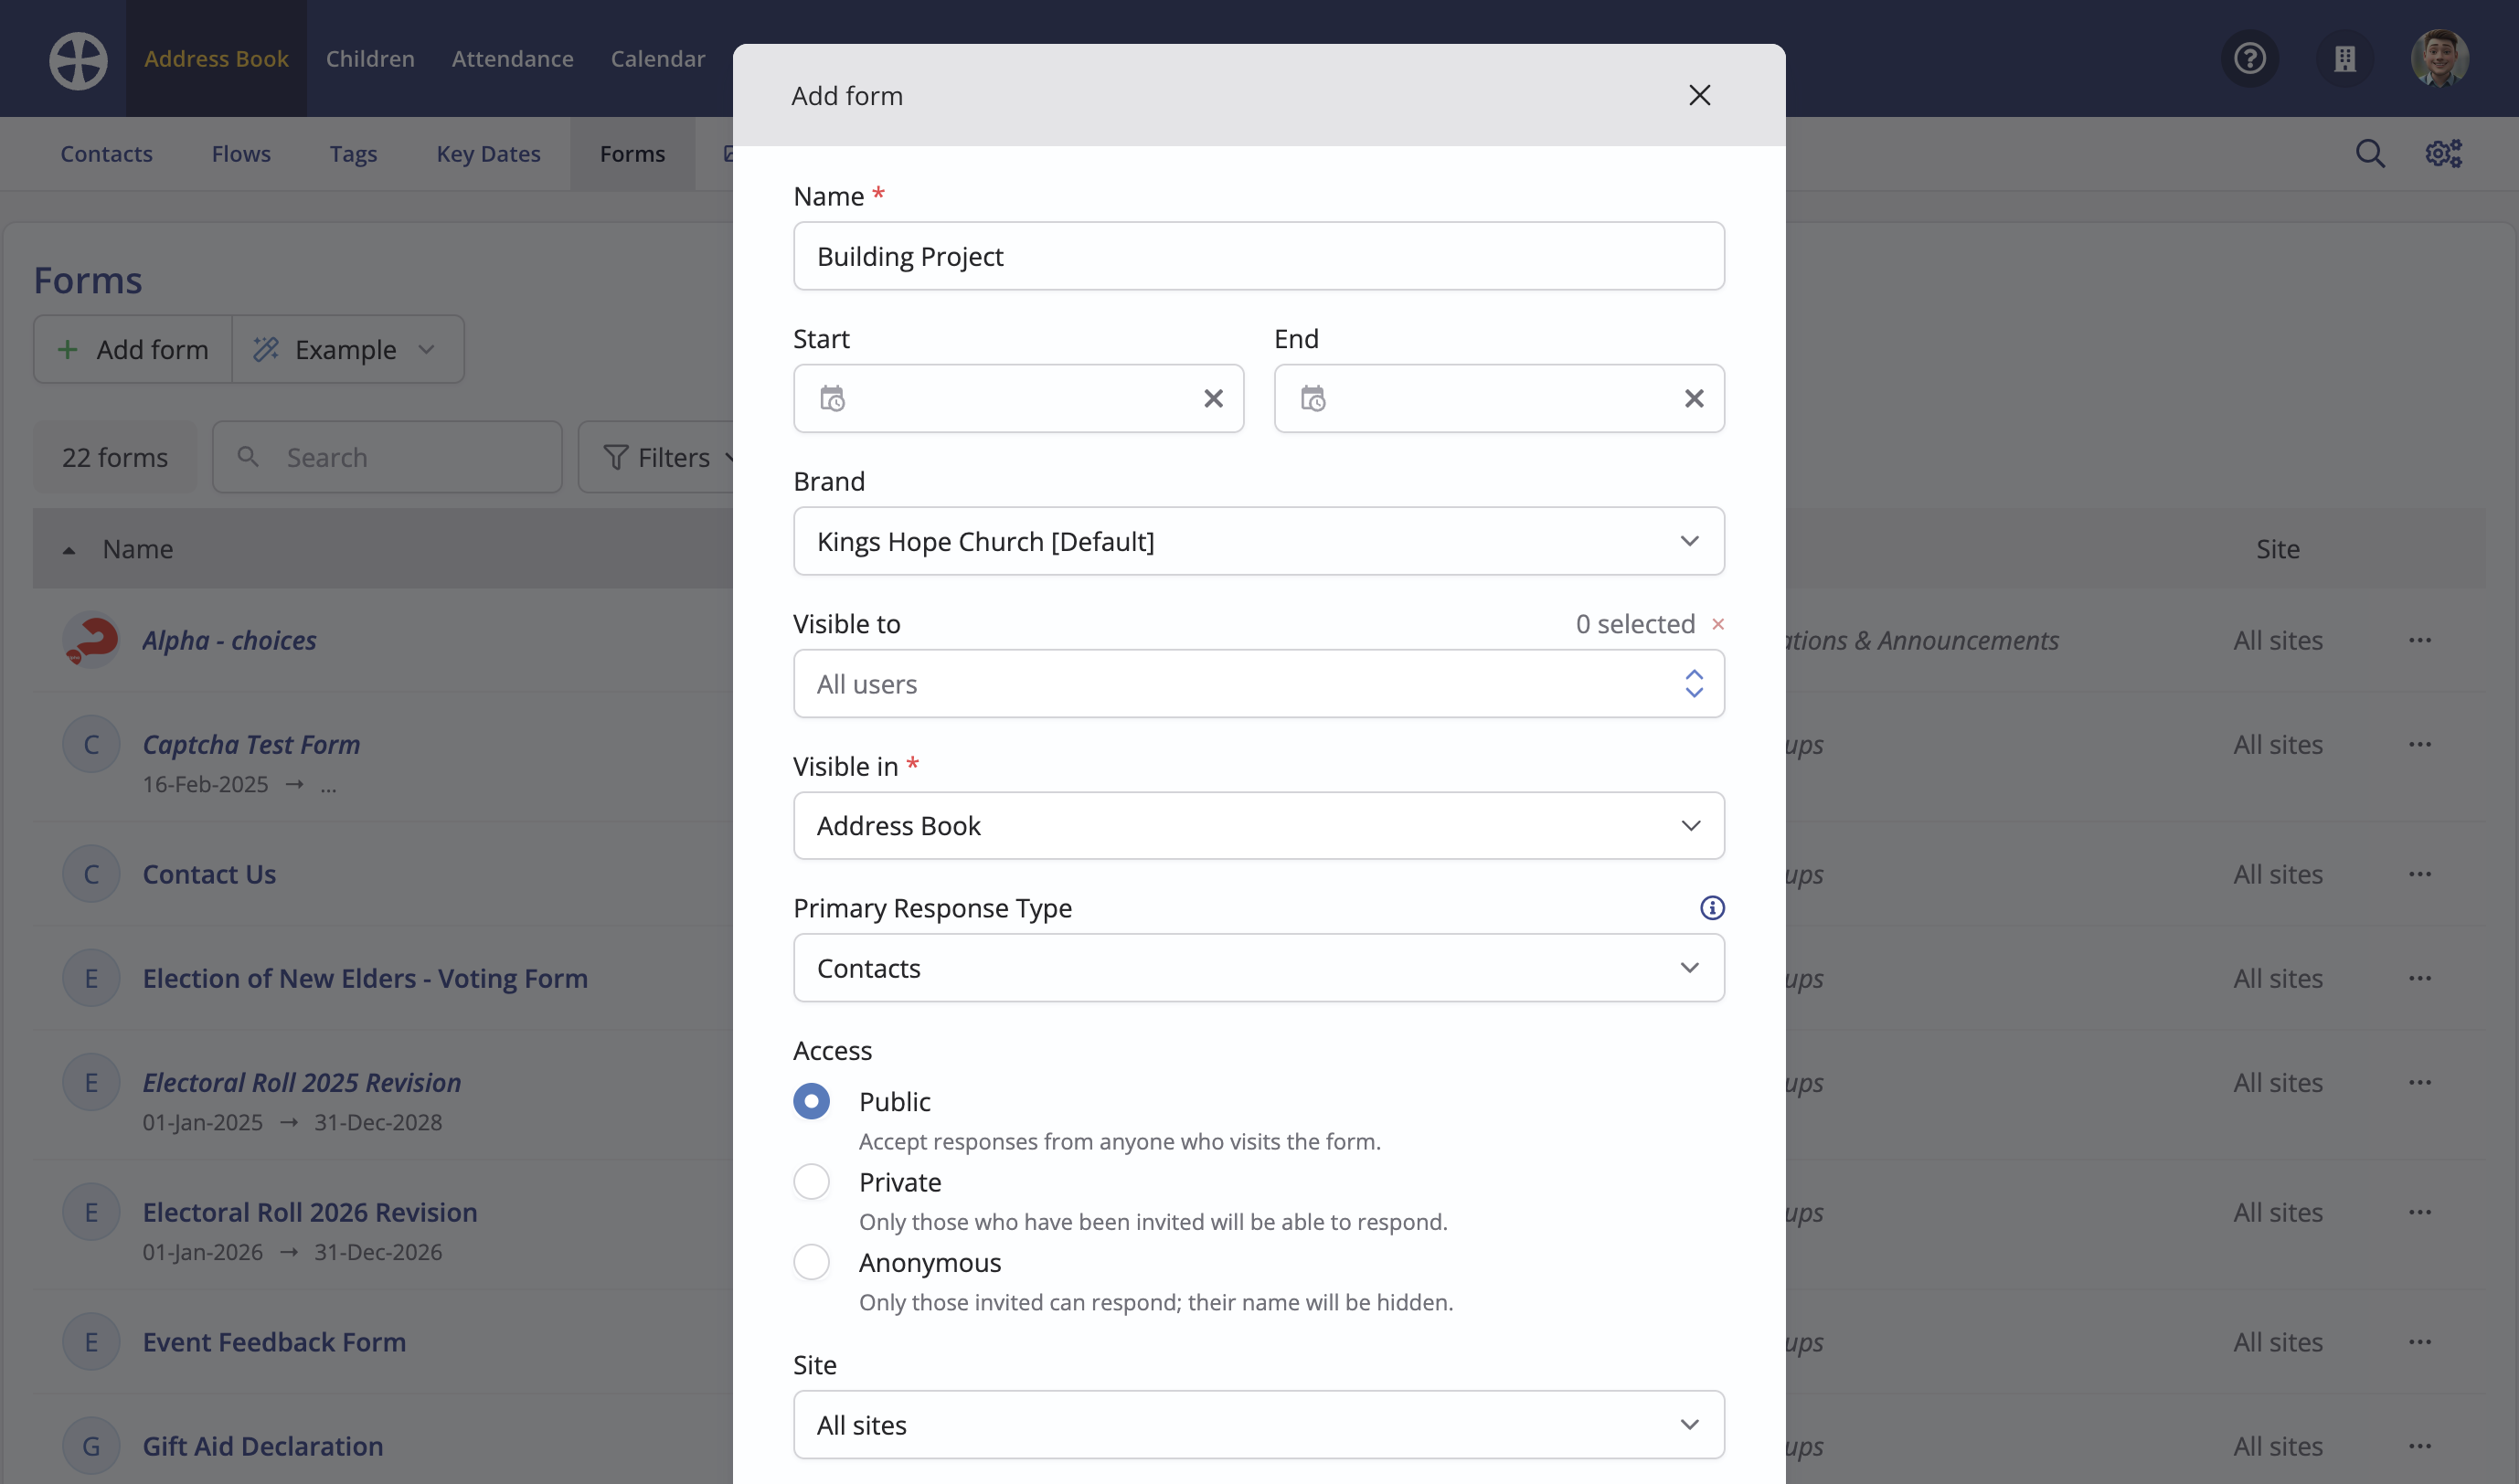
On the Add form pop-up, give the form a suitable Name, which is also shown on the form. Optionally specify Start and End dates within which responses are accepted. Optionally assign a custom Brand to the form - see the related support article on Using Brands. The form and its responses are visible to all module users but you can optionally restrict who the form and responses are Visible to. Choose which module/s the form is Visible in and the Primary Response Type, i.e. the primary subject of the form (explained below). If both contacts and children will respond, select "Visible in both modules" and set the primary response type to "People". Finally, choose the form Access (explained below). Multi-site customers can select a form Site, enabling users to have site-specific forms or "All sites" forms.
Choosing the right Access
Public forms accept responses from anyone who visits the form page. The public form page URL can be added to a website, shared via email communications and posted on social media channels. Responses can be linked to existing individuals in ChurchSuite. Responses with a definitive match are automatically linked and linking suggestions are provided for unlinked responses. You can also add new contacts and children for unmatched responses. Public forms are ideal where respondents may not yet exist in your ChurchSuite modules. Public forms also accept responses to form invitations.
Private forms only accept responses from individuals who have received a form invitation, i.e., those already in ChurchSuite. Where the form includes smart-linked fields (explained later), the invitee's existing smart-linked personal details are pre-populated into their form and differences in their response data can be used to update their existing data held in the system.
Anonymous forms only accept responses from individuals who have received a form invitation, i.e., those already in ChurchSuite. While the invite workflow allows you to stay on top of who has and hasn't responded, responses are anonymous. Anonymous forms are suitable for anonymous voting, surveys and questionnaires where the respondent's identity does not need to be known. Anonymous forms that have received responses cannot be later changed to make them Public or Private, thereby preserving the anonymity of responses already received.
Choosing the right Primary Response Type
The primary type of respondent to a form can be Contacts, Children or both (People). The primary response type determines:
- The smart-linked fields that are available when building the form
- The audience to whom form invitations can be sent
- The actions available to run when managing responses
- Whether non-invitation responses can be auto-linked where there is a definitive match
A Contacts Form must be visible in the Address Book module but it can also be visible in the Children module. Contact-specific fields, as well as generic 'person' fields, are available for smart linking. Only contacts can be invited to respond and responses can only be linked to contacts in the Address Book. Only new contacts, not children, can be added from an unlinked response. Responses are auto-linked to contacts where there is a definitive match on First Name, Last Name, Email and Mobile; otherwise, the response fails safe to "Unlinked" and can be linked manually.
A Children Form must be visible in the Children module but it can also be visible in the Address Book module. Child-specific fields, as well as generic 'person' fields, are available for smart linking. Only children can be invited to respond and responses can only be linked to those in the Children module. Only new children, not contacts, can be added from an unlinked response. Responses are auto-linked to children where there is a definitive match on First Name, Last Name, Email and Mobile; otherwise, the response fails safe to "Unlinked" and can be linked manually.
A People Form can be visible in the Address Book, Children module or both; however, contact and child-specific fields will not be available for smart linking, only generic person fields will be available. You can link responses to either a contact or a child or create a new contact or a new child. You can send invitations to contacts and children to invite them to complete the form. Non-invitation responses received from the use of the public form page URL are never auto-linked but can be manually linked to the appropriate person in the Address Book or Children module.
Once a form has been published and depending on the fields on the form, you will be unable to change the form's Primary Response Type once invites are sent or responses have been linked. For example, for a form with a primary response type of Contacts that contains a smart-linked contact Marital Status field, you will be unable to change the Primary Response Type to Children. Similarly, for a form whose Primary Response Type is set to People and has invitations previously sent for Children, you cannot change the Primary Response Type to Contacts.
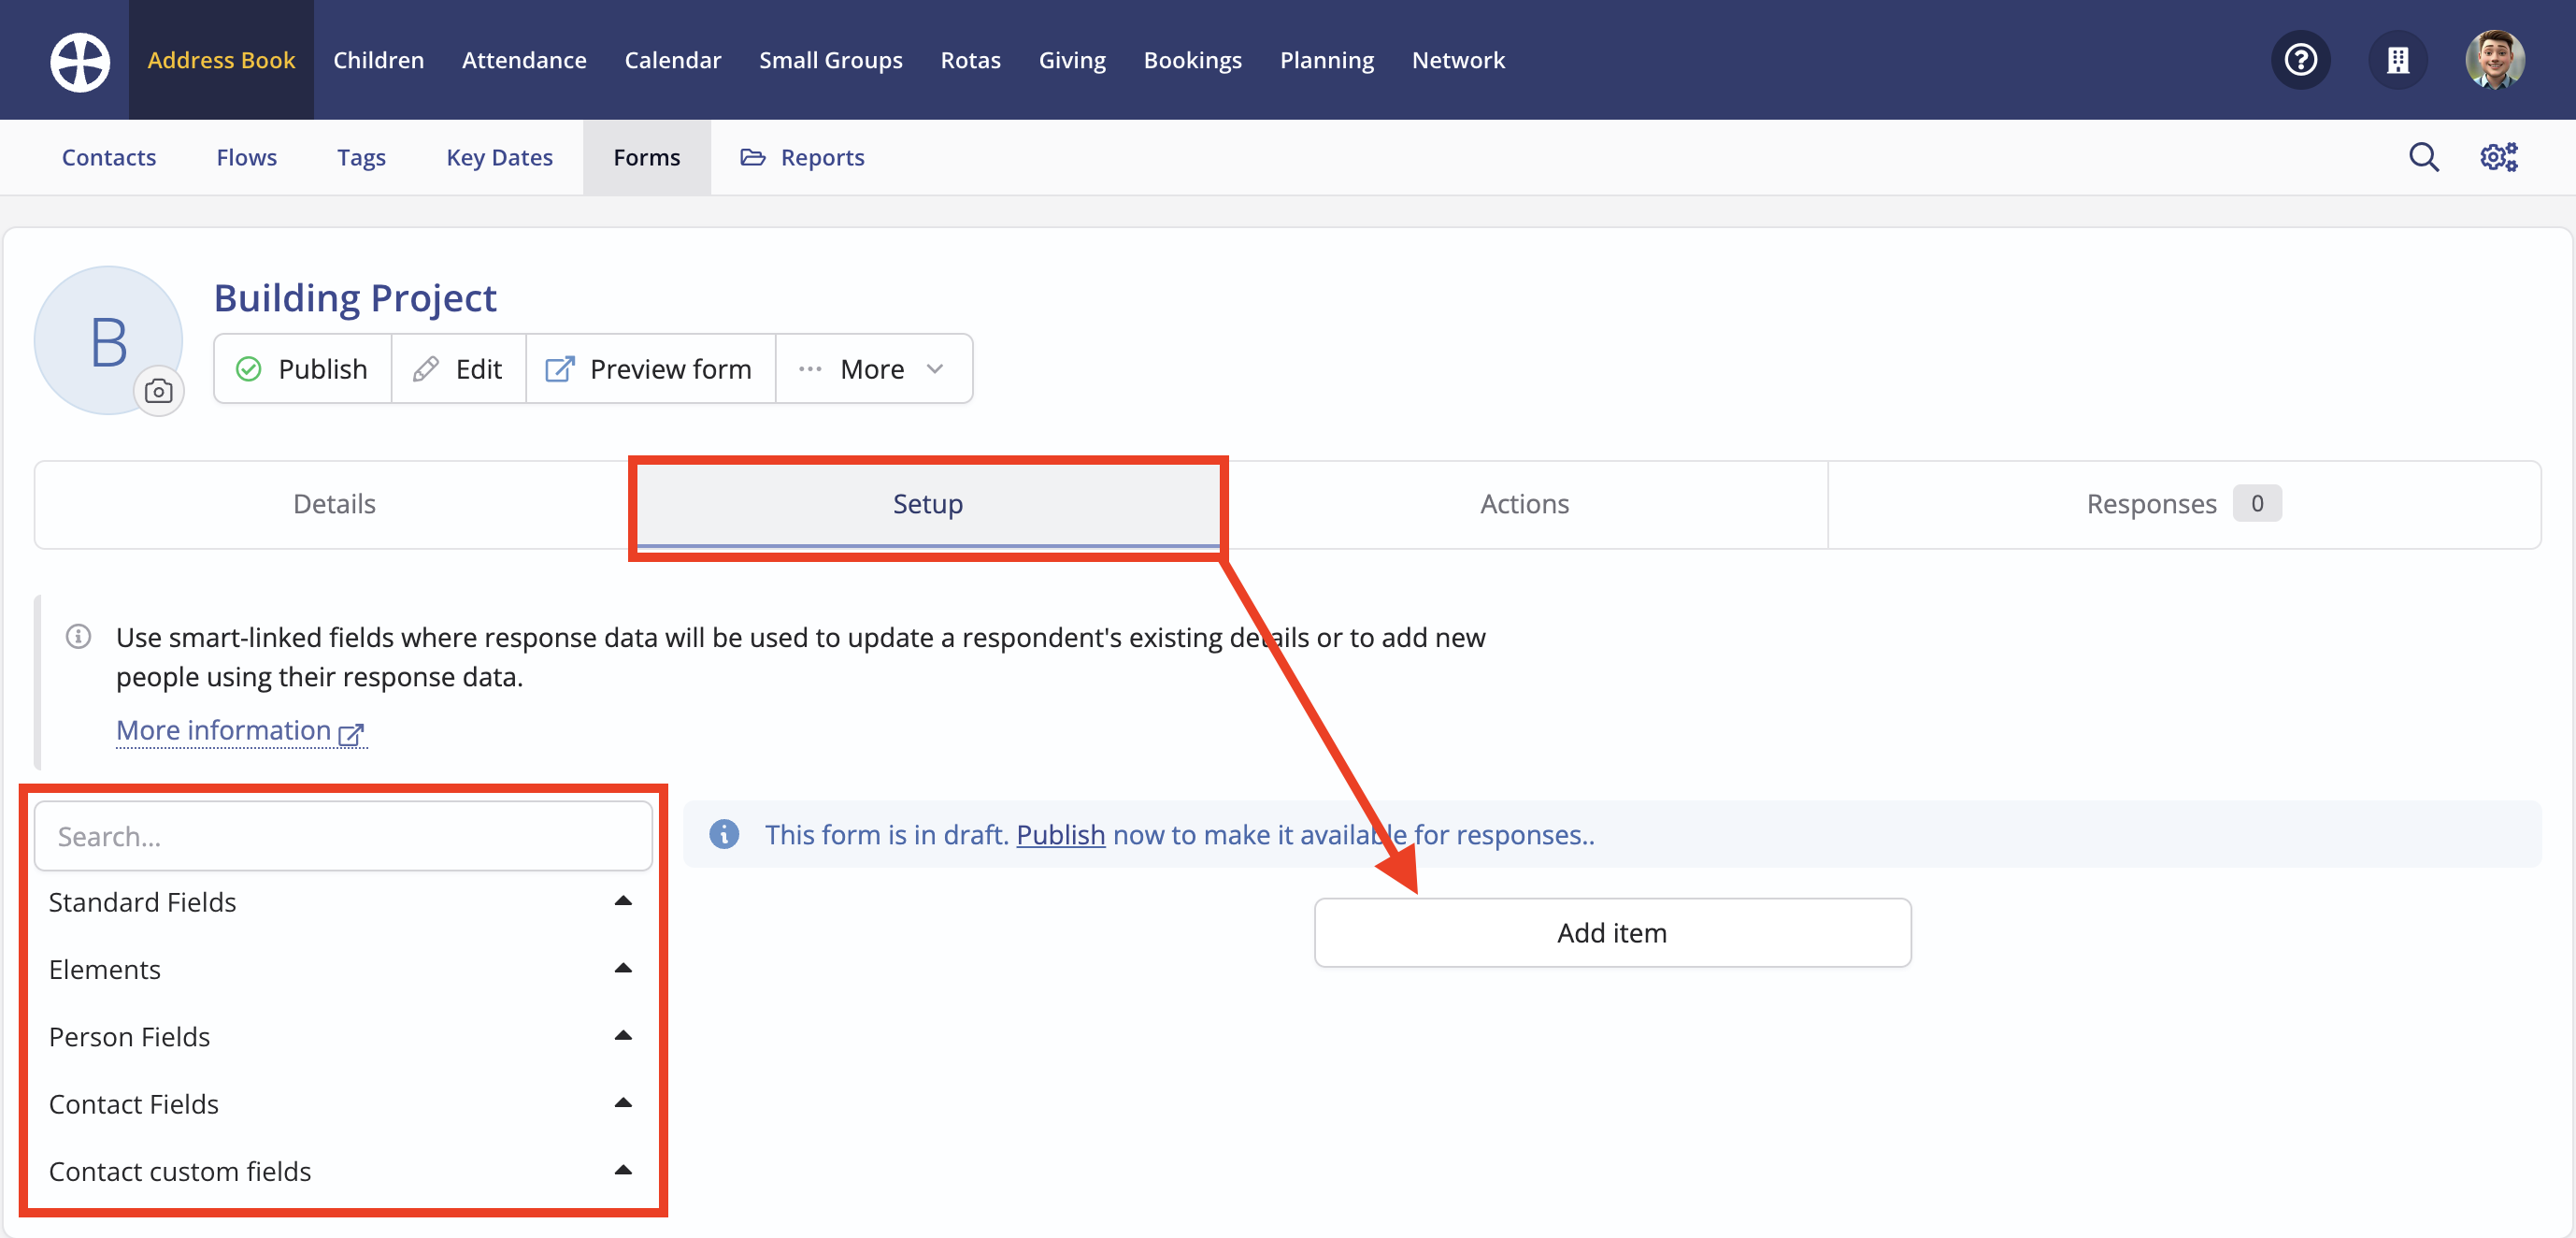
Click Save to create the new form. You can now begin adding response fields and other items (see next section). The form is added with a Draft status. Once published, you can start accepting responses (see later).

Adding form fields
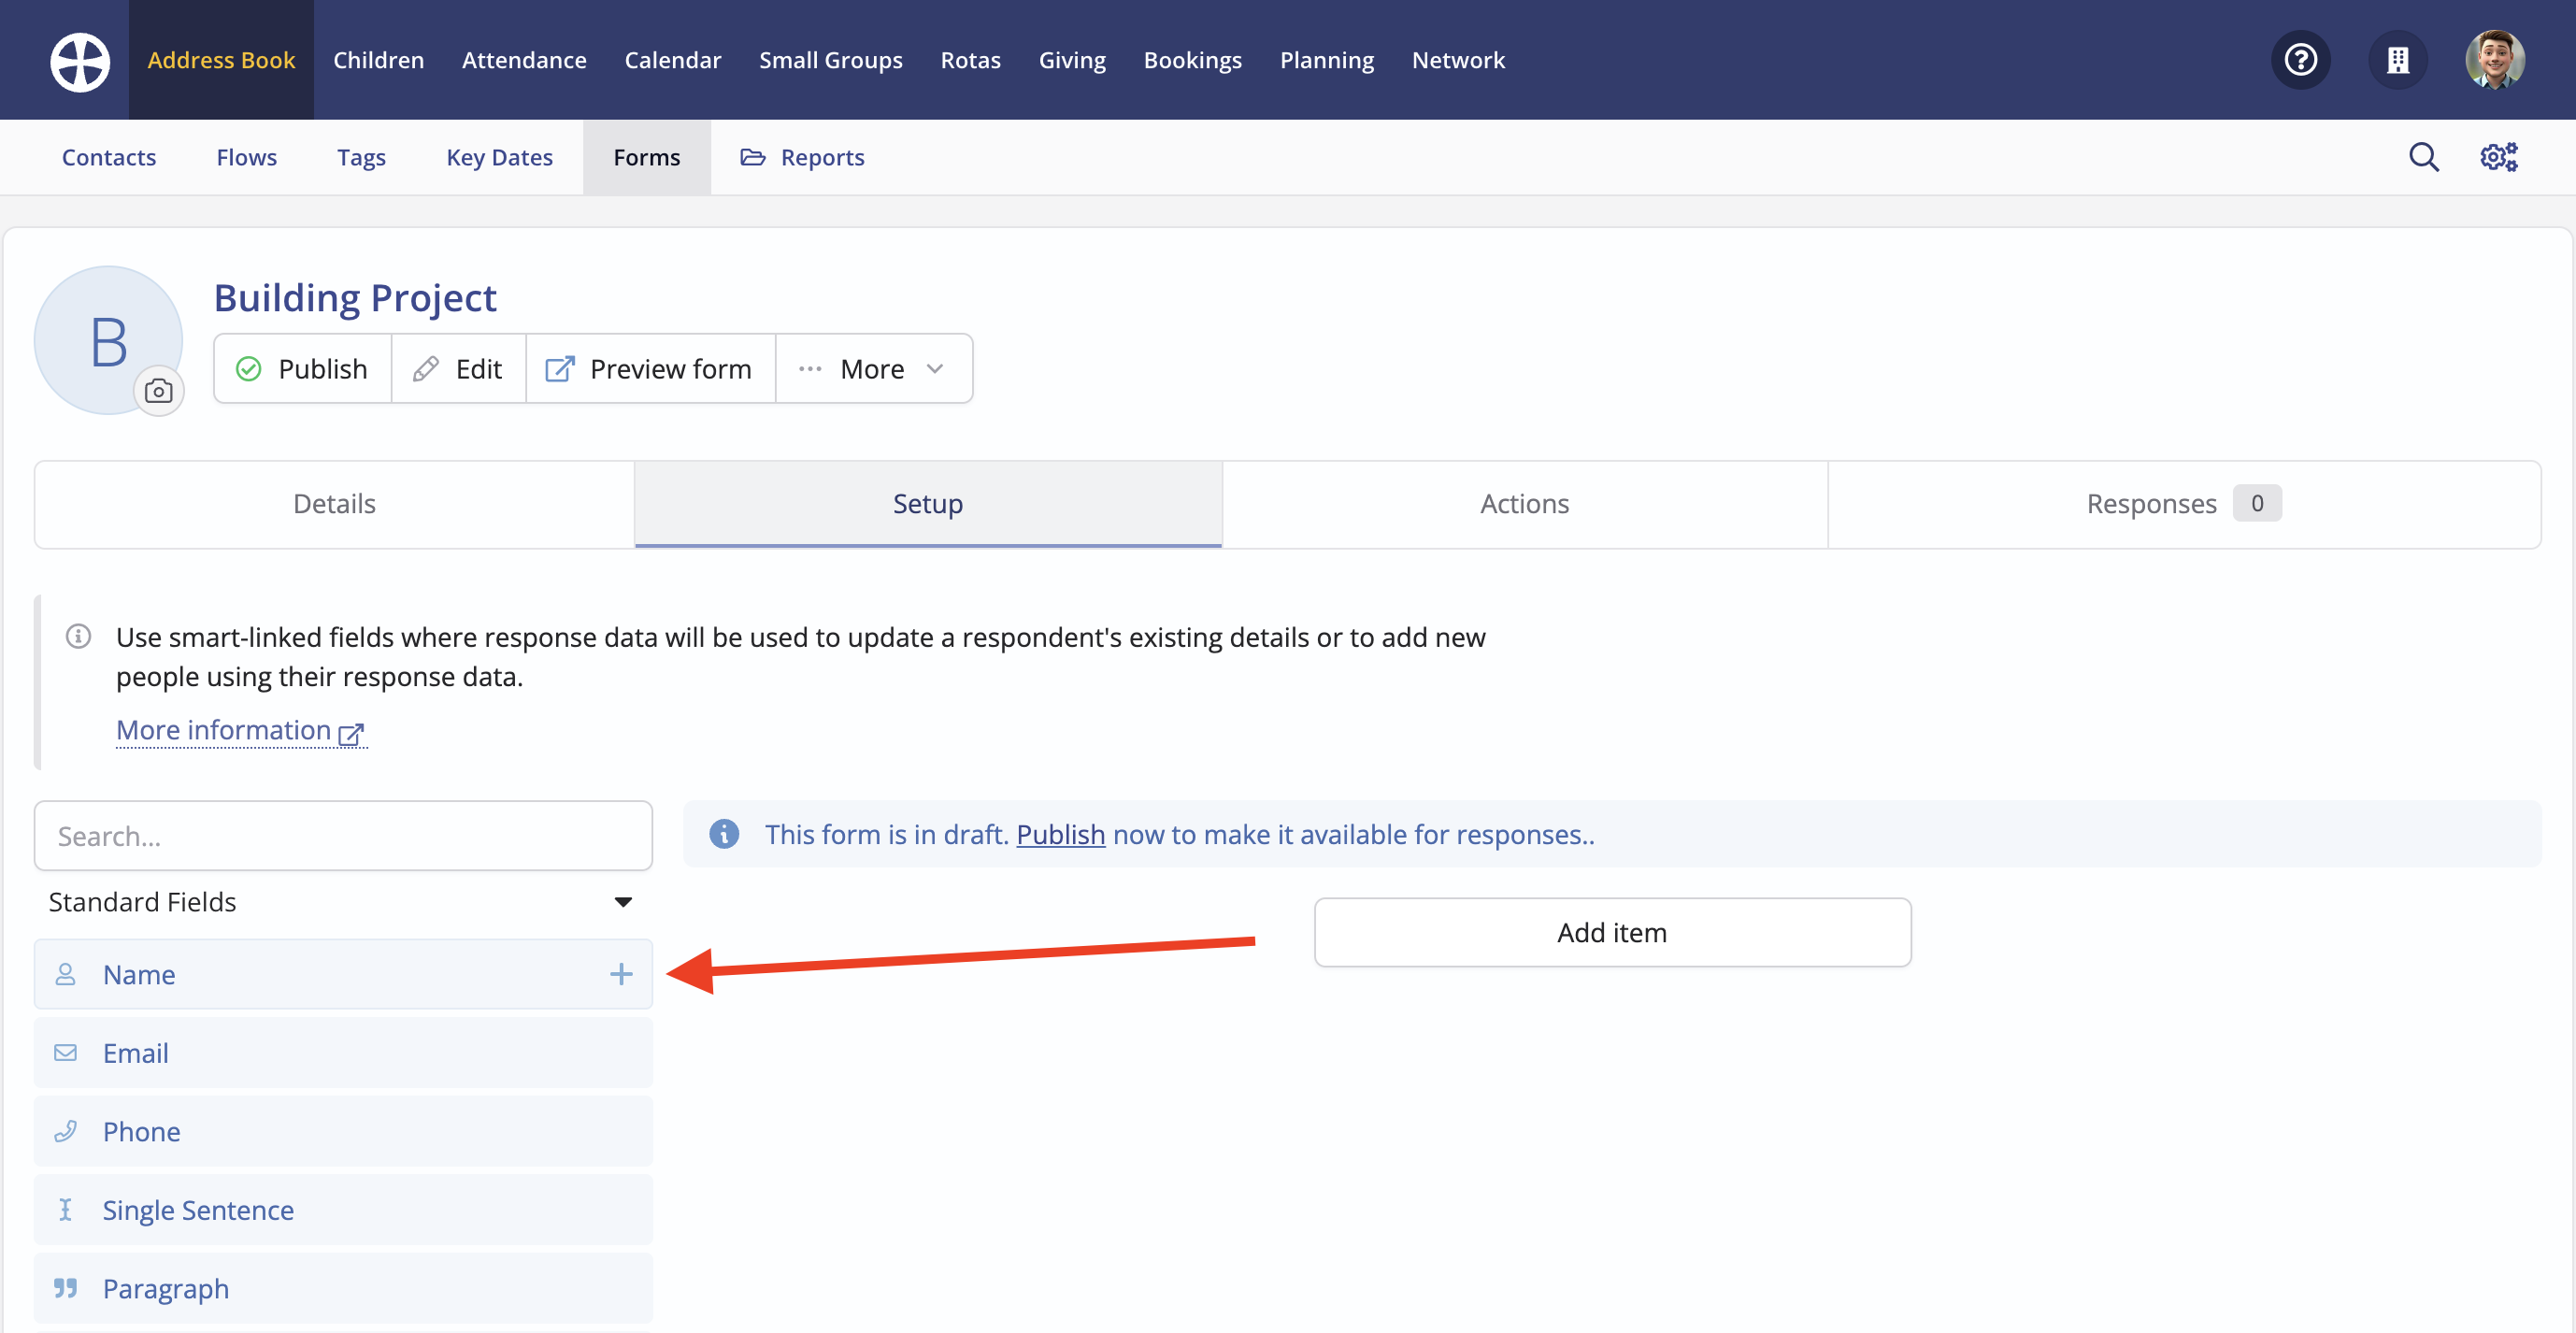
Working from the Setup tab, you can begin to add fields and other elements to the form and order them. There is a wide range of Standard Fields and form Elements to choose from. While Contact Fields and Contact custom fields are unique to Address Book contacts and Child Fields and Child custom fields are unique to children, some Person Fields are common to both contacts and children. The Search feature provides field suggestions as you type or you can click Add item and select from a curated list of items.
You can also build your form by adding items in the following ways:
- Clicking an item's + icon, which appears when hovering over the item, will add it to the end of the form.
- Dragging an item from the list on the left allows you to position it between existing items.
You can customise each added item - the options available depend on the field type. Let's explore some examples:
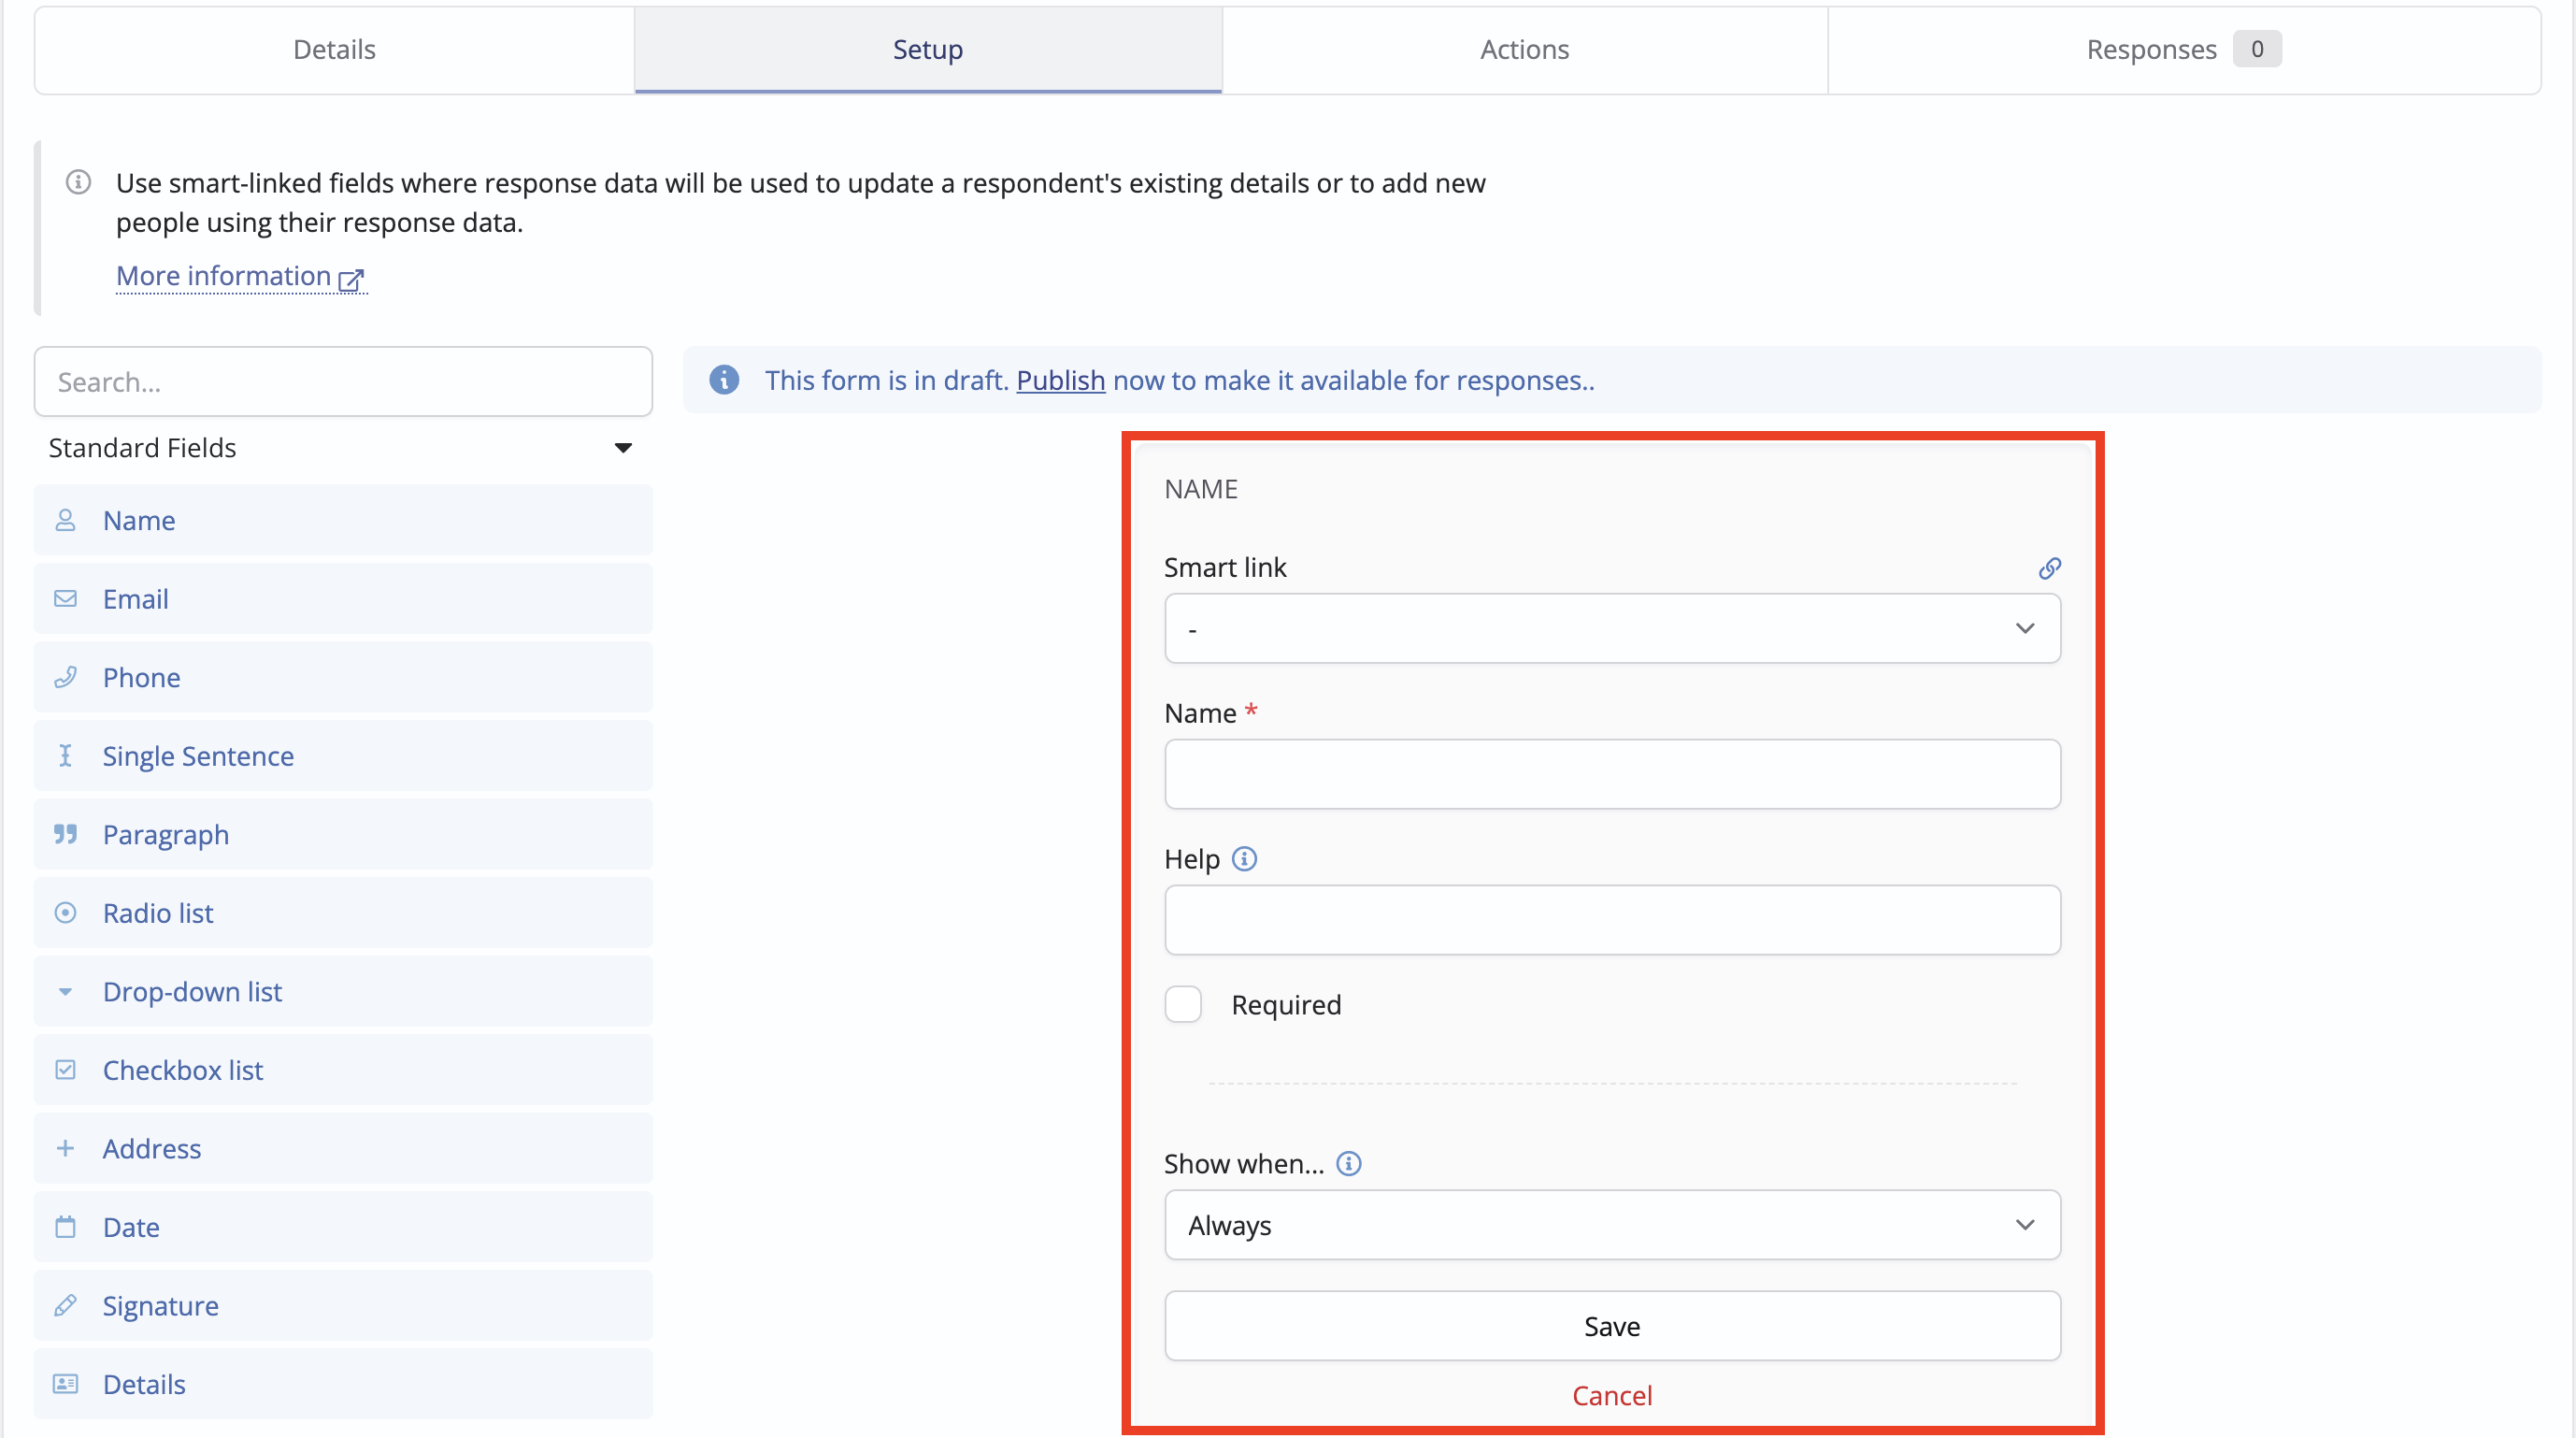
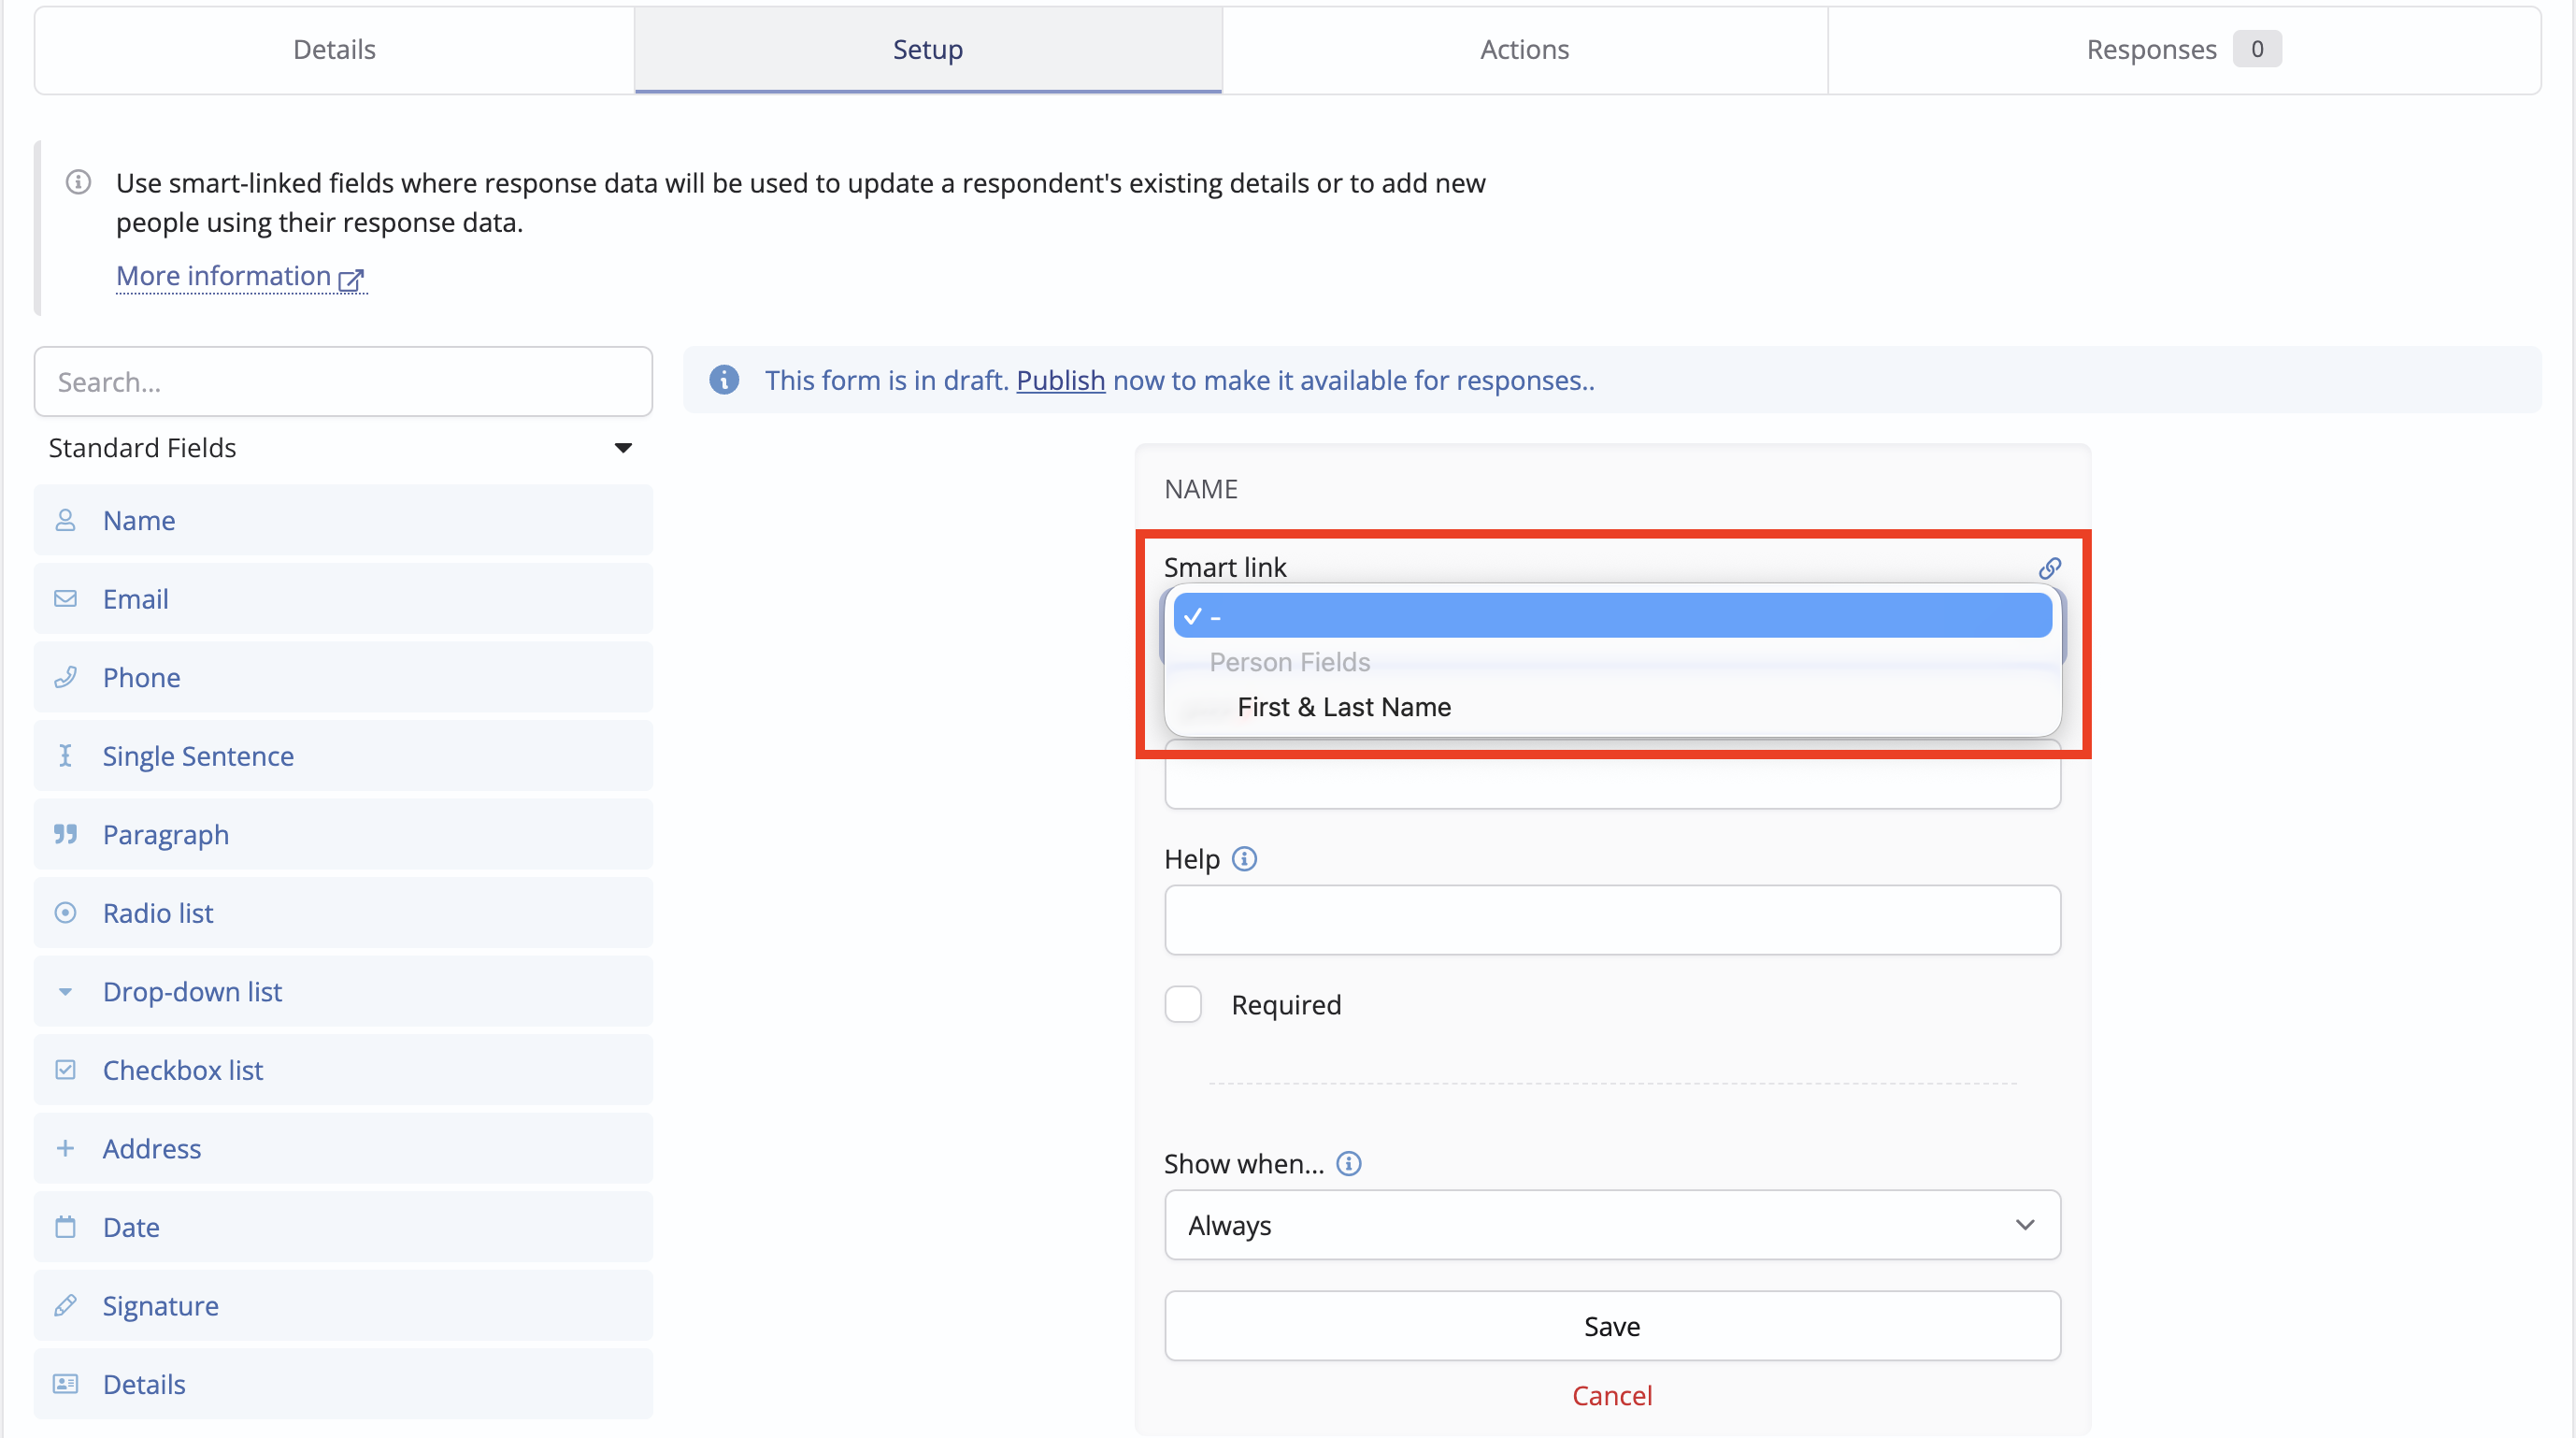
In this first example, a Name field from the Standard fields, you can Smart link the field on your form to a specific field in ChurchSuite, enabling you to map data from the form to a particular field in the module. This is desirable for sending form invitations or when you need to update a person's existing data based on a form response. Smart-link suggestions depend on the field and module in which you are working.
Top Tip - Smart Links
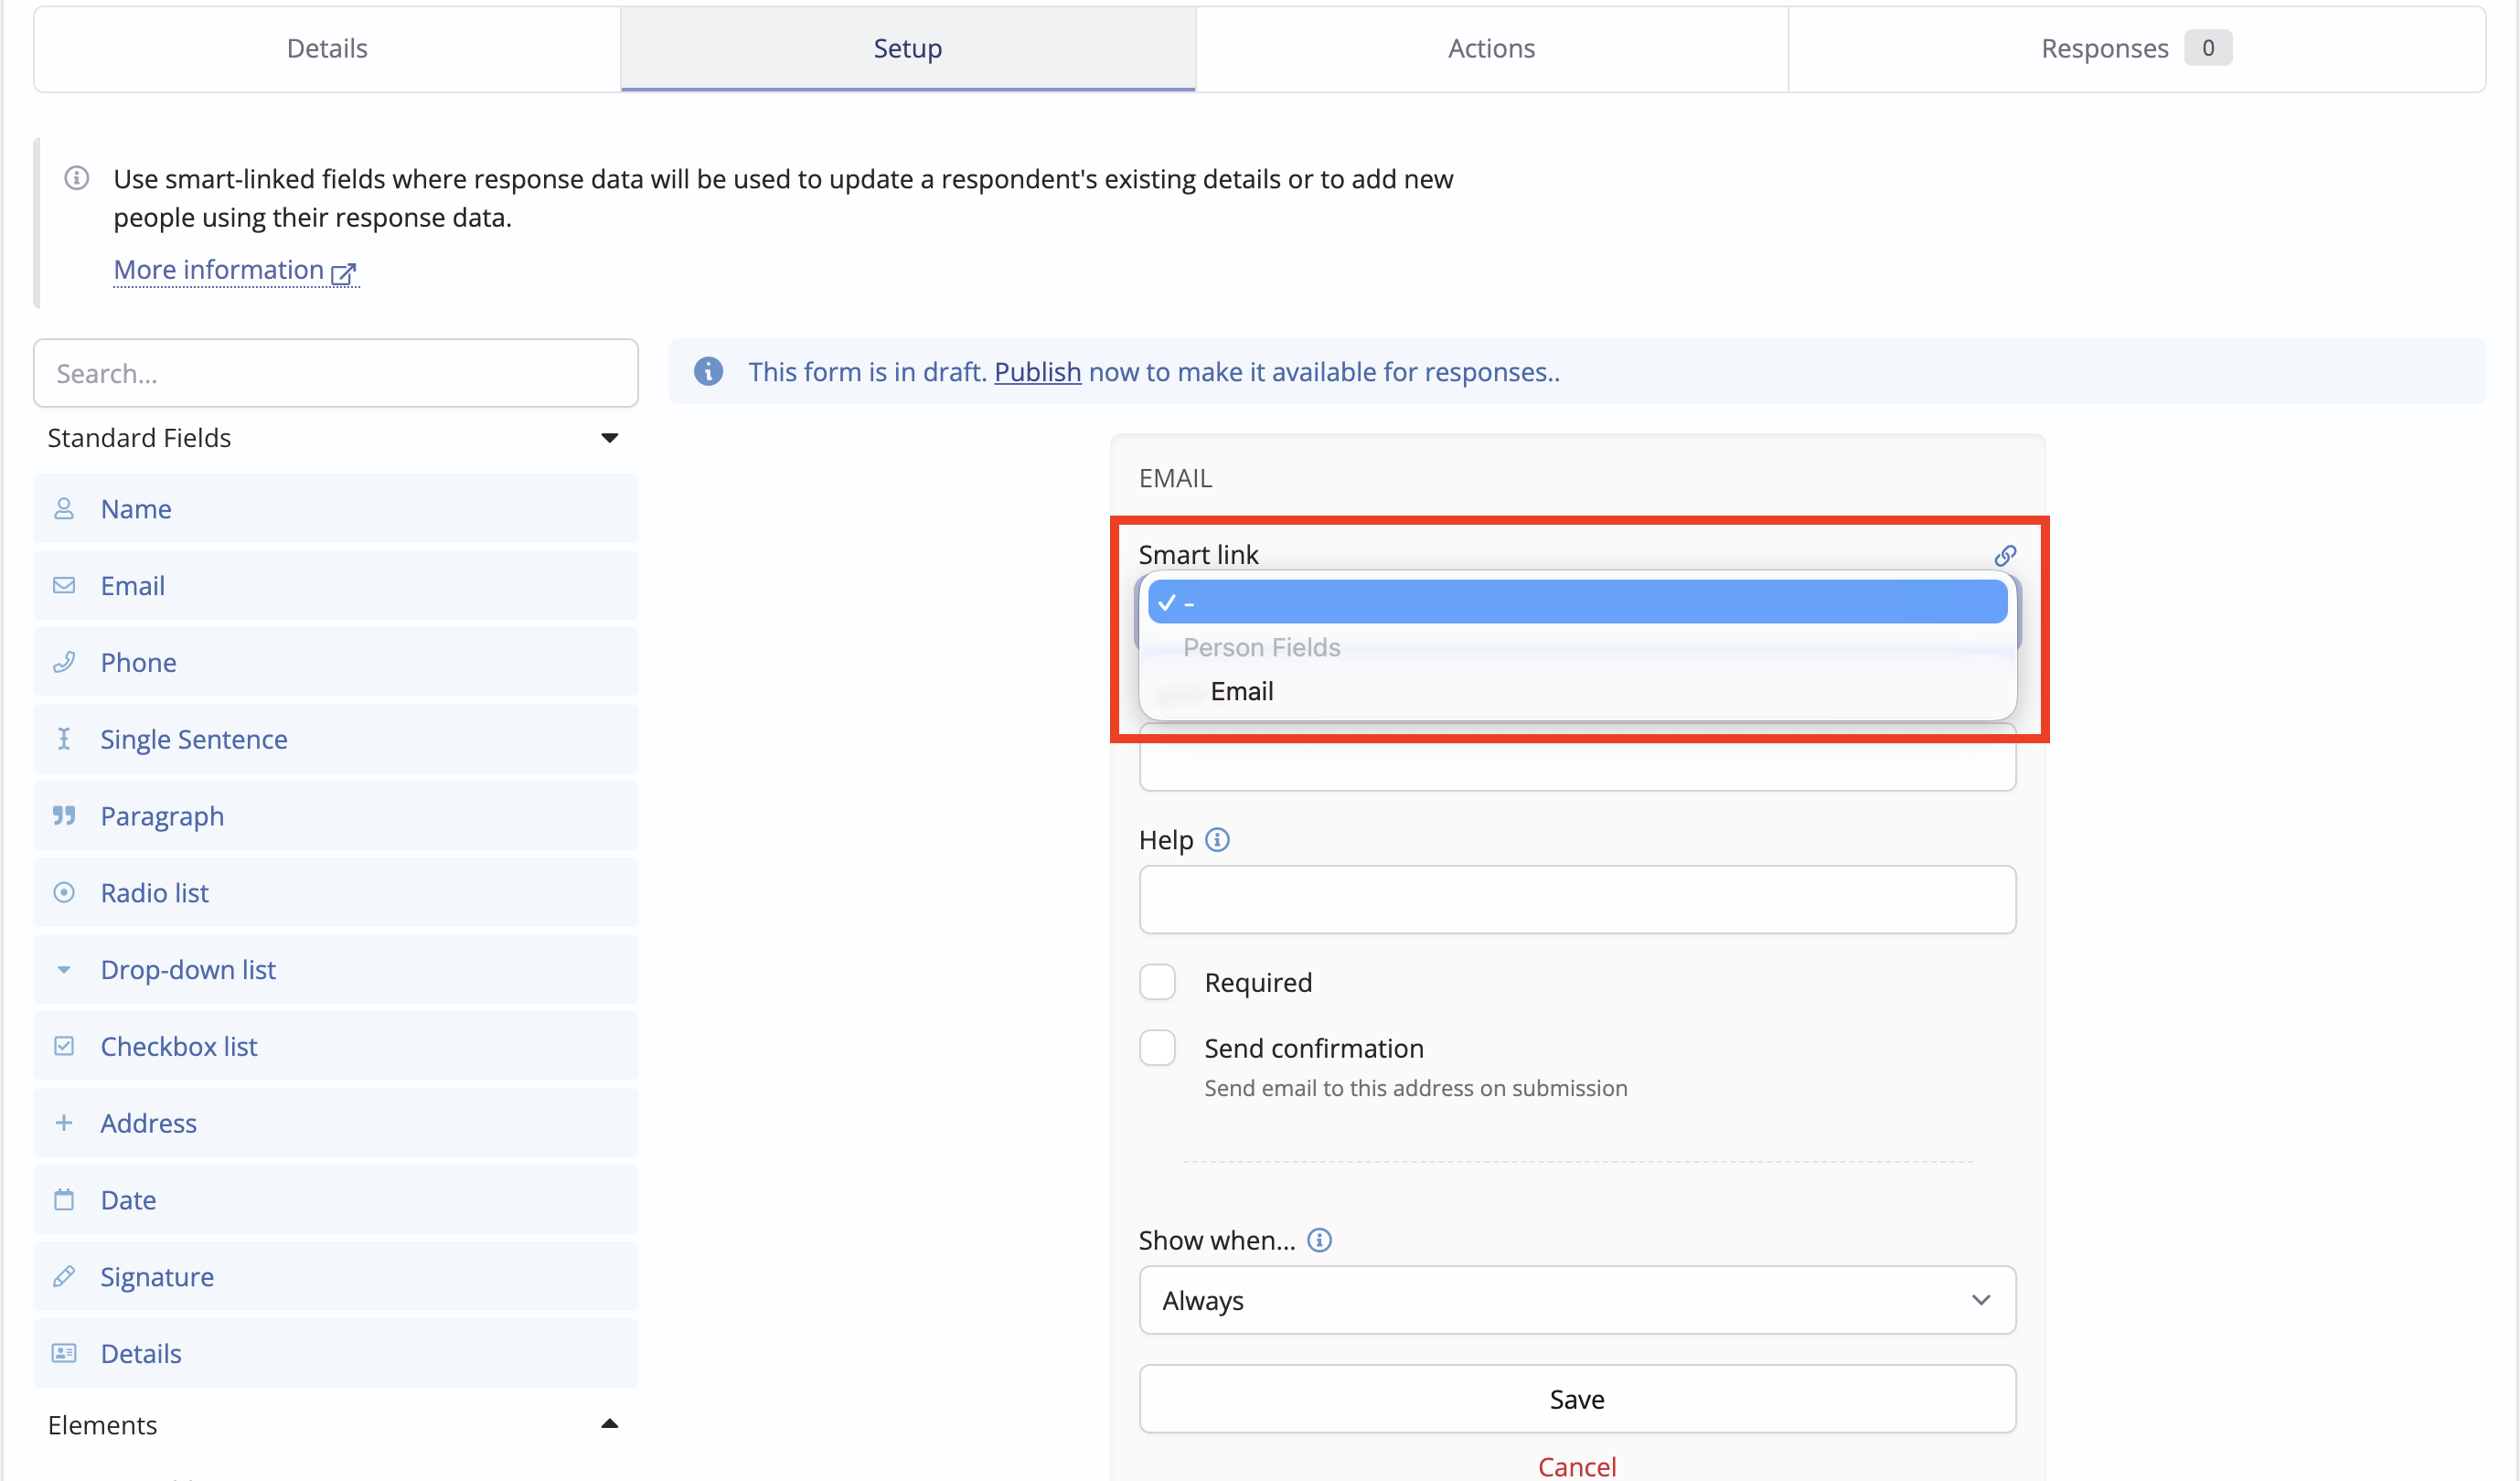
While the fields on a form typically collect isolated data, smart links allow you to map the fields on a form to the appropriate fields on a person's profile. For example, you can link an Email field on a form to the contact Email field in the Address Book. Smart linked fields have several advantages:
- Invited respondents will see their existing smart-linked details pre-populated in their form, making completion of your form a simpler experience.
- For a public form being completed by a non-invited respondent, smart-linked field responses can be used to:
- Update a linked person's existing details or
- Add new people to your Address Book or Children module using the smart-linked response data.
Consider the following Public form example:
- Form 1 is created using only standard fields with no smart linked fields. It includes fields for First & Last Name, Email, Mobile and Address
- Form 2 is created using smart linked fields for First & Last Name, Email, Mobile and Address.
Both forms collect the same data but each behaves differently, as follows:
- Anyone using the public form page URL to complete the form will see no visual difference between Form 1 and Form 2 - the form will show empty, ready to be completed by the respondent. However, unlike Form 1, Form 2 responses can be used to update a person's existing details when the response is later linked to a person in ChurchSuite or to add a new person using the smart-linked response data.
- Invitees to Form 1 would also see an empty form with no pre-filled data because there are no smart links.
- Invitees to Form 2 will see their smart-linked personal details pre-populated into their form. They can make changes to the data or leave the pre-filled details as they are.
- If the fields on Form 1 are subsequently edited and smart links are added, Form 1 will then behave like Form 2 and new and existing invitees who have not previously responded will now see their smart-linked personal details pre-filled in the form.
- In the same way, subsequently editing Form 2 to remove the smart links would prevent previously smart-linked personal details from being pre-filled in the form for those invitees who have not yet responded.
For each field you add to the form, enter a suitable Name (required) as it should be shown on the form. Optionally add some Help text to clarify further what you'd like respondents to enter or select when responding and set whether a response is Required. By default, each field and element added to a form is Always shown but you can optionally restrict an item's visibility based on conditions, meaning the item will only be shown When all conditions are met or When any of the conditions are met
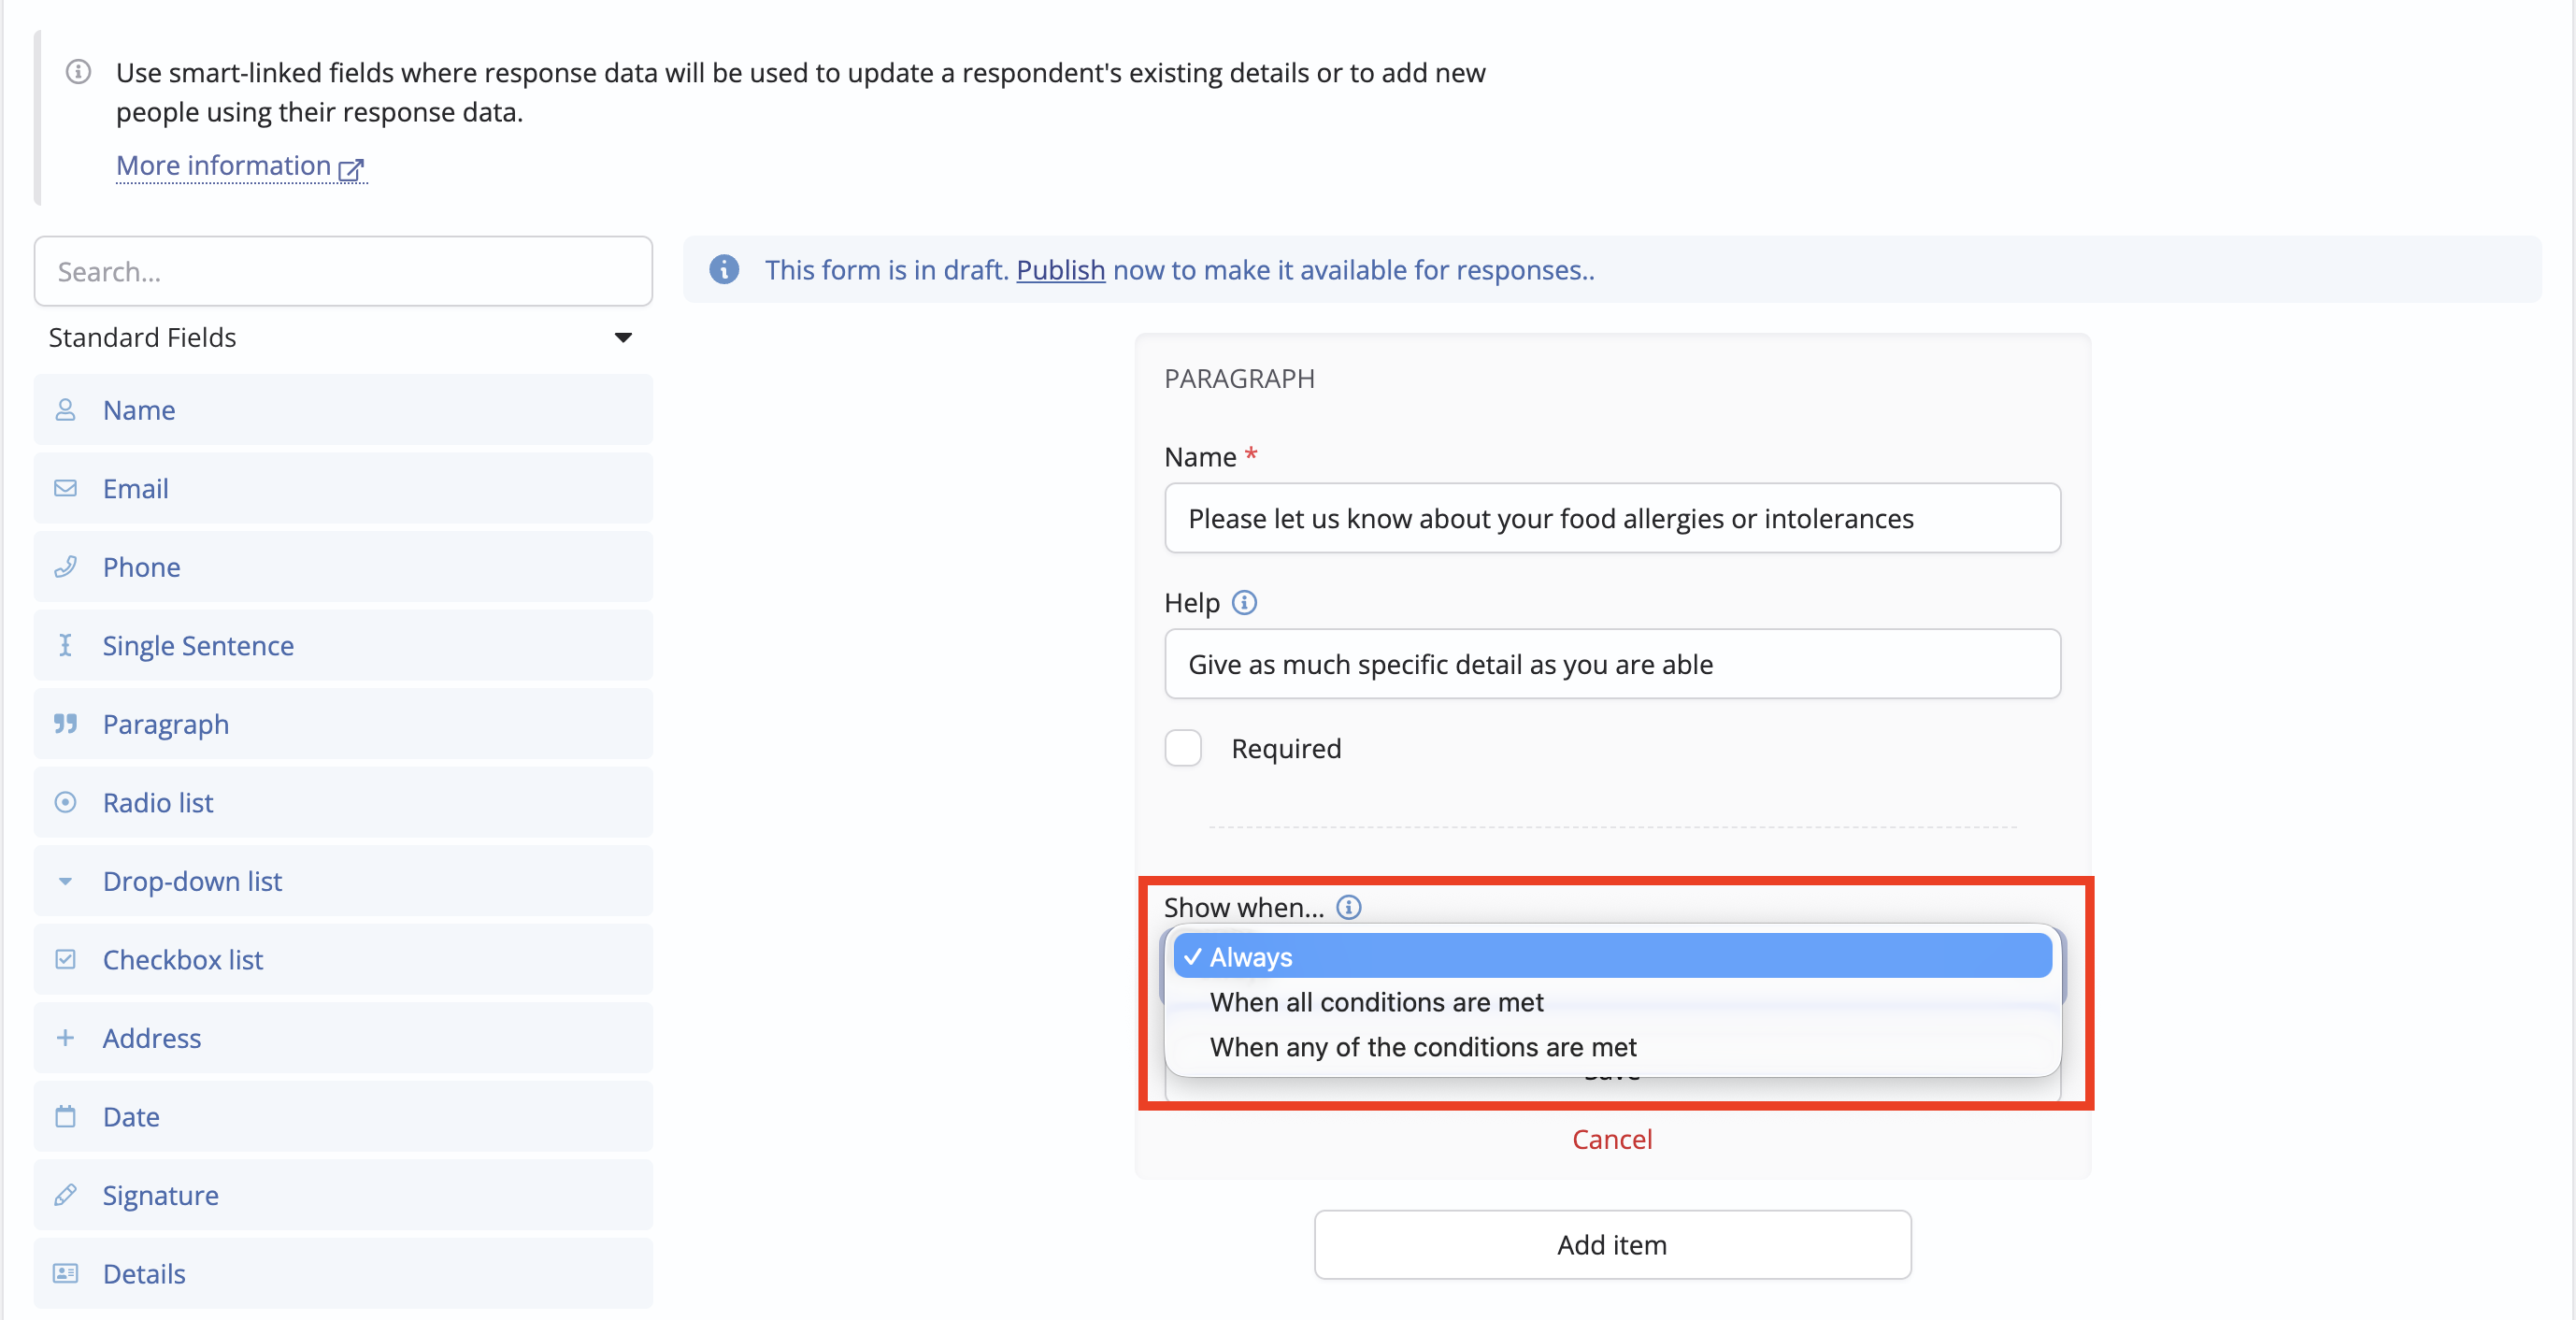
In the example below, the respondent is asked if they have any allergies or intolerances, with a yes/no response option, followed by a conditional field - a Paragraph-type field enquiring about their specific intolerances, which is conditionally shown if the first question response value is 'yes':
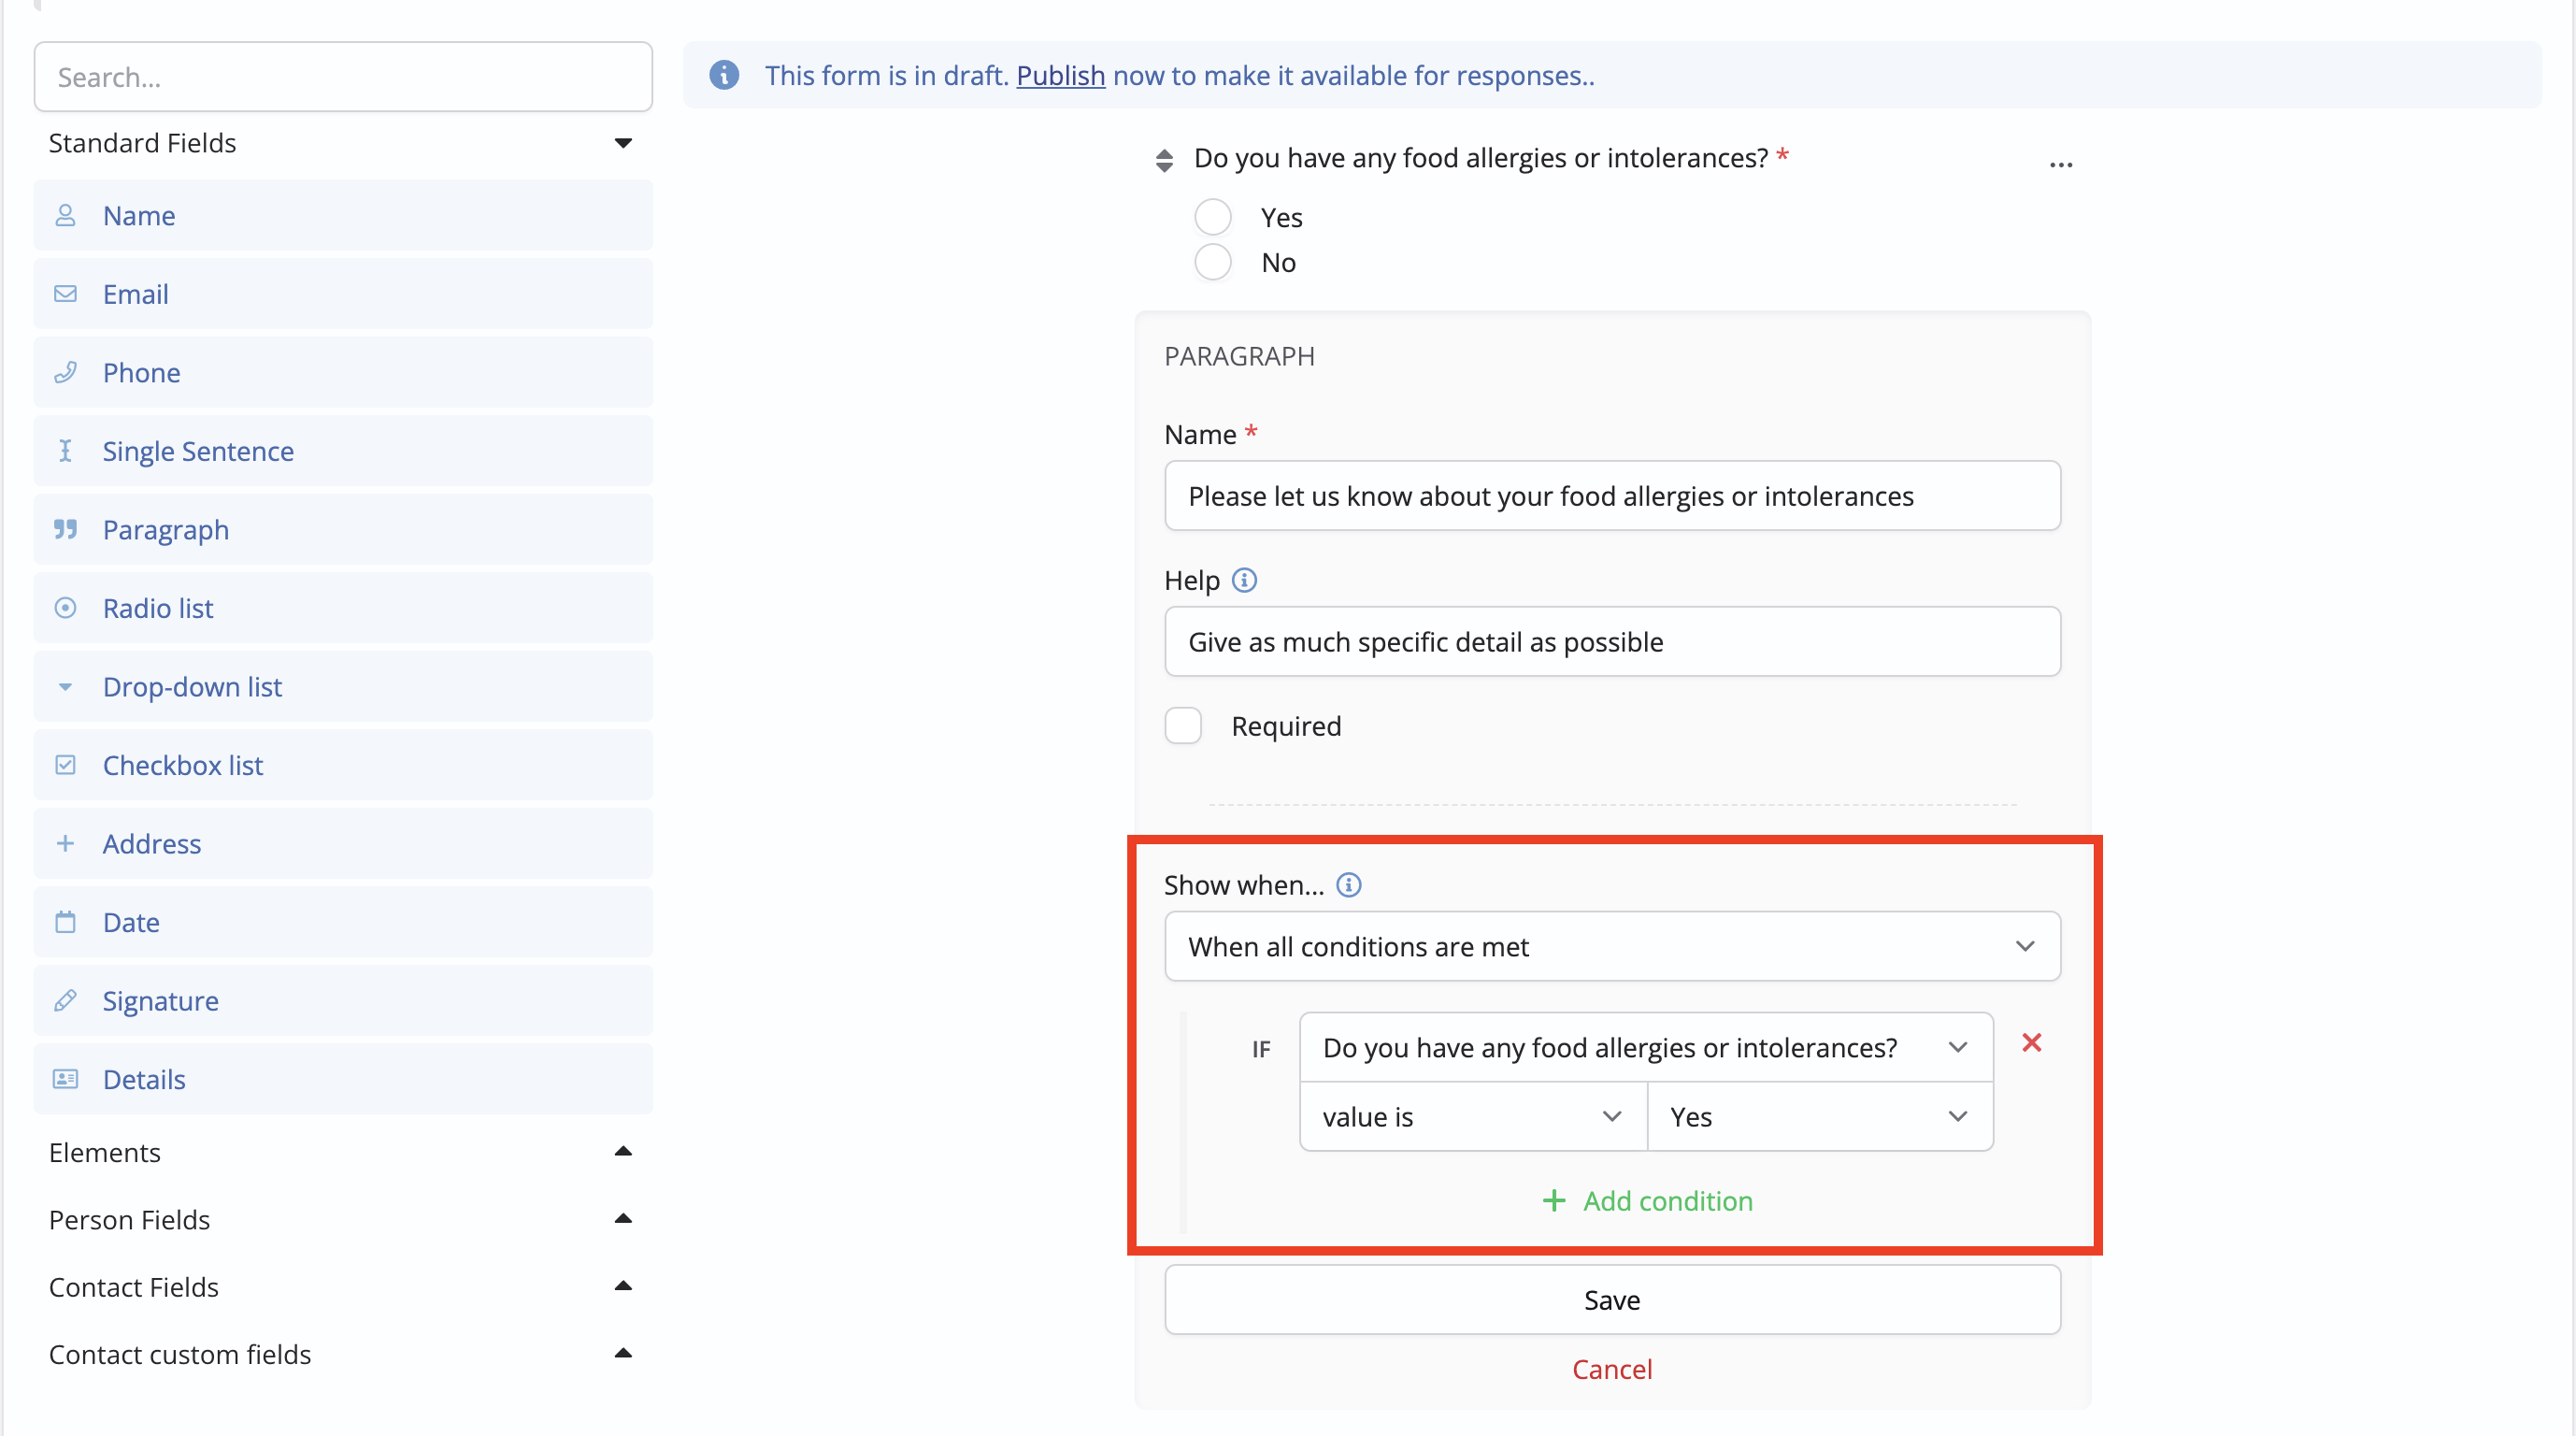
Note: care should be exercised if later removing or reordering fields on a form, as their absence or new position may impact the conditional visibility settings of other fields on the form.
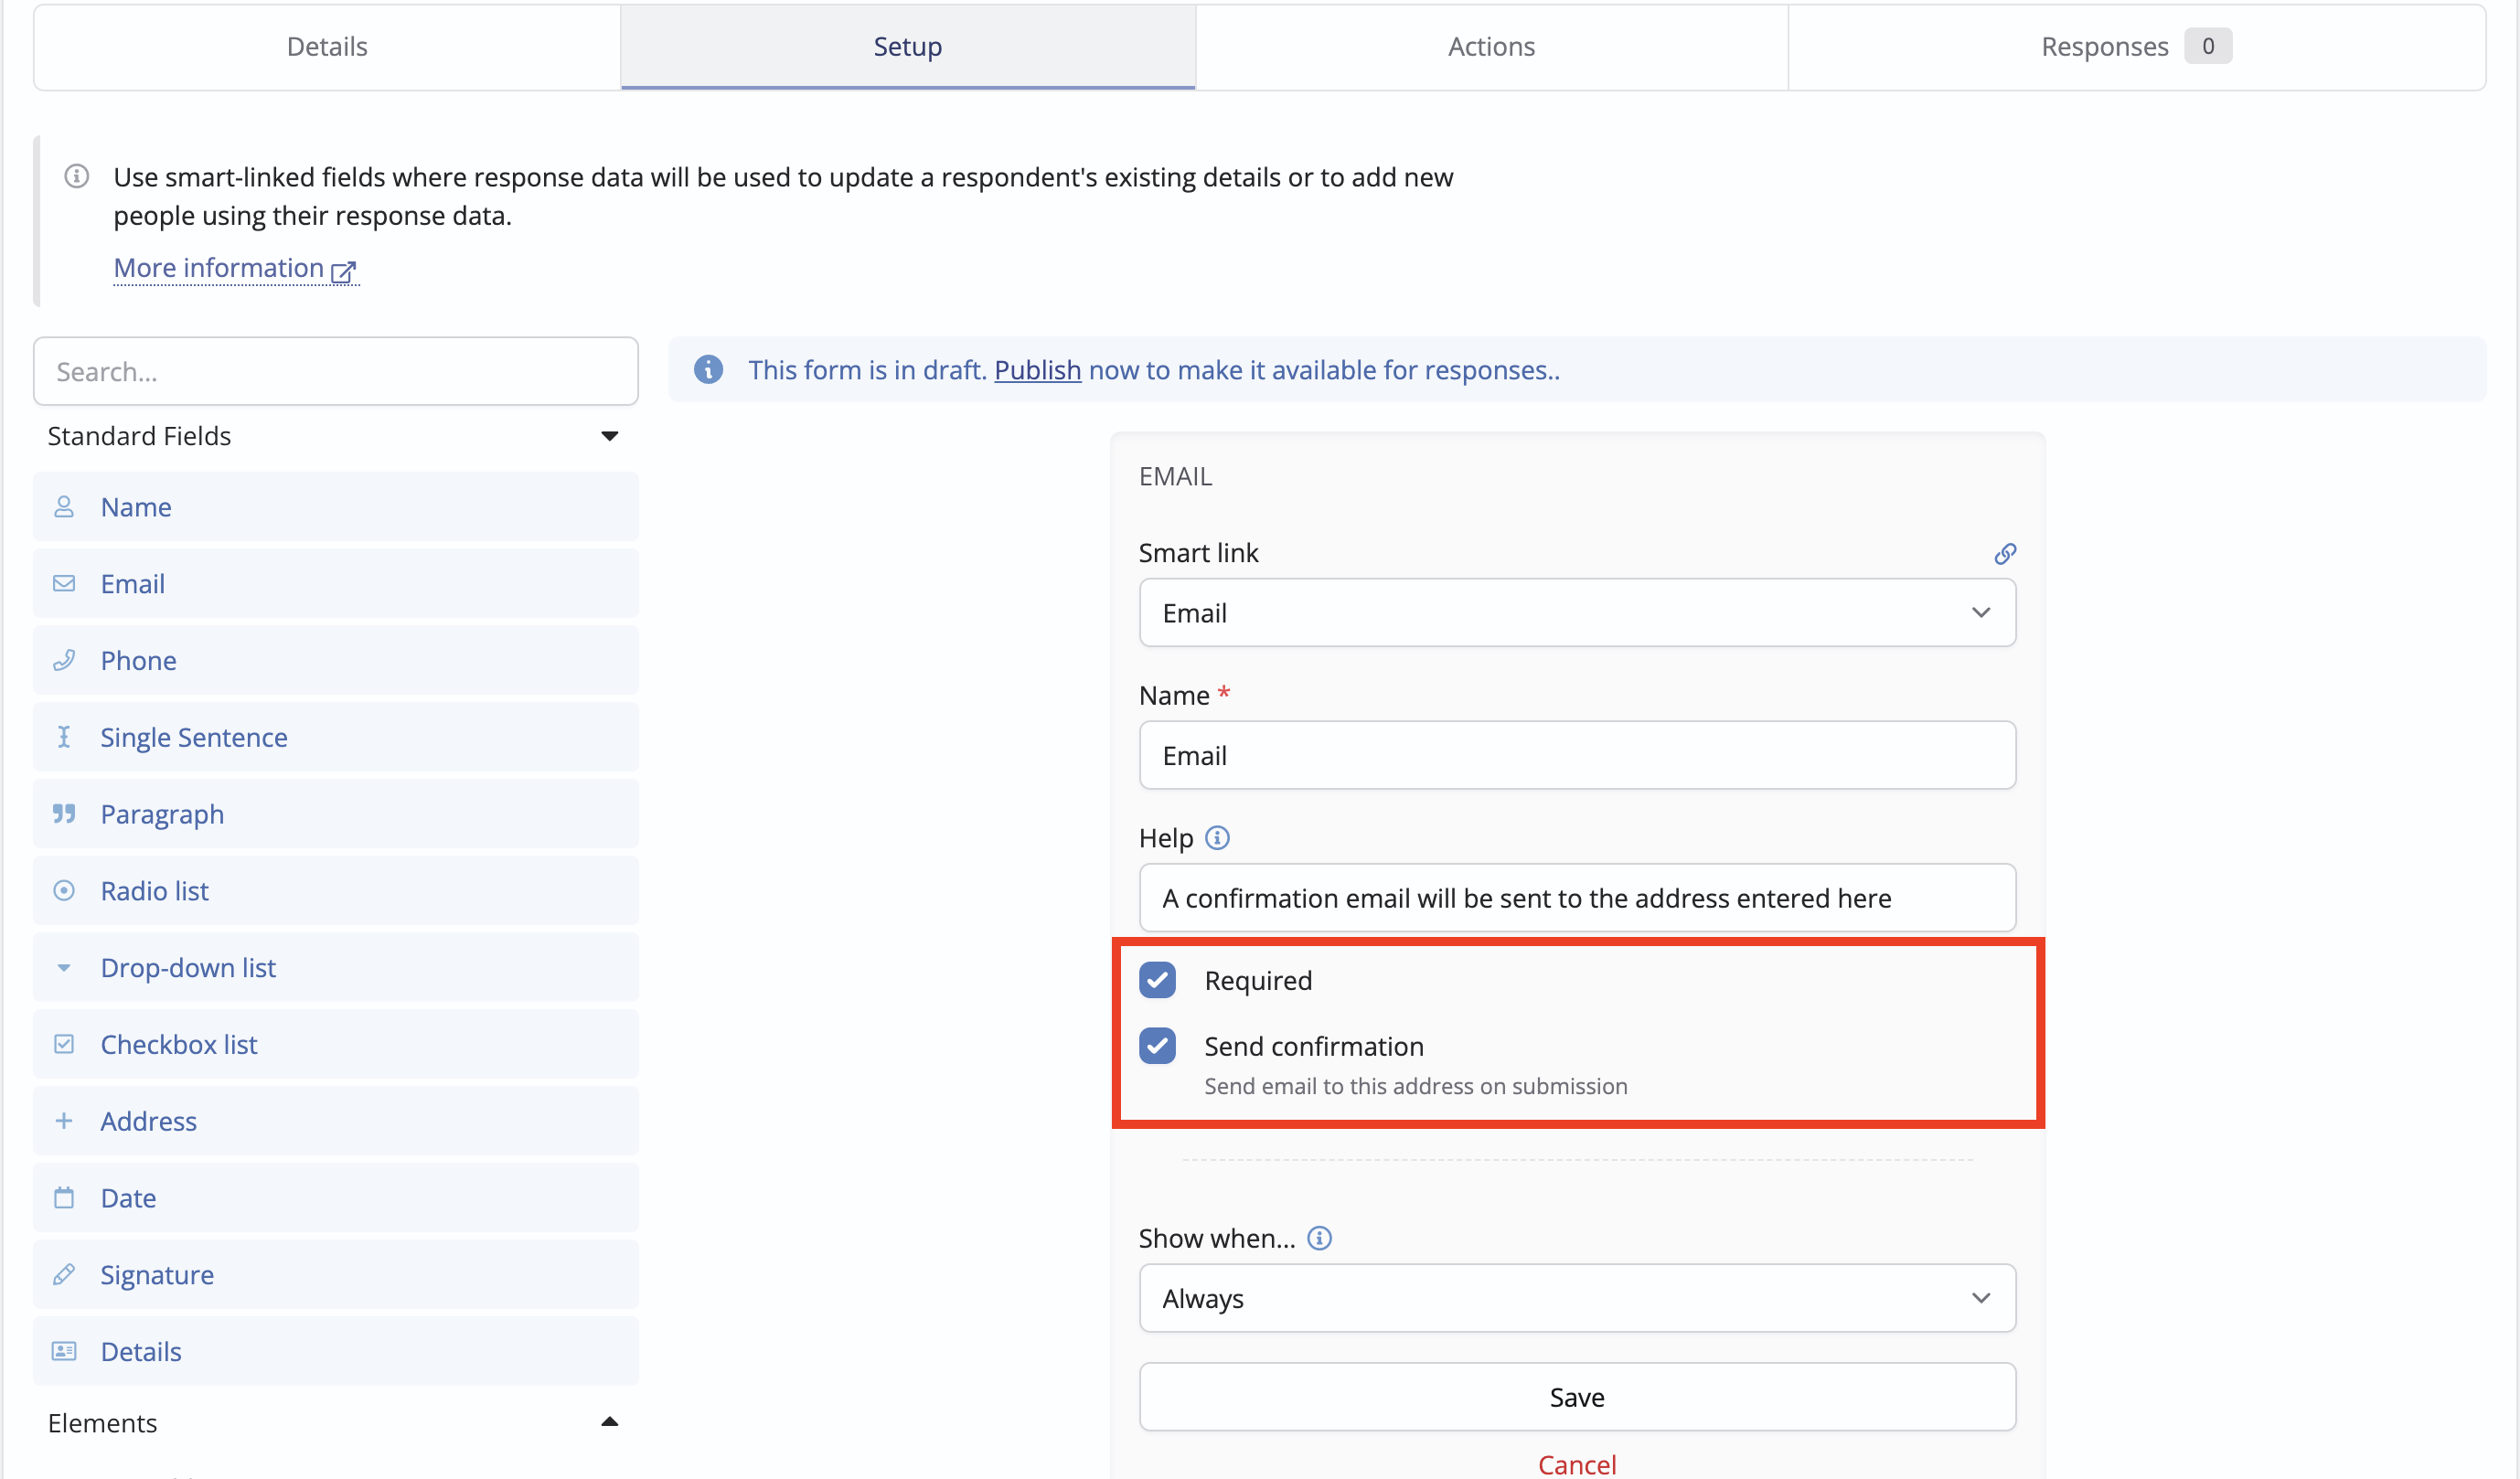
The Email field includes a Send confirmation option, allowing you to choose whether this email address will be used to send the response submission confirmation. For example, a parental consent form may contain multiple email fields—one for each parent or carer and one for the child. In this way, you can choose whether the submission confirmation is sent to a parent/carer, all parents/carers or the child. A further example is when a form asks the submitter to add another person's email address, perhaps for a reference. In this scenario, you will want a submission confirmation to be sent to the submitter's email address rather than the referee's email address.
Top Tip - Contact details
As an alternative to adding separate items for Name, Email, Mobile and Telephone, you can add them as a single Details block:
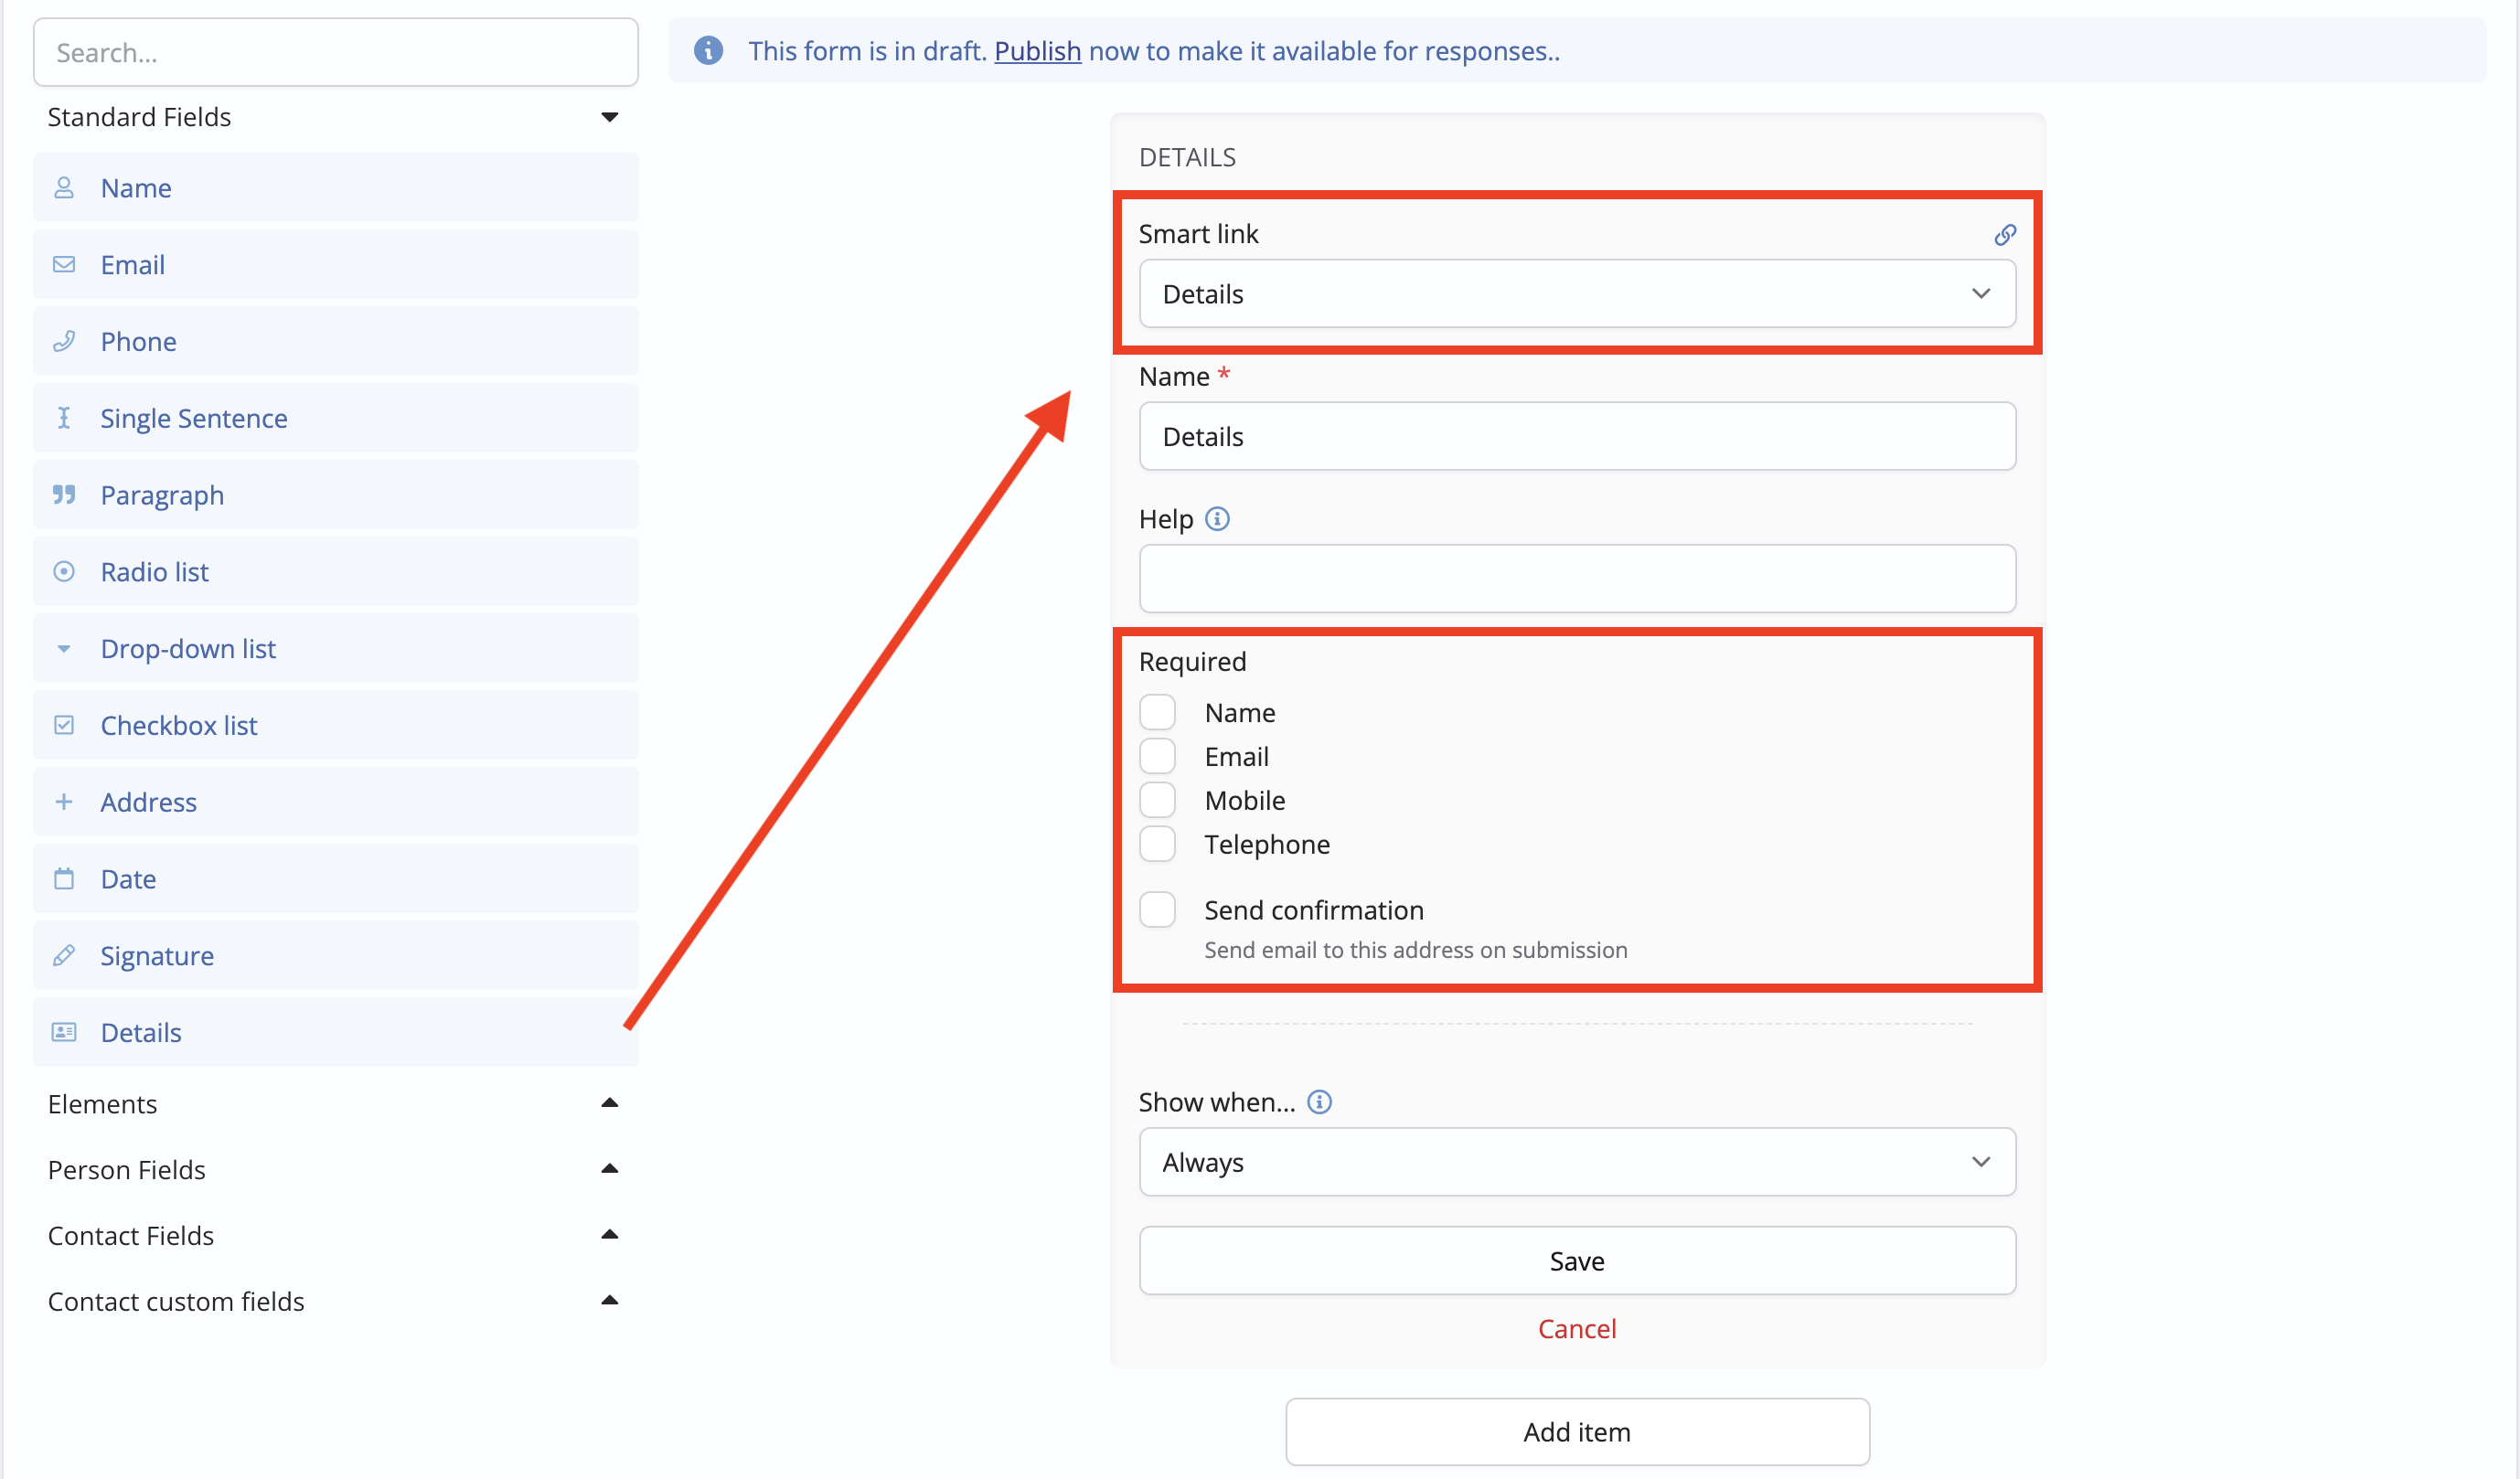
Like the standalone email field, Details field includes a Send confirmation option, allowing you to choose whether this email address will be used to send the response submission confirmation.
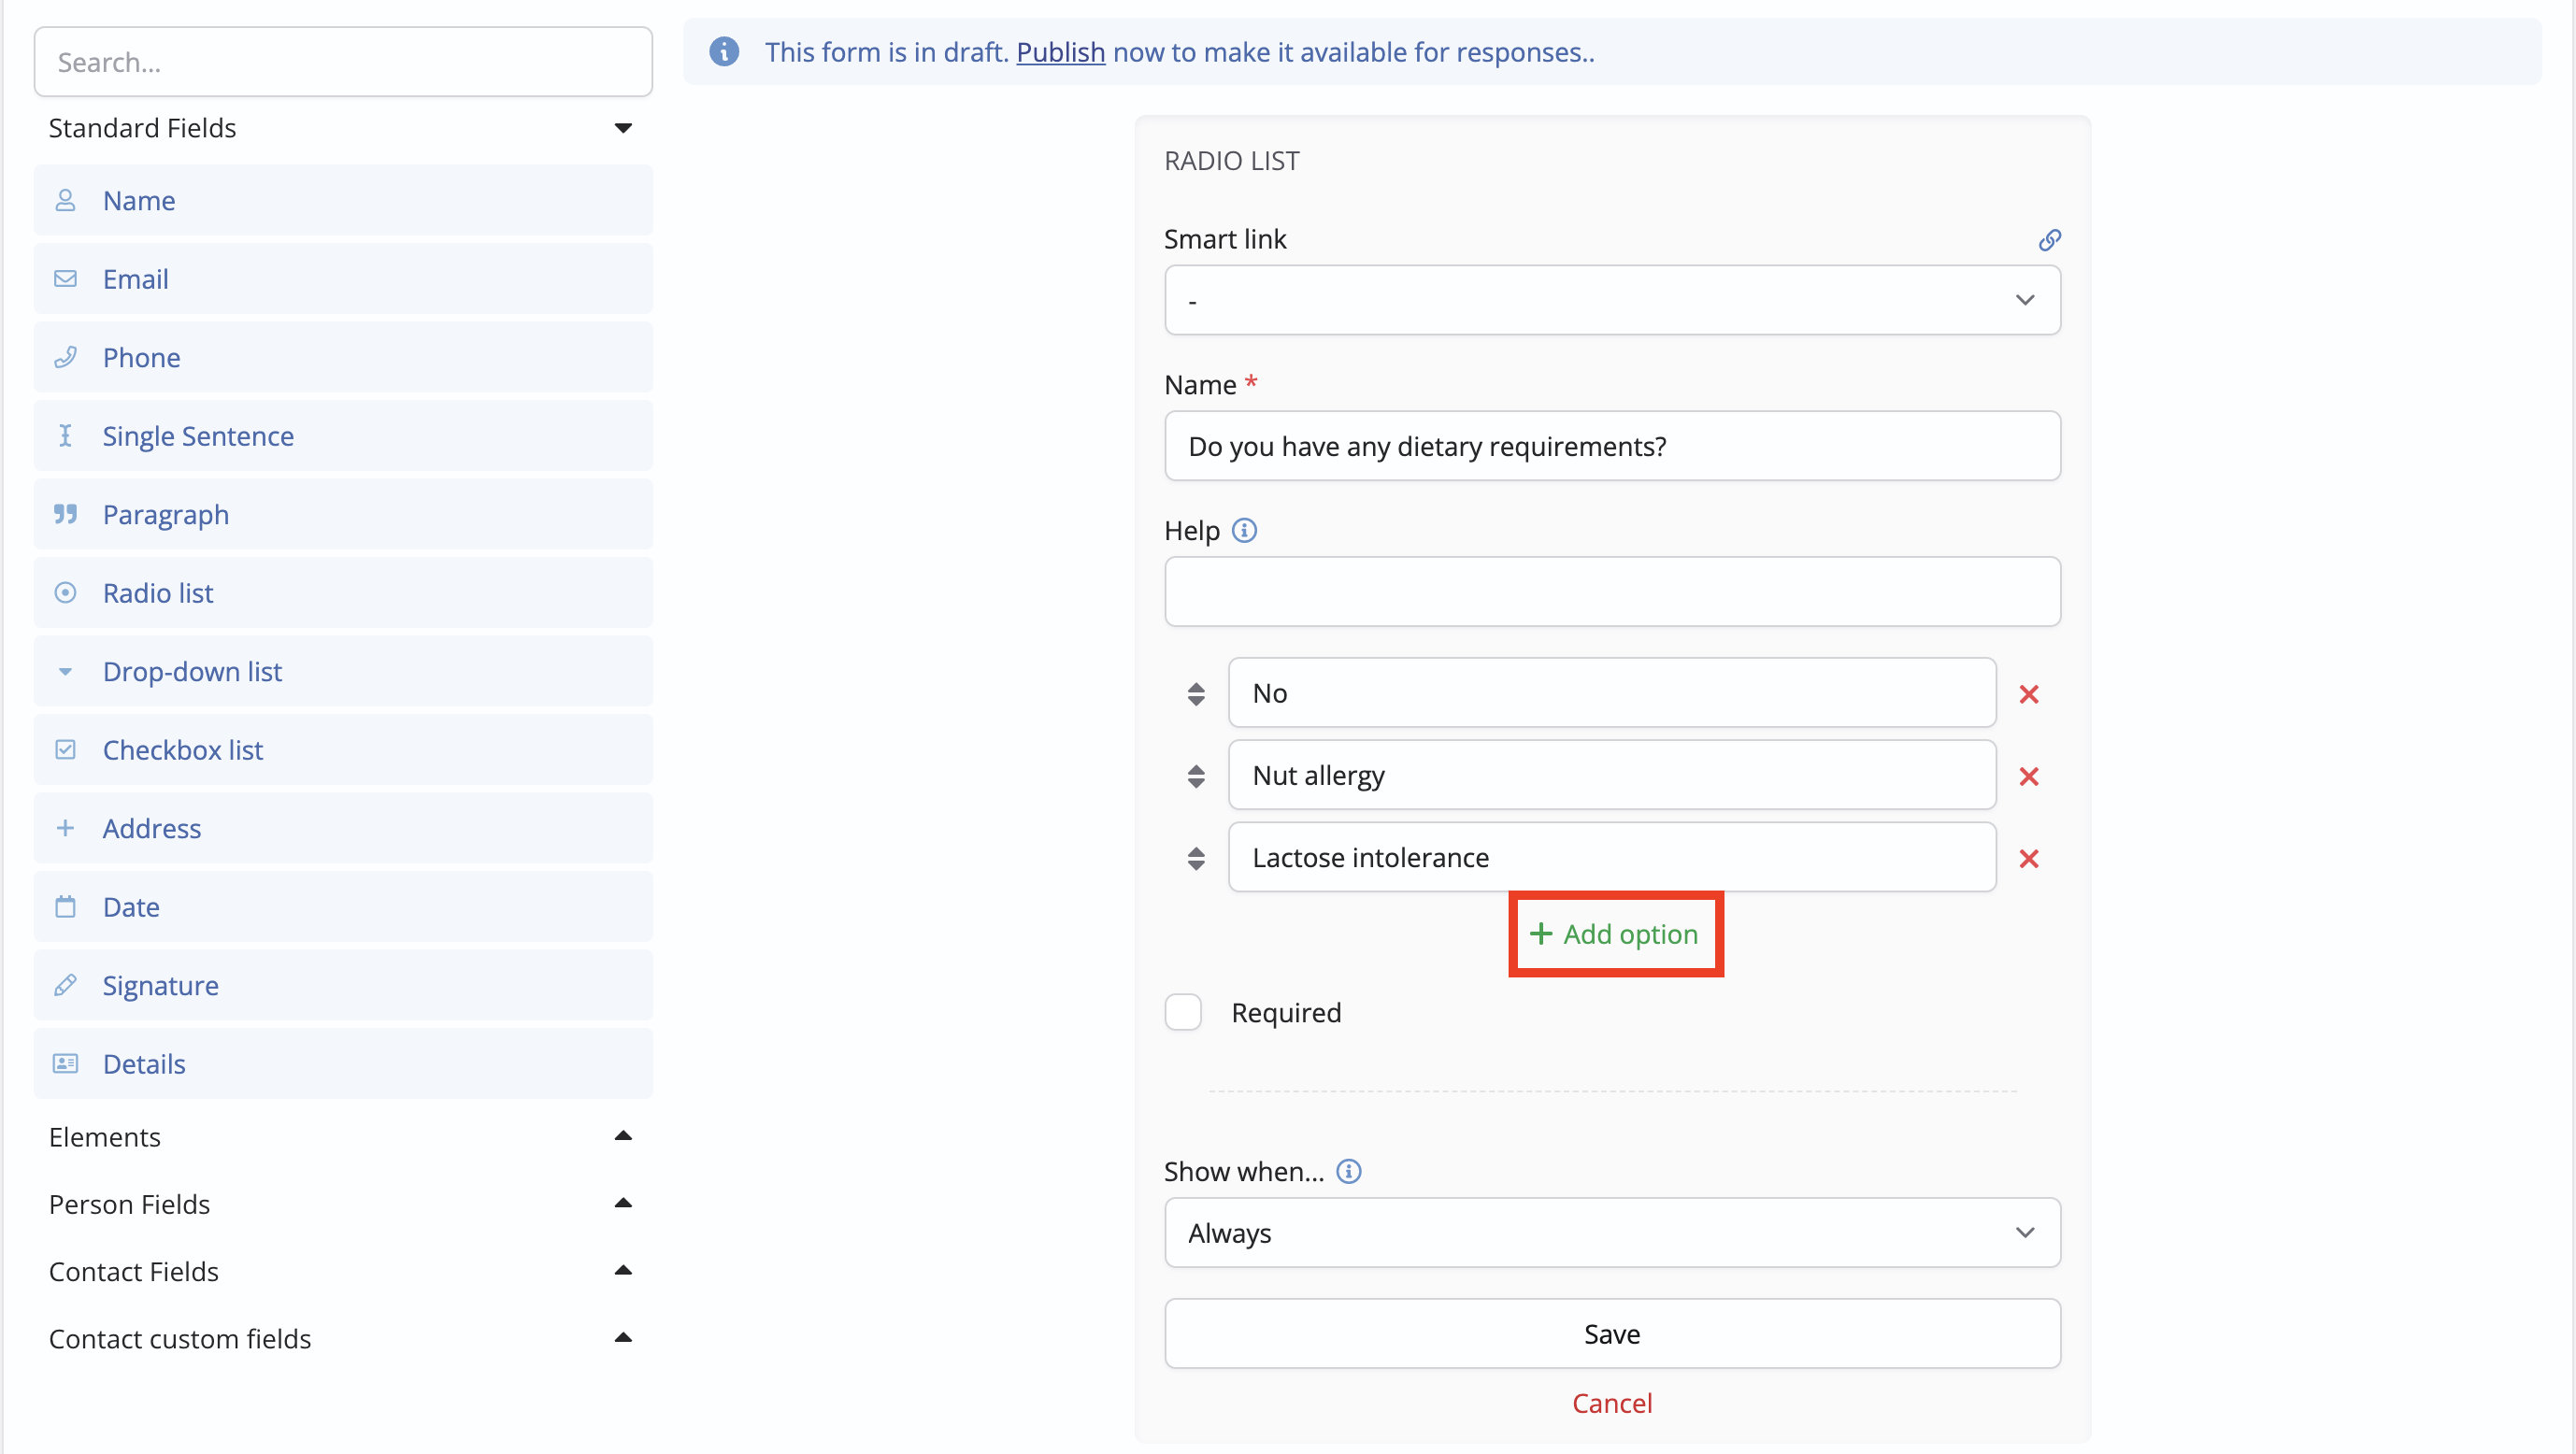
When adding a Radio list, Drop-down list or Checkbox list field, you'll add one or more response Options.
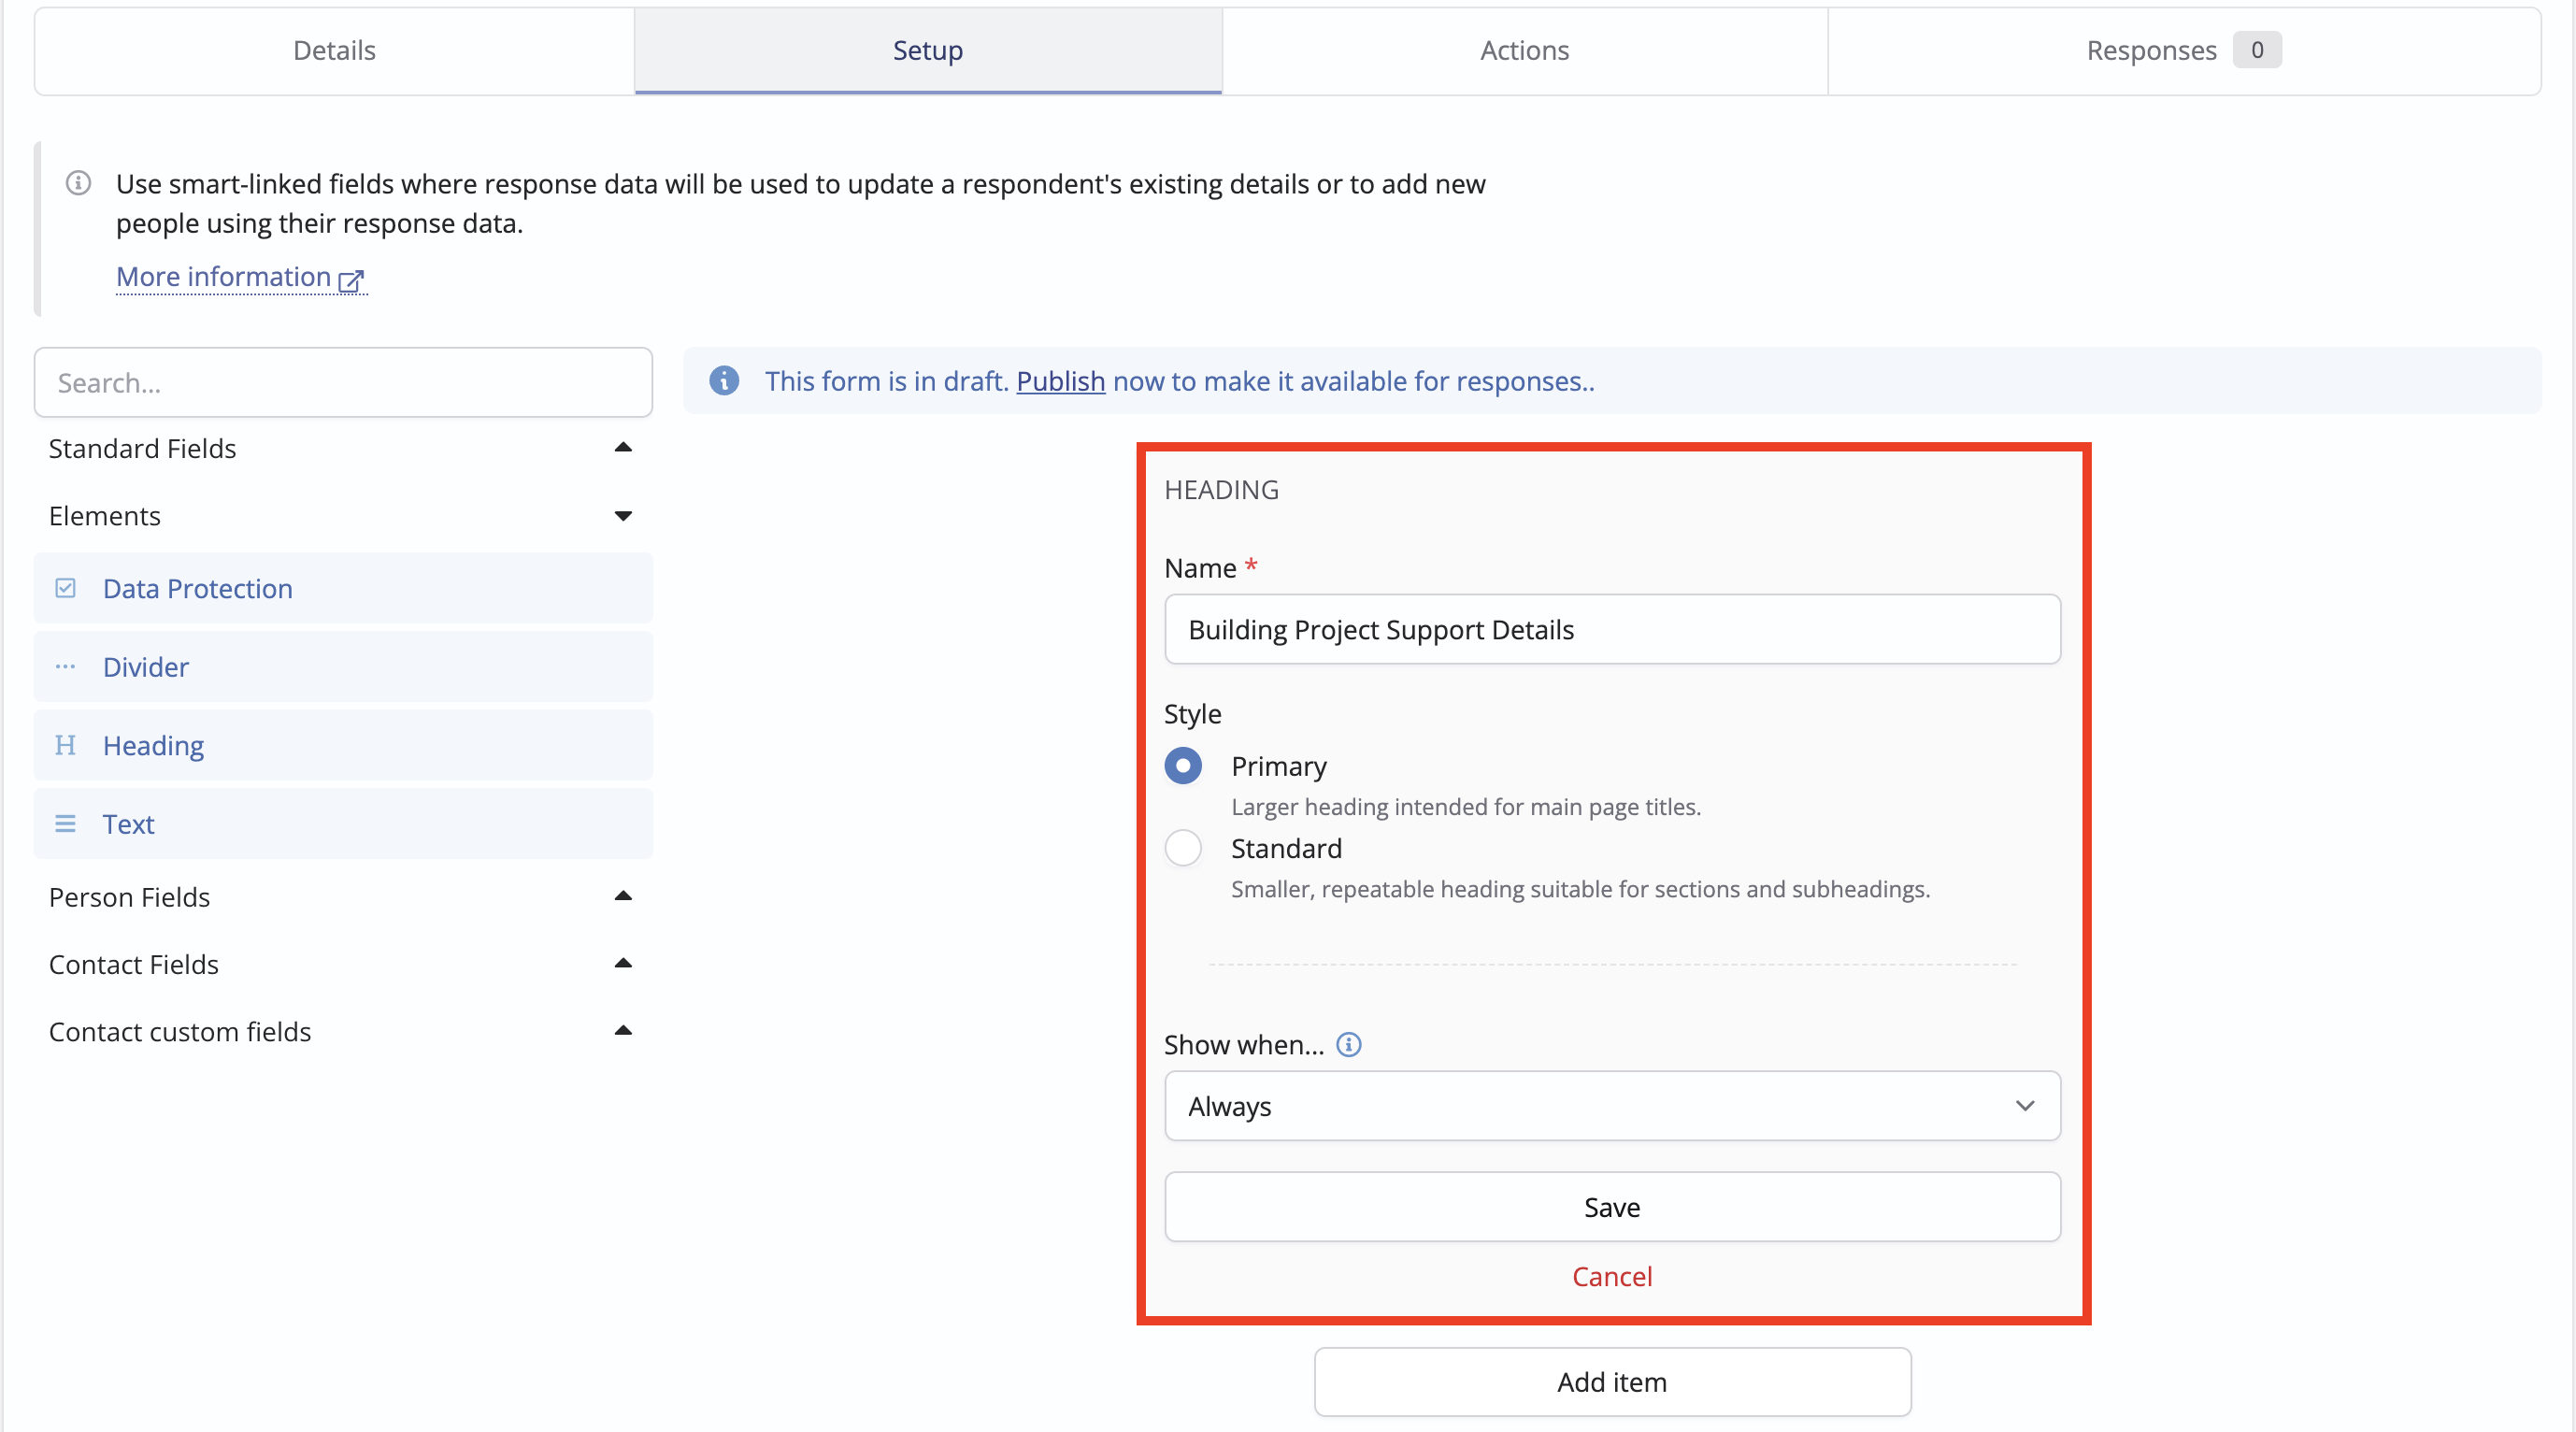
When adding a Heading element, you can choose if the style is Standard, which will appear on the form as a smaller, repeatable heading suitable for sections and subheadings or Primary, which is a larger heading intended for use at the top of your form as the main page title. If a primary header exists in a form then the form name at the top of the page will be hidden, giving you control over how your form looks to those filling it in.
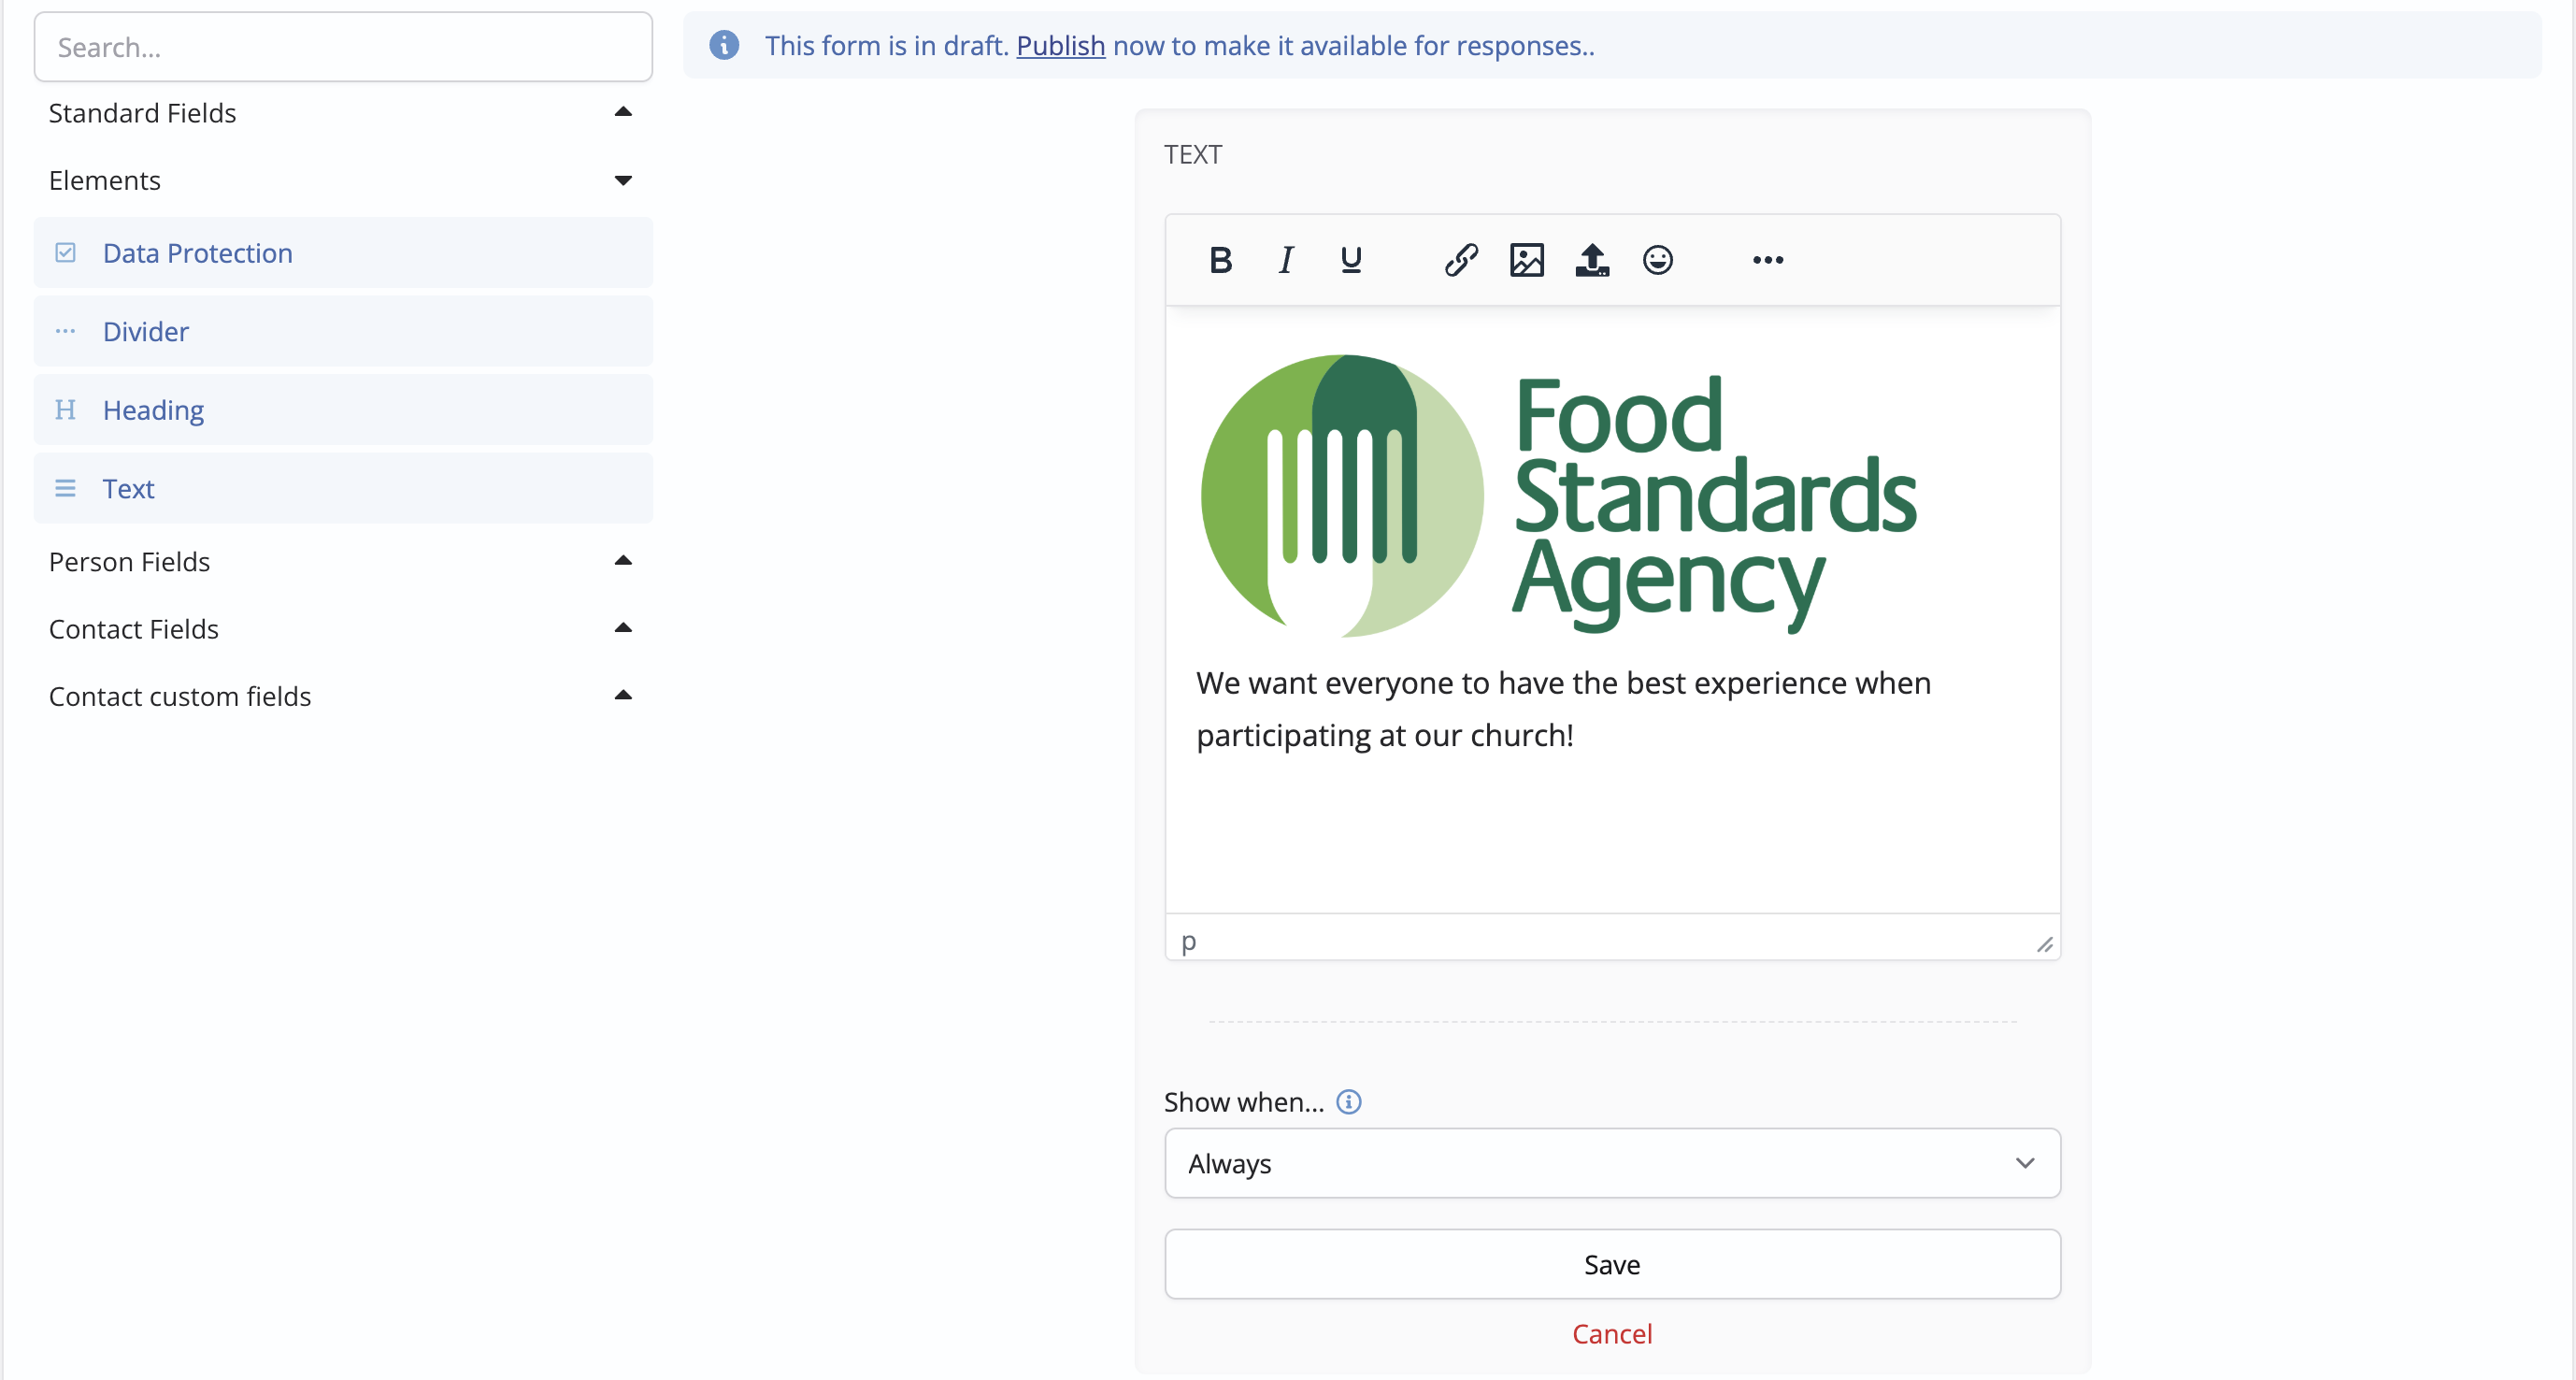
For the Text element, you have a range of tools to style the content, insert lists and tables, embed links and add images or videos. With a bit of creativity and imagination, the Heading, Text and Divider elements will enhance the user experience for those completing your form.
Top Tip! Embedding videos in forms
When viewing a video on a site like YouTube, click the "Share" option and select Copy embed code. You can also access this menu option by right-clicking on the video.

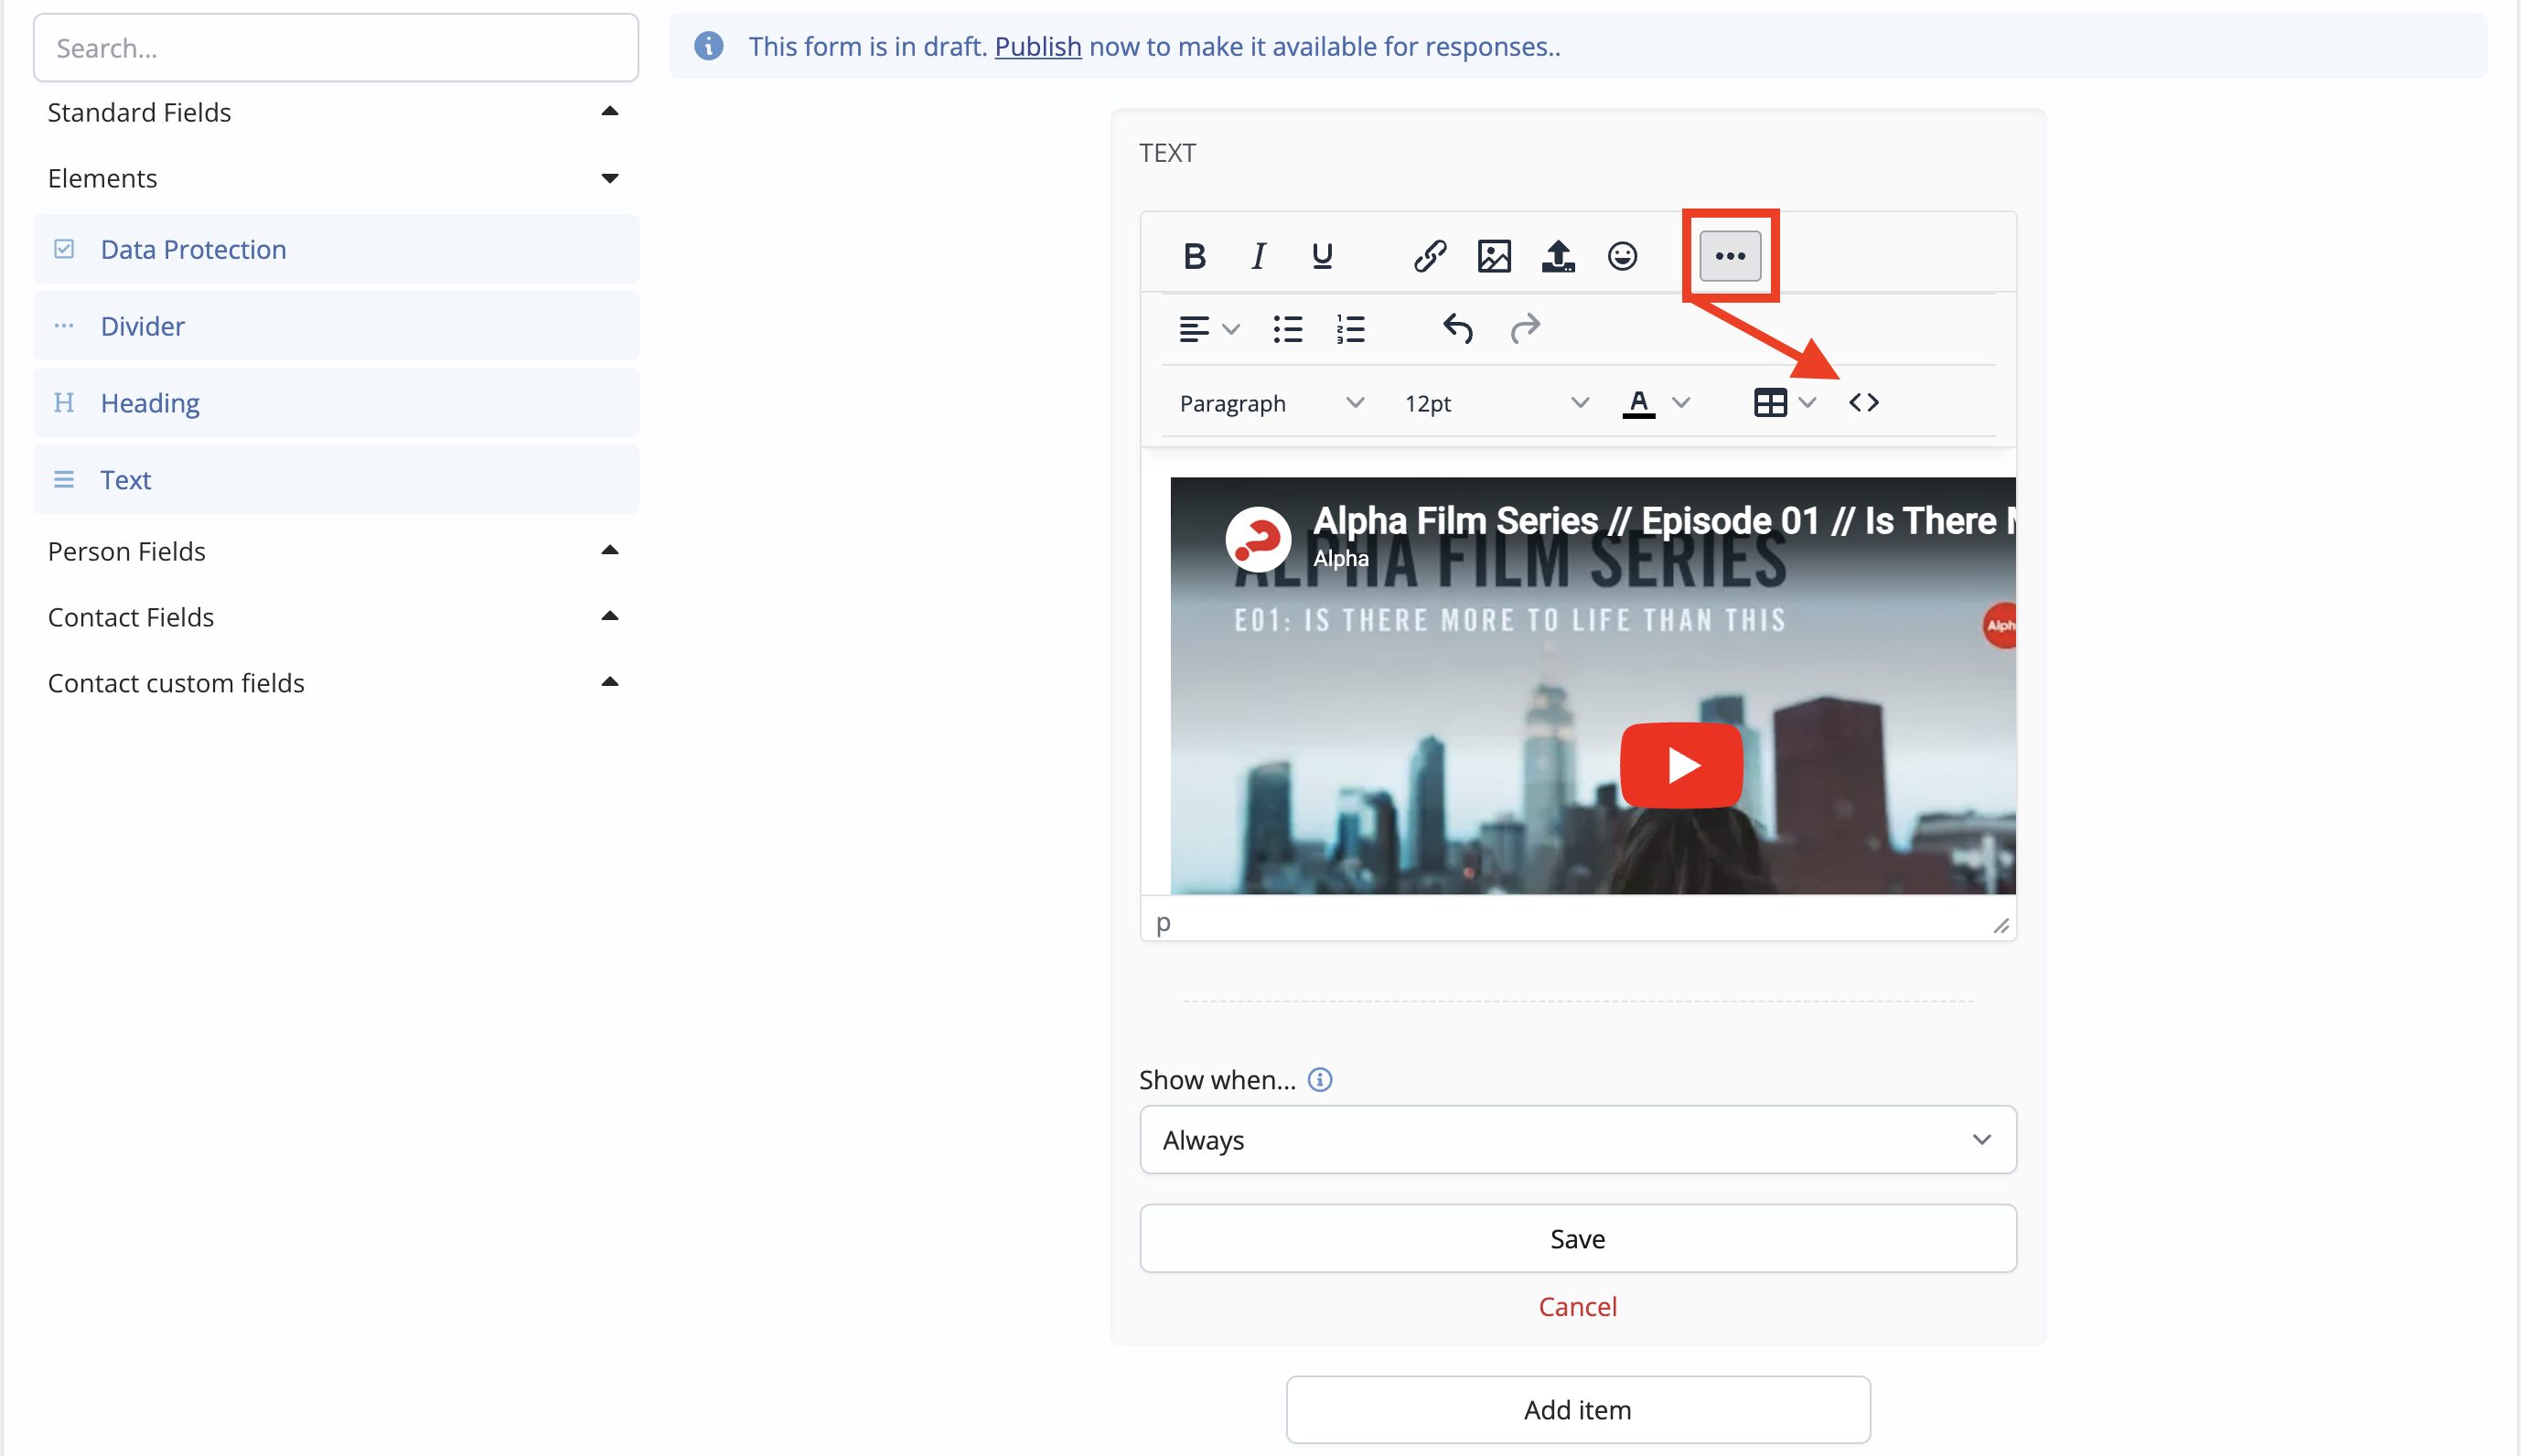
Back in ChurchSuite, and having added a Text element to the form, click the ellipses icon to surface the second row of tools and select the <> "source code" tool. Paste the previously copied embed code into the code viewer, being careful to paste it in the right place. Save the code viewer and text element. You can use the Go to form option to preview the video.
The pasted embed code typically includes width and height parameters, which you can adjust (while constraining the proportions), perhaps to fit the full form width of 500px:
<iframe width="894" height="503" src="https://www.youtube.com/embed/fViYK_Xb3Wg" title="YouTube video player" frameborder="0" allow="accelerometer; autoplay; clipboard-write; encrypted-media; gyroscope; picture-in-picture" allowfullscreen></iframe>
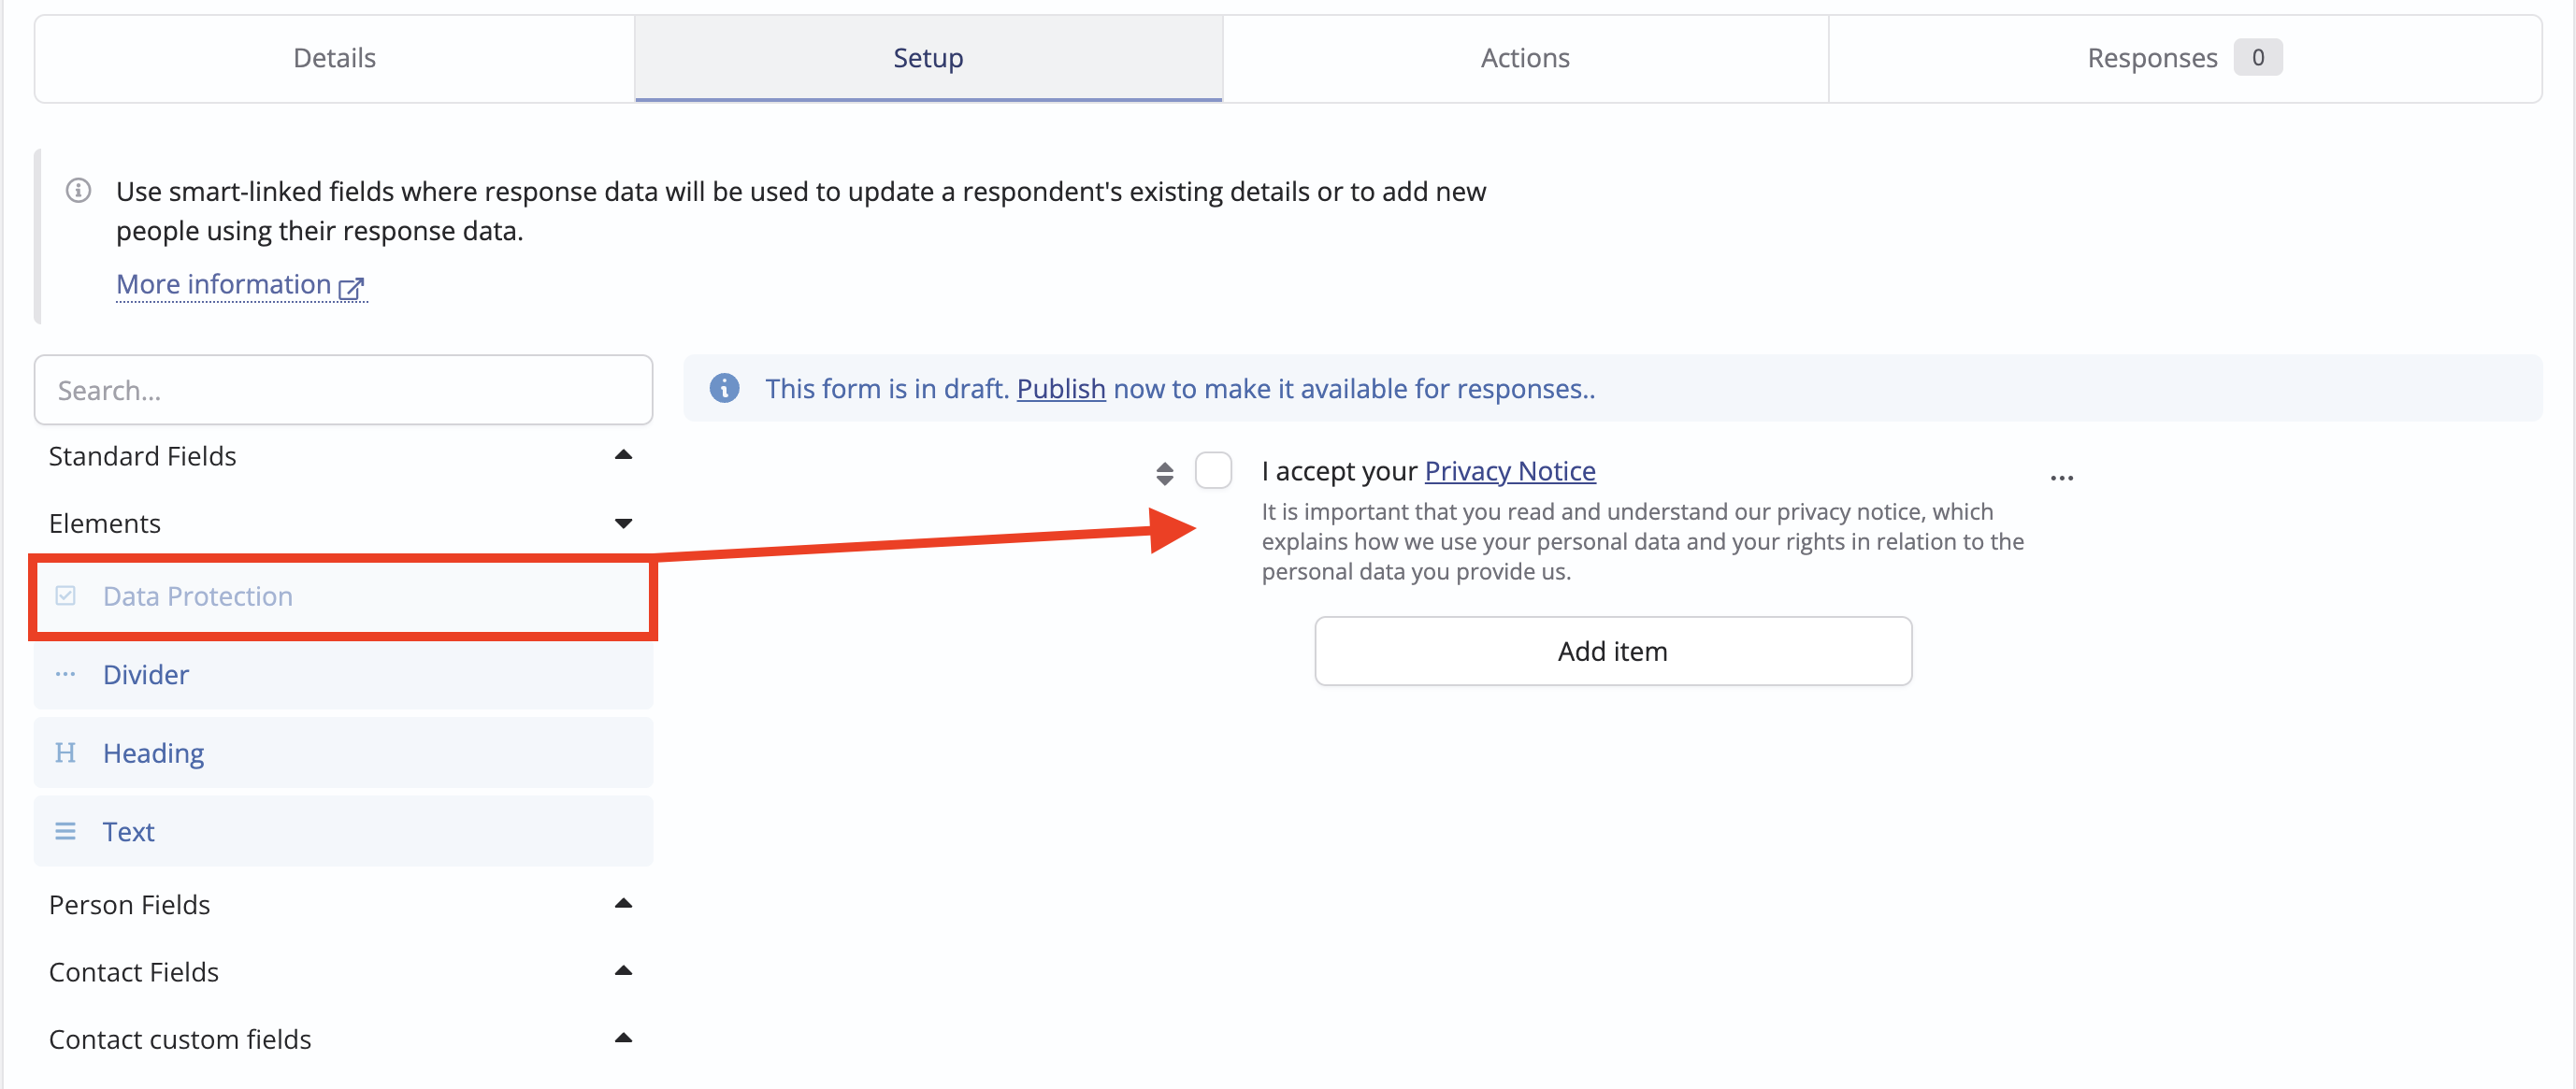
The Data Protection element has no settings and is added to the form immediately. The element comprises an affirmative 'accept' checkbox and preset text. See our related support article on How to personalise your ChurchSuite account, which includes a section explaining how to add your data protection statement to ChurchSuite (sometimes referred to as a privacy notice). The article also describes how to customise the additional helper text shown under the 'accept' statement. Depending on data protection legislation for your country/region, you may be required to add a data protection element to any form that collects personal data. Respondents can only submit the form if they accept your data protection statement. The statement (or privacy notice) is clickable on forms and will open the full data protection statement in a pop-up for viewing.
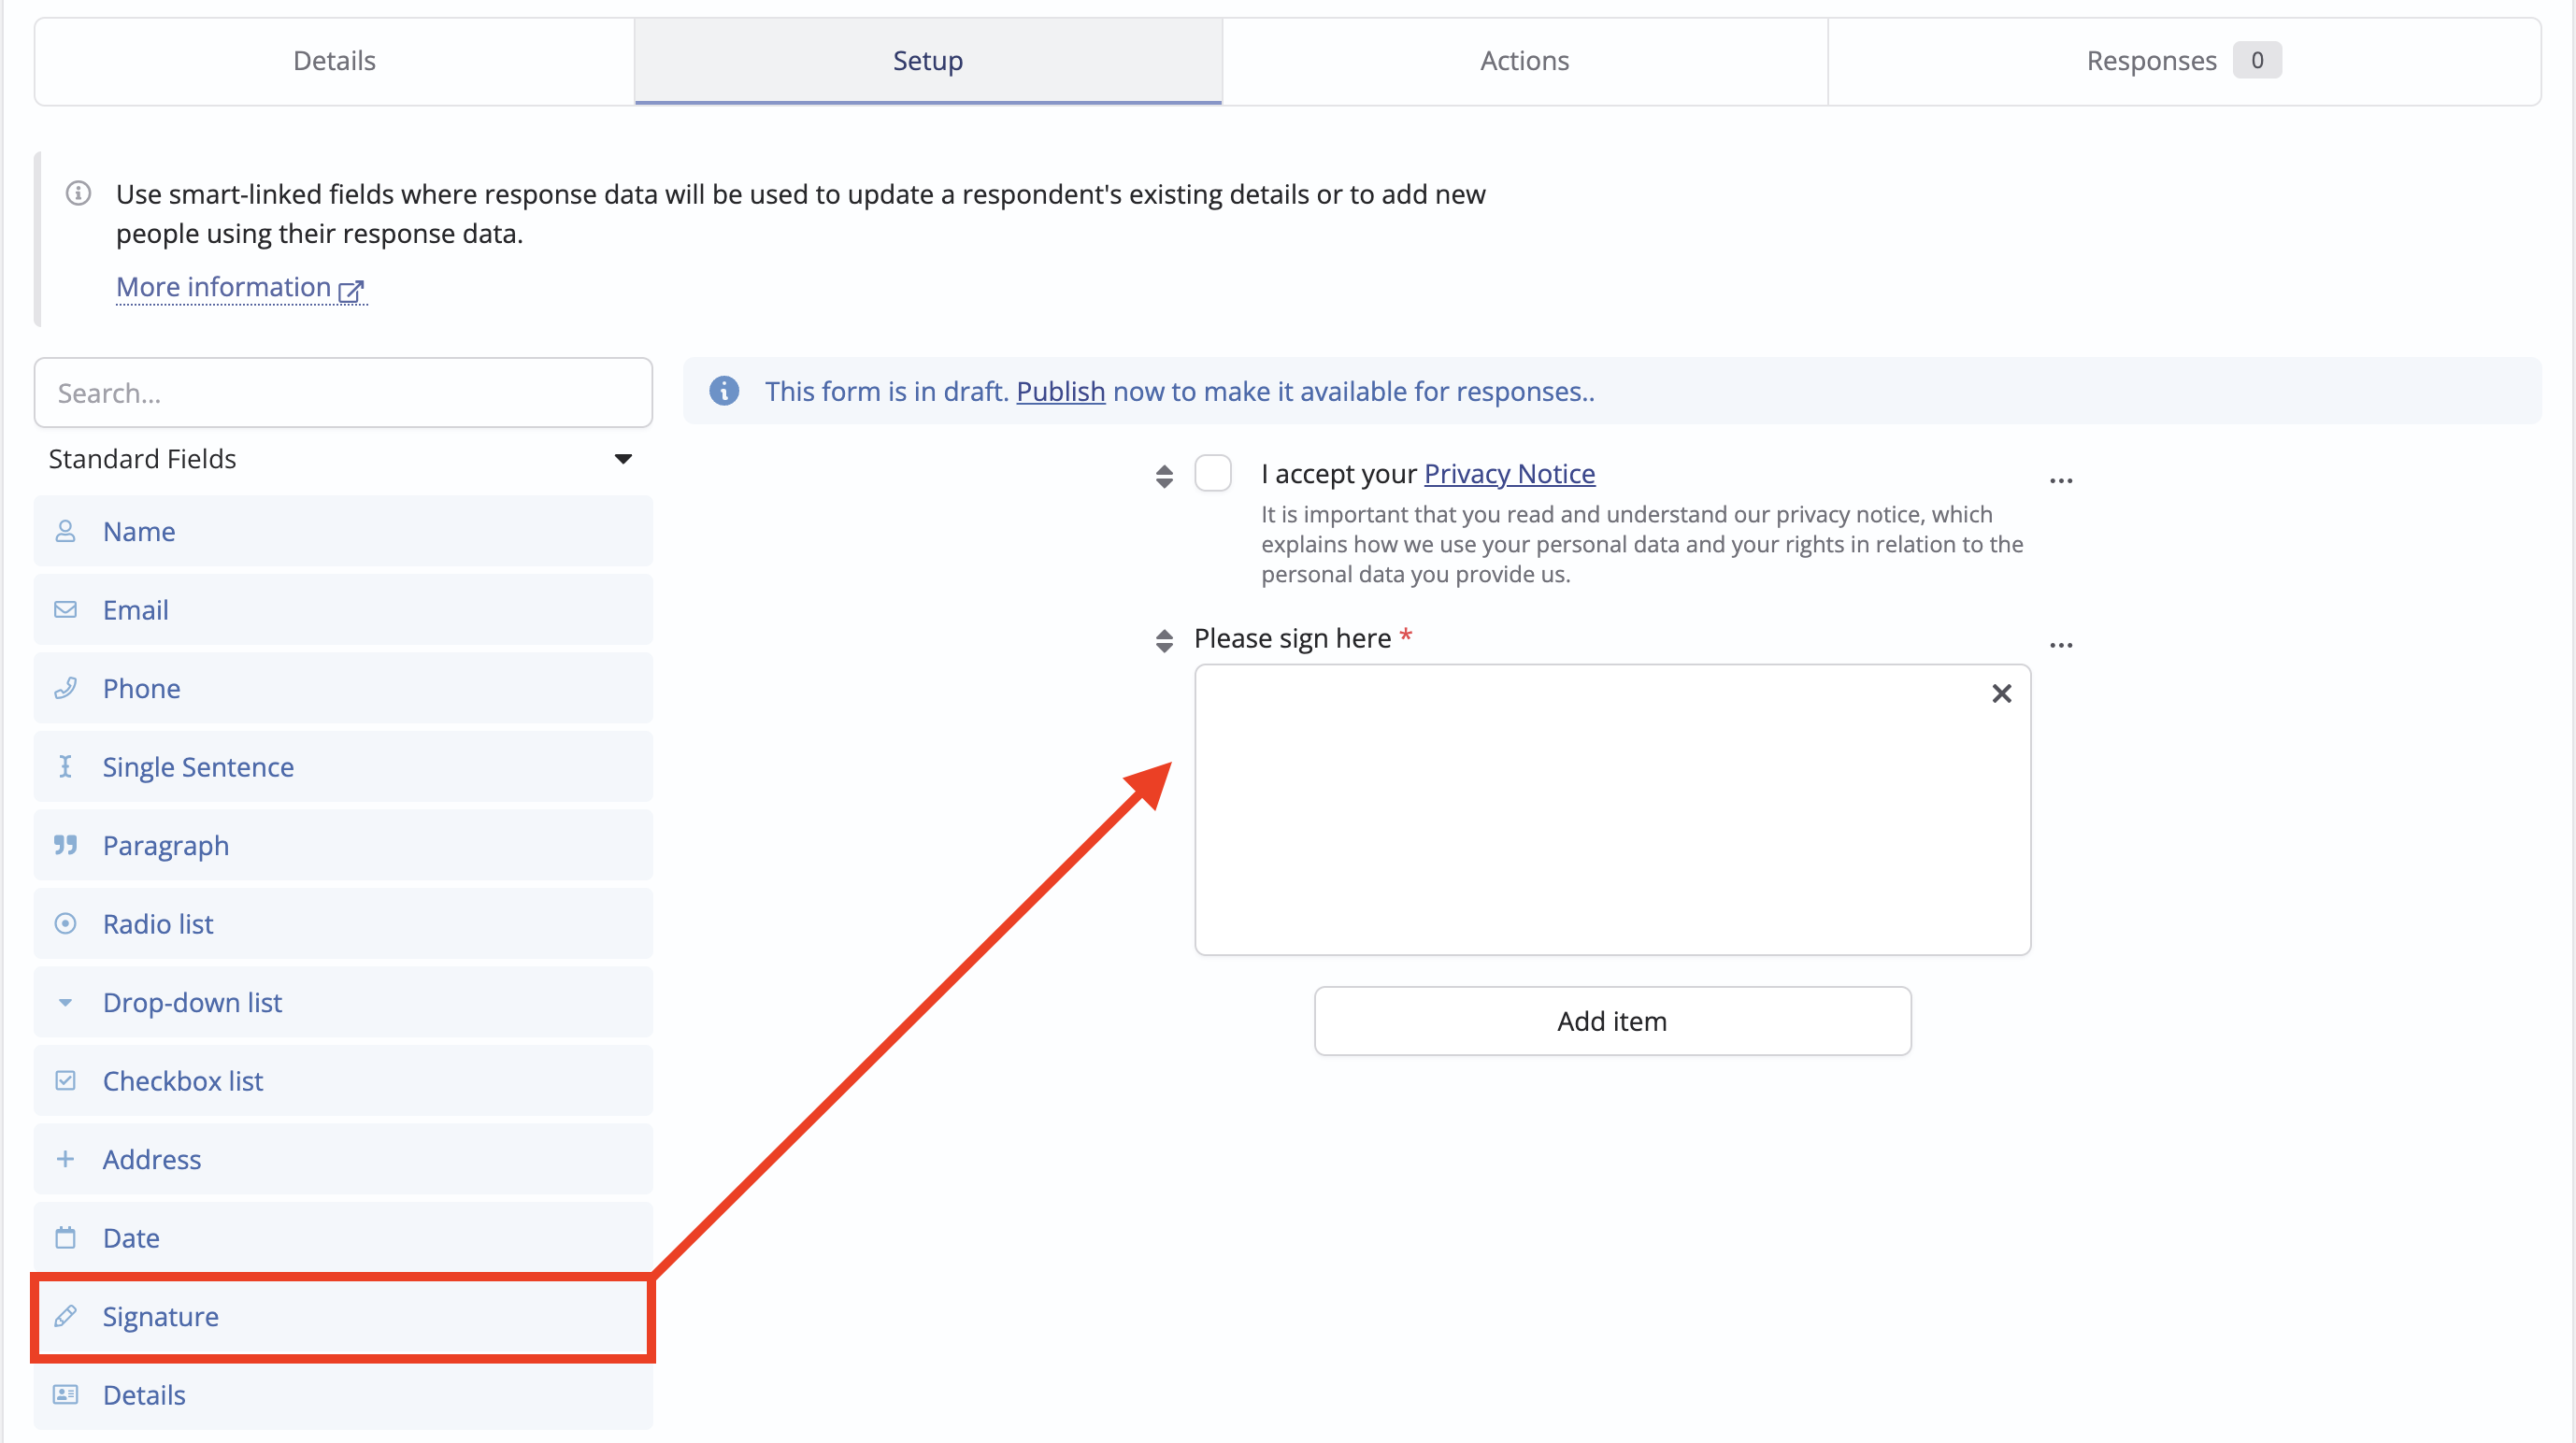
The Signature field is displayed on a form as a white box, allowing a respondent to use their finger, trackpad or mouse to provide a signature. The use of a signature field will likely depend on your processes for verifying a signature - the field is only a likeness, which means accurate verification is not practical. The signature field creates an image that is maintained against the response.
When building a form, the fields and elements available are subject to the following constraints:
- Anonymous forms do not offer Person fields, Contact fields, Contact custom fields, Child fields or Child custom fields. Only Standard fields (but not smart links) and Elements are available.
- For forms not visible in the Address Book, Contact fields and Contact custom fields are not available.
- For forms not visible in the Children module, Child fields and Child custom fields are not available.
- Smart-linked Person fields, Contact fields, Contact custom fields, Child fields or Child custom fields can only be used once and are disabled in the list if they have already been used. For example, you cannot have two smart-linked email fields on the same form; you can only smart link to one Email address field in a person's profile details.
Continue adding fields and elements to build your form. Note the options to drag and reorder items, the icon distinguishing smart-linked and conditional items and the item actions to Duplicate, Edit, Delete and View changes.

Top Tip! Handling parent/carer forms and multiple children
Many scenarios require a parent or carer to complete a form on behalf of multiple children. Before building your form, consider the following:
One approach might be to build a single form suitable for multiple children's details, adding several repeated sections of questions —one section per child —with enough sections for the maximum number of children that a parent or carer may need to use. With this approach, the response can only be linked to one parent or carer but not to another parent or carer or each child; a form can only be linked to one person. The user experience may also be frustrating - have you added enough sections to cater for larger families? Since a response is linked to a parent or carer, you will be unable to use smart linking to update a child's details. This approach is discouraged for these reasons.
A better approach, which offers the most flexibility and functionality, as well as the clearest parent/carer user experience, is to build a public form in the Children module with fields for just one child and to require a parent/carer to submit a separate response for each of their children. While this is unavoidably repetitive for a parent or carer with multiple children, it is a process they will likely already be familiar with for their children's schools. As long as your form is clear and concise and completion requests are infrequent, parents/carers will accept an occasional repetitive task to complete a form for each child. This approach allows you to use smart-linked child fields. Responses can be linked to the child and response data can be used to update the child's details (but not the child's parent/carer details).
With this approach, there are two ways you might share the form with parents and carers.
- The first is to share the form page link in your email communications to parents/carers (perhaps authored from the Children module using the Send to primary parents/carers or Send to all parents/carers option) or make the form available through your website (either embedding the form itself or embedding a link to the form). The email or website page, along with the form itself, should provide clear instructions asking parents or carers to submit a form response for each of their children. Responses received can then be linked to the appropriate child in the Children module and any actions or suggested changes to child details can be processed.
- The second way is to send form invitations. See the related support article for further information on Sending form invites. However, to track the response status of each child and pre-populate each child's existing details into a form built with smart-linked fields, the invites must be sent to the child, which will be delivered to the address specified in the Child Email field. It is only possible to surface a child's existing smart-linked details and track that child's invitation response if the invitation is sent to the child. However, if you add a parent /carer email address to the Child Email field for each invited child in your Children module, you can deliver the invitation messages to the parent/carer's inbox.
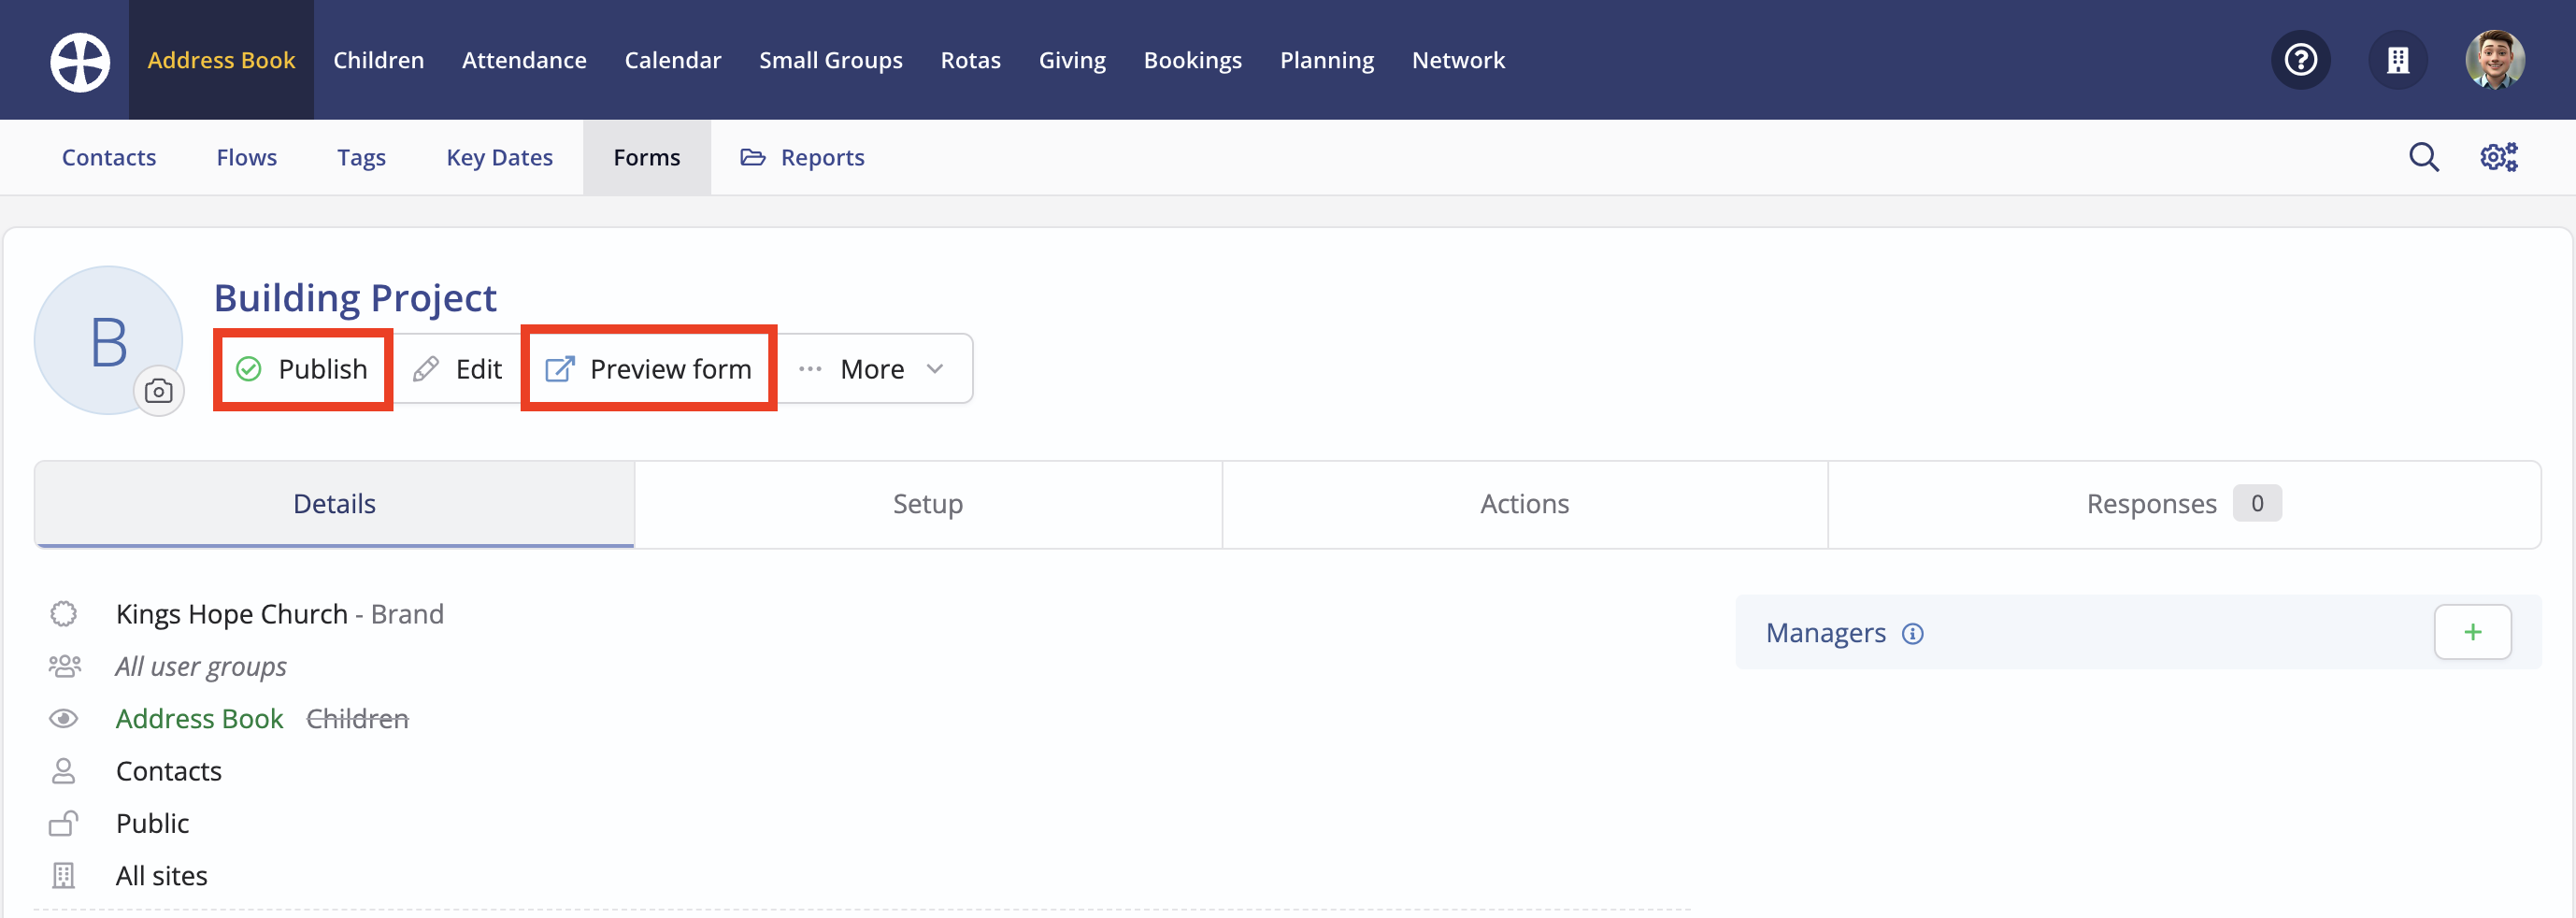
You can preview a Draft form at any time by clicking Preview form. When you have finished building the form, you can Publish it, ready to accept responses.
Other form-building options
In this section, we look at some further form-building customisation options:
- Customising the Success Message that people see when submitting a response
- Customising the Submission Confirmation email that respondents receive
- Assigning Managers who are notified when a response is submitted
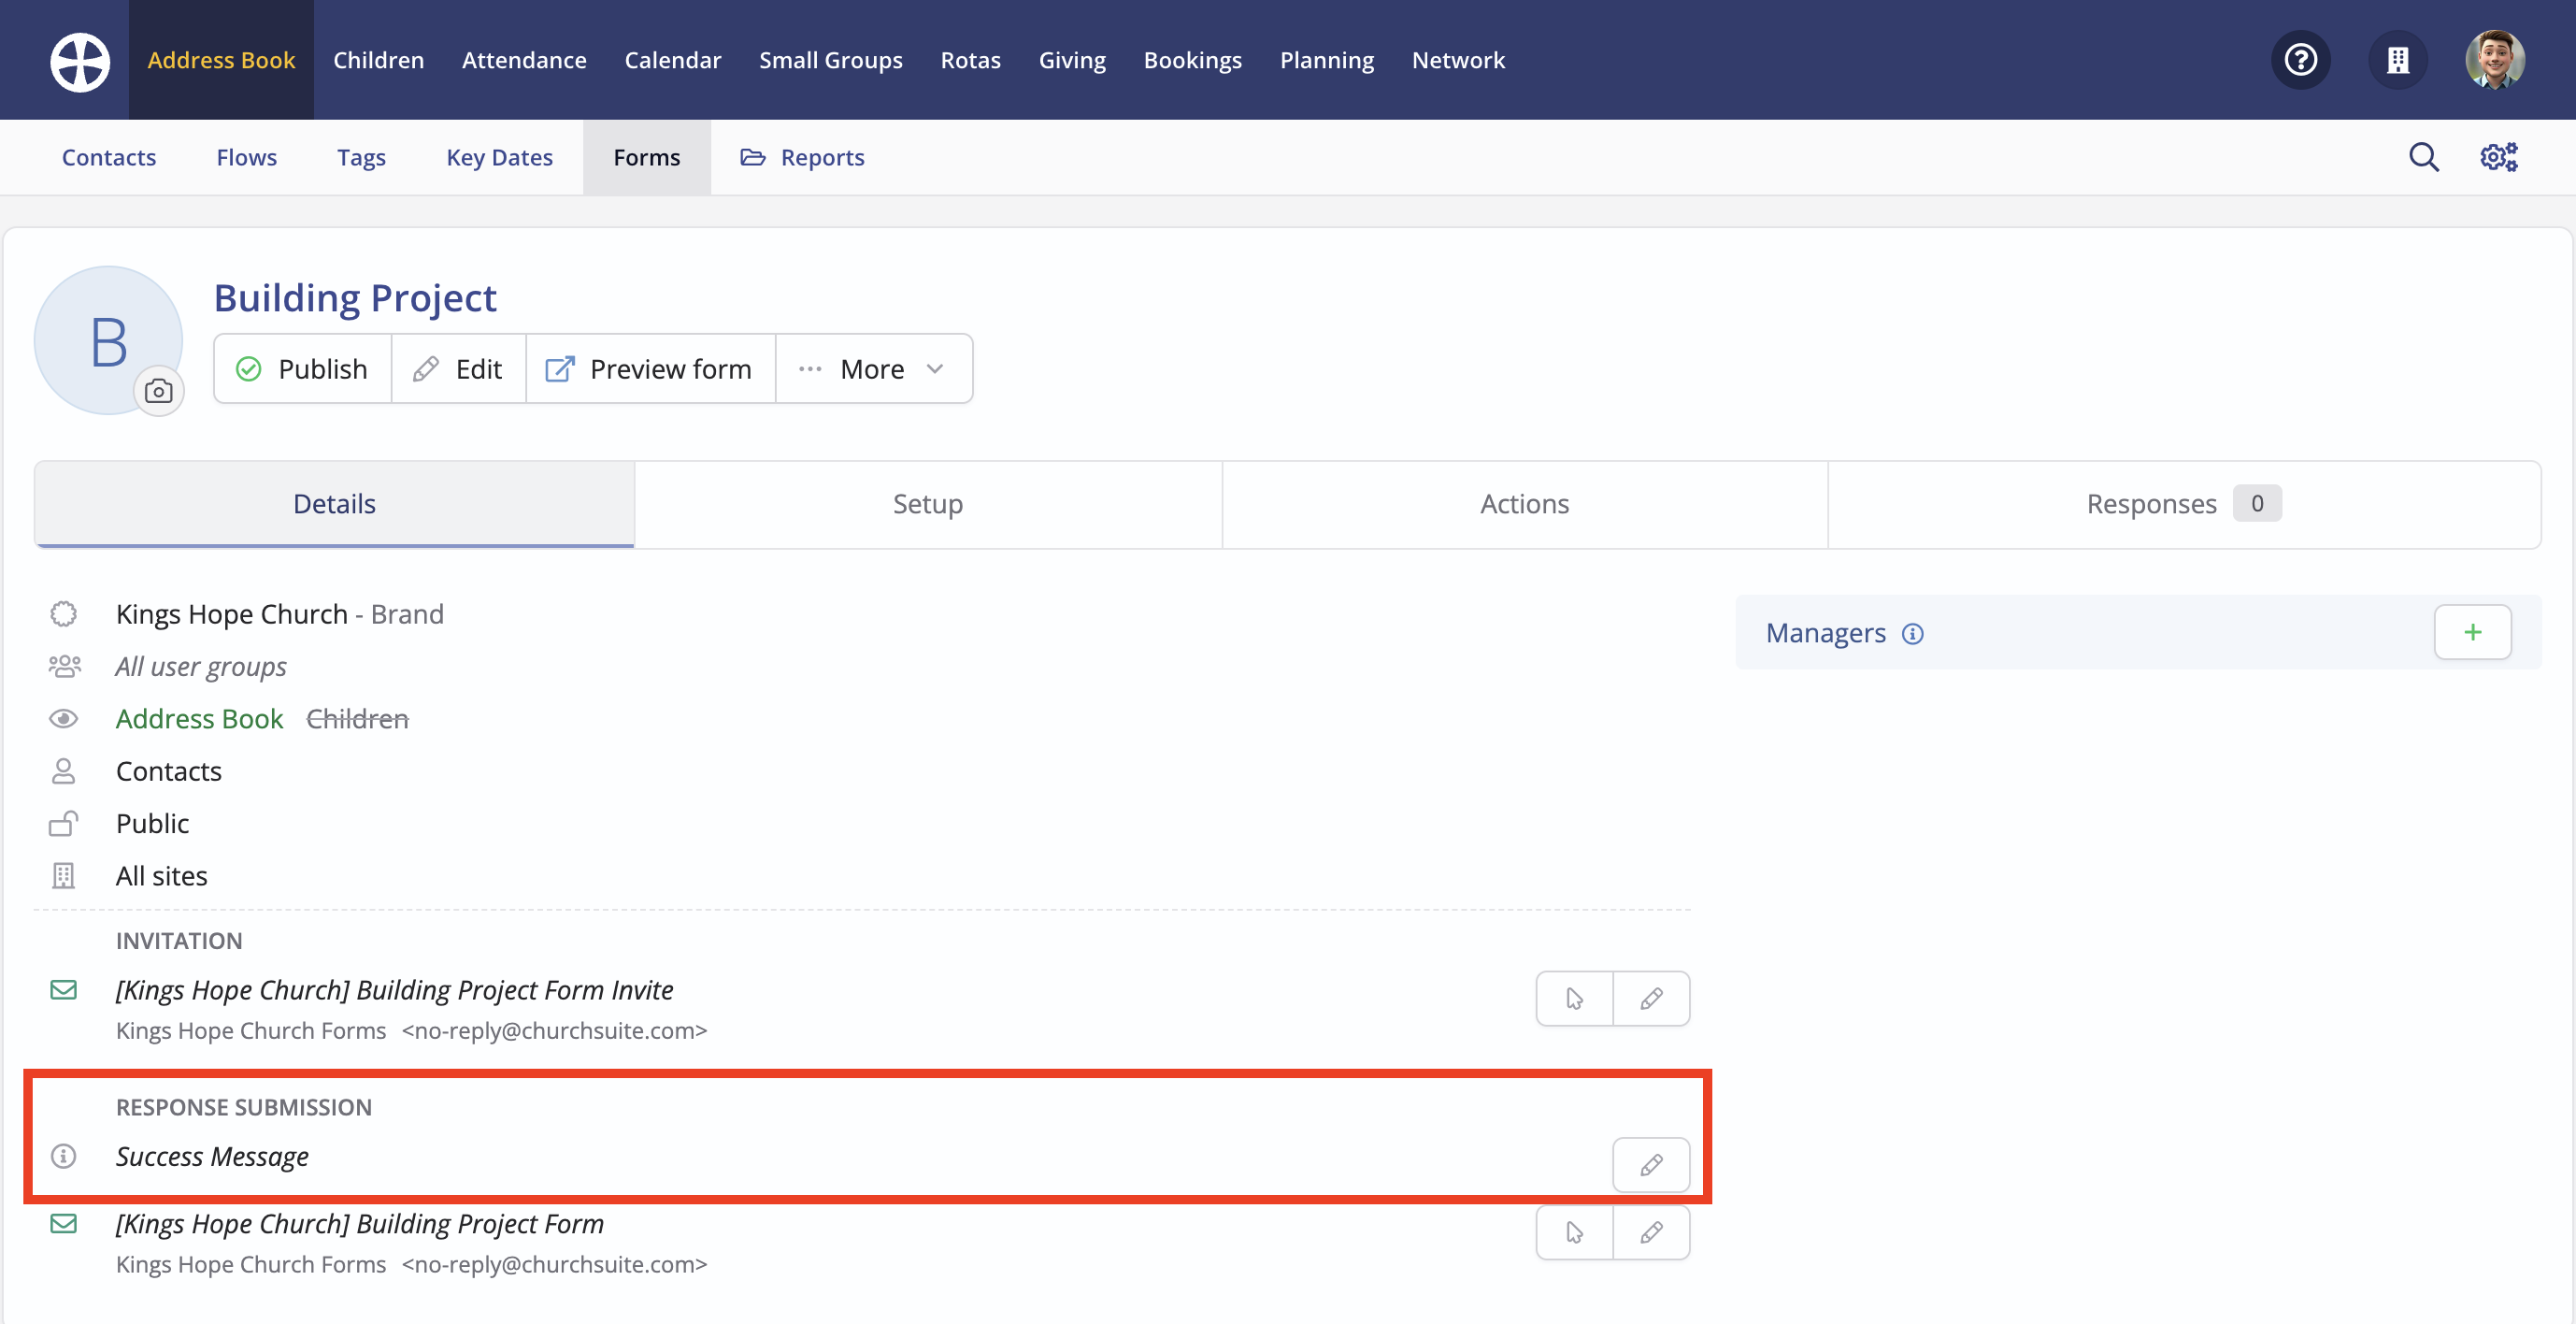
Optionally Edit and add a custom Success Message that shows on the screen when a form response is submitted. This could be a brief thank-you message but it can include embedded links to follow-up resources on your website.
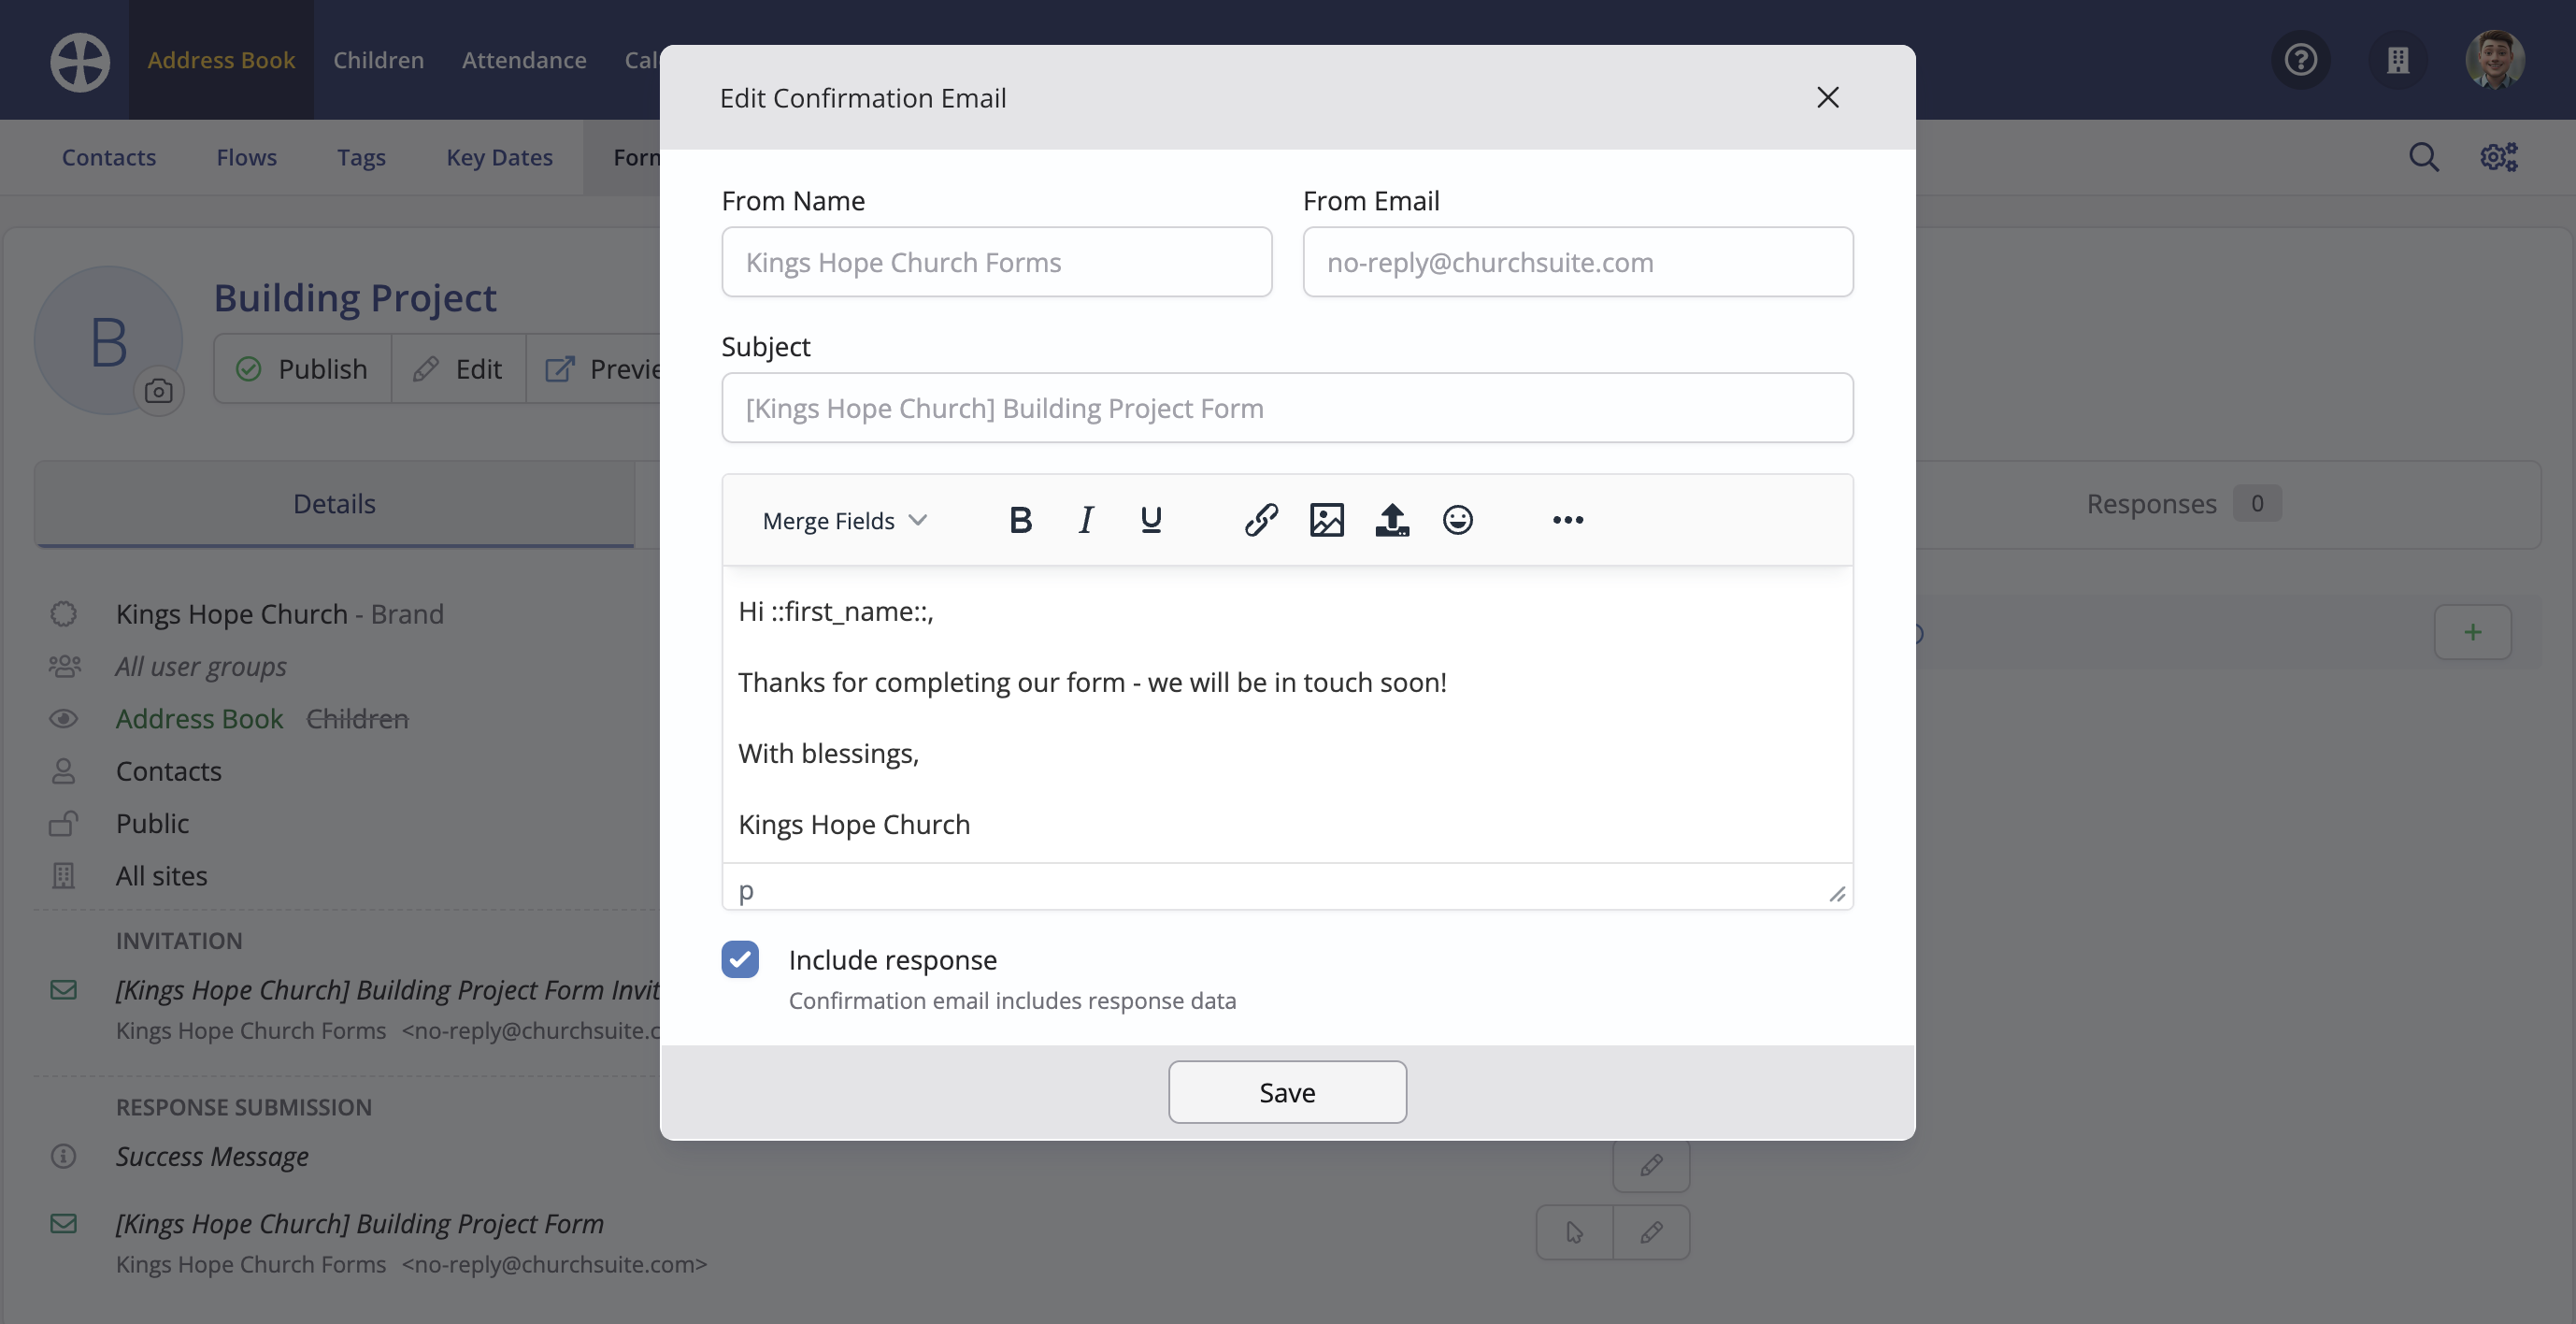
Respondents will always receive a confirmation email when submitting a form response (and if they later change a previously submitted response). Click Edit to add a custom confirmation message:
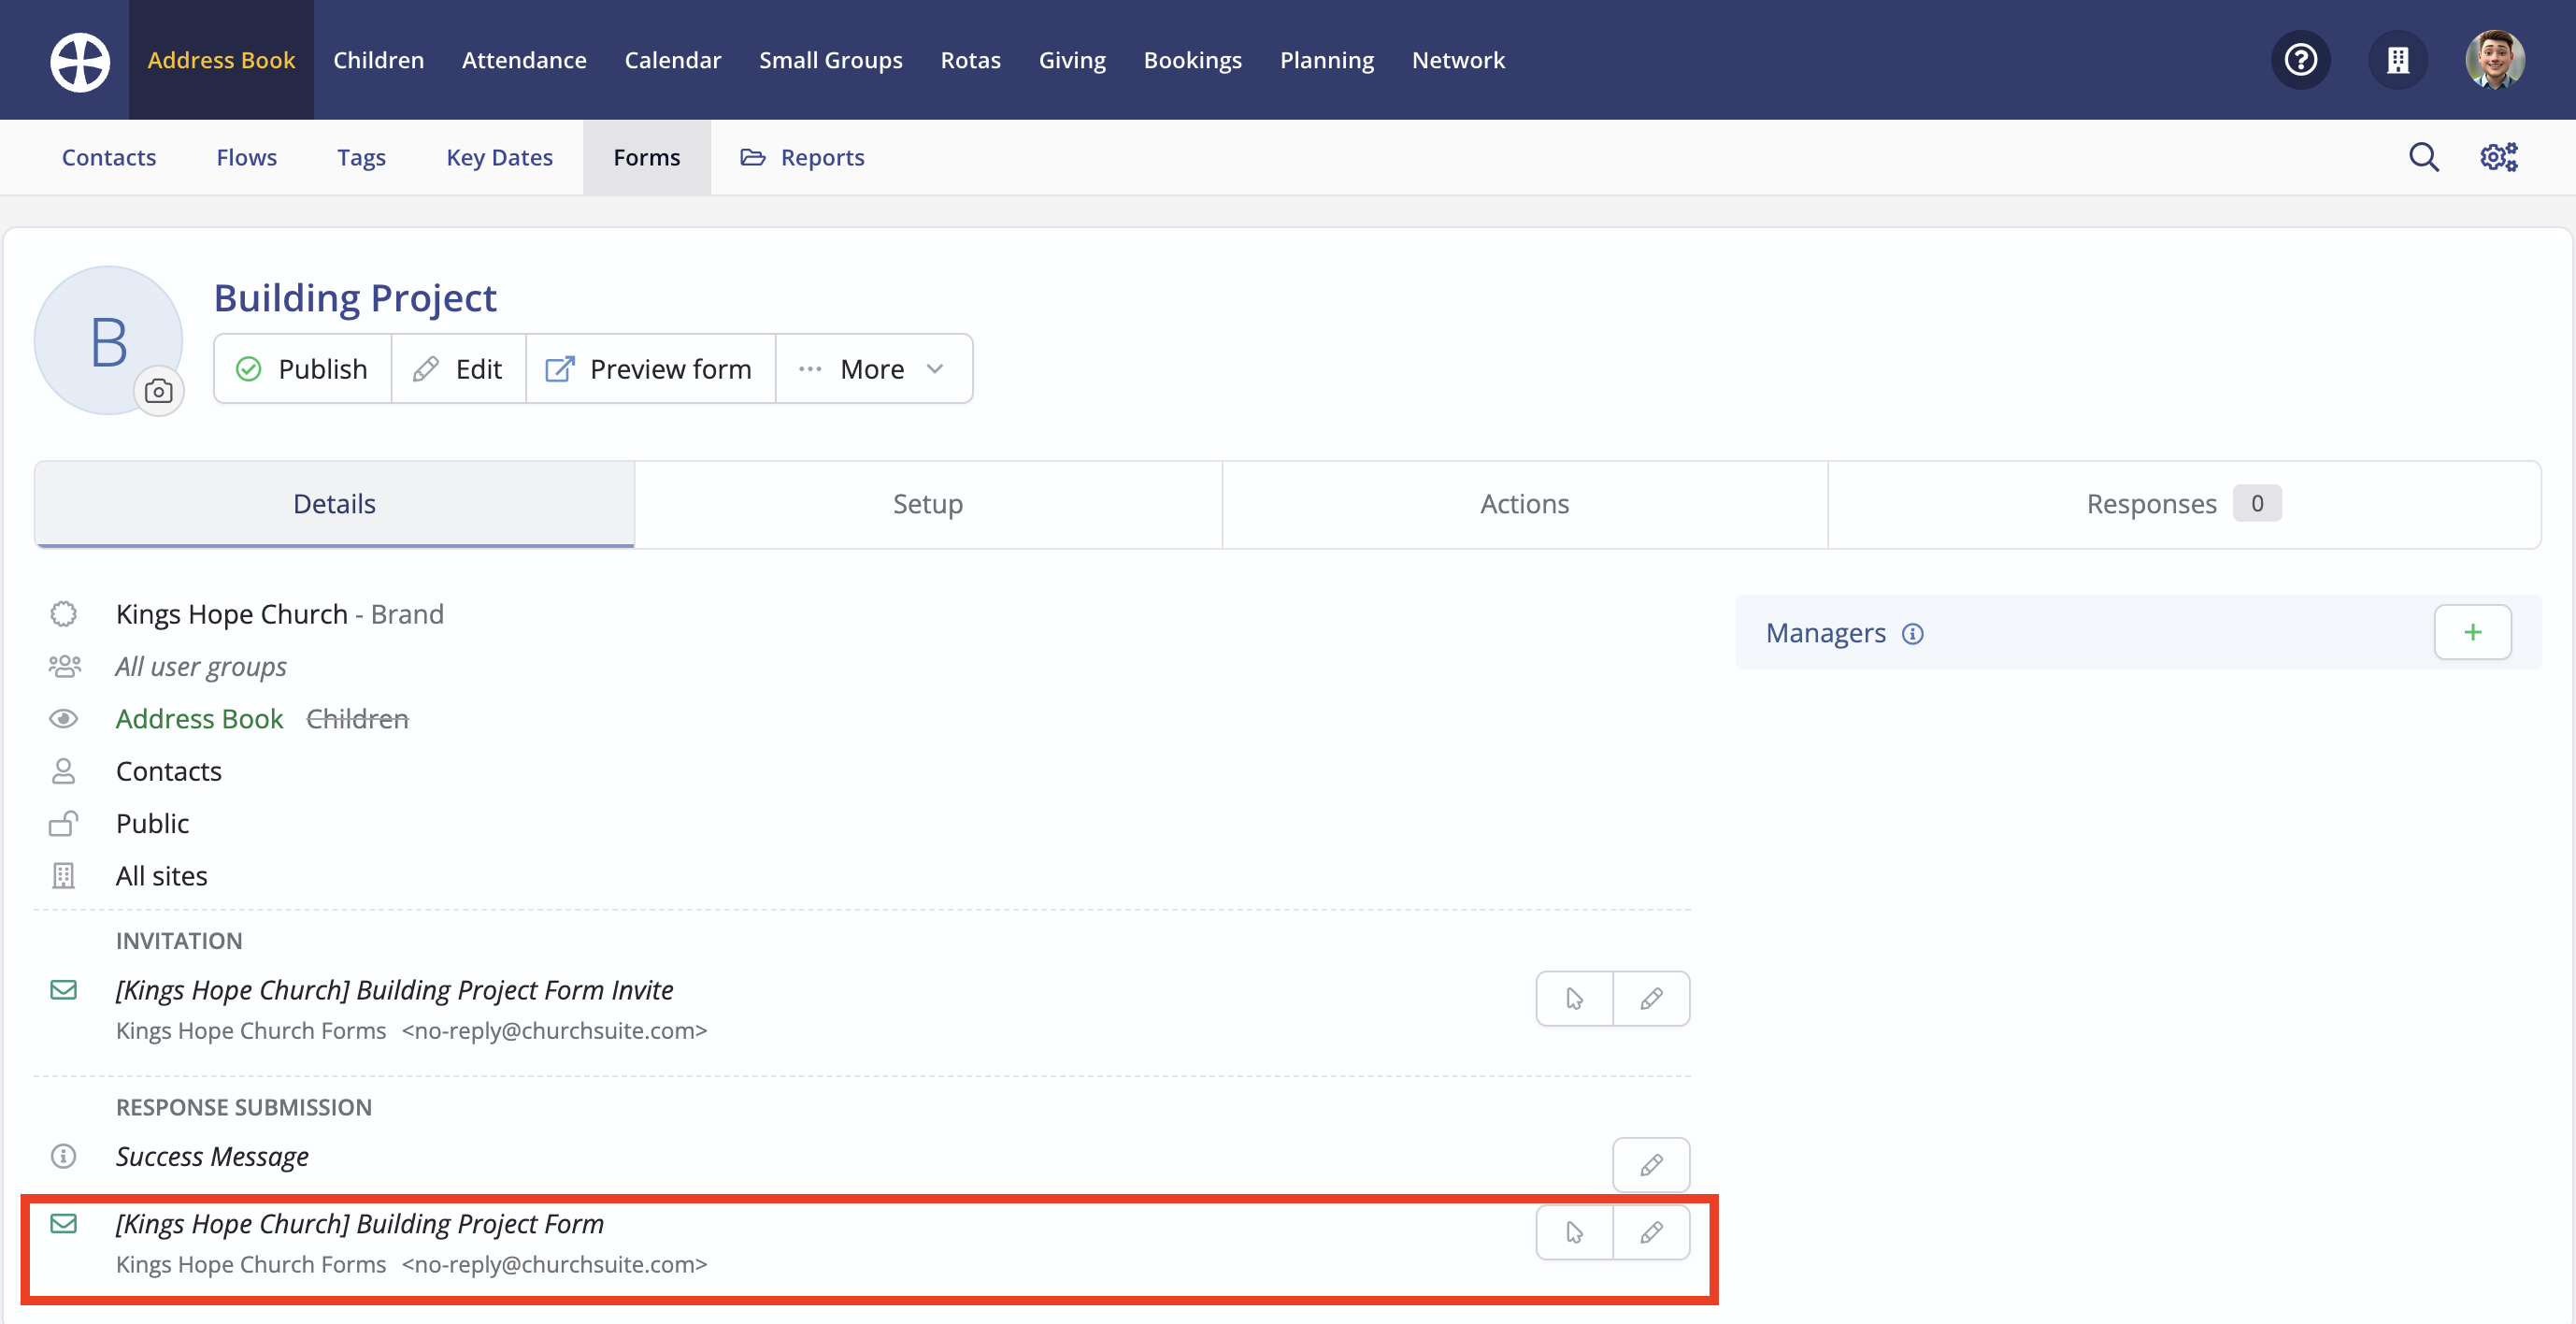
On the Edit confirmation pop-up, note the options for personalising the email sender details, subject and message. The message field supports 'merge field' personalisation, embedded links and styling. You can also select Include response, which will embed the person's form responses into the confirmation email. When the response is for a form invitation, the sent confirmation is logged against the known responder's communication log in the Address Book or Children module. However, for public and anonymous forms, where responses are initially received 'unlinked,' the sent confirmation is not logged.
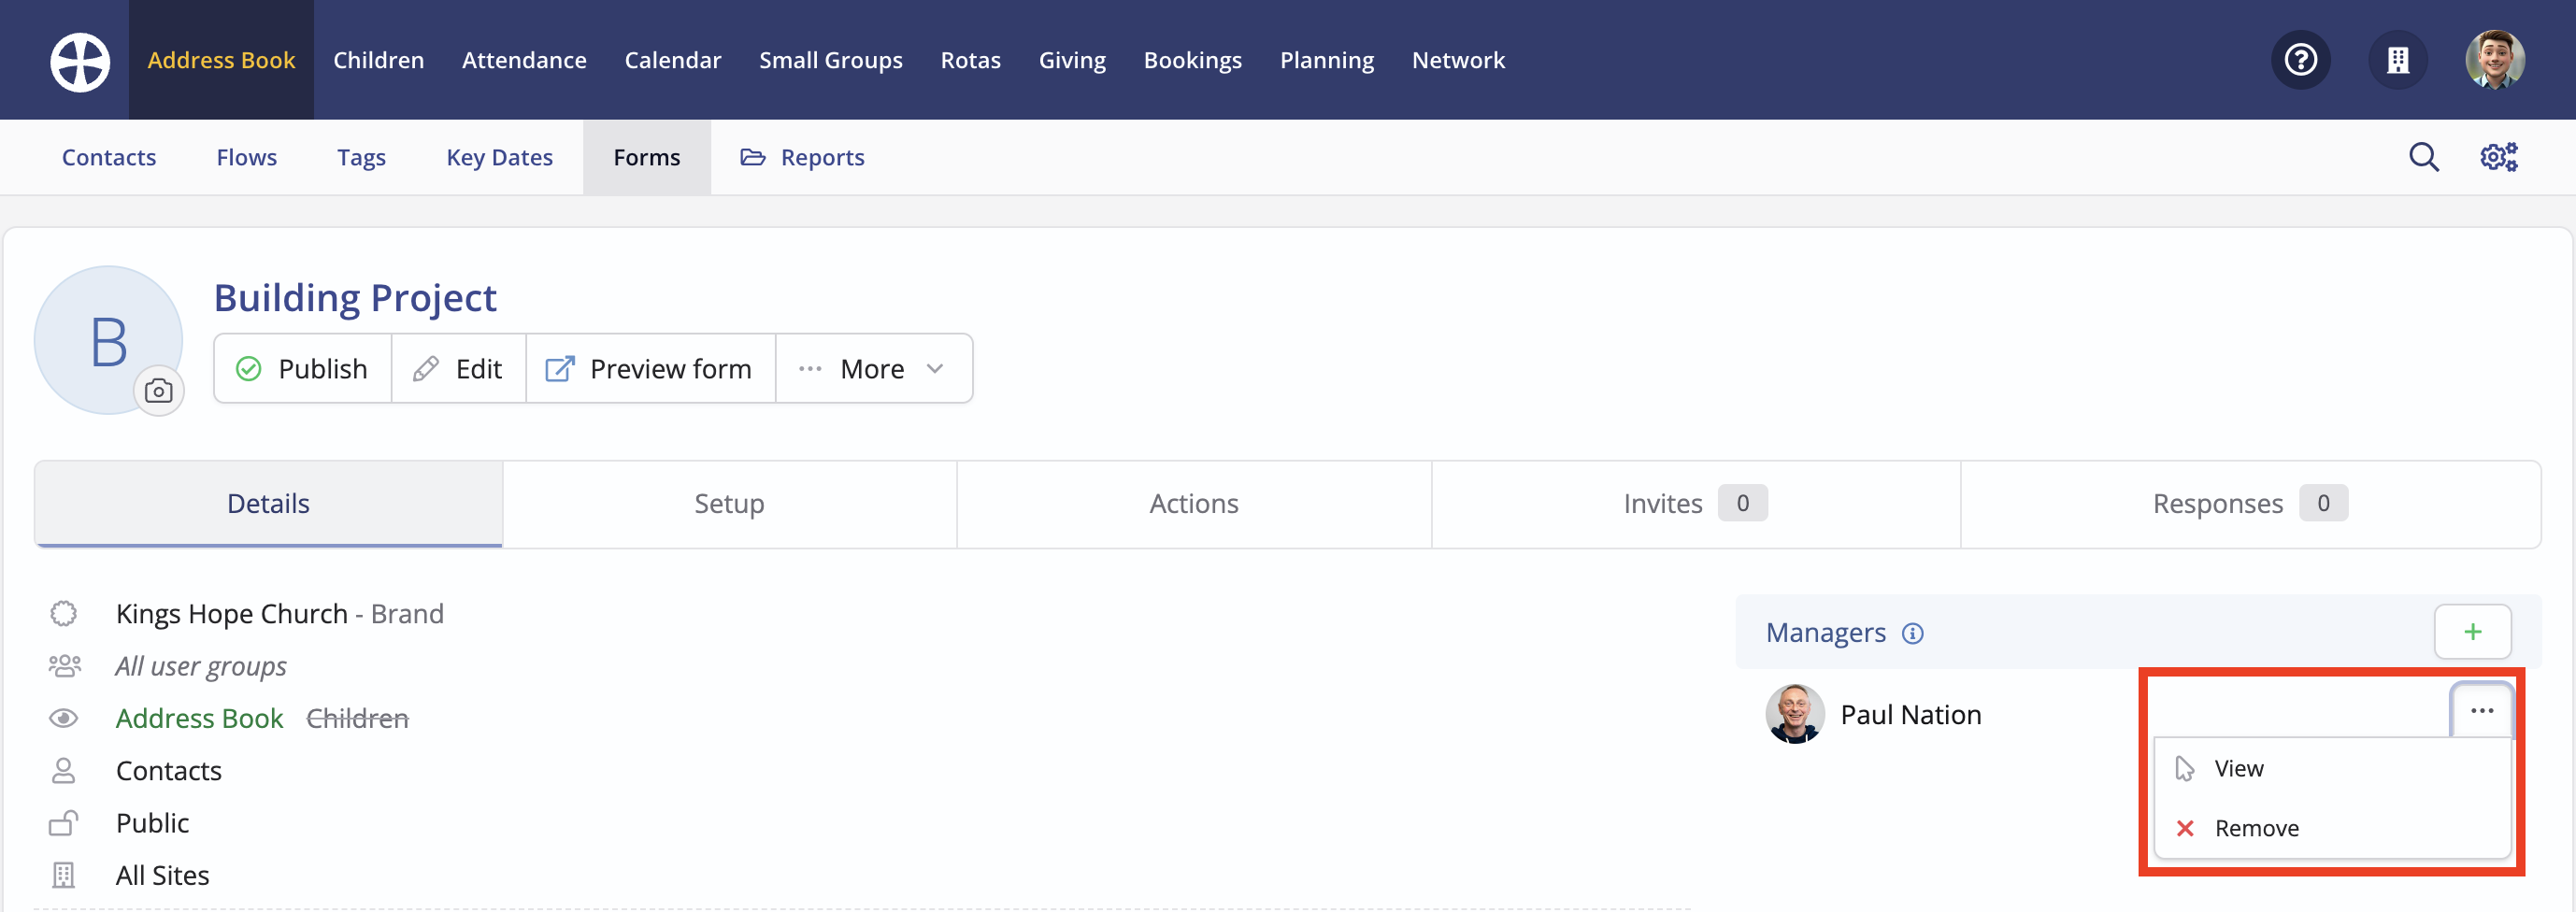
Designated form Managers will receive an email notification each time a new response is first submitted (but not if a previously submitted form response is later changed and resubmitted). The notification email only indicates that a response has been received; no personal response data is included in the message. However, Managers with module access can view the full response in ChurchSuite. Click "Add manager" to search and select a contact from the Address Book.
Managing forms
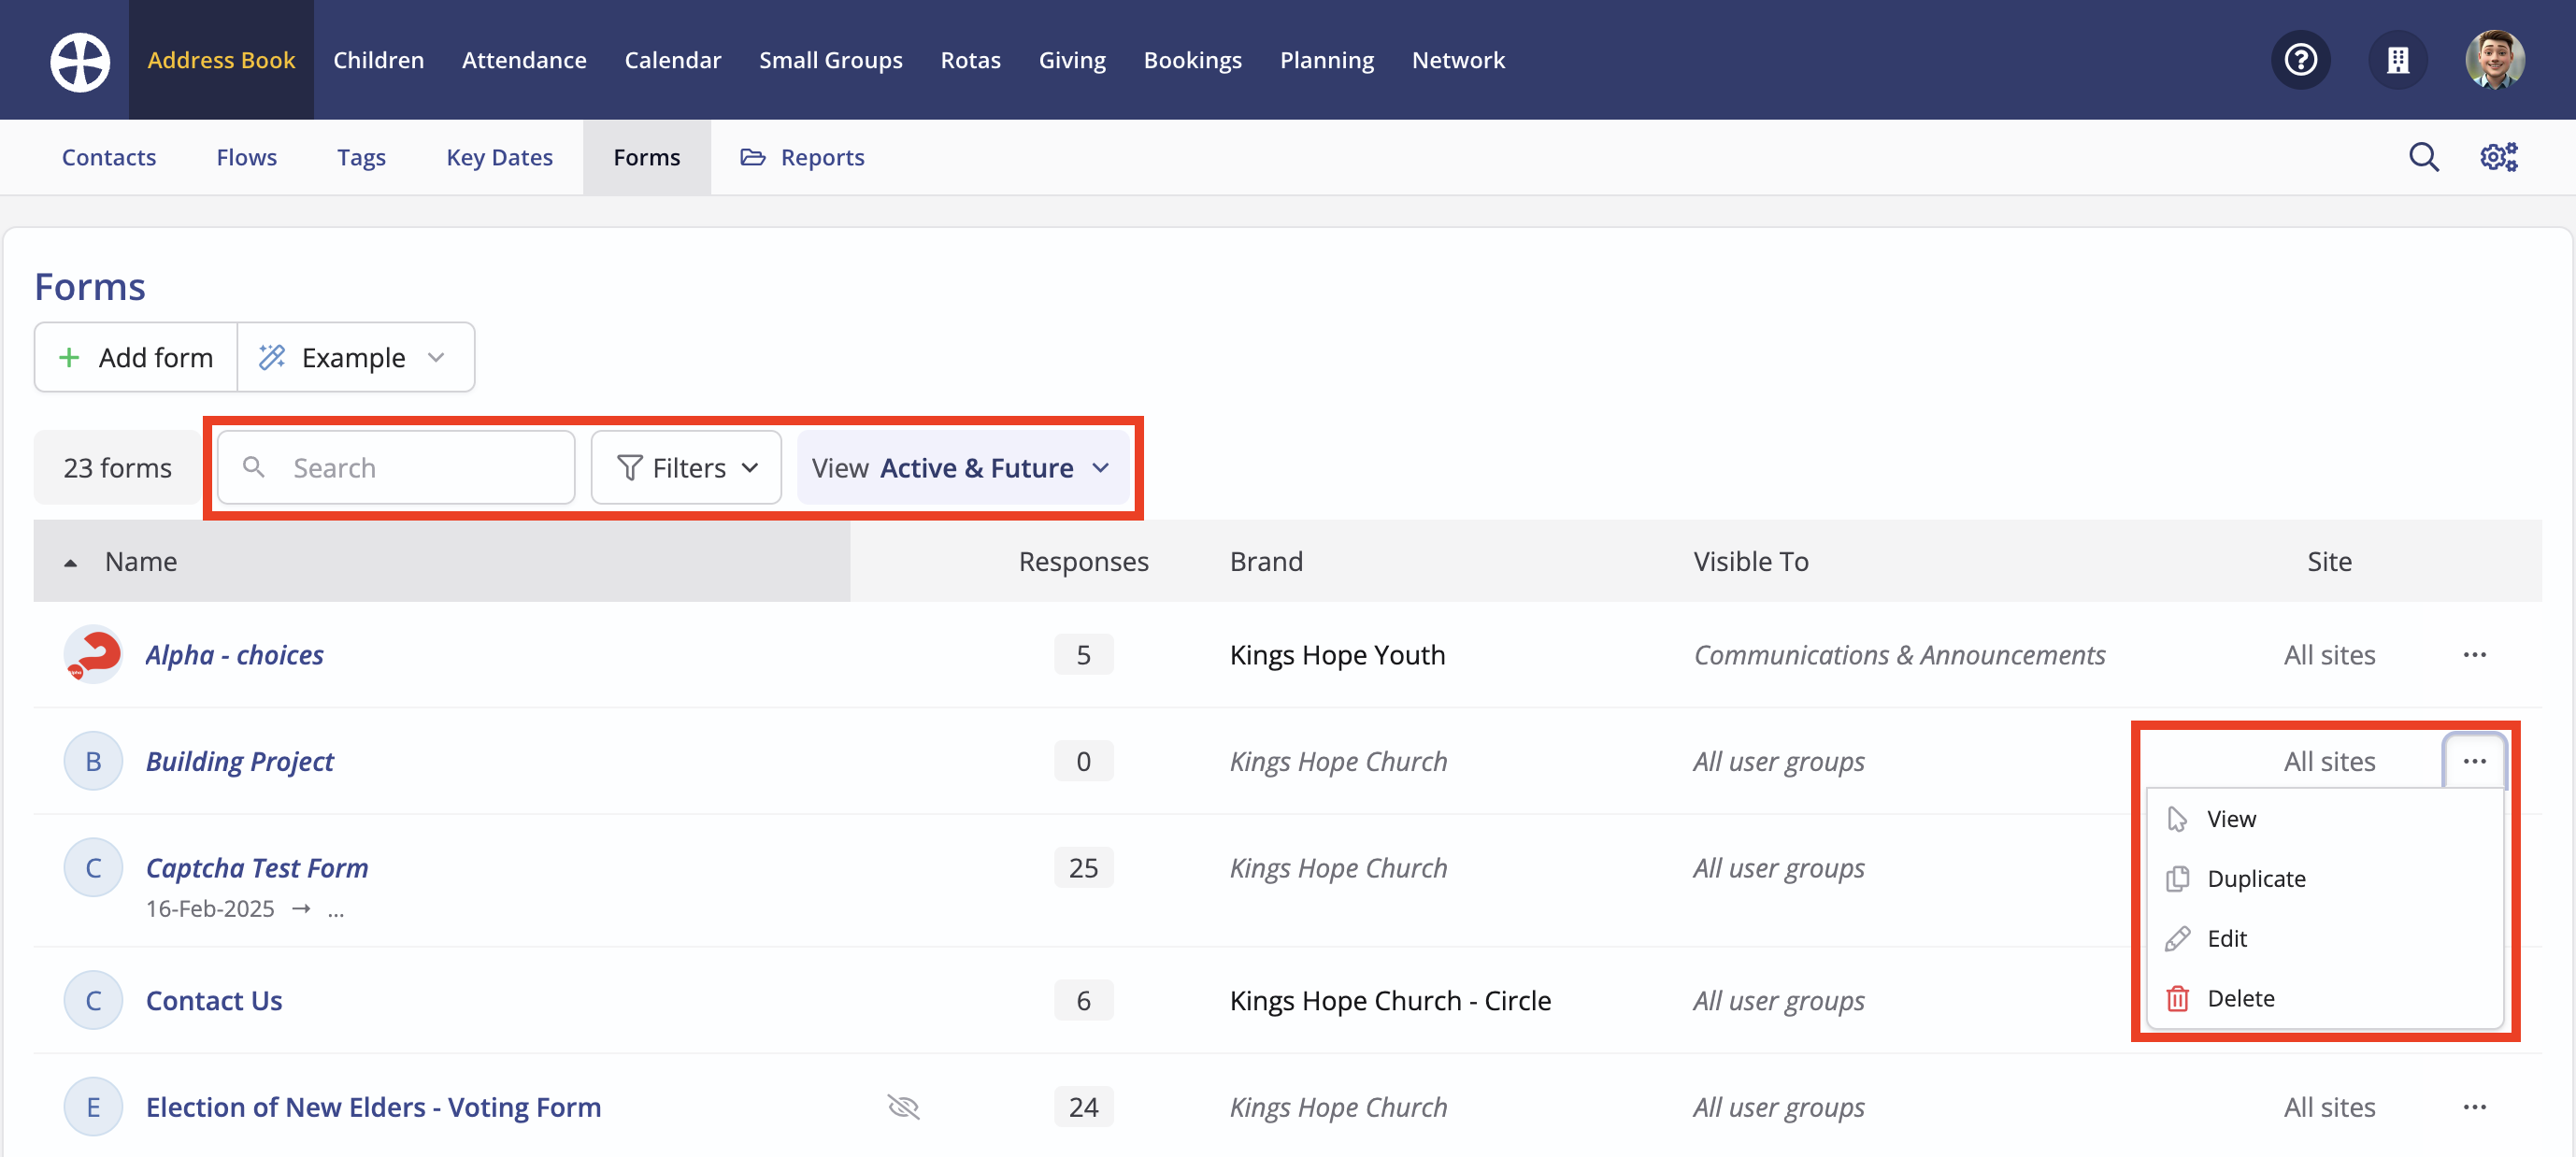
Returning to the Forms section of the module, you can further manage all the forms in the module. You can filter by Status (Draft or Published) and use Search to filter a long list of forms. The list shows Active & Future forms by default but you can switch to view Past or Active or Future forms. Finally, note the form Actions to View, Duplicate, Edit or Delete a form.
Making changes after responses have been received
Certain changes to form settings cannot be made once invitations have been sent or responses have been received. Additionally, making changes to the fields on a form after responses have been received can result in the loss of response data in the following scenarios:
- When adding smart links to a previously unlinked field
- When changing a field's smart linking
- When deleting a field from a form
- When removing or renaming options for drop-down, radio and checklist fields
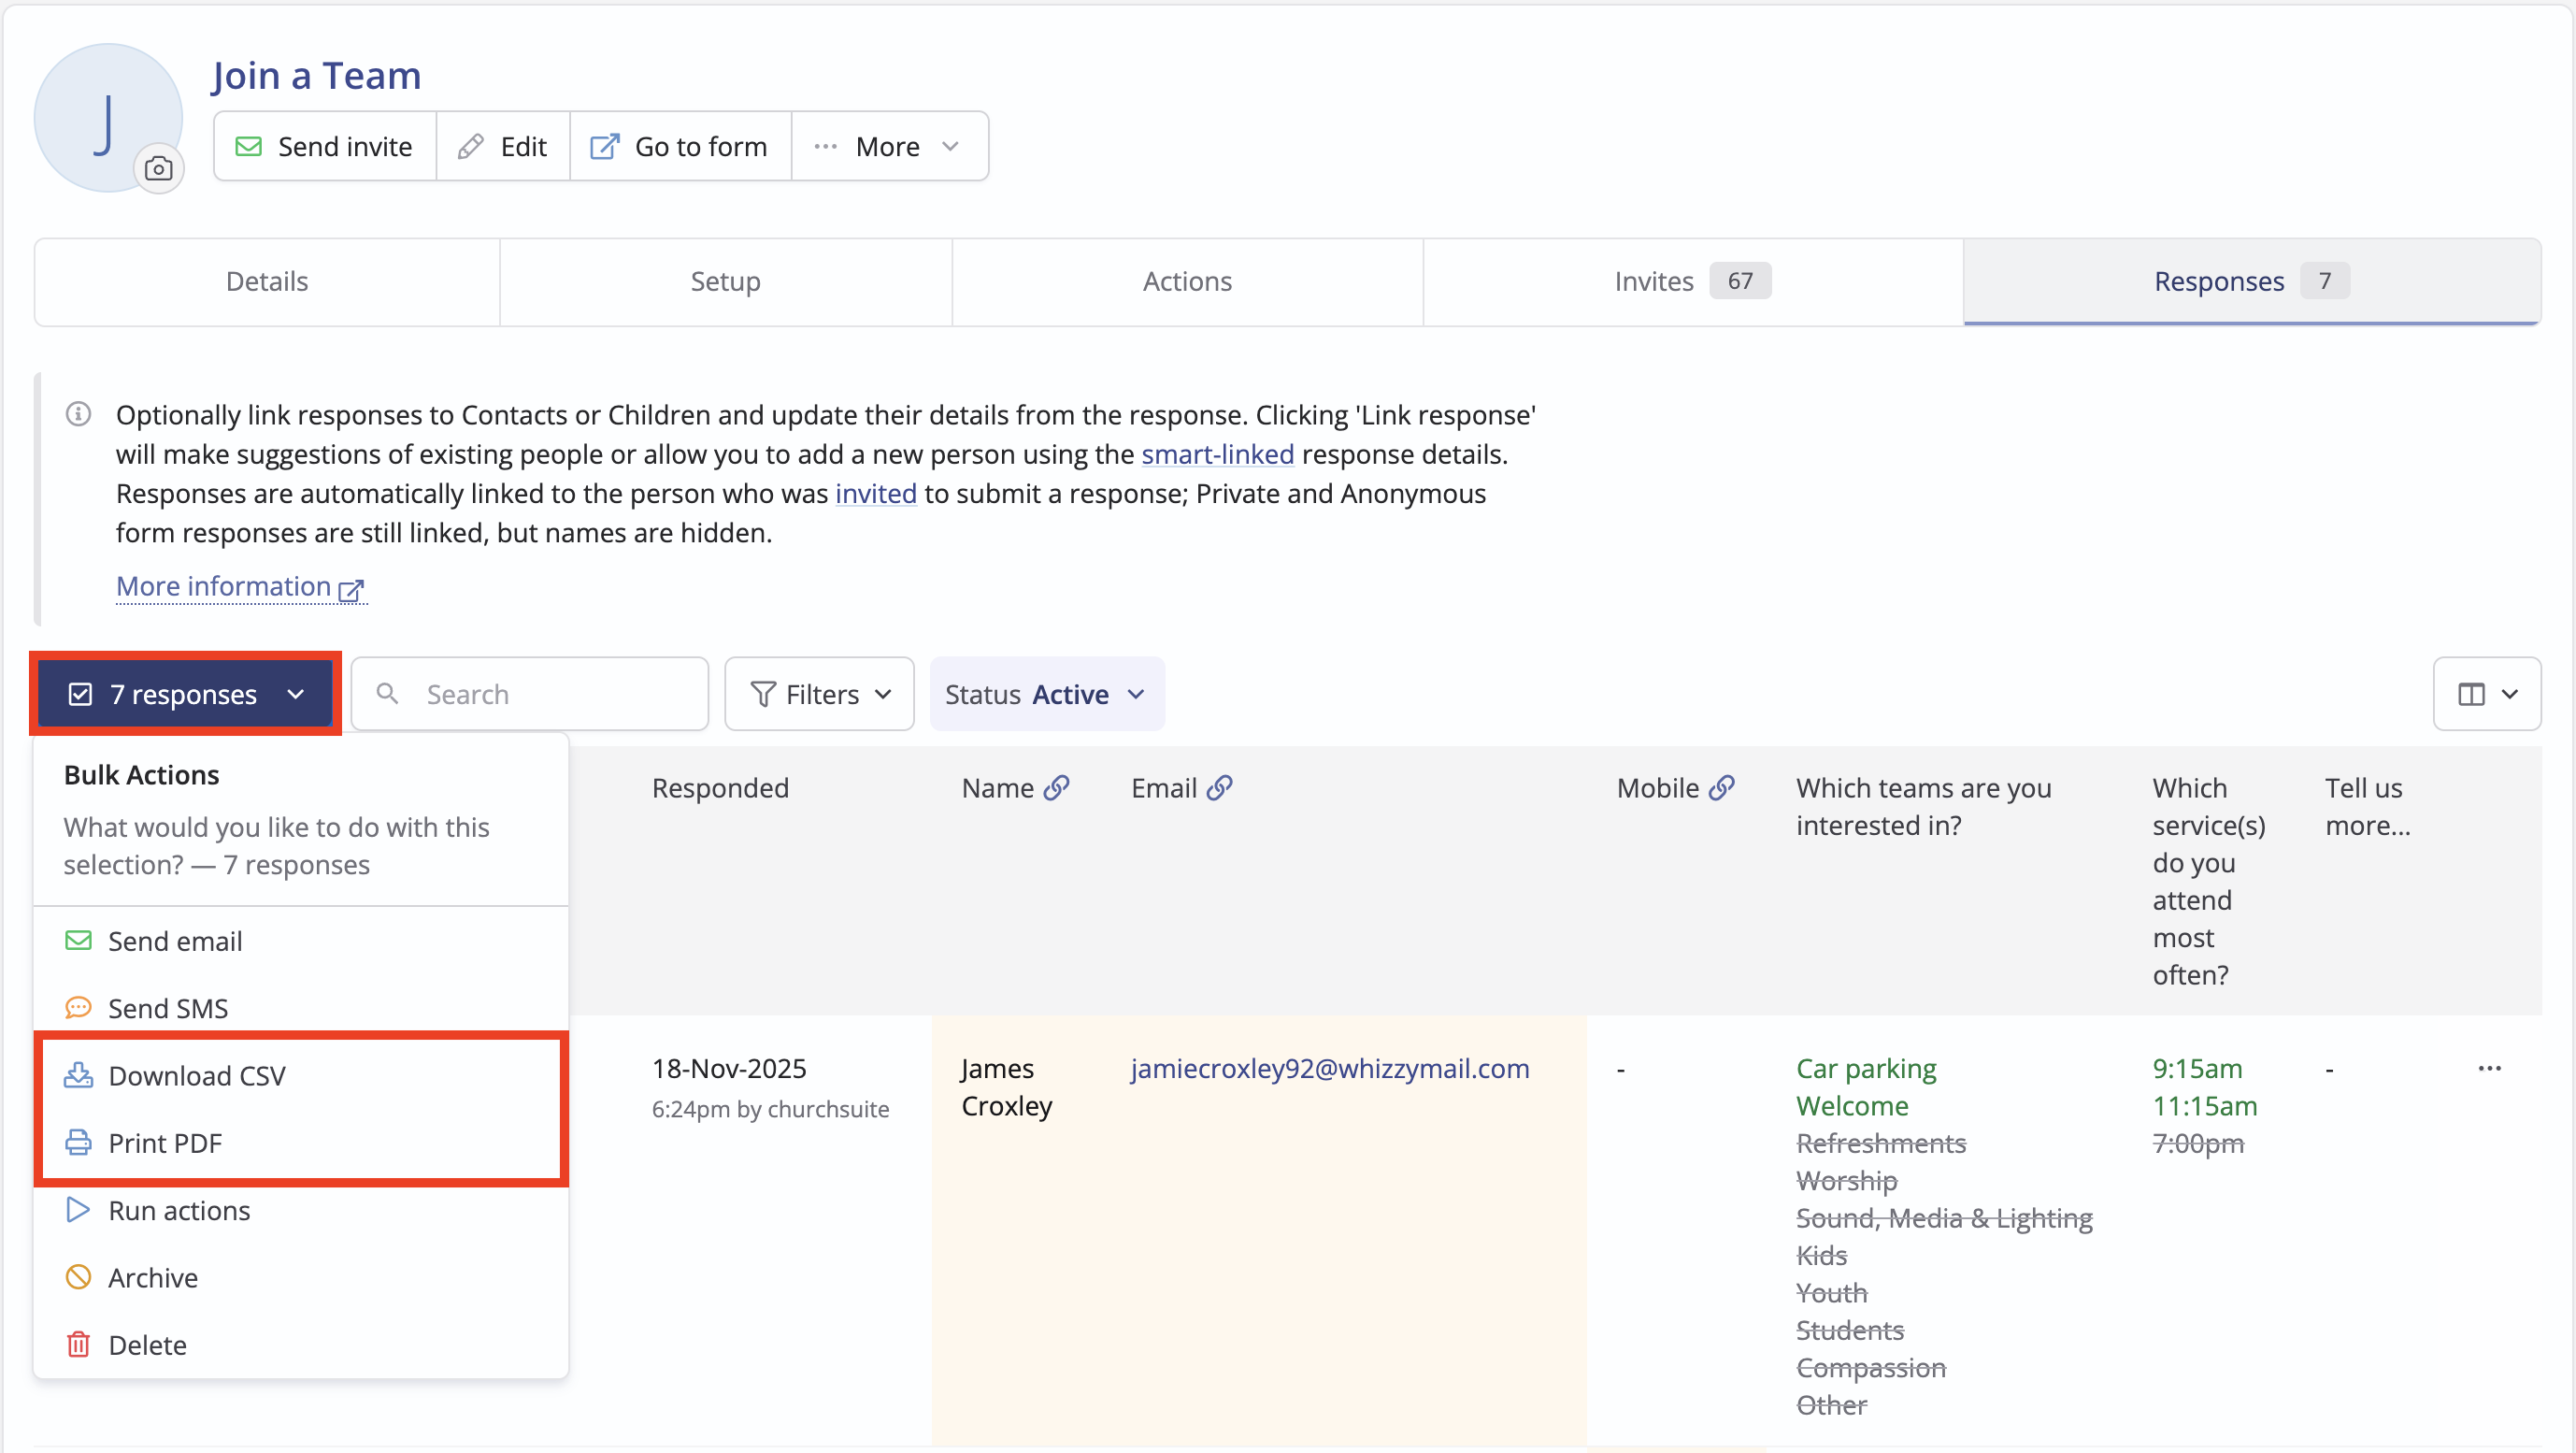
Before making field changes to a form with existing responses, we recommend downloading the existing responses to a CSV or PDF file:
Duplicating forms
Duplicating an existing form copies all its settings, fields, options, smart links, managers, submission confirmation, success message, and any defined actions. Previous invitees and responses are not duplicated, resulting in an empty draft-status duplicate form being created, ready for use.
Deleting a form
Deleting a form will delete all form responses but not the contacts or children to whom responses are linked. This action is highly destructive to data and irreversible; delete with caution. If a form is no longer needed and no longer collecting responses, consider editing it and setting its End date in the past. The form will no longer be shown in the Active & Future list but the historic responses will be preserved.
Sharing published forms
Having built the perfect form, you'll now want to share the form and begin collecting responses. Depending on the form's settings - public, private or anonymous - and the intended audience, you can easily share forms in a variety of ways:
- Use the Send Invite workflow to share any form with specific recipients already in your Address Book or Children module in ChurchSuite. This method has distinct advantages, enabling you to track each invitee's response status and providing invitees with a great user experience, as the details are pre-populated in their response (where smart-linked fields have been used). See the related support article on Sending form invitations.
- Share the Form Page URL for public forms, such as on WhatsApp, social media pages or in your email communications. A form page URL cannot be shared for private or anonymous forms - responses are only permitted by people who have been sent a form invitation.
- Share the form's unique QR code in your communications.
Good to know!
An unsubmitted form response will persist in a respondent's browser for 24 hours, meaning a respondent can begin completing a form, close their browser or navigate away from the form, and return to it up to 24 hours later to continue completing the form.
Accessing a Form Page URL
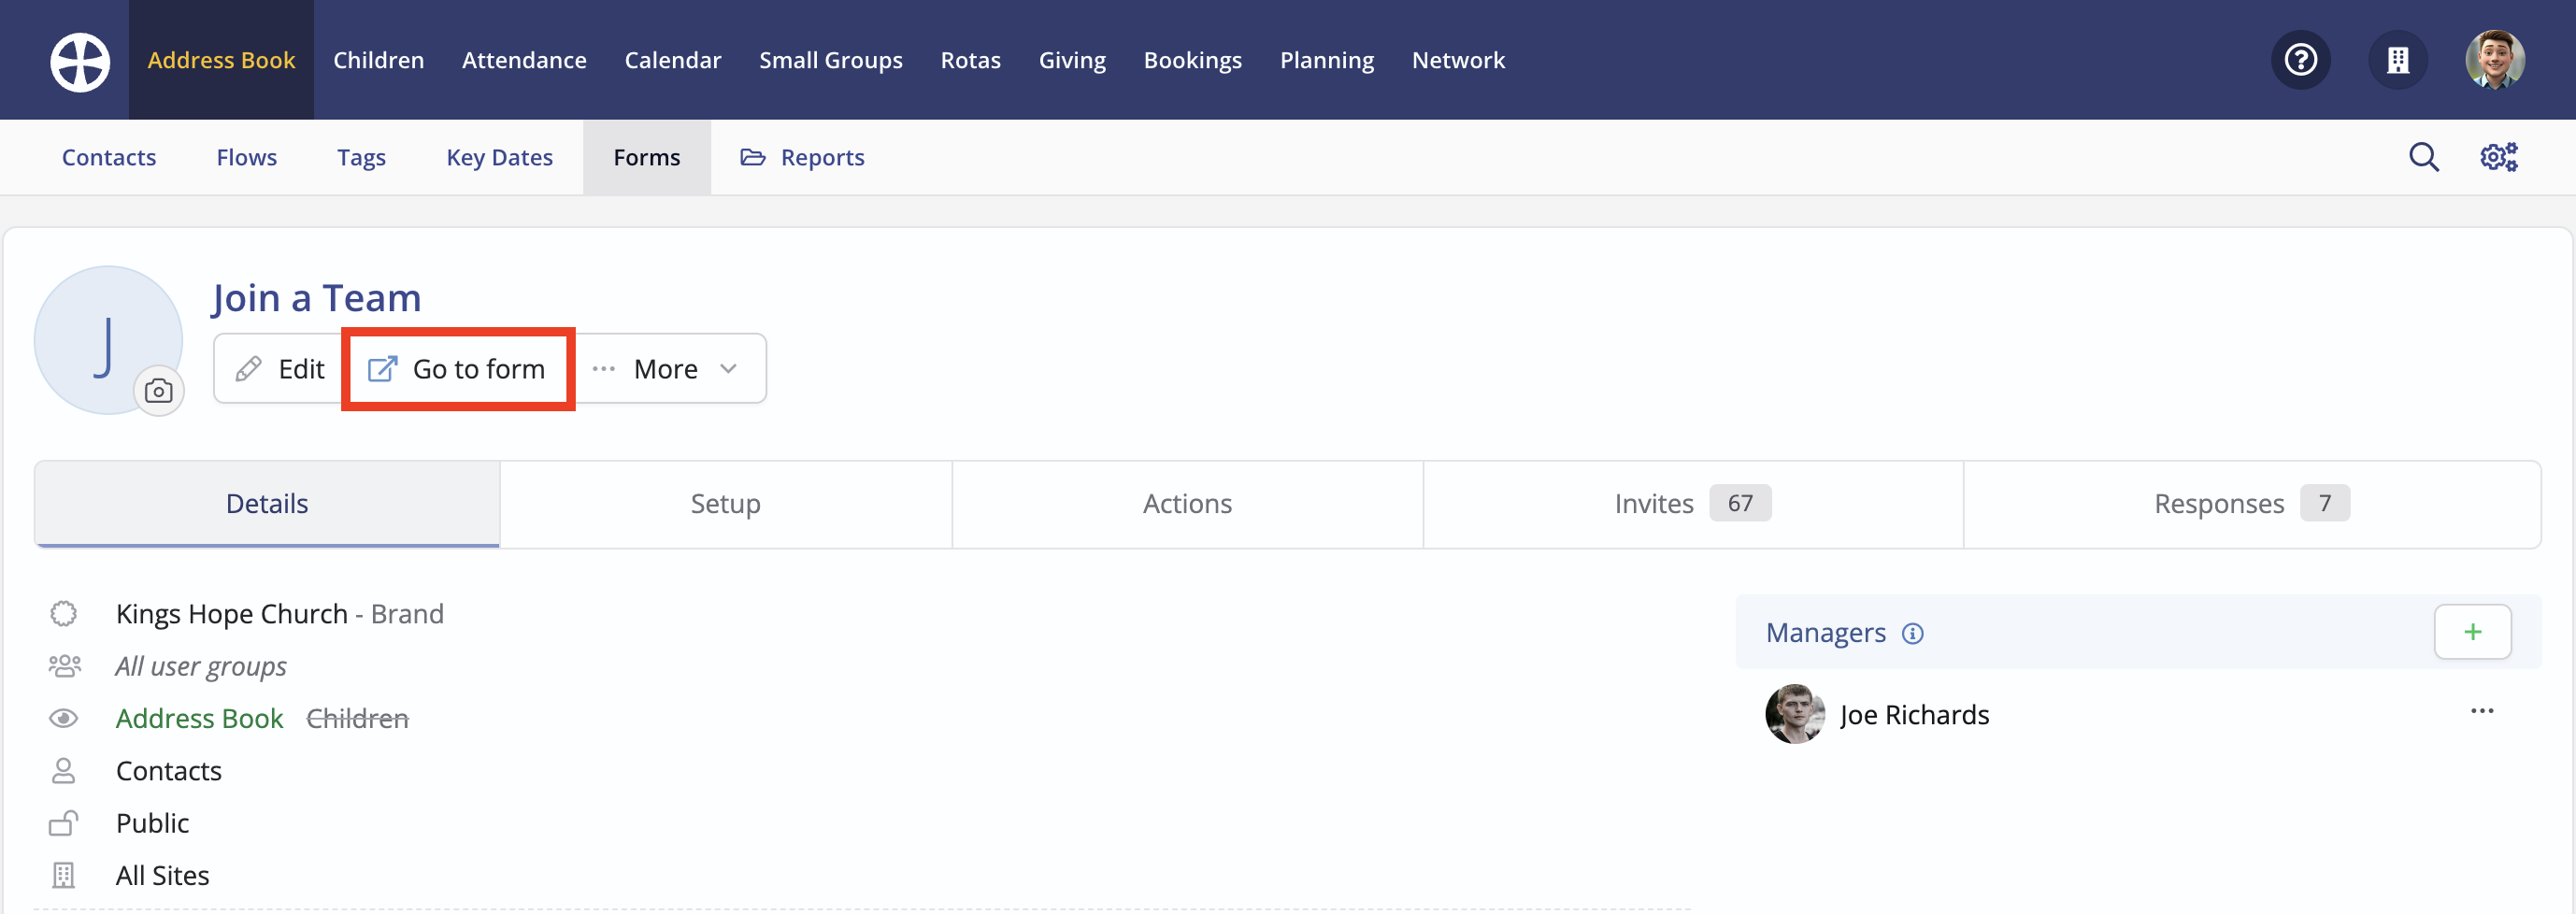
From a published Public Form View, click Go to form.
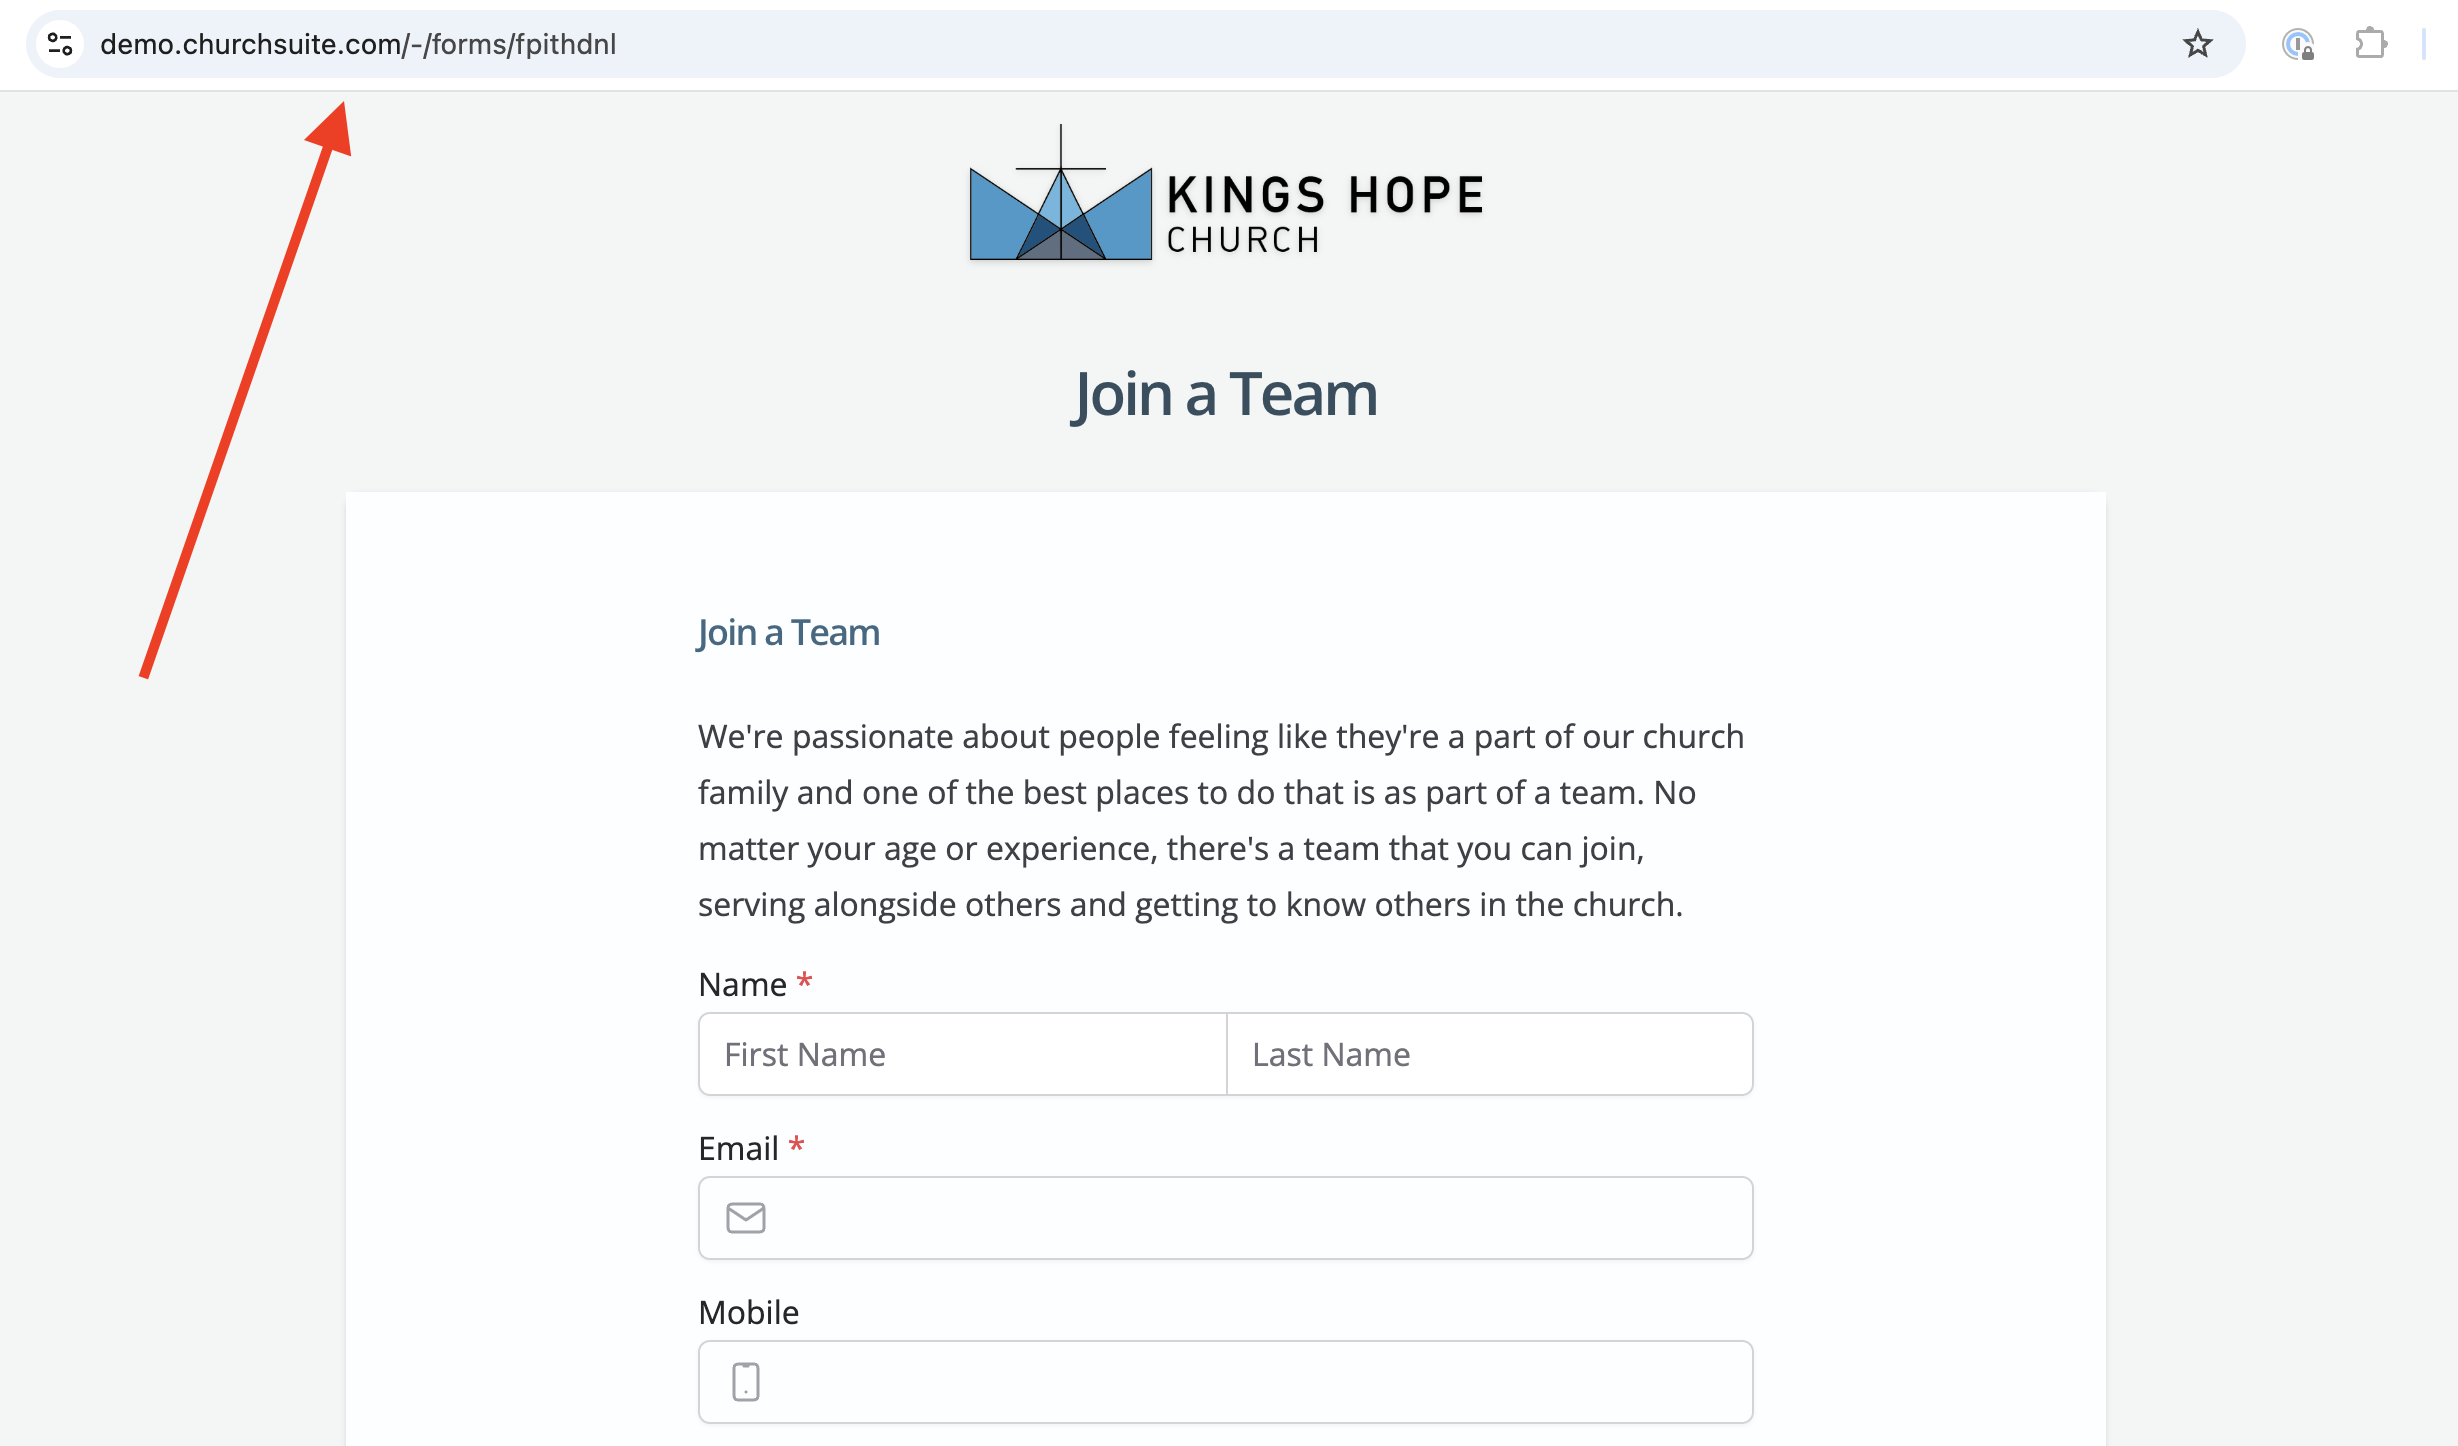
The Form Page opens in your browser. Copy the URL from your browser. This public-facing URL can now be pasted and shared in your various communication channels - social media, email and website links.
Sharing a QR code
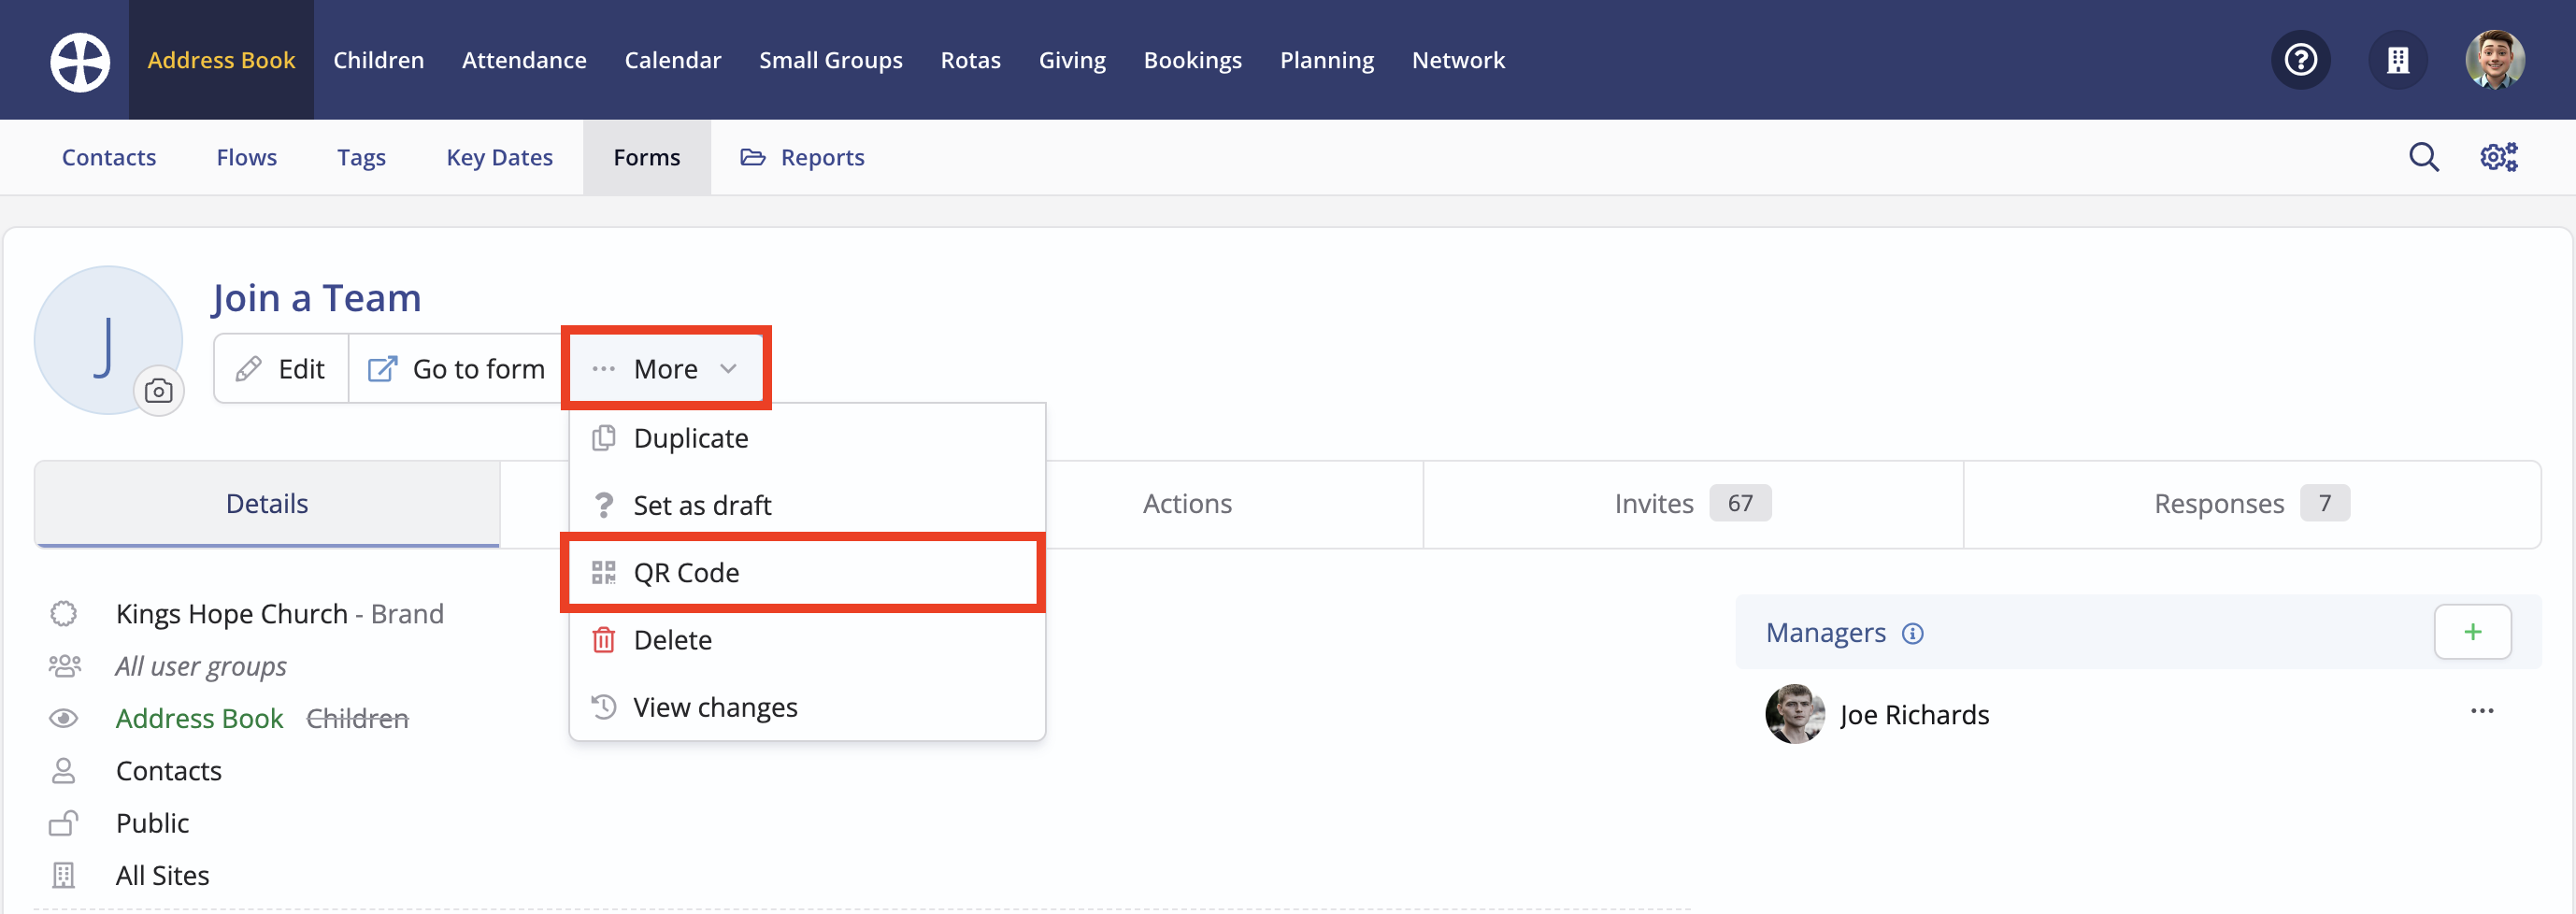
A great way to share your new form is to use the unique QR code available from the More menu:
All you need to do is copy the image or save it to your own device - right-click on the image to access the options:
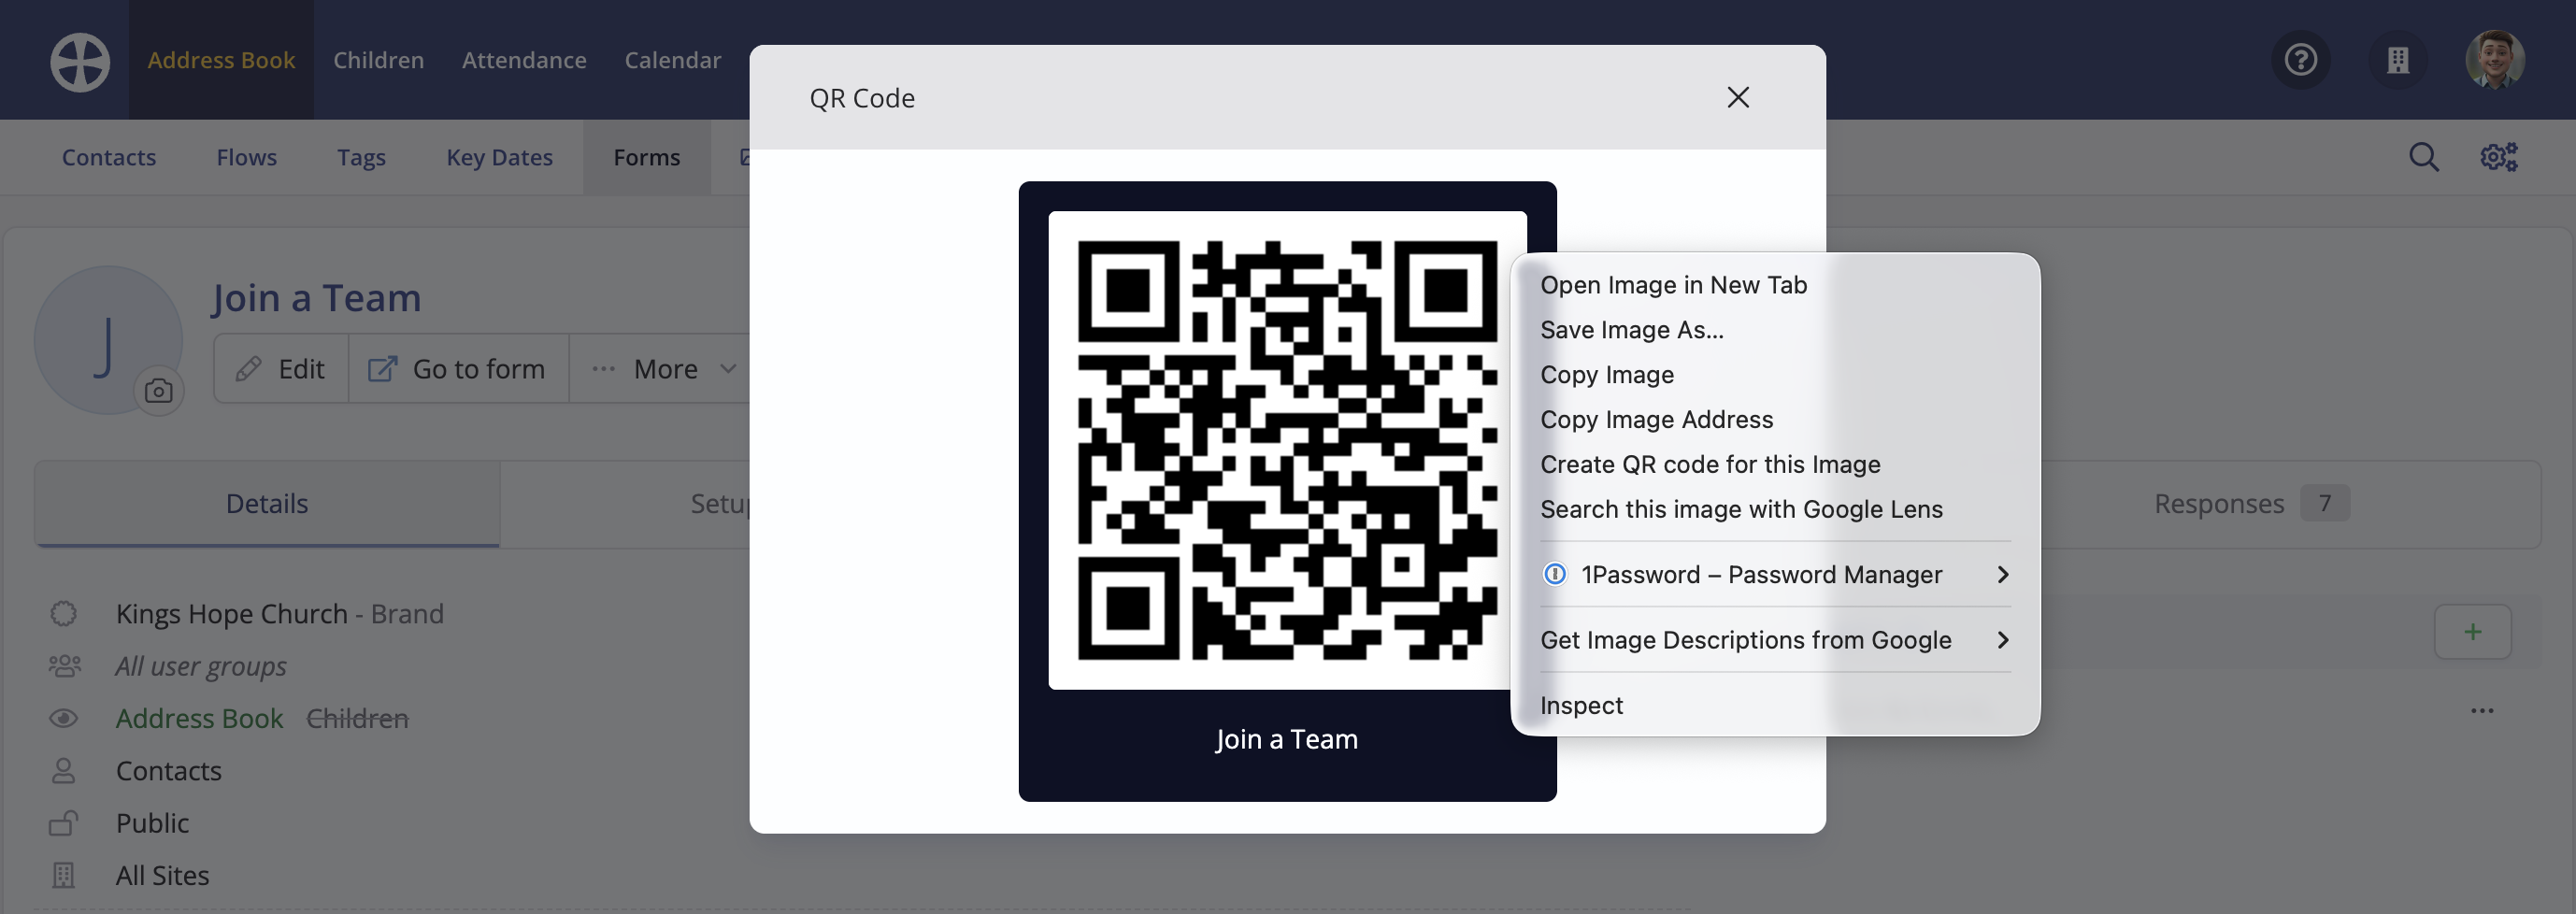
Once generated, you can add the QR code to your email communications, printed flyers or even the weekly notice slides at the beginning of your services. Anyone with a smartphone can then scan the image to access and complete the form.
Adding forms to a website
Using the guidance in the previous section to gain the form page URL, you can easily add a link to a form on your website, perhaps using an image, a button or a text element, and adding a hyperlink to the form's URL. We'd suggest adding a button to your website that links to the form page.
Embedding forms on your website
Following changes in the security features of some web browsers, we no longer advise embedding forms on websites. If you currently have a form embedded in an iframe on your website, we'd suggest removing this and replacing your embedded form with a button linking to the form page, as detailed above.