Sending form invitations
In this article
Introduction
Having built and published a Form, you'll now want to make the form accessible to prospective respondents. One way to share a form, and where your intended audience already exists in your Address Book or Children module, is to send form invitations, enabling you to keep track of who has responded and whose response is outstanding.
Form invitation recipients enjoy a simple, intuitive user experience, with smart-linked response fields pre-populated with the recipient contact or child's existing details in the form. Form invitees can review and update details as necessary, answer any other questions on the form, and submit their responses.
A person can be sent multiple invitations. For example, having submitted a parental consent form response last year, they can be re-invited to submit a new response for the current year. The system keeps careful track of each invitation status, treating a previously-responded invitee as a new invitation, and those that have not yet responded to an invitation as an invitation reminder. Any invitation can be deleted, preventing further use of the form by the invitee (any previous responses are unaffected).
Invitations can be sent for all three types of Forms:
- Public forms - in addition to sharing a public form page URL with any audience, including those not yet in ChurchSuite, you can also send personal invitations to those who are in ChurchSuite
- Private forms - these can only be completed by those already in ChurchSuite to whom you've sent an invitation
- Anonymous forms - these can only be completed by those already in ChurchSuite to whom you've sent an invitation. Even if smart-linked fields are included in the form to pre-fill each recipient's existing details, responses received are processed anonymously
What are smart-linked form fields?
Smart links elevate a Standard field. When used in a form, invited respondents will see their existing smart-linked details pre-populated in their form. And for a public form being accessed by a non-invited respondent, smart-linked field responses can be used to update a person's existing details in ChurchSuite or to add new people to ChurchSuite using the smart-linked response data. Essentially smart-linking is all about mapping fields on a form to the fields in a module, which reduces the need to manually re-key response data.
Smart-linking isn't required for every field on a form - it's entirely possible to collect response data that isn't being mapped to a field on someone's profile.

Consider the following Public form scenarios:
- Form 1 is created using only standard fields with no smart link fields. It includes fields for First & Last Name, Email, Mobile and Address
- Form 2 is created using smart linked fields for First & Last Name, Email, Mobile and Address.
These forms appear to be collecting the same data, but each behaves differently, as follows:
- Anyone using the public form page URL to complete the form will see no visual difference between Form 1 and Form 2 - the form will show empty, ready to be completed by the respondent. However, unlike Form 1, Form 2 responses can be used to update a person's existing details (when the response is later linked to an existing person) or to add a new person using the smart-linked data
- Invitees to Form 1 would see also an empty form with no pre-filled data because there are no smart links
- Invitees to Form 2 would see their smart-linked personal details pre-populated into their form. They can make changes to the data, or leave the pre-filled details as they are
If the fields on Form 1 are subsequently edited and smart links added, Form 1 would then behave like Form 2, and new and existing invitees who have not previously responded would now see their smart-linked personal details pre-filled in the form.
In the same way, subsequently editing Form 2 to remove the smart links, would prevent previously-smart-linked personal details from being pre-filled in the form for those invitees who have not yet responded.
For further information, see the related support article on Using smart links in forms.
Sending form invitations
To send an invitation, click Send invite at the top of a Published form "View" page.
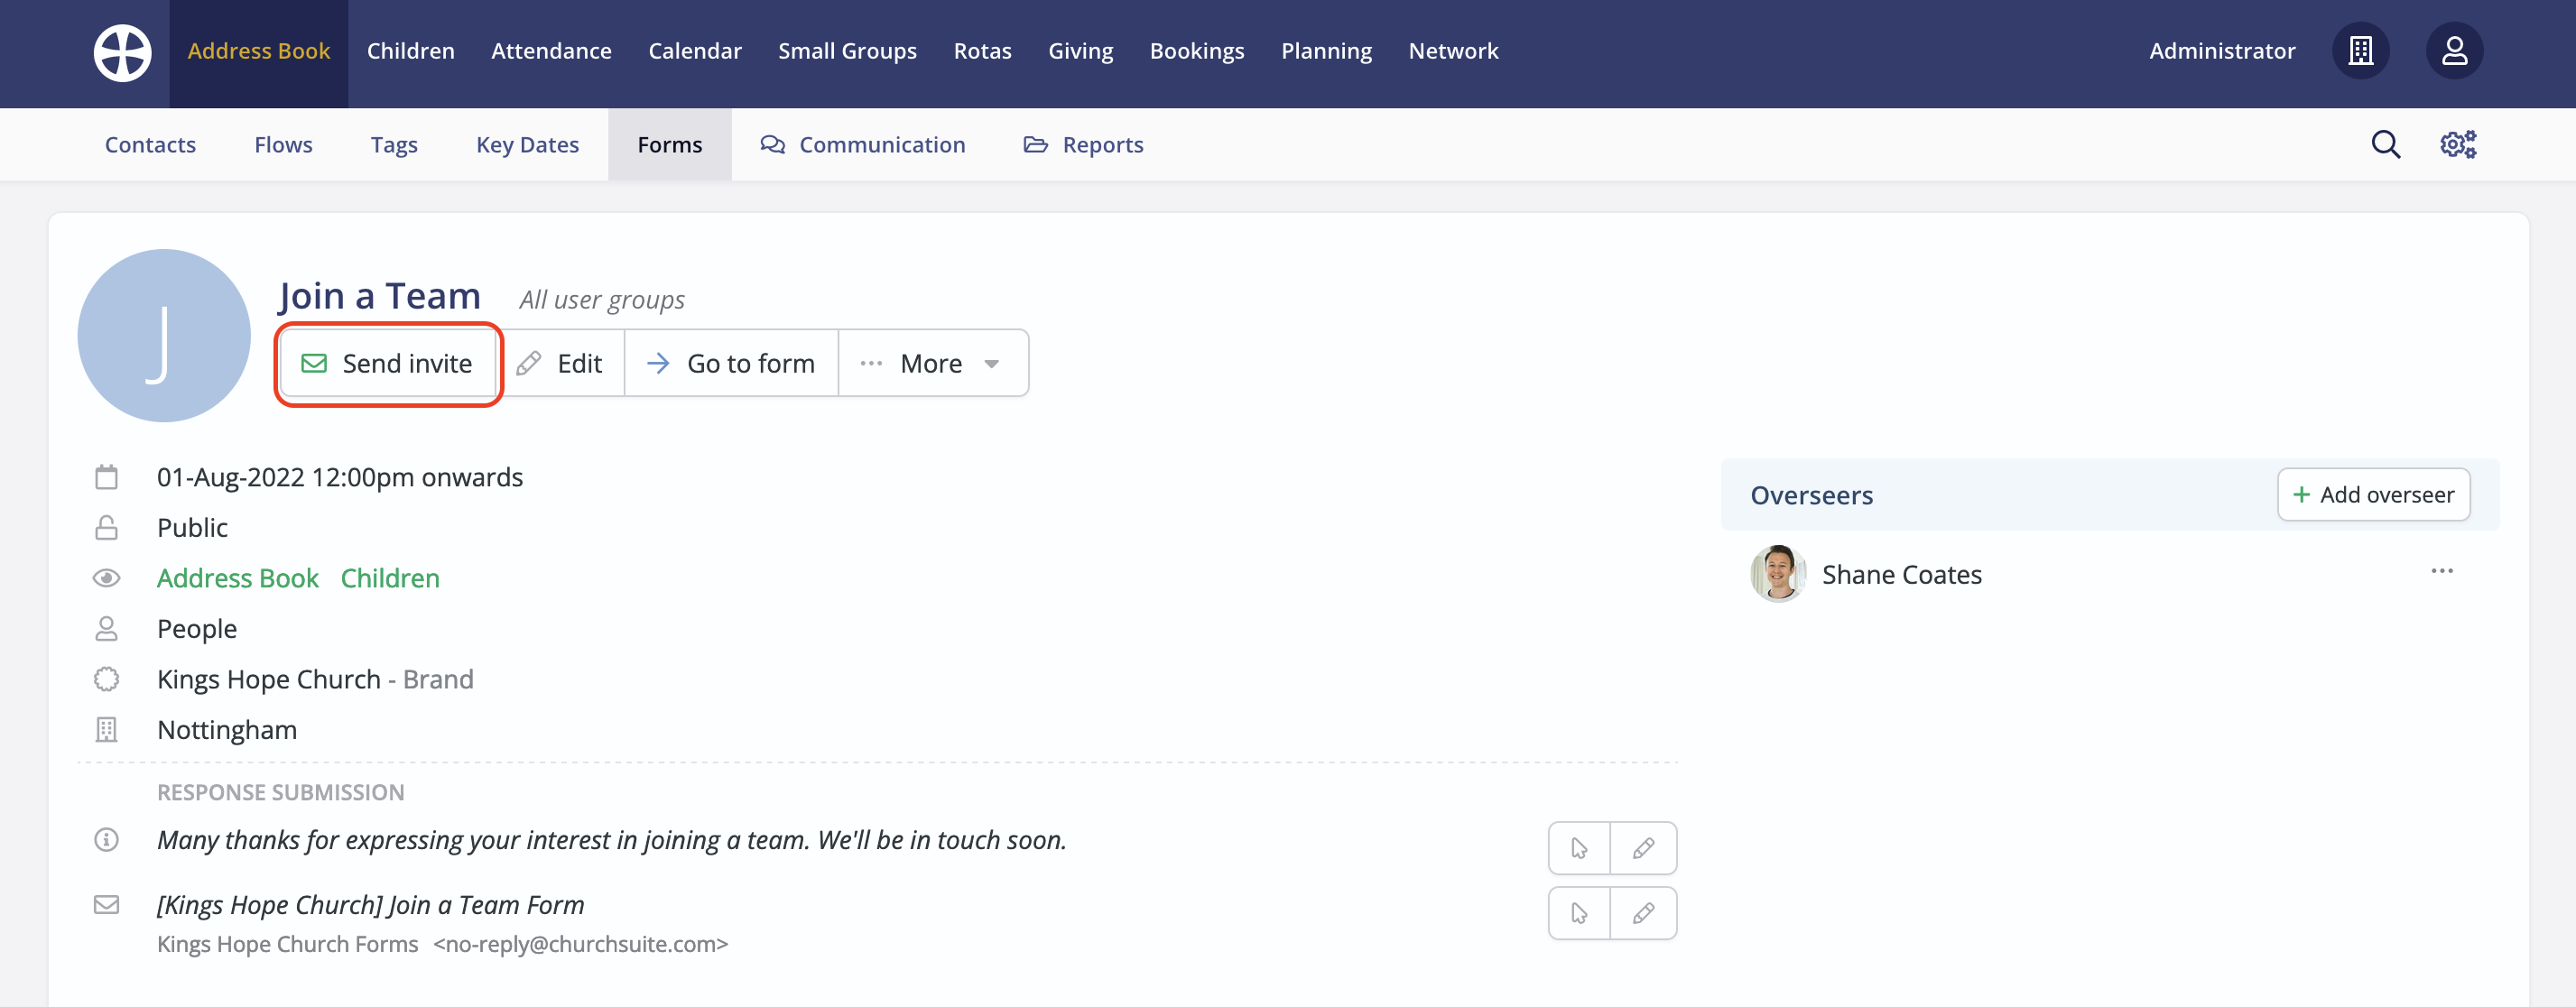
A pop-up message reminds you that sending invitations to any existing invitees that have not responded will send them a reminder, and those who have already previously responded will be sent a new invitation. Click Proceed to continue,

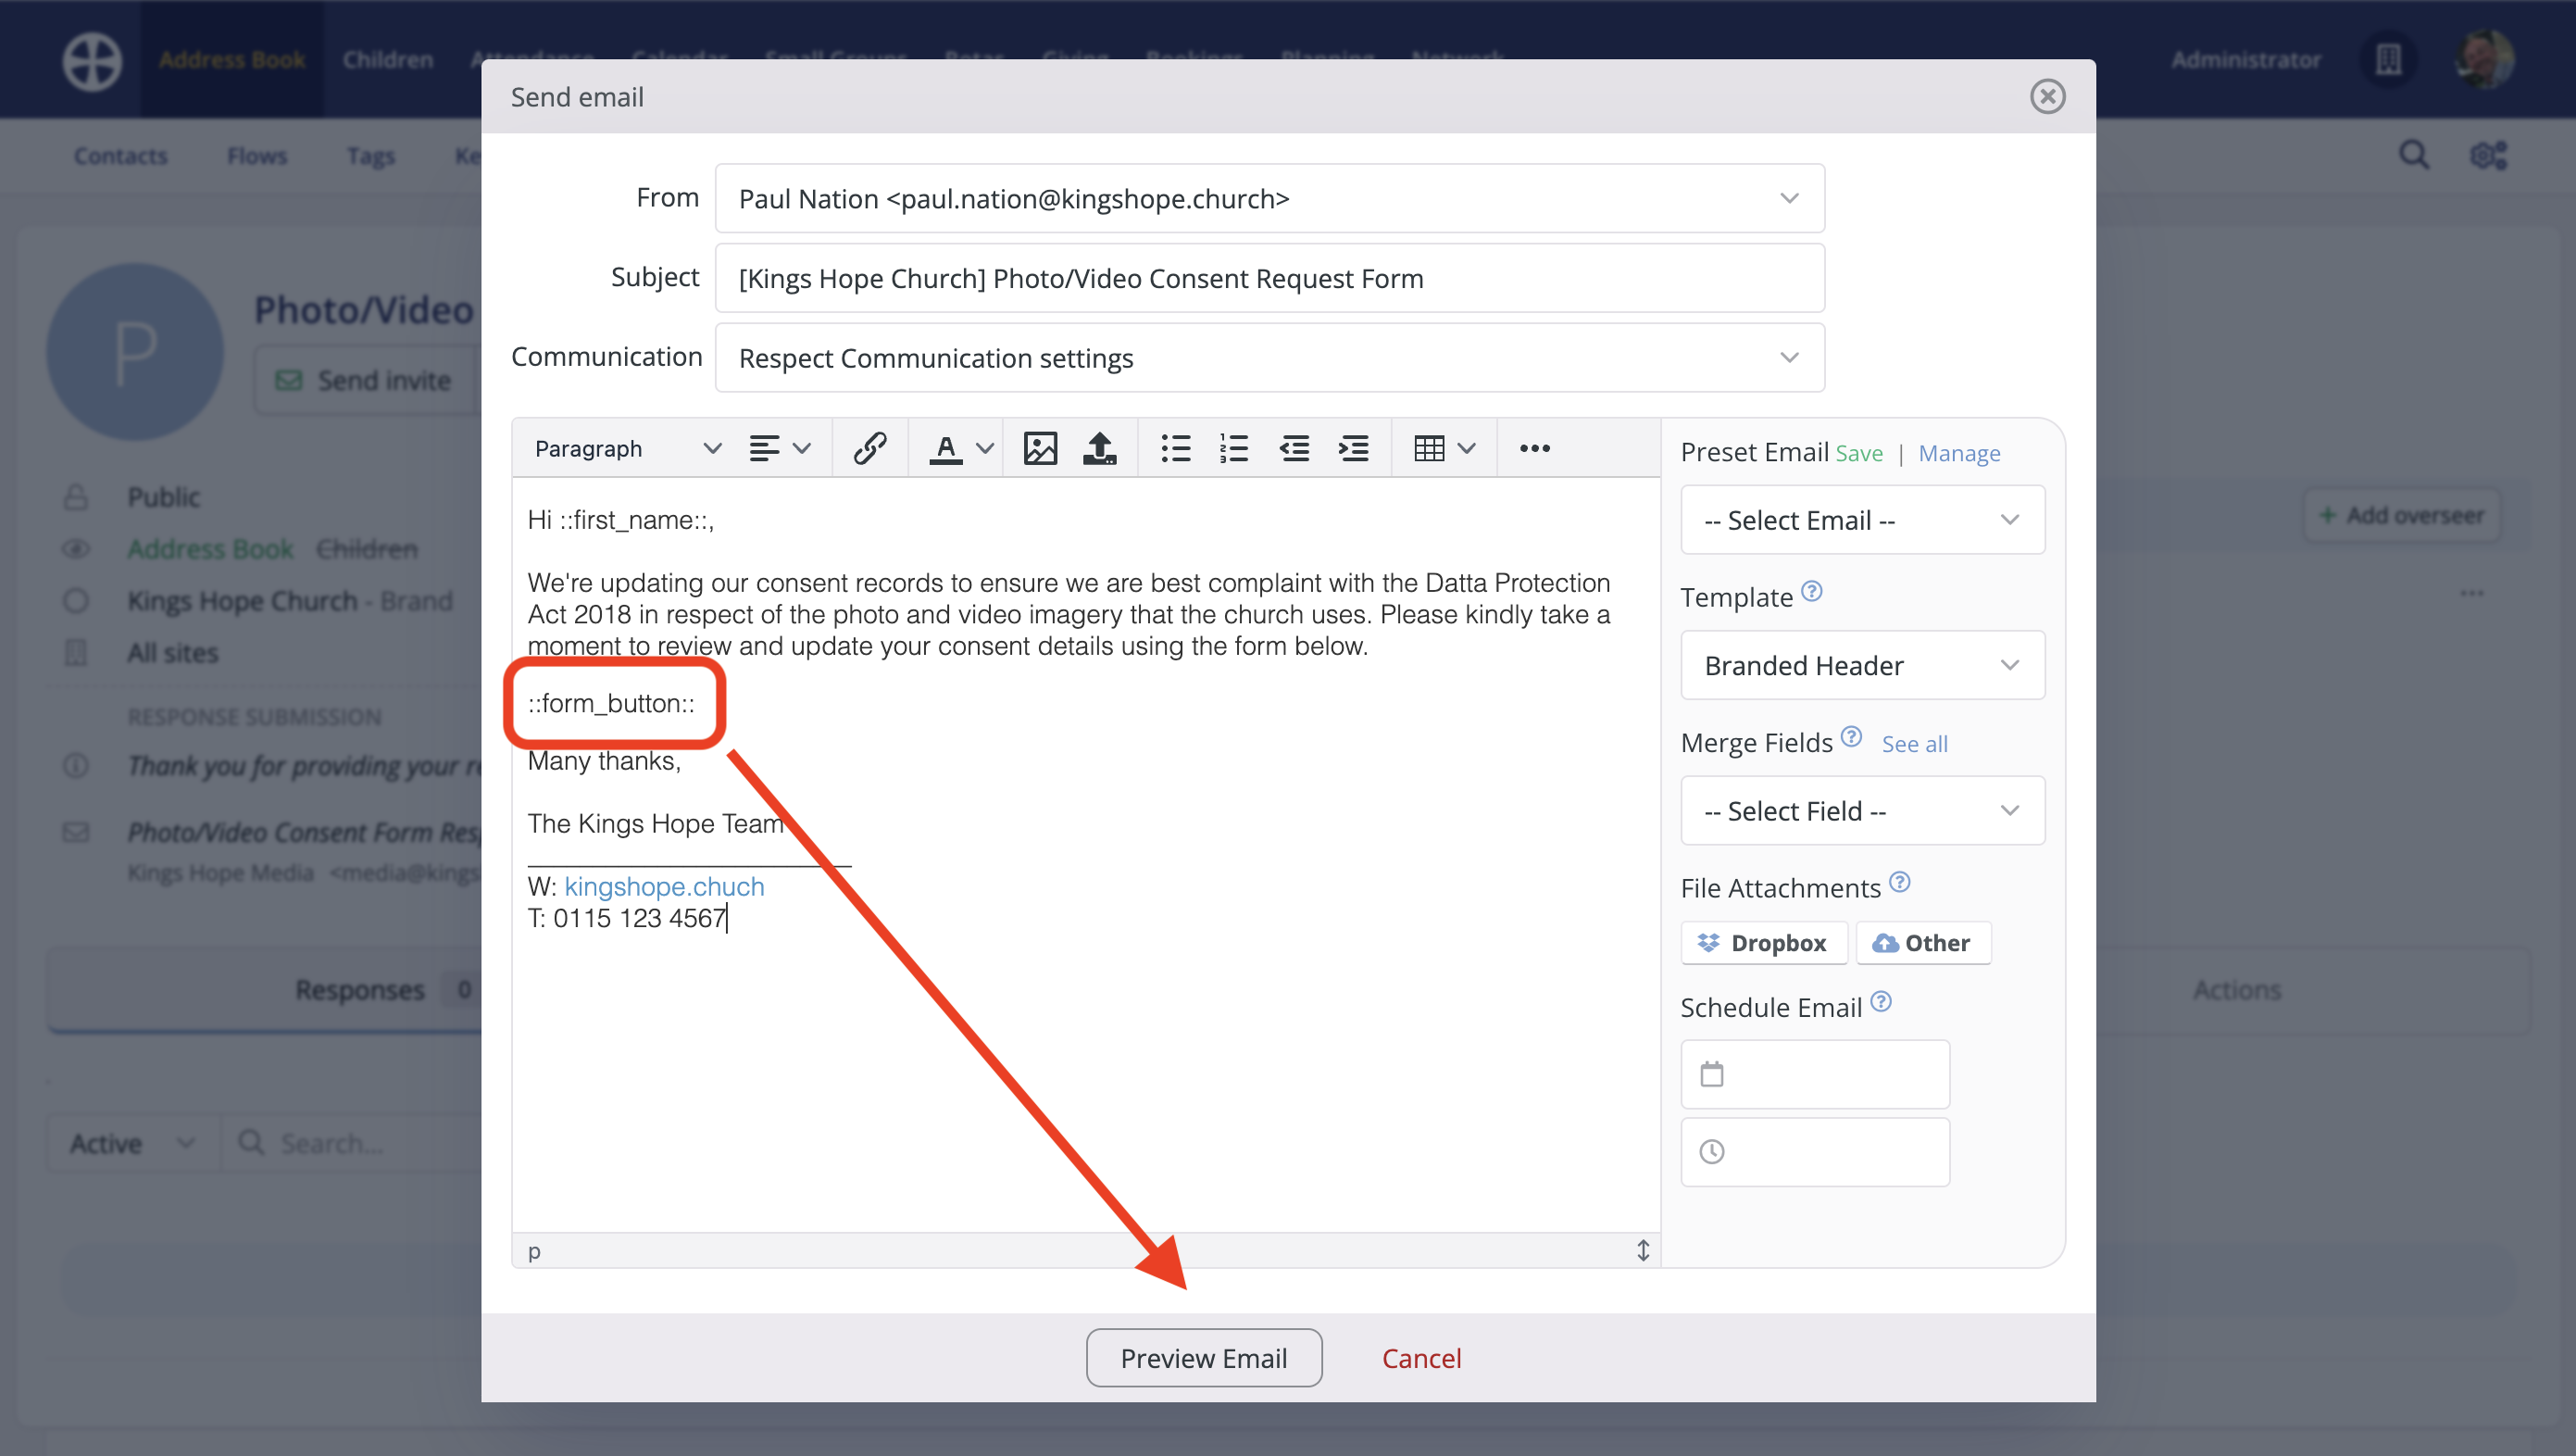
On the Send email pop-up, compose your invitation message. It's important that the ::form_button:: merge field is always present in the invitation email body section - this merge field will be later merged to become each recipient's personalised form page URL link and can be positioned anywhere within your message. When you Preview Email (see next step), you'll this the unstyled merge field is replaced with a styled Go to form button. Use the HTML Editor tools to further customise and style your invitation message as appropriate.
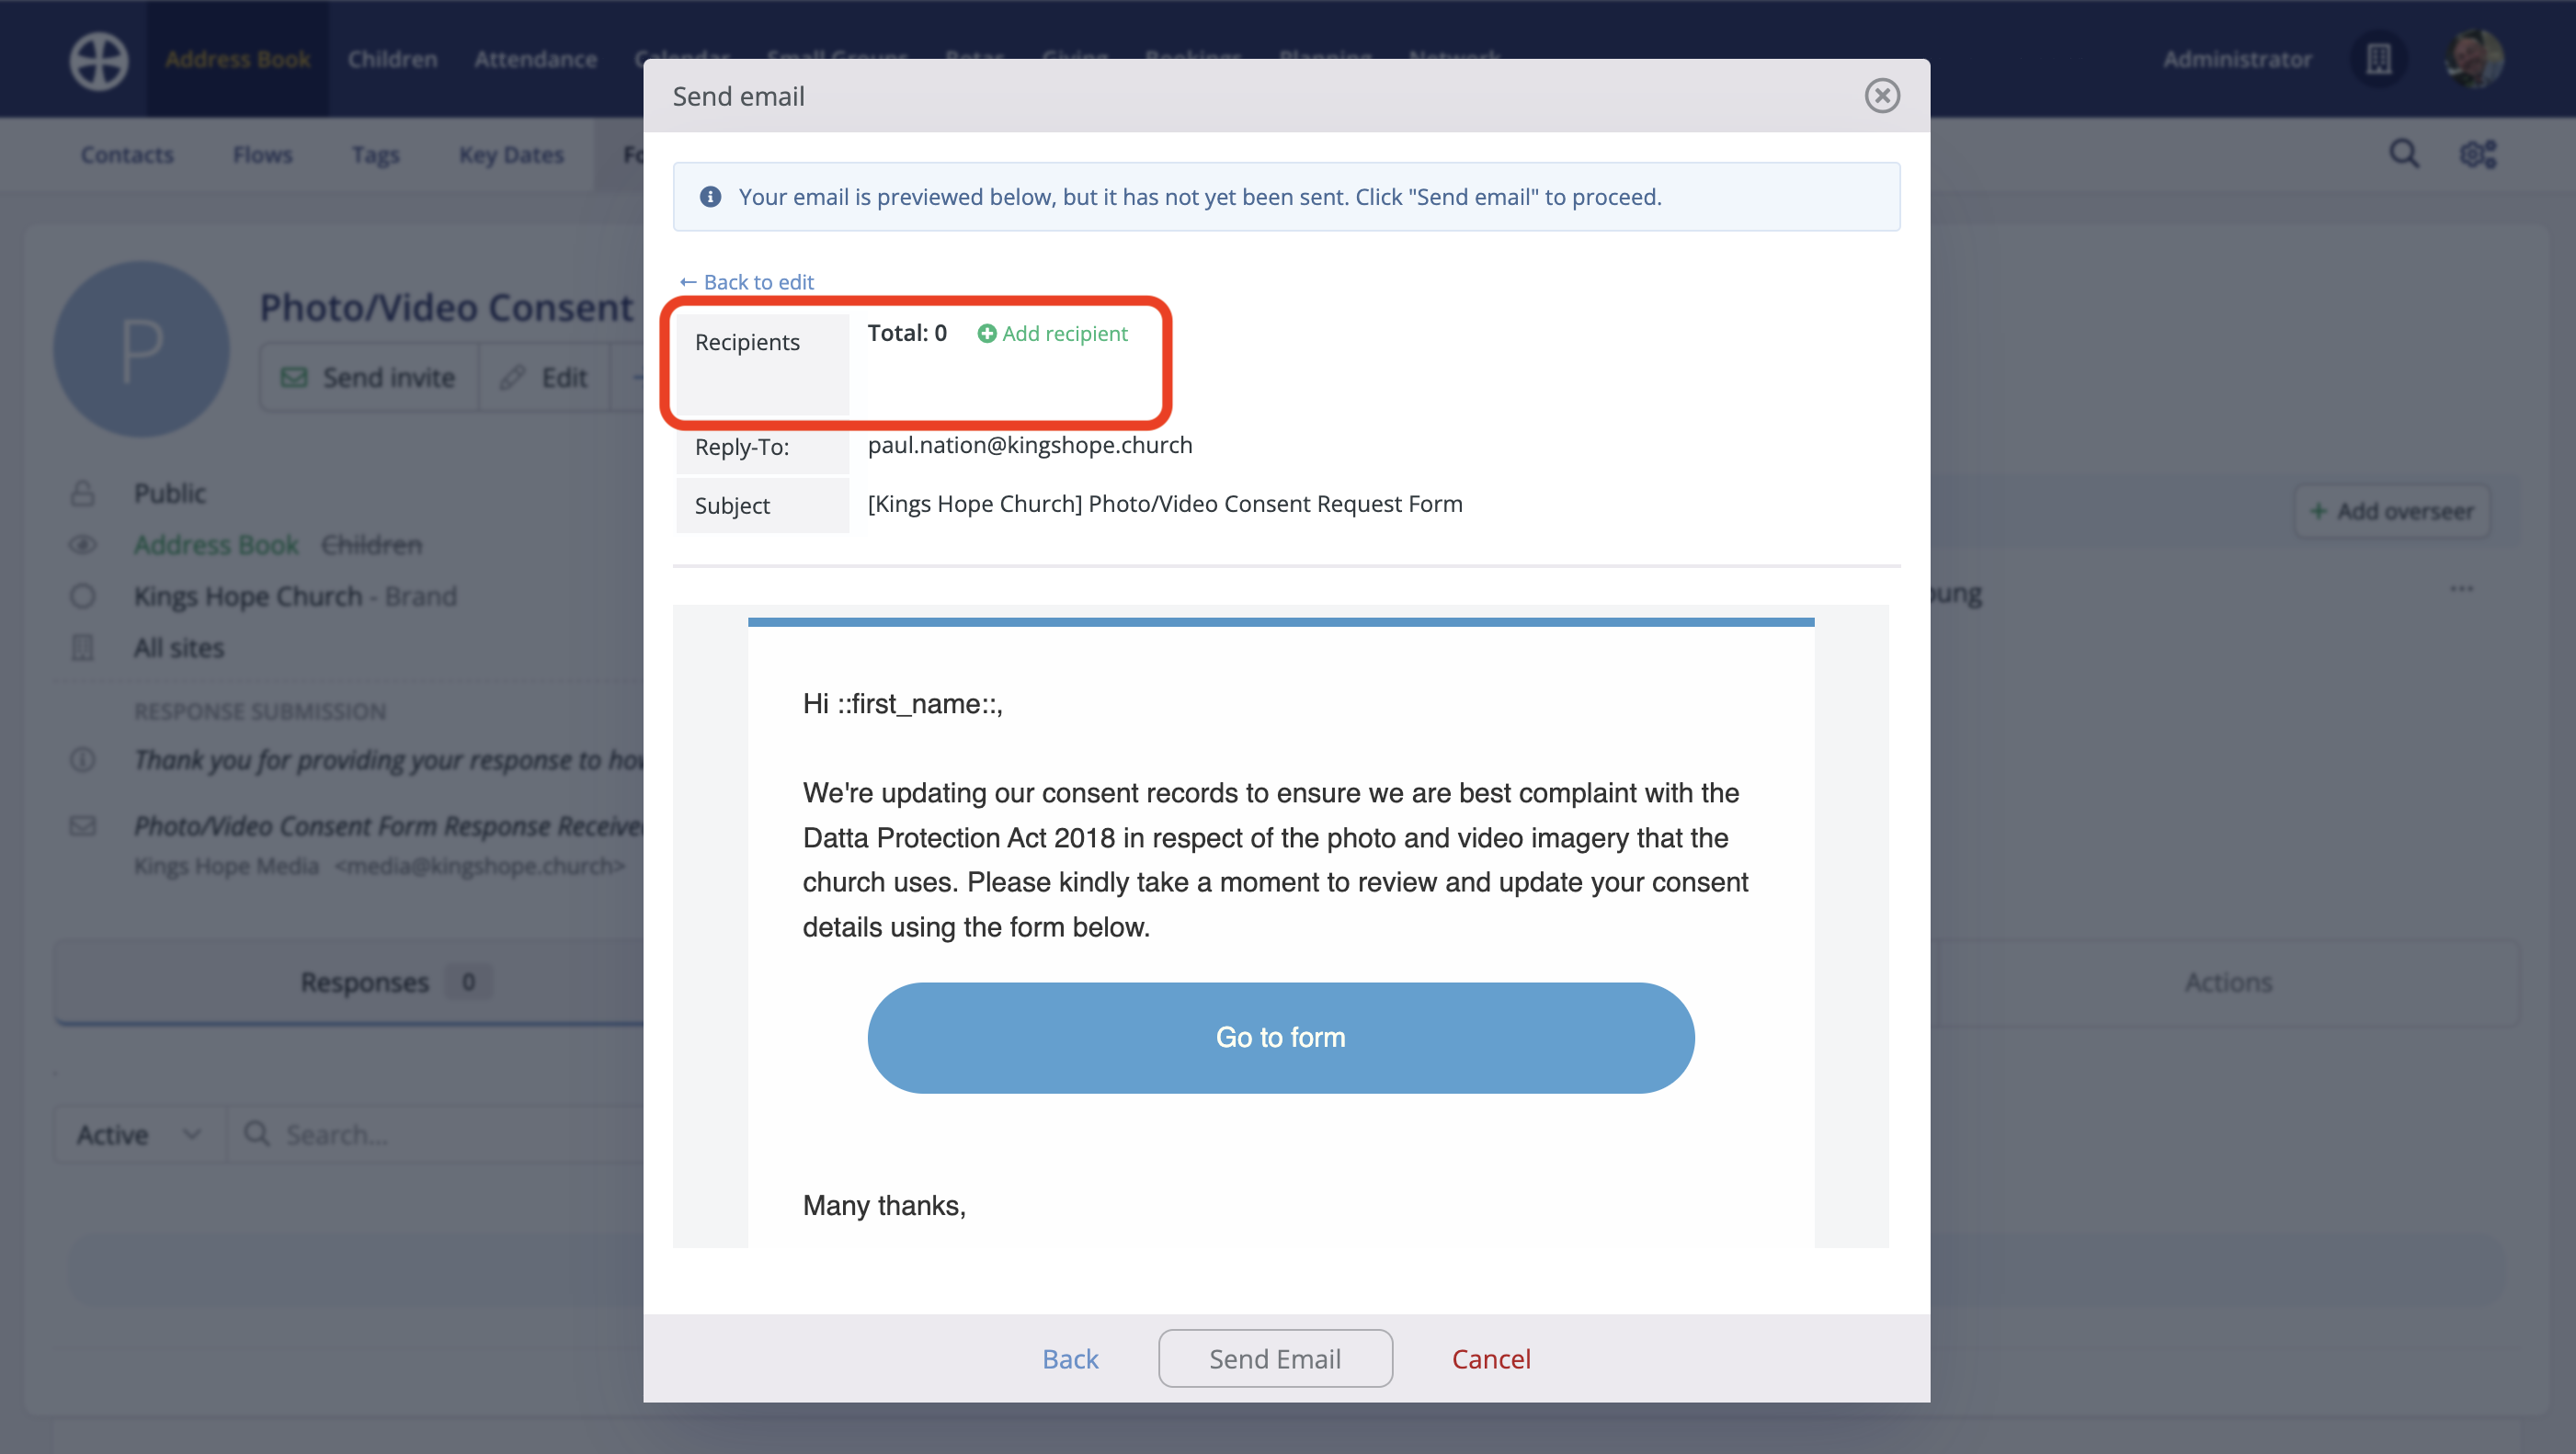
Clicking Preview Email displays a preview of the styled message ready to select Recipients and send. Click Back to edit to go back and make further changes or click Add recipients to search and select your invitees - you can search and select people individually - matching names filter as you type - or type a Tag name to bulk add multiple tagged recipients in one process (where the invitees have been previously grouped in a Tag). Click Send Email to send the invitations.
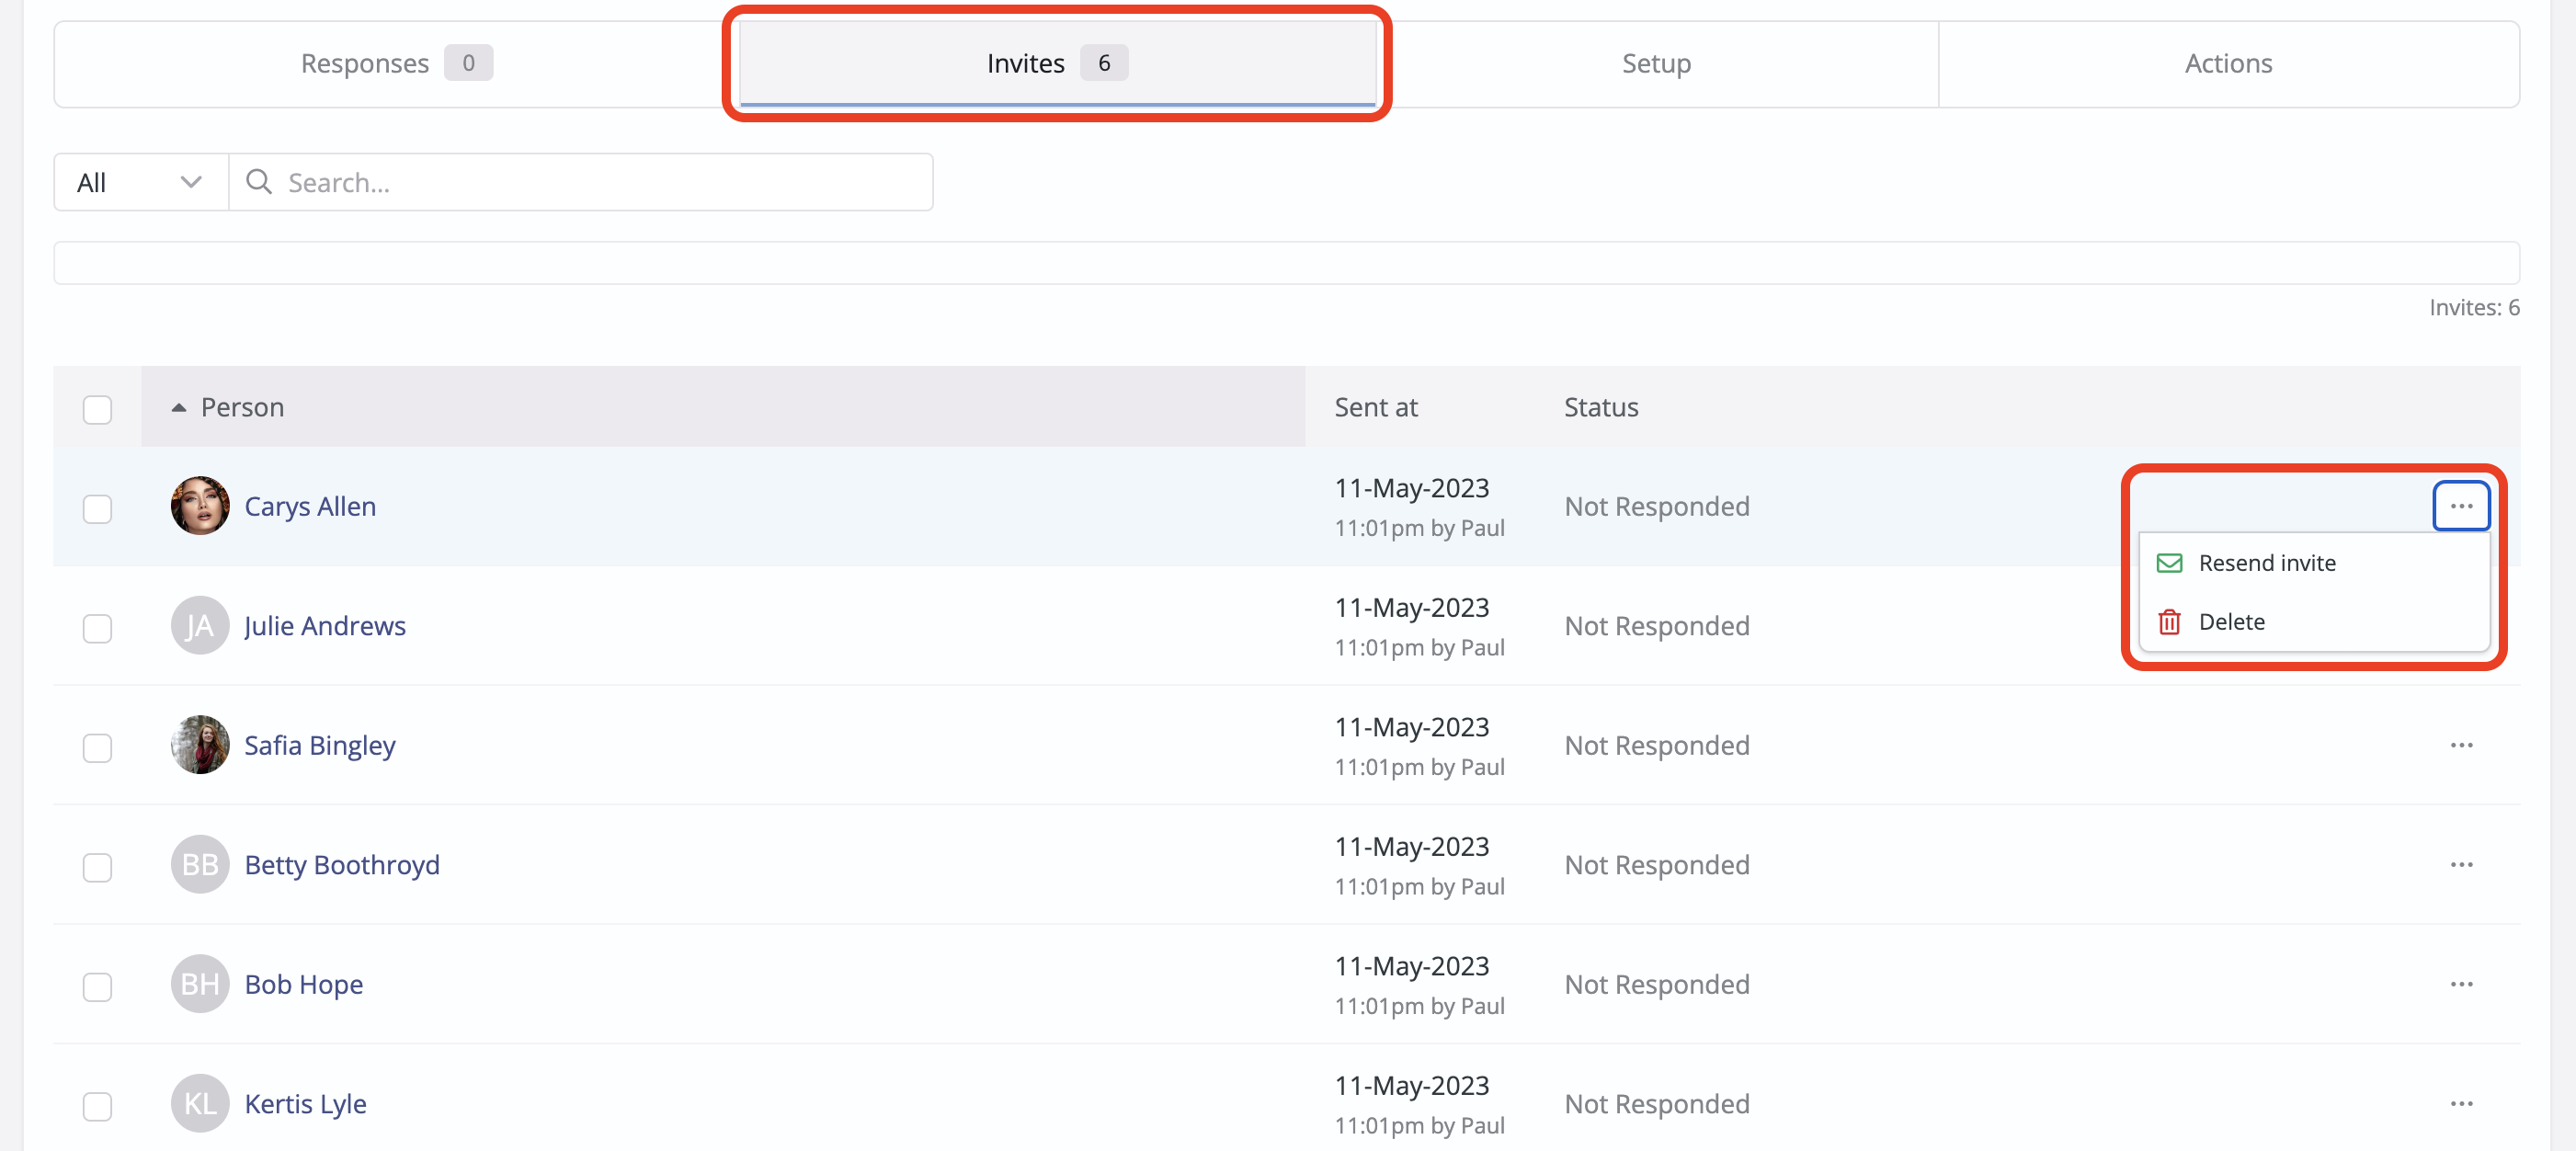
Once sent, the Invites tab updates and lists all the invitees and their current response Status. All statuses are shown by default, but the list can be further filtered to view just Responded or Not Responded invitations. Note that response Status is not shown for anonymous forms. As invitees submit their response, the invitation status updates to responded and their response is added to the Responses tab. See our related support article for further information on Managing form responses. Note also the invite Actions to Resend an invitation not yet responded to, or Delete an invitation. Invitations with any Status - Not Responded and Responded can be deleted - the invitee will be unable to further access the form page, but any previous responses are unaffected.
People can be invited to complete a form multiple times - for example, an annual invitation to parents inviting them to submit a parental consent form for each of the children.
If the person has a previous invitation with a status of Not Responded, the form link in their invitation email will be for their existing invitation (essentially a reminder).
If the person has a previous invitation with a status of Responded, they will be sent a new invitation link which will create a new response when the form is submitted.
When an invited person submits their response, a response Notification email is sent to the form's Overseers, and a submission Confirmation email is sent to the invitee and is logged in the person's communication log on their contact or child profile.