Assigning roles to organisation members
In this article
Adding roles
Assigning roles
Communicating with organisation members by role
Roles are a useful way of distinguishing organisation members and making it easier to communicate with groups of members based on roles. Once added, roles are easily assigned to the relevant members of each organisation.
Adding roles
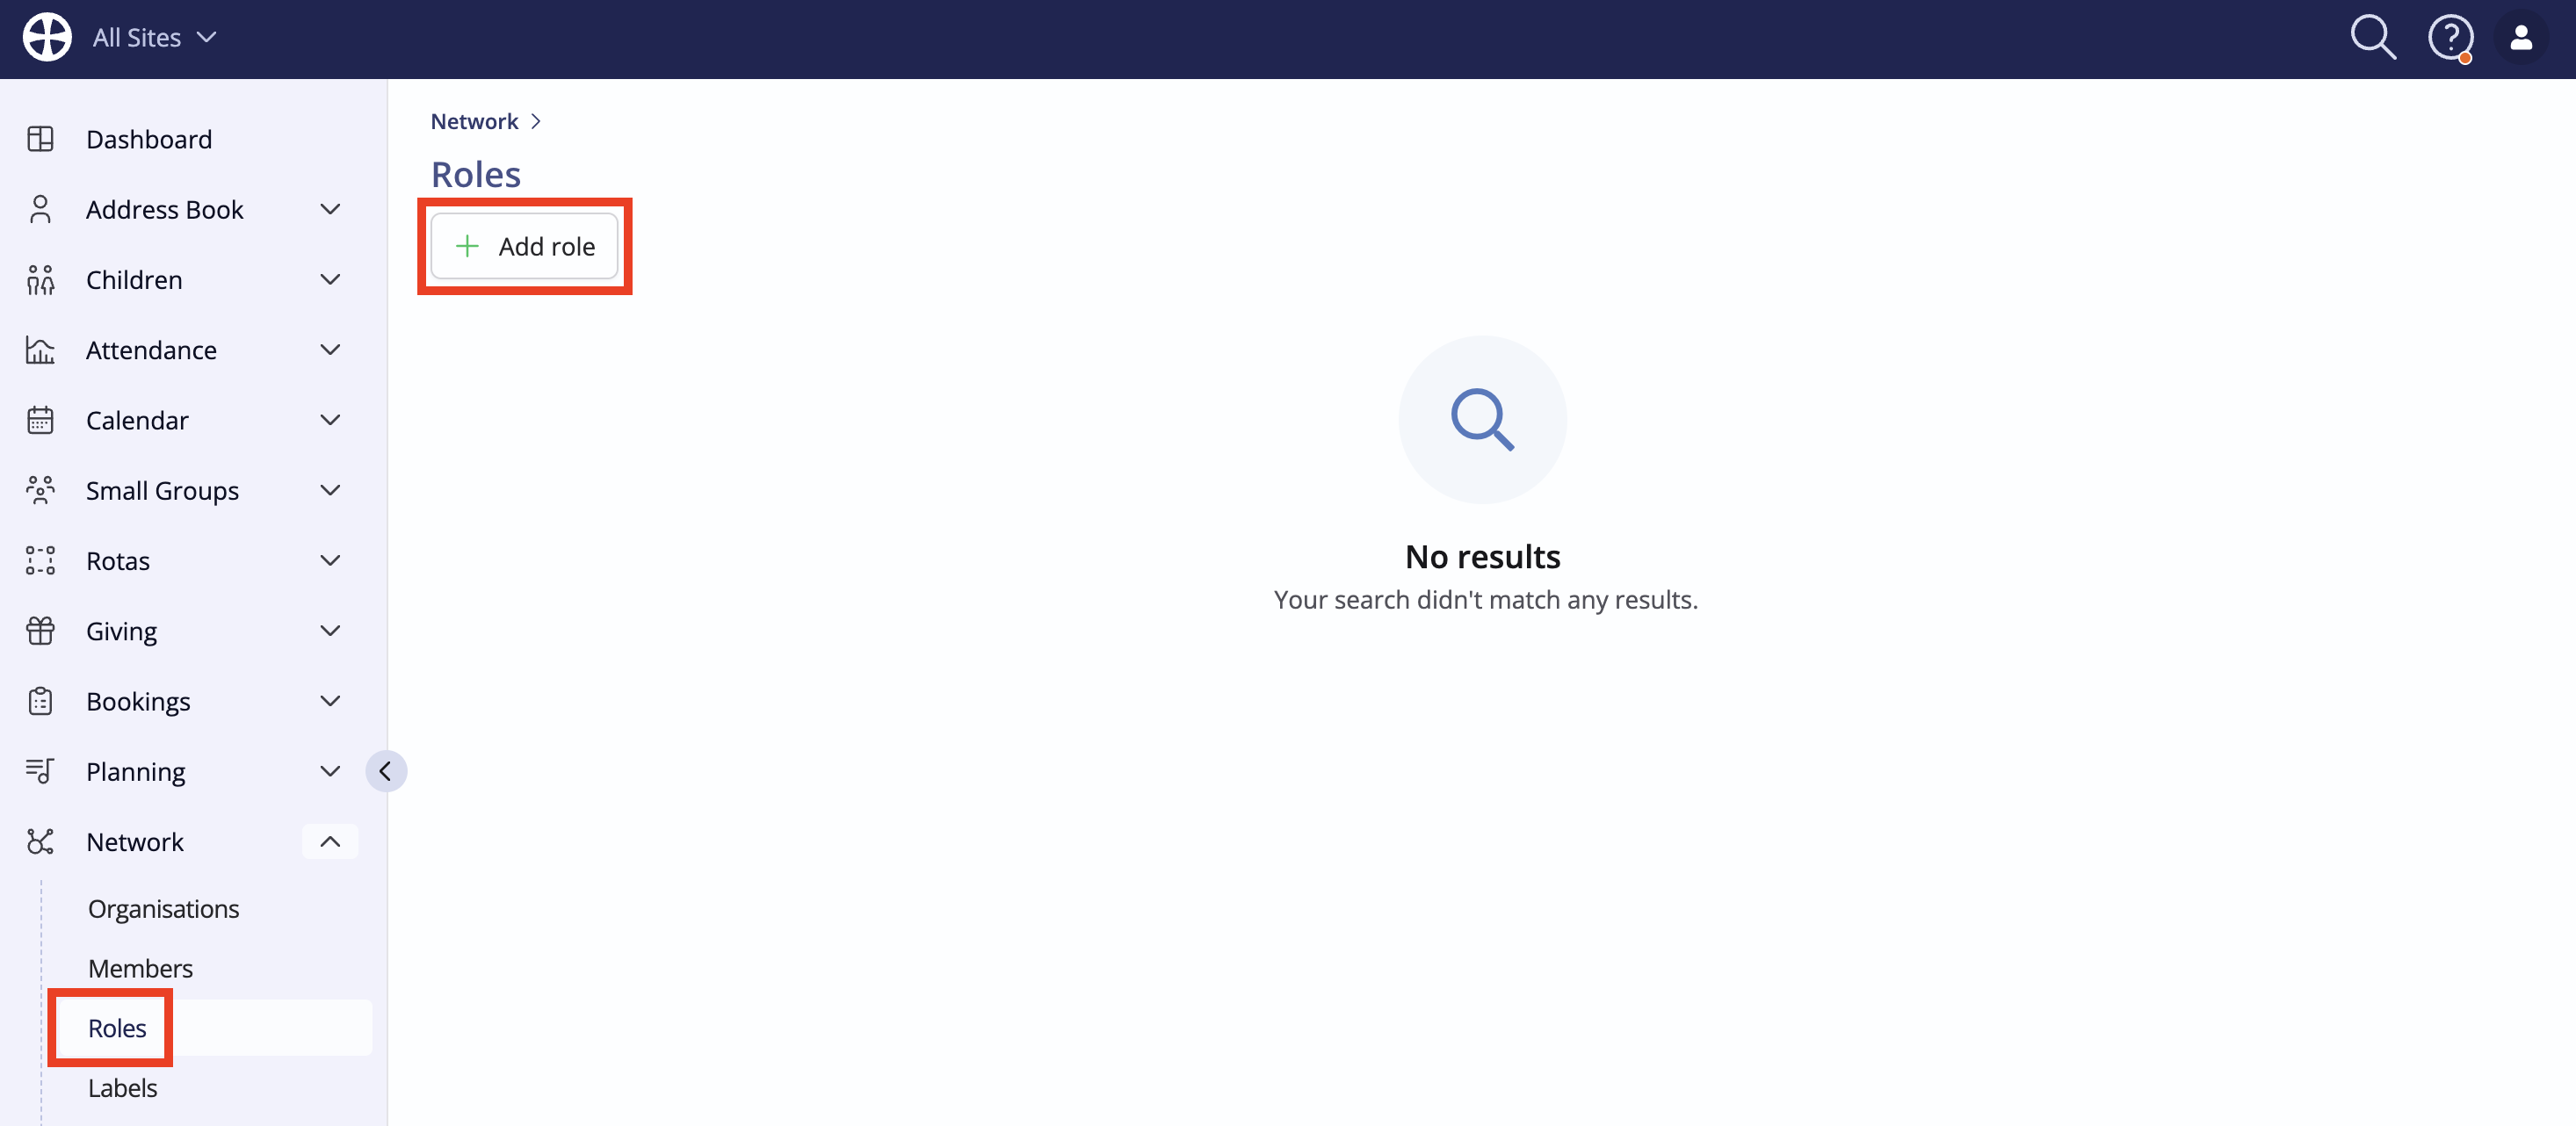
Navigate to the Roles section of the Network module and select Add role.
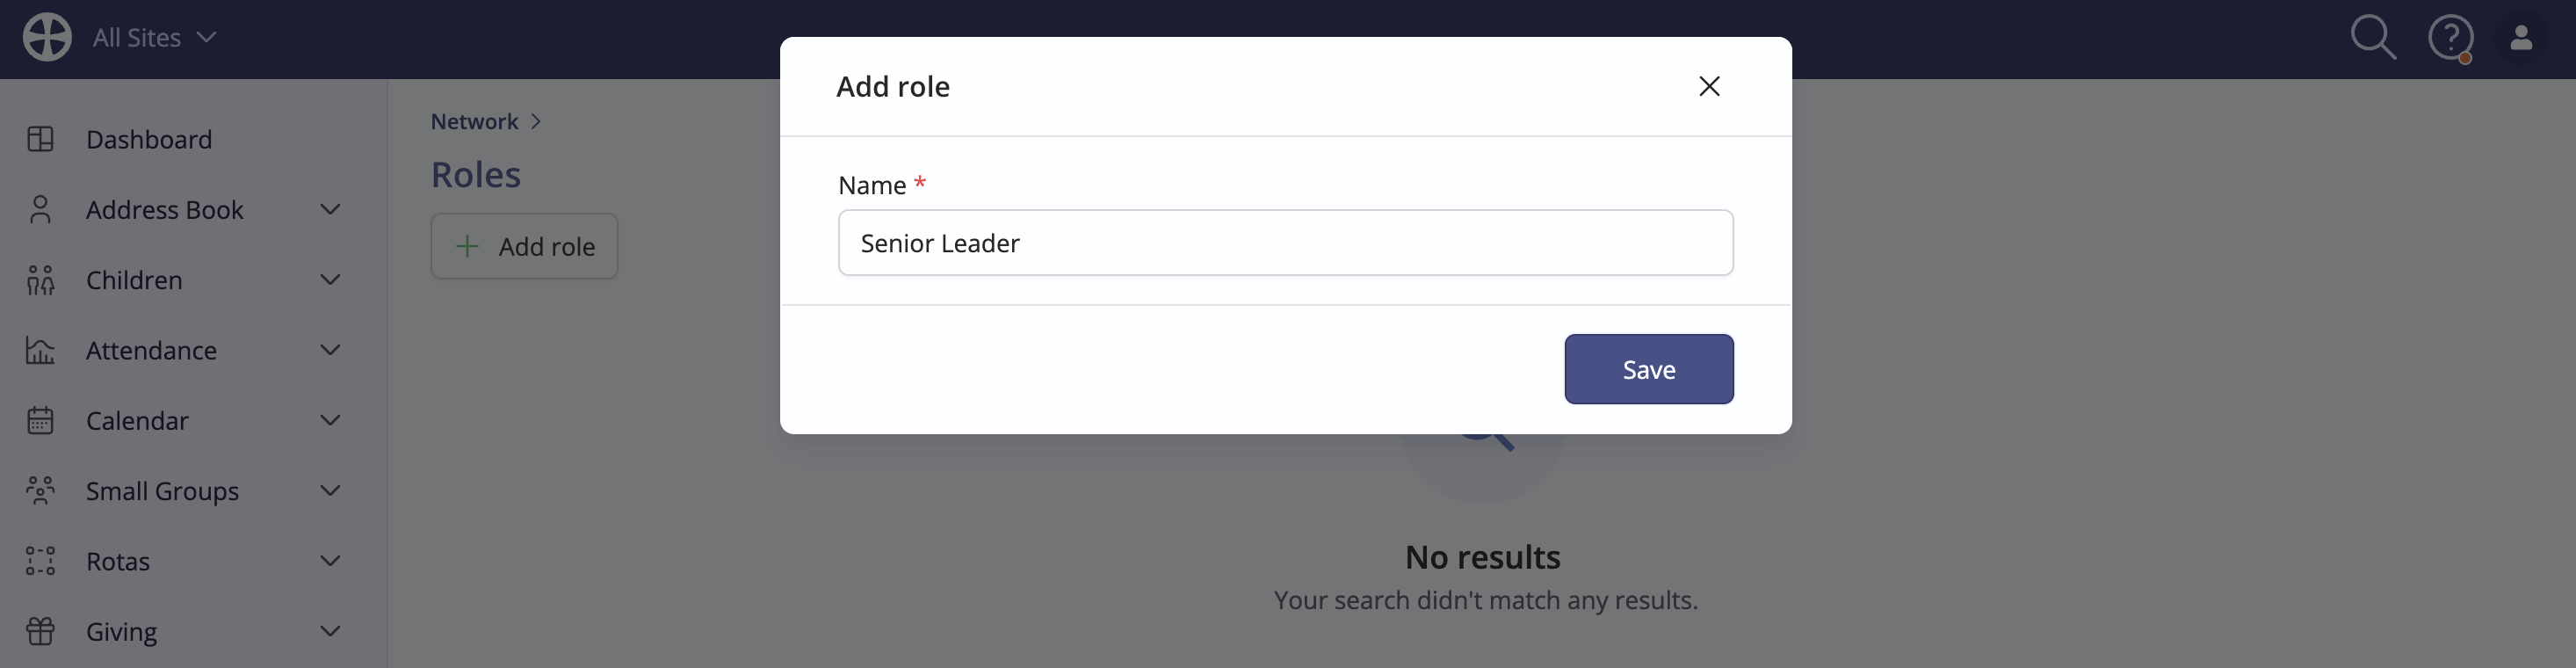
On the Add role pop-up, enter a suitable role Name and click Save.
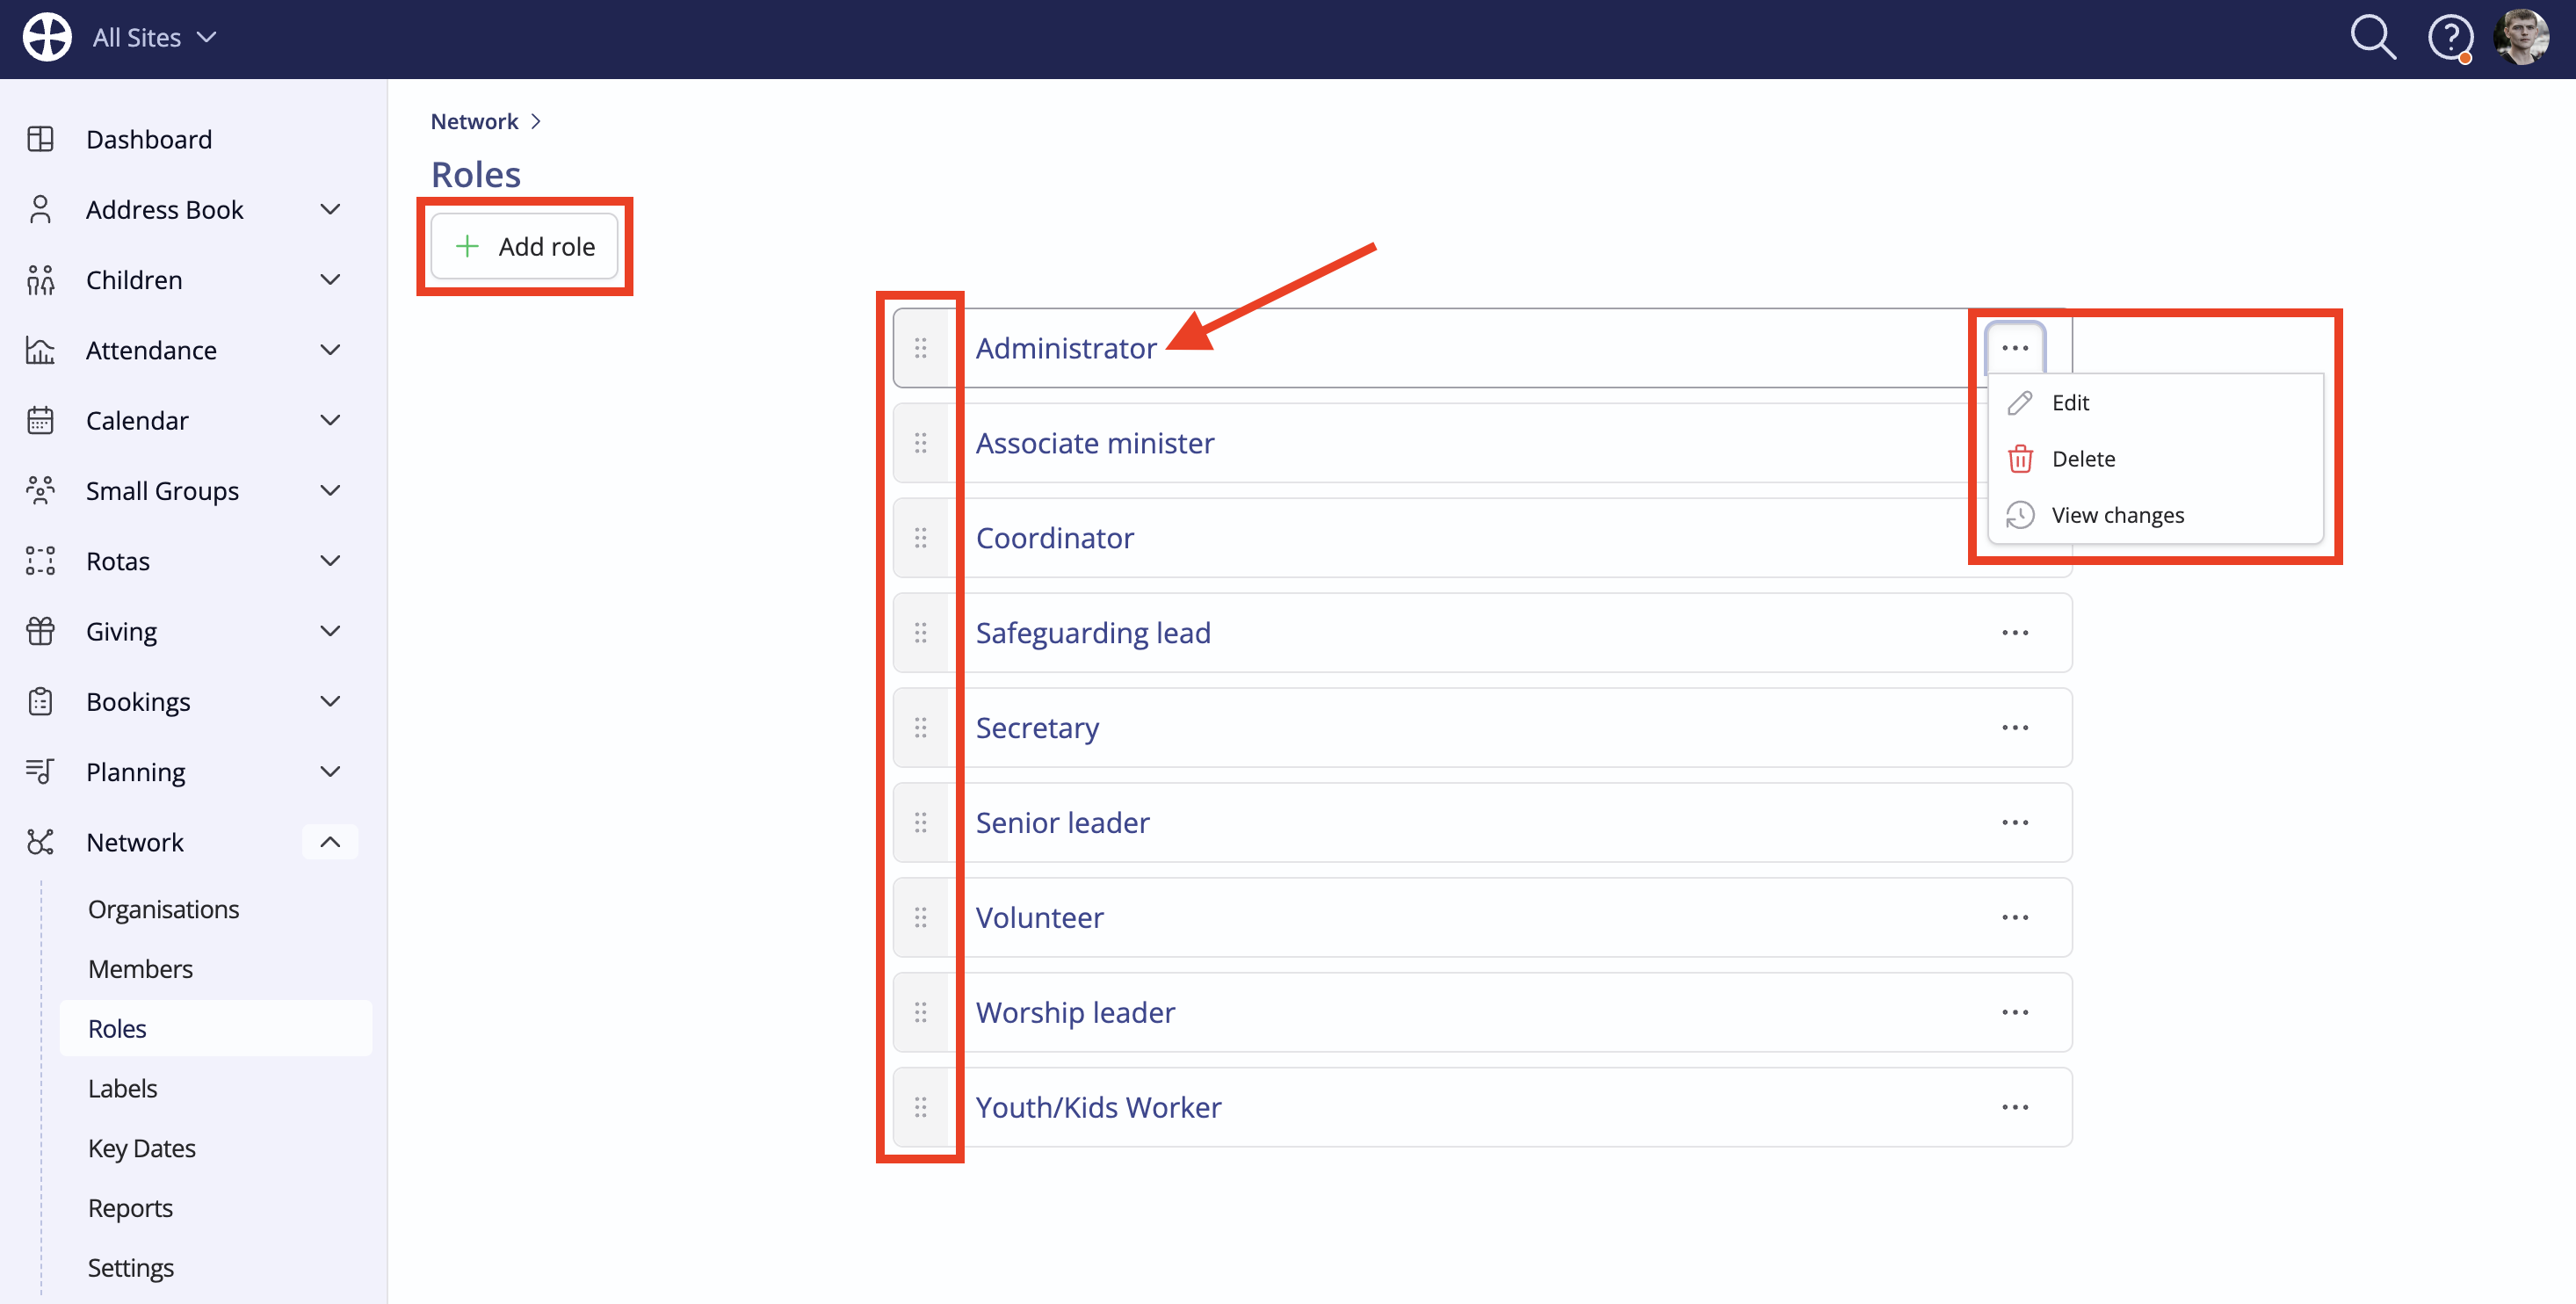
Continue adding roles as appropriate. Note the role Actions - to Edit or Delete a role. You can View a role by clicking on the role name. Deleting a role unassigns that role from all previously assigned organisation members but the members themselves are not deleted from the Address Book or removed from the Network organisation. You can also change the Order of roles by dragging roles using the reorder control to make order changes within a pop-up.
Selecting to View a role takes you to the Network Members page, automatically filtering the members list to the role you clicked on. You can optionally filter this list further using the Filters feature.
Assigning roles
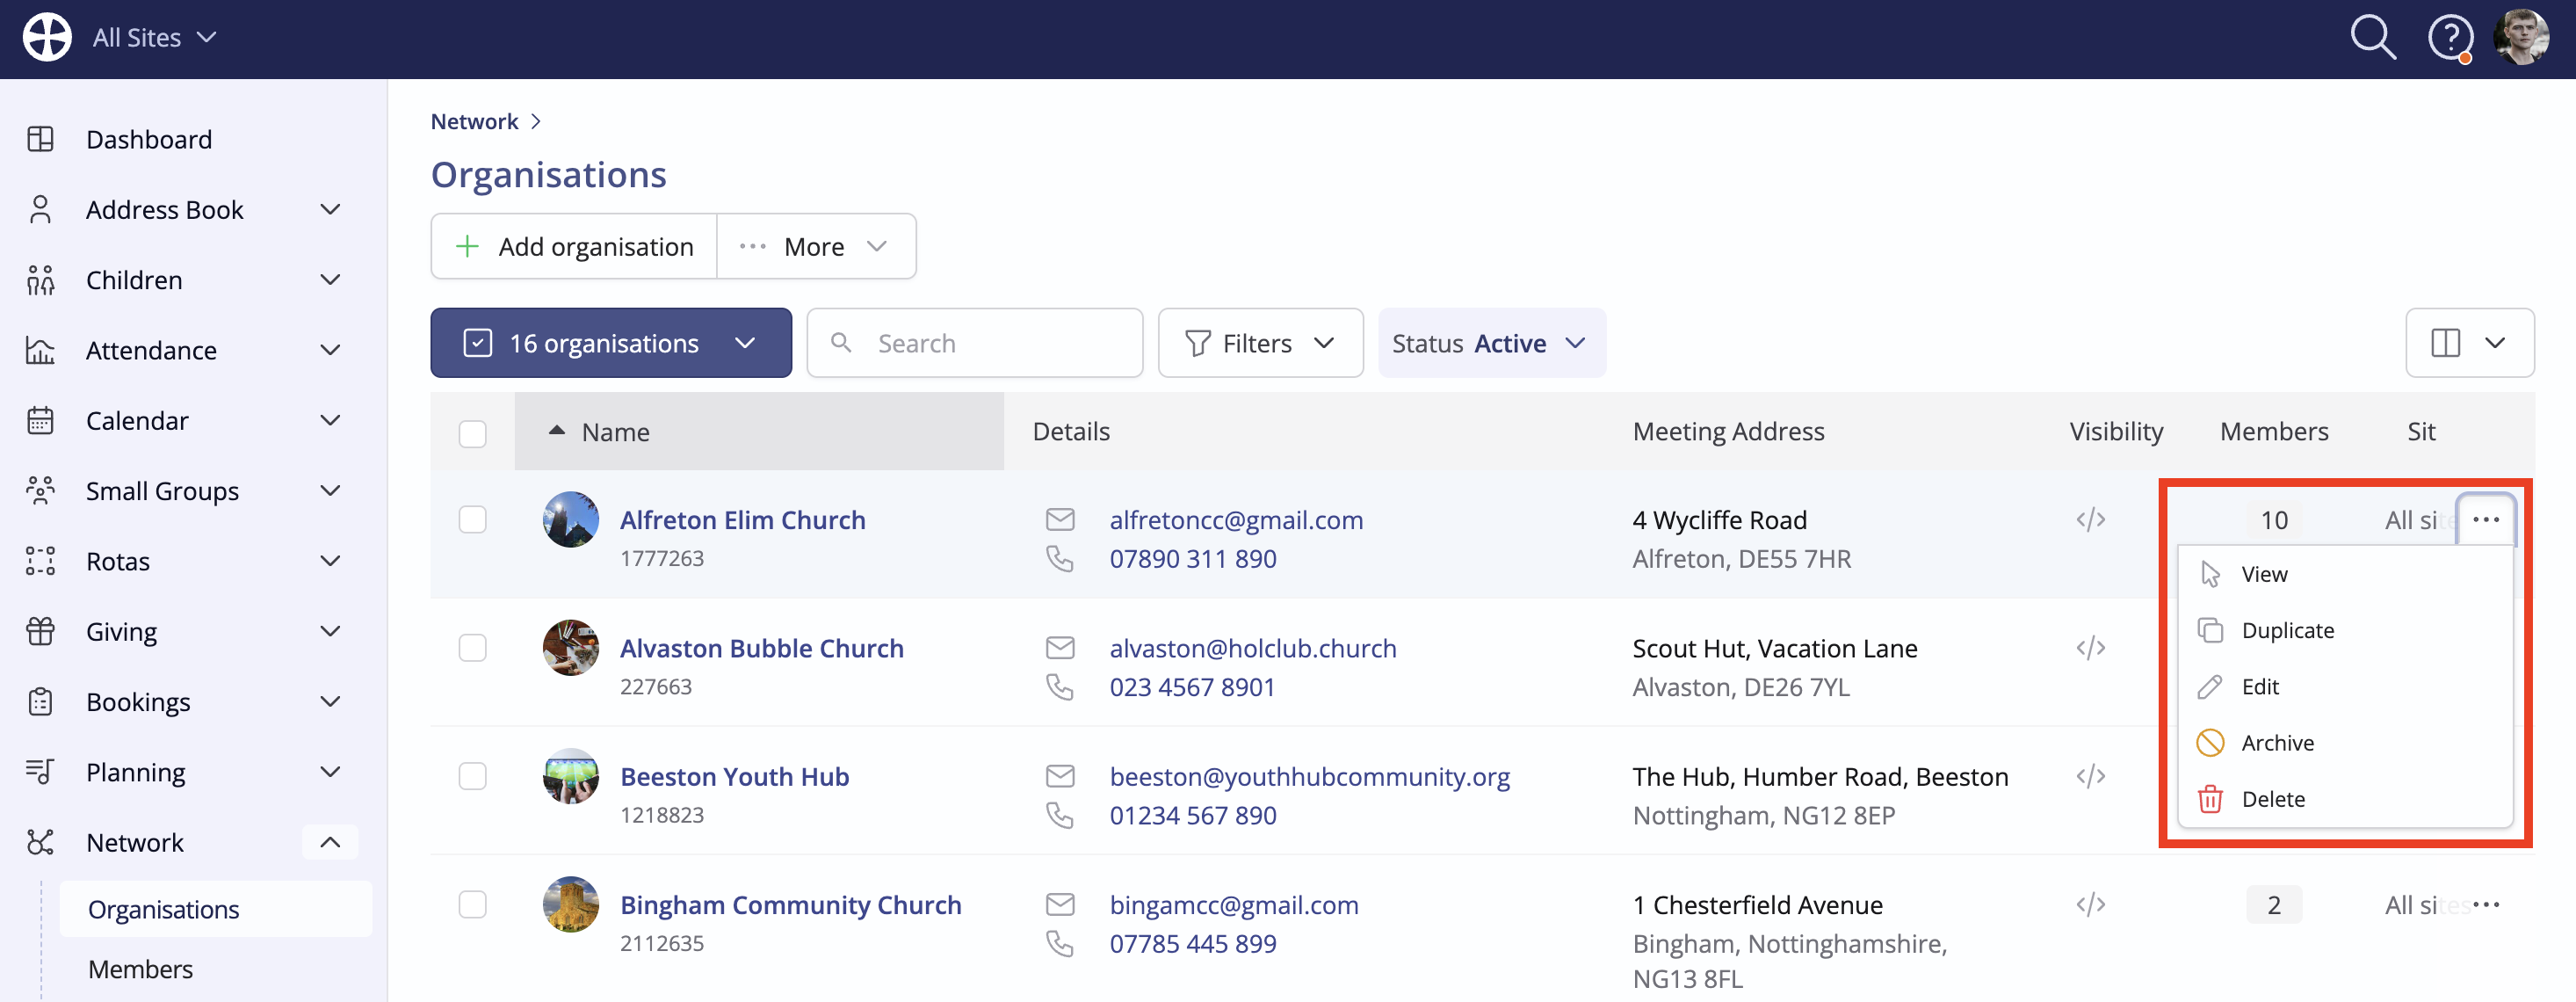
Working within the Organisations section of the module, search for and open an organisation to View - either by clicking on its Name or selecting View from the organisation Actions.
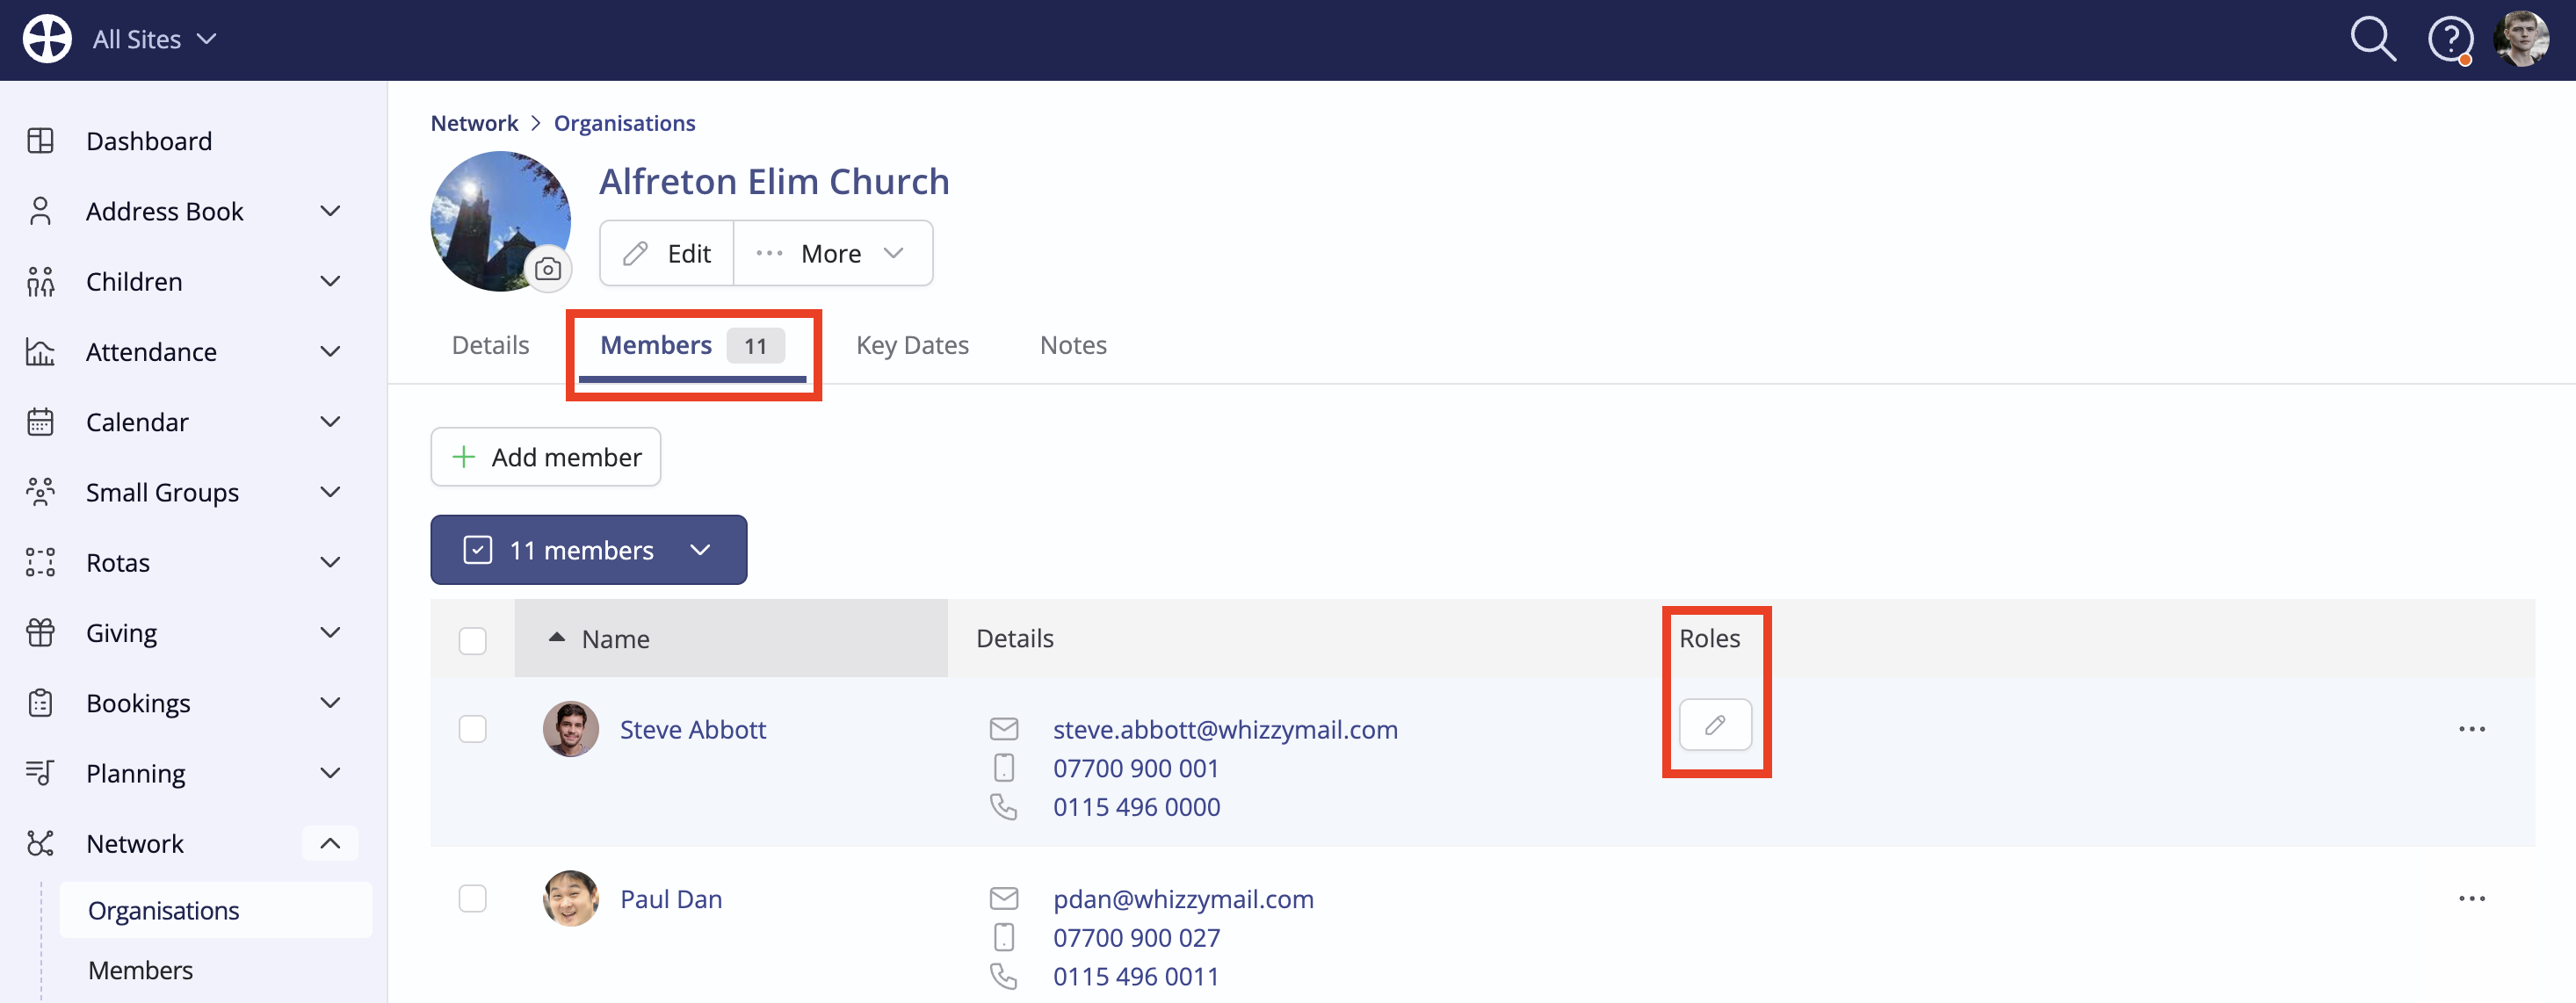
There are two ways to assign roles. The first and simplest is to use inline role editing. Alternatively, you can assign roles within the respective Add member or Edit member pop-ups. Let's look at the inline role editor:
As you hover your cursor in the Roles column of a member, the inline editing button is shown; click the pencil icon.
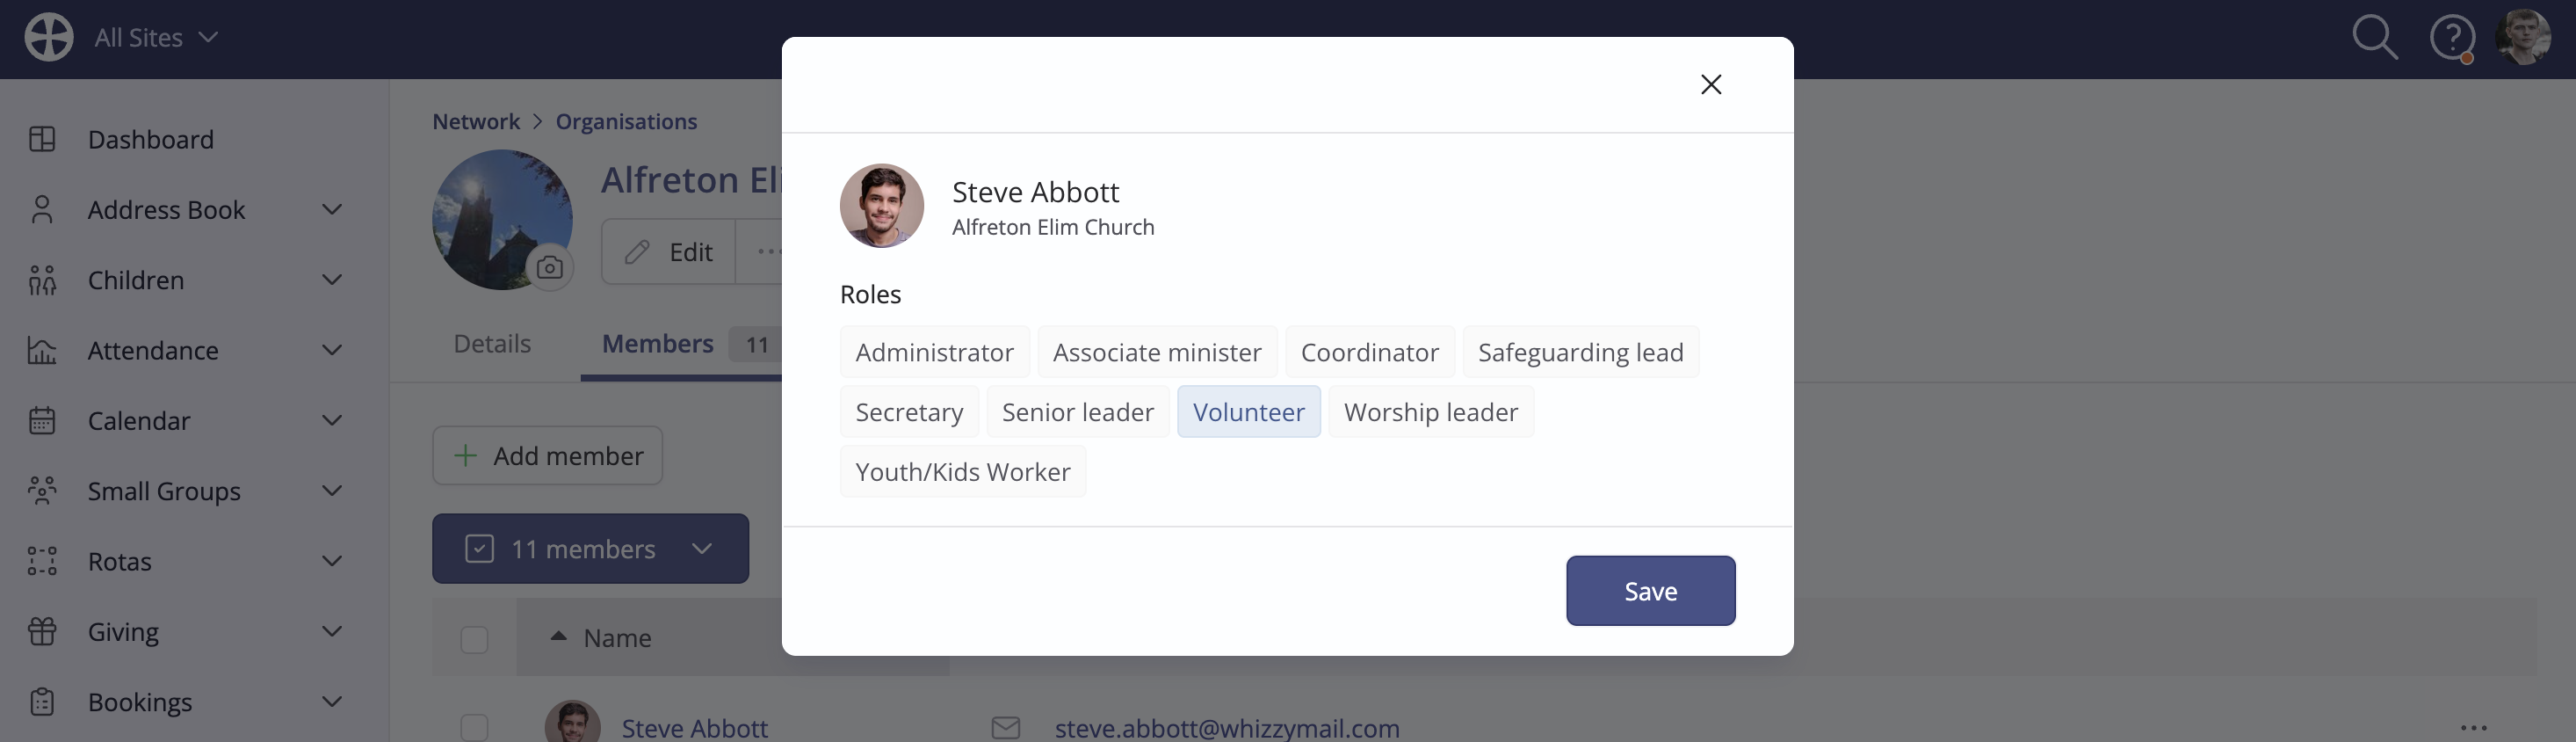
The available roles are shown. Assign roles as appropriate. The assigned roles change colour from grey to blue. Click Save to close the inline editor. Continue assigning roles to organisation members as appropriate.
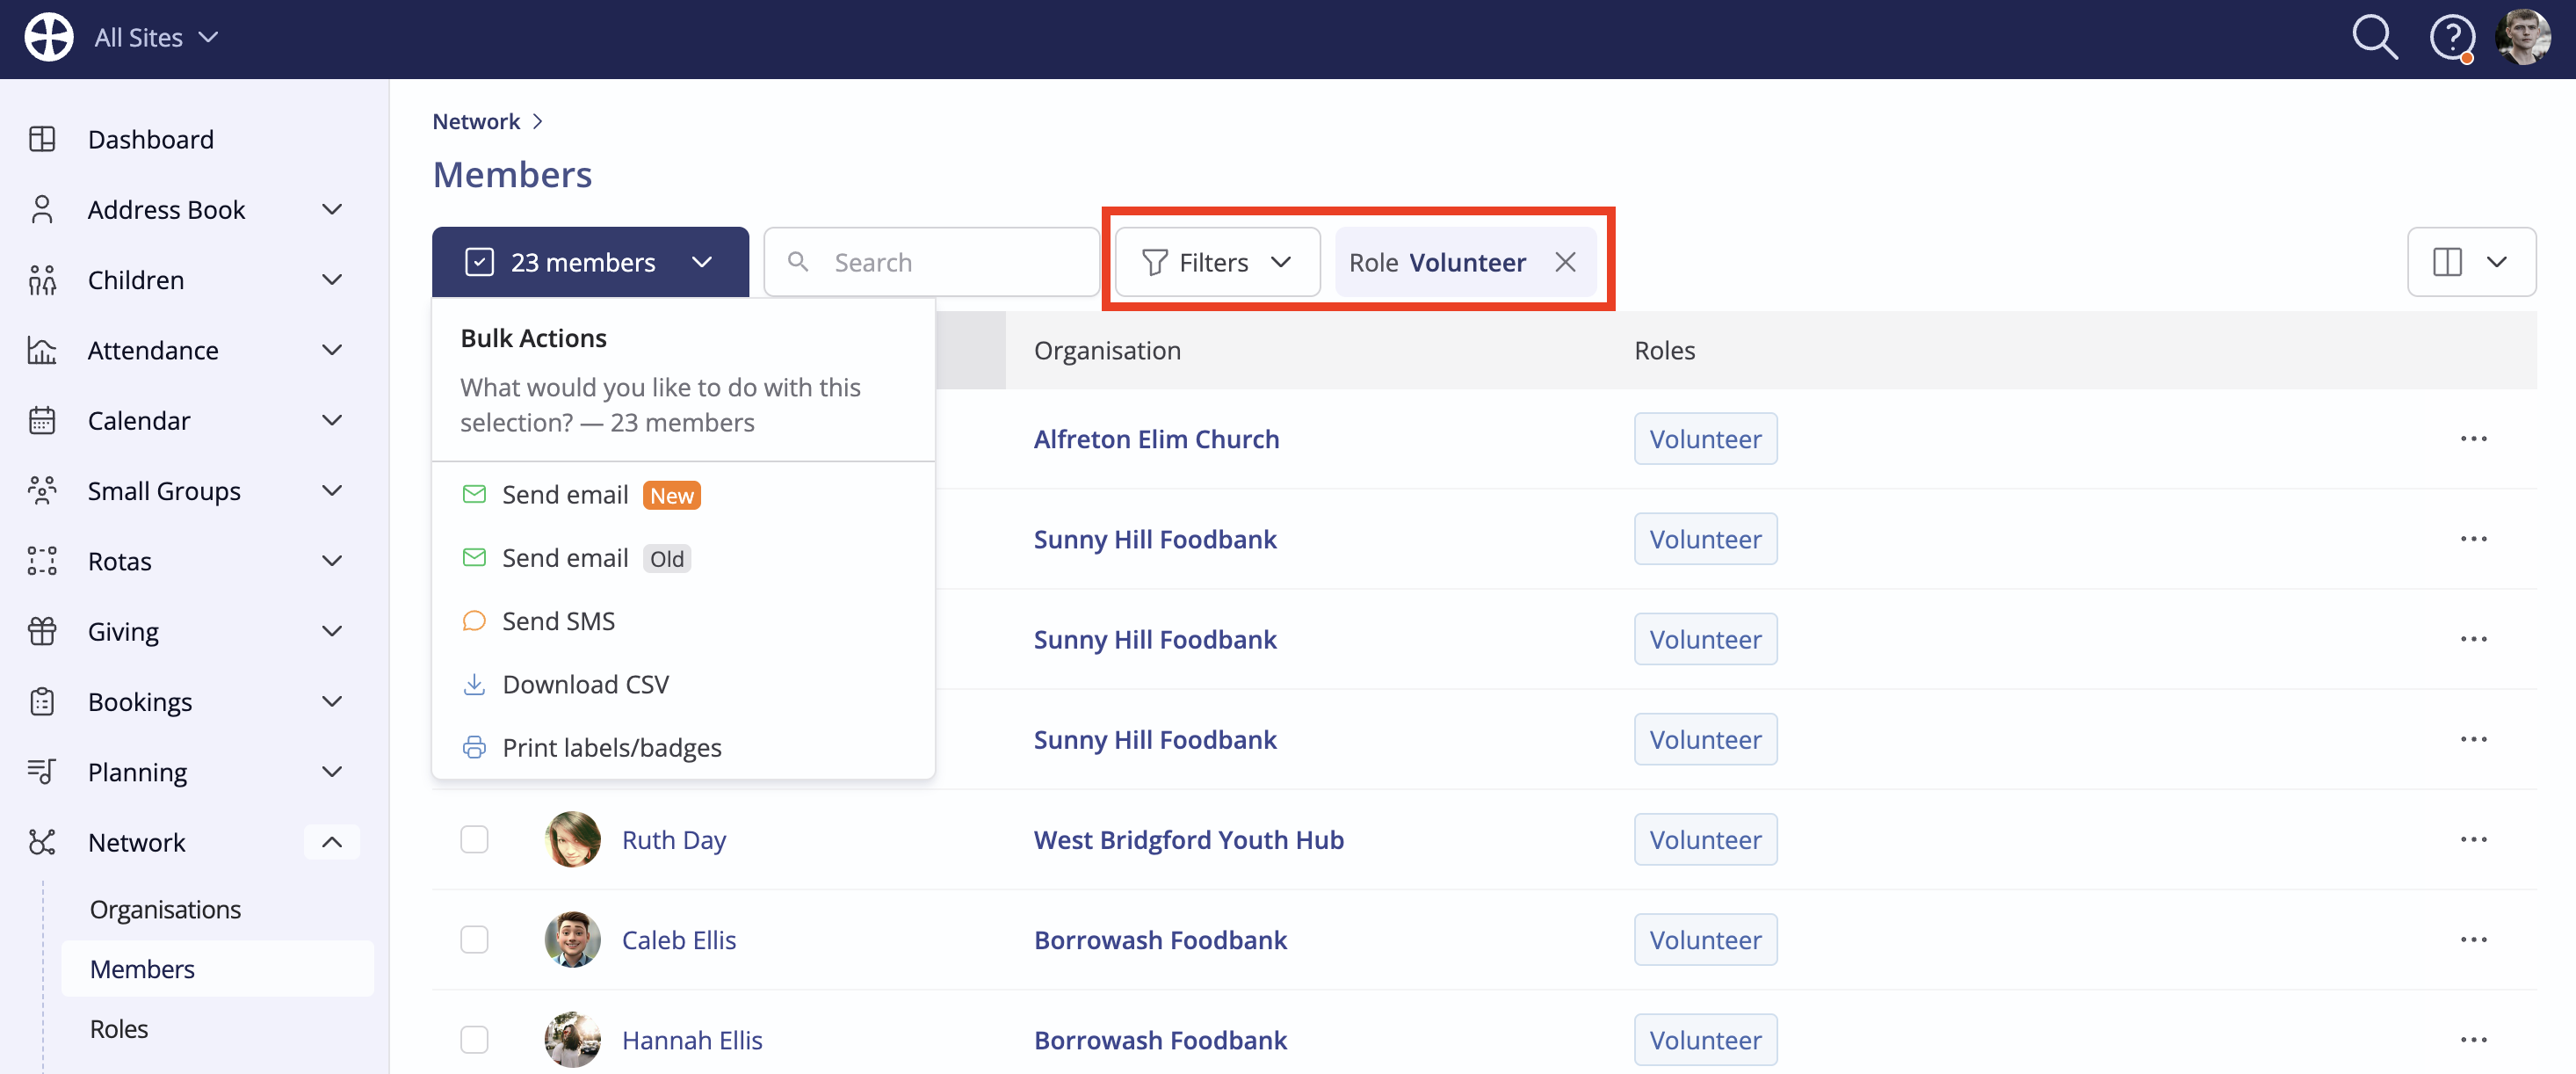
Communicating with organisation members by role
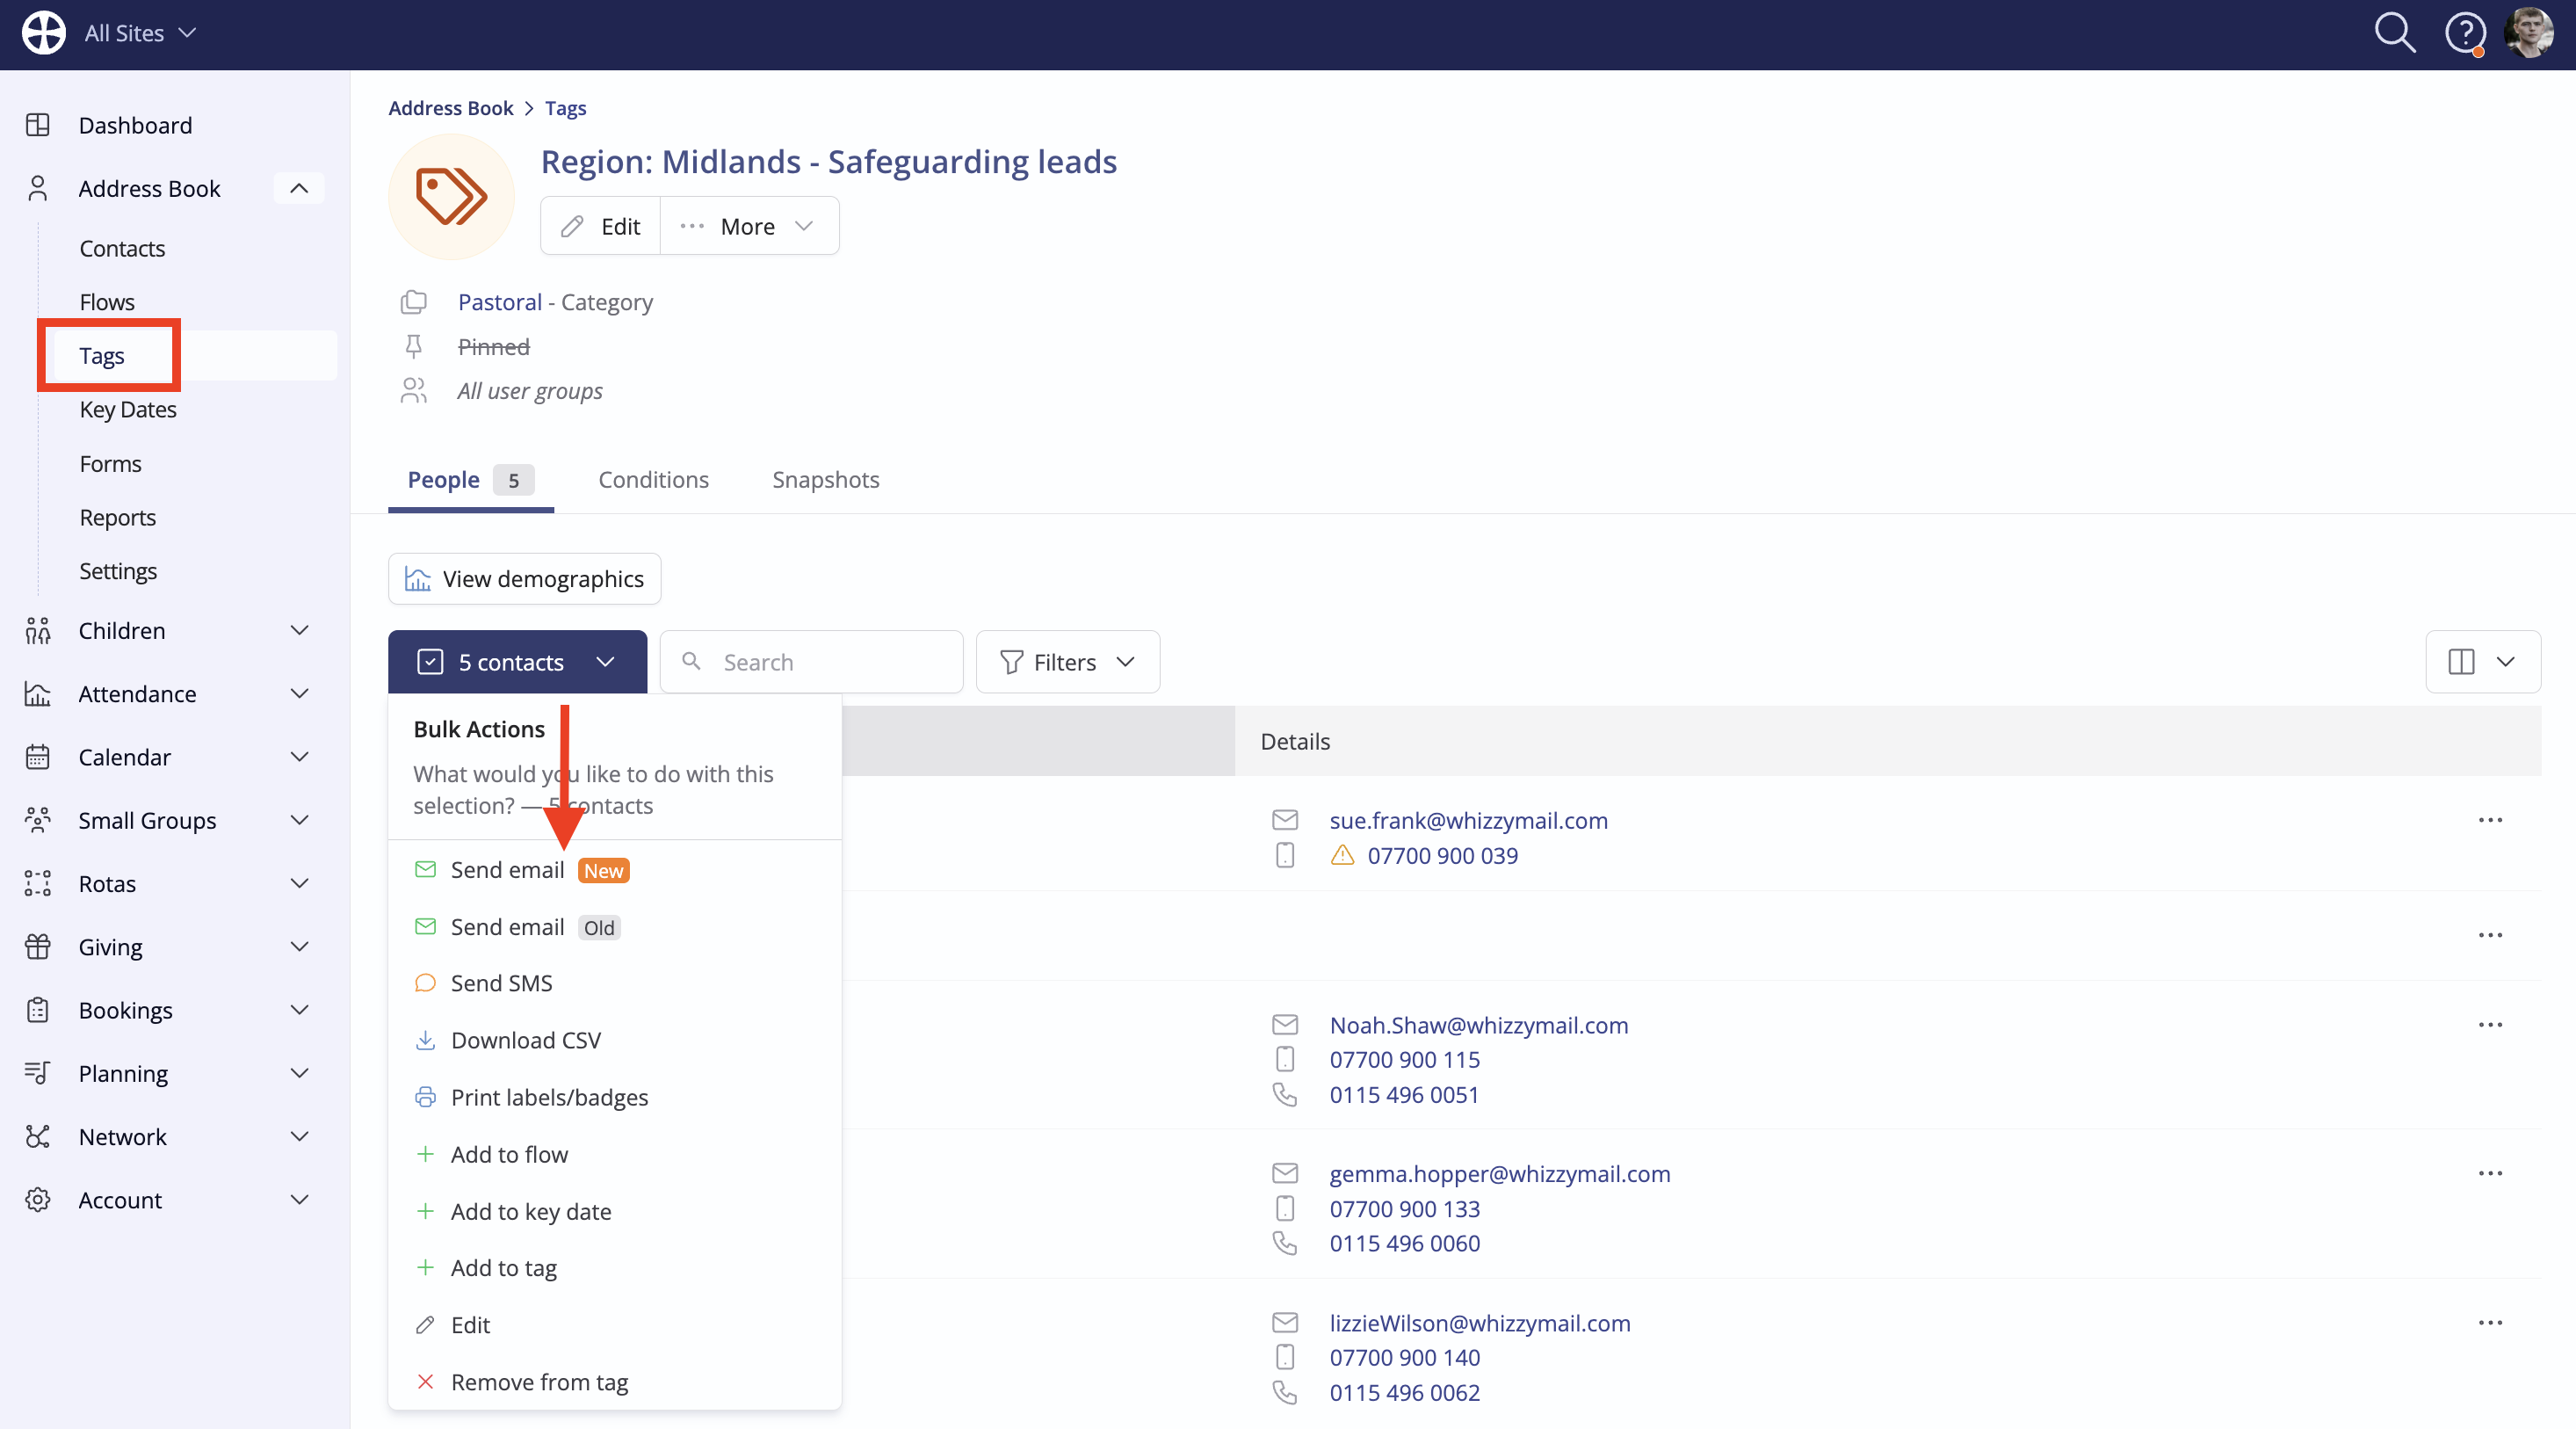
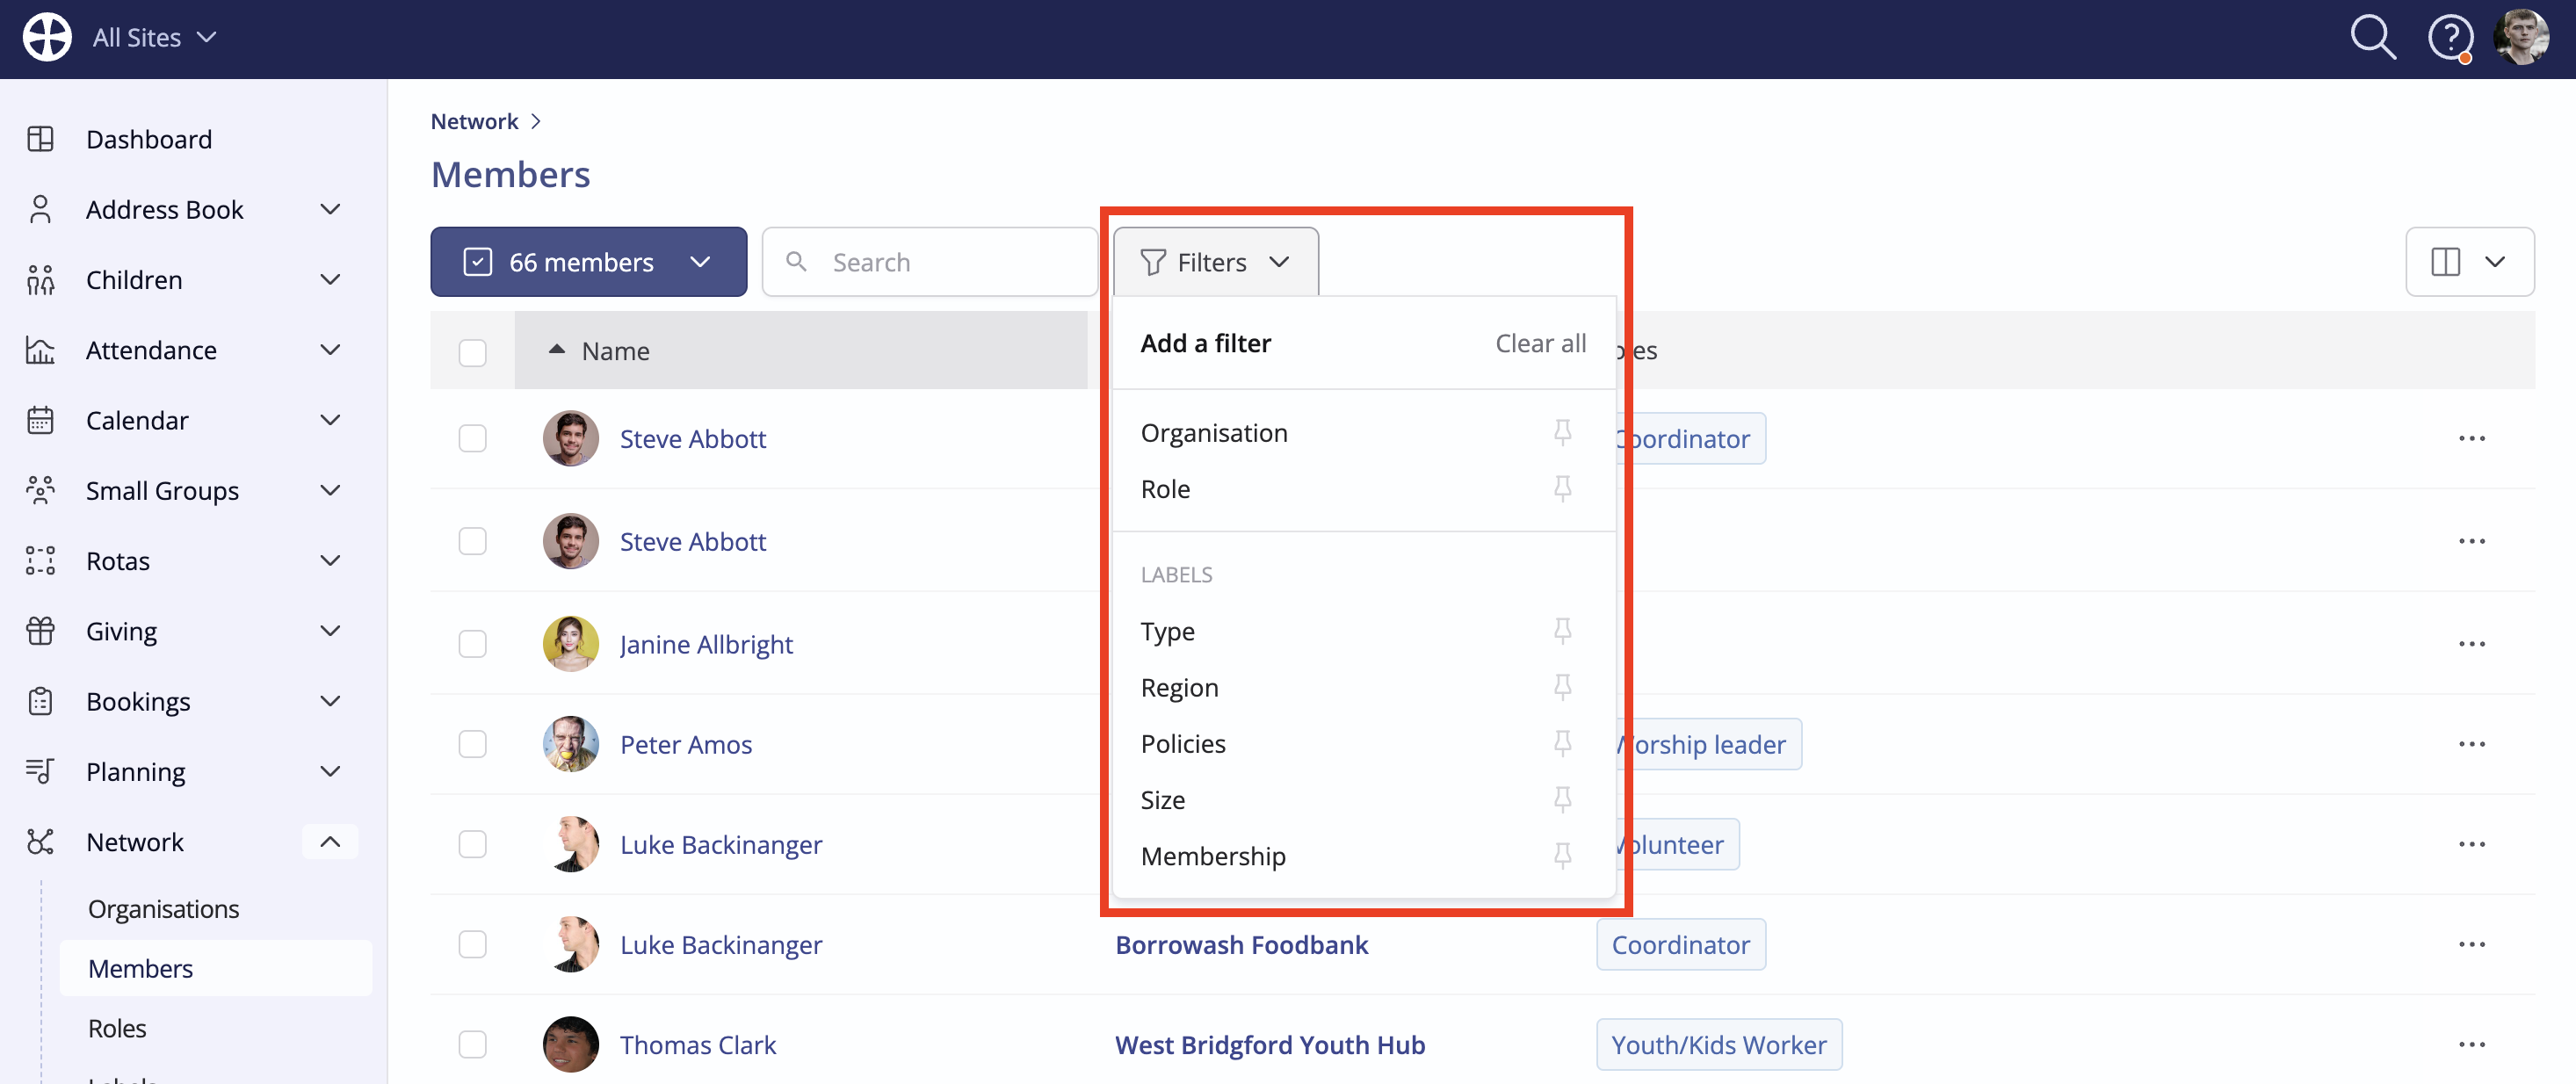
As mentioned earlier, you can easily communicate with organisation members assigned with a specific role. Working within the Members index, using the Filters feature to filter to a specific role, you can communicate to members assigned to roles via the Send email or Send SMS options.
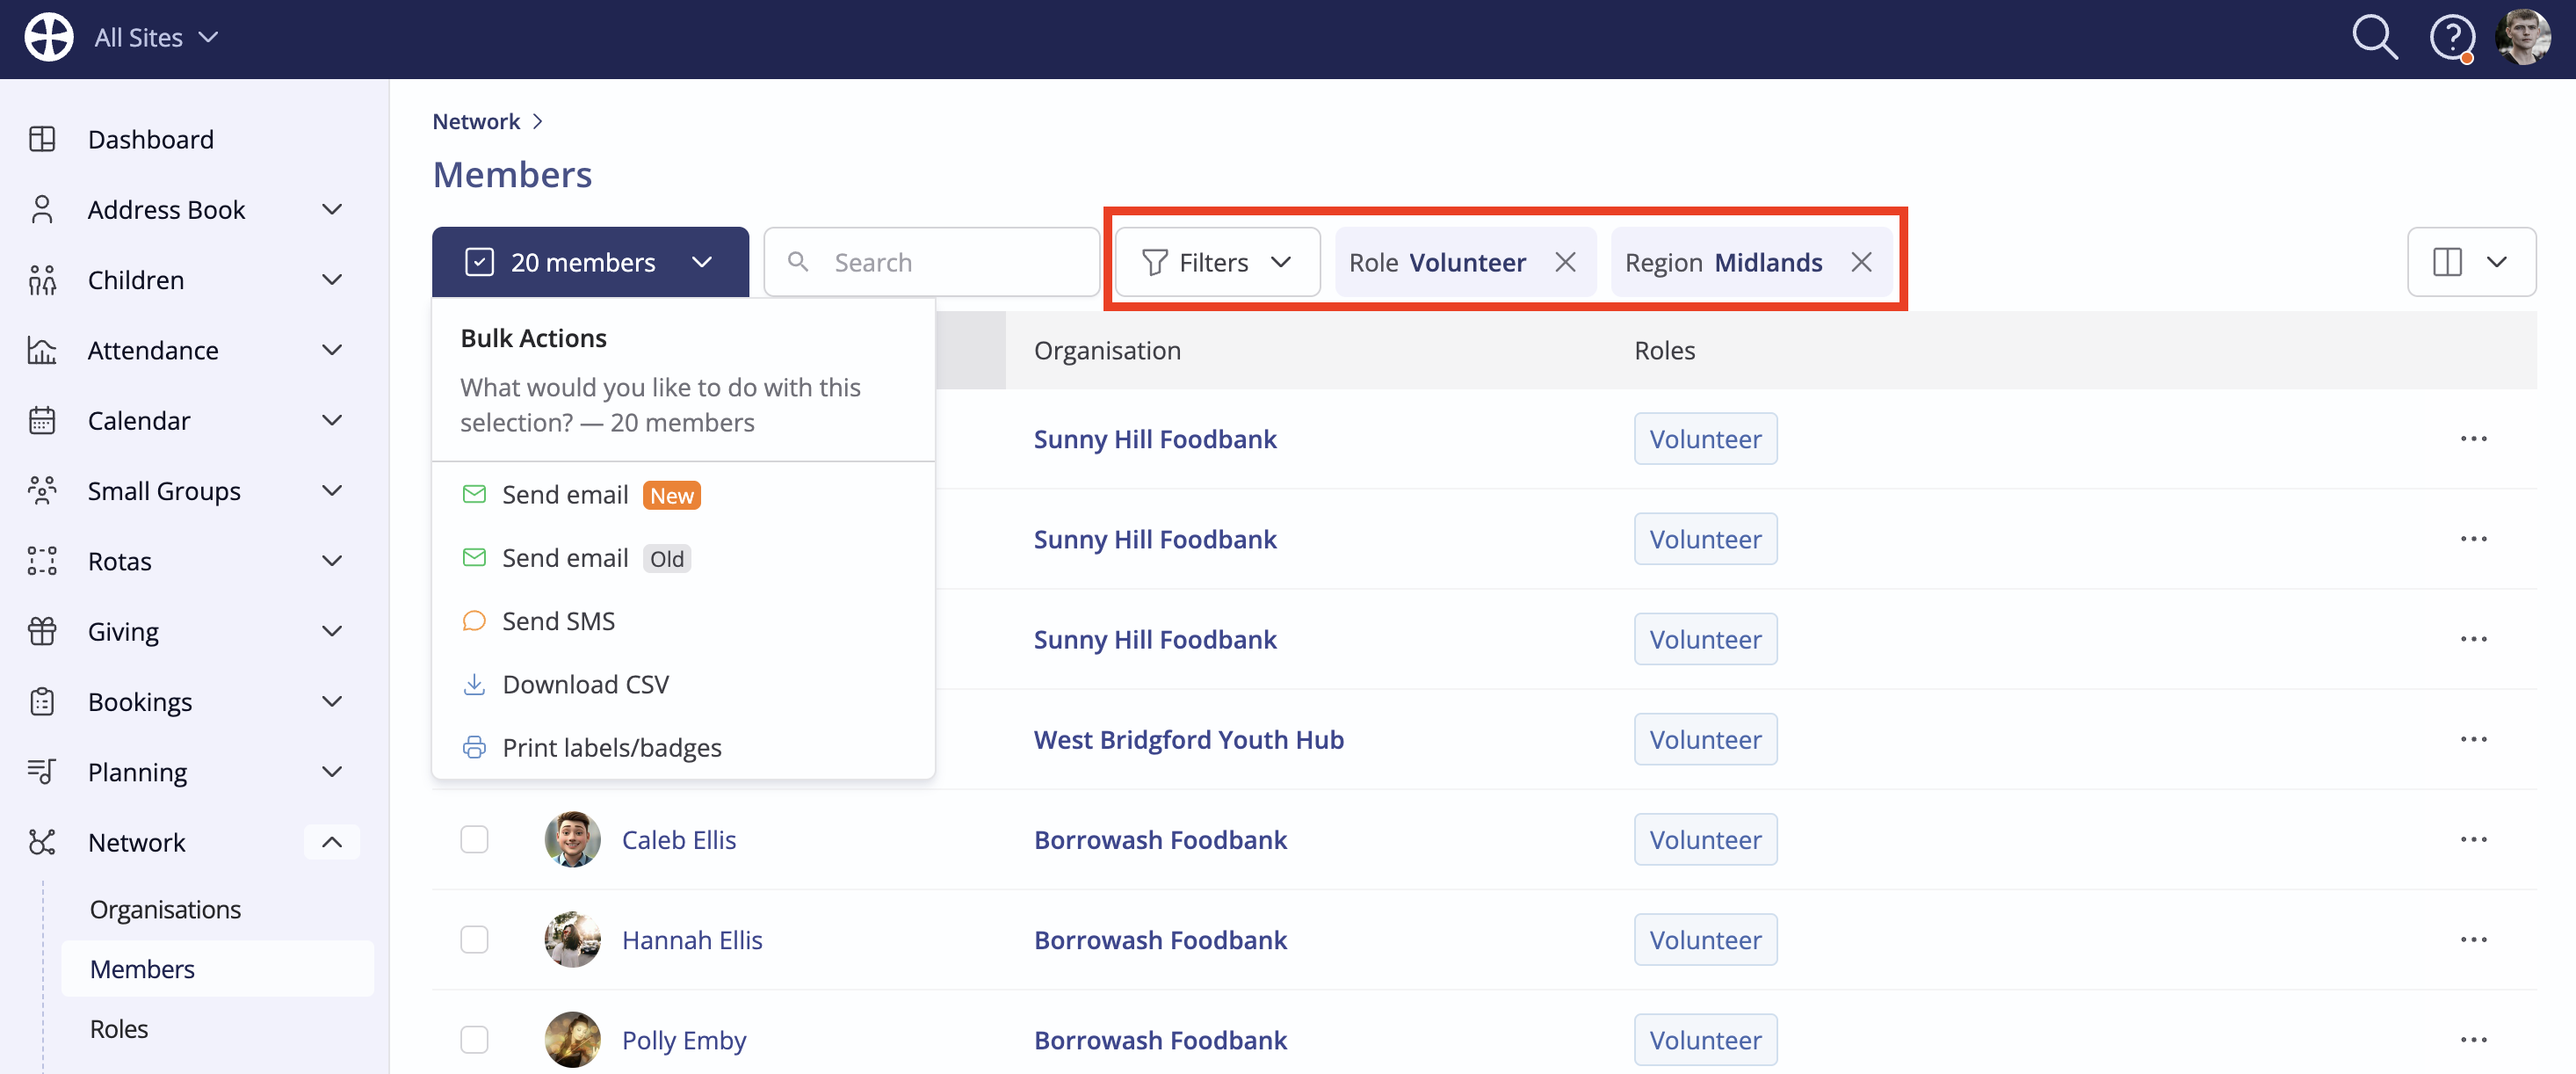
However, to communicate with more specific groupings of people, you can filter the members list even further to group people and communicate more dynamically. There are a wide range of fields you can use to filter and communicate with members. In the example below, the members list has been filtered to the contacts who are organisation members who hold a specified role in a particular region.
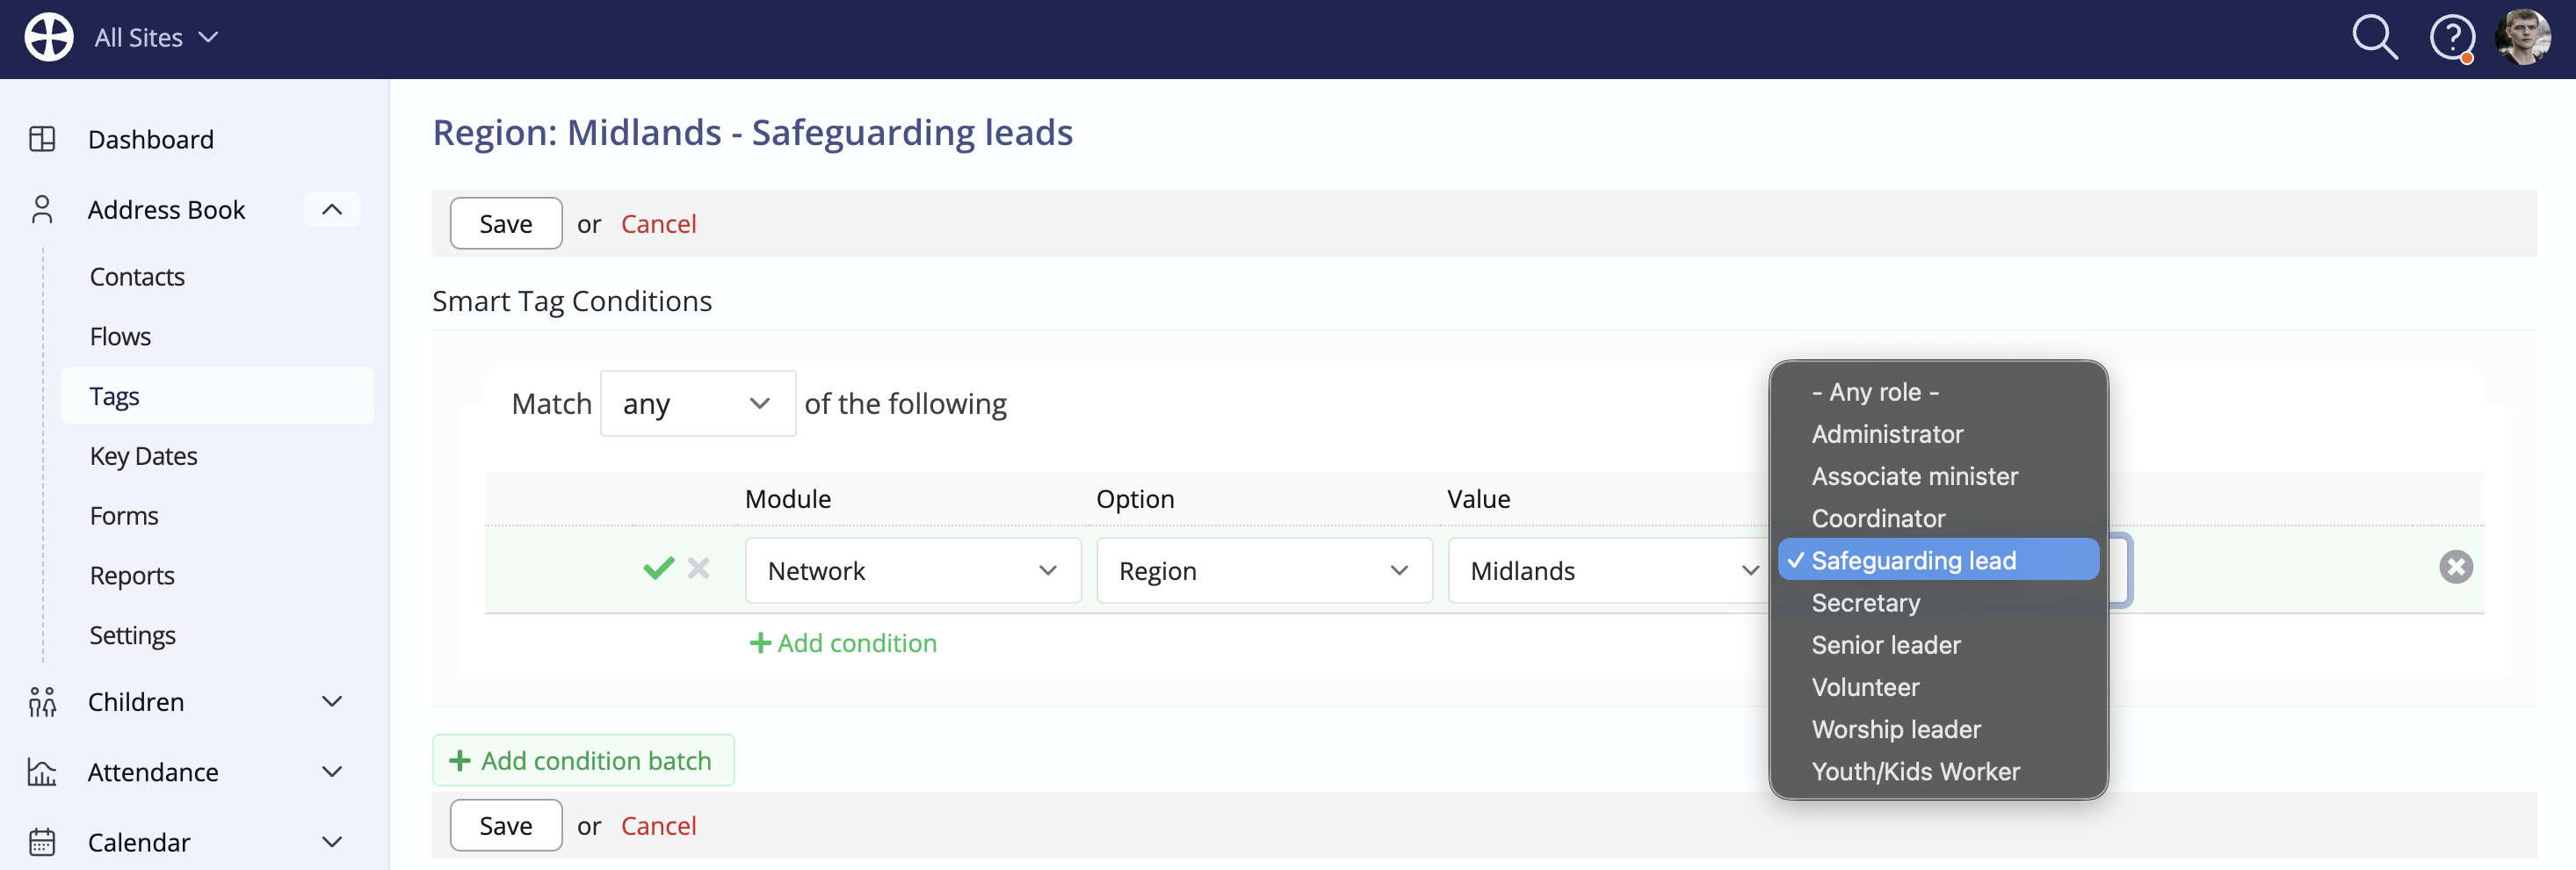
Additionally, in the Address Book, you can optionally create Smart Tags, which enable you to group people based on conditions dynamically: those contacts whose details match the tag's condition are tagged; those whose details no longer match the tag's conditions are untagged. Smart tags remain up to date as your organisation member contact details change over time, meaning you are communicating with just the right grouping of people at that time. See our related support article for further information about Smart Tags.
There is a wide range of supported Network module conditions, giving you lots of granular control over the contact members of organisations the tag matches. In the example below, the tag has a condition to match contacts who are organisation members who hold a specified role in a particular region. In this example, 'region' is stored as an organisation label. Notice that there are smart tag conditions available related to Members, Organisations, Meeting Addresses, Office Addresses, Labels and Custom Fields.
In this way, you can easily create highly elaborate smart tags to drill down into your Organisation member data and then Communicate with those tagged contacts directly from a tag "View".