Customising your ChurchSuite account
In this article
Introduction
Customising your account settings
Renaming and re-ordering modules
Introduction
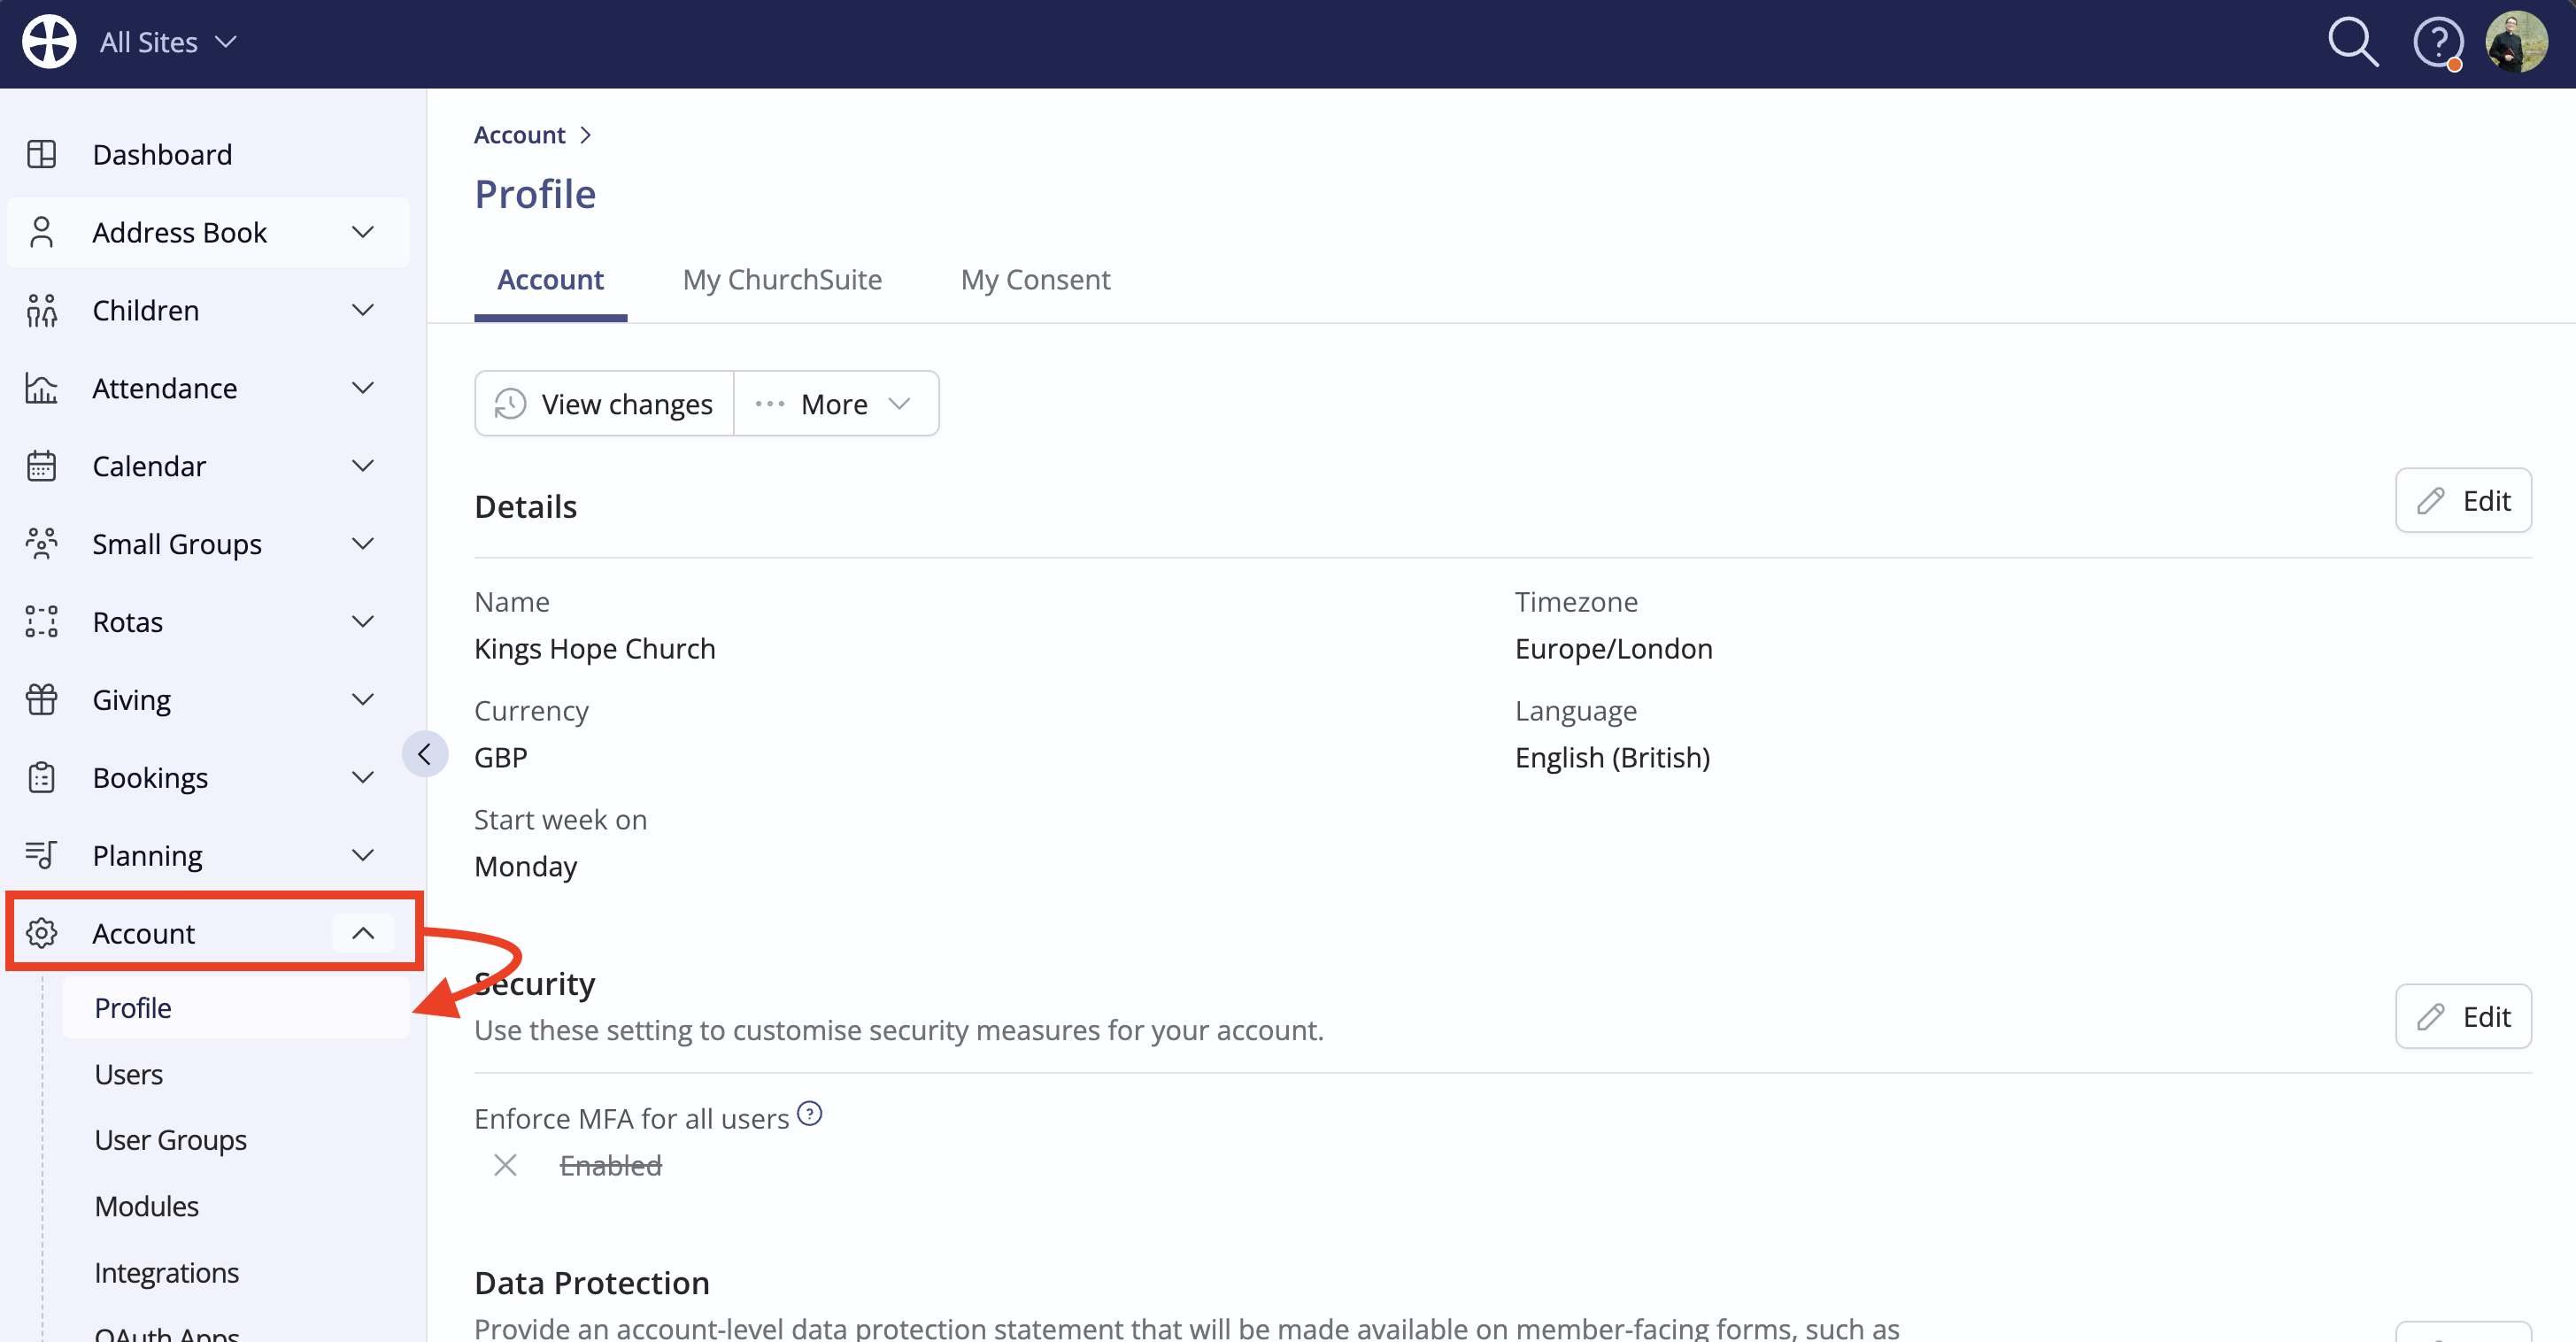
The account Profile is home to your ChurchSuite Account, My ChurchSuite and My Consent settings. These global settings apply to all users and are accessible to Administrators through the Account menu:
In the Profile, you can add your organisation's Data Protection statement - sometimes known as your Privacy Notice - which is then shown on all public-facing and member-facing forms through which people might submit personal details as they engage with your various events and activities. Those submitting personal details during visitor check-in, event sign-up, small group sign-up via an embedded group page, a custom form response, newcomer "My Details" forms and Donate will first need to agree to your Data Protection statement before they can submit their response.
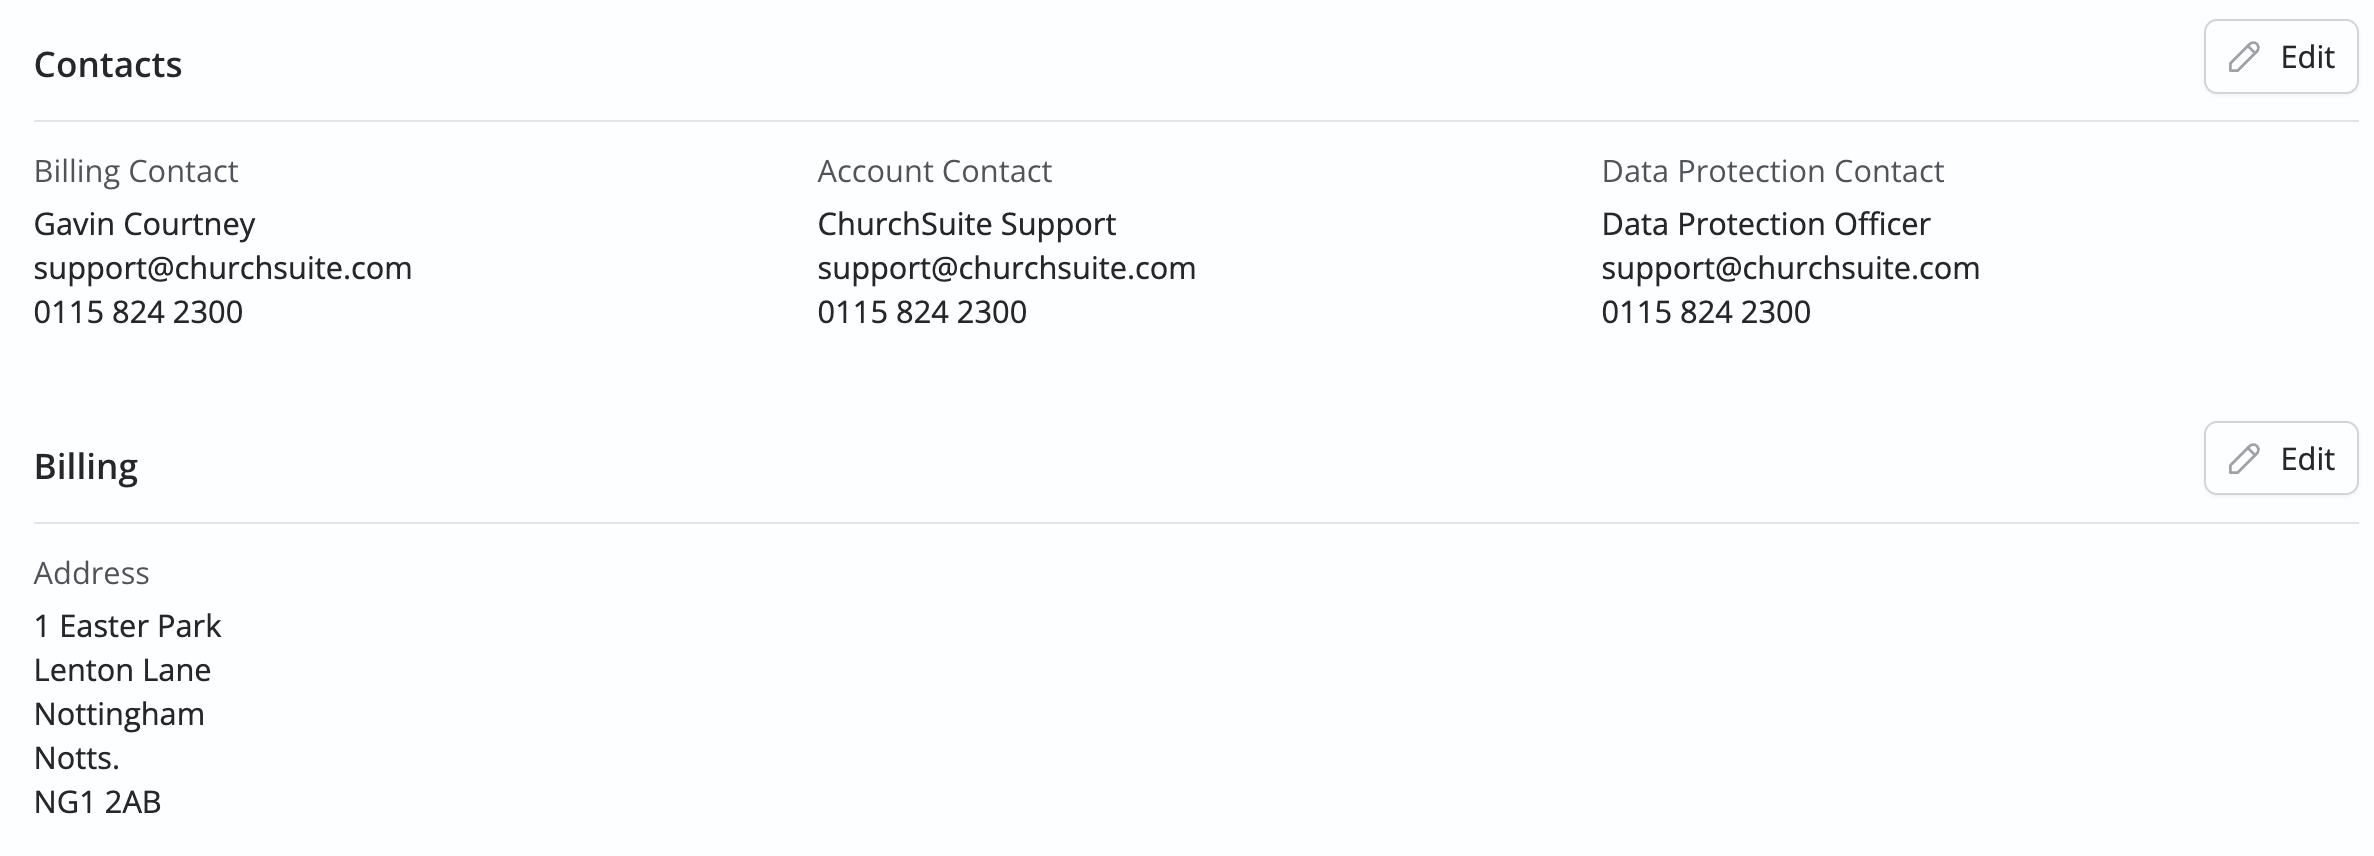
The account Profile is also home to your account contact details; the designated individuals that we might need to communicate with from time to time about matters relating to your account, billing or data protection.
Customising your account settings
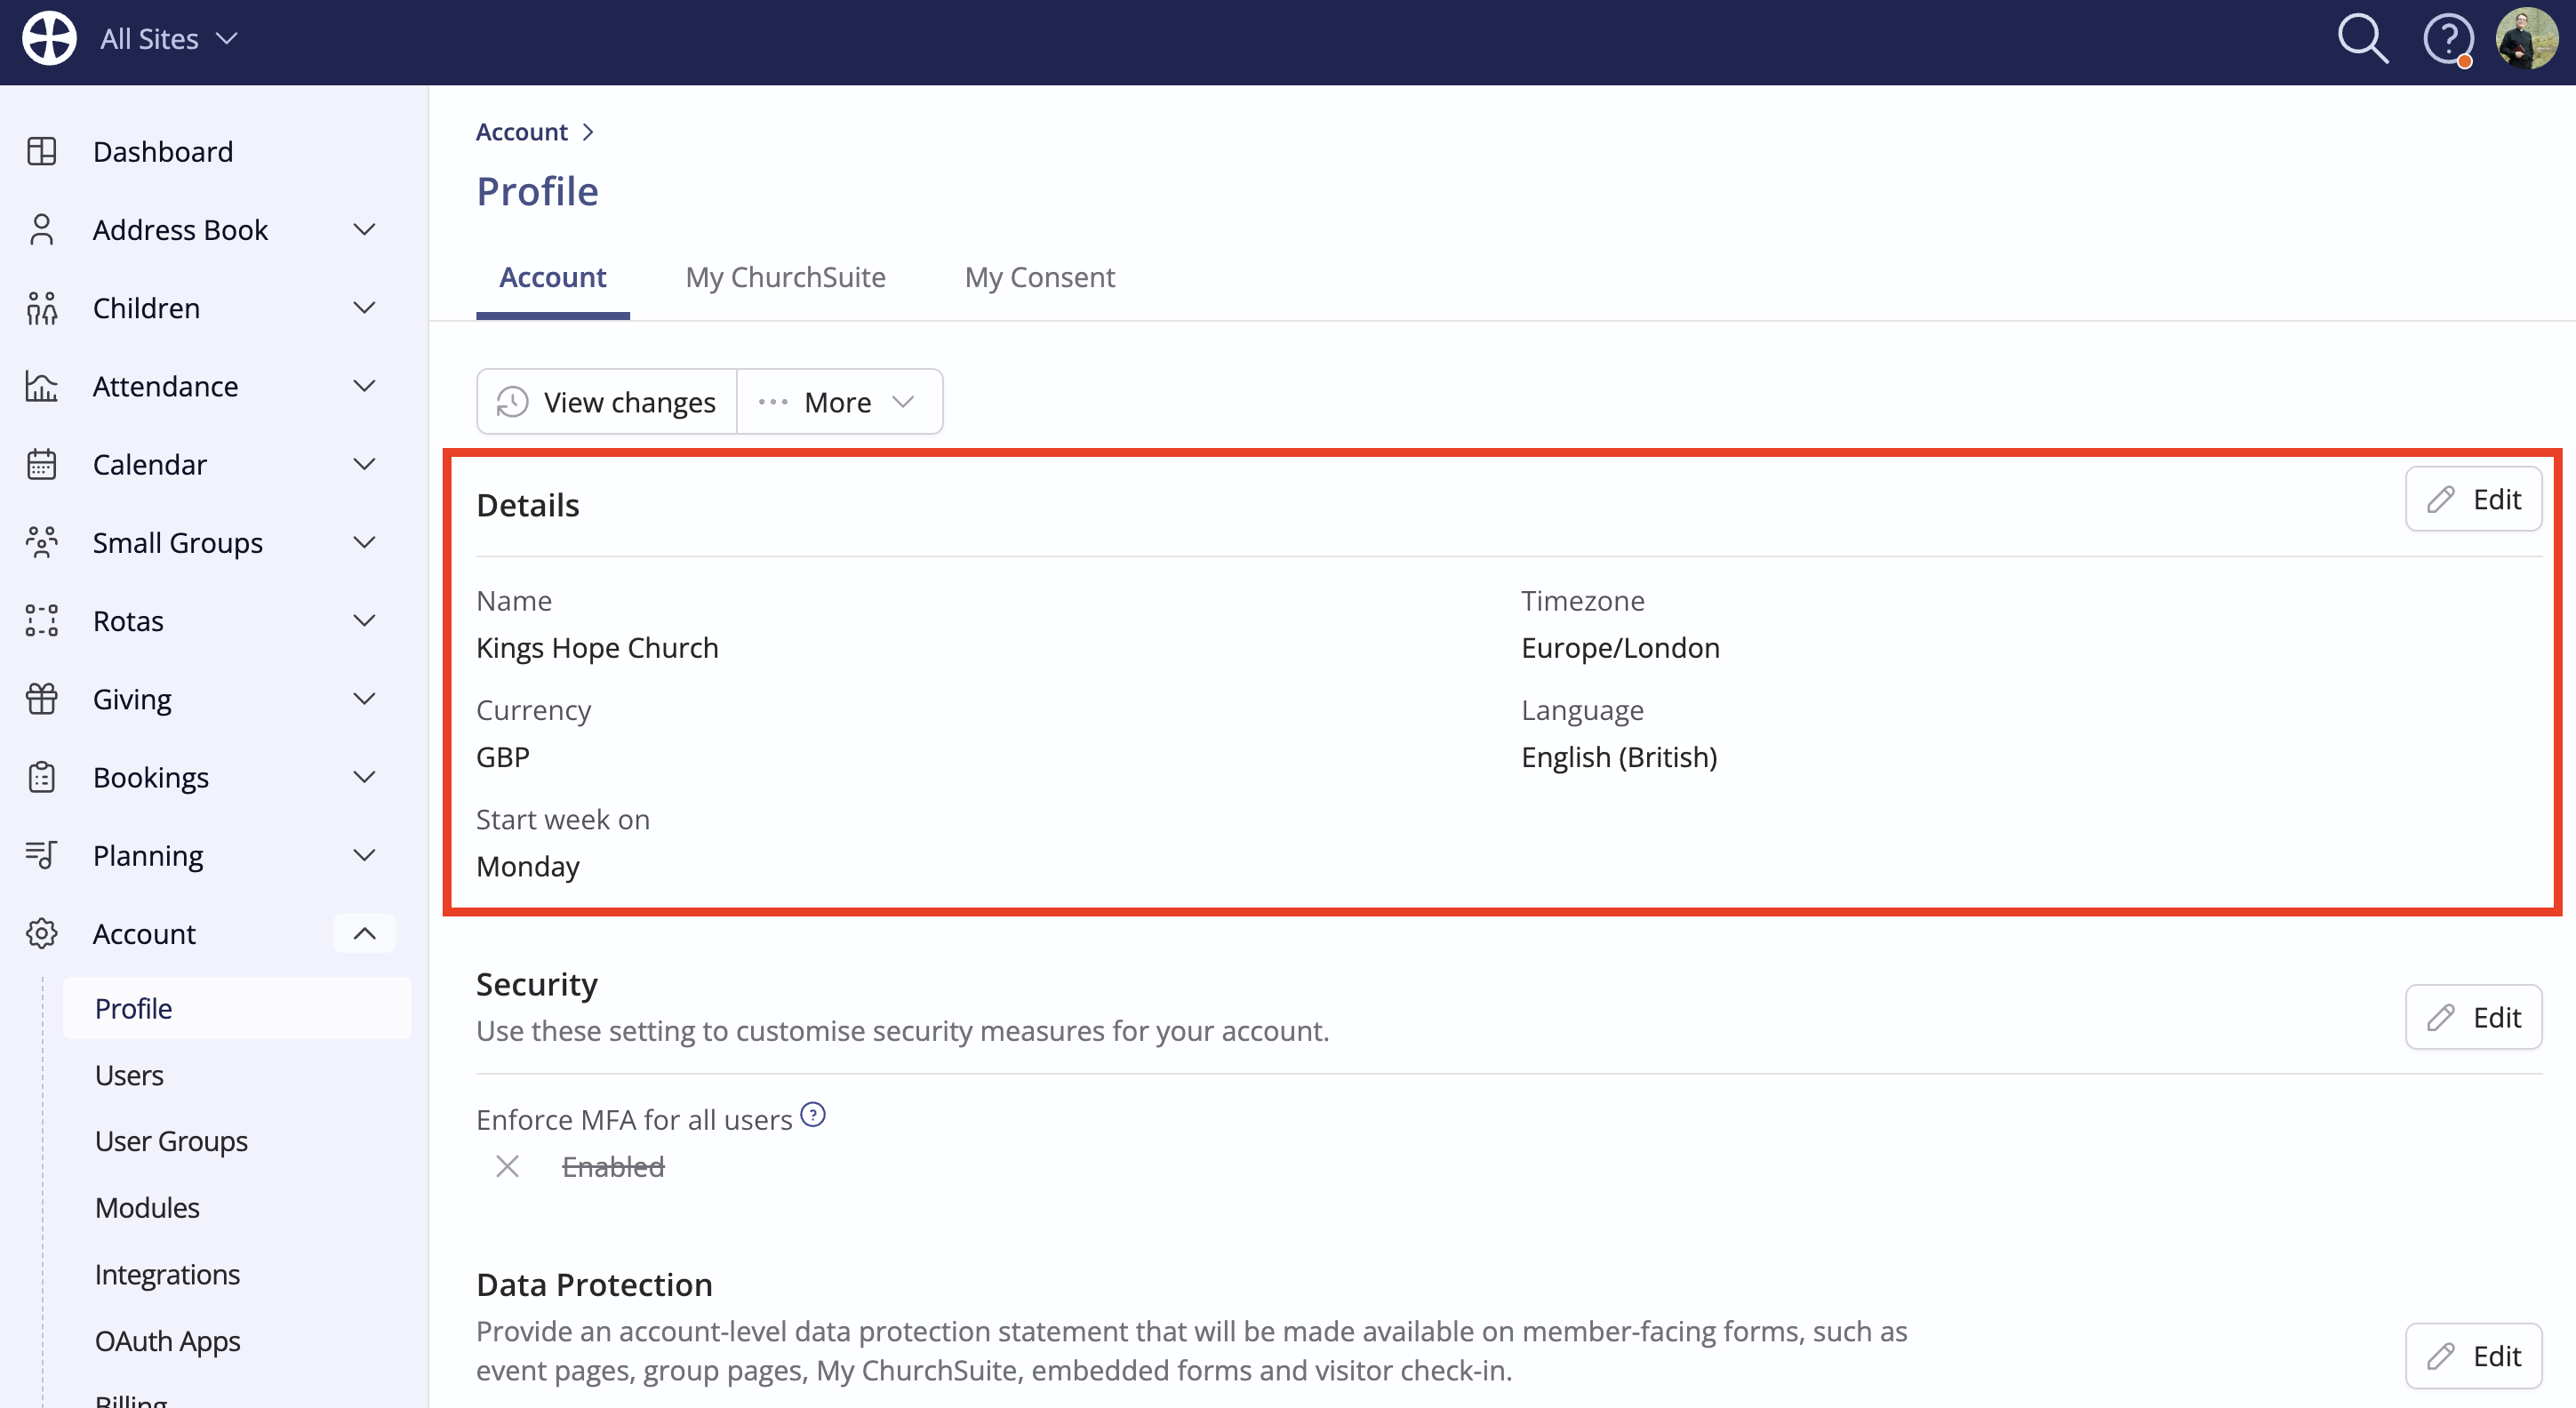
The Account Details are originally populated from the details first provided when you submitted a ChurchSuite trial request. Click Edit to make changes to your organisation Name, Timezone, Currency and Language. Start week on controls the first day of the week for date pickers and when viewing the calendar in ChurchSuite, My ChurchSuite or Embed.
You can optionally enforce multi-factor authentication (MFA) for all users in the Security settings, or users can self-enable MFA for their accounts.

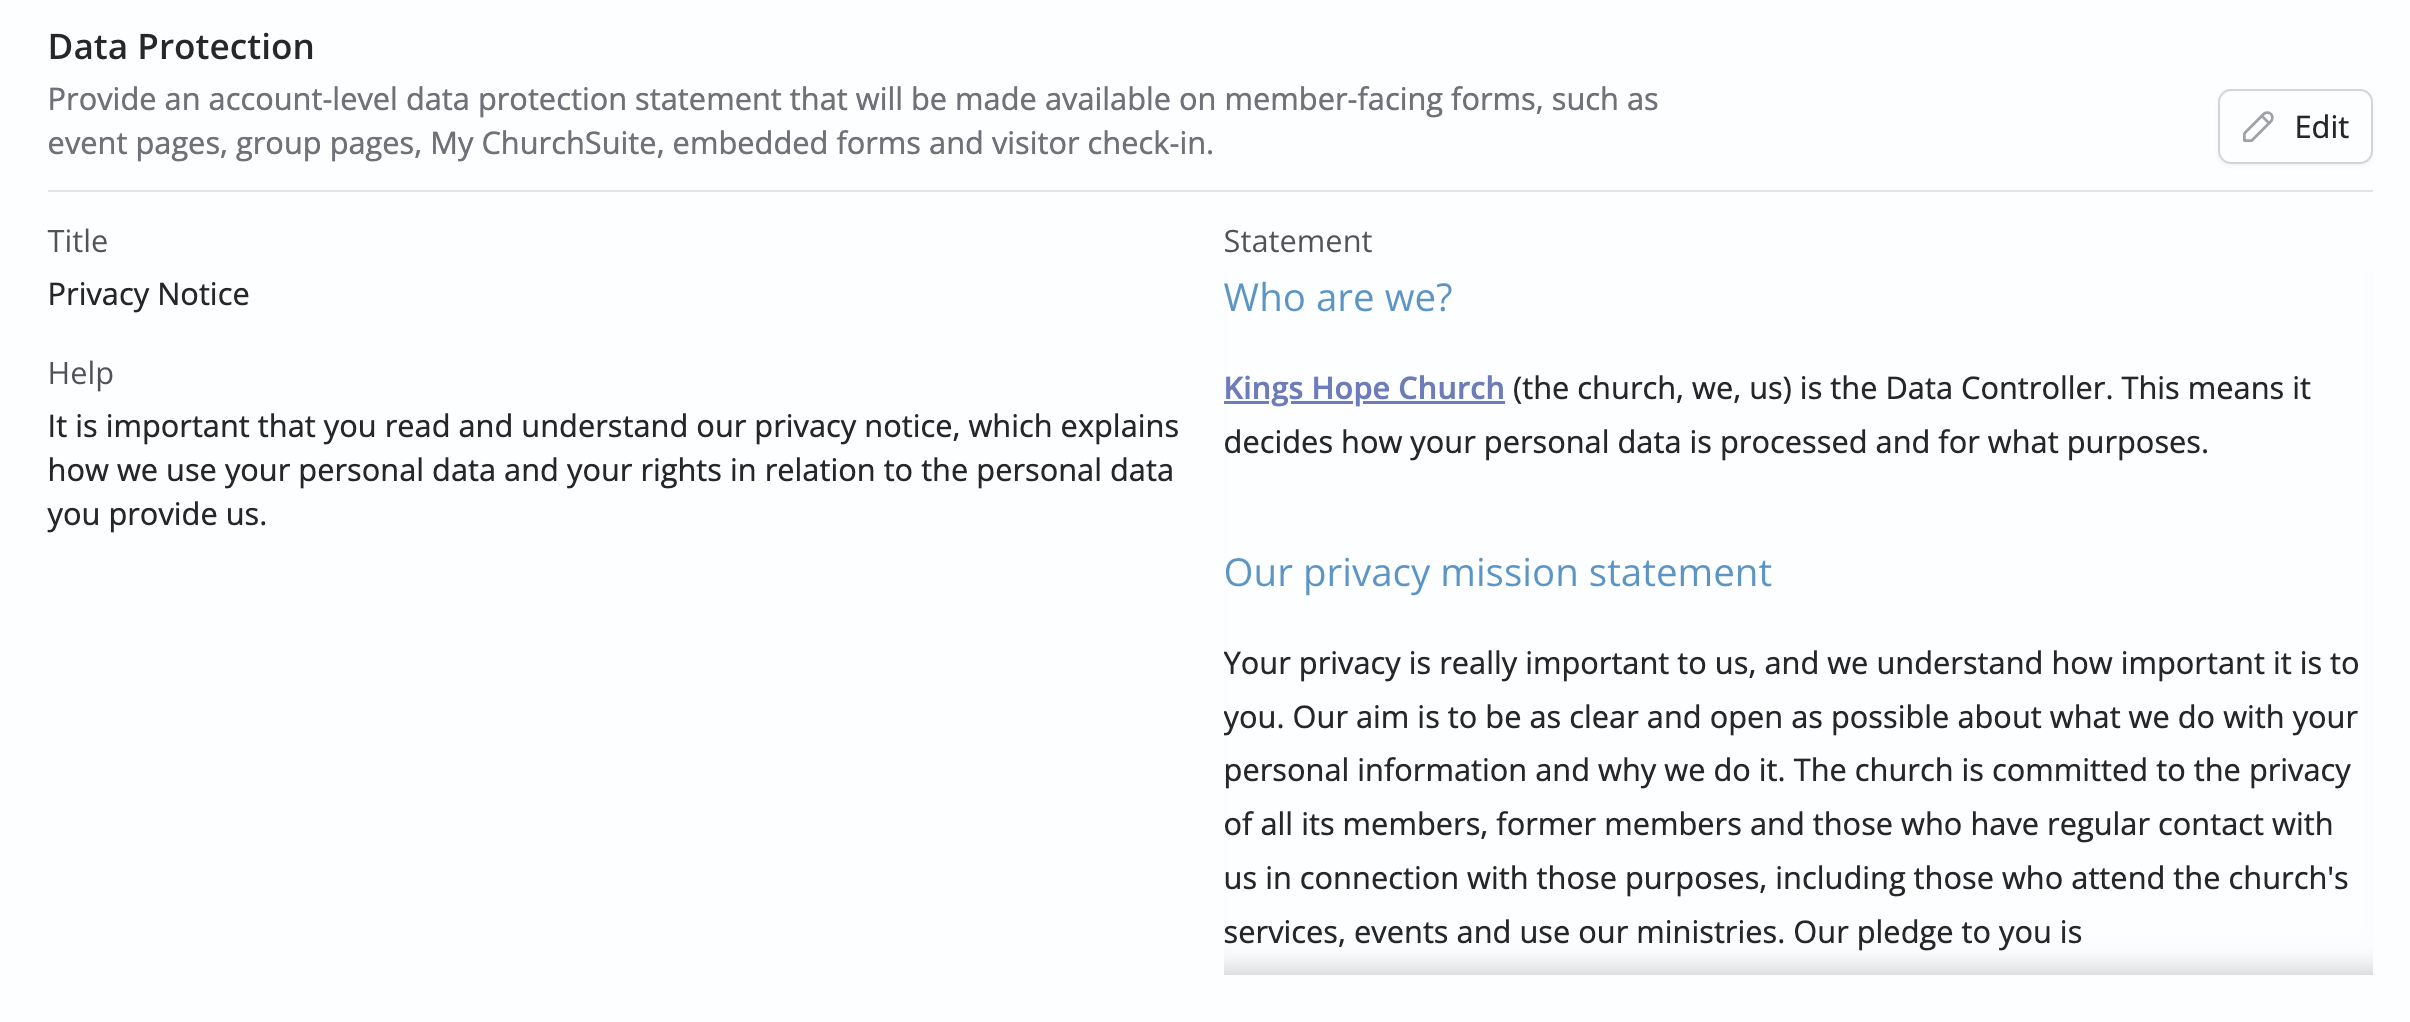
In the Data Protection settings, you can add your organisation's Data Protection statement - sometimes referred to as your Privacy Notice. Give your statement a suitable Title, e.g. Privacy Notice, and add some optional Help text that is shown with the "I accept ..." confirmation checkbox that people see on all ChurchSuite forms that collect personal information. The help text typically clarifies what ticking "I accept..." means. For example, you might say something like, "You must read and understand our privacy policy, which explains how we use personal data and your rights relating to personal data". Finally, add (or copy and paste) your data protection statement as plain text into the Statement field. Once added, you can use the HMTL Editor tool to further style the content, including options to embed external links and images if you wish.

Once added, the data protection statement is shown on all public-facing and member-facing forms through which people submit personal details, including My ChurchSuite, visitor child check-in, event sign-up pages, embedded small group sign-up pages, customer-facing booking pages, Donate, custom forms and the newcomer My Details forms.
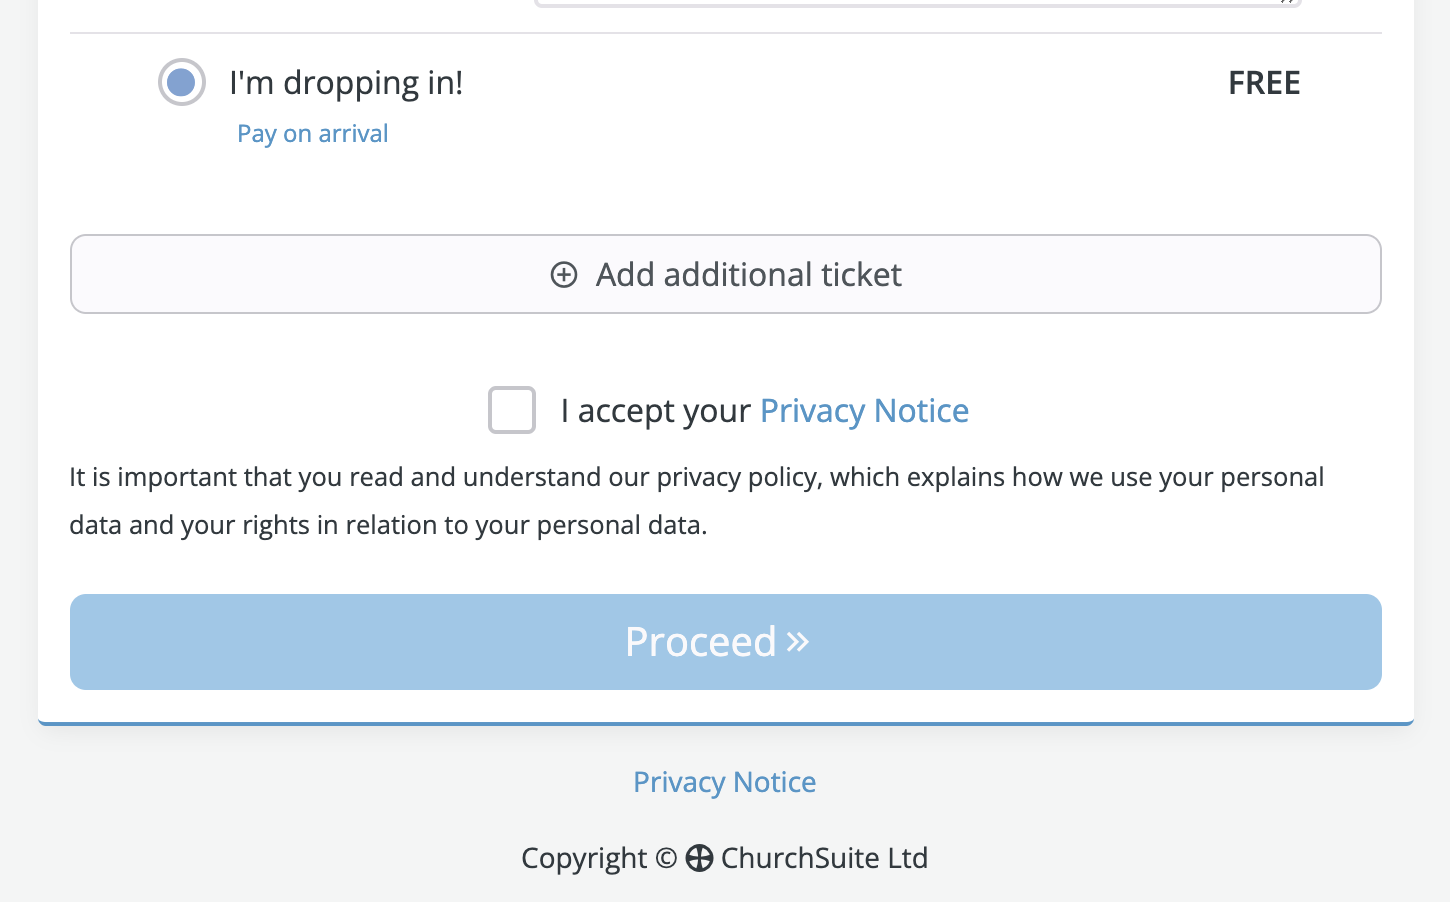
Here's an example from an event page where the sign-up form includes an I accept checkbox, a link to the data protection Statement (which when clicked, opens to view in a pop-up) and the Help message that you added clarifying what ticking the checkbox means. For data protection and best compliance, sign-ups are unable to click Proceed until they tick the checkbox.
Through the Email settings, you can choose the default Email Template used when composing emails. Note that a user can override the default when composing an email and choose a different template if they wish. You can enable or disable email Open Tracking. Disabling tracking prevents an open-tracking "pixel" from being added to outbound ChurchSuite emails, which is used to determine 'email open' responses from recipient email service providers that support open rate tracking. Open Tracking records the date and time of an 'email open' only - all other tracking data, such as the recipient user agent and IP address are discarded and are not maintained in your ChurchSuite account.

Finally, there are settings for Contacts and Billing. This is required information and is pre-populated with the details provided when you first signed up to use ChurchSuite. Click Edit to keep these details up to date.
Renaming and re-ordering modules
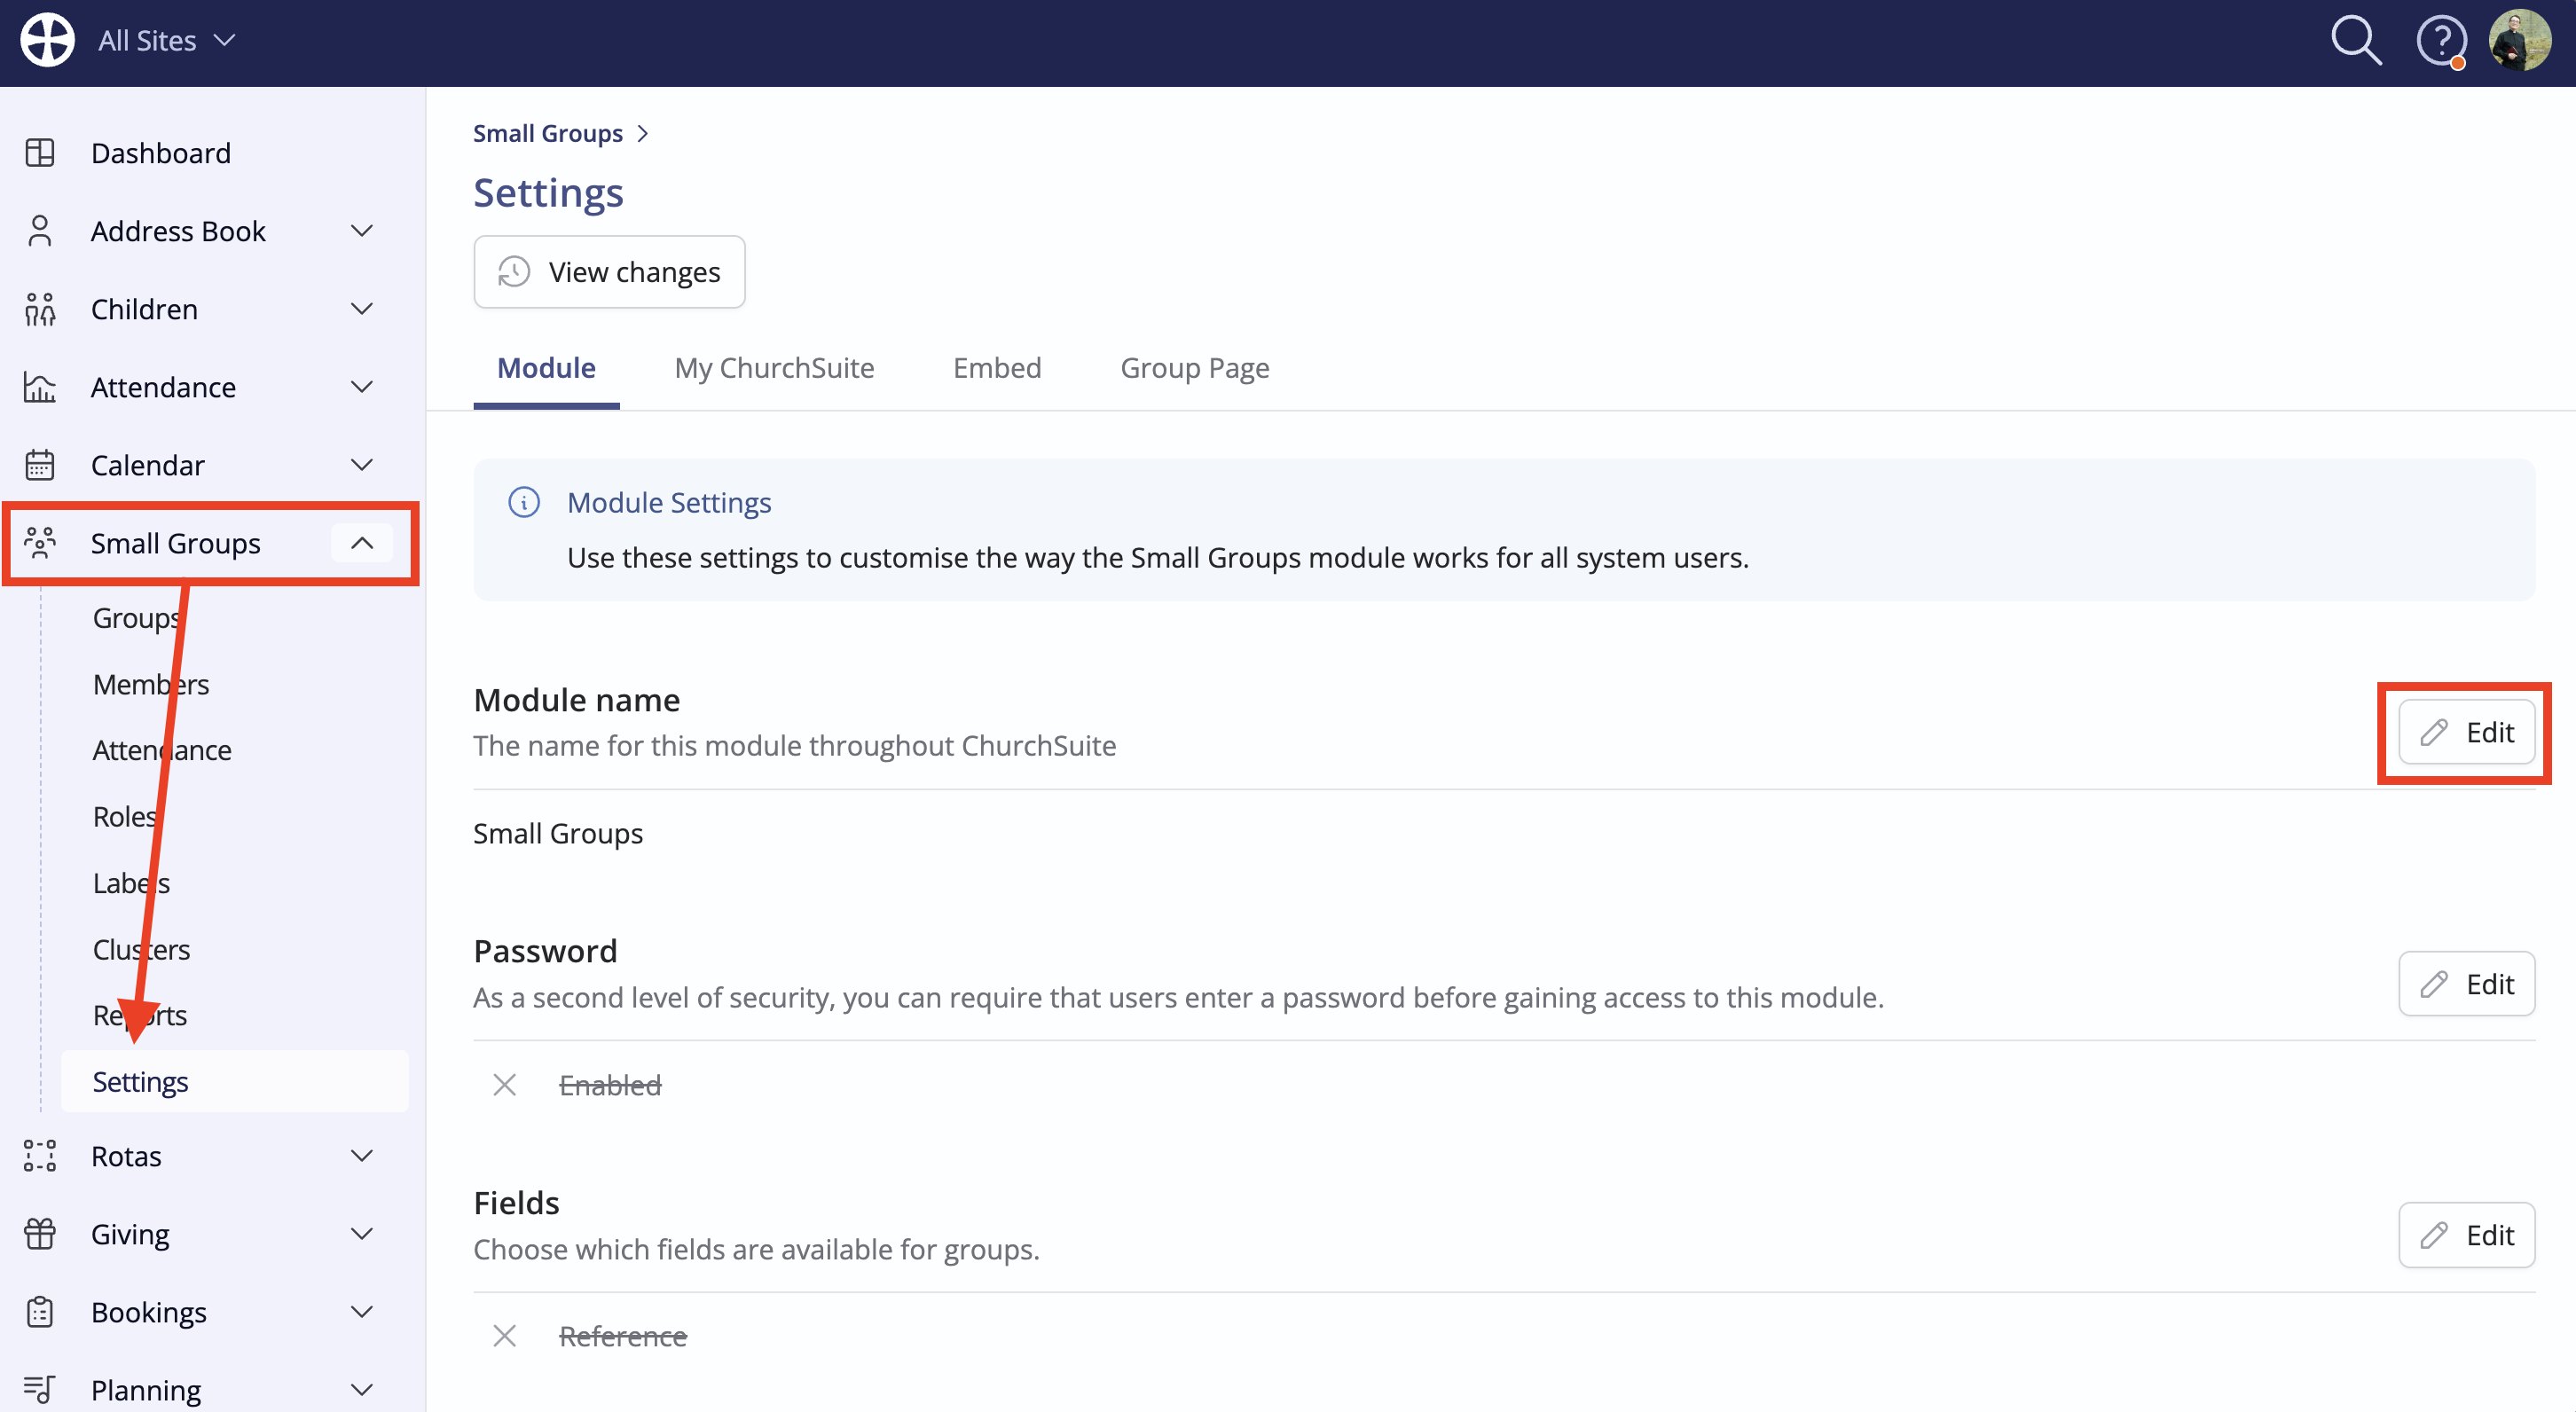
You can rename modules, perhaps to use terms that are more familiar to your users. For example, if you refer to small groups as life groups, cell groups or life communities. To change a module Name, navigate to the module Settings. On the Module Options tab, click Edit and change the module Name. The change is applied when the edit pop-up is saved.
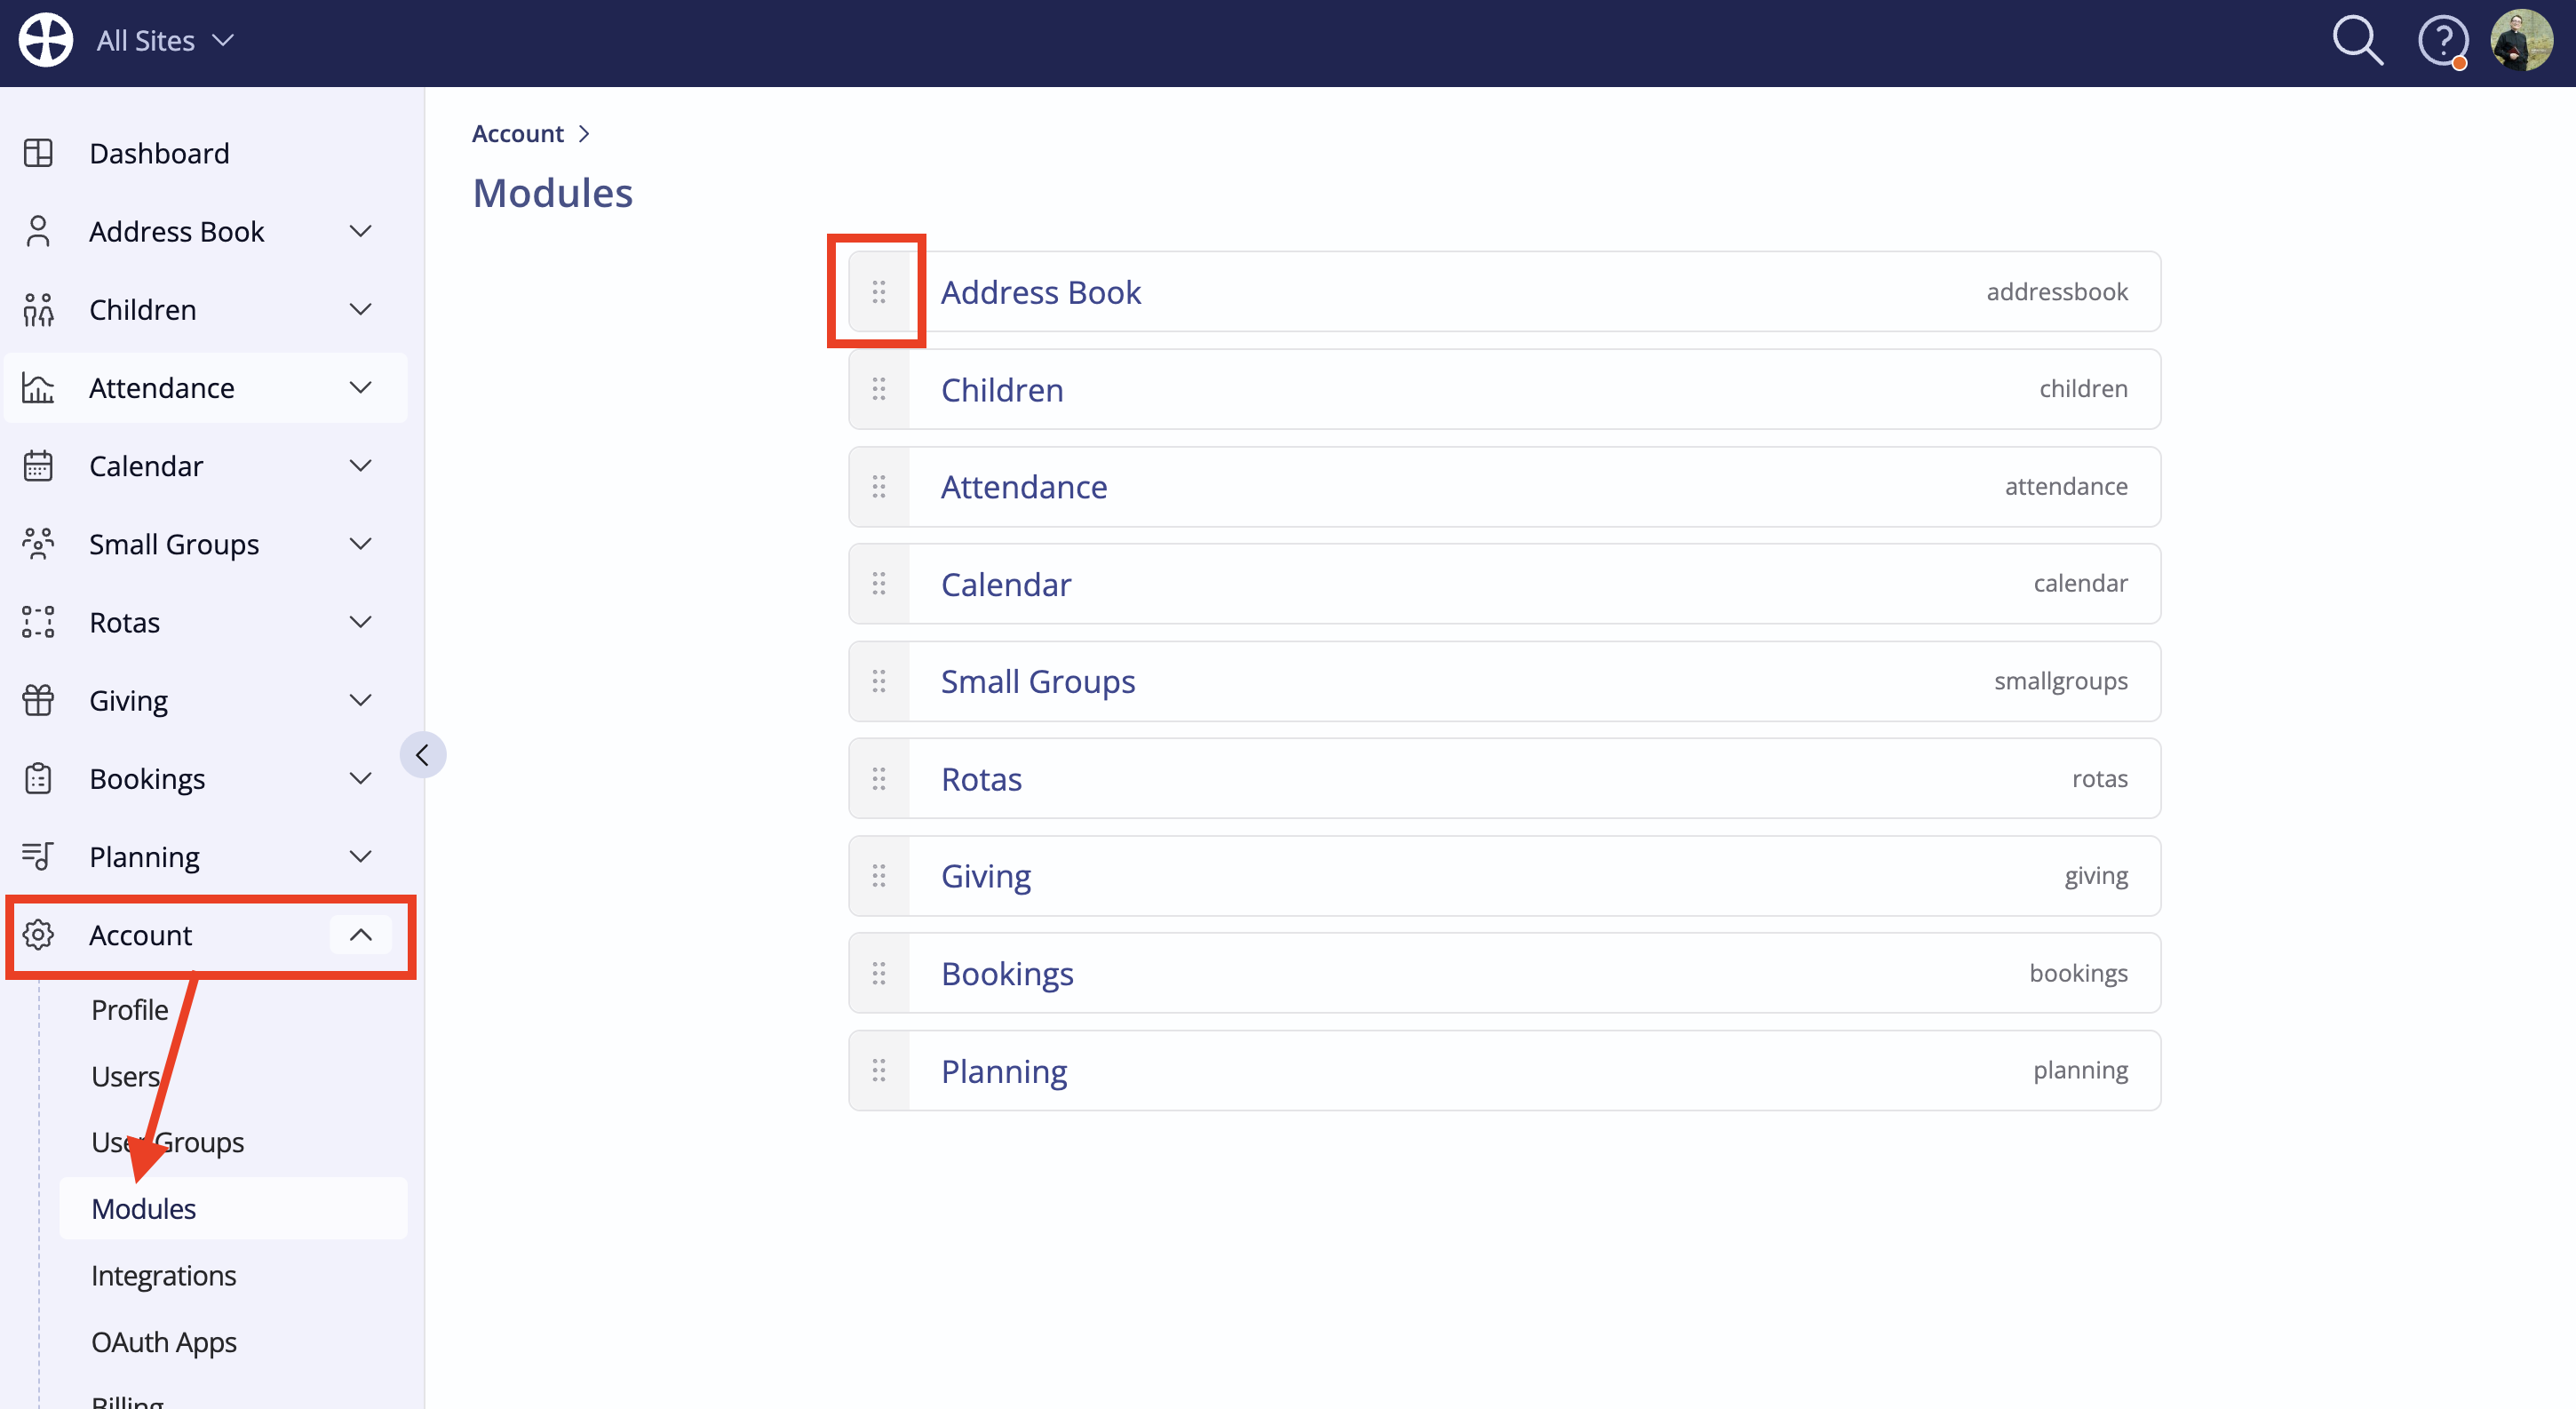
You can also change the order of modules displayed in the module bar. In the Modules section of your Account menu, click the module you wish to move (as shown below) and drag to re-order as appropriate. Changes are applied immediately and apply to all users.