Integrating with Microsoft Entra ID for SSO
Customers using Microsoft Entra ID (formerly Azure Active Directory) can give their ChurchSuite users a Single Sign-On (SSO) user experience to access ChurchSuite using their existing Entra ID credentials. Email support@churchsuite.com to request the Microsoft Entra ID integration be enabled on your ChurchSuite account, and then follow the instructions in this article to complete the integration process.
In this article
Introduction and intended functionality
Obtaining the Microsoft Entra ID identification credentials
Adding the authentication redirect URL for ChurchSuite
Completing the Microsoft Entra ID integration
Enabling SSO for ChurchSuite users
Introduction and intended functionality
Organisations using Microsoft Entra ID can give their ChurchSuite Users a secure Single Sign-On (SSO) experience, enabling them to log into ChurchSuite using their existing Entra ID credentials.
Changes to service user permissions in Entra ID do not apply to ChurchSuite. Your ChurchSuite account has its own administrator-managed user permissions to the modules and sites, which can be set on a user-by-user basis. The distinction between Administrators and Users, as defined in ChurchSuite, is unrelated to the level of service user permissions set within Entra ID. When a service user's access is revoked in Entra ID, an SSO-enabled user will no longer be able to access ChurchSuite. However, you should archive (or, with caution, delete) their ChurchSuite user profile as a separate task. See our related support article on Adding and managing users for further information.
Once SSO is enabled for a ChurchSuite user, any previously set ChurchSuite username and user password are disabled to prevent use. An 'SSO Enabled' notification is sent to the user, shown in the user's communication log, and a user change log is added. An SSO-enabled user is prevented from changing their user email address. Additionally, the ChurchSuite password change/reset actions and multi-factor authentication functionality are disabled and bypassed for that user.
SSO can only be disabled for a user by a ChurchSuite Administrator. Resetting the Microsoft Entra ID integration will disable SSO for all users. When SSO is disabled, a user's previous ChurchSuite username and user password are reactivated. A password reset request can be sent to encourage users to secure their user account with a new password, and they can enable multi-factor authentication (MFA can also be enforced for all users).
Obtaining the Microsoft Entra ID identification credentials
To complete the ChurchSuite integration with Microsoft Entra ID, you will first need three values from your Microsoft Entra ID account. They are:
- Application (client) ID
- Directory (tenant) ID
- Client Secret
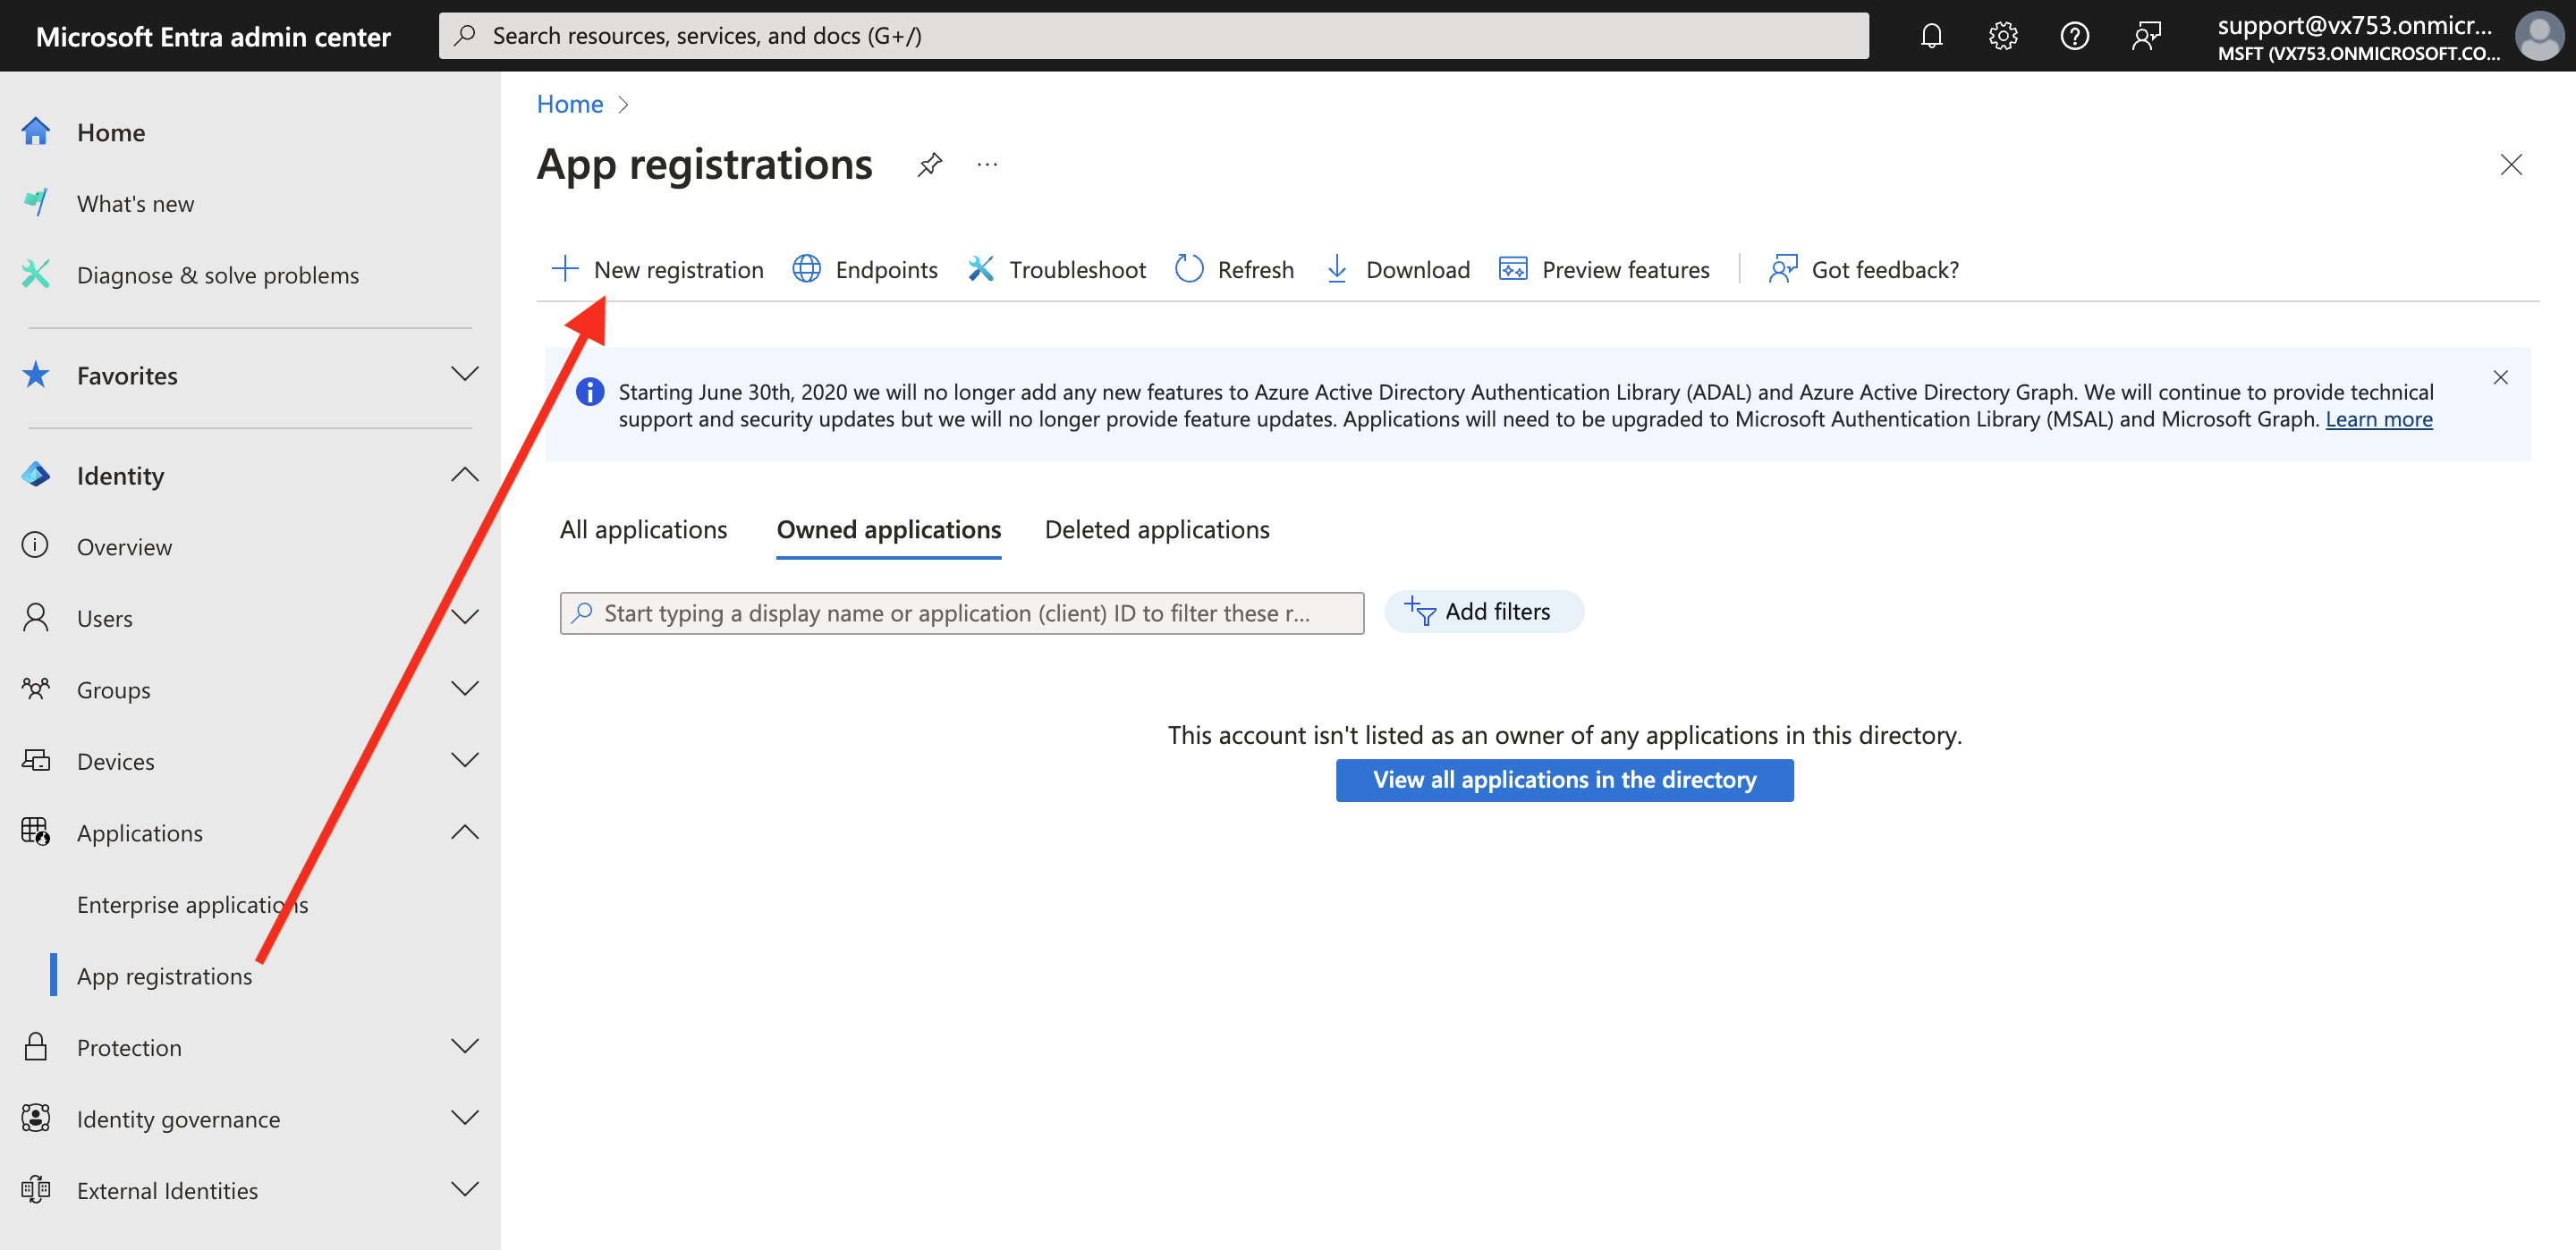
Let's see how to obtain these. From the Microsoft Entra Admin Center, click New registration:
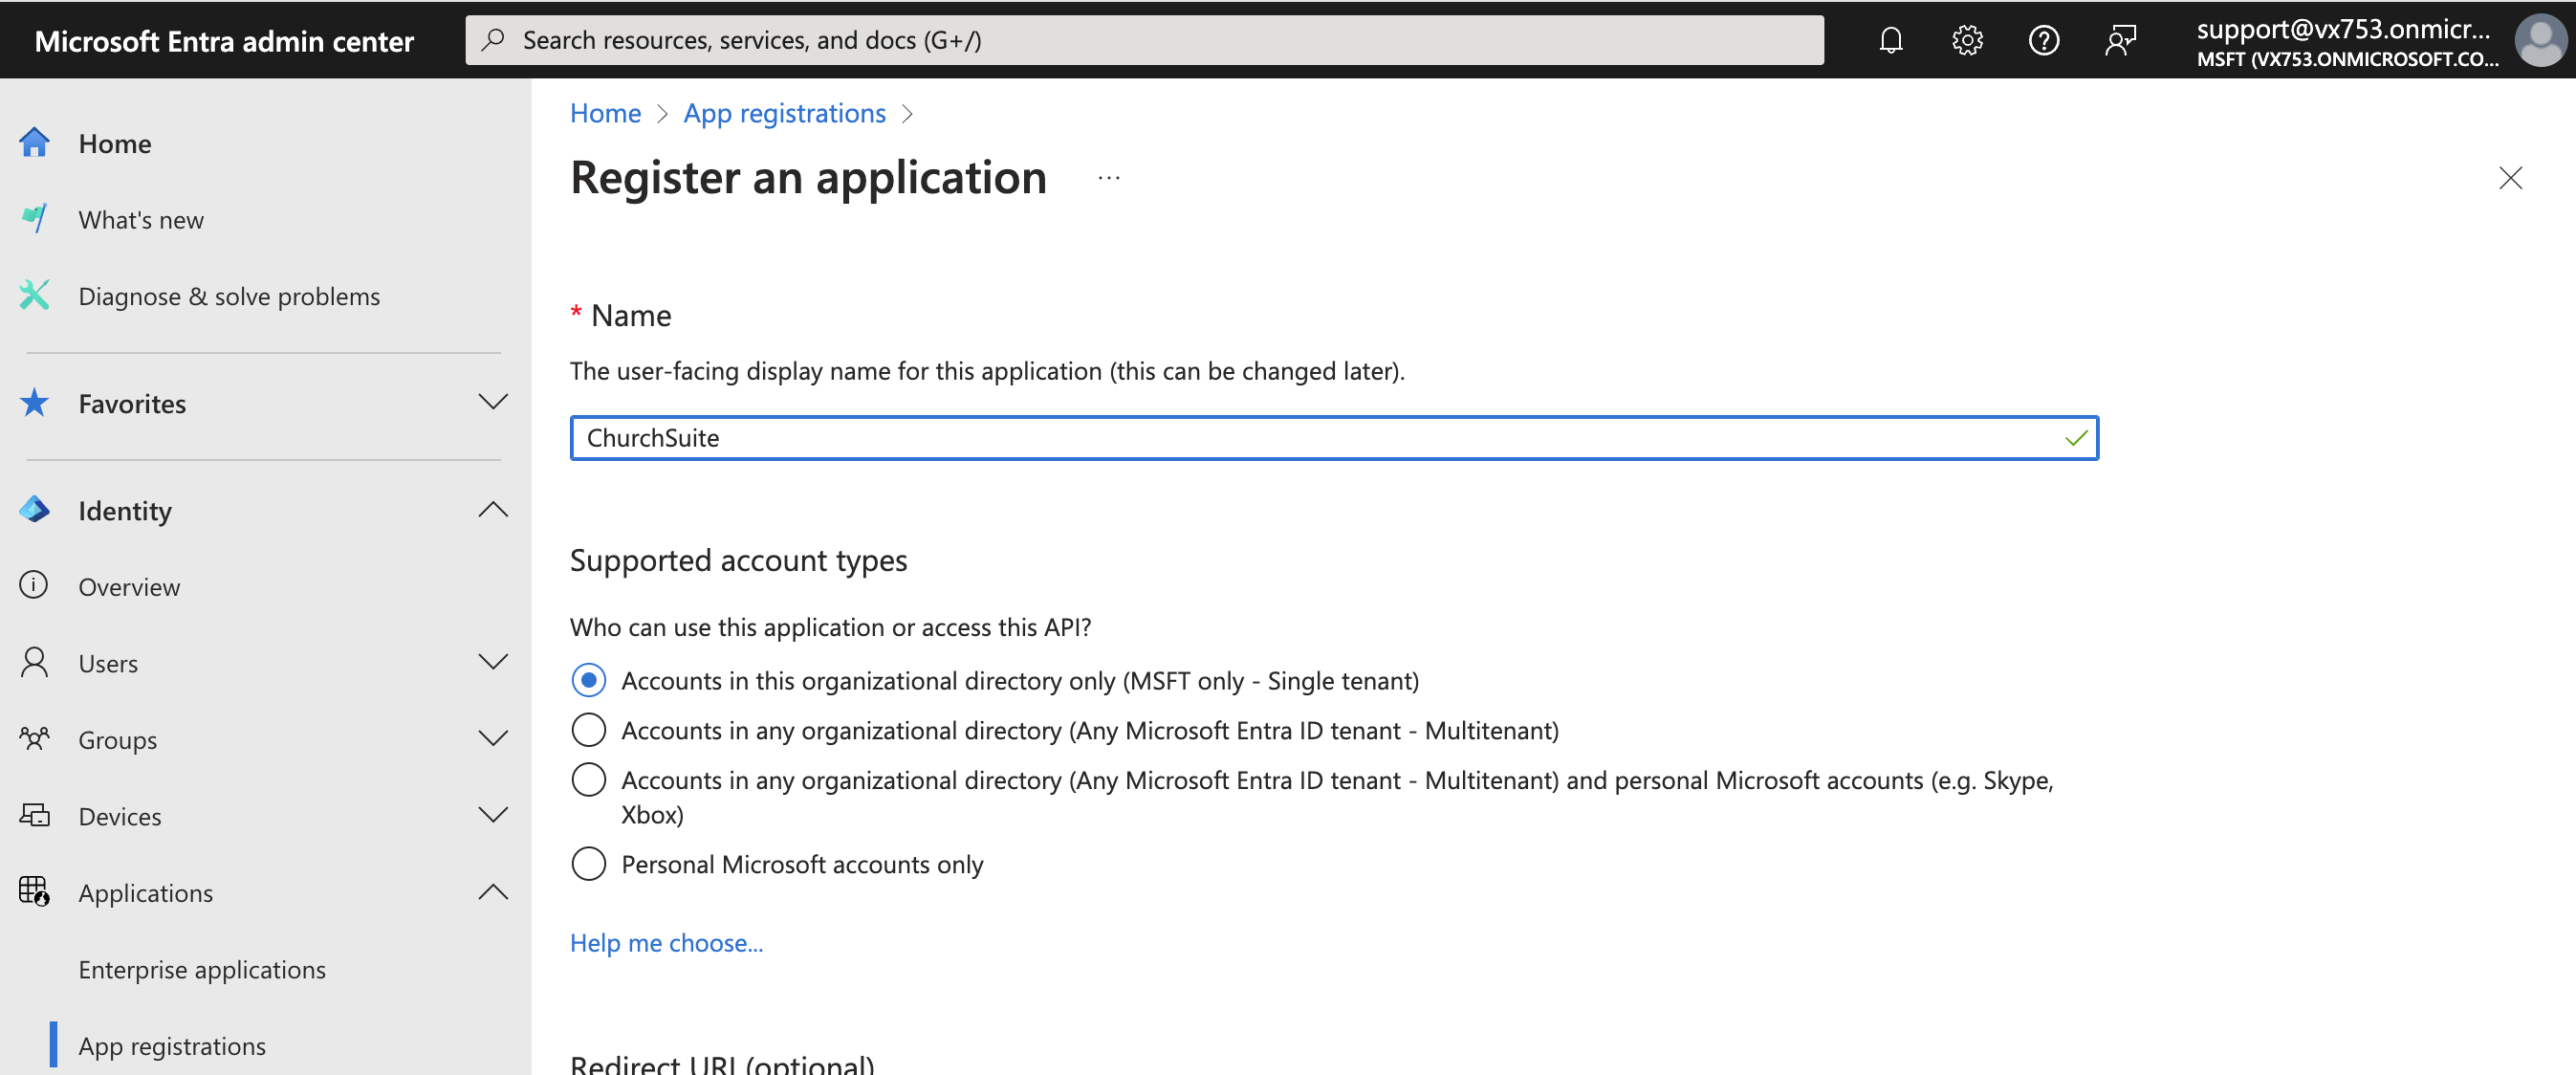
Enter a suitable user-facing display Name for the application, e.g. ChurchSuite, choose the correct account type (typically Single tenant), and click Register to complete the process:
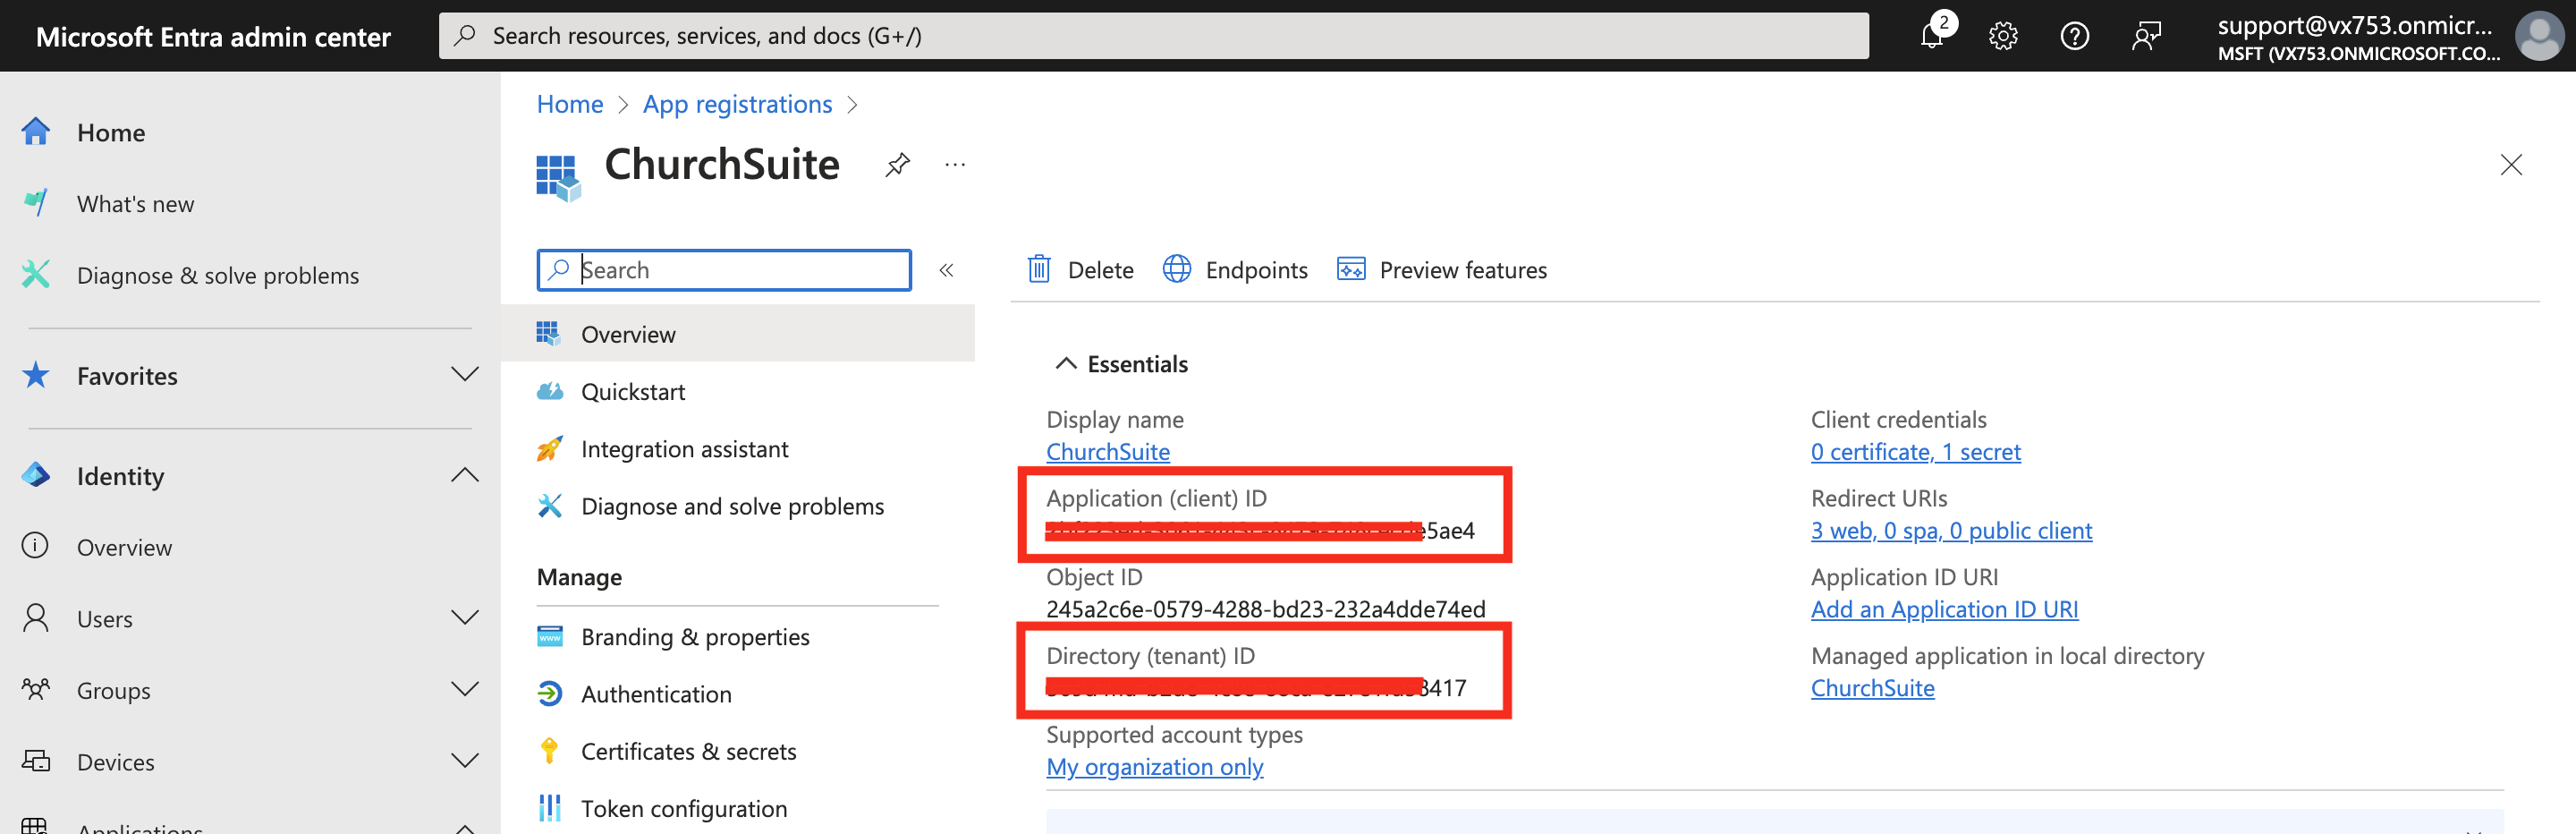
The registered application is shown. Note the Application (client) ID and Directory (tenant) ID (shown below), which are needed when completing the integration in ChurchSuite. As you hover your cursor over each ID, you can Copy to clipboard and then paste each value into the appropriate box in the ChurchSuite integration, shown later - you may find it helpful to have the ChurchSuite integration open in a second browser tab so that you can switch between browser tabs as you copy and paste the values.
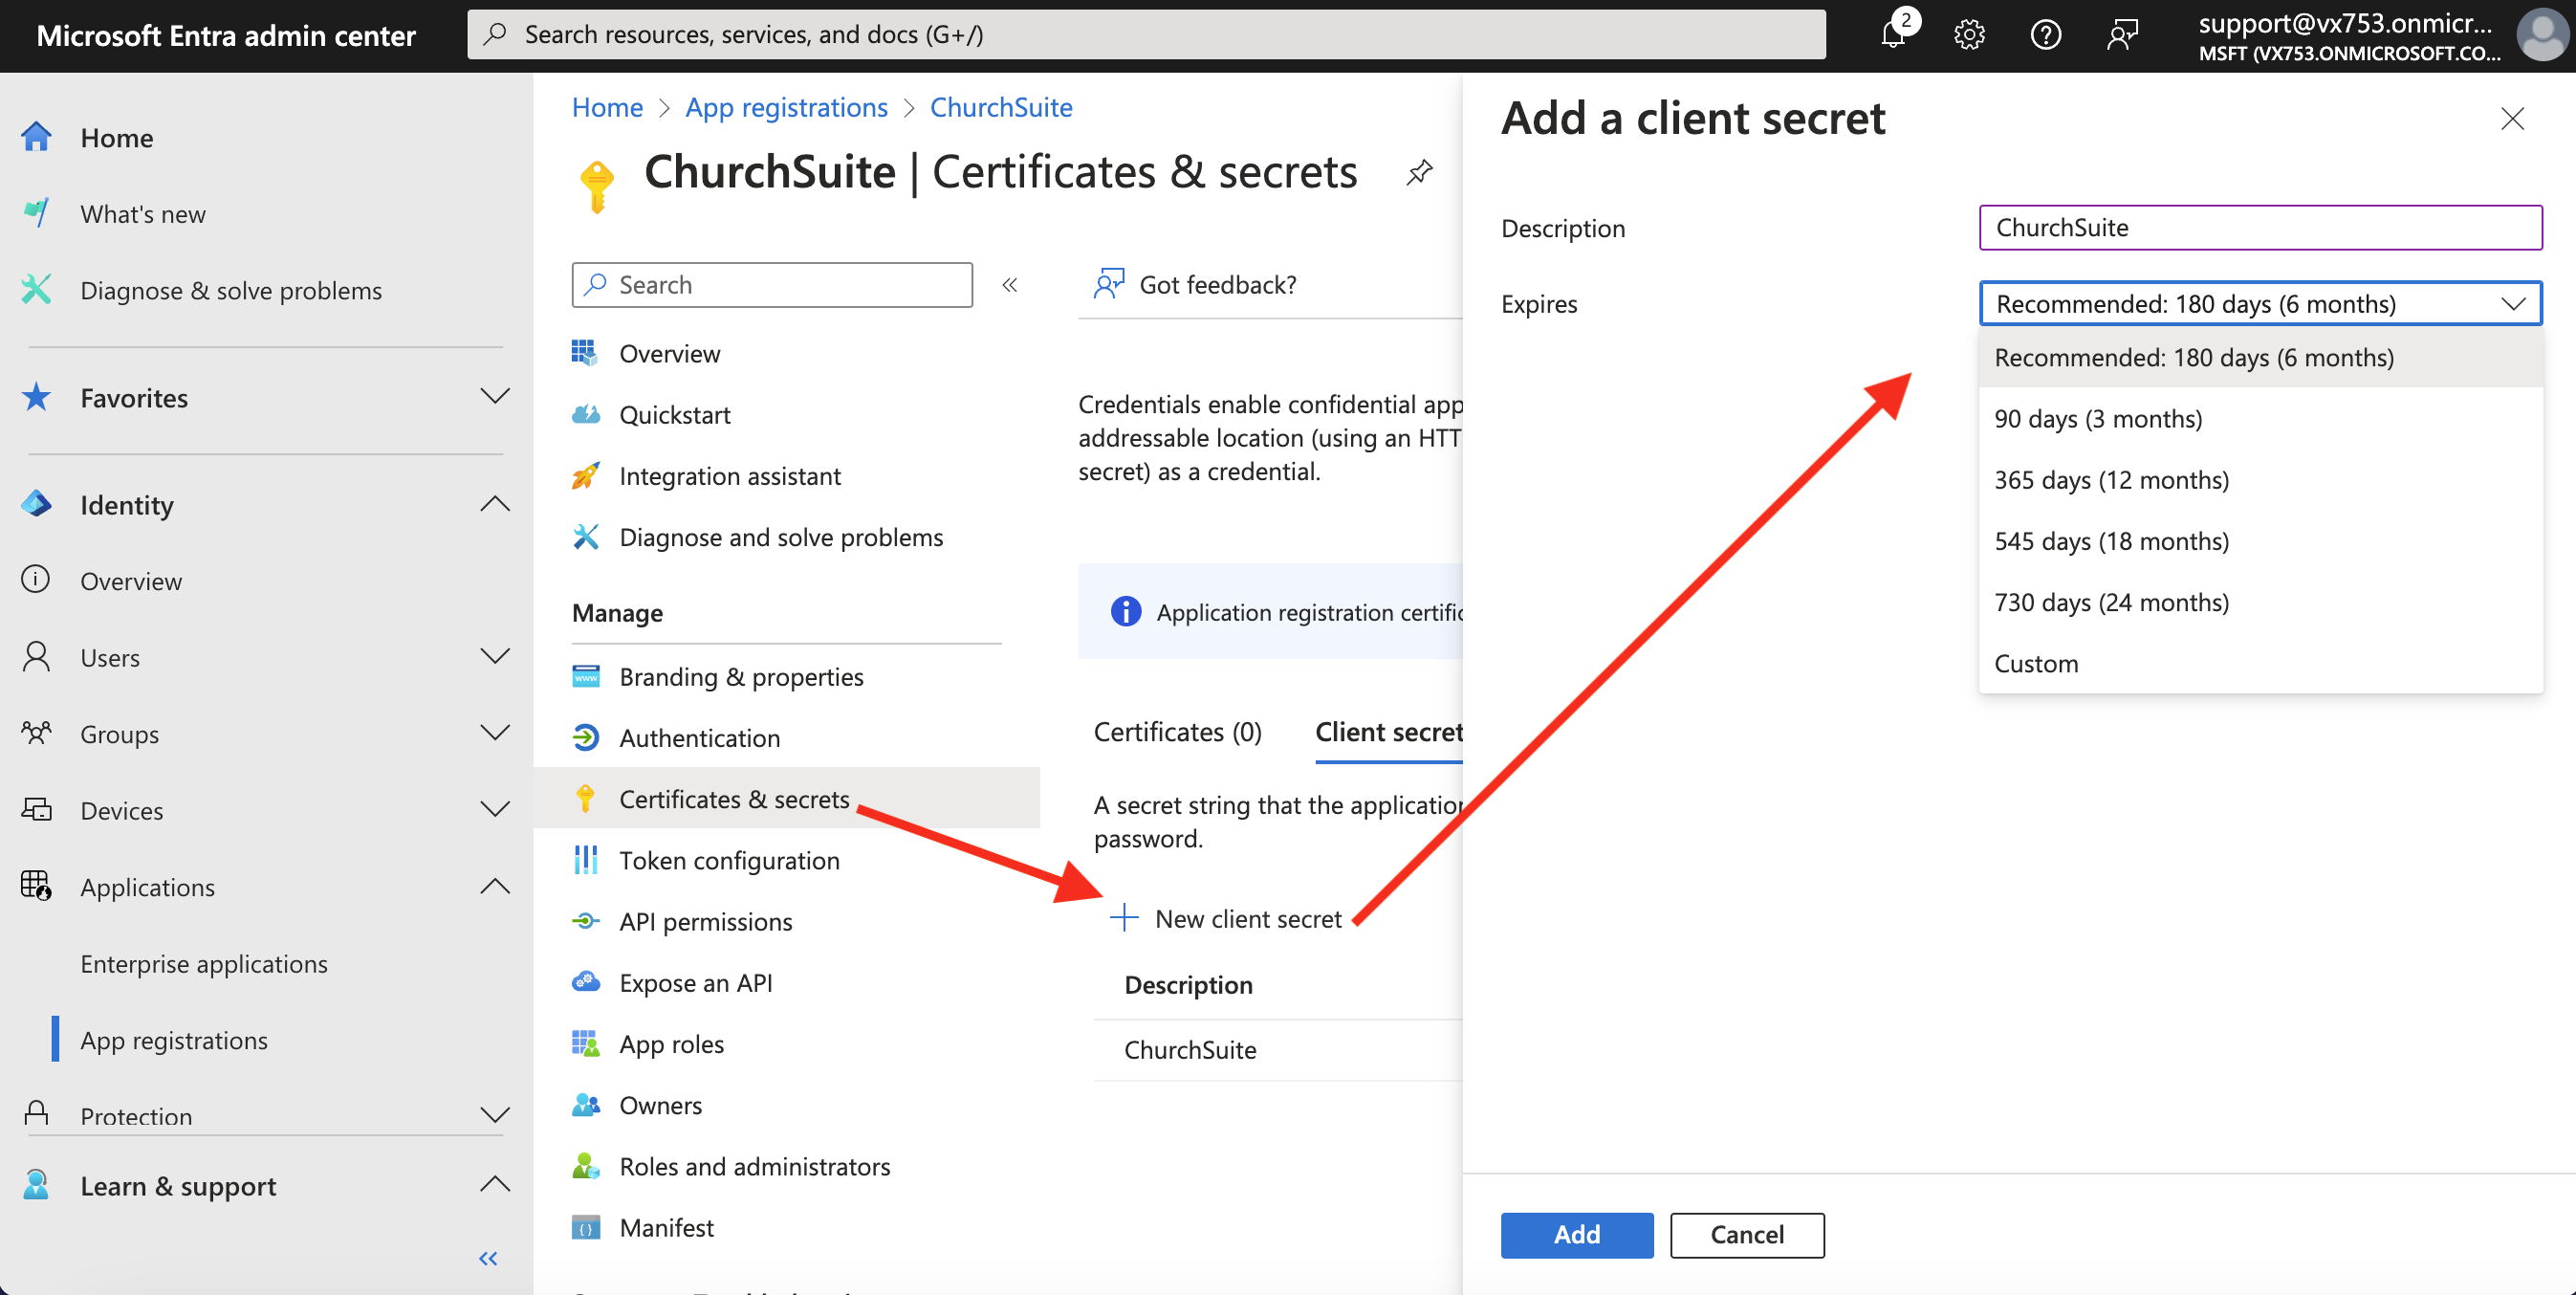
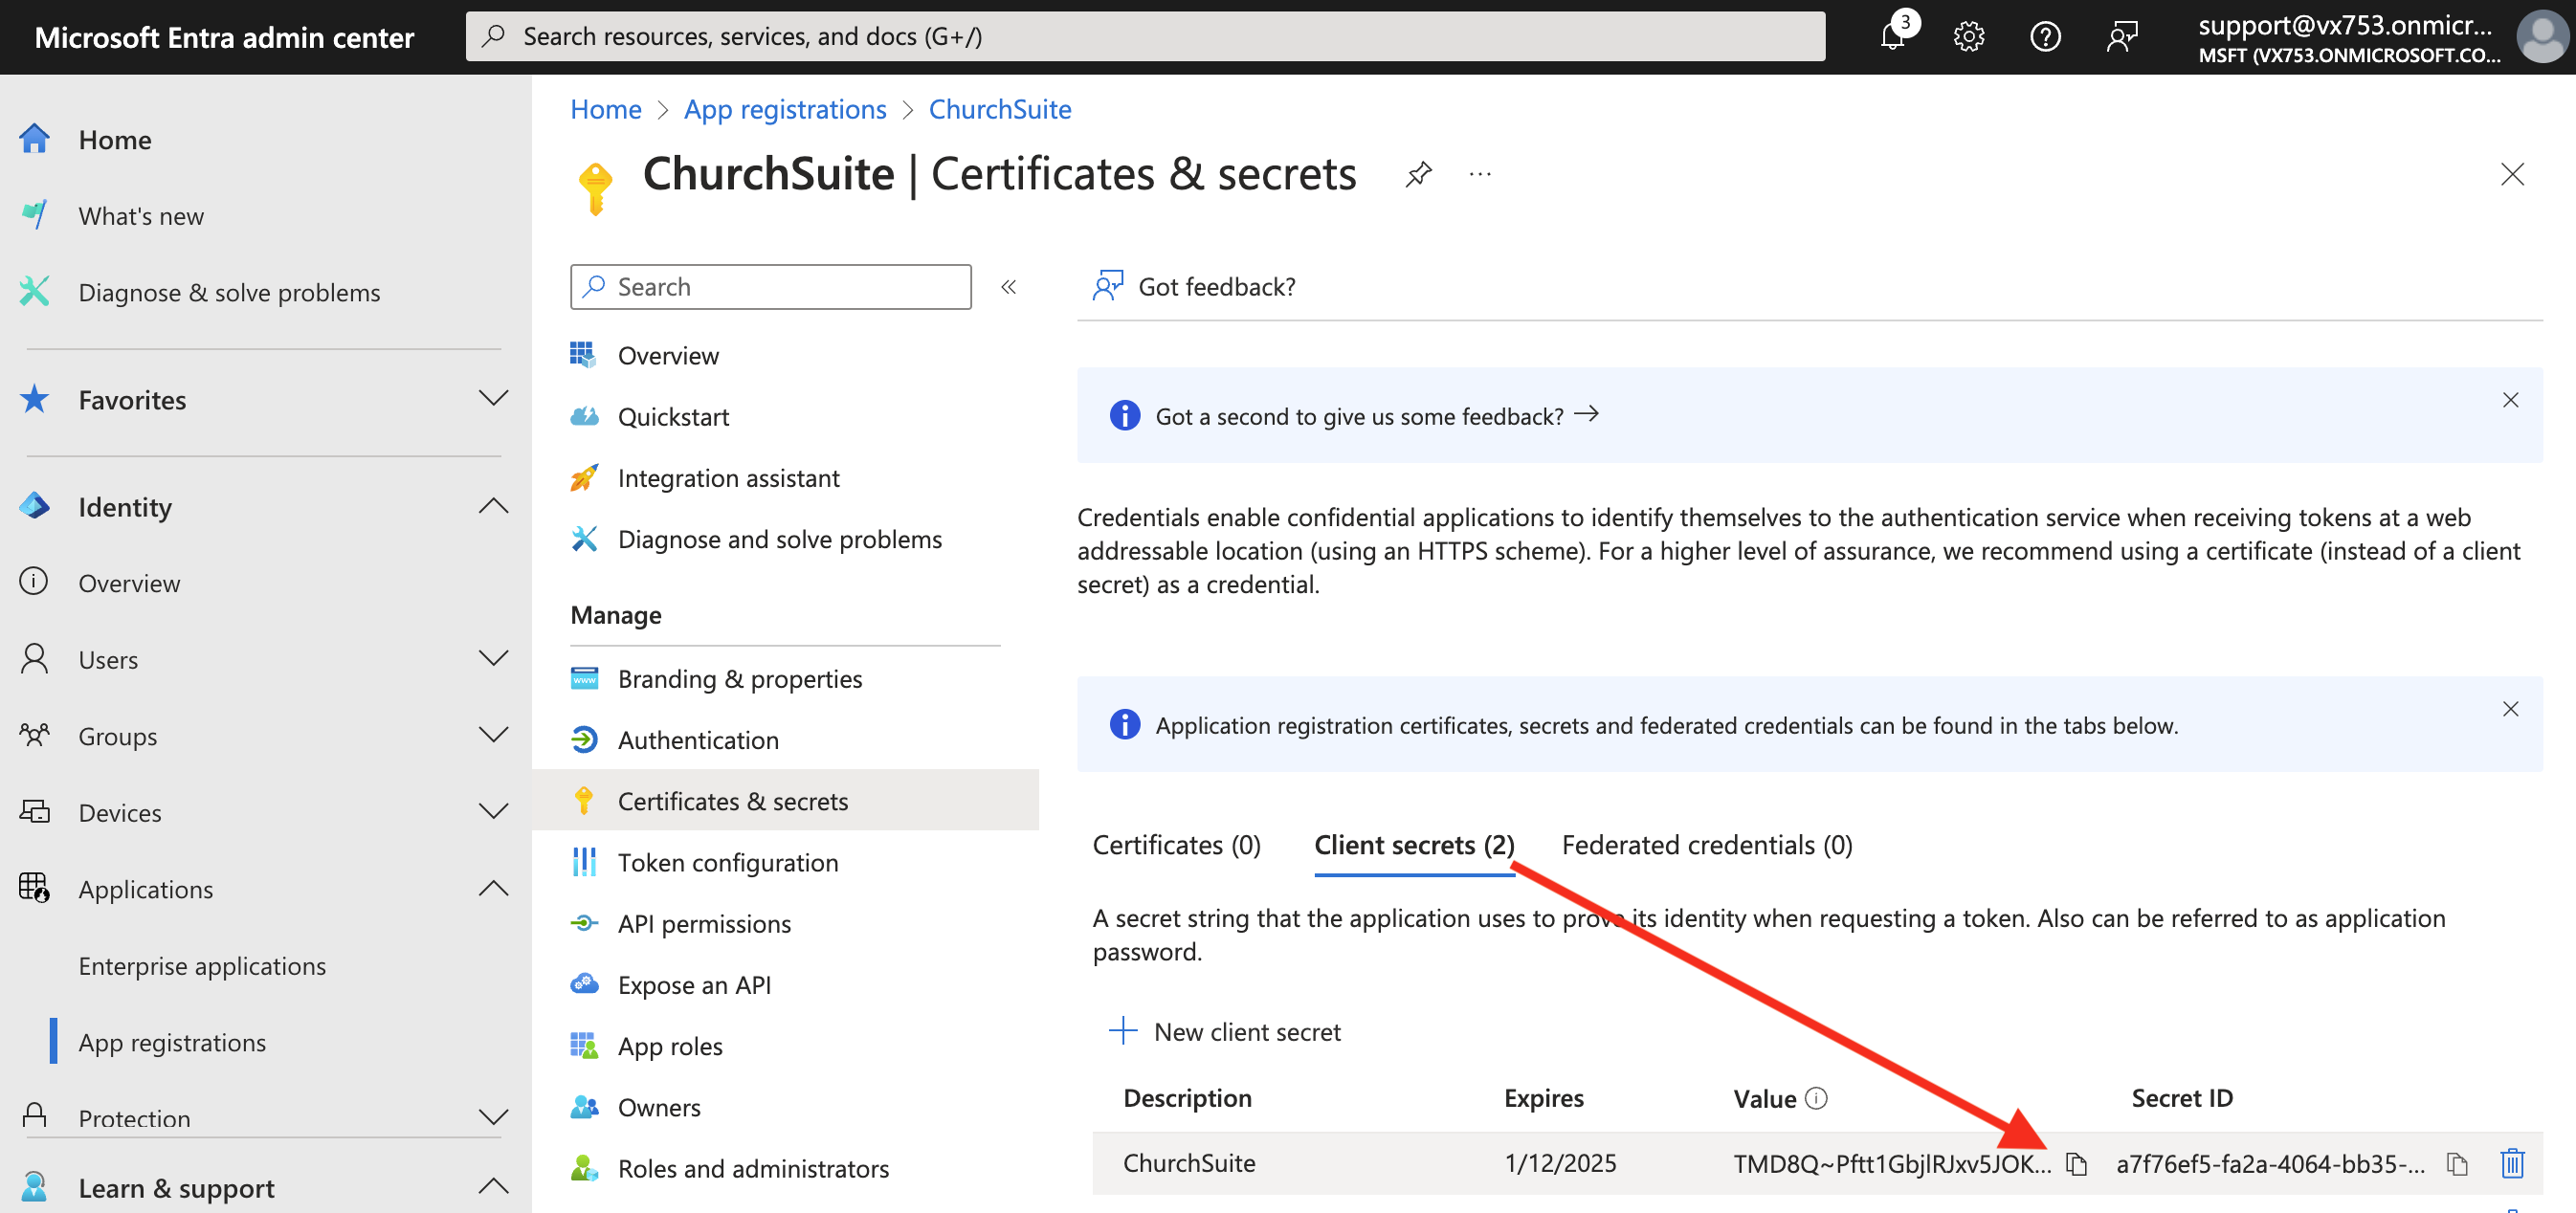
Next, navigate to the Certificates & secrets section from the menu on the left. Click New client secret. Enter a suitable Description and select your secret Expiry preference. A client secret cannot exist indefinitely, which means you must periodically regenerate a new client secret before it next expires and update the secret in the Entra ID integration settings in ChurchSuite. Failure to do this will result in loss of user access to ChurchSuite for all SSO-enabled users. Click Add to complete the process:
The Client secret is added. Click Copy to clipboard and paste the secret Value into the appropriate box in the ChurchSuite integration, shown later. Client secret values can only be viewed immediately after creation. You must copy or save the secret value before leaving the page.
Note: If you are switching between browser tabs to copy and paste values from Entra ID into the ChurchSuite integration, the integration View will continue to say "Unable to connect to Entra ID" until the authentication redirect URL and API permissions have been added to your Entra ID application settings (explained in the next sections).
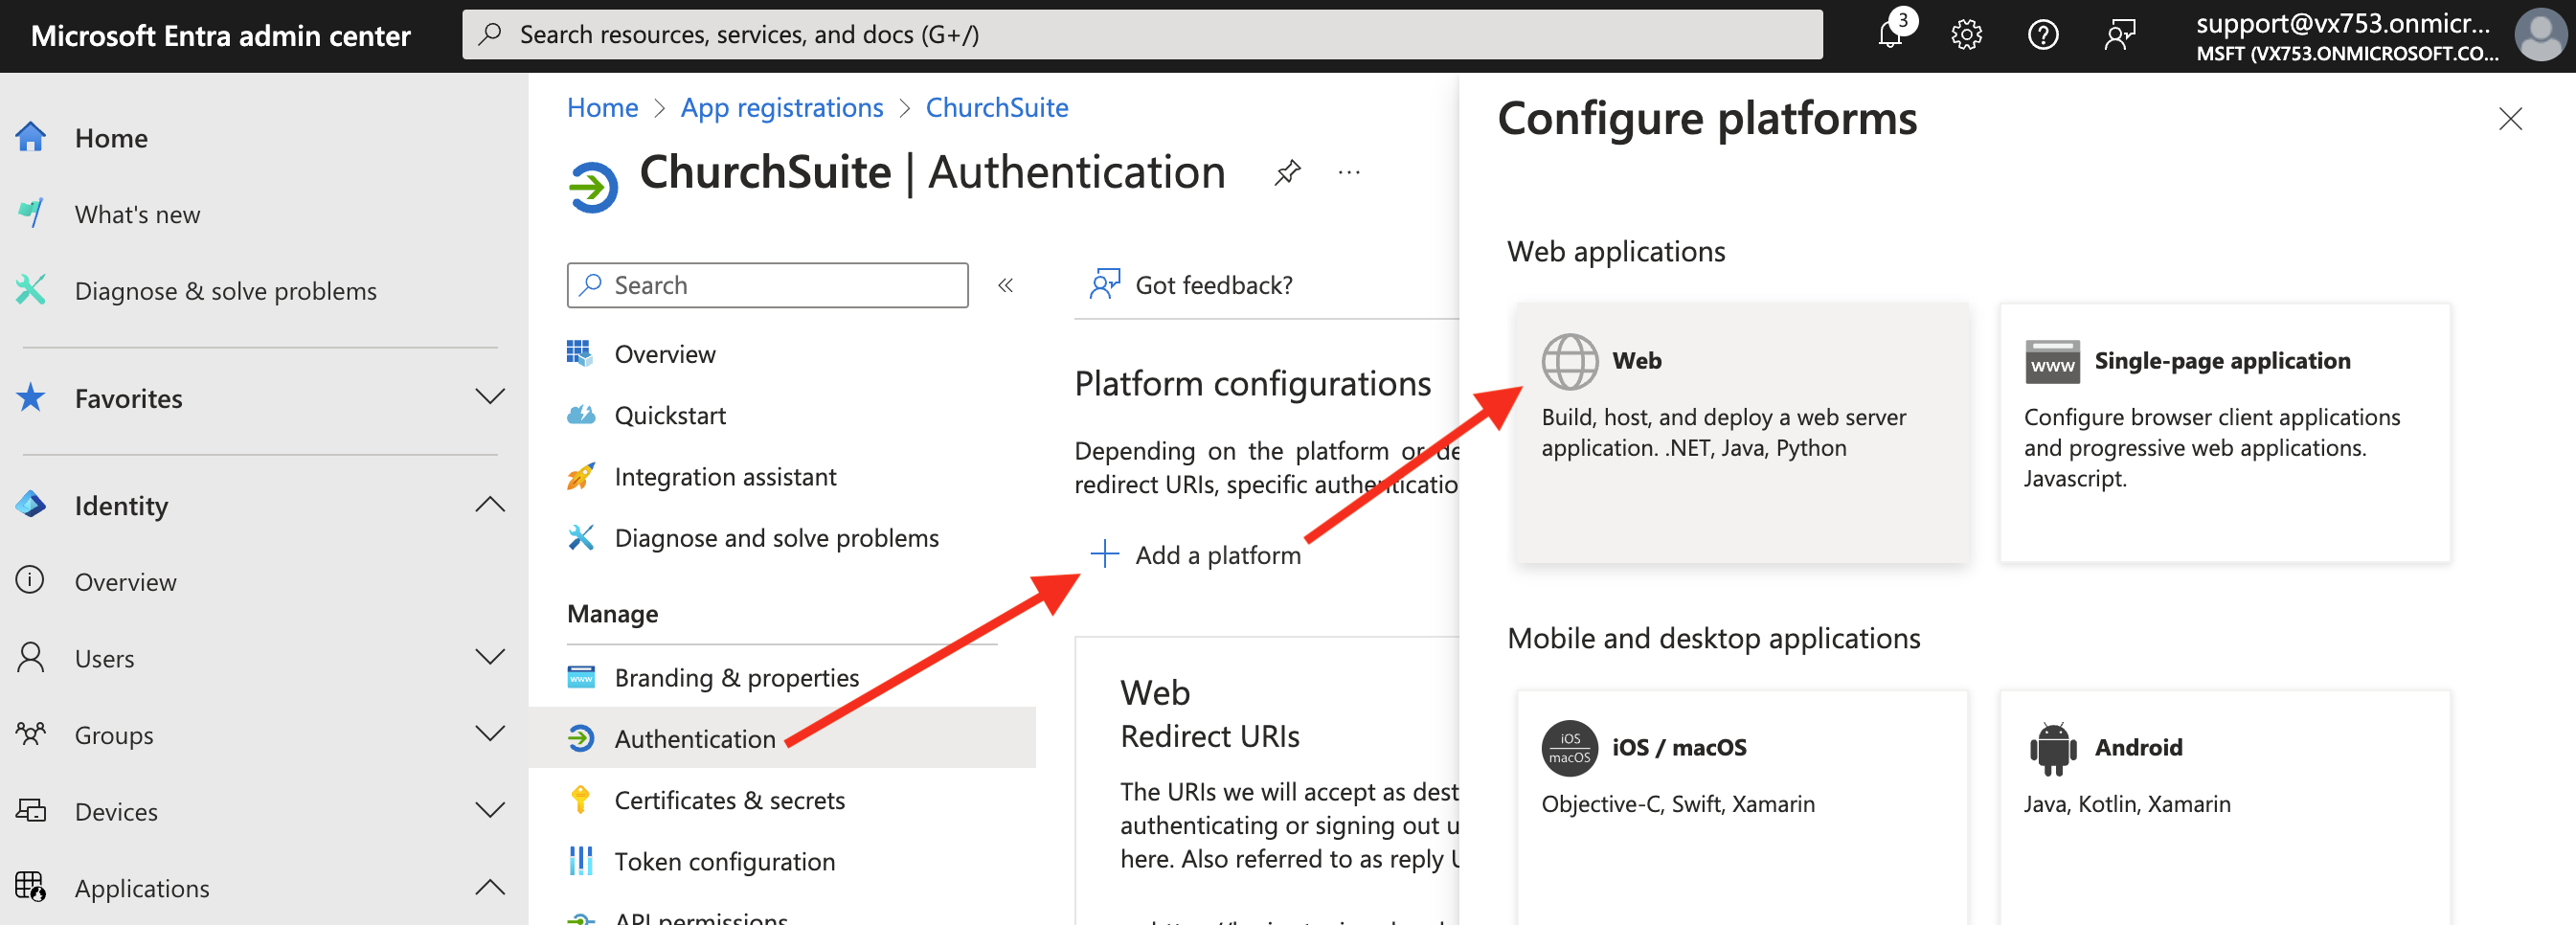
Adding the authentication redirect URL for ChurchSuite
You must add the ChurchSuite login page redirect URL to the newly added App registration. From the App registration page, navigate to the Authentication section from the menu on the left. Click Add a platform and choose the Web application option:
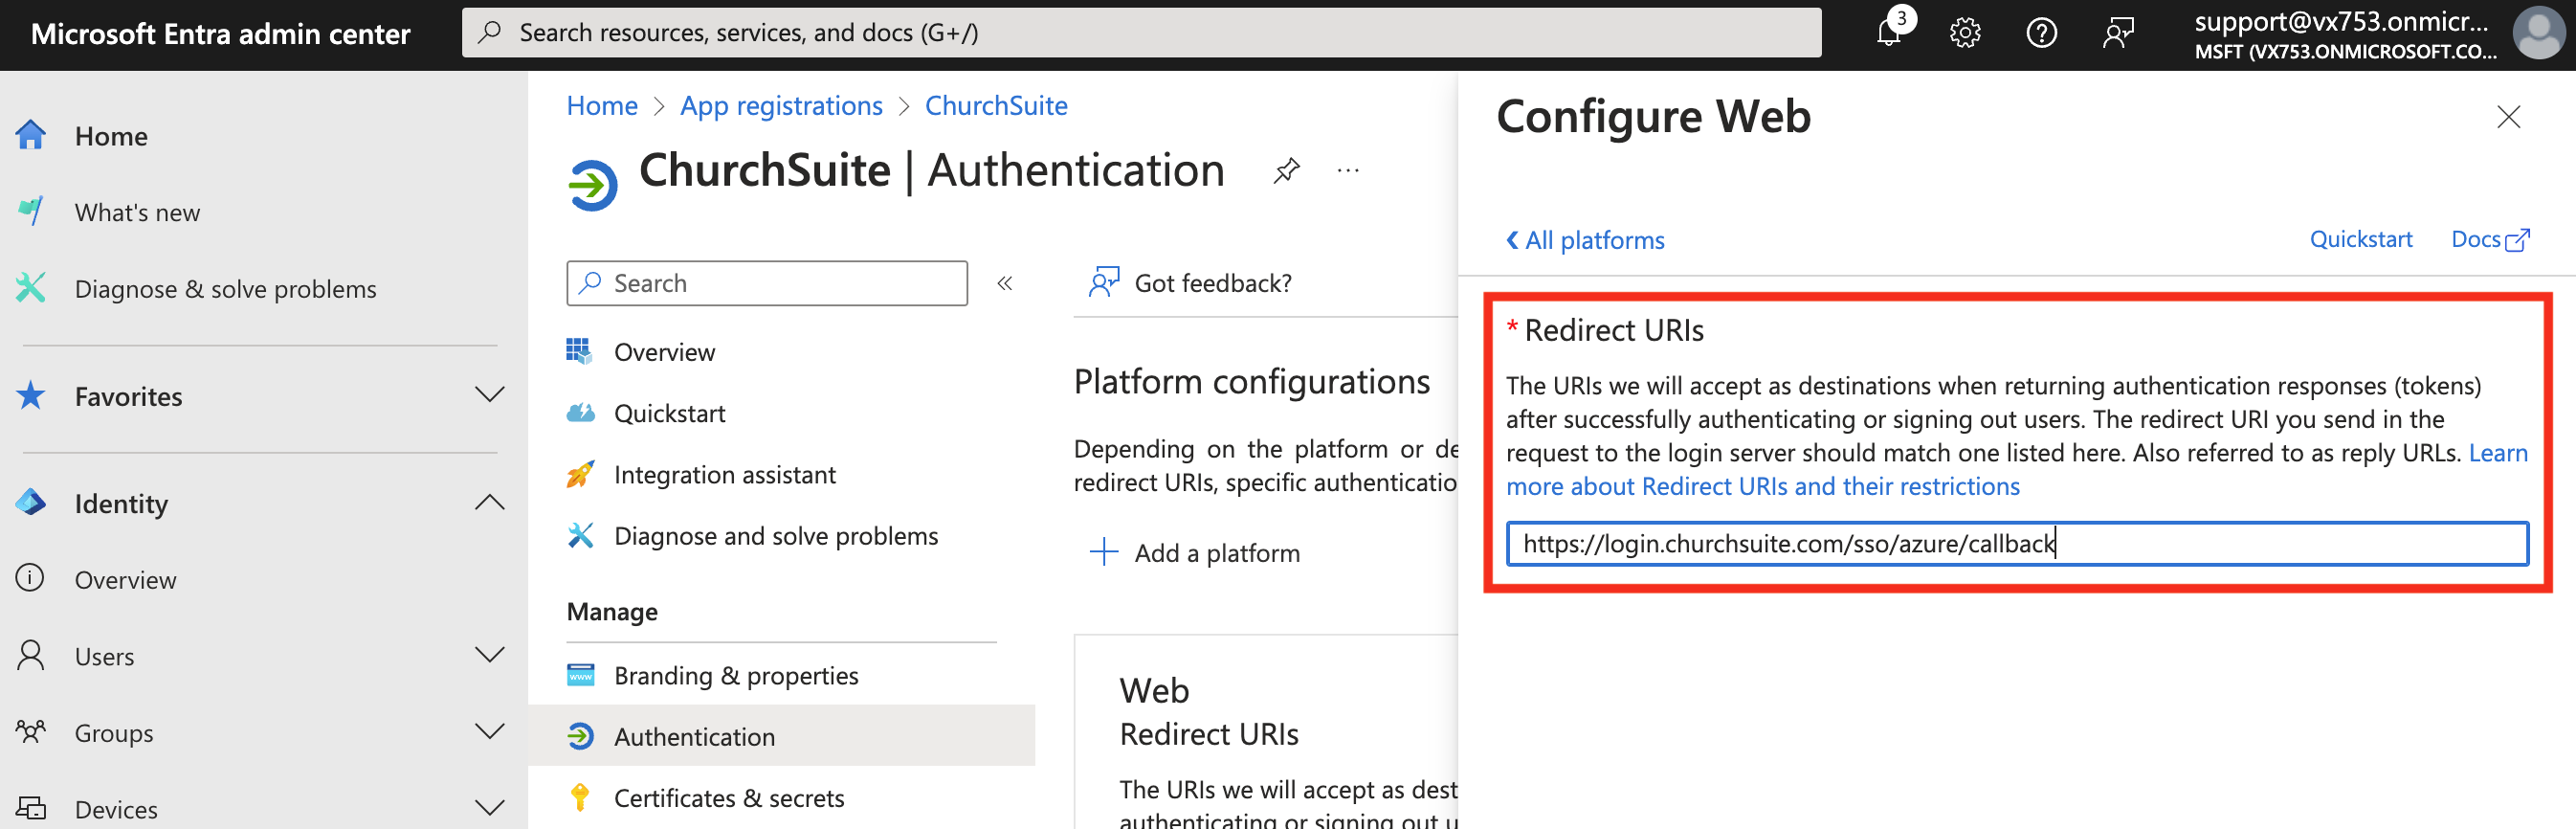
Enter the Redirect URL shown below into the Configure Web box and click Configure to apply the changes.
https://login.churchsuite.com/sso/azure/callback
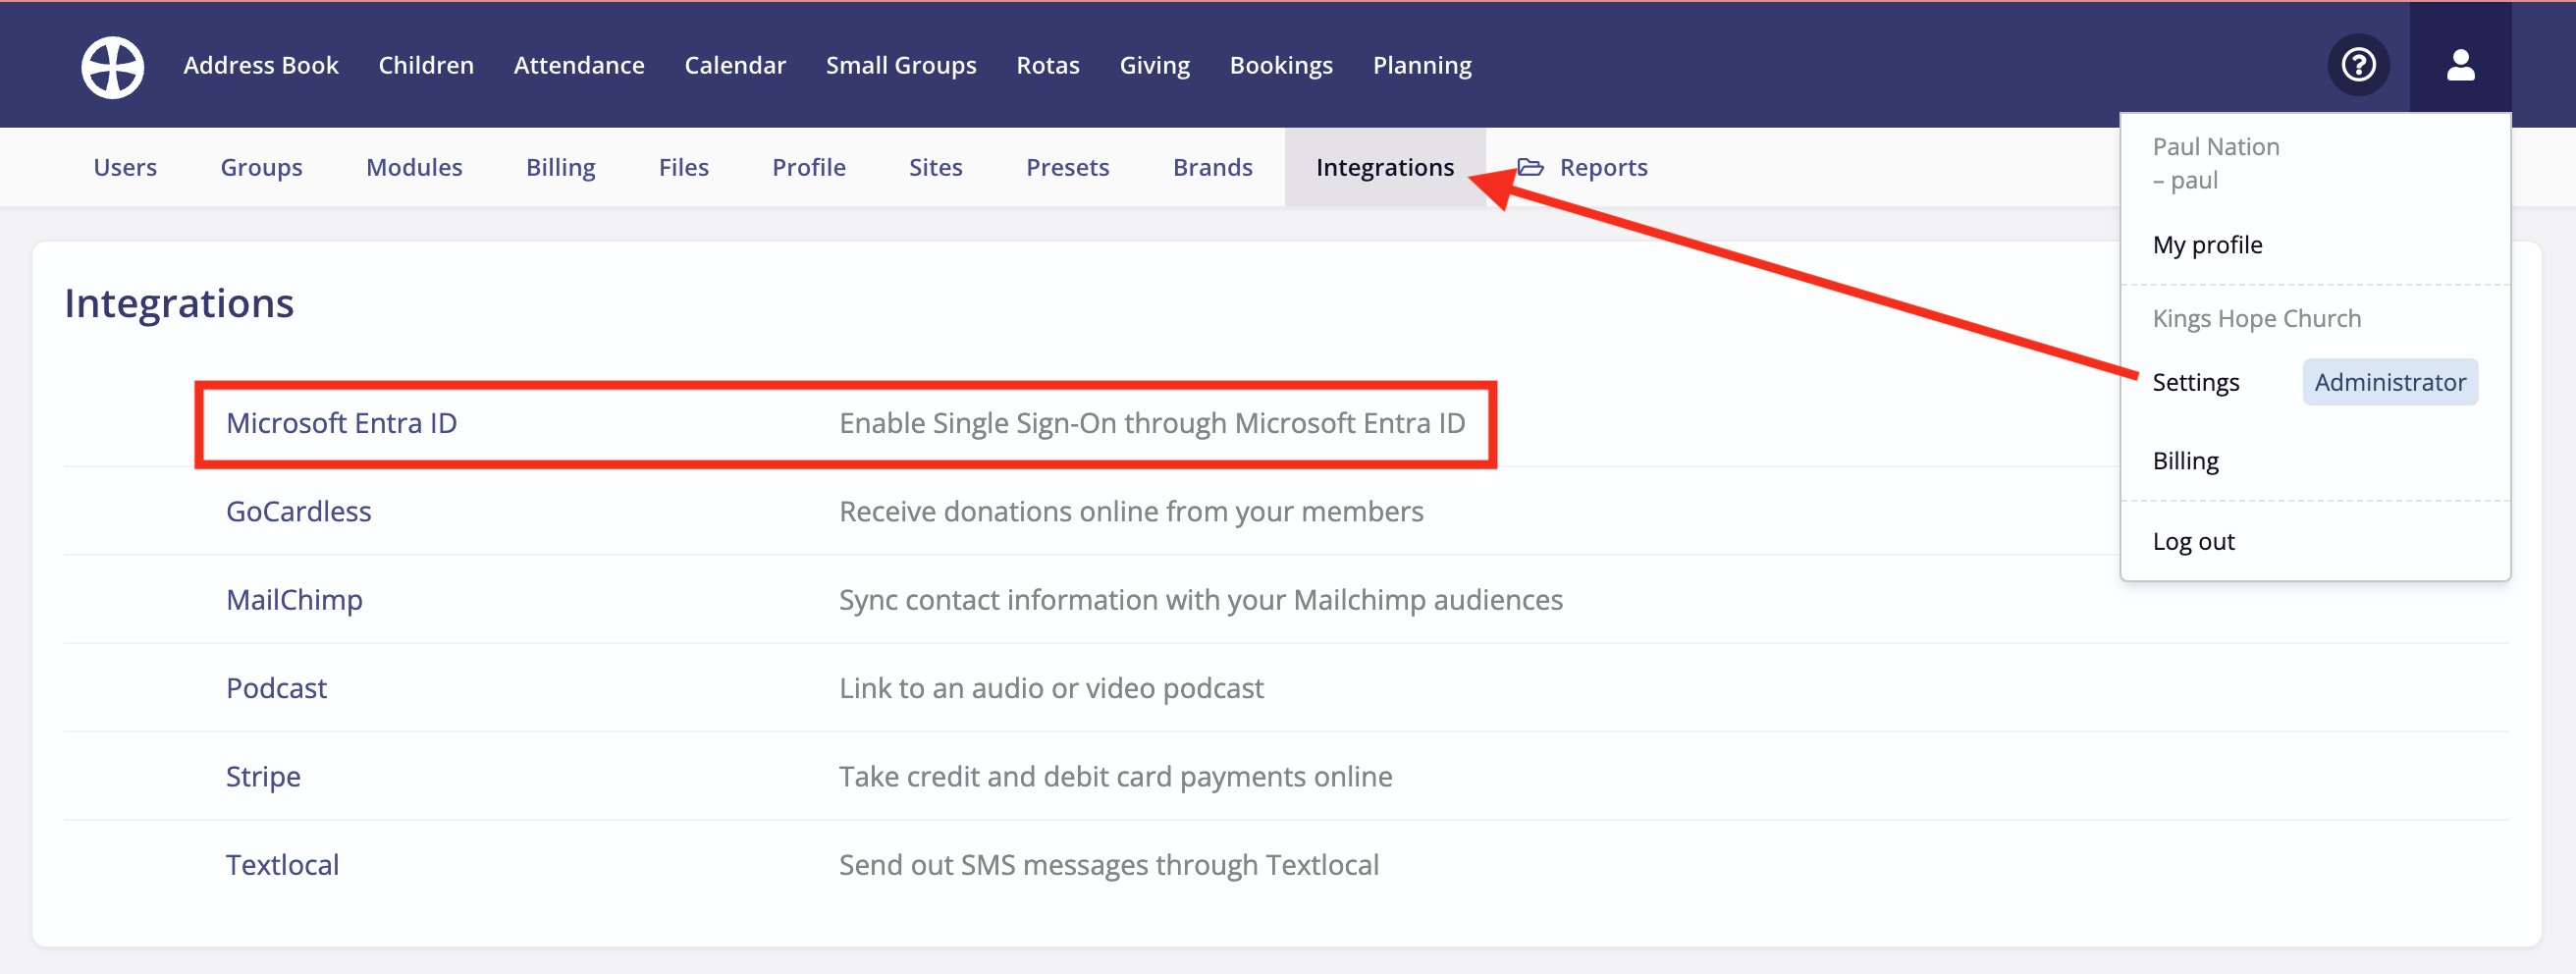
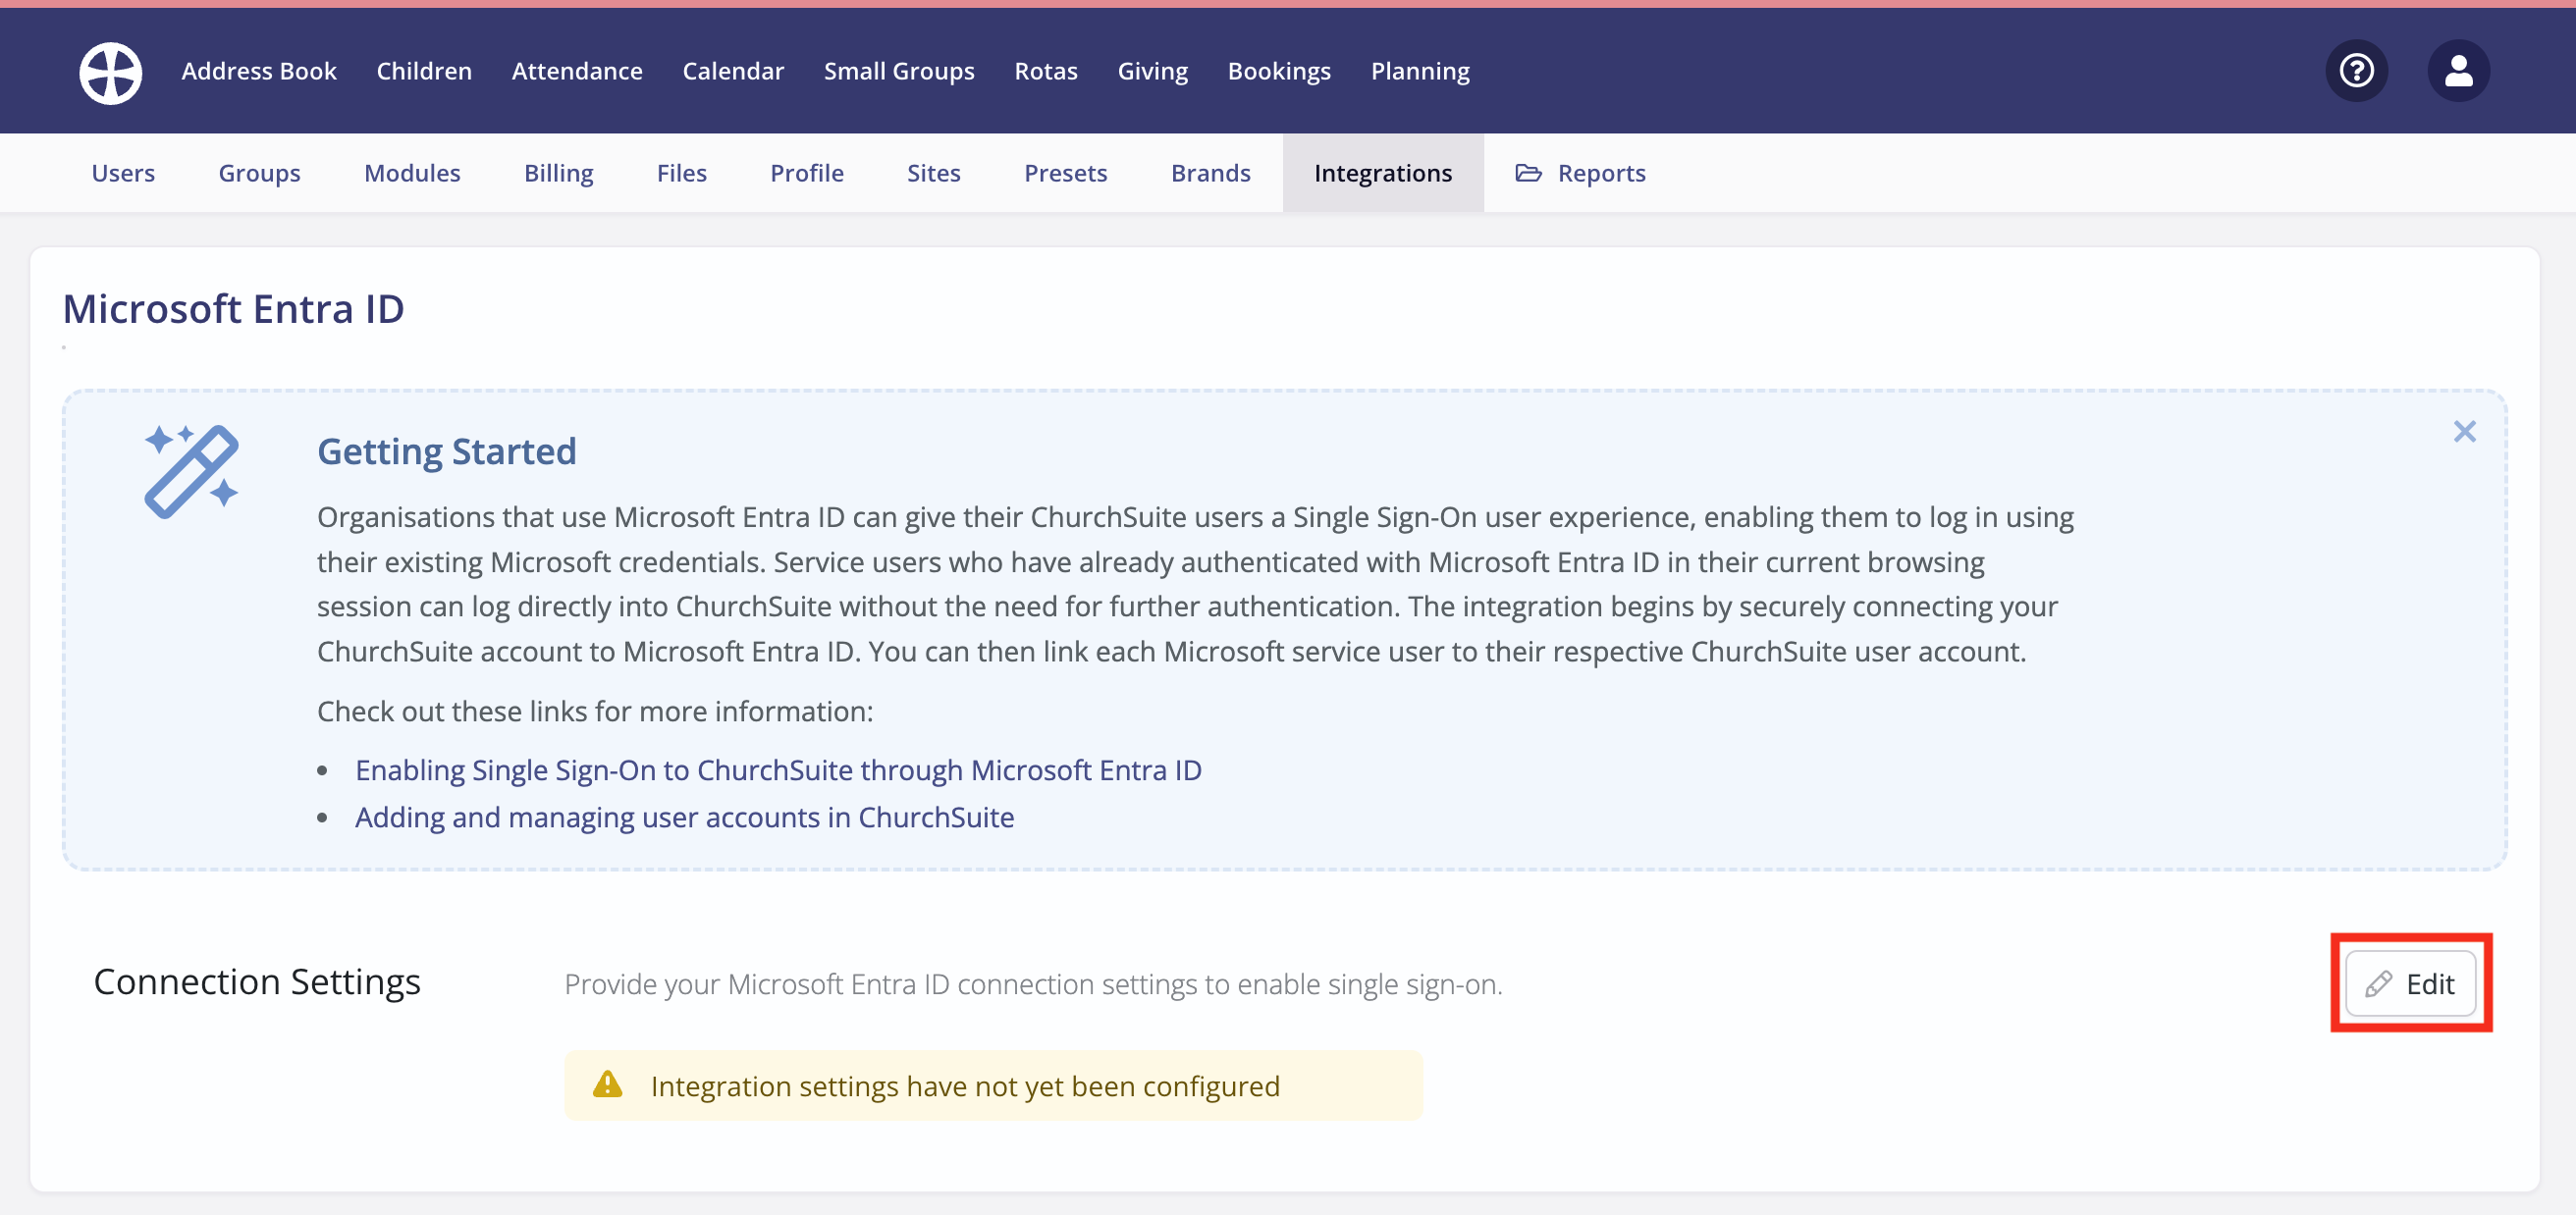
Completing the Microsoft Entra ID integration
From the Integrations section of your Account Settings, click Microsoft Entra ID:
Click Edit.
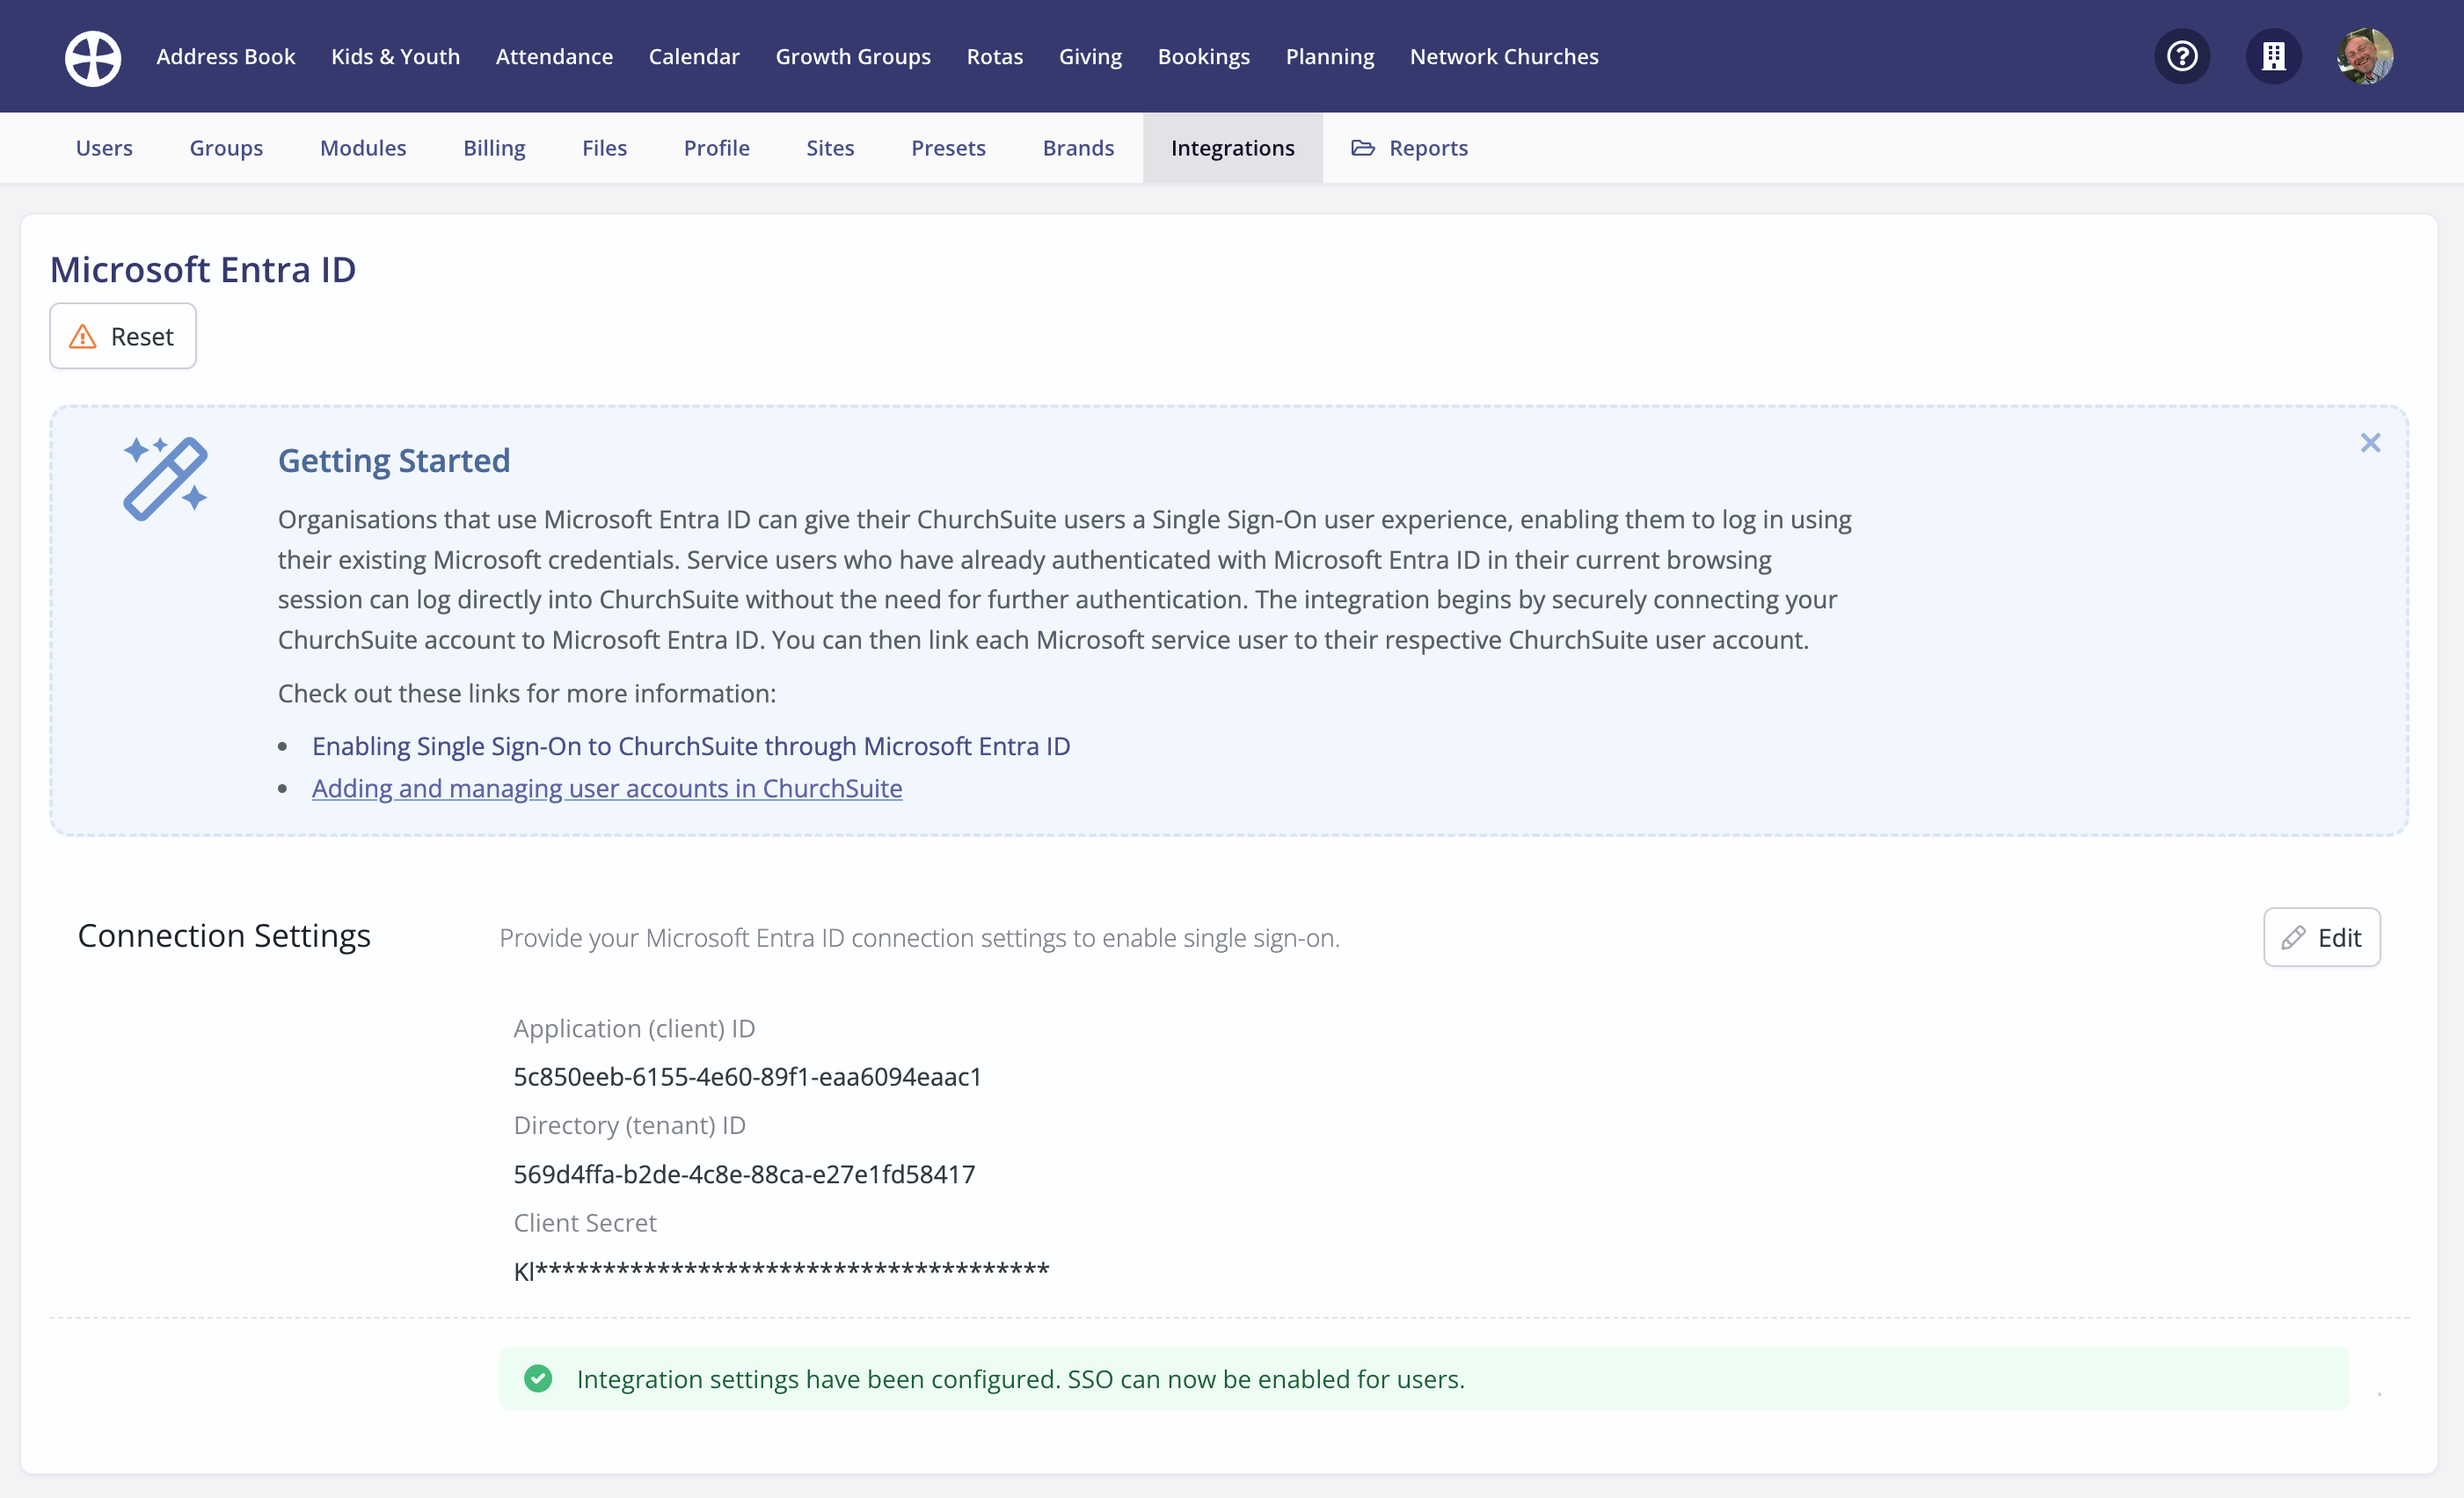
On the Edit pop-up, paste the three values explained in the previous section into the appropriate box - be careful to paste each value into the correct box! Click Save to complete the process.

The newly added Connection Settings are shown. You can return to Edit these settings further in the future to update an expiring Client Secret. You are now ready to begin enabling SSO for your ChurchSuite users.
Enabling SSO for ChurchSuite users
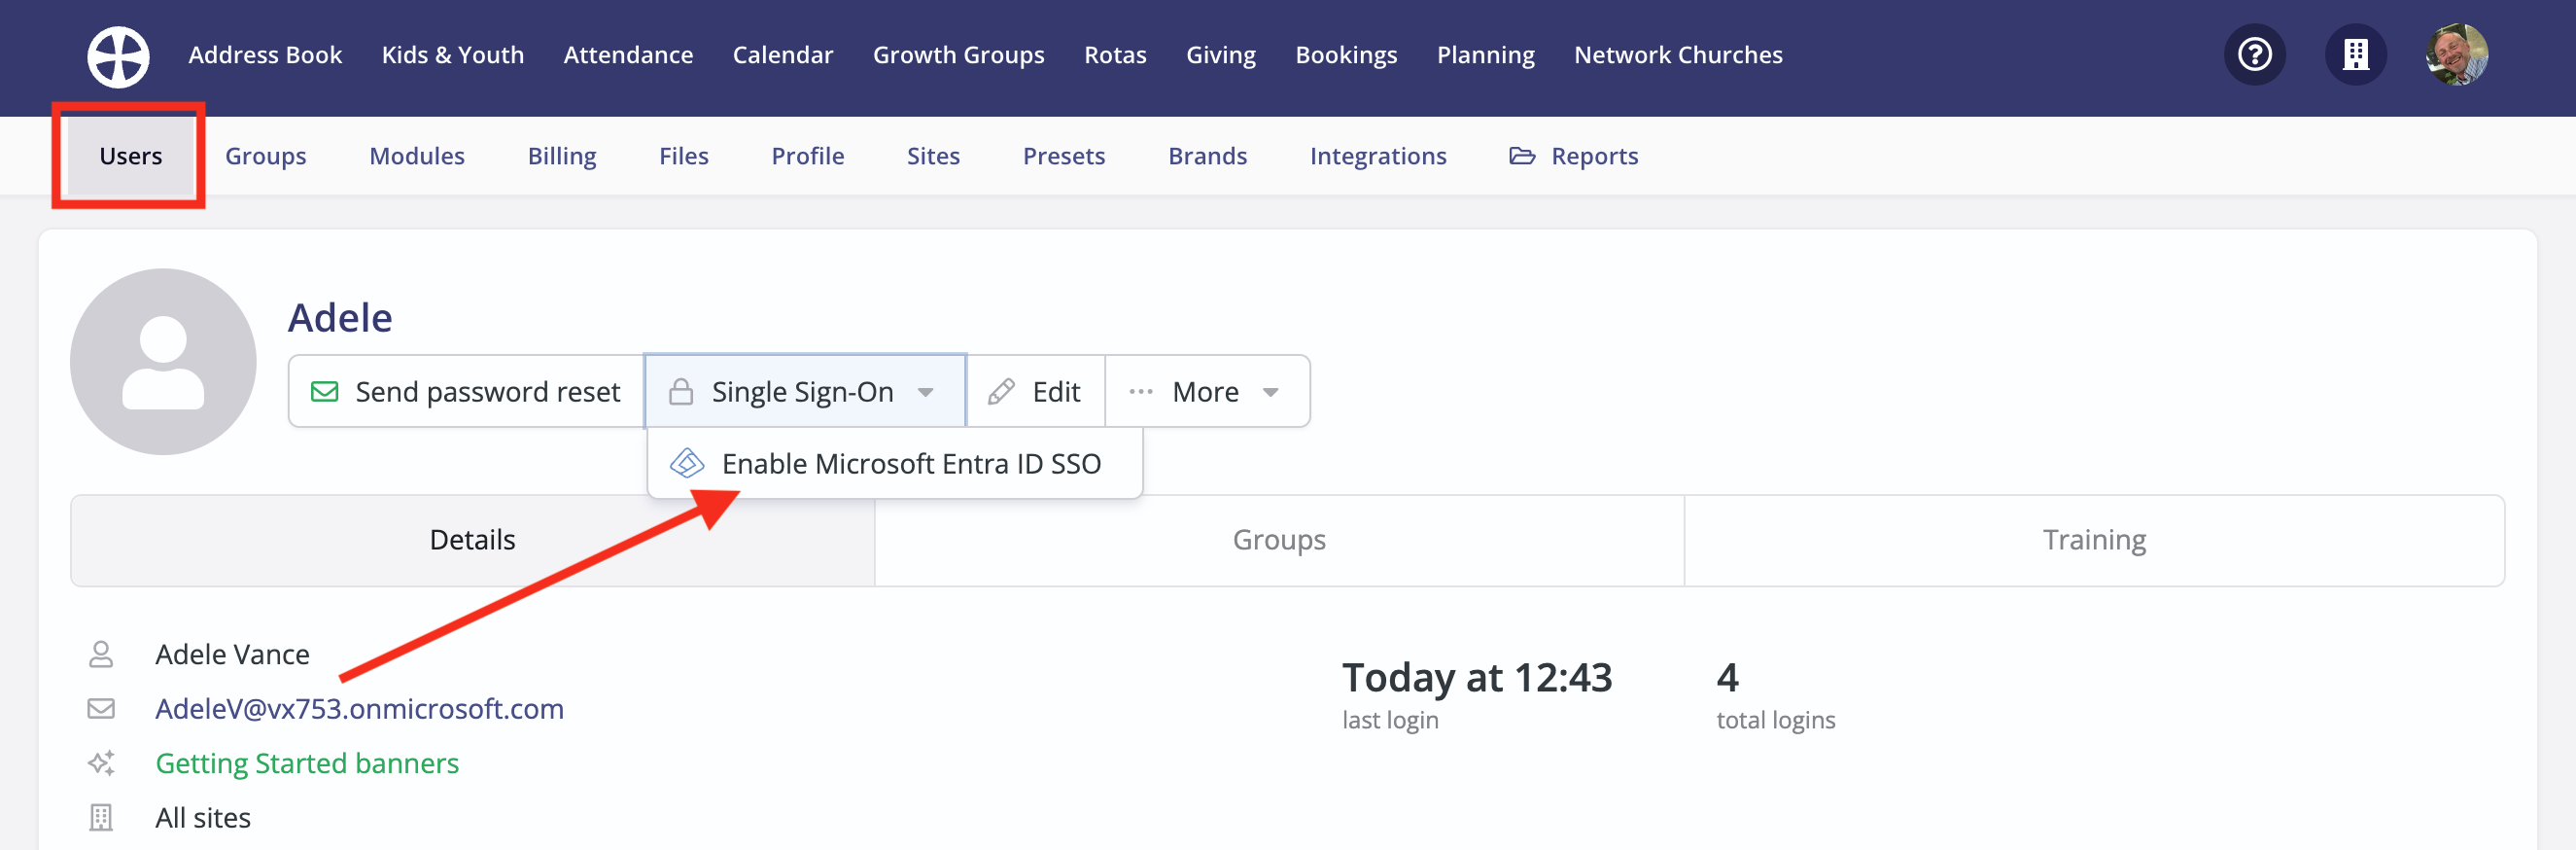
From a user profile:
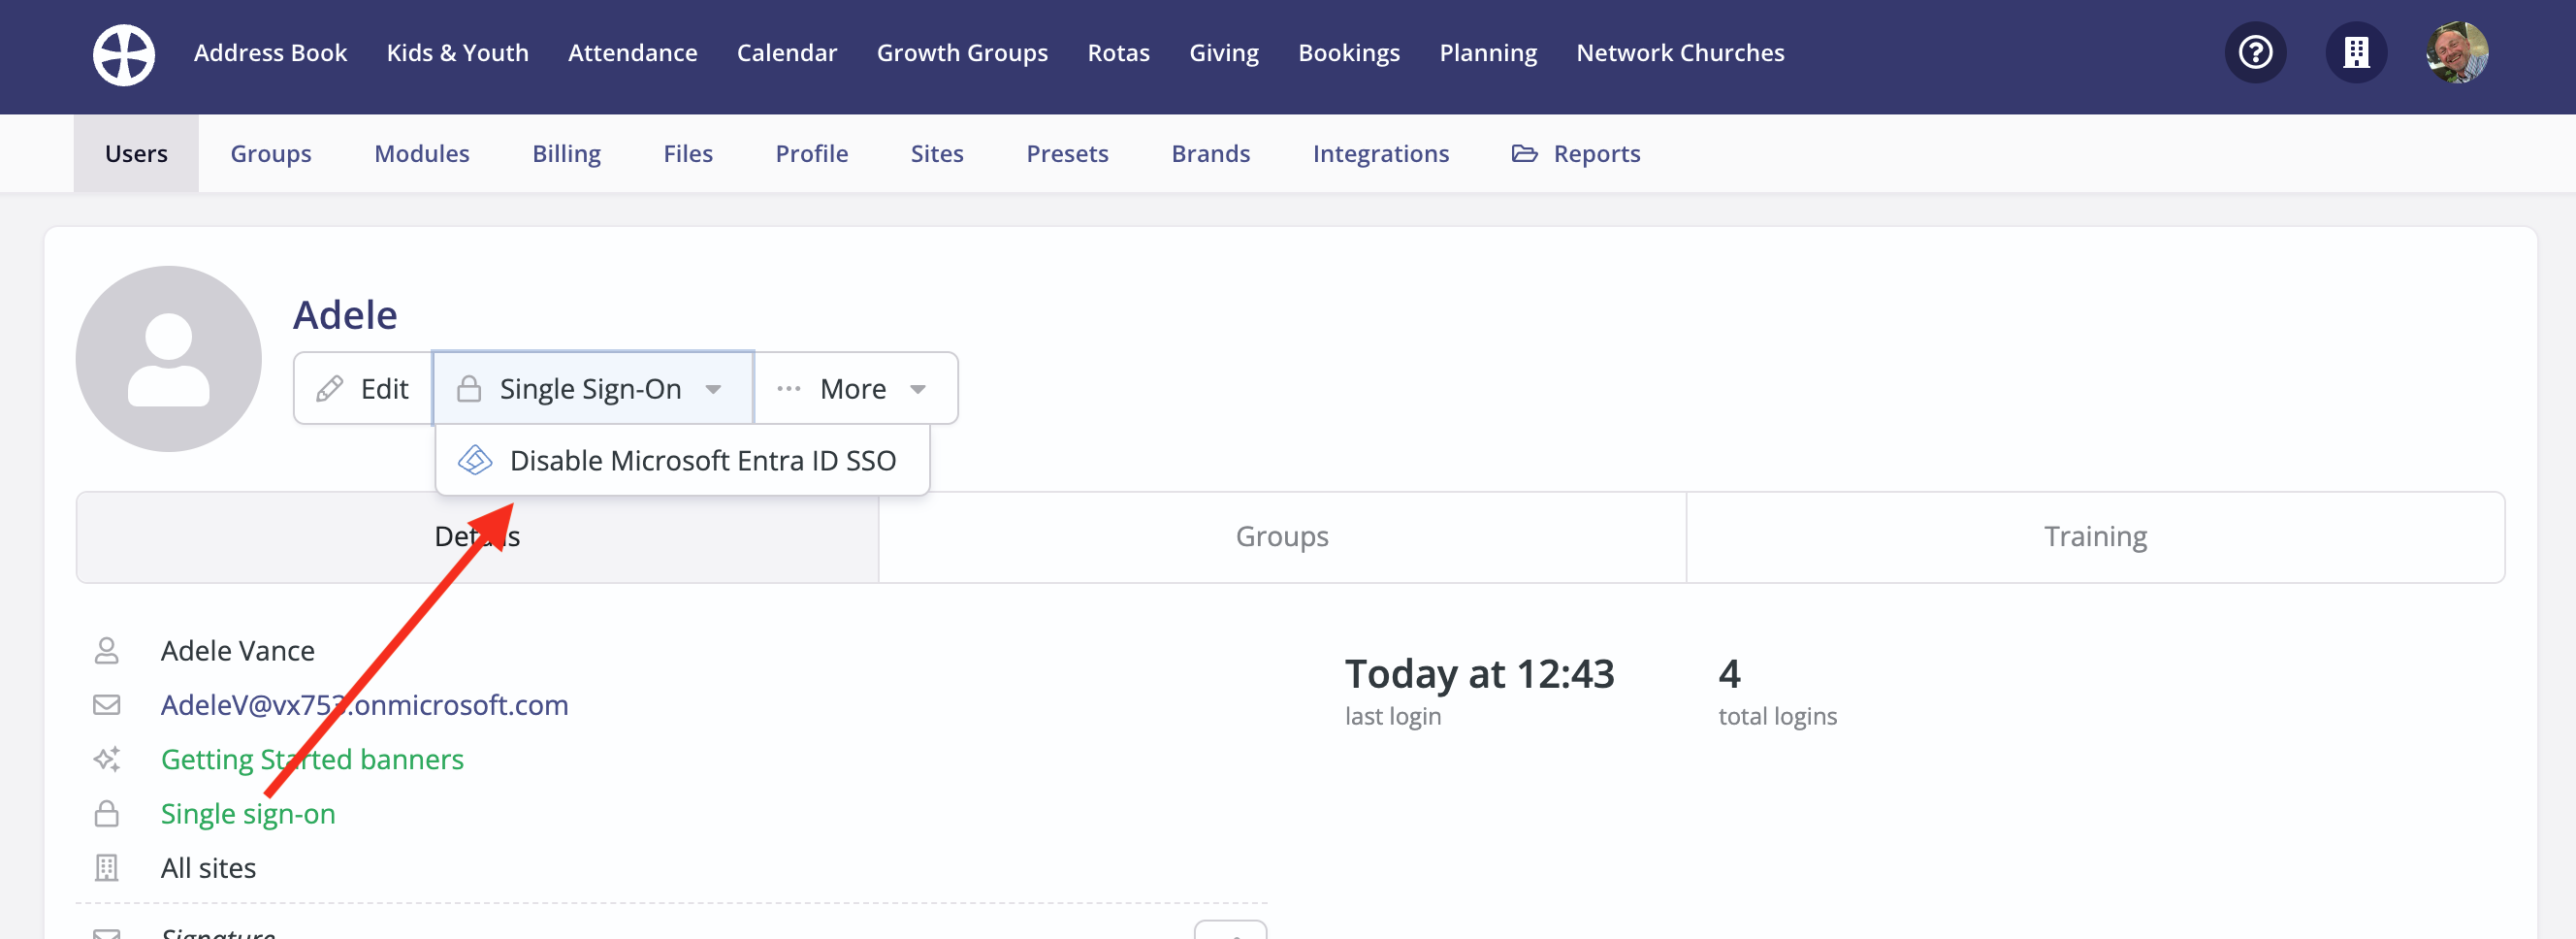
Working within the Users section of your Account Settings, select Enable Microsoft Entra ID SSO from a user's profile.
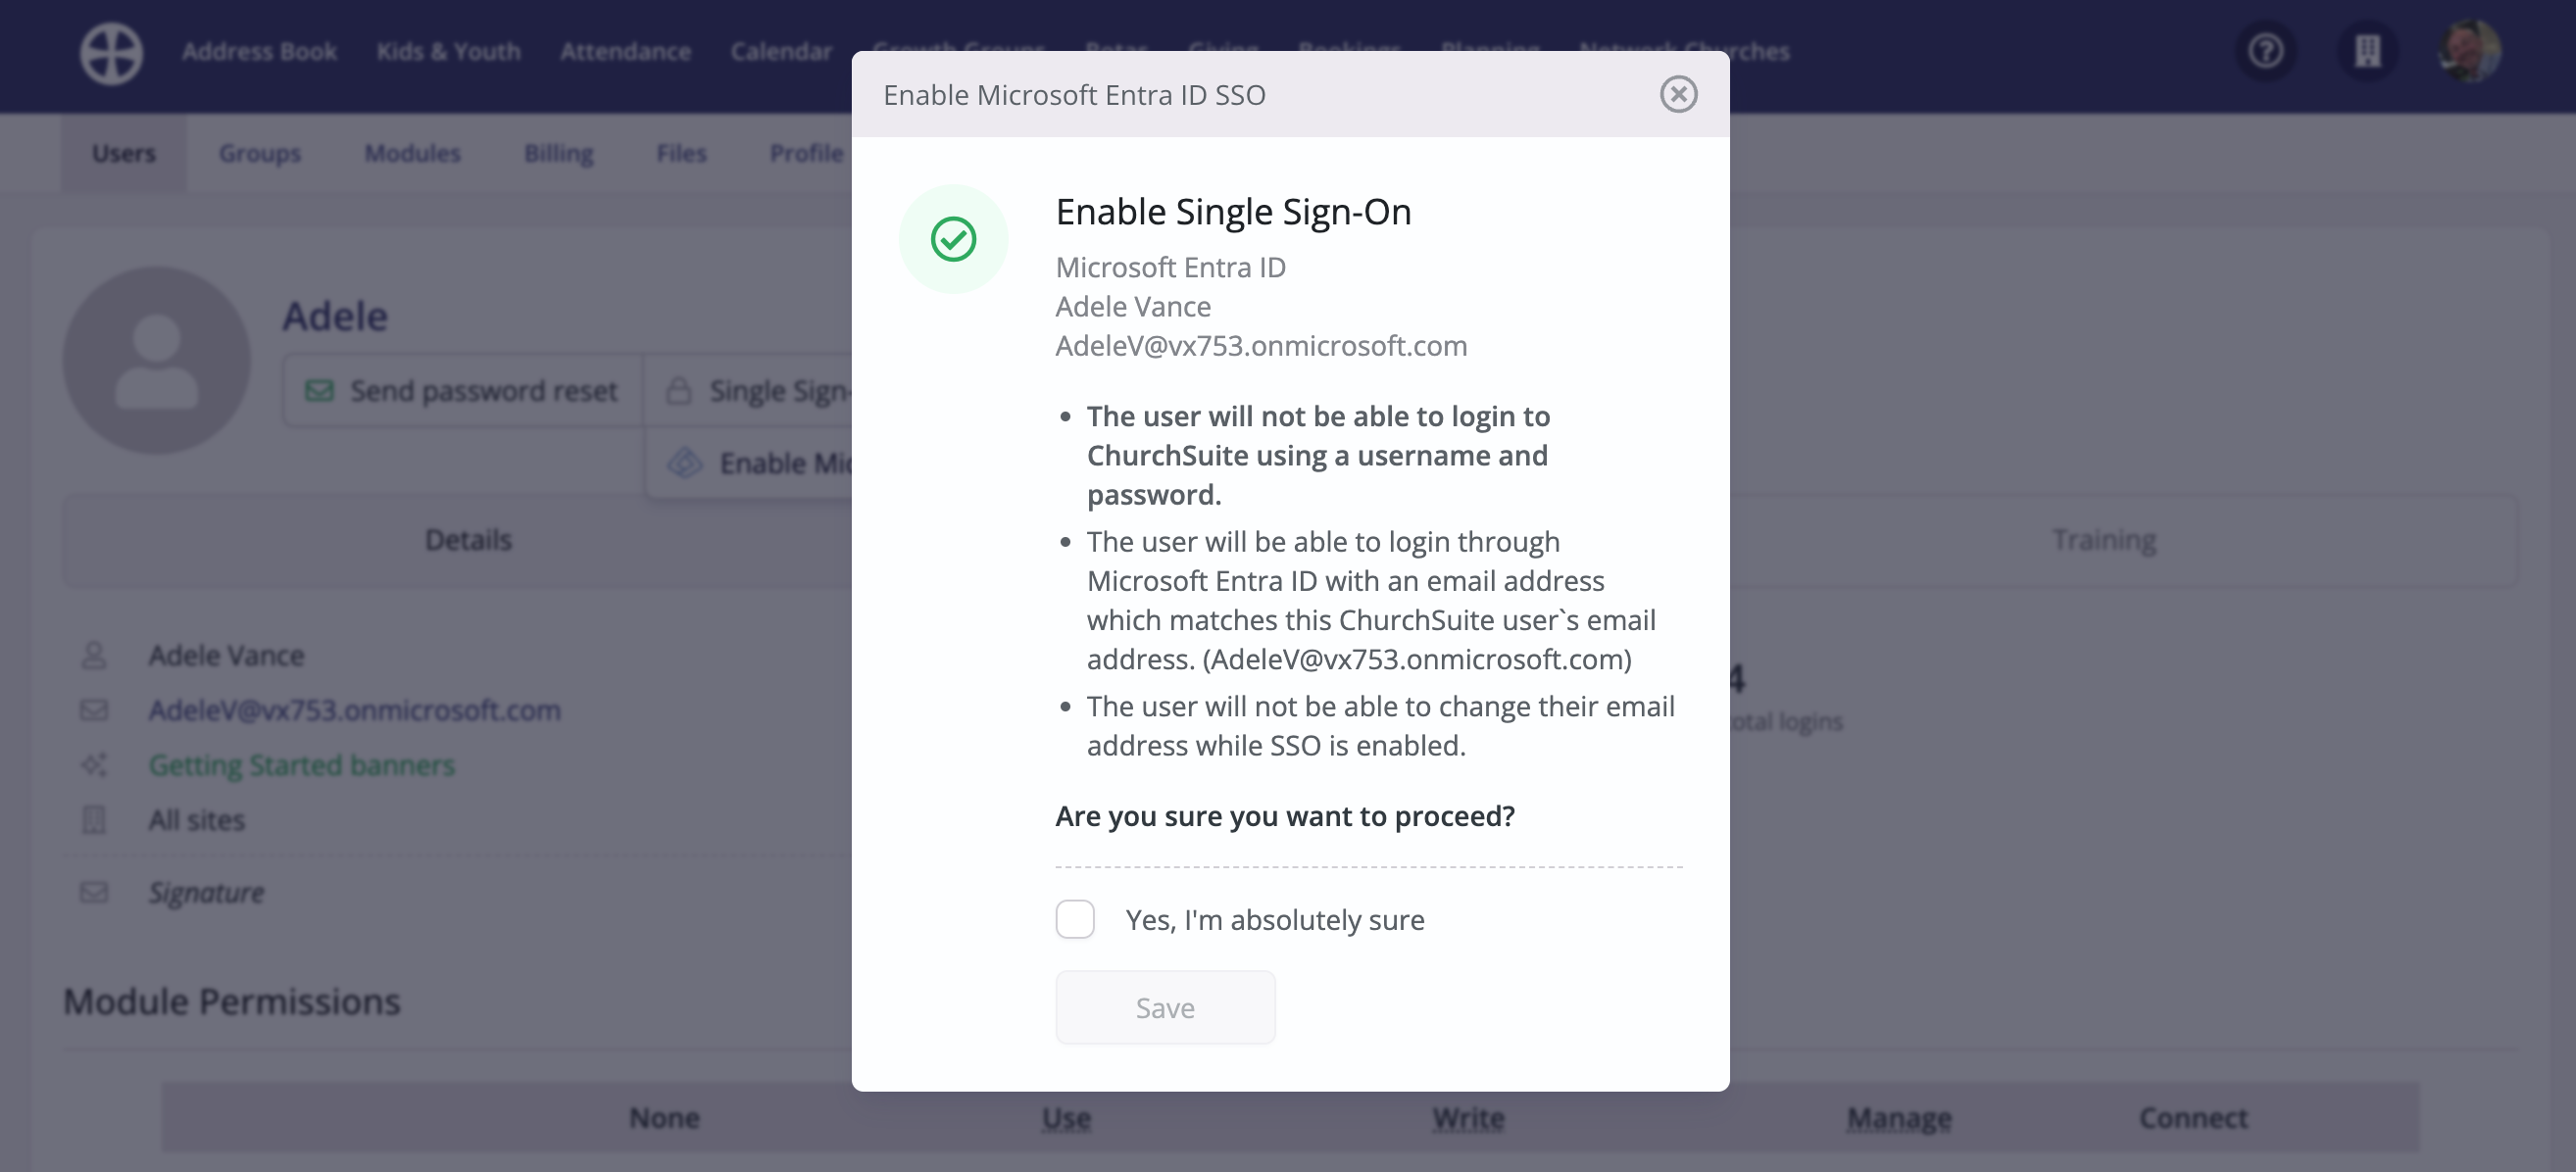
You must check that the user's email address matches an active service user in Entra ID; otherwise, they will be unable to log into ChurchSuite. Once you are happy, tick the confirmation checkbox and click Save.
The user profile updates to show that Single sign-on is active. Note the option to Disable Microsoft Entra ID SSO.
From the Users list:
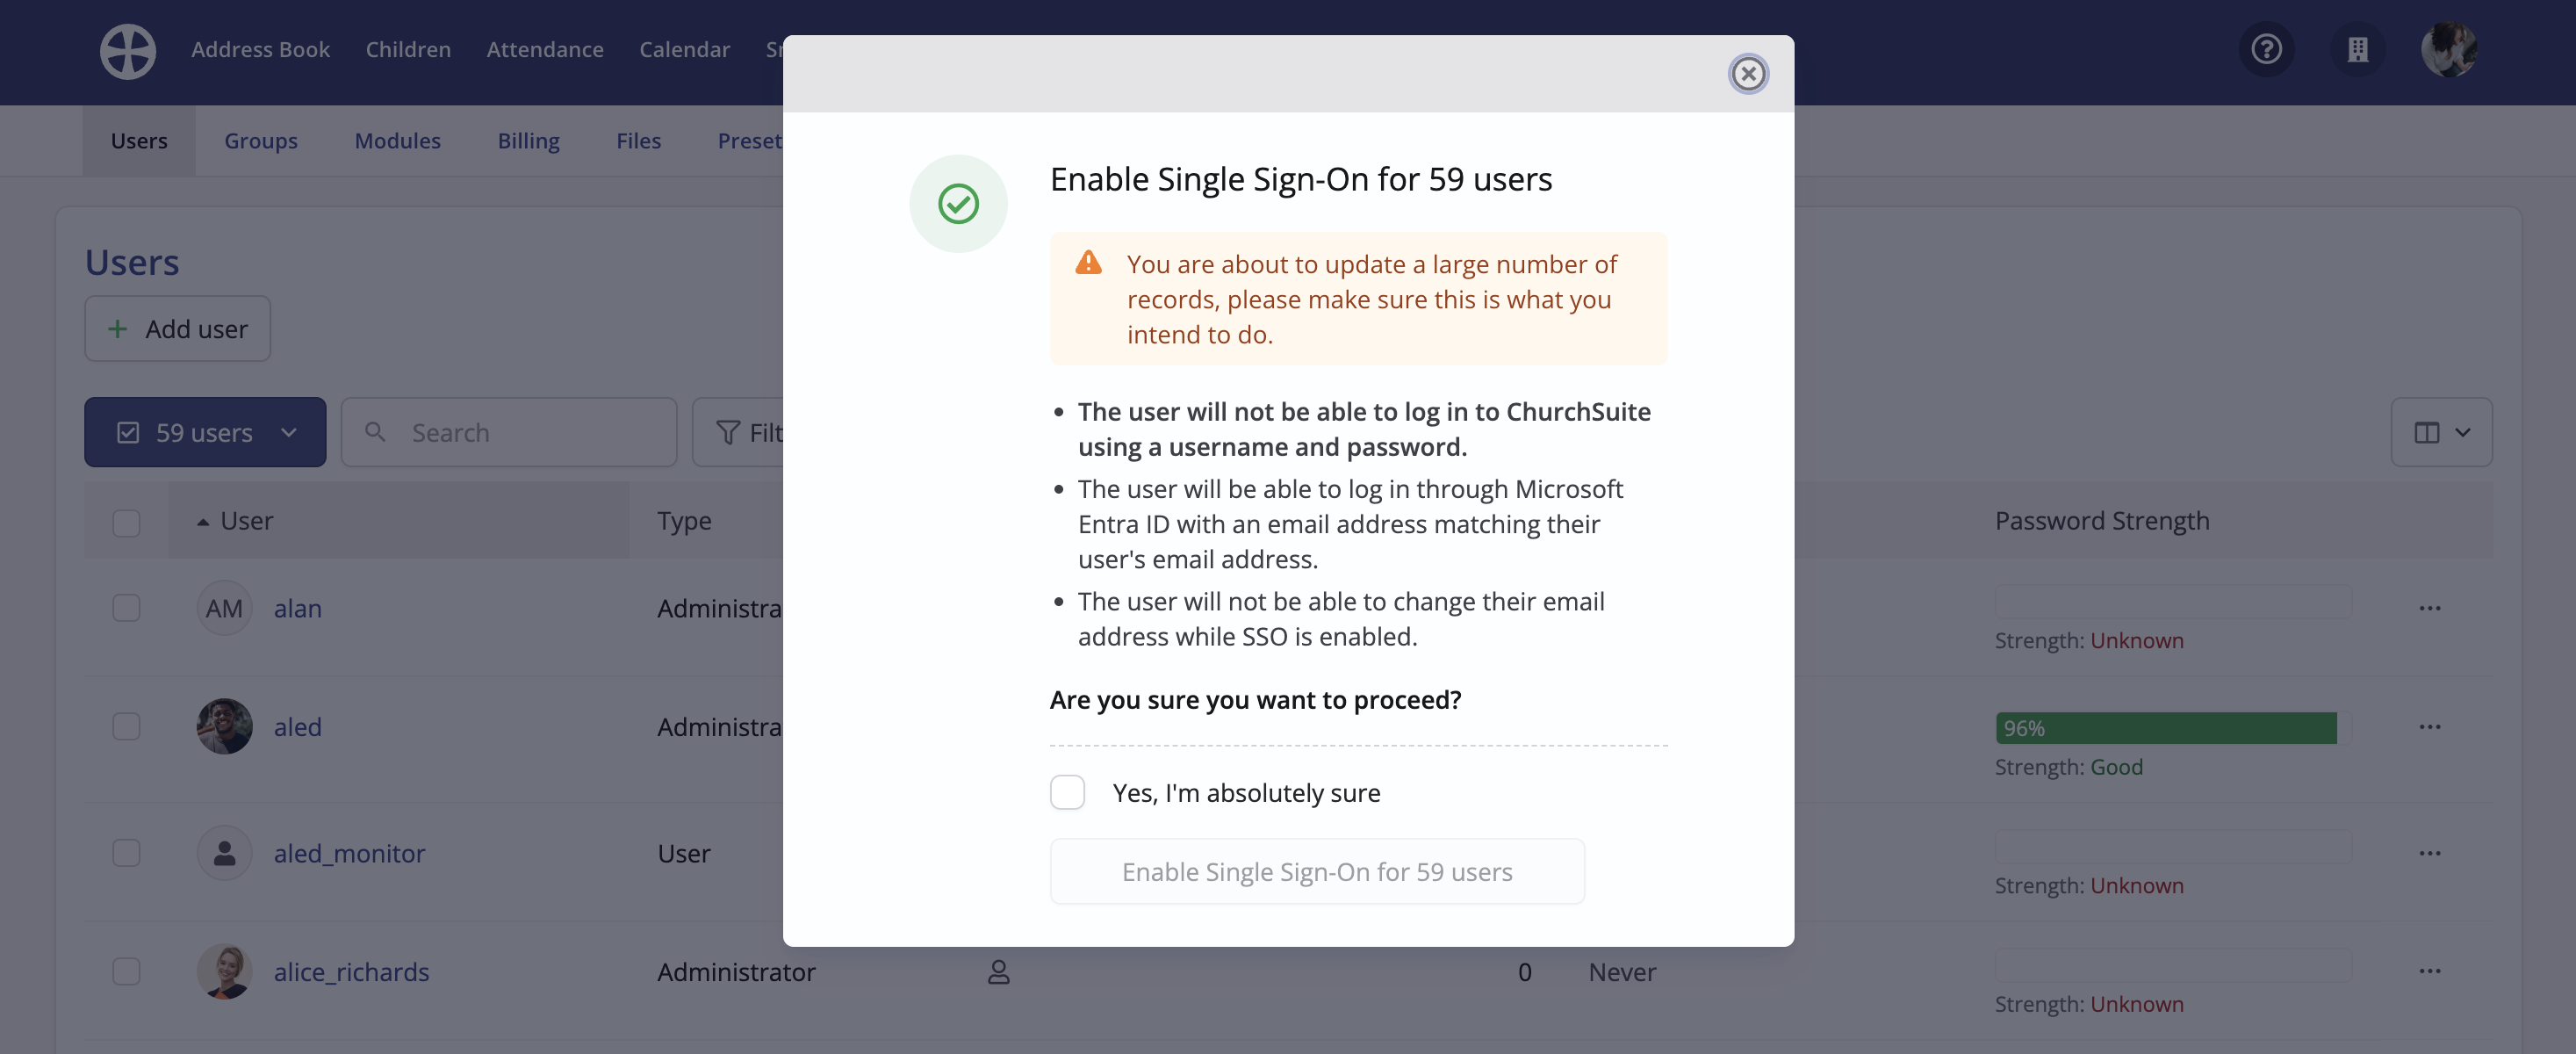
Using the Bulk Actions, you can enable (and disable) Microsoft Entra ID SSO for multiple selected users within the Users section of your Account Settings.

First, ensure that each selected user's email address matches an active service user's email address in Entra ID; otherwise, users will be unable to access ChurchSuite. Once you are happy, tick the confirmation checkbox and click Save to apply the changes to the selected users.
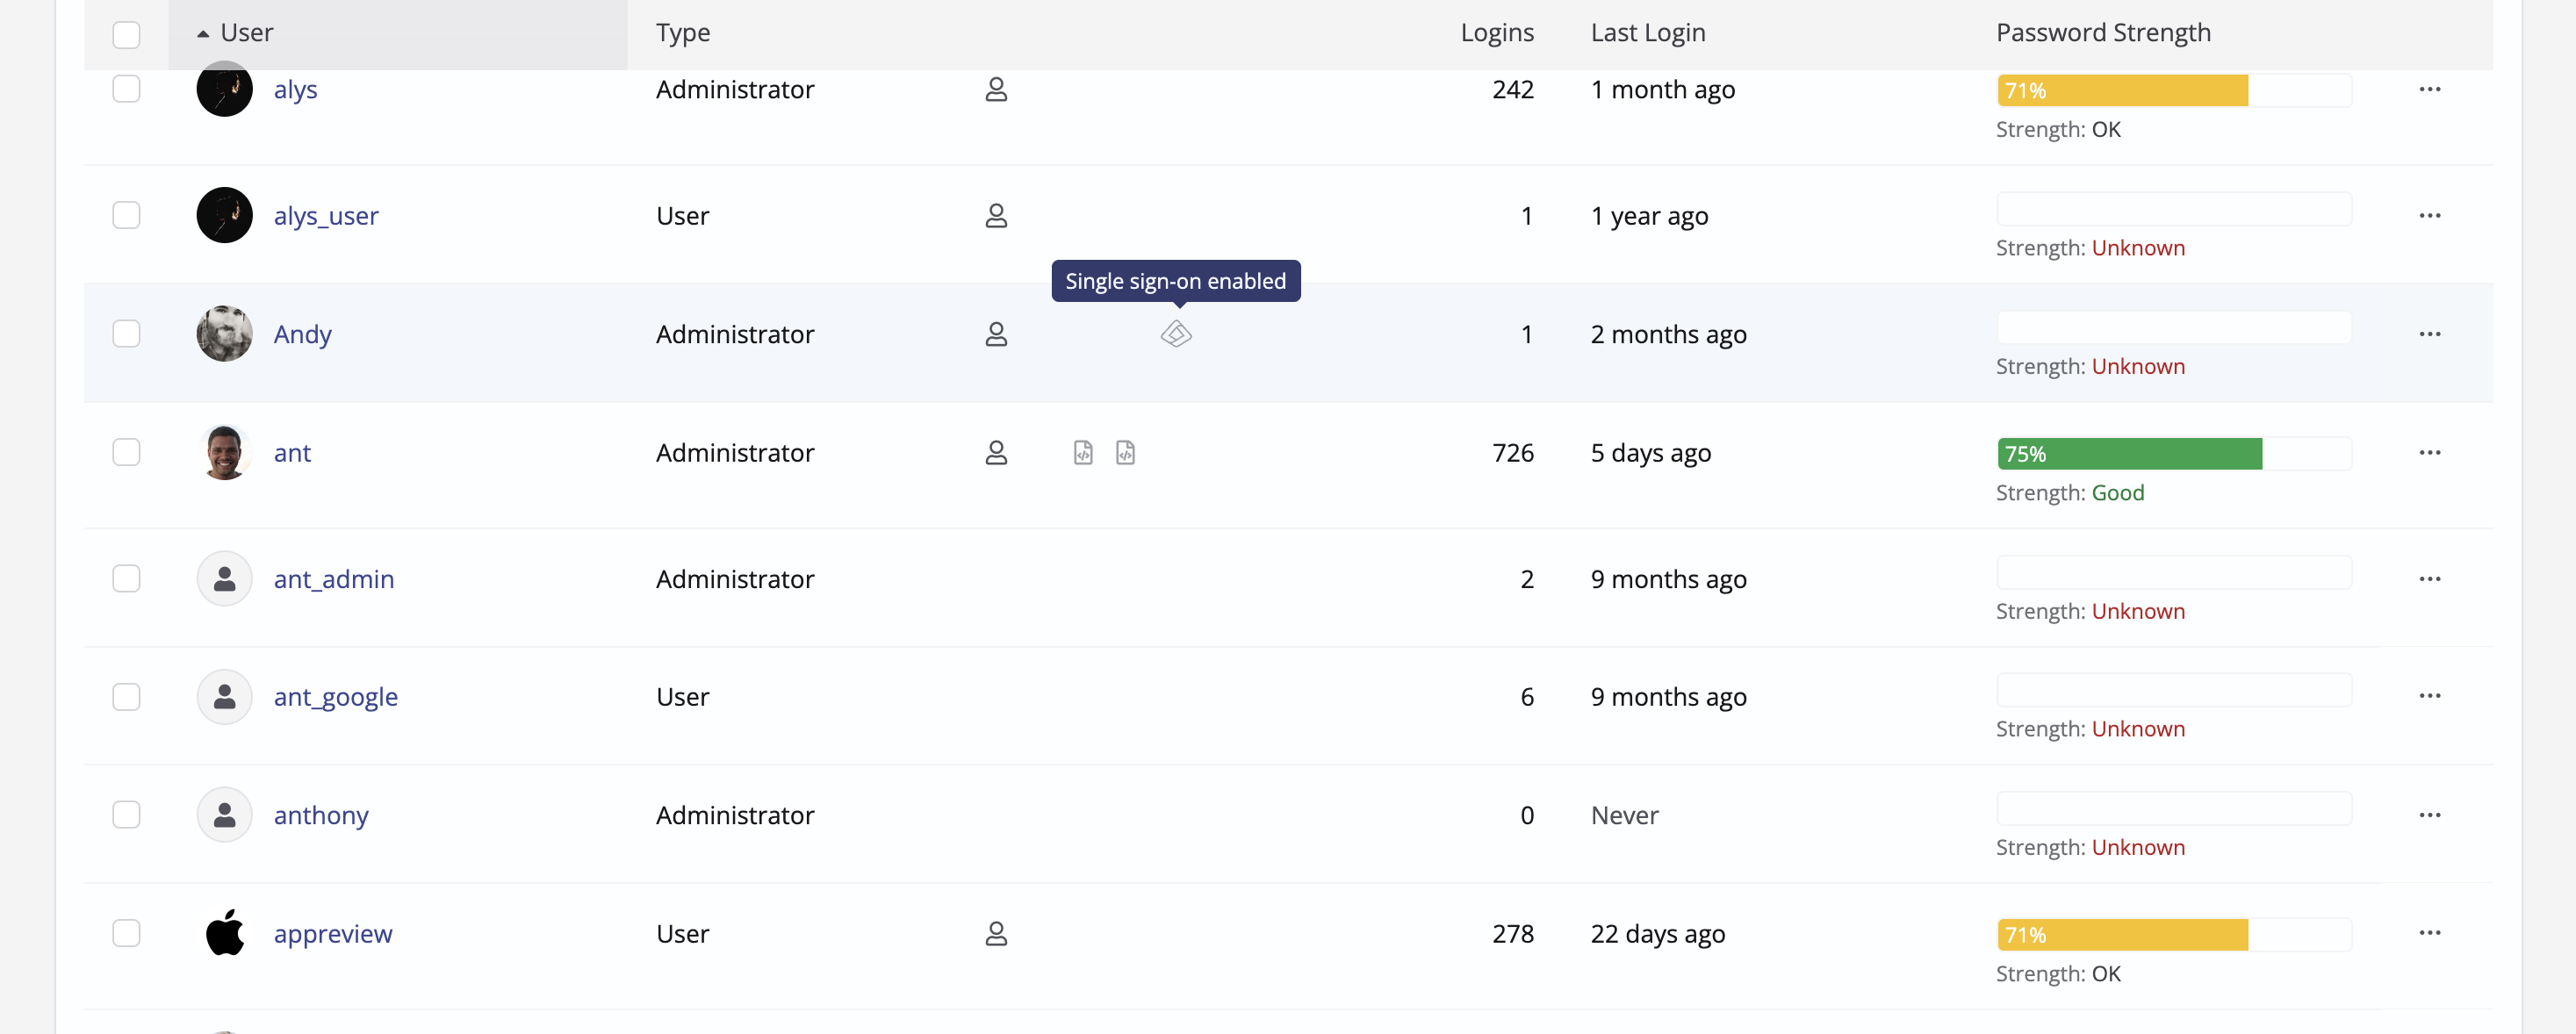
An icon in the Users section distinguishes SSO-enabled users:
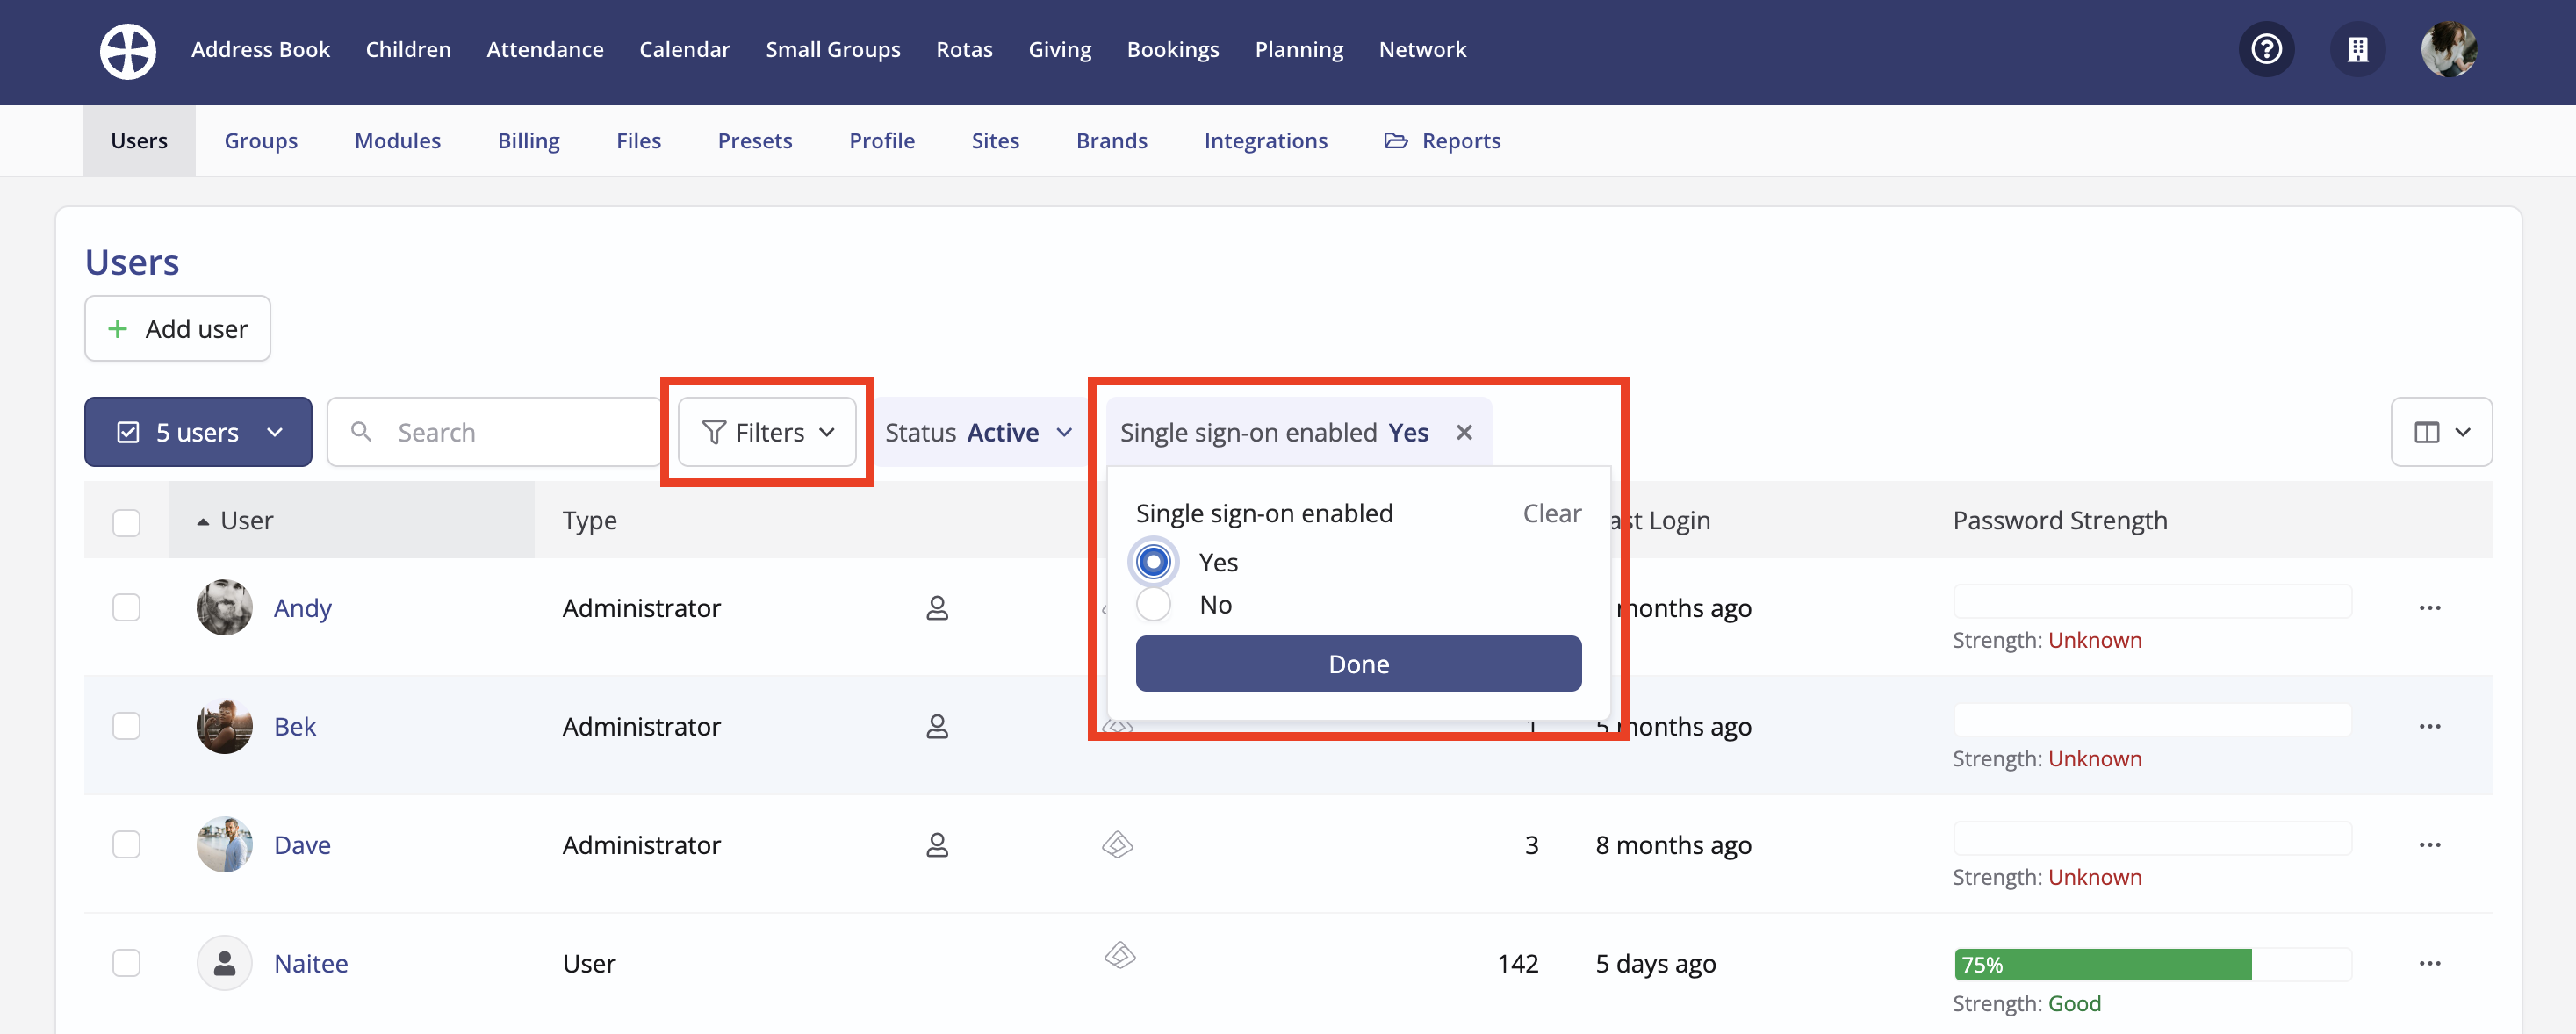
Use the Filters to see just those users with SSO enabled or disabled:
Once SSO is enabled for a ChurchSuite user, any previously set ChurchSuite username and user password are disabled to prevent use. An 'SSO Enabled' notification is sent to the user, shown in the user's communication log, and a user change log is added. An SSO-enabled user is prevented from changing their user email address. Additionally, the ChurchSuite password change/reset actions and multi-factor authentication functionality are disabled and bypassed for that user.
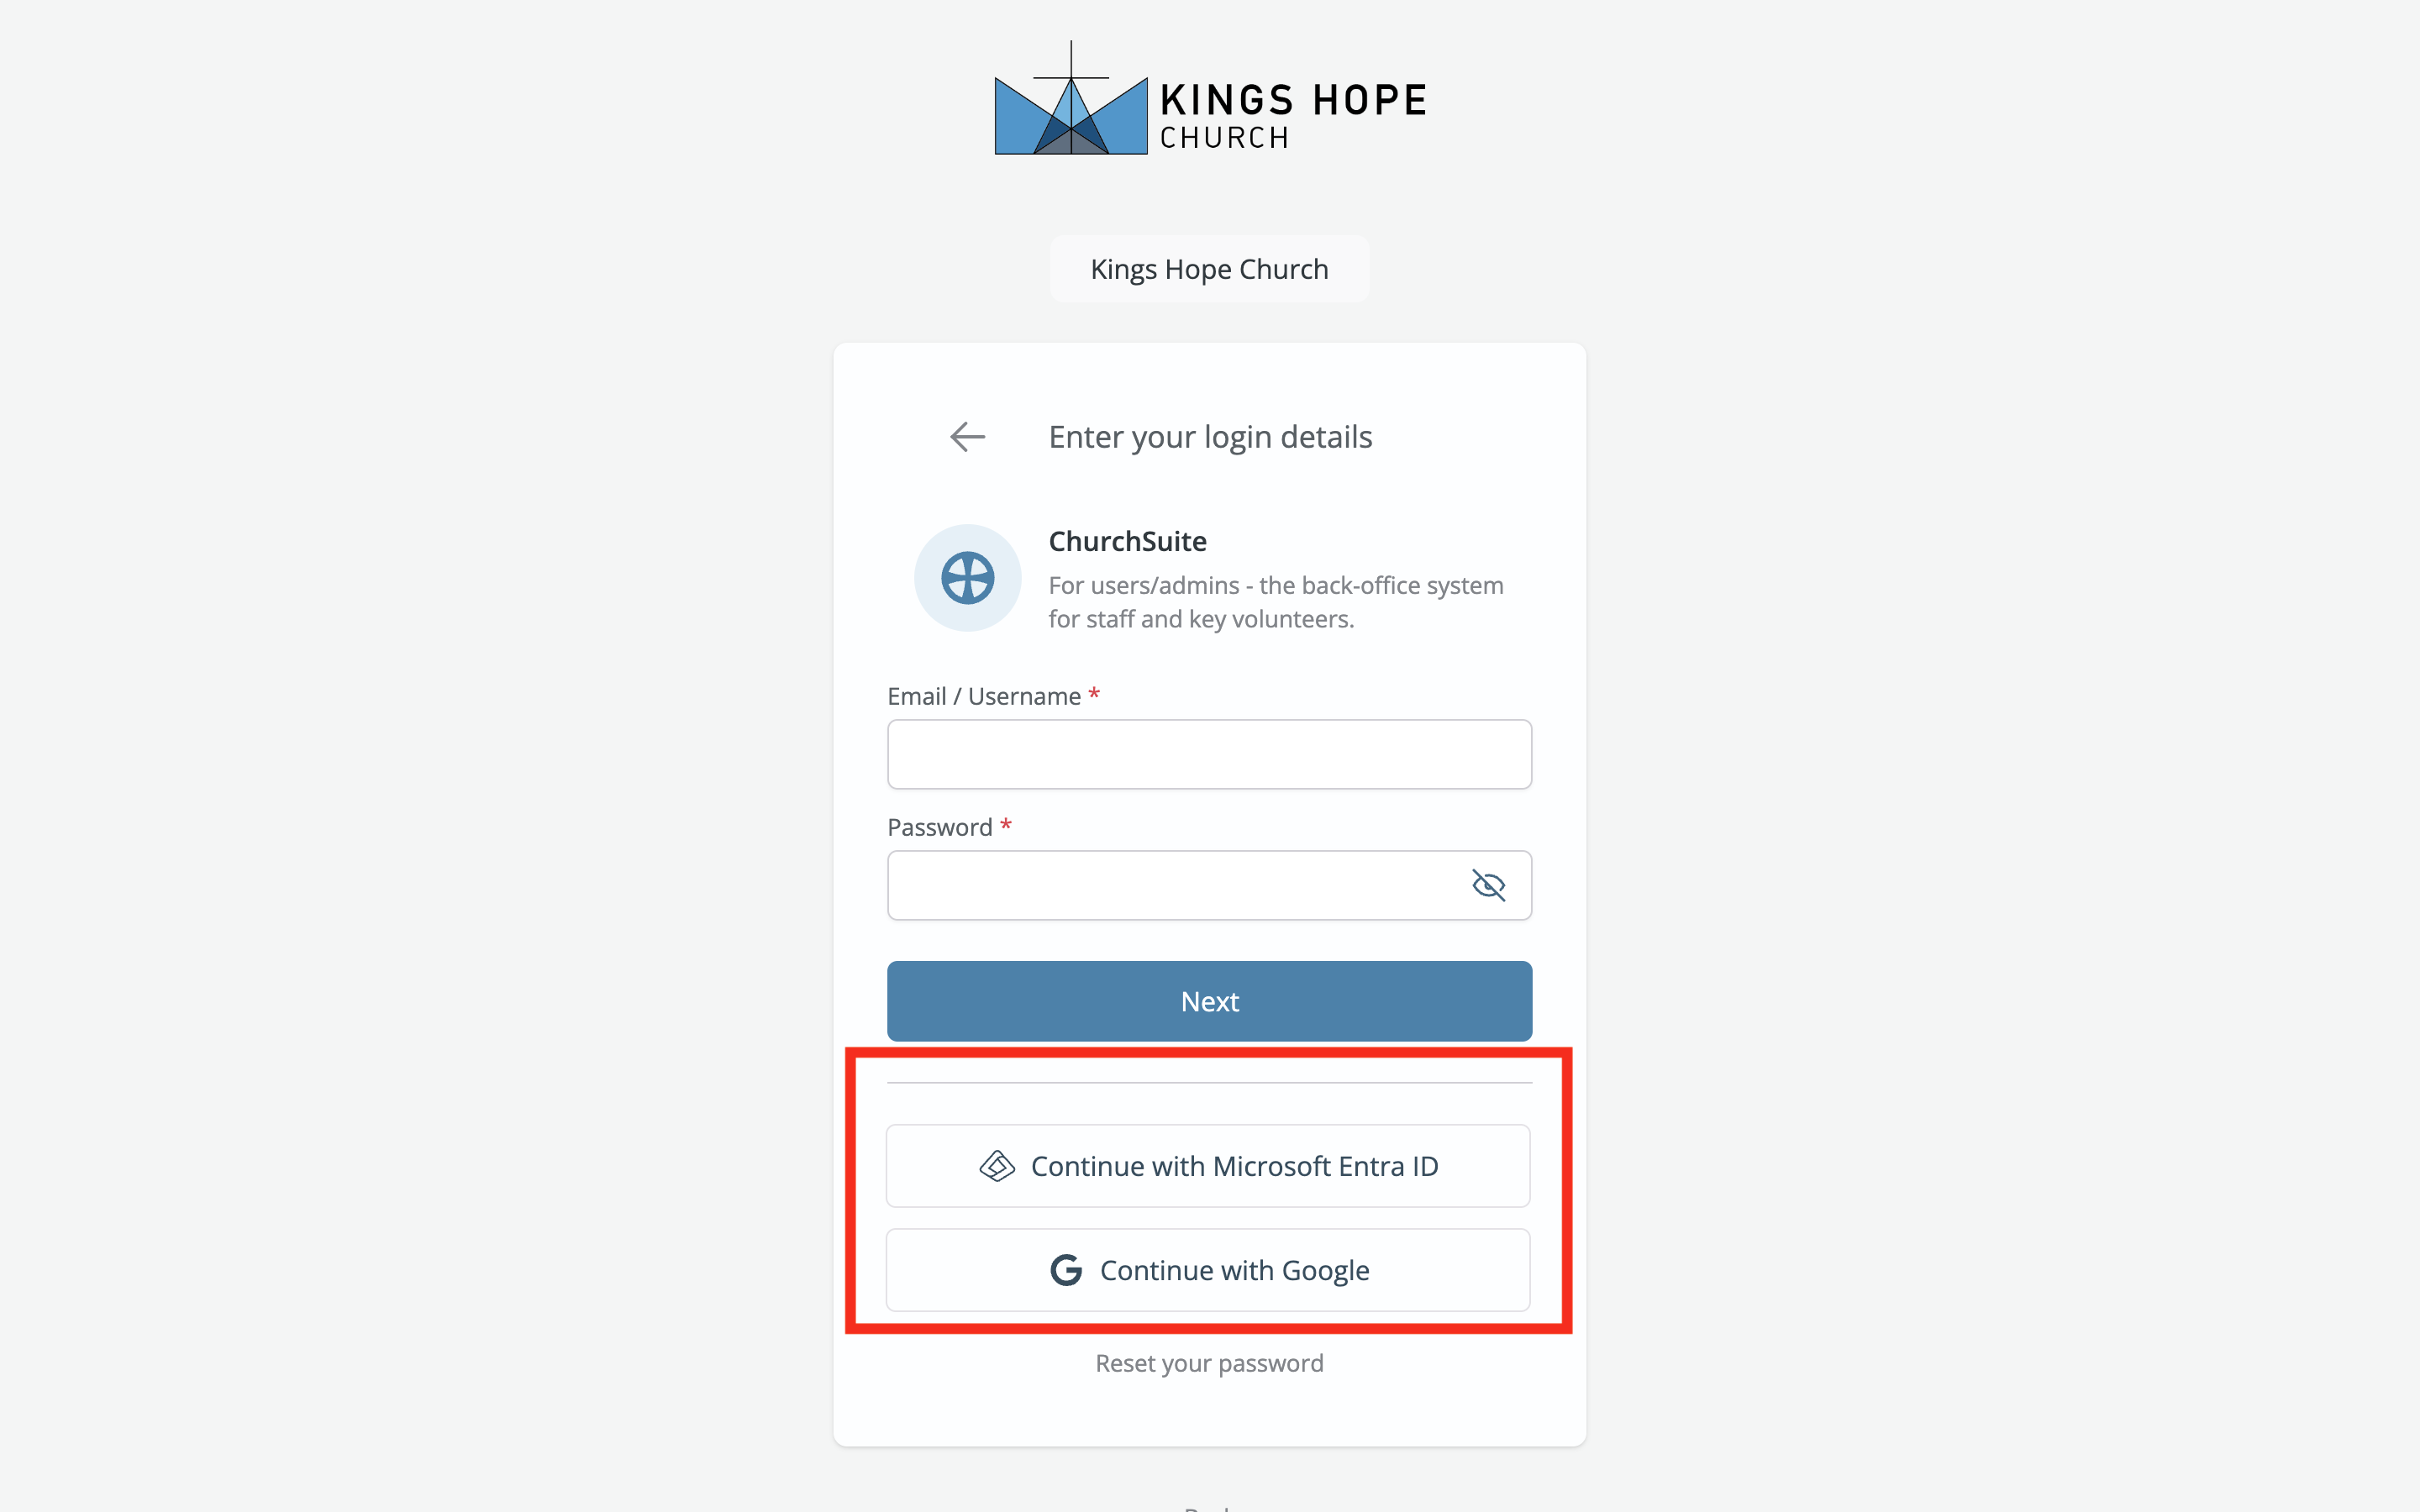
When an SSO-enabled user next logs in, they can access ChurchSuite by clicking Continue with Microsoft Entra ID:
Disabling SSO
SSO can only be disabled for a user by a ChurchSuite Administrator. Resetting the Microsoft Entra ID integration will disable SSO for all users. When SSO is disabled, an "SSO Disabled" notification is sent to the user, shown in the user's communication log, and a user change log is added. The previous ChurchSuite username, user password, and password change/reset actions are reactivated for that user. When disabling SSO, a password reset request can be optionally sent to encourage users to secure their ChurchSuite login with a new password, and they can enable multi-factor authentication.