Check-In session templates
Introduction
The Check-In system is purpose-designed to register and check children and young people into groups at the start of a session and securely check them out again at the end of the session. Session attendance for each group is automatically added from the Check-In system to the Children module, and leaders have a comprehensive Check-In Admin Area with everything they need to manage their group and the children in their care.
In many churches, the same session settings apply each time your children and youth groups meet. You can make starting a Check-In session easier for your leaders by creating session templates. A session template stores all the session settings, making starting a new session from a template a 'button click' process.
Adding a session template
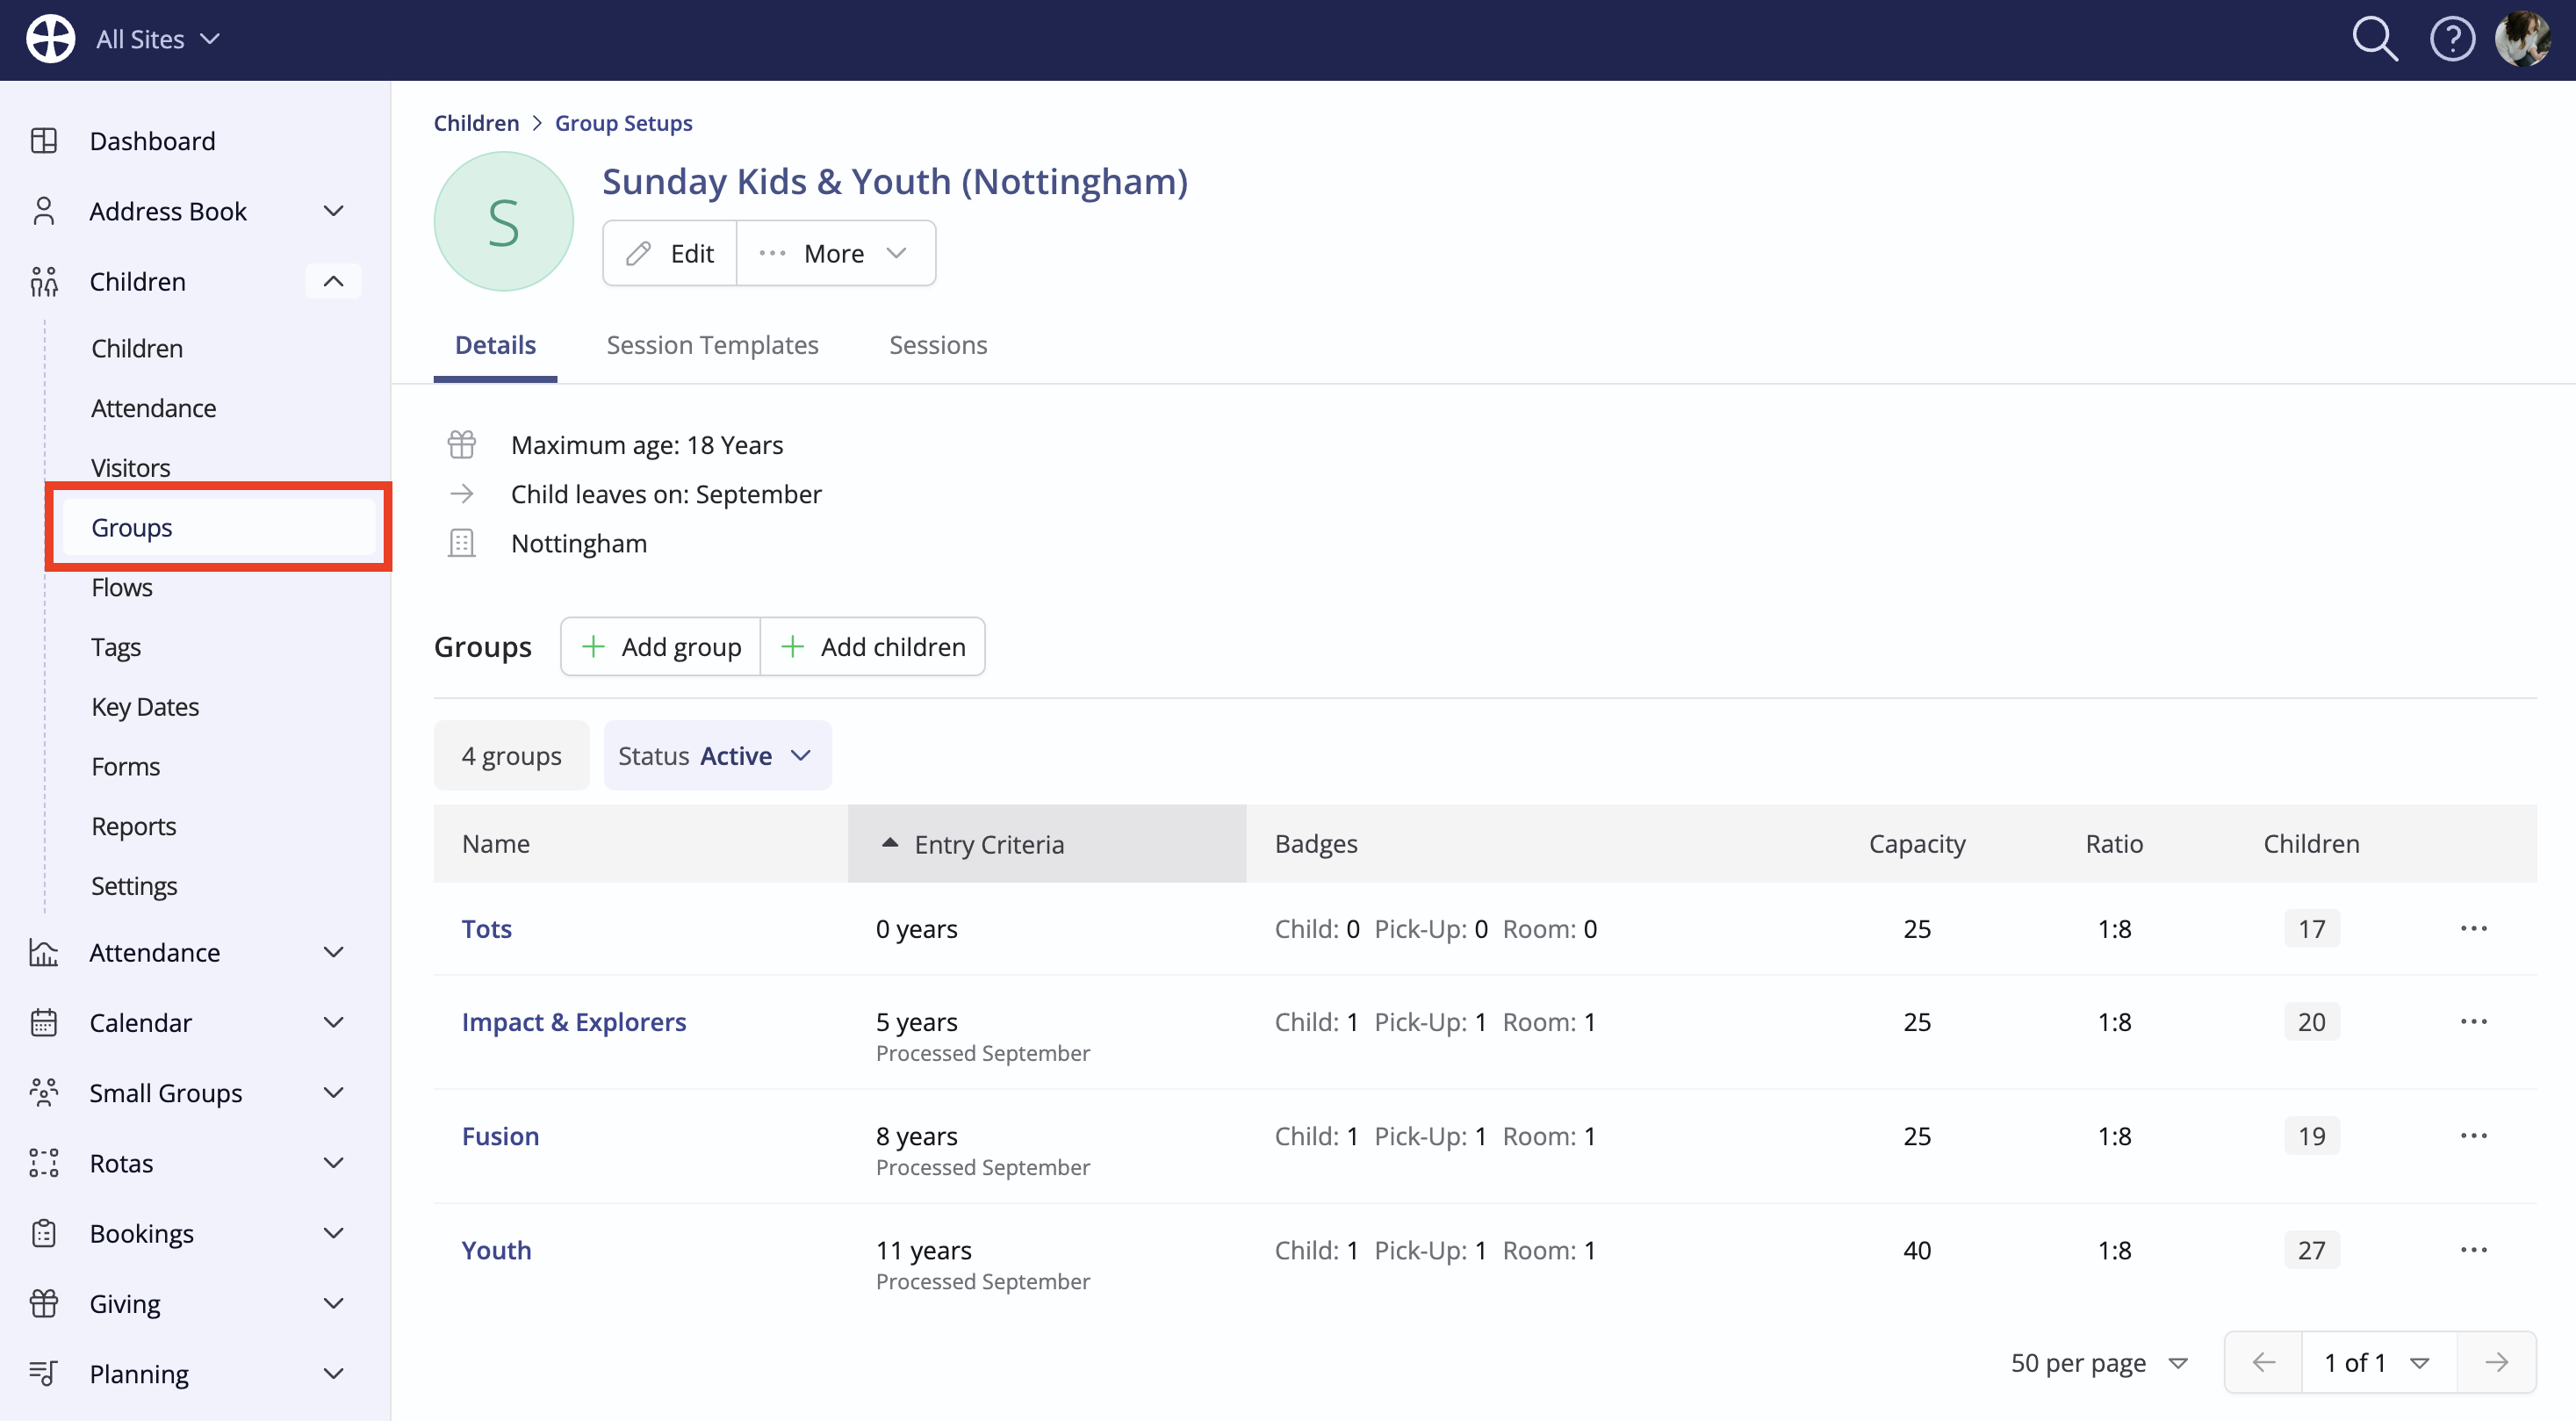
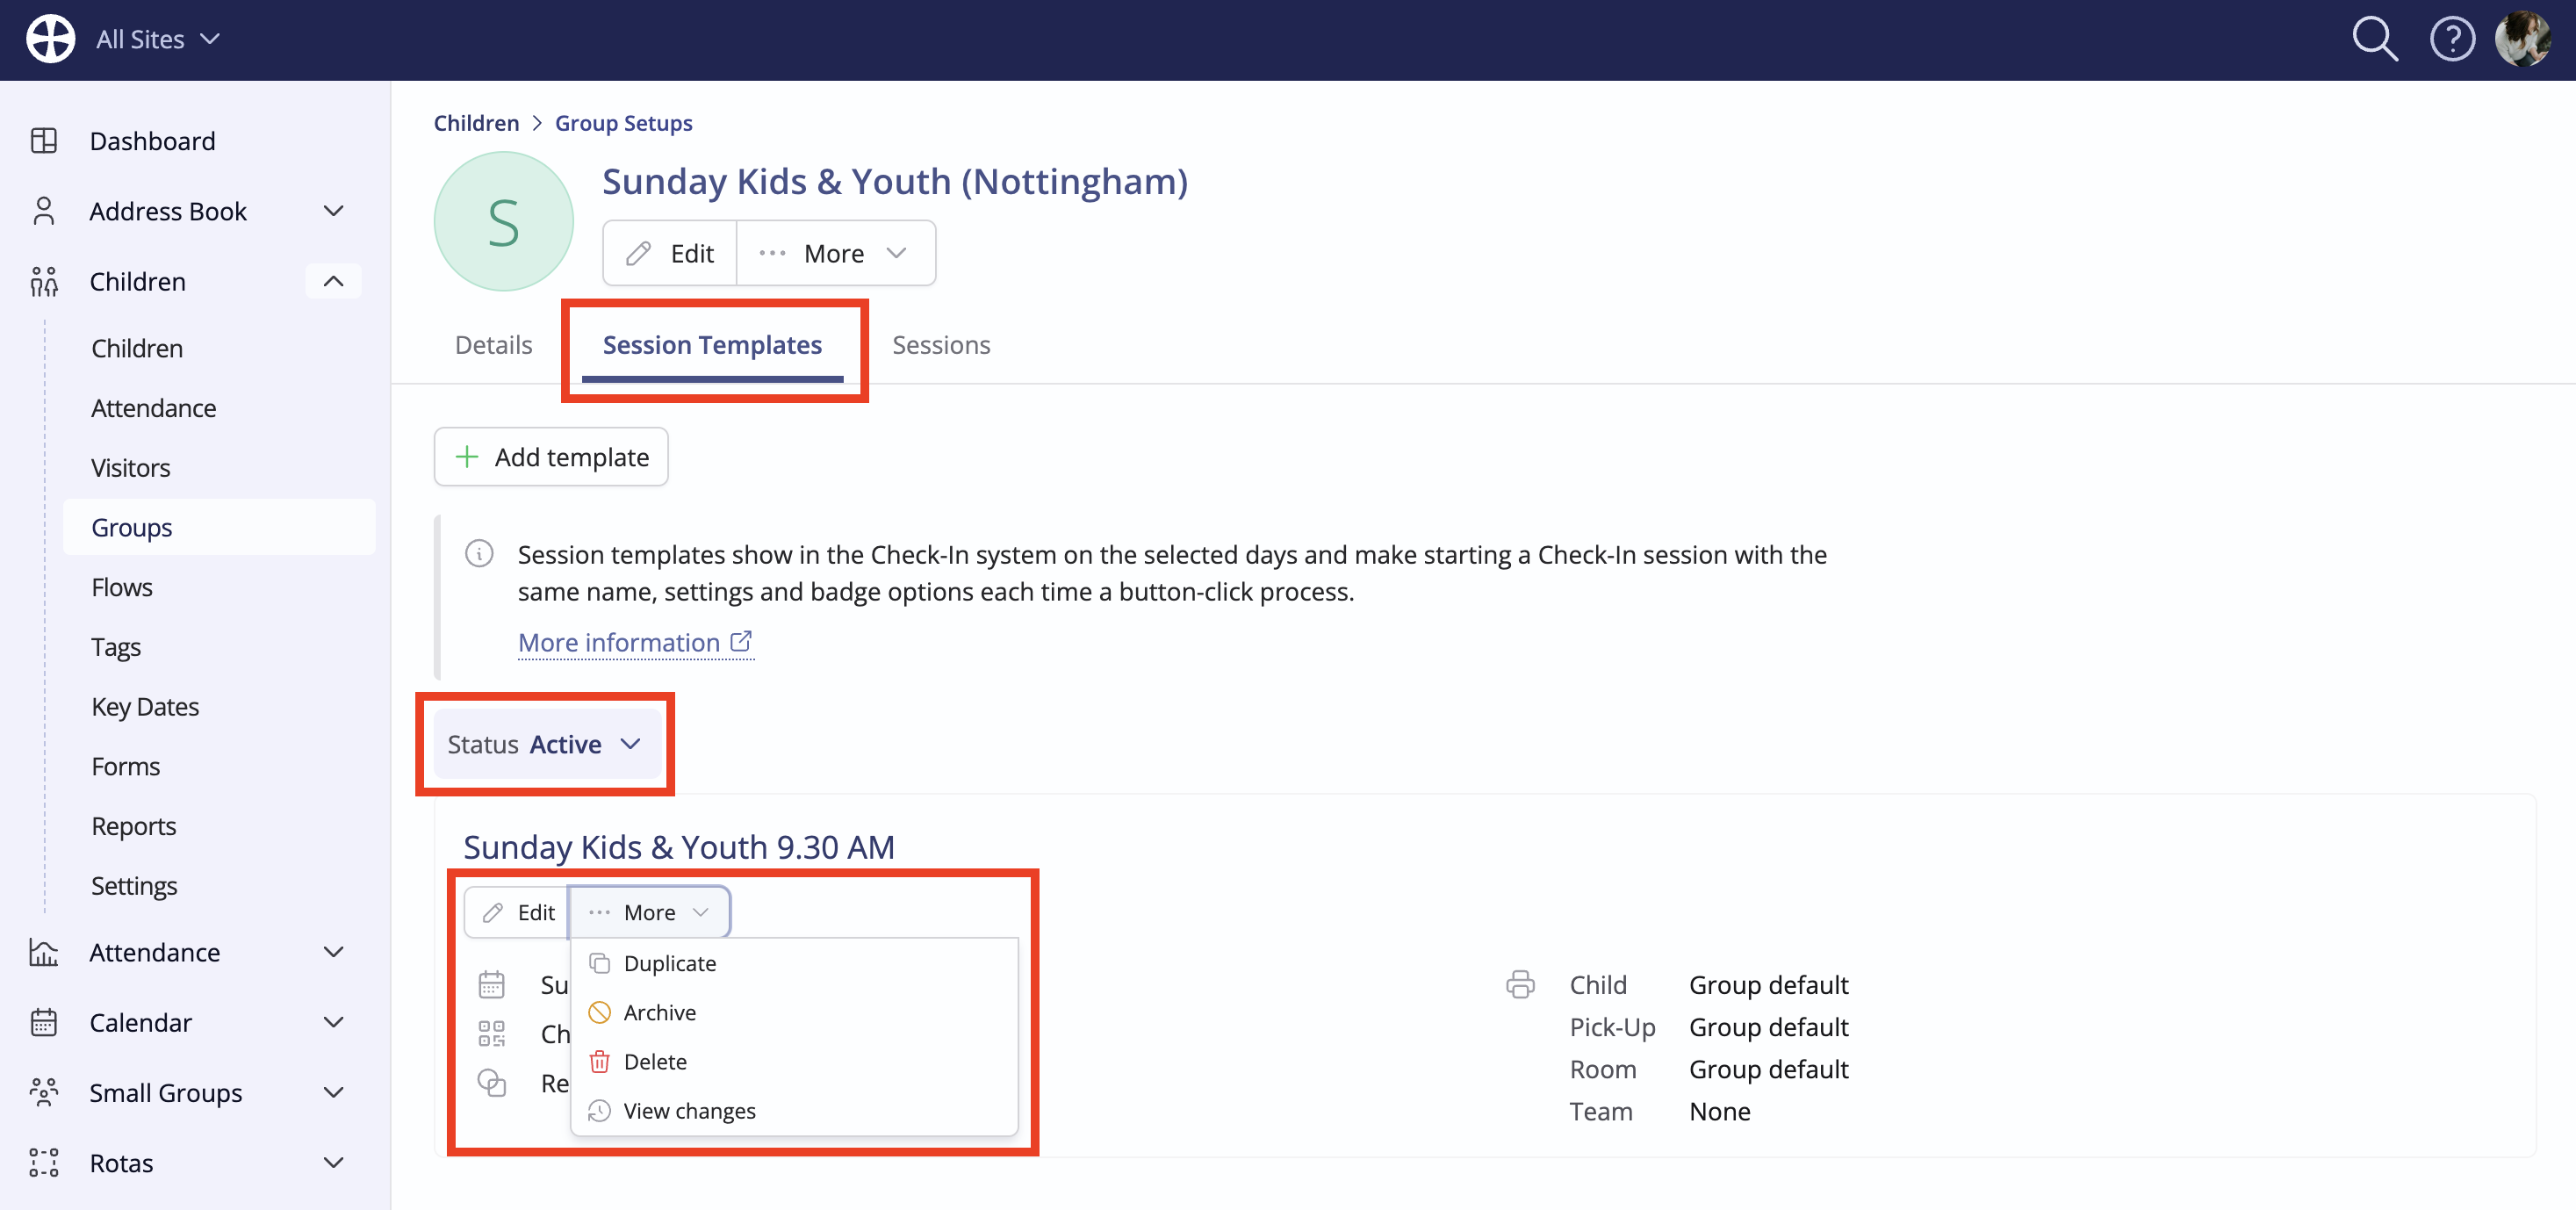
Working within the Children module, navigate into the Groups section and click on a Group Setup of interest that you'll be using the Check-In system for:
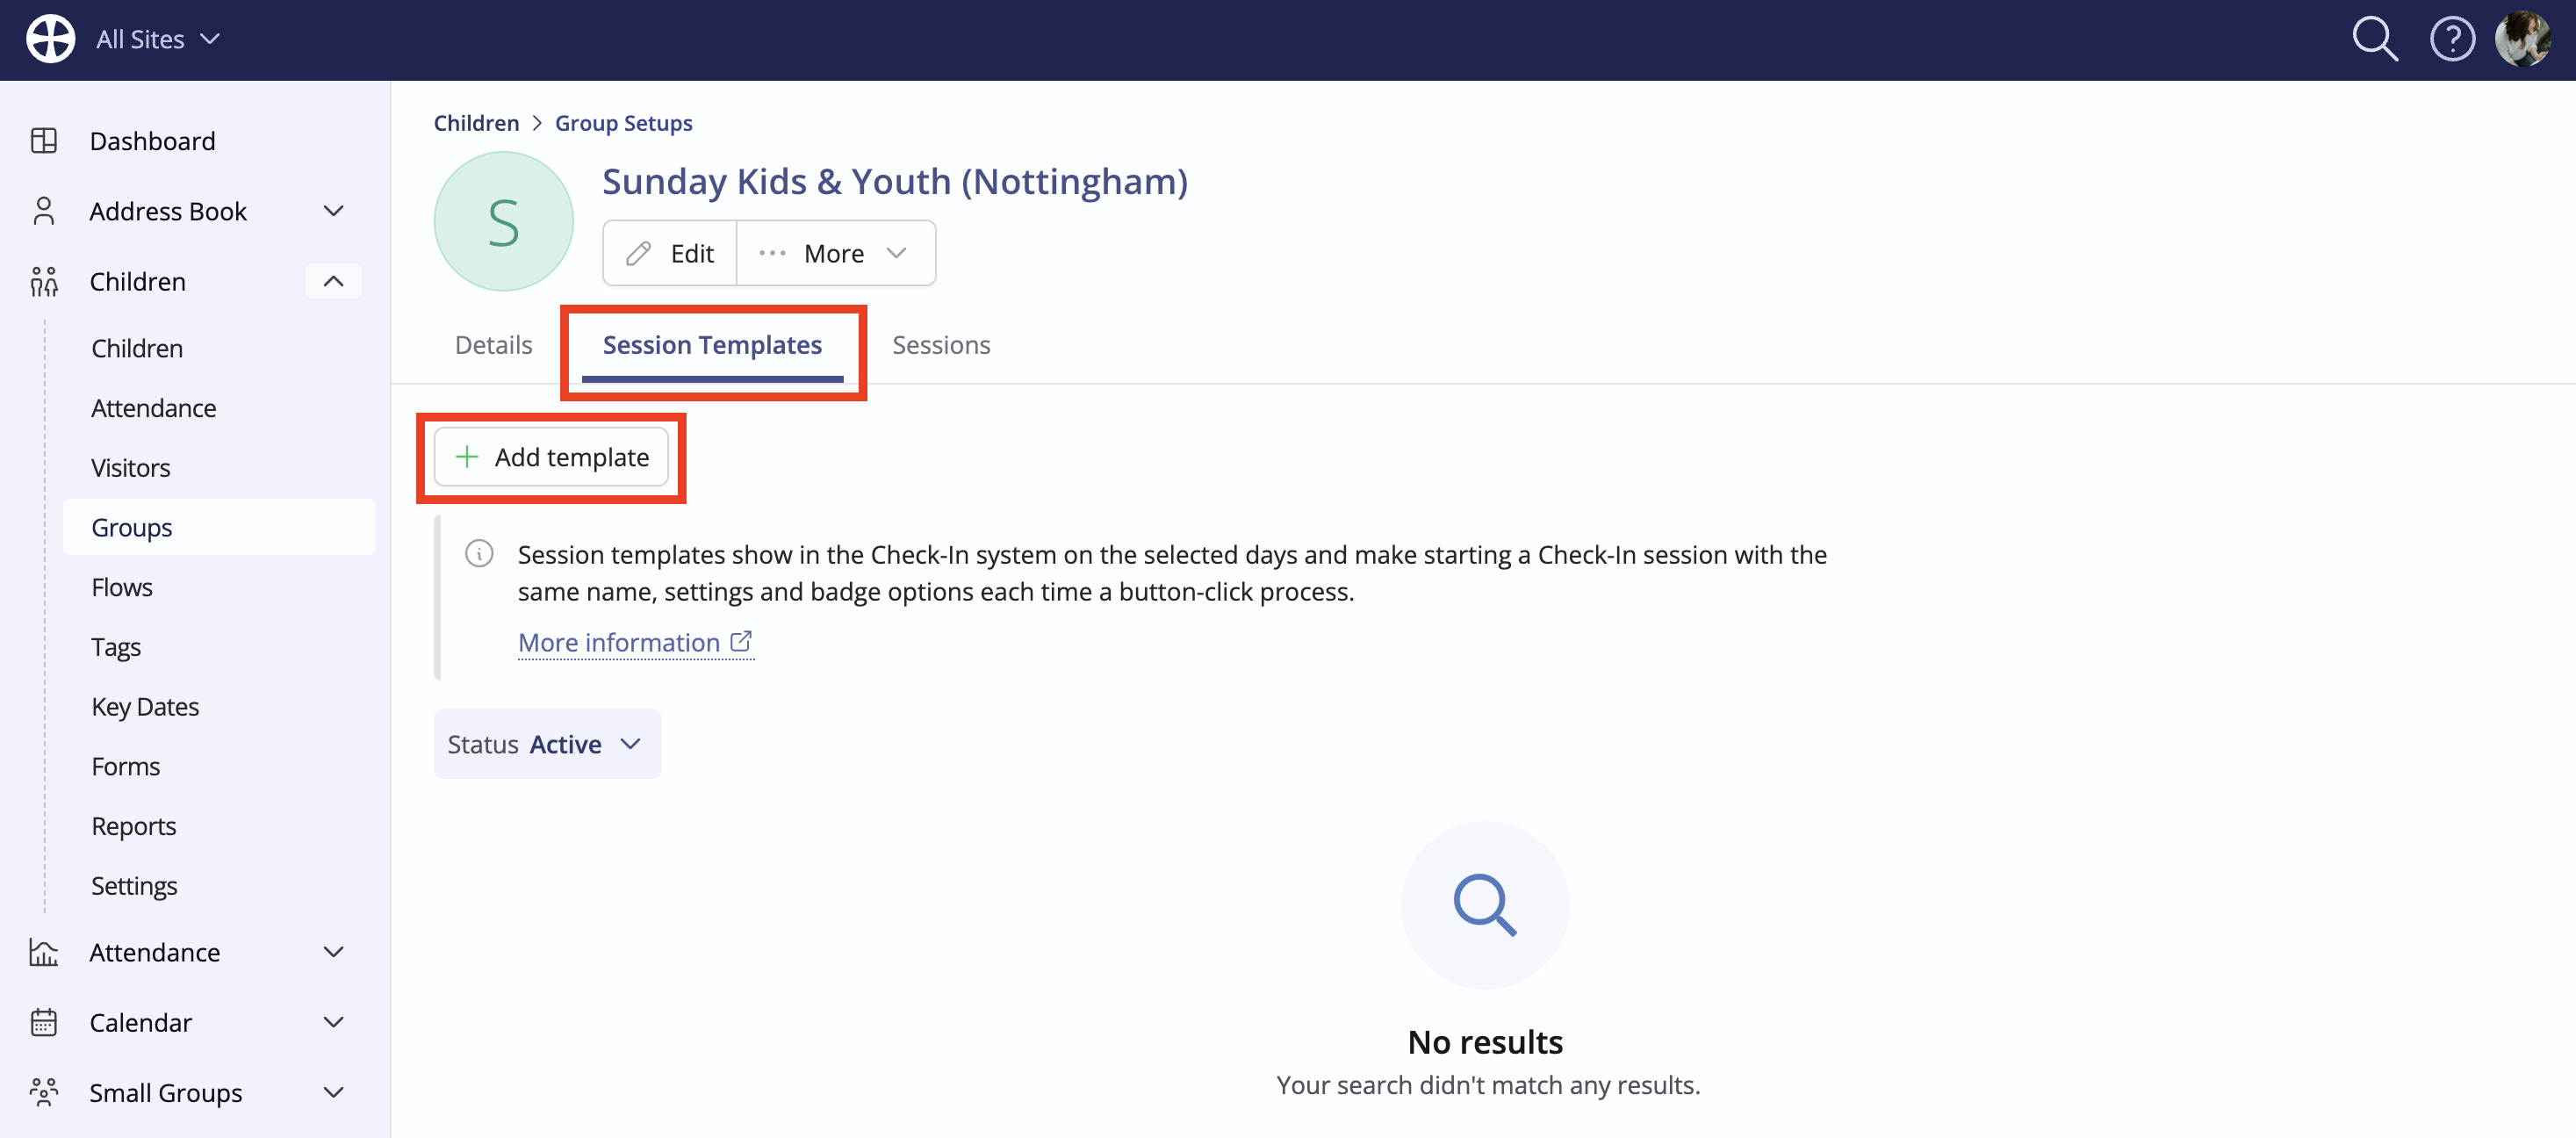
From the Session Templates tab, click Add template:
On the Add template pop-up, give the template a suitable Name. For example, "Friday Youth Club" and "Sunday Kids & Youth". You don't need to include the session date in the naming convention - attendance is dated automatically each time the template is used for a session. Where you use the same Group Setup for different events and services, the template Name should distinguish those other occasions, e.g. "Sunday Kids & Youth 9.30 AM" and "Sunday Kids & Youth 11.30 AM". This will help with attendance reporting, enabling you to track session attendance over time.
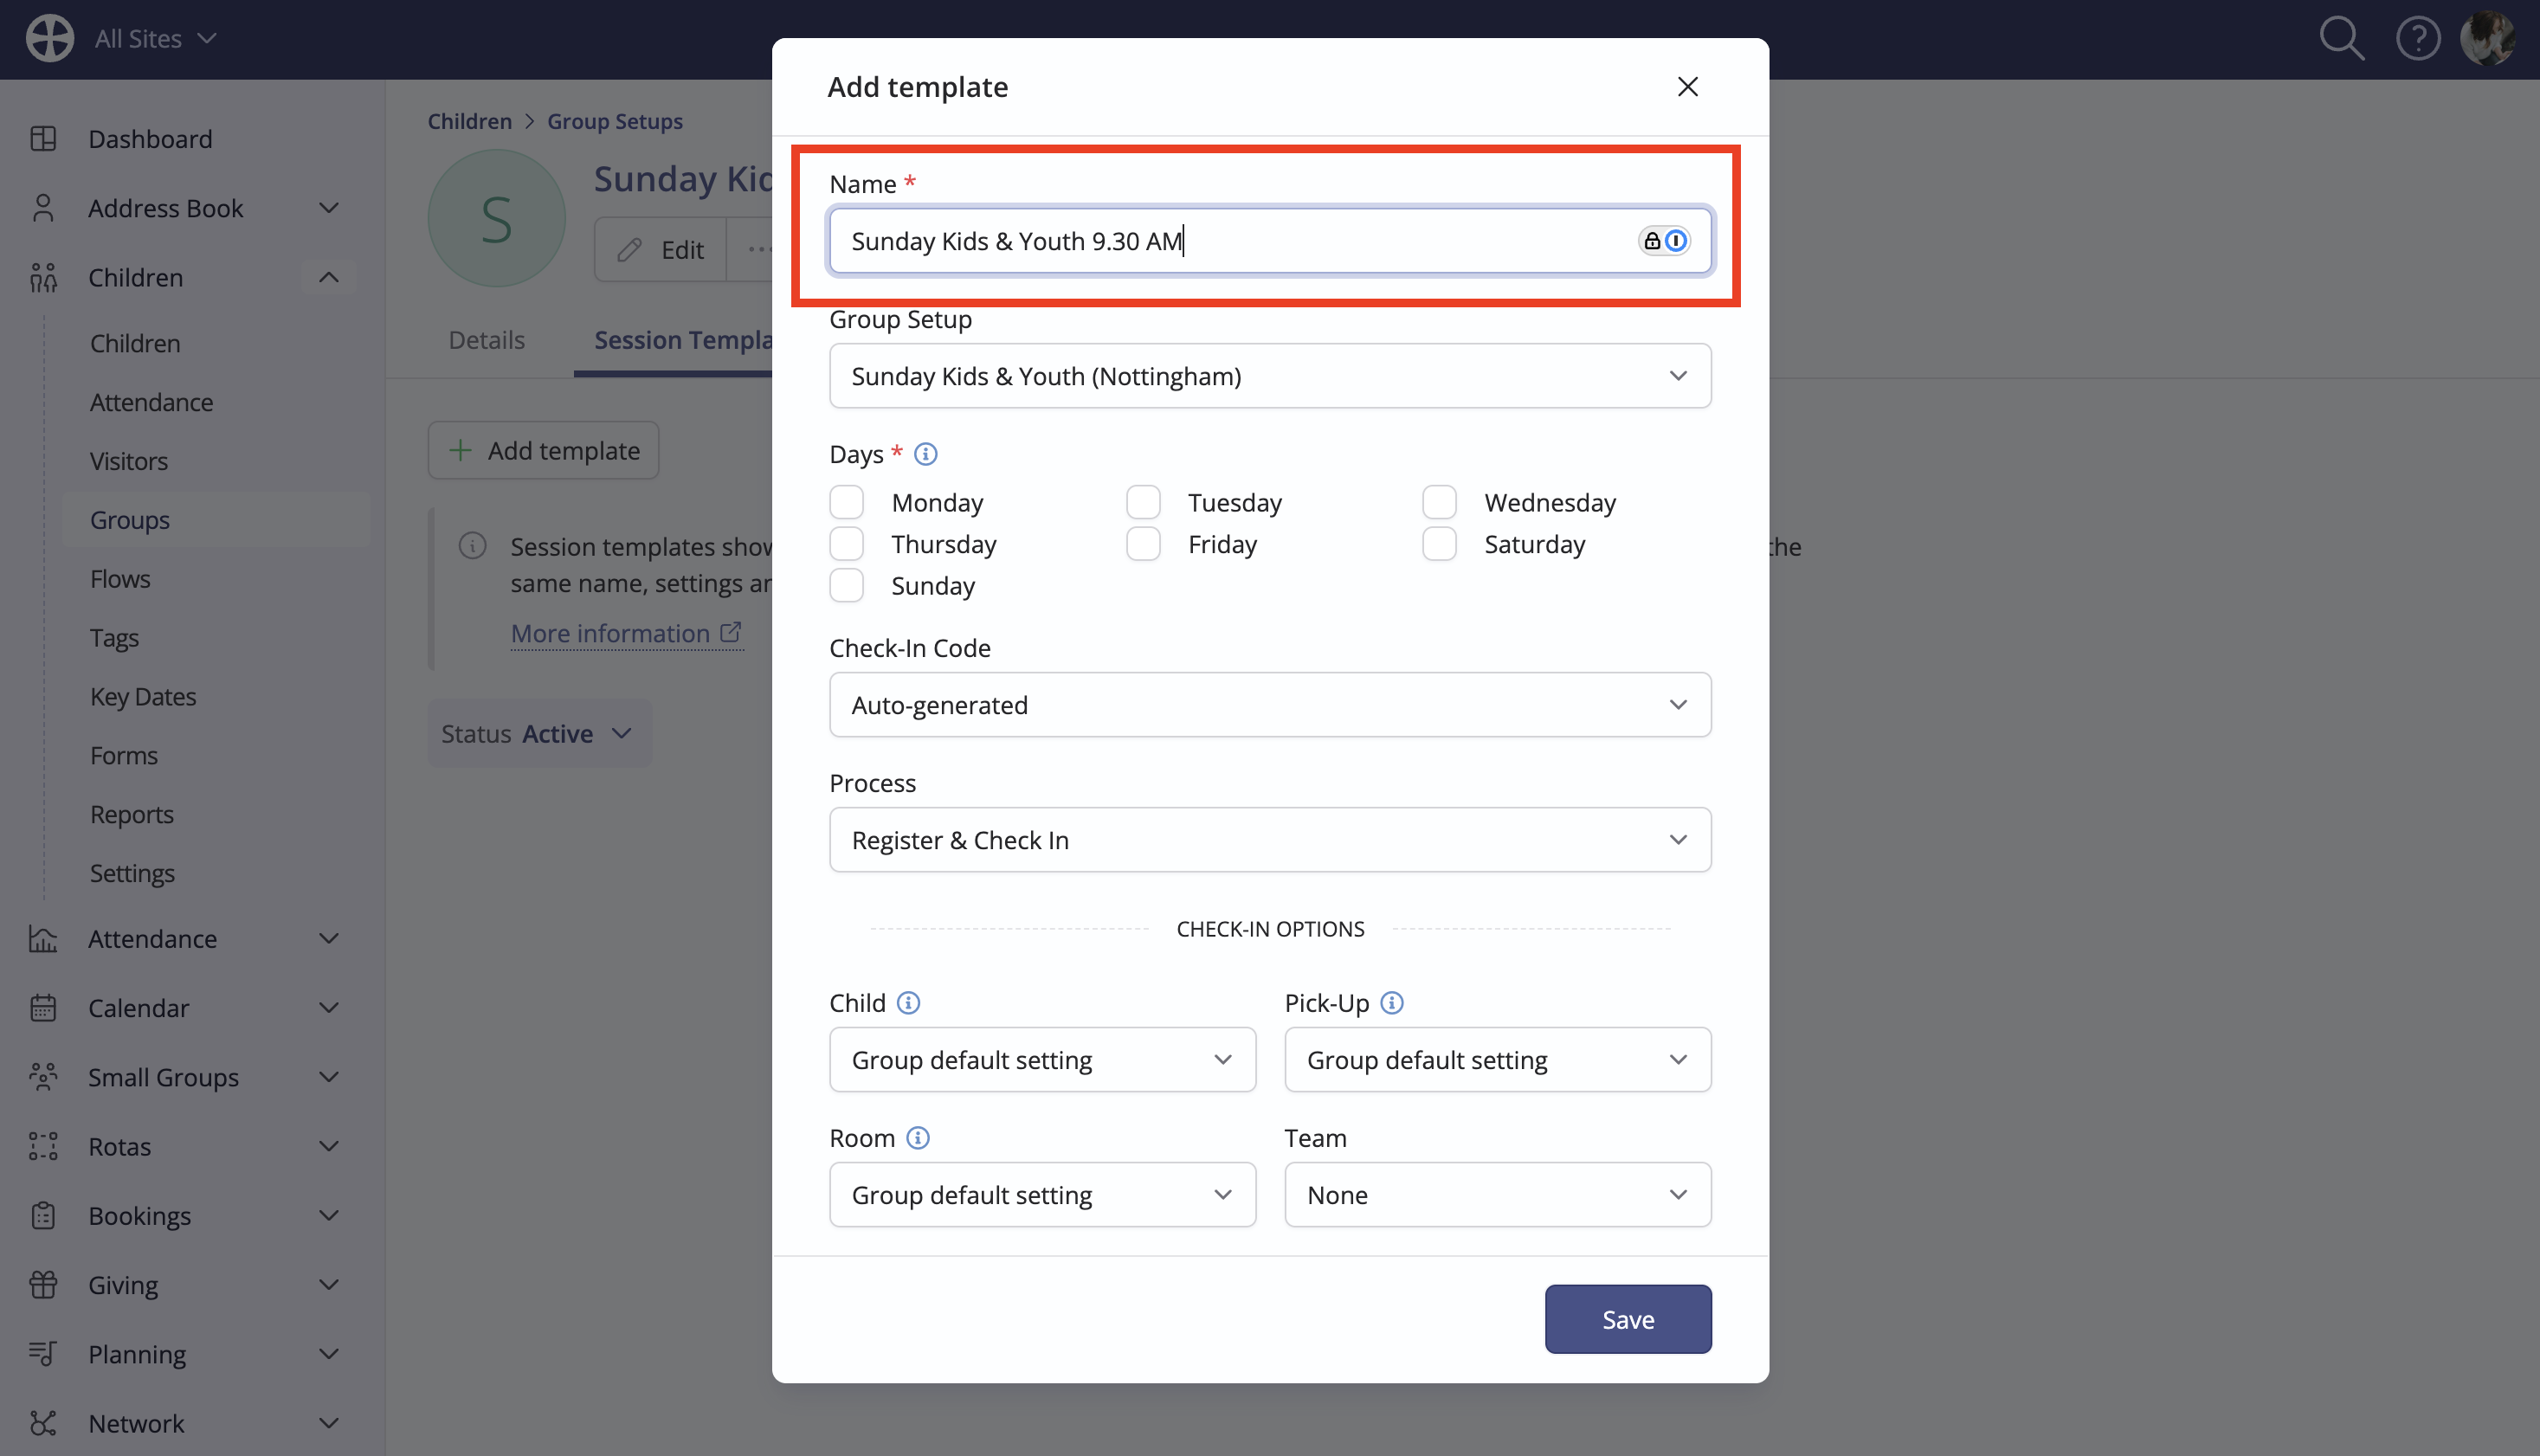
The Group Setup is pre-selected based on the Group Setup being viewed. Select the Days the groups in this Group Setup meet. This might be only Sunday for a weekend service, but the Check-In system can also be used for mid-week events and meetings, such as youth clubs and other mid-week activities. Selecting all the possible days these groups typically meet will ensure the session template is always shown on the appropriate days the Check-In system is being used and not on days when the groups don't meet. For example, a session template for a "Thursday youth club" wouldn't be visible except when the Check-In system is used on a Thursday. This will help your team to select and start the correct session before the children arrive.

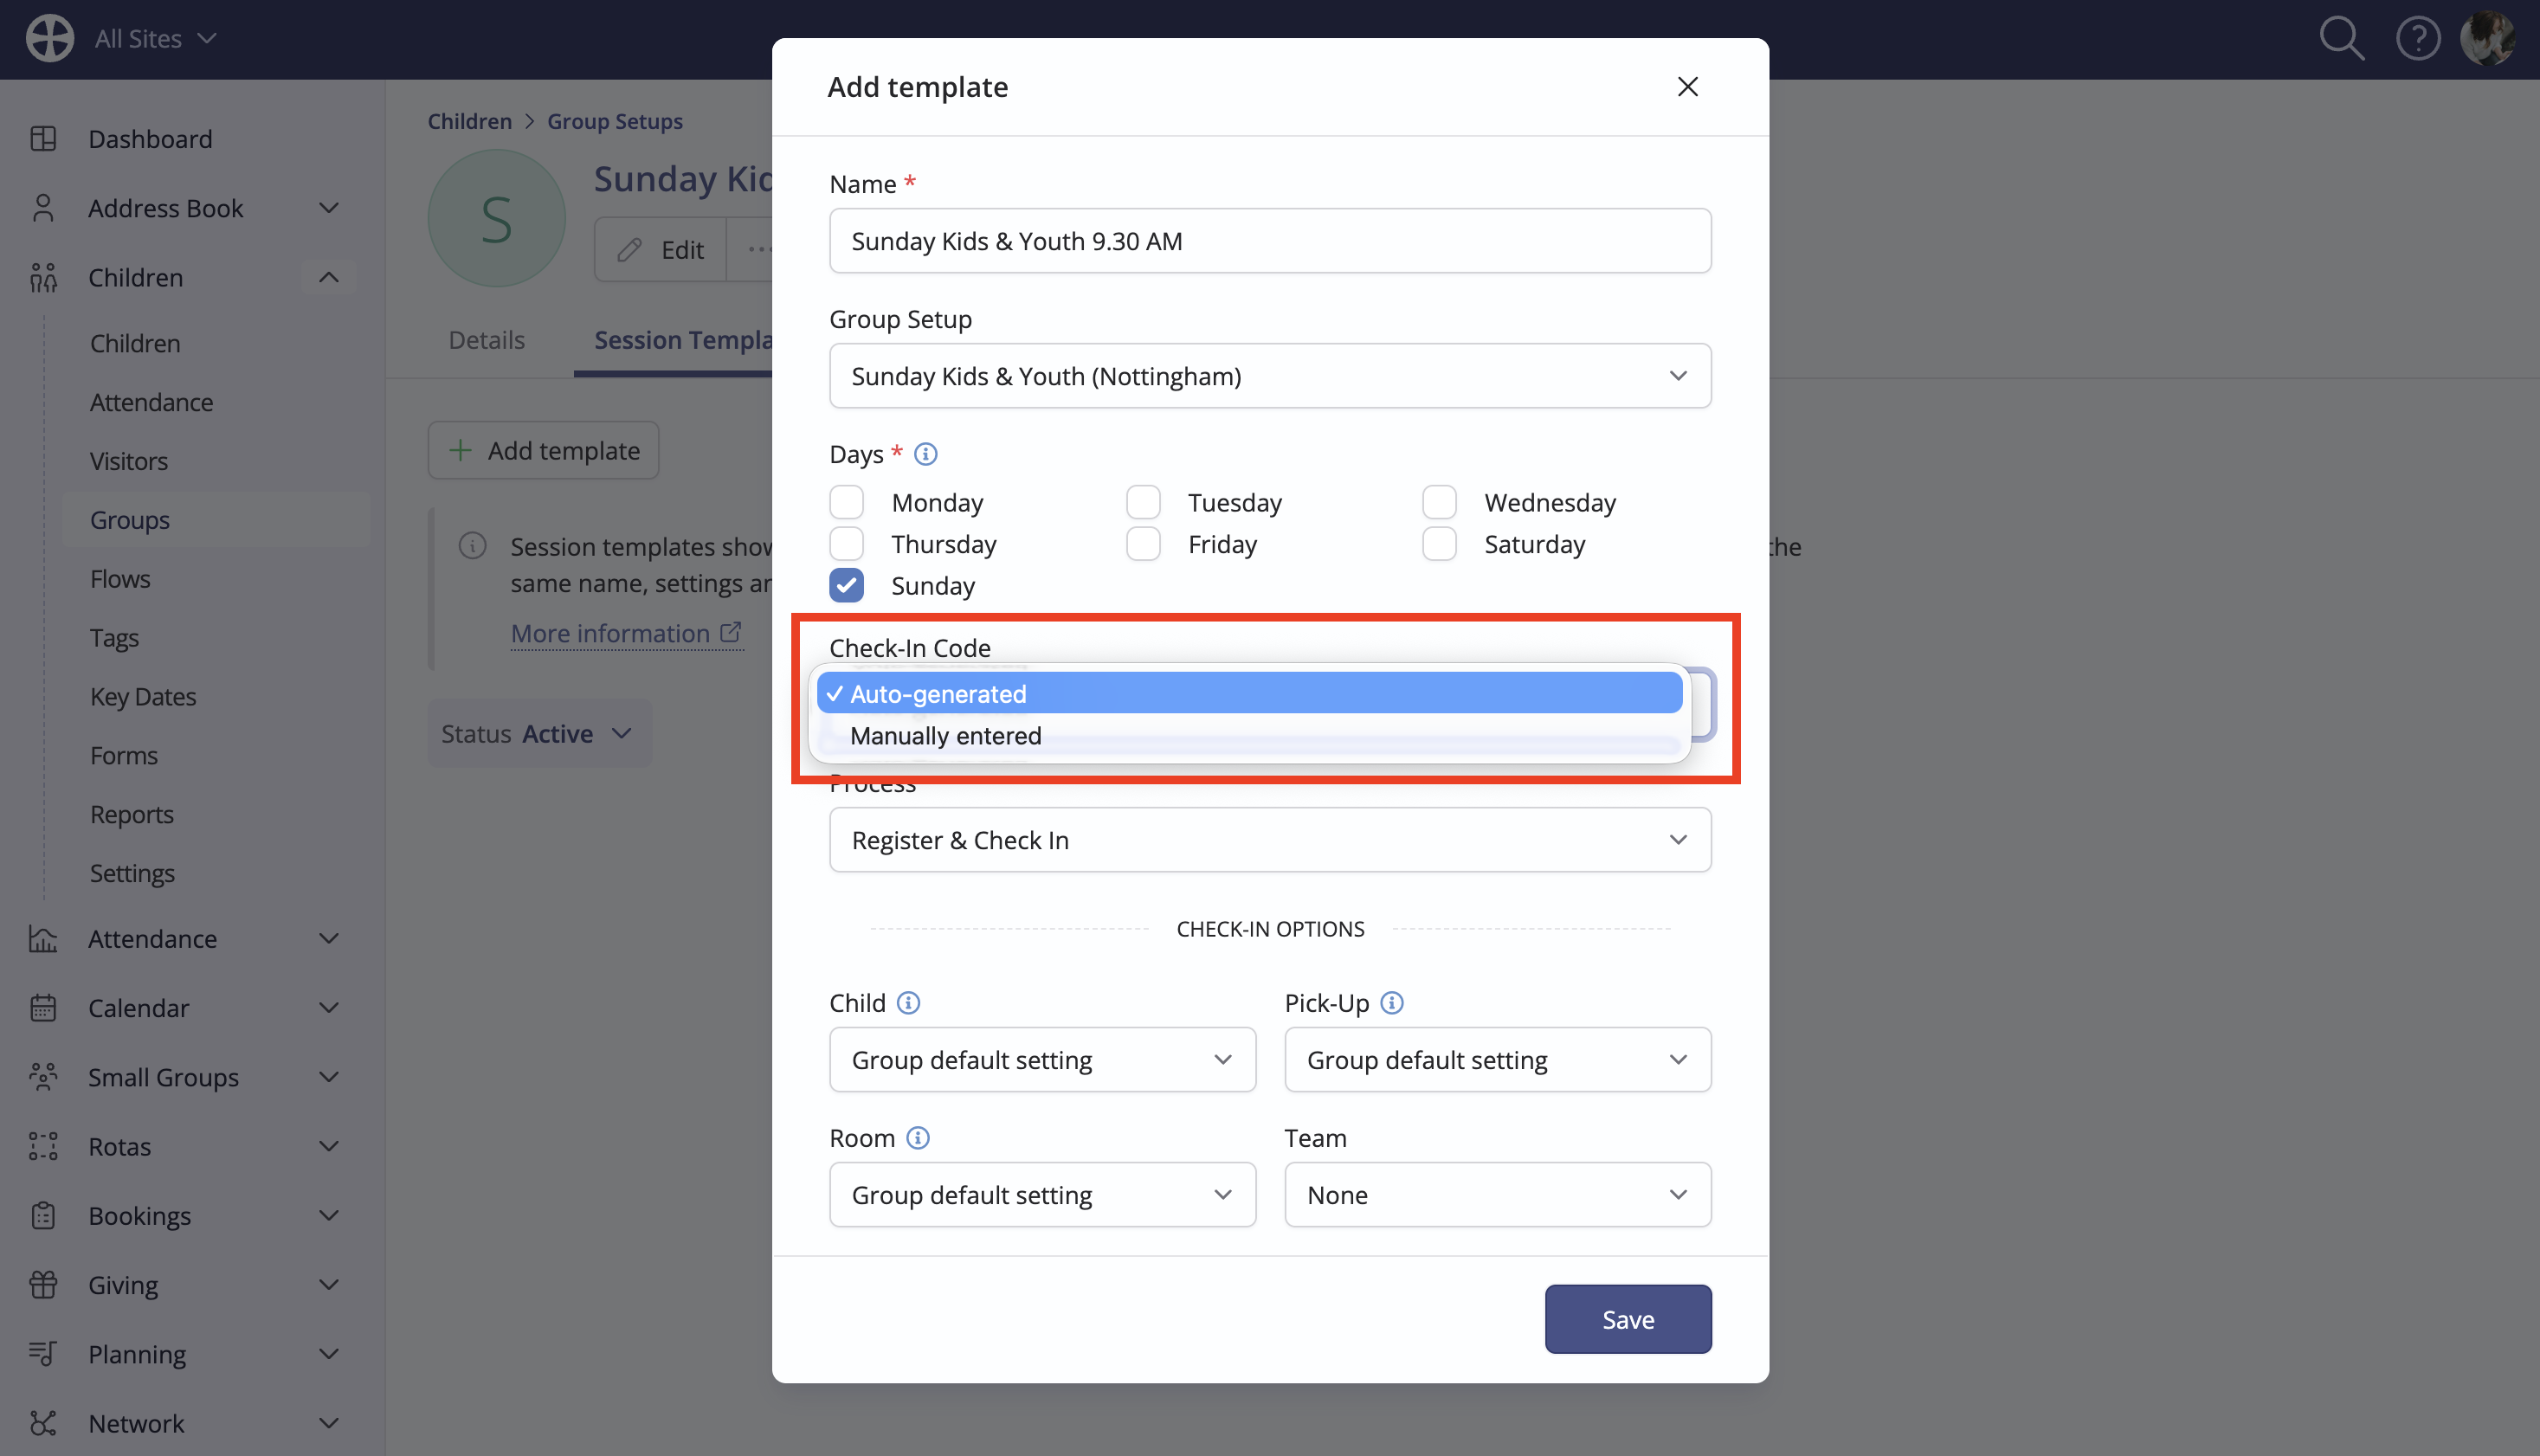
Next, select the Check-In Code to be shown on child and parent/carer pick-up badges. This safeguarding feature shows a unique code for the session on the child and parent/carer pick-up badges. Your team can use this code to ensure each child is being returned to the appropriate responsible person at the end of the session, which is especially helpful for younger children. You can choose between a code that is Auto-generated by the system or one that is Manually entered - perhaps where you have a separate safeguarding numbering system, such as coloured and numbered wristbands that you give to a parent/carer to collect each of their children. When 'Manually entered' is selected, the User experience will require manual entry of a Check-In code to complete the check-in process for each child.
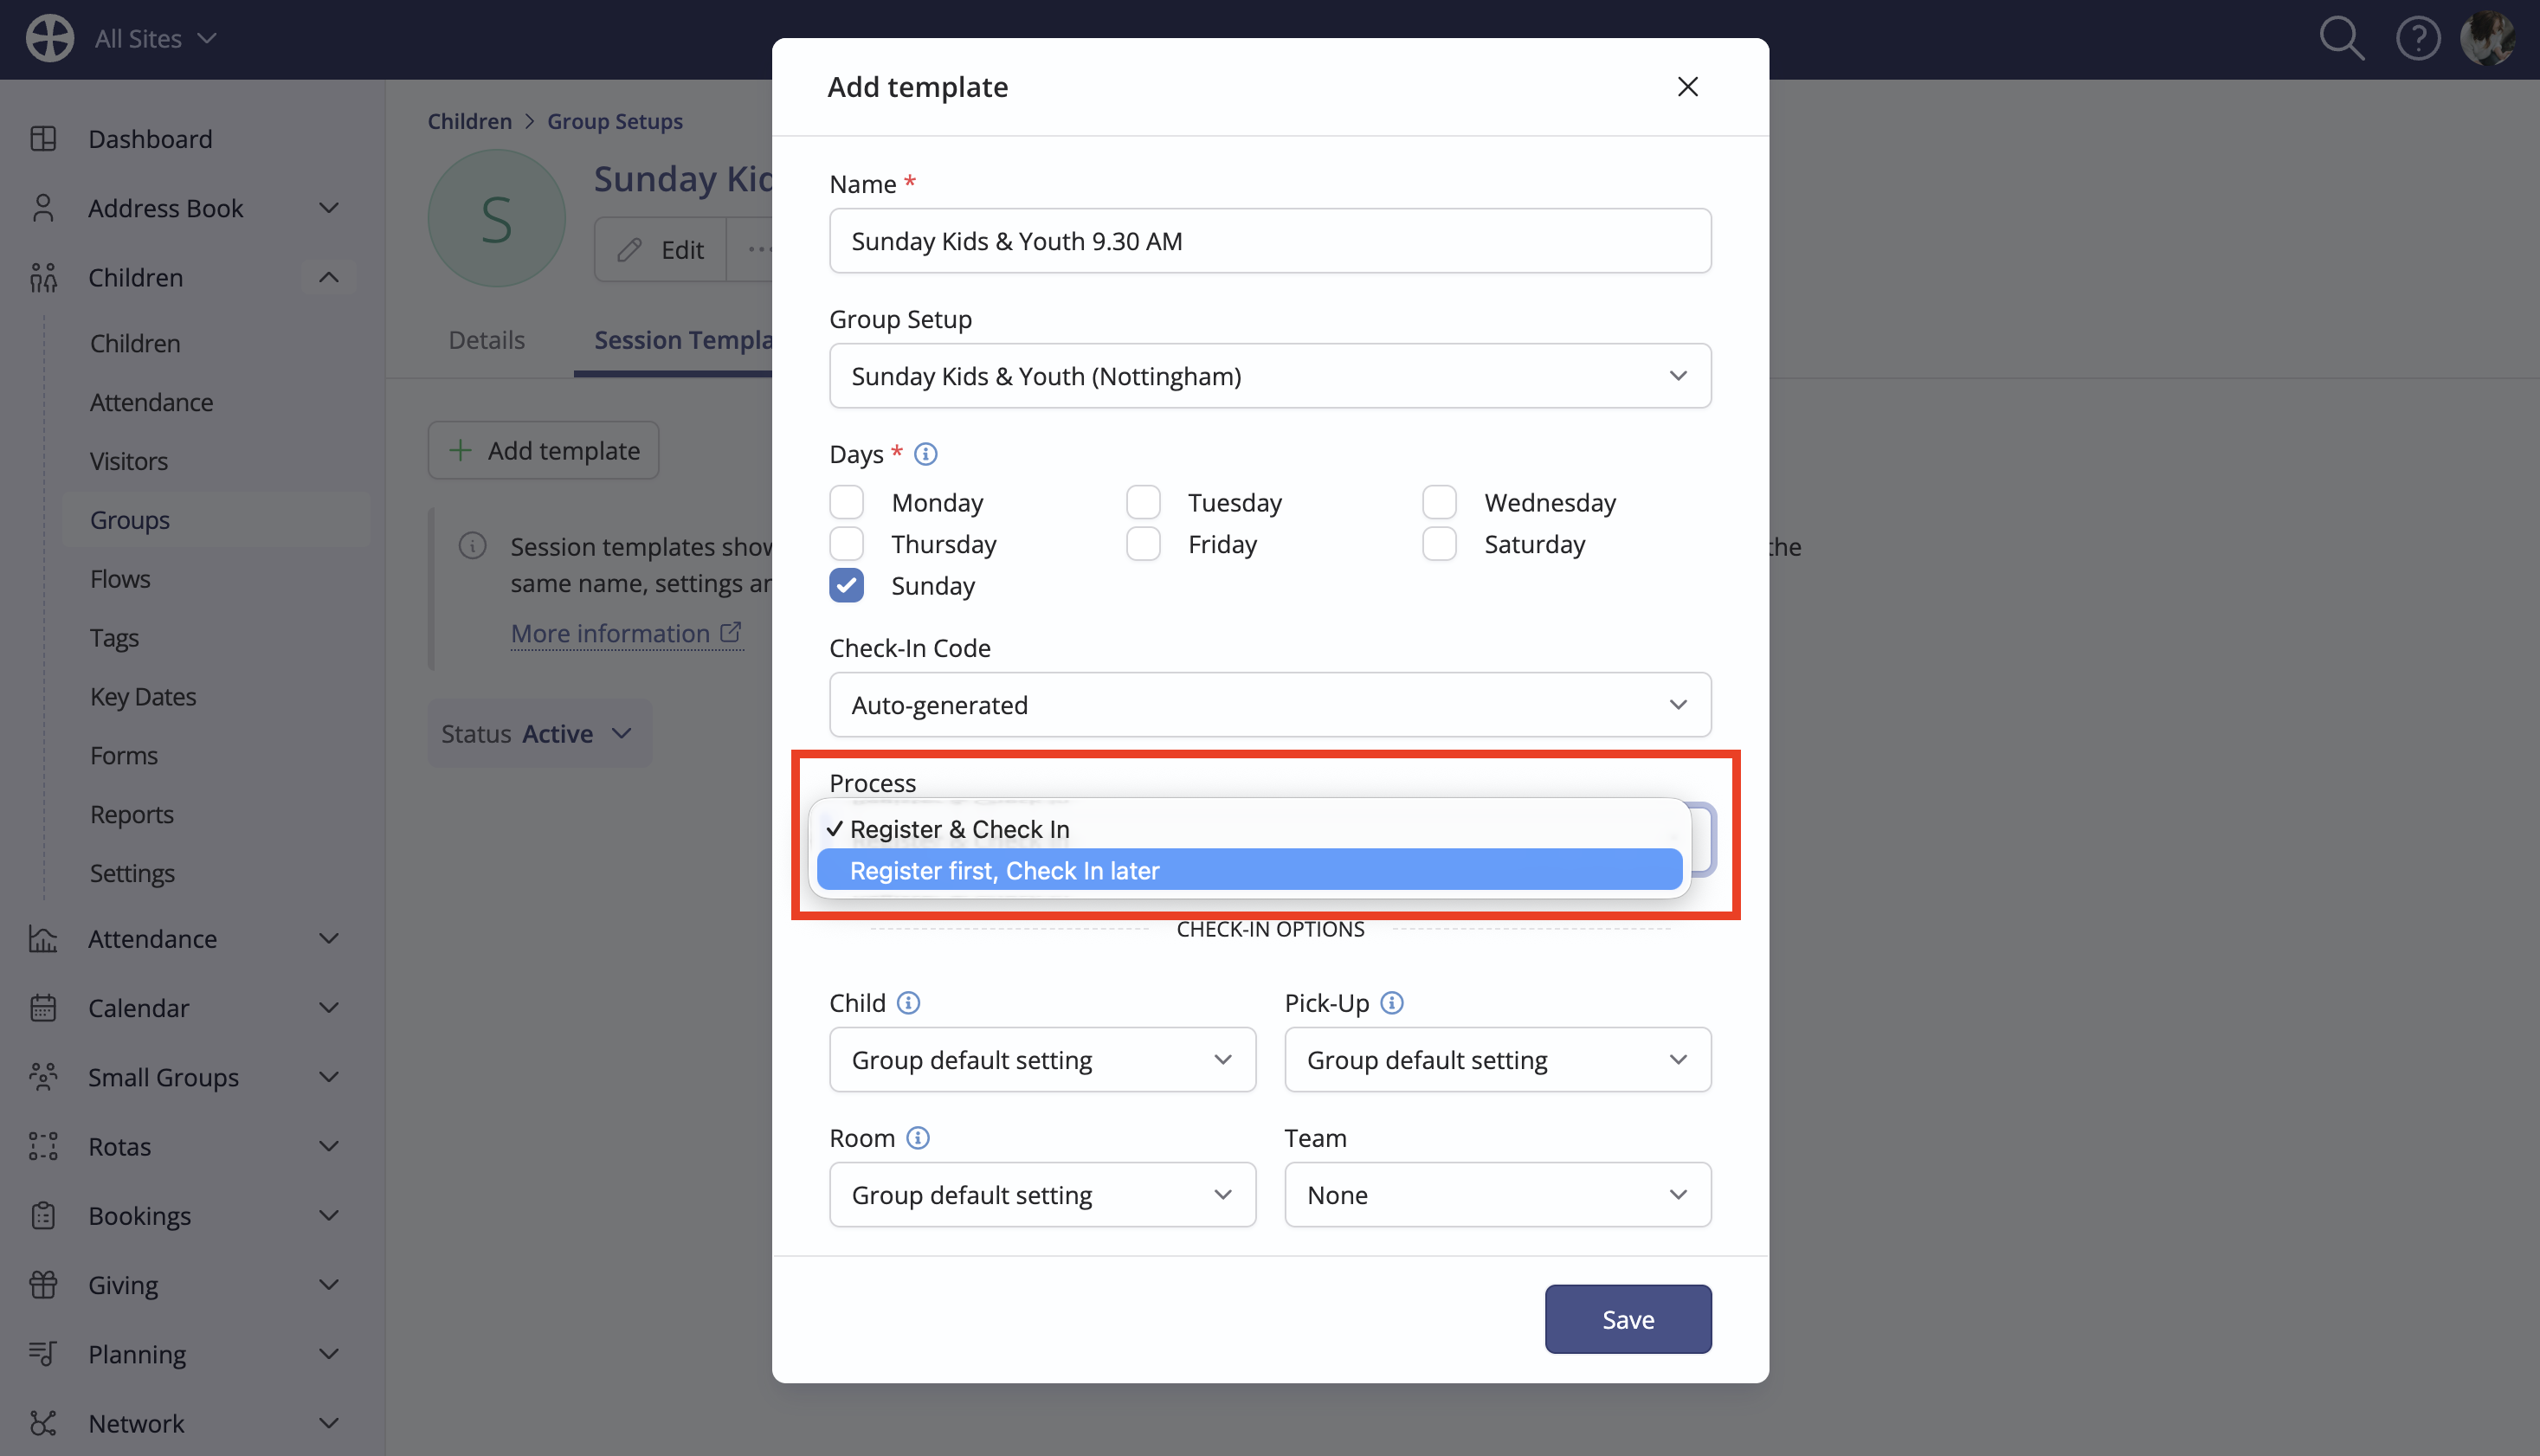
The next template setting controls the Check-In Process:
- Register & Check In—This is a one-stage process in which badges are produced, and the child is immediately checked in and recorded as being in attendance. This option applies where children are immediately handed over to your care as soon as they are registered and their badges are produced.
- Register First, Check In Later—This is a two-stage process in which badges are produced, but no check-in attendance is recorded until the child is checked in later in the meeting, which can be done from the Check-In "Admin Area." This option applies where children remain with their parents/carers after registration and are handed over to your care later in the meeting.
In both processes, you always have an up-to-date safeguarding register for the session of children that are registered, those who are checked in as 'in your care' and those who have been checked out and returned to parents/carers.
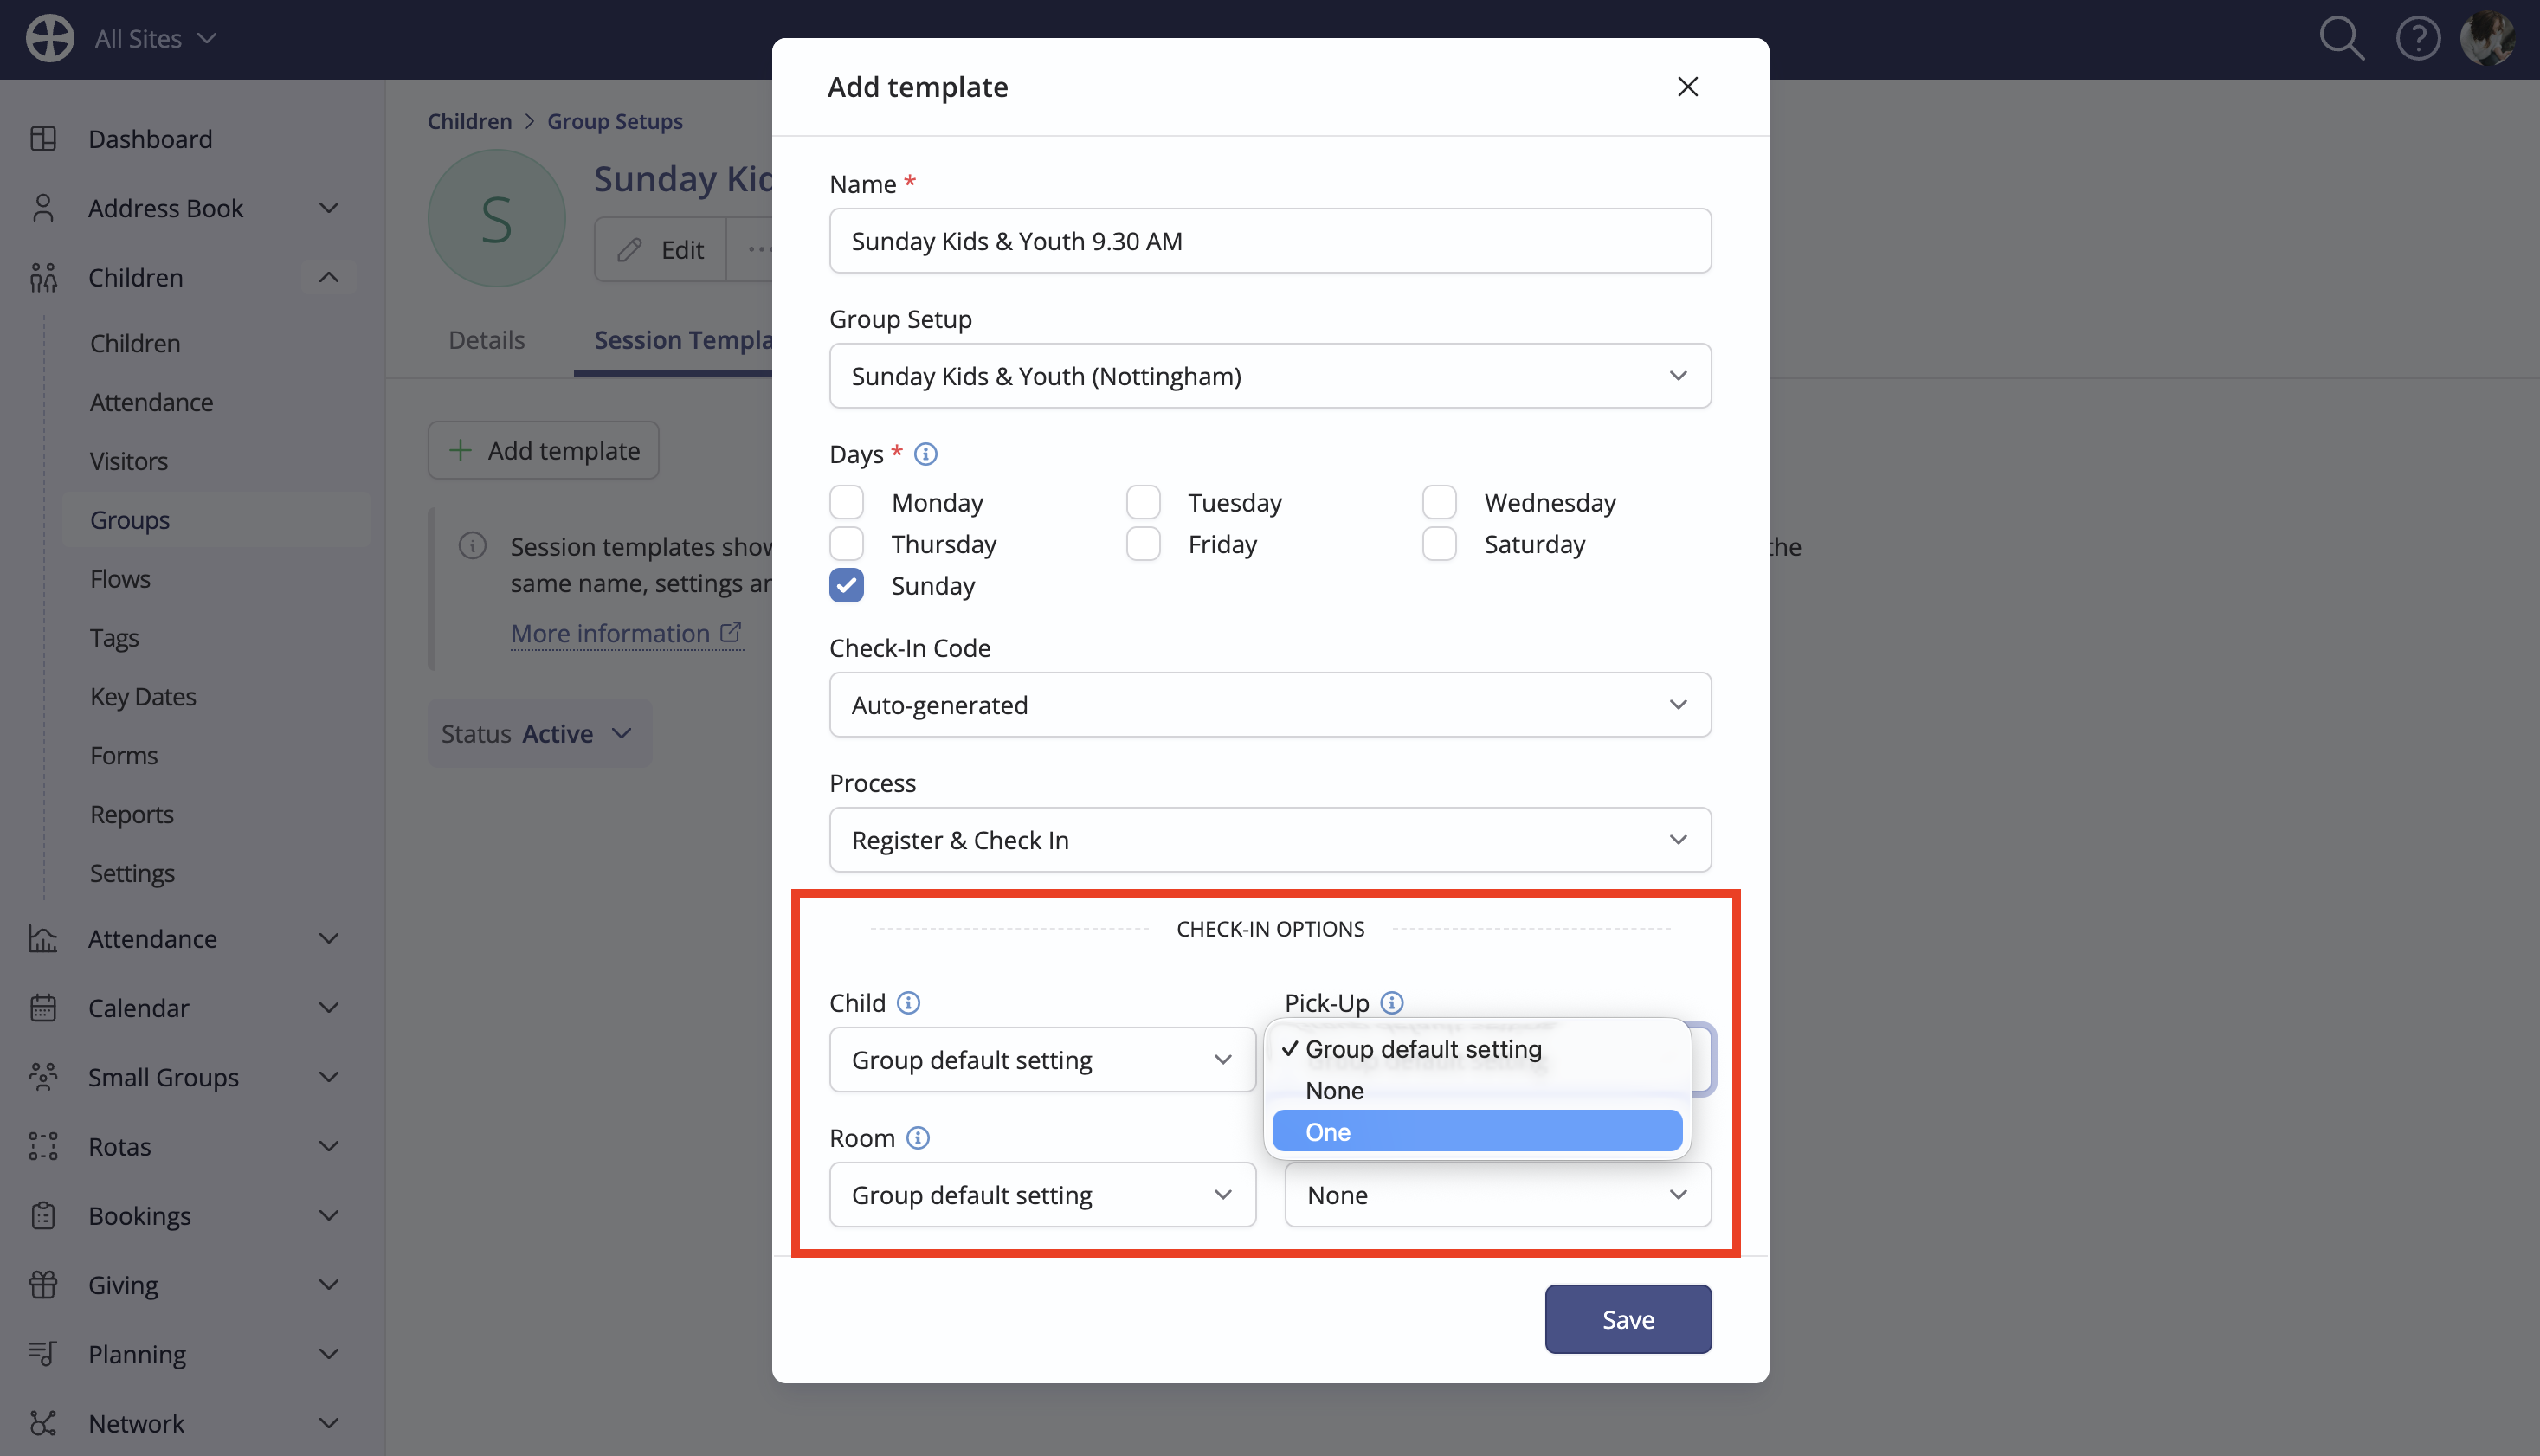
Finally, the Check-In Options determine how many of each type of badge are to be printed, which means you can set different badge-printing options for different sessions. The print quantity of each badge type is set on a group-by-group basis (see the related support article on Group setup, groups and sessions). While a session template can use that Group default setting, you can also set a fixed number of badges of each type that will always print for all groups in the Group Setup, where the template is used to start a session or choose "None" if no badge printing is needed for the session.
Click Save to add the session template. Further templates for the same group setup can be added as appropriate. Note the option to Edit the template, and More actions to Duplicate (perhaps to duplicate the template for another similar group setup), Archive and Delete. You can archive templates that are no longer in use and later set them active again if needed - only Active templates are shown in the Check-In system - and switch between viewing Active and Archived session templates. Archived templates are not shown in the Check-In system. Archiving and Deleting session templates has no impact on historically recorded attendance or children's data.
With session templates added, you are ready to begin using them with the Check-In system to Start a session from a template - see the related support articles on Running a Check-In session. Don't forget to download the iOS or Android Check-In app!
