Integrating with SAML2 Single Sign-On
Customers using SAML 2.0-enabled versions of Microsoft Entra ID and Google Workspace can provide their ChurchSuite and CharitySuite users with a Single Sign-On (SSO) experience, allowing them to access the system using their existing Entra ID or Google credentials. Email support@churchsuite.com to request that the SAML2 integration be enabled on your ChurchSuite or CharitySuite account, and then follow the instructions in this article to complete the integration process.
In this article
Introduction and intended functionality
Beginning the SAML2 integration
Using the Microsoft Entra ID service
Using the Google service
Enabling SSO for users
Introduction and intended functionality
Organisations using SAML2-enabled versions of Microsoft Entra ID and Google Workspace can provide their ChurchSuite and CharitySuite users with a secure Single Sign-On (SSO) experience, allowing them to log into the system using their existing Entra ID or Google credentials.
Changes made to SAML2 service user permissions do not apply to ChurchSuite/CharitySuite. Your ChurchSuite/CharitySuite account has its own administrator-managed user permissions for modules and sites, which are managed on a user-by-user basis within the system. Similarly, the distinction between Administrators and Users in ChurchSuite/CharitySuite is unrelated to the level of service user permissions set within Microsoft Entra ID or Google Workspace. However, when a service user's access is revoked in a SAML 2 service, that SSO-enabled user will no longer be able to access ChurchSuite/CharitySuite; nevertheless, you may want to archive (or, with caution, delete) their user profile as a separate task. See our related support article on Adding and managing users for further information.
When SAML2 SSO is enabled for a ChurchSuite/CharitySuite user, their username and password are disabled to prevent use. Additionally, the ChurchSuite/CharitySuite password change/reset workflows and multi-factor authentication are disabled and bypassed for that user. An SSO-enabled user is also prevented from changing their ChurchSuite user email address.
SAML2 SSO can only be disabled in ChurchSuite/CharitySuite by an Administrator. Resetting the SAML2 integration will disable SSO for all users. When SAML2 SSO is disabled, a user's previous ChurchSuite/CharitySuite username and password are reactivated. A password reset request can be sent to encourage users to secure their user account with a new password and enable multi-factor authentication.
Beginning the SAML2 integration
Completion of the SAML2 integration assumes familiarity with the advanced configuration settings of your SAML2 service.
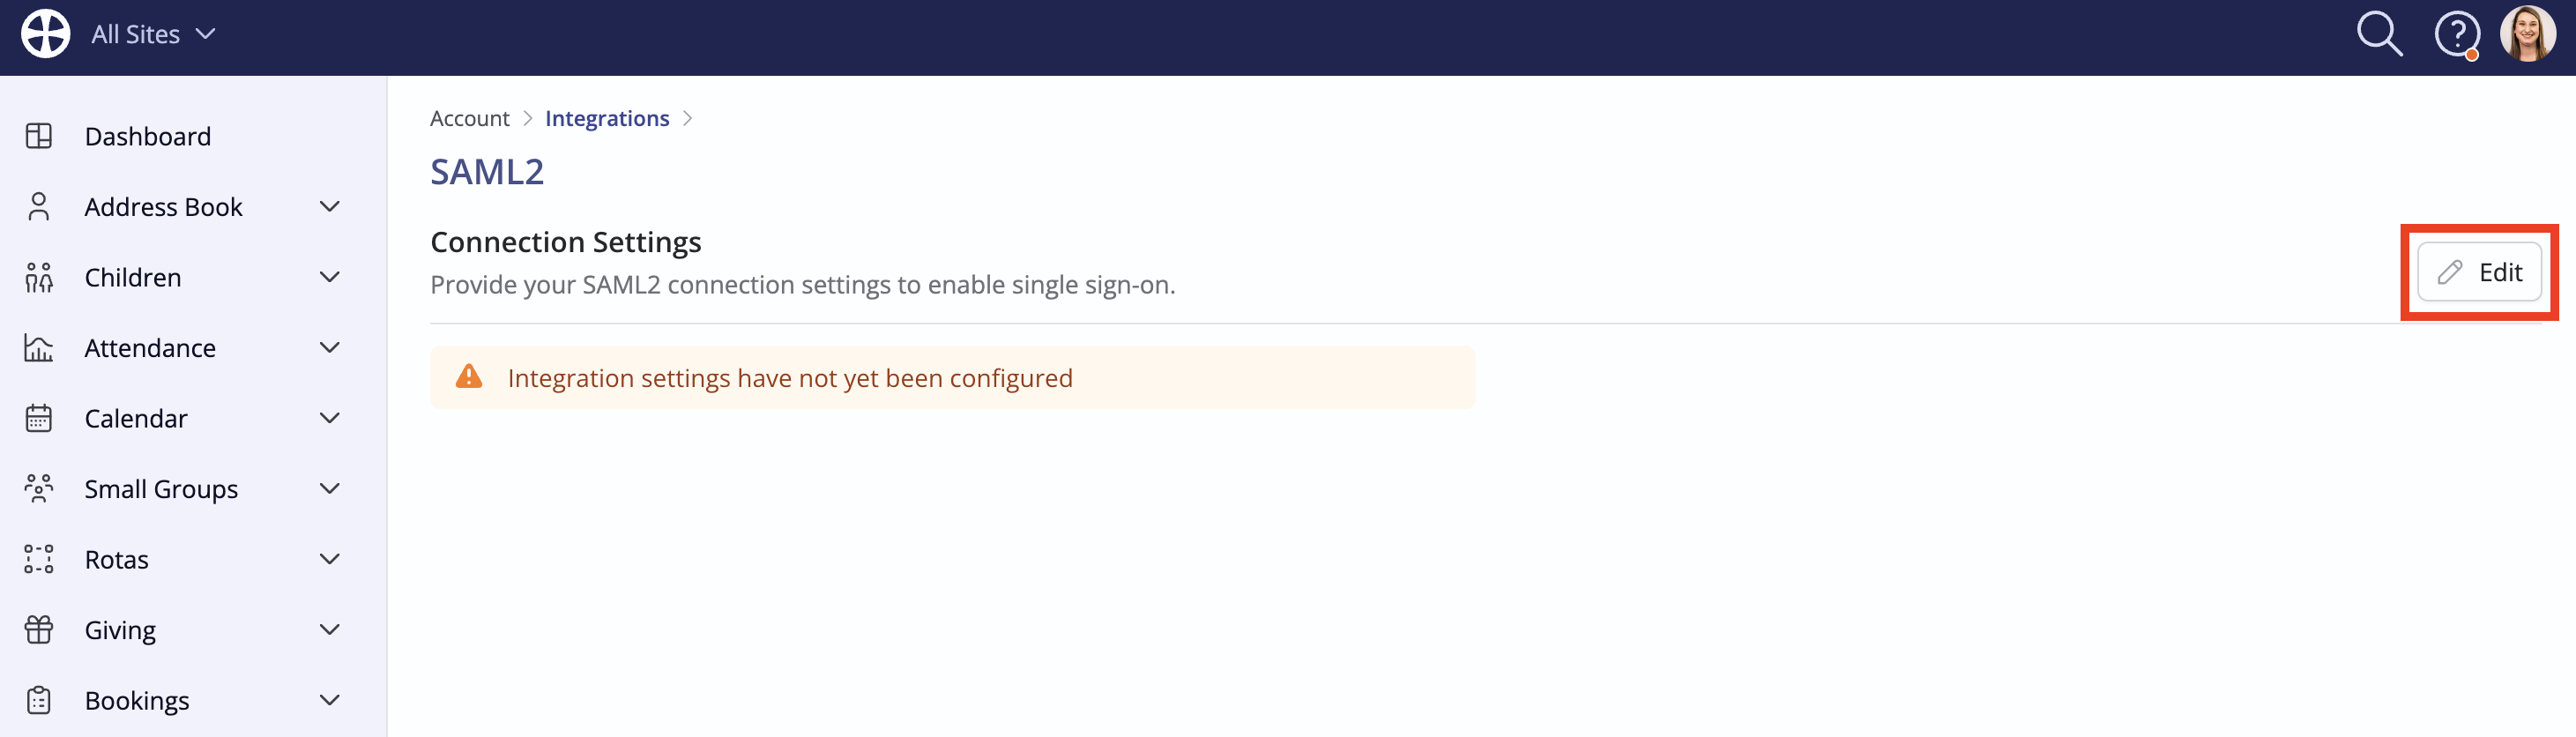
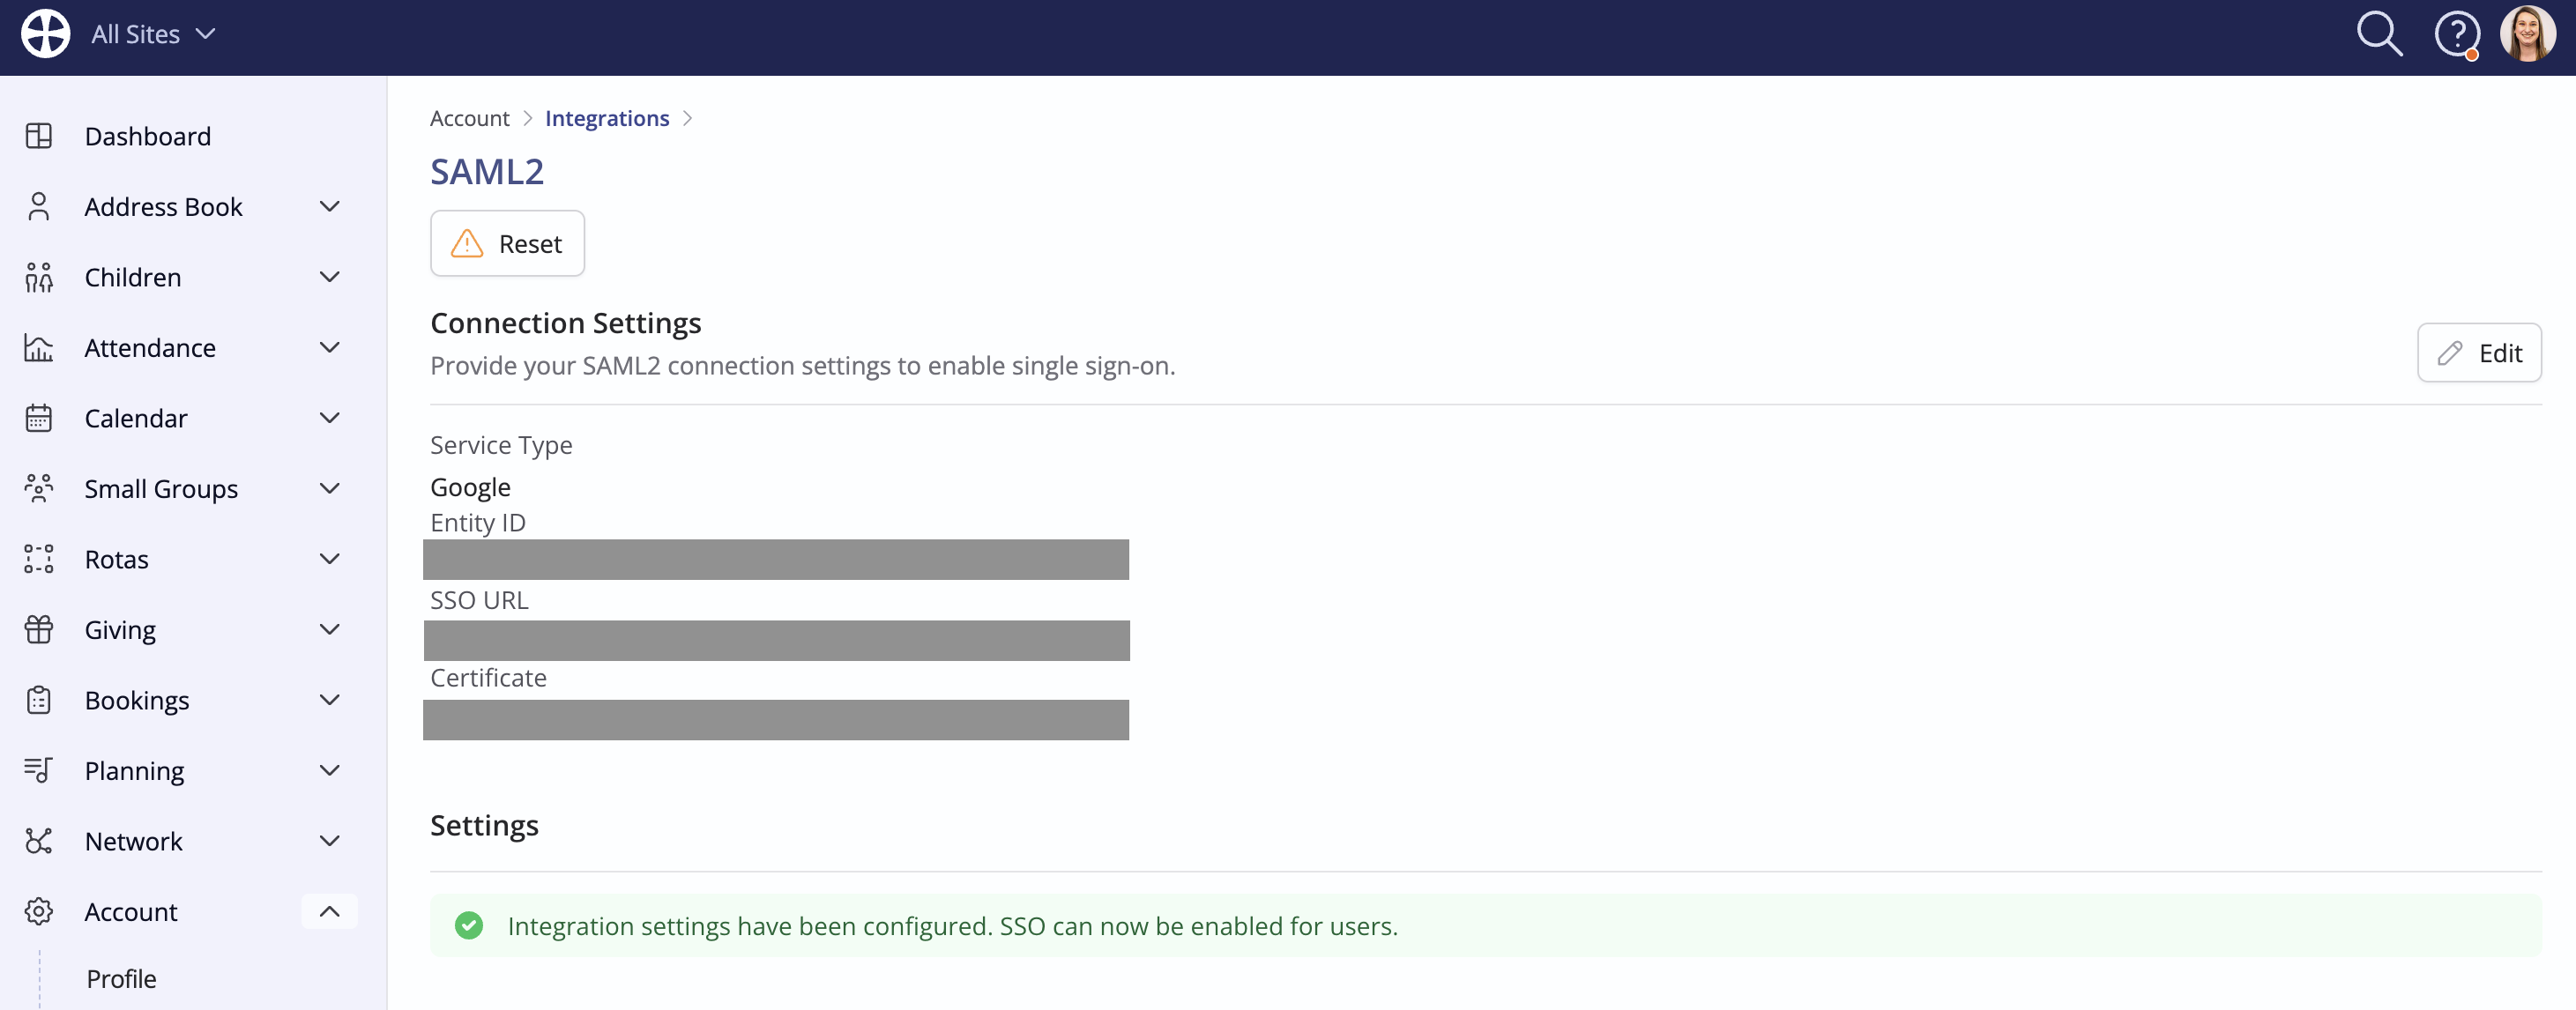
From the Integrations section of your Account area, click SAML2:

Click Edit.
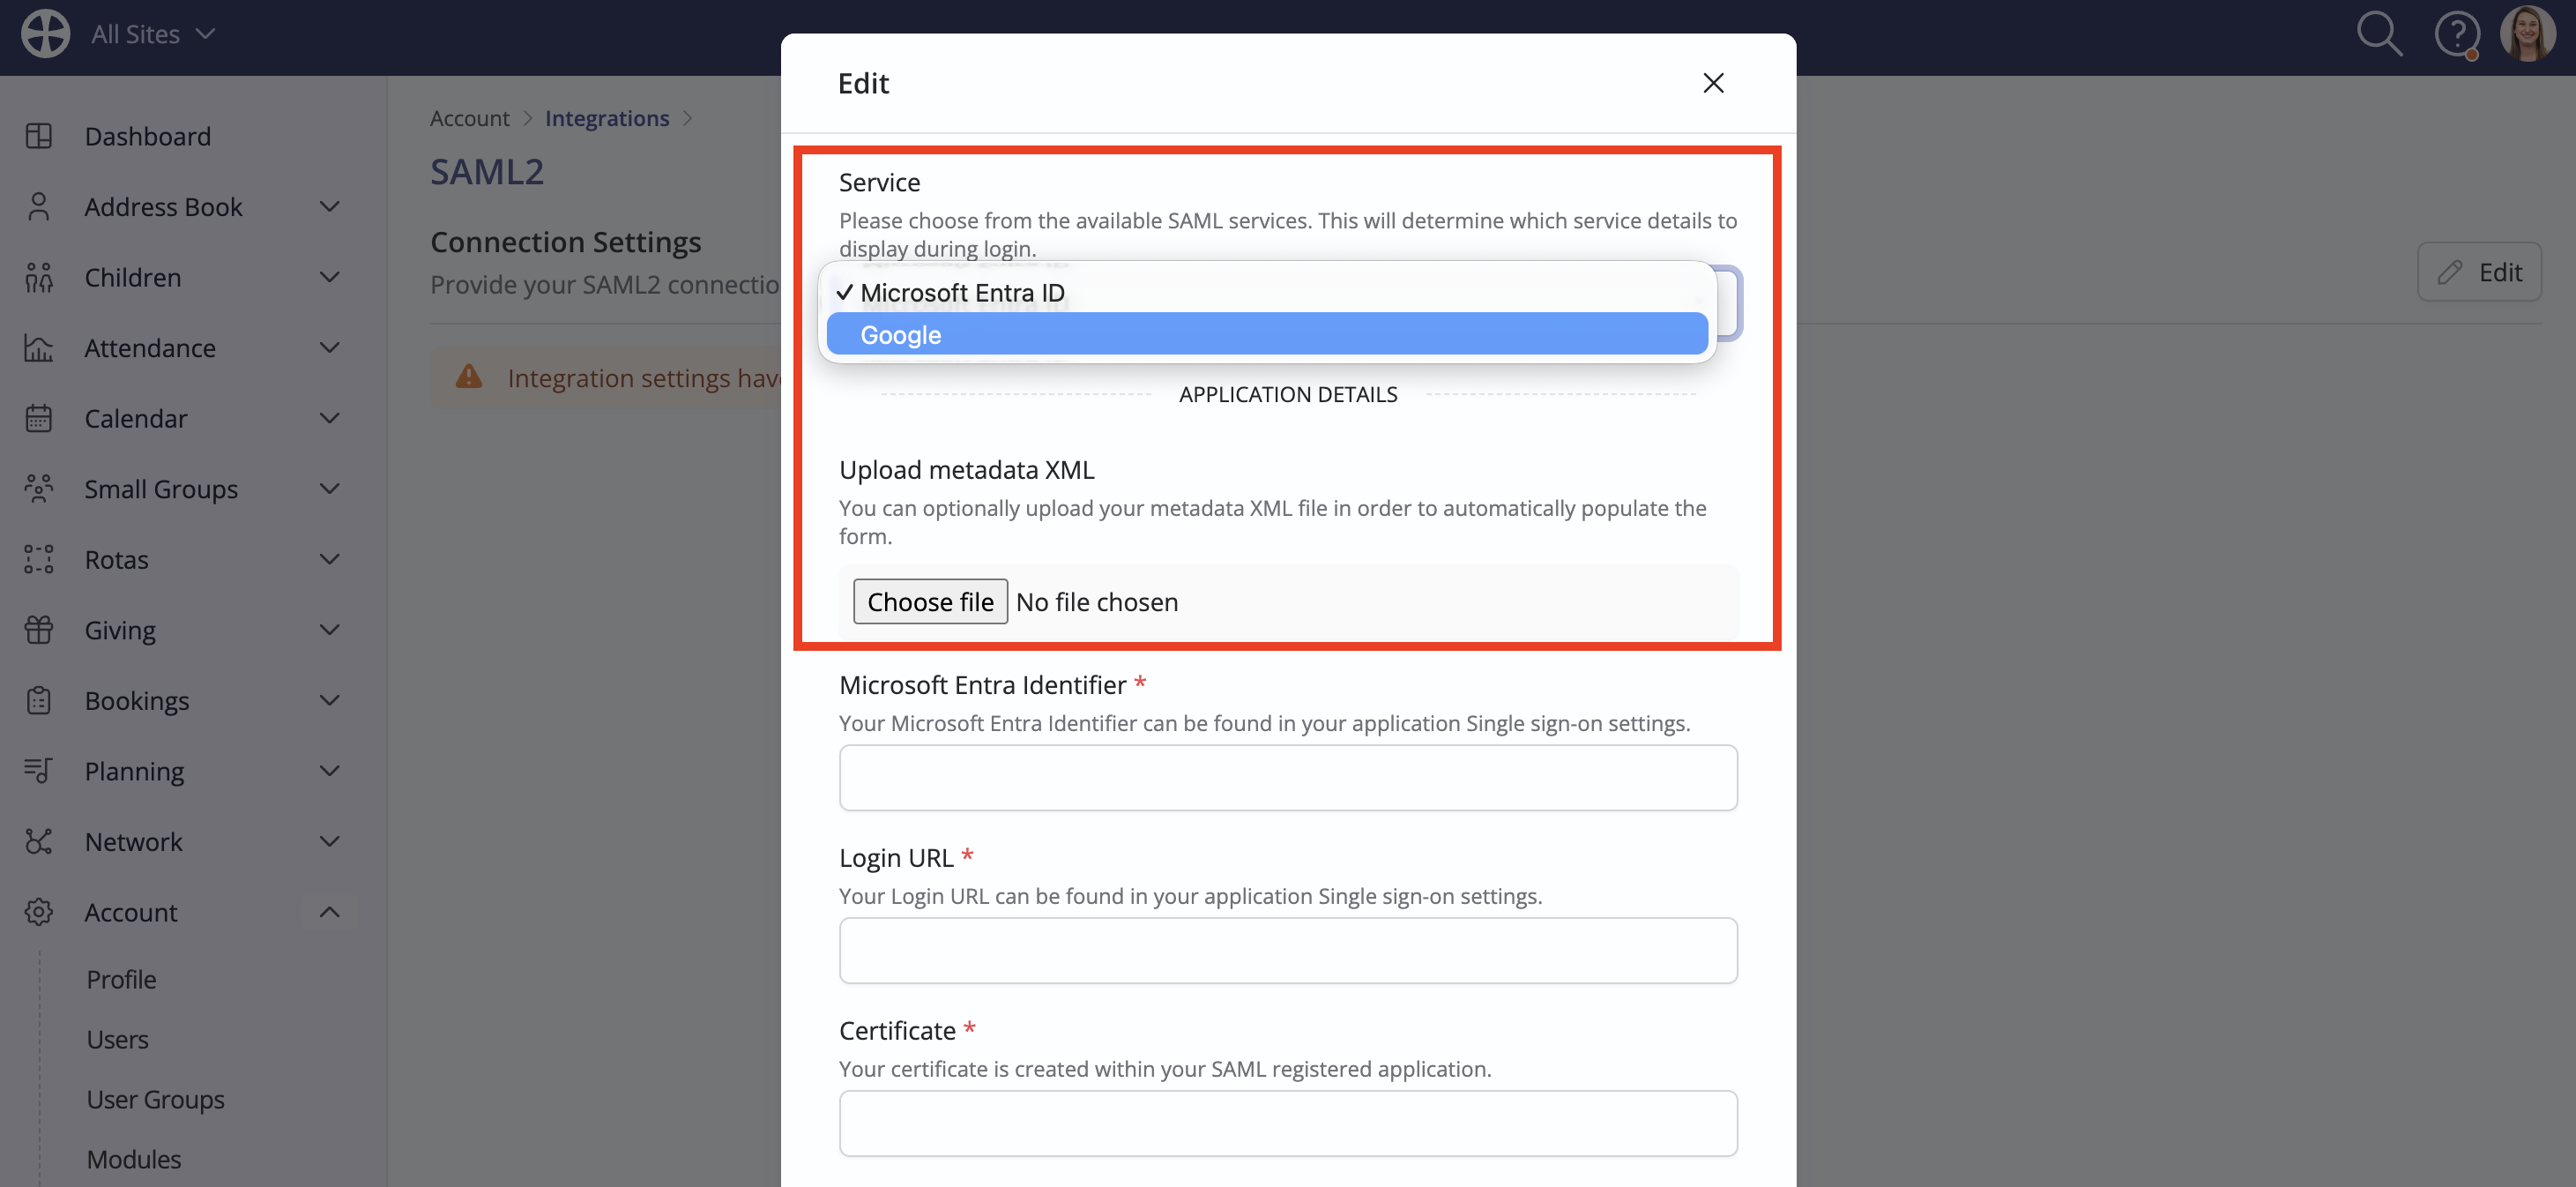
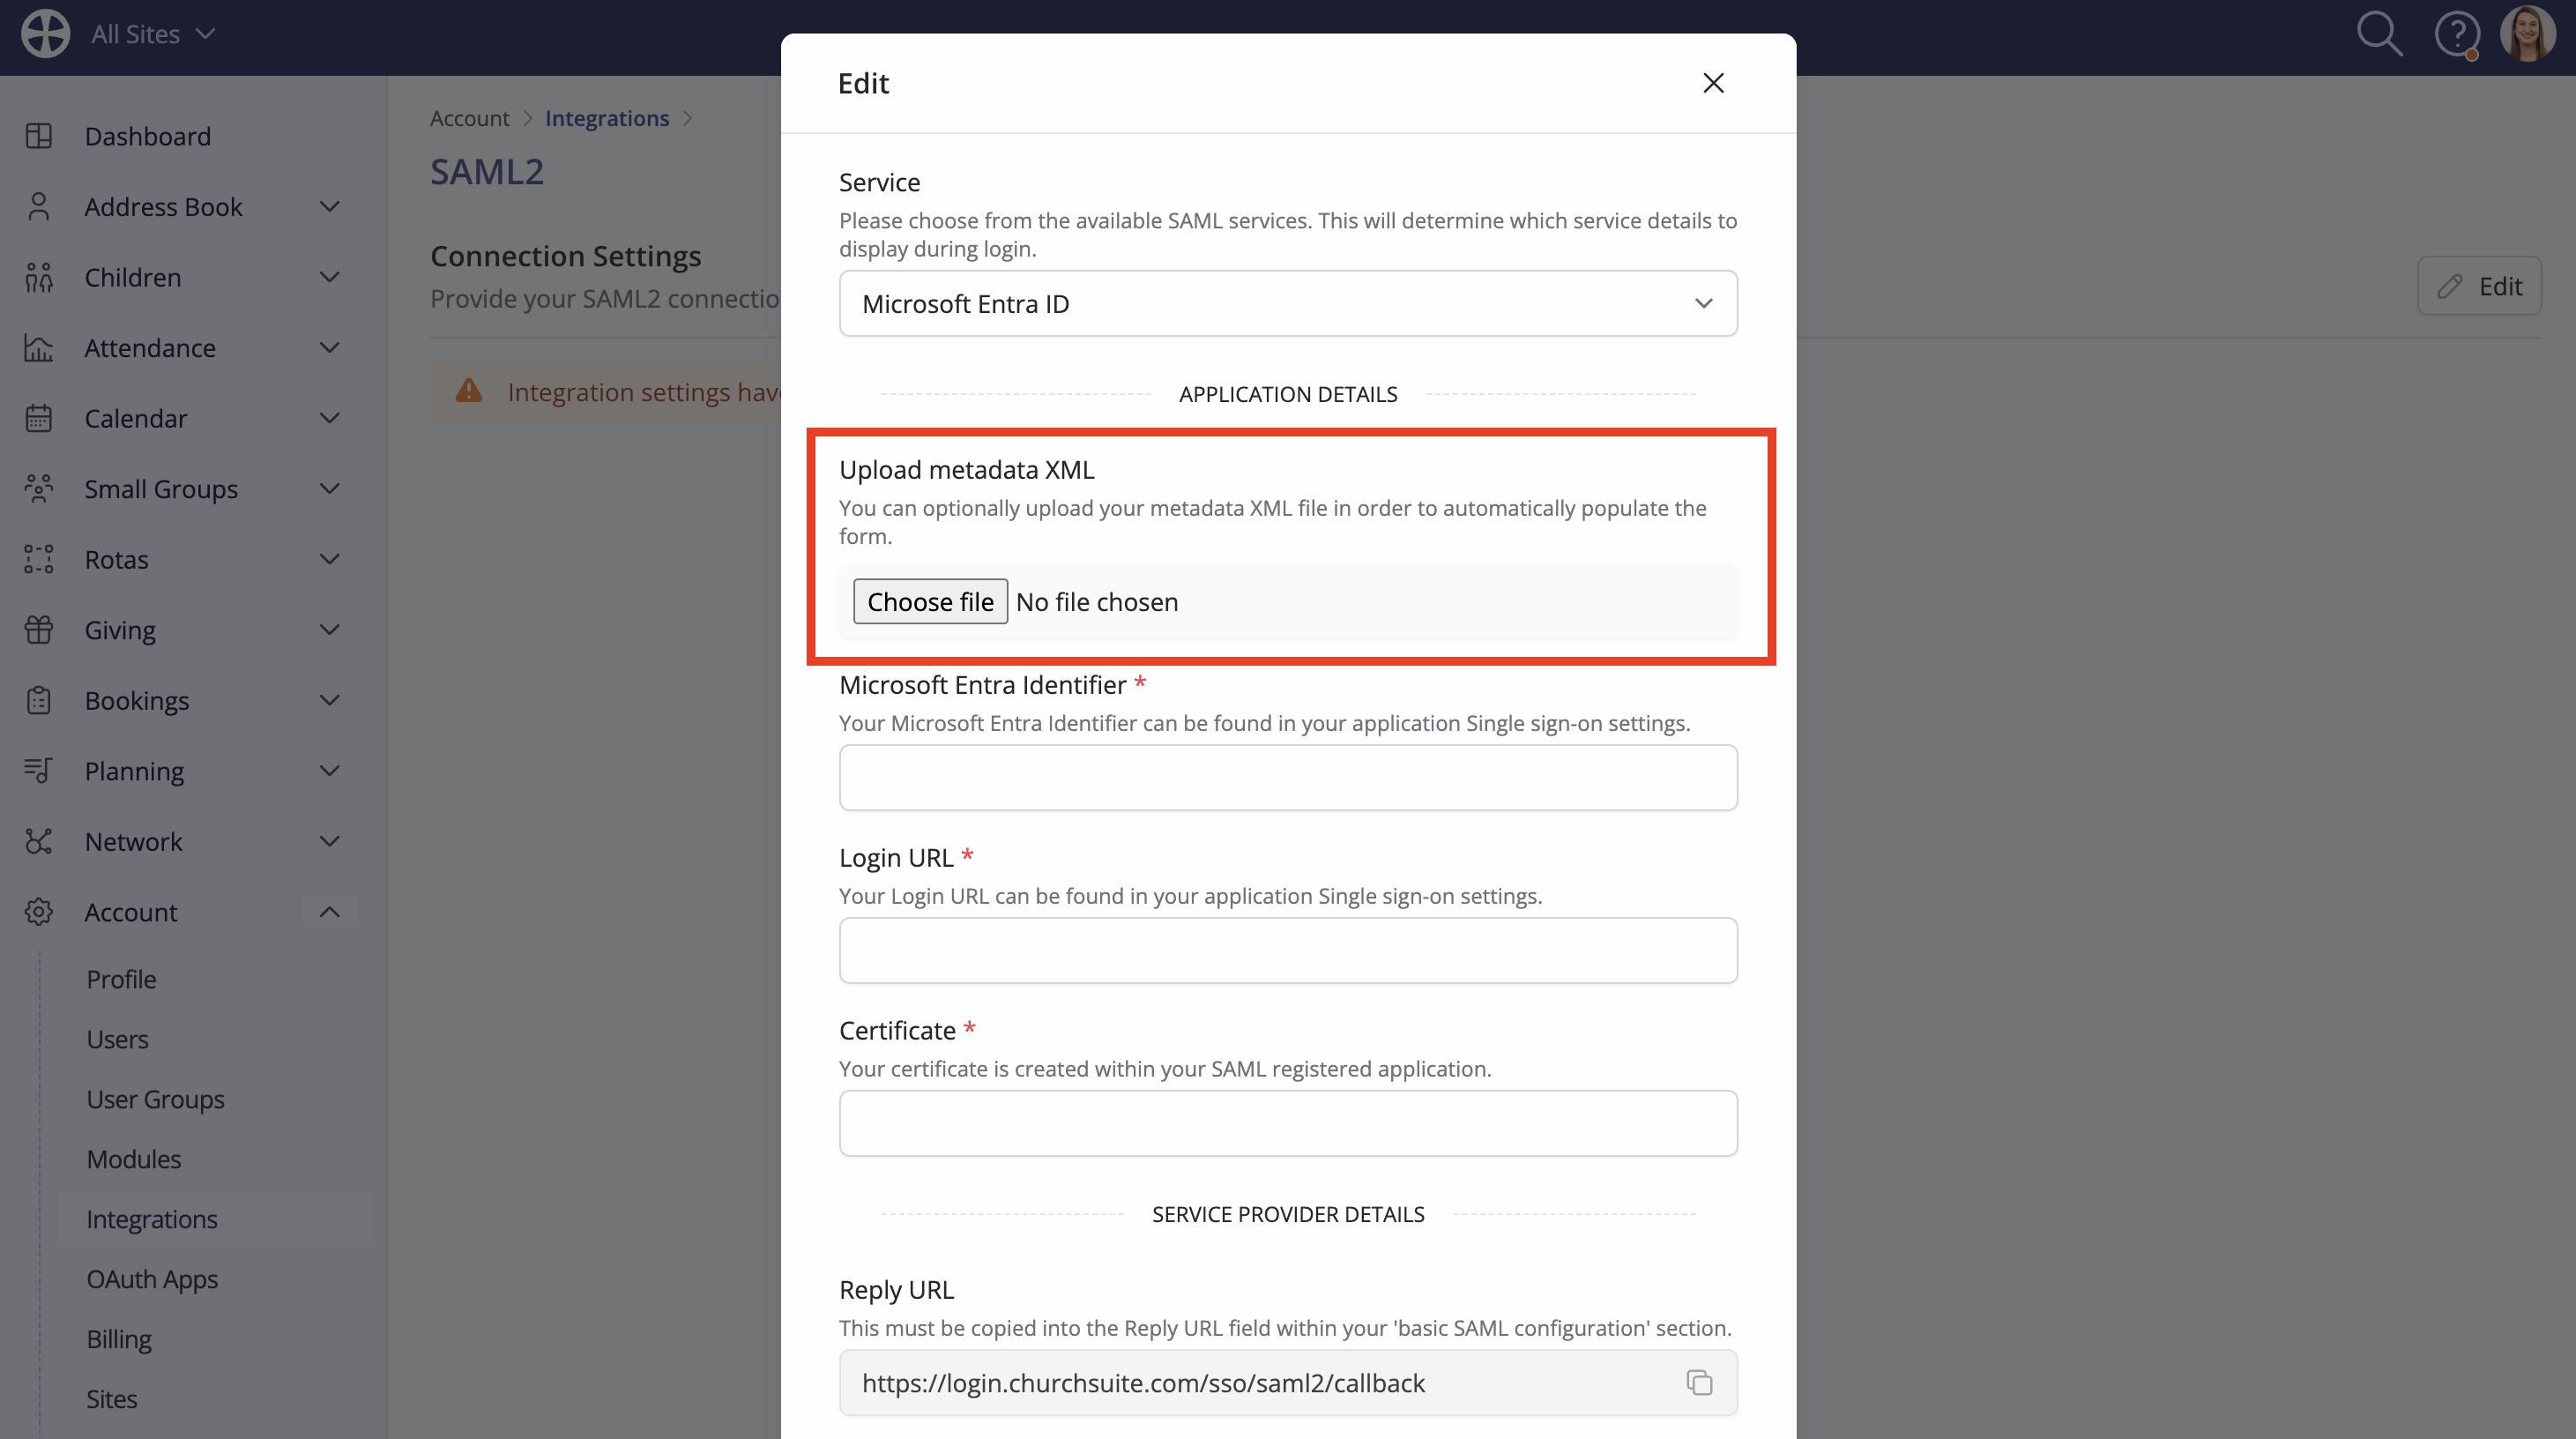
On the Edit pop-up, select the SAML Service. The other settings will change to reflect the selected Service. Rather than manually populating responses into the integration fields, you can optionally upload a metadata XML file that will automatically populate the form. This method is recommended and minimises the risk of mistakes, which will lead to the integration failing. We'll look at how to obtain this from your chosen service in the next sections.
Using the Microsoft Entra ID service
NB: This section and it's screenshots are correct at the time of writing (July 2026). As Microsoft makes changes, nuances of our description and screenshots may become outdated.
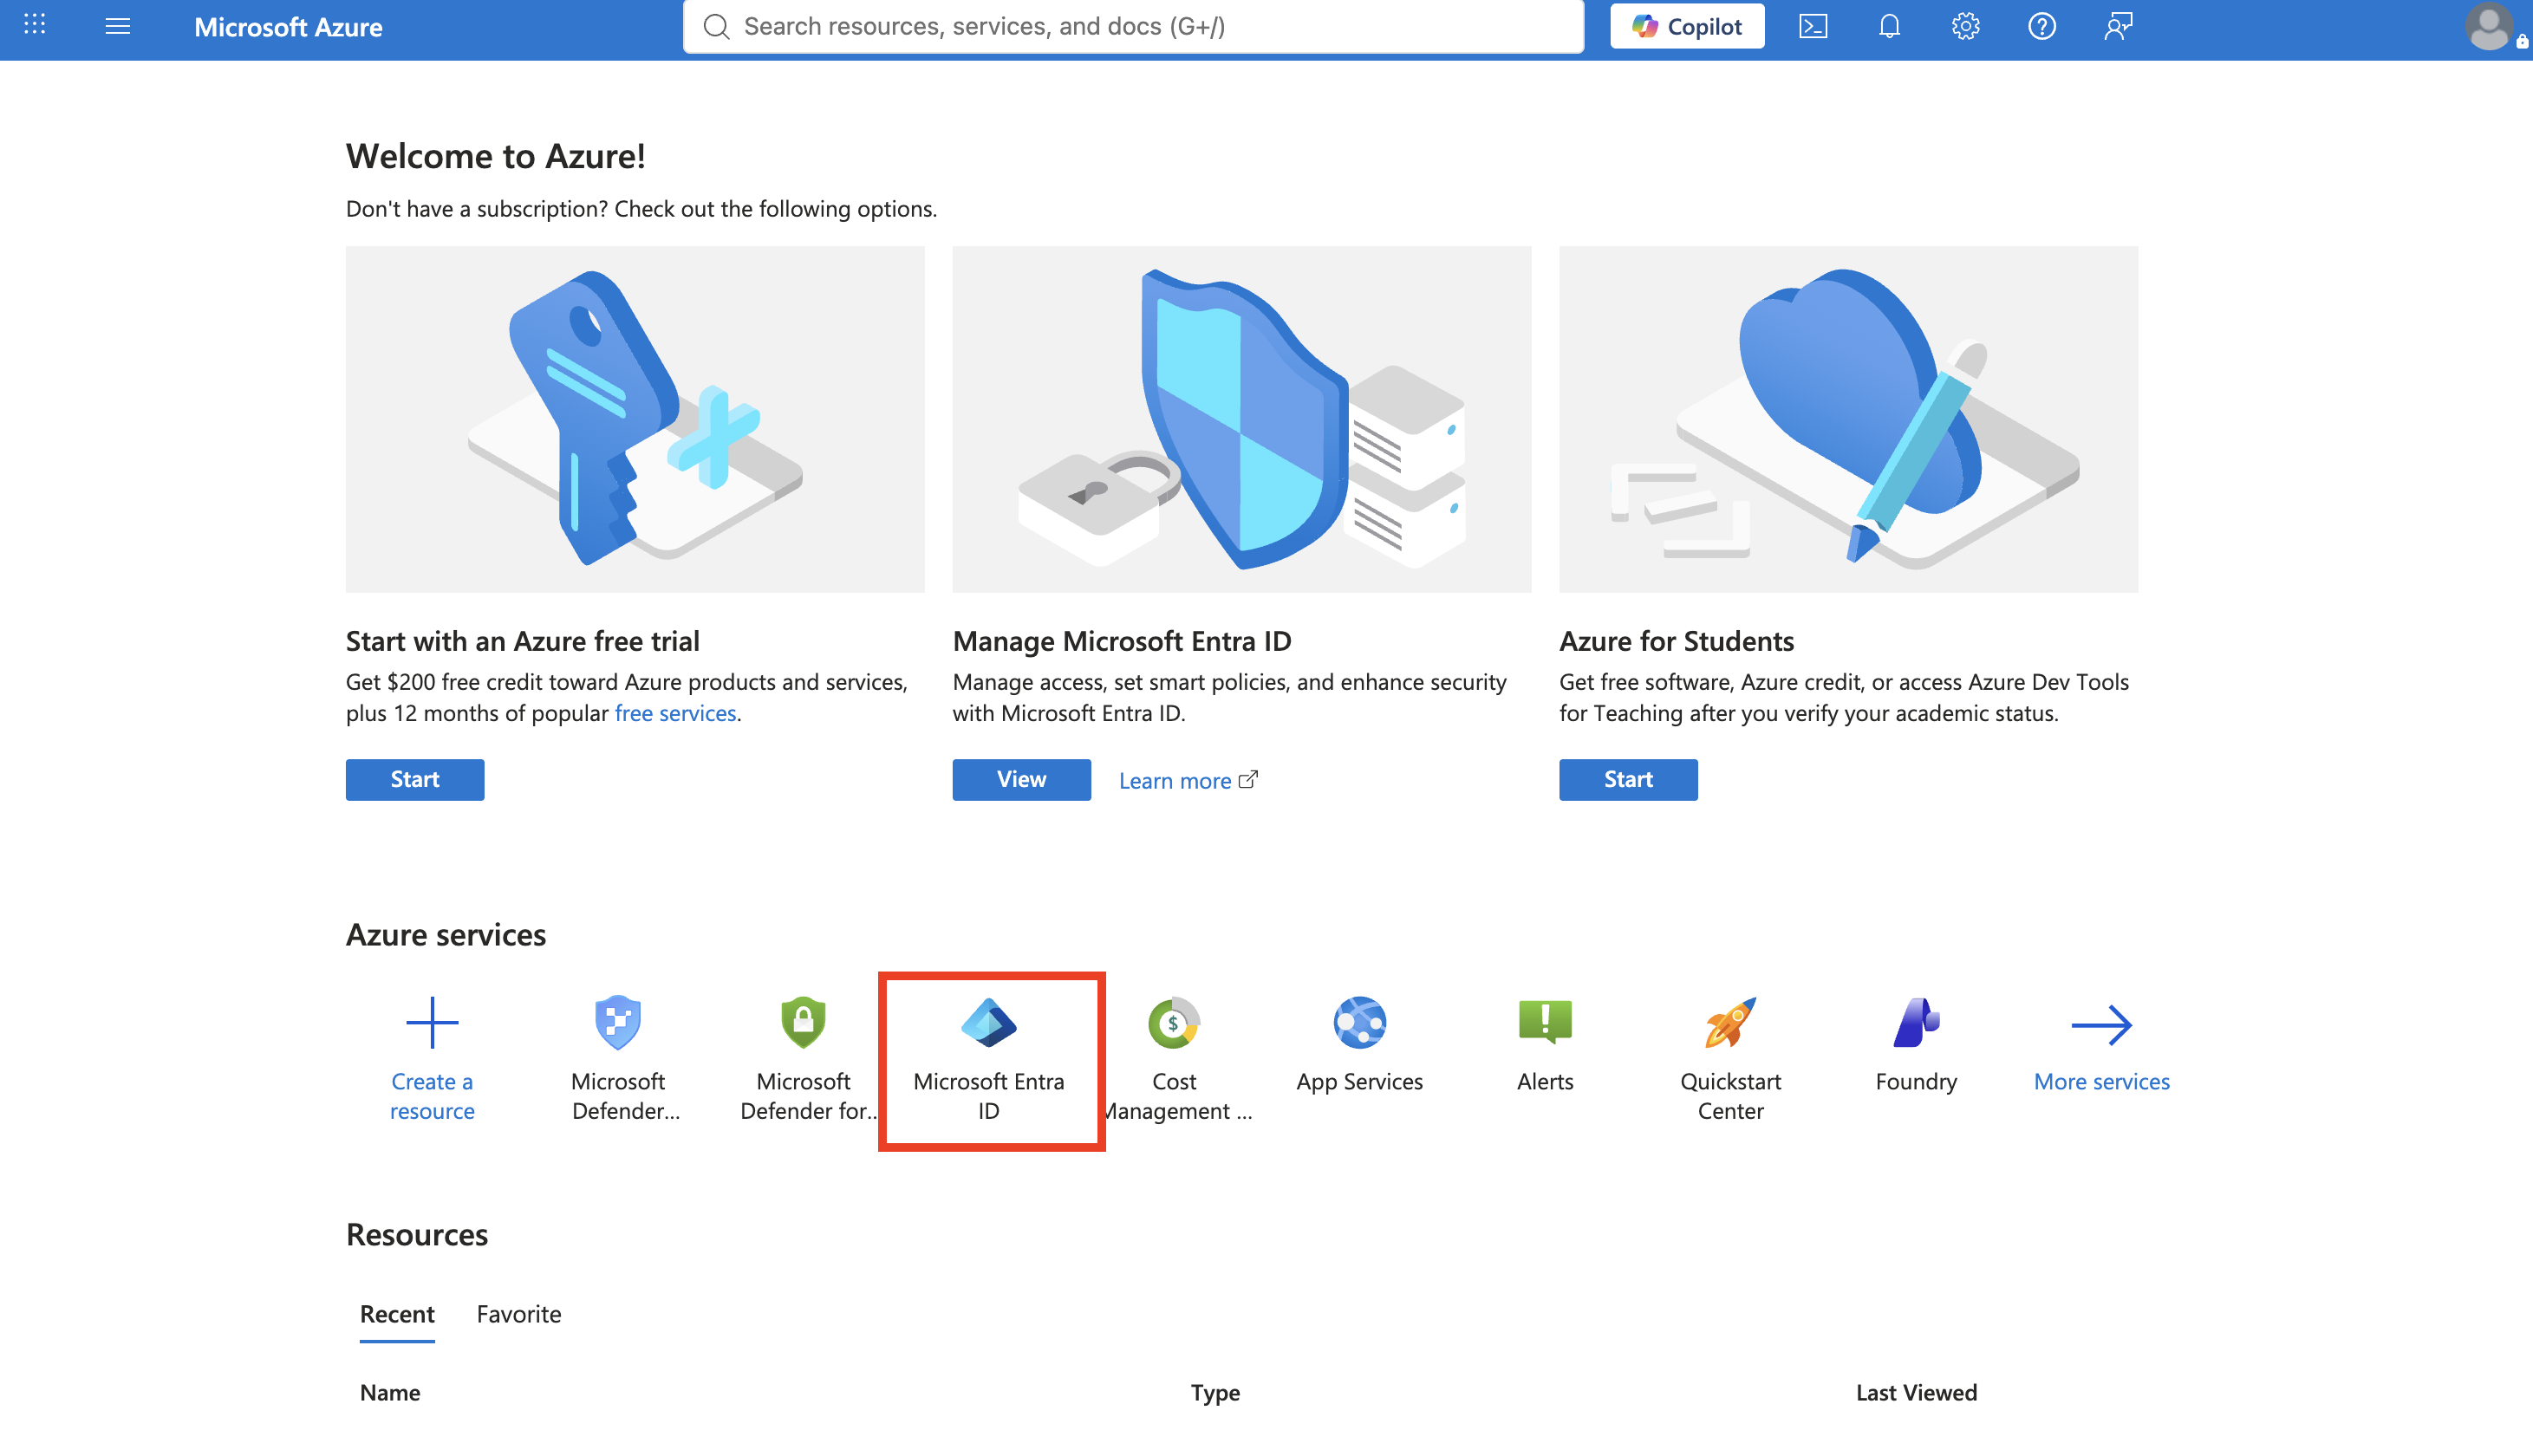
Navigate to the Microsoft Azure Portal and use your credentials to sign in. Click Microsoft Entra ID.
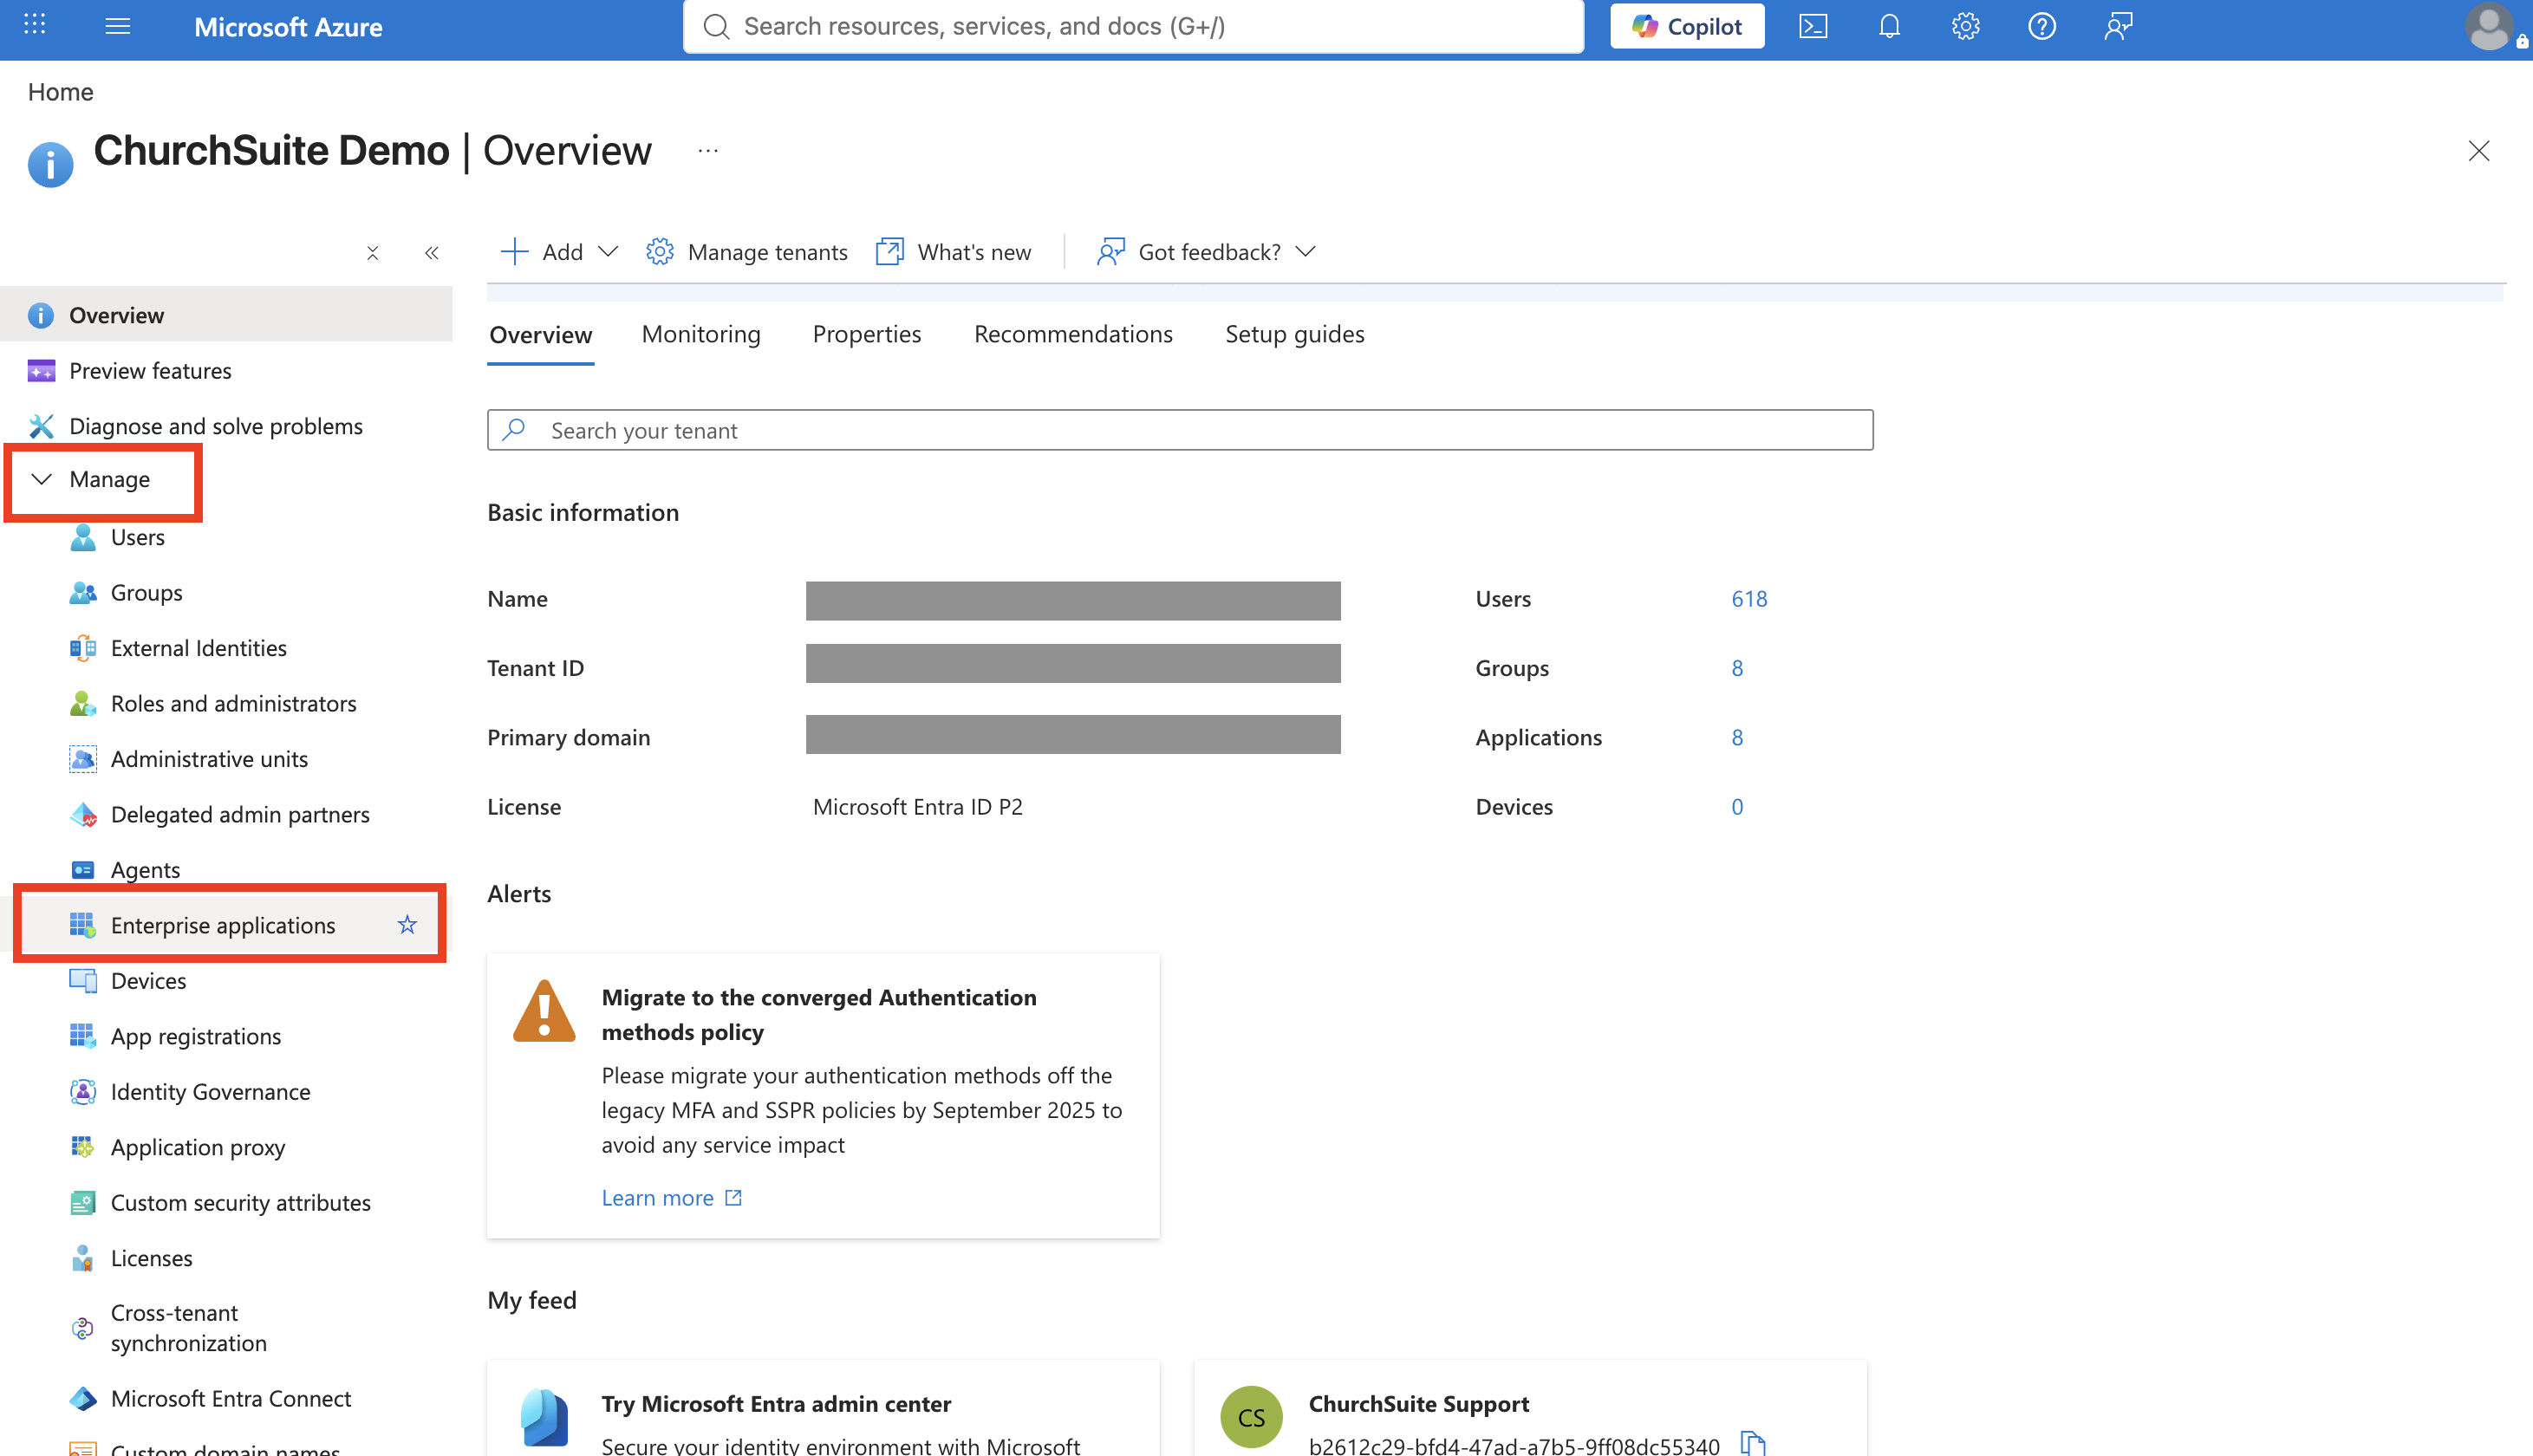
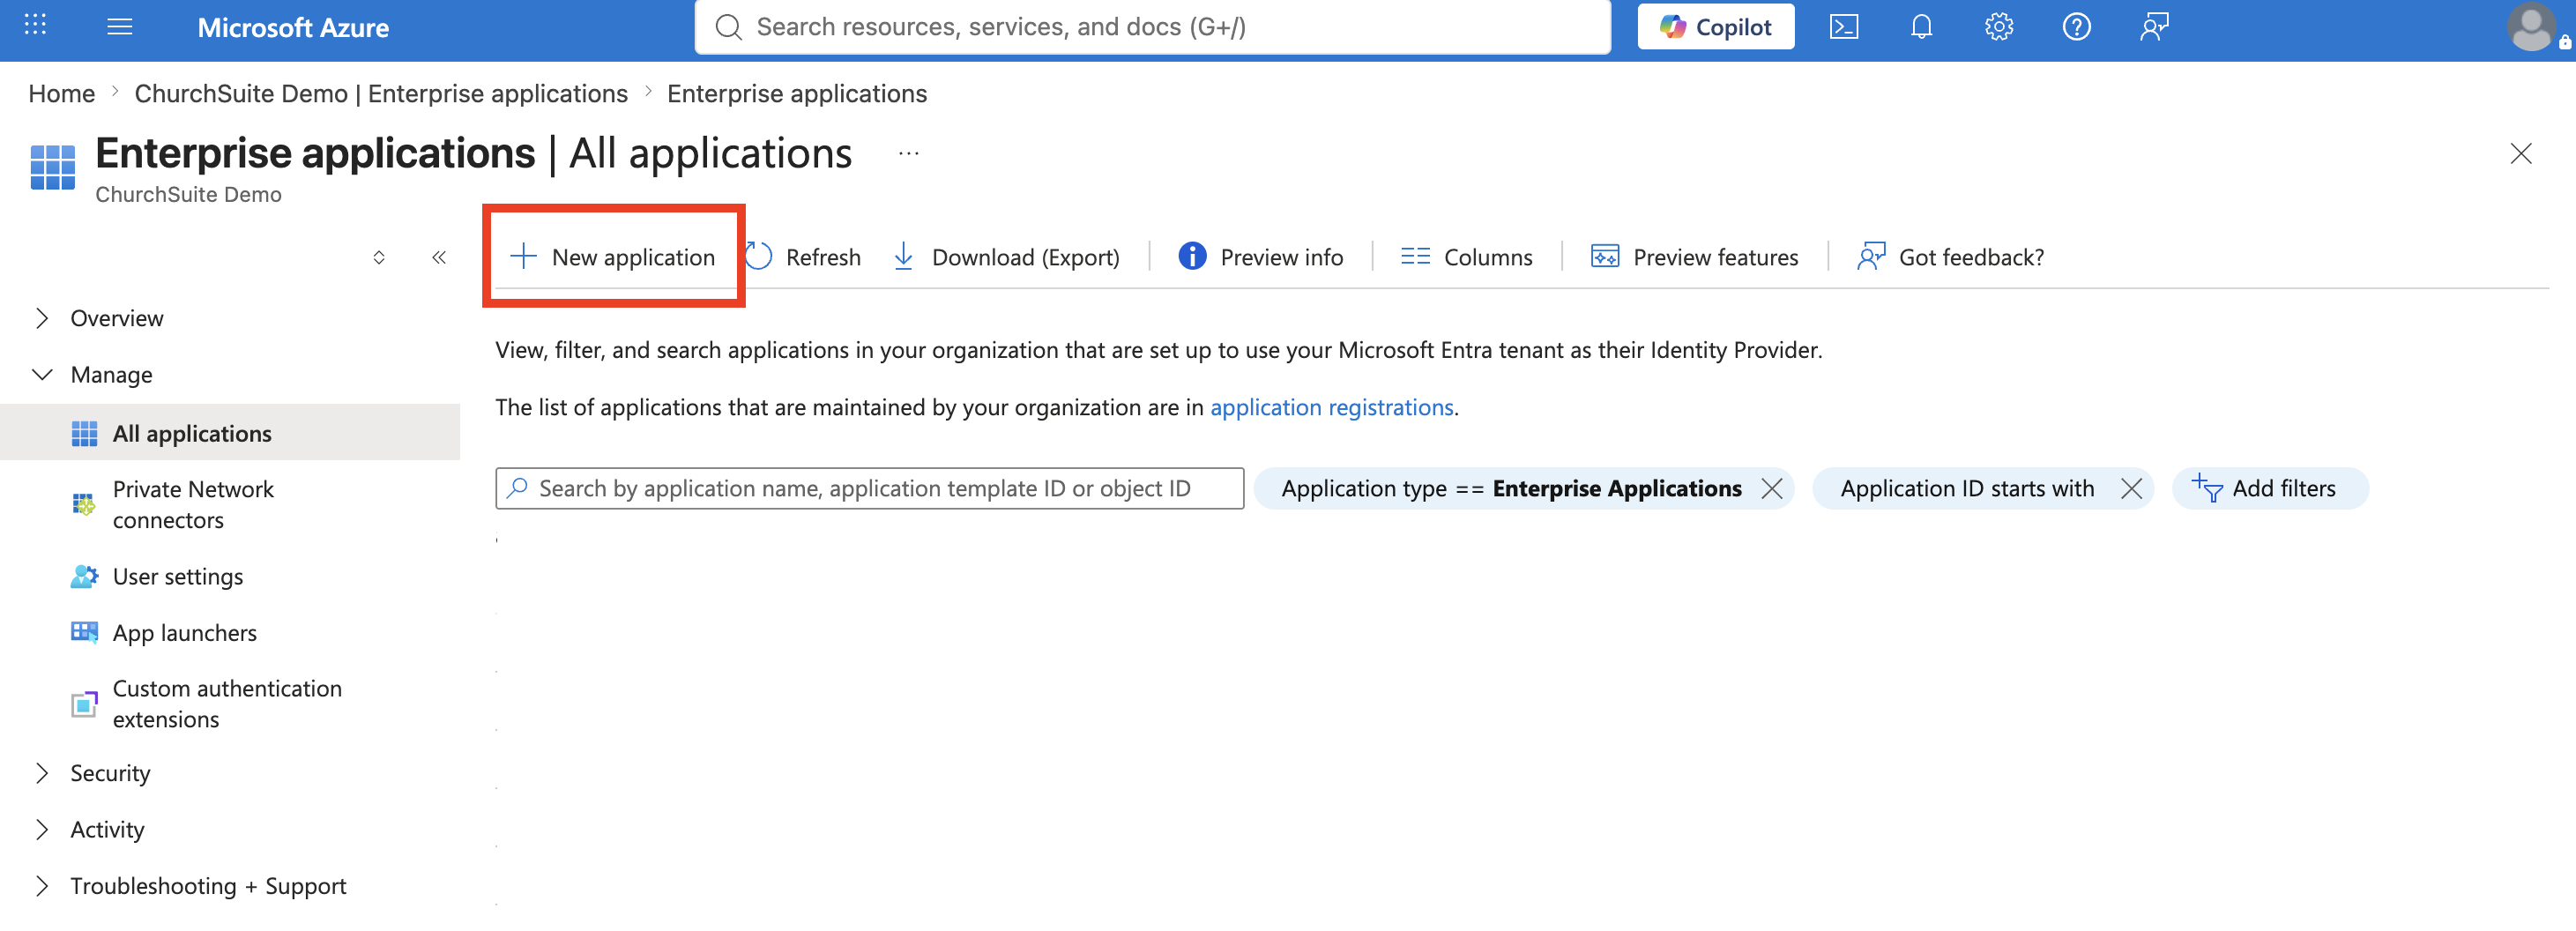
In the Manage menu, choose Enterprise applications.
Select New application and then Create your own application - this may take a few moments.
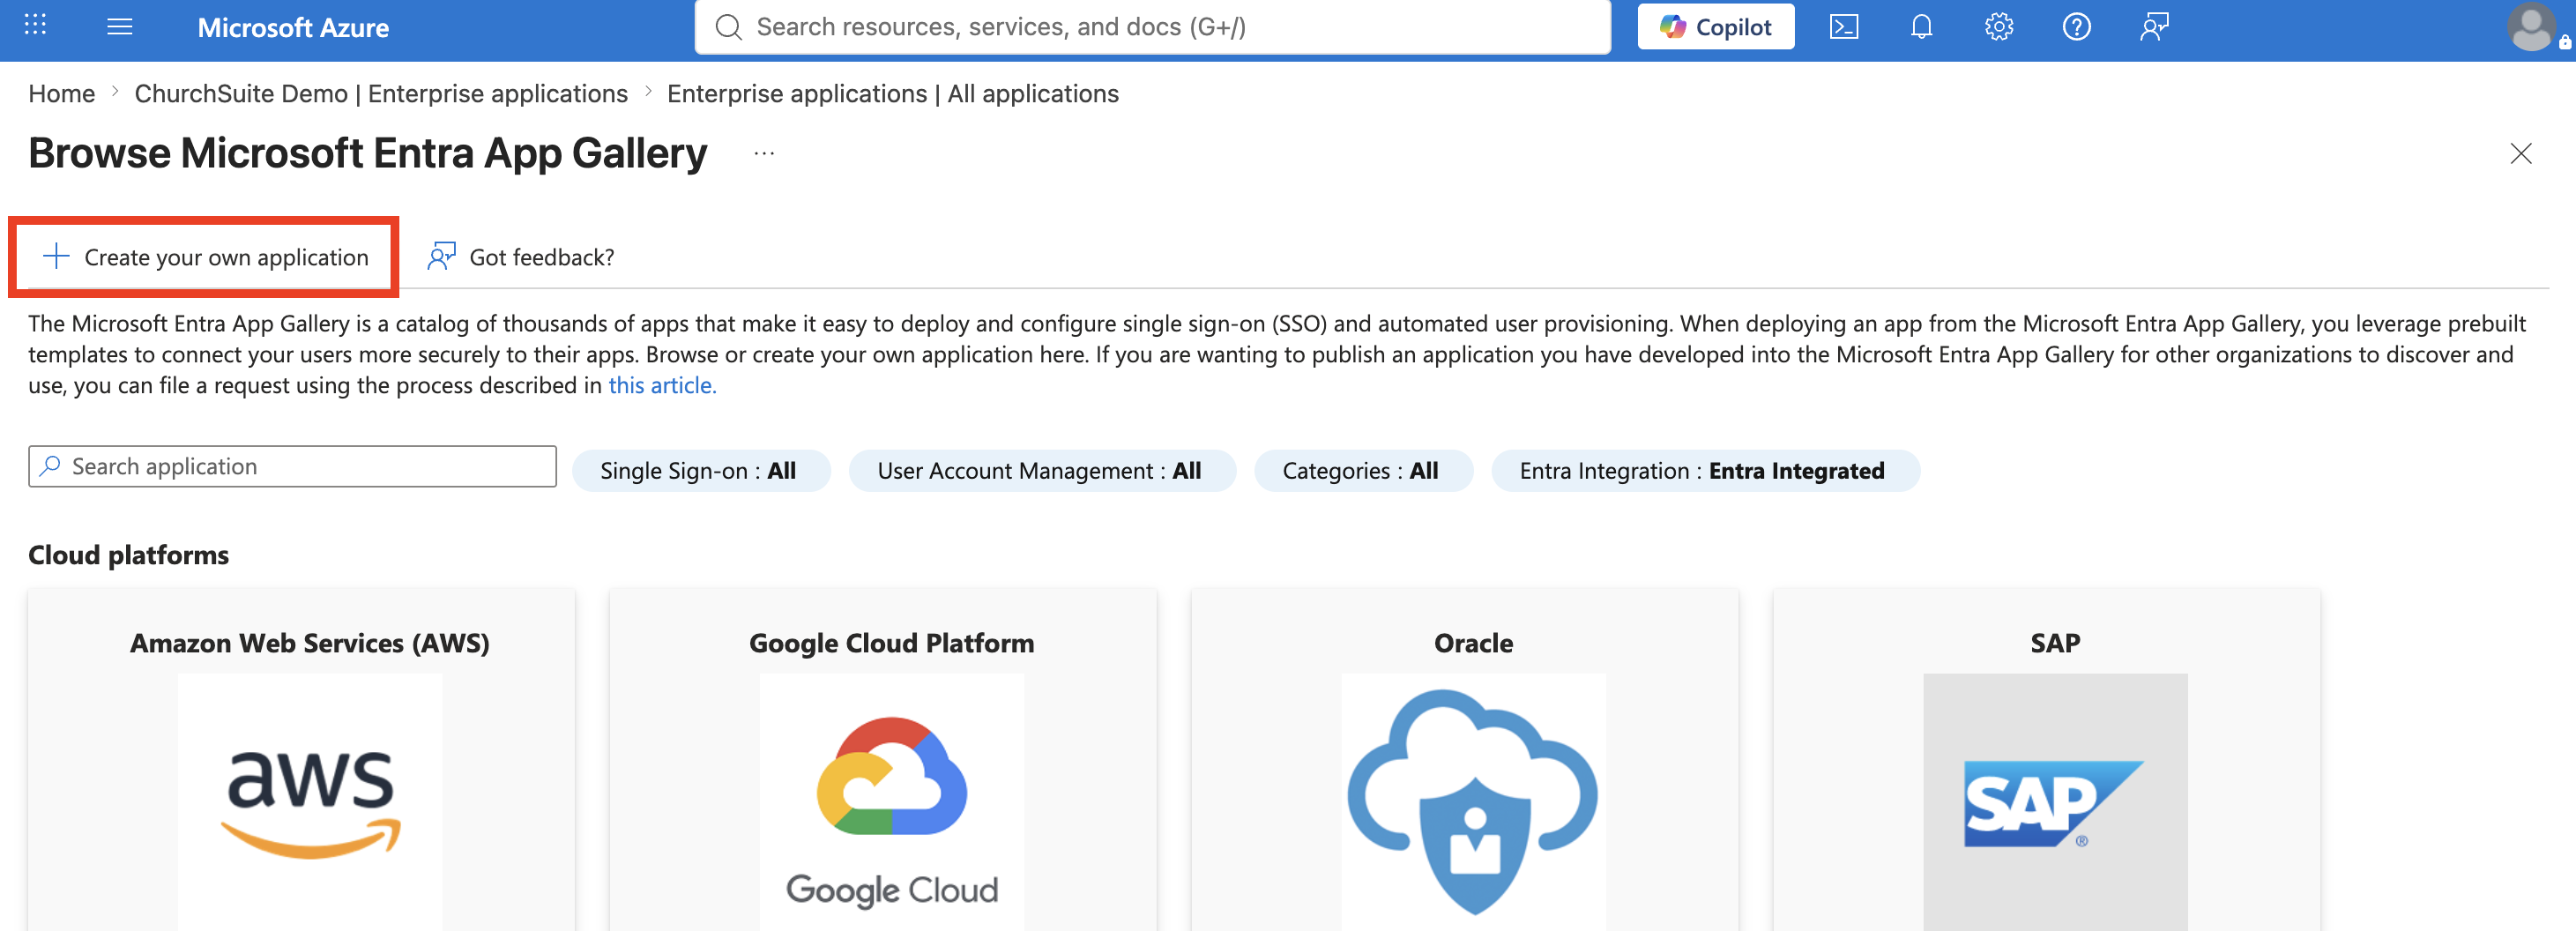
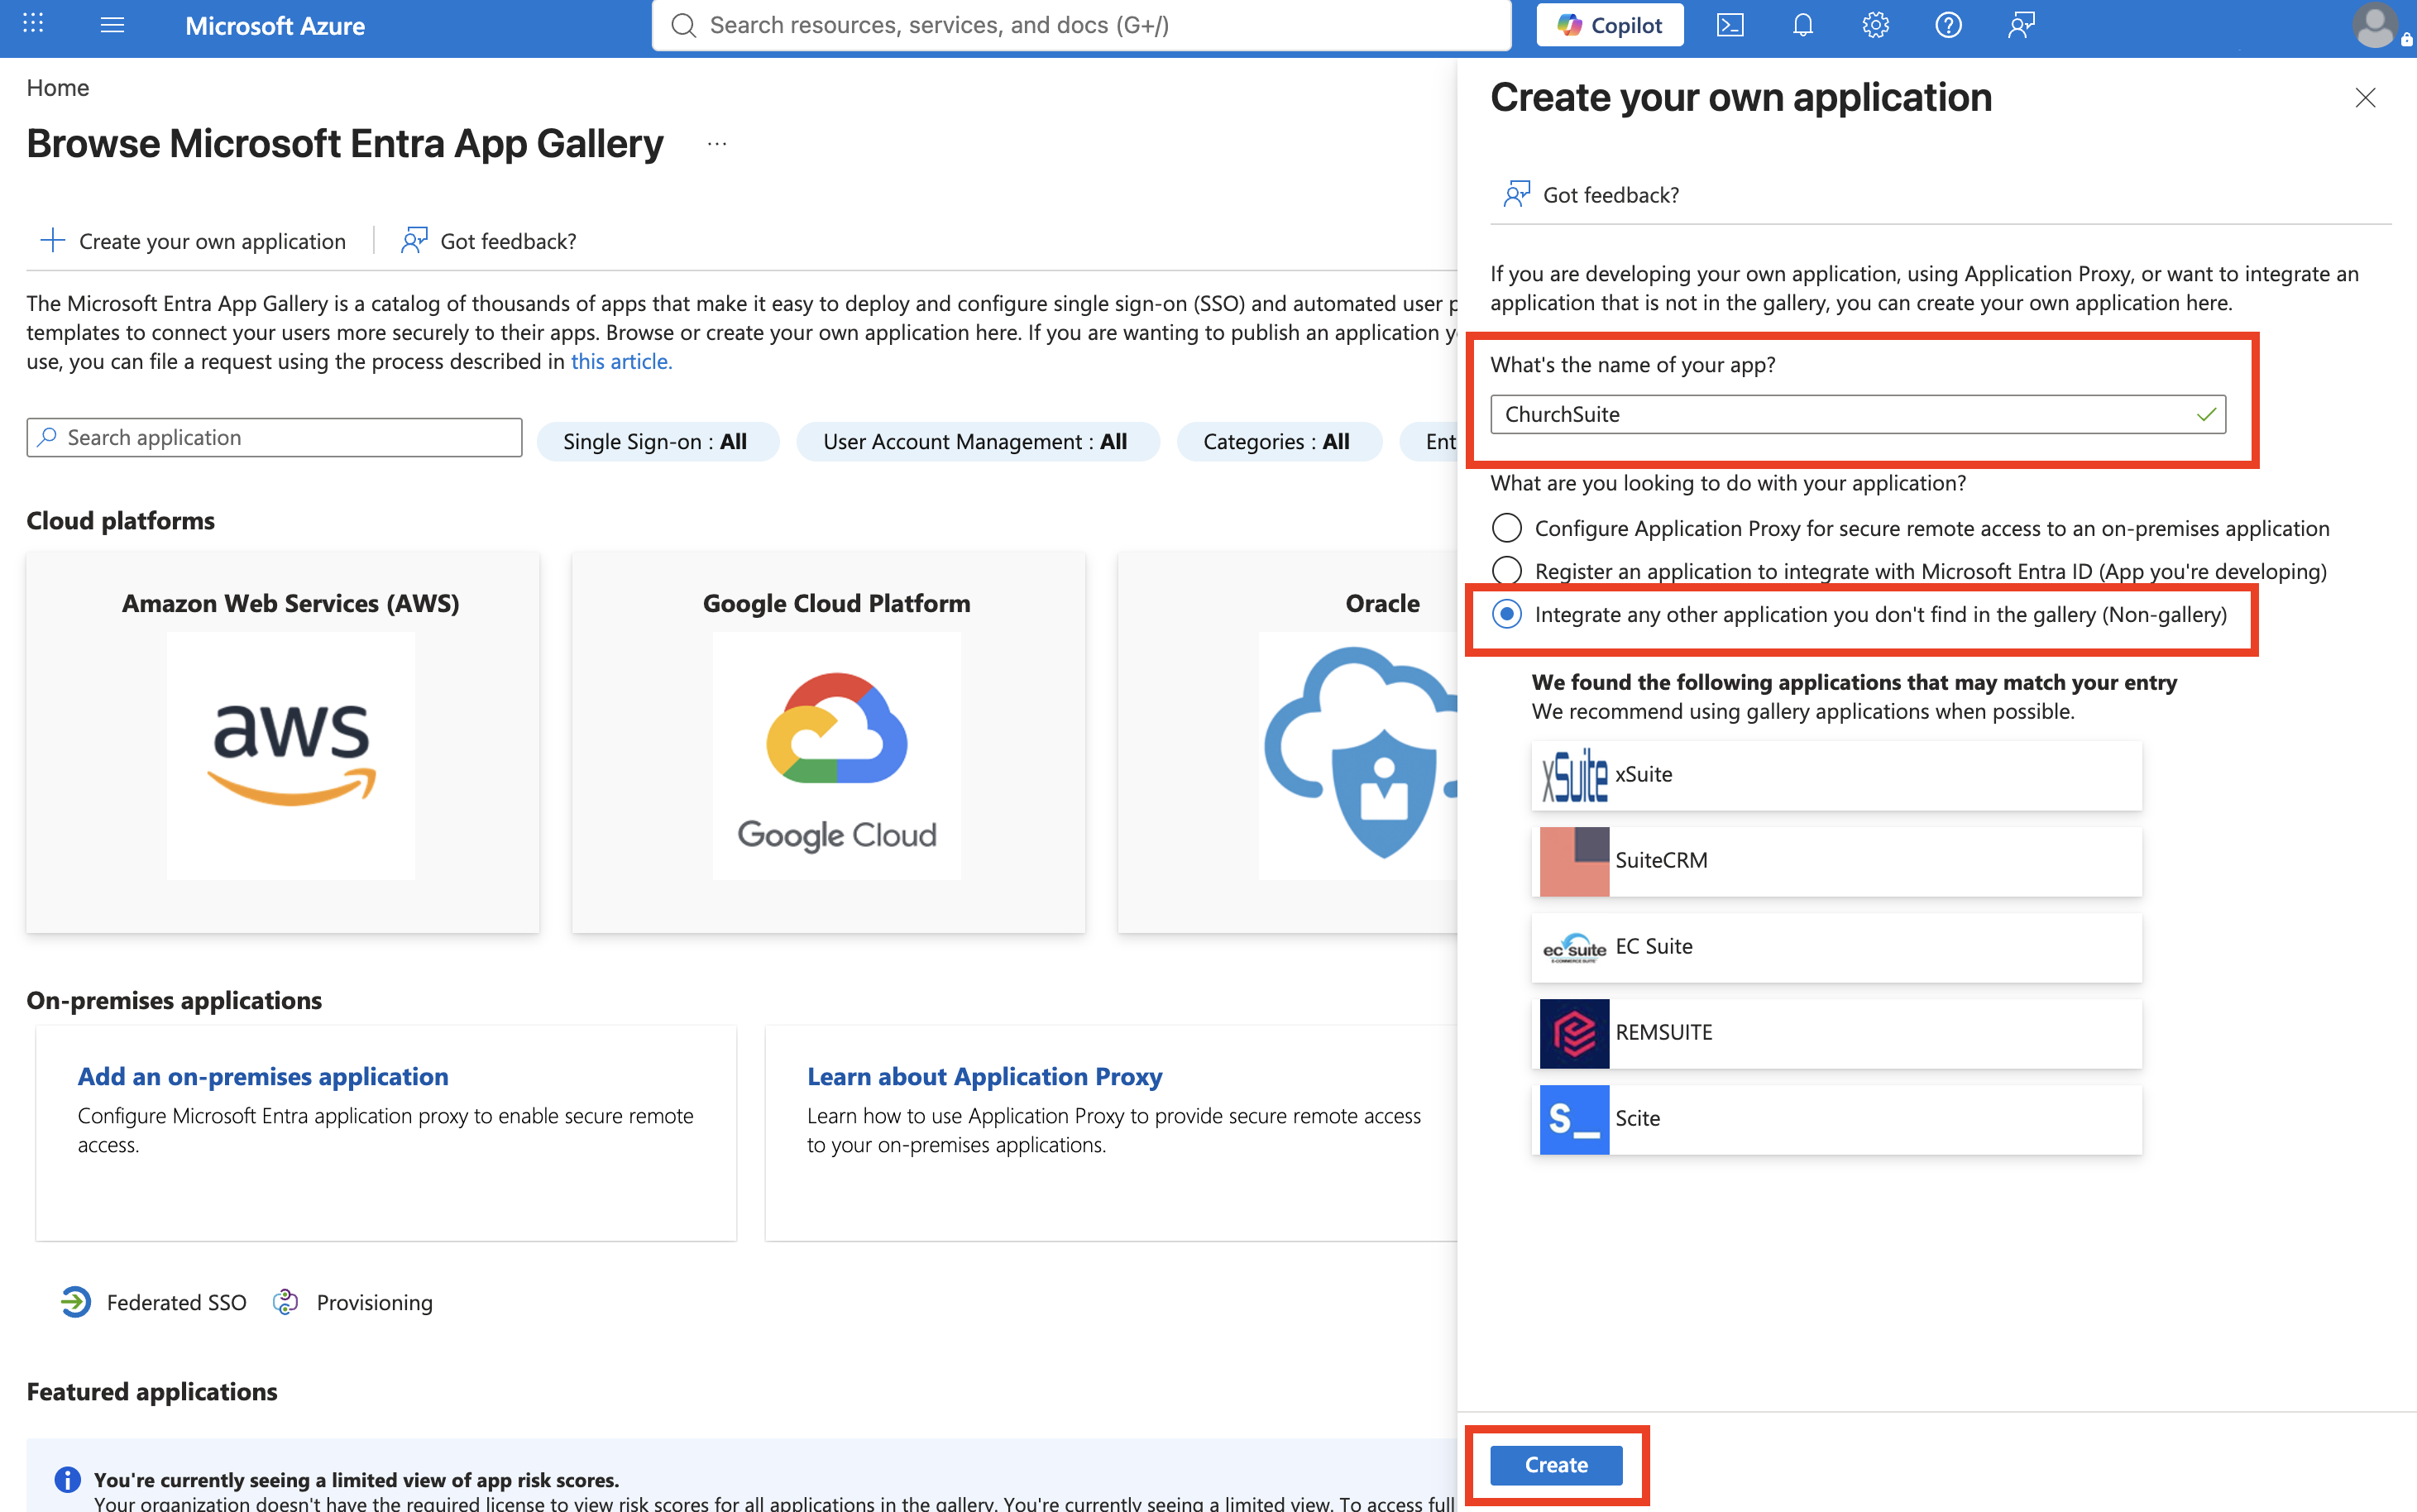
Insert the app name (we've used ChurchSuite) and select Integrate any other application you don't find in the gallery (non-gallery), then Create.
Next, choose 2. Set up single sign on and select SAML.


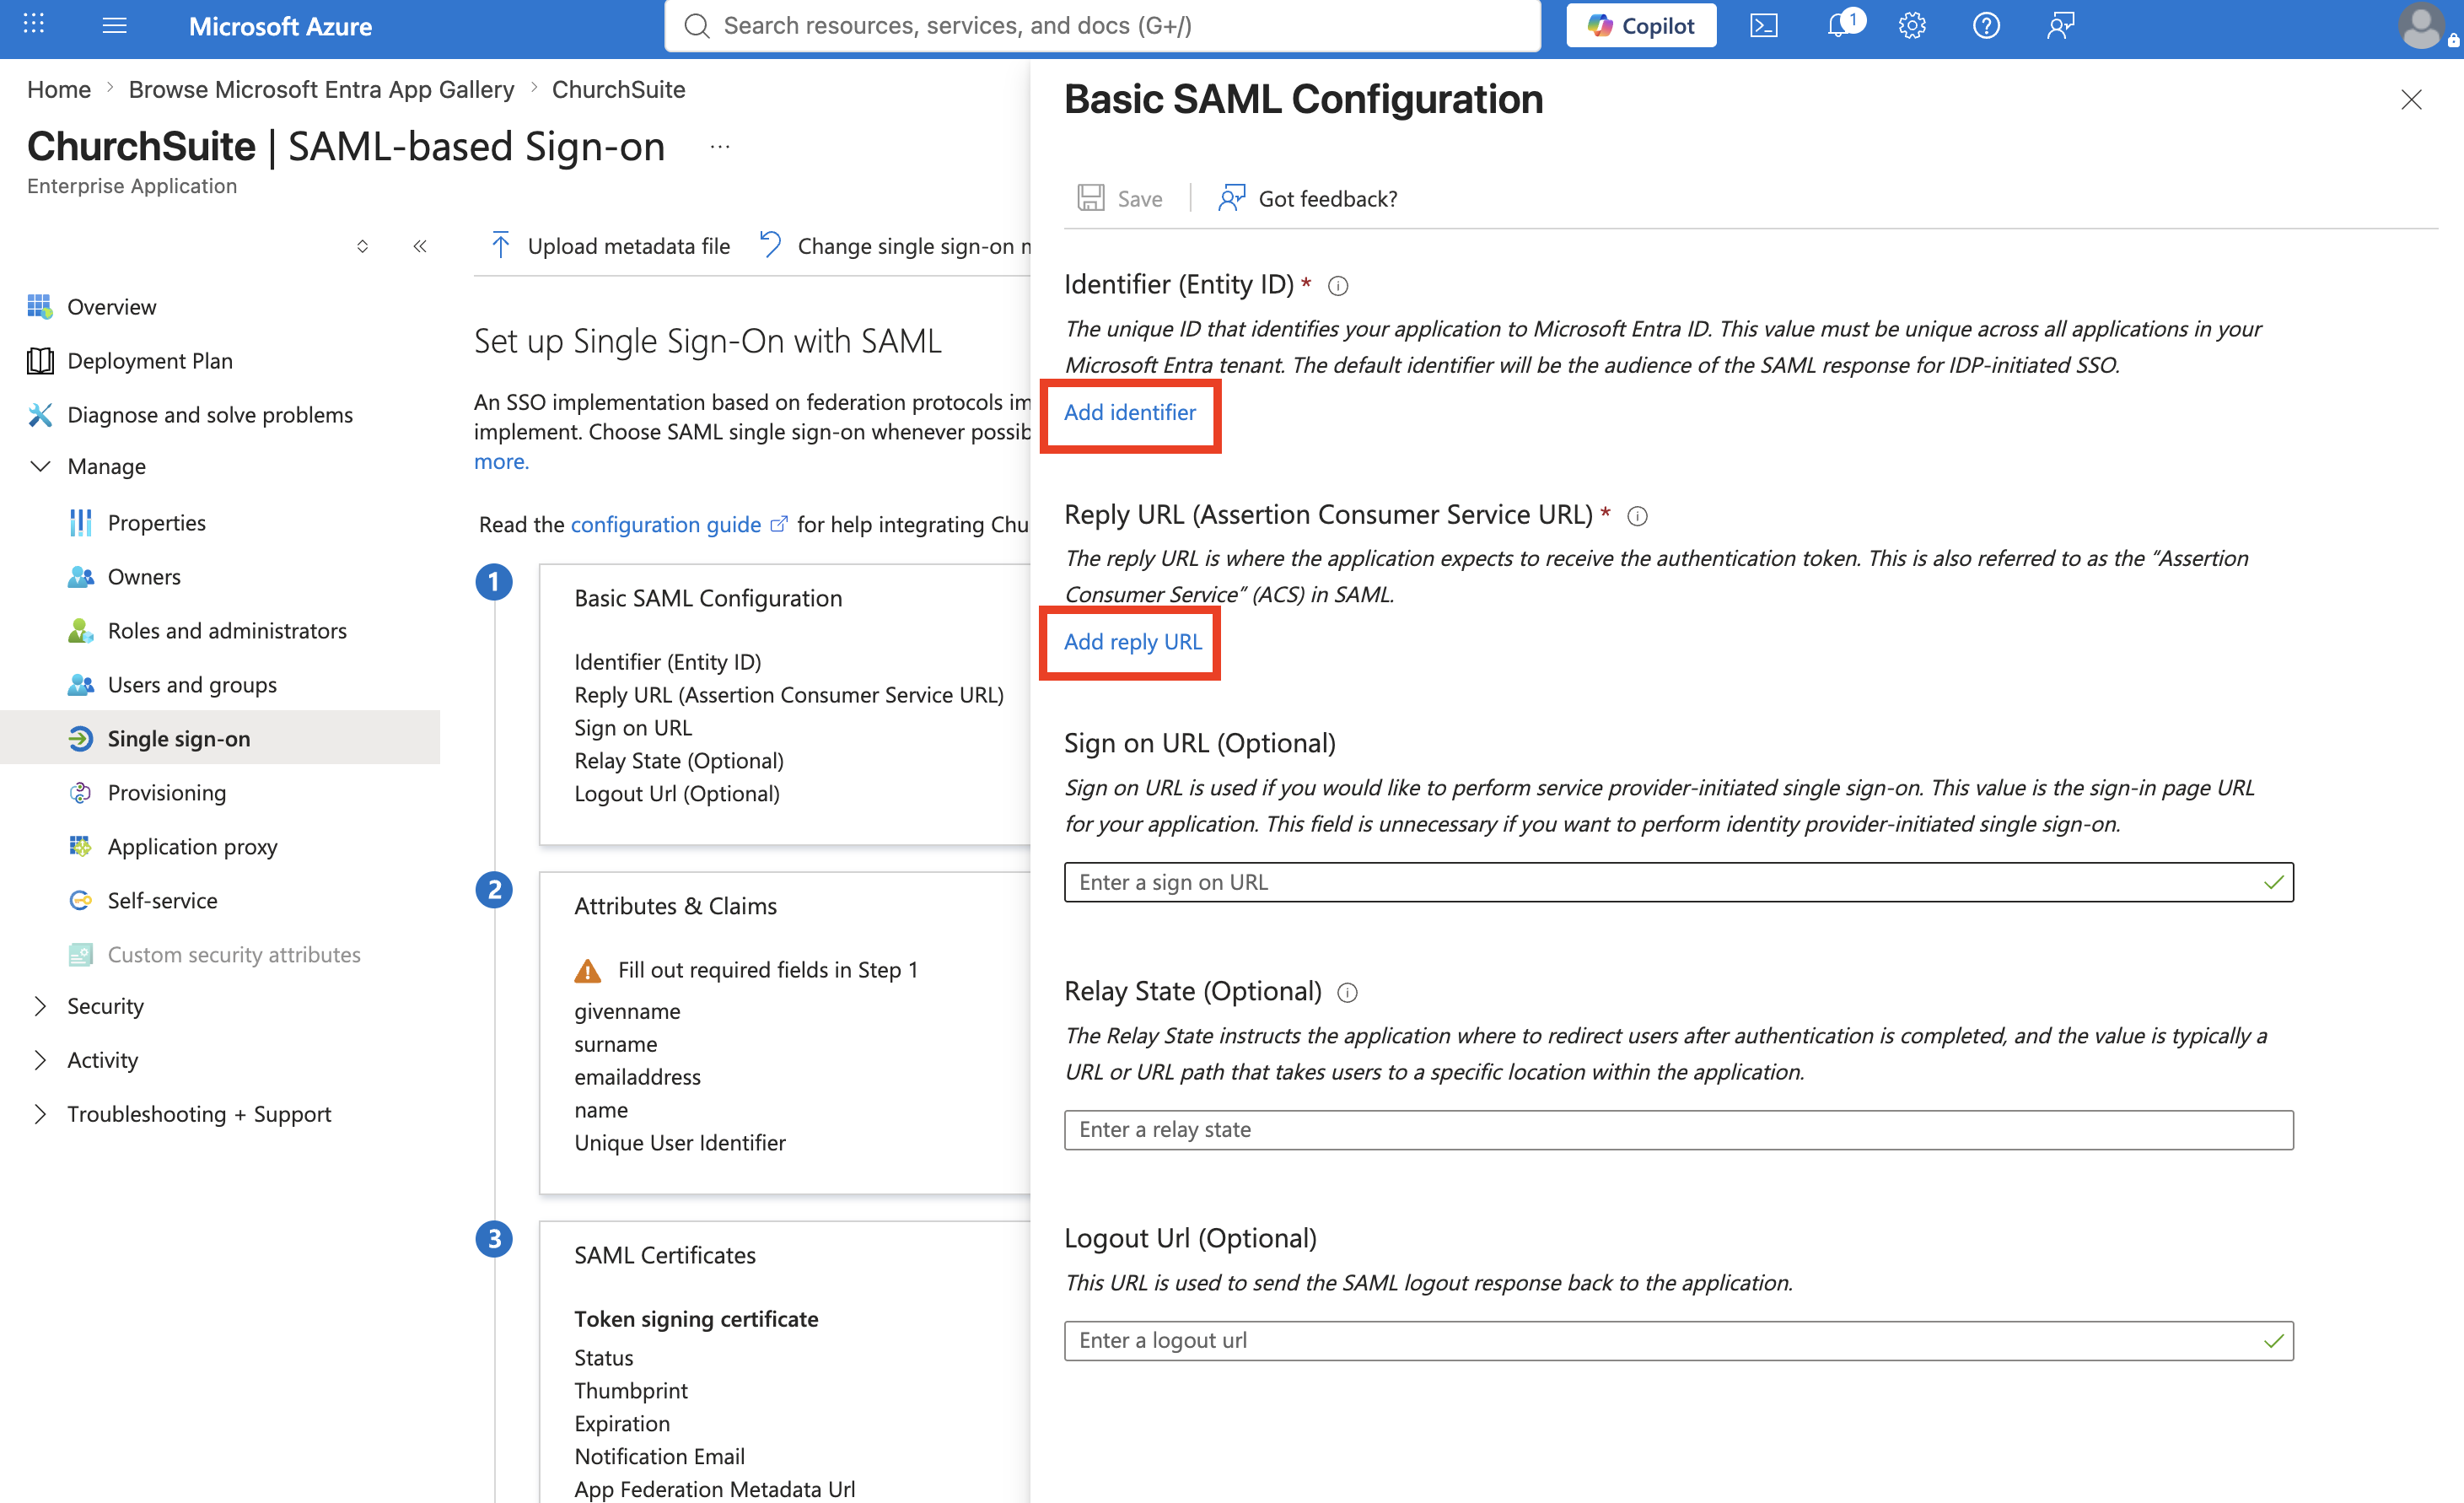
Edit the Basic SAML Configuration section.
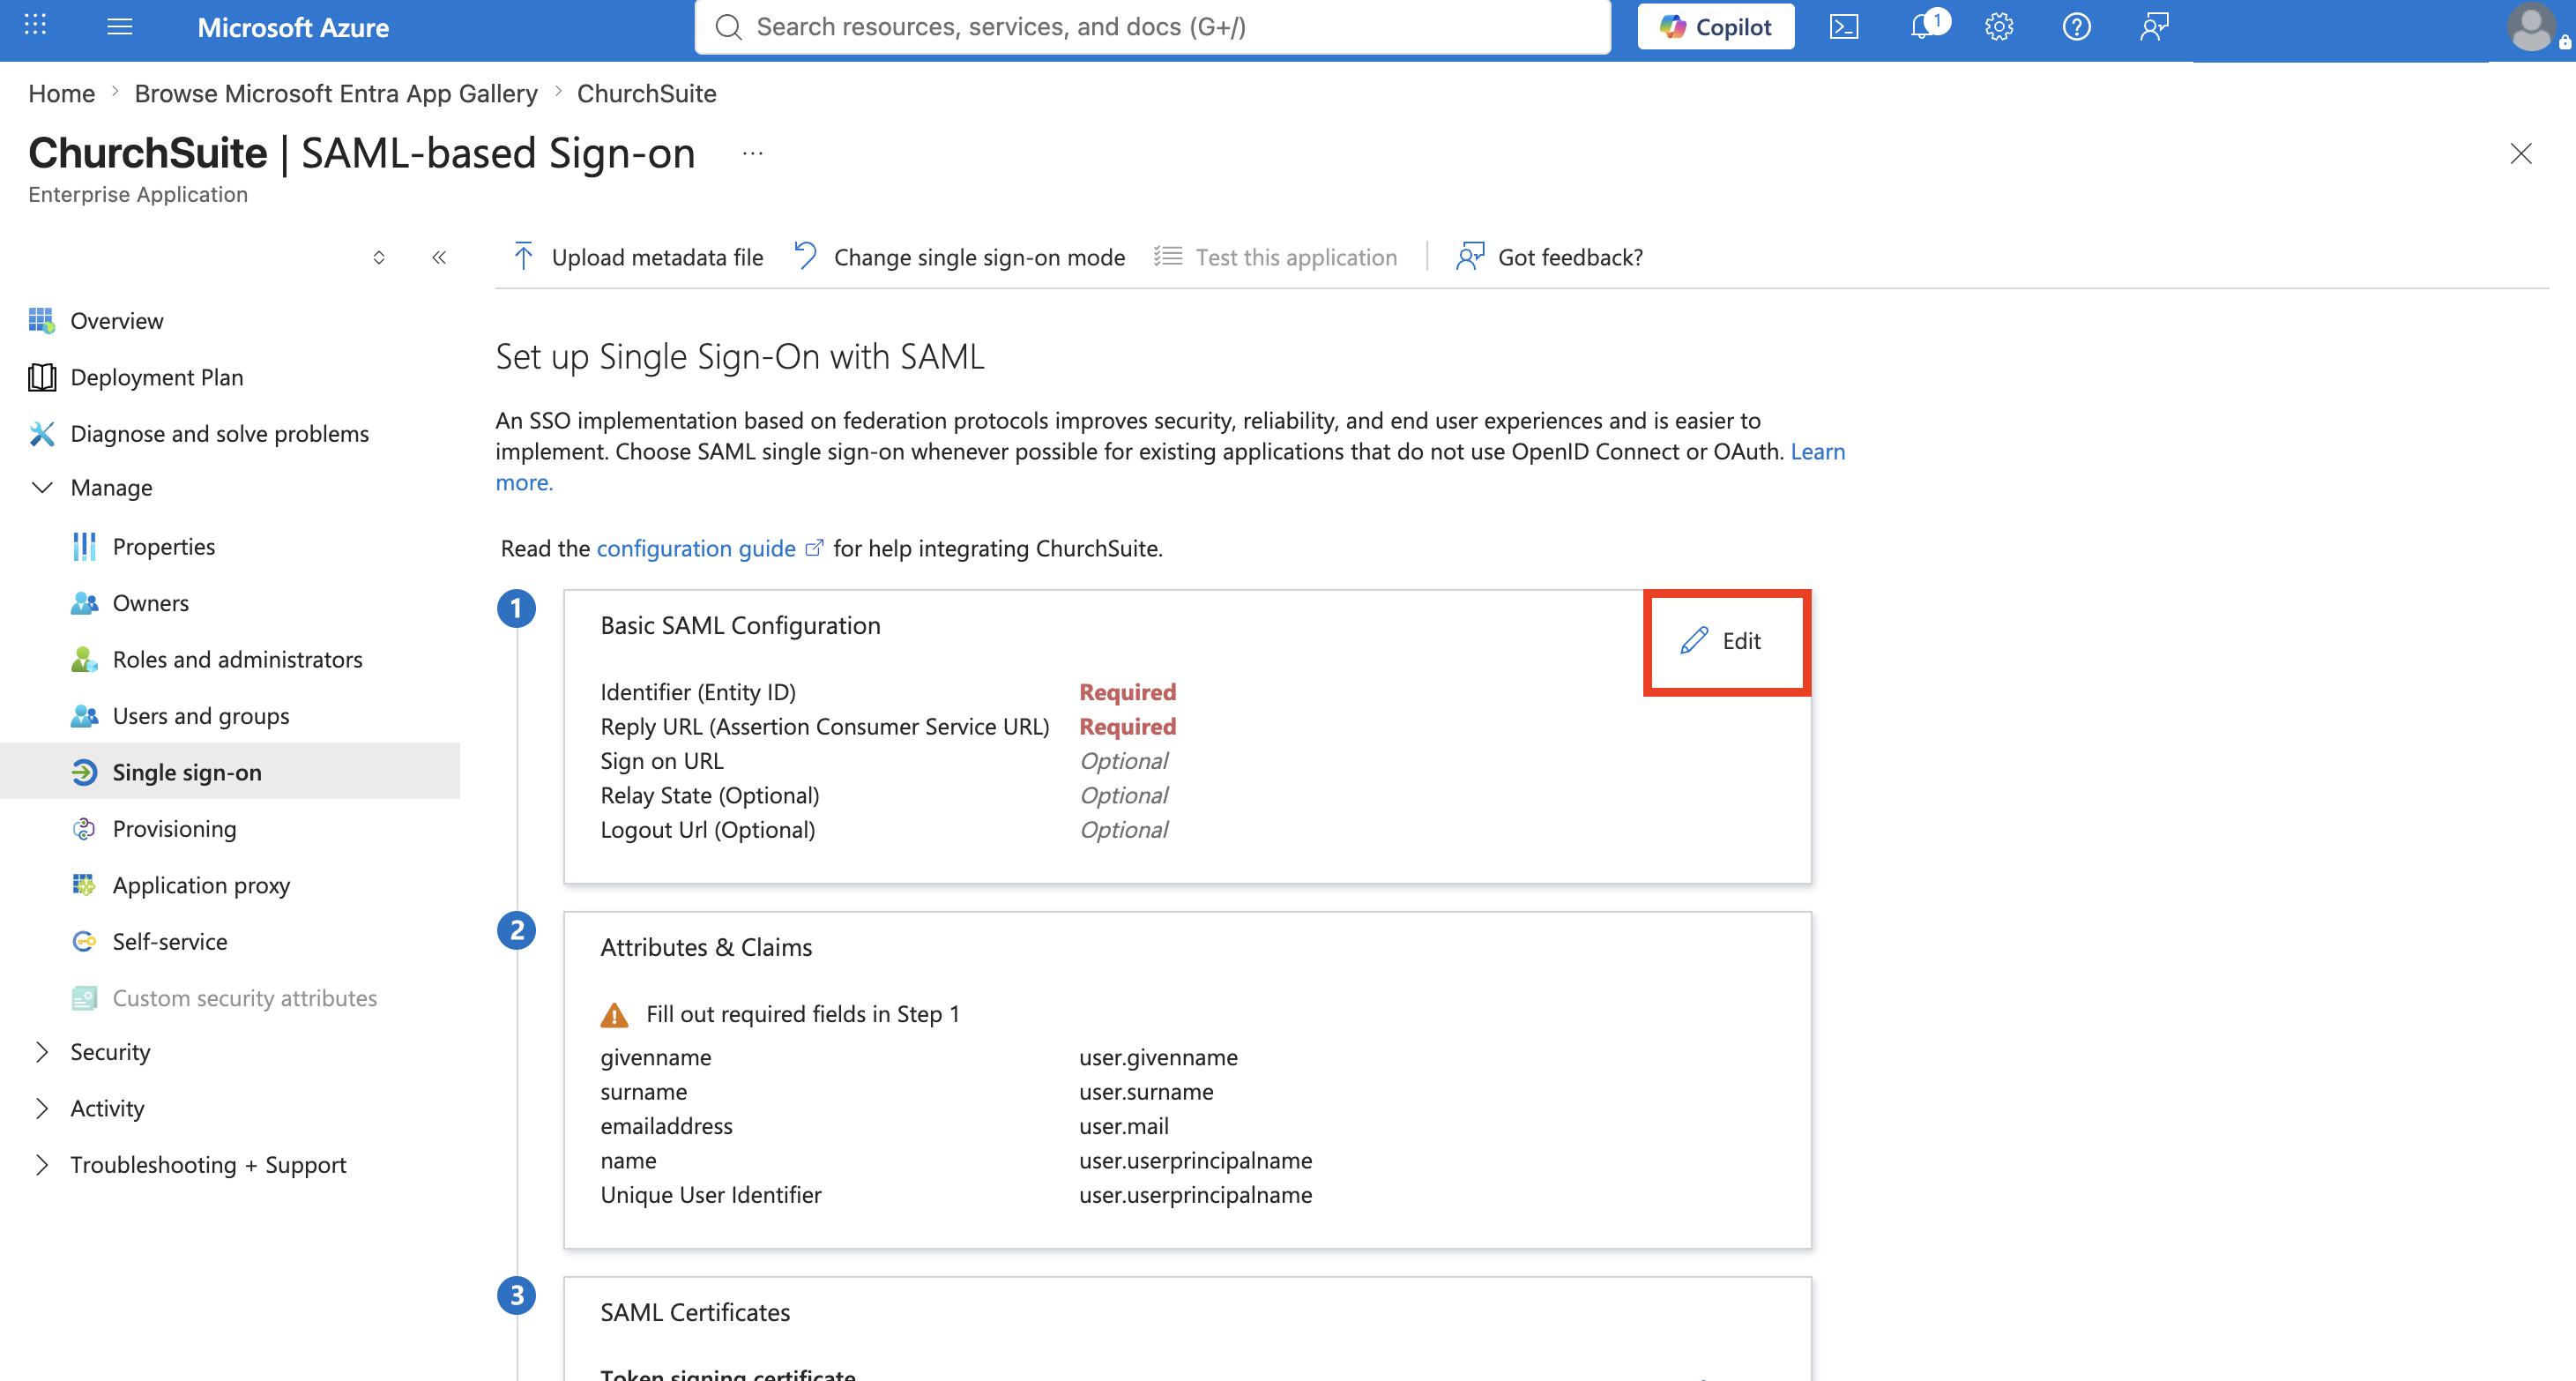
Using the Service Provider Details from within ChurchSuite/CharitySuite, copy and paste the details into the relevant fields.
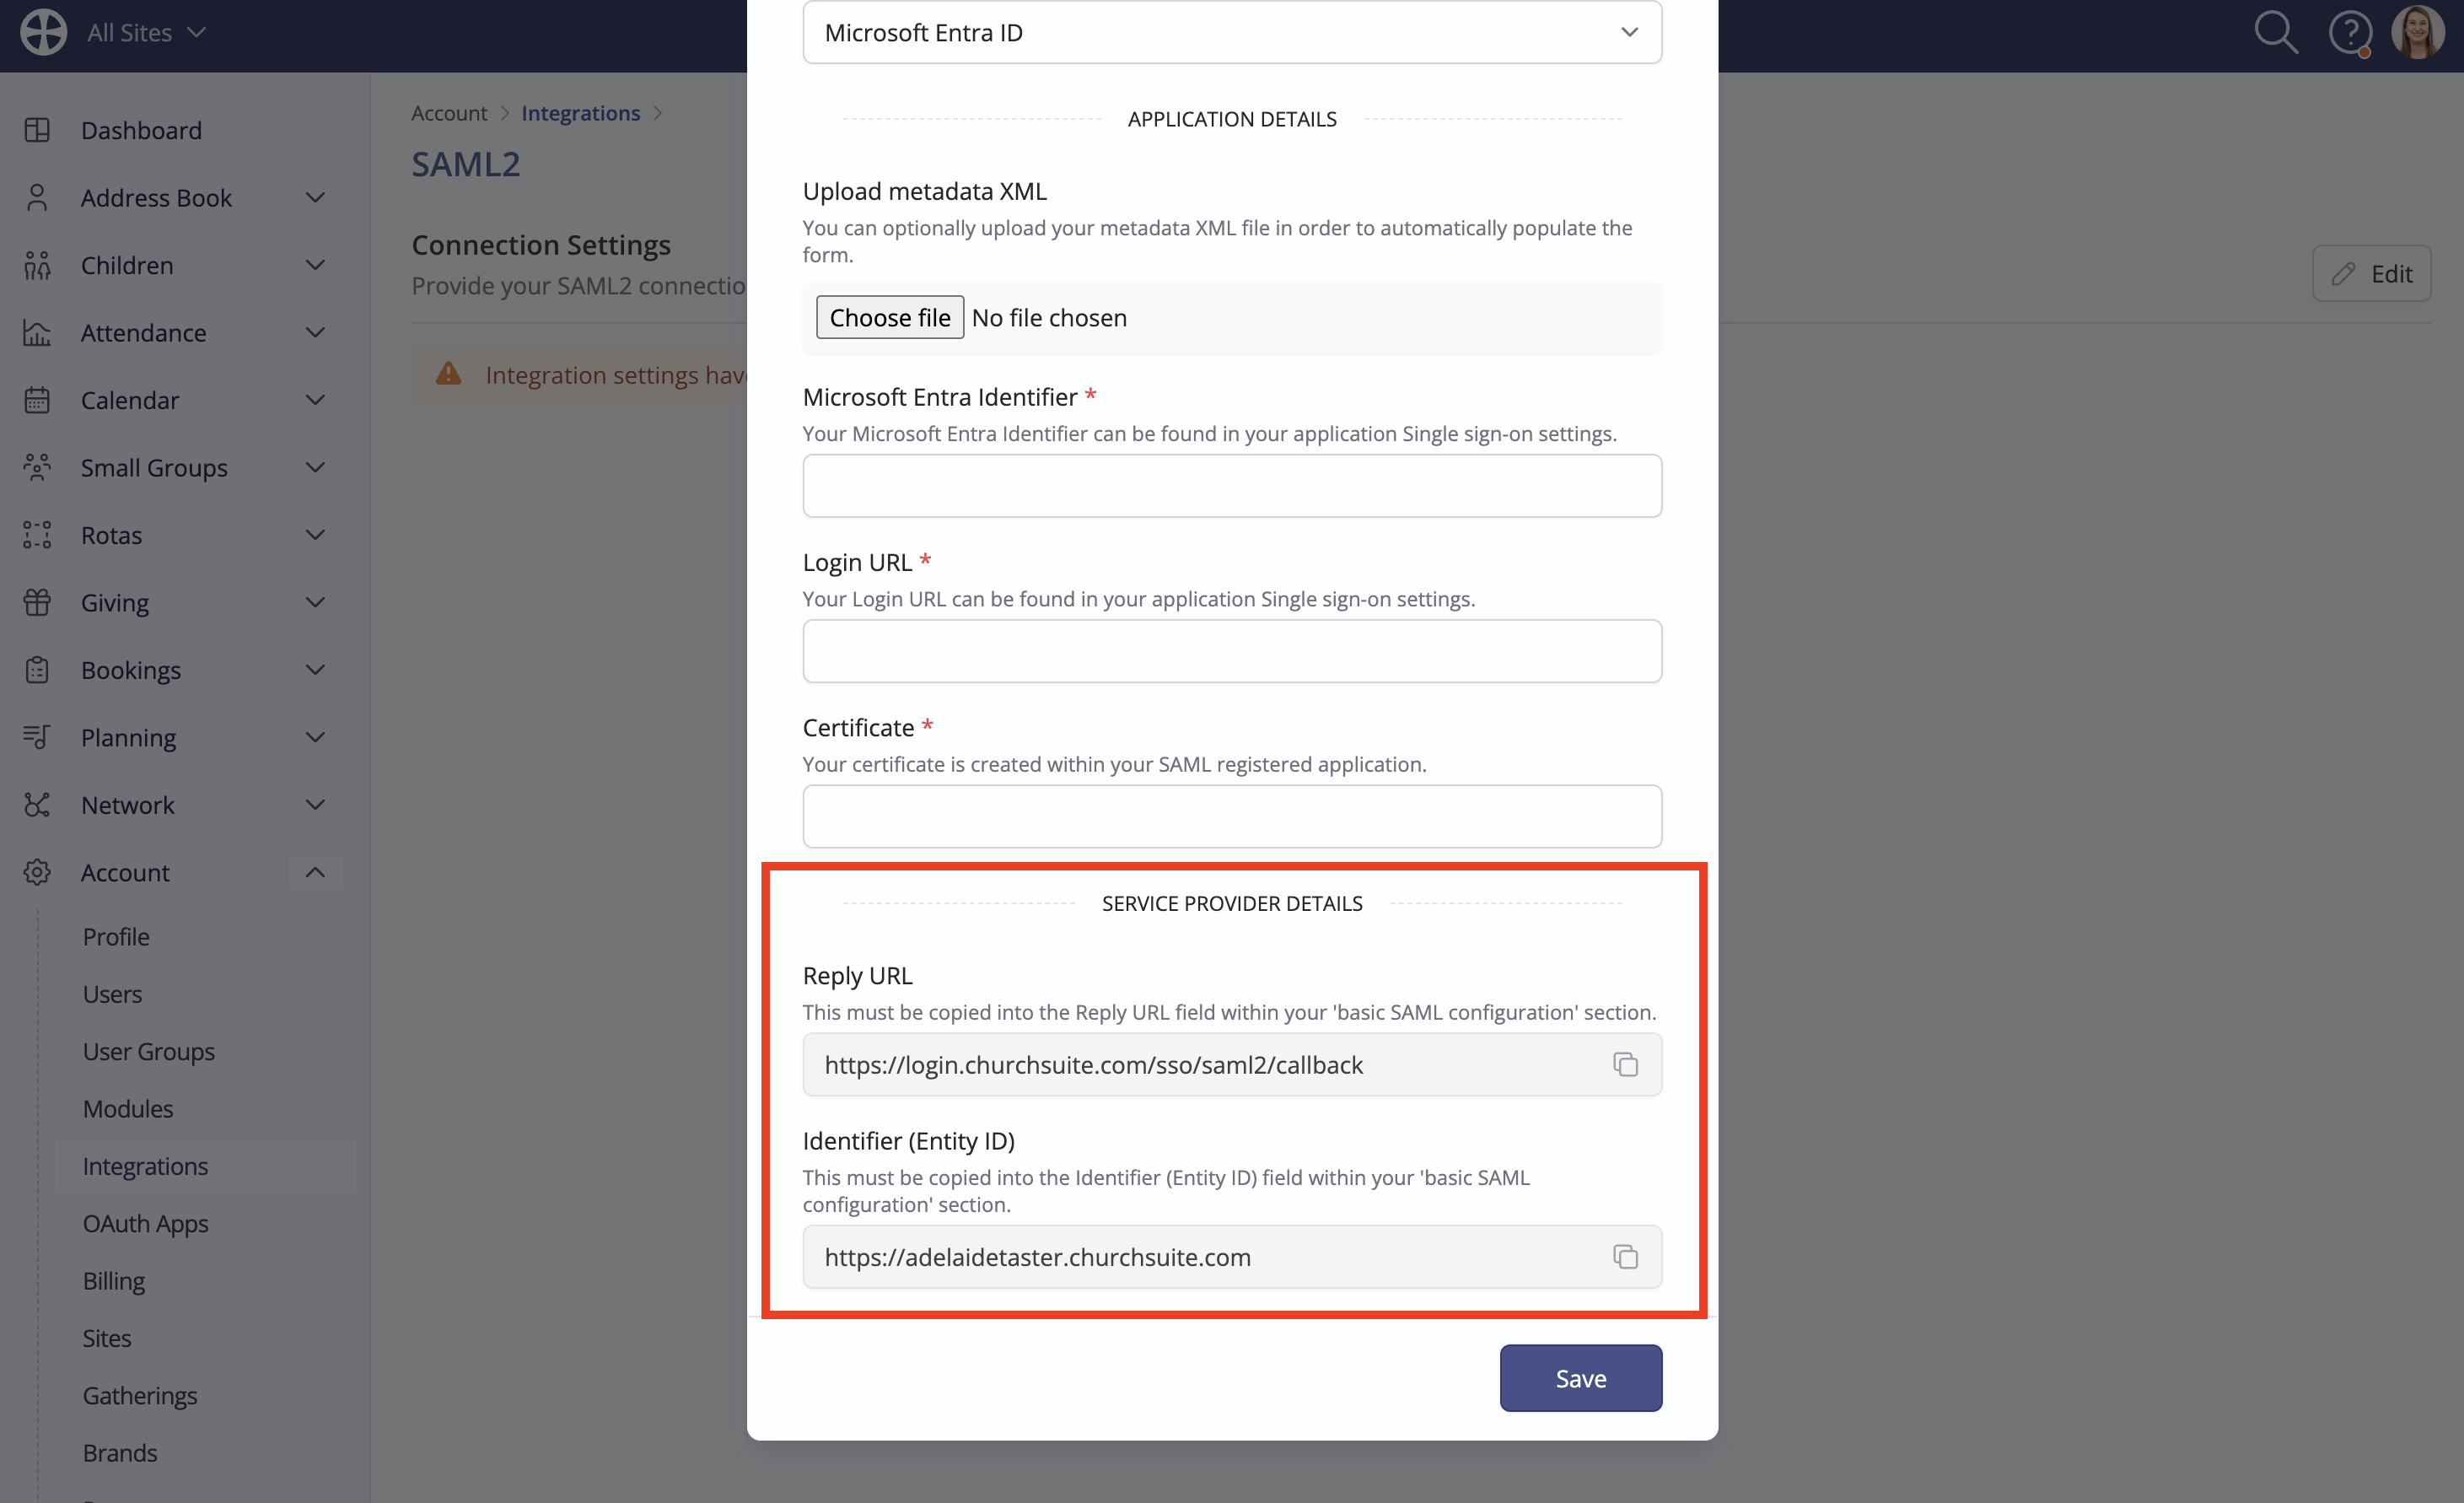
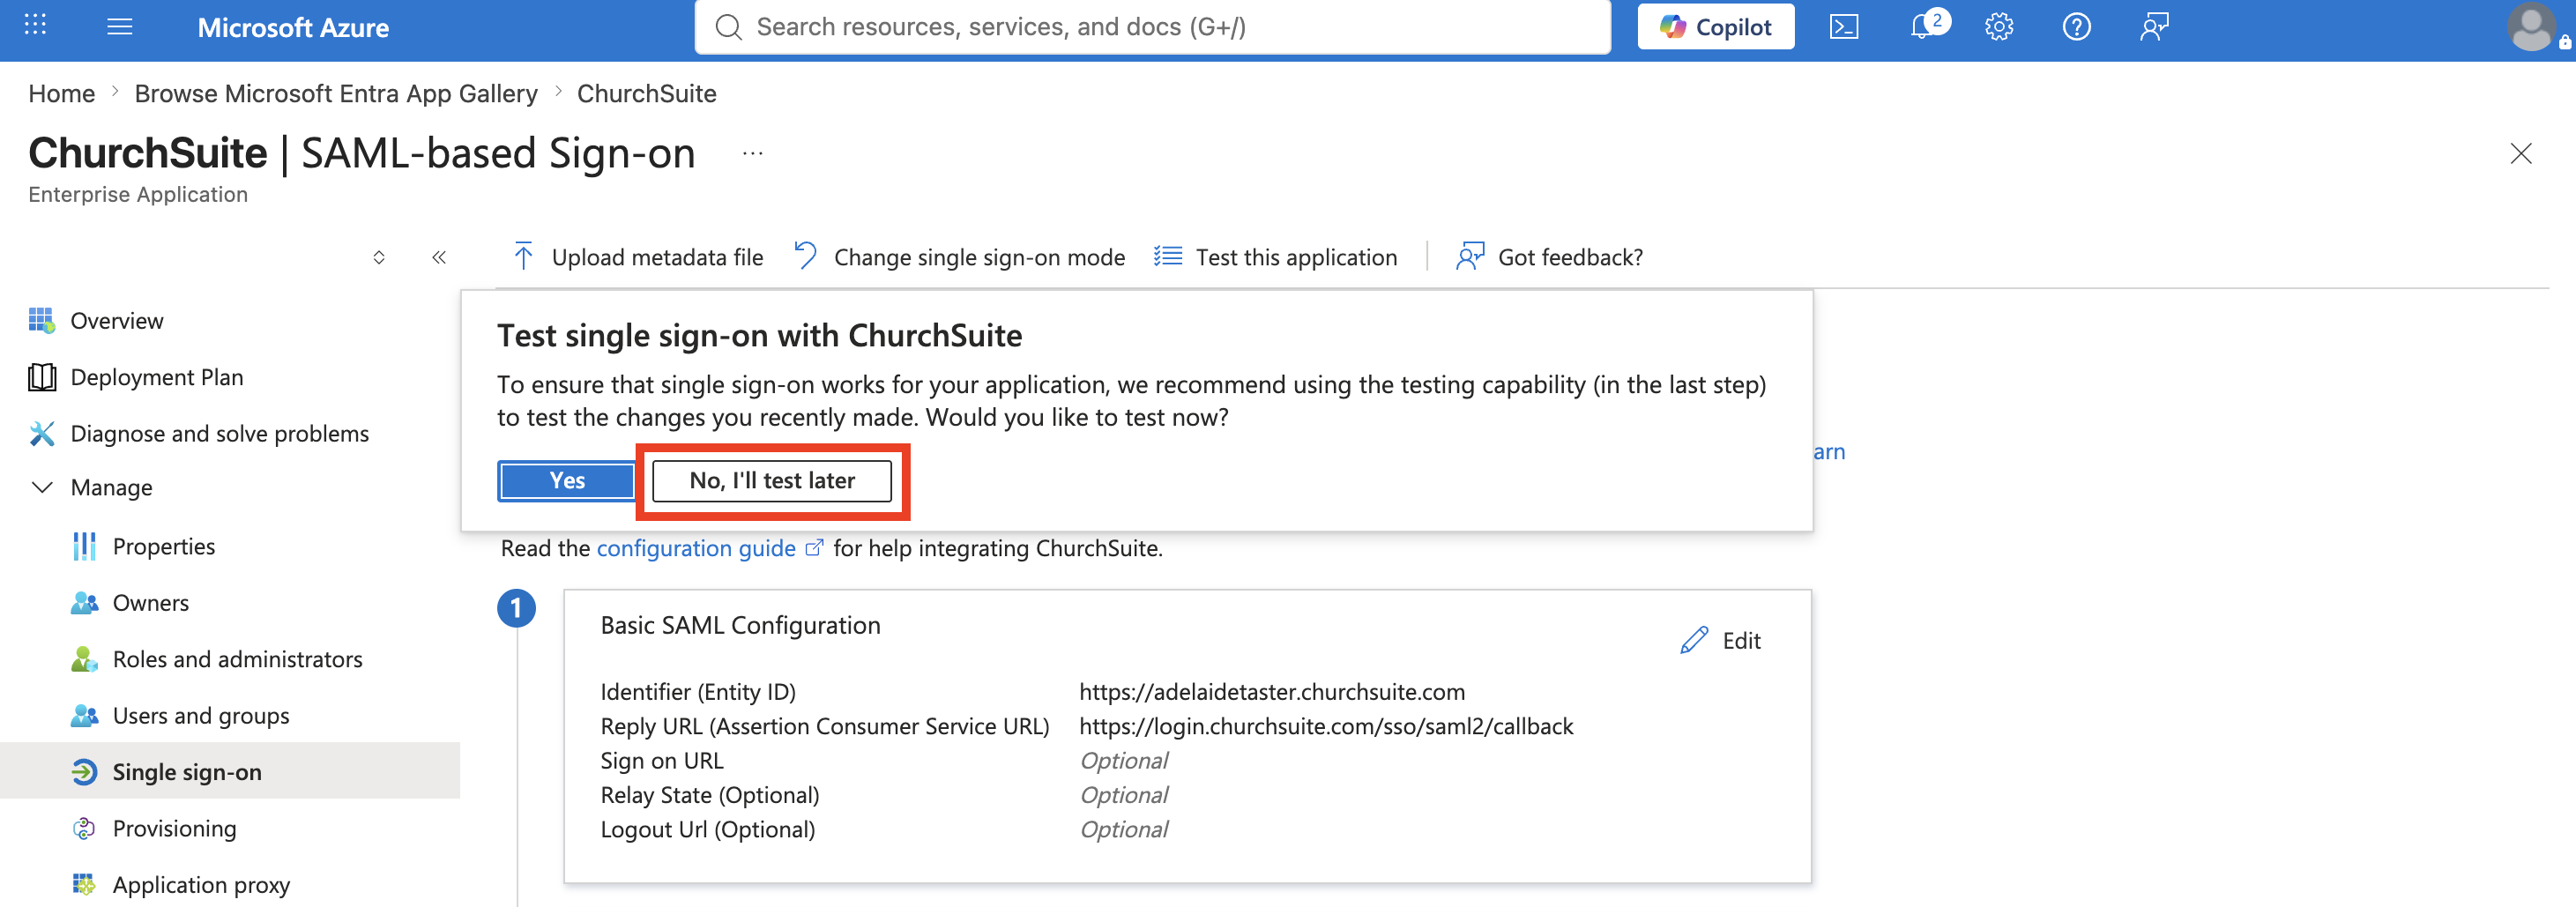
Once you're happy that the detail match, click Save and then exit the Basic SAML Configuration area using the X.

You may be prompted to test single sign-on - decline this using the No, I'll test later option.
Download the Federation Metadata XML...
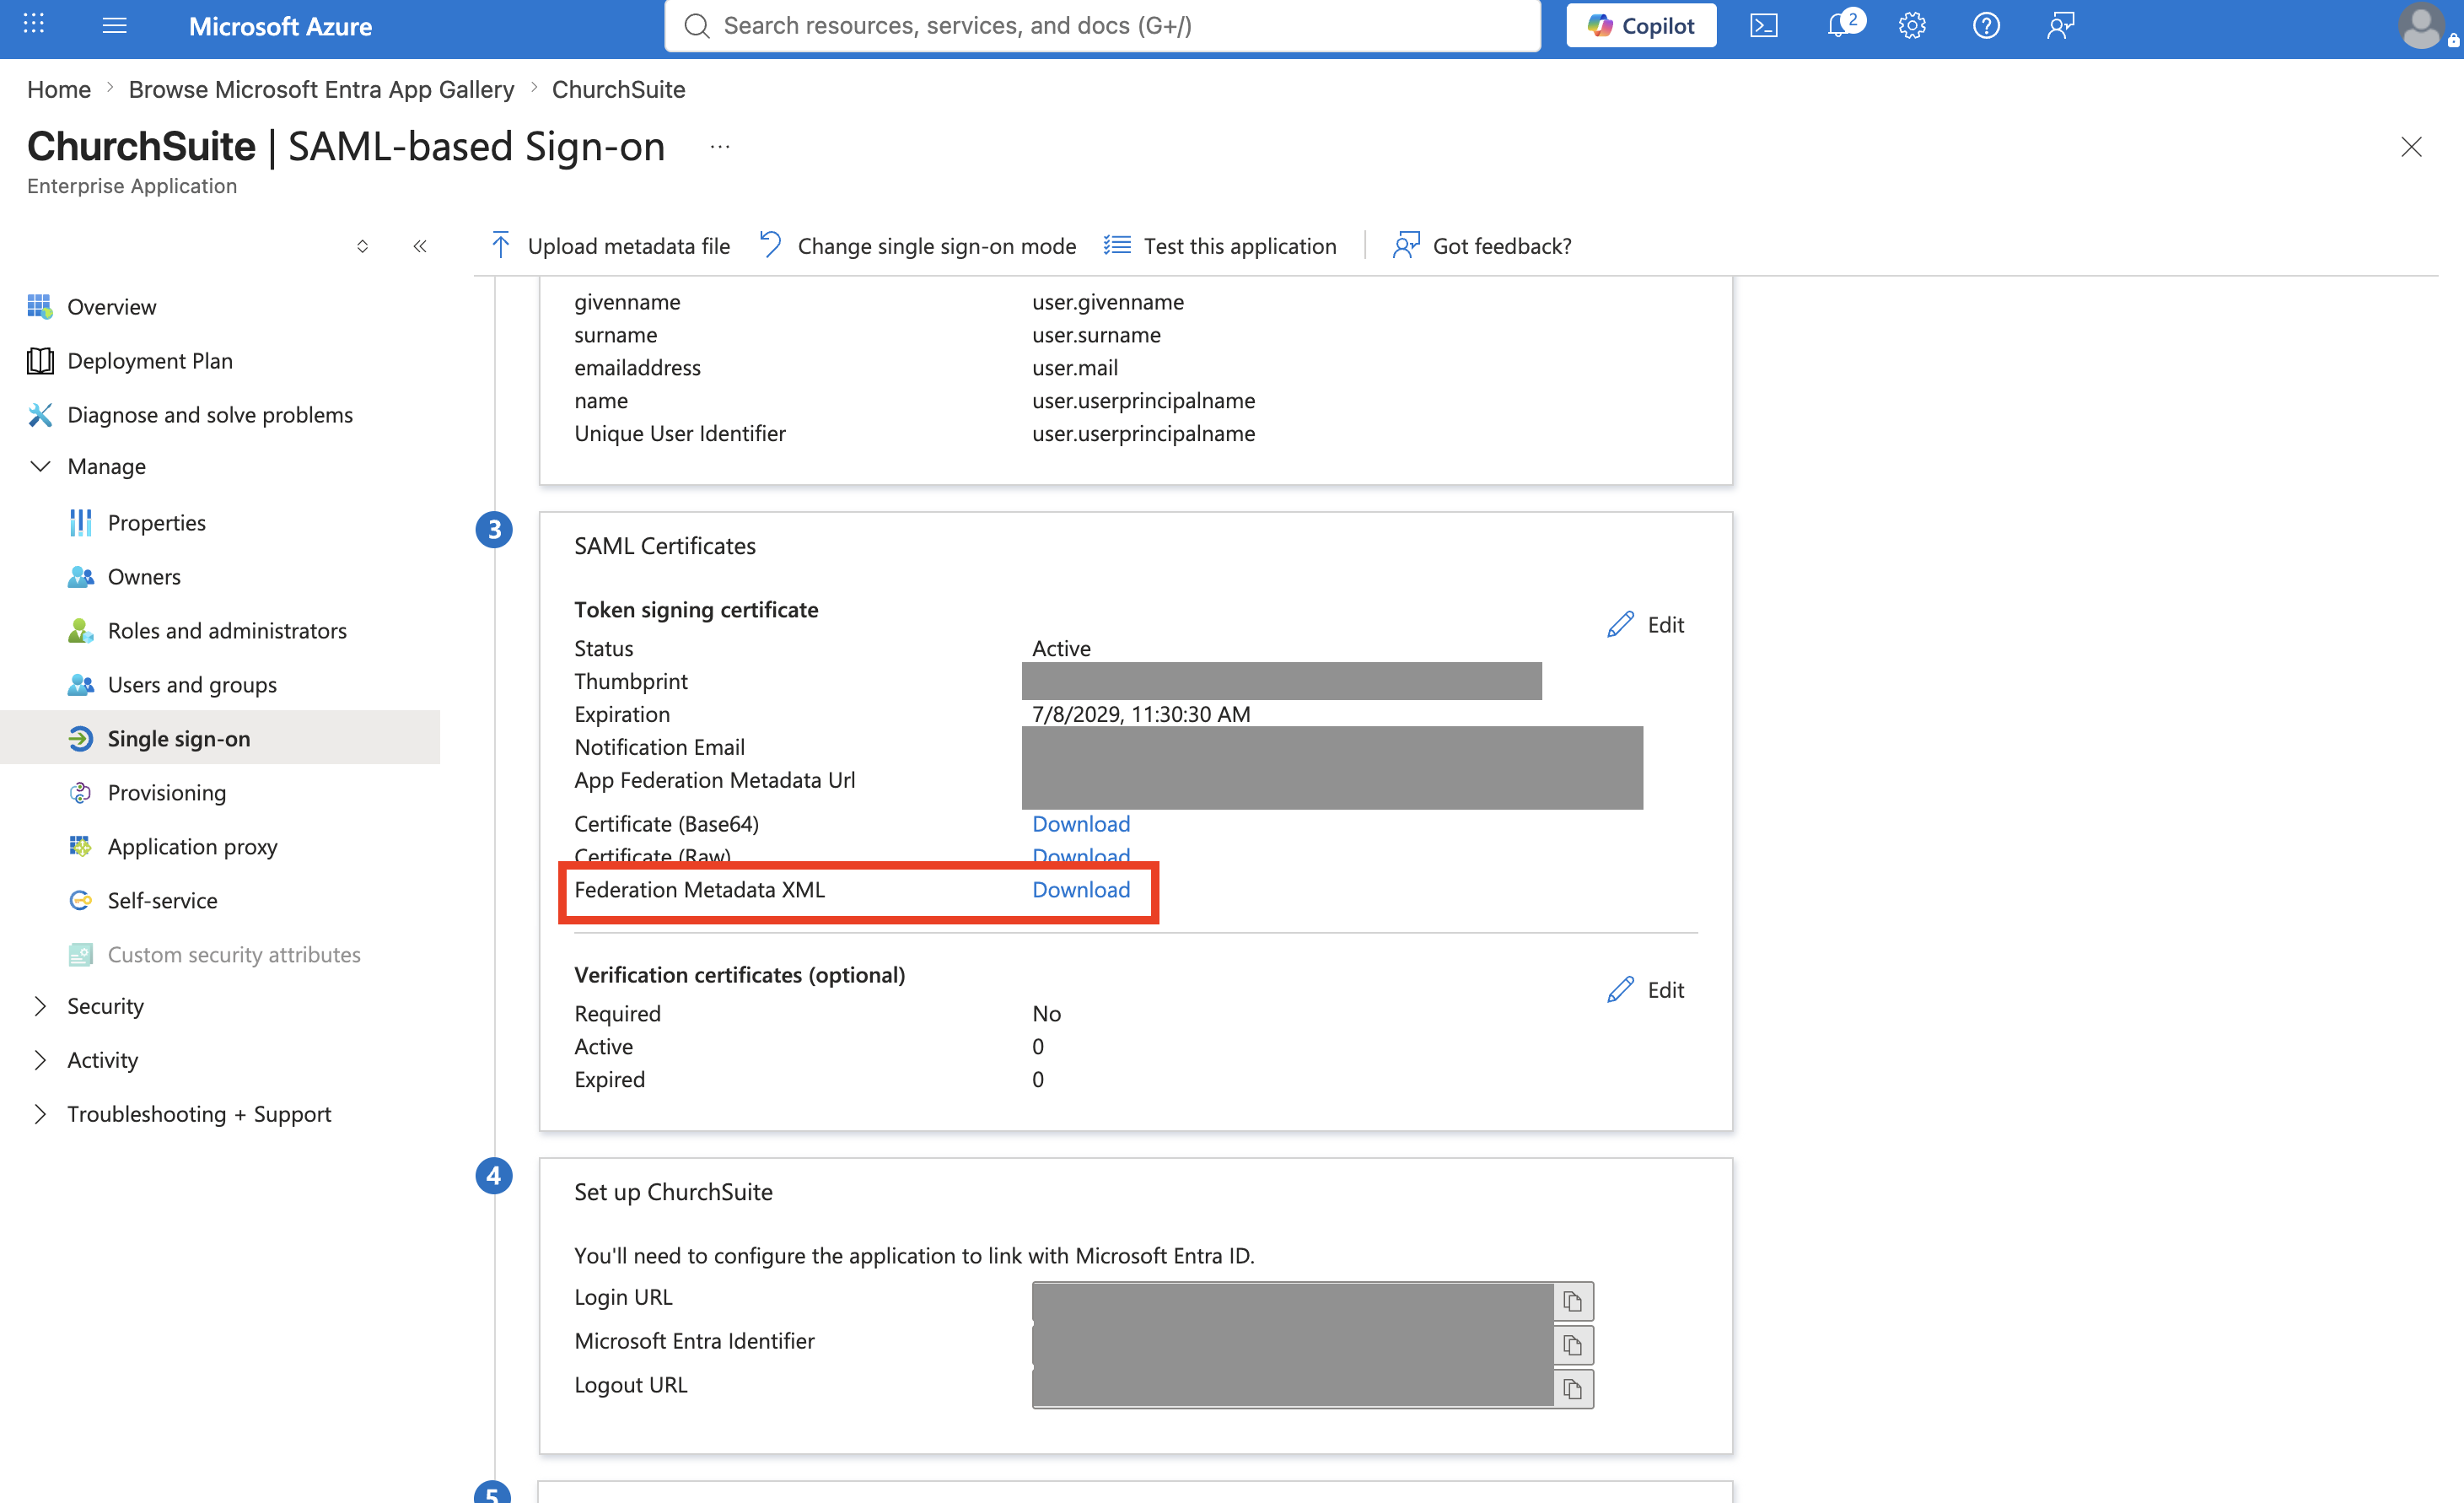
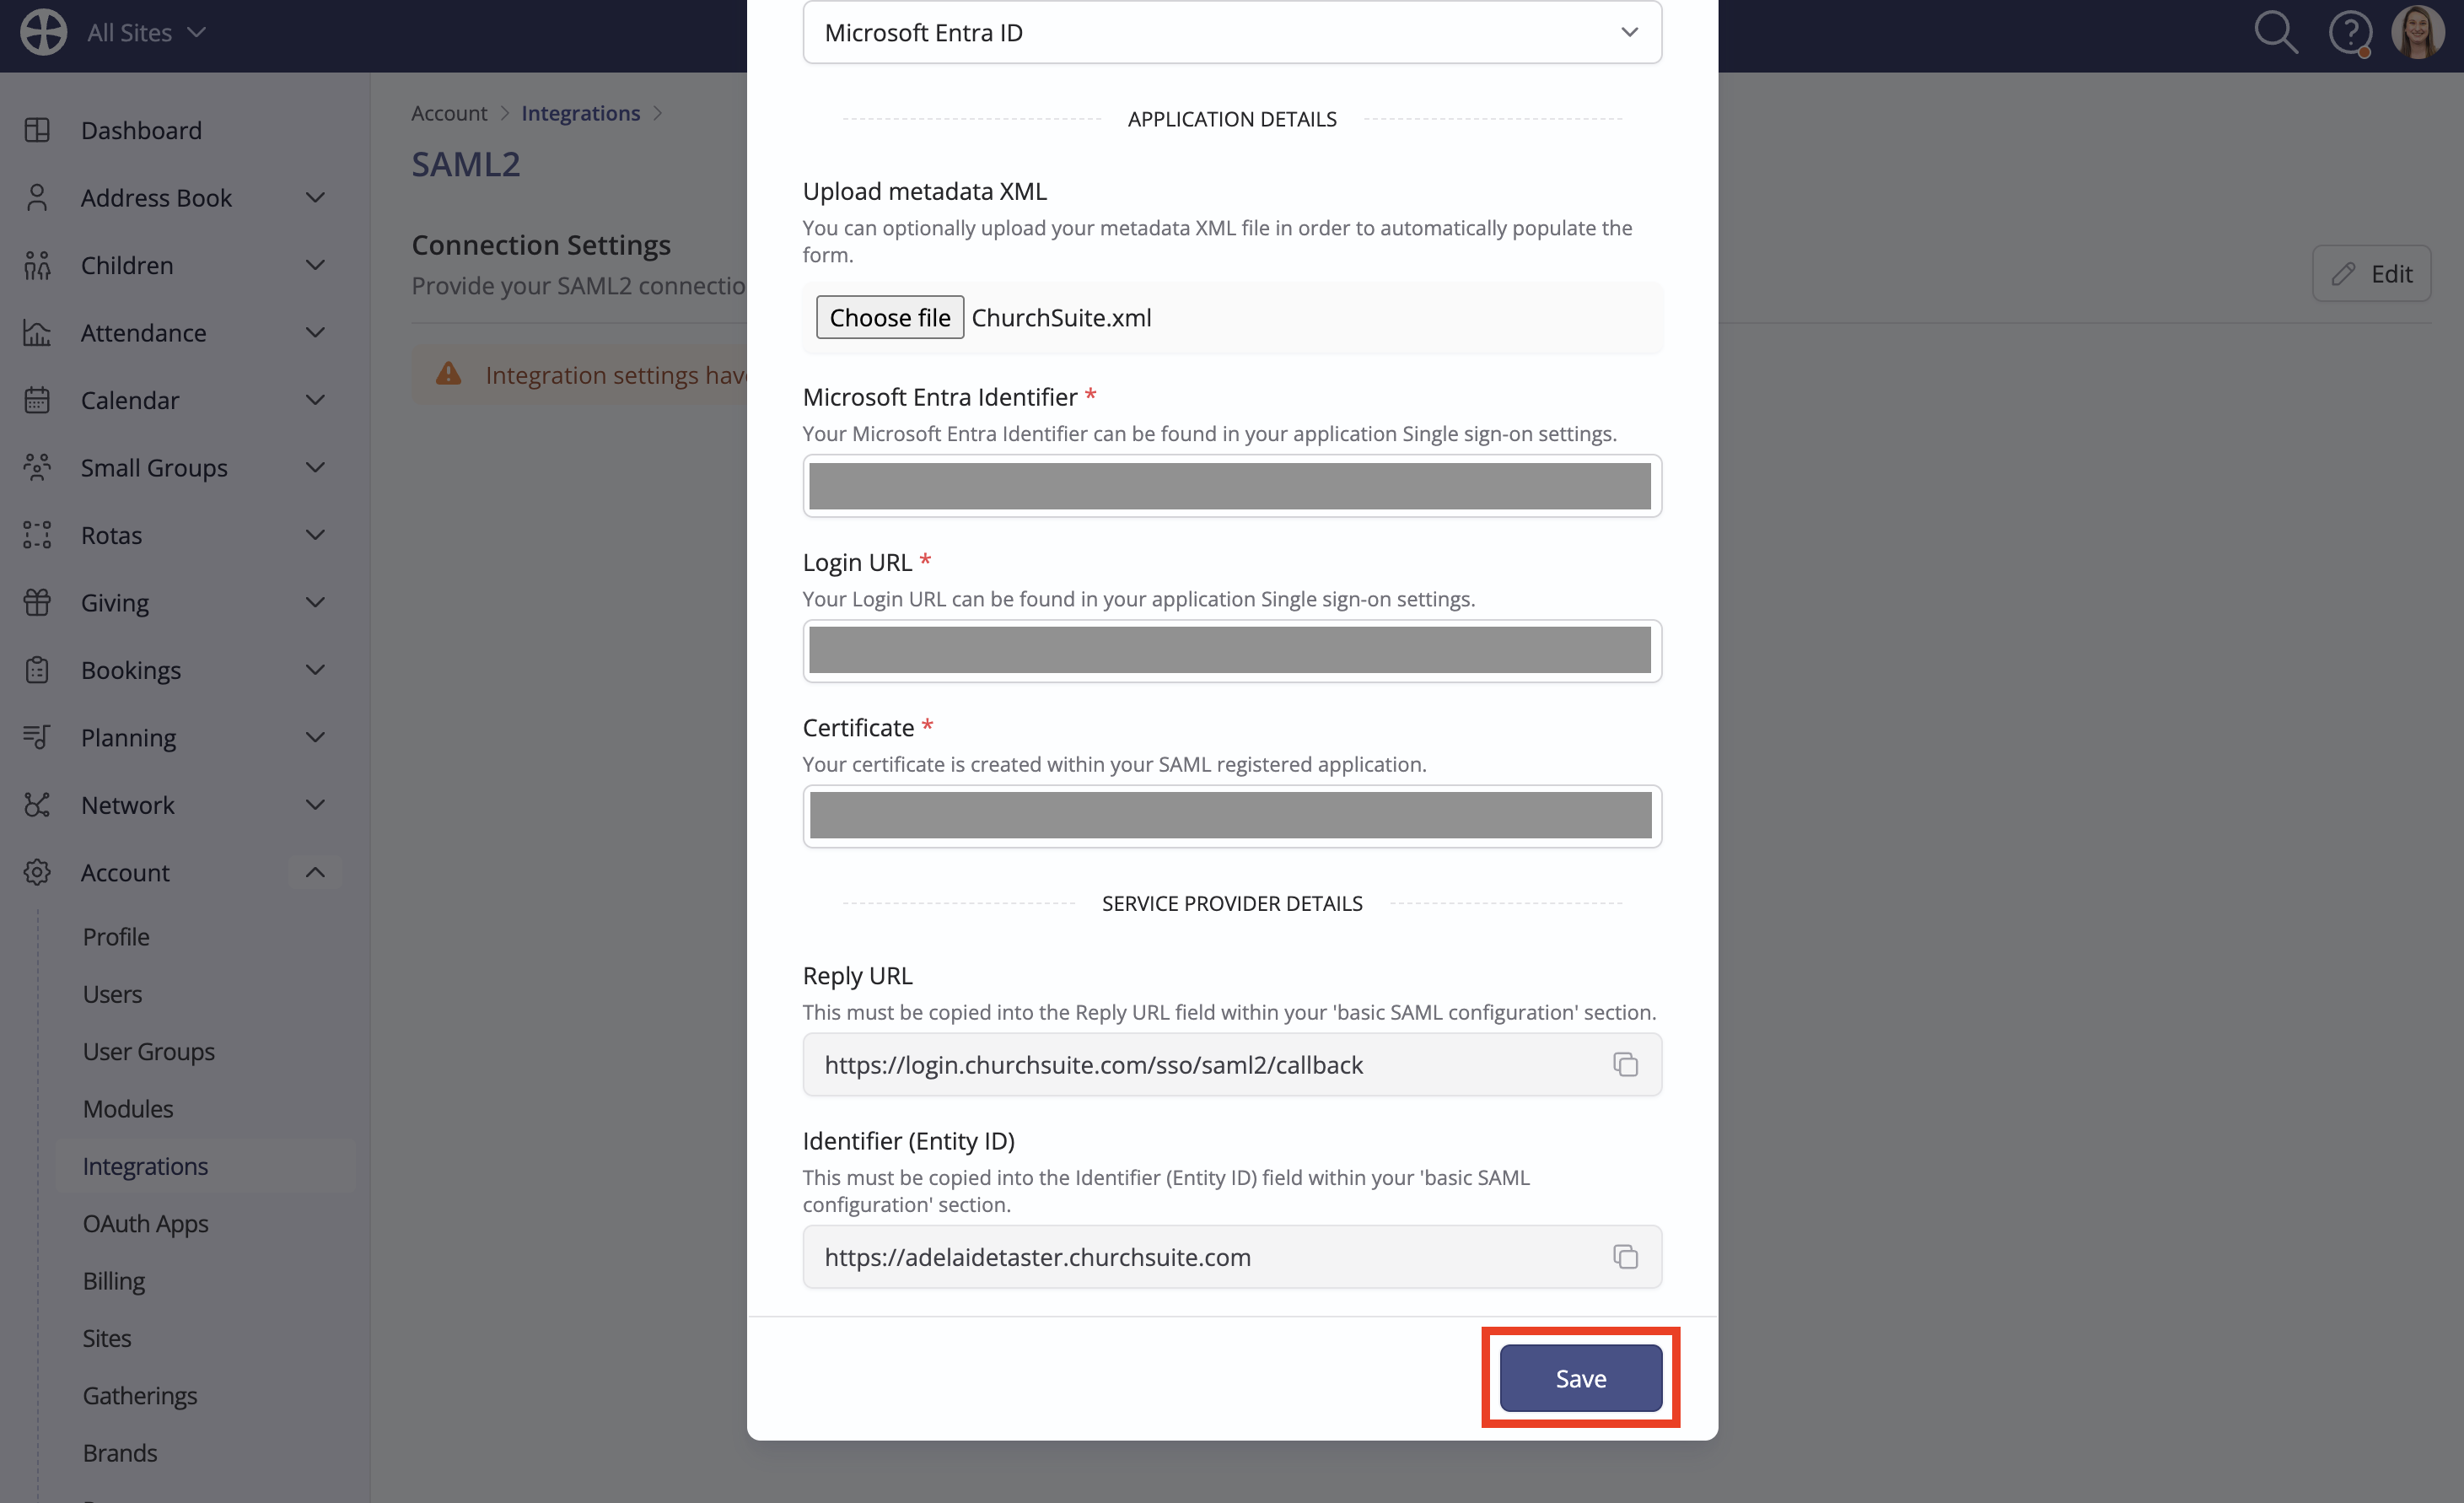
...then Choose the downloaded file in ChurchSuite/CharitySuite - the Entra Identifier, Login URL and Certificate application details will be automatically populated. Alternatively, add these manually. Click Save.
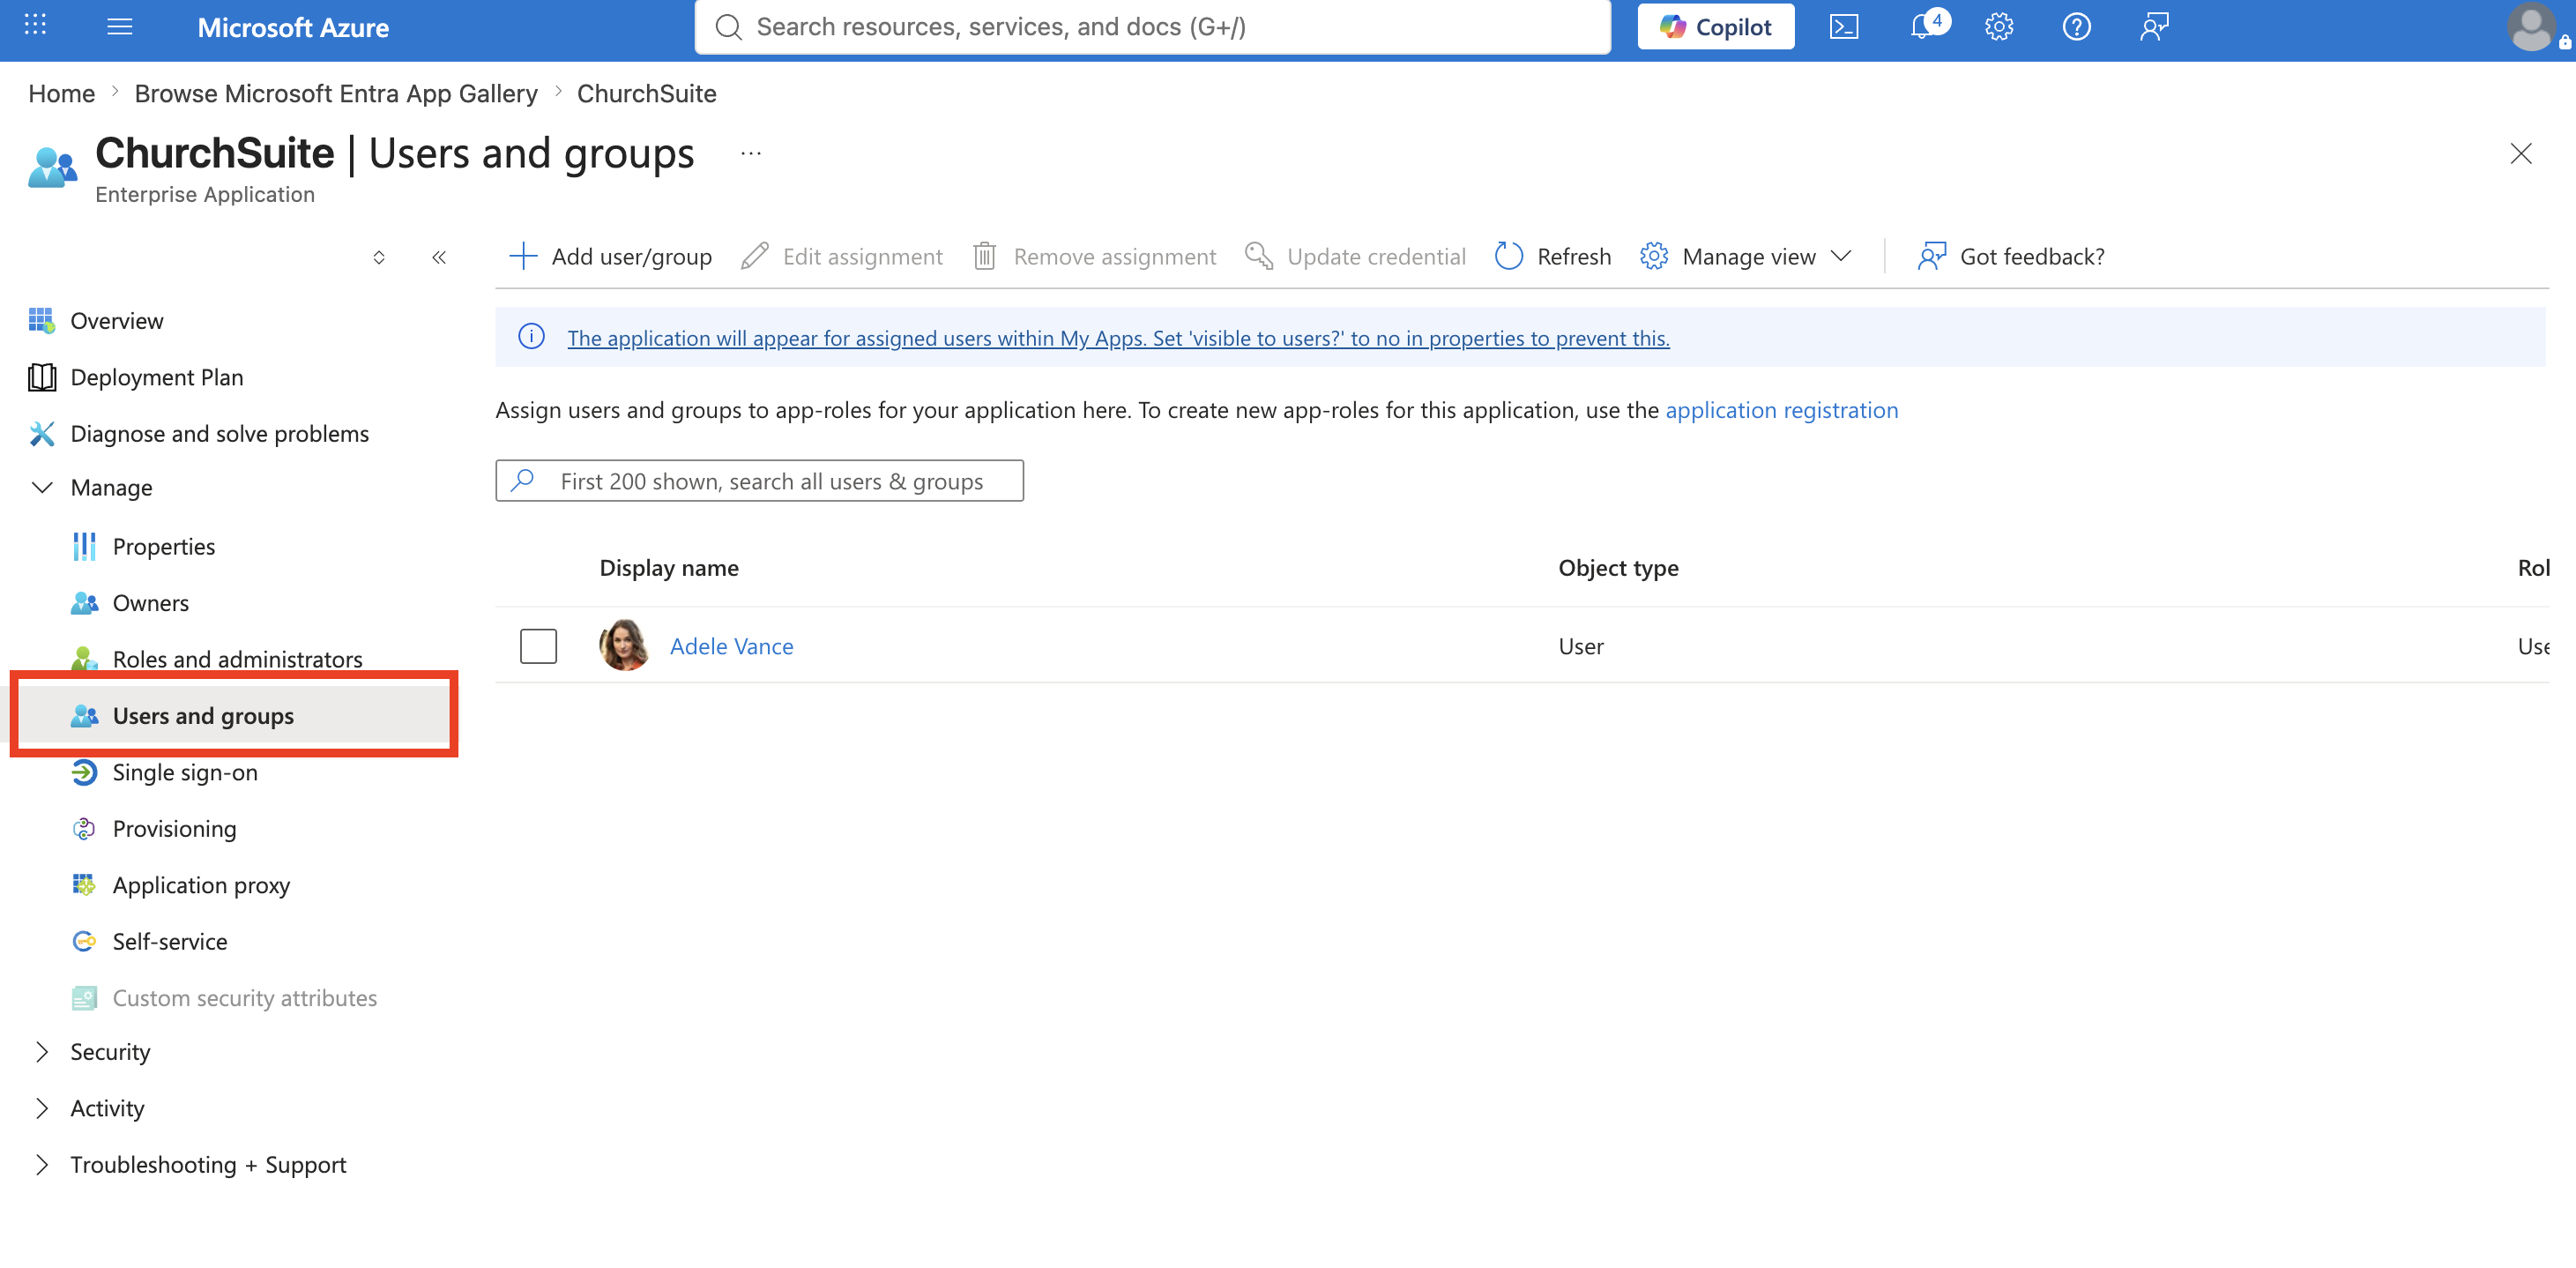
Finally, back in your Microsoft account, ensure that the app Users and Groups reflect those who you wish to use SAML2 Single Sign on.
Next...
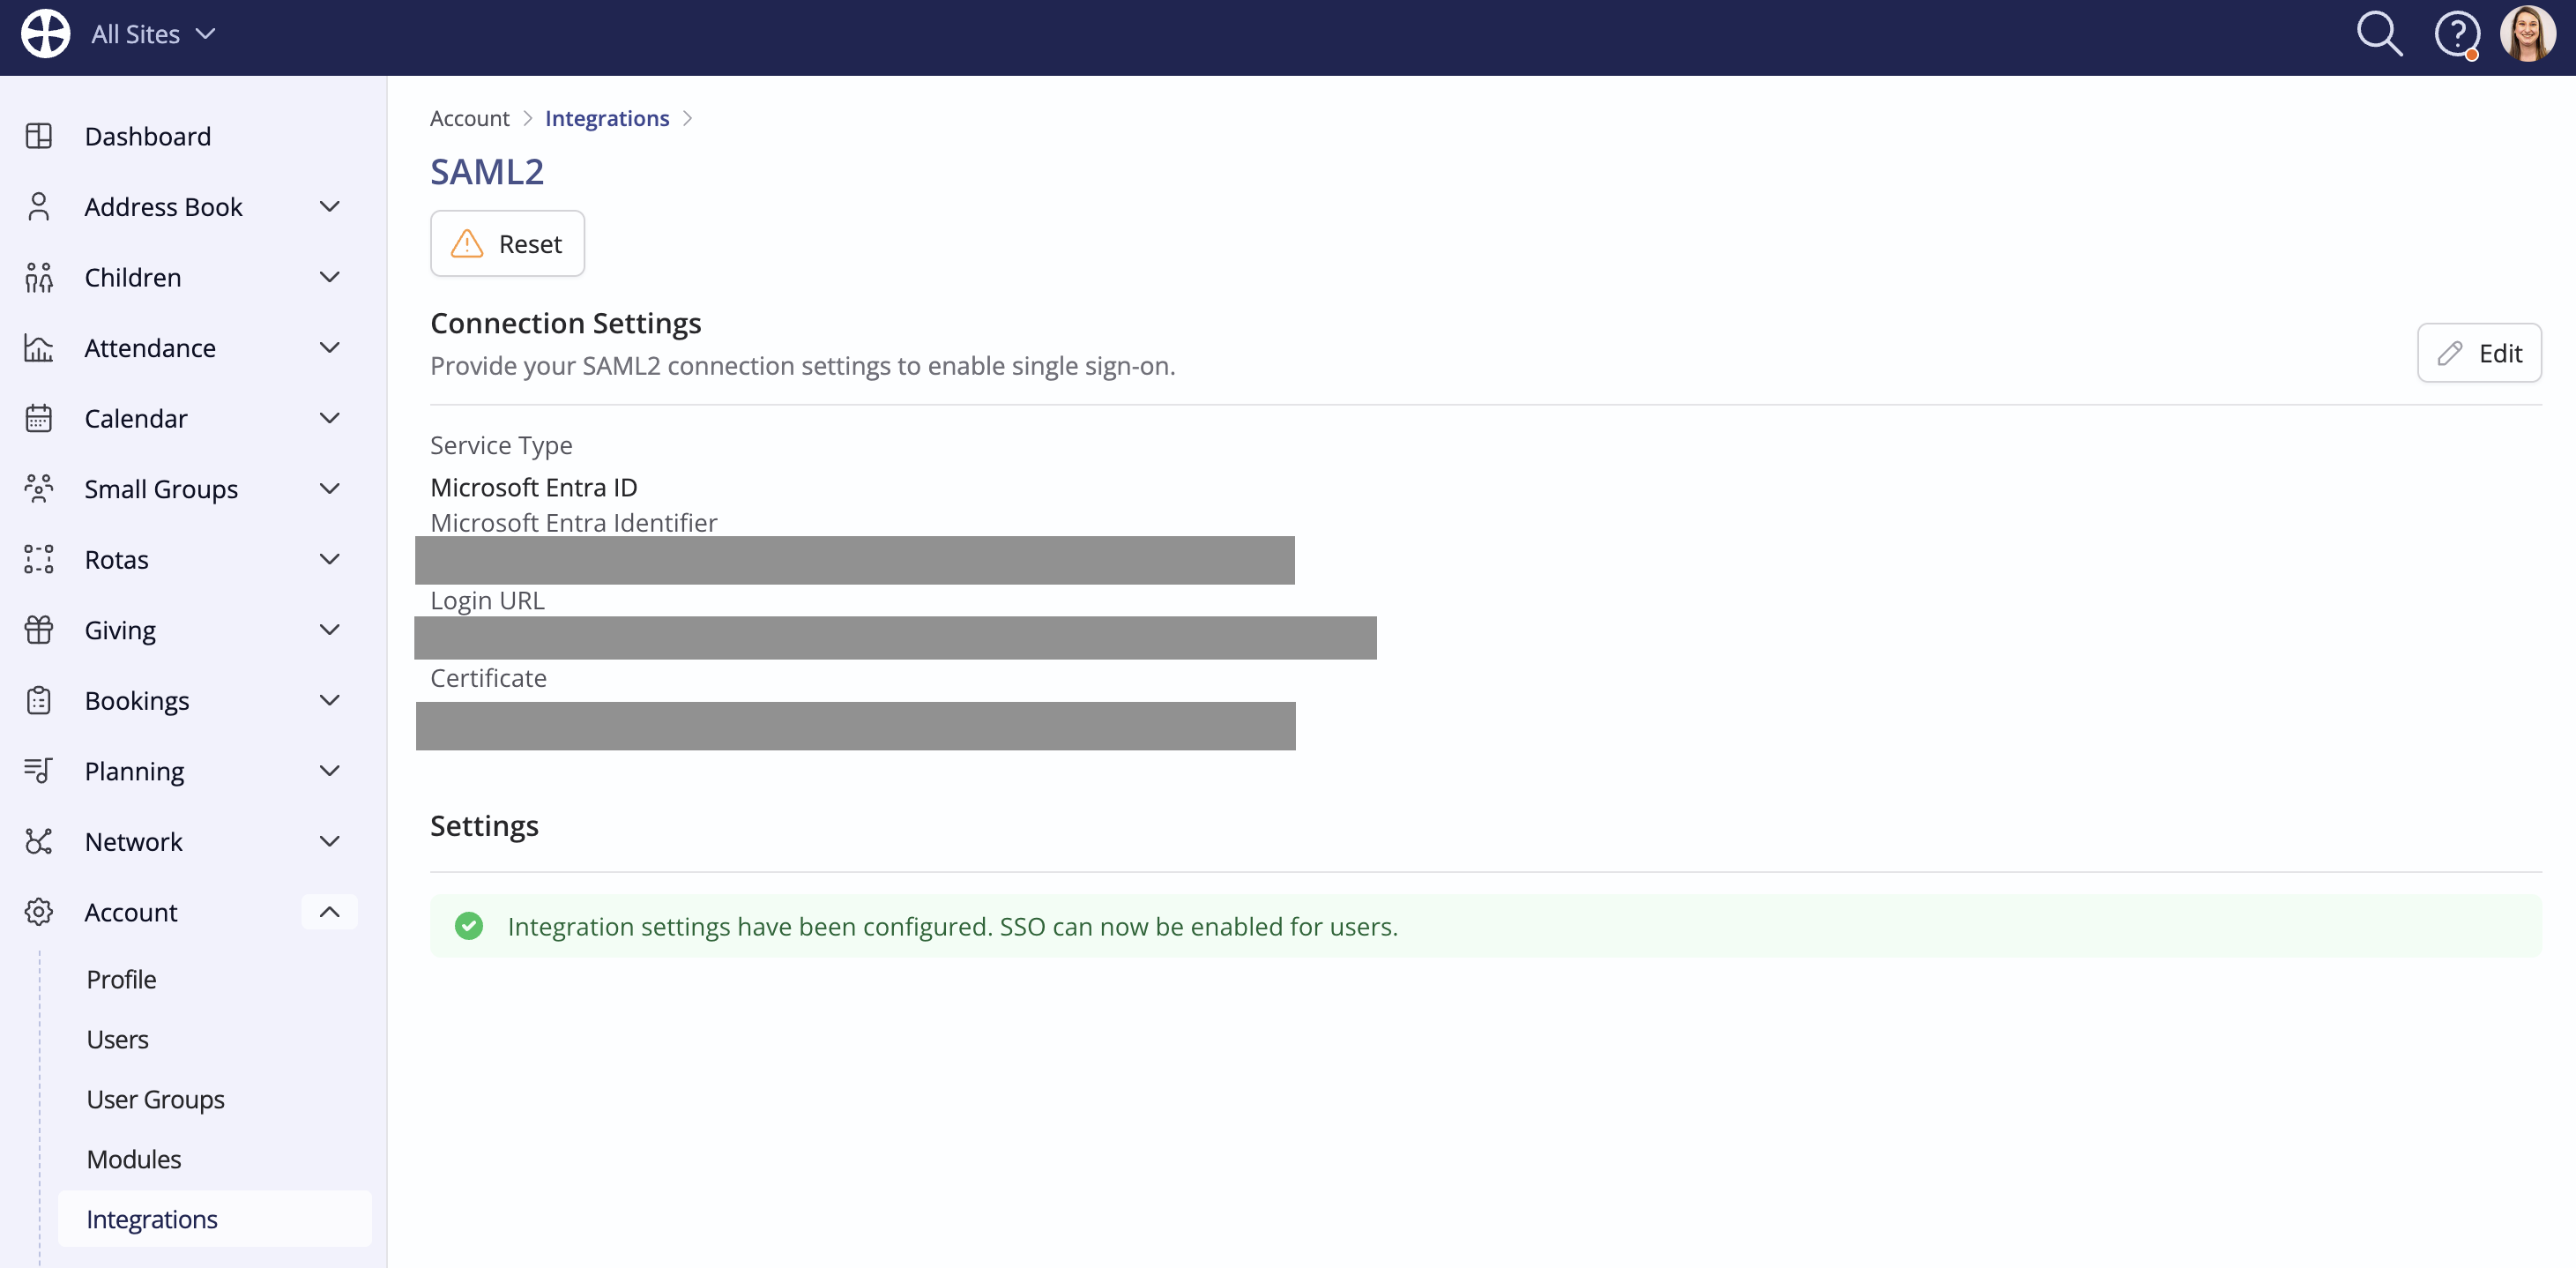
Once the integration settings are correctly configured, you can begin enabling SAML2 single sign-on for your ChurchSuite/CharitySuite users, as explained in the final section.
Using the Google service
NB: This section and it's screenshots are correct at the time of writing (July 2026). As Google makes changes, nuances of our description and screenshots may become outdated.
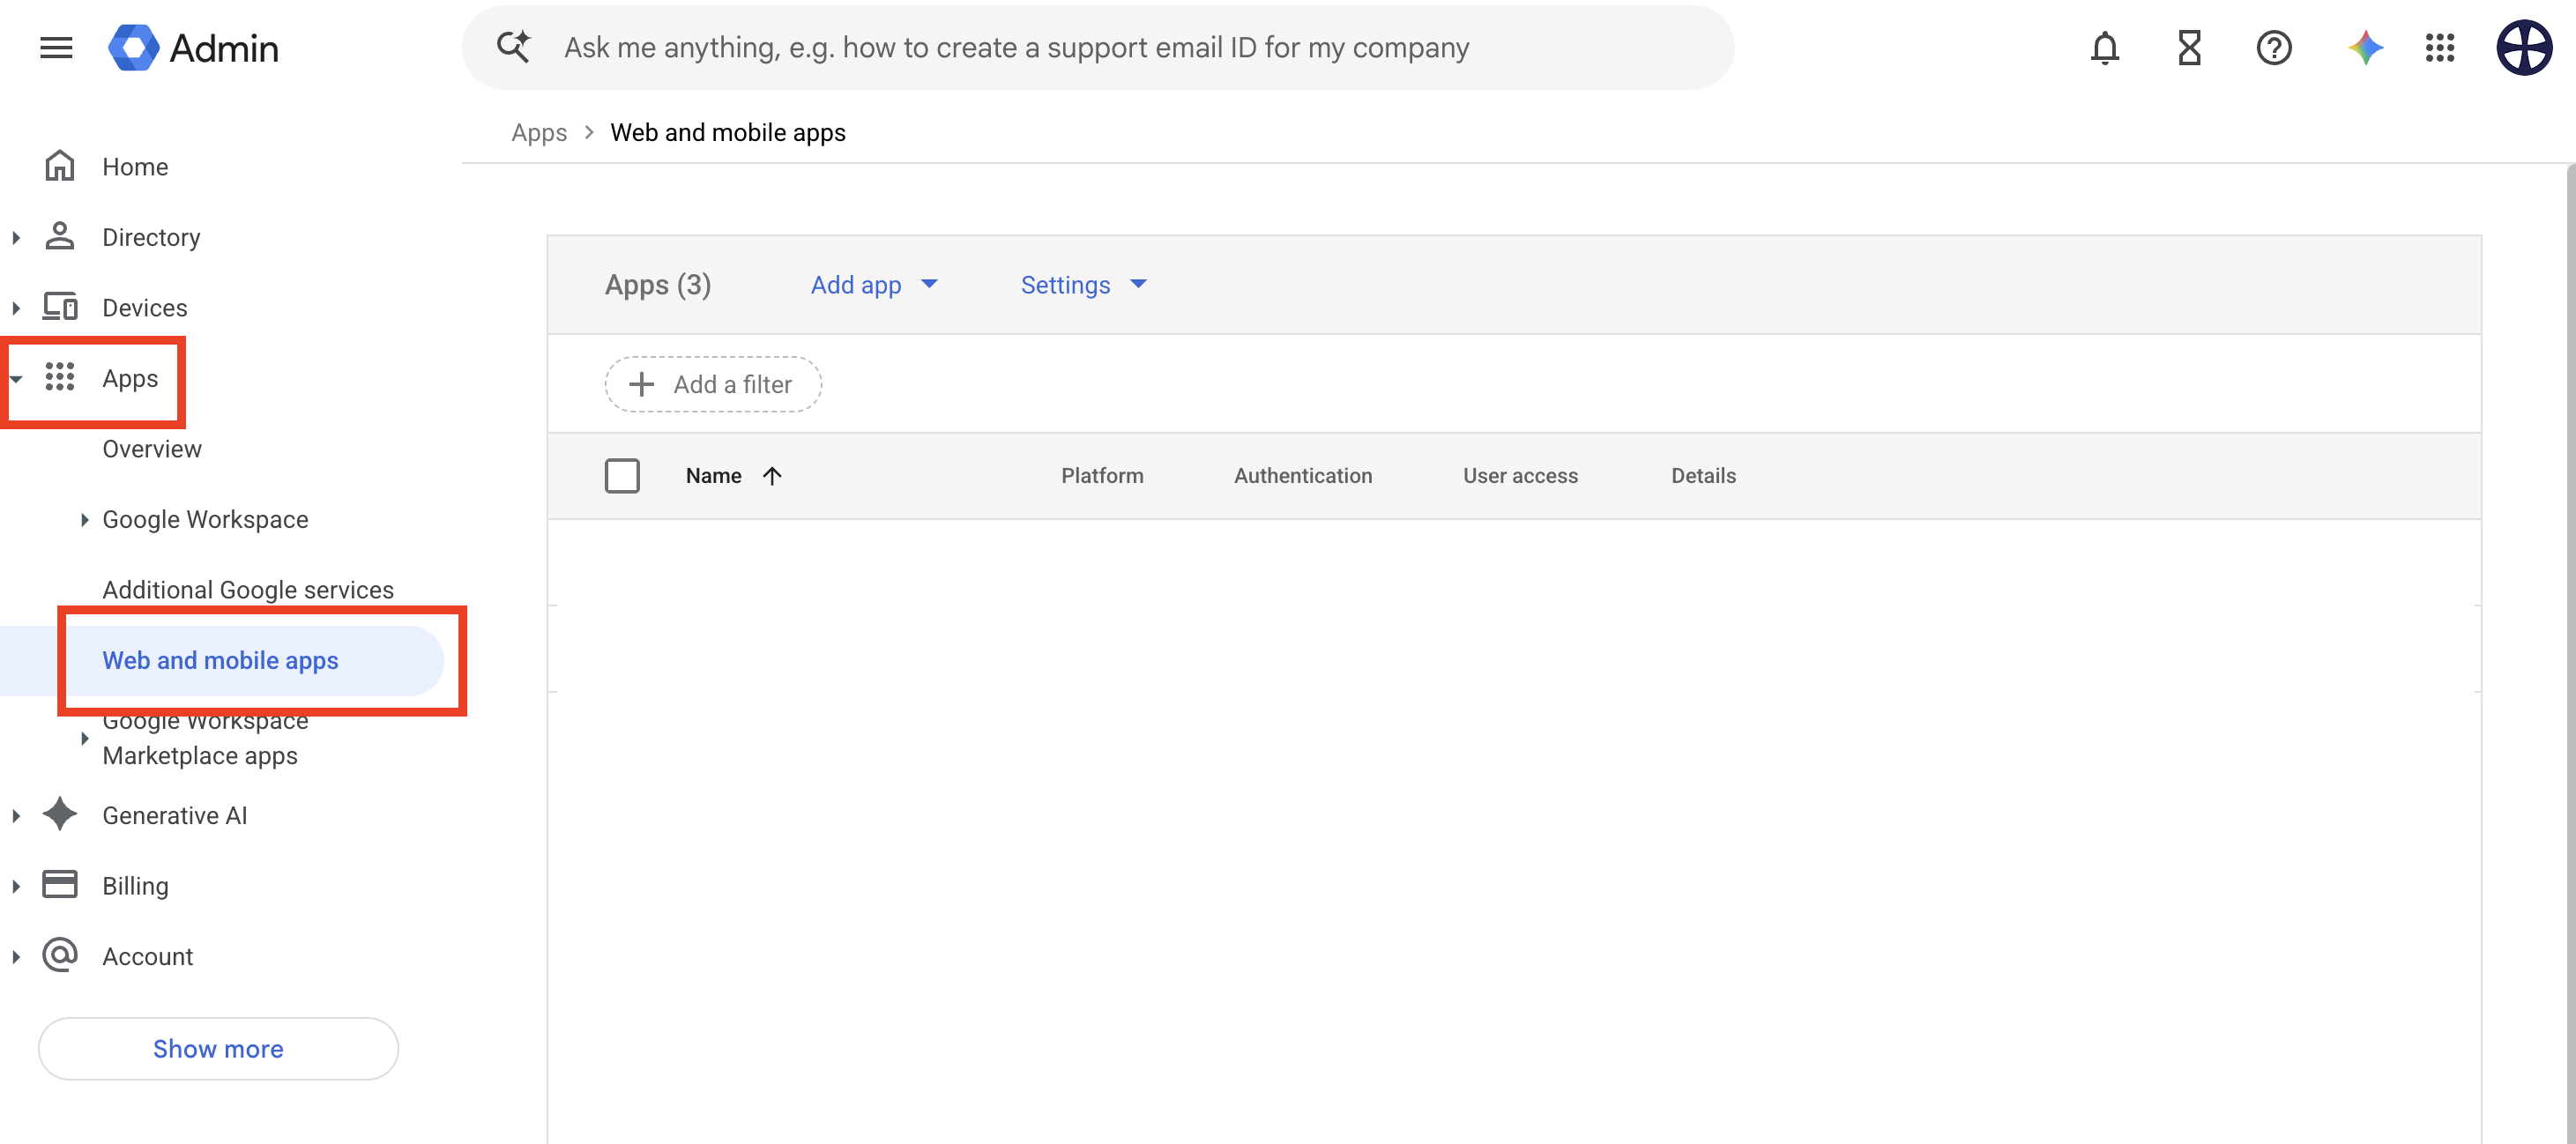
Navigate to Google Workspace's Admin Console and use your credentials to sign in. Click Apps then Web and mobile apps.
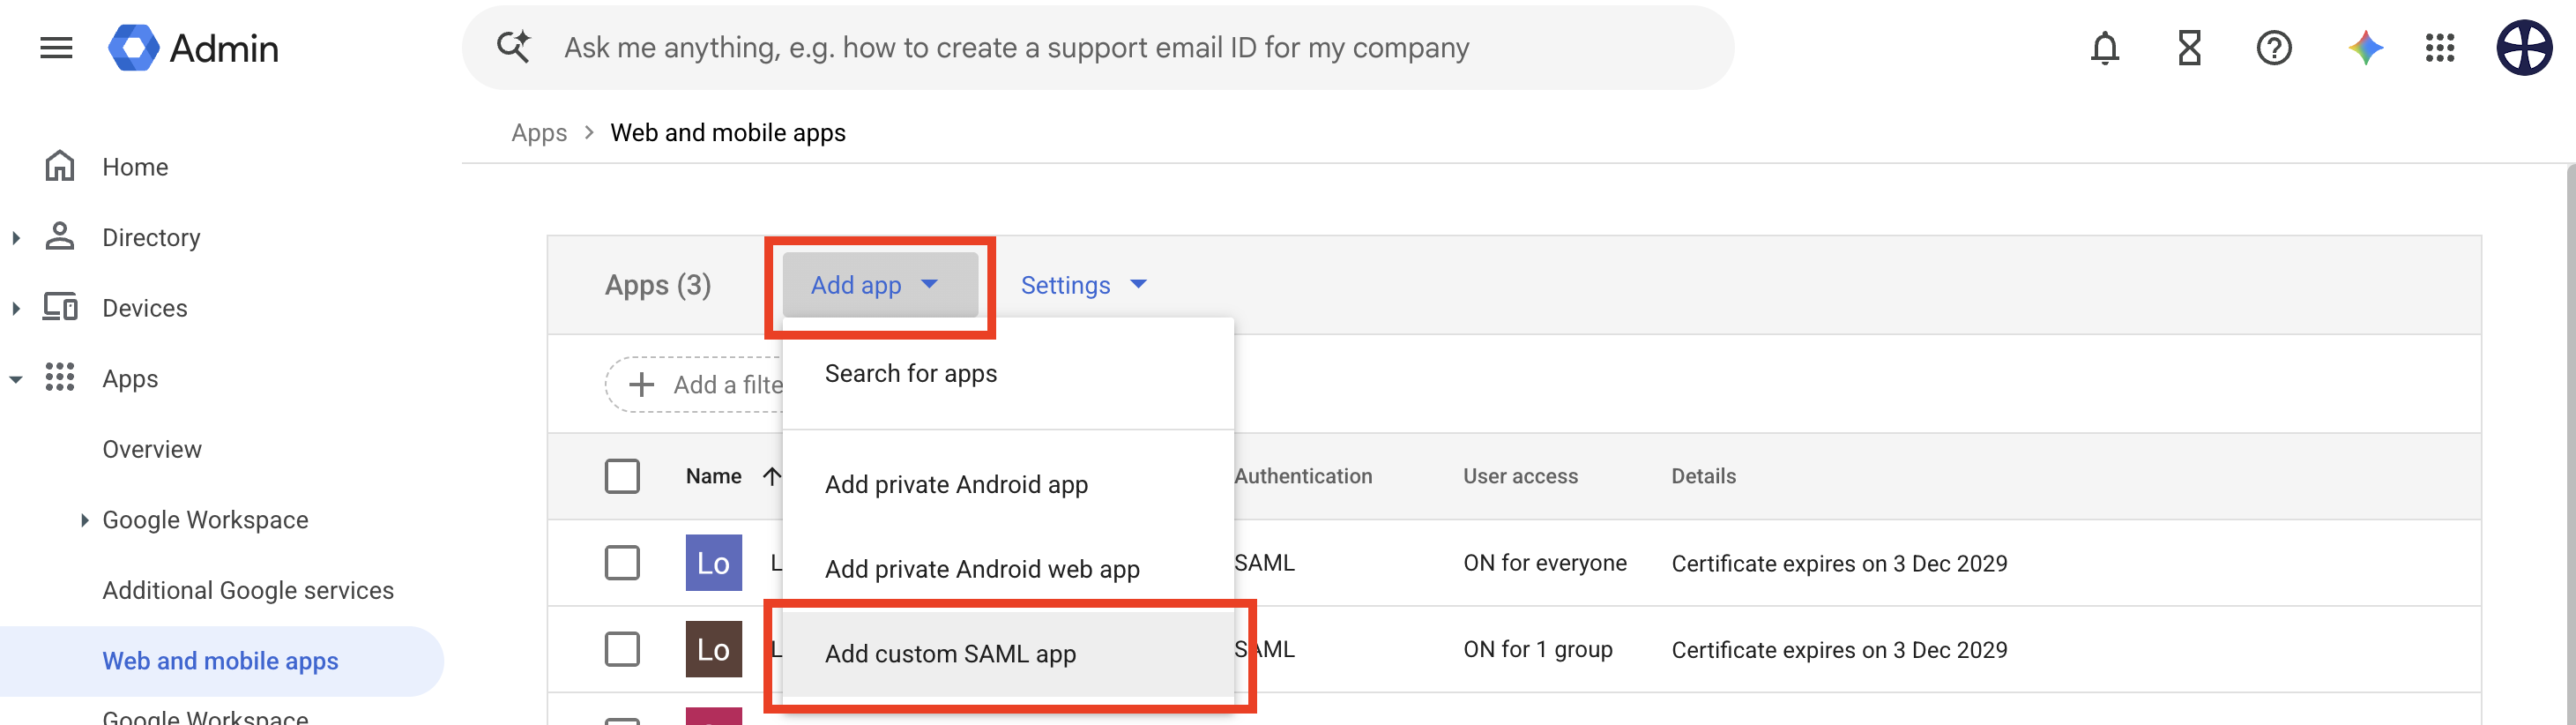
Click Add app and choose Add custom SAML app.
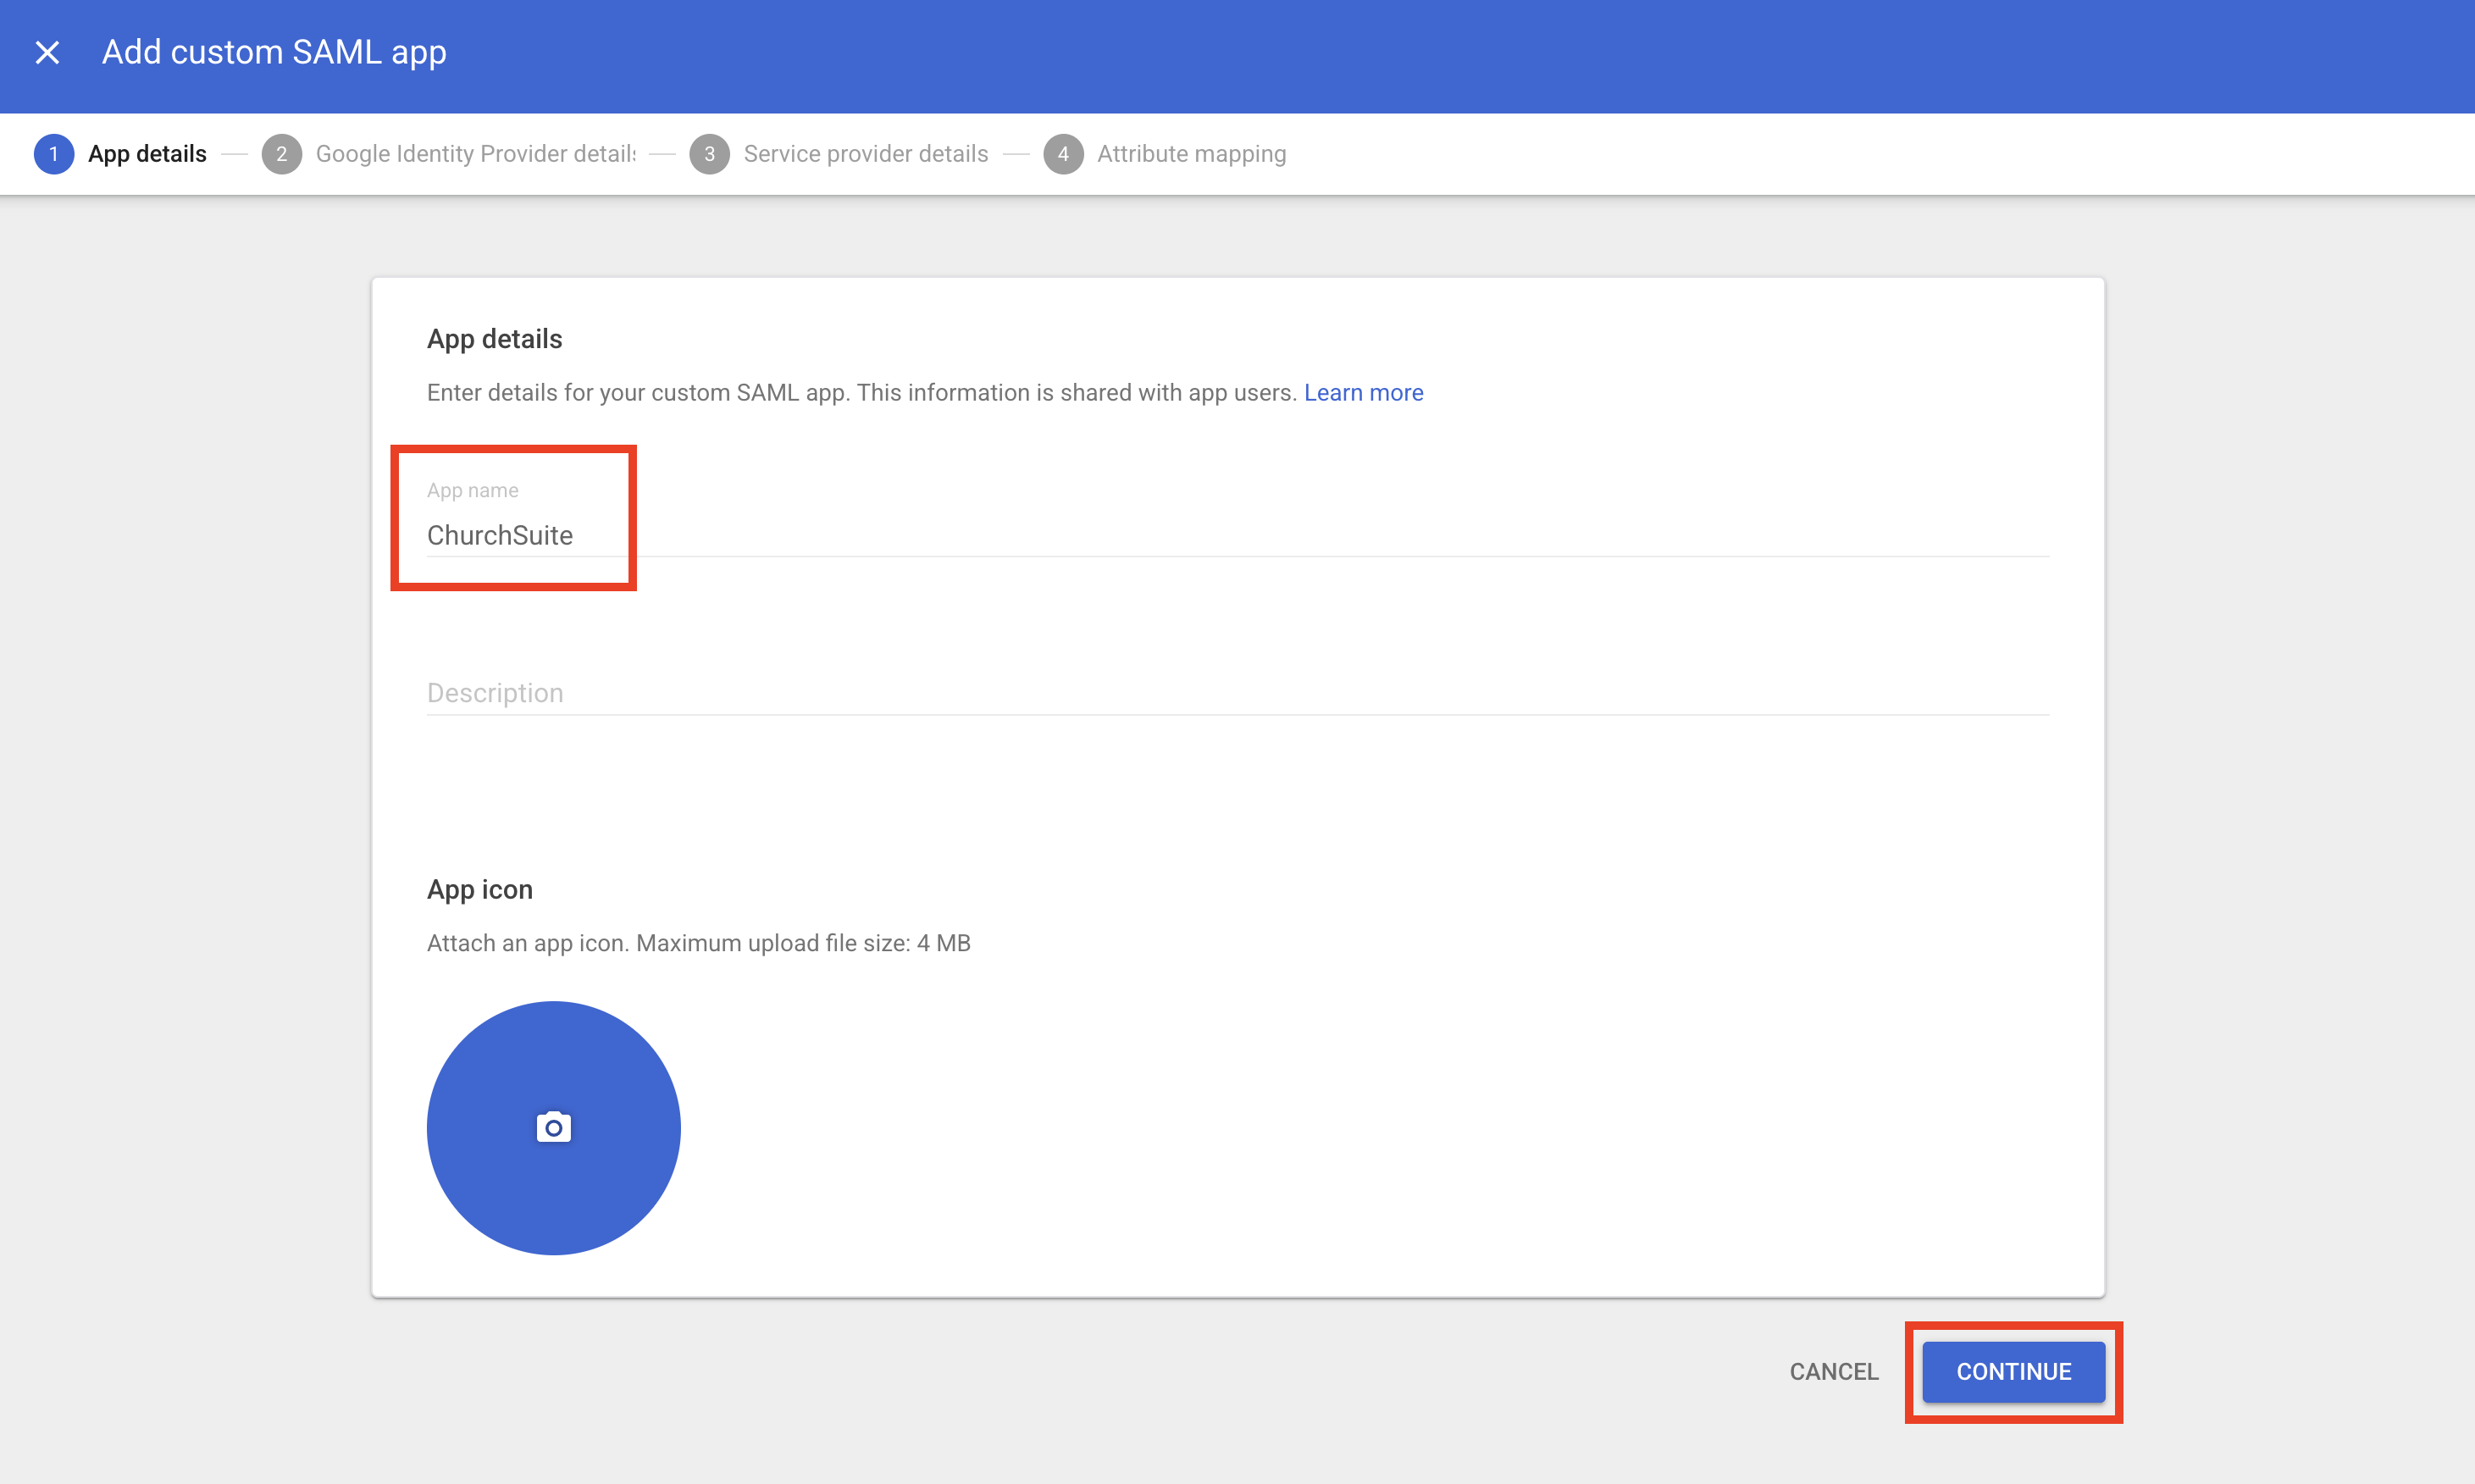
Enter the App Name and click Continue.
Click Download Metadata to download the metadata XML file.
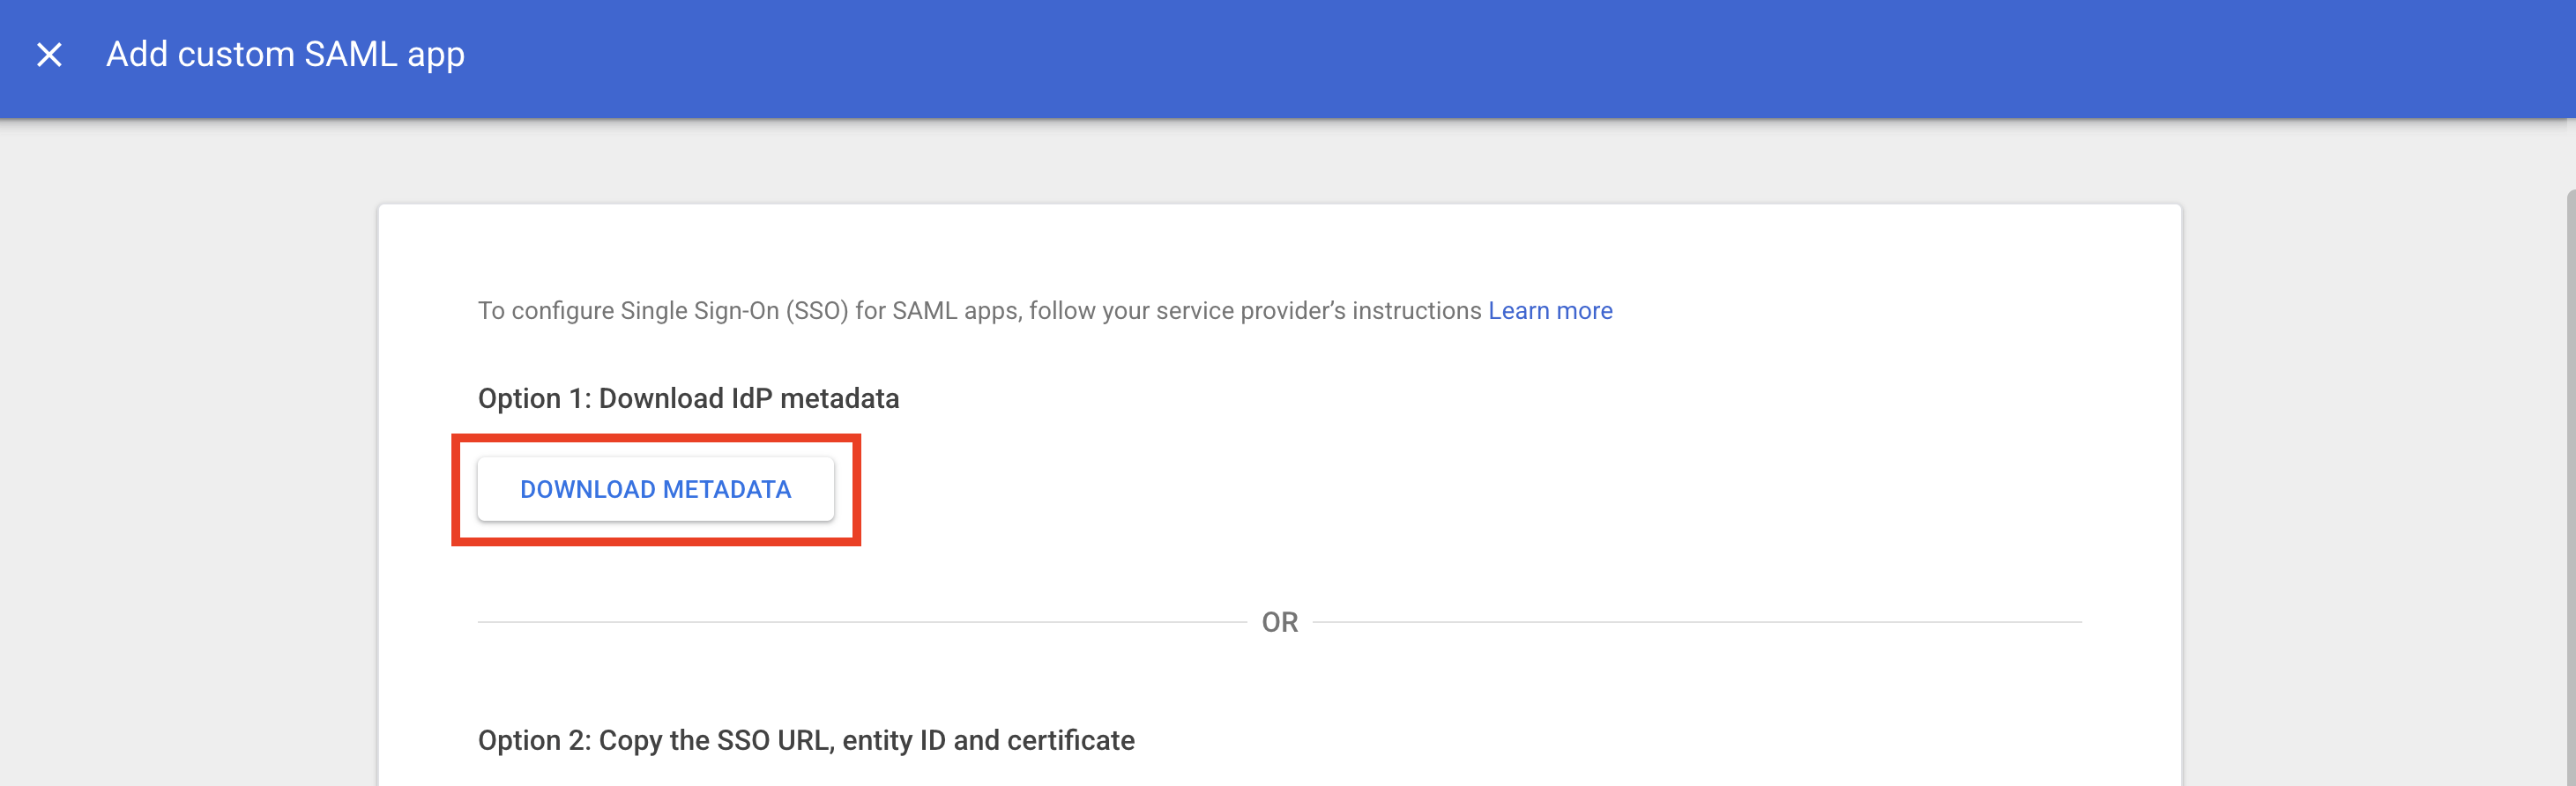
Click Continue.

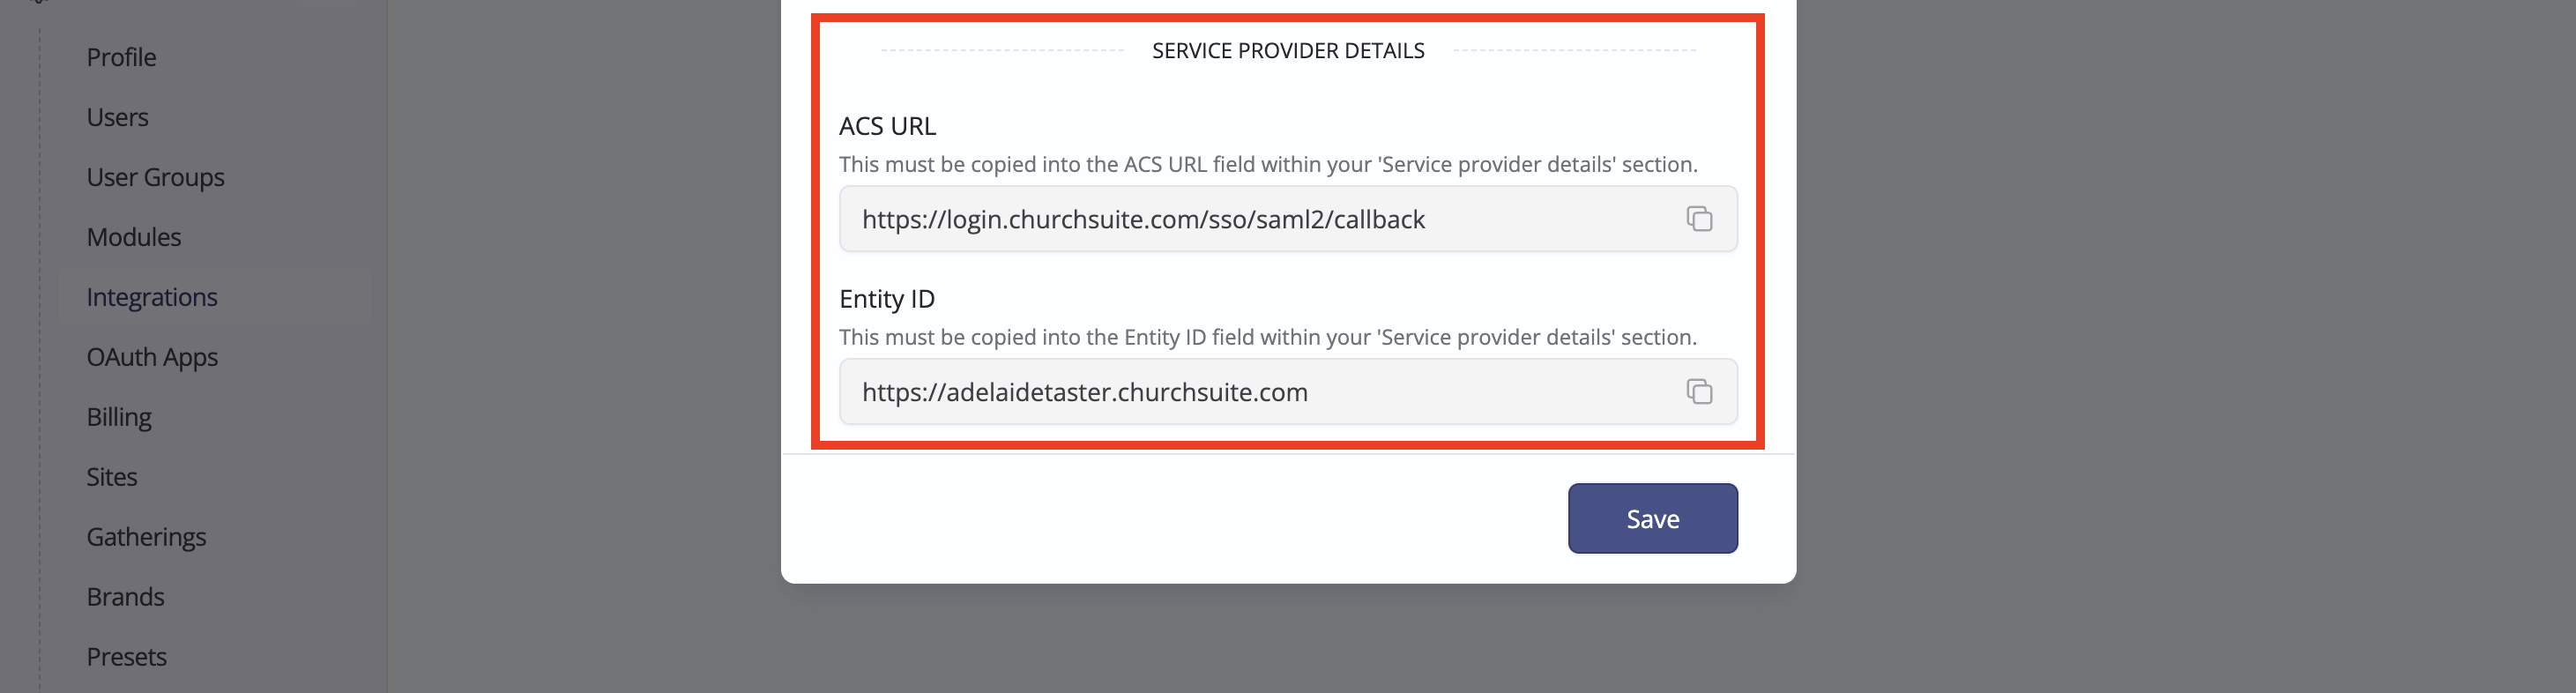
Back in ChurchSuite/CharitySuite, Choose the downloaded file - the Entity ID, SSO URL and Certificate application details will be automatically populated. Alternatively, add these manually. Don't click save just yet!
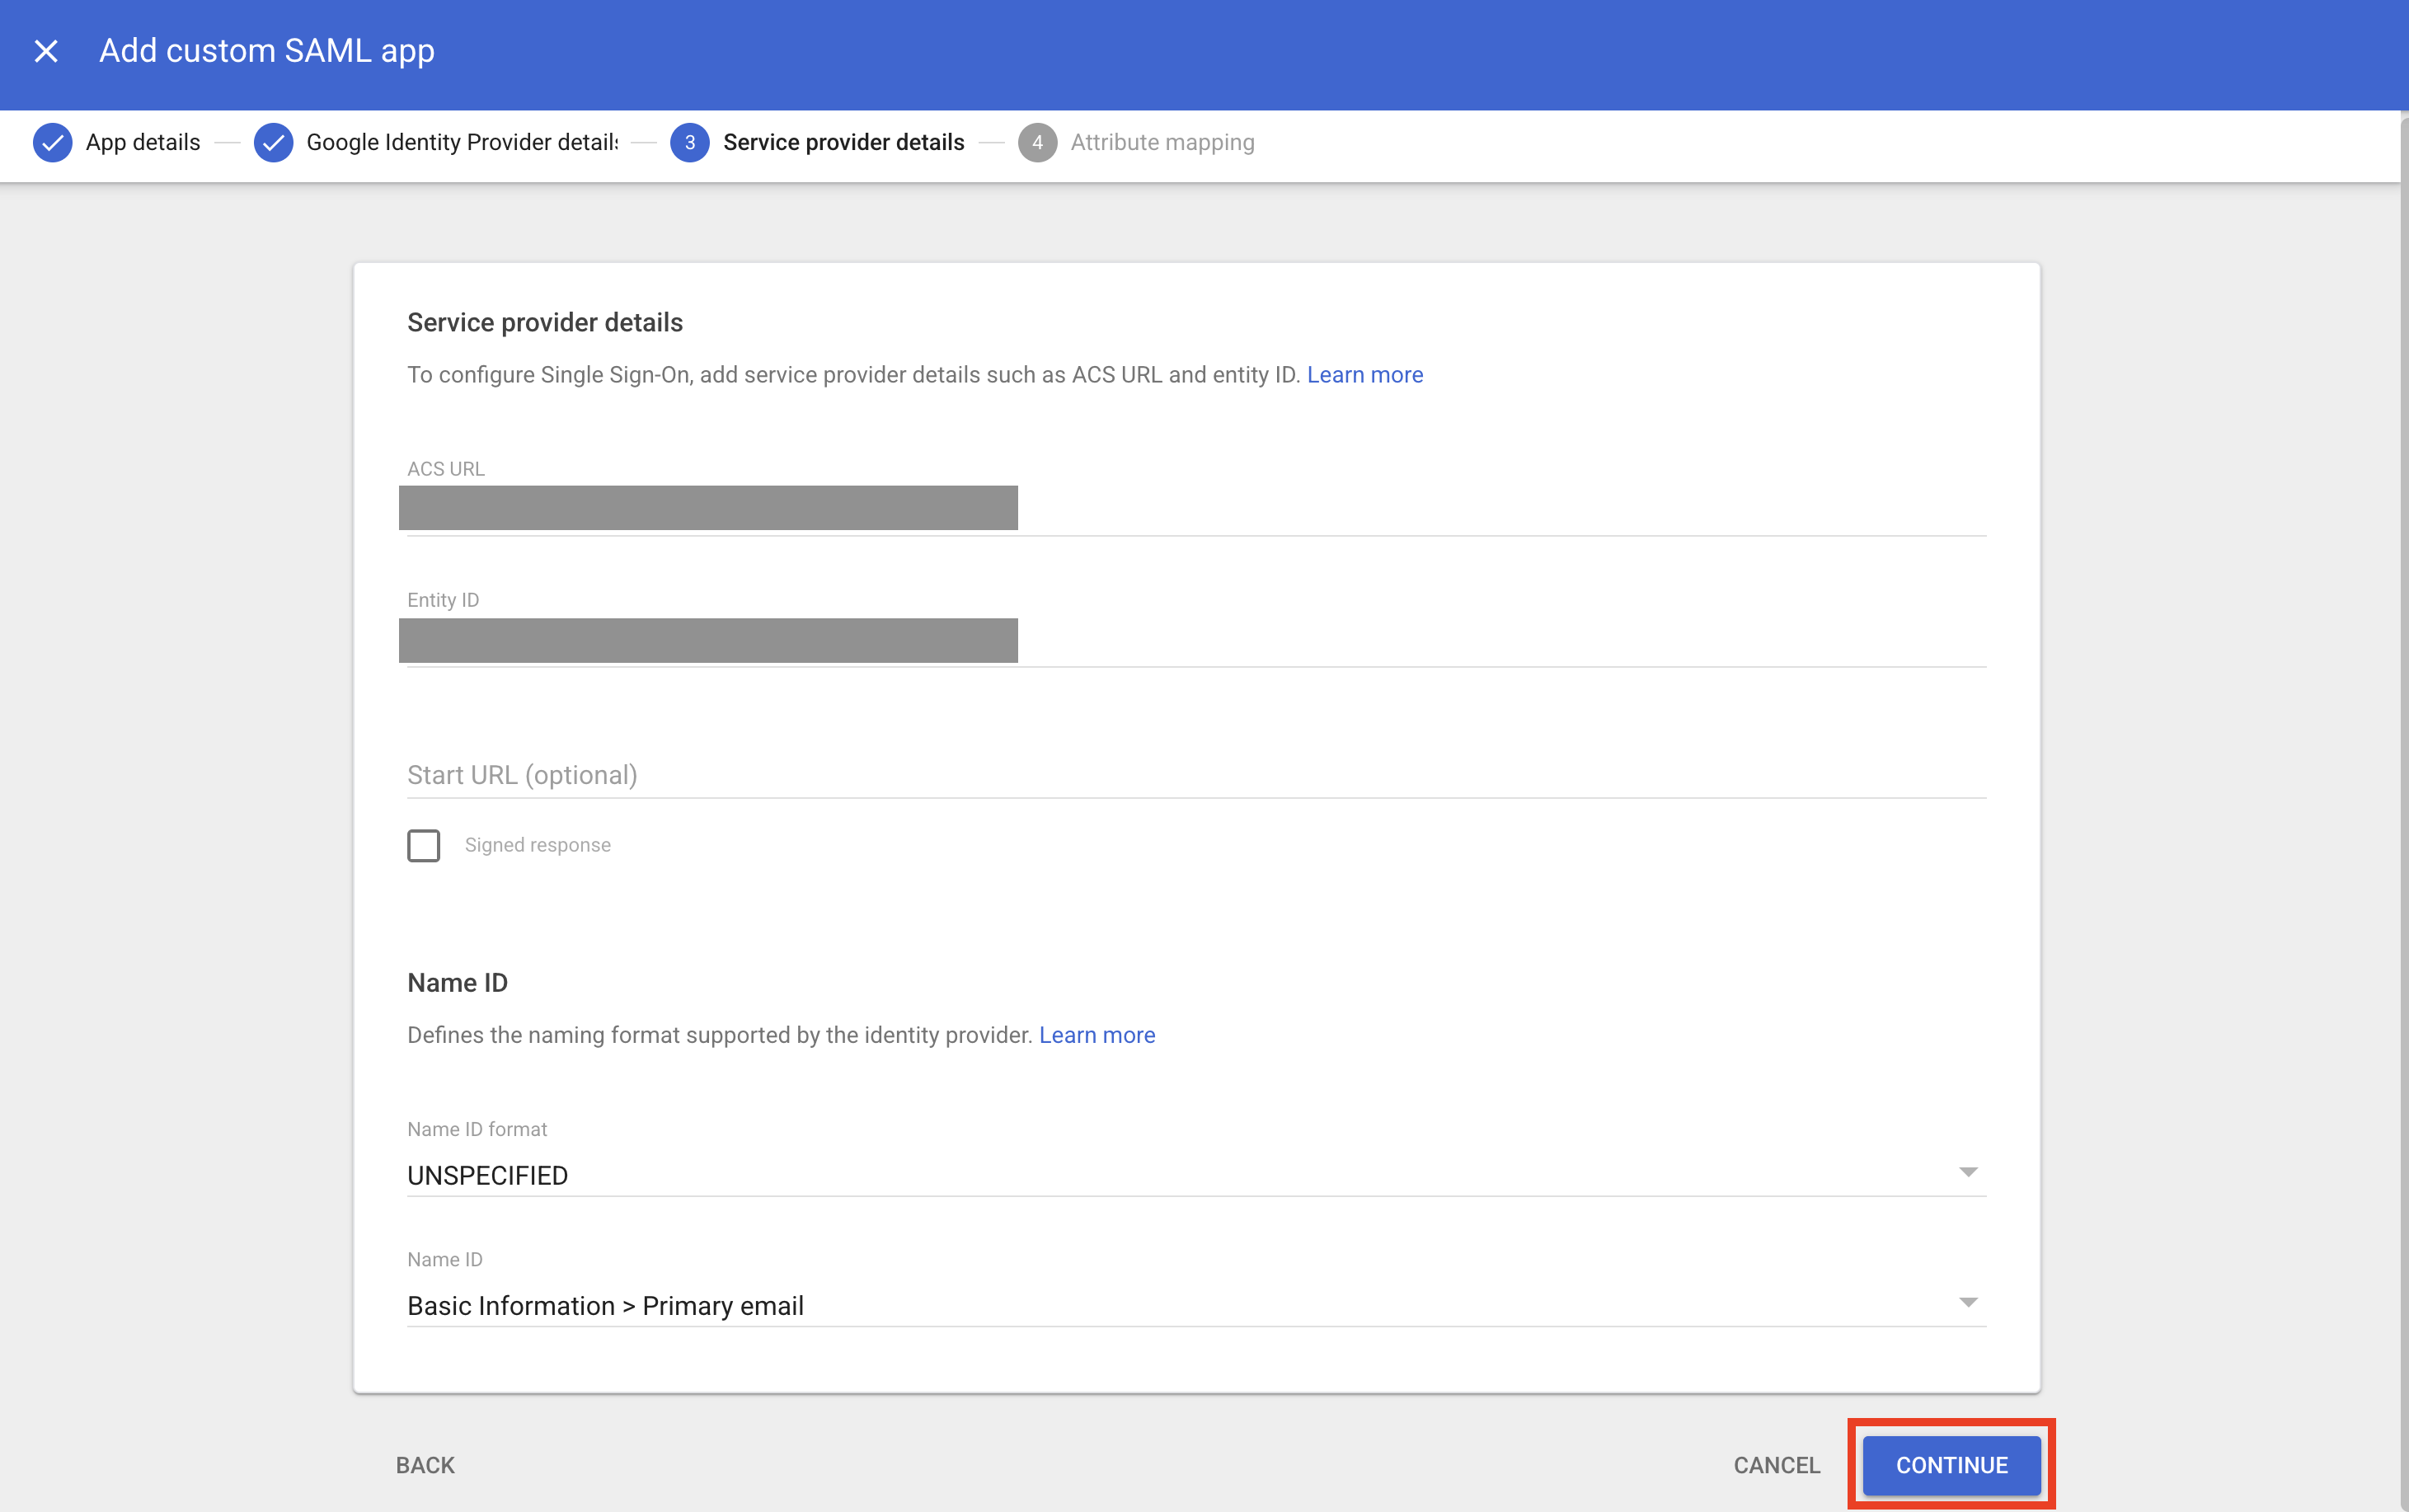
Next, copy the ACS URL and Entity ID details back into your Google Service Provider Details section and Continue...
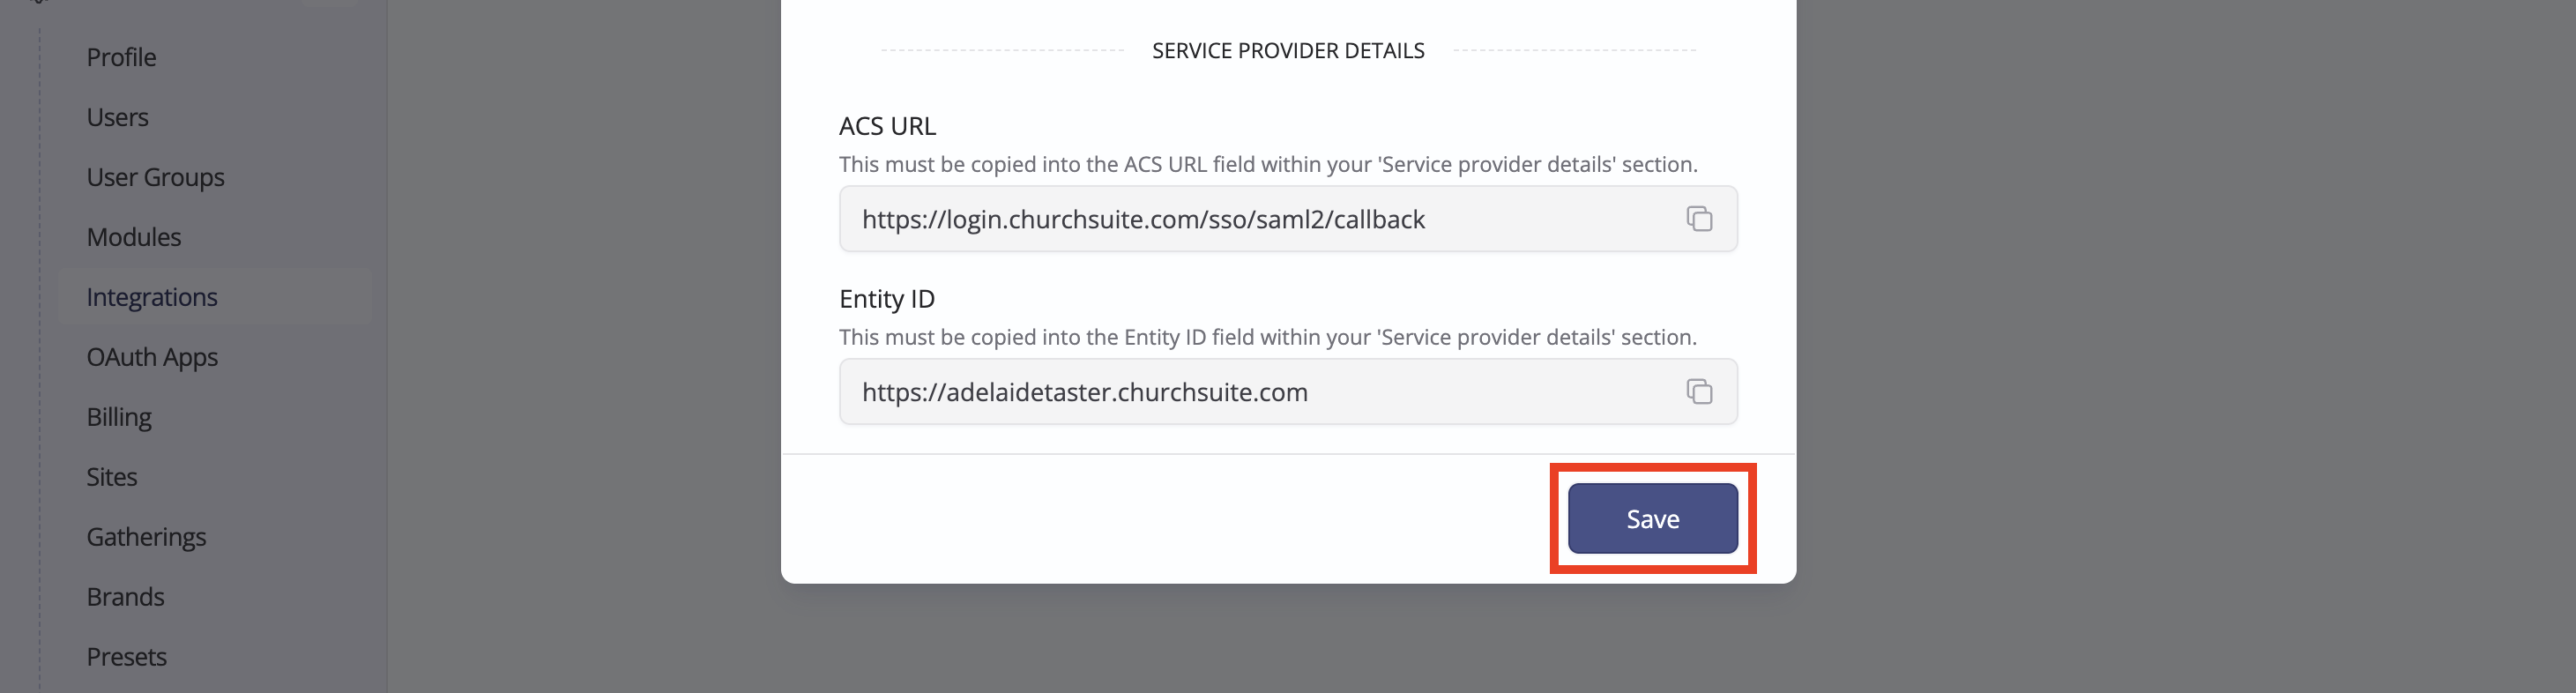
...then click Save back in ChurchSuite/CharitySuite.
Next...
Once the integration settings are correctly configured, you can begin enabling SAML2 single sign-on for your ChurchSuite/CharitySuite users, as explained in the next section.
Enabling SSO for users
Top tip - migrating from legacy SSO
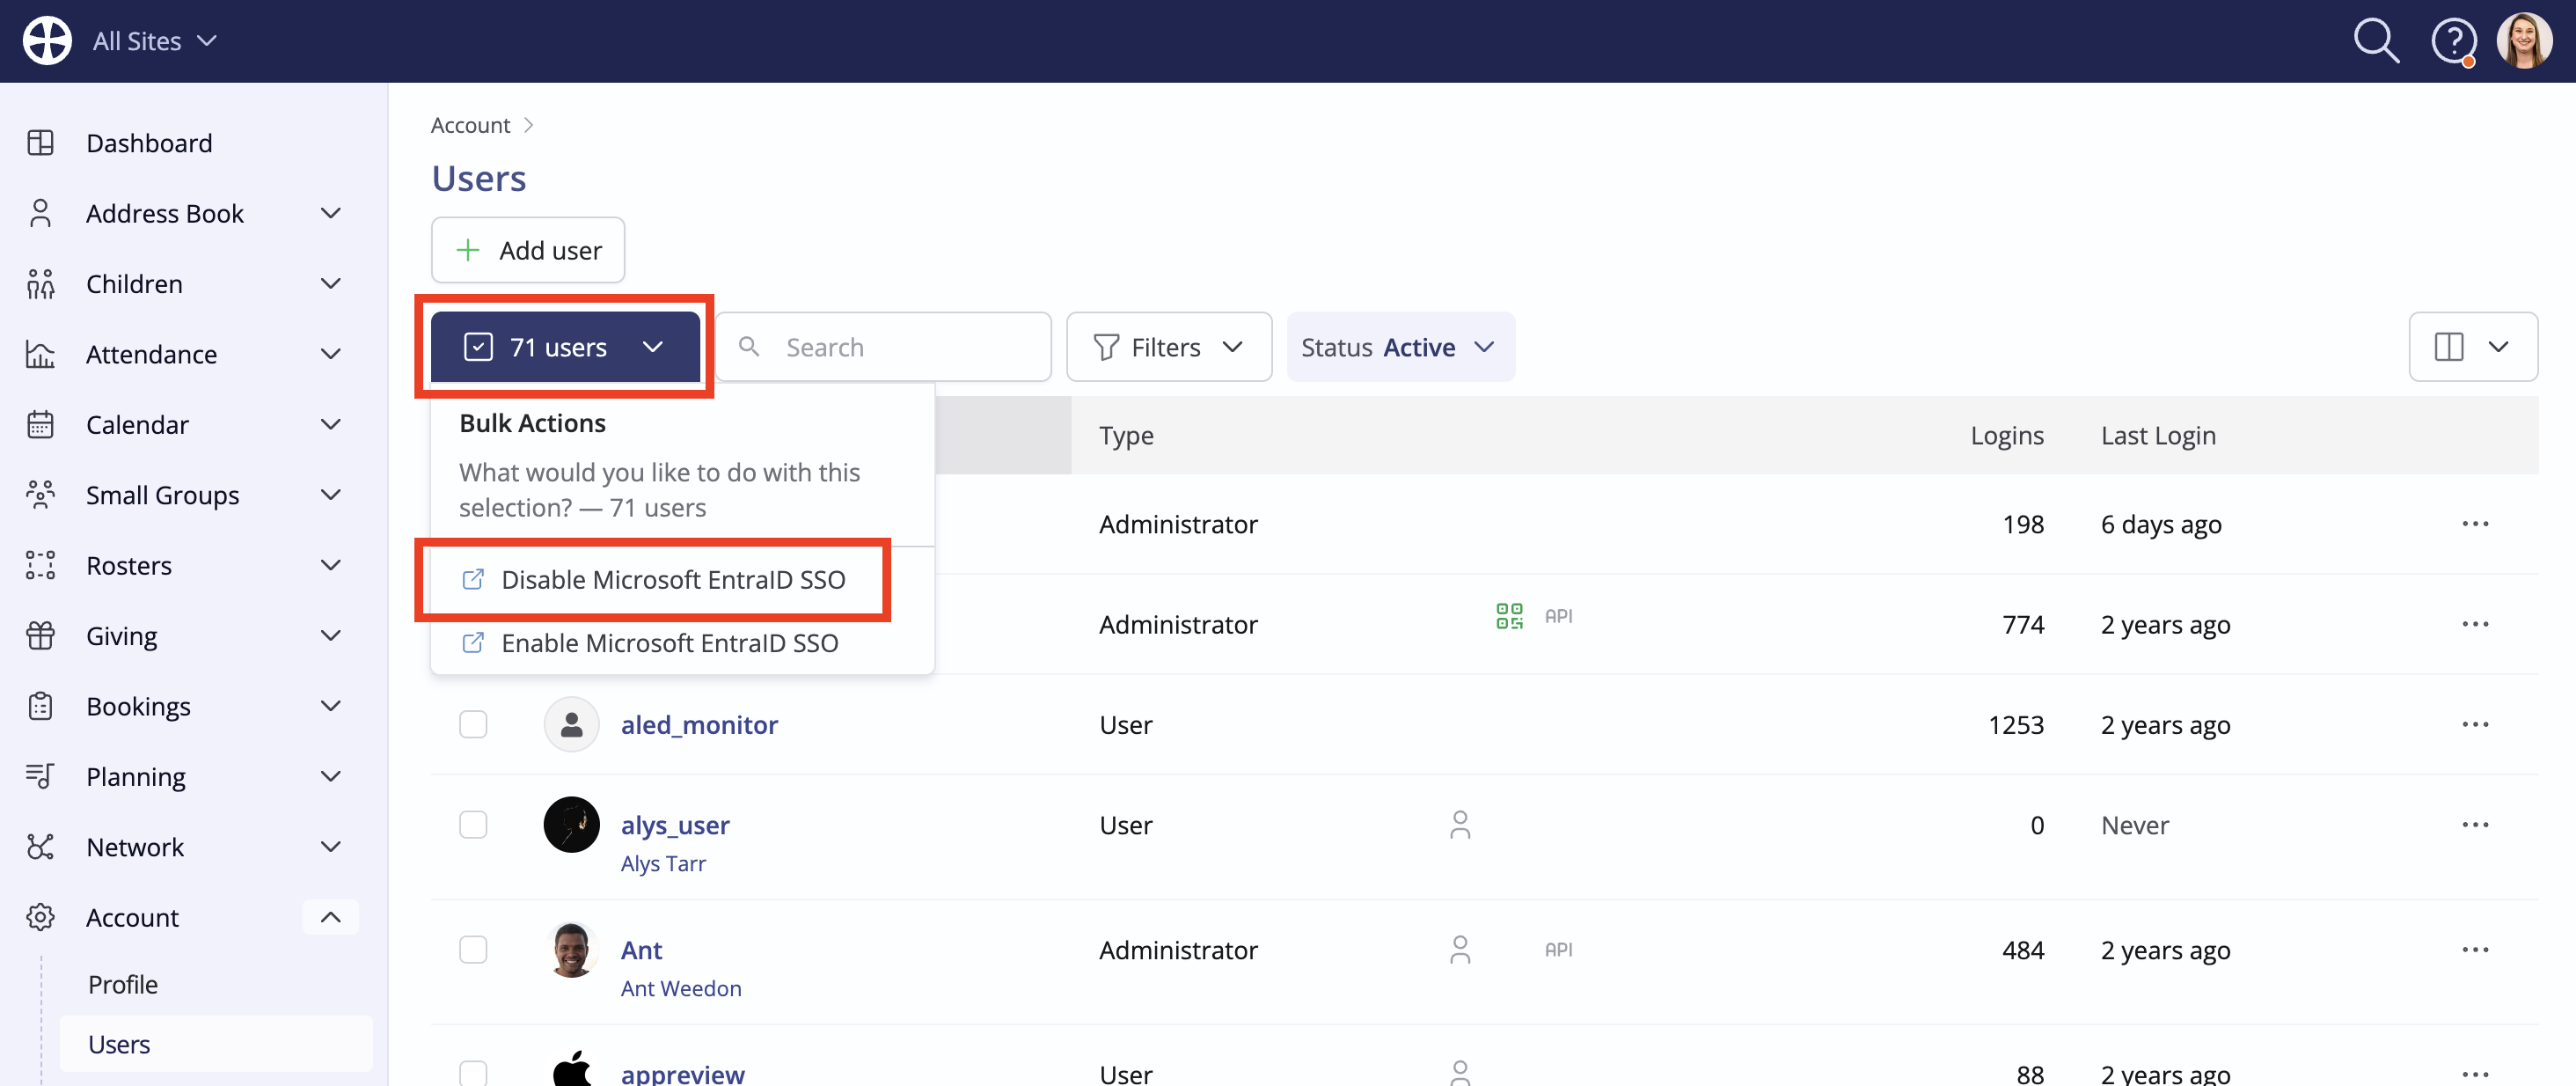
If you're migrating from the legacy Entra ID or Google SSO integration, you'll need to first Disable SSO for your users. You can do this using the Bulk Actions.
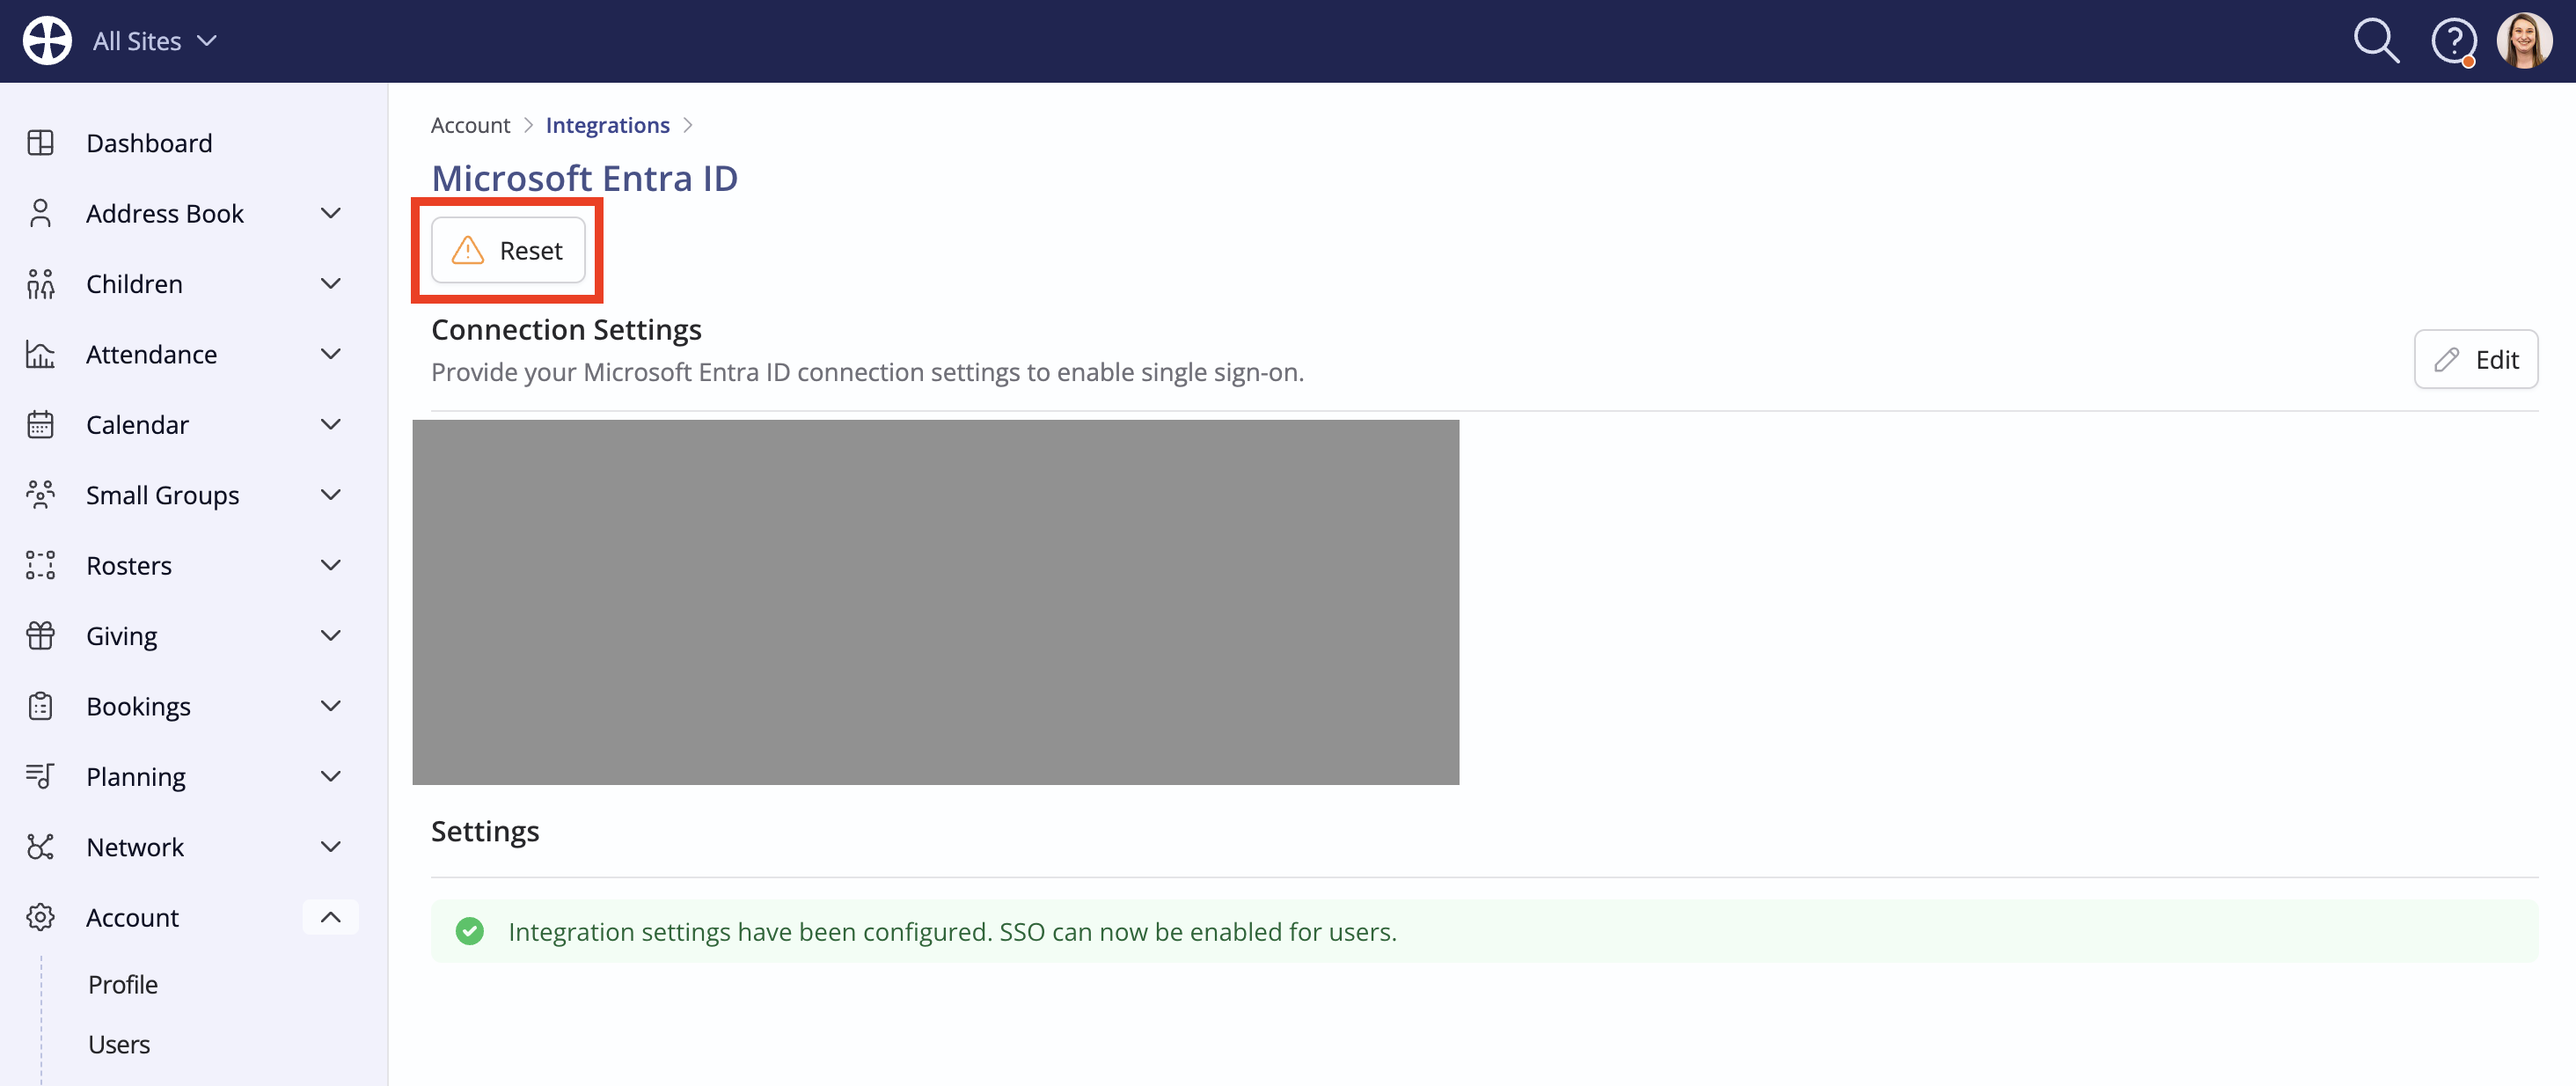
You can then Reset your previous SSO integration...
...and proceed to Enable SAML2 SSO for your users as per the below.
From a user profile:
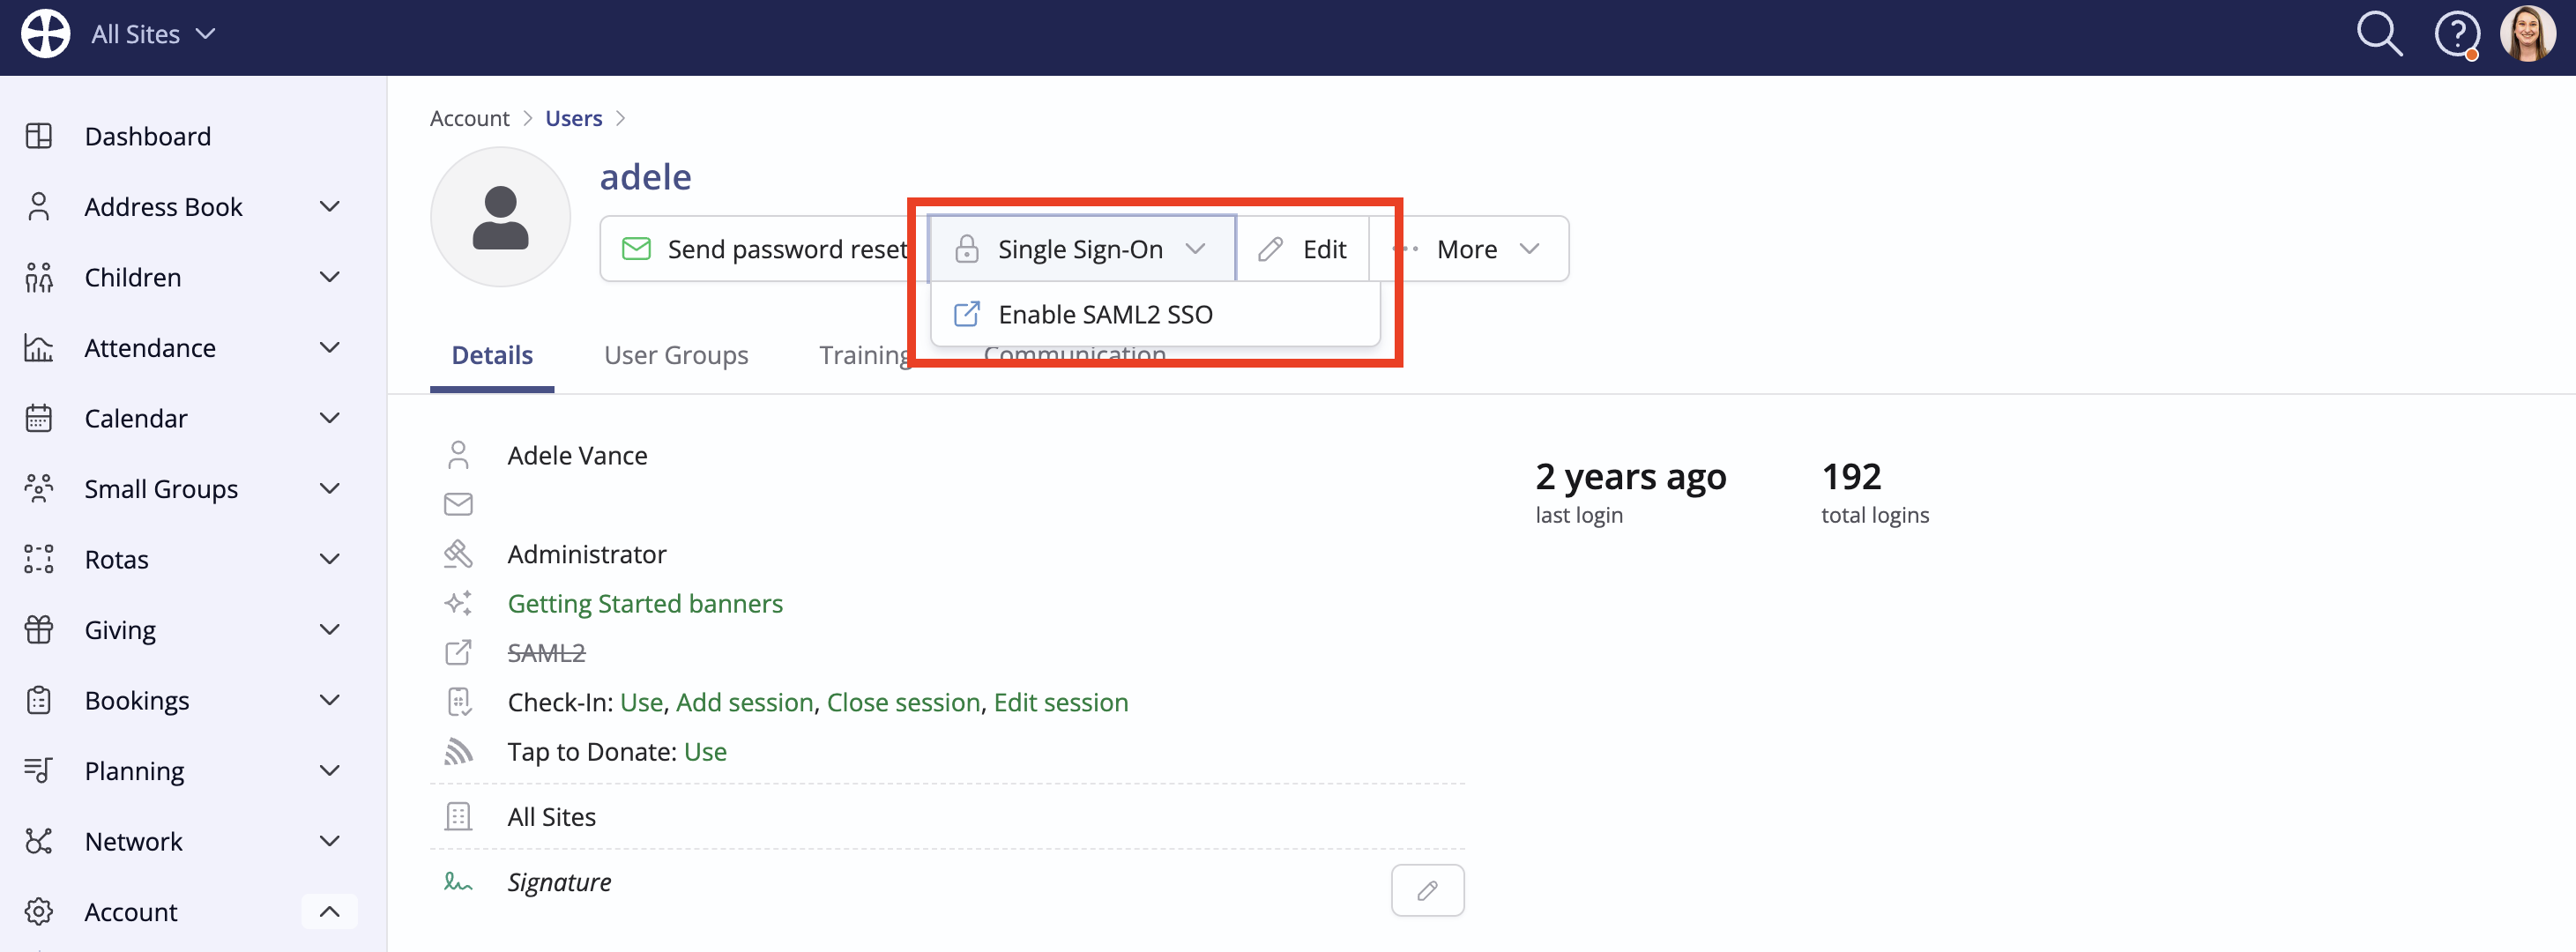
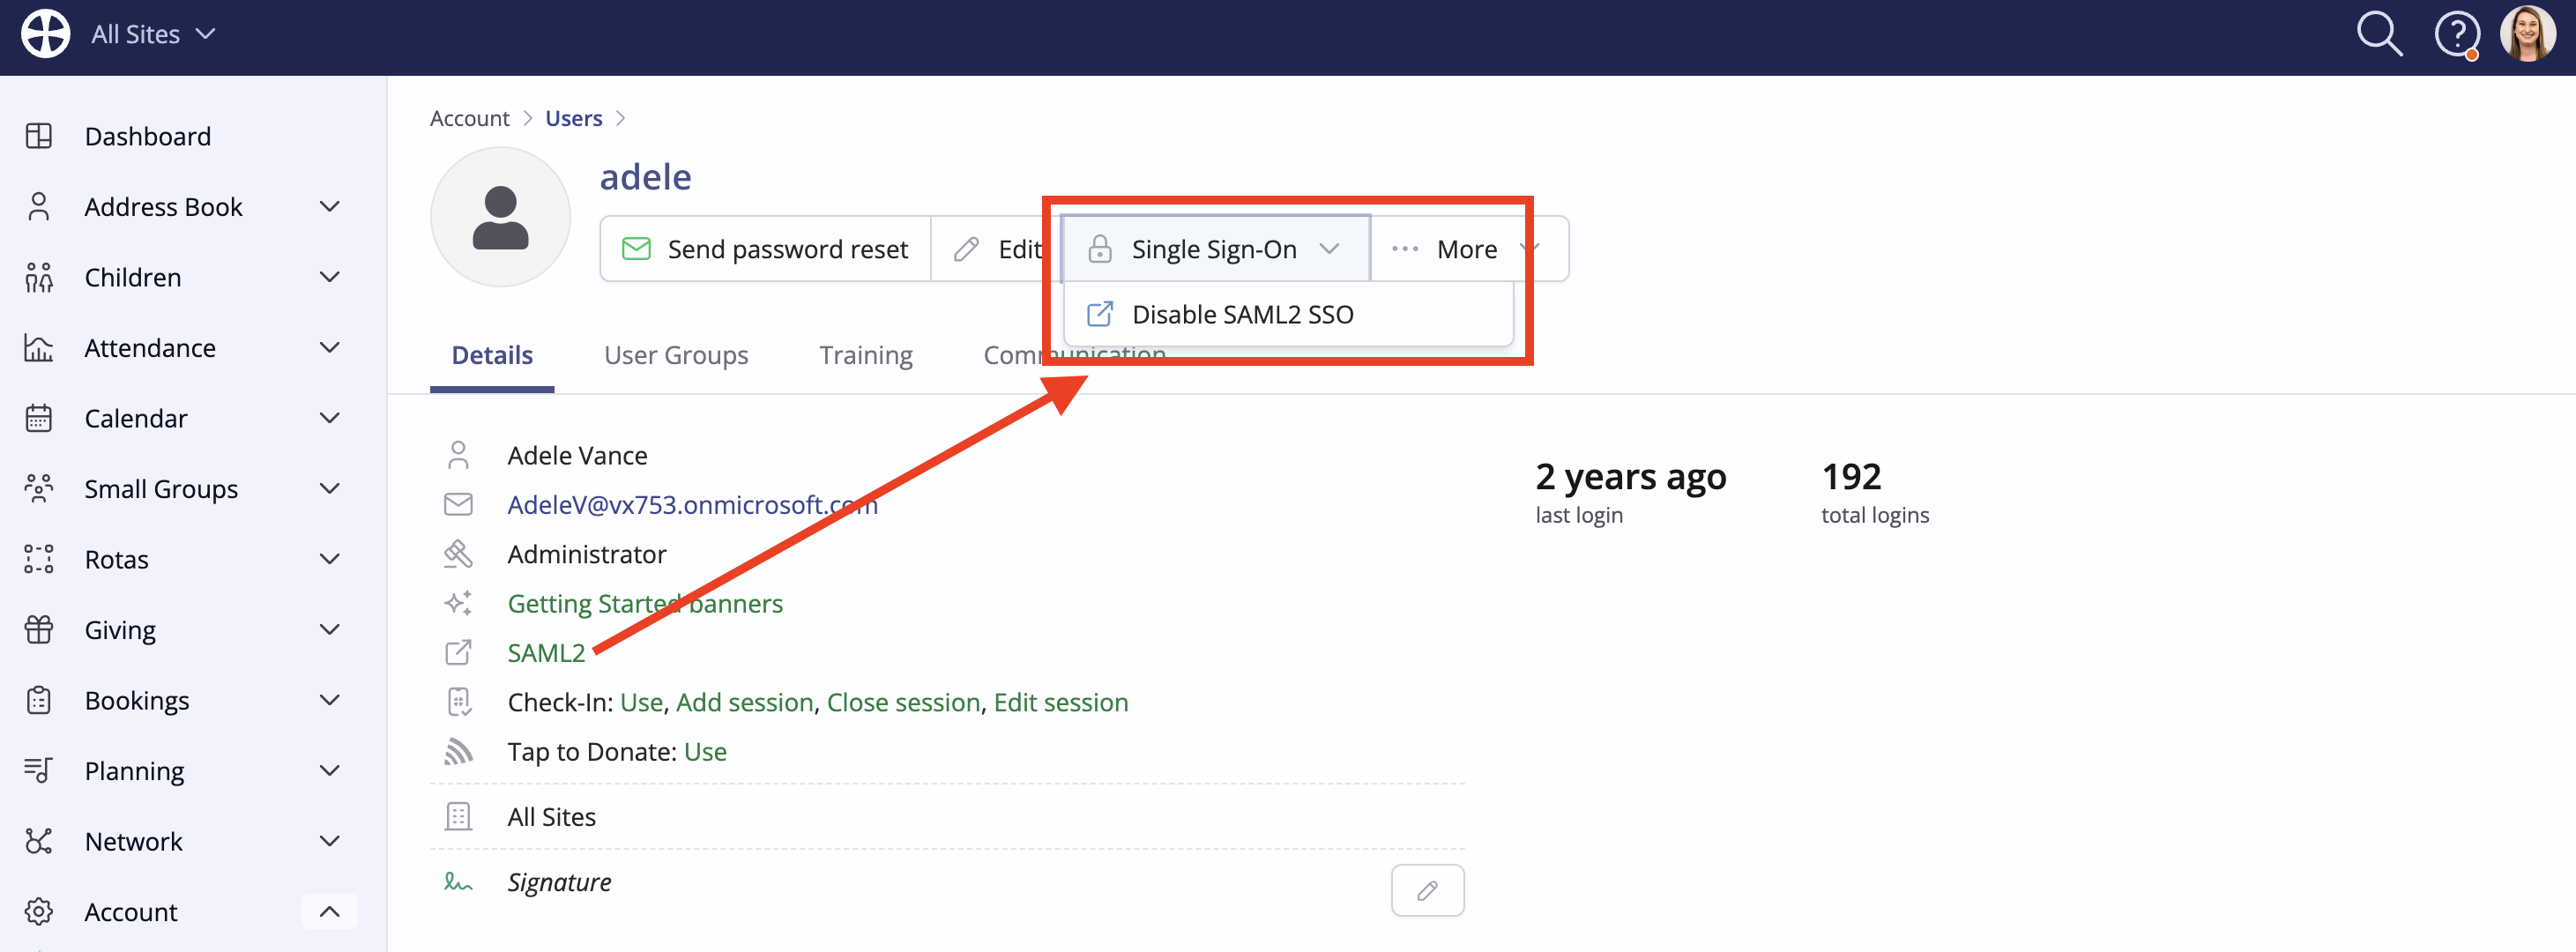
Working within the Users section of your Account area, first select Enable SAML2 SSO from a user's profile.
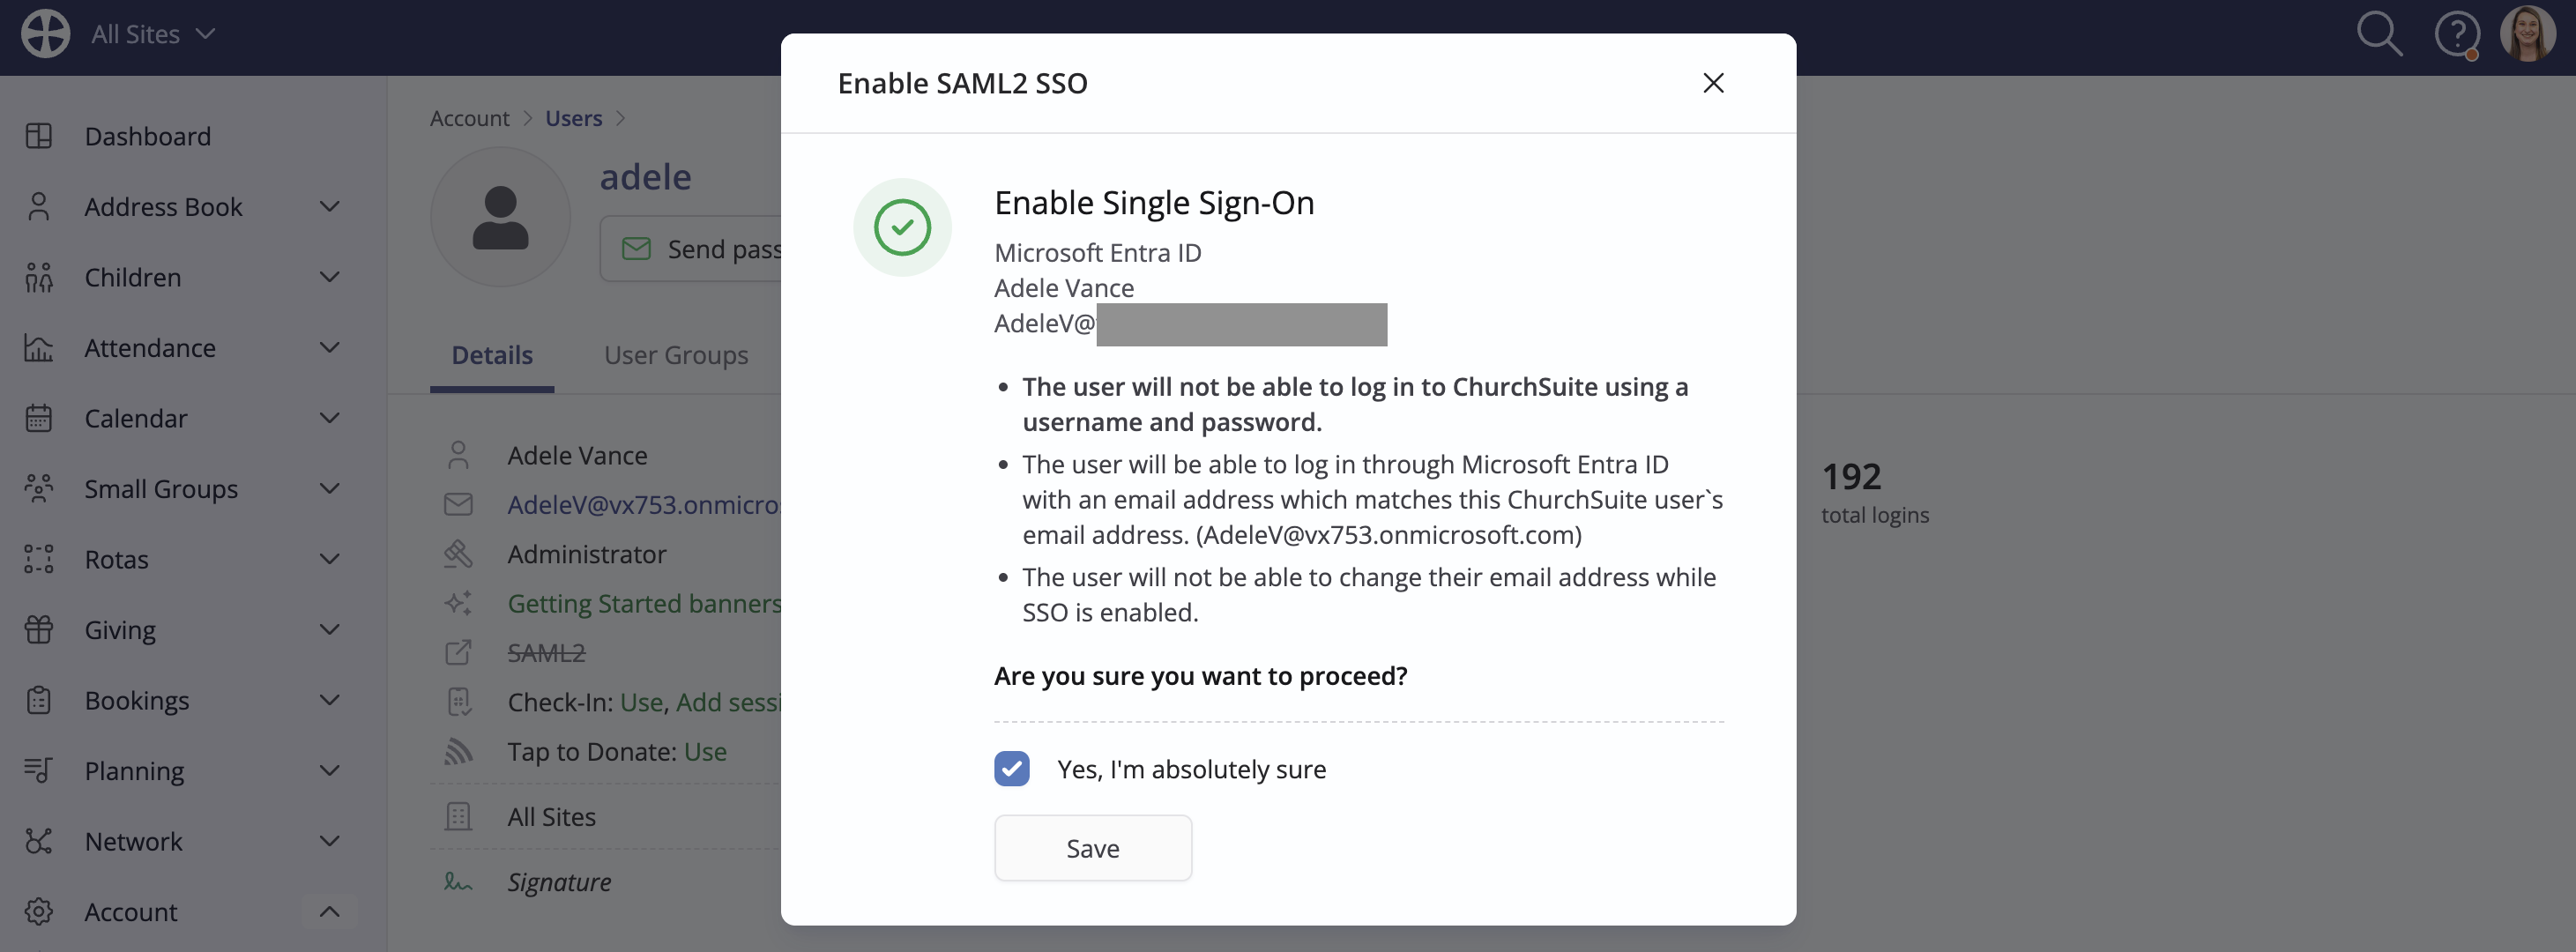
You must first verify that the user's email address matches an active SAML2 service user; otherwise, they will be unable to log in to ChurchSuite. Once you are happy, tick the confirmation checkbox and click Save.
The user profile updates to show that Single Sign-On is active. Note the option to Disable SAML2 SSO.
From the Users list:
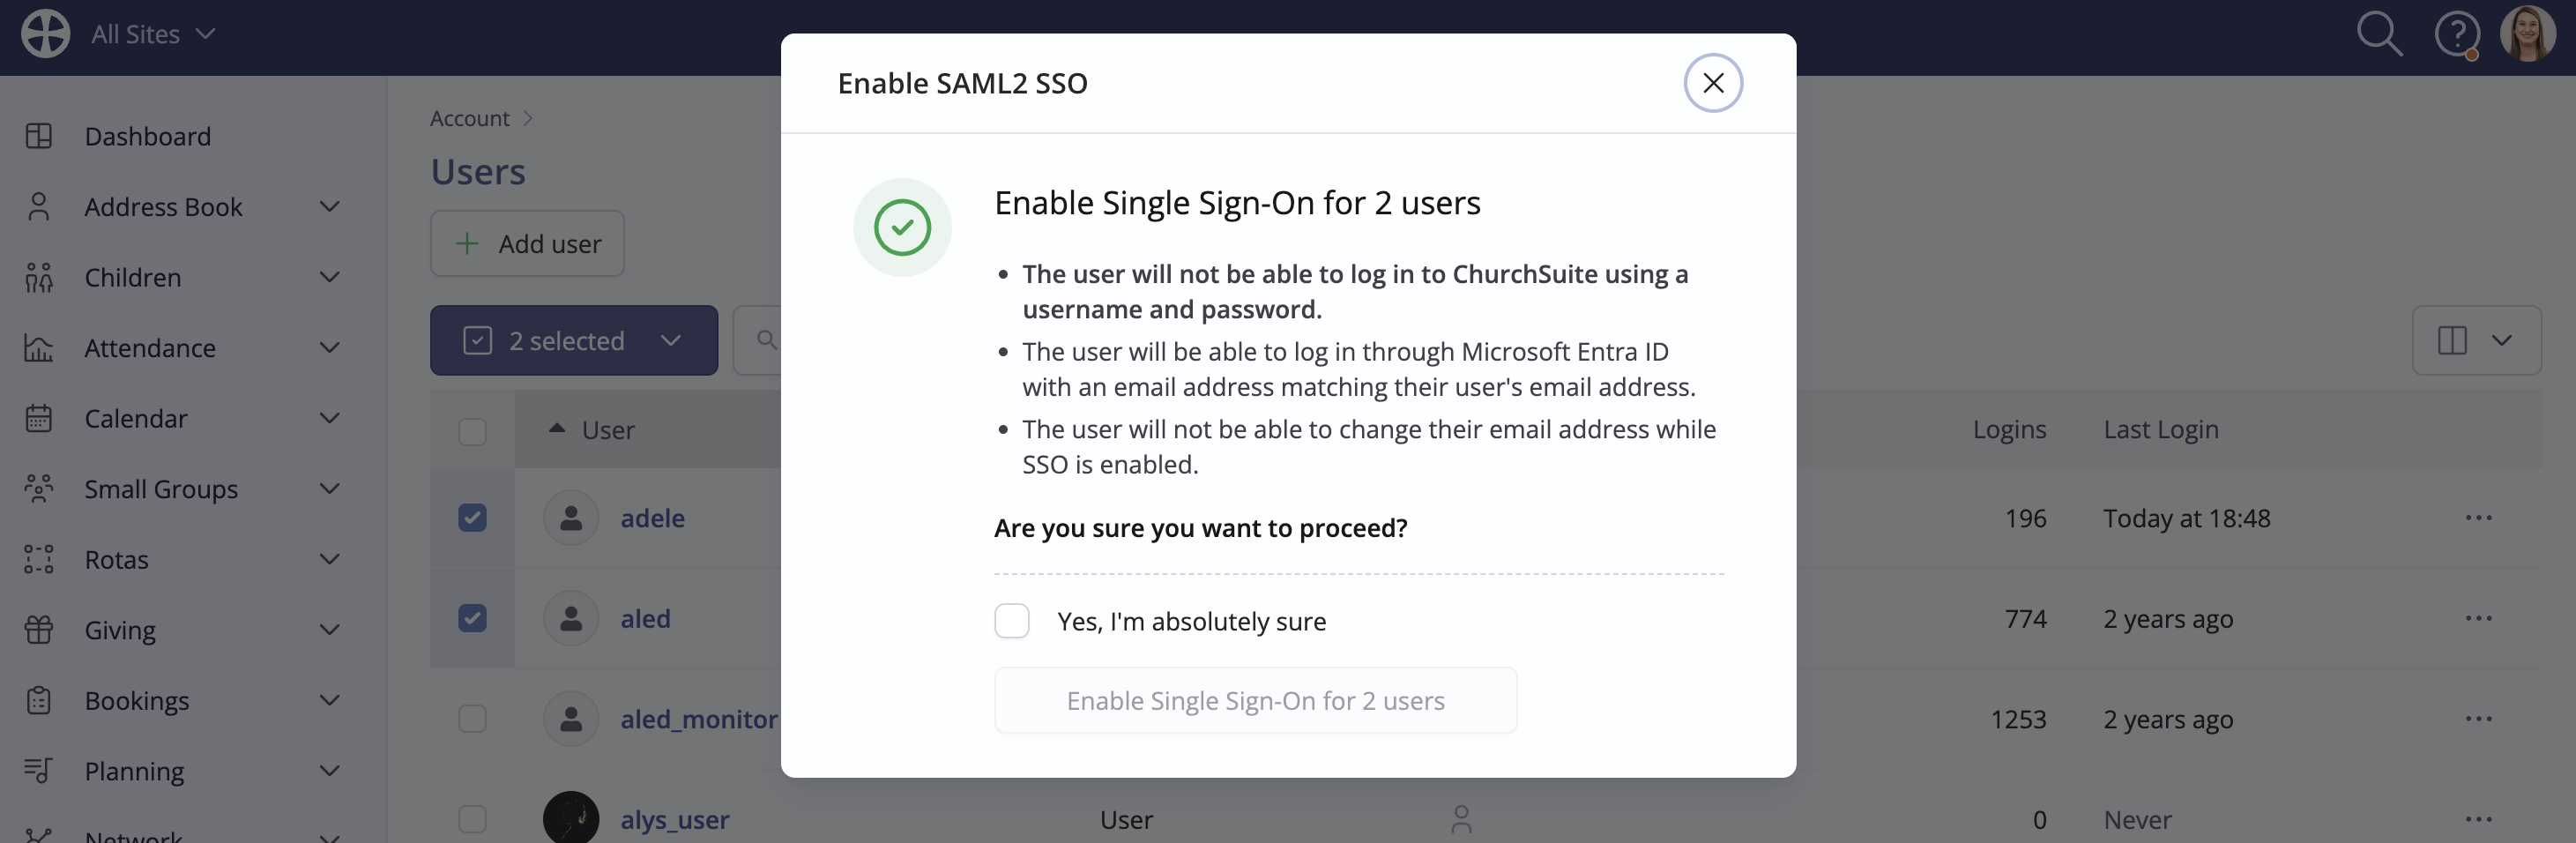
Using the Bulk Actions, you can enable and disable SAML2 SSO for multiple selected users within the Users section of the Account area.

First, ensure that each selected user's email address matches an active SAML2 service user's email address; otherwise, users will be unable to access ChurchSuite/CharitySuite. Once you are happy, tick the confirmation checkbox and click Save to apply the changes to the selected users.
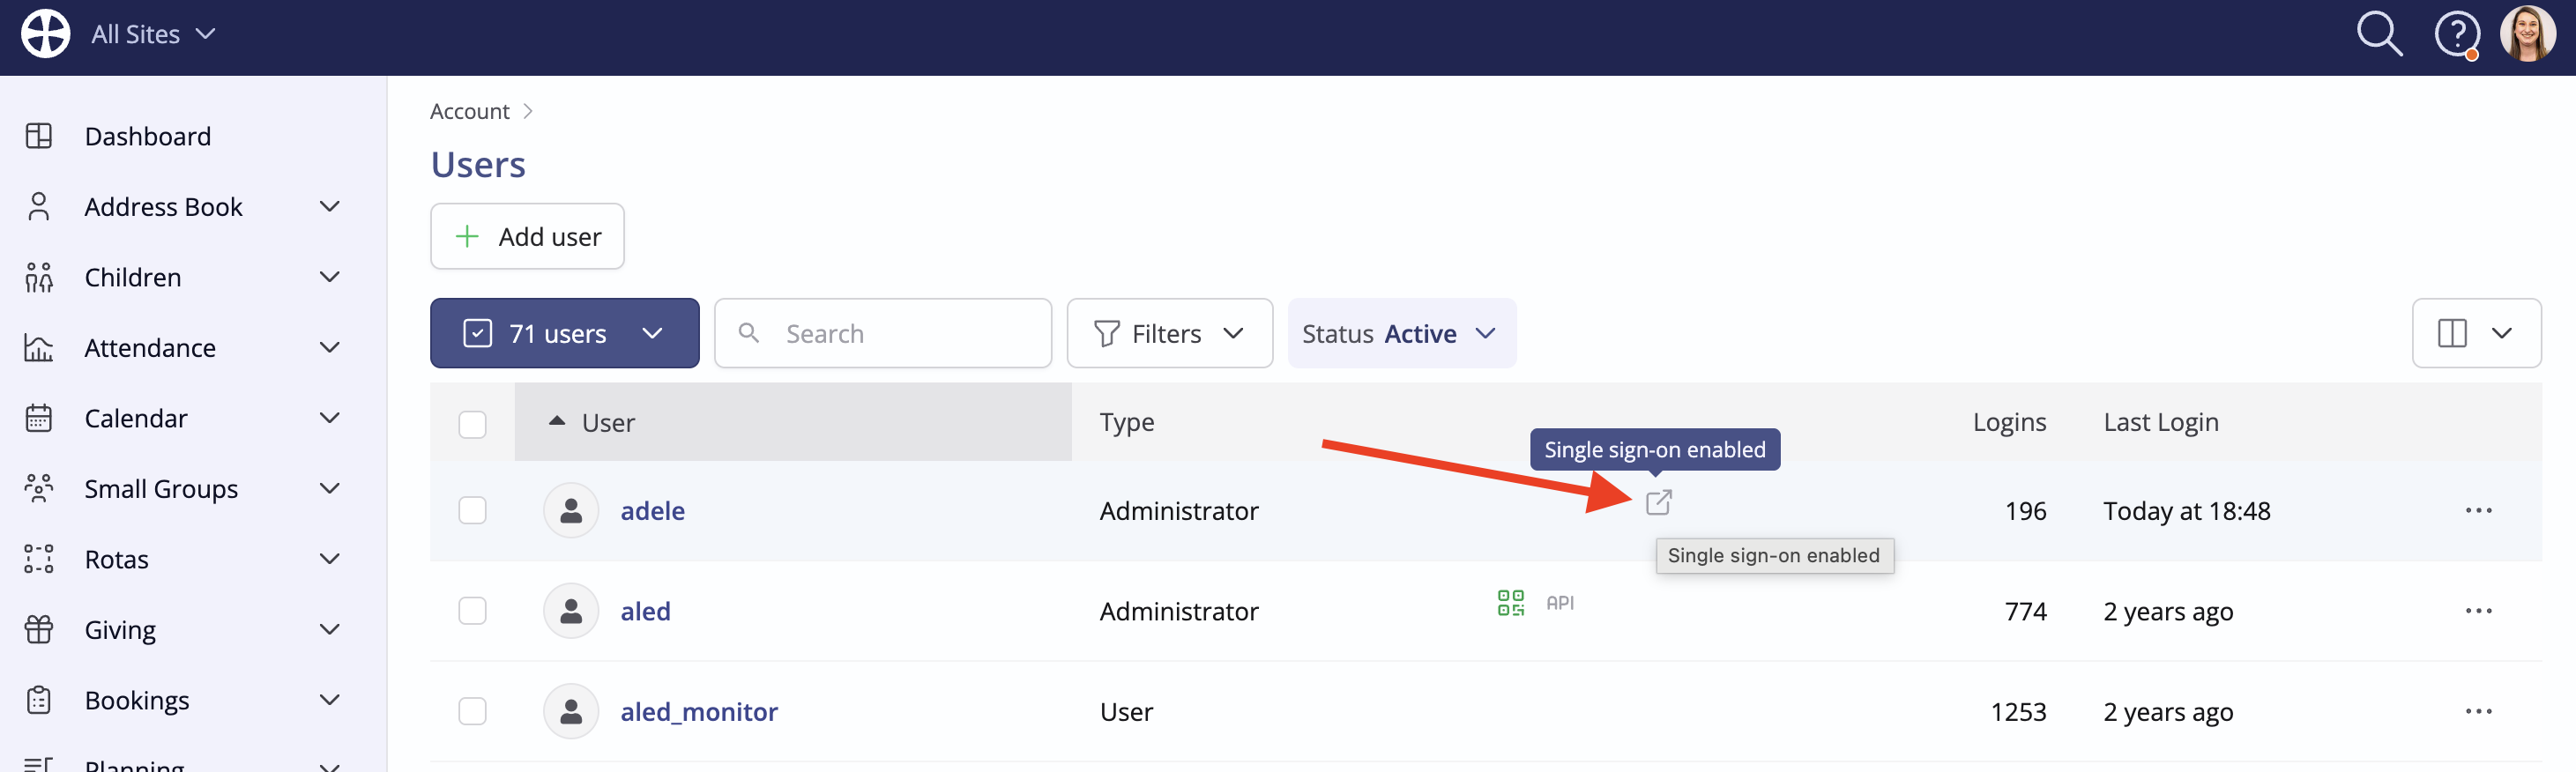
An icon in the Users section distinguishes SSO-enabled users.
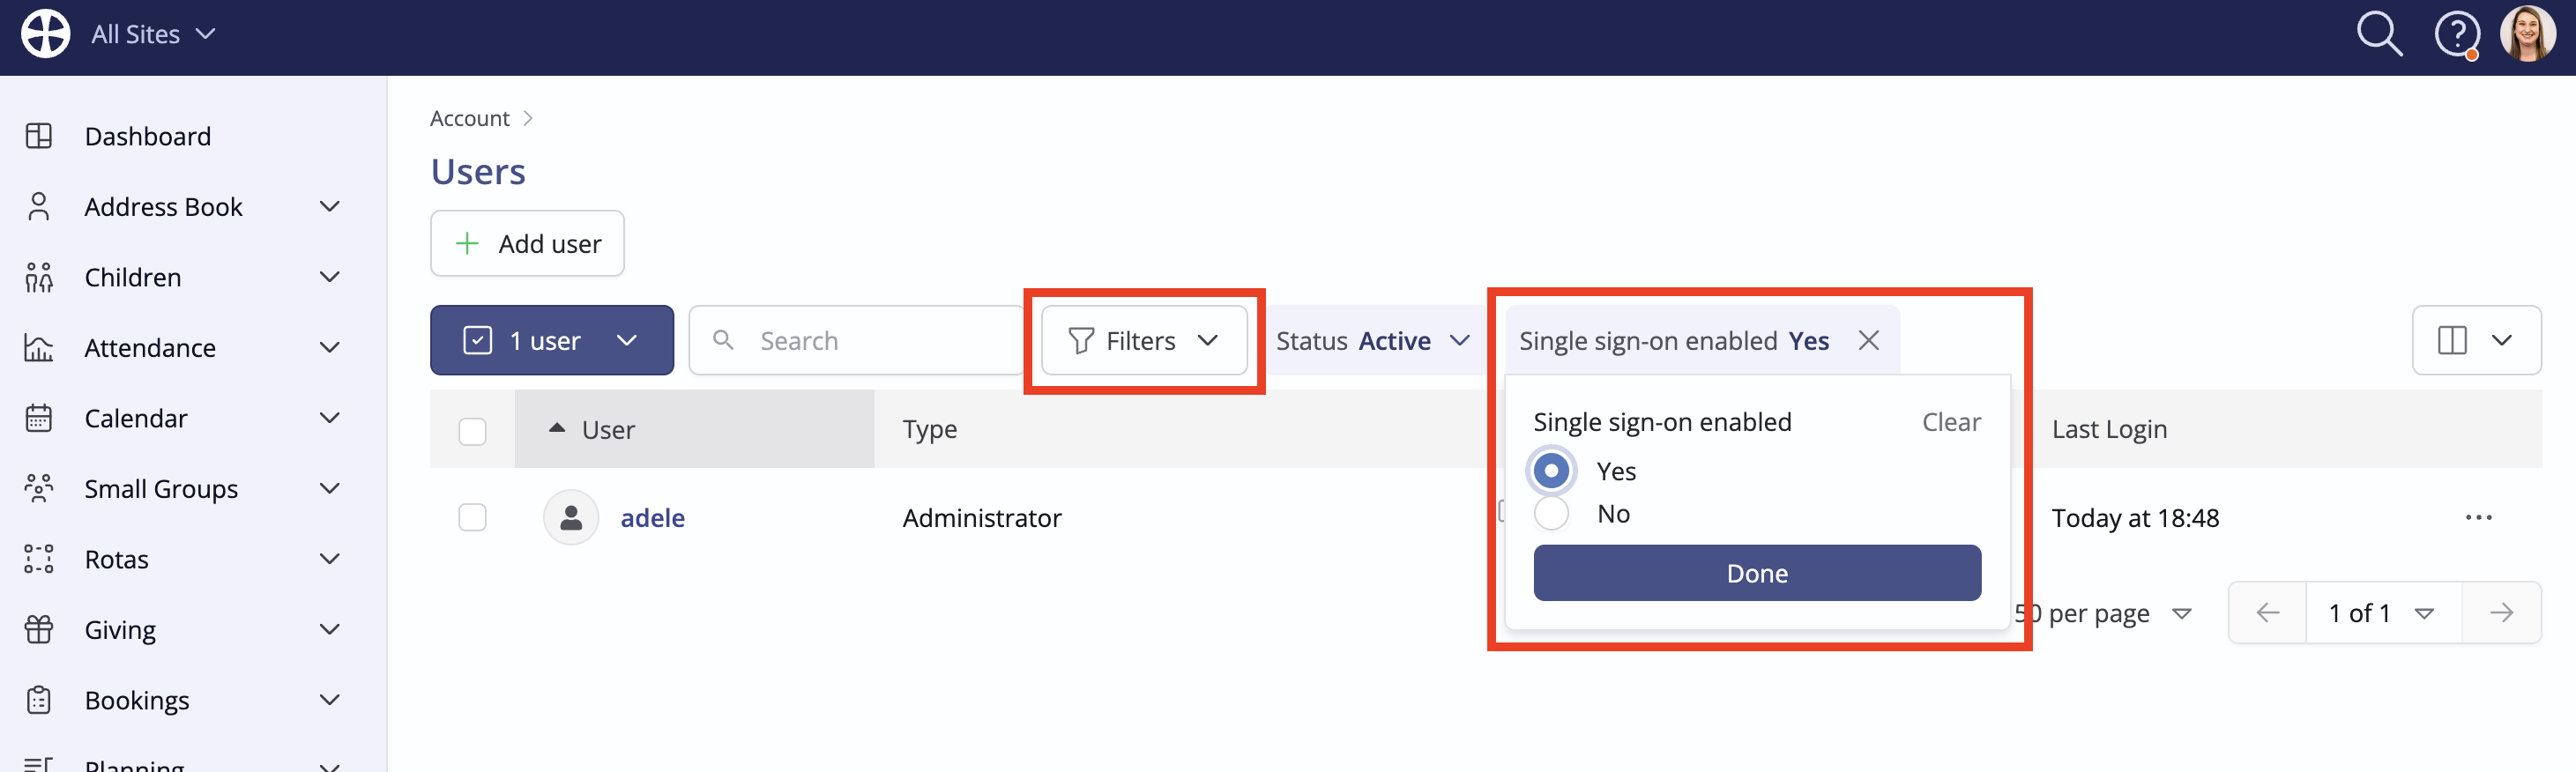
The Filters can be used to filter and see just those users with SSO enabled or disabled.
Once SSO is enabled for a ChurchSuite/CharitySuite user, any previously set ChurchSuite/CharitySuite username and user password are disabled to prevent use. An 'SSO Enabled' notification is sent to the user, shown in the user's communication log, and a user change log is added. An SSO-enabled user is prevented from changing their user email address. Additionally, the ChurchSuite password change/reset actions and multi-factor authentication functionality are disabled and bypassed for that user.
When an SSO-enabled user next logs in, they can access ChurchSuite/CharitySuite by clicking Continue with Microsoft Entra ID or Continue with Google:
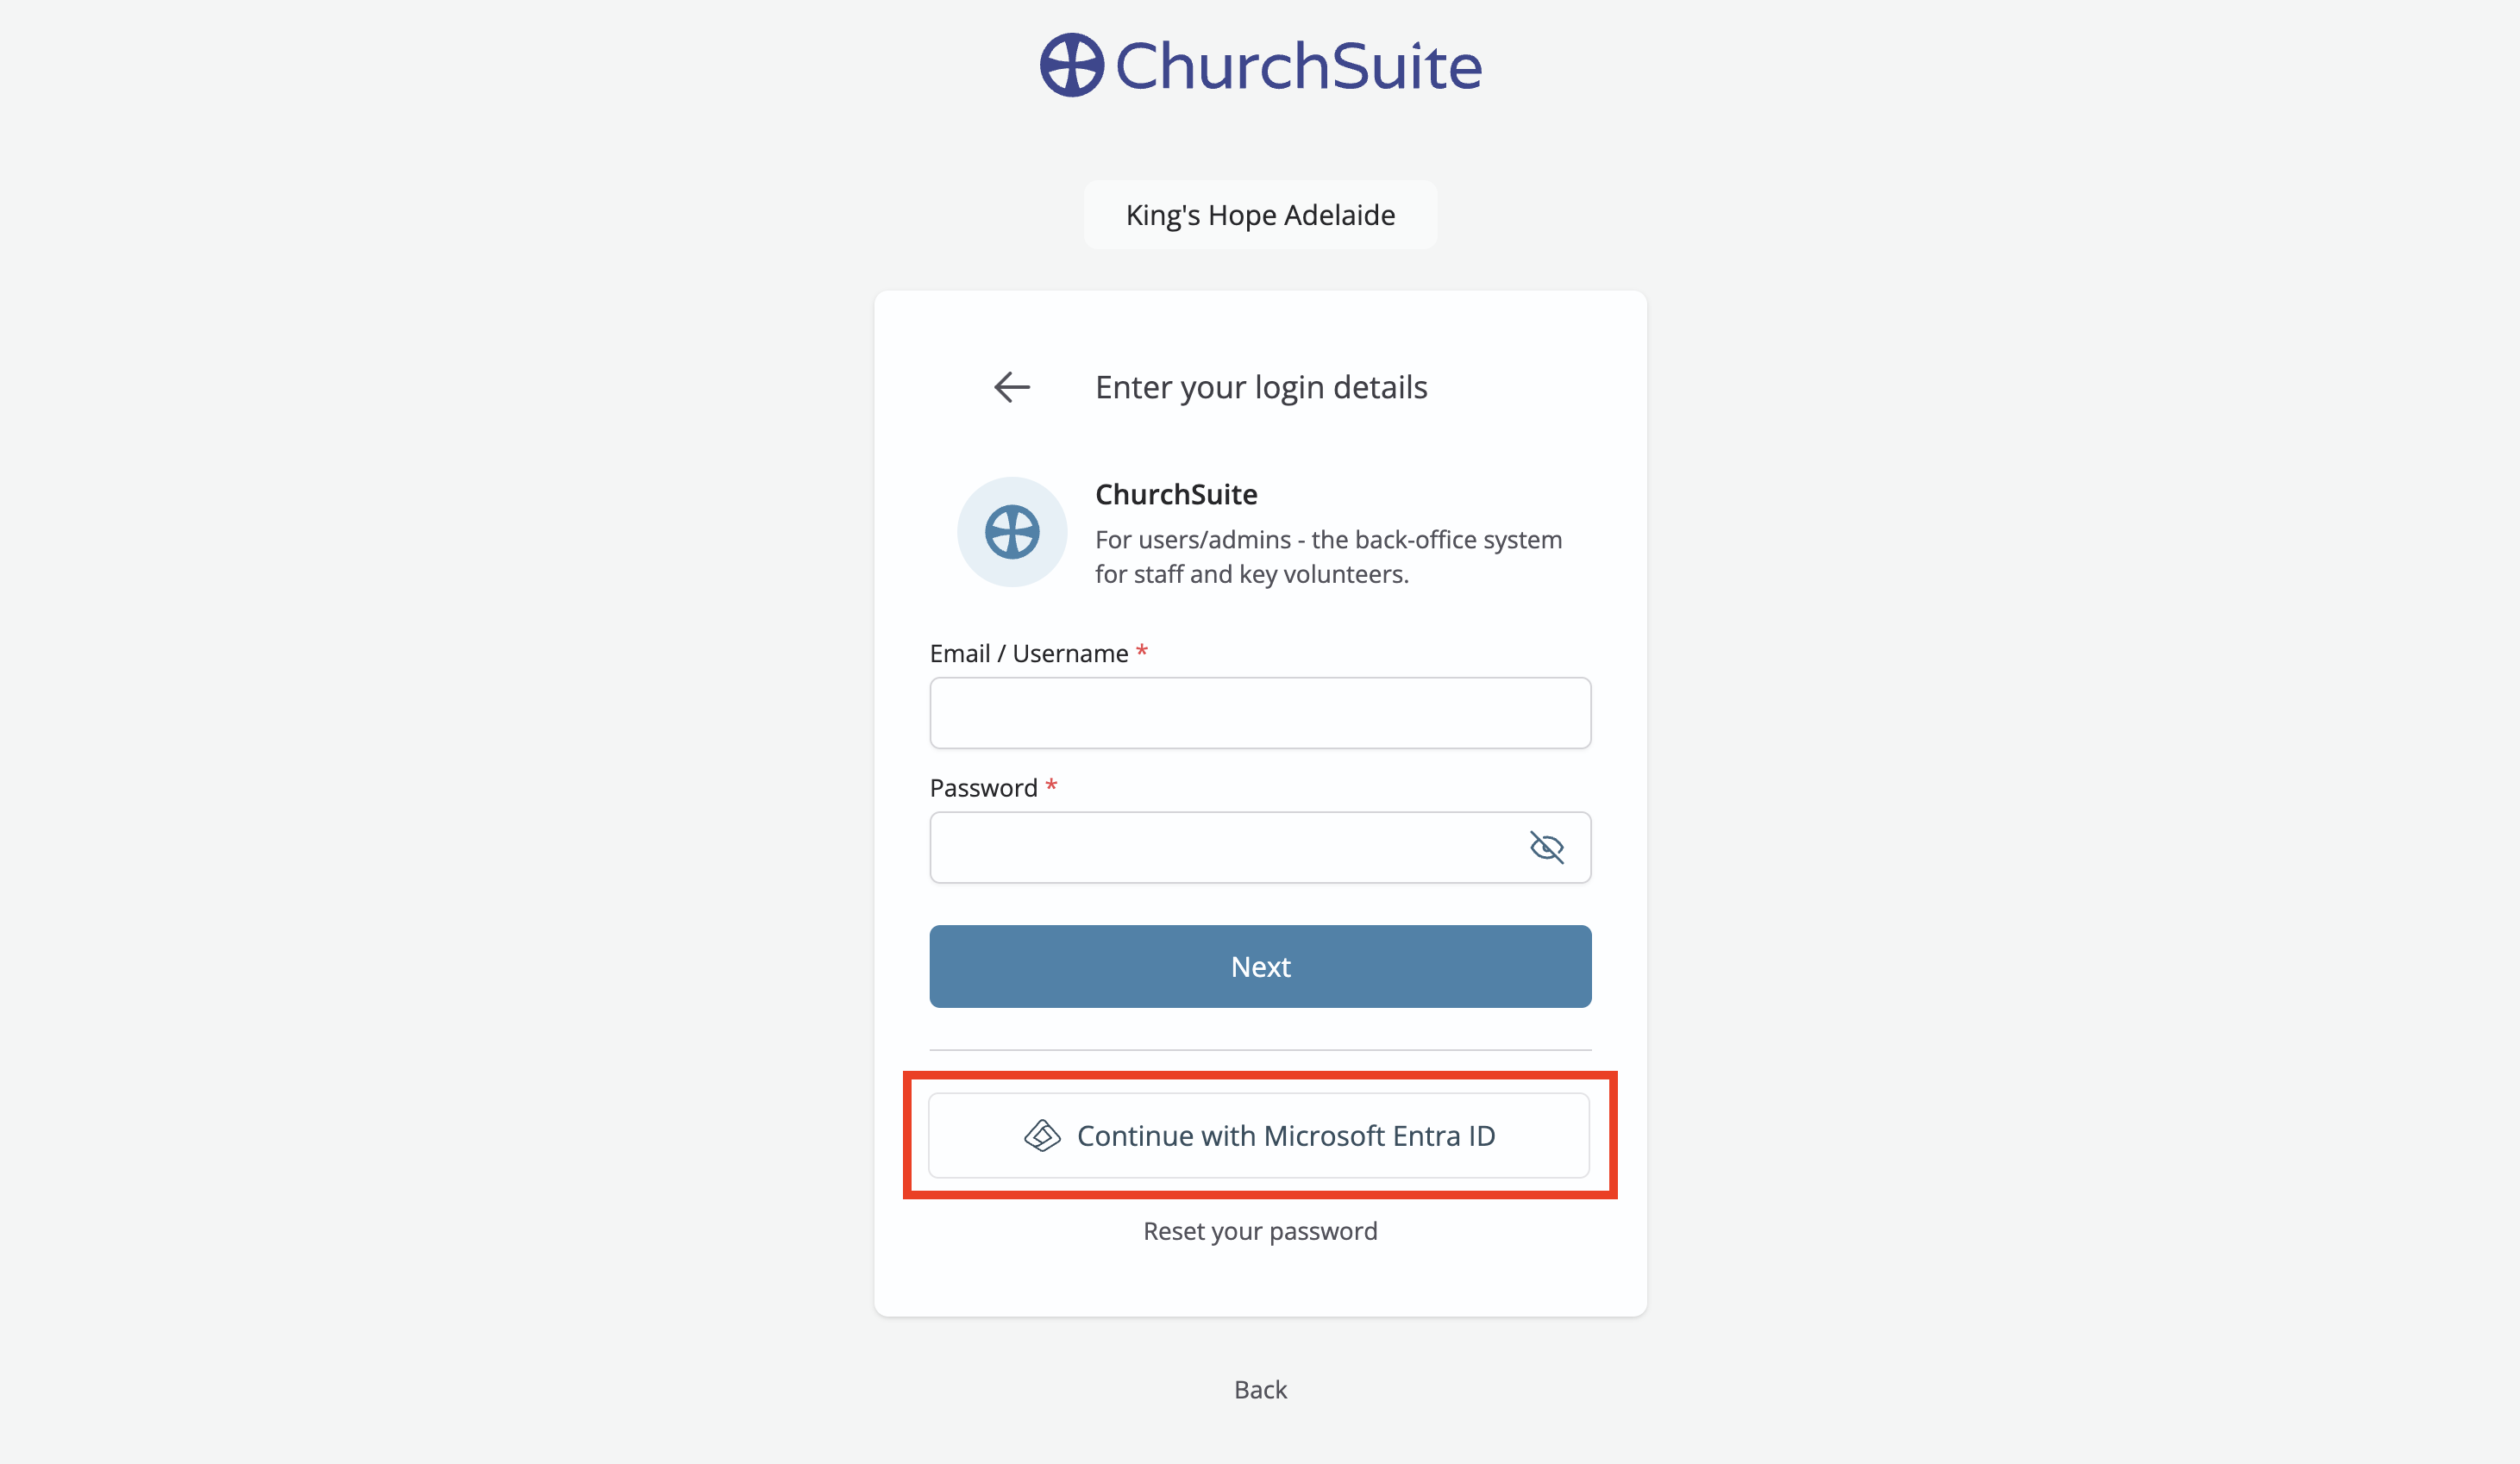

The user may be asked, upon their first login, to confirm access permissions - once confirmed, they won't be asked about this again.
Disabling SSO
SSO can only be disabled for a user by a ChurchSuite/CharitySuite Administrator. Resetting the SAML2 integration will disable SSO for all users. When SSO is disabled, a "SSO Disabled" notification is sent to the user, displayed in the user's communication log, and a user change log entry is added. The previous ChurchSuite/CharitySuite username, user password and password change/reset actions are reactivated for that user. When disabling SSO, a password reset request can be optionally sent to encourage users to secure their ChurchSuite/CharitySuite& login with a new password and enable multi-factor authentication.