Managing booking types
In this article
Introduction
Adding booking types
Setting default resources
Assigning type managers
Adding type-specific booking questions
Booking types in action
Deleting a booking type
Introduction
In this article, we show you how to add and manage your various booking Types. Booking "Types" (and Resources) are the backbone of your Bookings module, enabling you to collect all the pertinent type-specific details for each customer's bookings. A booking type is used to distinguish wedding bookings, internal bookings, conference bookings and funeral bookings. There's no limit to the number of booking types you can add and each can be customised with type-specific questions that are later used to collect customer responses about their booking. For example, when adding a wedding booking, you'll be prompted to enter responses to your various wedding-type questions, while adding a funeral booking will surface an entirely different set of funeral-type questions. For each booking type, you can optionally choose default resources that are preselected to be added for new bookings of that type and you can also assign managers who can optionally receive email notifications when bookings for that type are added, edited or deleted.
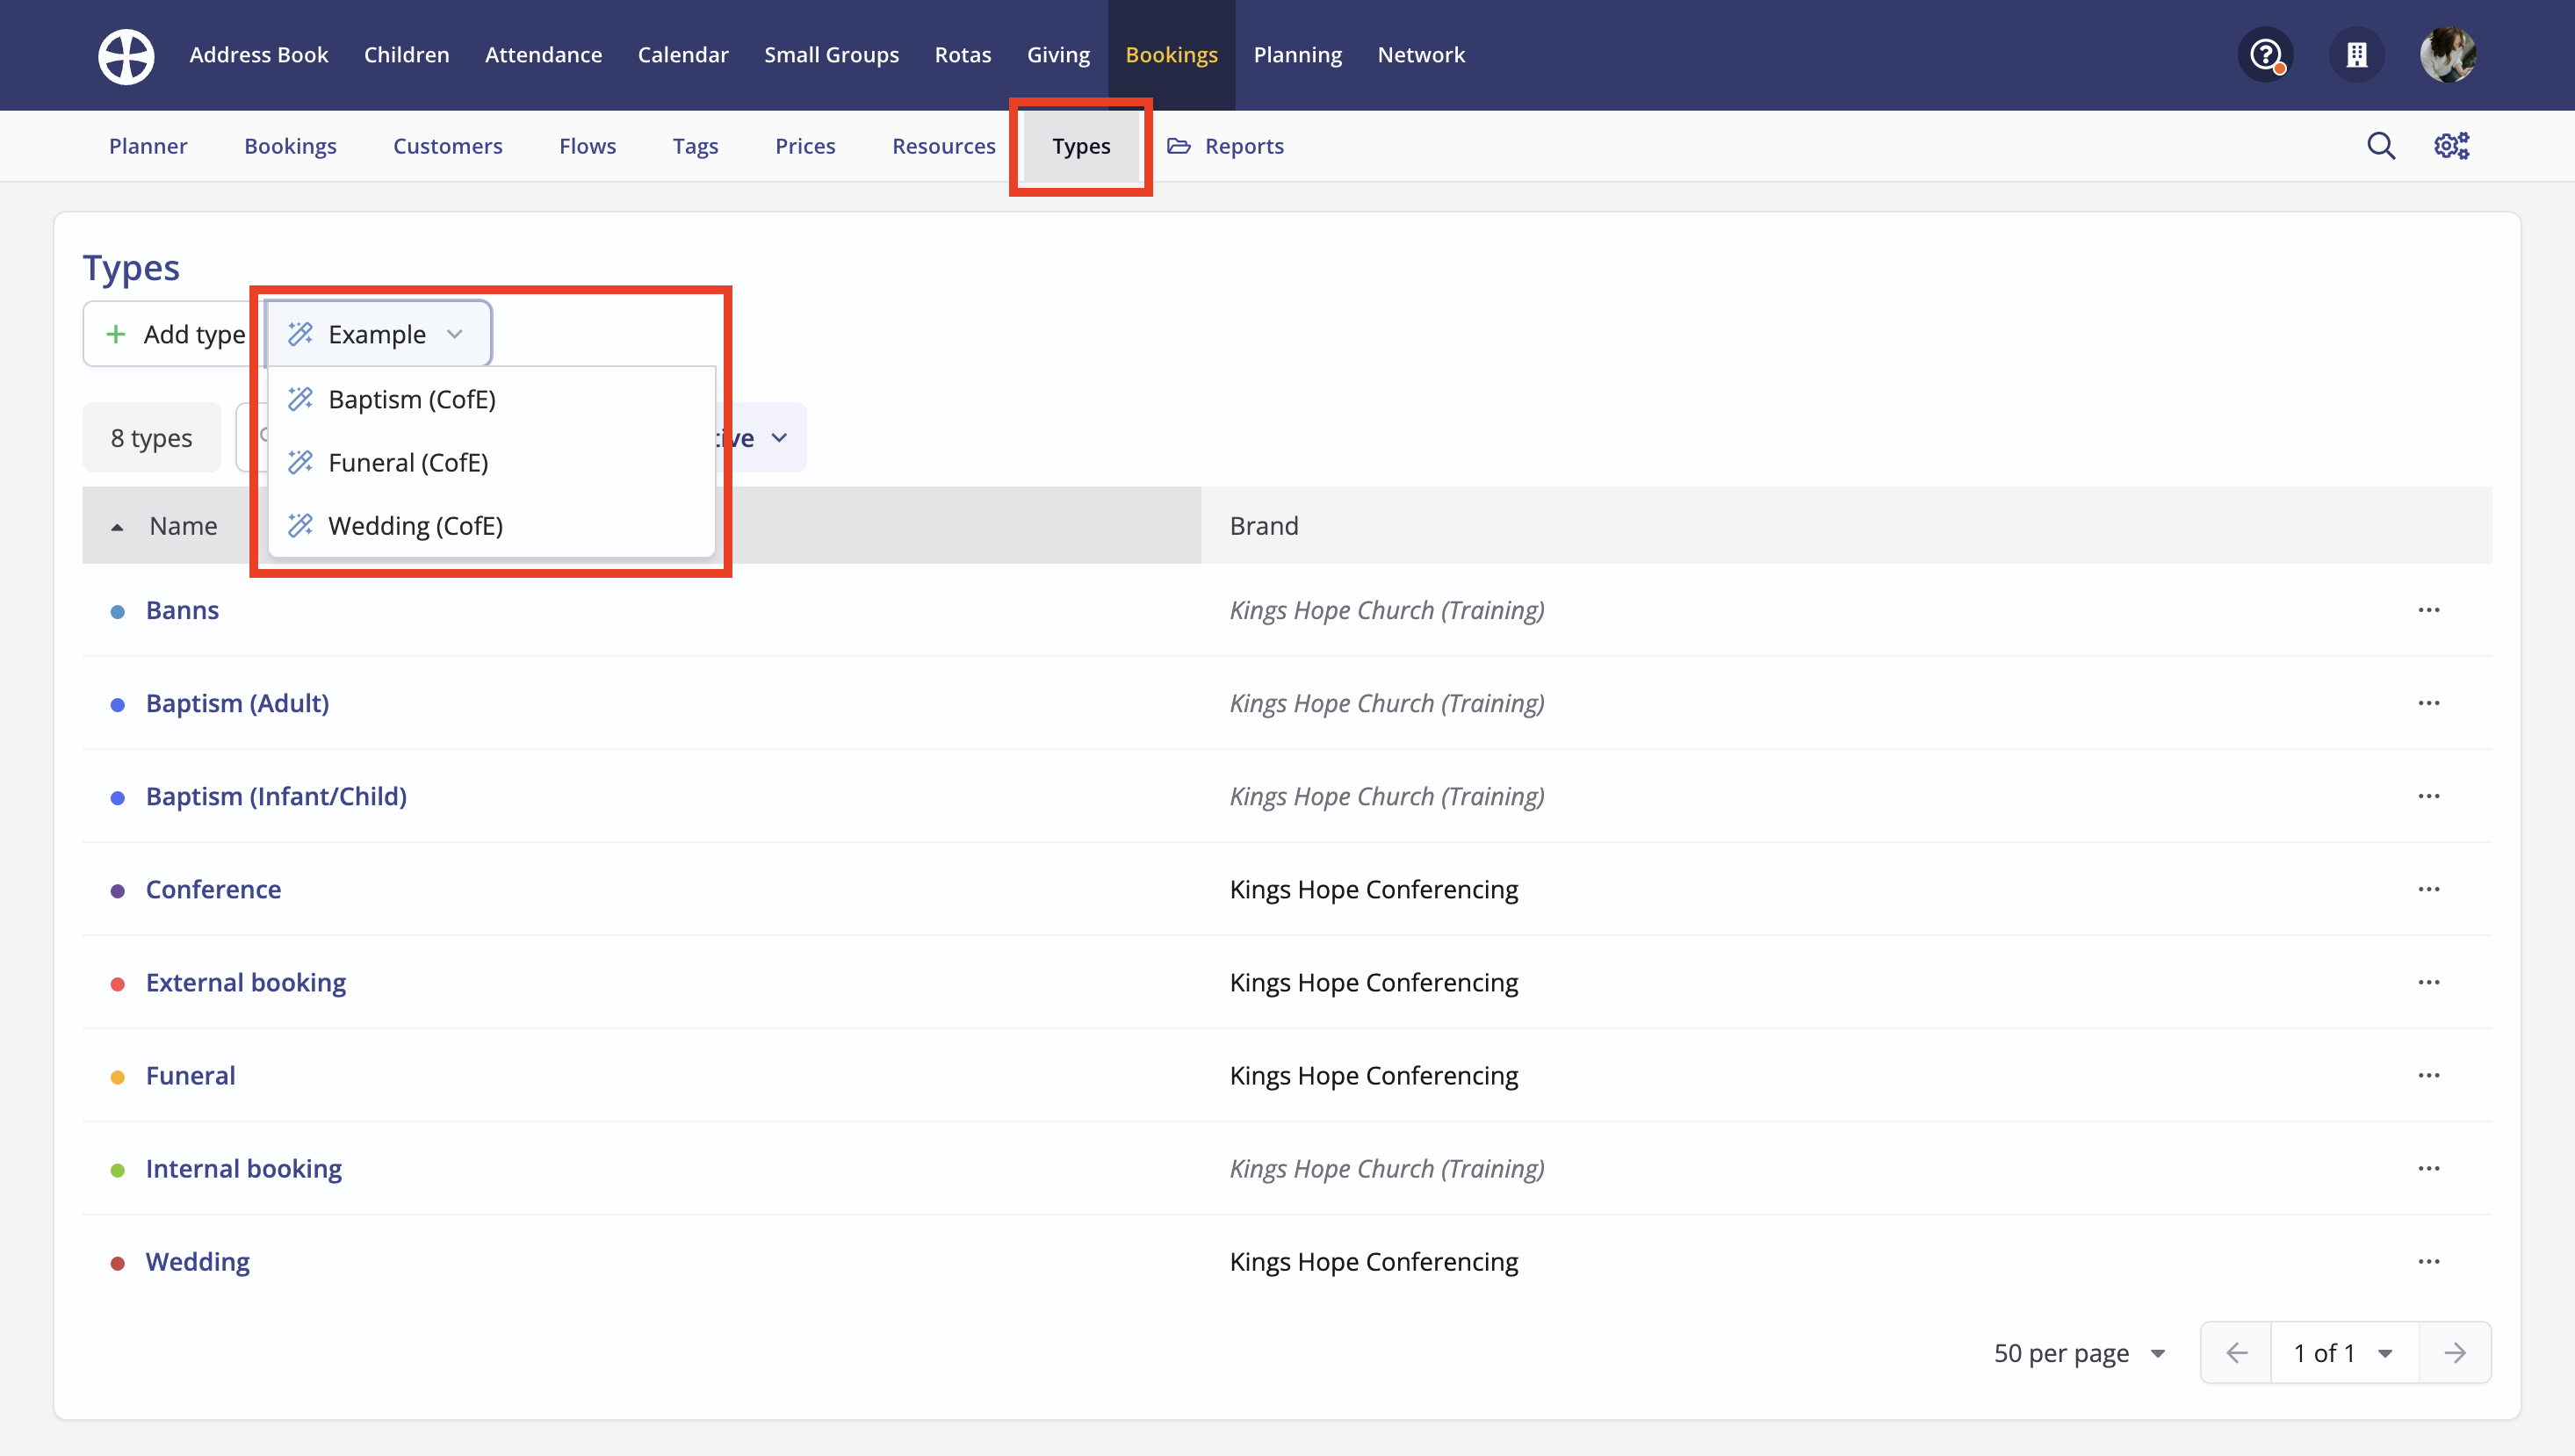
Adding booking types
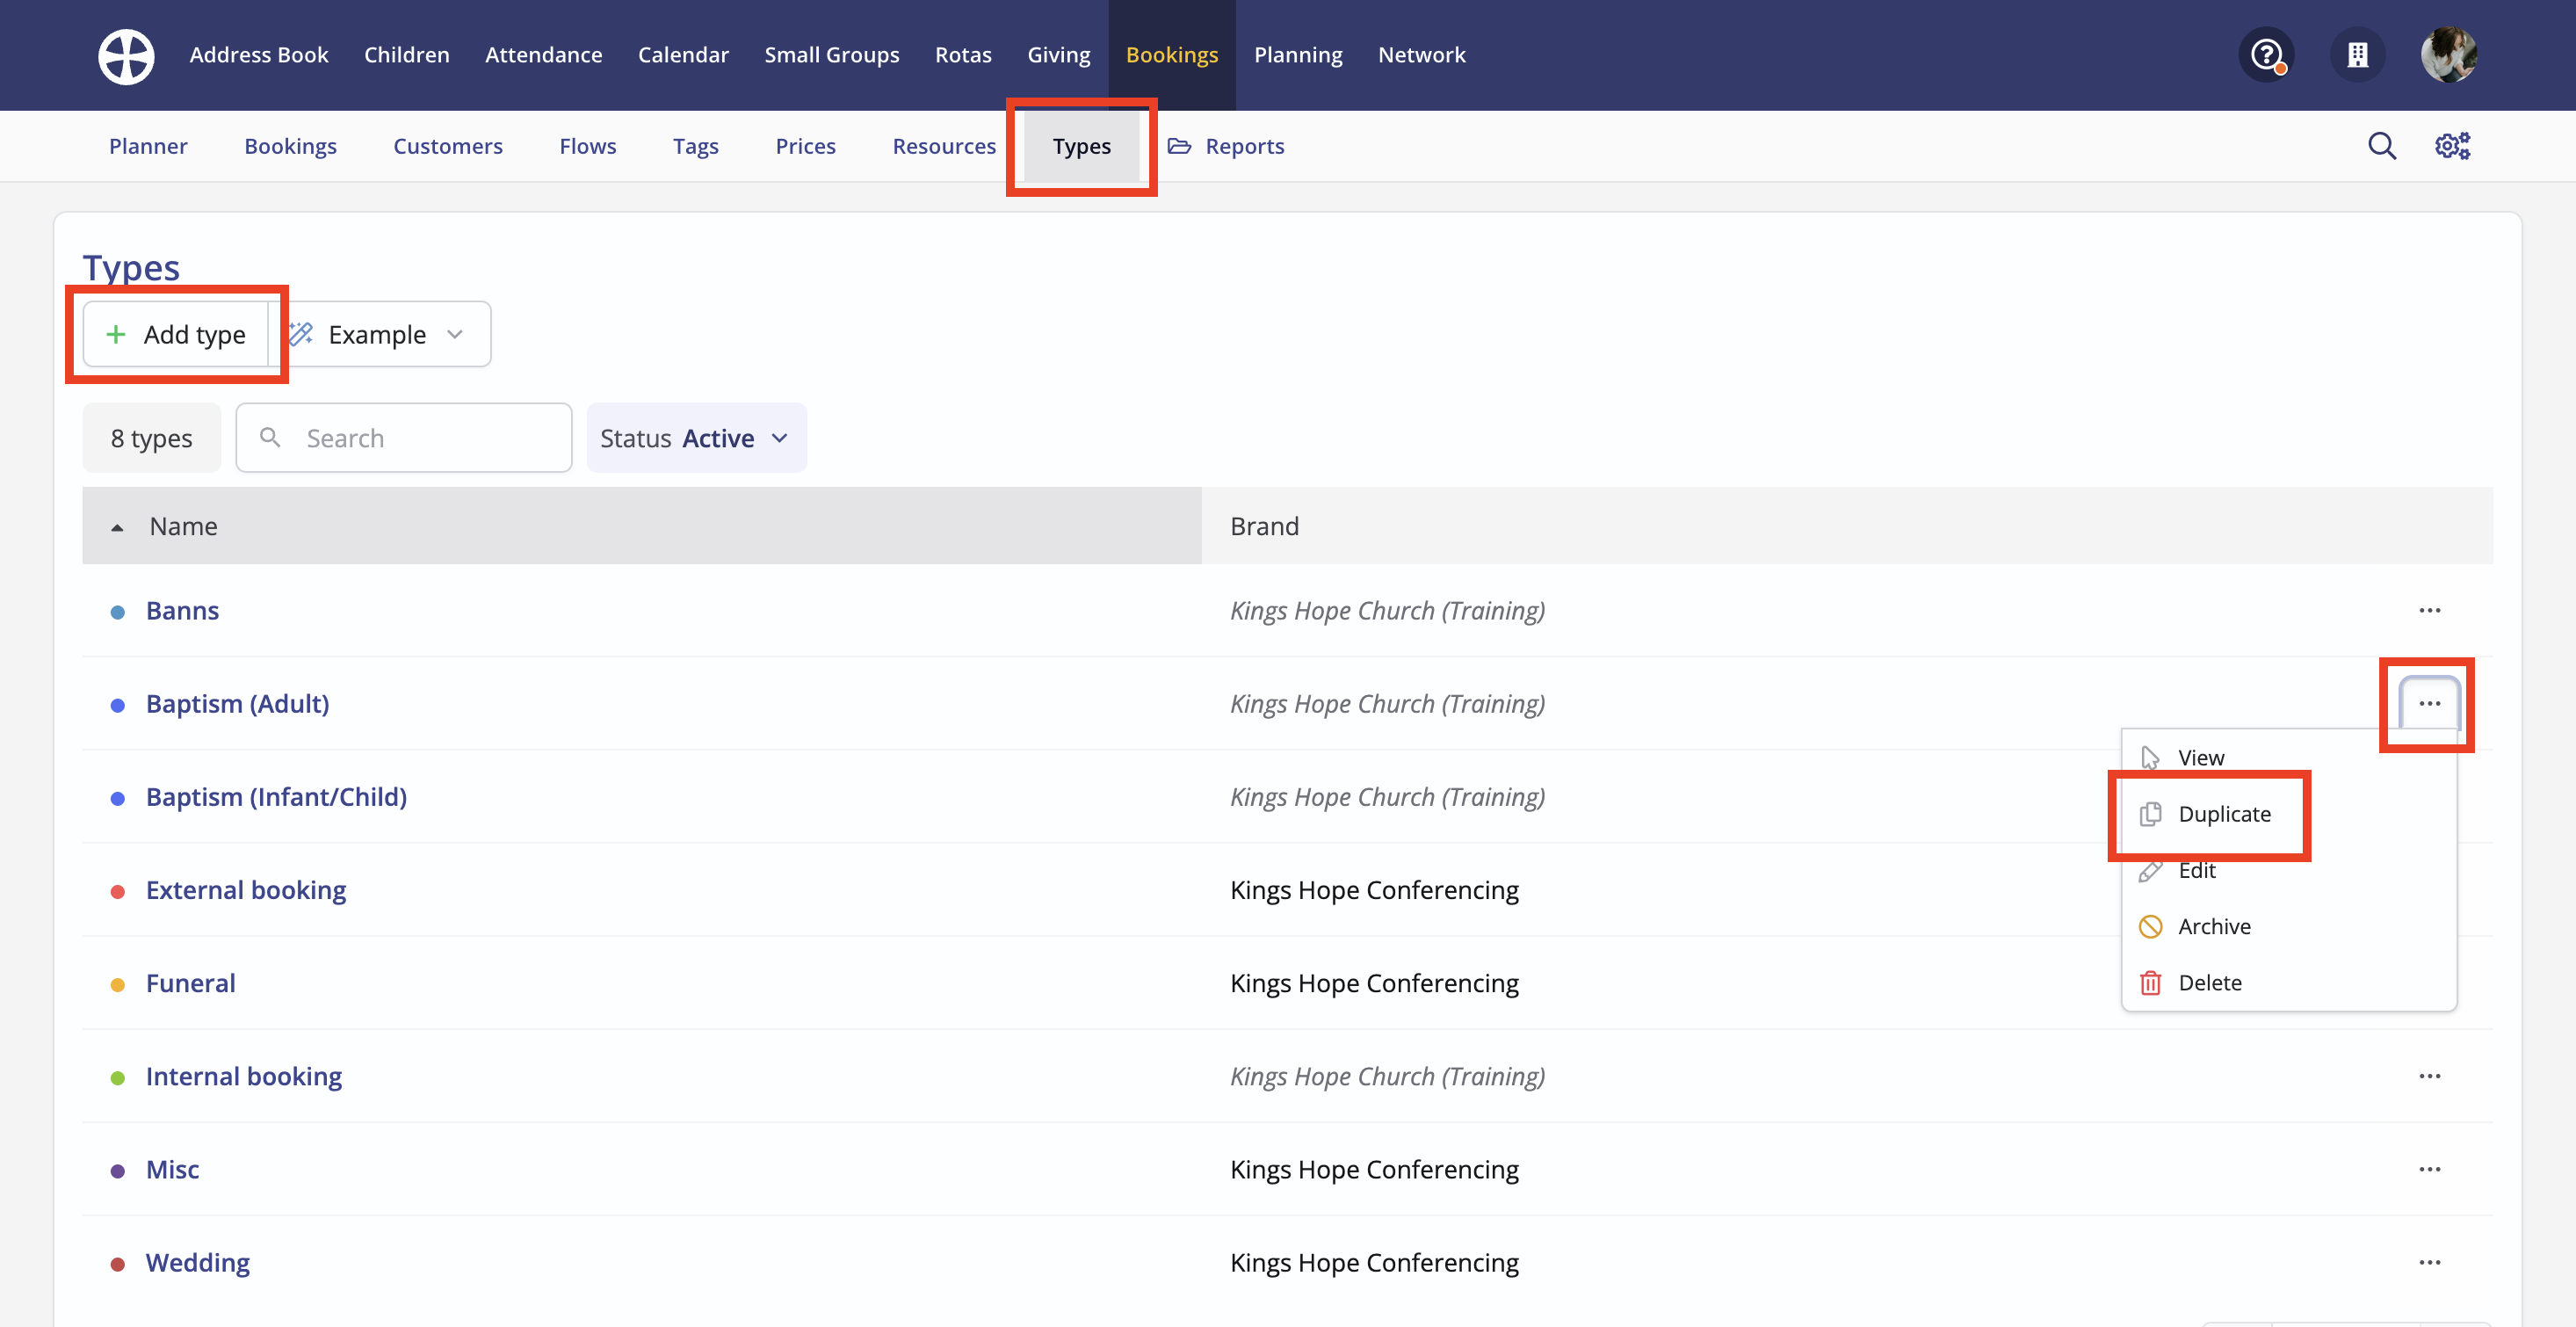
Working within the Bookings module, navigate to the Types section of the module. Notice the option to switch between viewing Active and Archived booking types. Booking types that no longer serve a useful purpose can be archived and later reactivated if needed. Archiving a type doesn't affect existing bookings of that type (past or future); however, you can only add new bookings for an active booking type.
Click Add type or select to Duplicate an existing type, which will also duplicate the type's Questions and Checklists.
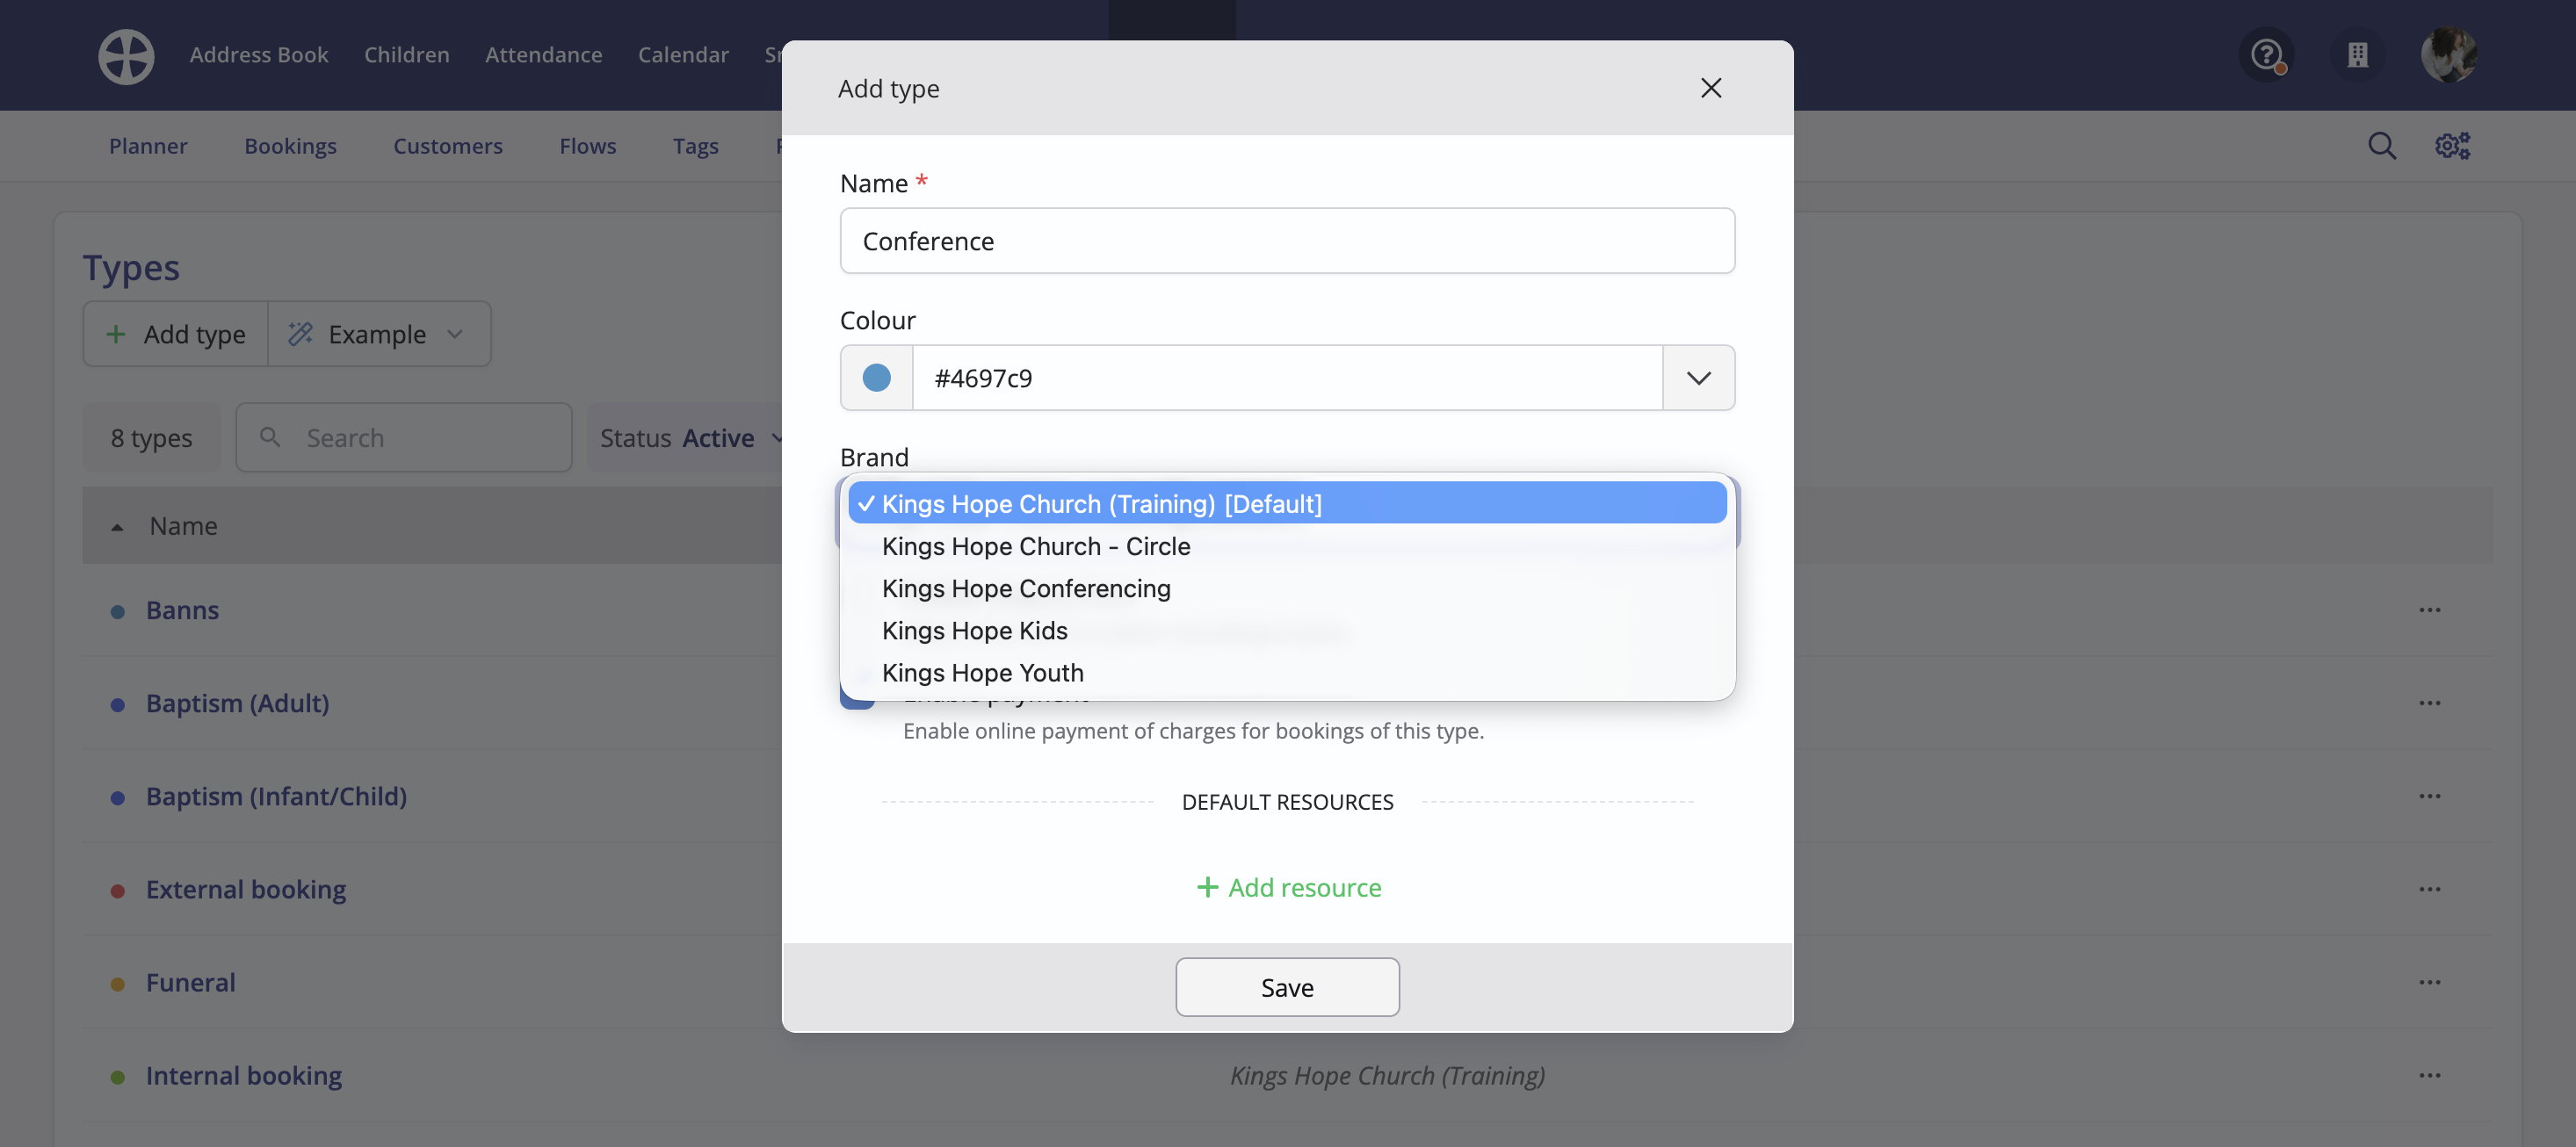
On the Add/Duplicate type pop-up, provide a suitable Name and choose a Colour, which is used to distinguish bookings of this type when viewing the resource Planner. Optionally assign a custom Brand to the booking Type or use your default brand – see our related support article for further information on Adding Brands. The selected brand's logo, emblem and style colour will be used for the customer-facing Booking Pages and branded email communications for all bookings of this Type. This may be helpful if your commercial or external bookings have different branding from your default church branding (perhaps for an "external bookings" Type).
Optionally tick the Enable enquiry form option if you wish prospective customers to be able to submit booking enquiries through an enquiry form. There's more information on this in our related Booking enquiries article at the bottom of the page.
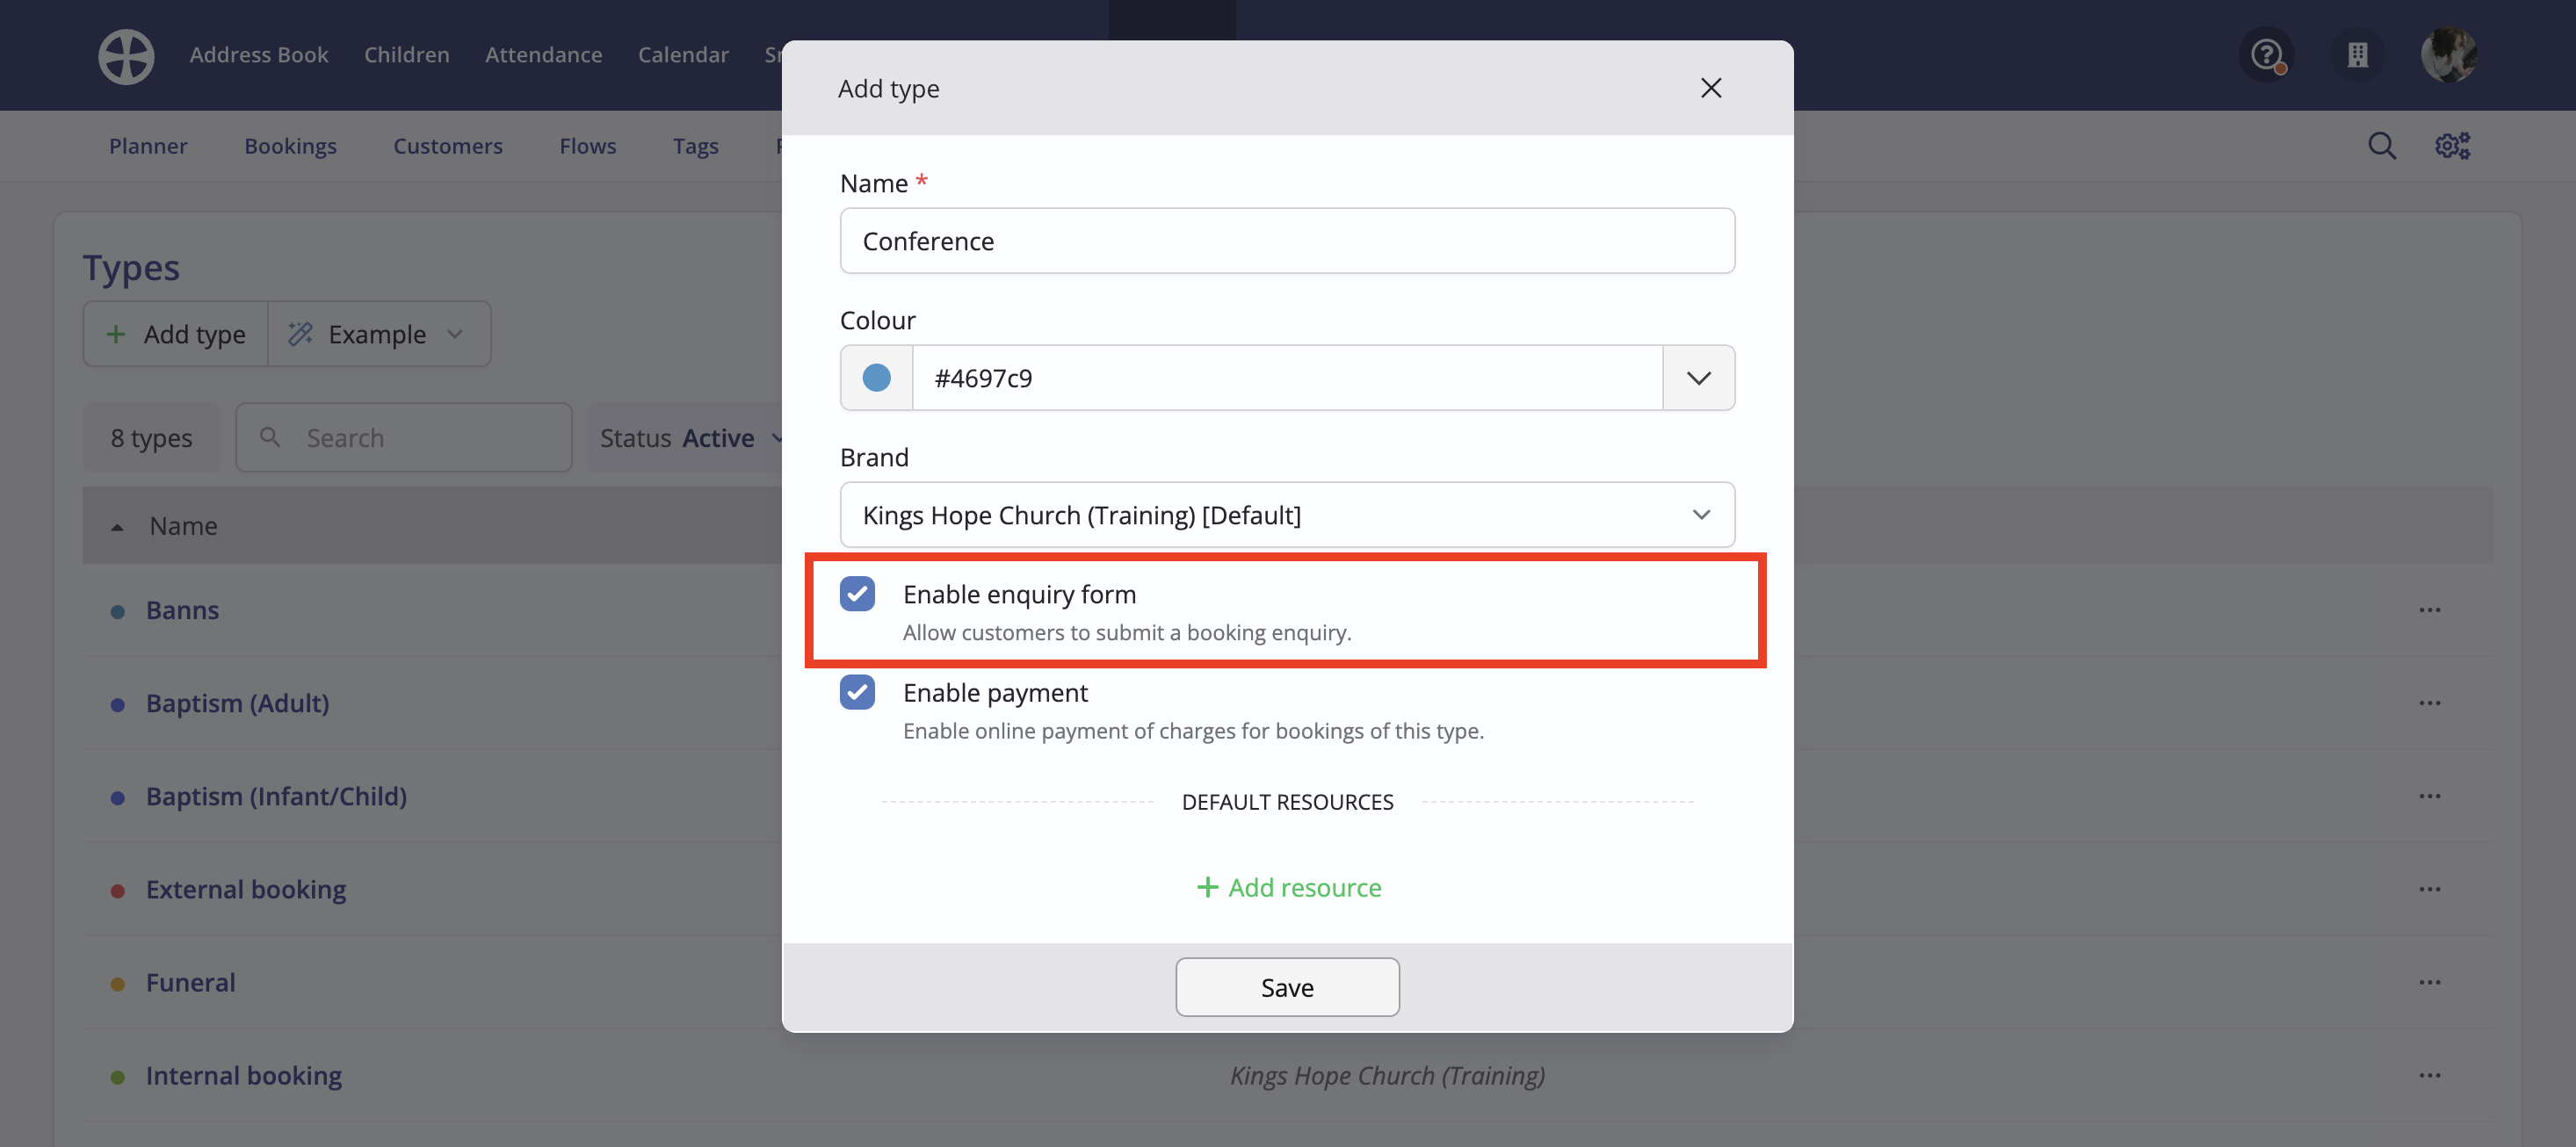
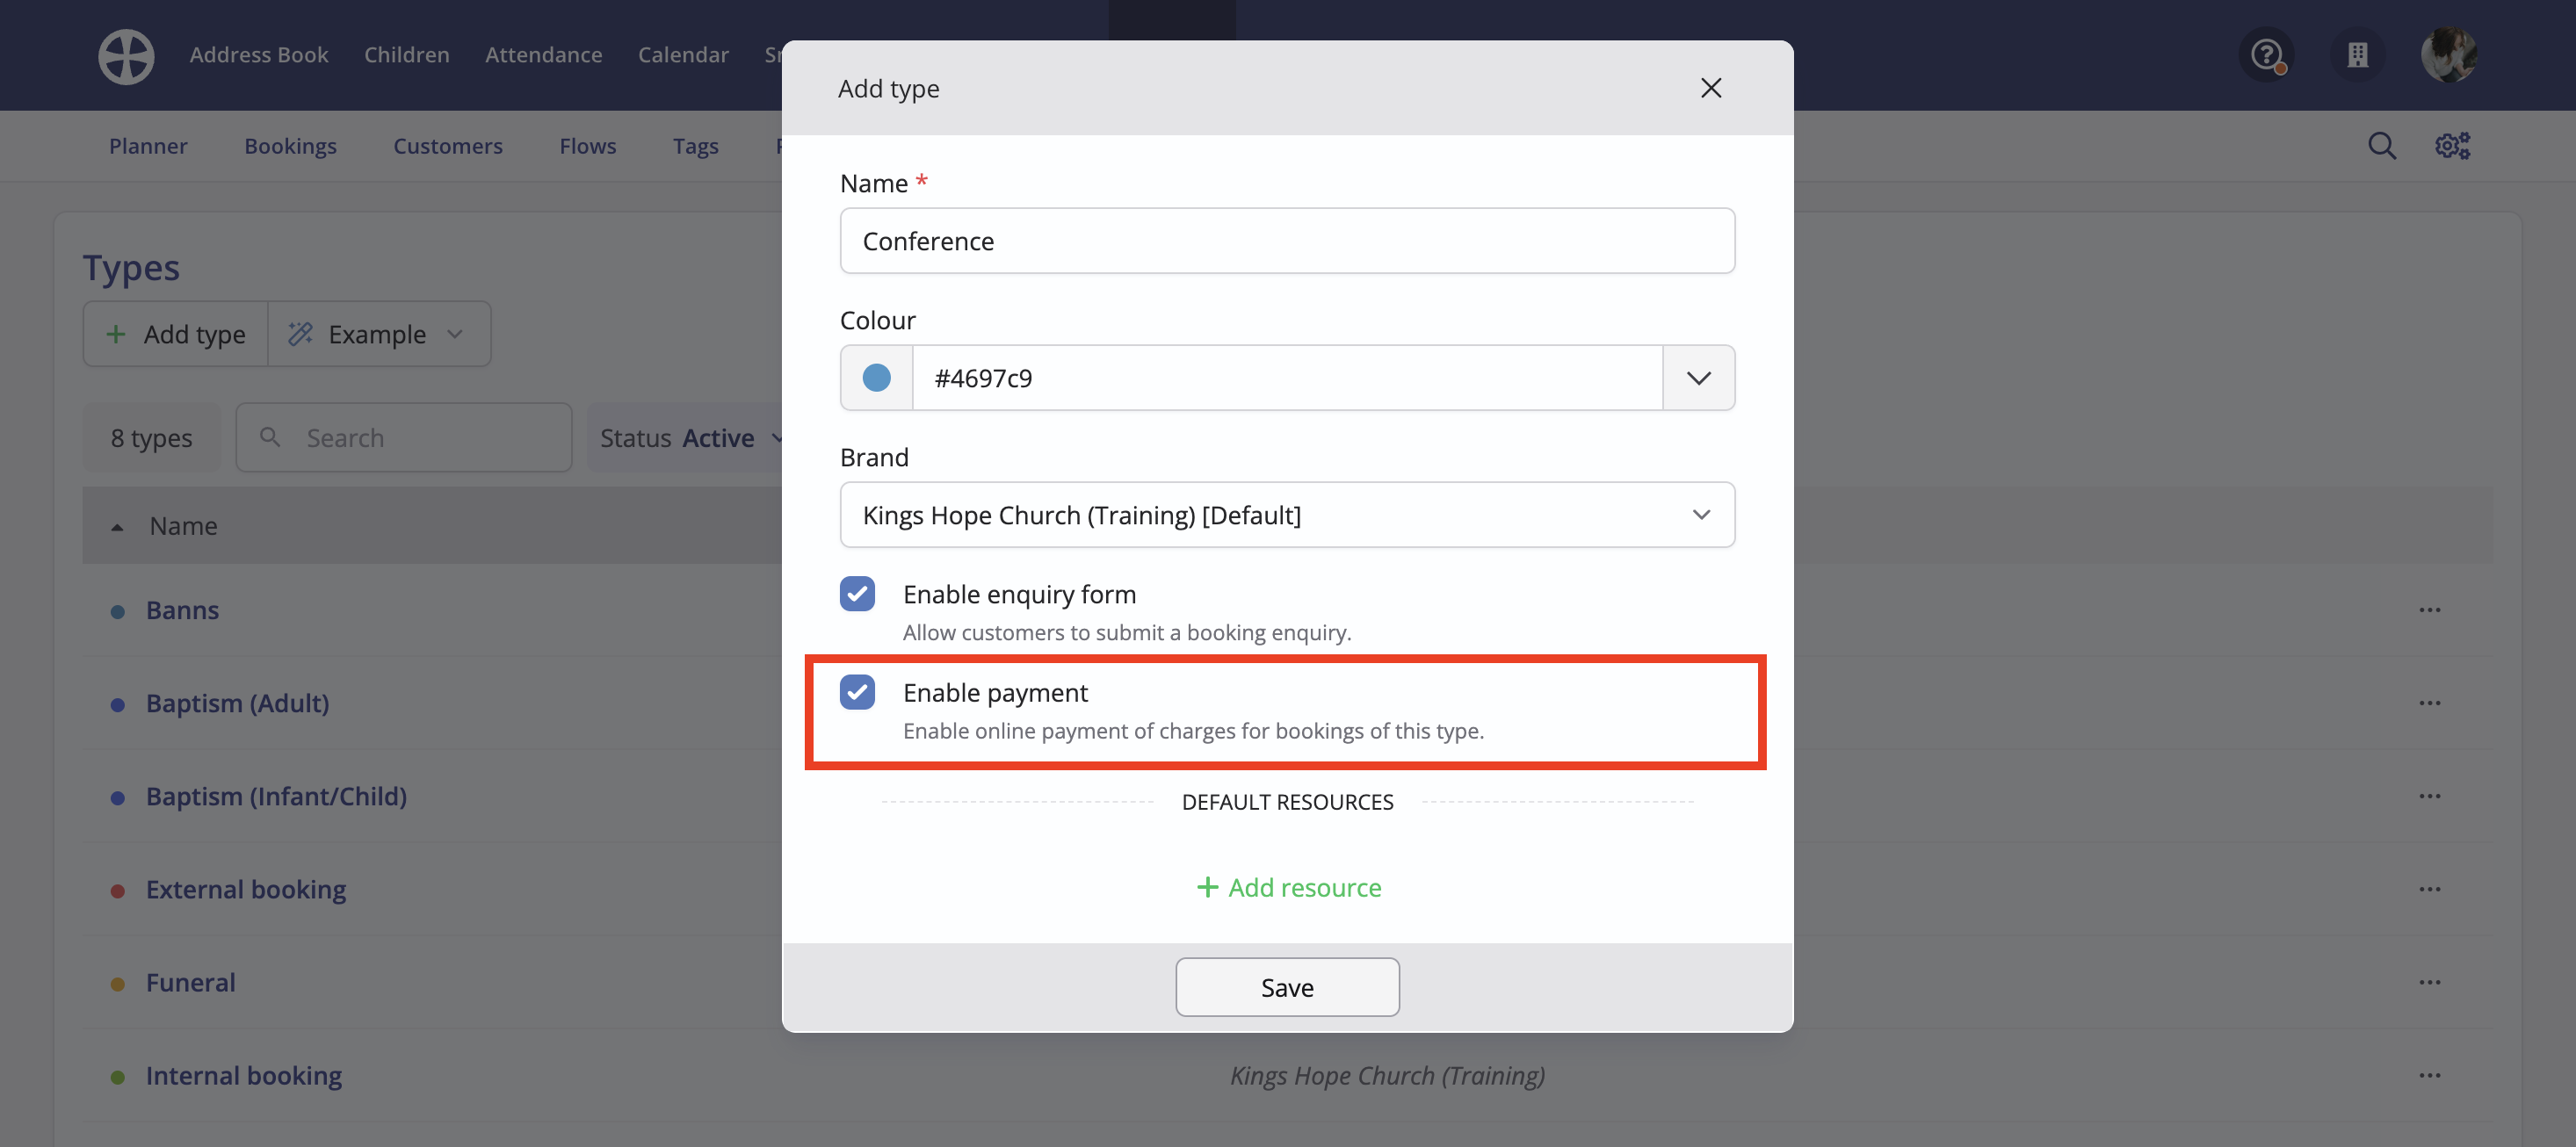
Next, tick the Enable payment option if you wish to accept card payments from your customers for this booking type. When this setting is enabled, customers will see a Pay by card payment option on their customer-facing Booking Page when there are unpaid charges. While online payment provides a convenient user experience that customers may appreciate, you can, of course, still communicate other payment methods on the Booking Page and process manual payments for charges paid by those other methods. The Enable payment setting is a default setting for bookings of this Type; however, you can still override the default by enabling or disabling online payment on a booking-by-booking basis.
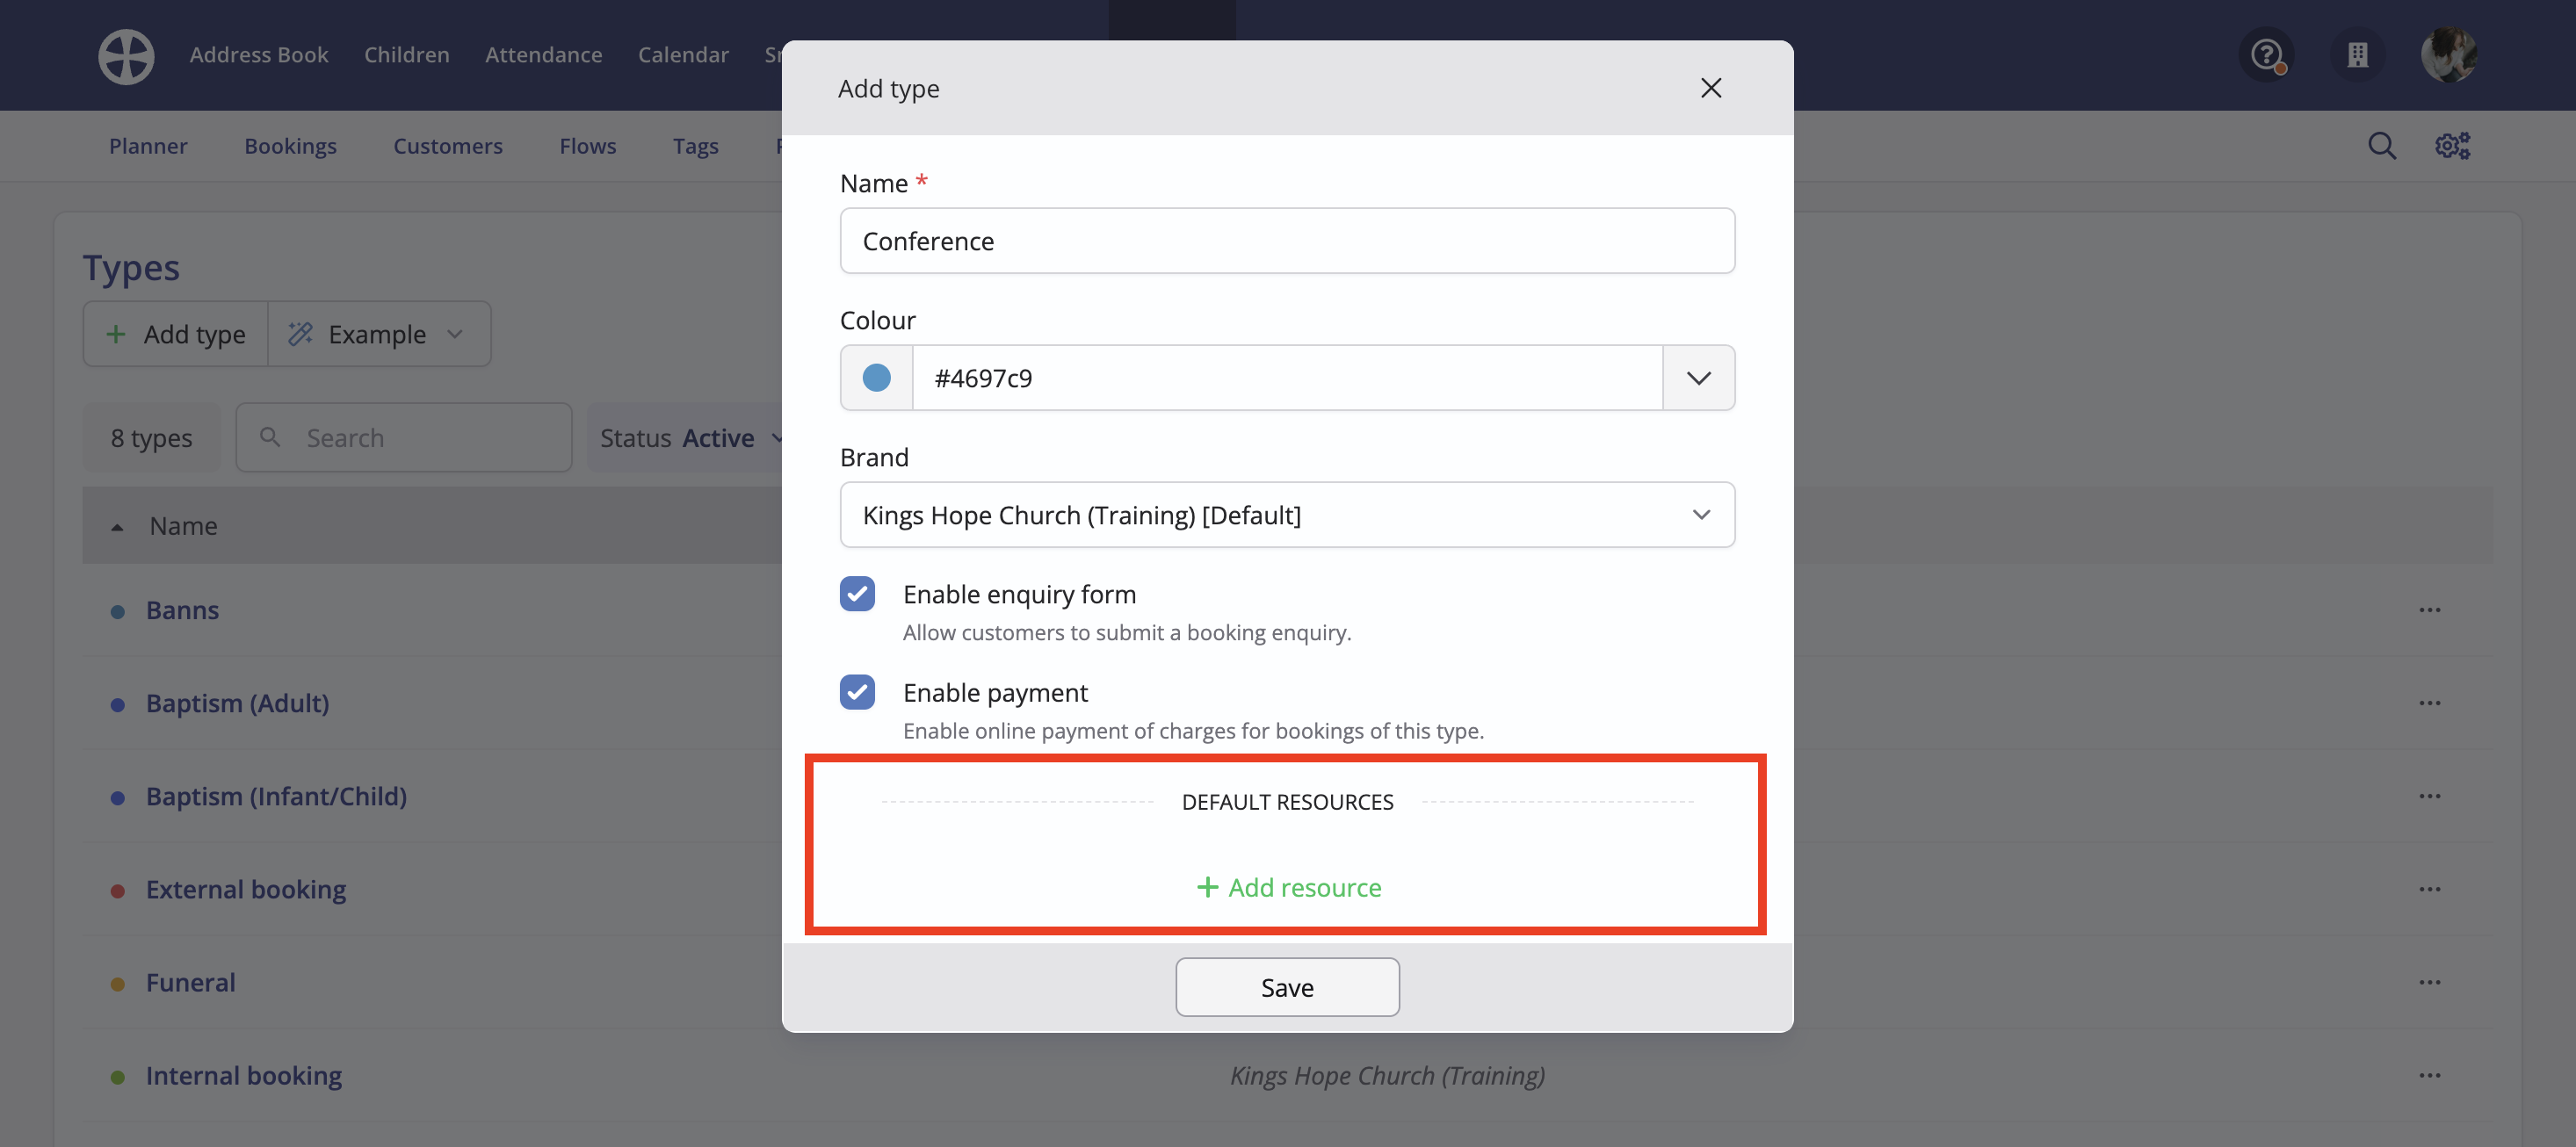
Finally, choose if you want to add any Default resources - see the section below for more information.
Click Save to add the new booking type. You will then be redirected to the Type View, which displays all the details that you just added.
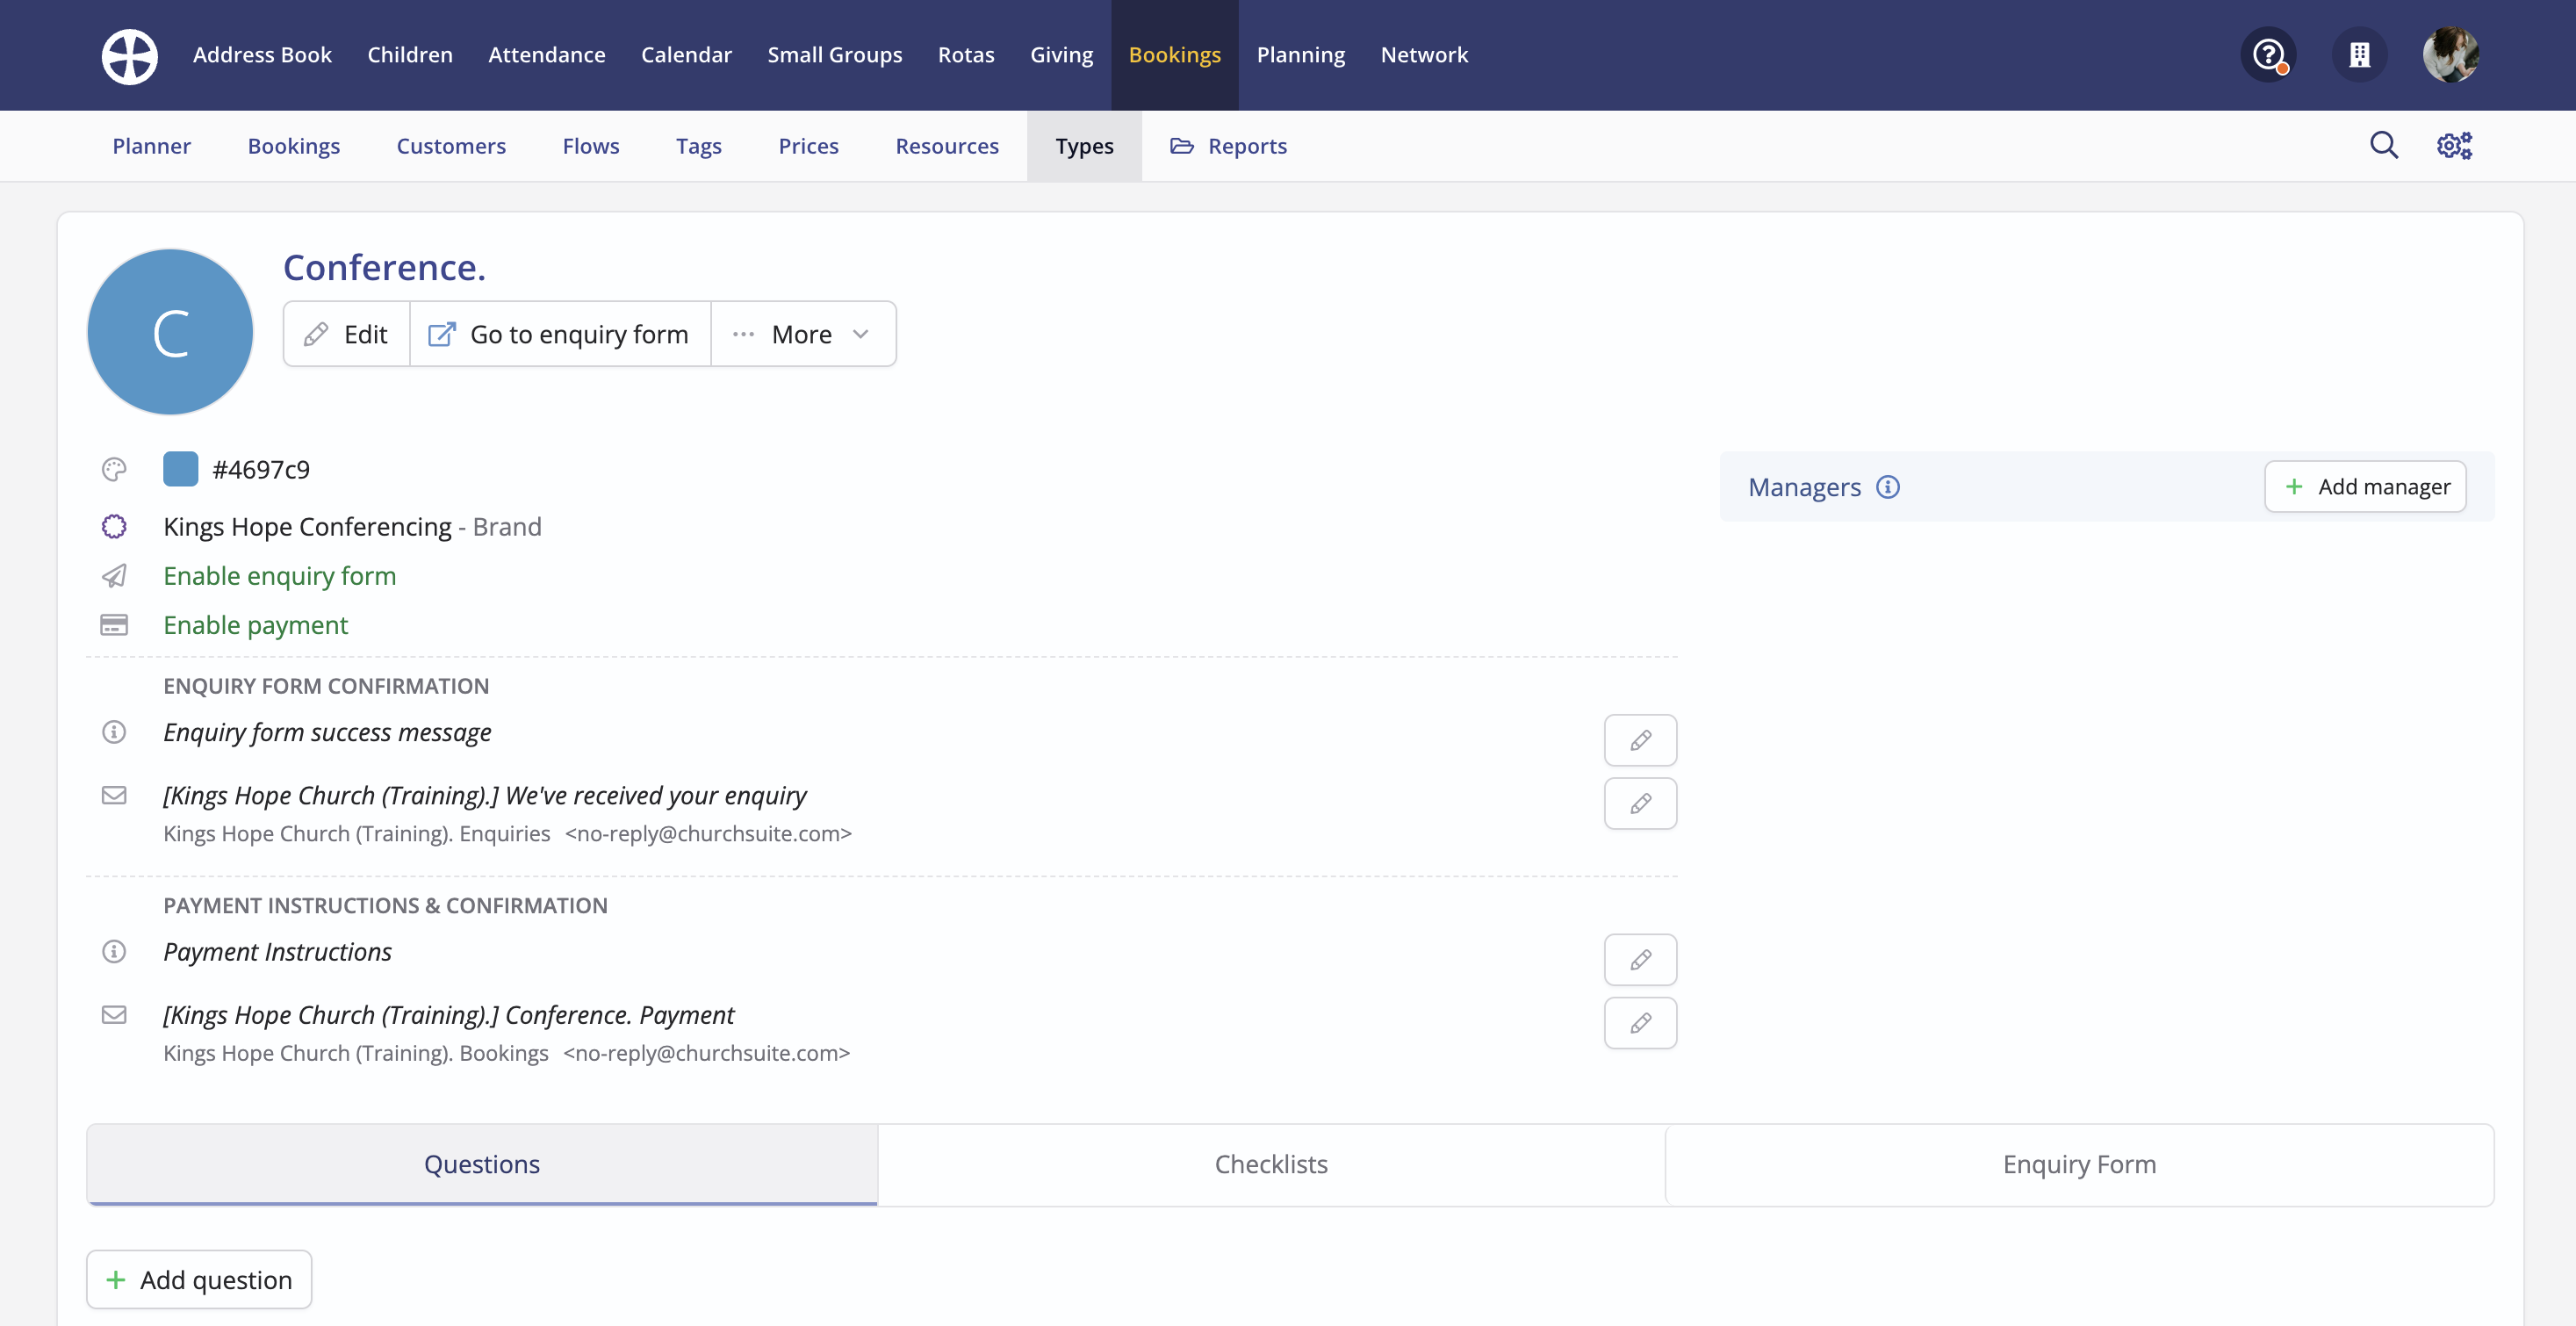
For bookings with enquiry forms enabled, optionally customise the enquiry form success message and confirmation email.
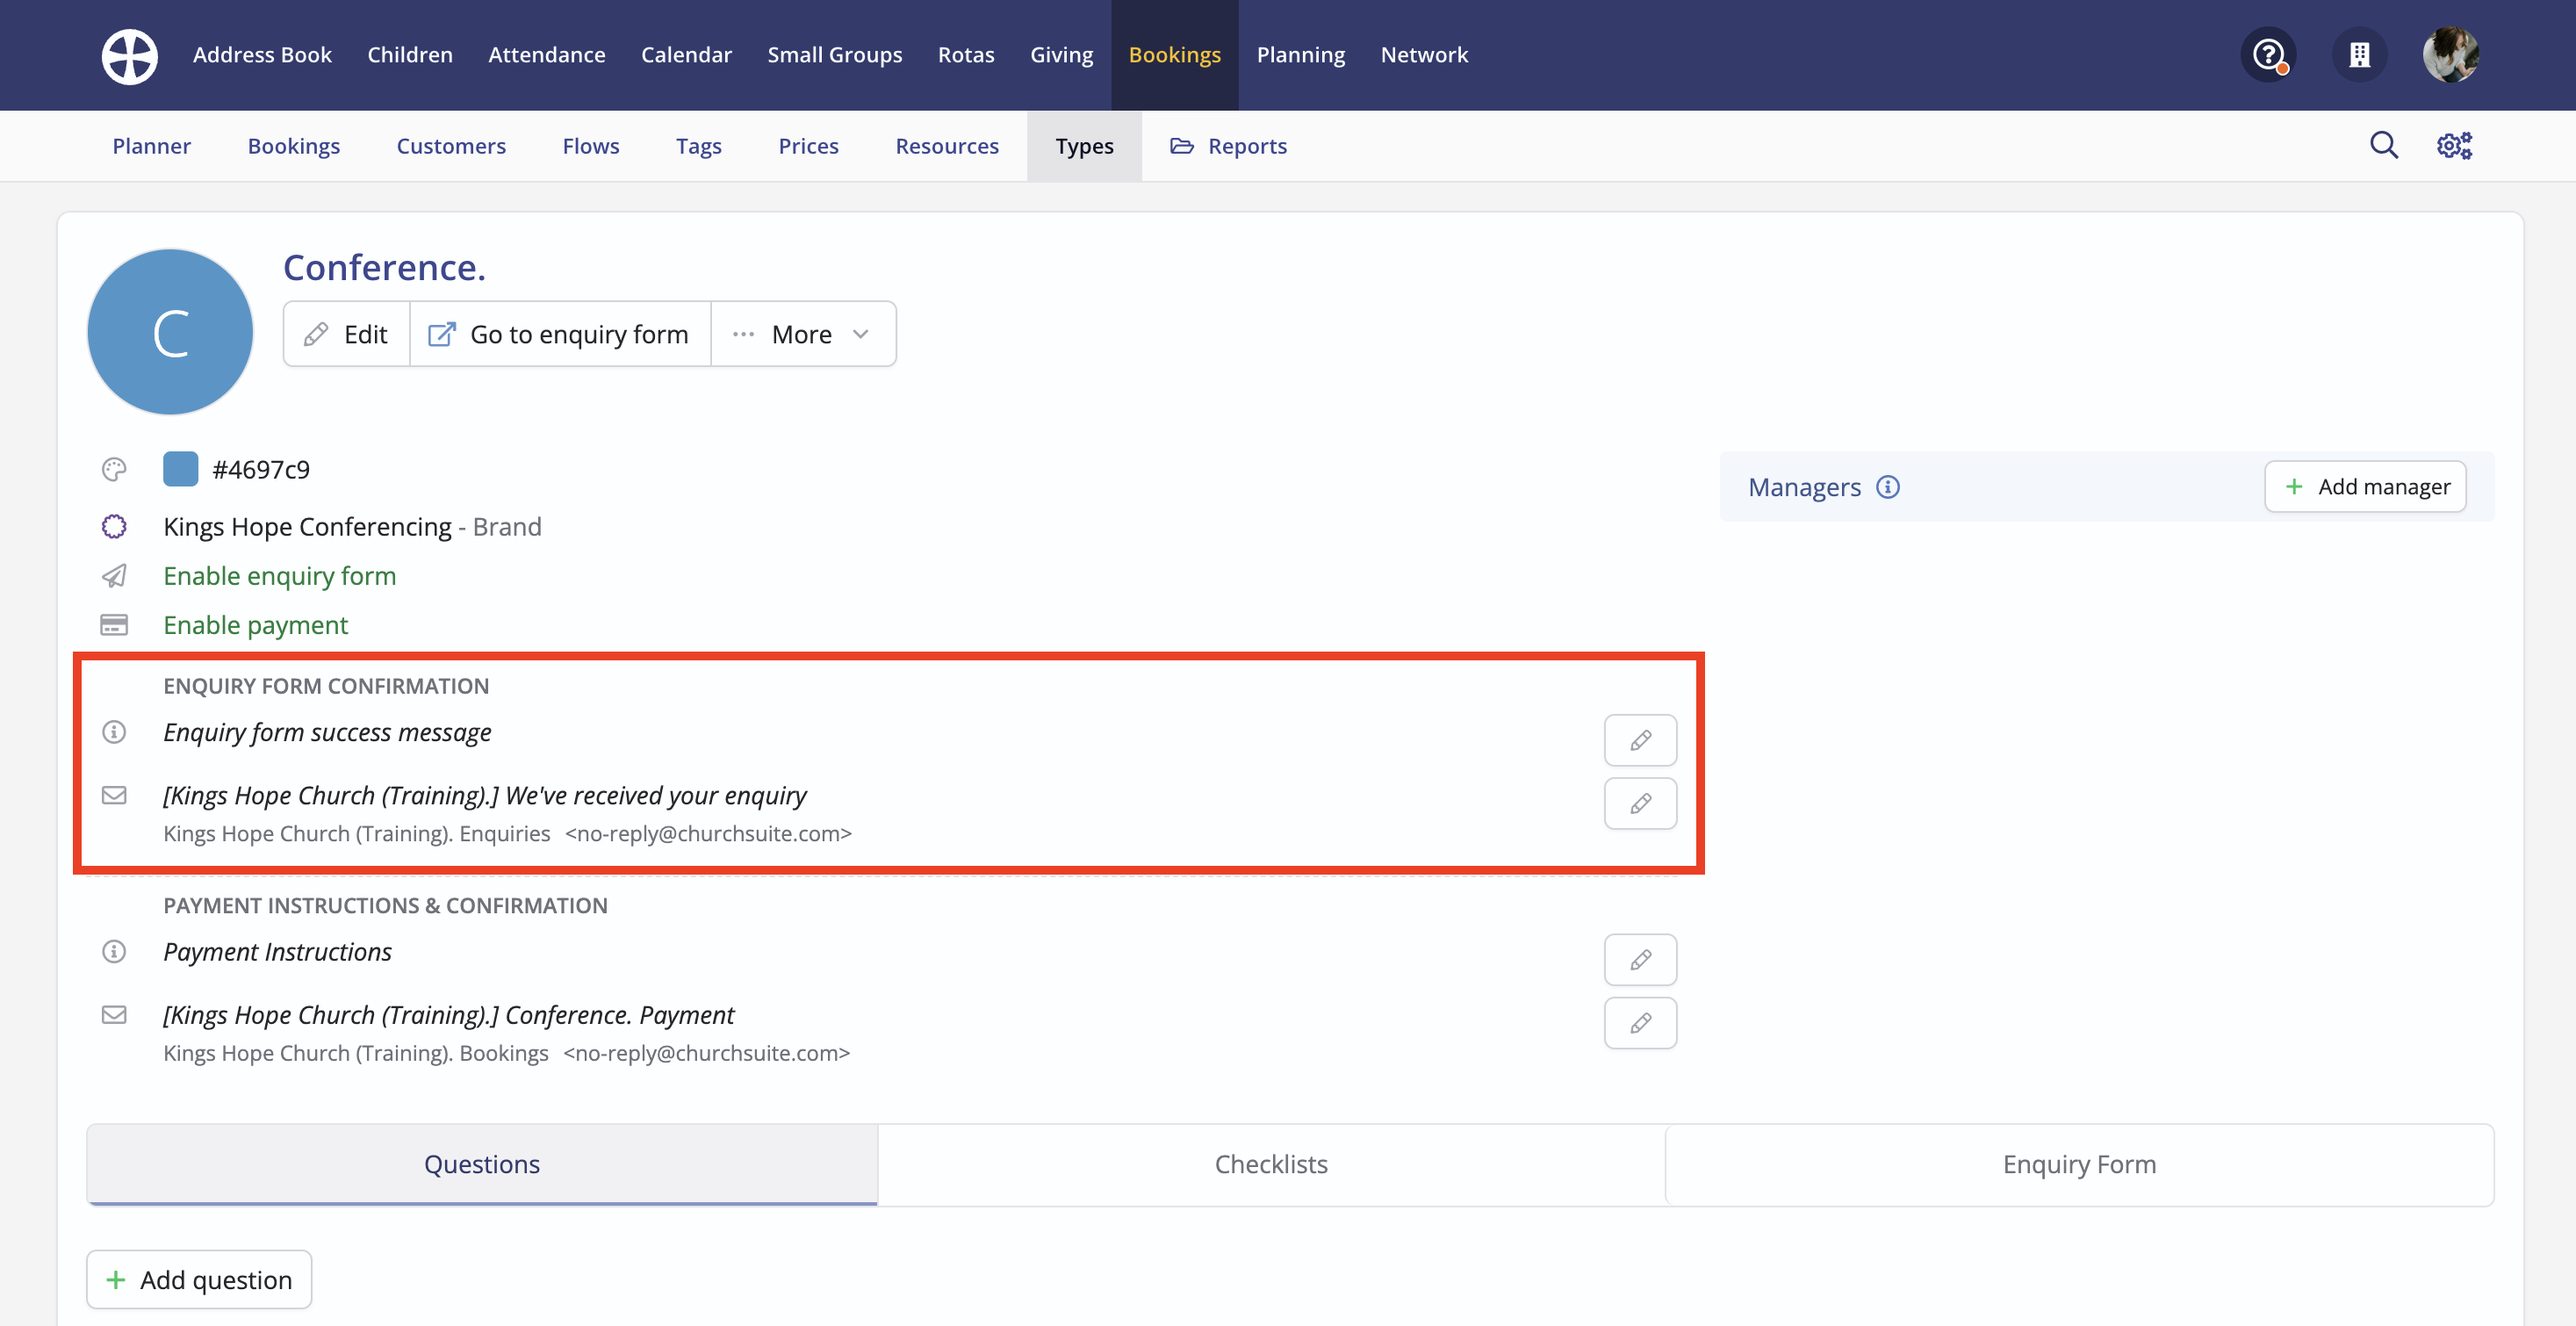
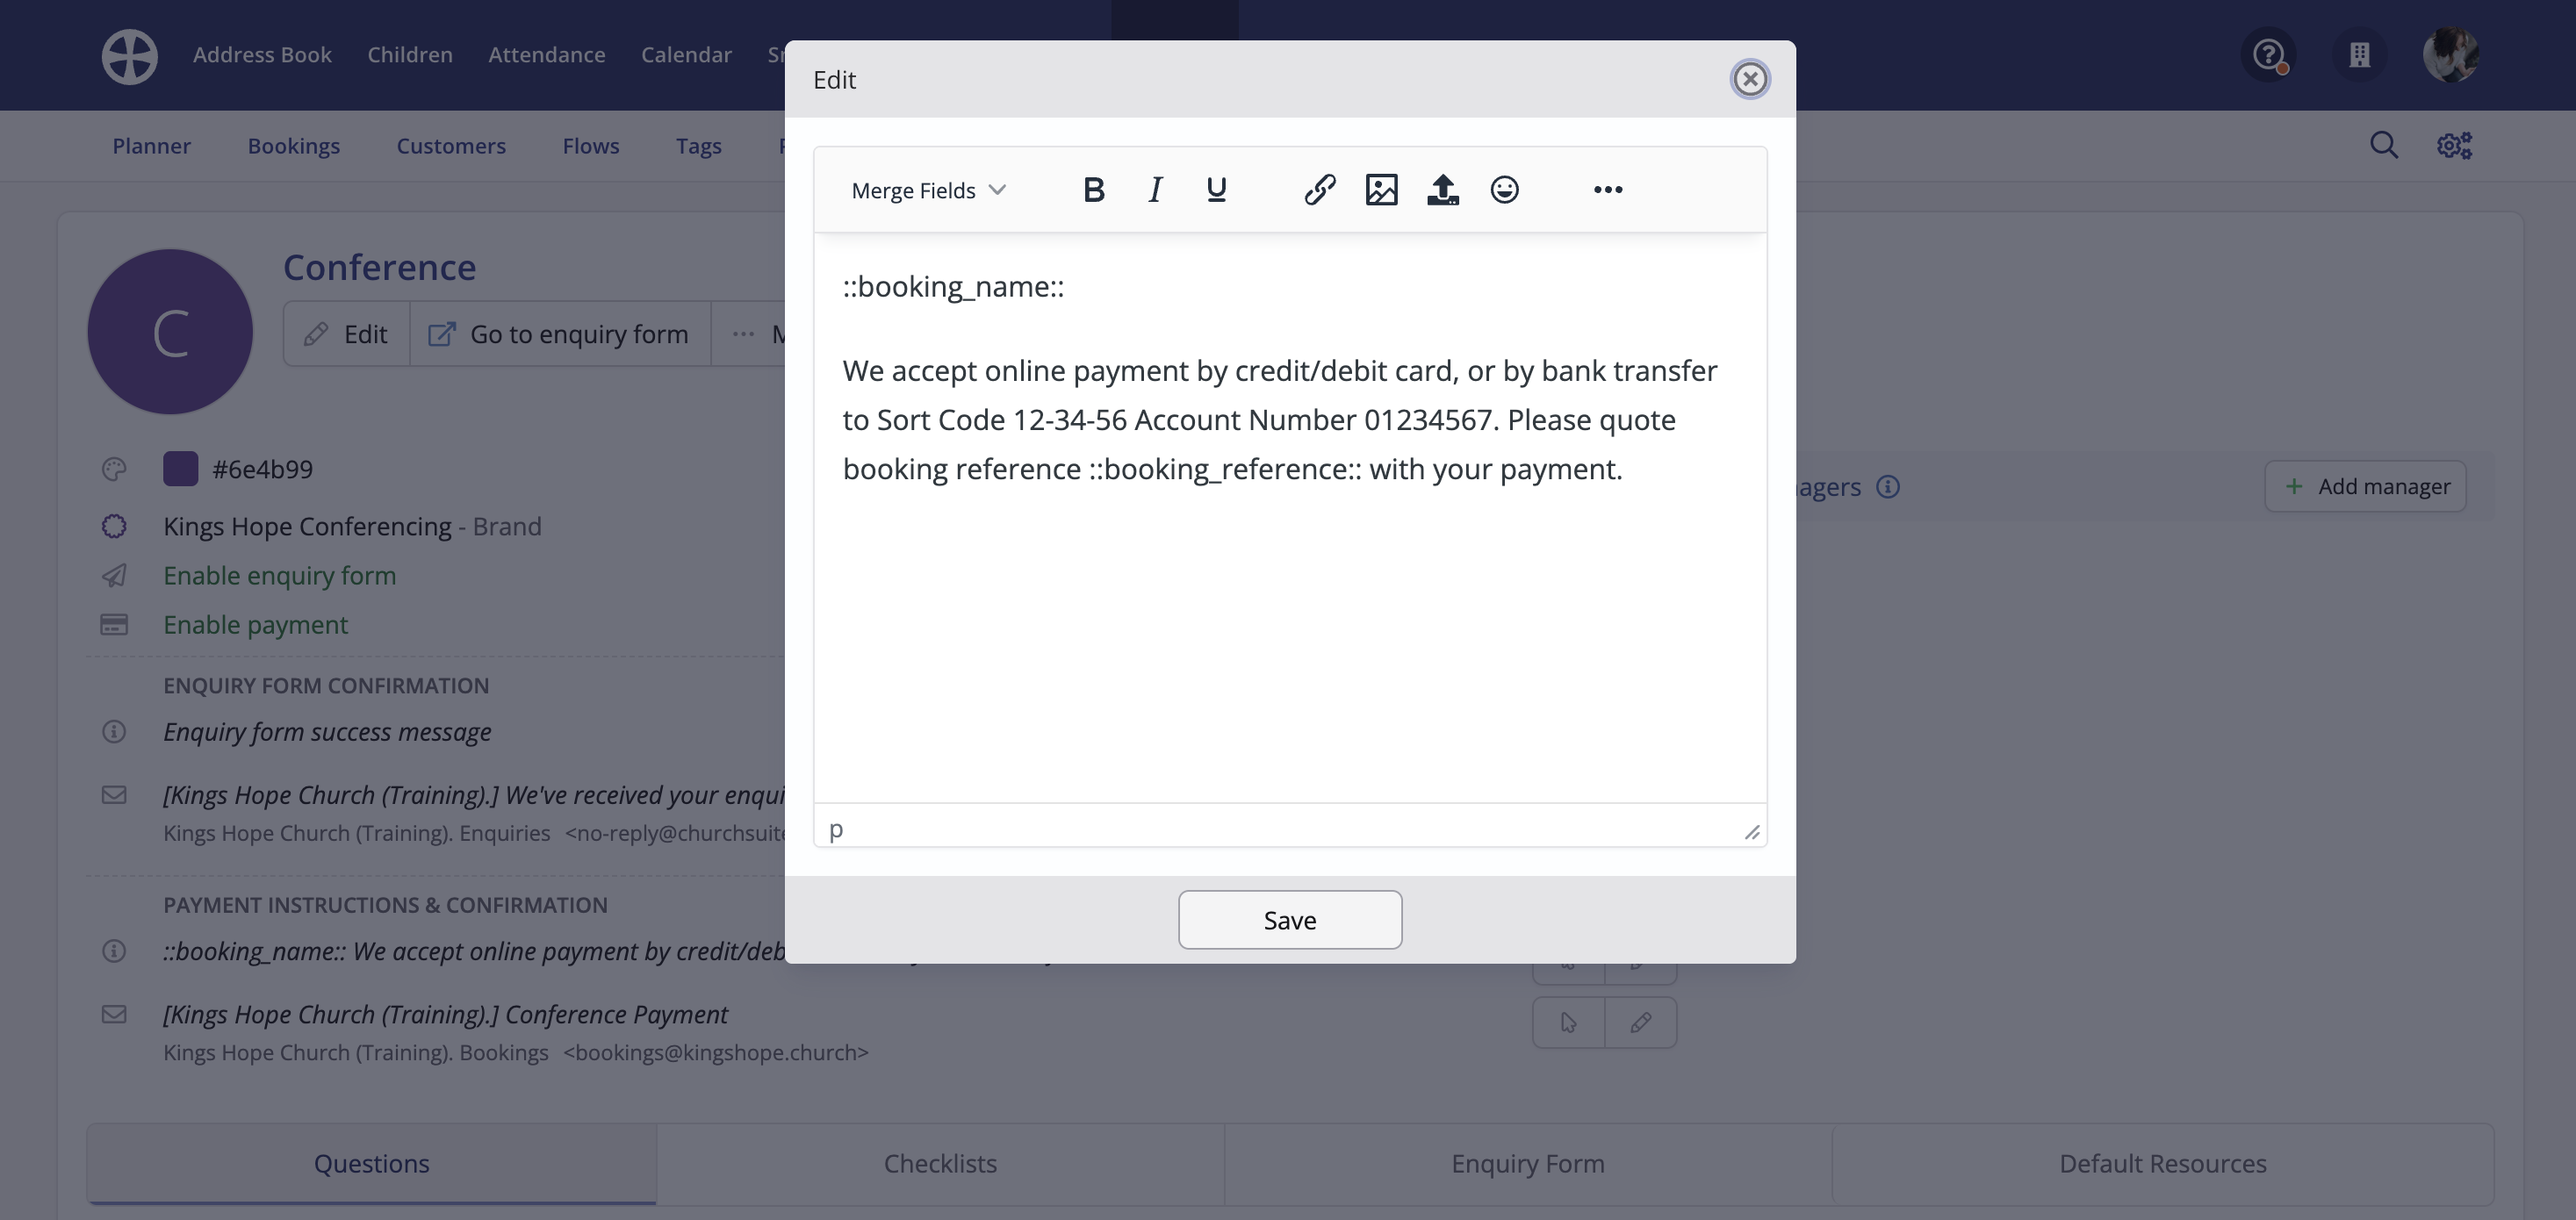
Optionally add Payment Instructions, which display on the customer-facing Booking Page for bookings of this Type.
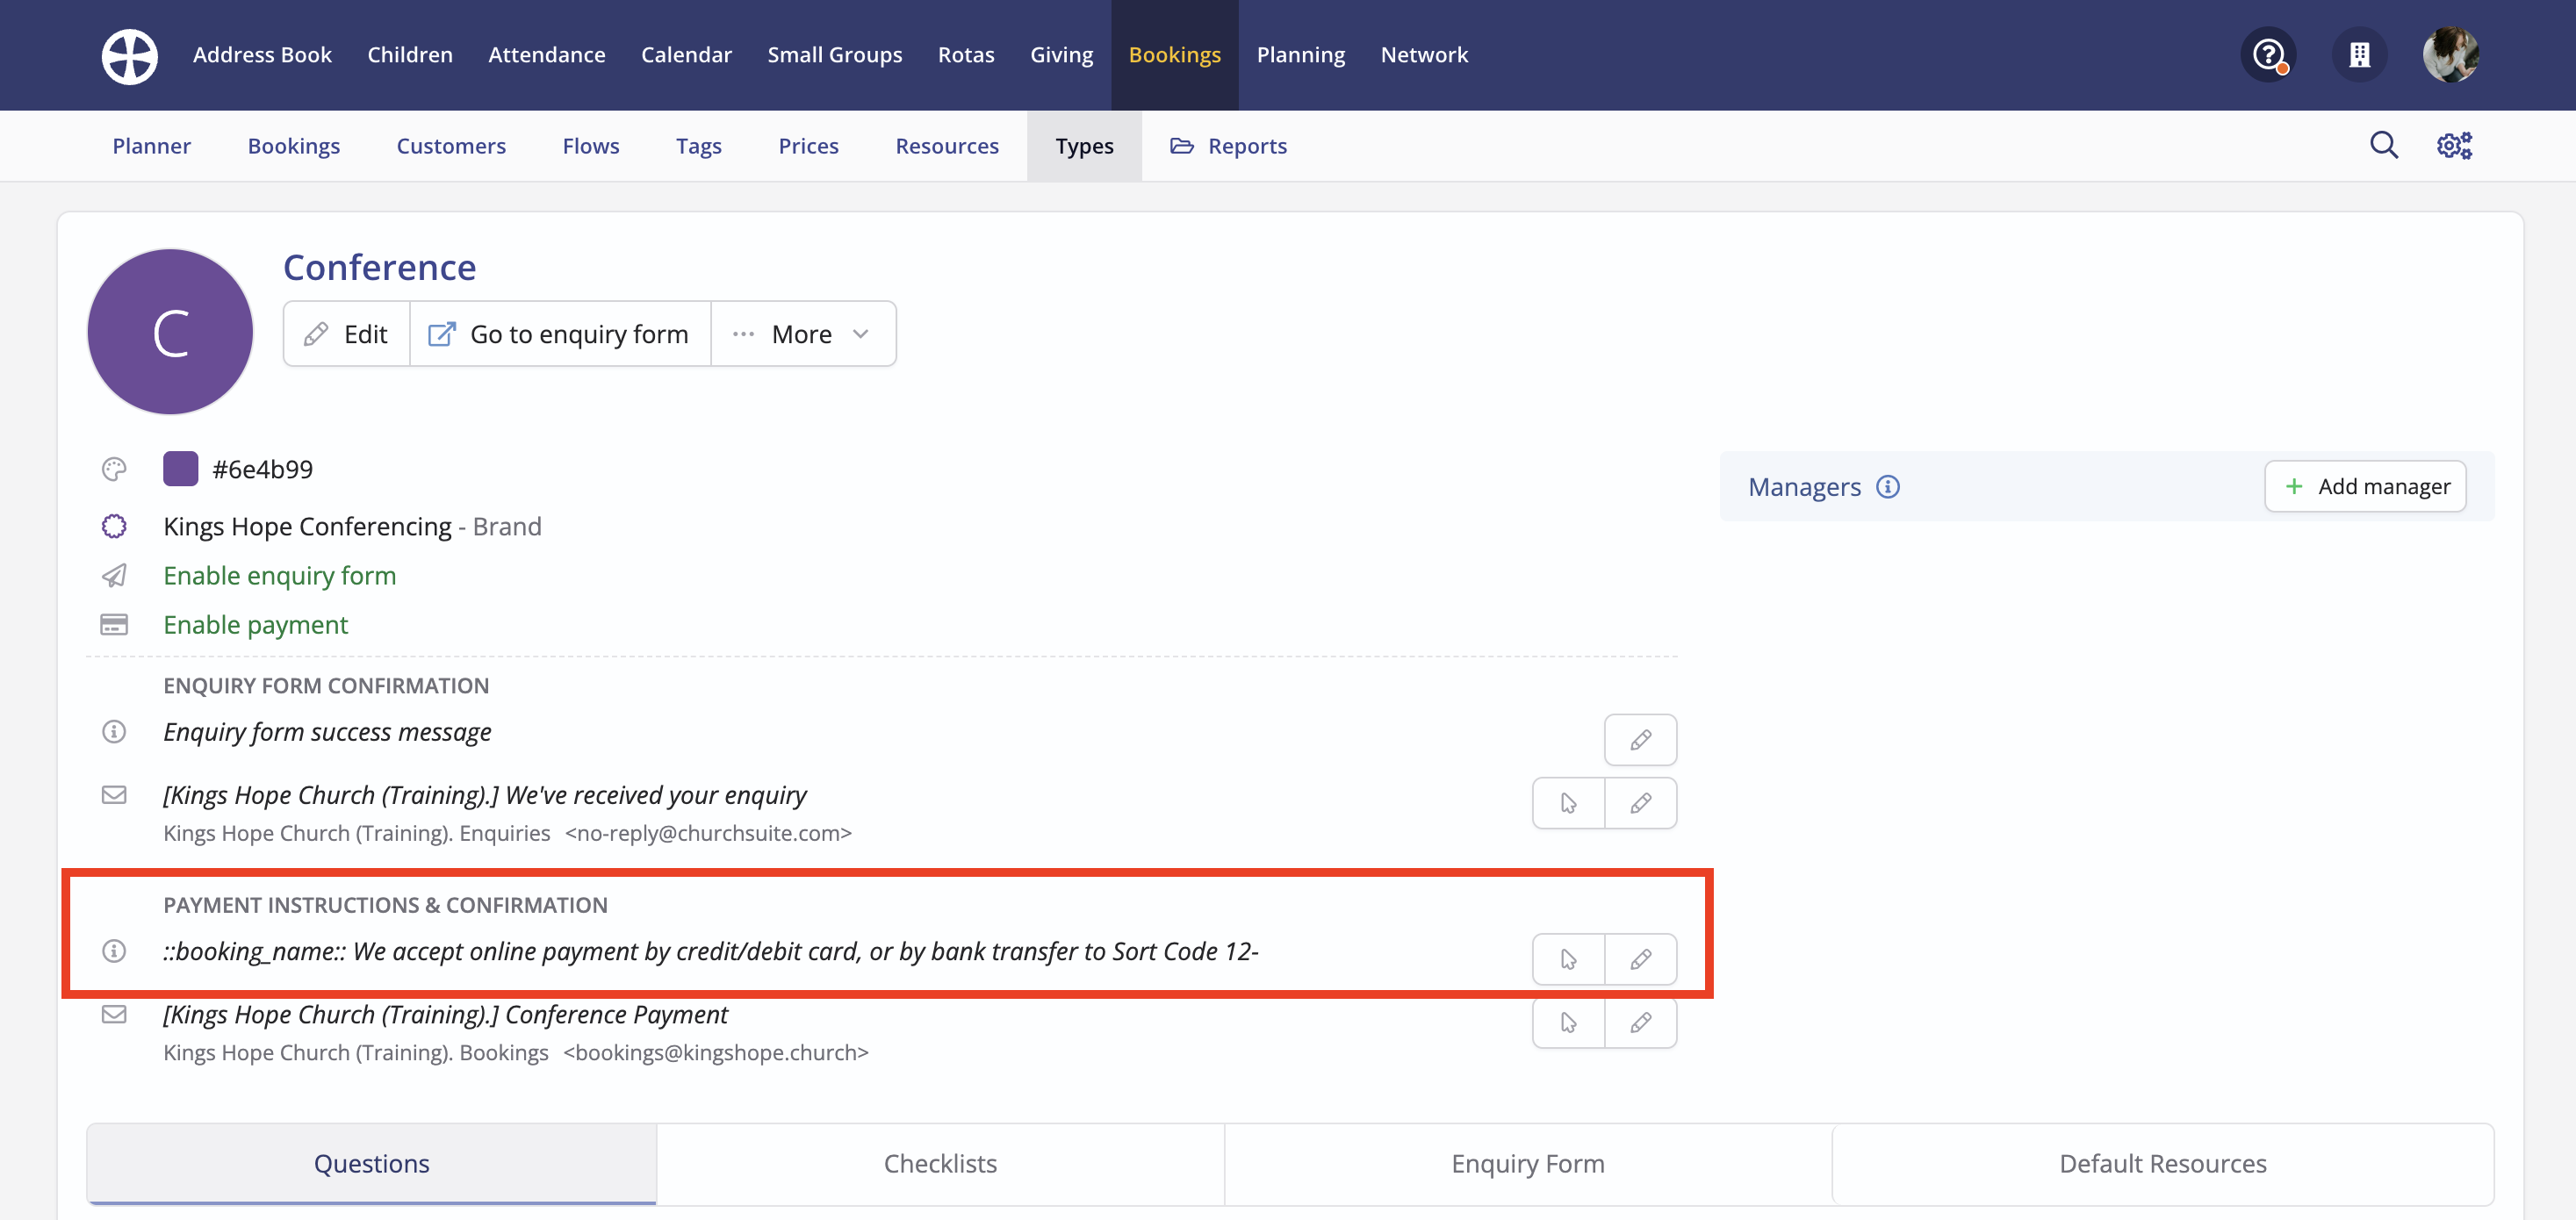
For example, you might add Payment Instructions that tell customers about your accepted payment methods or the payment process for bookings of this Type. Style the instructions using the HTML tools provided, then Save the changes. These payment instructions are displayed at the bottom of the customer-facing Booking Page.
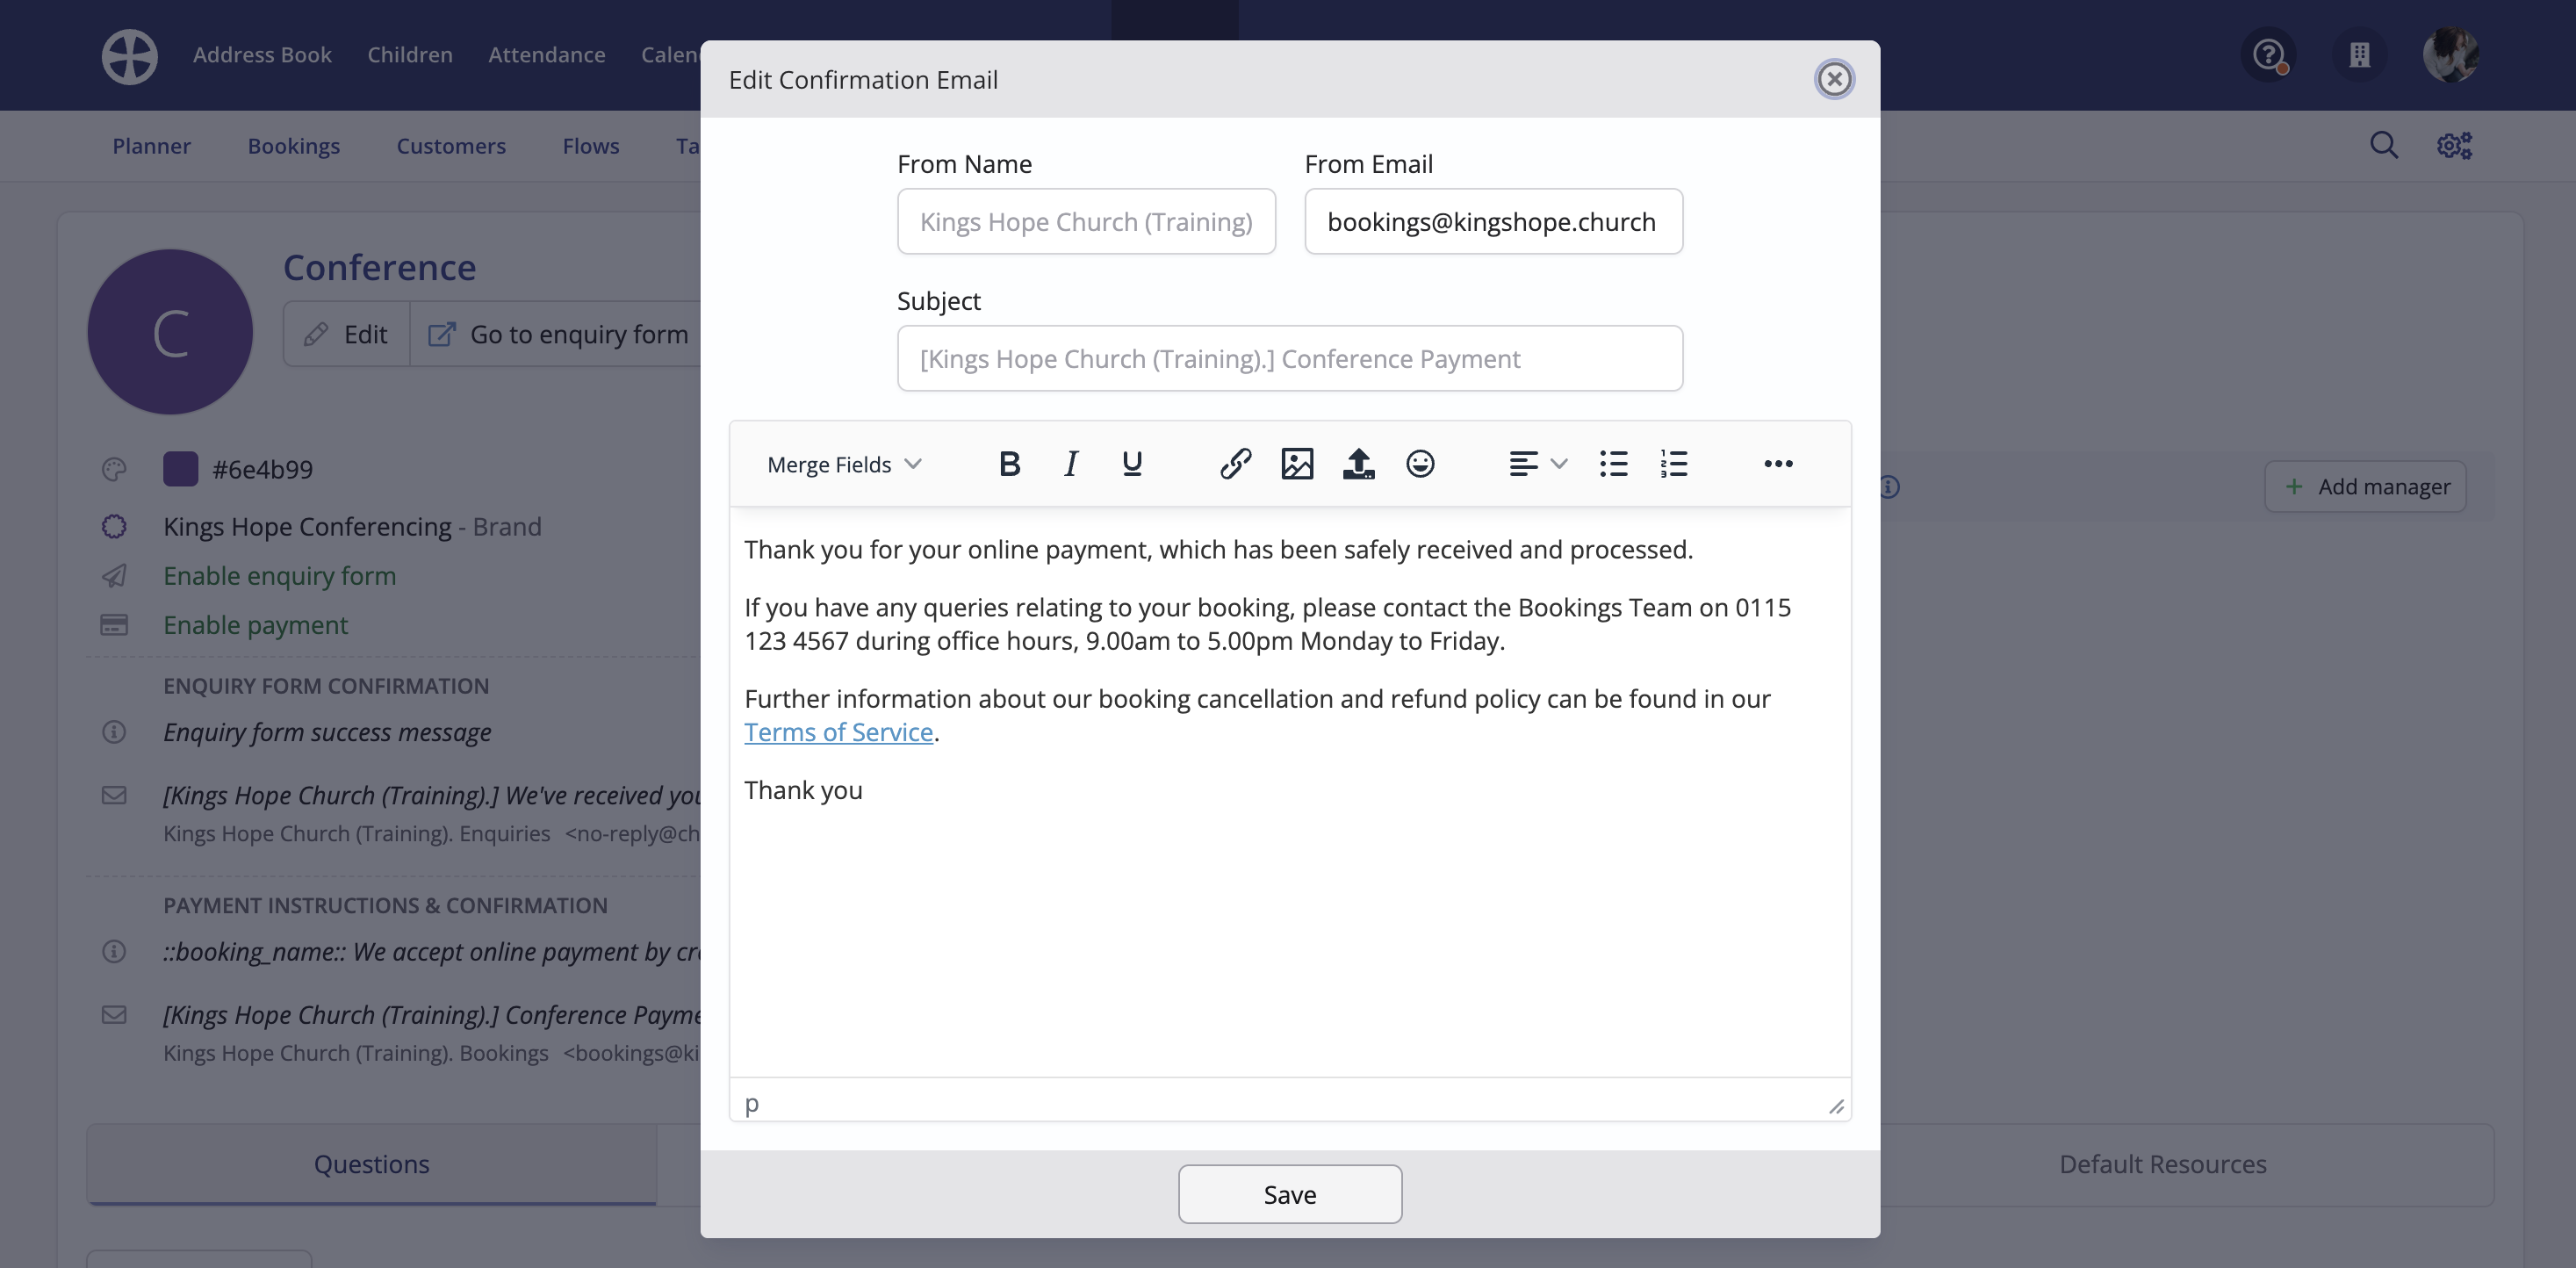
You can also customise the online payment Confirmation email that customers receive when they pay their booking charges online via their customer-facing Booking page. Click Edit to add/edit a custom confirmation message.
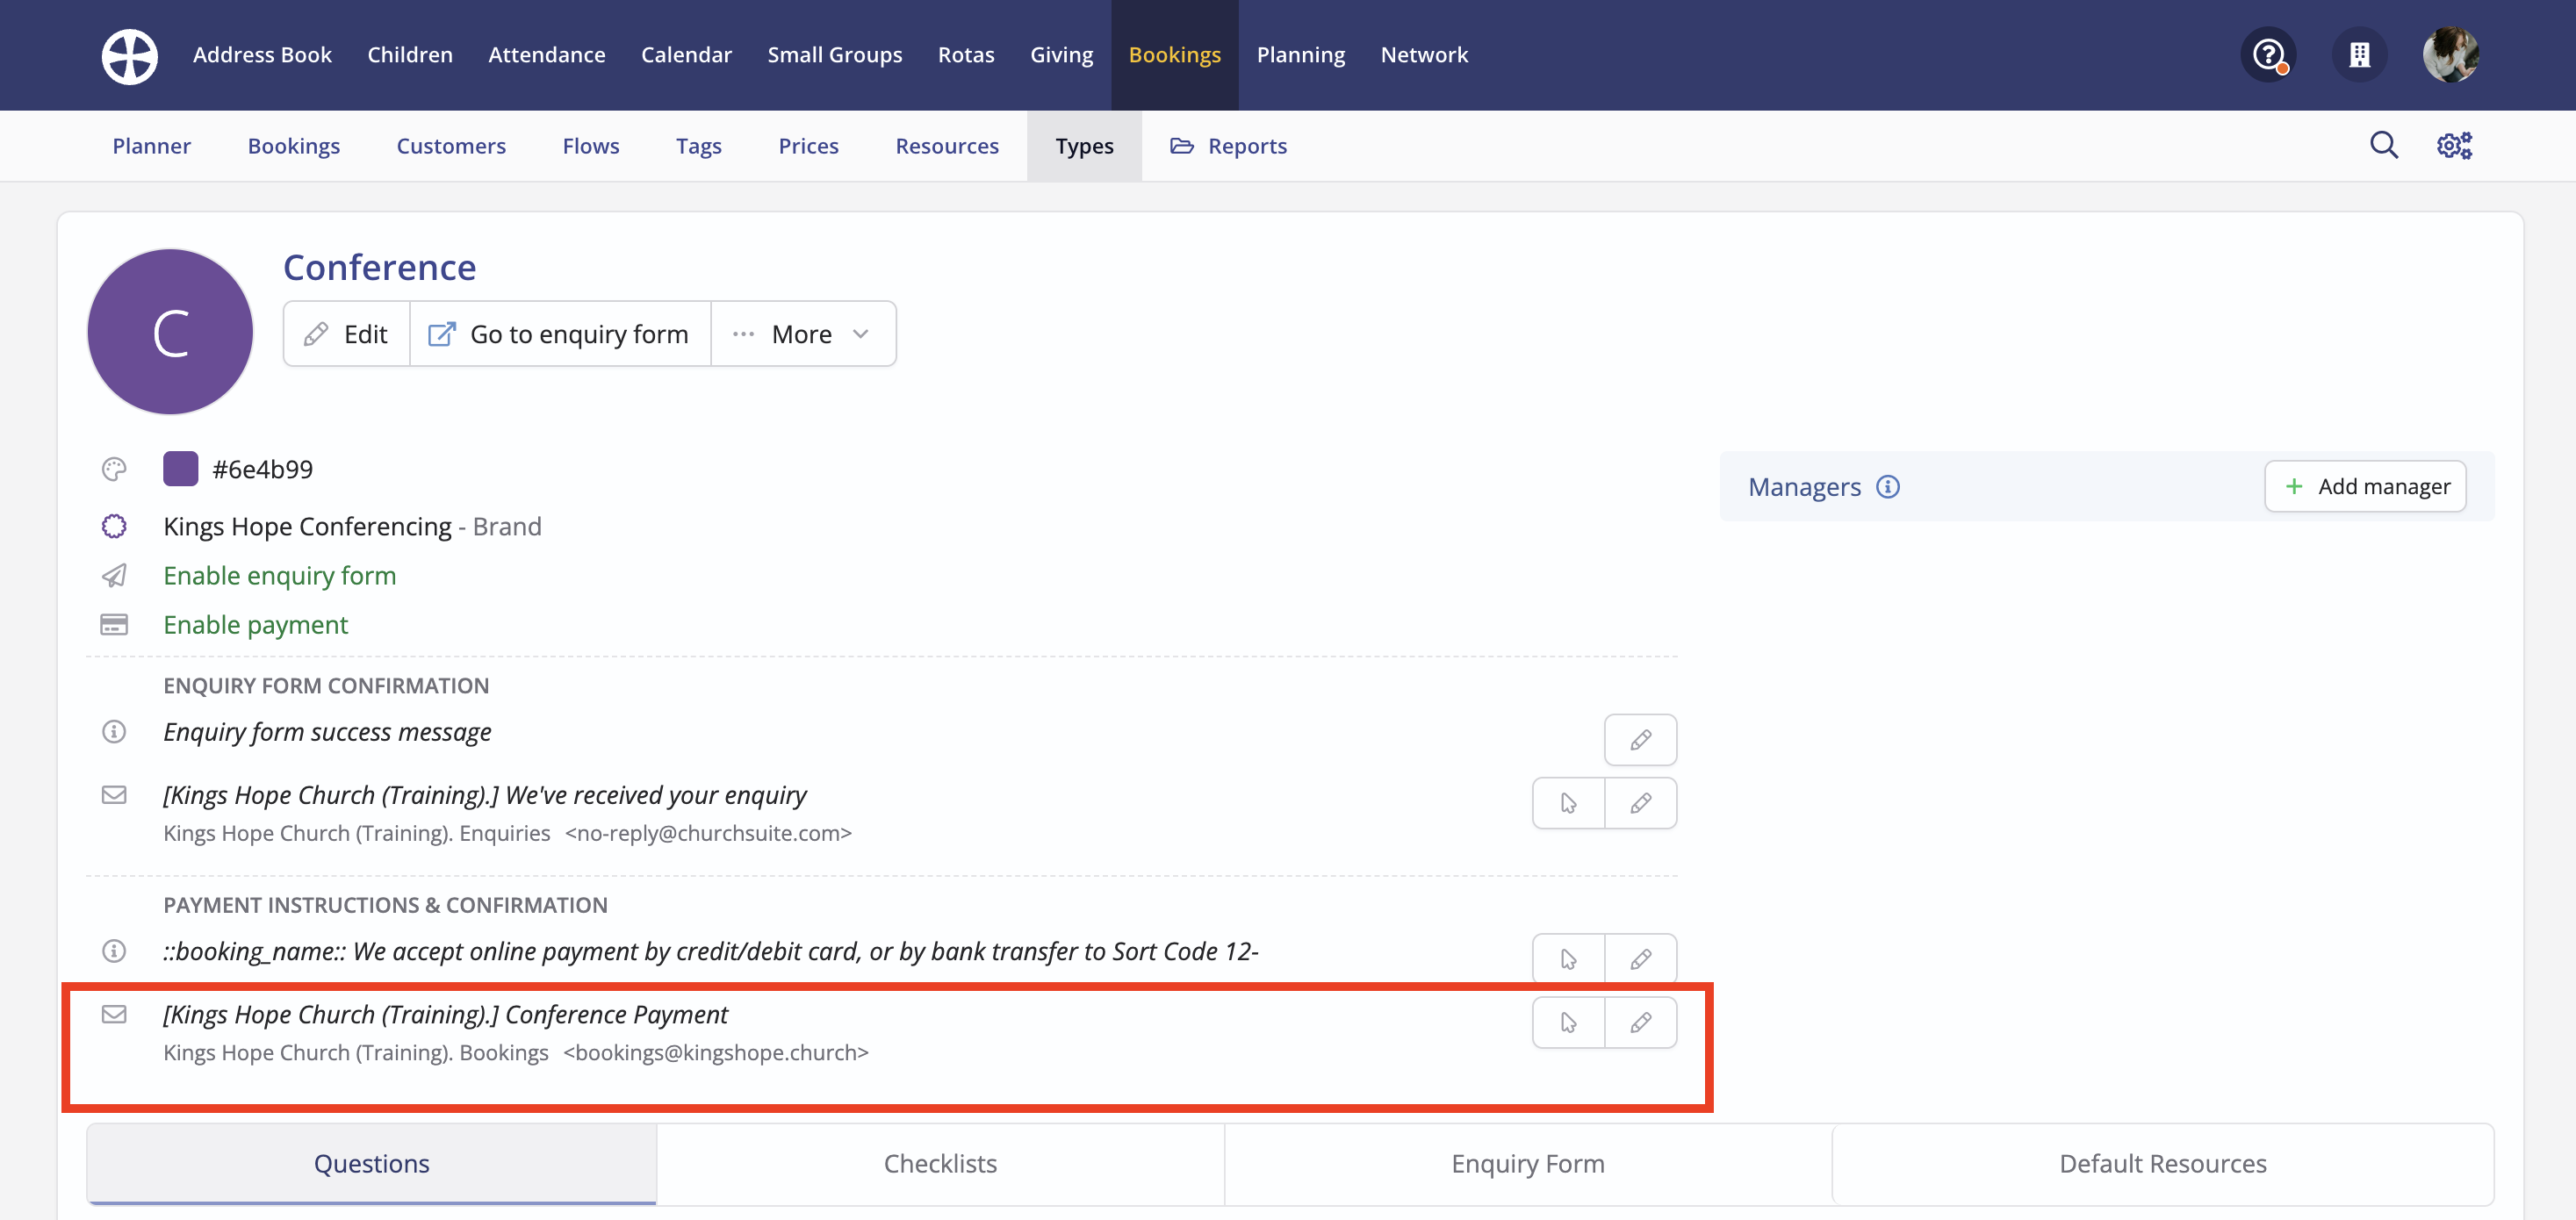
By default, the payment confirmation email, sent to the booking contact/customer's email address, will contain full details of the charges raised, the payments made and the name and date of the booking. However, you can further customise that email by adding a custom message appended to the end of the customer email when sent. Notice the options to change the From Name, From Email and Subject. Click to Save any changes made.
Top tip - Managing occasional offices and life events
For Church of England customers using the Bookings module to manage life events, we've created Example booking Types for and Prices for Baptisms, Funerals and Weddings, allowing you to install each booking type in few clicks, along with associated Questions, Enquiry Forms and the Church of England Parochial fees for the present year as Prices.
You can find out more in our related article on Managing occasional offices and life events.
Any customer can install these example types, regardless of denomination - you might find these examples a great place to start in managing Baptism, Funeral or Wedding bookings, however example prices will be applied to customers with accounts in England, the Isle of Man, Jersey and Guernsey only.
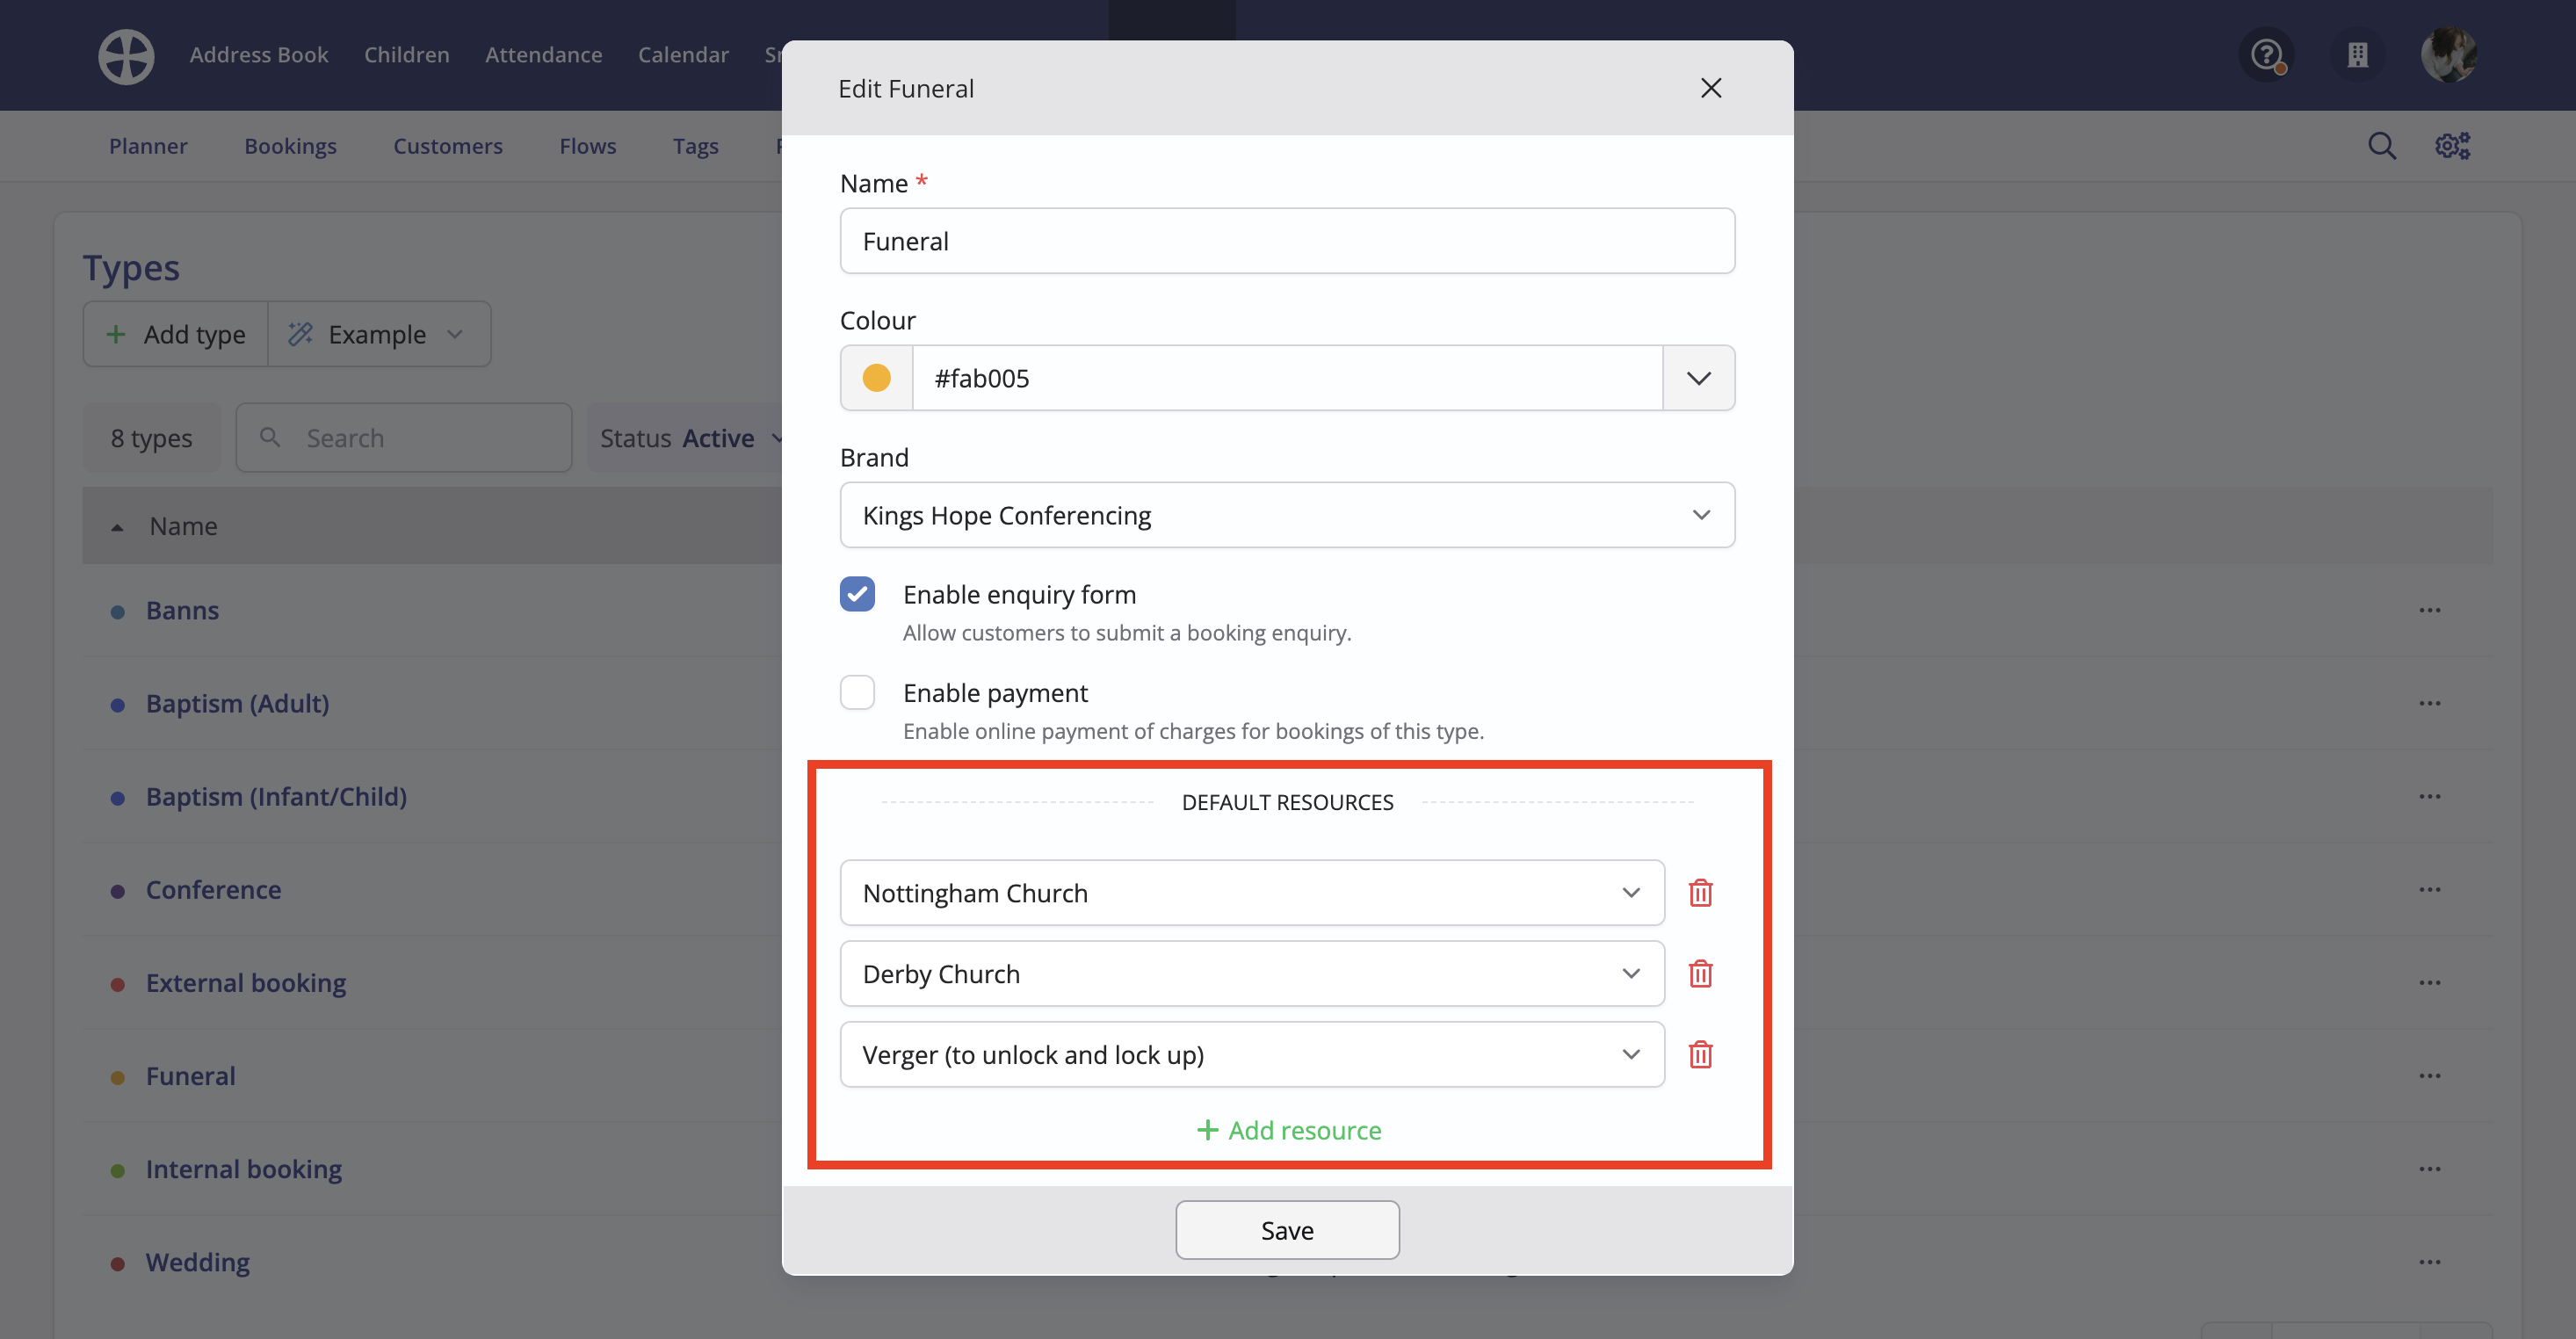
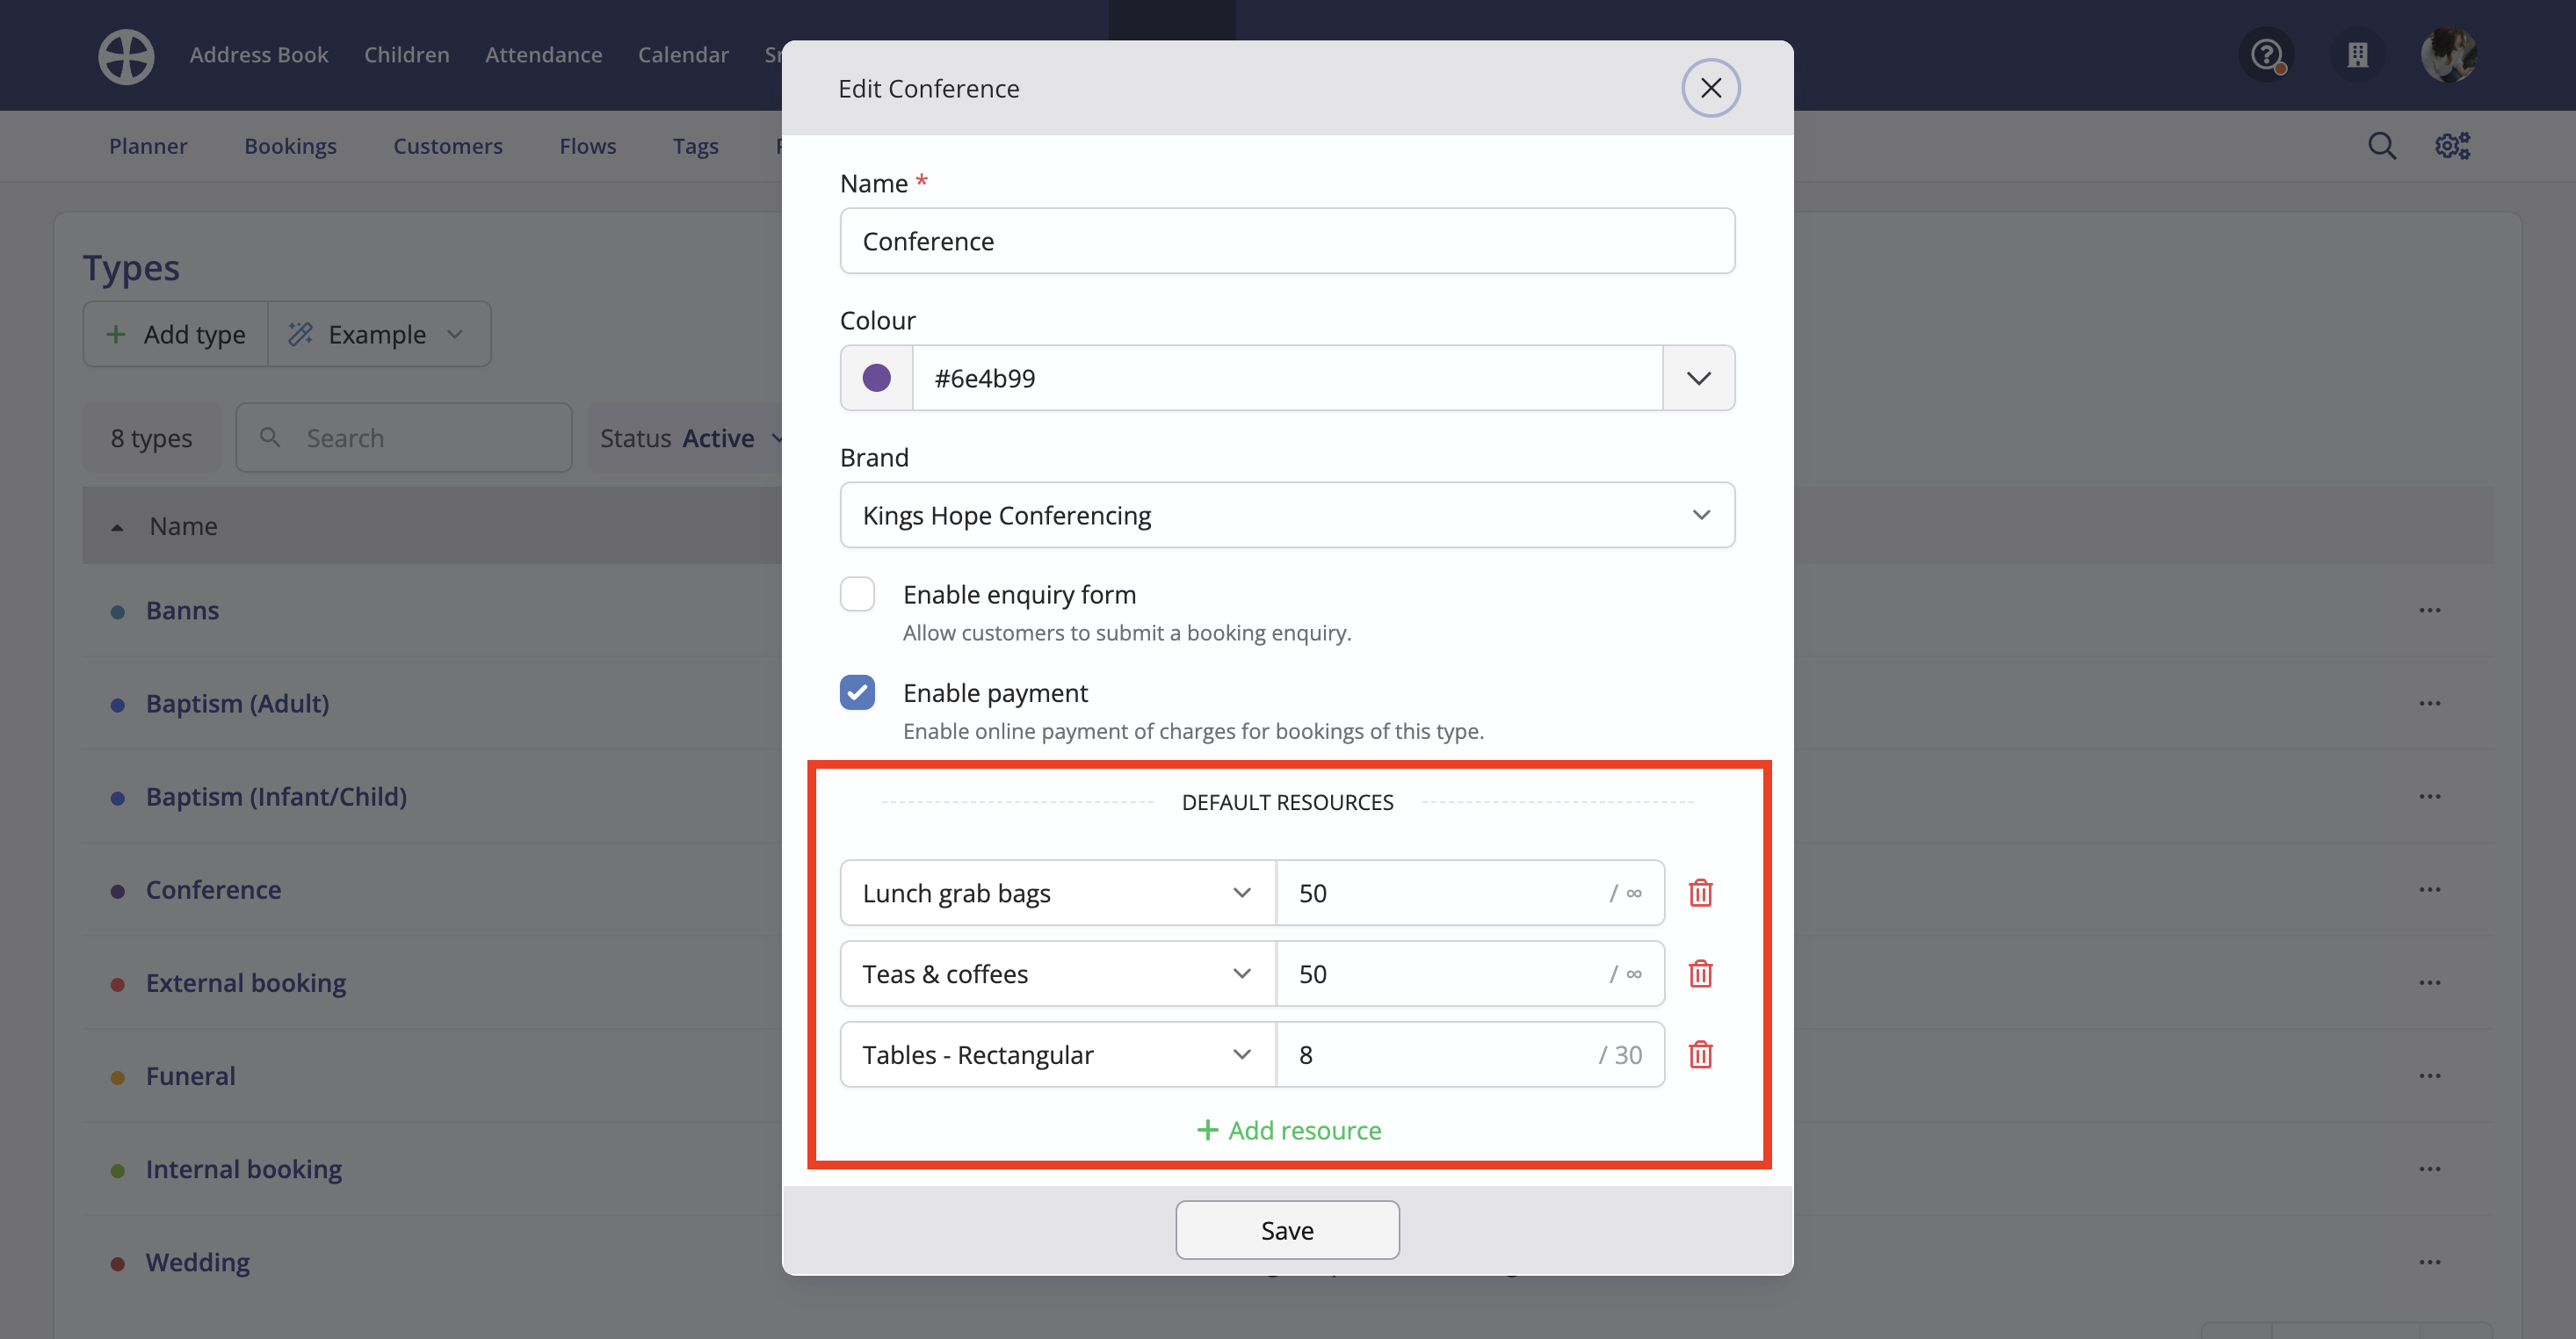
Setting default resources
You can optionally assign default resources to a booking type that are preselected when adding new bookings of that type. For example, you might set the "Church", "Kitchen" and "Verger" as default resources to be added preselected for Funeral bookings. When adding a booking, Users can still select other resources and deselect resources that were preselected by default, if they wish. Default resources are stored against a booking Type. On the Add type or Edit type pop-up, click Add resource to add each resource that will be preselected when adding a booking of that type. You can also remove a default resource (the resource will not be deleted). Click Save to close the pop-up:
Resources with a limited or unlimited quantity can also be defaults. For example, if a certain number of tables are stored in the Church, you could set those tables as a default resource to be preselected when a booking is added. The following example illustrates how default resources with limited and unlimited quantities are added:
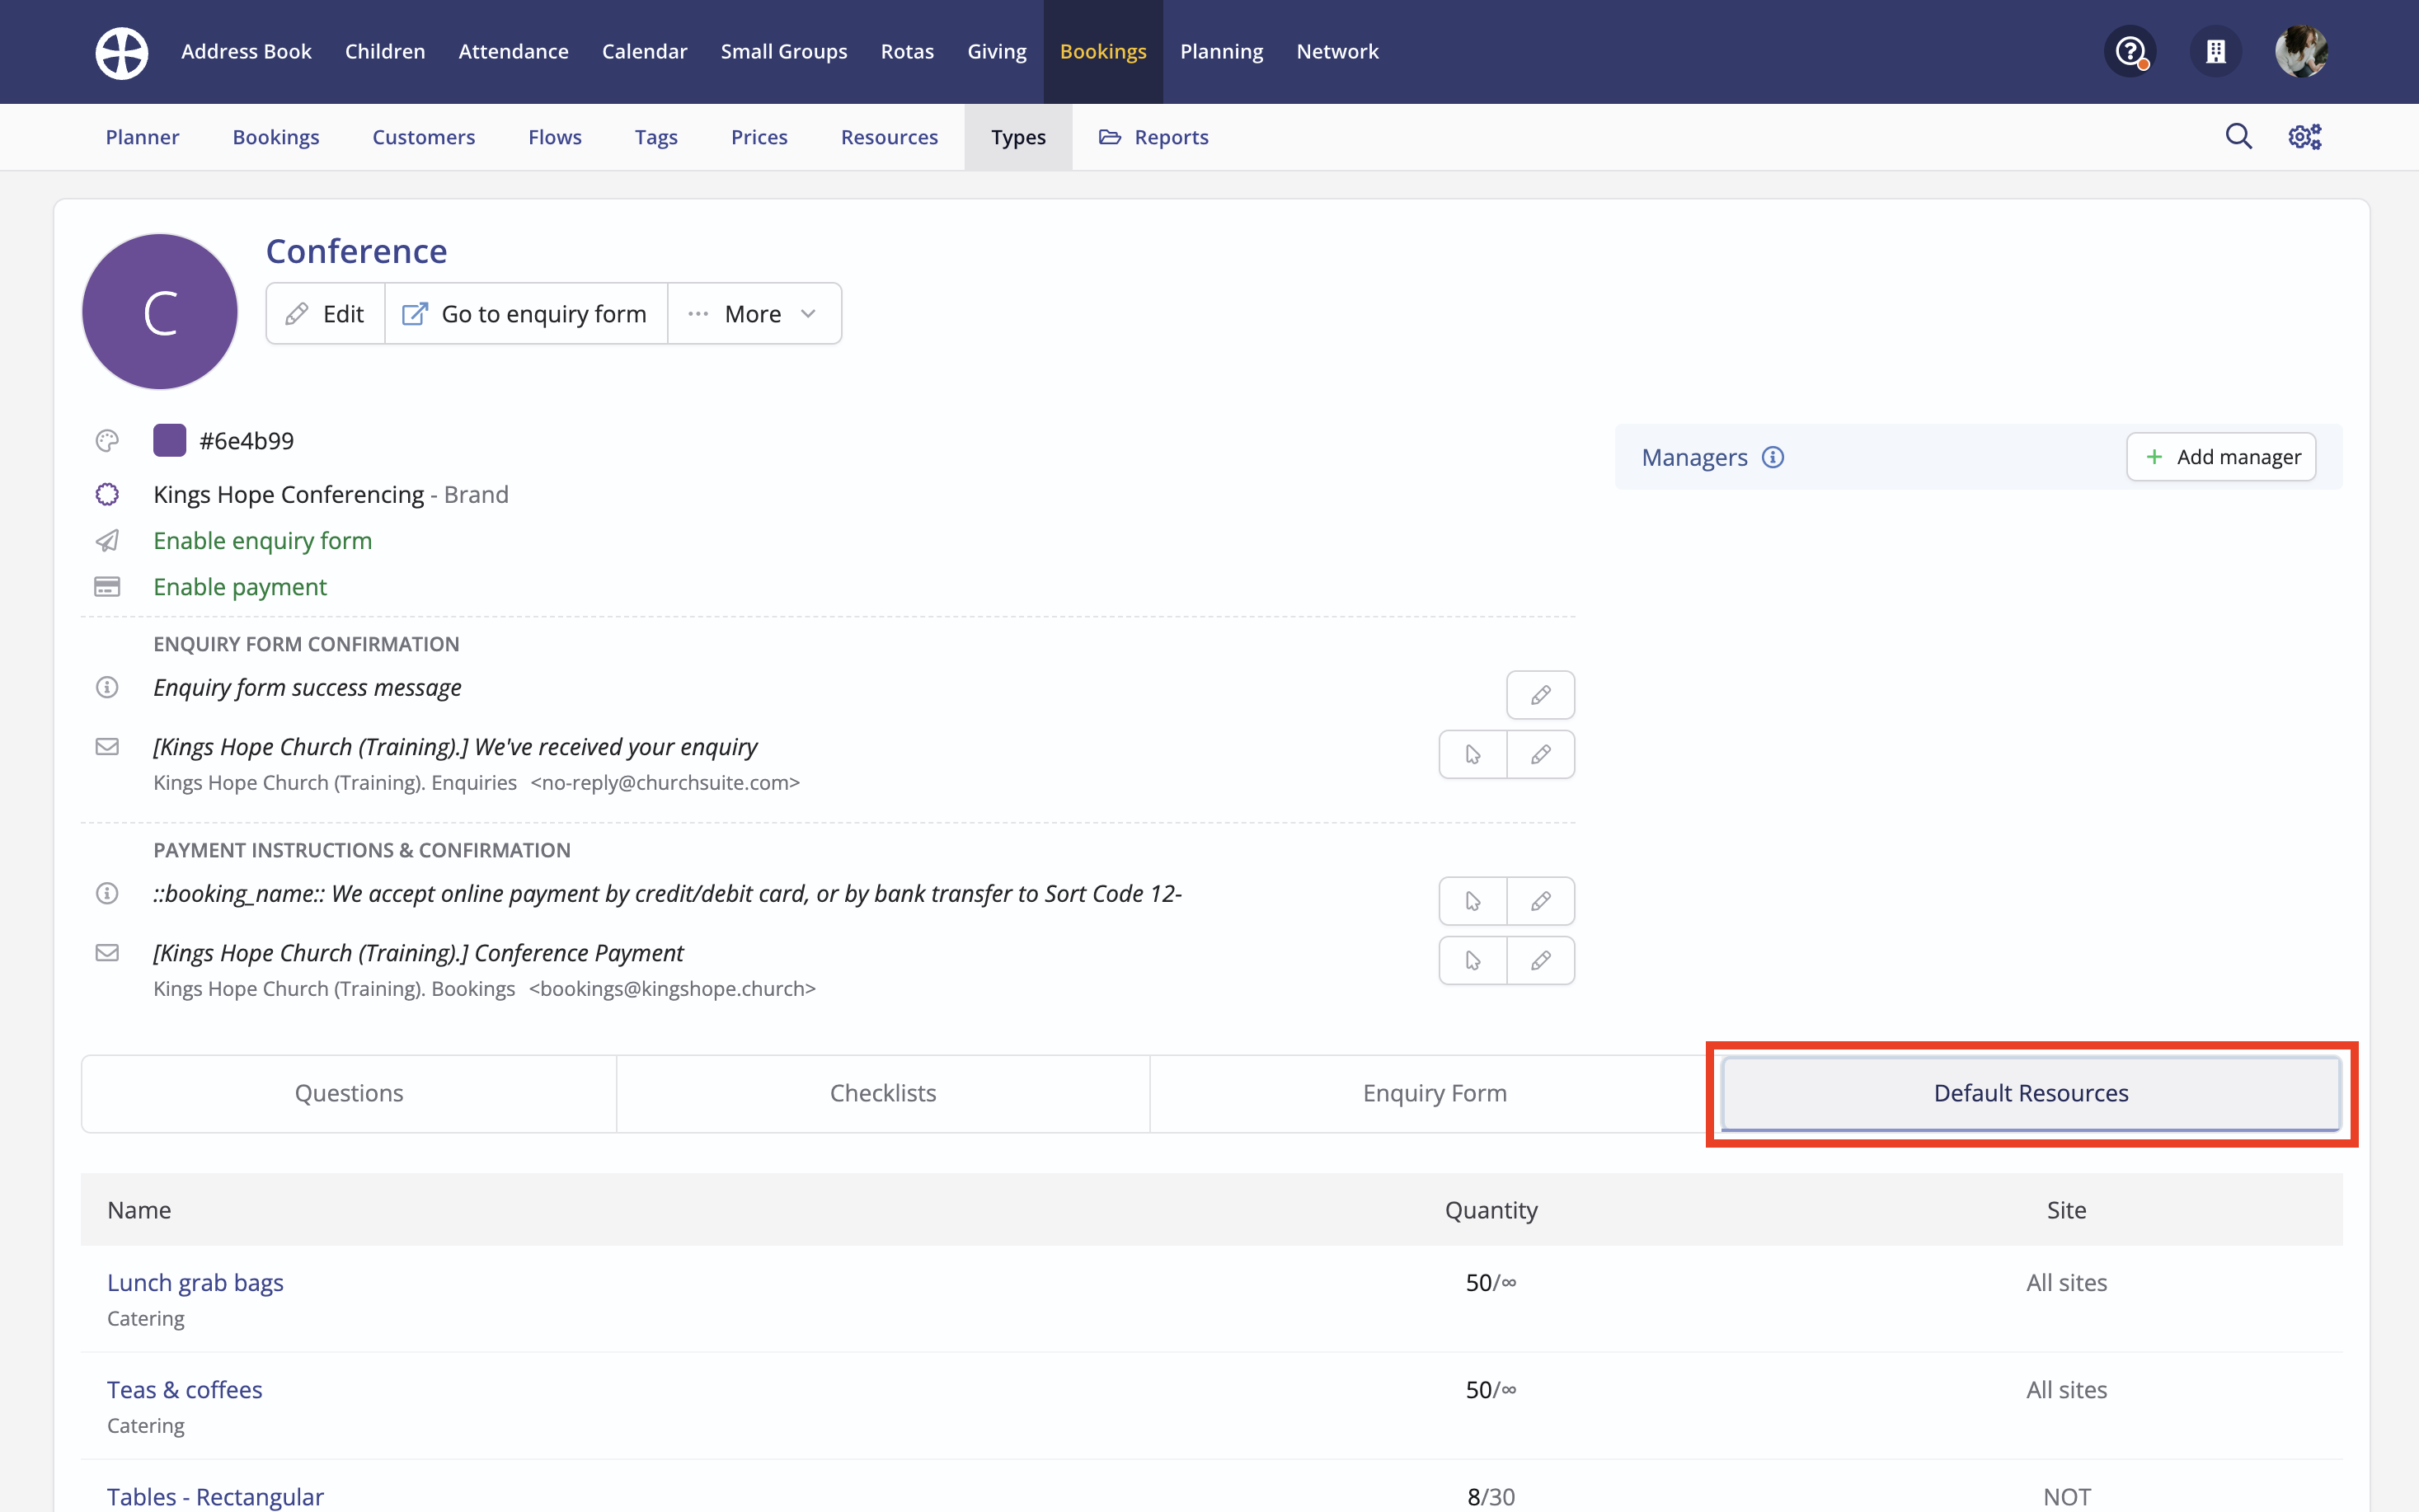
The Default Resources are shown on the type View:
Multi-site considerations
Those using ChurchSuite's multi-site functionality will have site-specific resources. When assigning default resources to a booking Type, ensure that all applicable default resources are assigned, regardless of their site. In the example below, when viewing as All Sites, you can see that the Funeral Booking Type has default resources that belong to the Nottingham and Derby sites, as well as an All-sites resource:
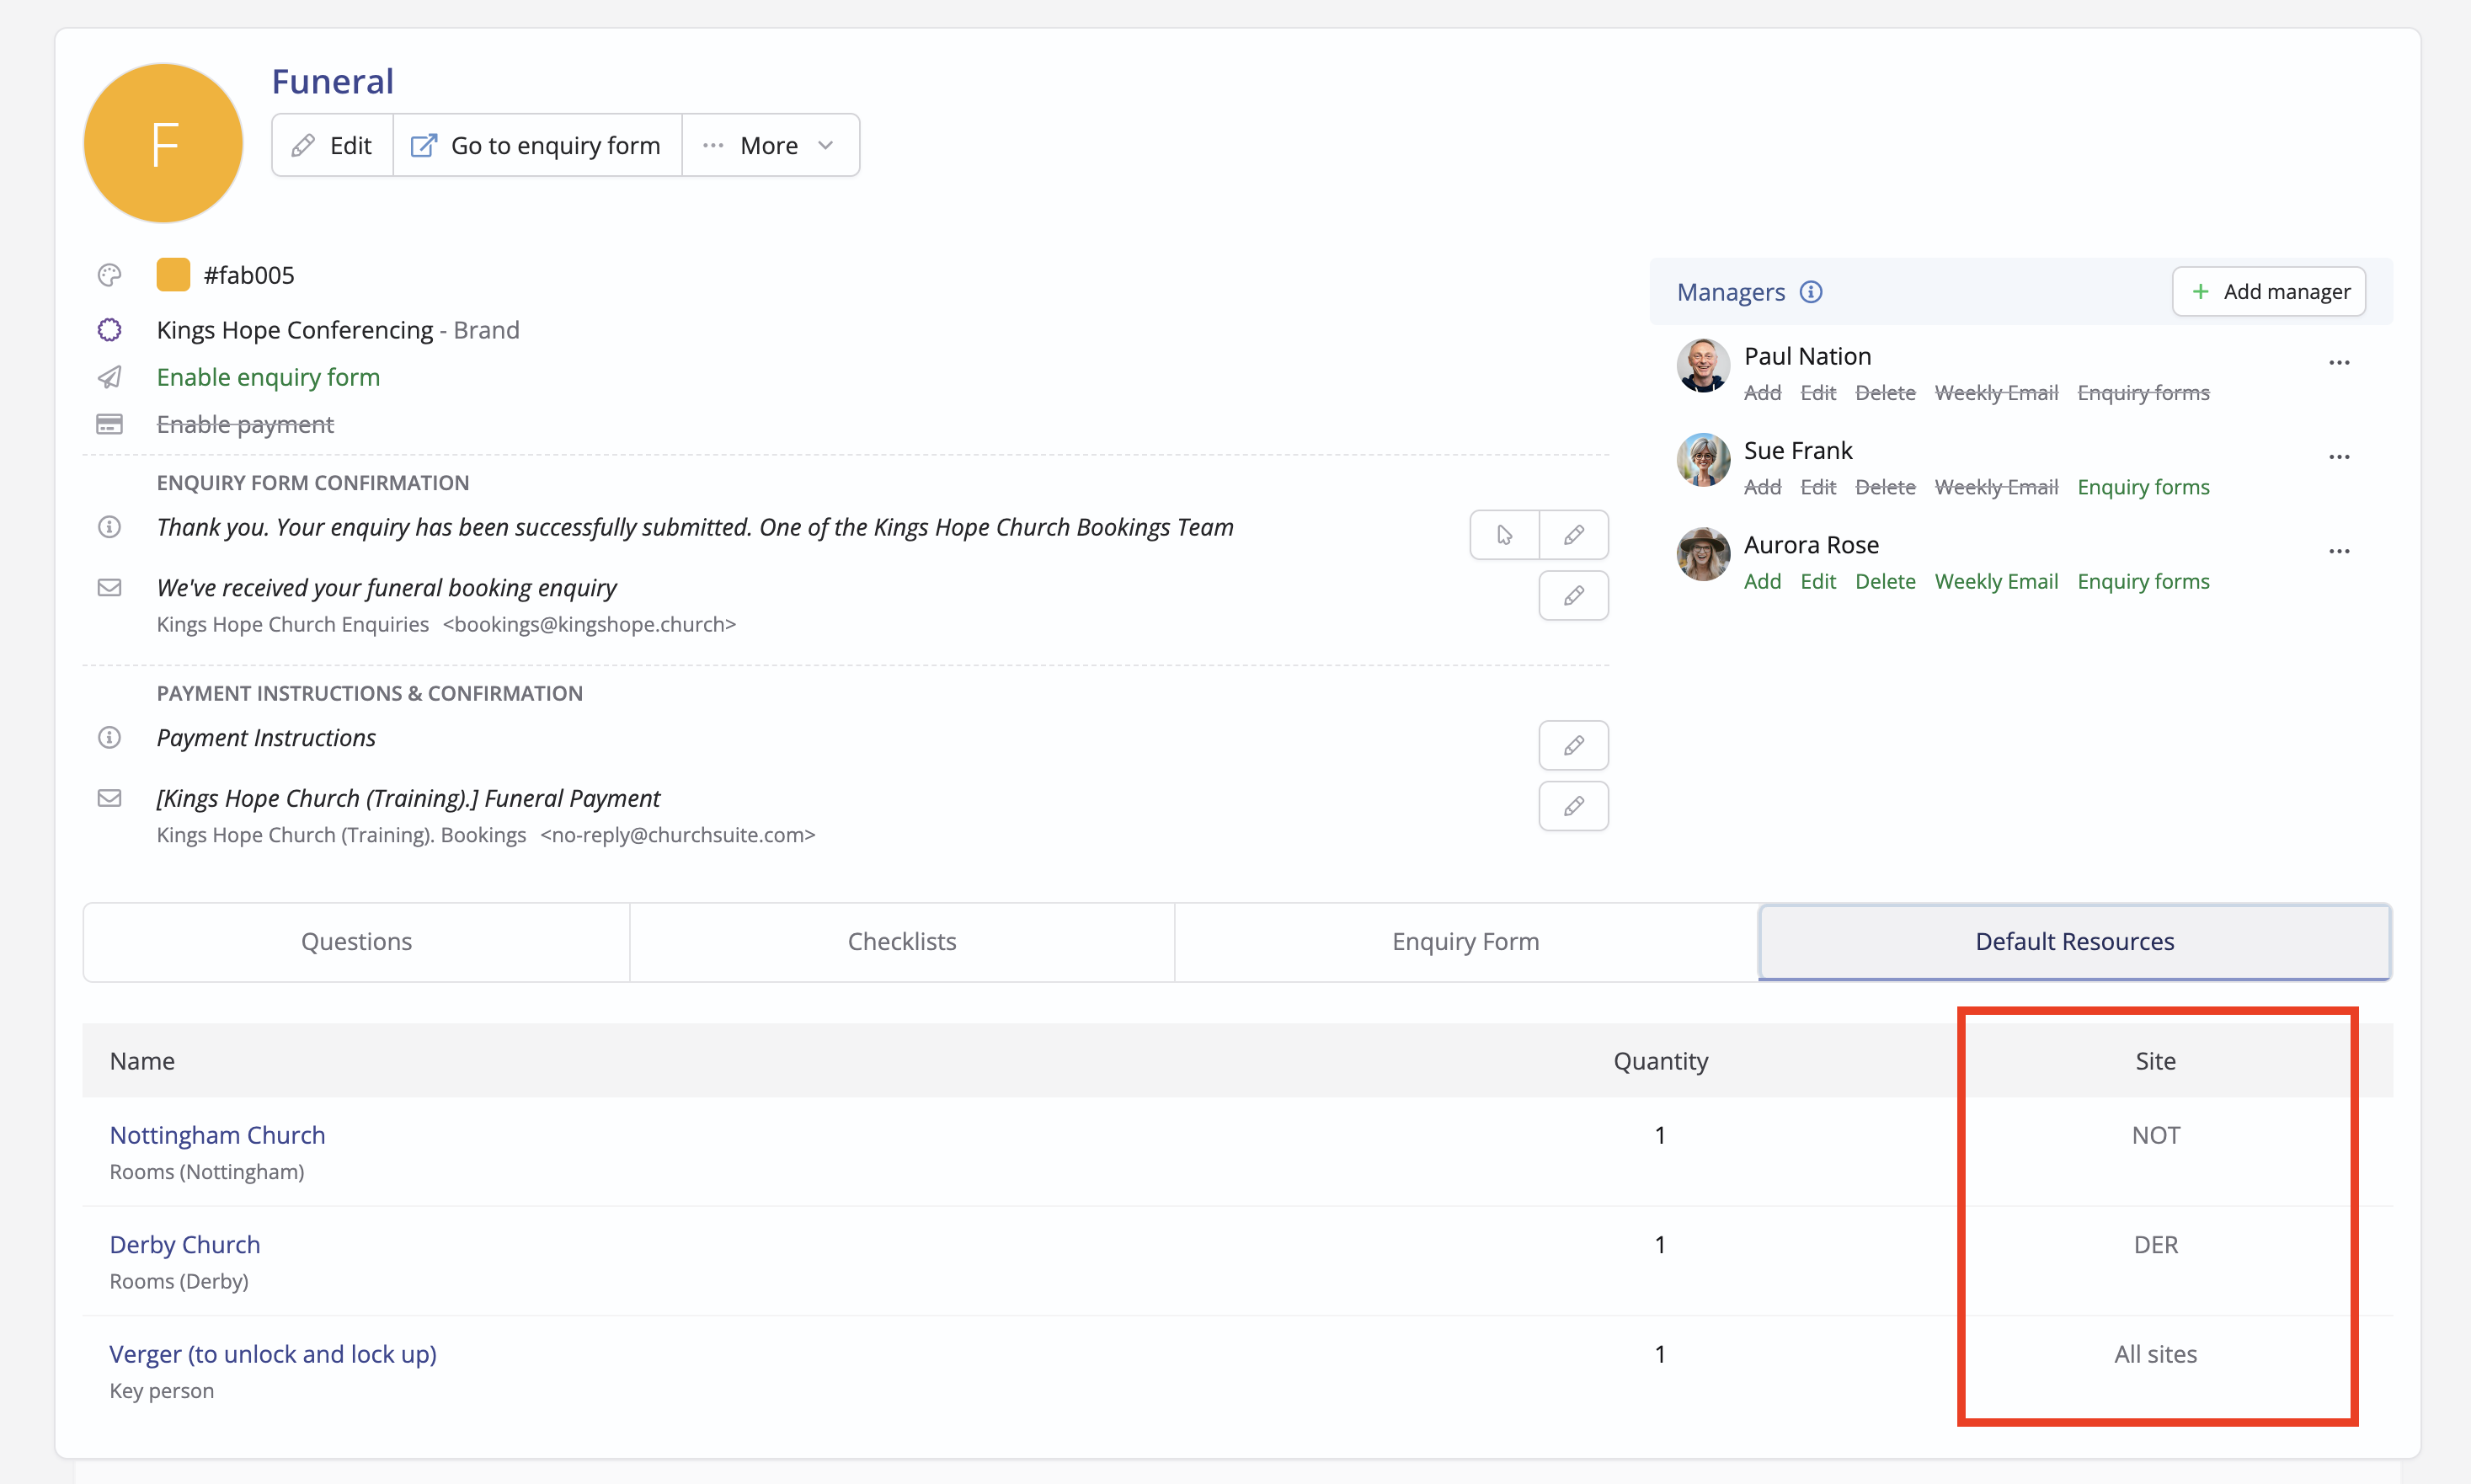
When adding a Funeral booking for a specific site, Derby, in this example, only the default resources related to the booking site (and any All-sites default resources) are preselected. Default resources for a booking Type that don't match the booking site are ignored and not preselected when adding a booking.

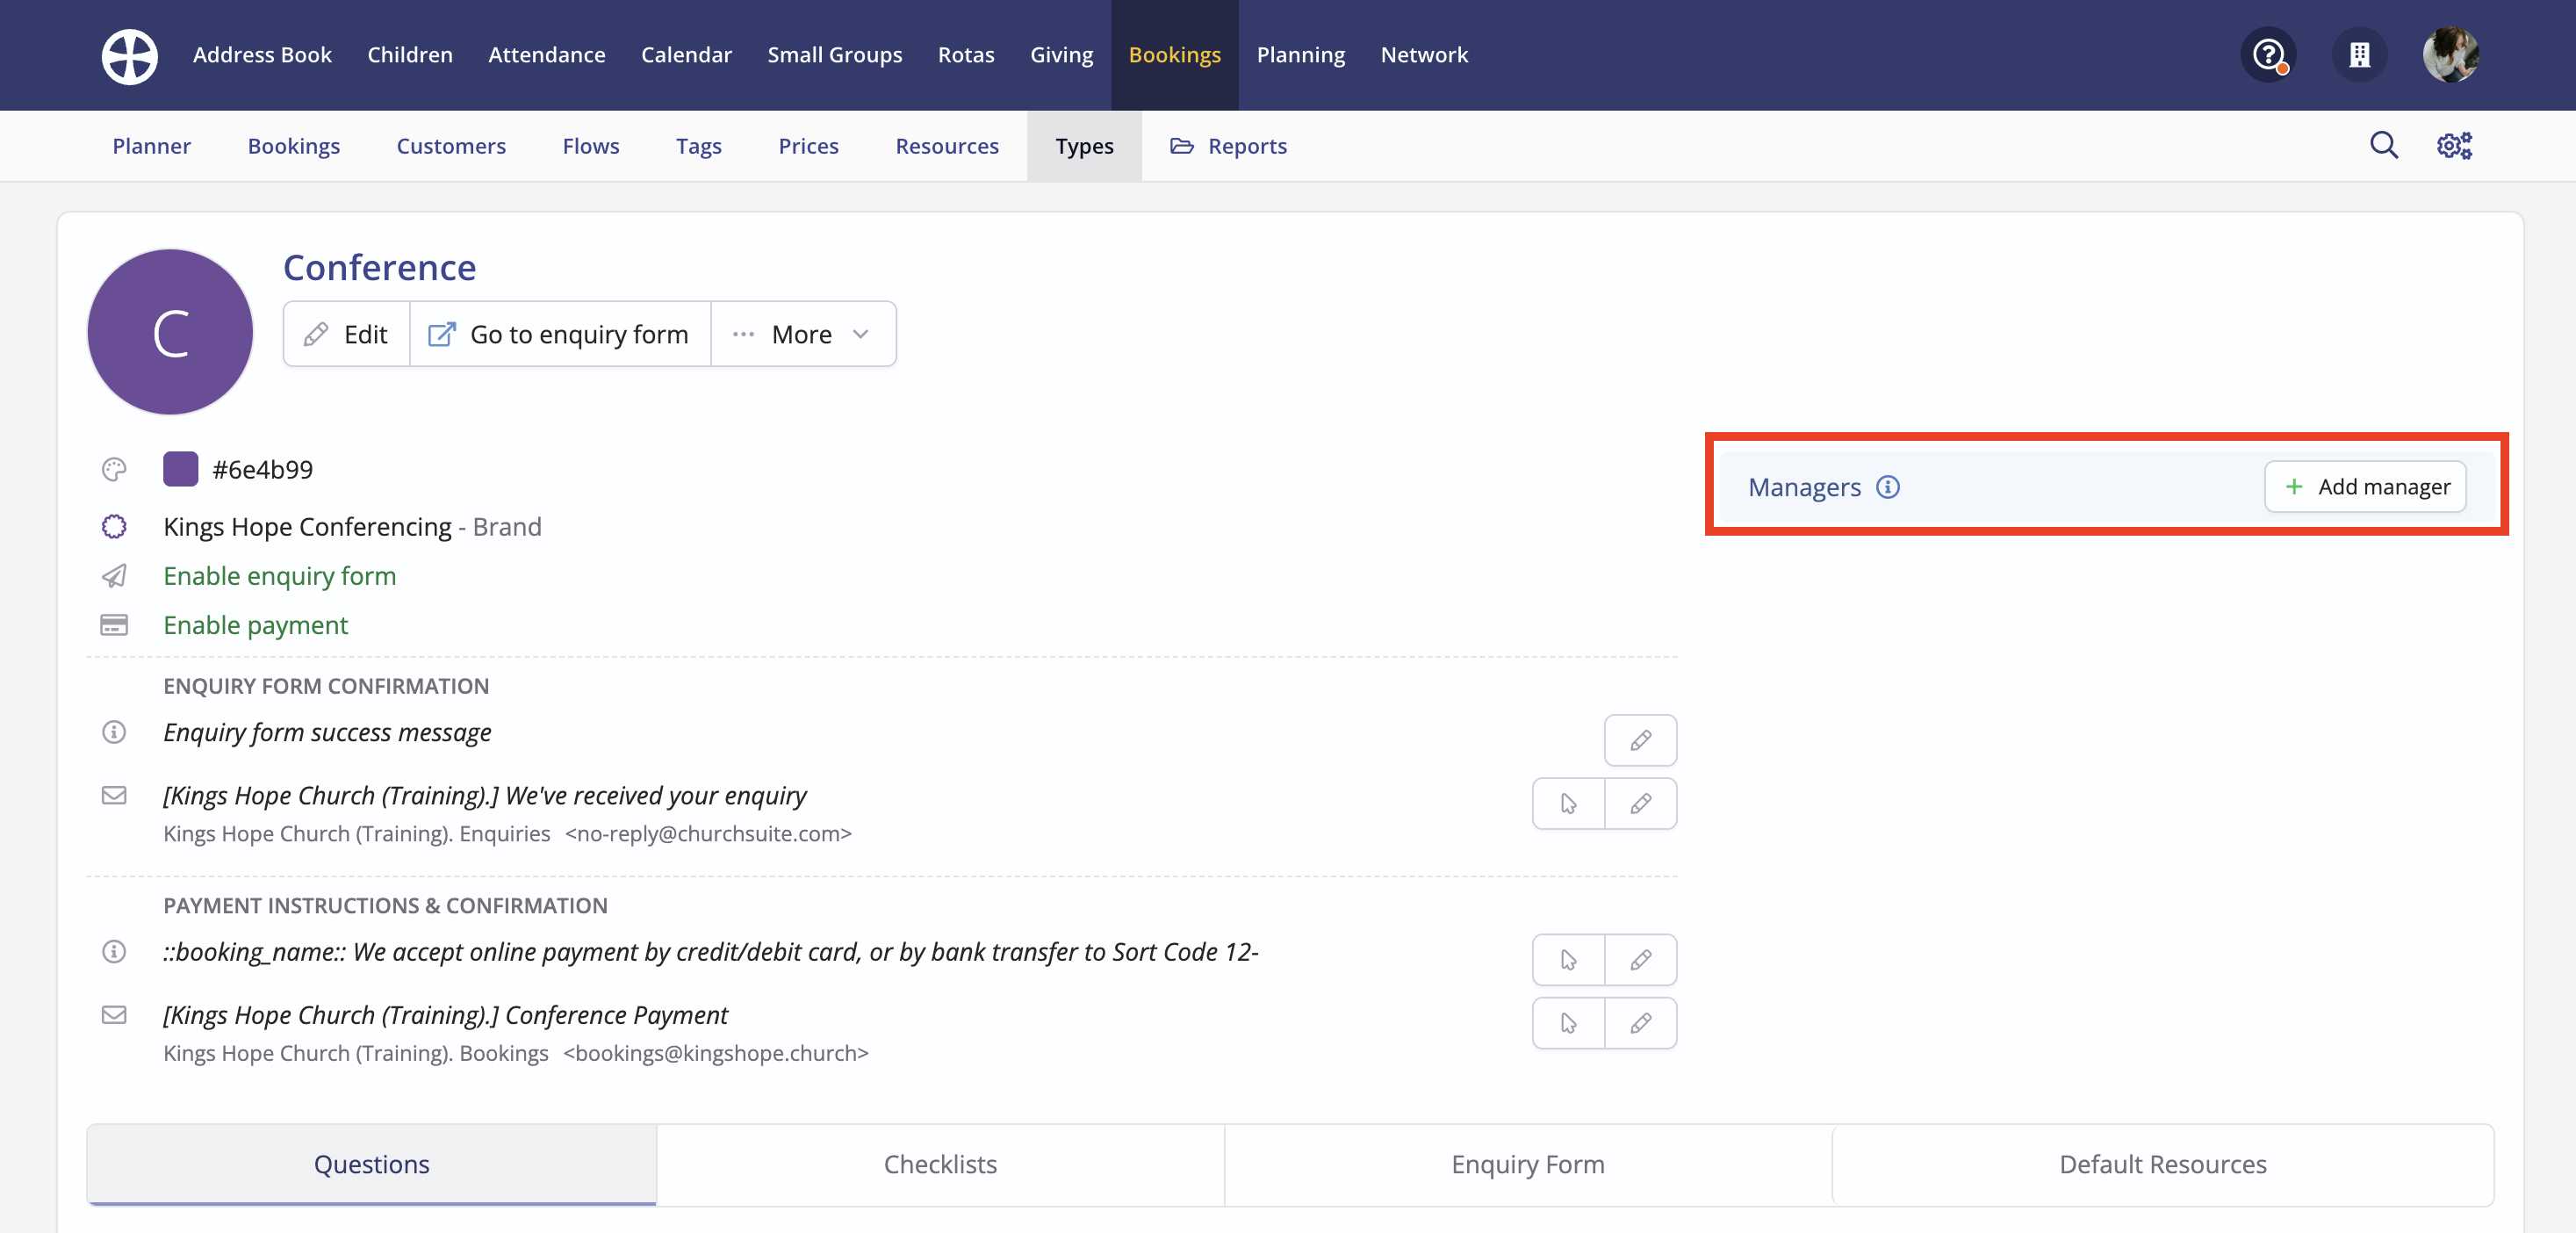
Assigning type managers
From the Type View, click Add manager to assign one or more individuals who can receive daily digest notification emails when bookings of this type are Added, Edited or Deleted.
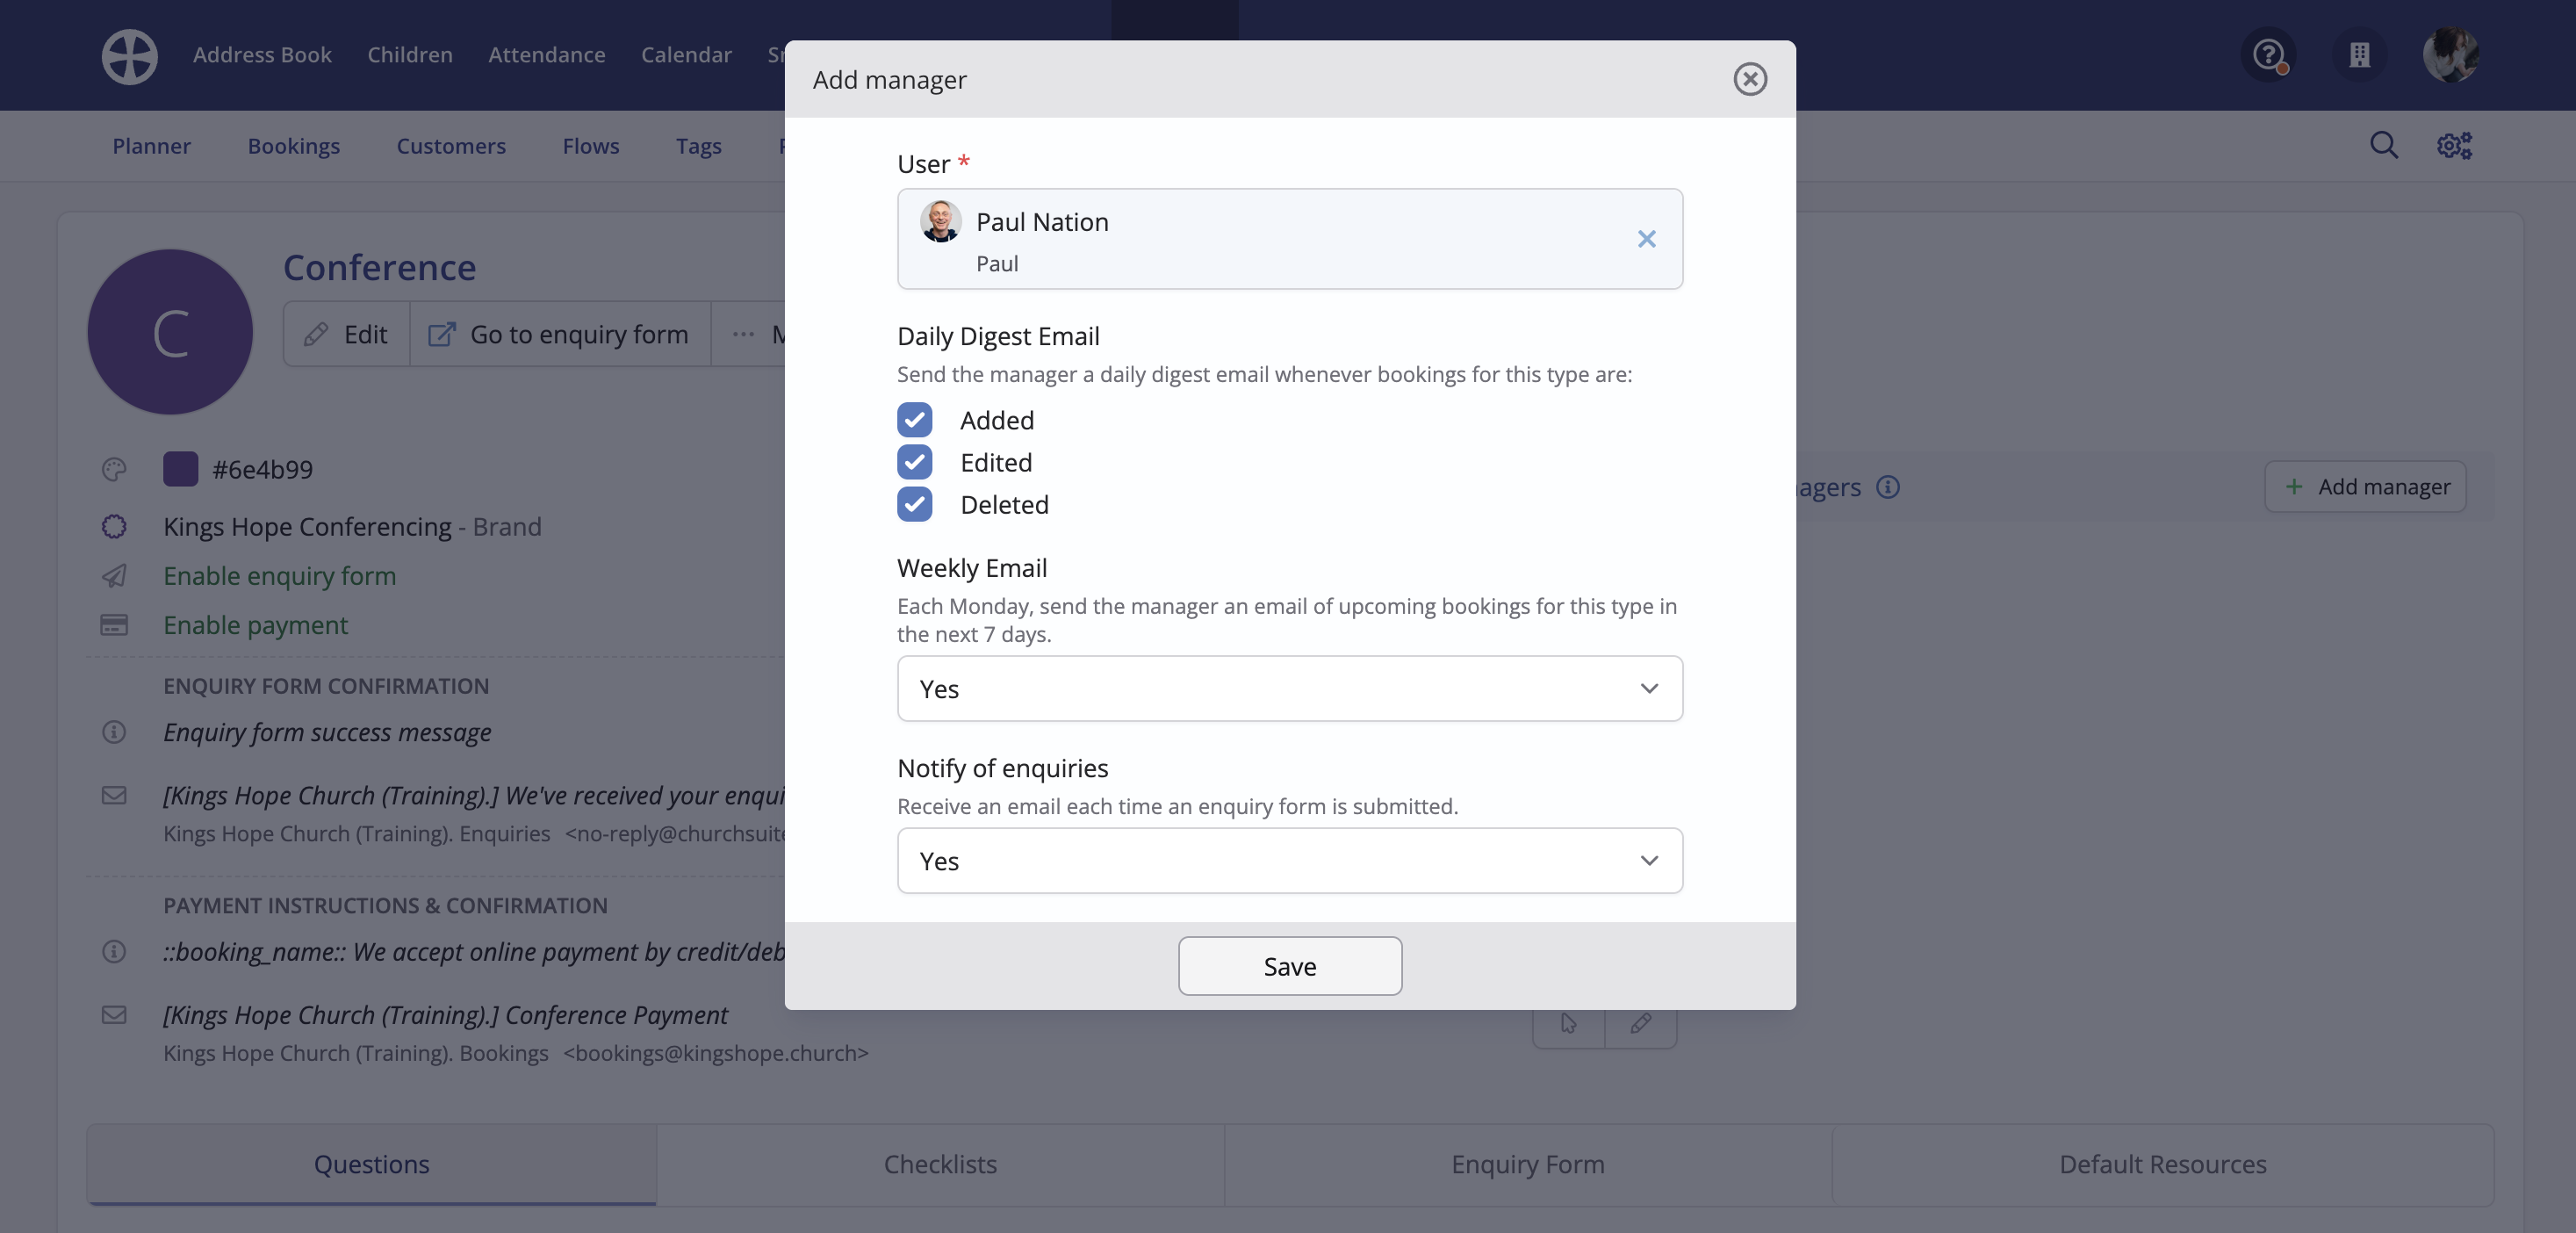
On the Add manager pop-up, search and select the User to be assigned as a manager and then choose their Daily Digest Email and Weekly Email options. Whenever bookings of this Type are added, edited or deleted, a Daily Digest Email is sent at 7 am and noon. The 7 am notification lists bookings updated since noon the previous day and the noon notification lists bookings updated since 7 am that same day. The Weekly Email is sent at 7 am on Monday and lists all the upcoming bookings for the Type for the next 7 days – ideal for starting the week with a reminder of what's happening. To avoid inbox overload, a contact who oversees multiple booking Types or Resources will receive one pair of daily digest emails (at 7 am and noon) and one weekly email on Mondays. Additionally, for booking types with enquiries enabled, choose if the manager should be notified each time the enquiry form is submitted. Click Save to add the manager.
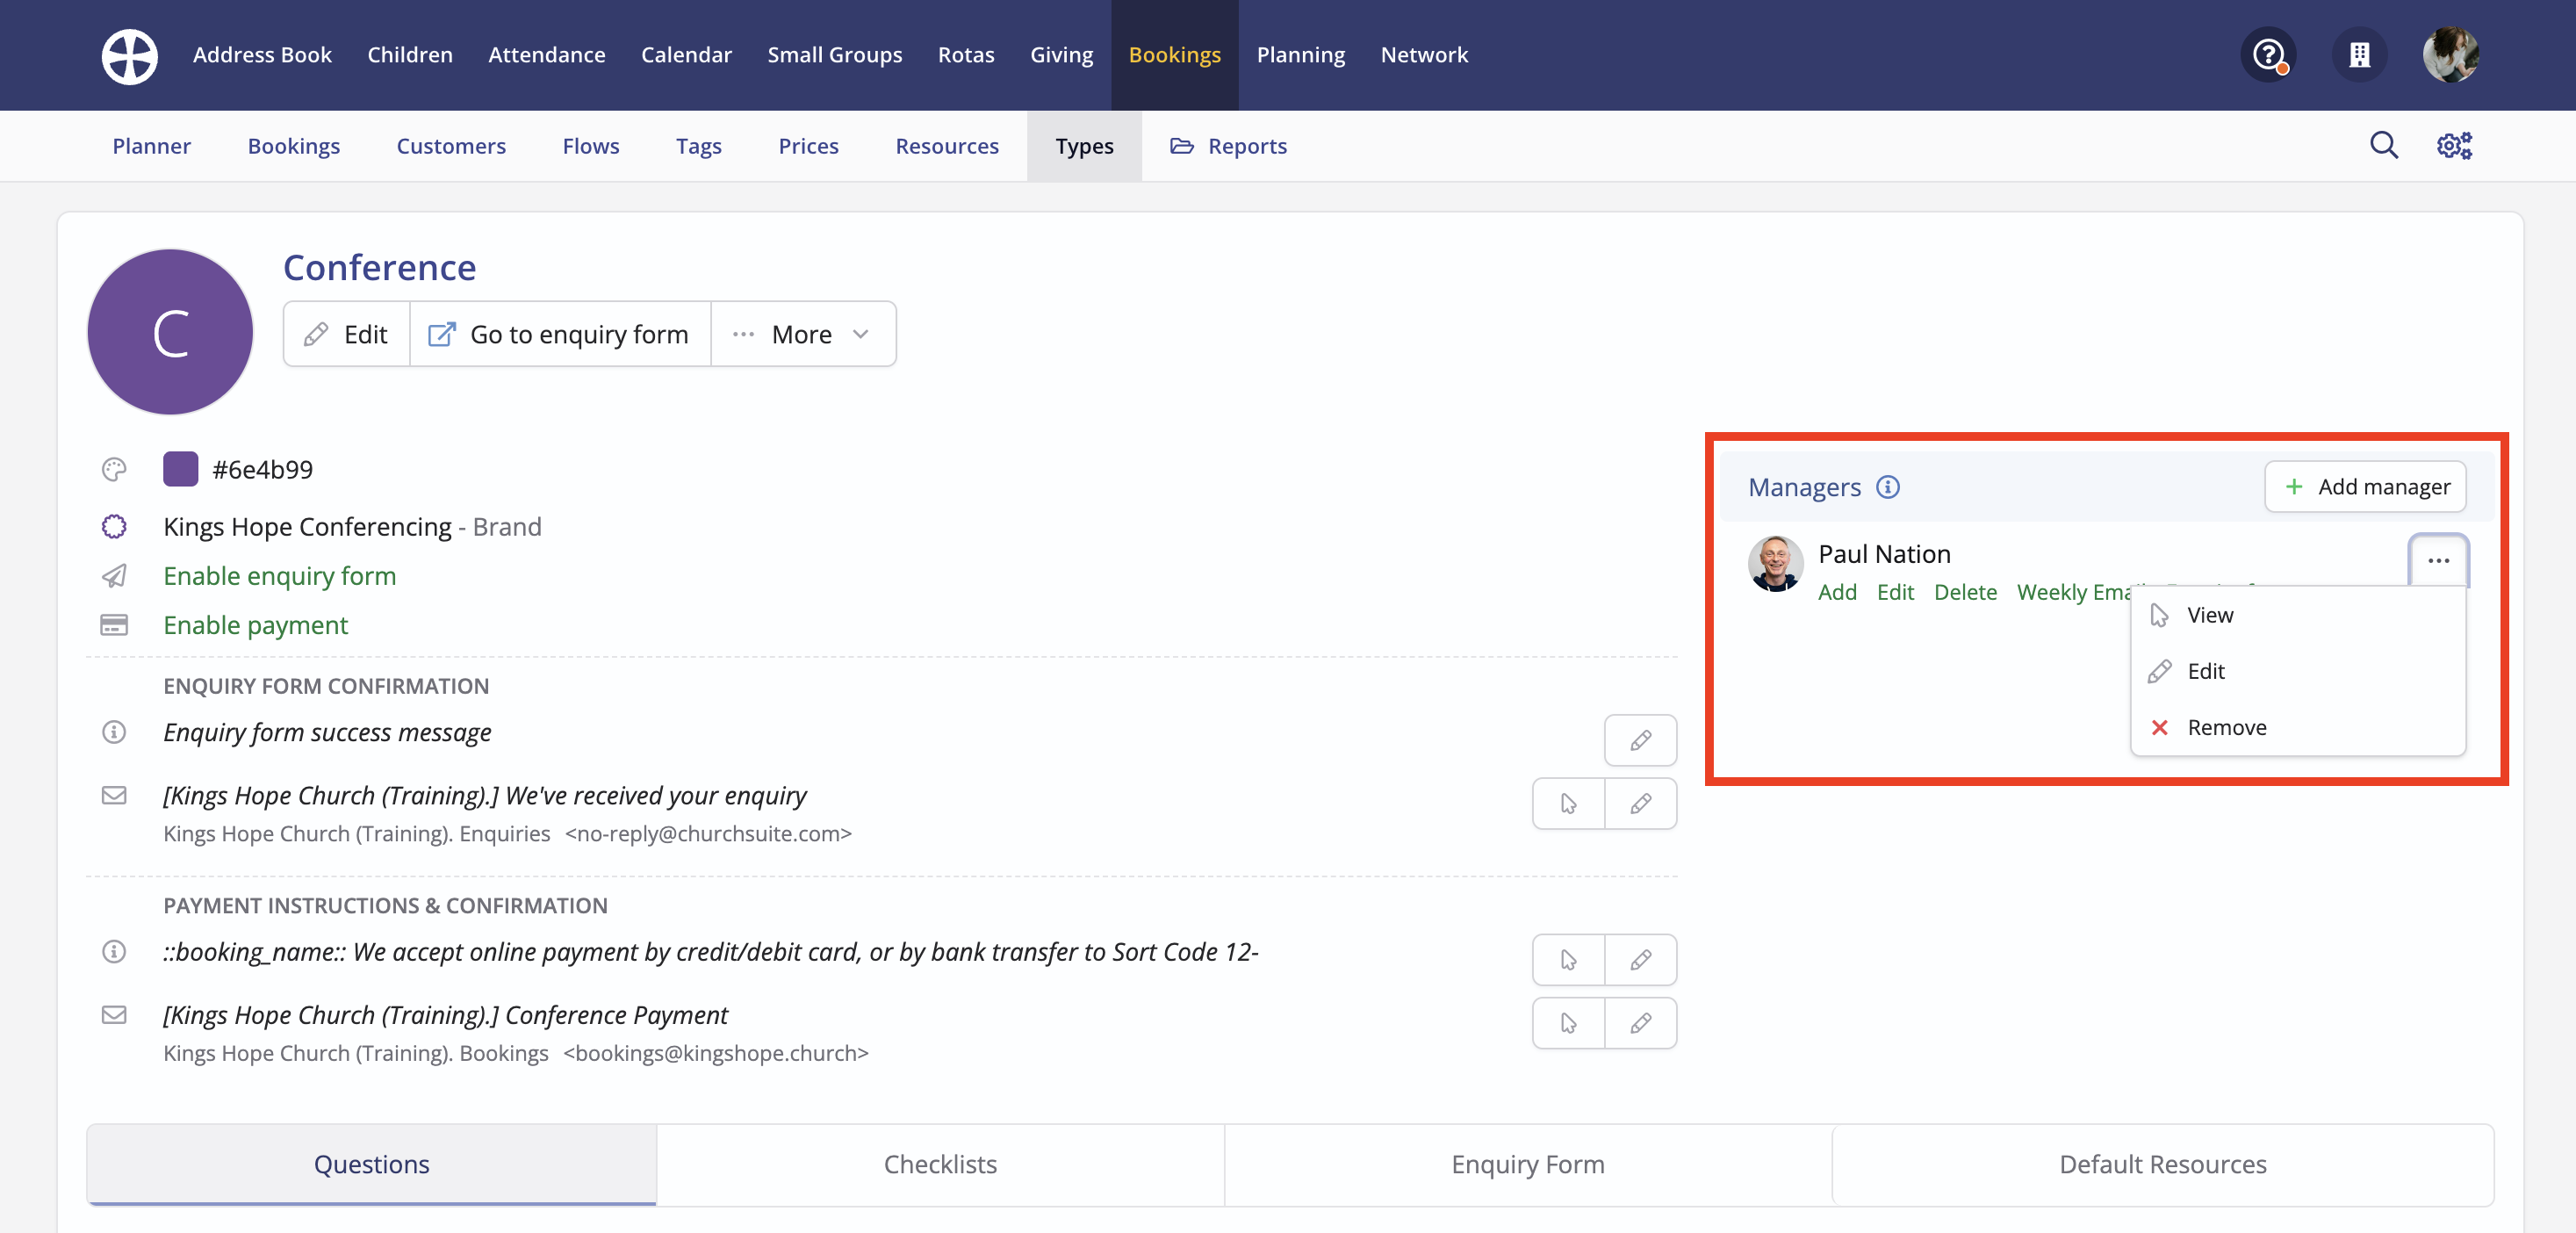
The newly added manager is shown, along with a visual indicator of their notifications. Further managers can be added and later edited or removed as necessary.
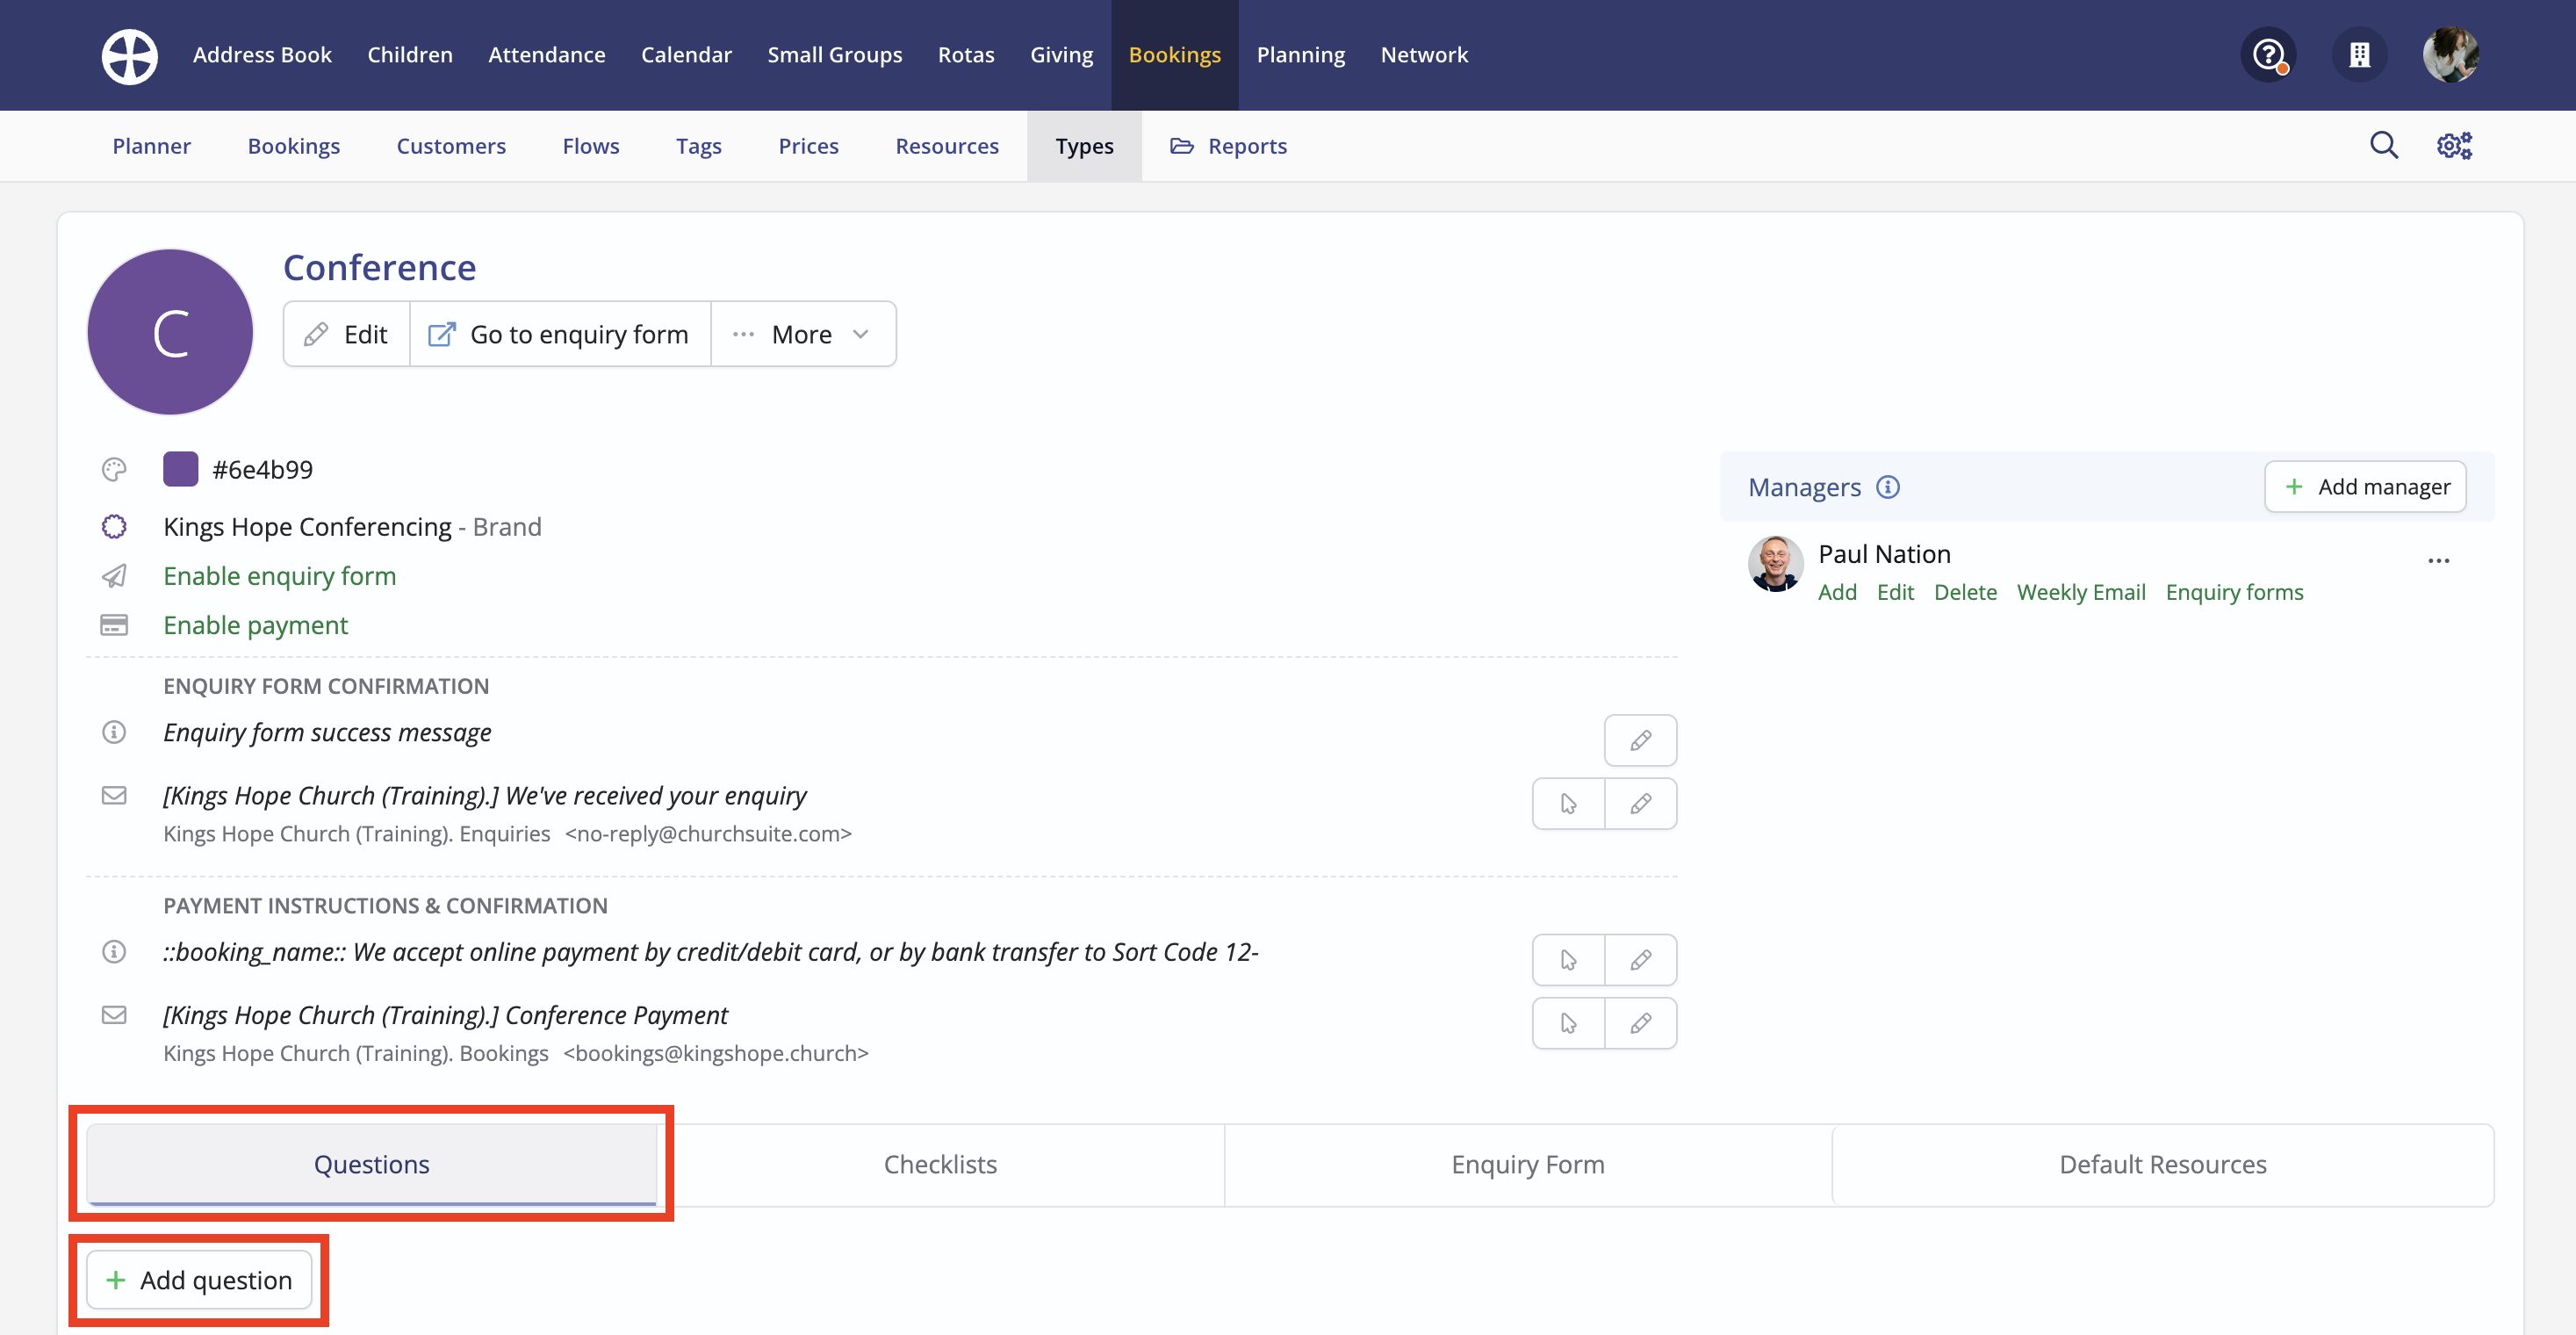
Adding type-specific booking questions
From the Type View, you can add various type-specific booking Questions that you ask your customers when they make a booking. Later, when adding a booking, you can record the customer responses to those questions. For example, when booking a wedding, you'll likely have questions related to the bride and groom and their ceremony; however, the questions asked of a customer when making an external booking for a birthday party will be very different.
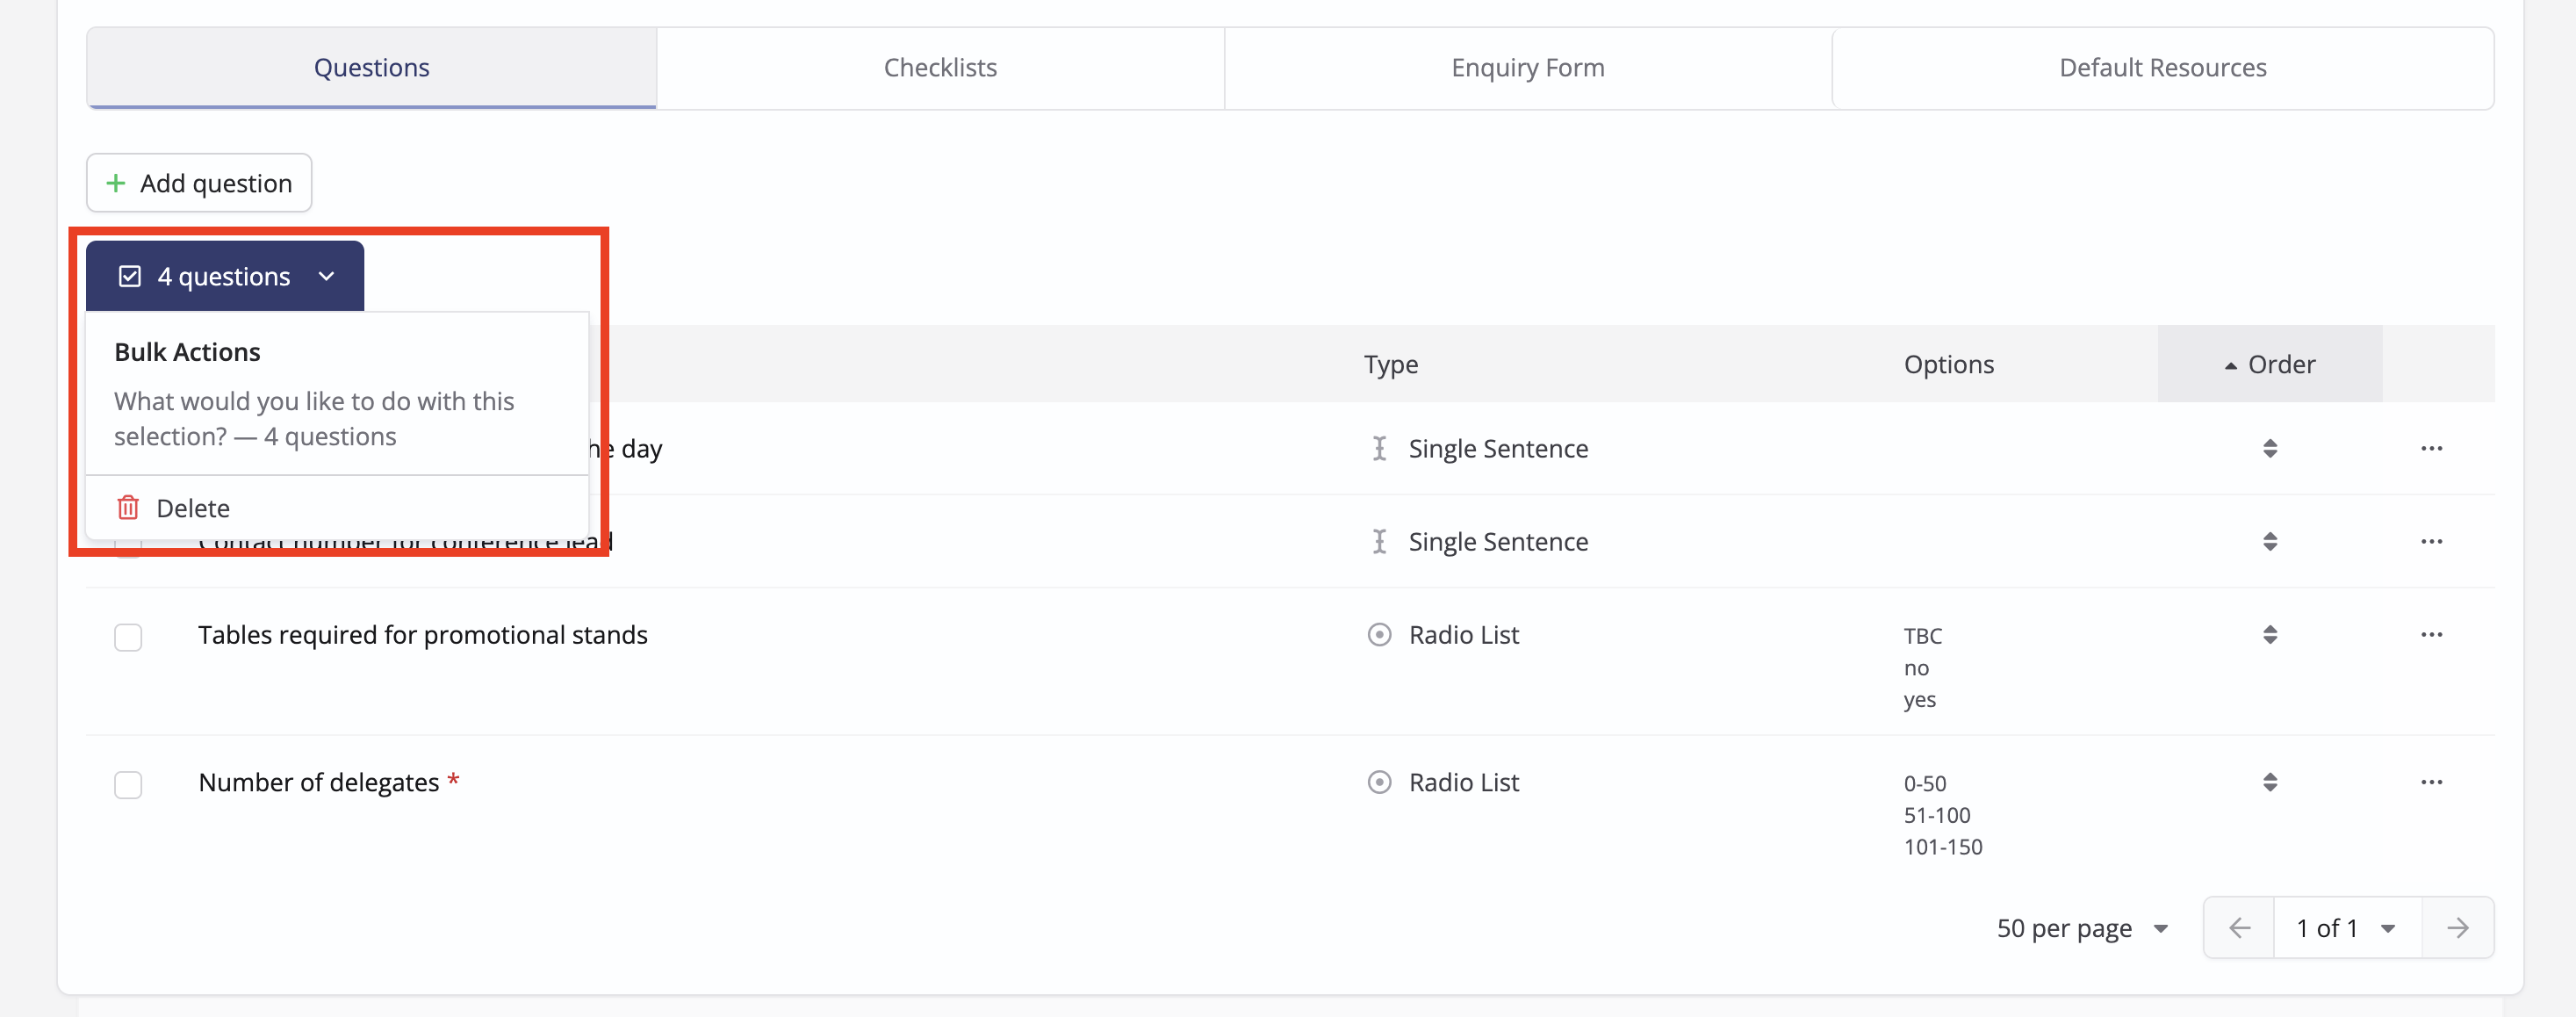
To add Questions, click Add question on the Questions tab.
On the Add question pop-up, add the question Name and select the response Type from the drop-down list - this is the format in which question responses will be stored against your bookings:
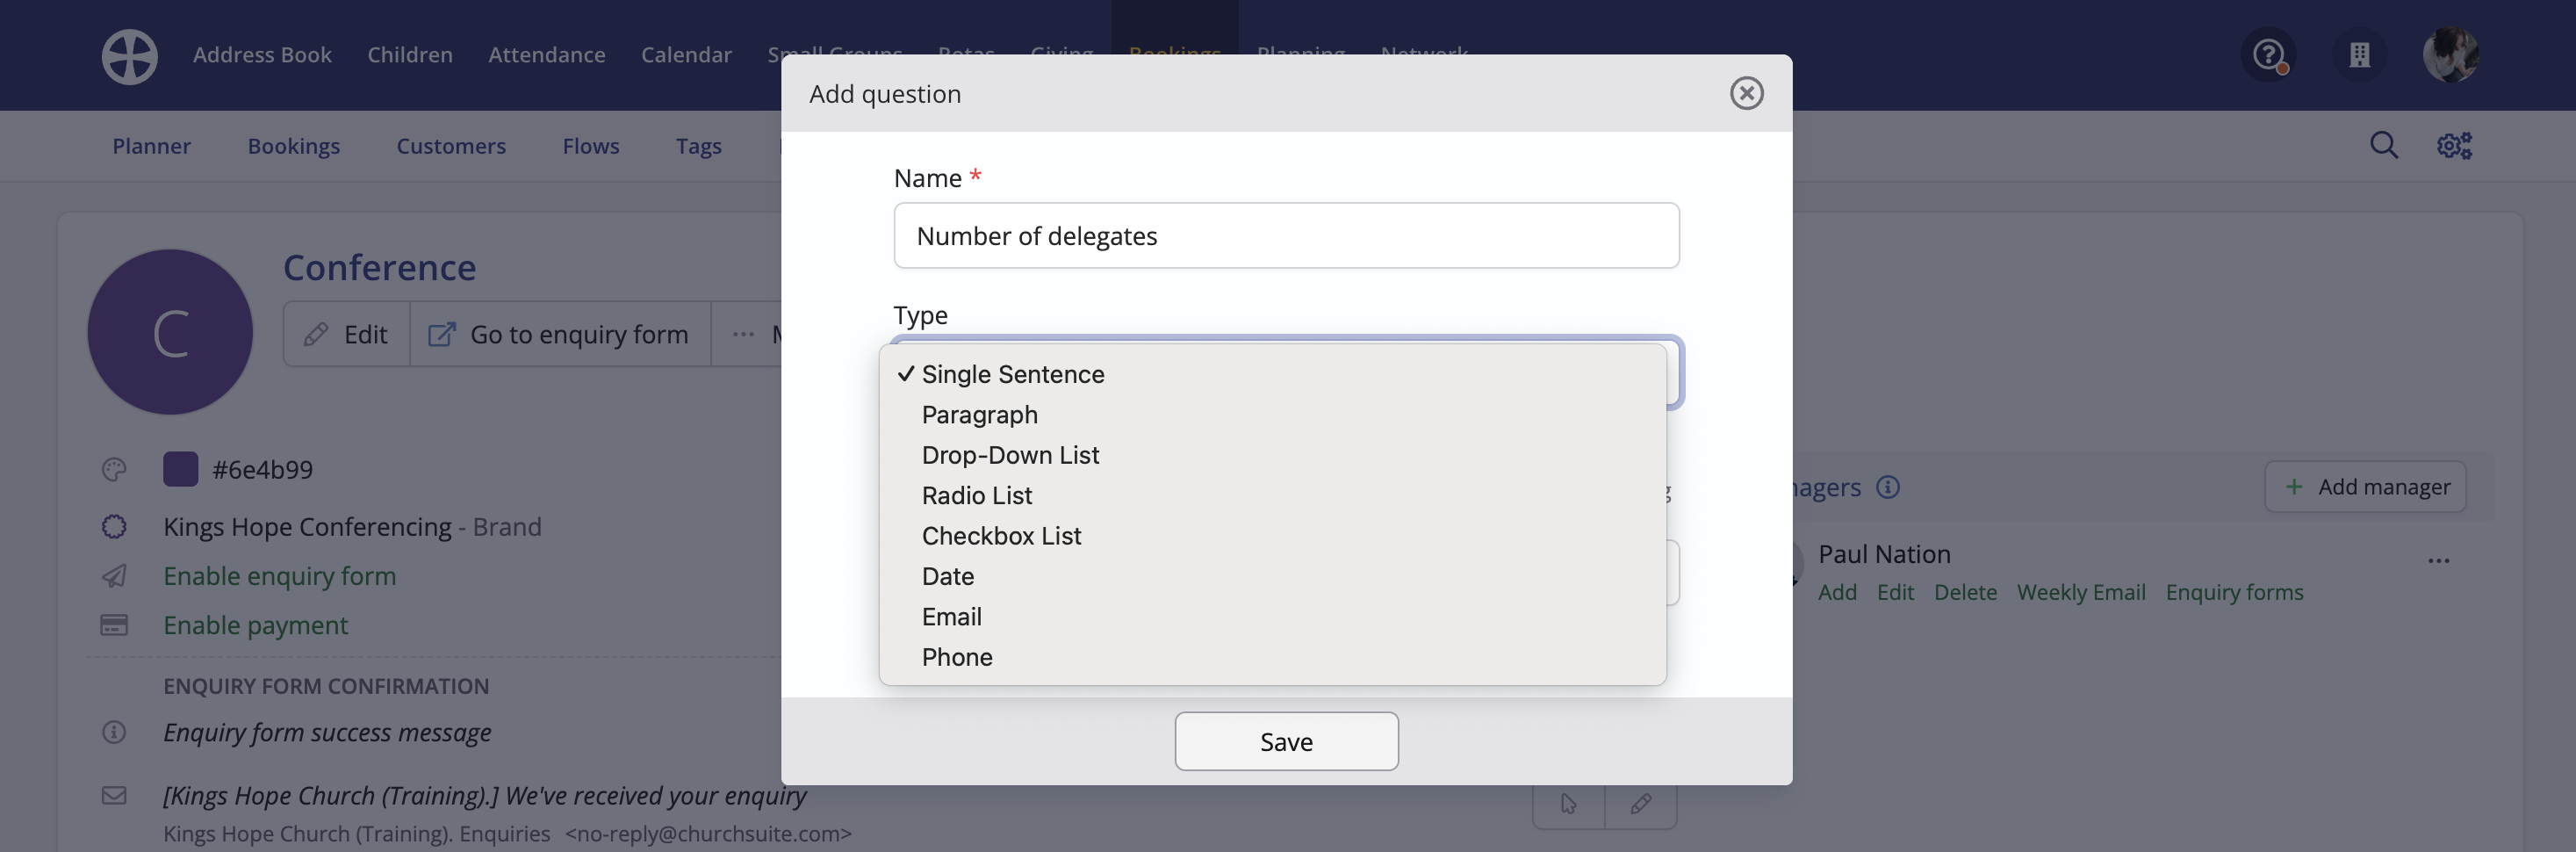
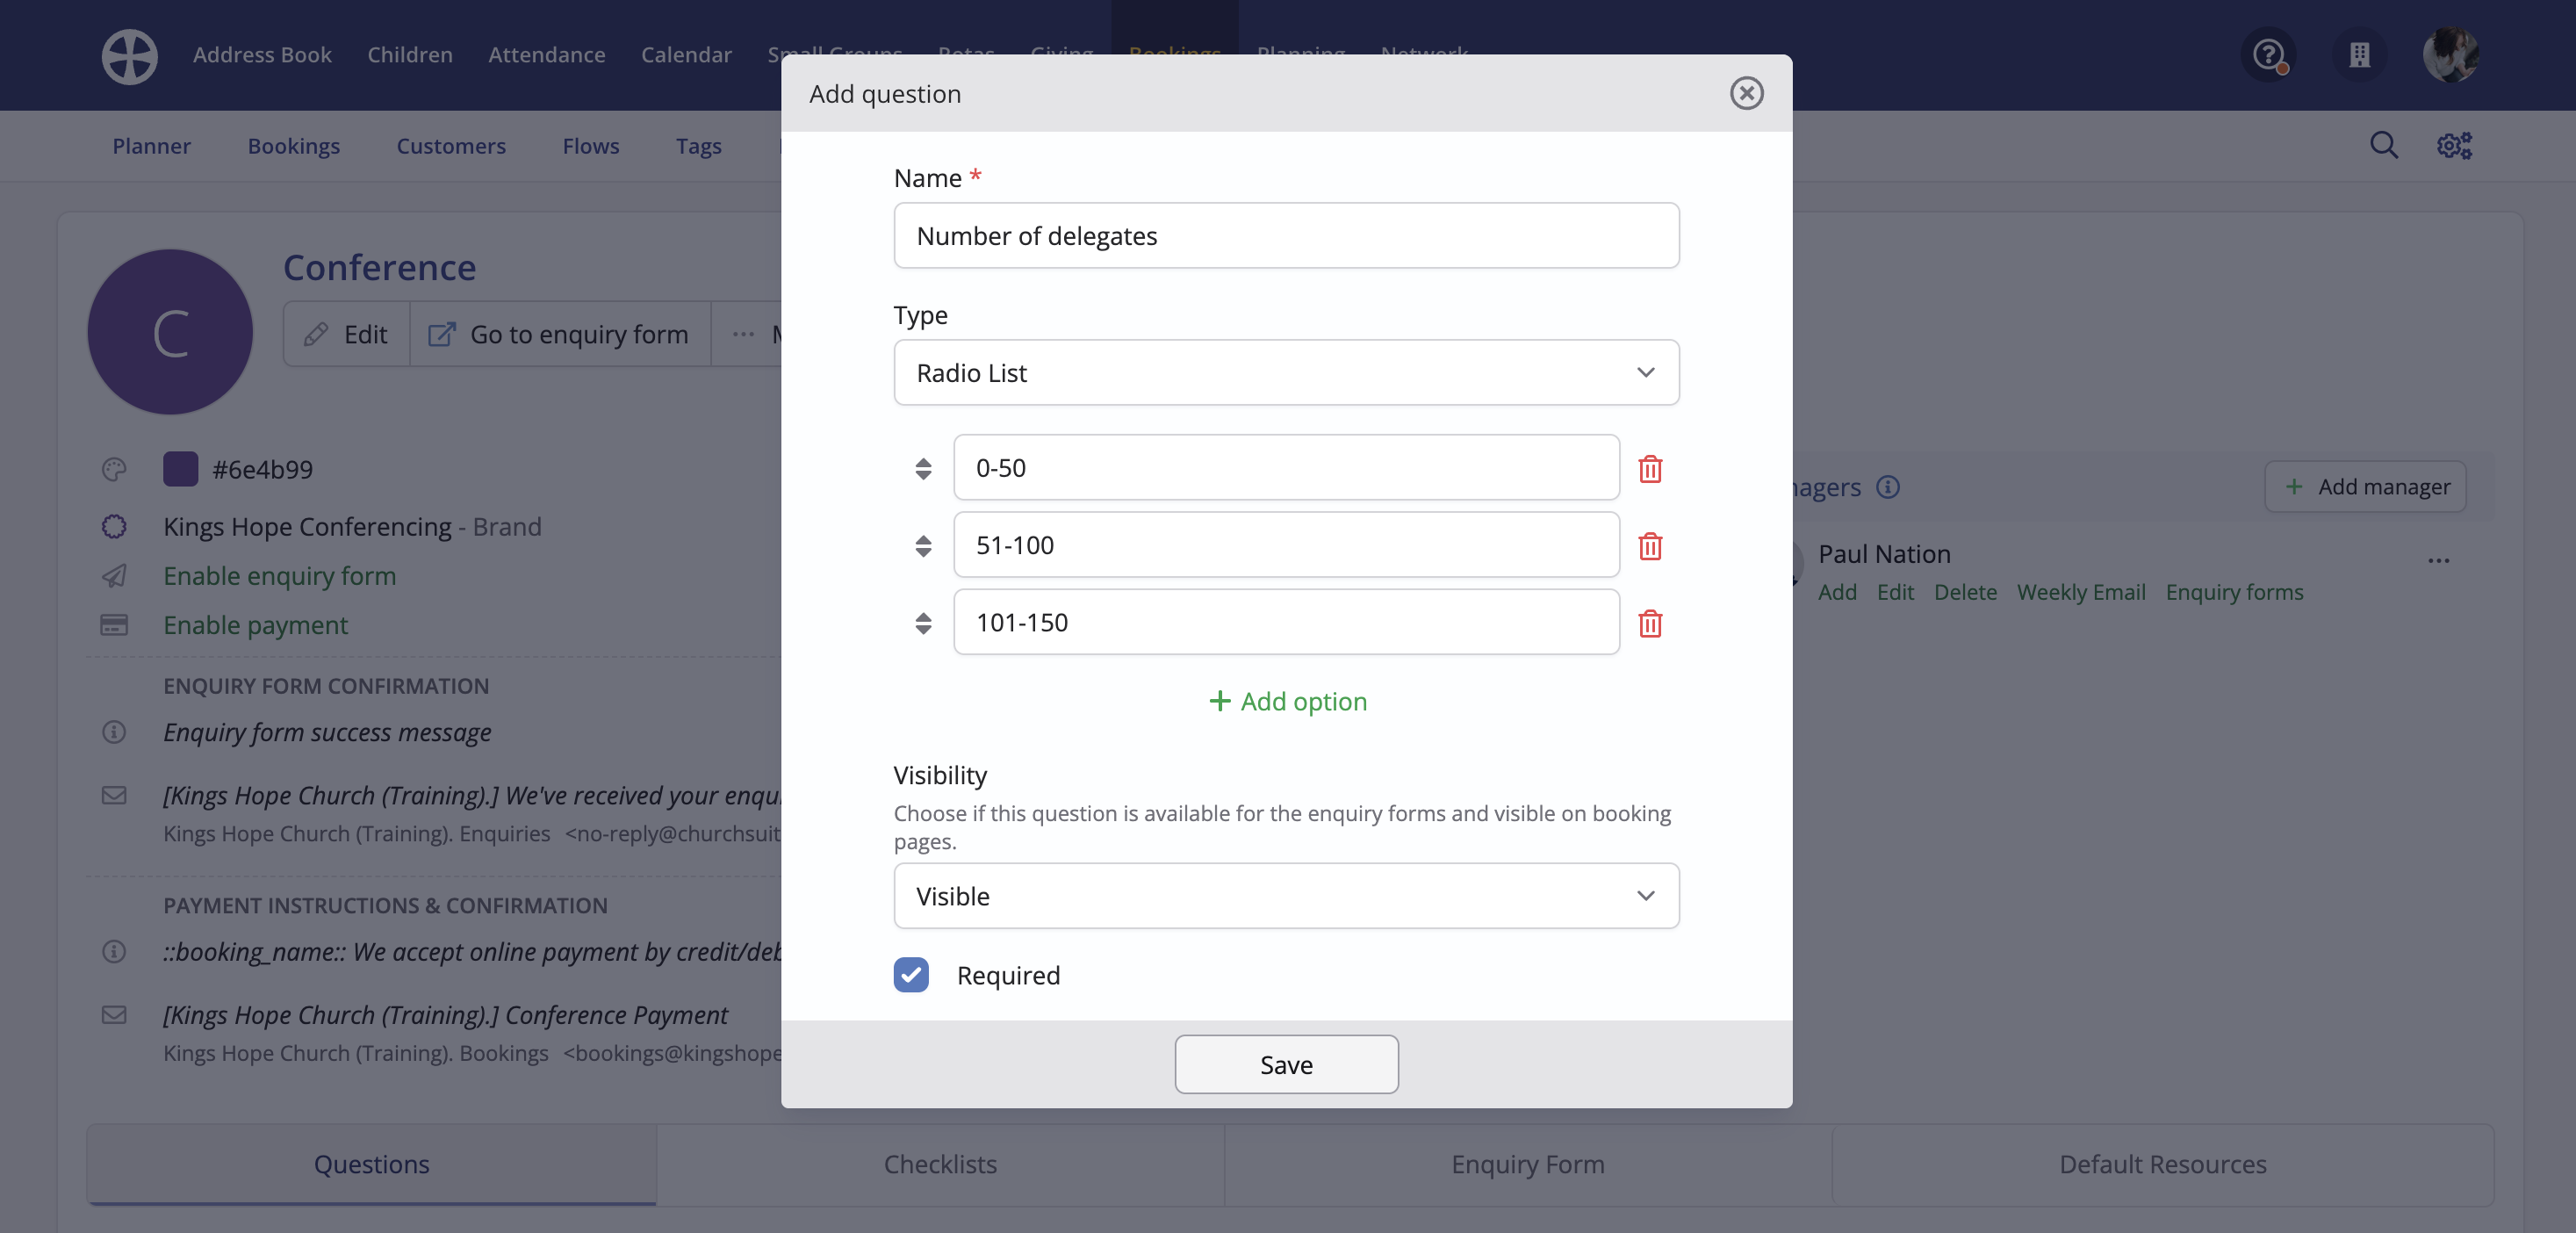
Depending on the question response Type selected, you can also define response Options. See our related support article for further explanation of response types. Also, note the option to set responses as Required but note that you will only be able to add a booking if a response to a required question is provided. Finally, Type questions and customer responses are Visible on the customer-facing booking page. However, you can optionally set the question's Visibility to Hidden. For example, some questions (and the responses) may be for internal use only and, therefore, do not need to be shown to the customer. Click Save to add the question.
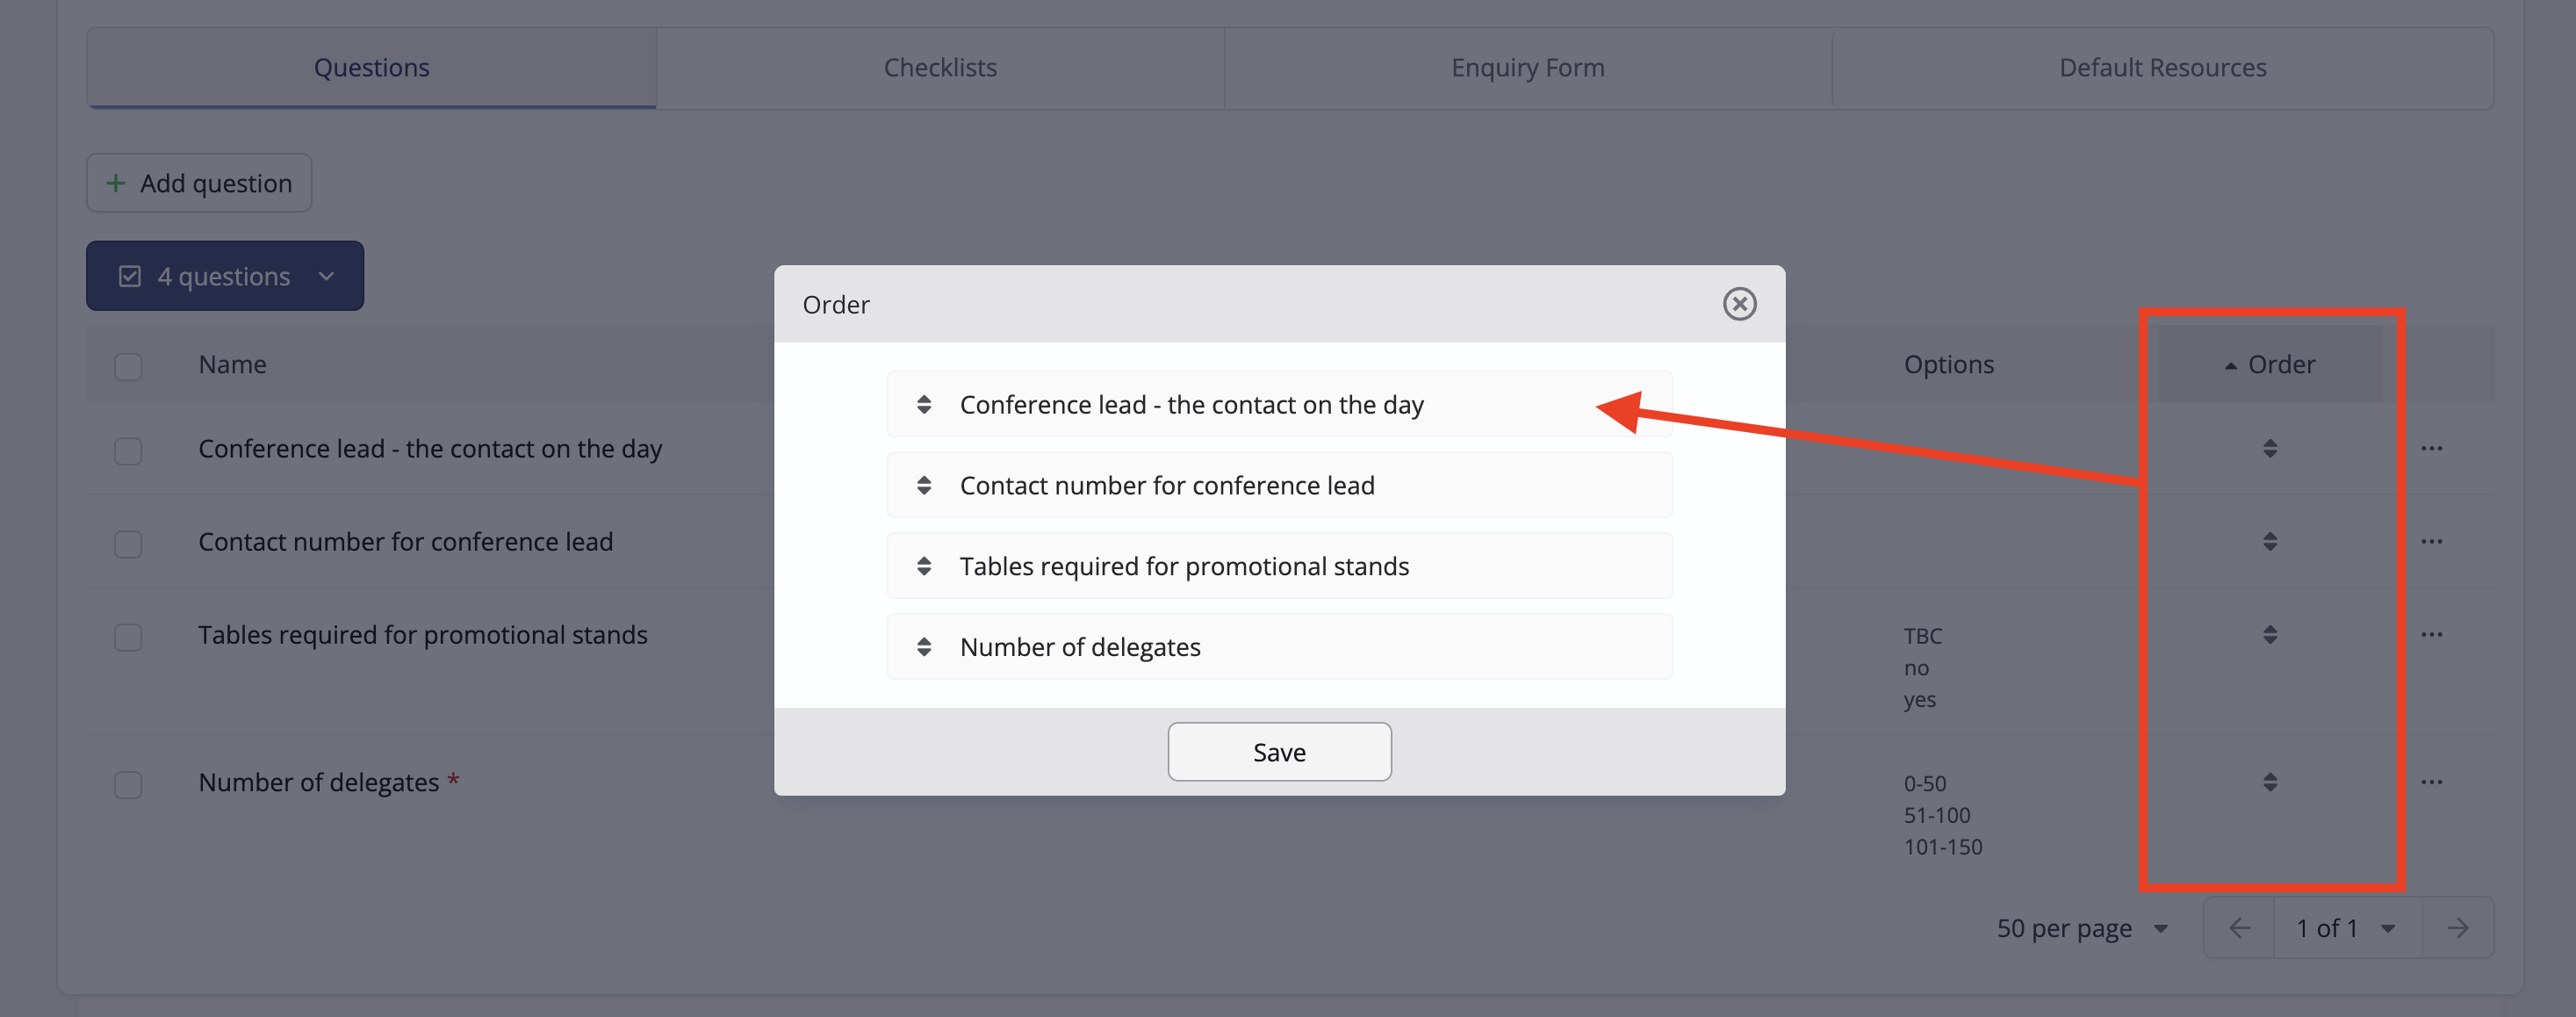
Continue adding further questions as appropriate. Each newly added question is first added to the end of the list but you can easily re-order the Questions list by clicking on any Order icon and dragging and dropping in the pop-up to change the order:
Note also the bulk Actions option to delete one or more selected questions in bulk. Deleting a question (or a question response option) will permanently delete that question and all related response data from all past and future bookings. Please delete it with caution.
Booking types in action
When adding a new booking, you'll select the booking Type (required), which will reveal any type-specific questions ready to collect your customer responses. Care should be taken when editing a booking and changing its booking type, as all type-specific question responses will be removed and replaced by the new type-specific questions.

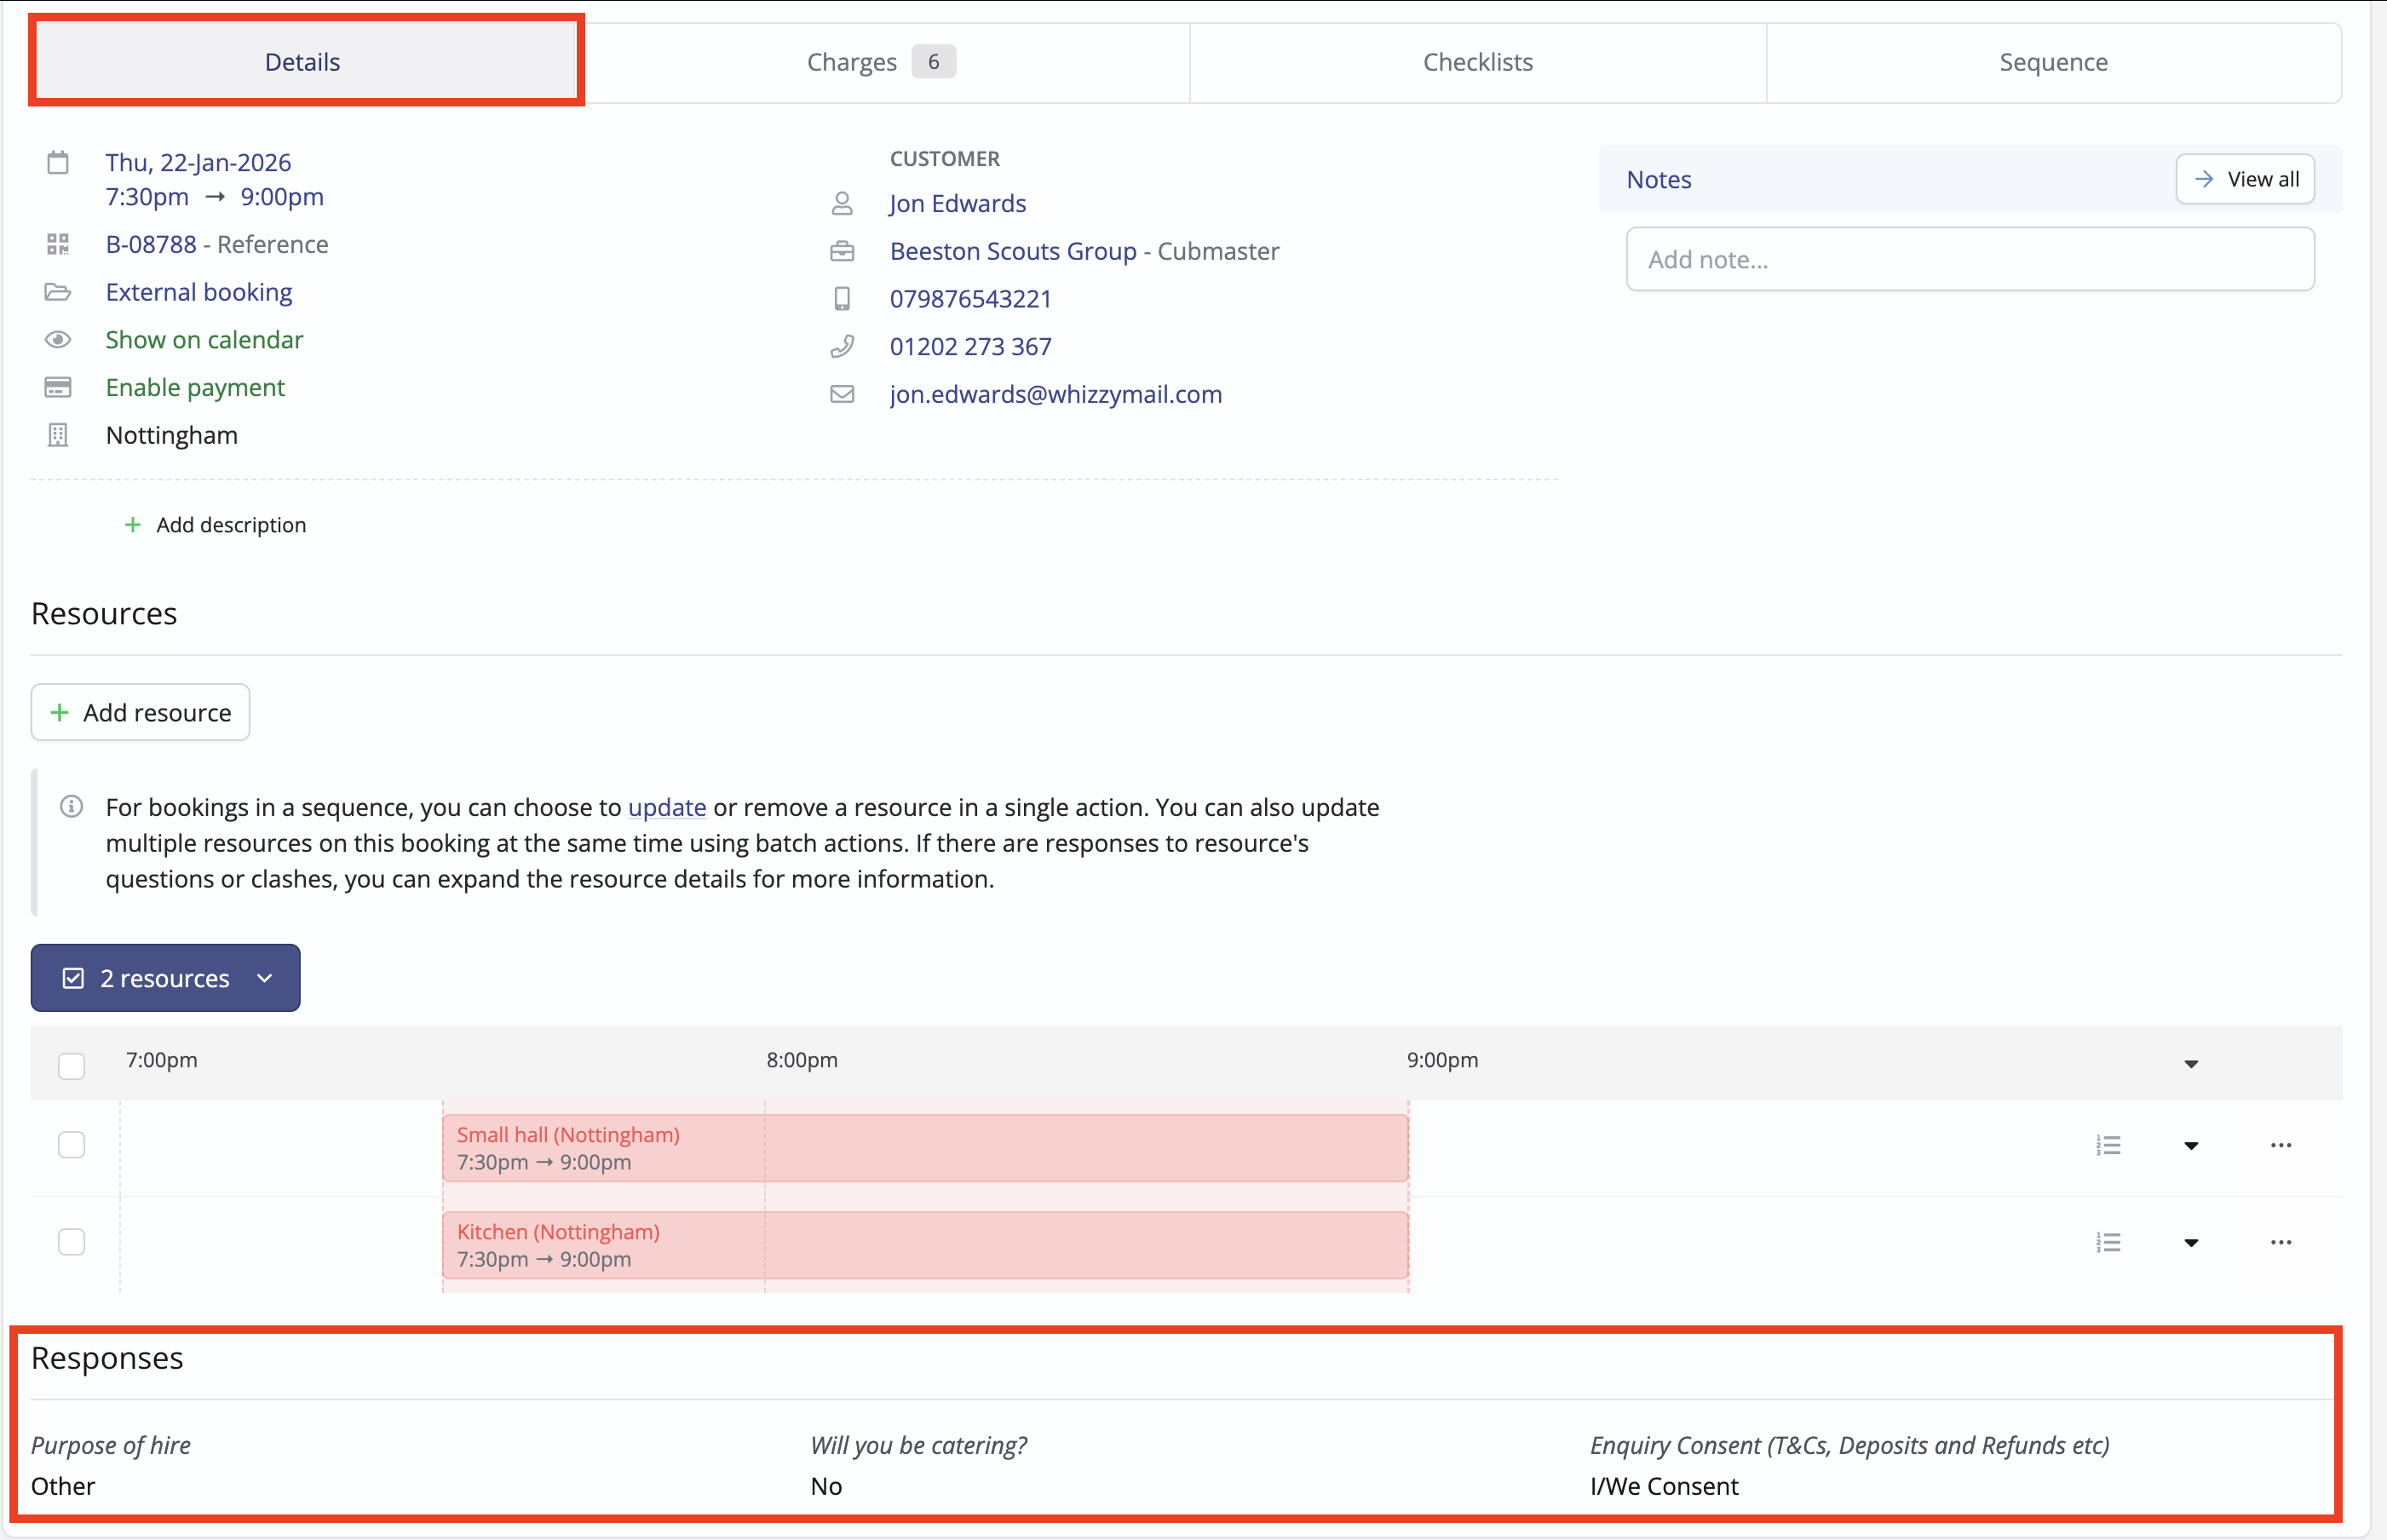
Booking Type questions and Responses are shown on the Details tab when viewing a booking.
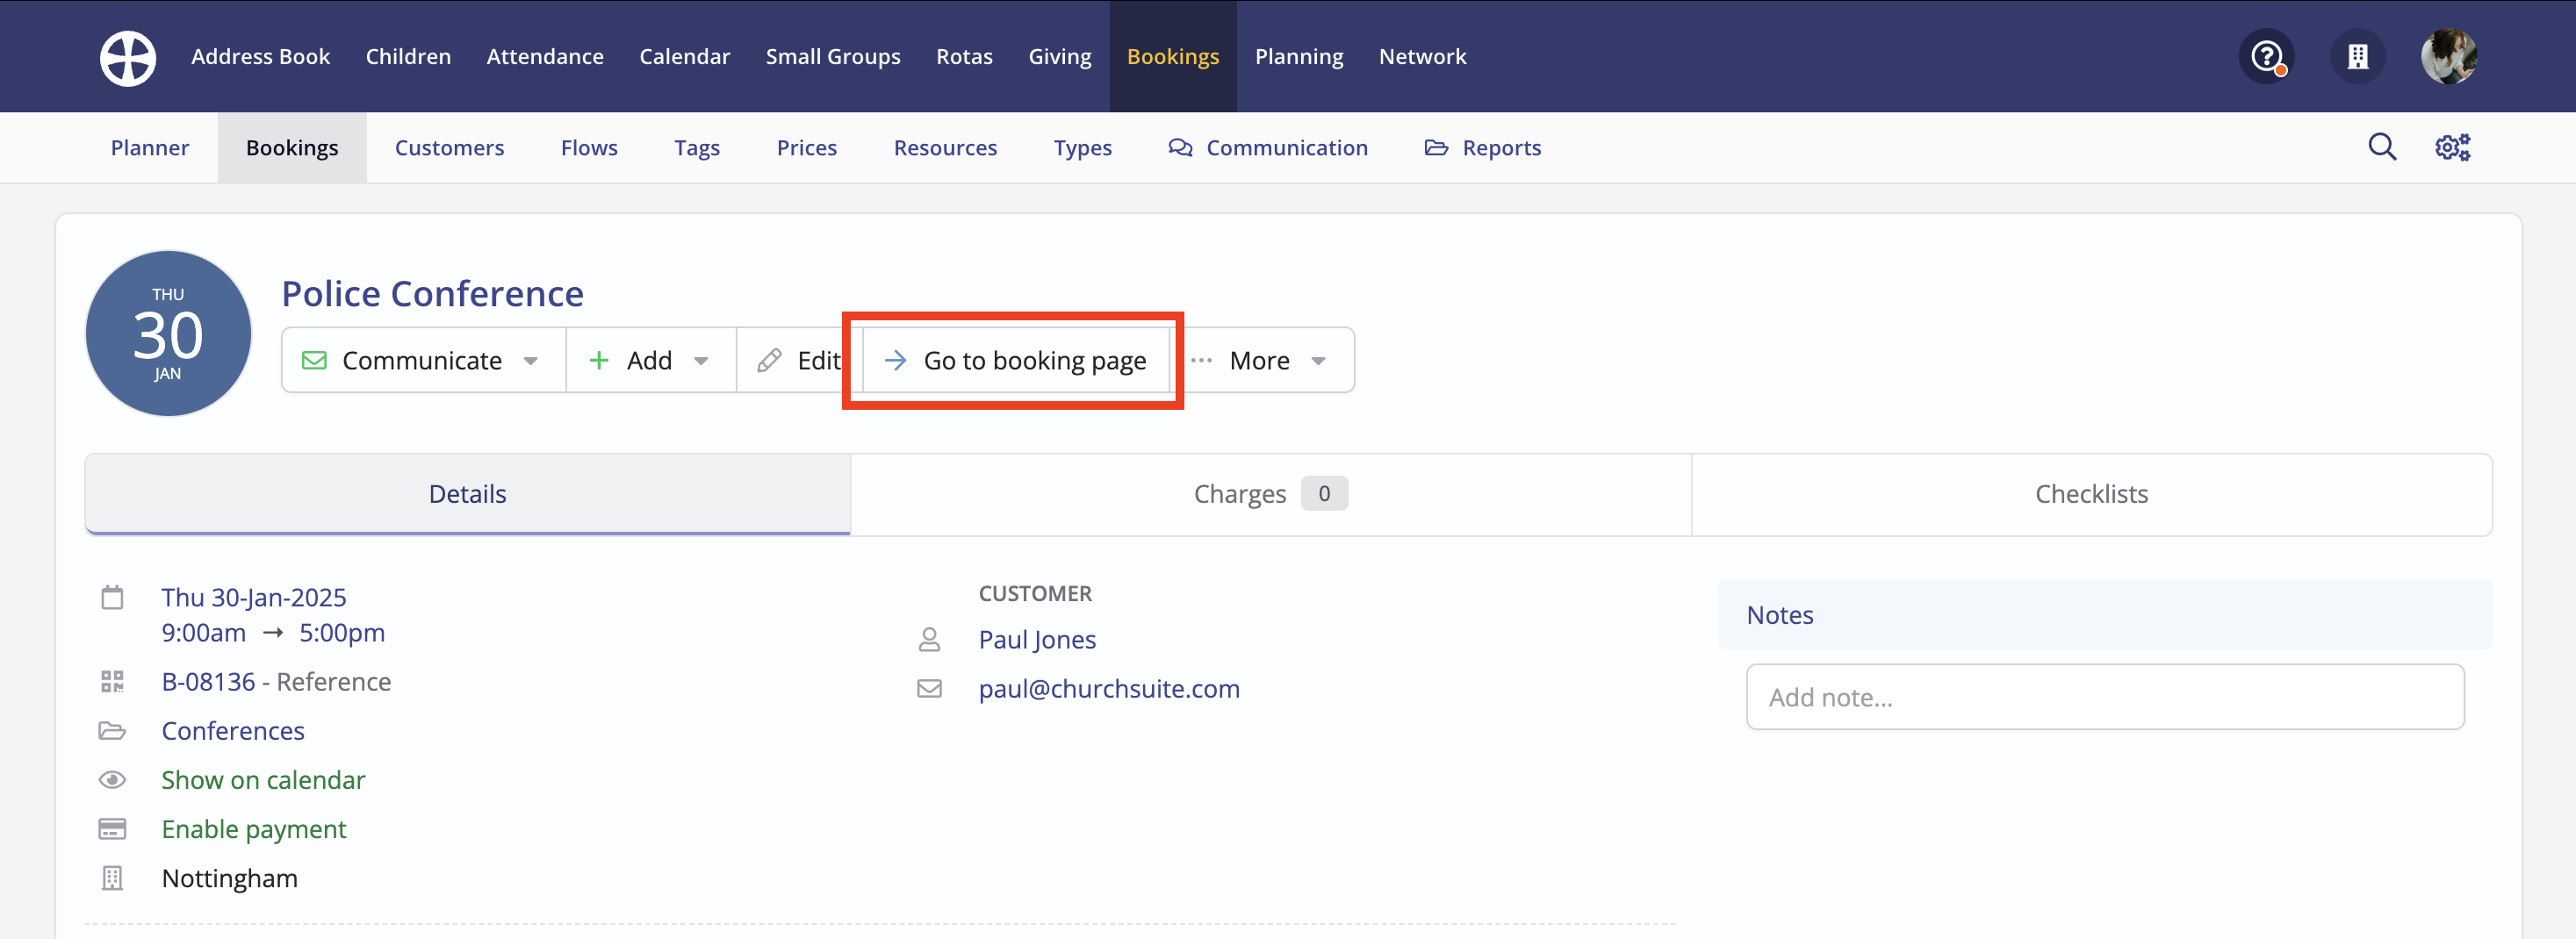
Similarly, when selecting Go to booking page from the booking View
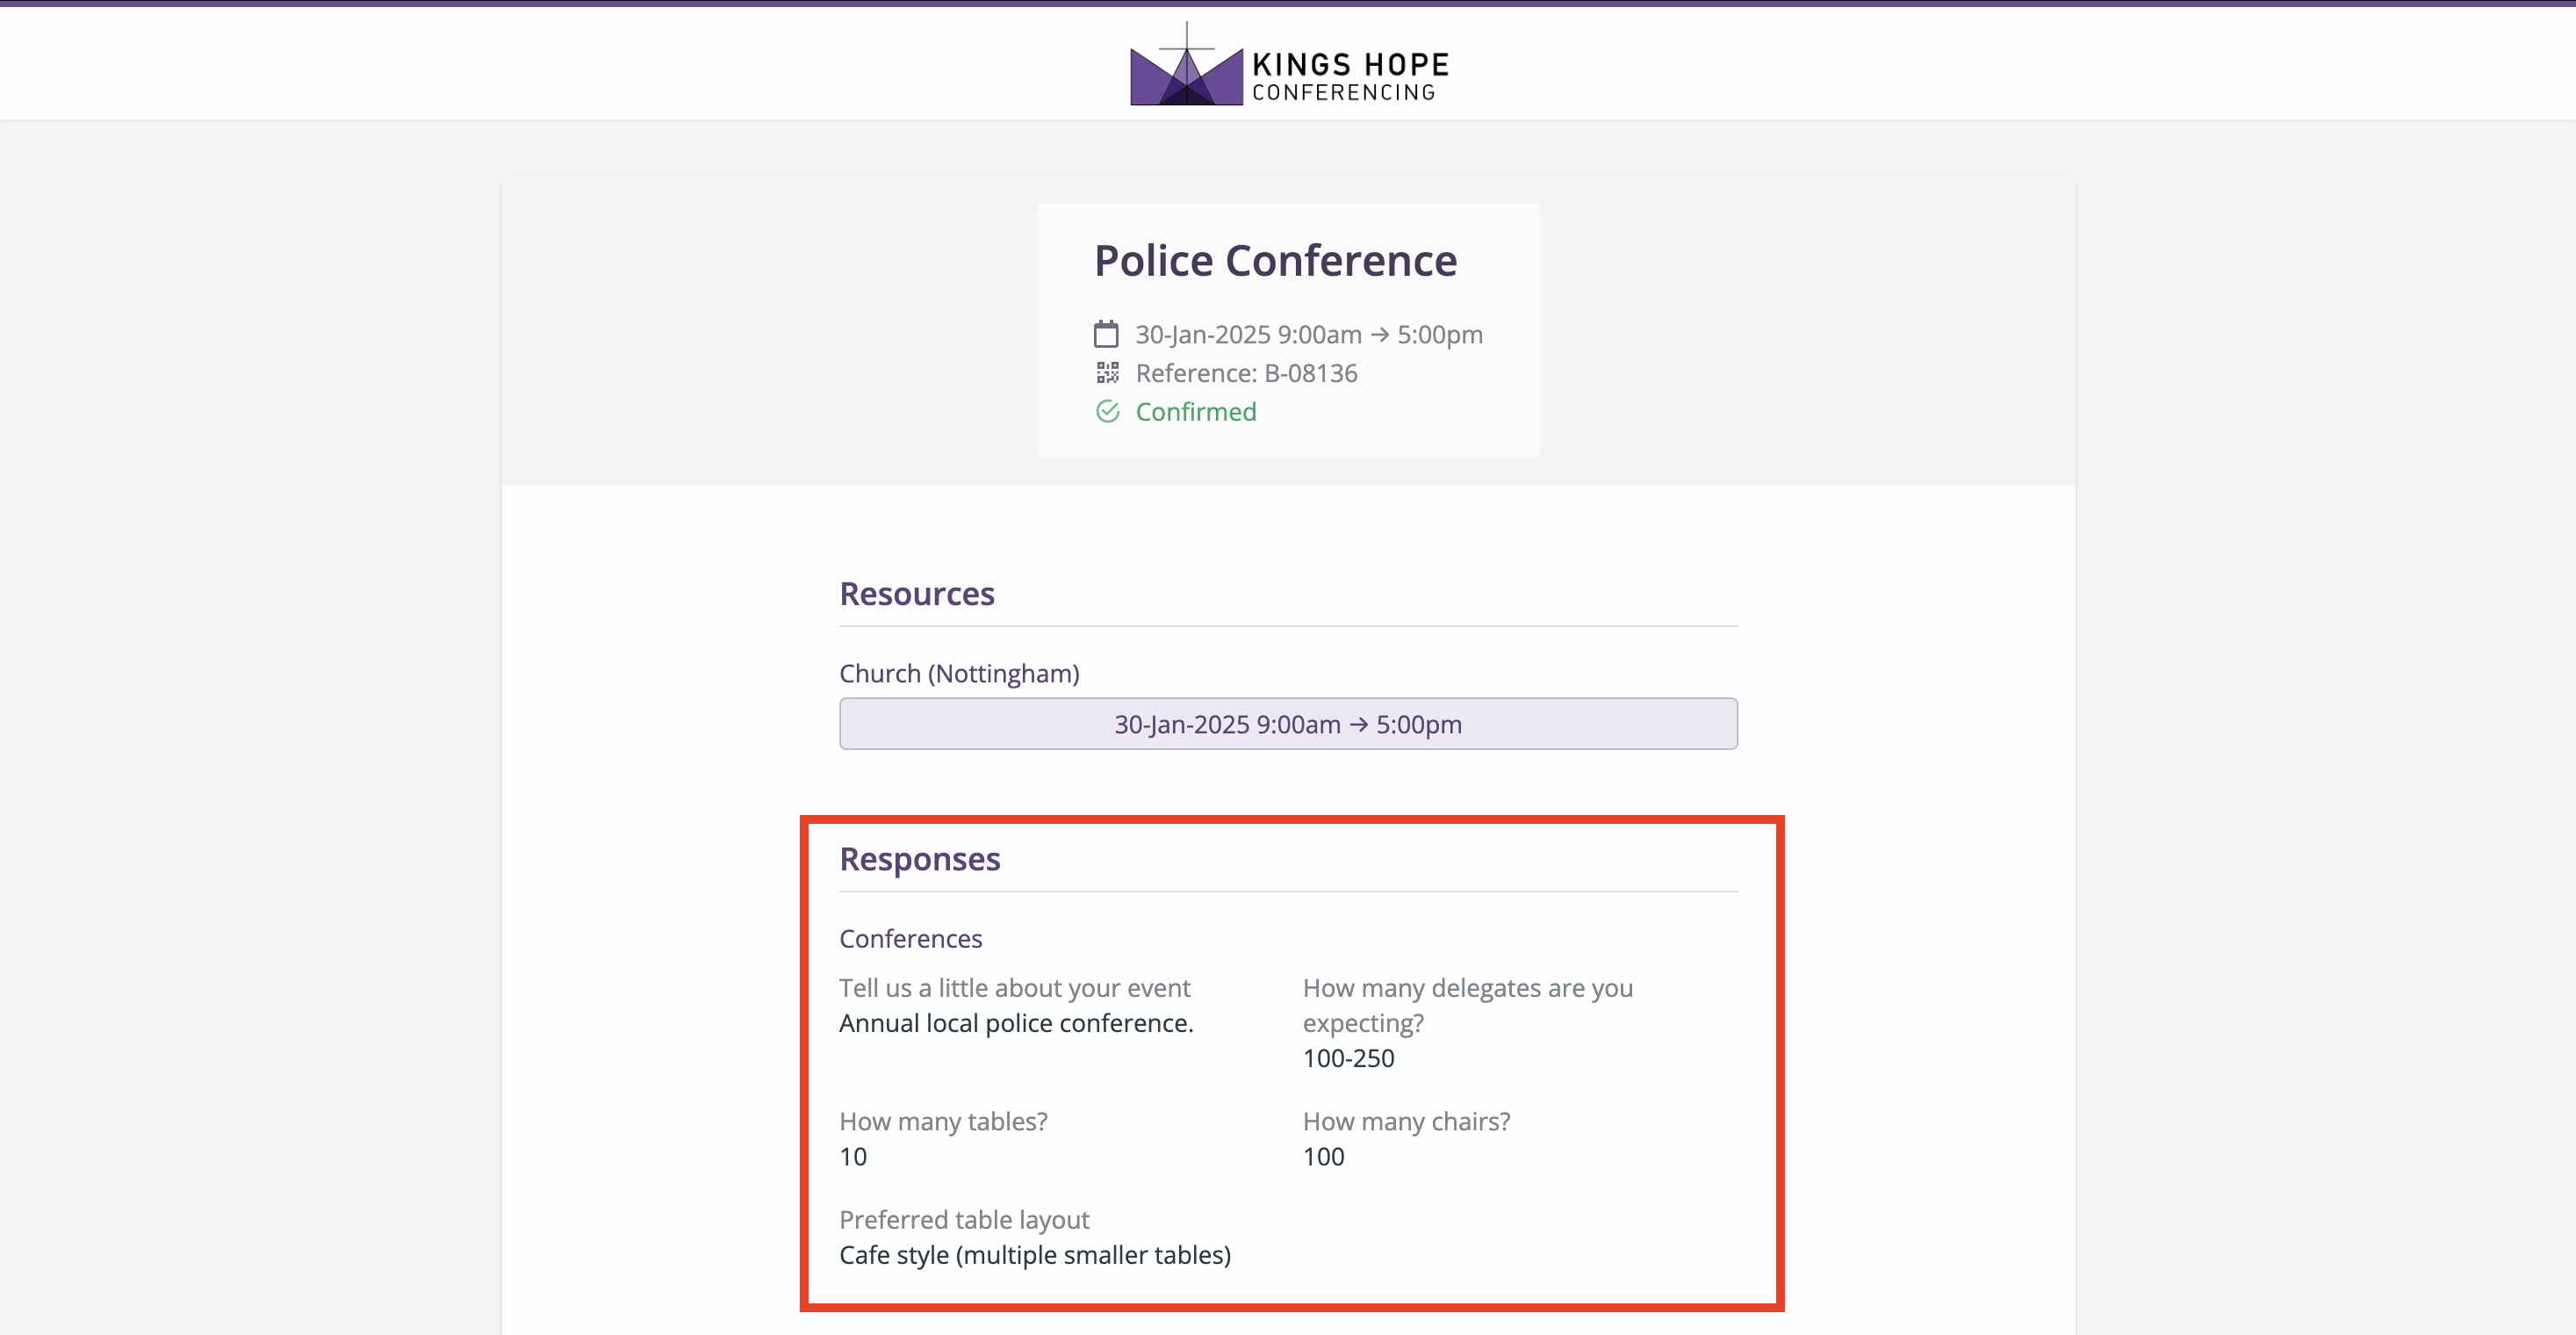
You can preview the customer-facing Booking Page and view all the non-hidden, visible booking-type question responses that the customer will see on their booking page, which you might send them. Booking pages are read-only; your customers cannot make changes. Only a module User can add or edit booking-type question responses.
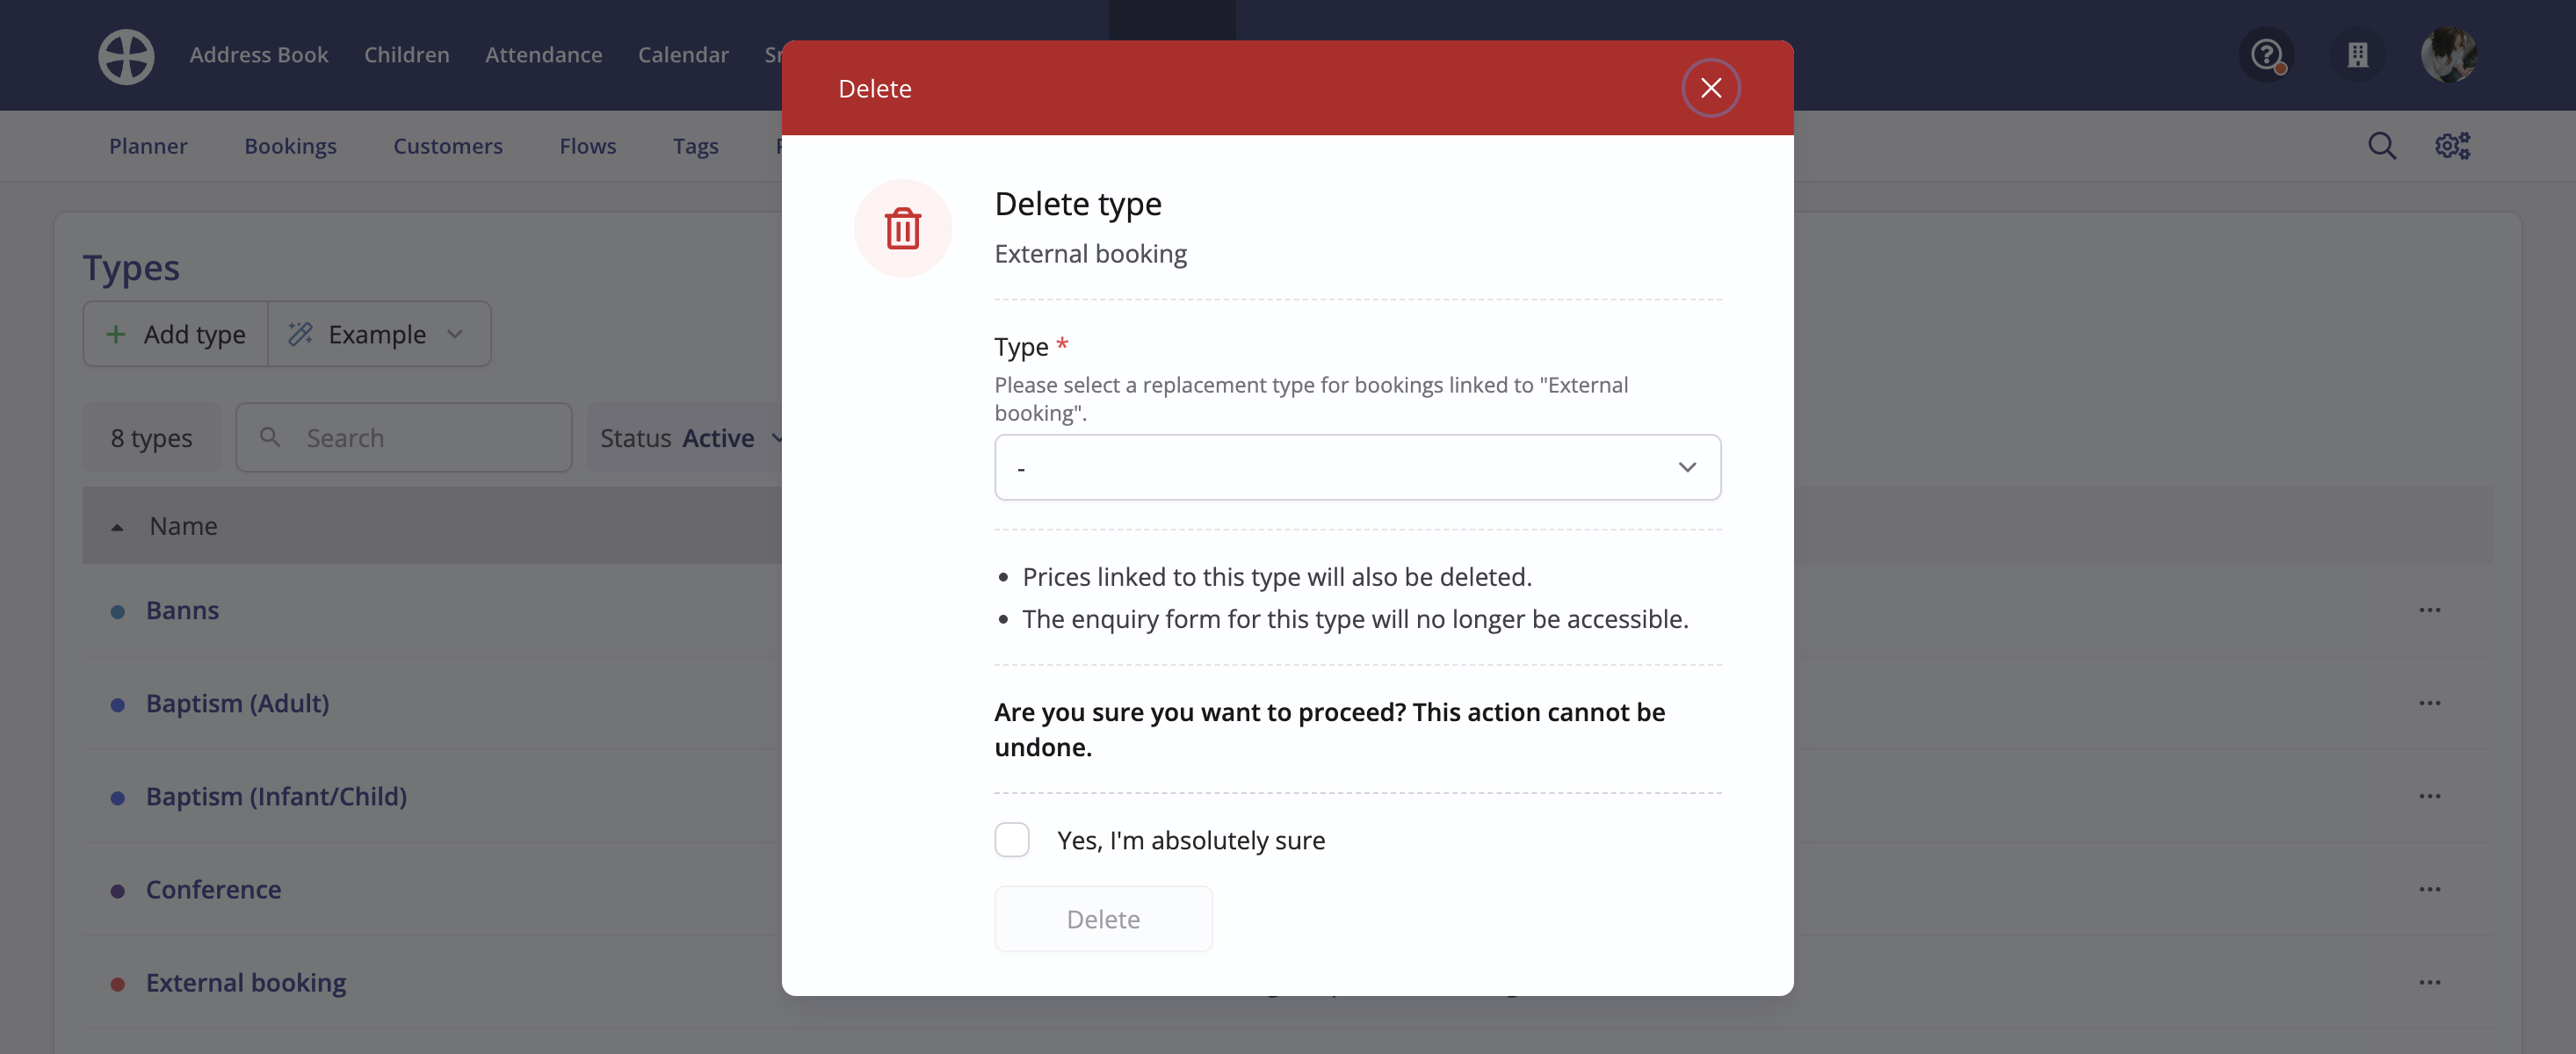
Deleting a booking type
The booking Type is a fundamental part of your booking data and is required when adding and editing bookings. When deleting a booking Type, you will be required to reassign existing bookings (past and future) to an alternative booking type - bookings cannot exist without a type. Additionally, deleting a booking type (and reassigning bookings to a different type) will also delete all associated questions and customer responses. This action is irreversible, so proceed with caution. Always archive an unwanted booking Type first. Types can later be set active again if needed.
From the Types section of the Bookings module, select Delete from the type Actions.
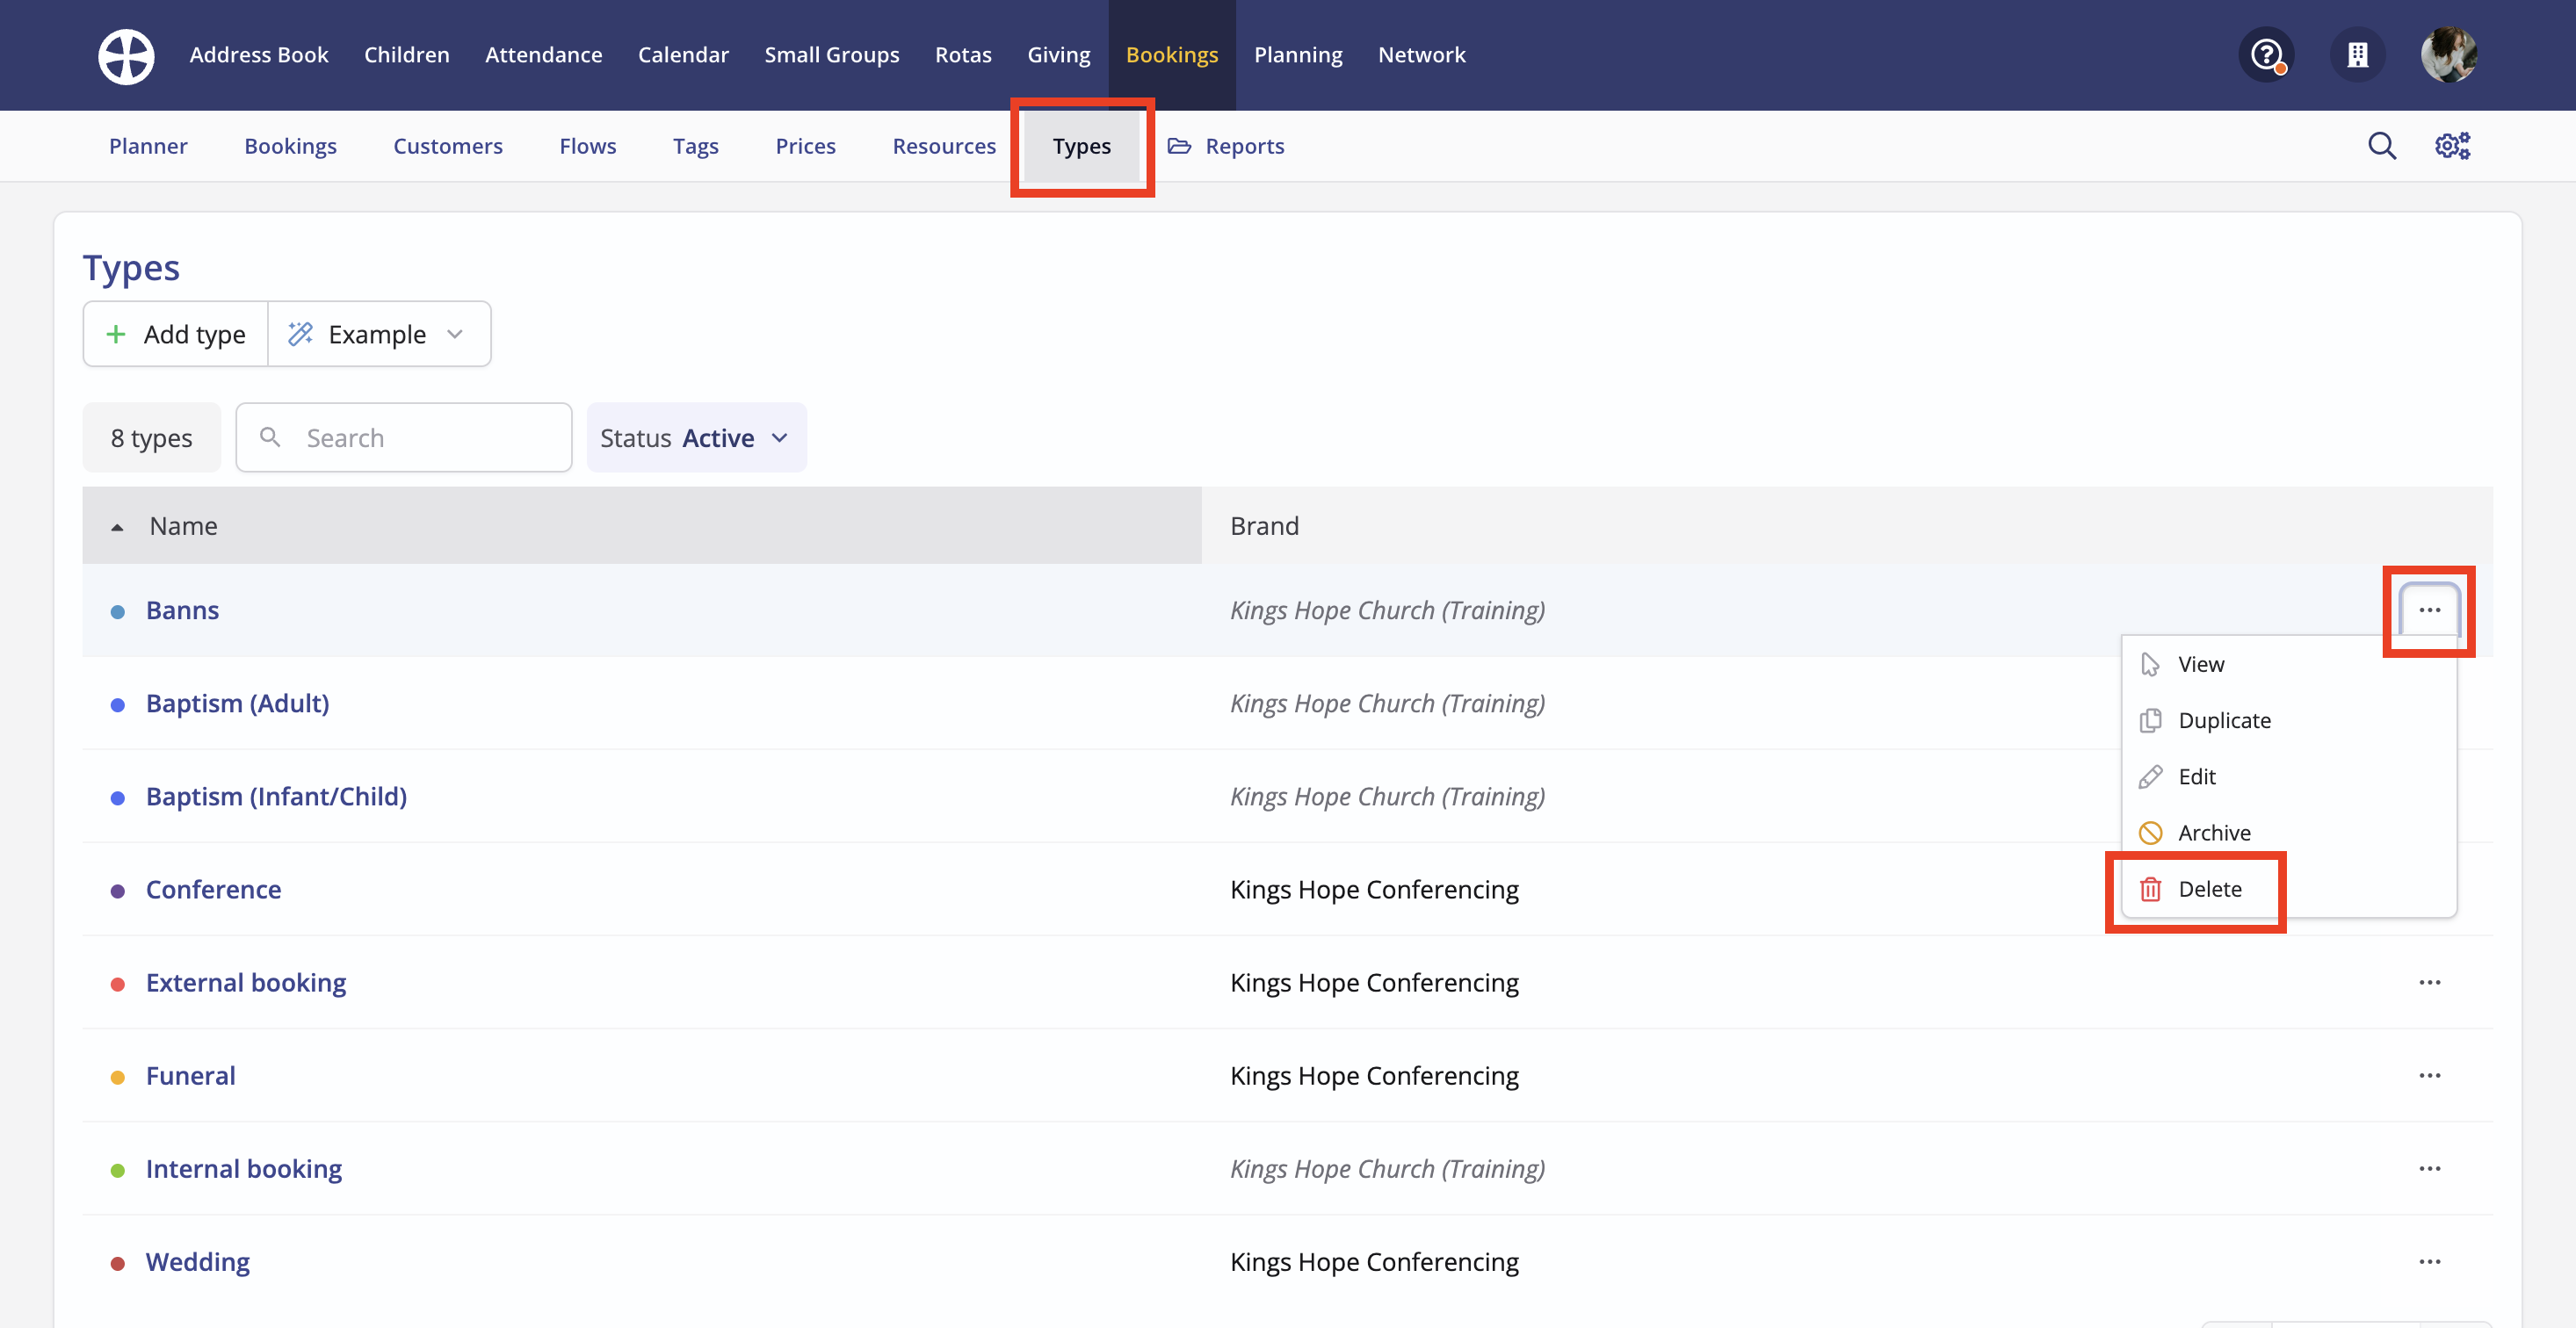
On the Delete confirmation pop-up, select the New Type to which all existing past and future bookings of this type are to be reassigned. This option will only be present if there are existing bookings of this type in your data. Tick to confirm the change and click Delete to process the deletion.