Managing booking enquiries
For each booking Type in the Bookings module, you can customise a customer-facing booking Enquiry Form that can be made available to prospective customers through your website or shared directly in your customer communications. The enquiry form collects all the pertinent details about the customer, their enquiry and the rooms and resources they require, with enquiry form responses automatically added to your Bookings module ready for review. Customers receive a customisable enquiry submission confirmation email, and an enquiry notification email is optionally sent to designated Managers for the booking Type. Following your preferred internal processes, a module user can confirm an enquiry, which creates a confirmed booking, or decline it. You can then communicate the outcome status with the enquiring customer.
In this article
Customising the enquiry form
Sharing the enquiry form
Managing enquiries received
Customising the enquiry form
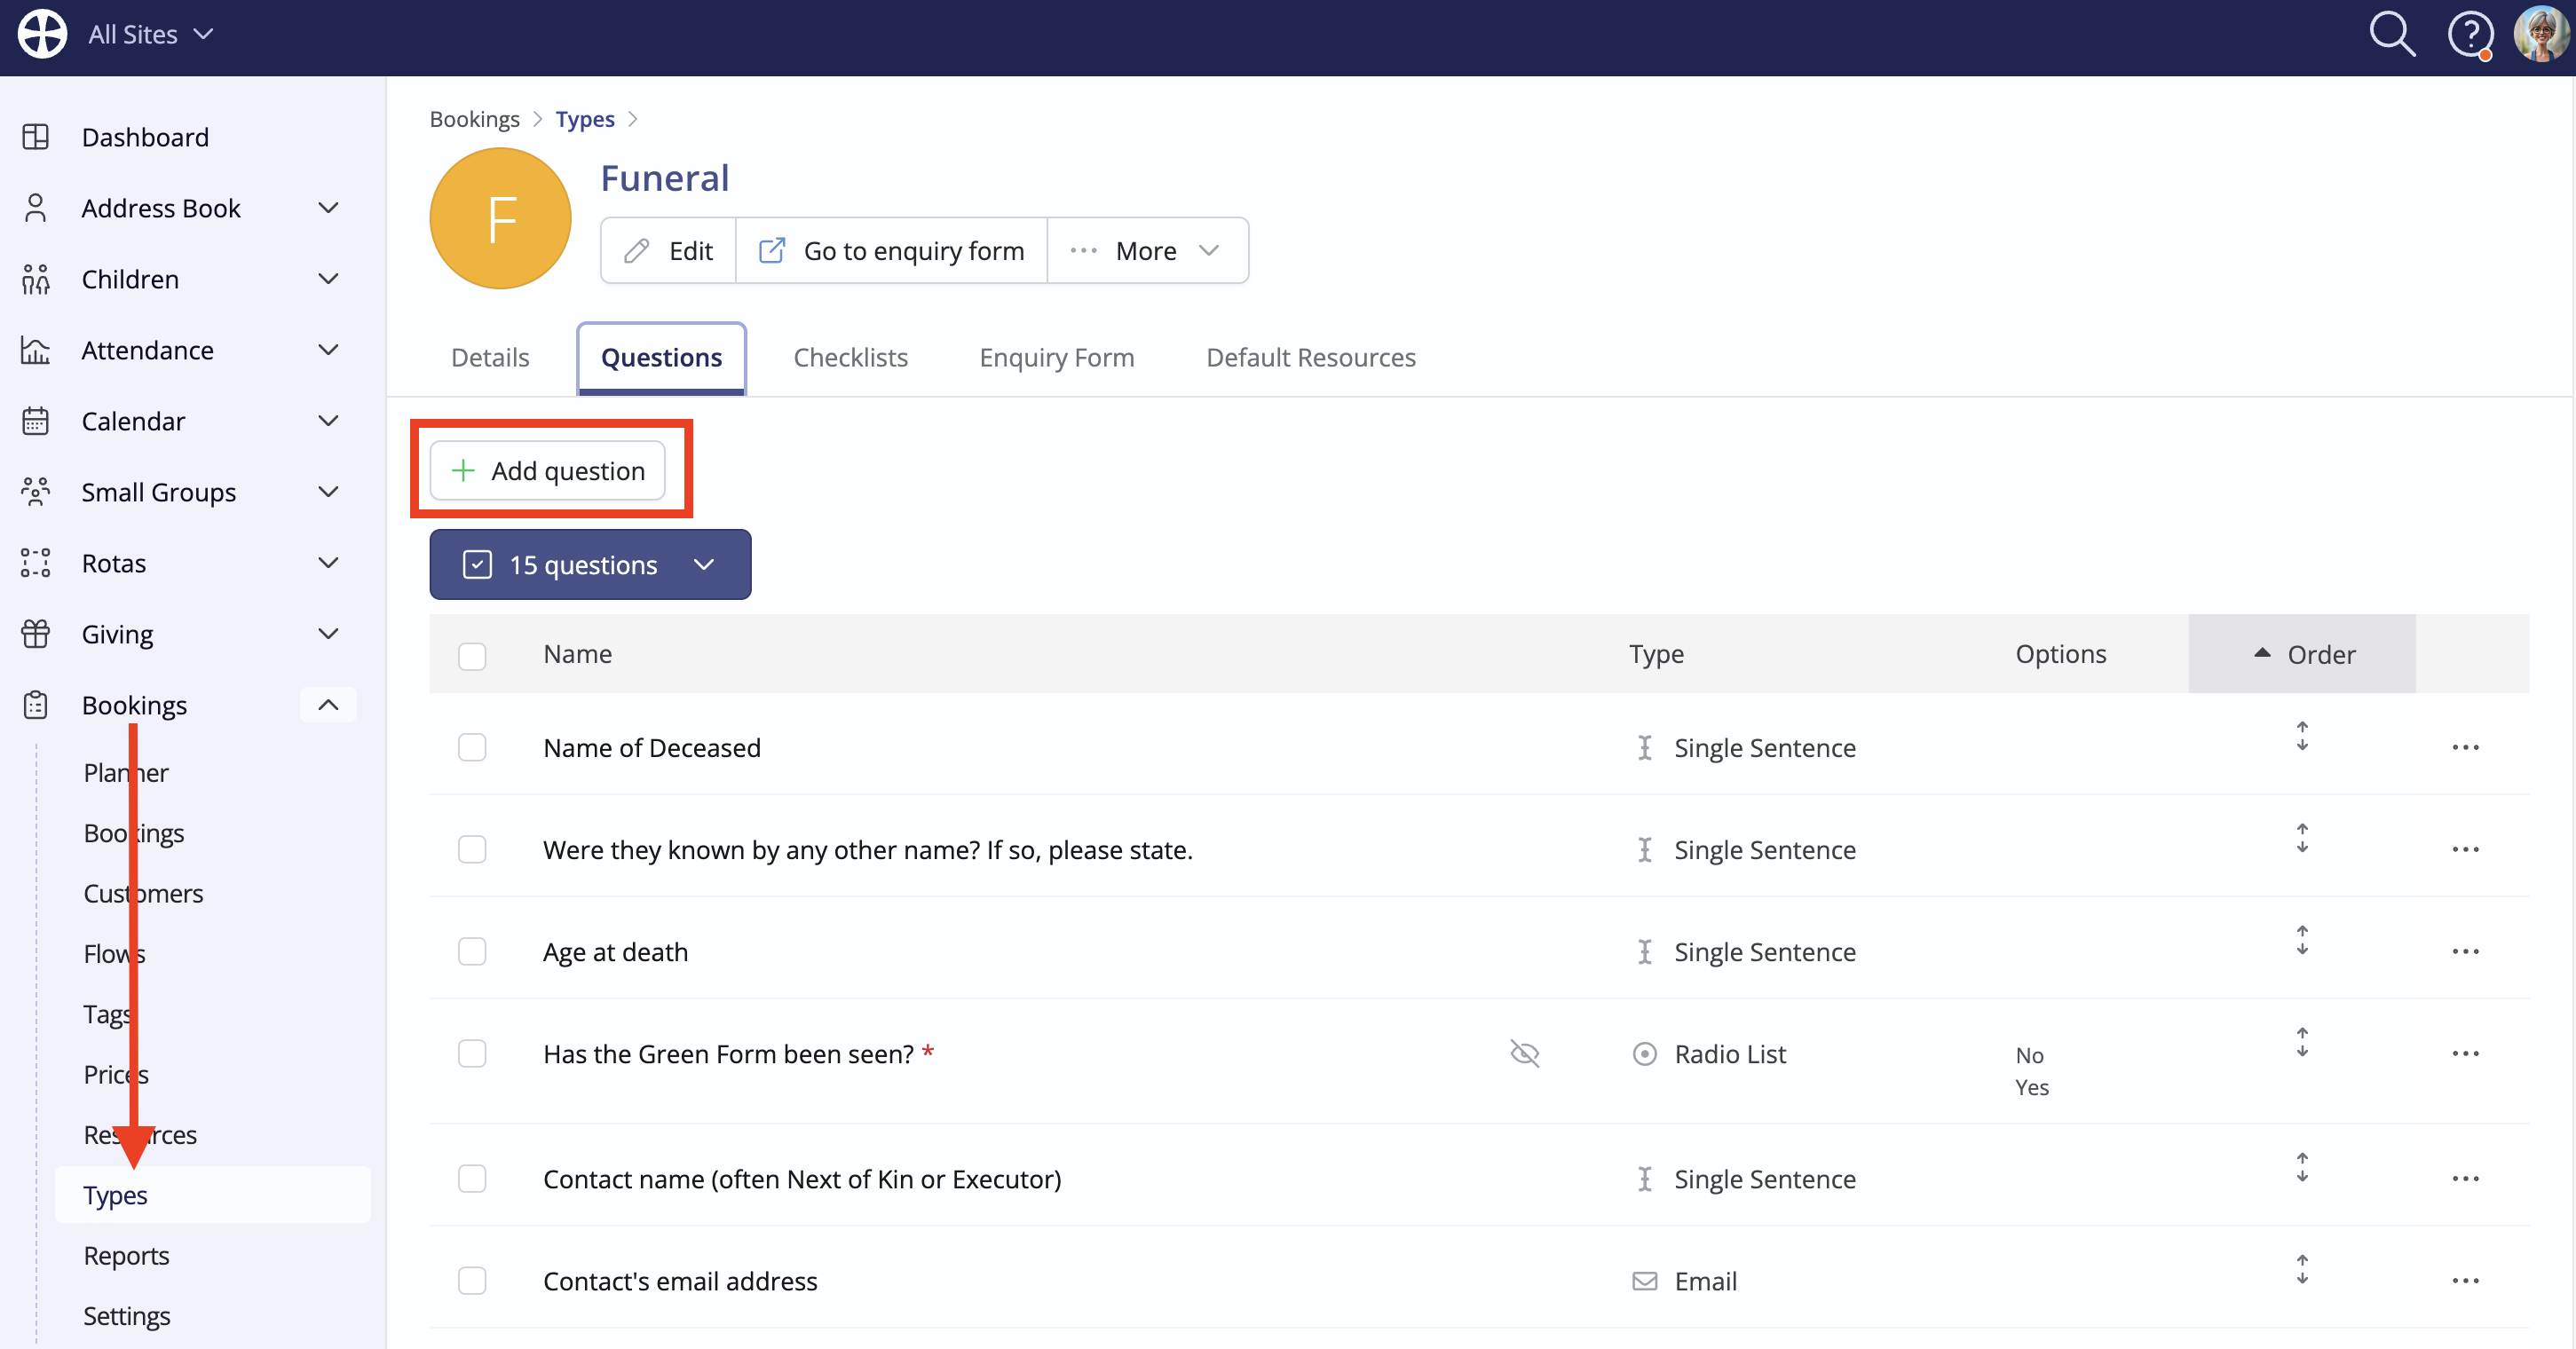
For those familiar with creating Forms in the Address Book and Children modules, creating an Enquiry form for a booking Type follows the same user experience. Enquiry forms are type-specific. In the example below, Questions have already been added to a 'Funeral' booking type, which are used to collect customer responses. These type-specific questions are the building blocks for the enquiry form for this 'funeral' booking type. We've produced a related support article on Managing booking types, which explains how to add the various type-specific questions that will be used to collect customer responses.
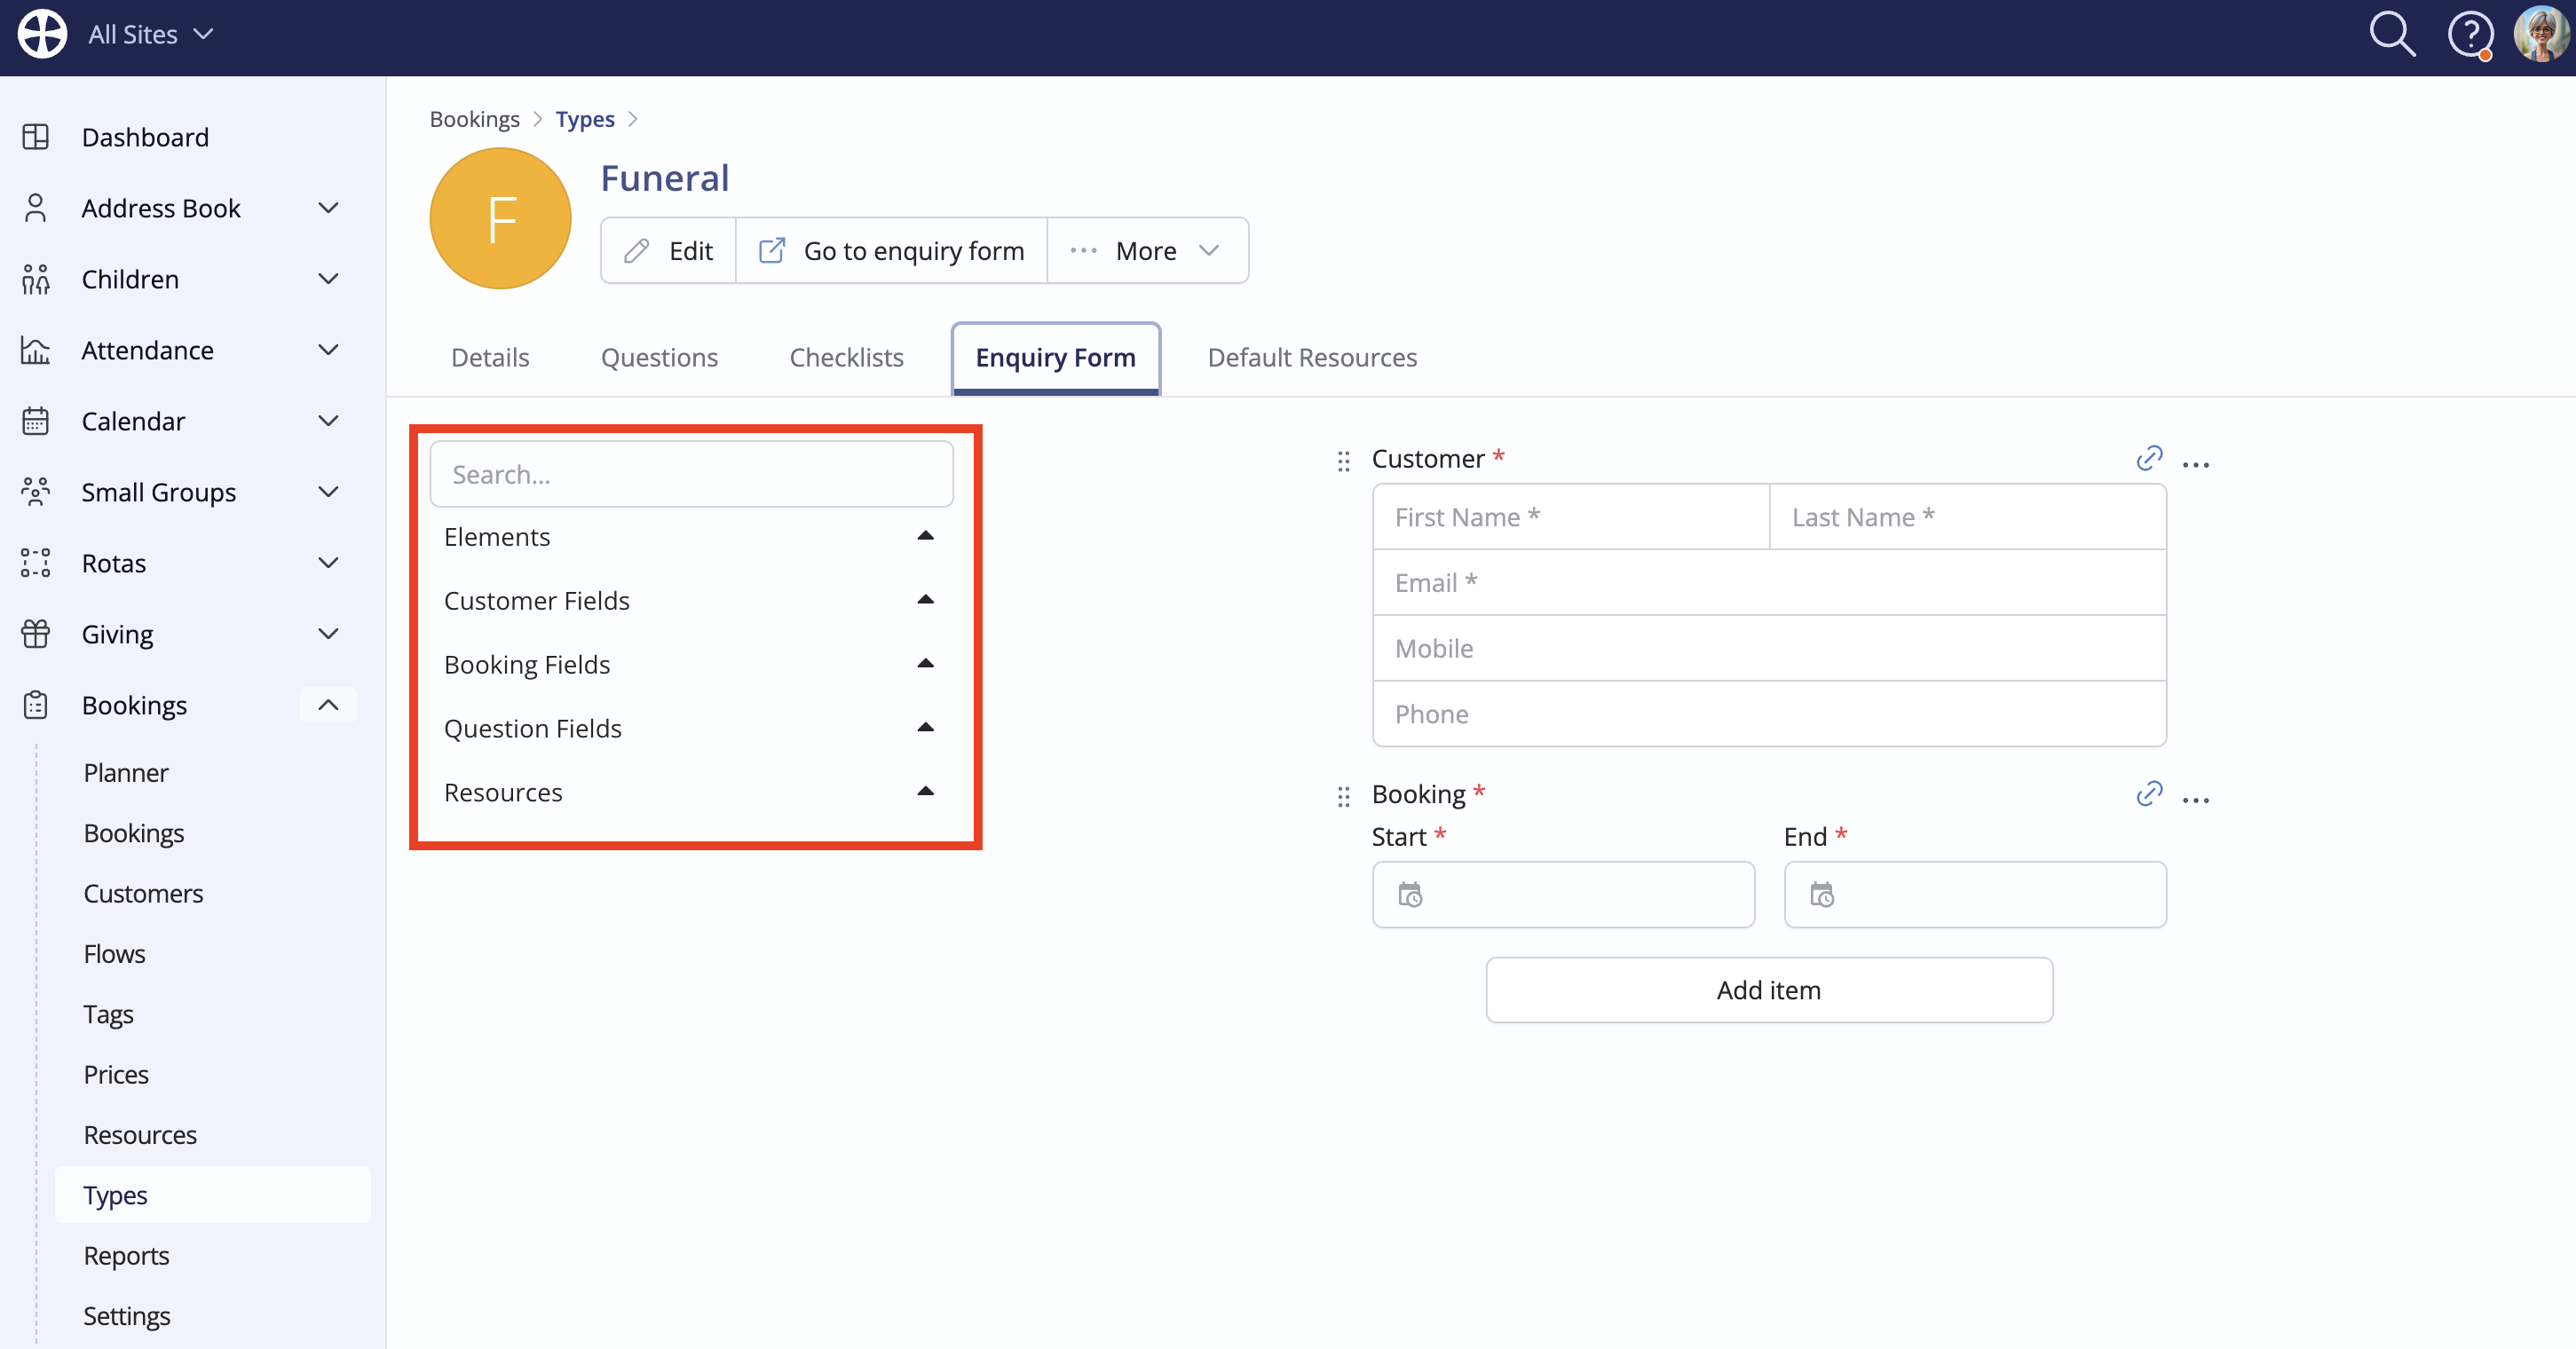
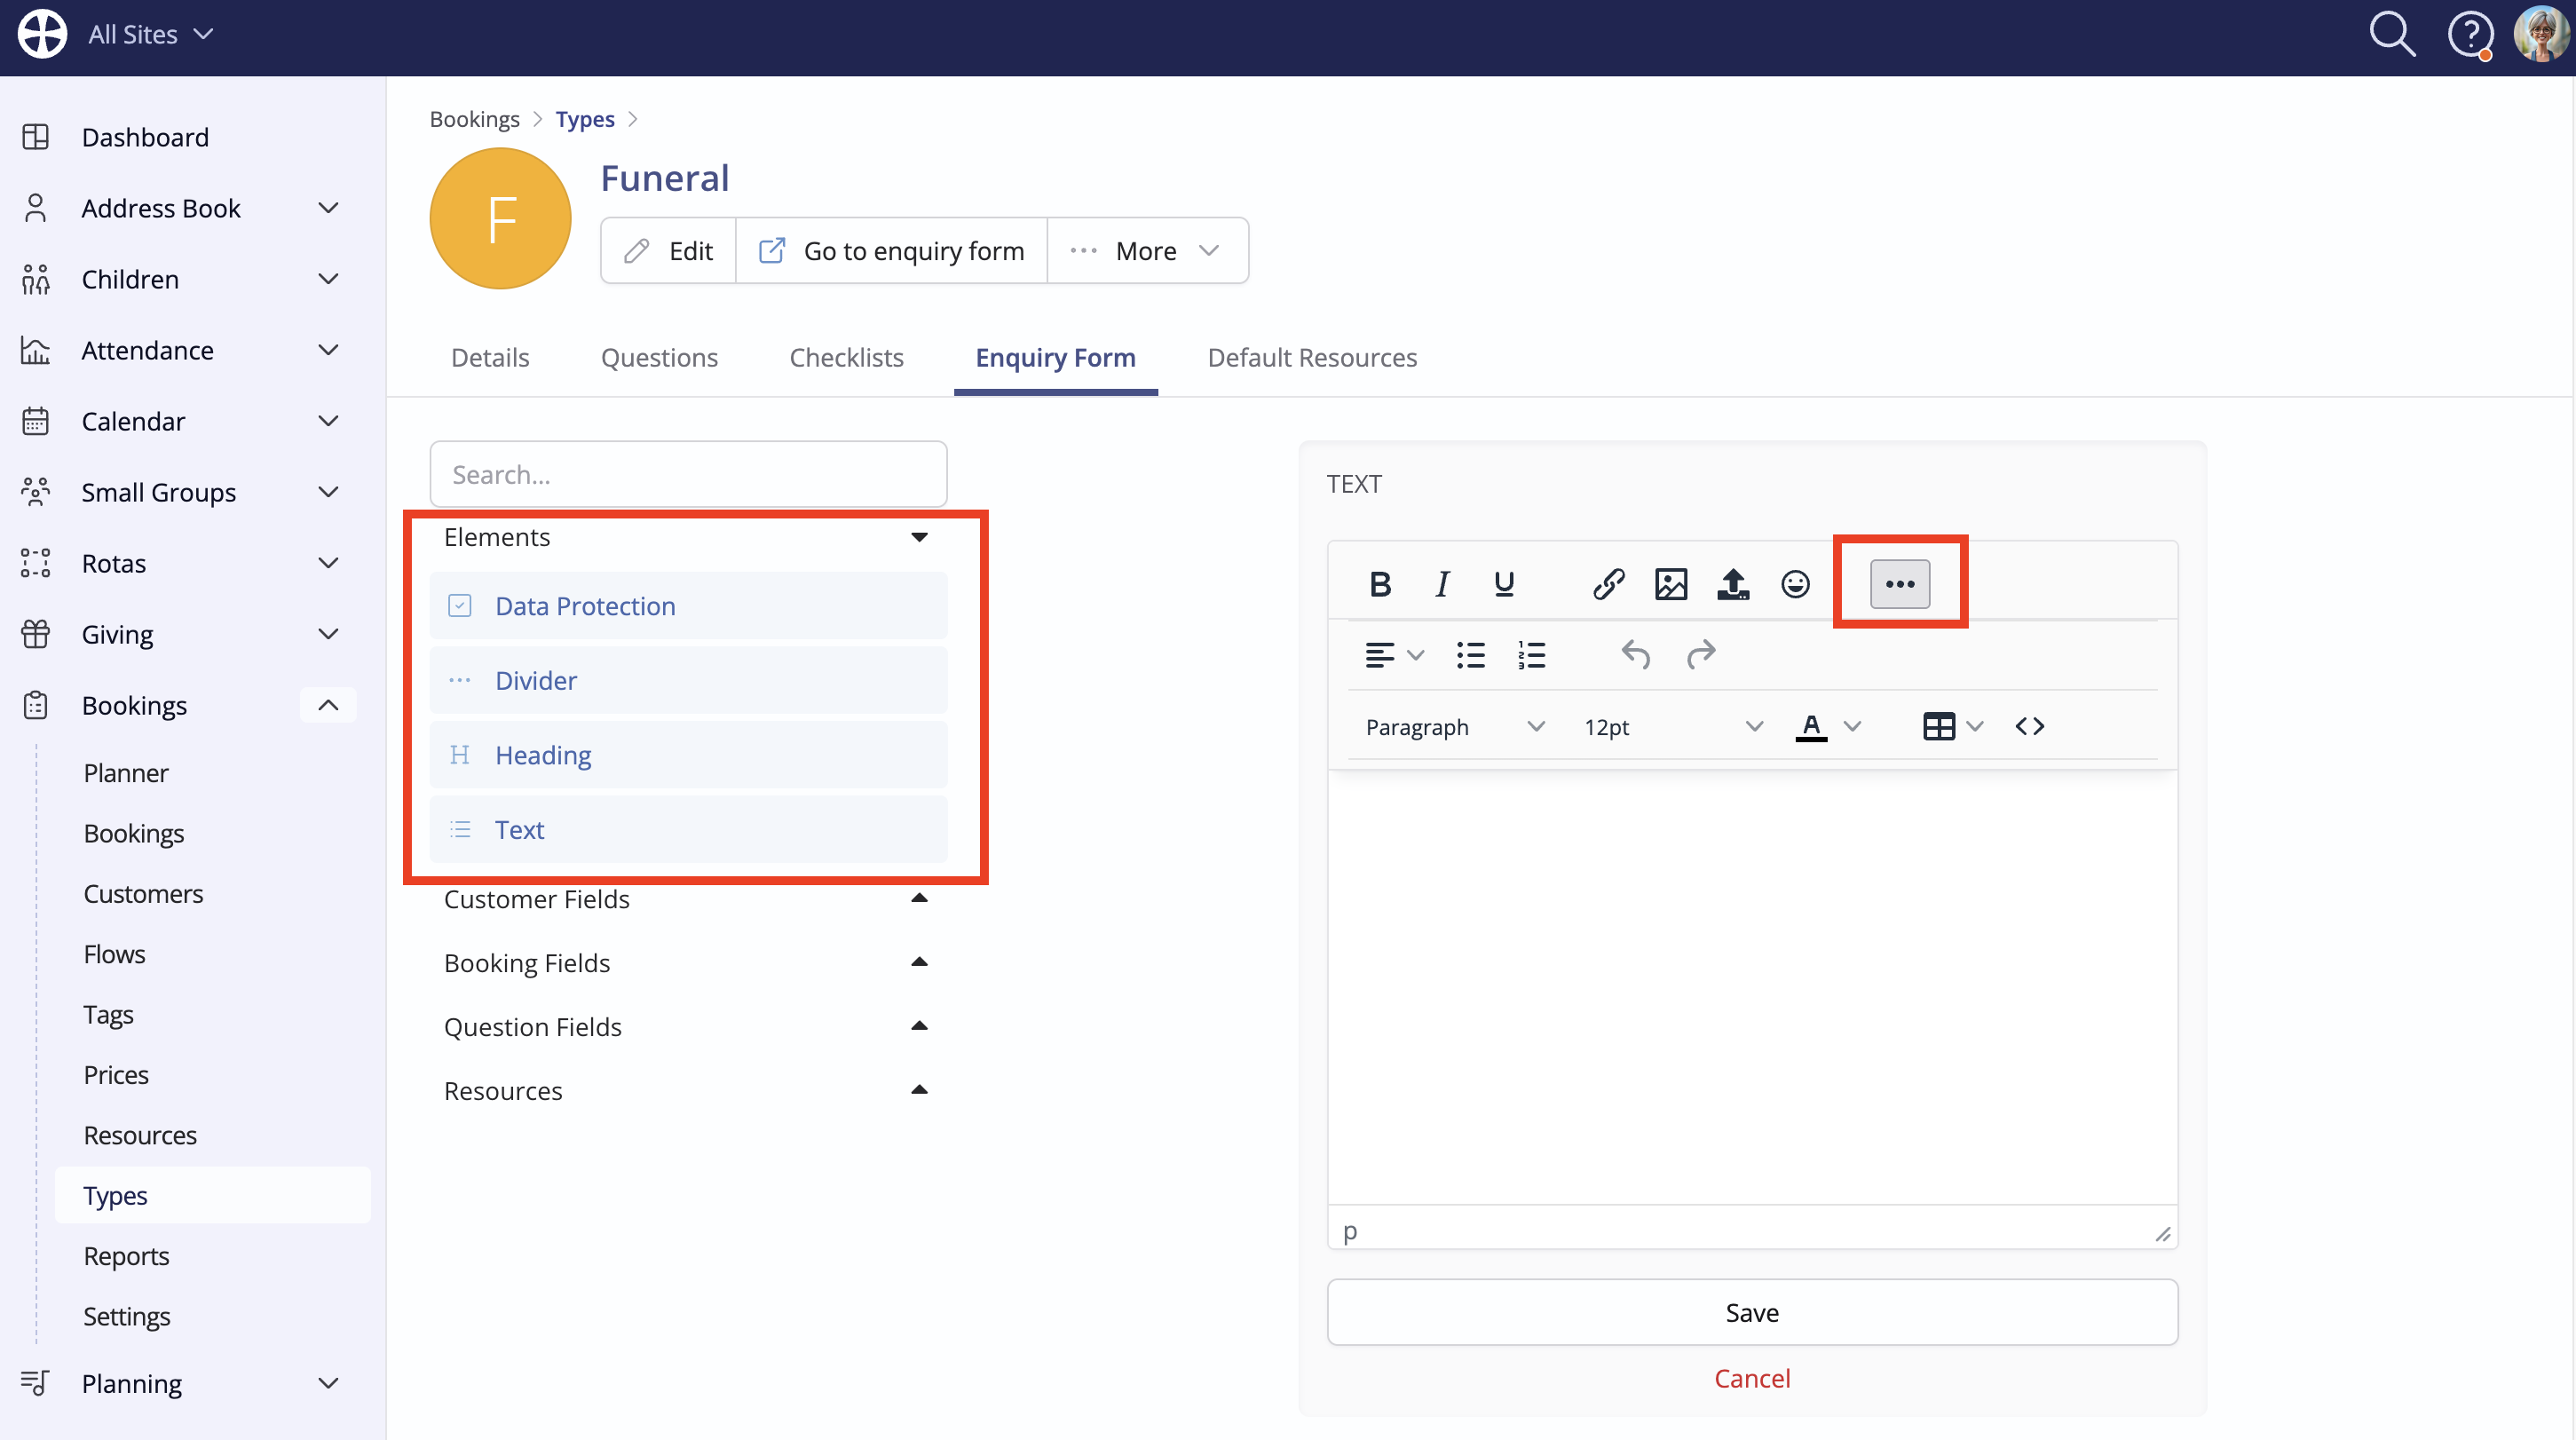
Having added Questions, you can now switch to the Enquiry Form tab to build the enquiry form. The Customer and Booking date fields are already added. These are the required fields needed to create a booking from an enquiry form response. While these fields can't be removed, they can be edited, renamed and reordered within the enquiry form. On the left is an expandable list of form elements, fields and resources that you can choose from:
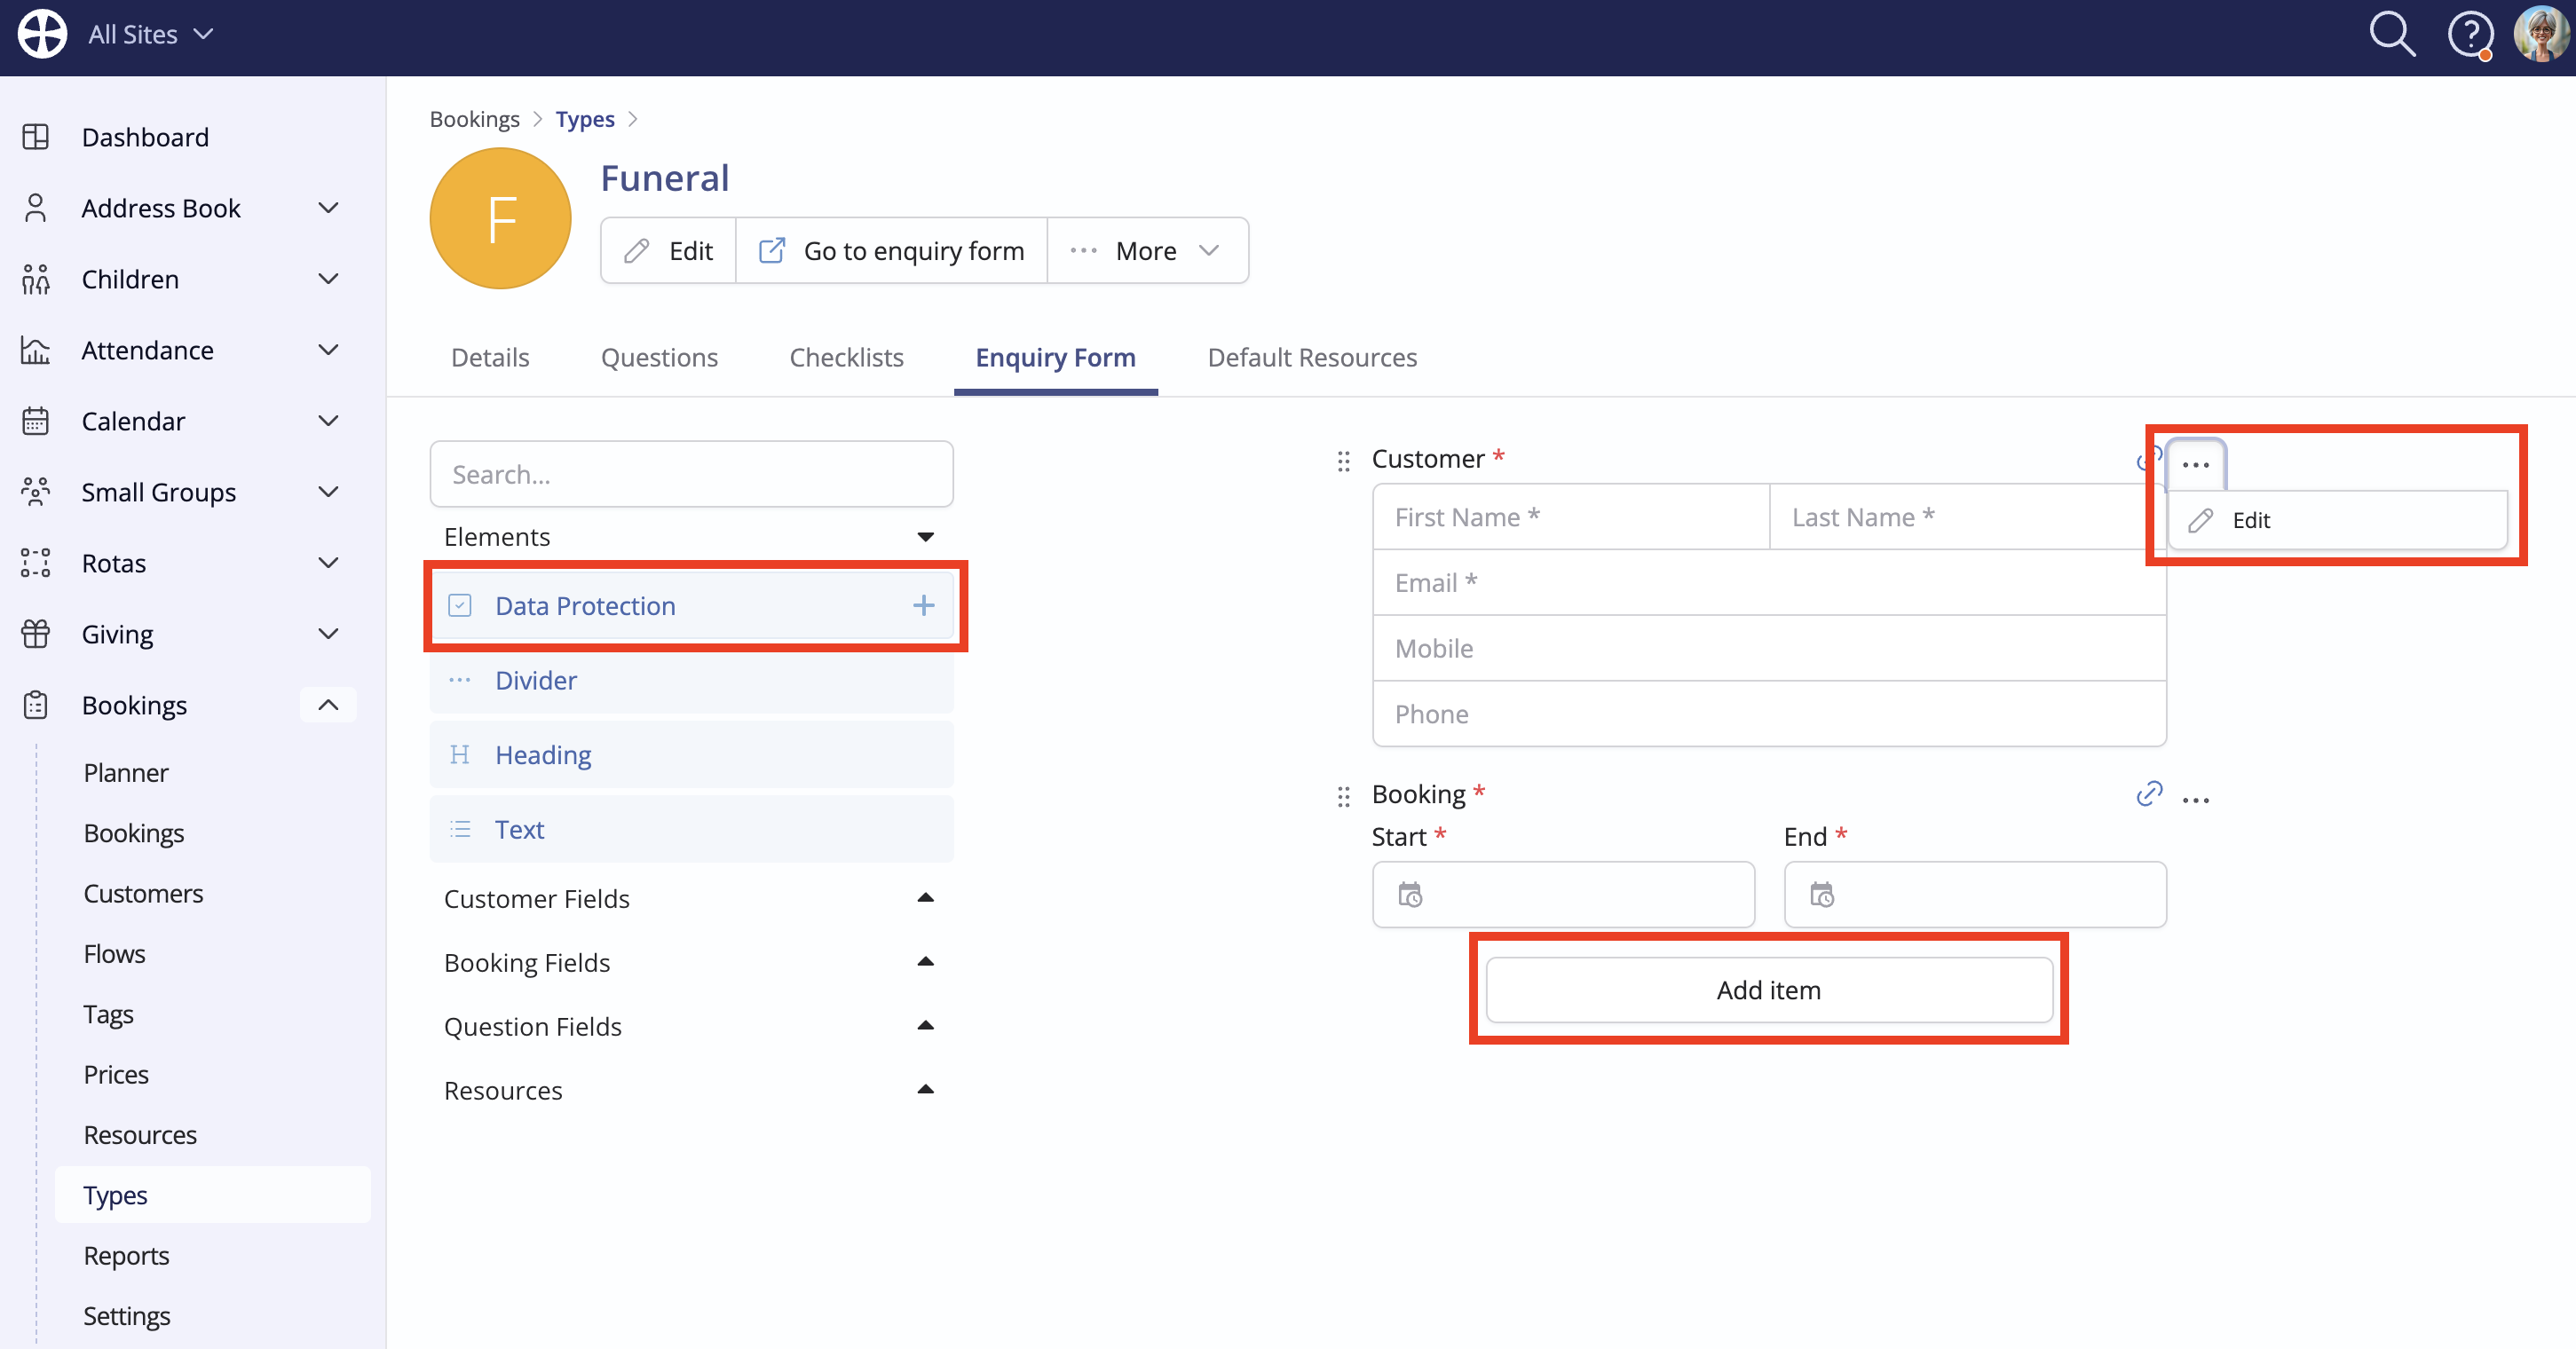
Note the options for adding and editing items. Added items can also be reordered. You can build the form by adding items in the following ways:
- Click Add item to choose from a list of elements to add to the end of the form.
- Hover over an element, field or resource in the list on the left and click the + icon to add it to the end of the form.
- Drag an element, field or resource from the list on the left and position it between existing items on the form.
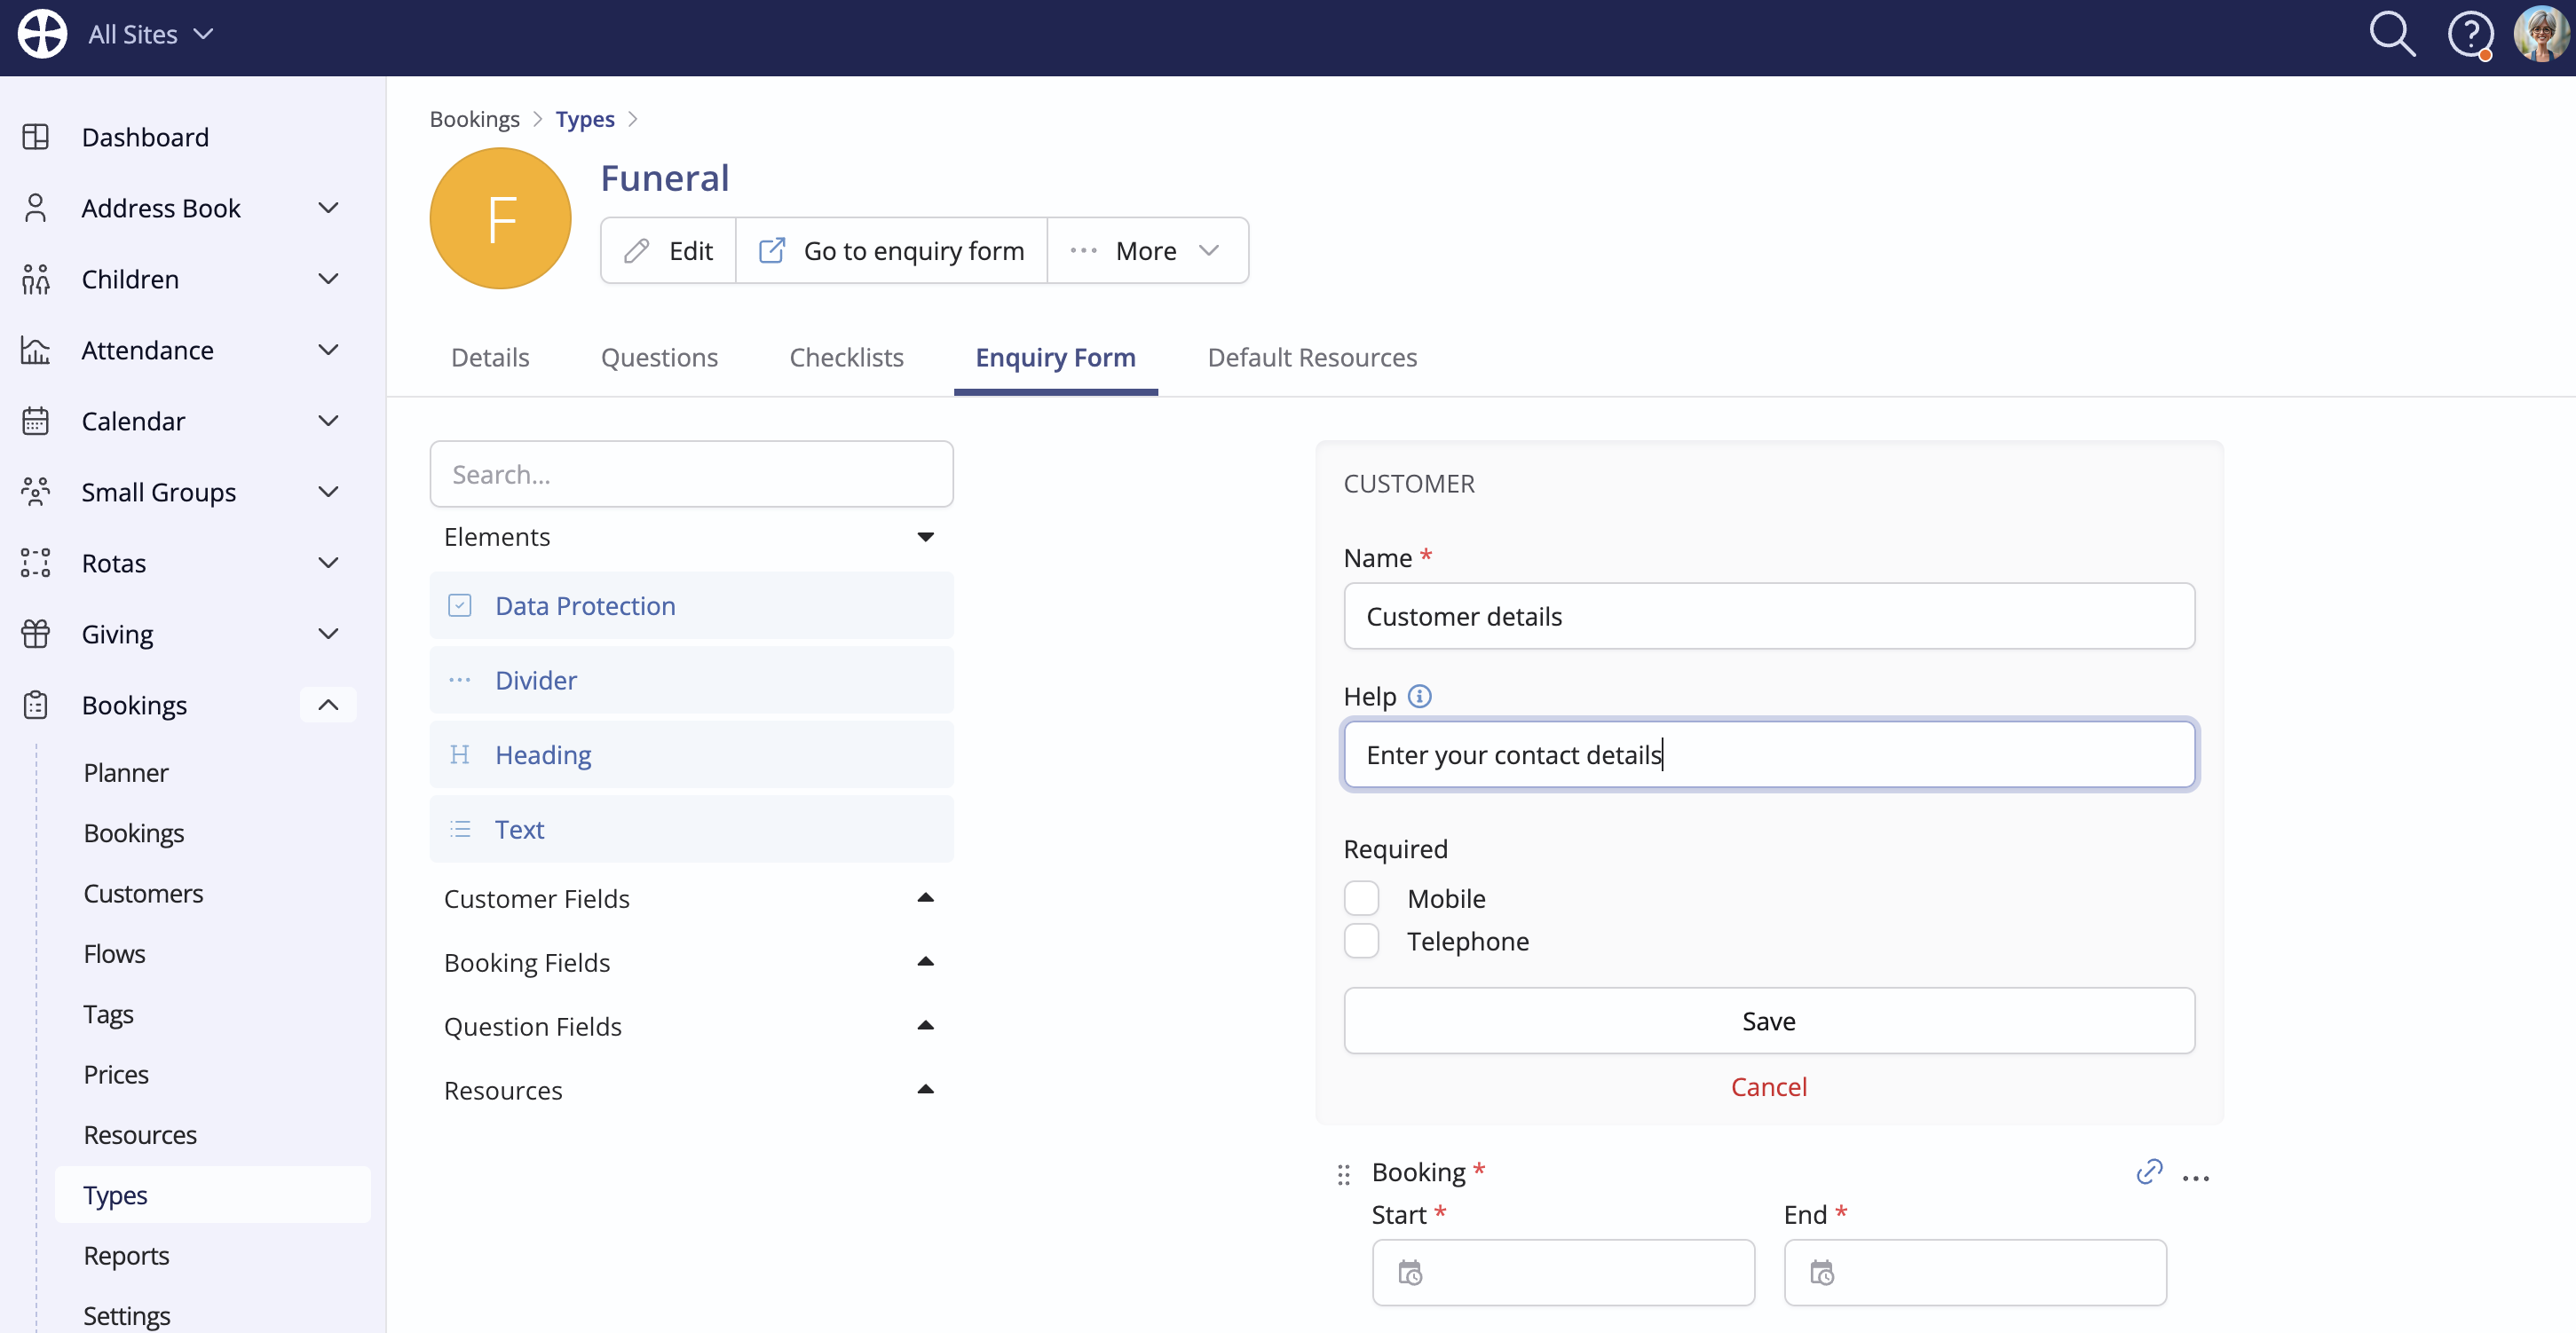
Most items can be further customised. The customisable settings available for an item depend on the item type. Let's explore a few examples and highlight some helpful features that you might consider using. This first example is the Customer details field (shown above), which is a required field already on the form that can be edited. Note the options - shown below - to customise the field Name on the Enquiry form and add optional Help text to guide customers on how to complete their response. While a customer's Email address is always required (to send an enquiry confirmation), Mobile and Telephone are optional but can be set as required. Click to Save the changes made to an item.
Several useful form Elements are provided. While fields and resources can only be added to the form once, elements can be added multiple times. The Text element includes a Rich-Text Editor with various tools to style a text block, which include adding embedded images and external links. You can add a title to an enquiry form using a Heading or Text element, and a Data Protection element can be added to help ensure compliance when collecting personal data from a customer.
The Booking Fields include an optional item for Booking Name. Ordinarily, a form response will create an enquiry with a booking name that comprises the customer's name and the booking type, for example, John Smith Funeral. However, you can ask the customer to enter their own Booking Name for their enquiry. We encourage you to consider the customer user experience here: The customer's enquiry name may differ from your preferred booking naming convention. However, a default enquiry name comprising the 'customer name and booking type' may be confusing or undesired for certain booking types. For example, for a funeral booking, the customer's name may be a next of kin family member or a funeral director rather than the name of the deceased. You can use the Help field to provide additional guidance to those submitting an enquiry form response.

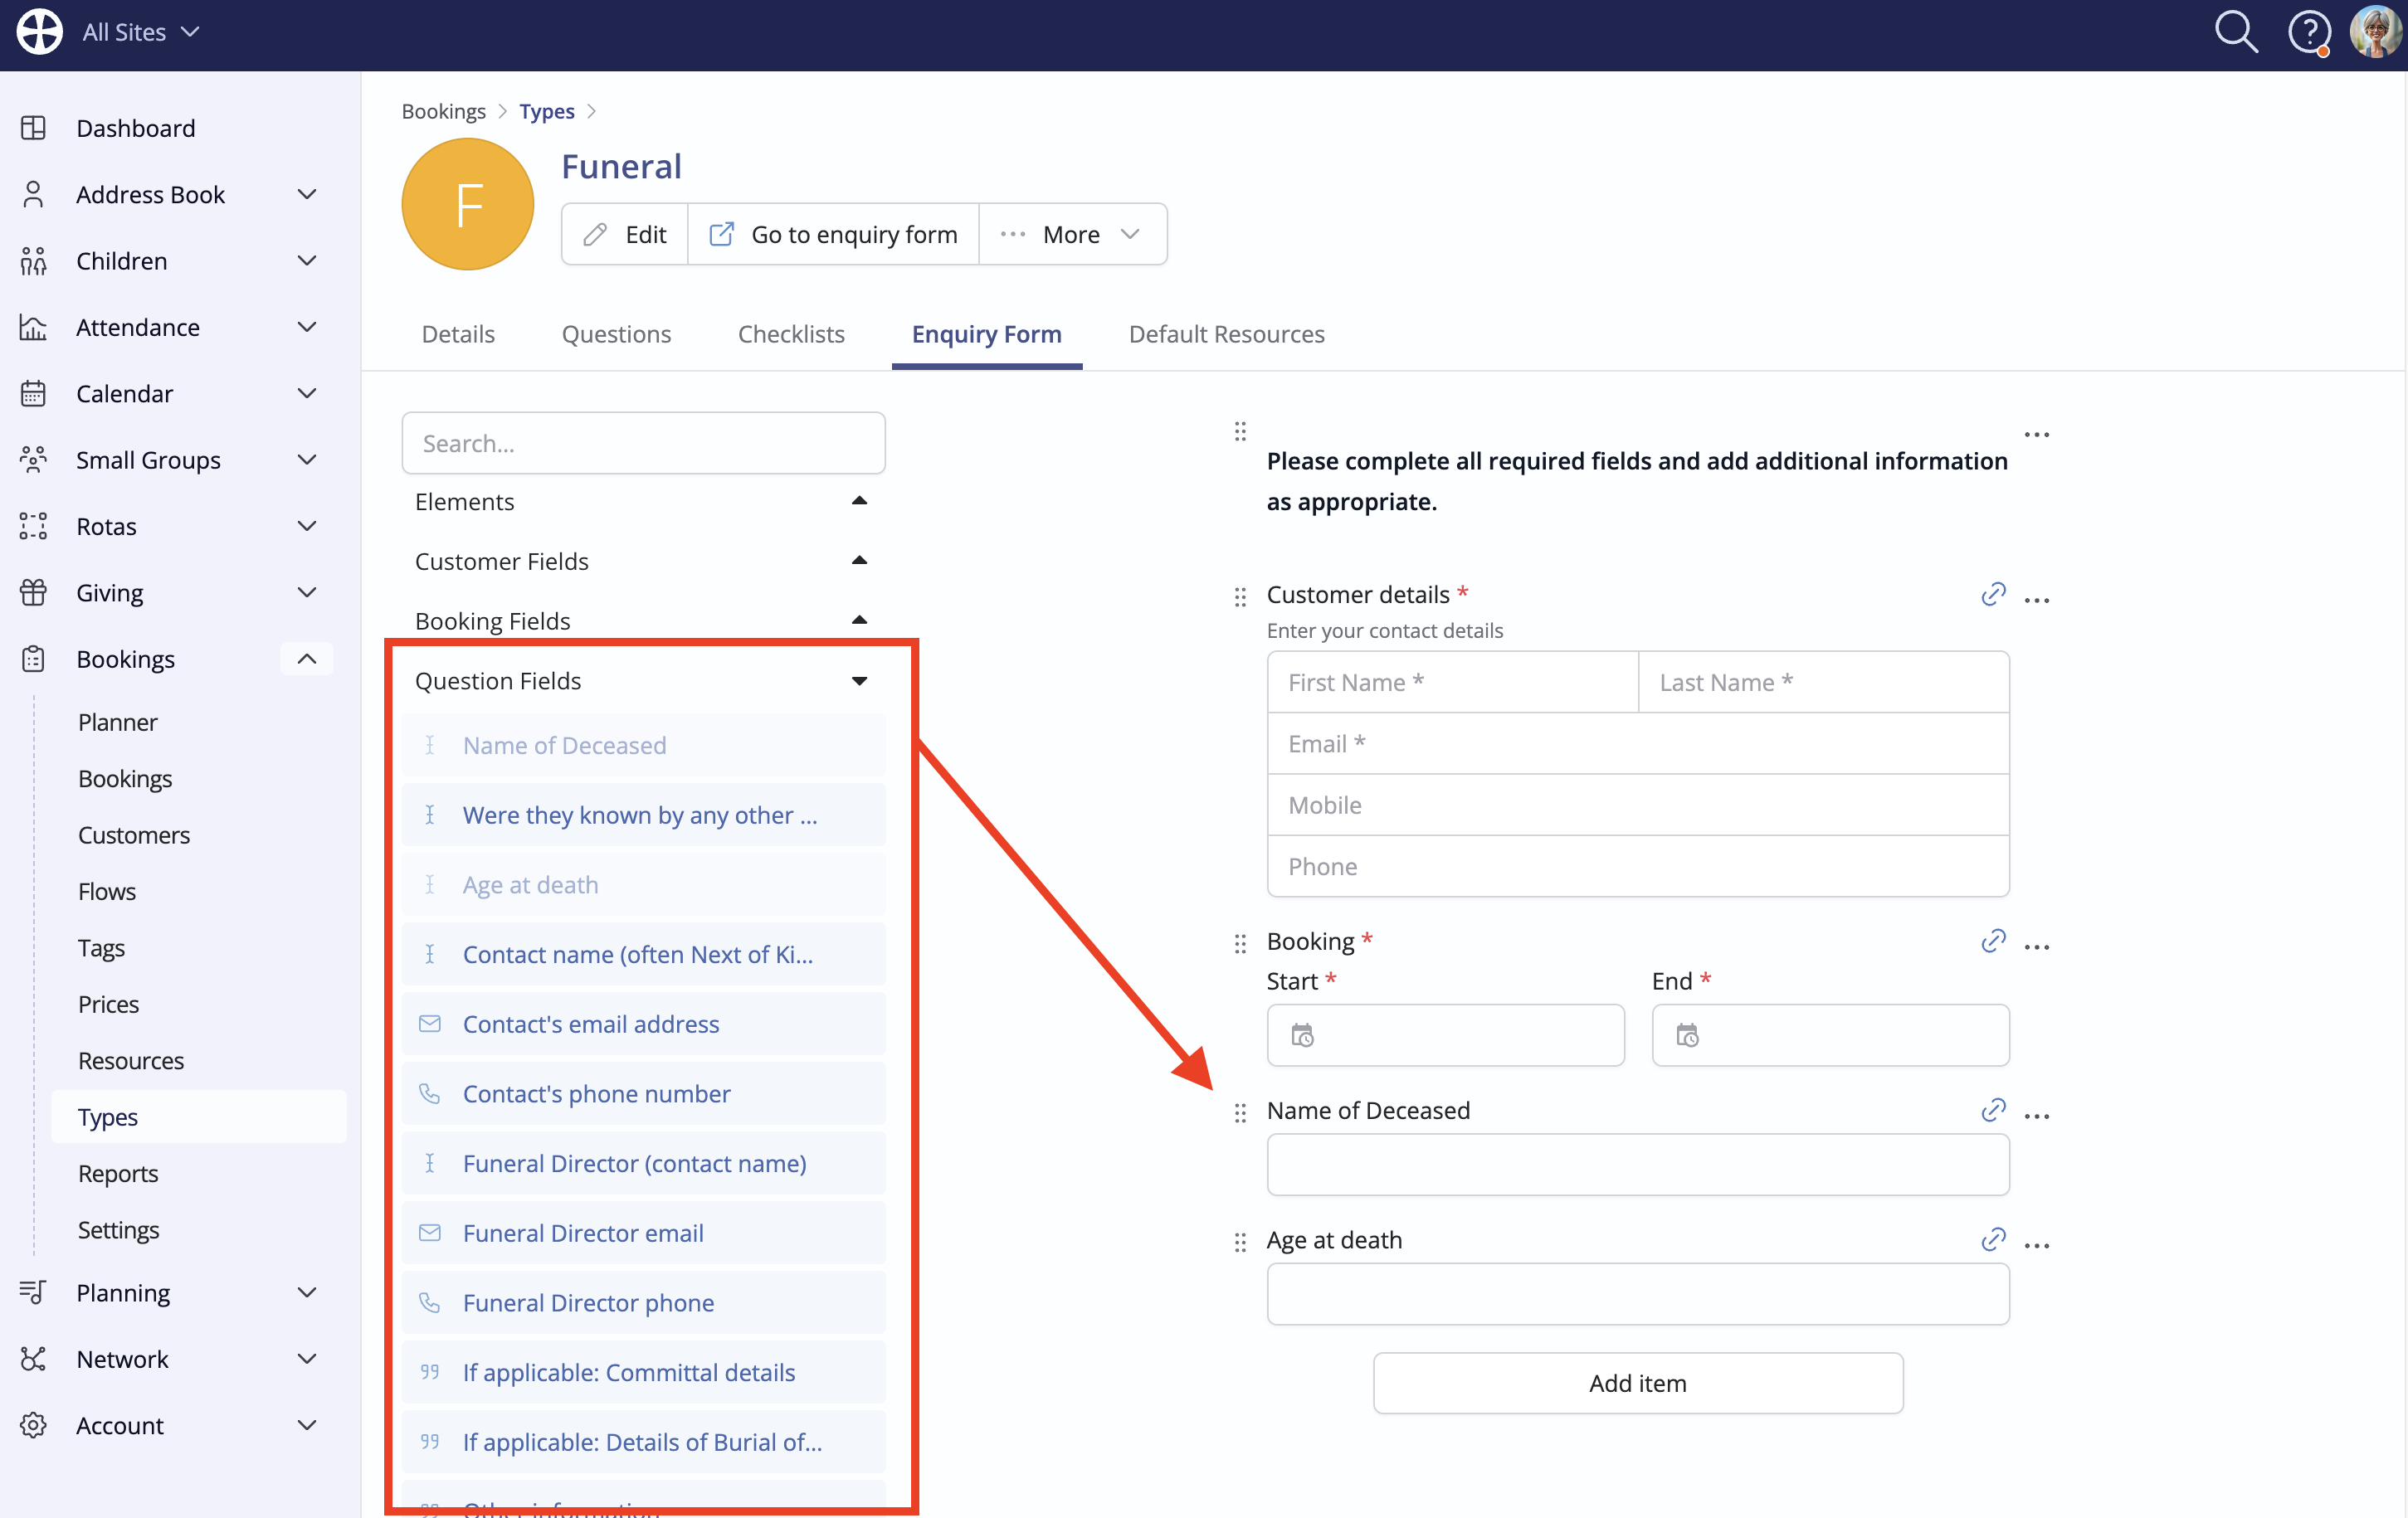
The booking type Question Fields can also be added to the form. Question Fields can be added only once. For each question field added, you can further customise the question Name, add explanatory Help text and optionally Require responses from your customers.
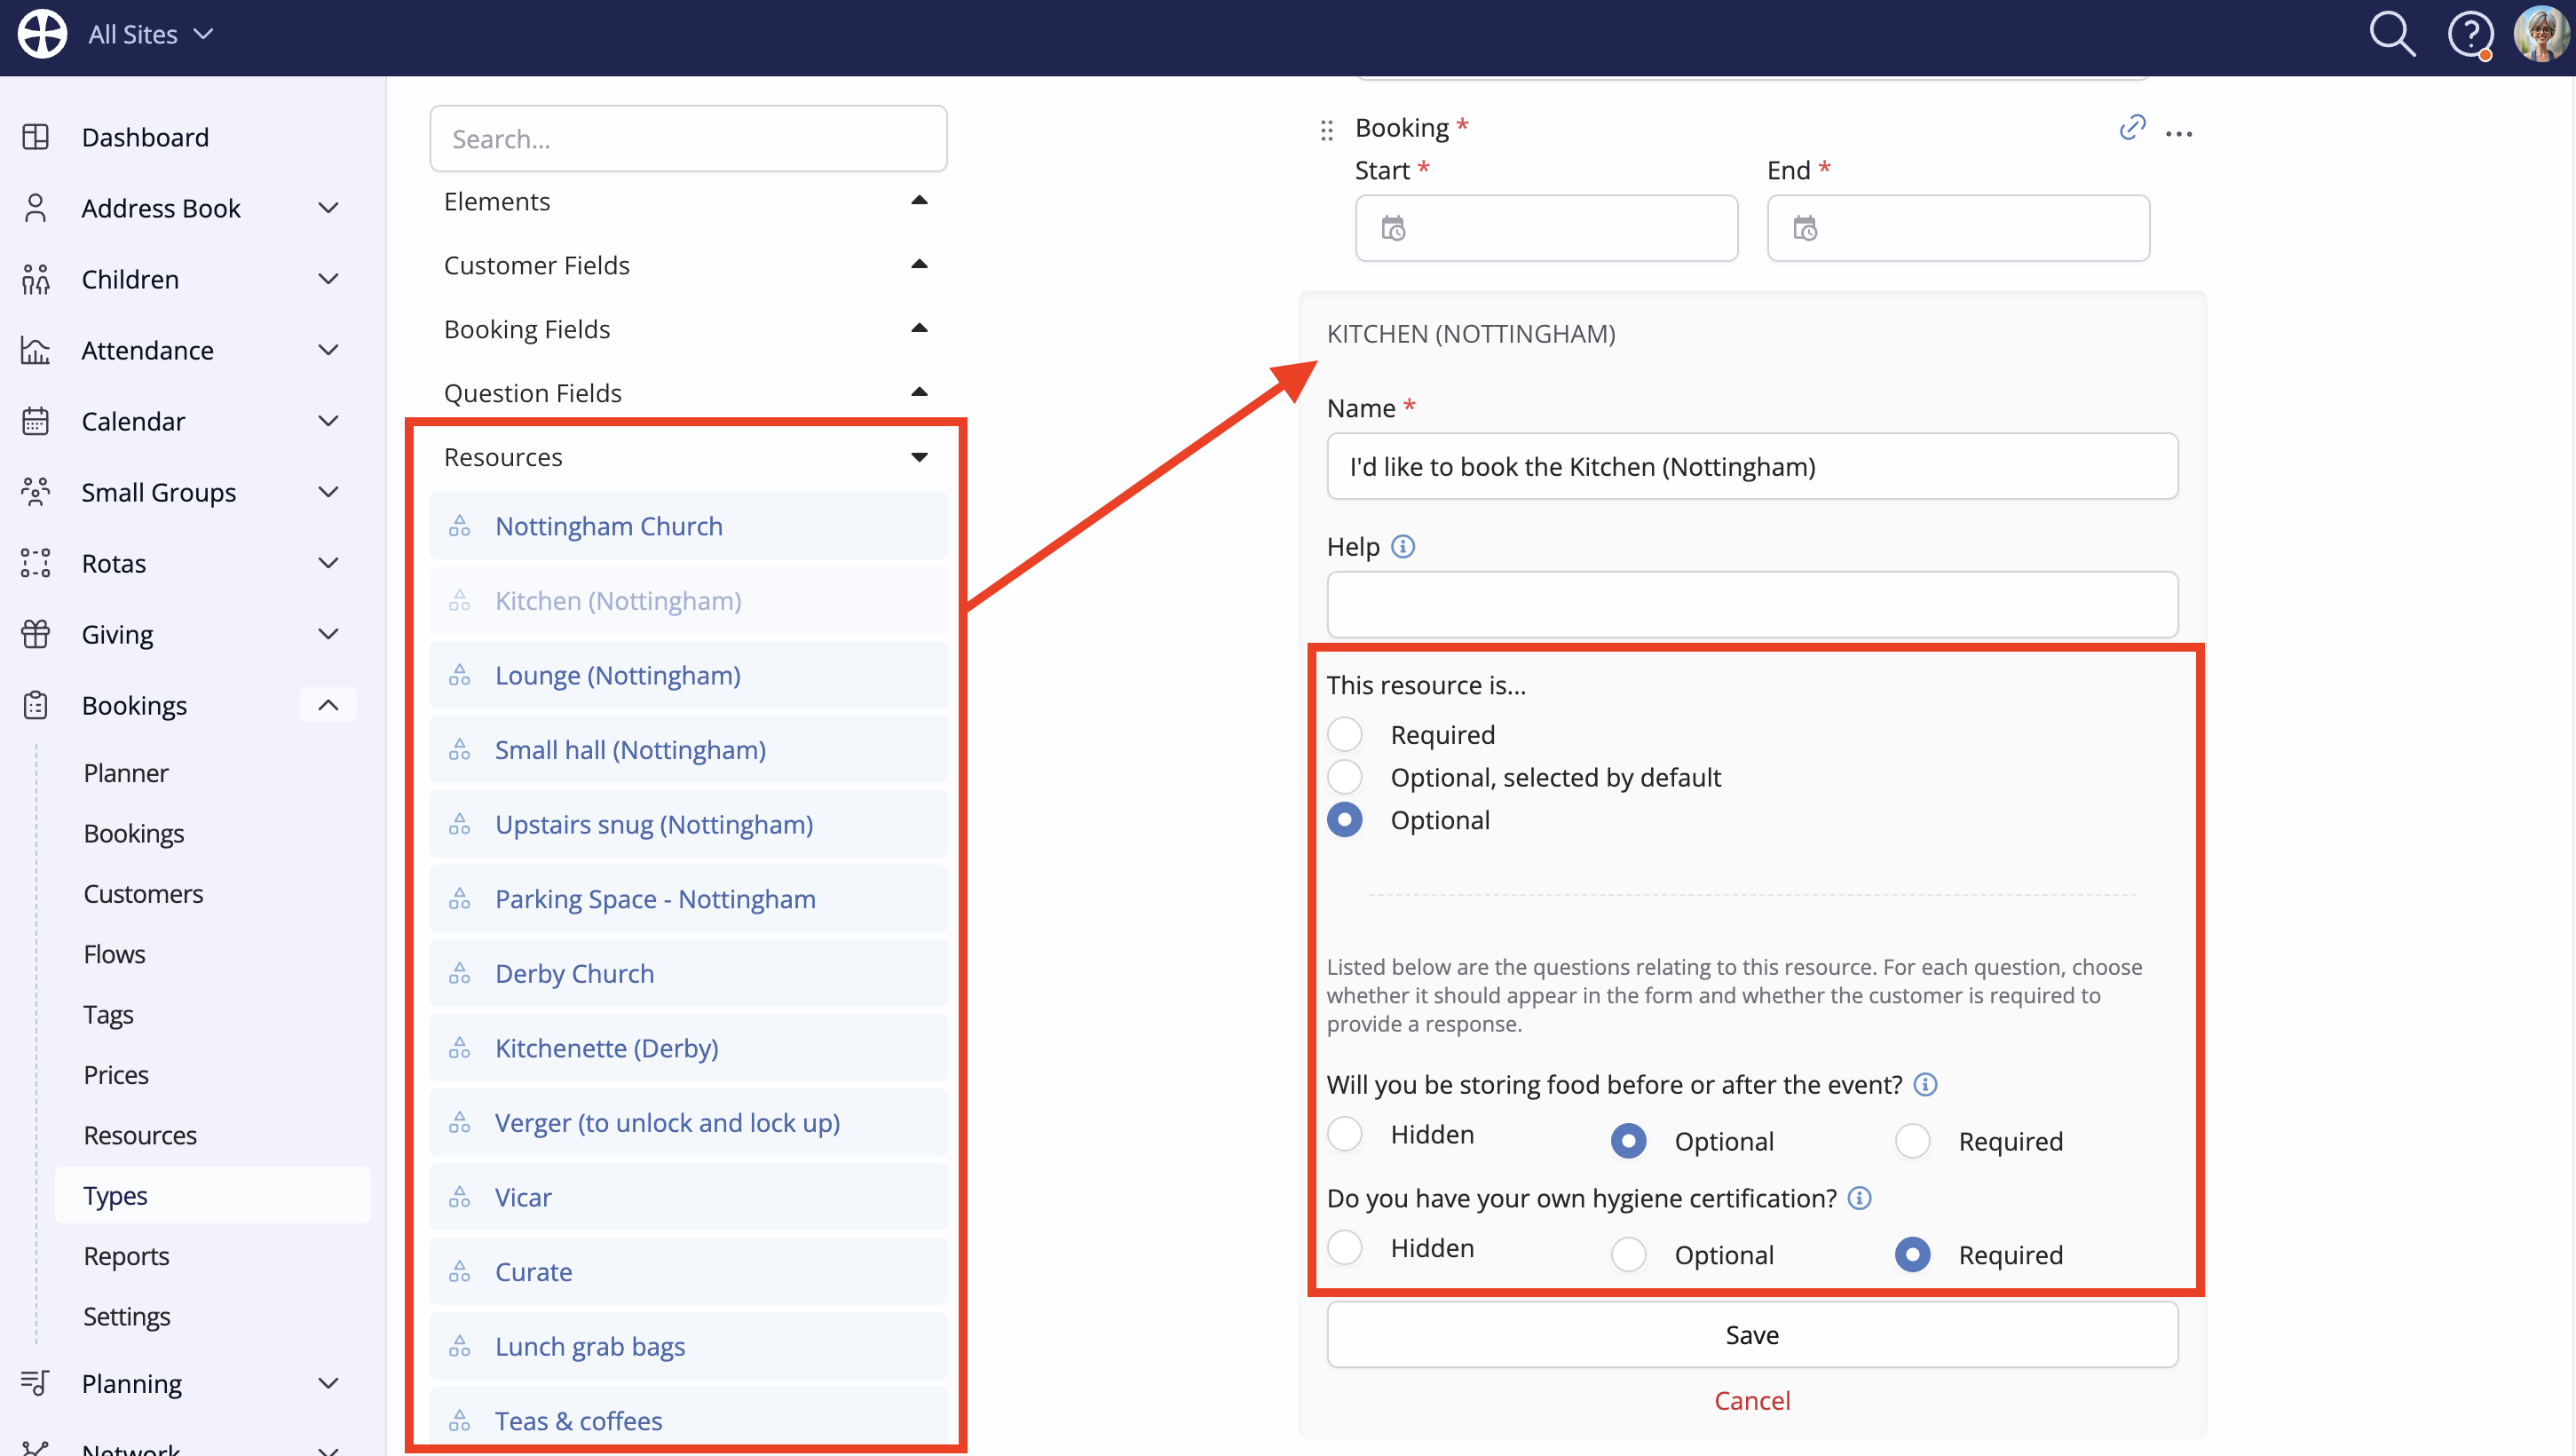
Finally, you can optionally add bookable Resources to the form. When adding a resource to the form, you can choose whether the resource is always Required - ie, preselected; the customer will be unable to deselect the resource; Optional, selected by default - ie, selected but the customer can deselect it; or Optional - ie not preselected but the customer can select it. Resource Questions can also be shown on the form, with options to set them as Optional or Required, or to make them Hidden and not visible on the form.
Resources and multi-site functionality
For each booking Type, you can generate a site-specific enquiry form. In this way, you can embed a Site A "External Bookings" enquiry form on your Site A website, and embed a Site B "External Bookings" enquiry form on your Site B website. Each Site's enquiry form will only show the bookable resources that belong to the enquiry form site (including any all-site resources that have also been added to the form). For example, when a customer submits an enquiry through your Site B website, they'll be able to choose from any Site B or all-site resources that you have added to the enquiry form - any Site A resources on the form are only shown on the Site A booking form. The enquiry and any new customer profile will be added to Site B in your Bookings module.
With this in mind, you can add resources from multiple sites to an enquiry form. The resources shown on the Enquiry Form tab will depend on the module user's permitted sites. For example, a Site B user will only be able to add and manage Site B resources on the form (and all-site resources).
Consider the example in the previous screenshot: The user has site permissions for Nottingham and Derby, so their Resources list comprises those from both sites plus any 'all-site' resources (like "Tables"). When building the Enquiry Form for the "Funeral" booking type, the user can add any of these resources to the form. When selecting Go to enquiry form, they'll generate two enquiry form links, one for Nottingham and one for Derby, with each form only showing resources that belong to that site (plus any all-site resources included on the form).
Continue adding and ordering elements, fields and resources to build the form. You can preview the form at any time by clicking Go to enquiry form. Note that the enquiry form will not accept responses until the enquiry form functionality has been enabled for the booking Type. To do this, click Edit to make changes to the Type settings and tick Enable enquiry form (or untick the option if you later wish to disable enquiry form responses).
Sharing the enquiry form
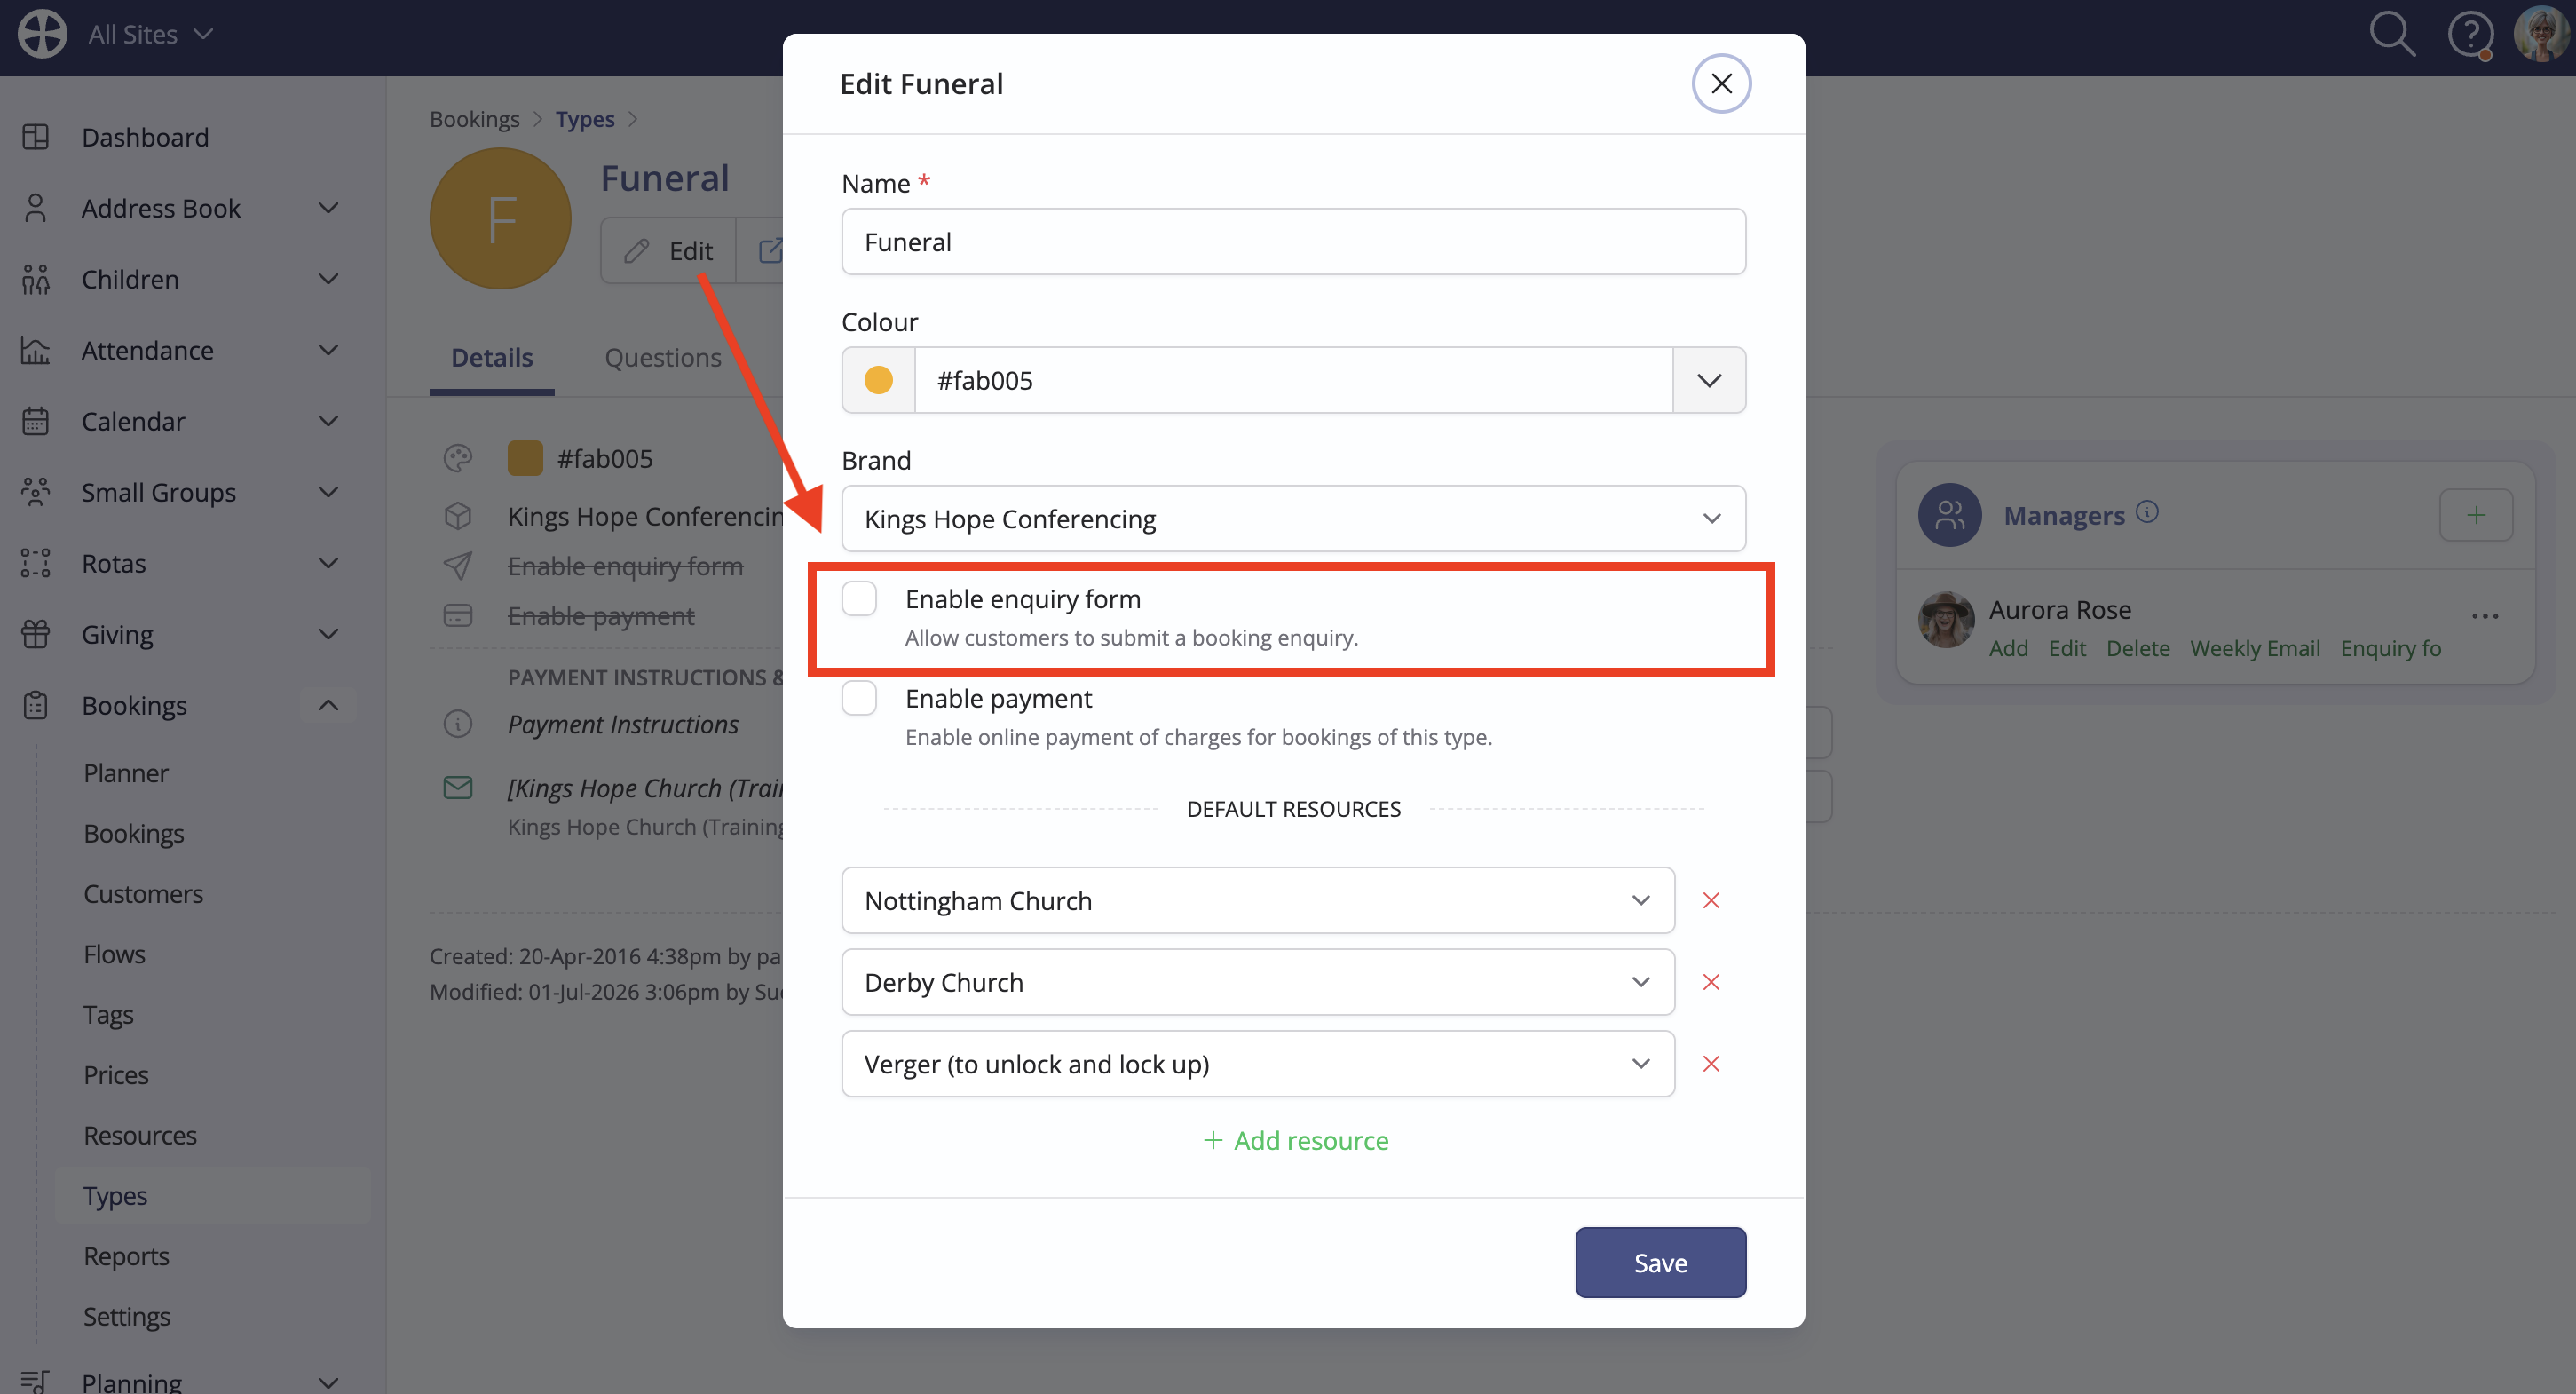
Prospective customers will be unable to submit booking enquiries through an enquiry form until the enquiry form functionality has been enabled for the booking Type. To do this, click Edit to make changes to the Type settings:
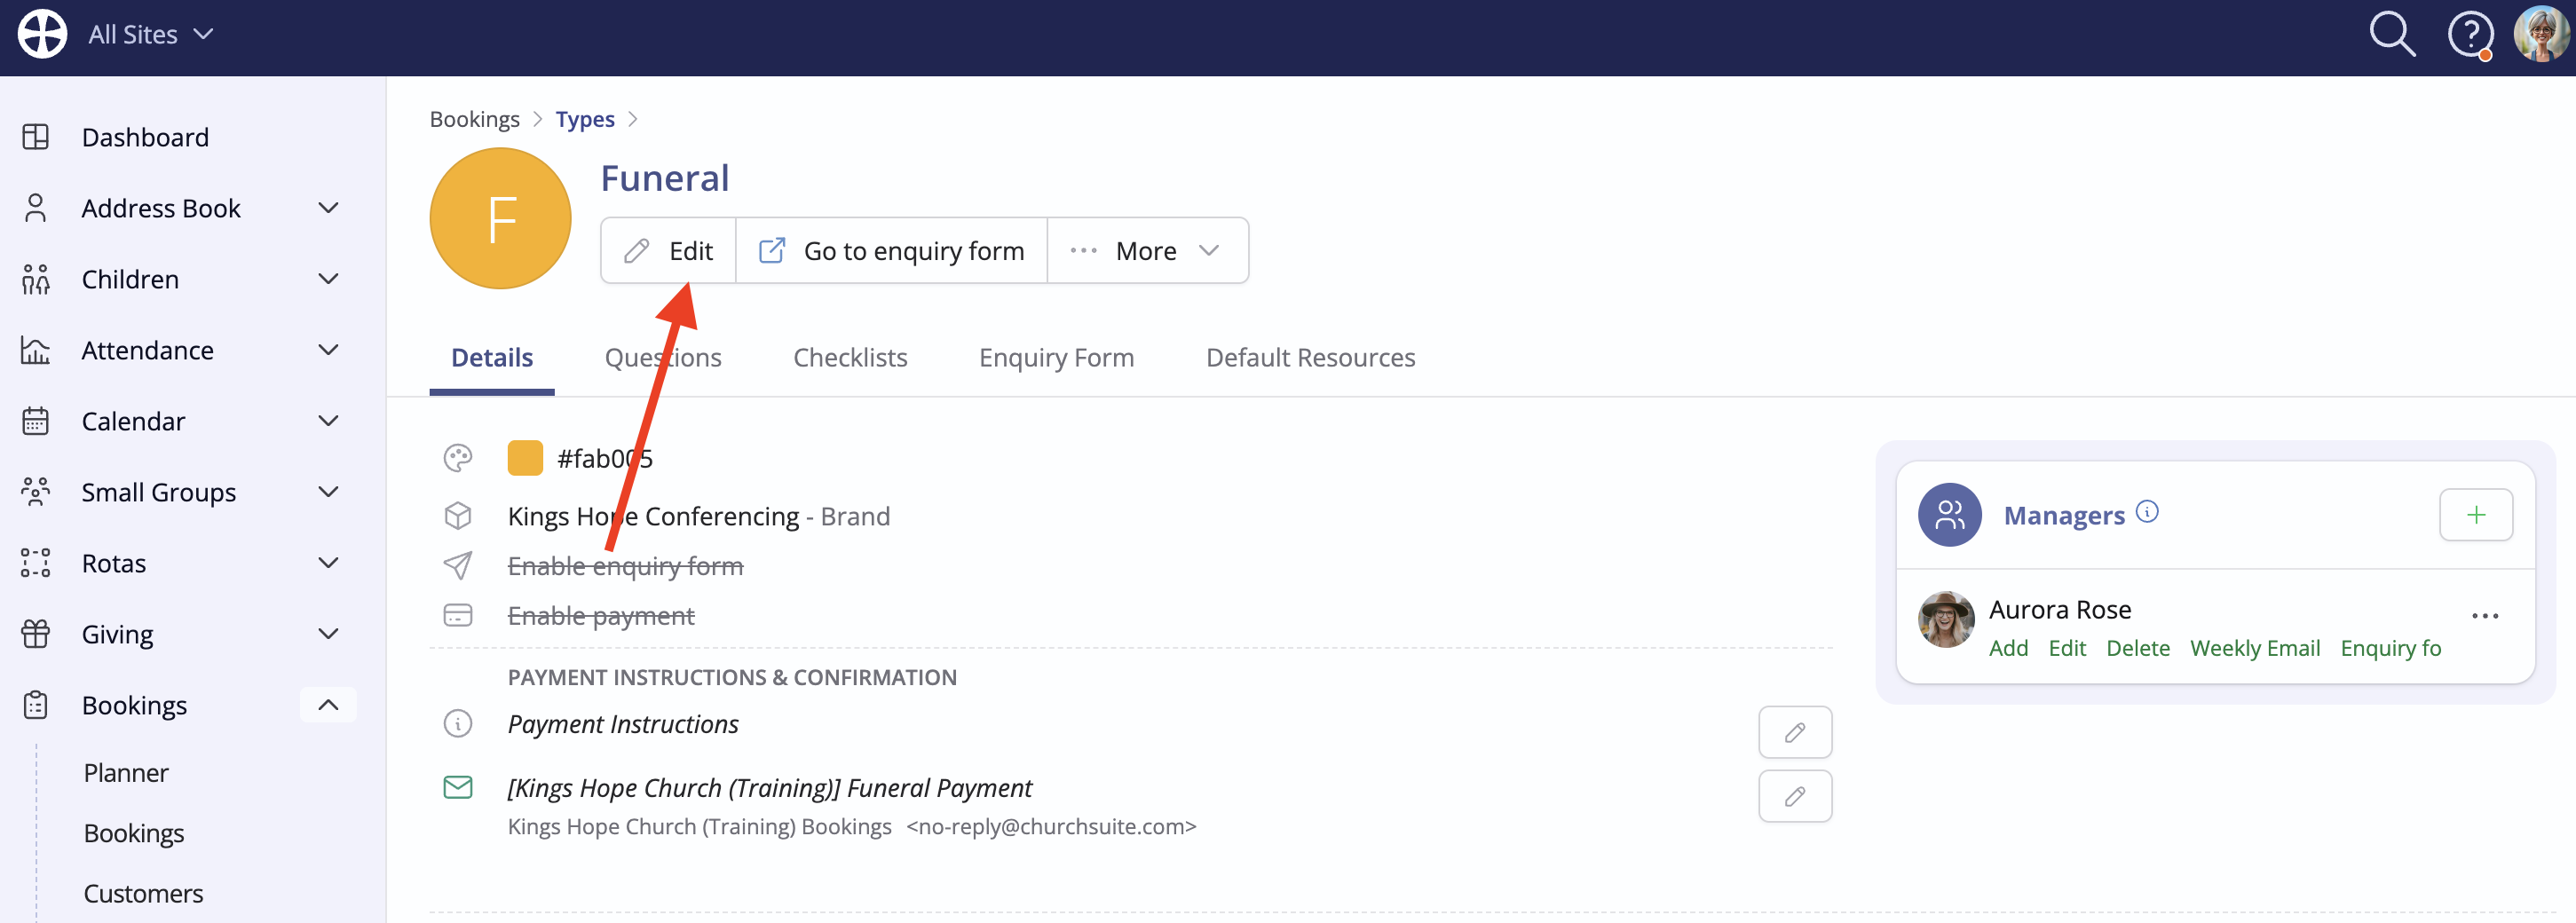
On the Edit pop-up, tick Enable enquiry form (or untick the option if you later wish to disable enquiry responses) and Save the changes.

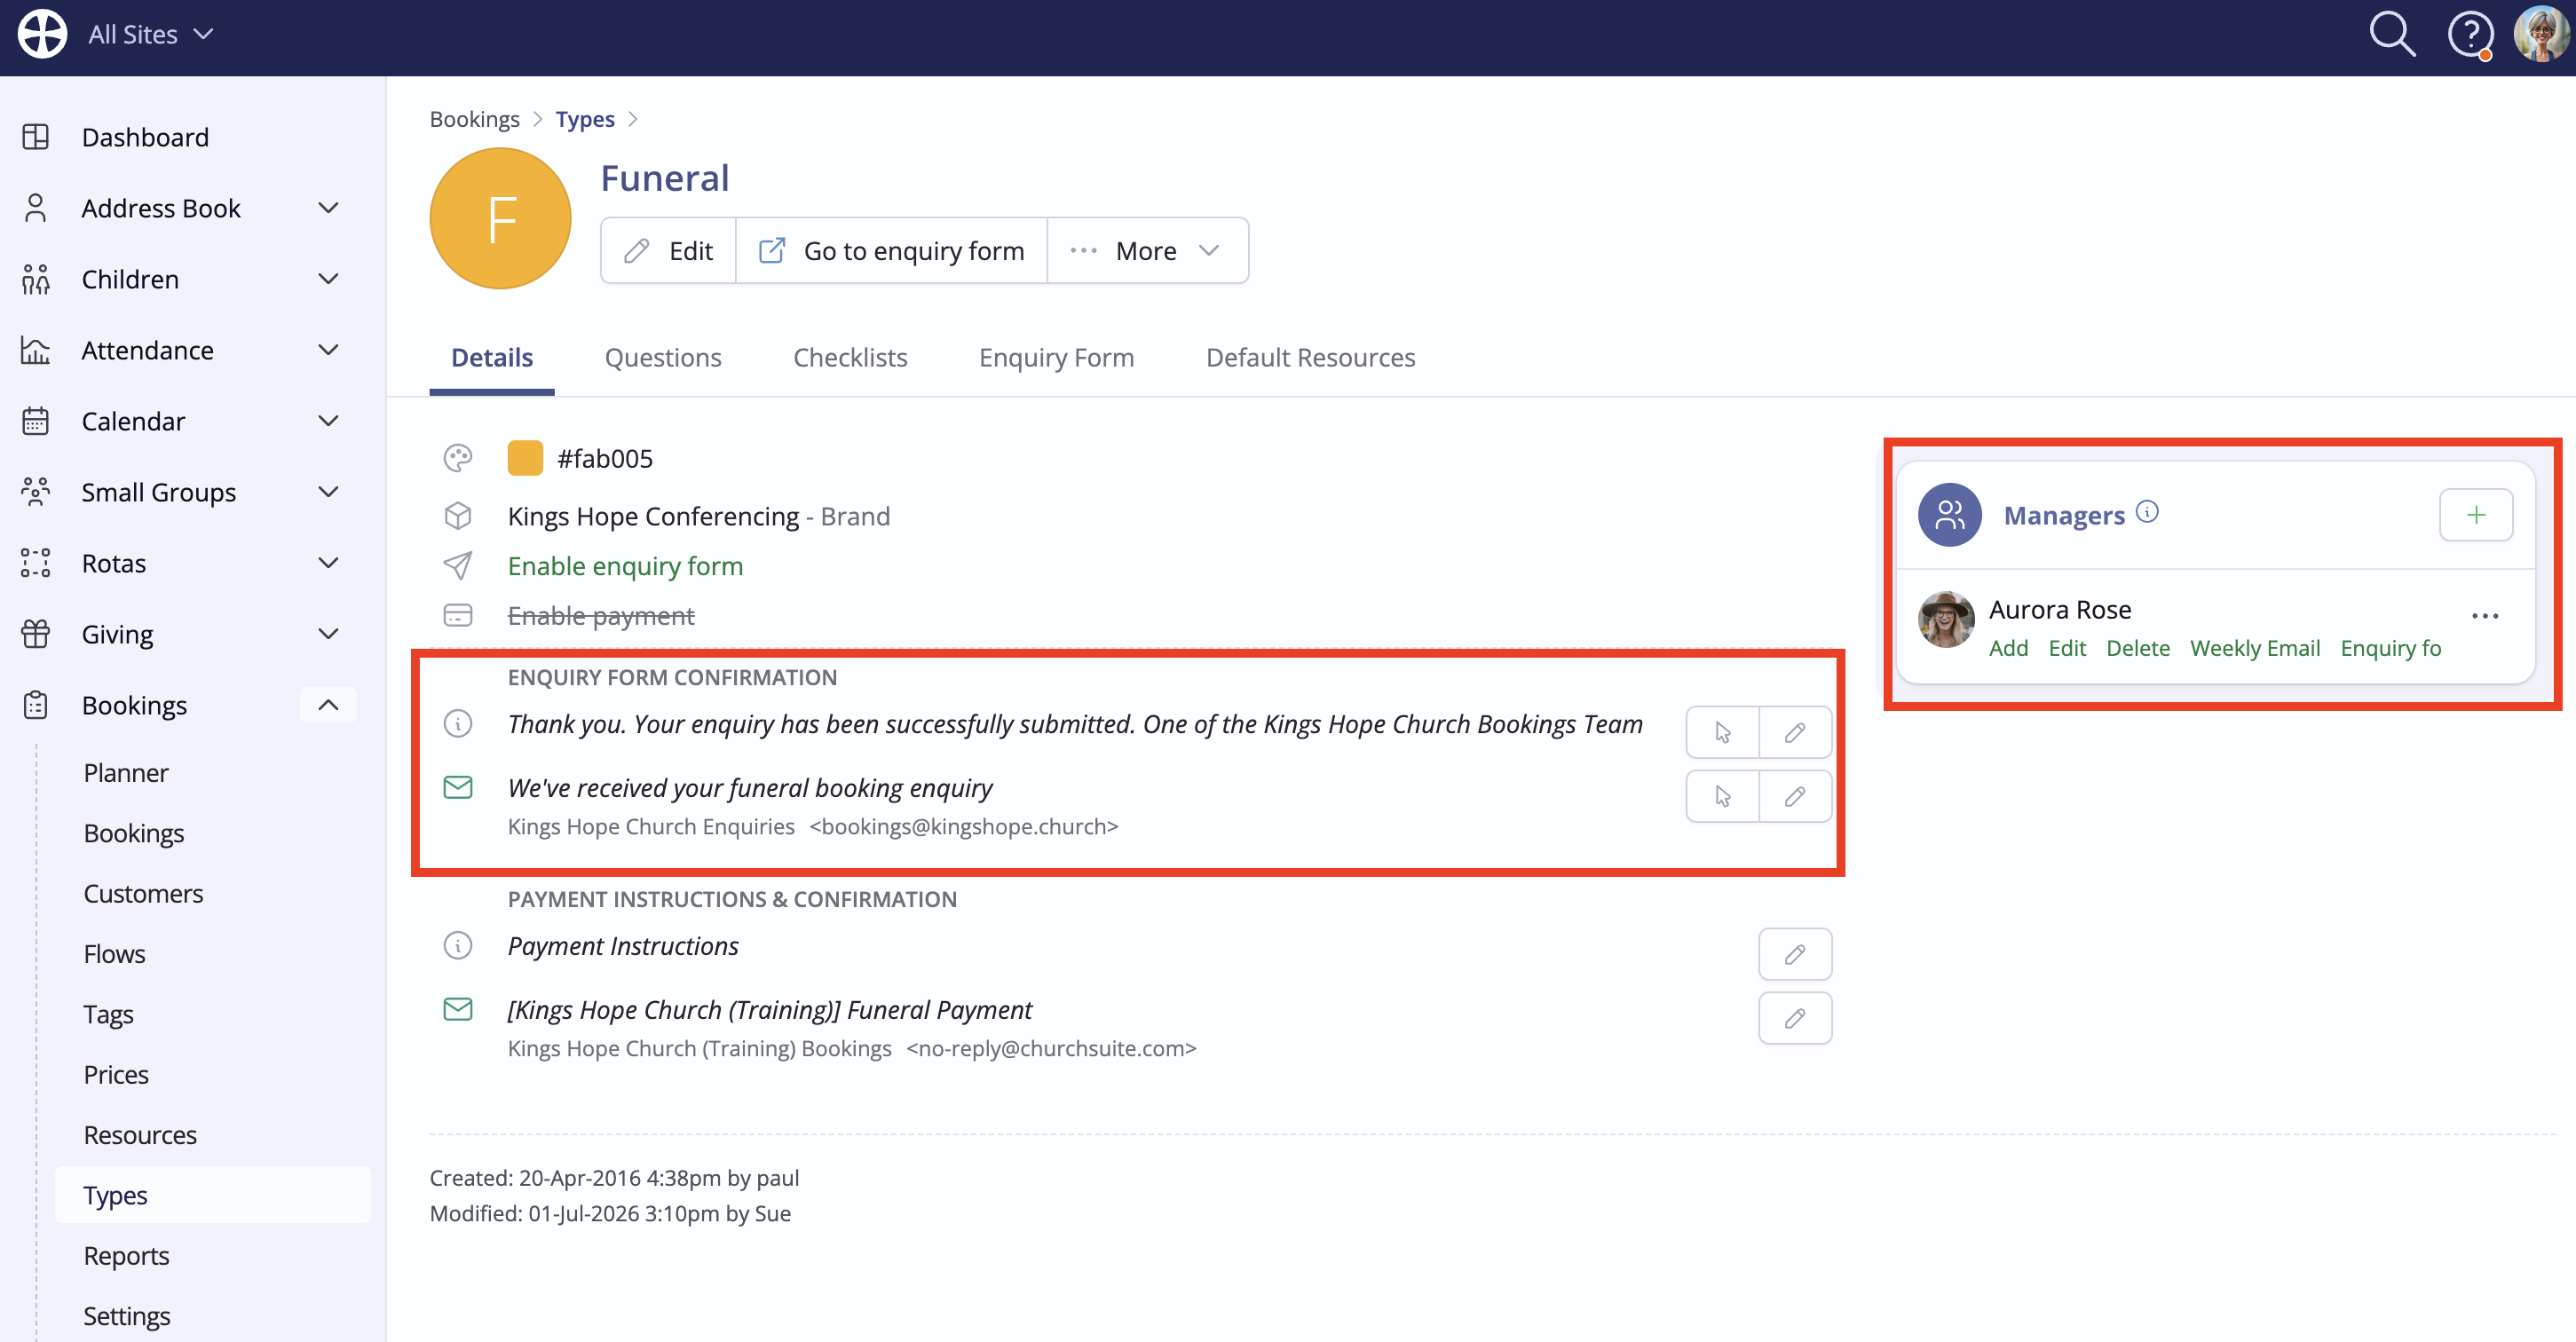
With the enquiry form enabled, you can customise the Enquiry Form Confirmation email and Success message sent/shown when a customer submits an enquiry. These two options can be used to help manage customer expectations and inform them of what will happen next and when. Managers can also receive notifications when a customer submits an enquiry. To enable this, tick the Notify of enquiries option when adding or editing a Manager.
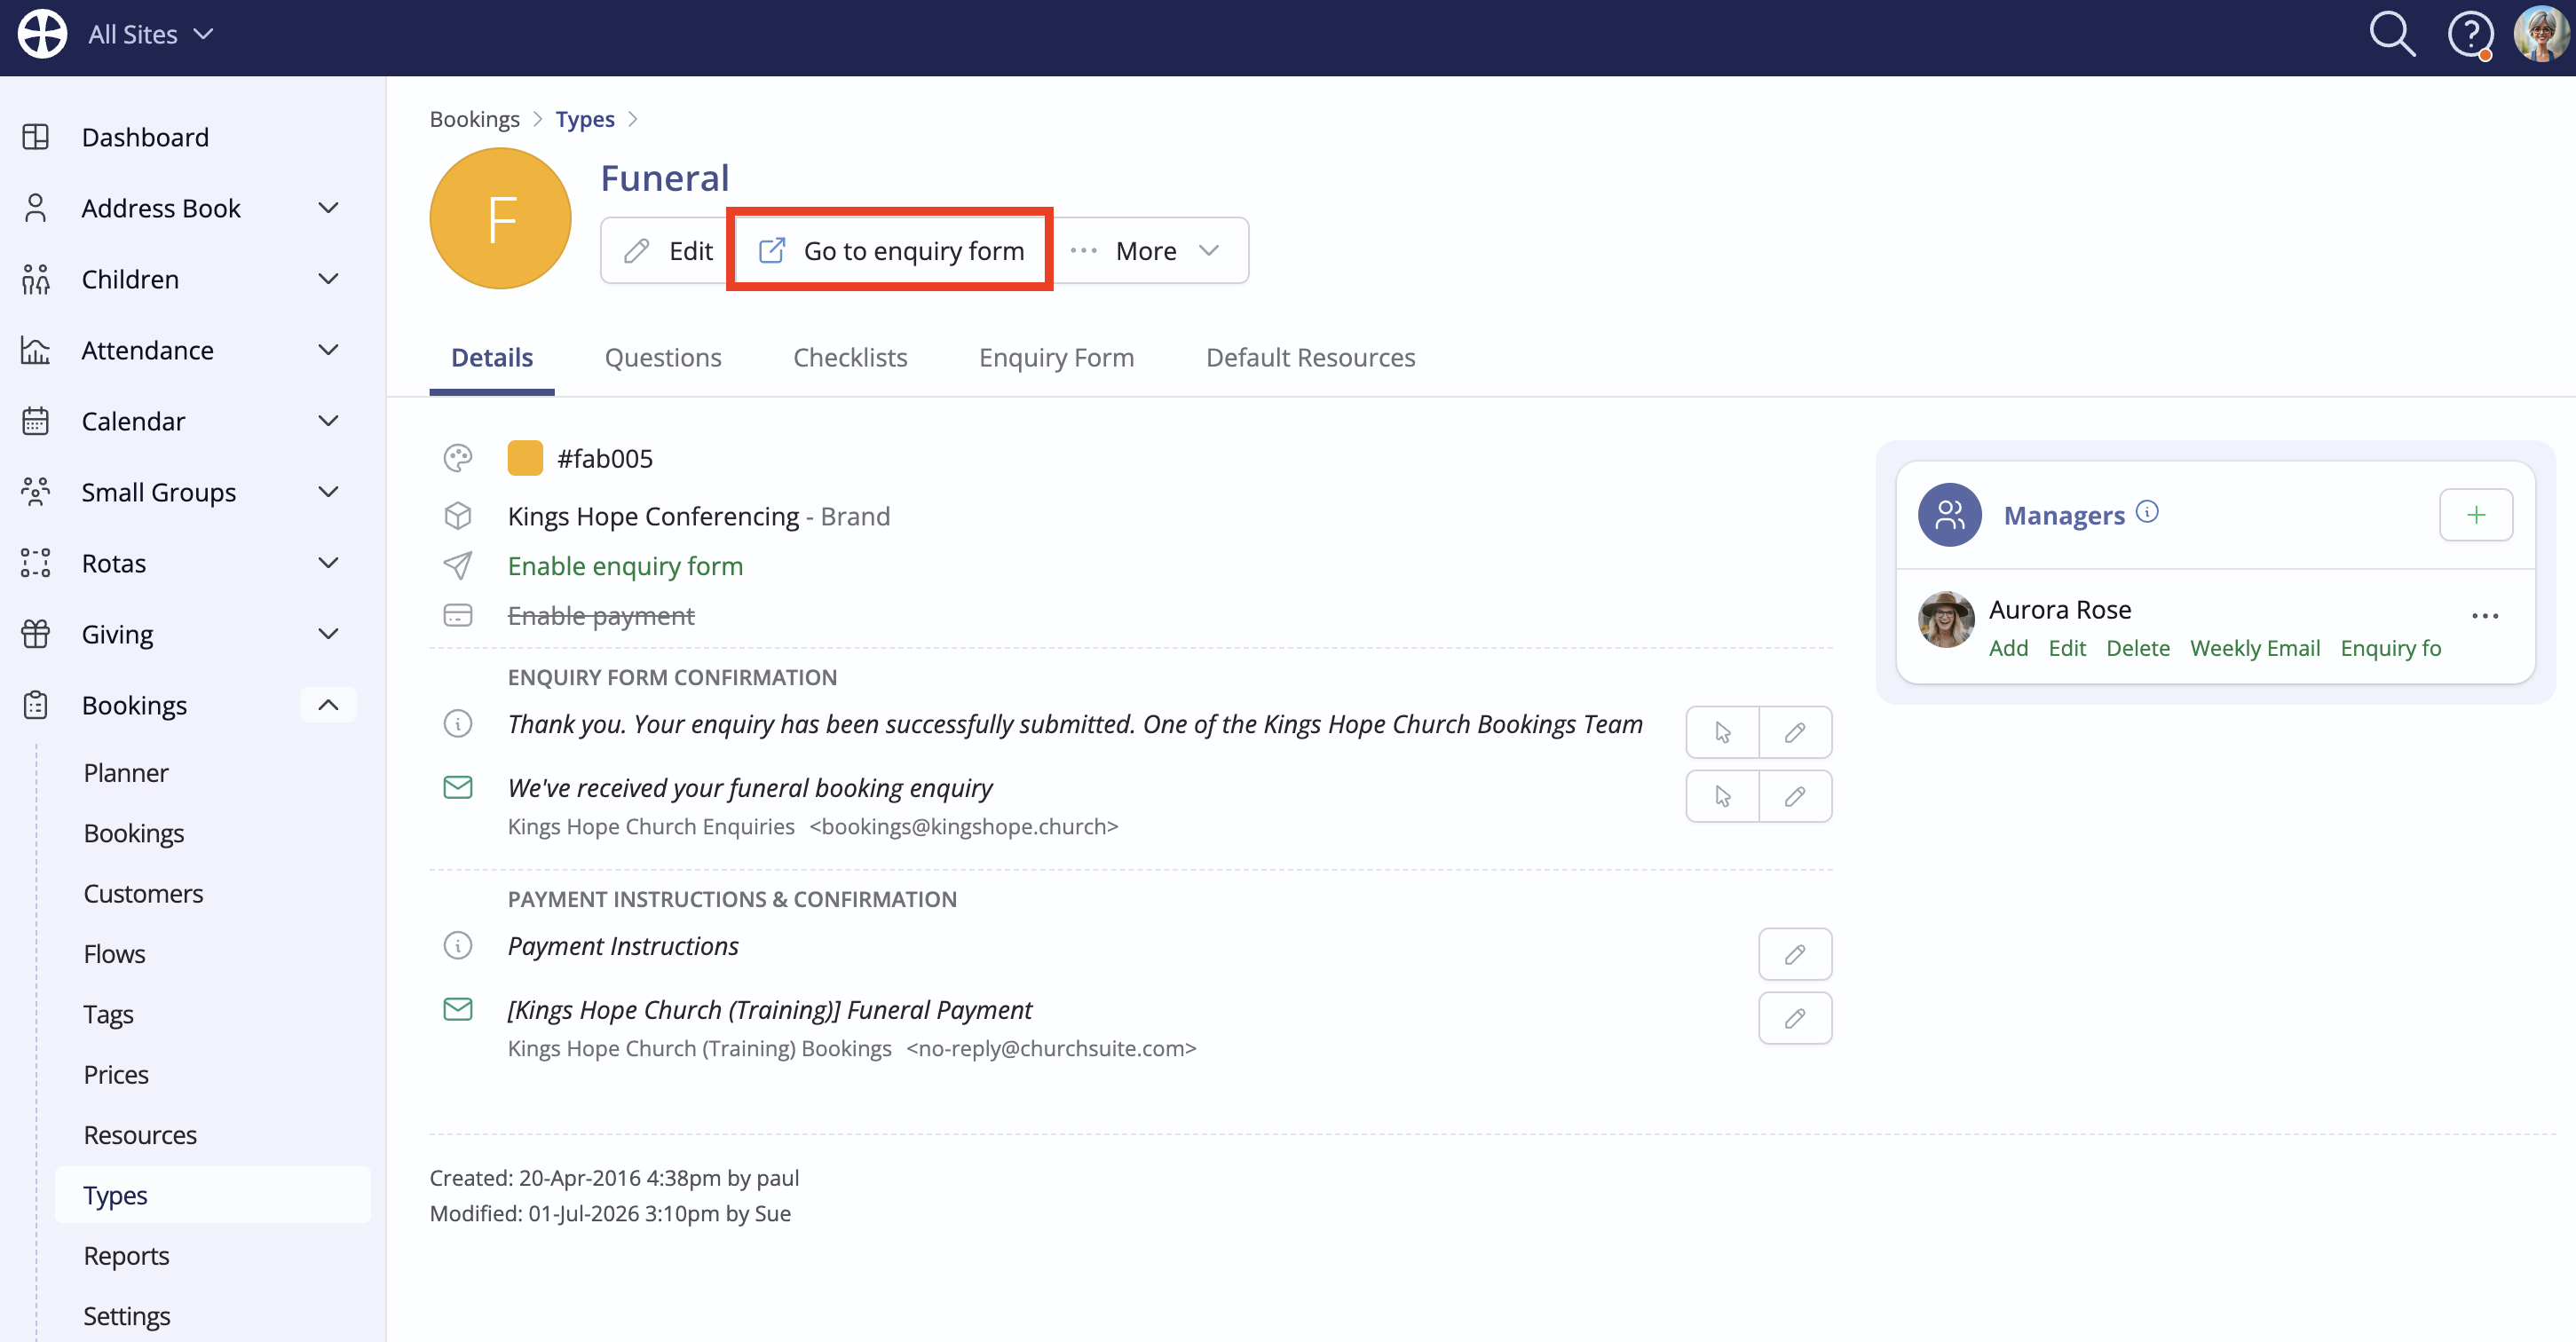
You can preview the form at any time by clicking Go to enquiry form:
A pop-up opens showing two tabs. To generate an enquiry form URL for general use, embedding in a website or sharing in communications, use the information on the Public tab. However, you can also create an enquiry form that is locked to a specific Customer. Let's look at both options:
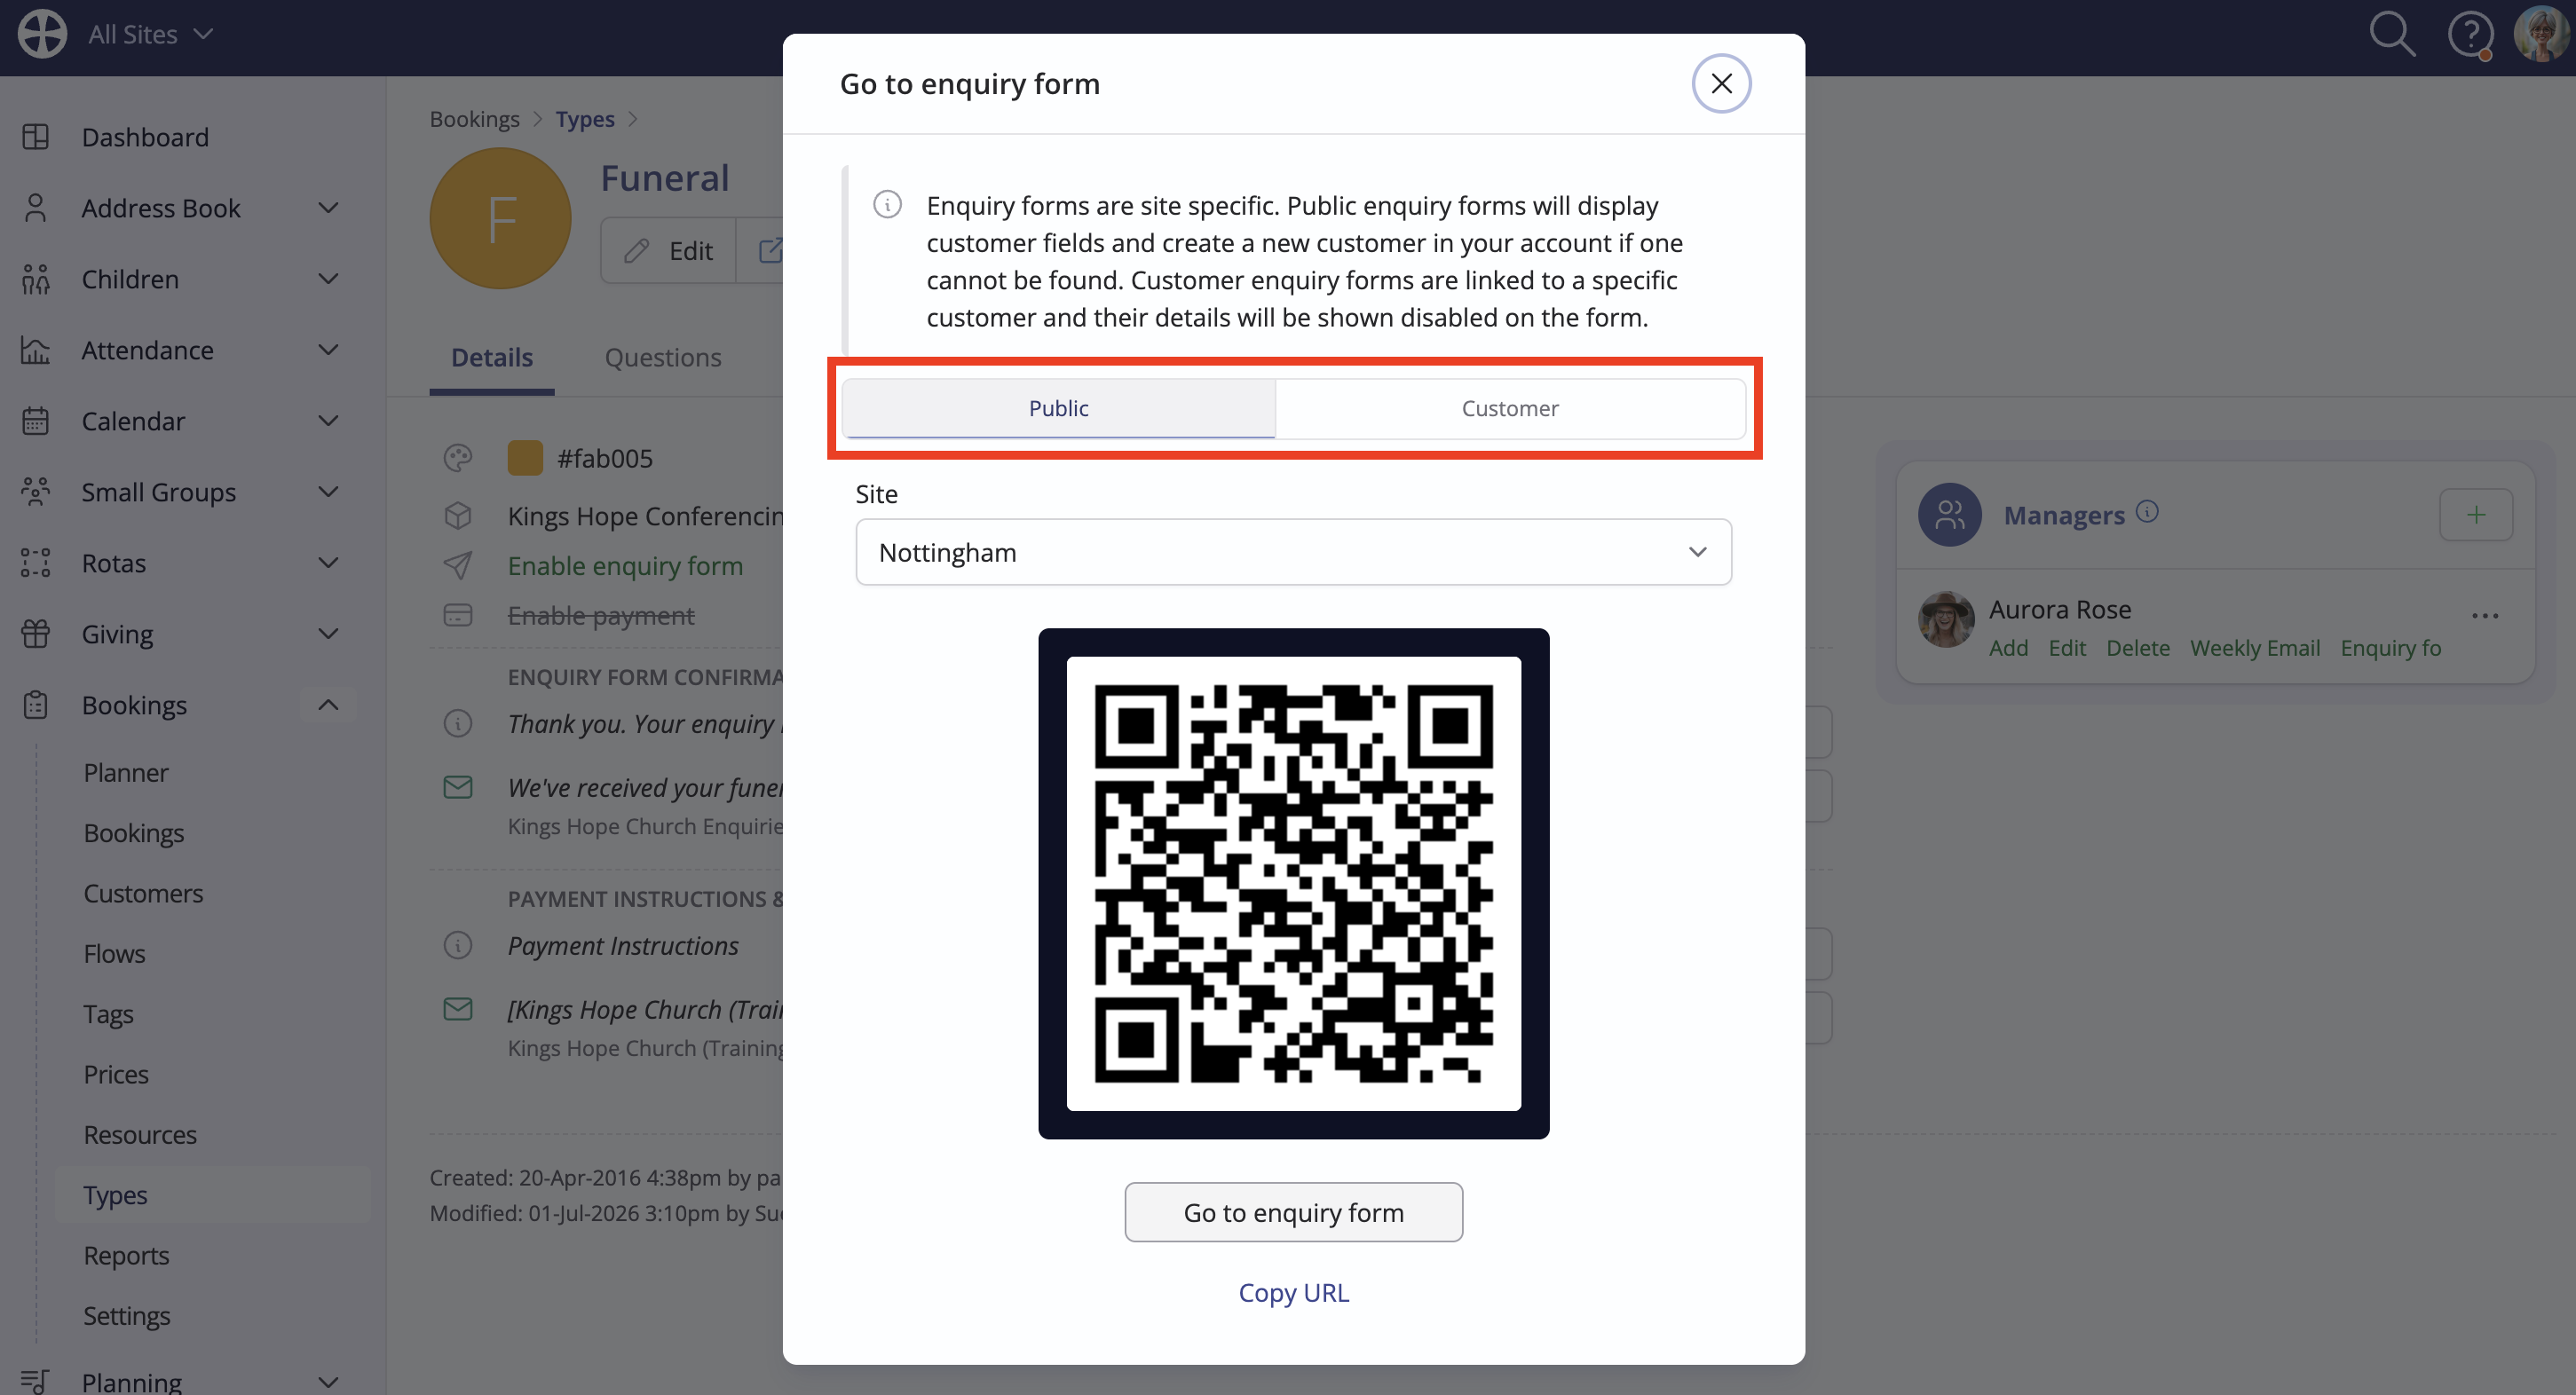
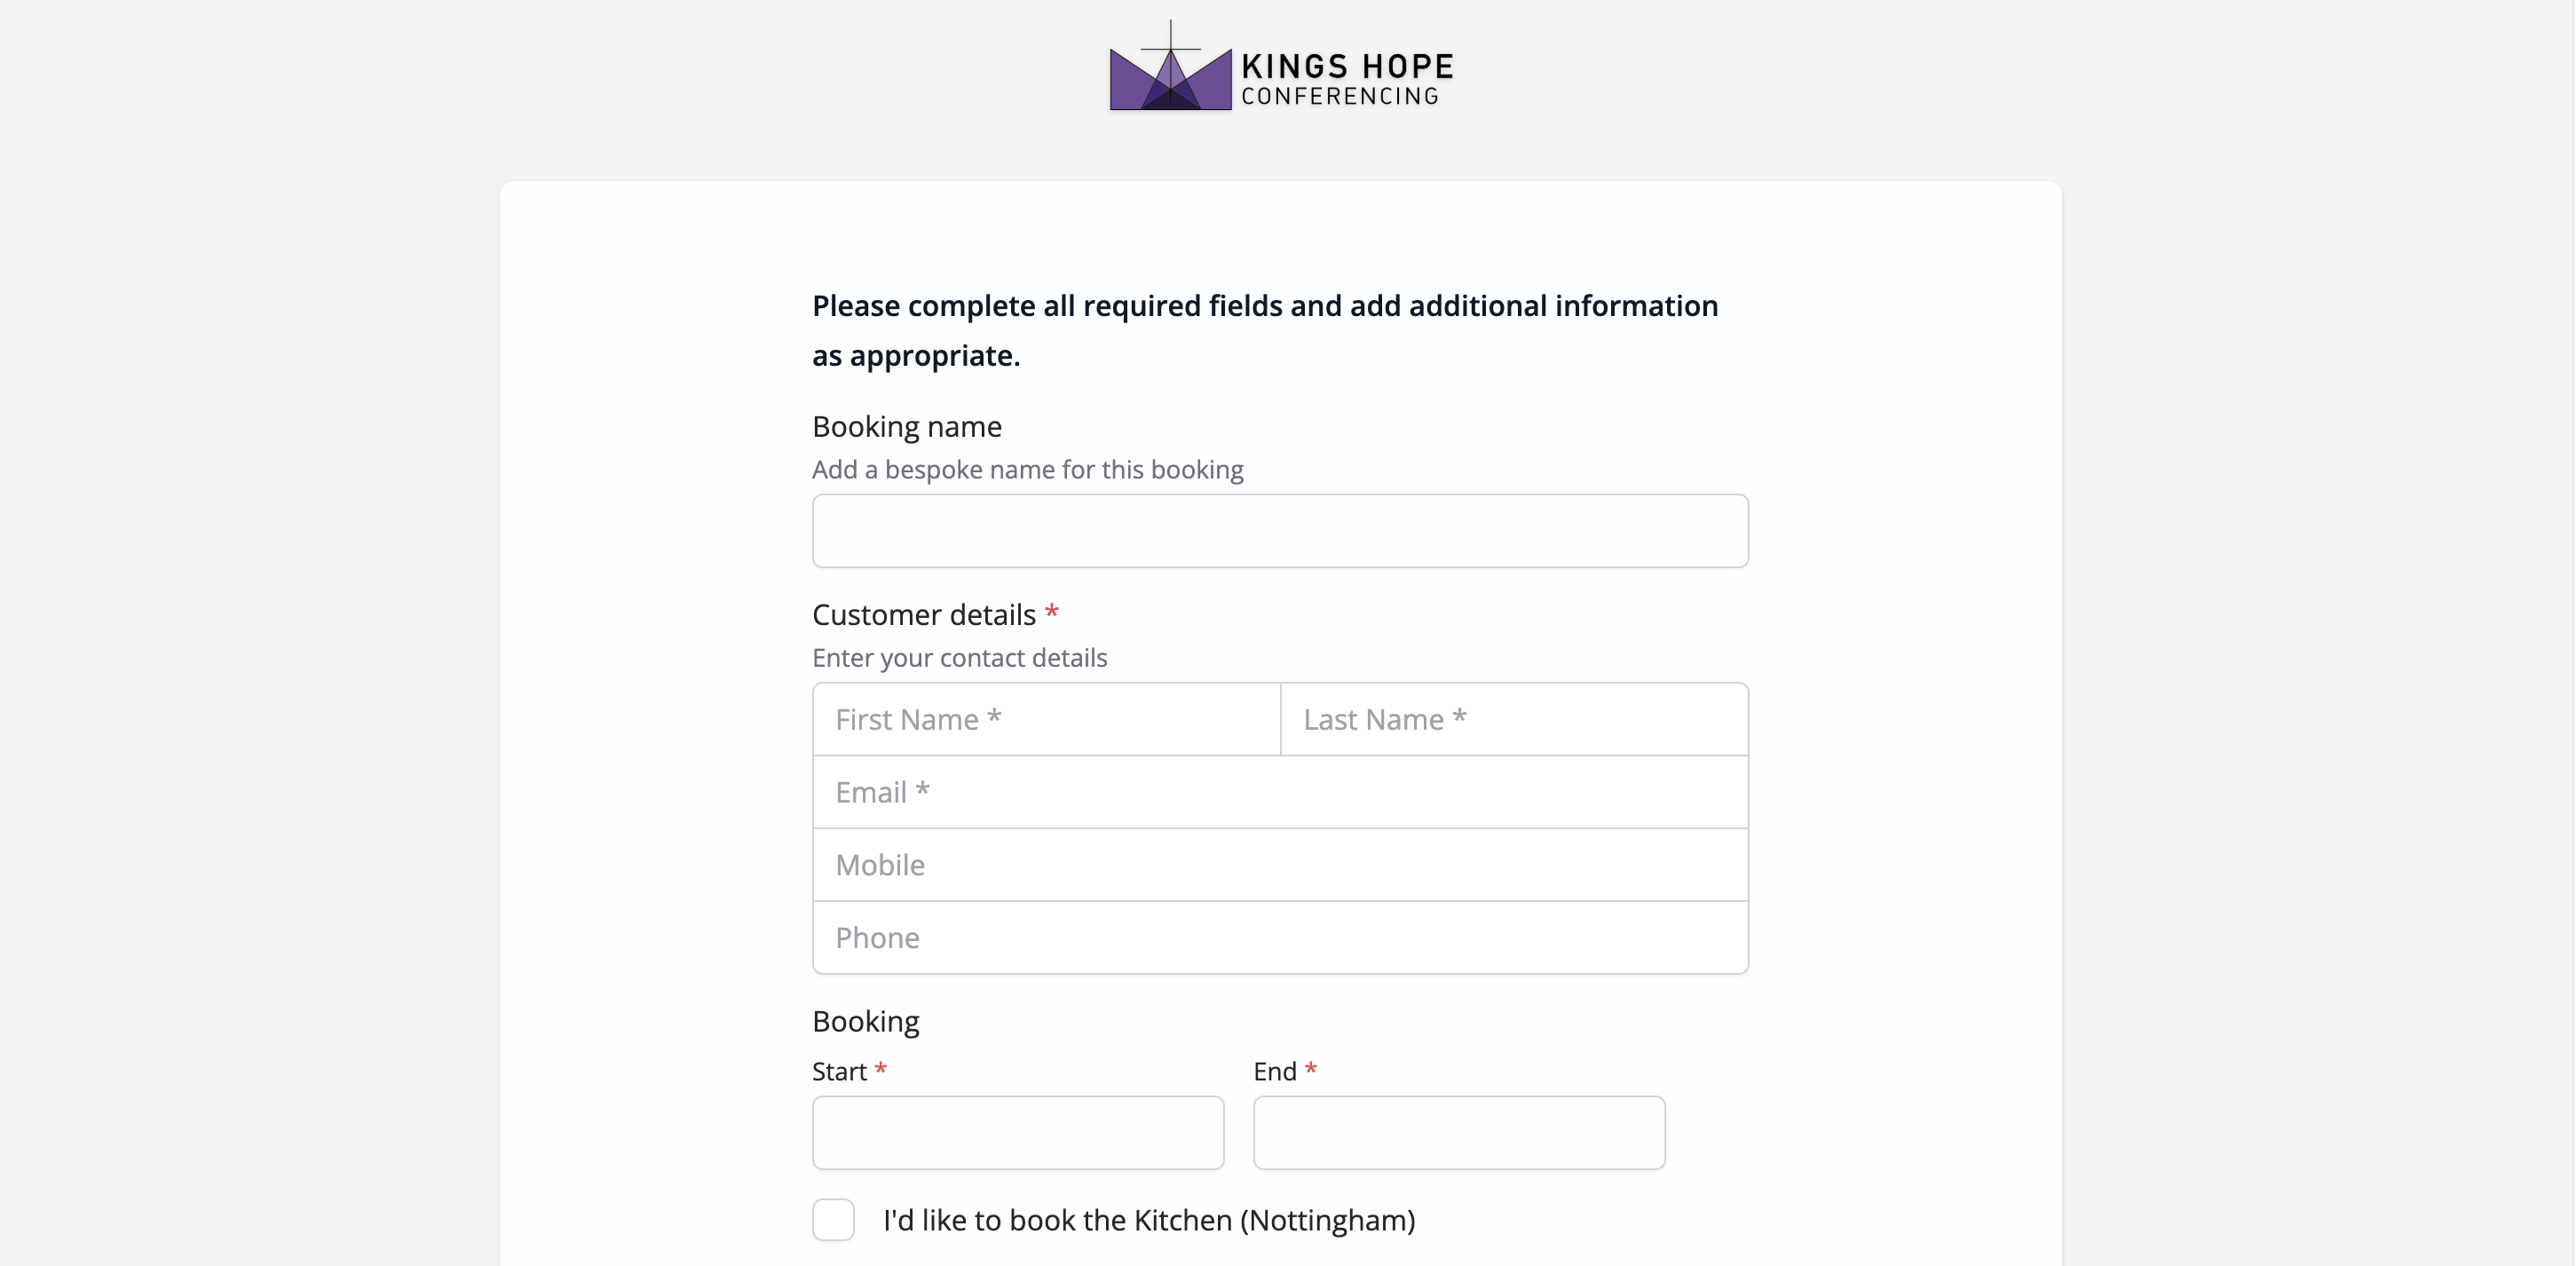
On the Public tab, multi-site customers will select the enquiry form Site. Use the QR code in promotional materials, or click Copy URL on the pop-up to paste it as an embedded link on a website or in email communications. Alternatively, click Go to enquiry form to view the enquiry form:

The enquiry form opens in a new tab in your device browser, sporting the logo and colour styling of the booking Type brand. See our related support article for further information on Using brands.
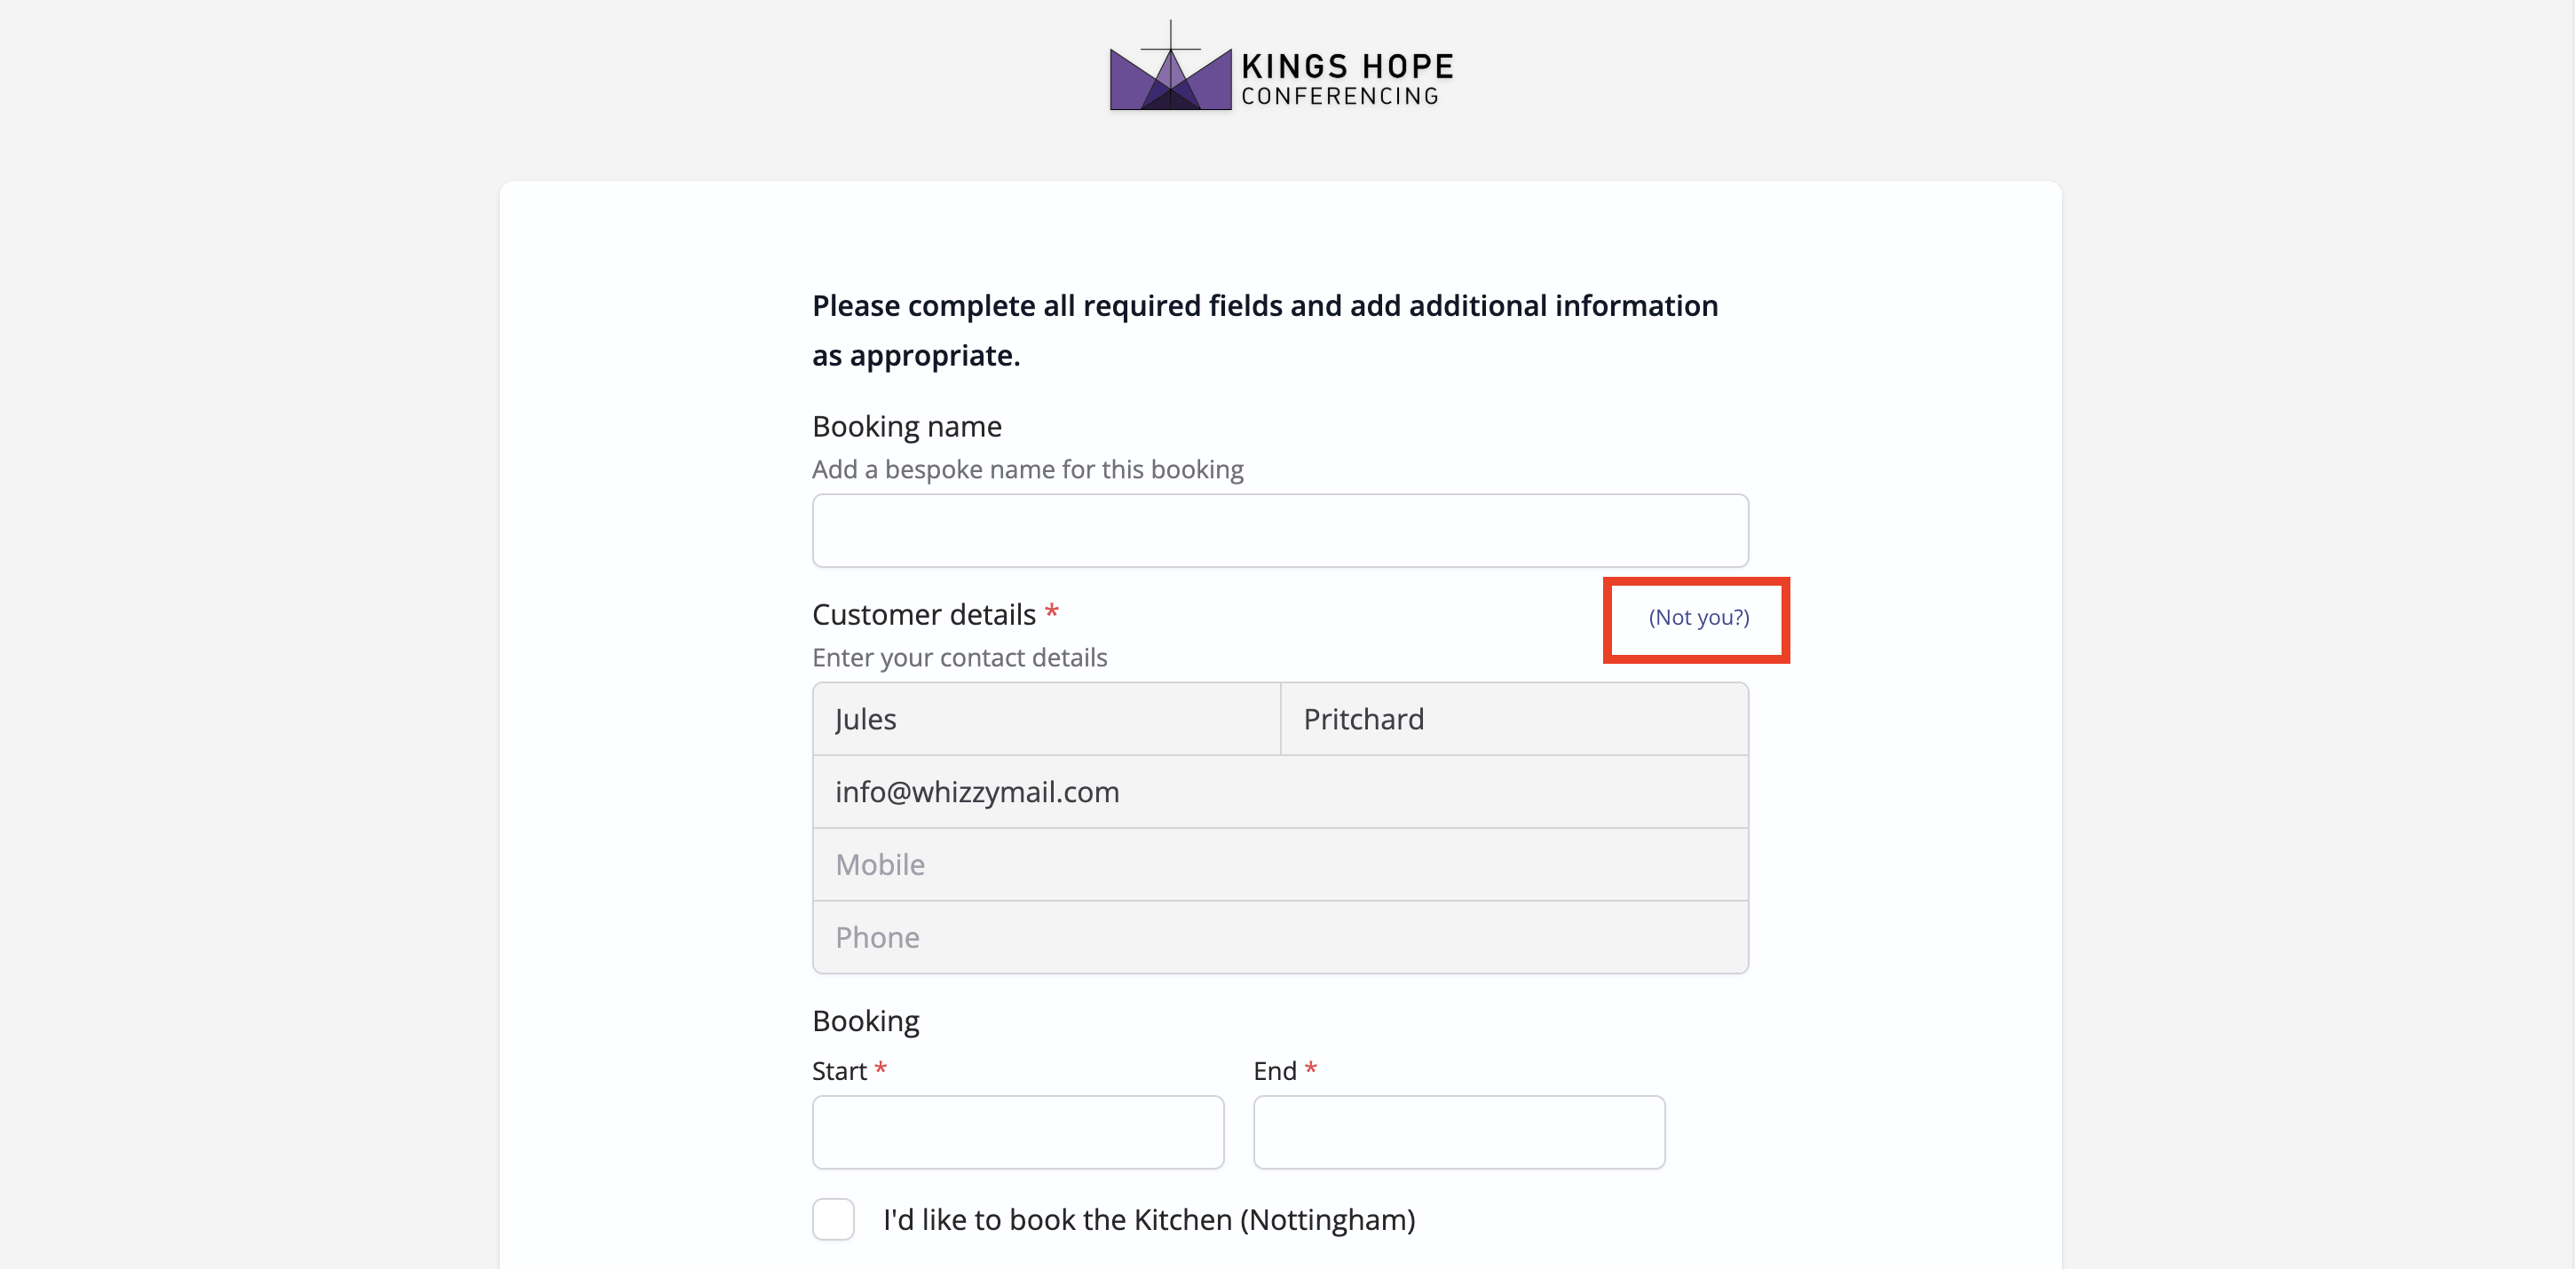
You can also access a QR Code and an enquiry form URL that is locked to a selected Customer. In this way, you can share an enquiry form URL with a repeat customer:

When the customer-locked enquiry form is accessed, the customer details are shown pre-populated into the form, and the customer fields are disabled. It's not possible for a customer to update their existing details through a booking enquiry form, but they can select Not you, which unlocks the form to allow new customer details to be entered.
Managing enquiries received
Enquiries are added to the Bookings section of the module with an Enquiry status, and if enabled, designated Managers for a booking Type receive an enquiry notification email to alert them to a new enquiry. Enquiries received can be approved or declined by a Bookings module user in accordance with your preferred internal review process. You can then communicate with the customer to let them know the outcome of their enquiry, including any additional information they may need to know ahead of their approved booking taking place. In this section, we explore the functionality designed to help manage booking enquiries.
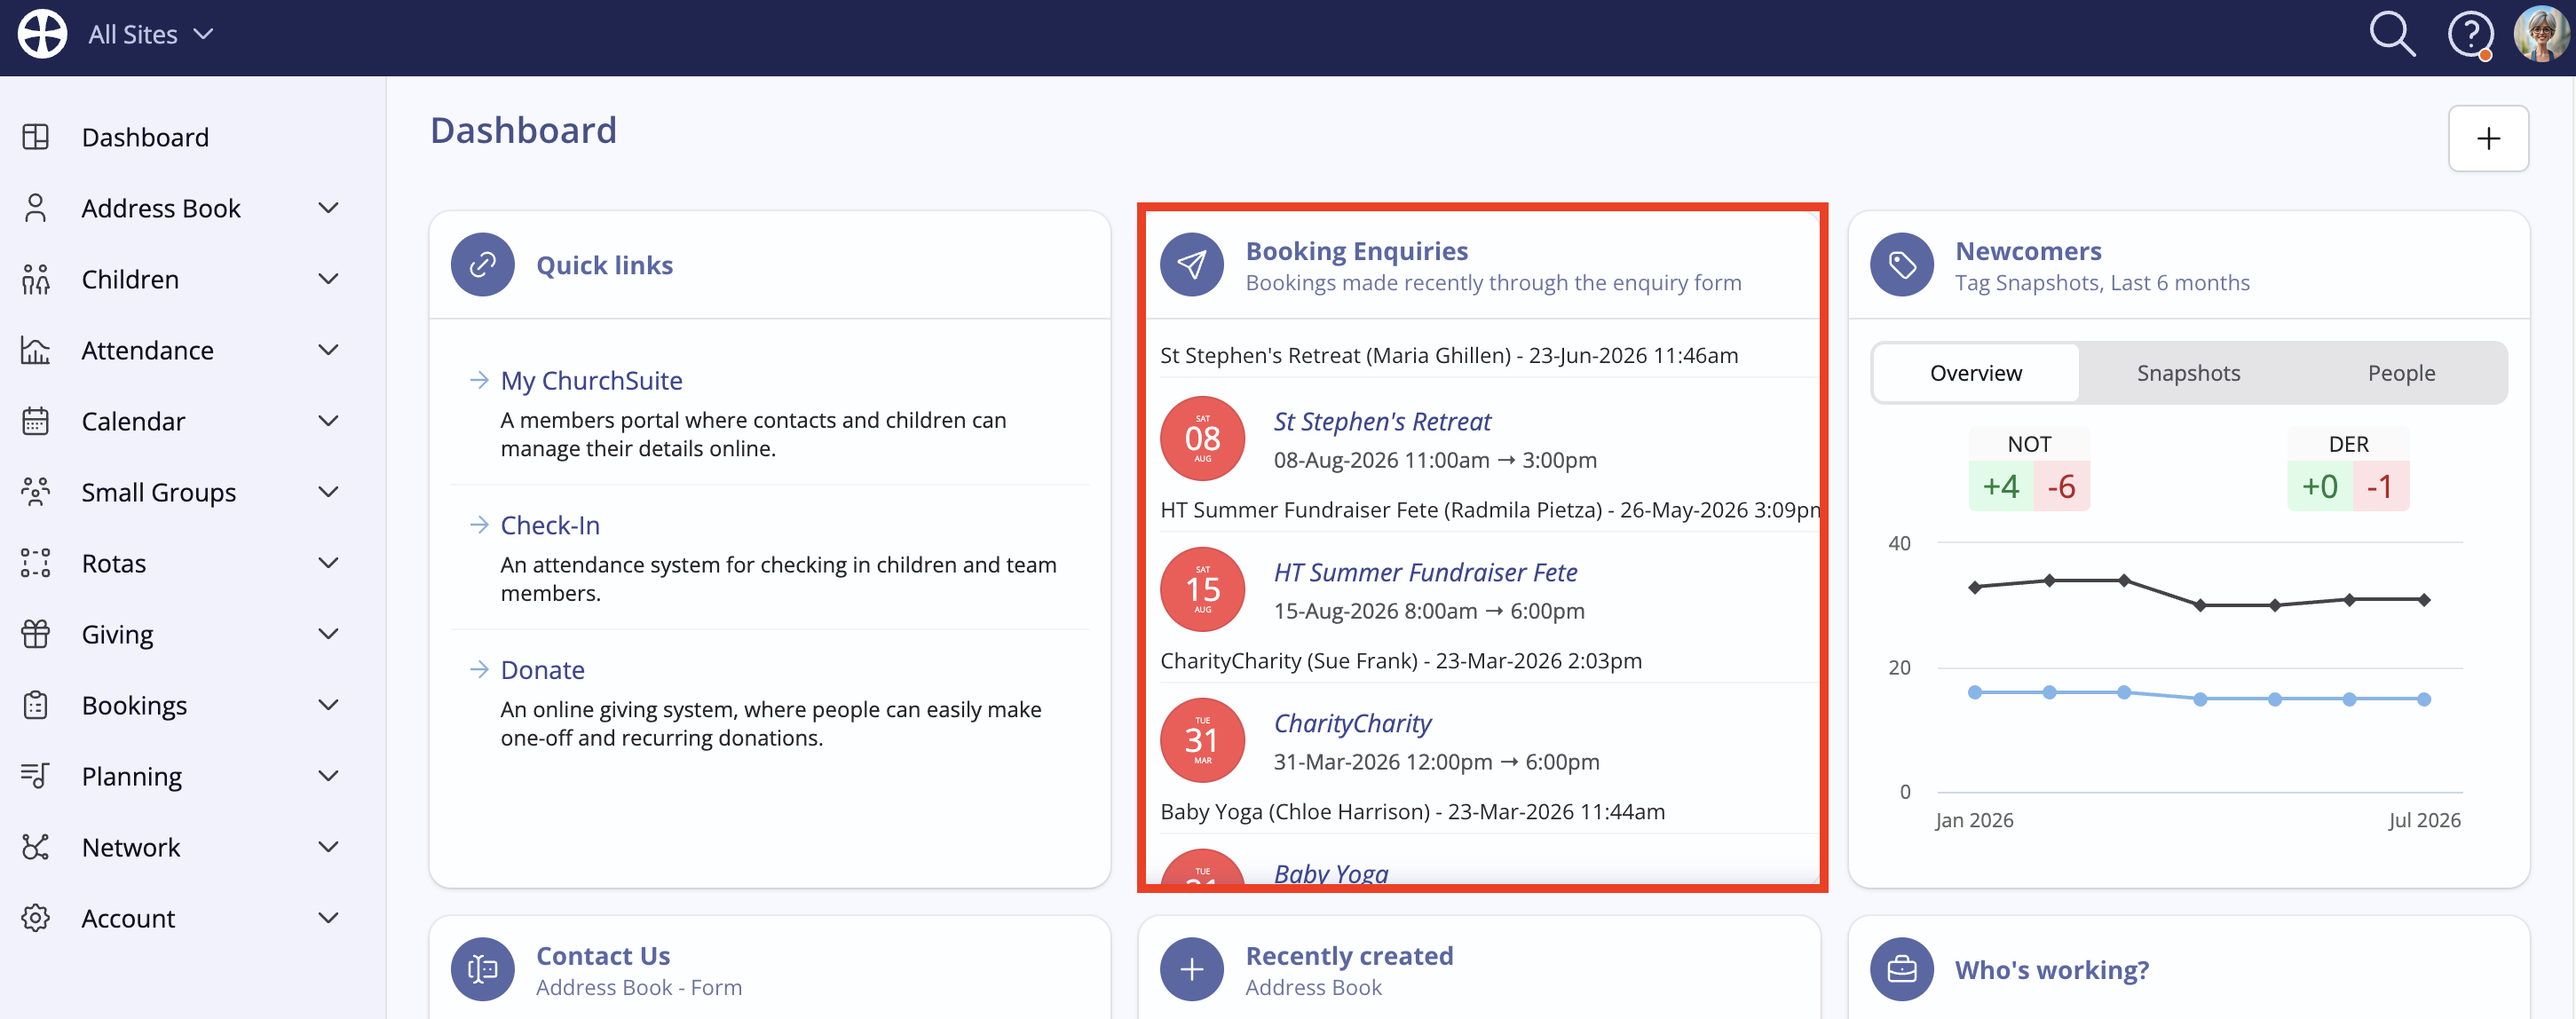
A Booking Enquiries widget can be added to a user's Dashboard, which displays enquiries order by the date received, with the oldest enquiry shown first (not booking-enquiry date order). Once an enquiry is confirmed or declined, it is no longer displayed in the widget. See the related support article for further information on Customising your dashboard.
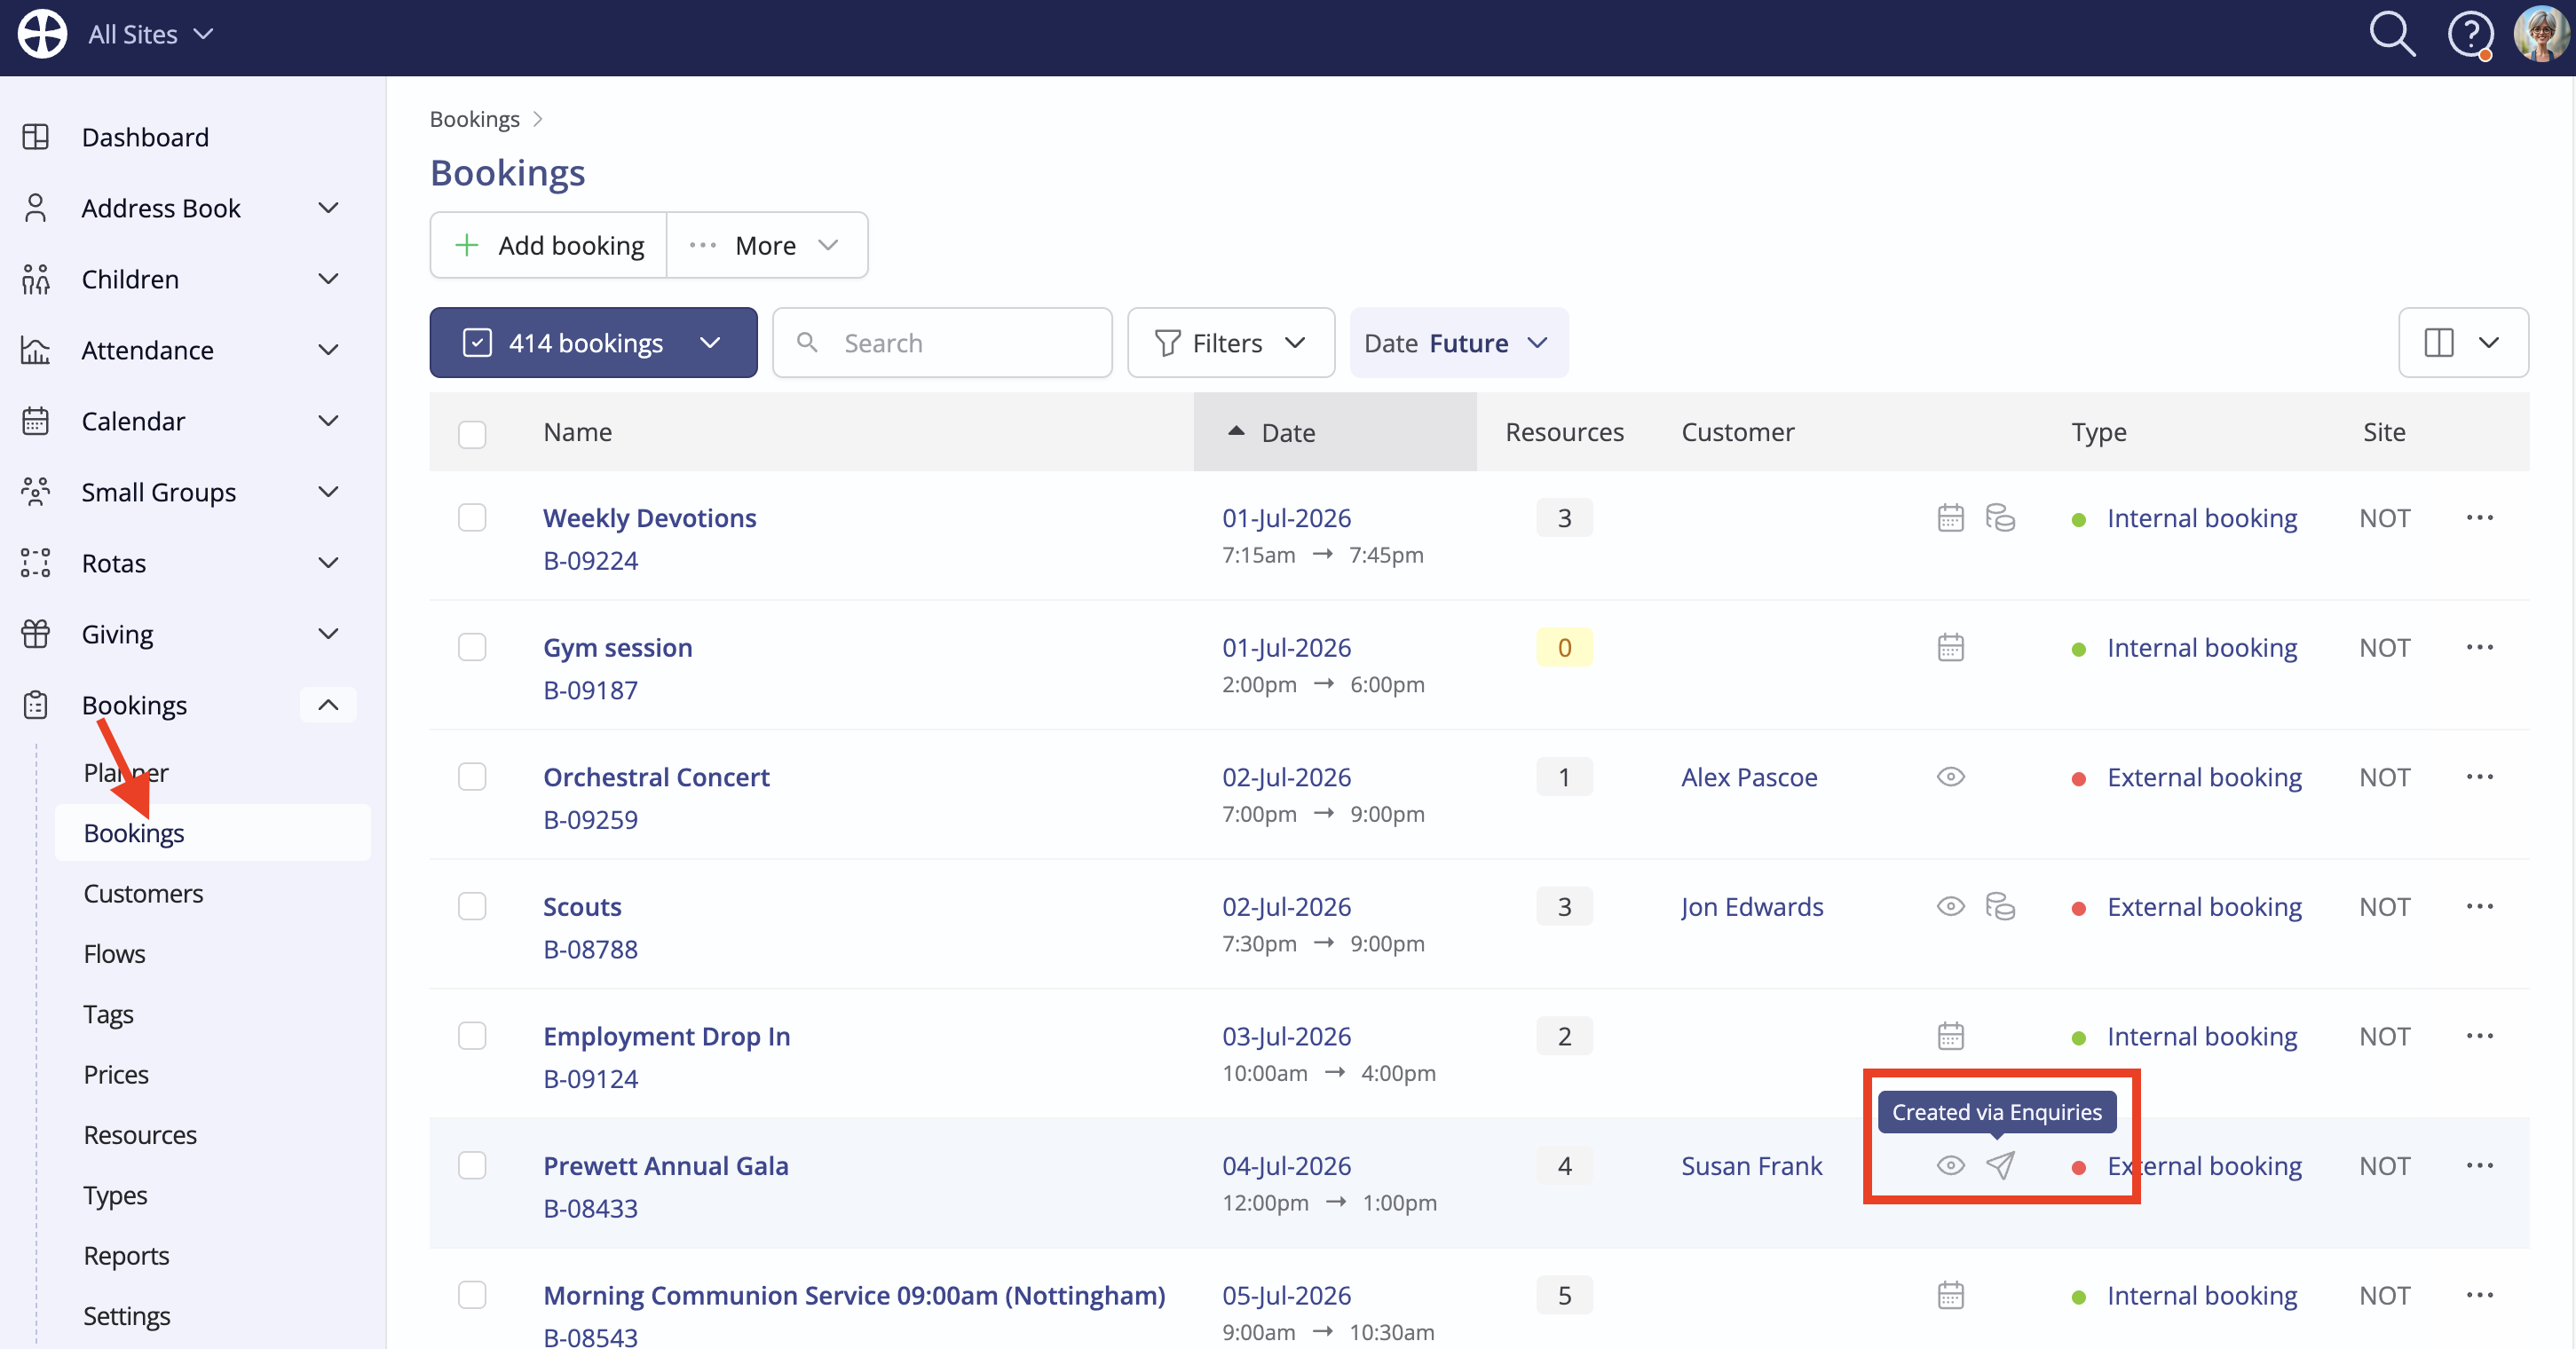
Enquiries are distinguished in the Bookings section of the module by an enquiry icon. This icon persists after an enquiry is Confirmed as a booking or Declined, and if a booking status is reverted to Pending.
The Is an Enquiry filter can be used to show or hide enquiries in the Bookings section:
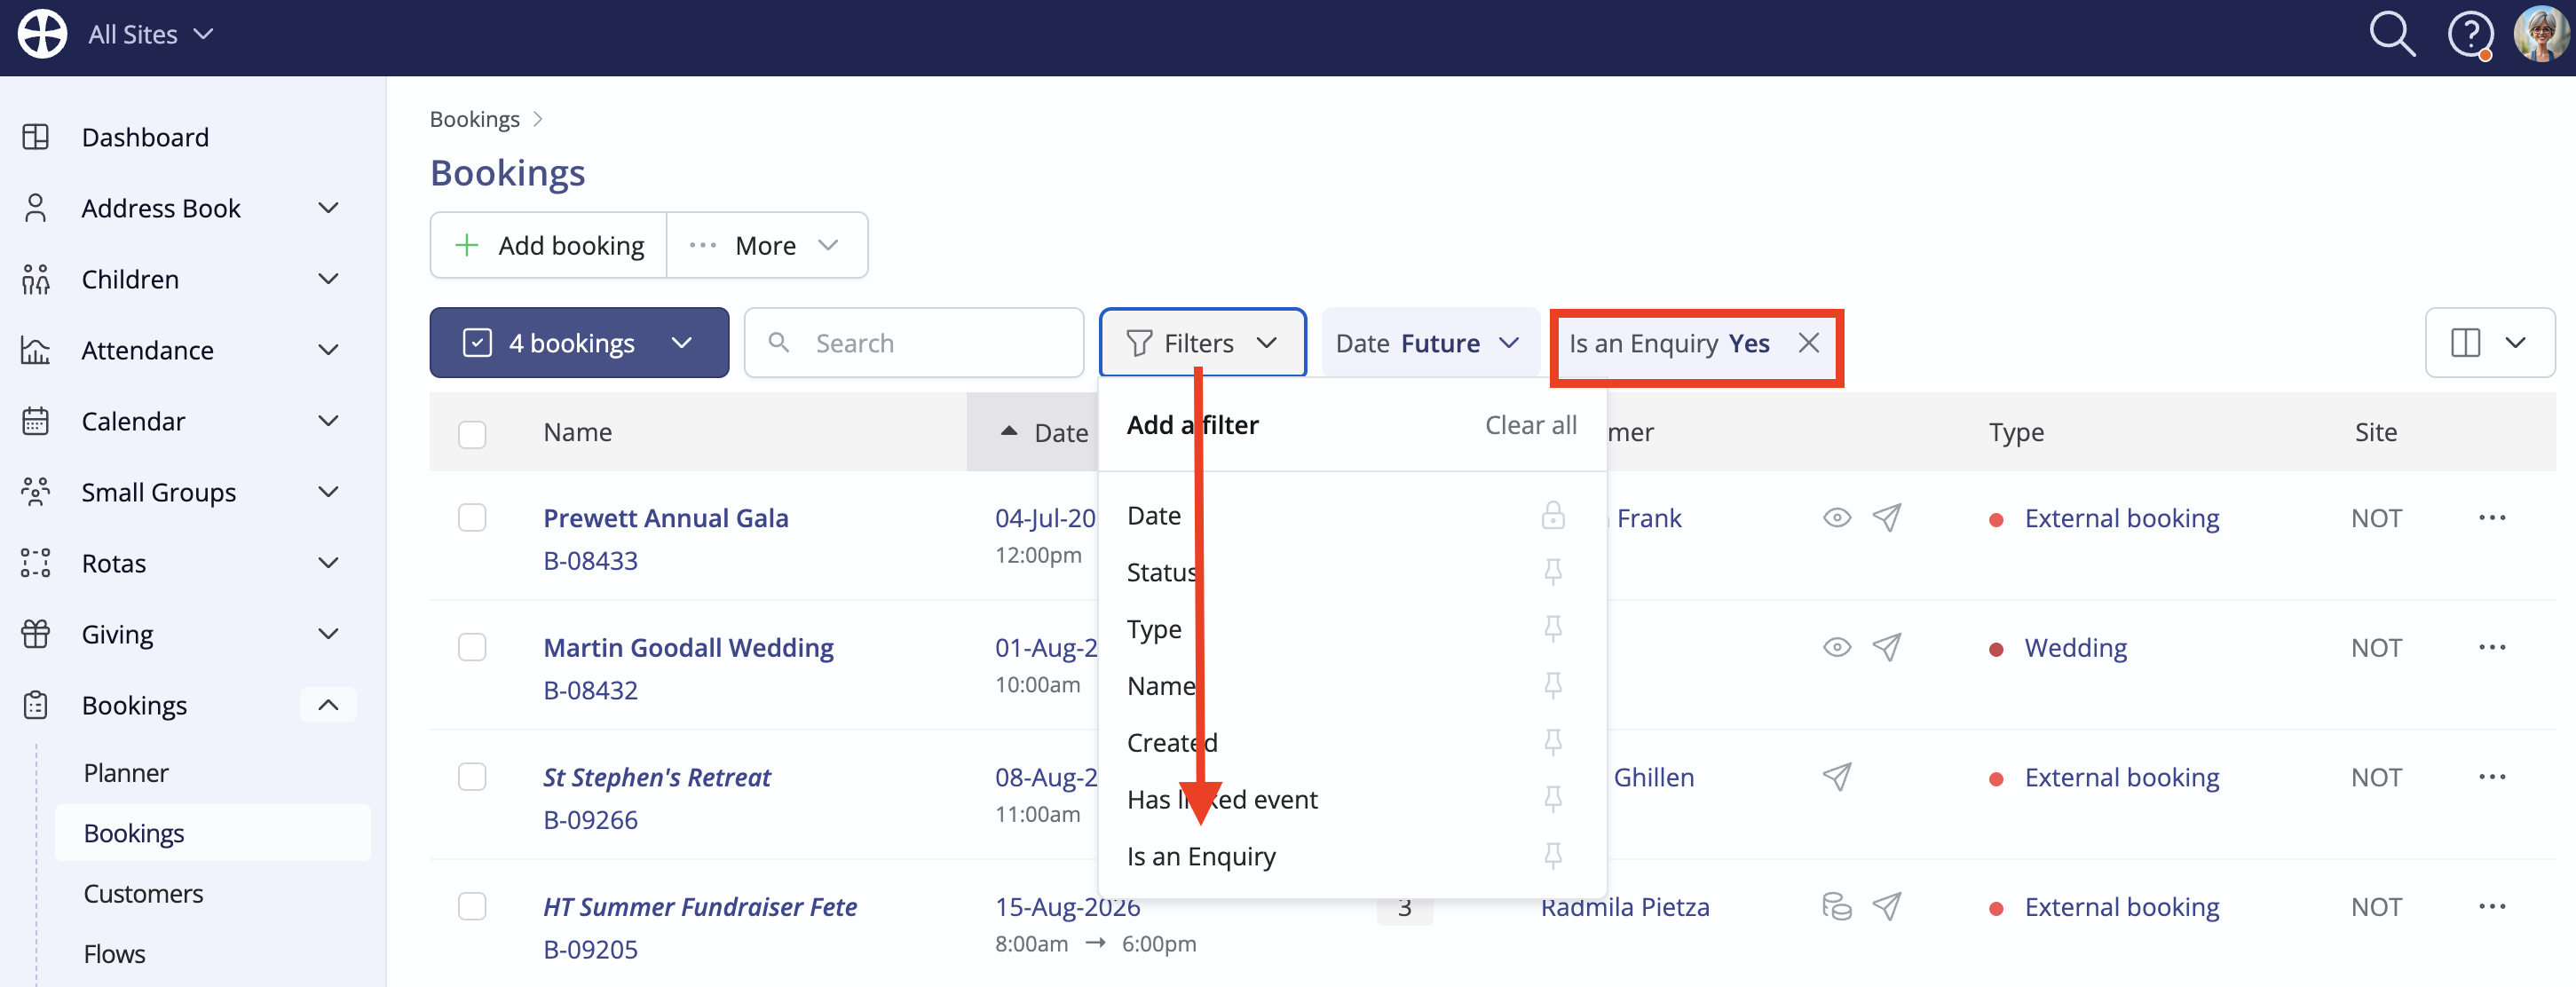
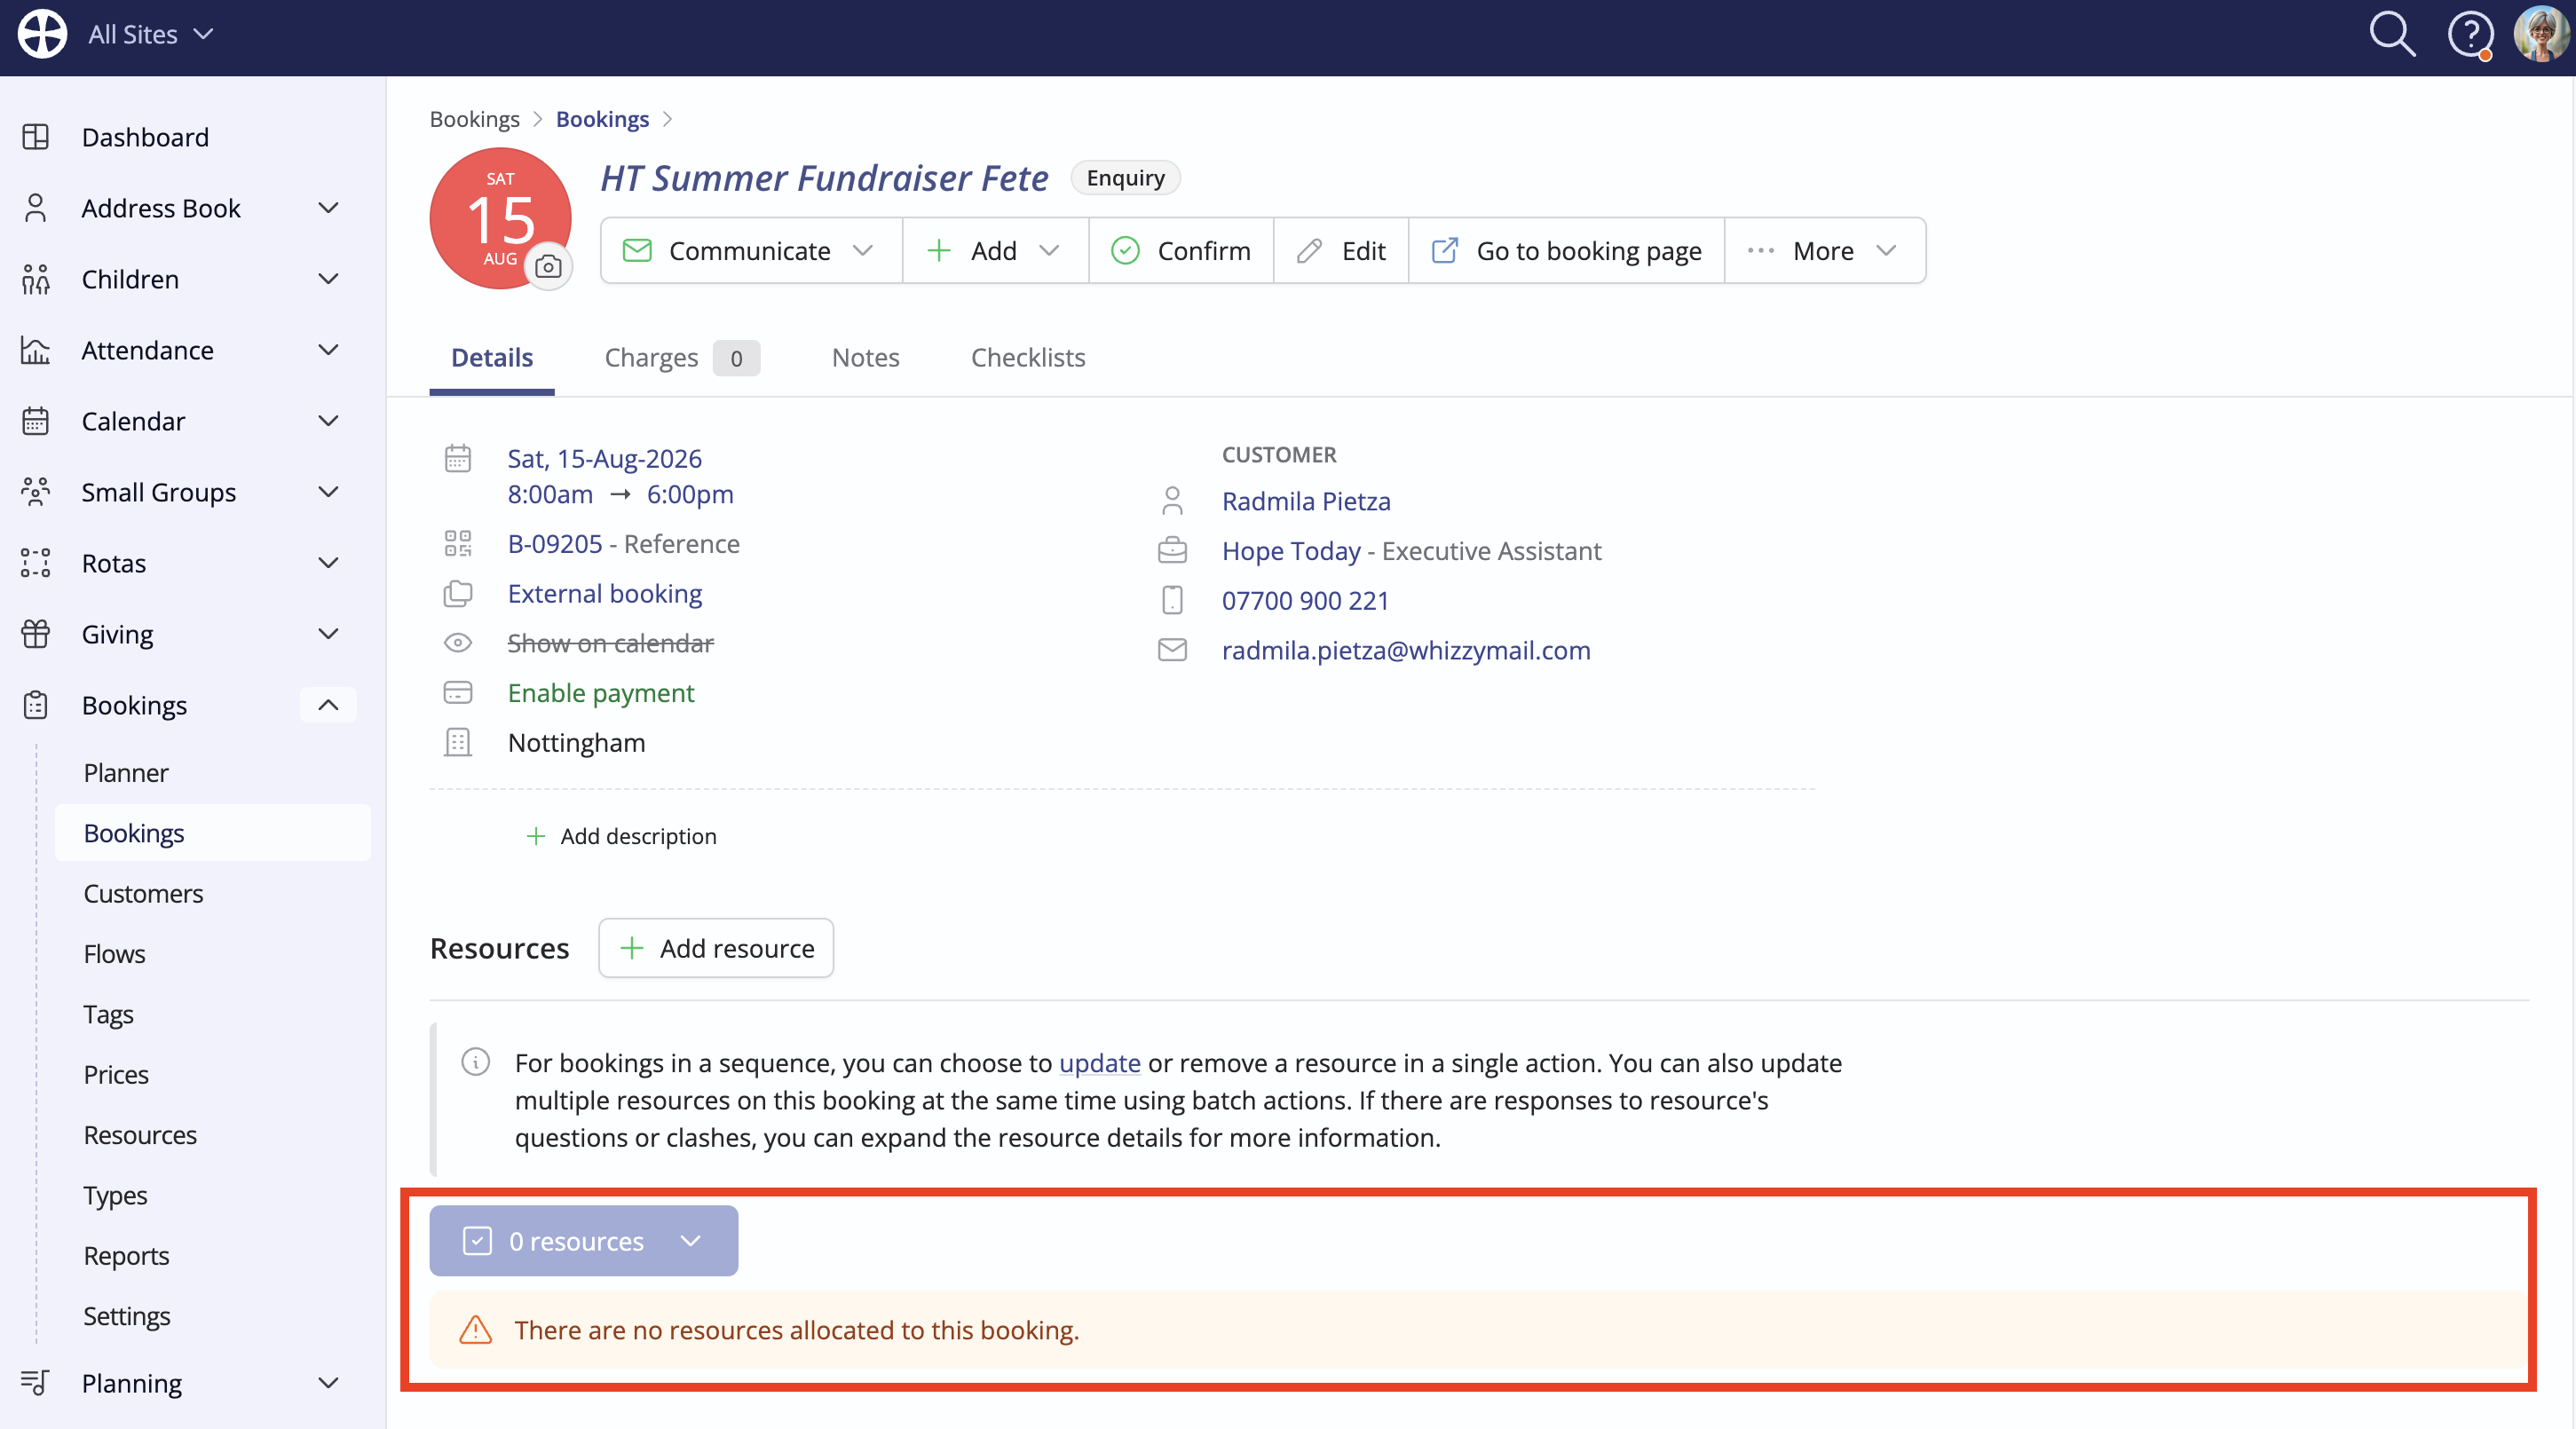
The Enquiry status is also shown when viewing the booking that has yet to be Confirmed or Declined. Note that where a customer didn't choose resources on their enquiry form, the enquiry will have no booked resources - the enquiry won't show on the Booking module's Resource Planner until one or more resources have been allocated.
Linking enquiries to existing customers
When an enquiry is submitted, the system will attempt to match the customer details on the enquiry form to an existing customer profile using the exact first name, last name, email and Site, in the following order:
- If a matching customer is found, the enquiry is linked to that customer, rather than creating a duplicate or new customer profile.
- If a matching archived customer is found, the archived customer record is set active, and the enquiry is linked to that customer.
- In both scenarios above, any missing customer information provided on the enquiry form - mobile, telephone, employer, job, and address - will be patched into the customer's profile. However, any existing data is not overwritten by different data supplied in the enquiry form, but the customer profile can be manually updated.
- Where no definitive match is found in the Customer section of the Bookings module, a contact match is sought in the active Address Book, again looking for an exact match on first name, last name, email and form Site. If a match is found, a new customer record is created, linked to that Address Book contact, and any missing information provided on the enquiry form is patched into the customer's profile. Again, no existing personal data will be overwritten, but the customer profile can be manually updated.
- If there is no definitive match to an existing customer or Address Book contact, the system will fall back to using all the customer details on the enquiry form to create a new customer record to which the enquiry is linked.
When considering a booking enquiry, you can Confirm or Decline it. No communications are auto-sent to the customer when this happens; however, you can Communicate the enquiry status outcome with the customer from the booking:
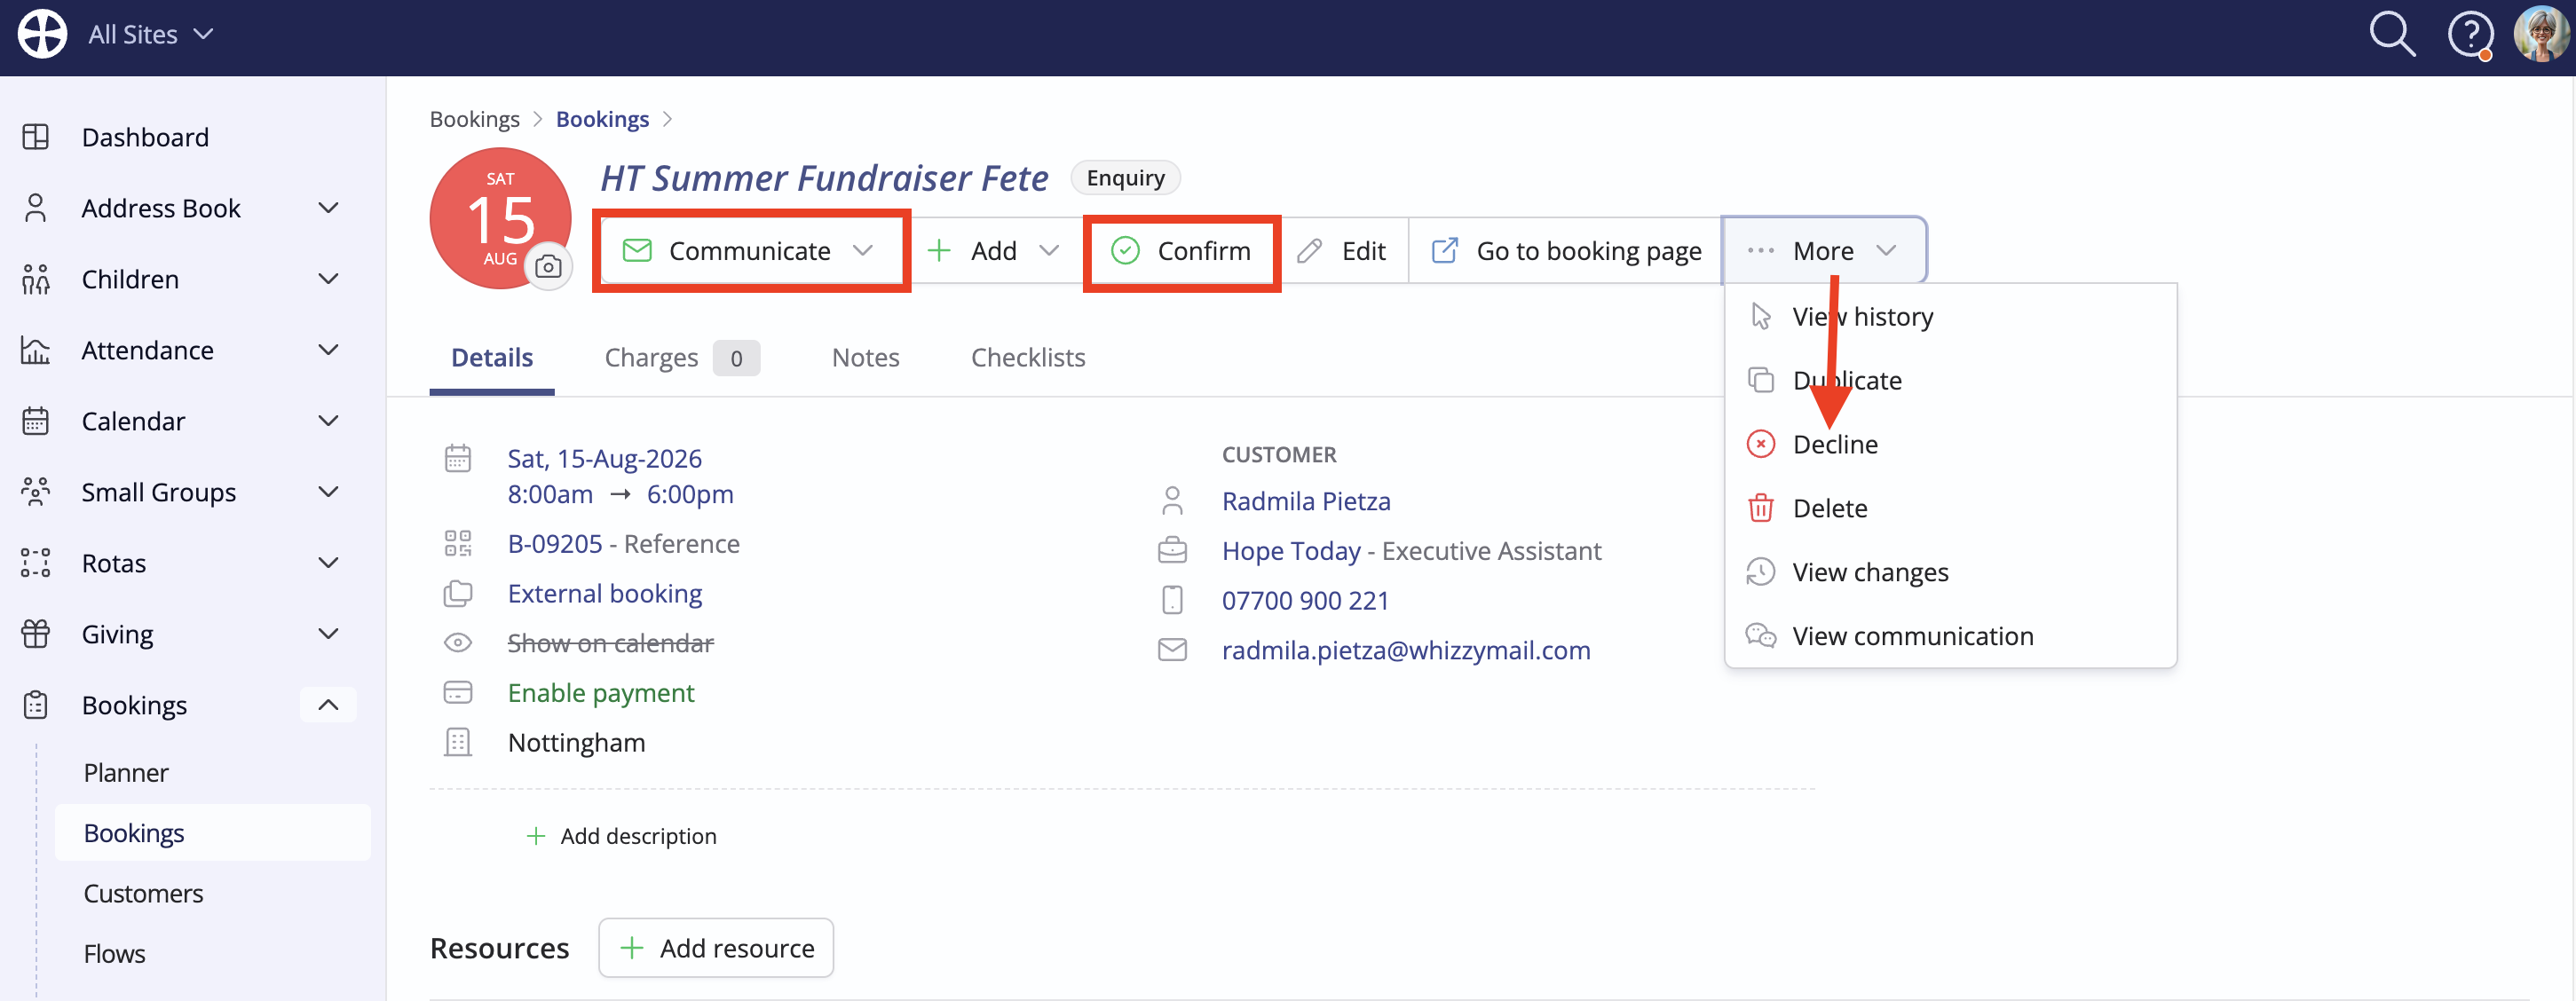
As part of an enquiry confirmation workflow, you'll likely review all the enquiry and resource details requested, including the booking "Name". You can optionally raise charges (see the related article on Raising booking changes) and send the customer their booking page.

Note that a declined enquiry can still be confirmed or reverted to a pending-status enquiry, if you wish.