Managing resources
In this article
Introduction
Adding resources
Making changes to a resource site
Assigning resource managers
Adding resource-specific booking questions
Resources in action
Managing resource usage
Introduction
In this article, we show you how to add and manage your bookable resources. Typically, these are the various rooms and spaces that can be booked for internal use or rented out to customers for external use. You may also want to add resources for other tangible items, such as equipment and furniture. However, you can also add intangible resources such as a named key holder like a verger, the minister assigned to wedding and funeral bookings or catering or refreshment services that you offer your customers when they make a booking.
The process of adding Resources is the same as for adding booking Types. First, you'll add the resource details, optionally assign resource managers and finally, add any resource-specific questions used to collect customer responses when the resource is booked.
Adding resources
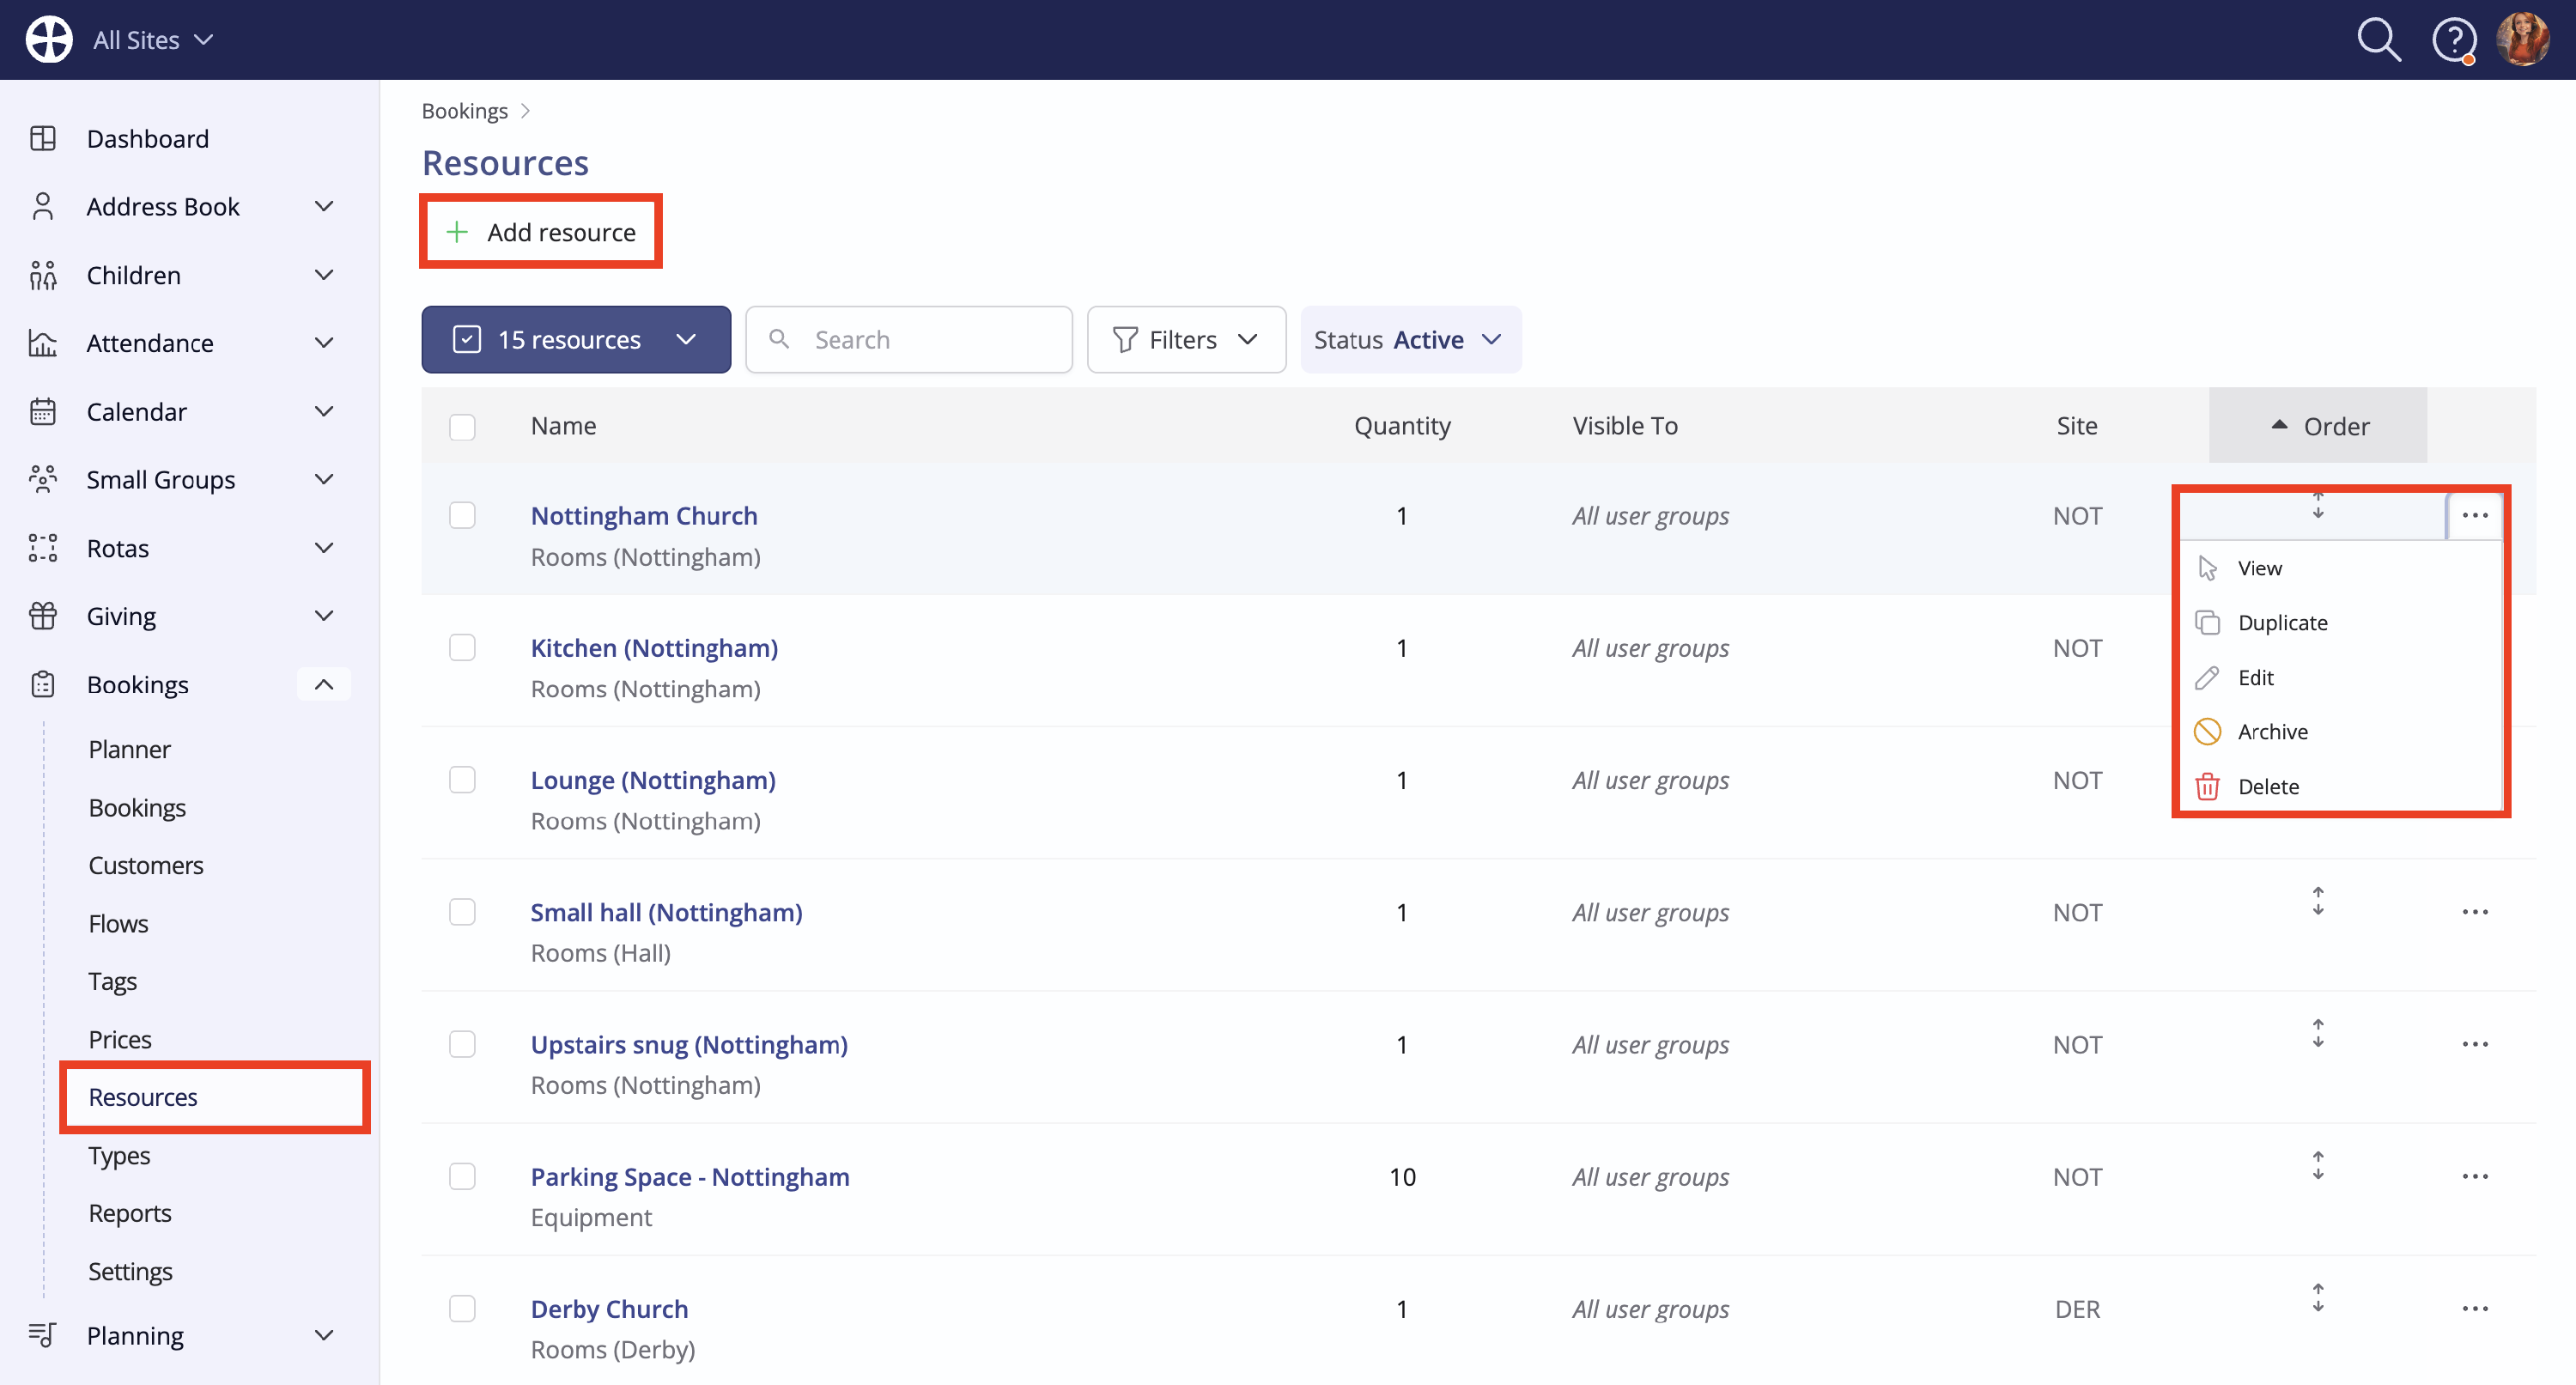
Navigate to the Resources section of the Bookings module. To add a new resource, click Add resource or select Duplicate to copy an existing or similar resource.
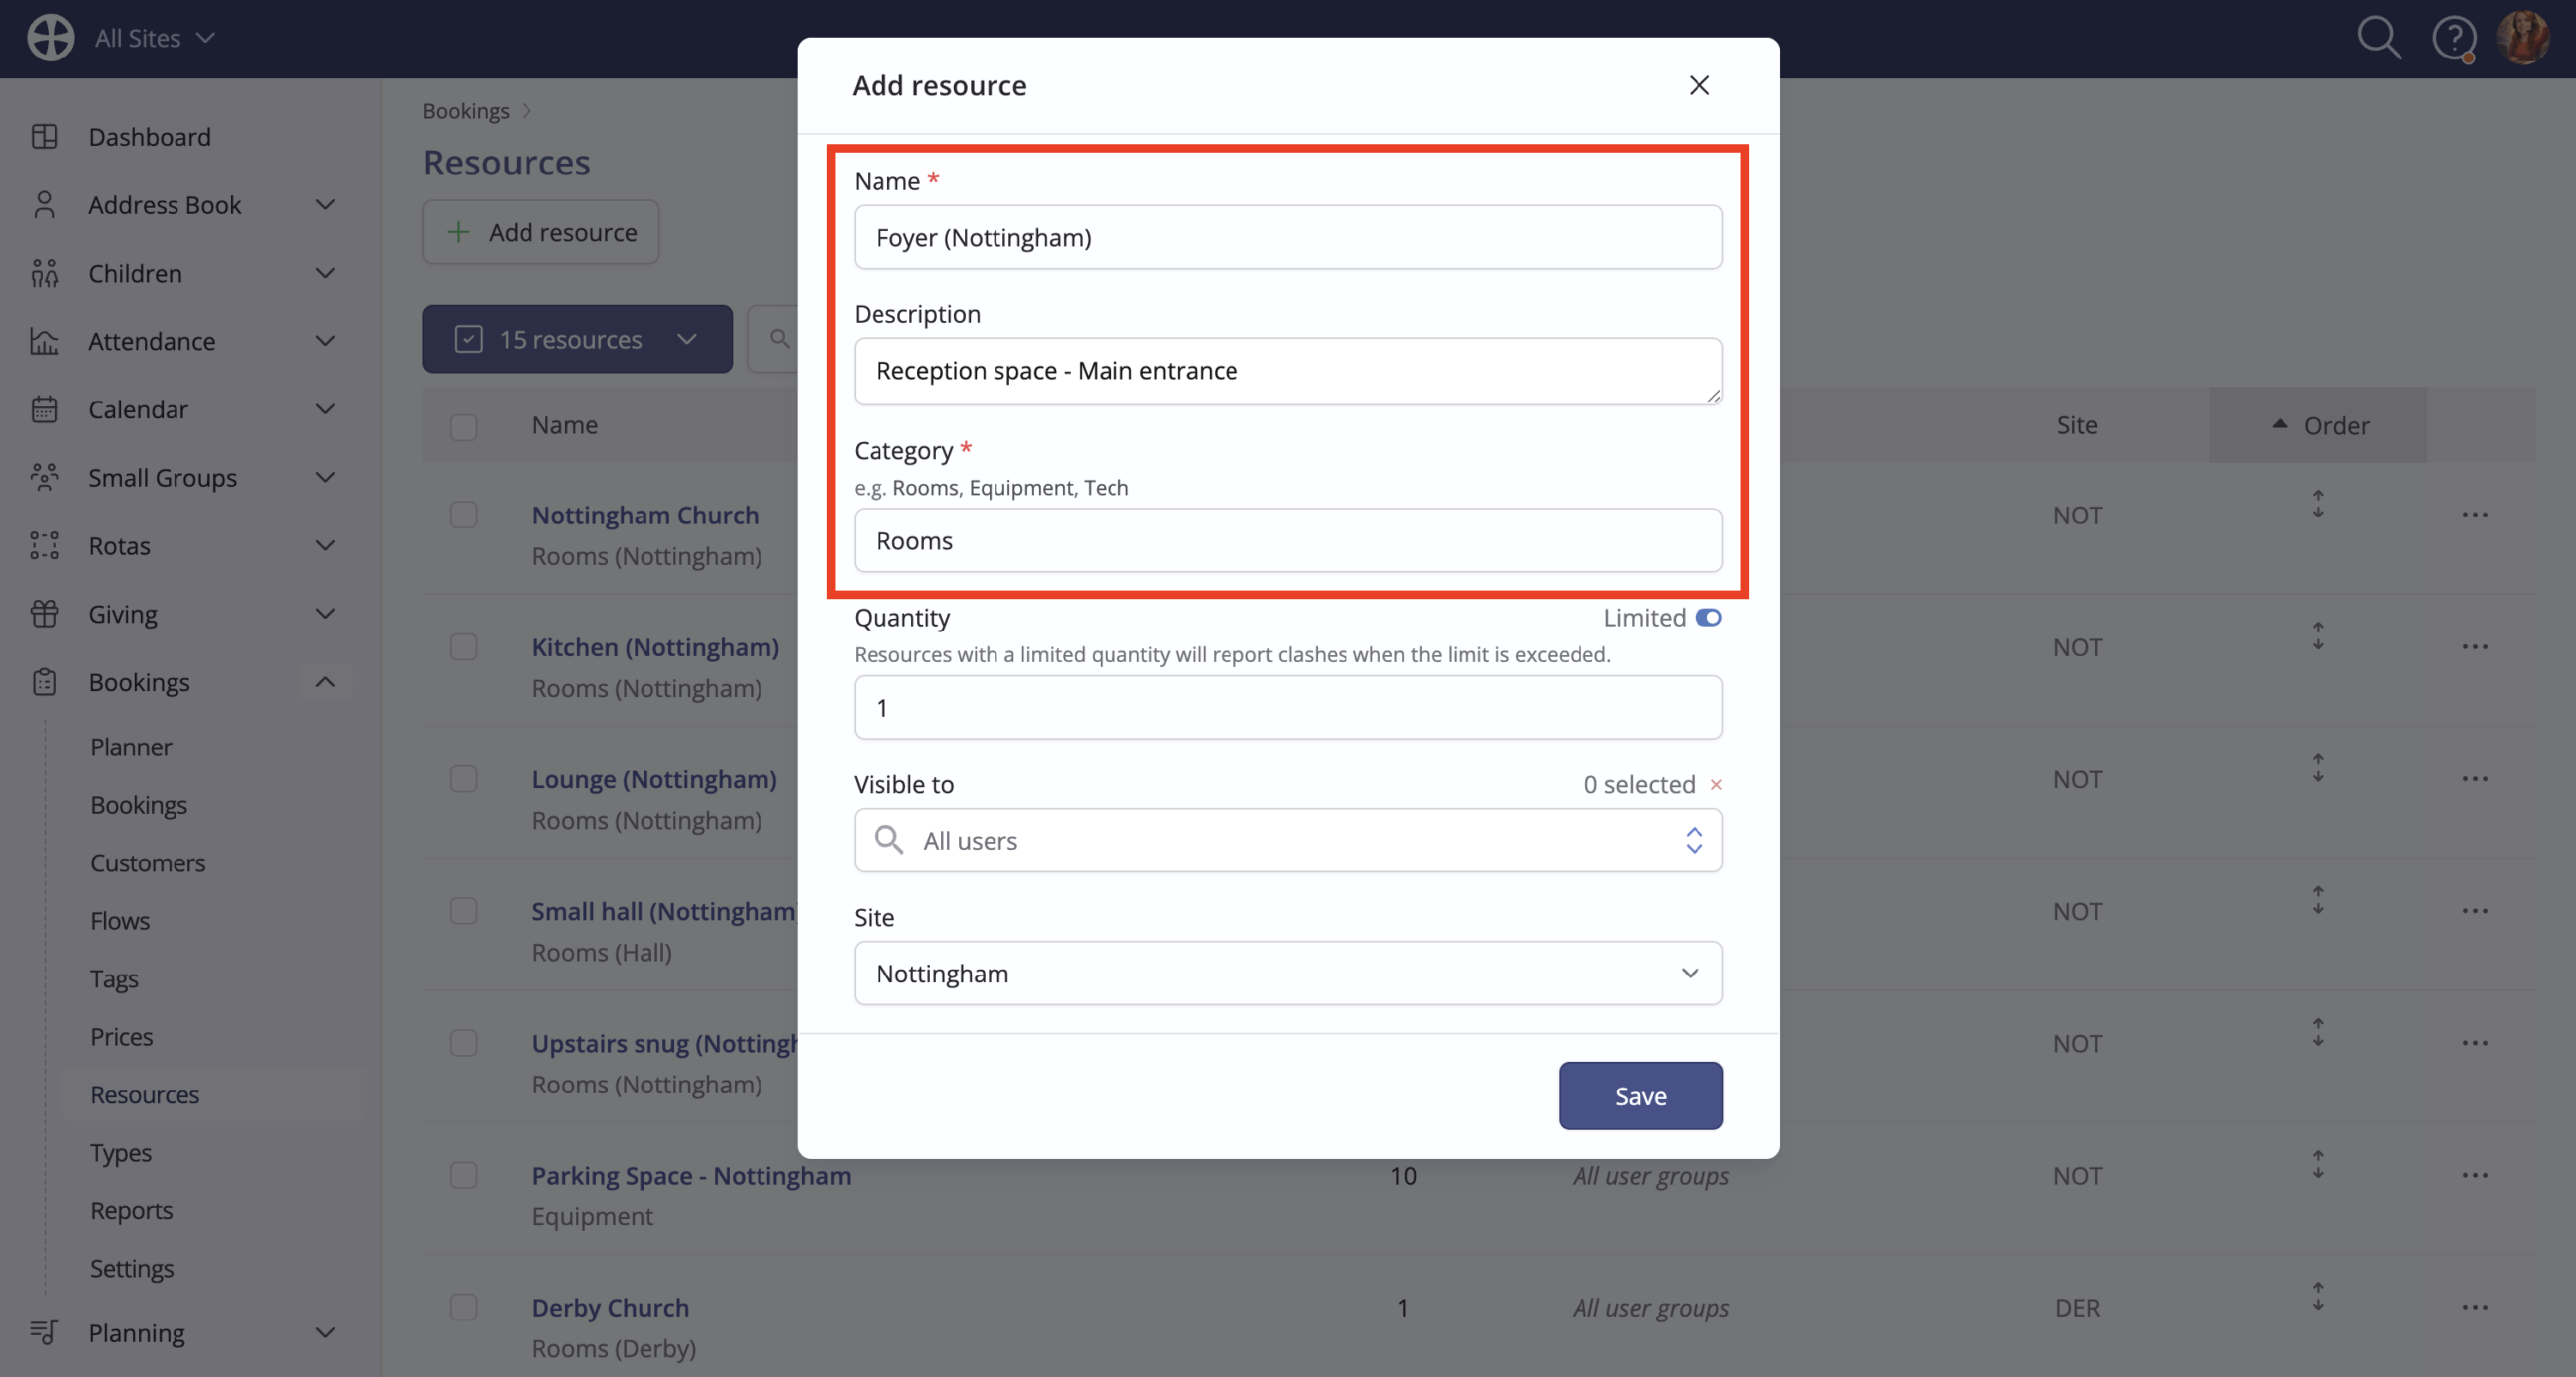
On the Add/Duplicate resource pop-up, enter a suitable Name. An optional Description will help Users know they're working with the correct resource. Resources are grouped by Category, e.g. Rooms, Equipment and Vehicles. Later, you'll be able to filter the resource Planner by category – ideal for viewing only "Room" resources. As you type in the Category field, existing categories are suggested or simply type a new category. When you save the resource, the new category will be added as well.
Top Tip! Resource quantities
While the Quantity for resources like a room is typically set Limited to 1, you can set the specific maximum quantity available for resources like tables and chairs. Users will see a clash warning if the number being booked exceeds the maximum quantity available. You can also set an Unlimited quantity for resources like 'Teas and Coffees', where the quantity of refreshments booked never gives rise to a clash.

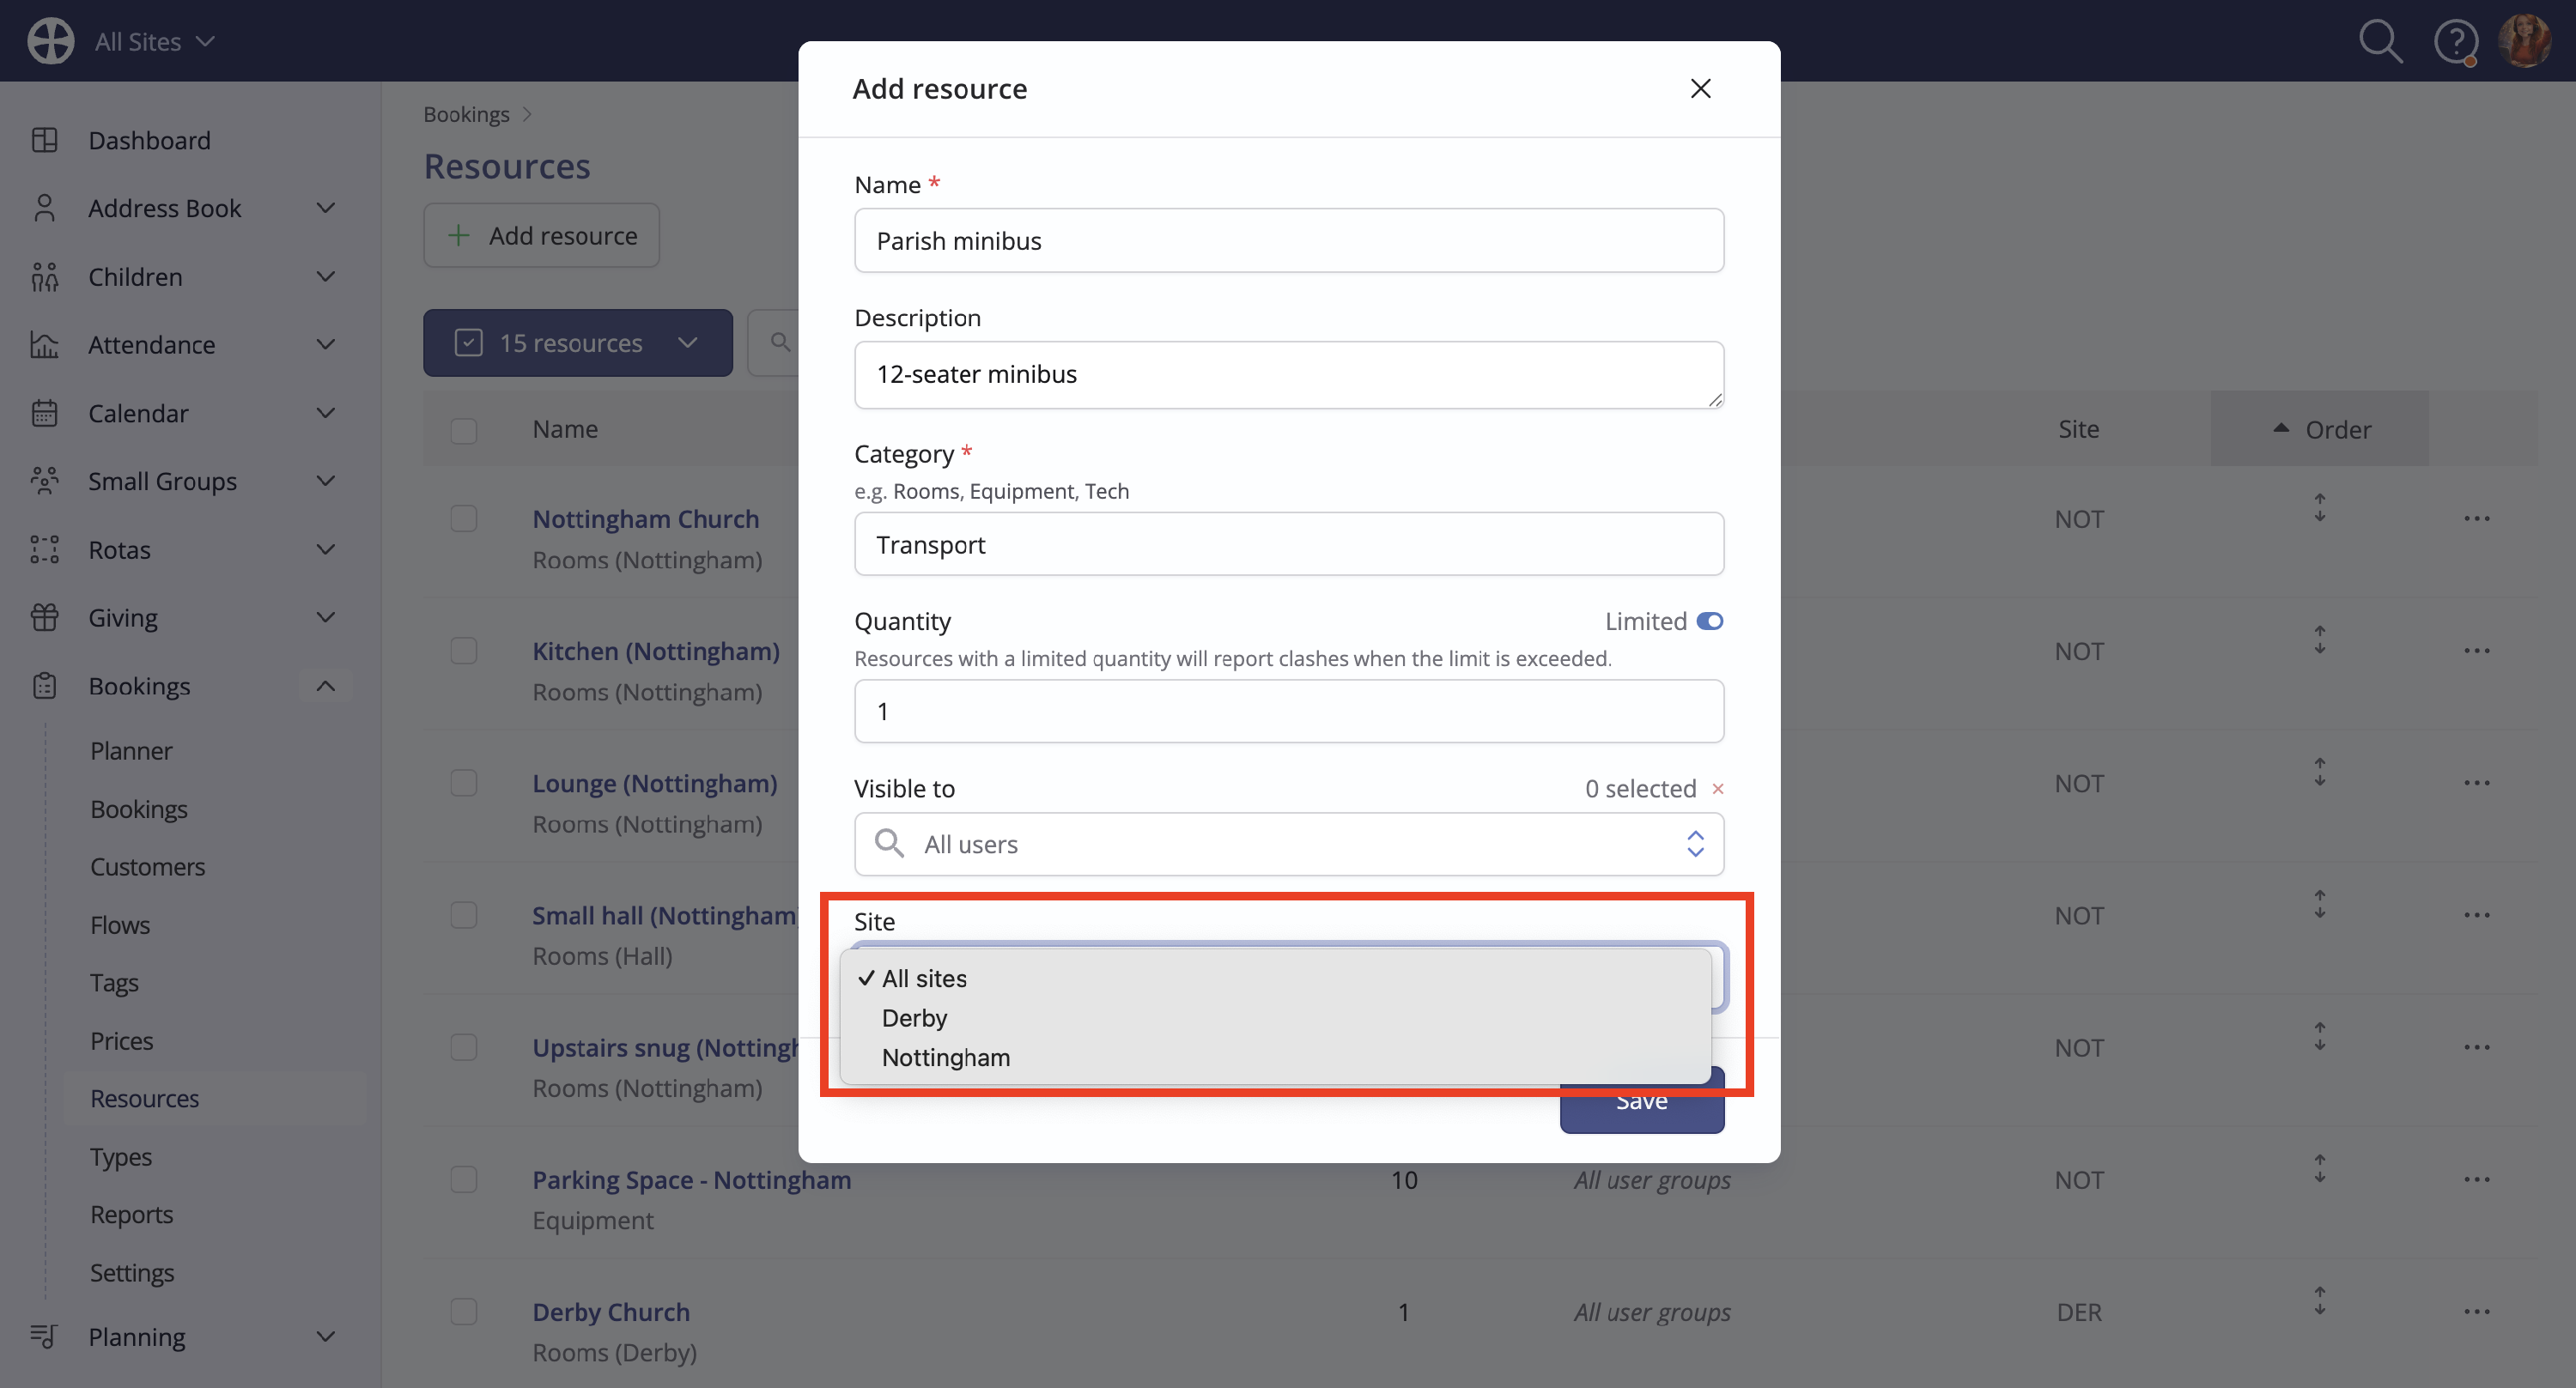
By default, typically, resources are Visible to all Bookings module users. However, you can optionally restrict the visibility of certain resources to one or more user groups, e.g. high-value resources or those requiring special expertise to use. Only user group members can assign restricted resources to a booking. We have produced a related support article on Restricting visibility and access with user groups. Finally, for multi-site customers, select the resource Site. A resource can be site-specific, such as a room or all-site. This setting is important – users can only assign all-site resources and site-specific resources that belong to the same site as the booking. For resources that are shared across multiple sites, such as a parish minibus, set the resource site to "All Sites".
Important: Resource site changes
Site-specific resources can only be assigned to bookings of the same site. Subsequent changes to a resource site are not permitted and a warning is shown alerting you to existing linked bookings whose site differs from the resource site change you are attempting to make.
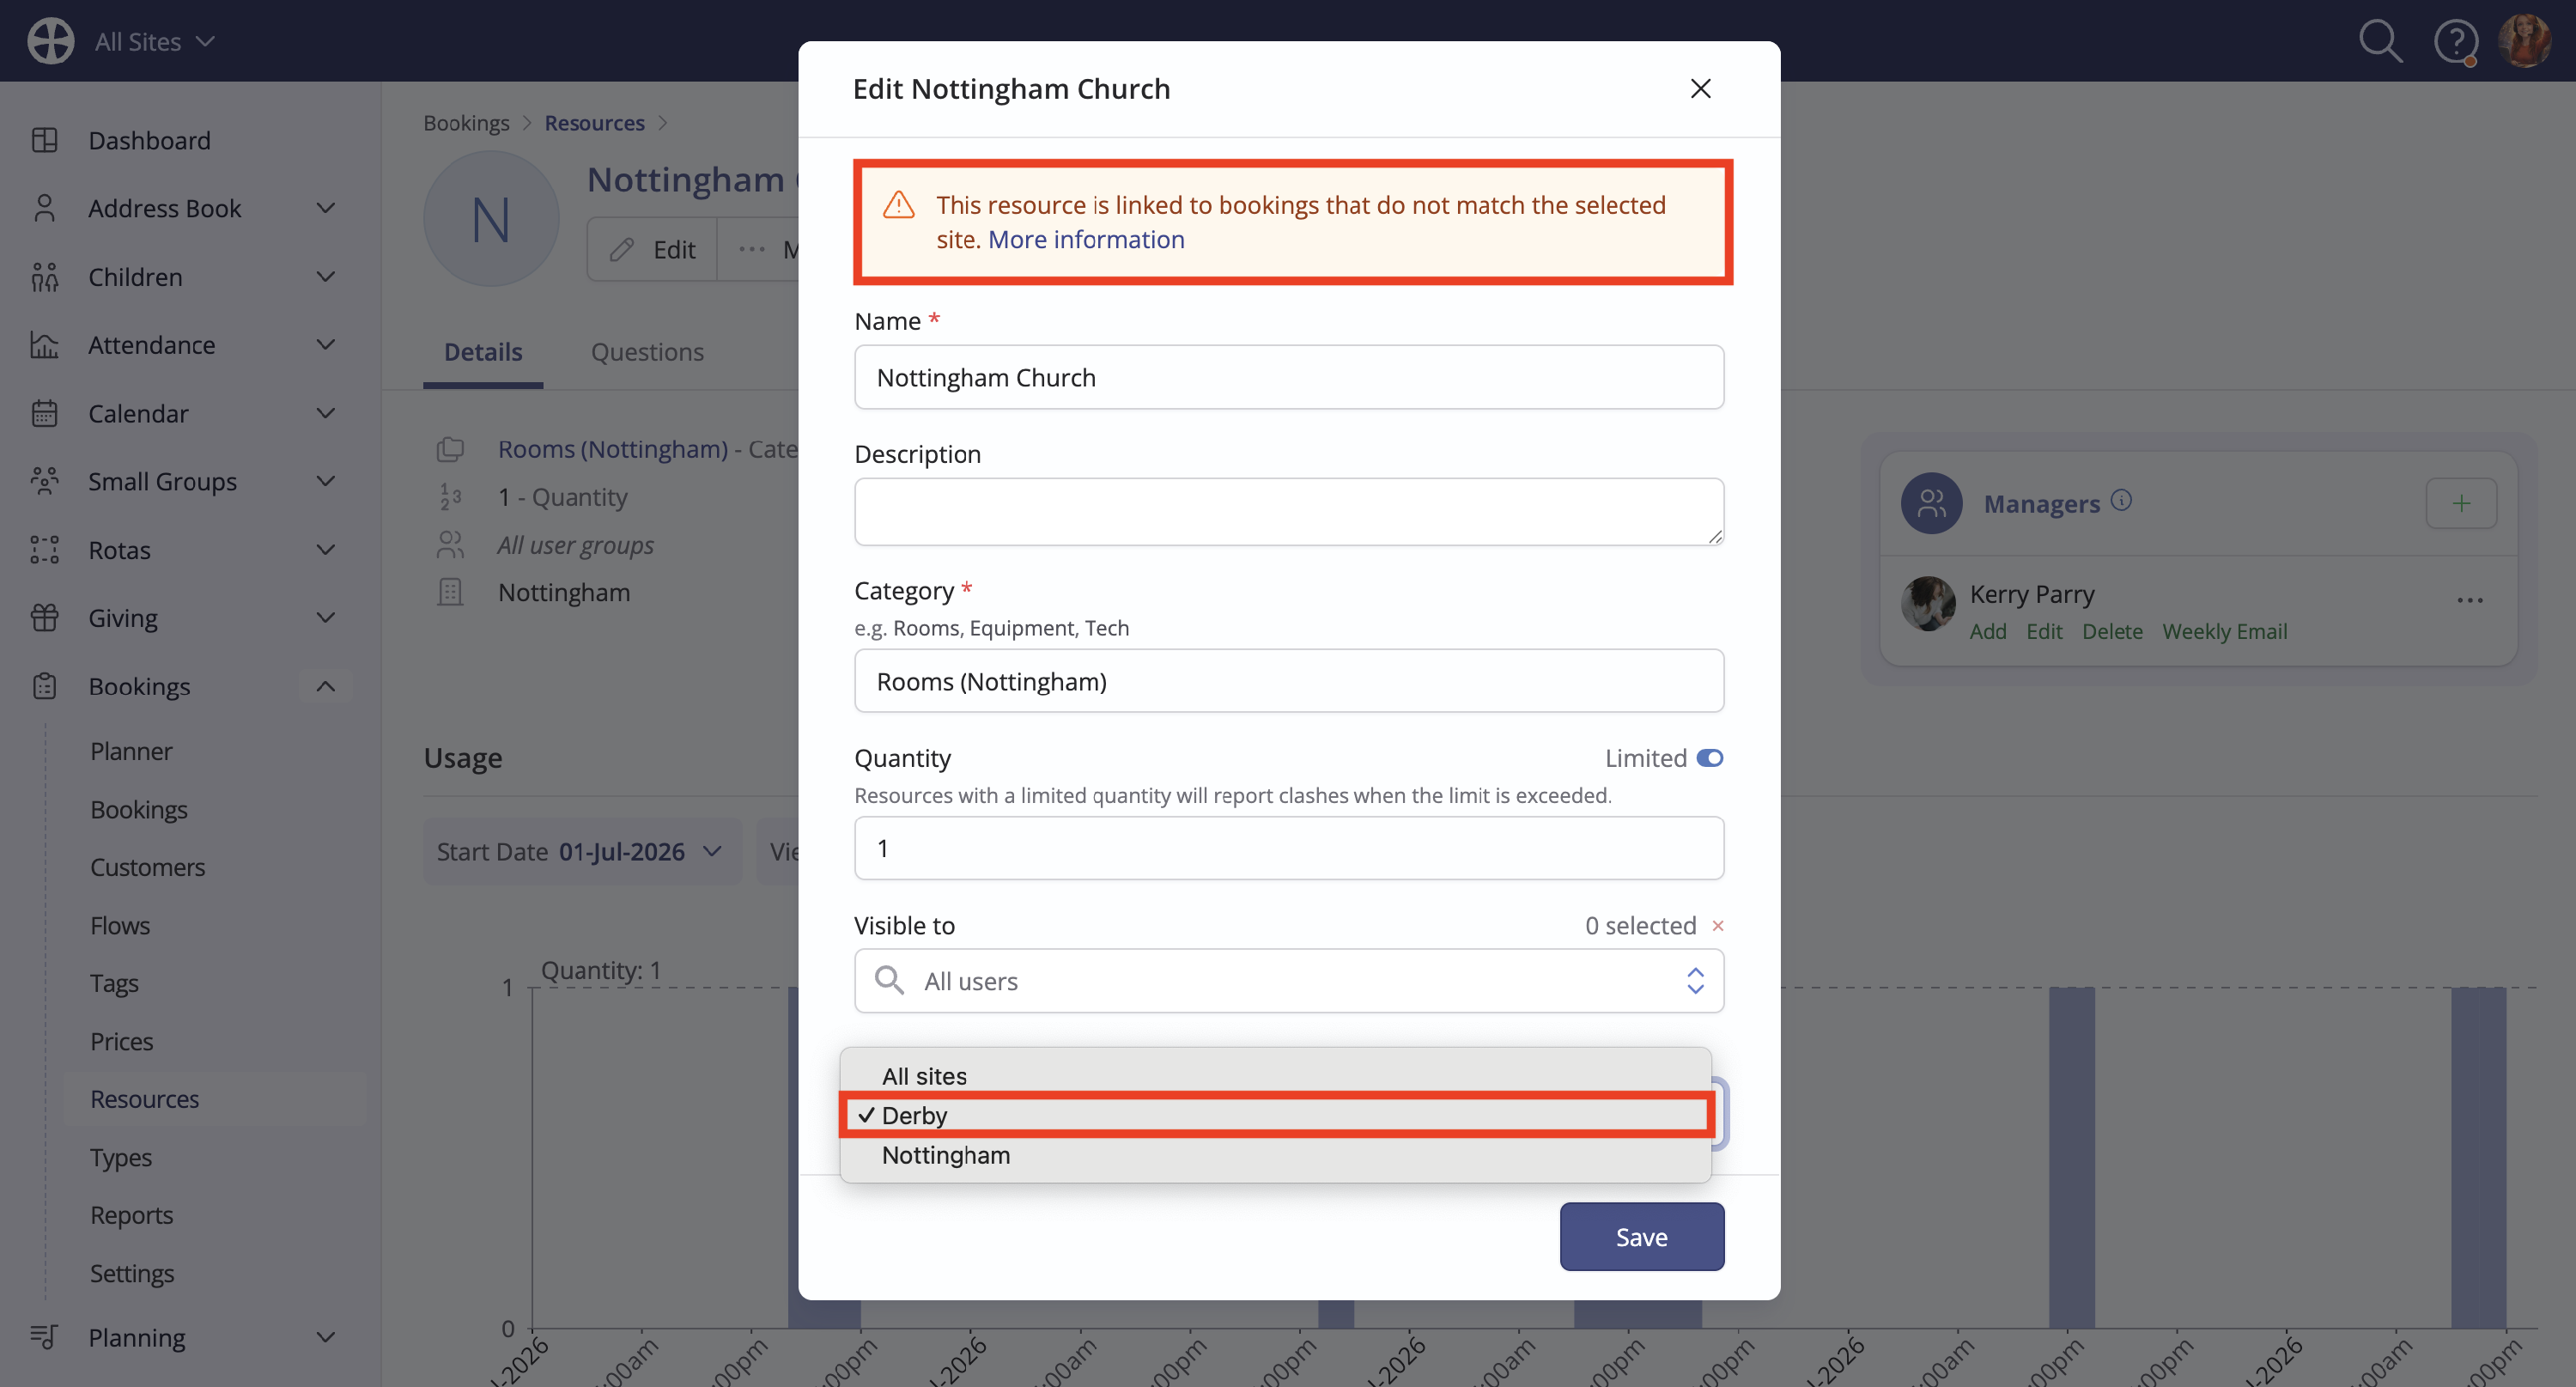
If you have a resource with an incorrect site, first archive the resource to preserve its linking to your existing past and future bookings. Then, add a new resource with the correct site.
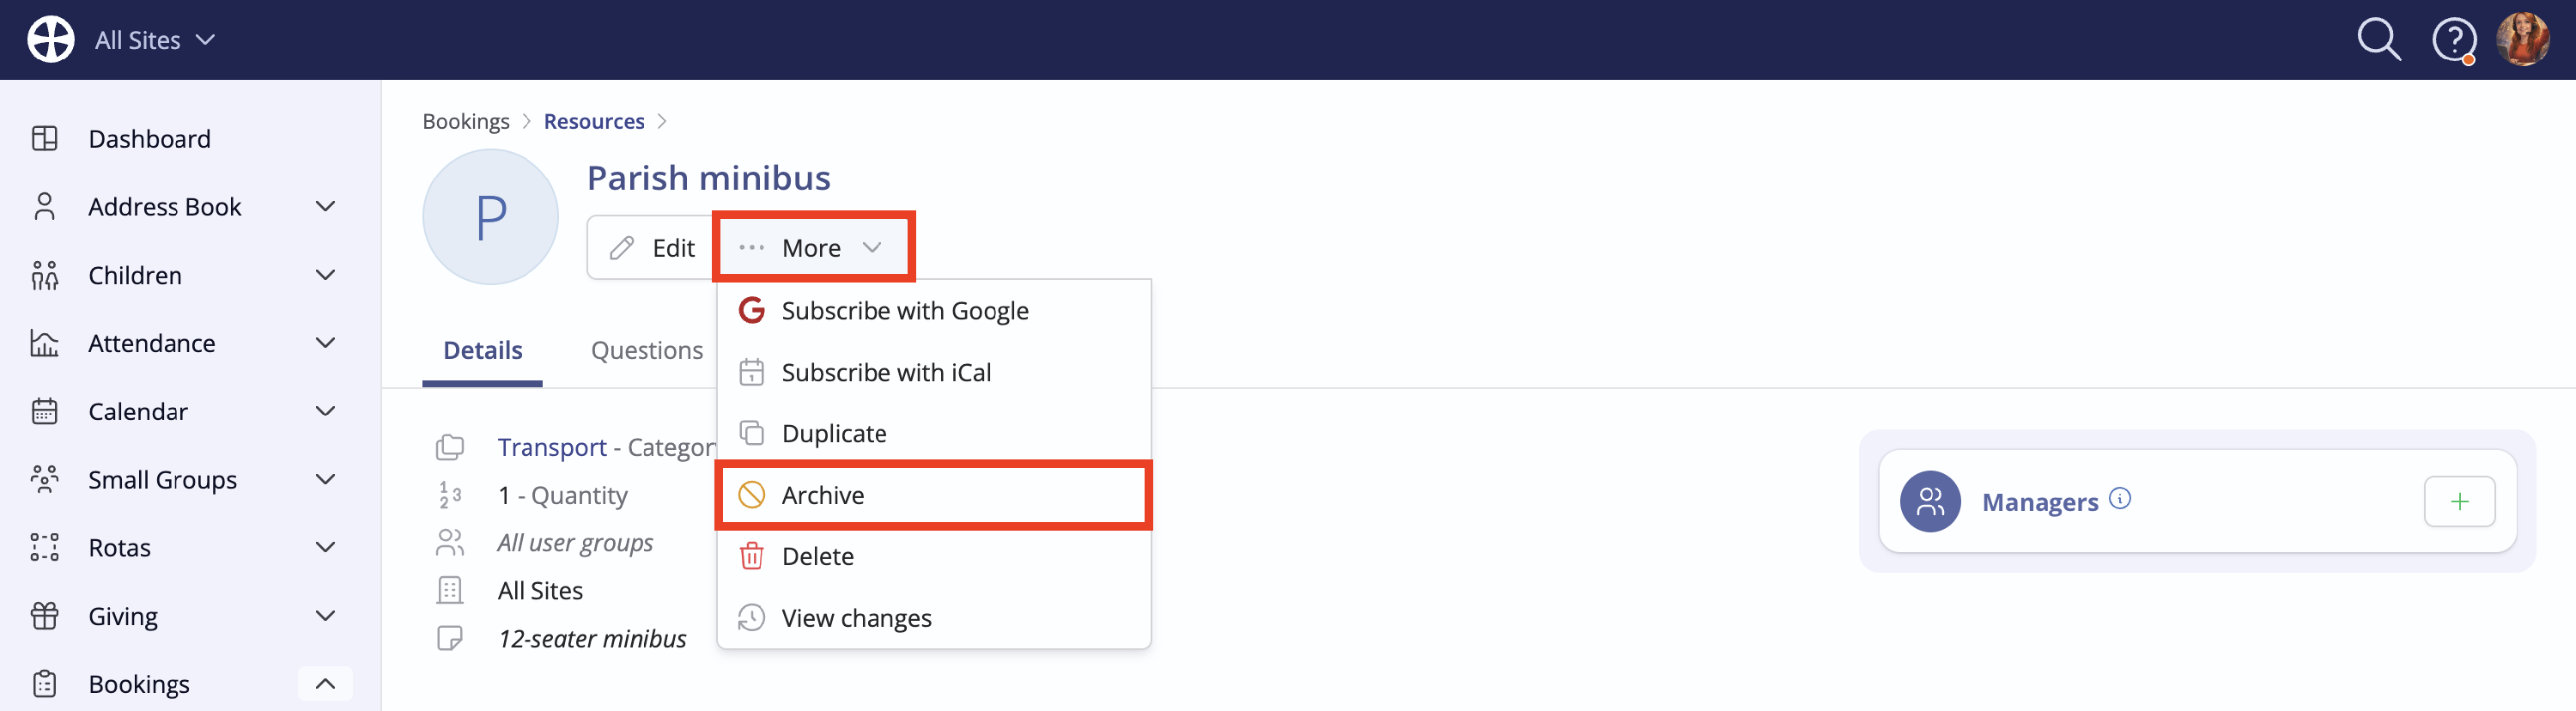
Click Save to add the new resource. The resource View displays all the details just added. Finally, note the other resource actions available to Archive or Delete a resource. Archiving preserves the resource against existing past and future-dated bookings but prevents the resource from being assigned to new bookings. Archived resources can be set active again. Deleting a resource will permanently remove it from all past and future bookings and is irreversible. Users can also optionally subscribe to a read-only iCal feed that displays booked resources in their personal calendar application.
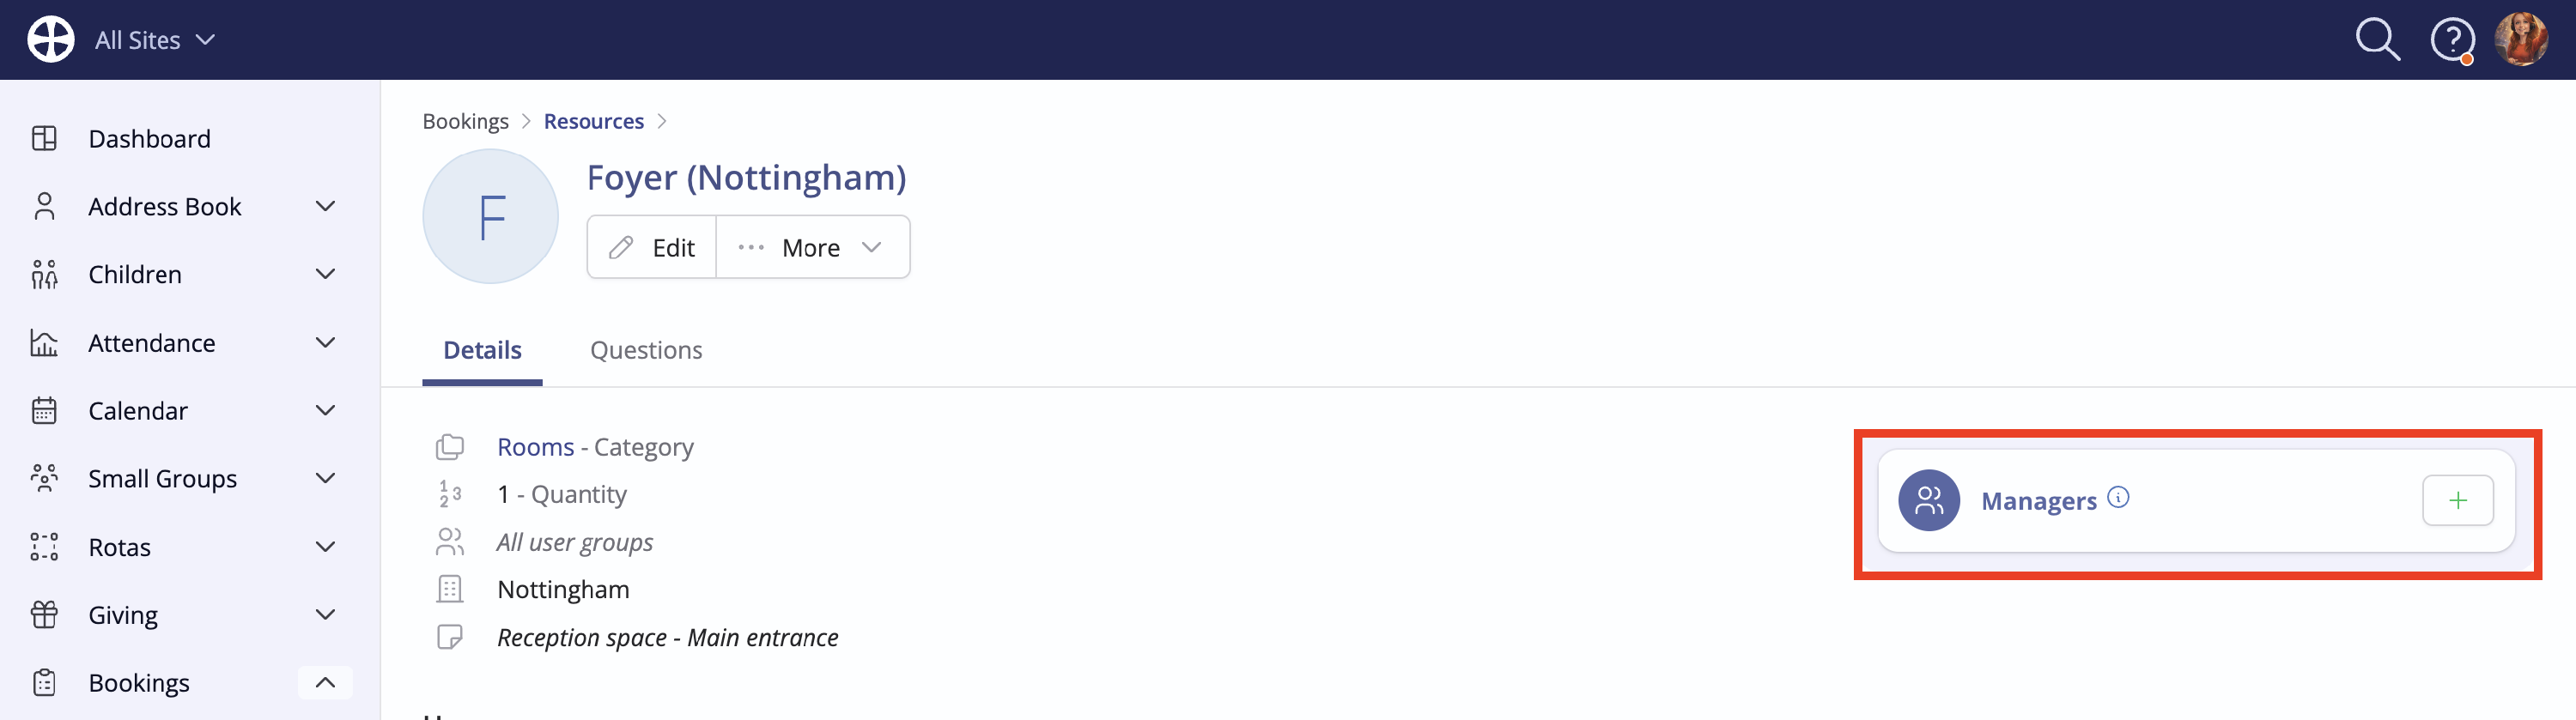
Assigning resource managers
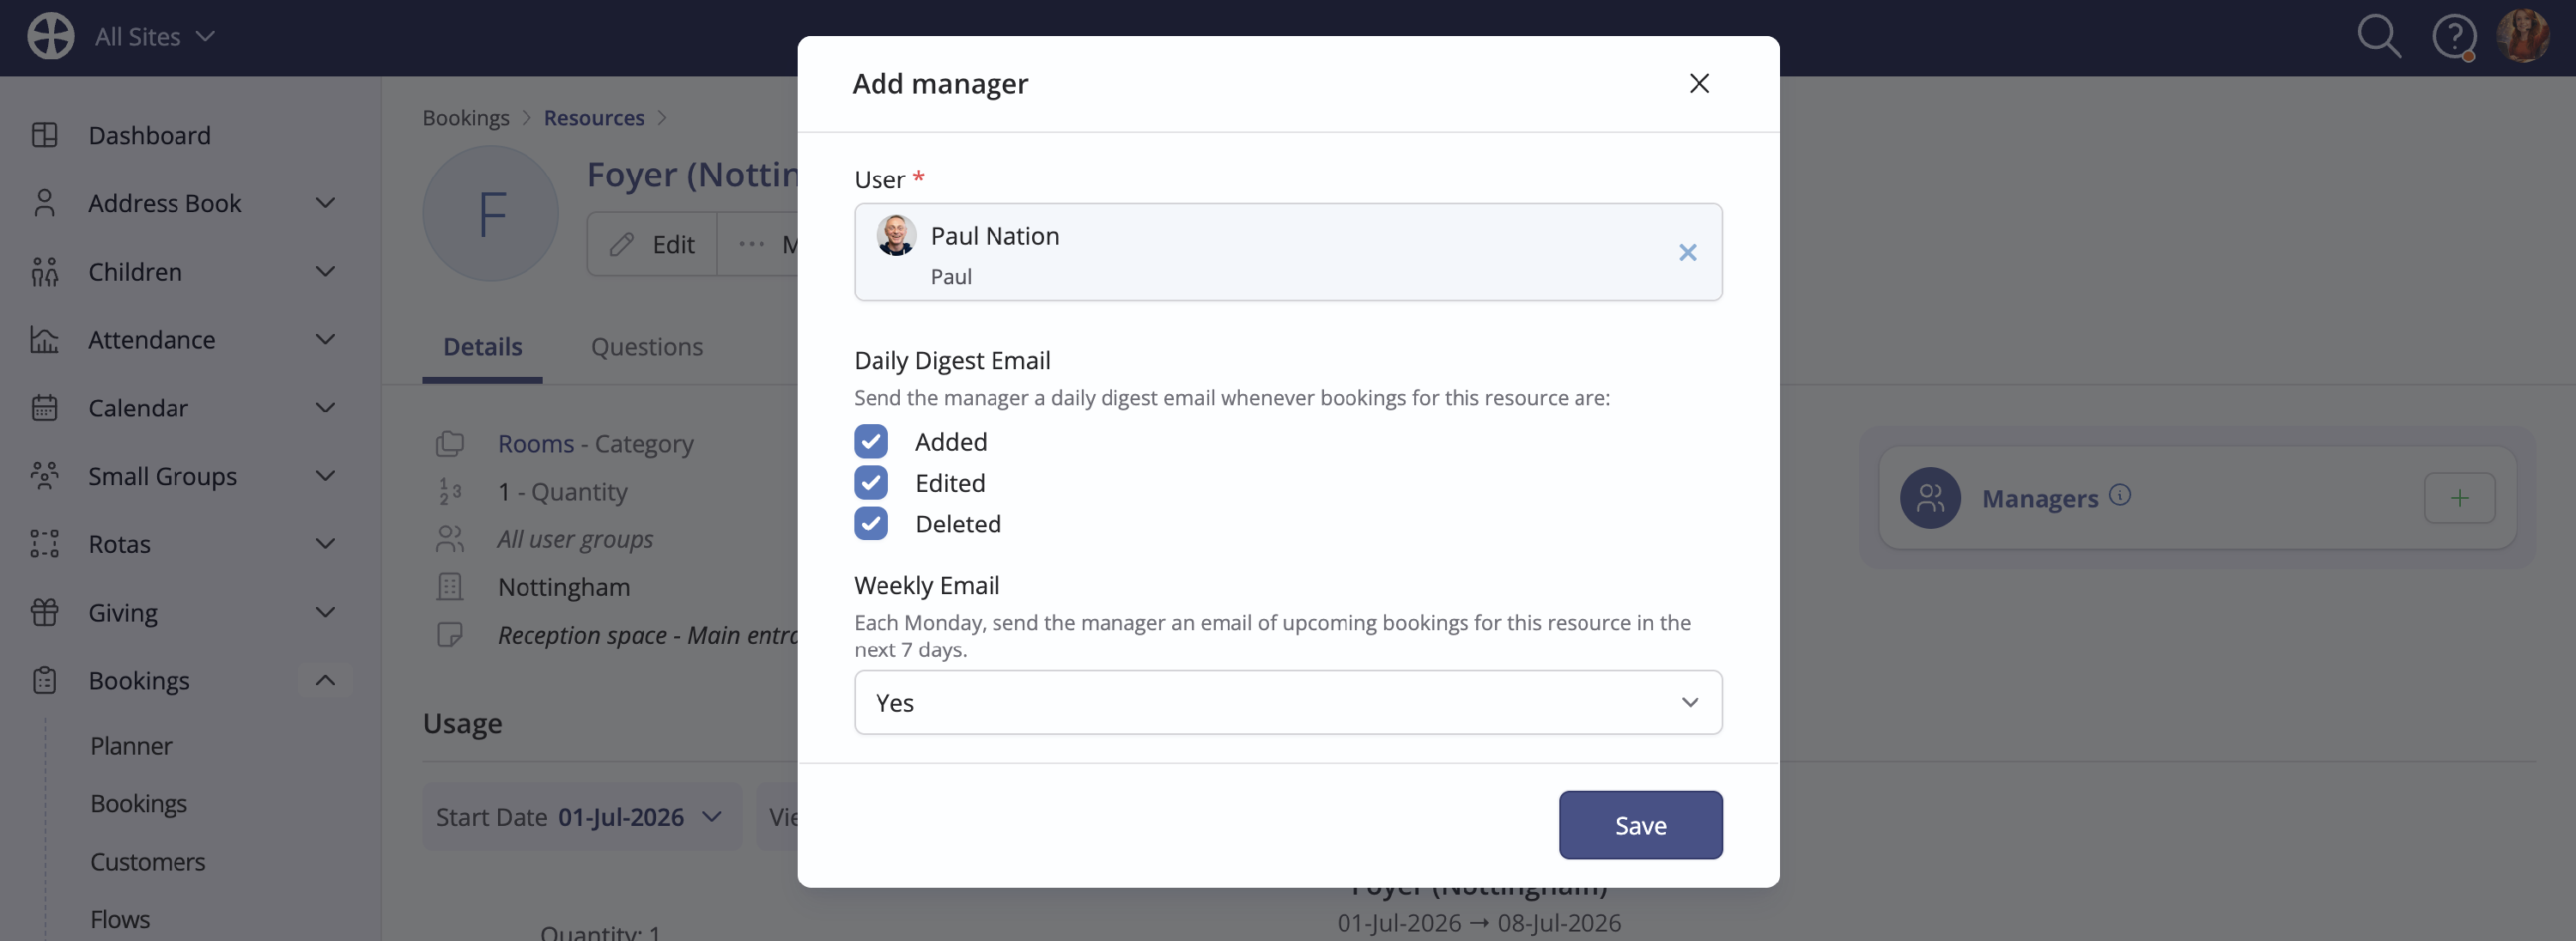
From the Resource View, click Add manager to assign one or more individuals who can receive daily digest notification emails when bookings that include this resource are Added, Edited or Deleted.
On the Add manager pop-up, search and select the User to be assigned as a Manager. As with booking Types, managers can optionally receive a Daily Digest Email when bookings for the resource are added, edited or deleted. A pair of digest notification emails is sent each day; one at 7 am that summarises all the changes made in the previous 19 hours and one at noon that summarises all of the changes made in the past 5 hours since the 7 am email. The Weekly Email is a 7-day summary of upcoming bookings for the resource and is sent every Monday at 7 am. Those who manage multiple resources or booking types will receive a single pair of daily digest emails and one weekly overview email (rather than separate emails for each resource or type they manage). Click Save to add the manager.
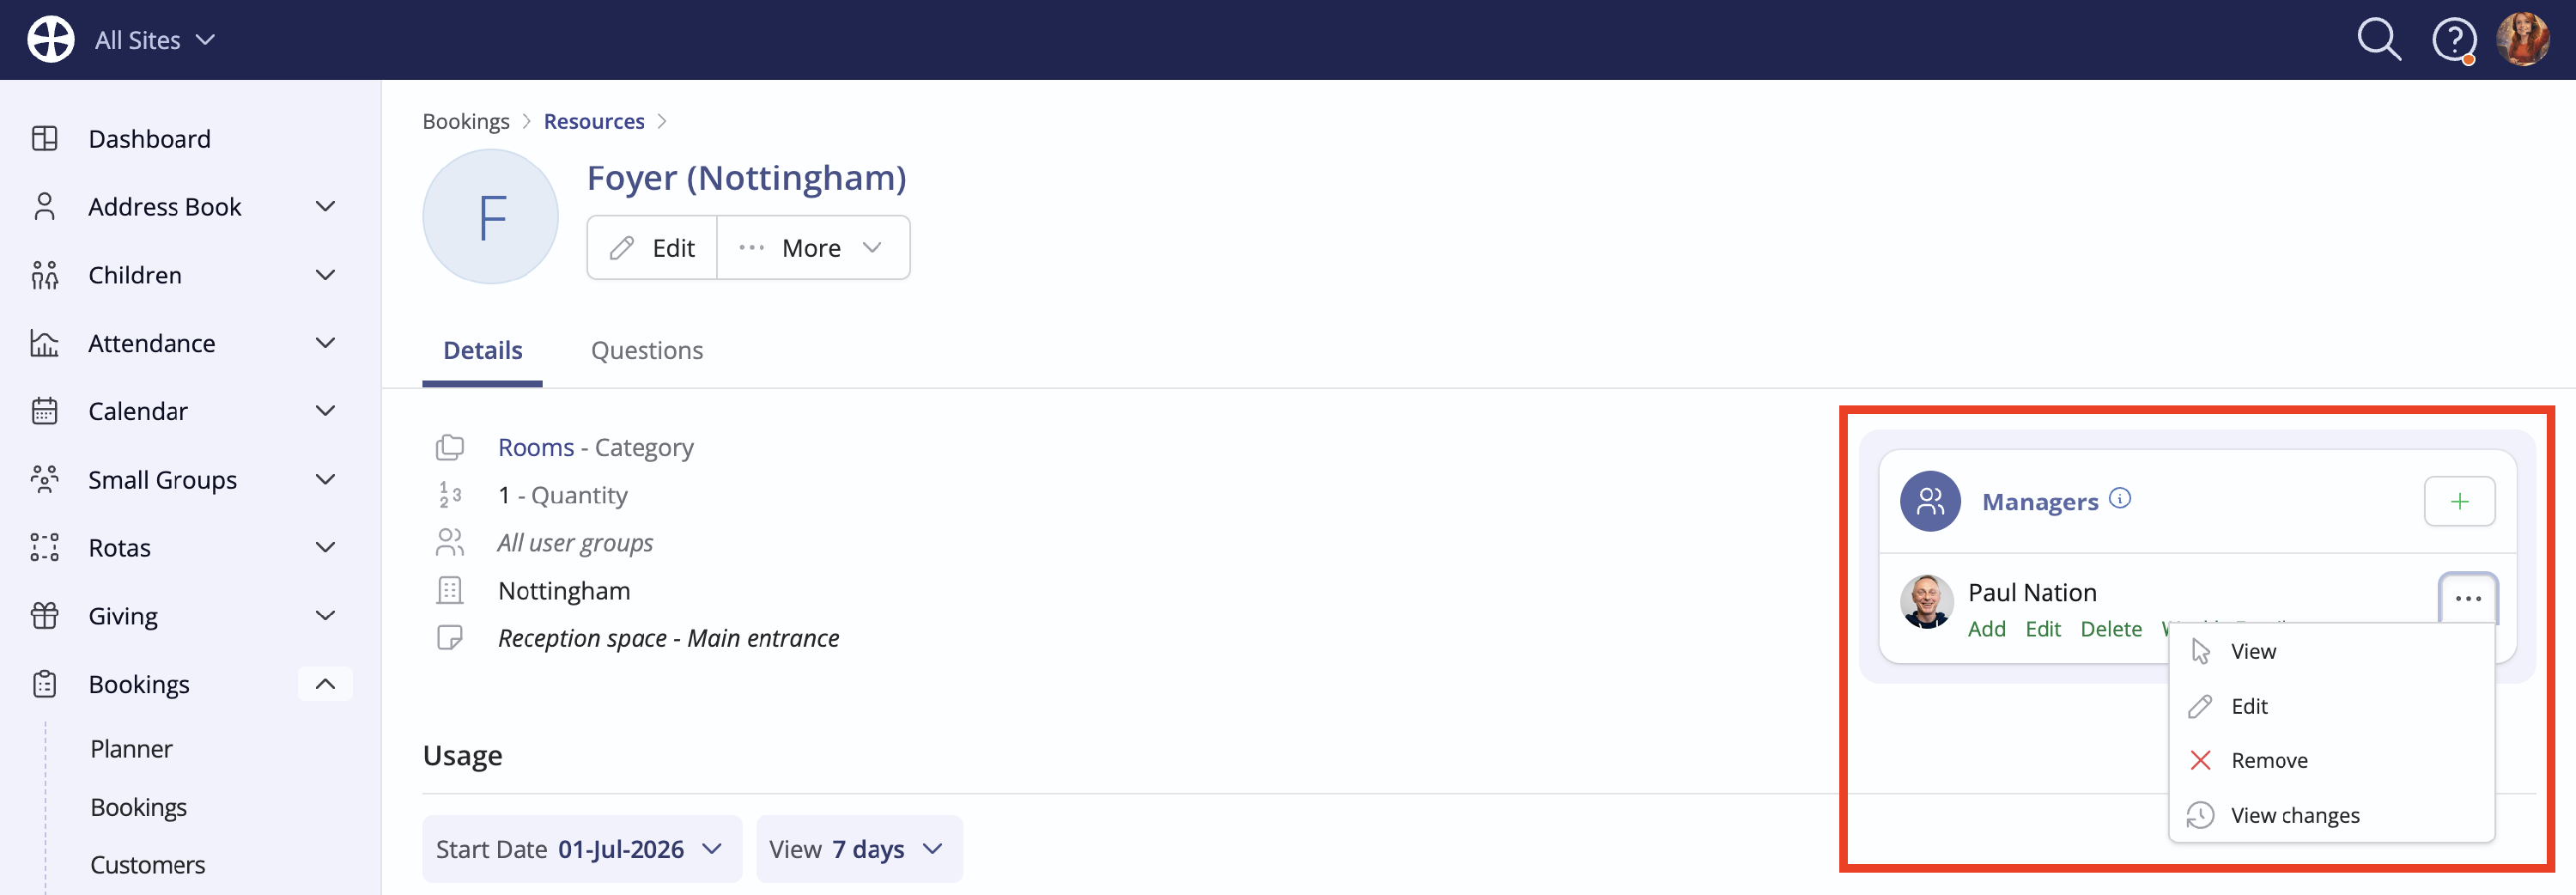
Continue adding further managers as appropriate. Note the available manager Actions: Edit and Remove a manager or View changes made.
Adding resource-specific booking questions
As with booking Types, you can add resource-specific Questions to collect customer responses when the resource is added to a booking. This is ideal for resources that require expertise for use or where you need additional information from a customer about their use of a particular resource. For example, for certain room resources, you may need to know whether a key holder is required to unlock or lock before and after the booking. By adding this question to the room resource, you can record customer responses against their bookings for that resource. Let's continue the previous resource example to see how questions work.
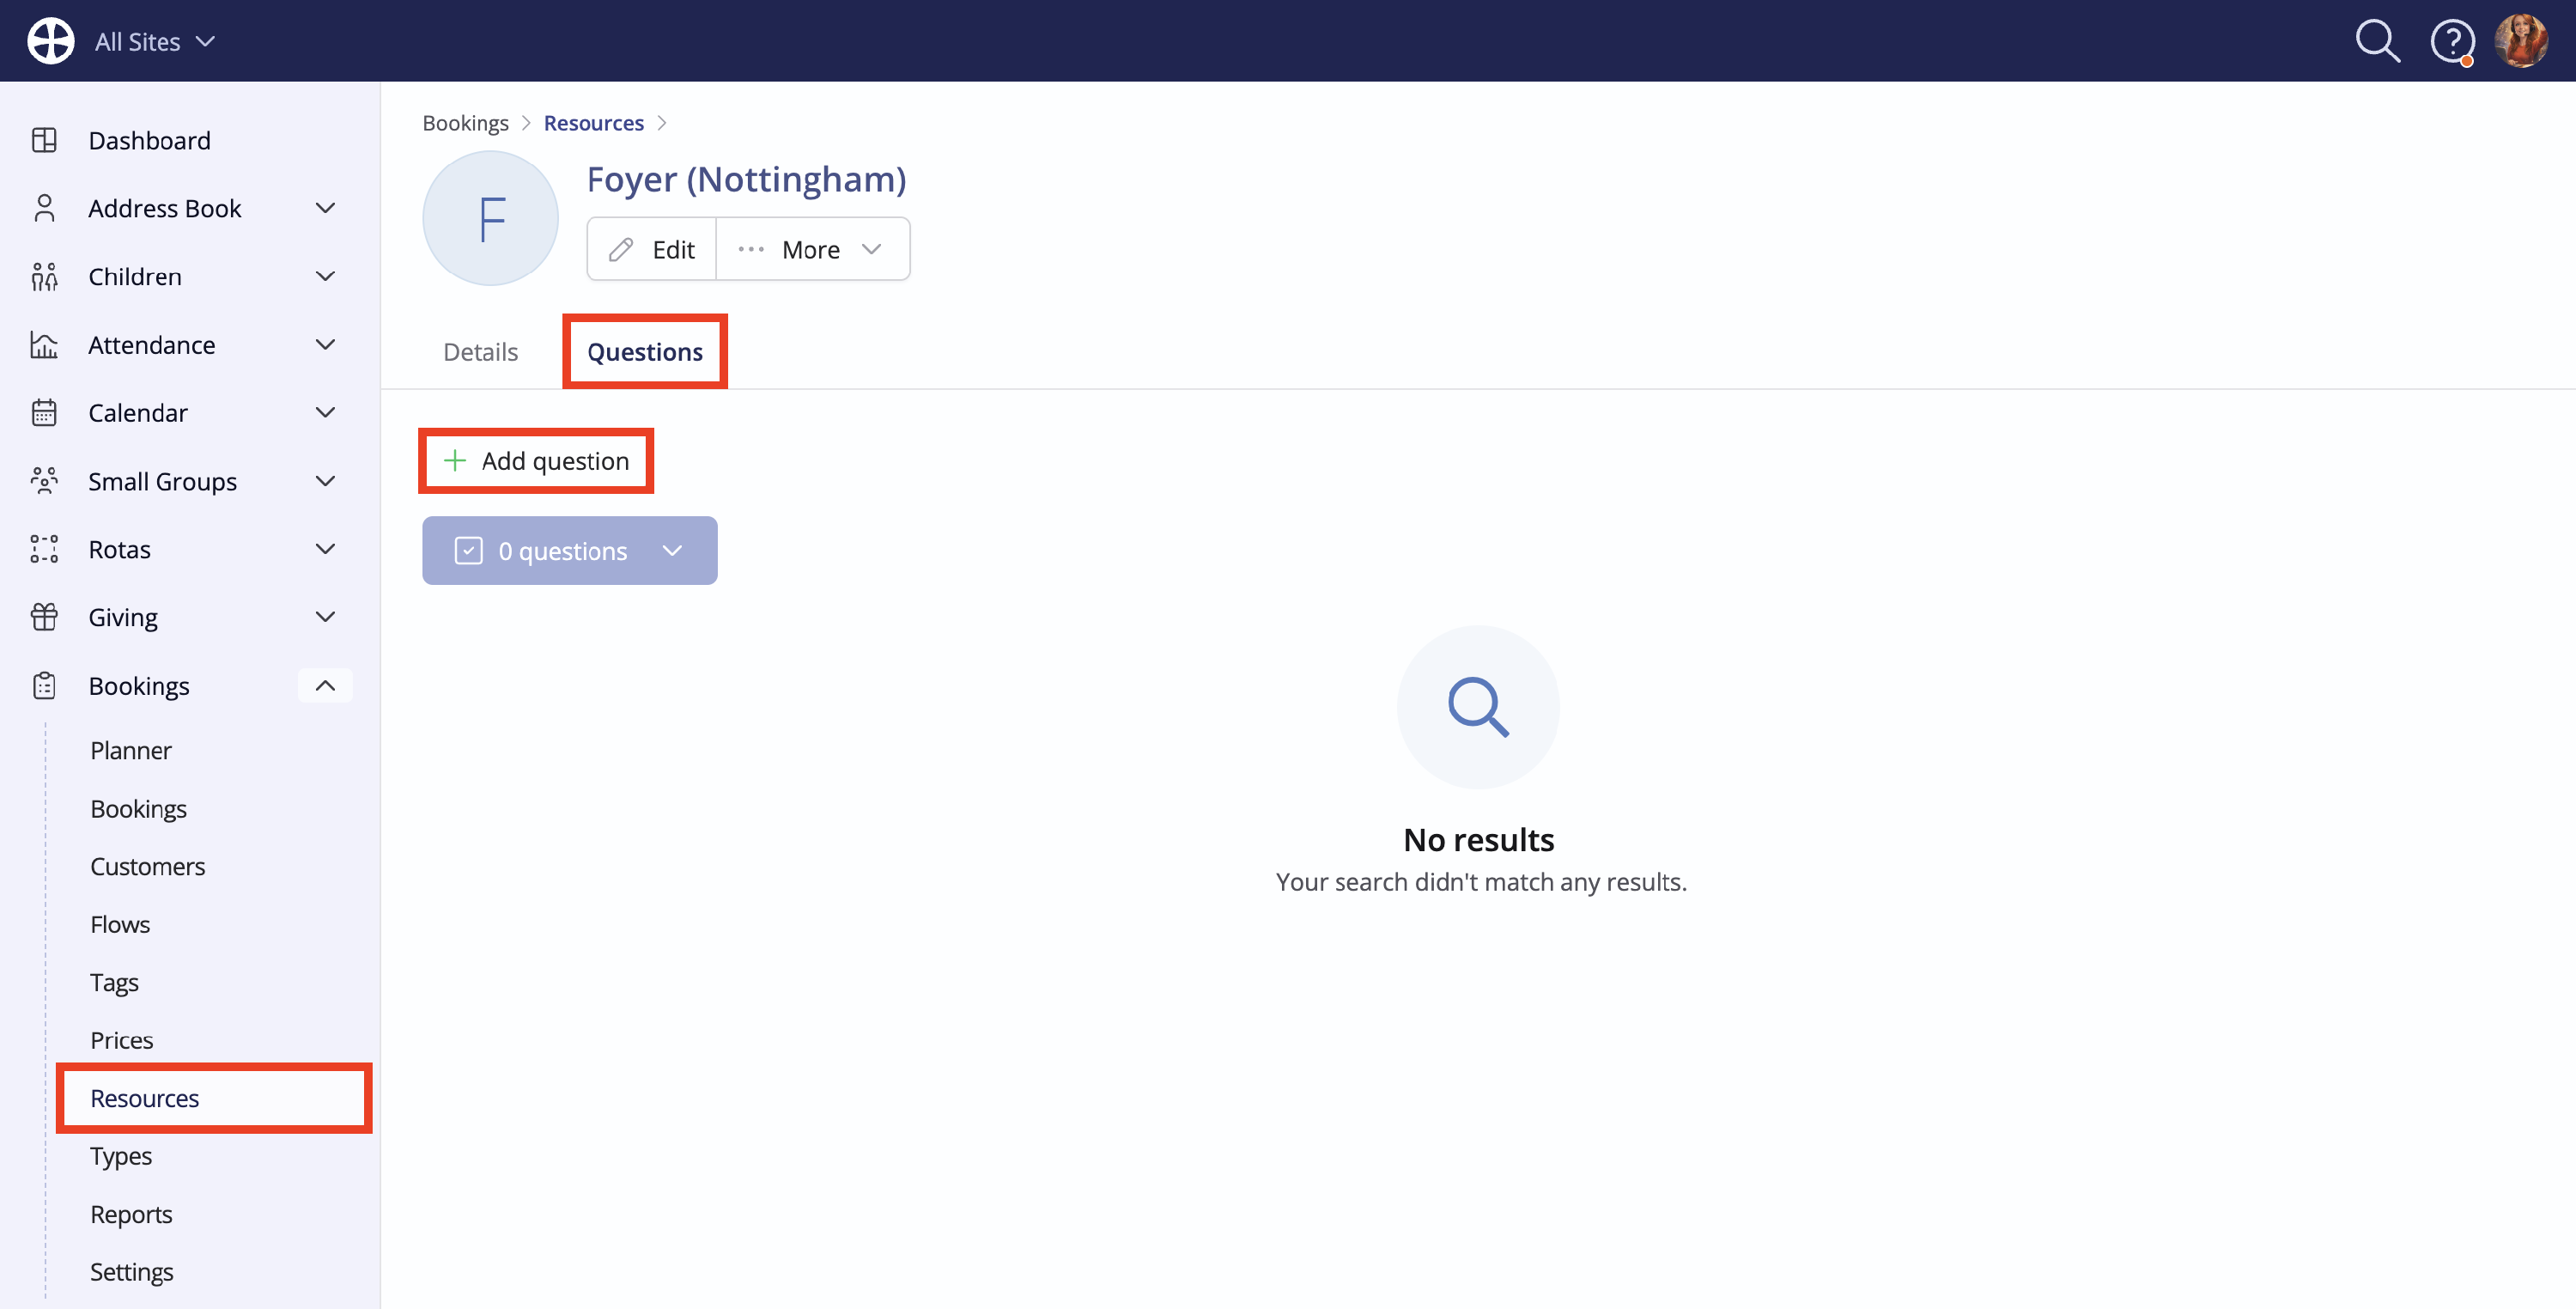
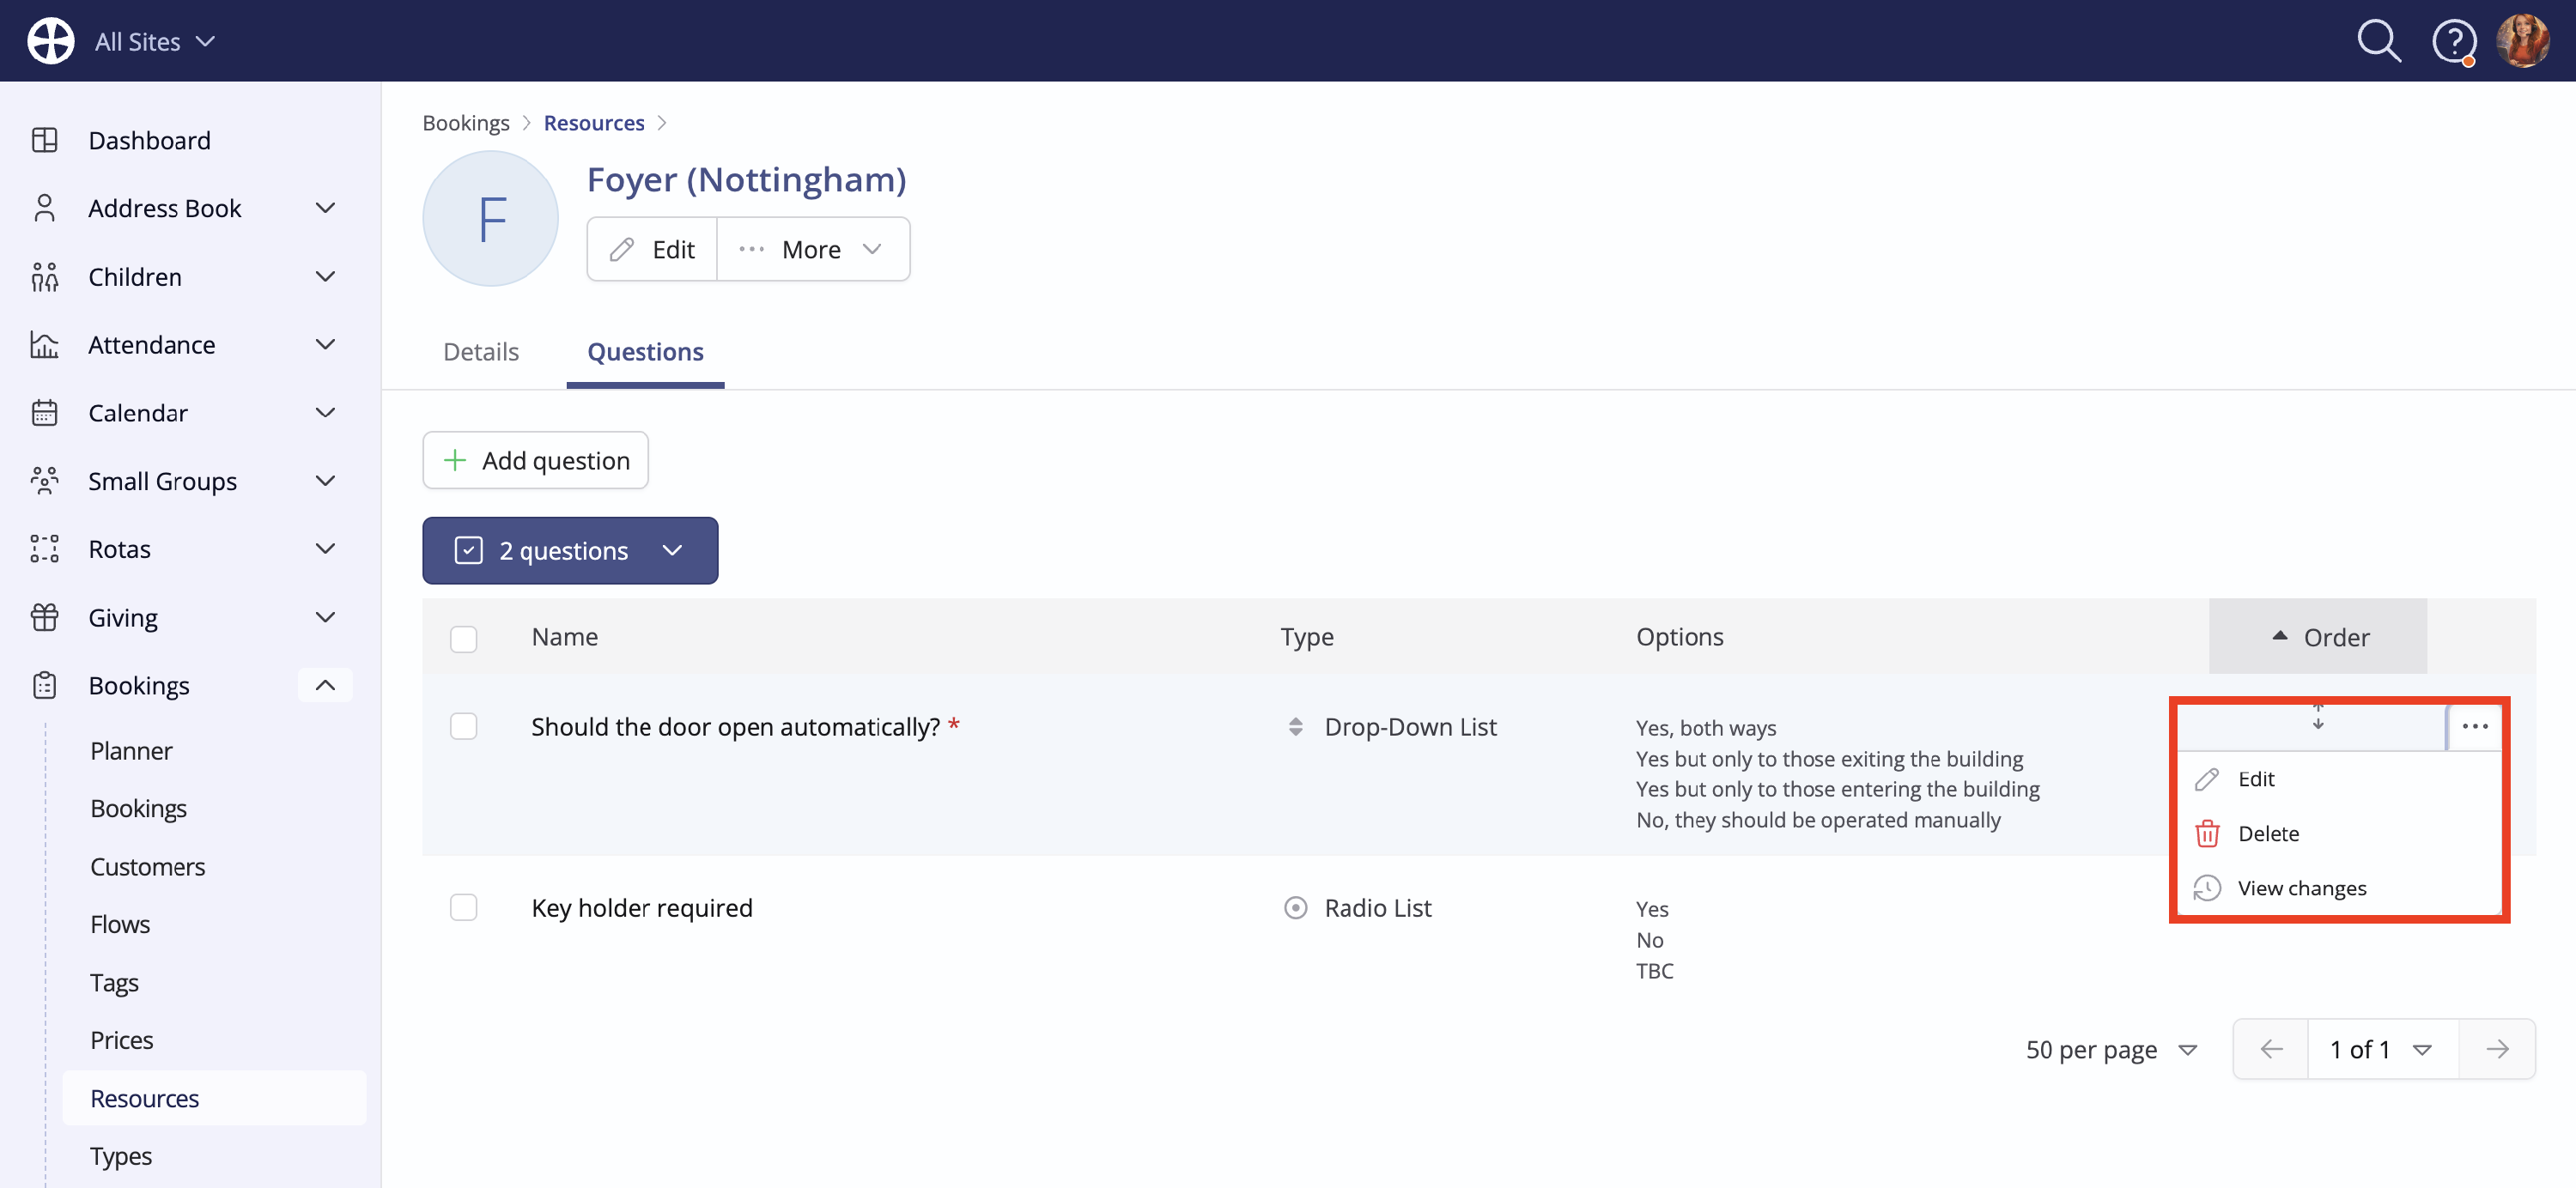
From the resource View, click on the Questions tab and Add question.
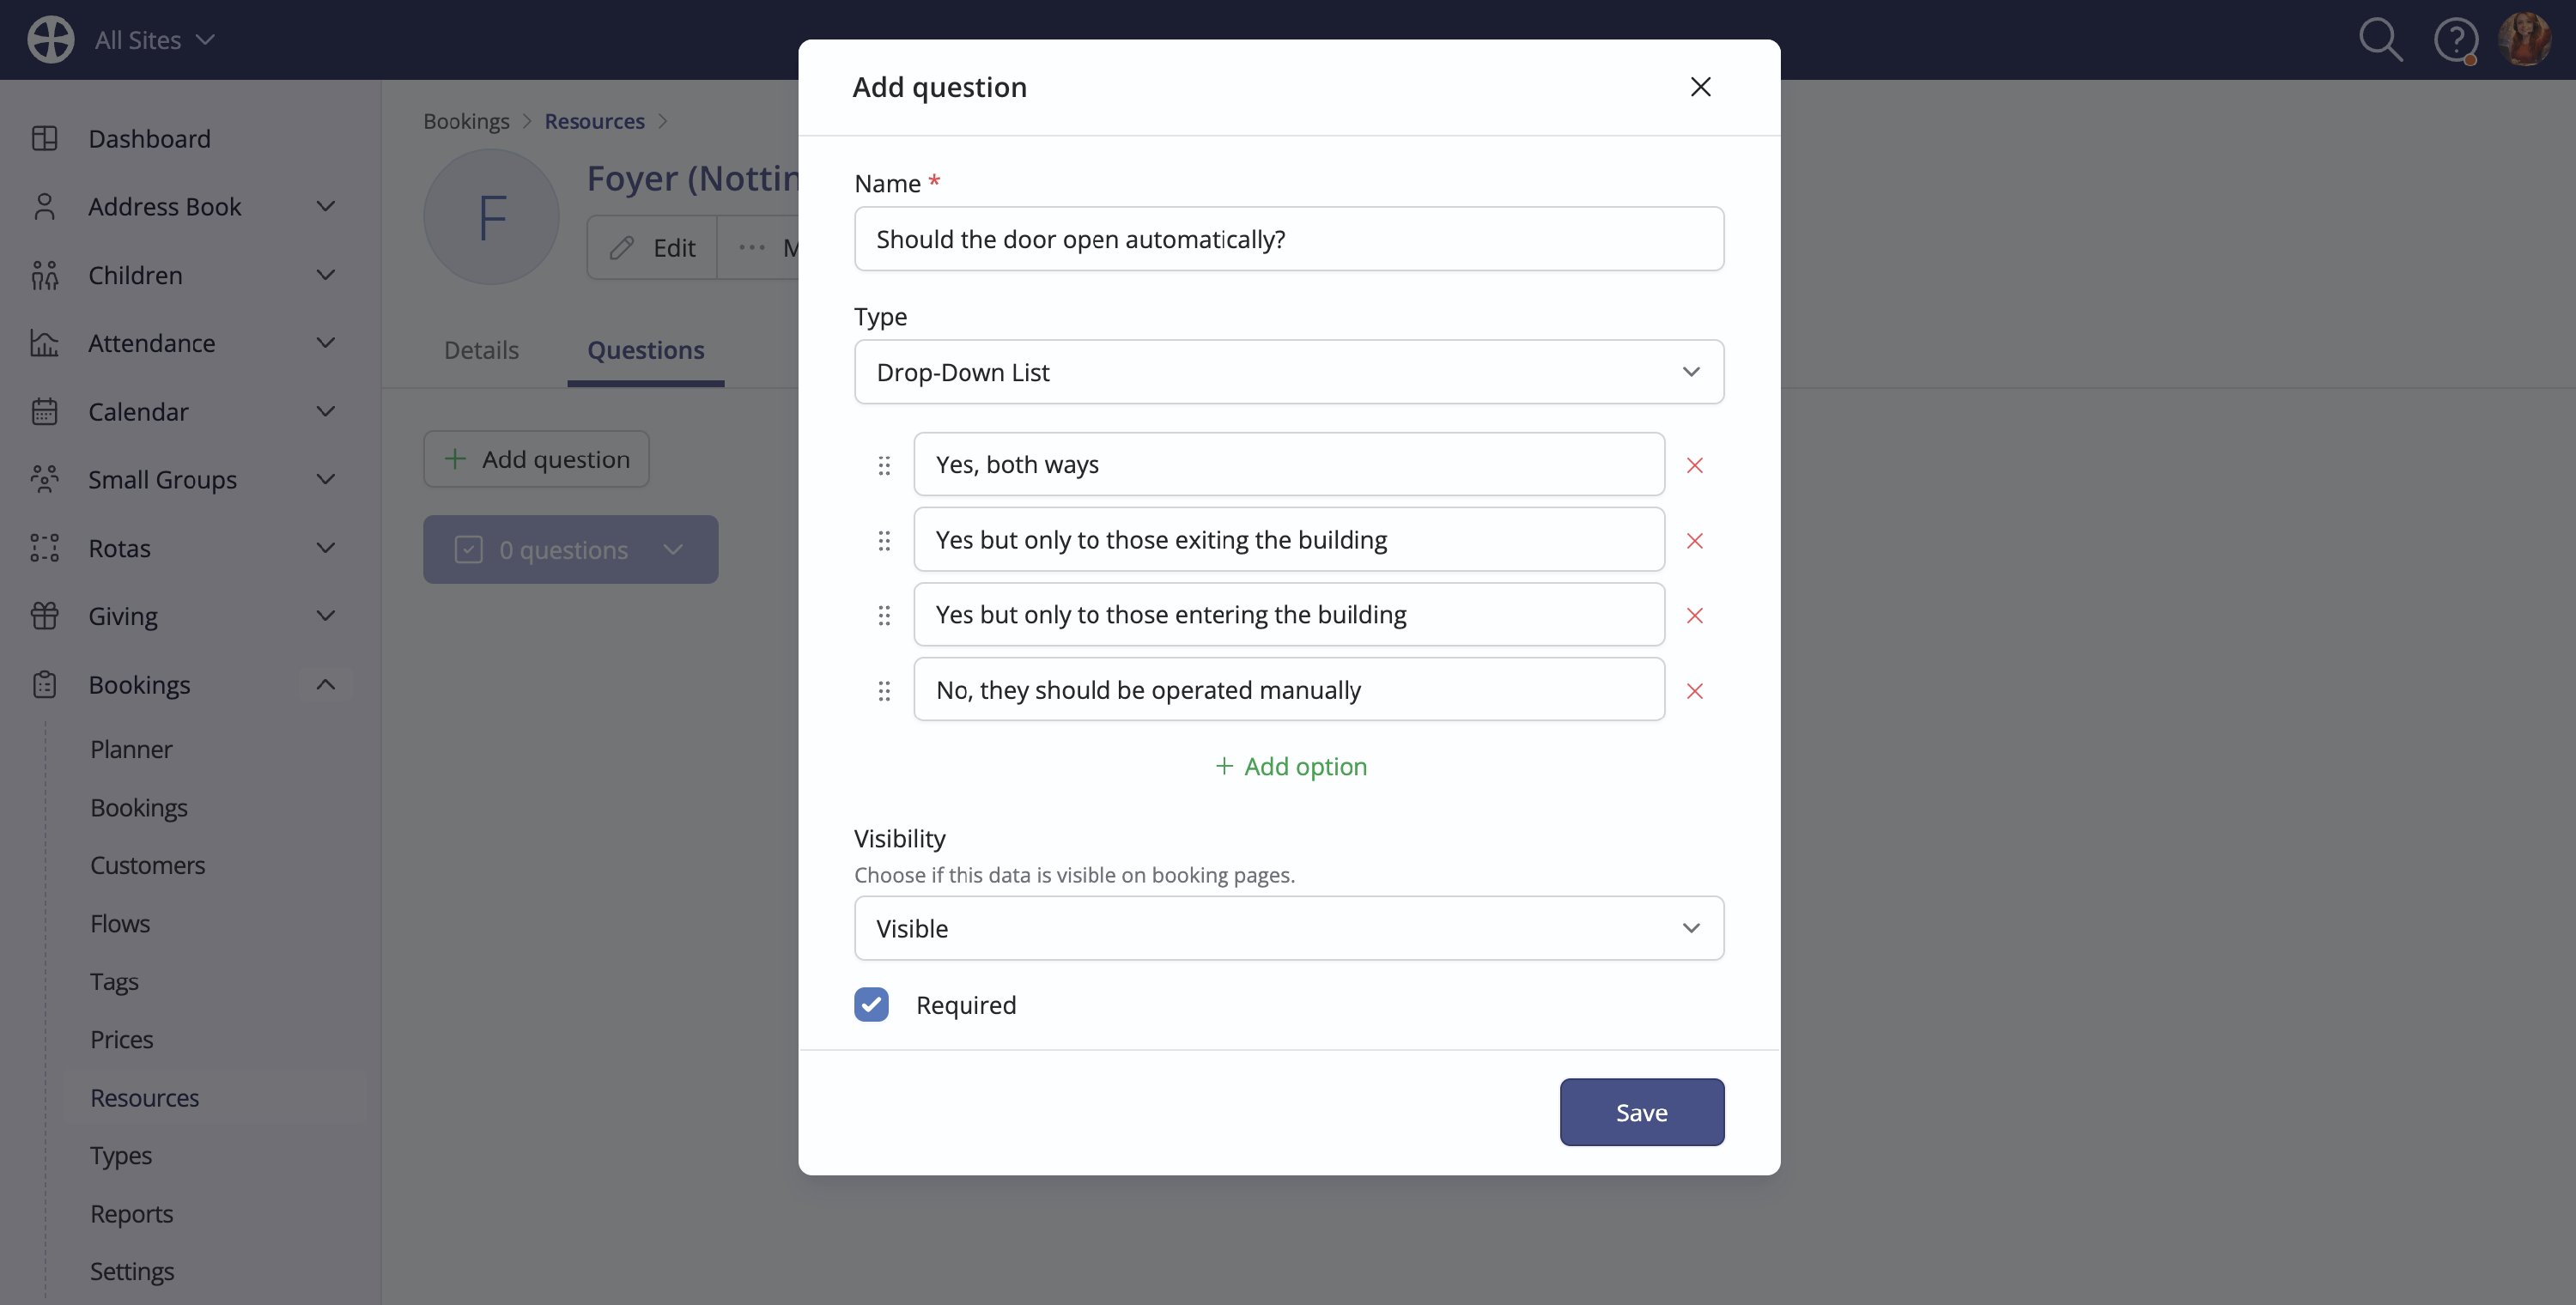
On the Add question pop-up, give the question a suitable Name and select the preferred question response Type from the drop-down list. Depending on the response type selected, you can set response Options. You can also choose whether a response is Required. Ordinarily, resource questions and customer responses are Visible to the customer on their customer-facing booking page but these can be optionally set to Hidden. For example, some resource questions and responses may be for internal use only and do not need to be shown to the customer. Similarly, some questions and responses may be pastorally sensitive (e.g. questions related to funeral resources), so it may be desirable to set those resource questions Hidden so that the responses are not shown on the customer-facing booking page.
Click Save to add the question. New questions are added to the end of the list but you can easily re-order questions by clicking the Order icon for any question in the list. There's no limit to the number of Questions you can add to a resource. Note also the resource question Actions to Edit or Delete a question. Deleting a question will delete all question responses from all past and future bookings where the resource is assigned. Delete with caution!
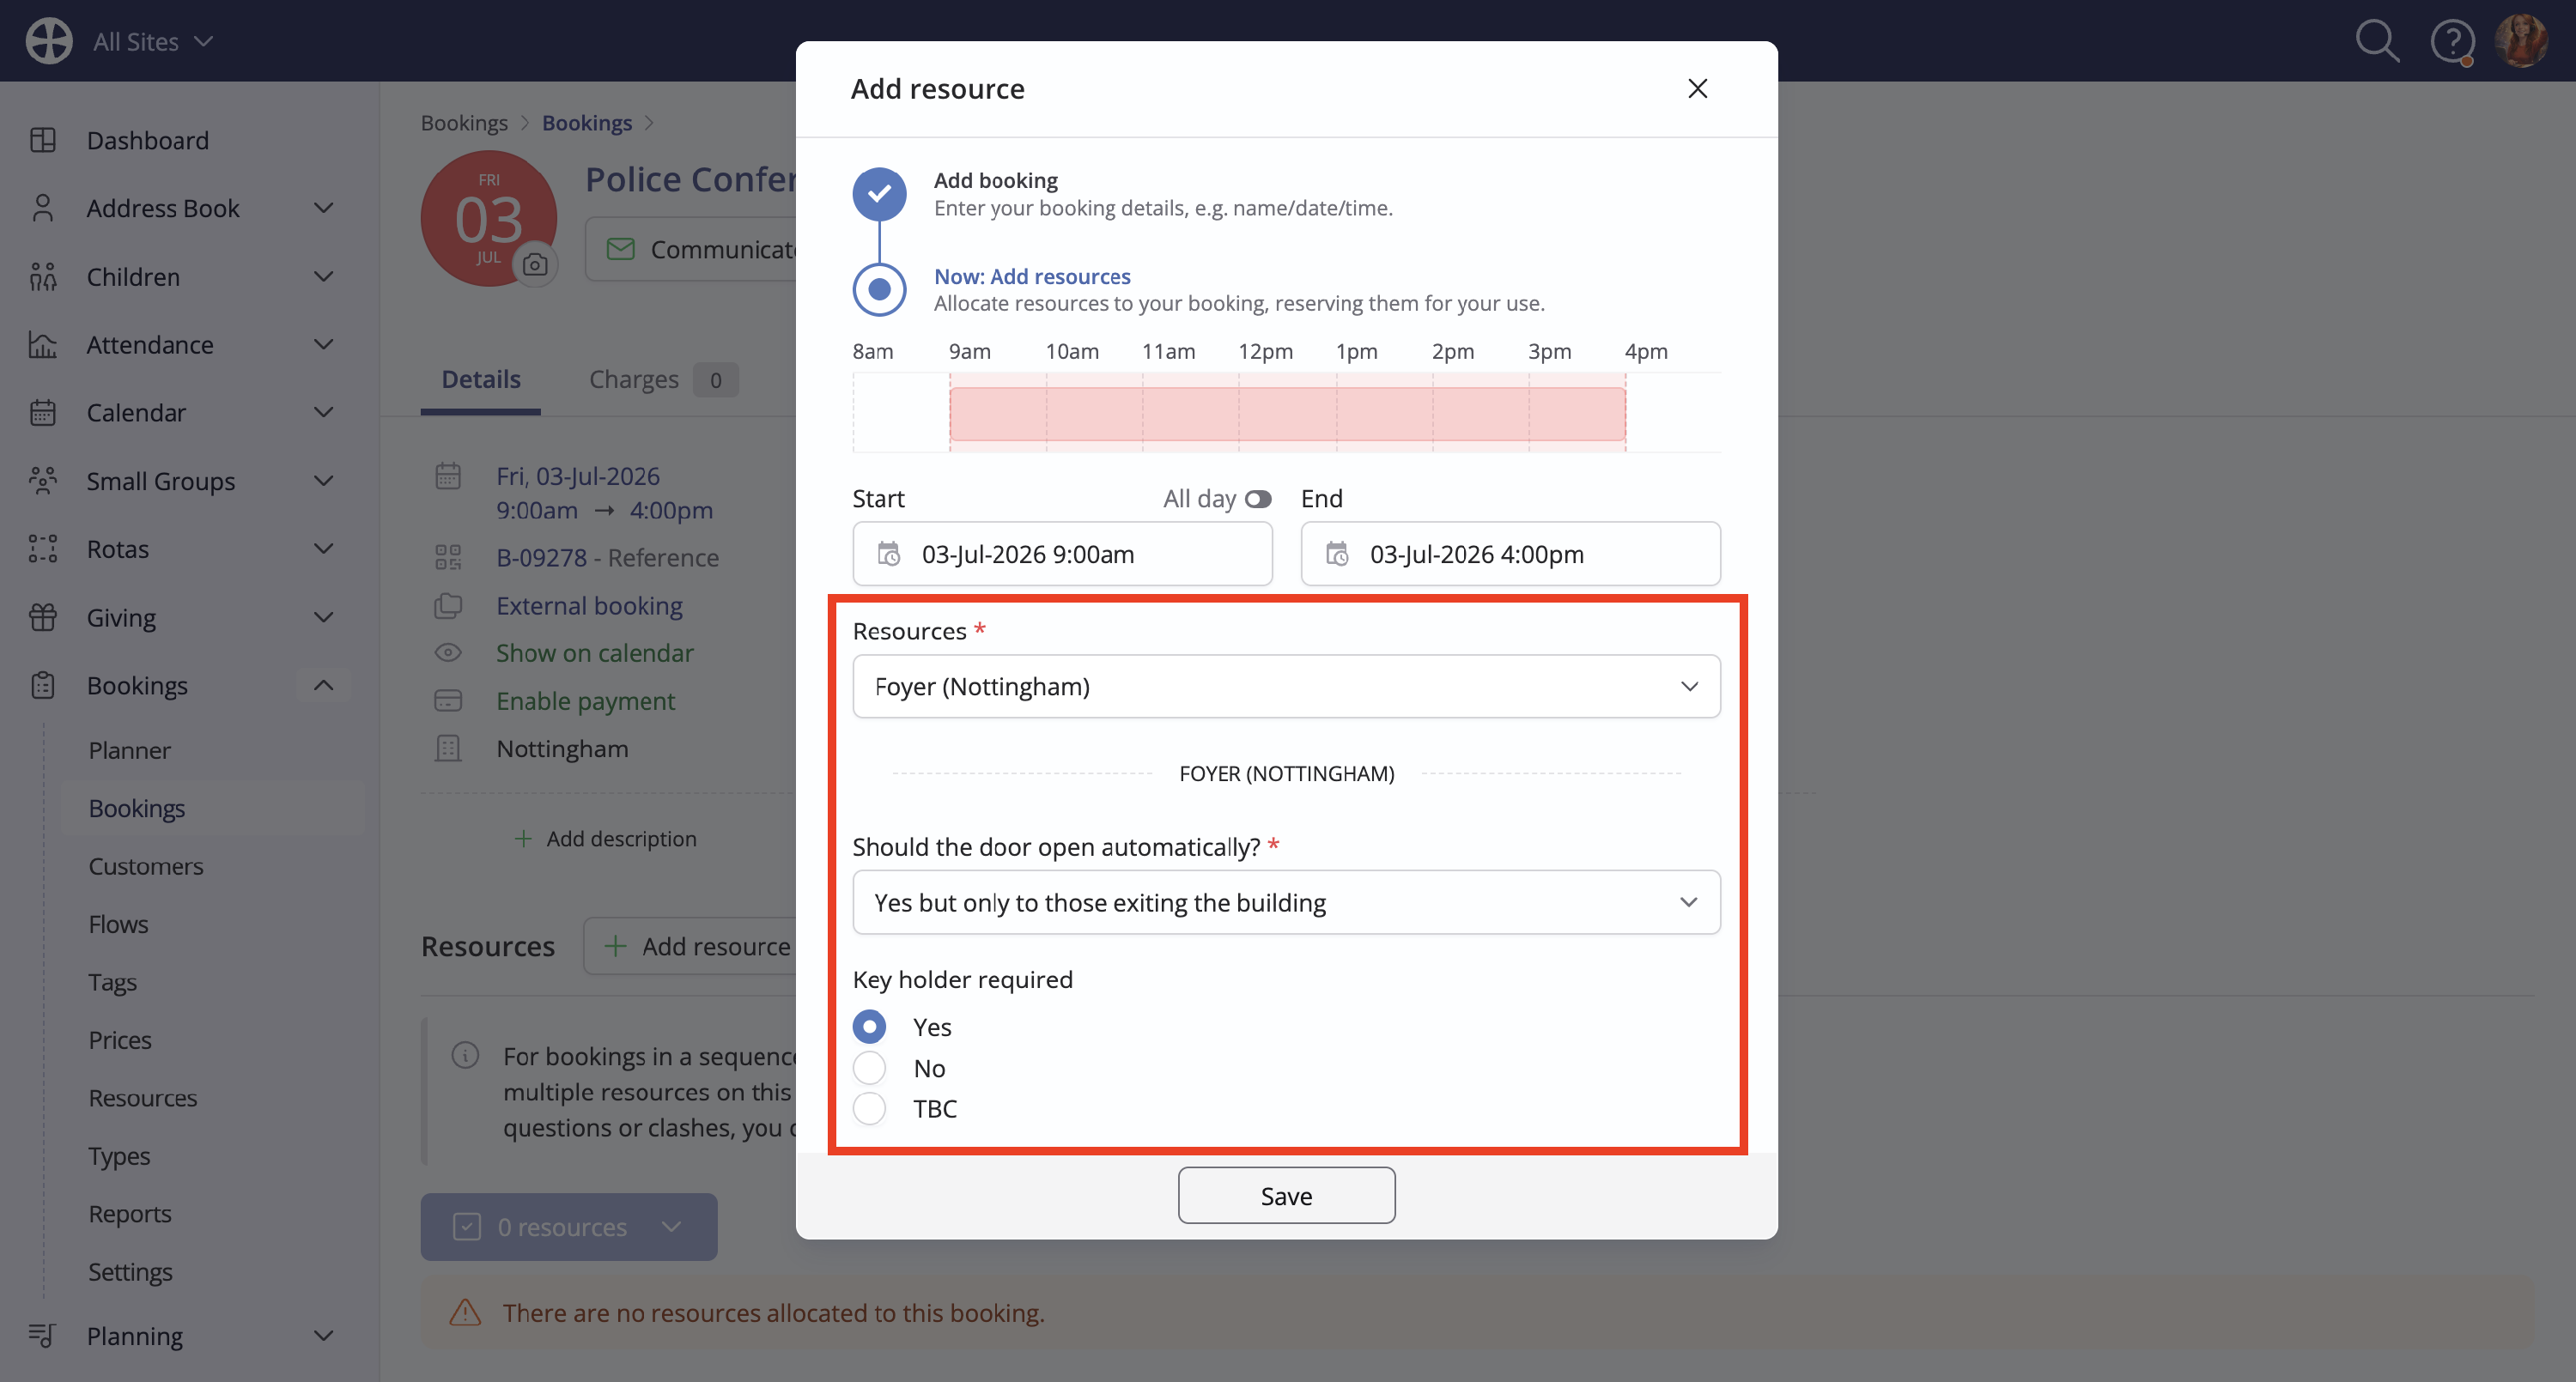
Resources in action
You'll see Resources in action when adding a booking. For each resource selected, any resource-specific questions are shown, ready to collect customer responses to store with the booking:
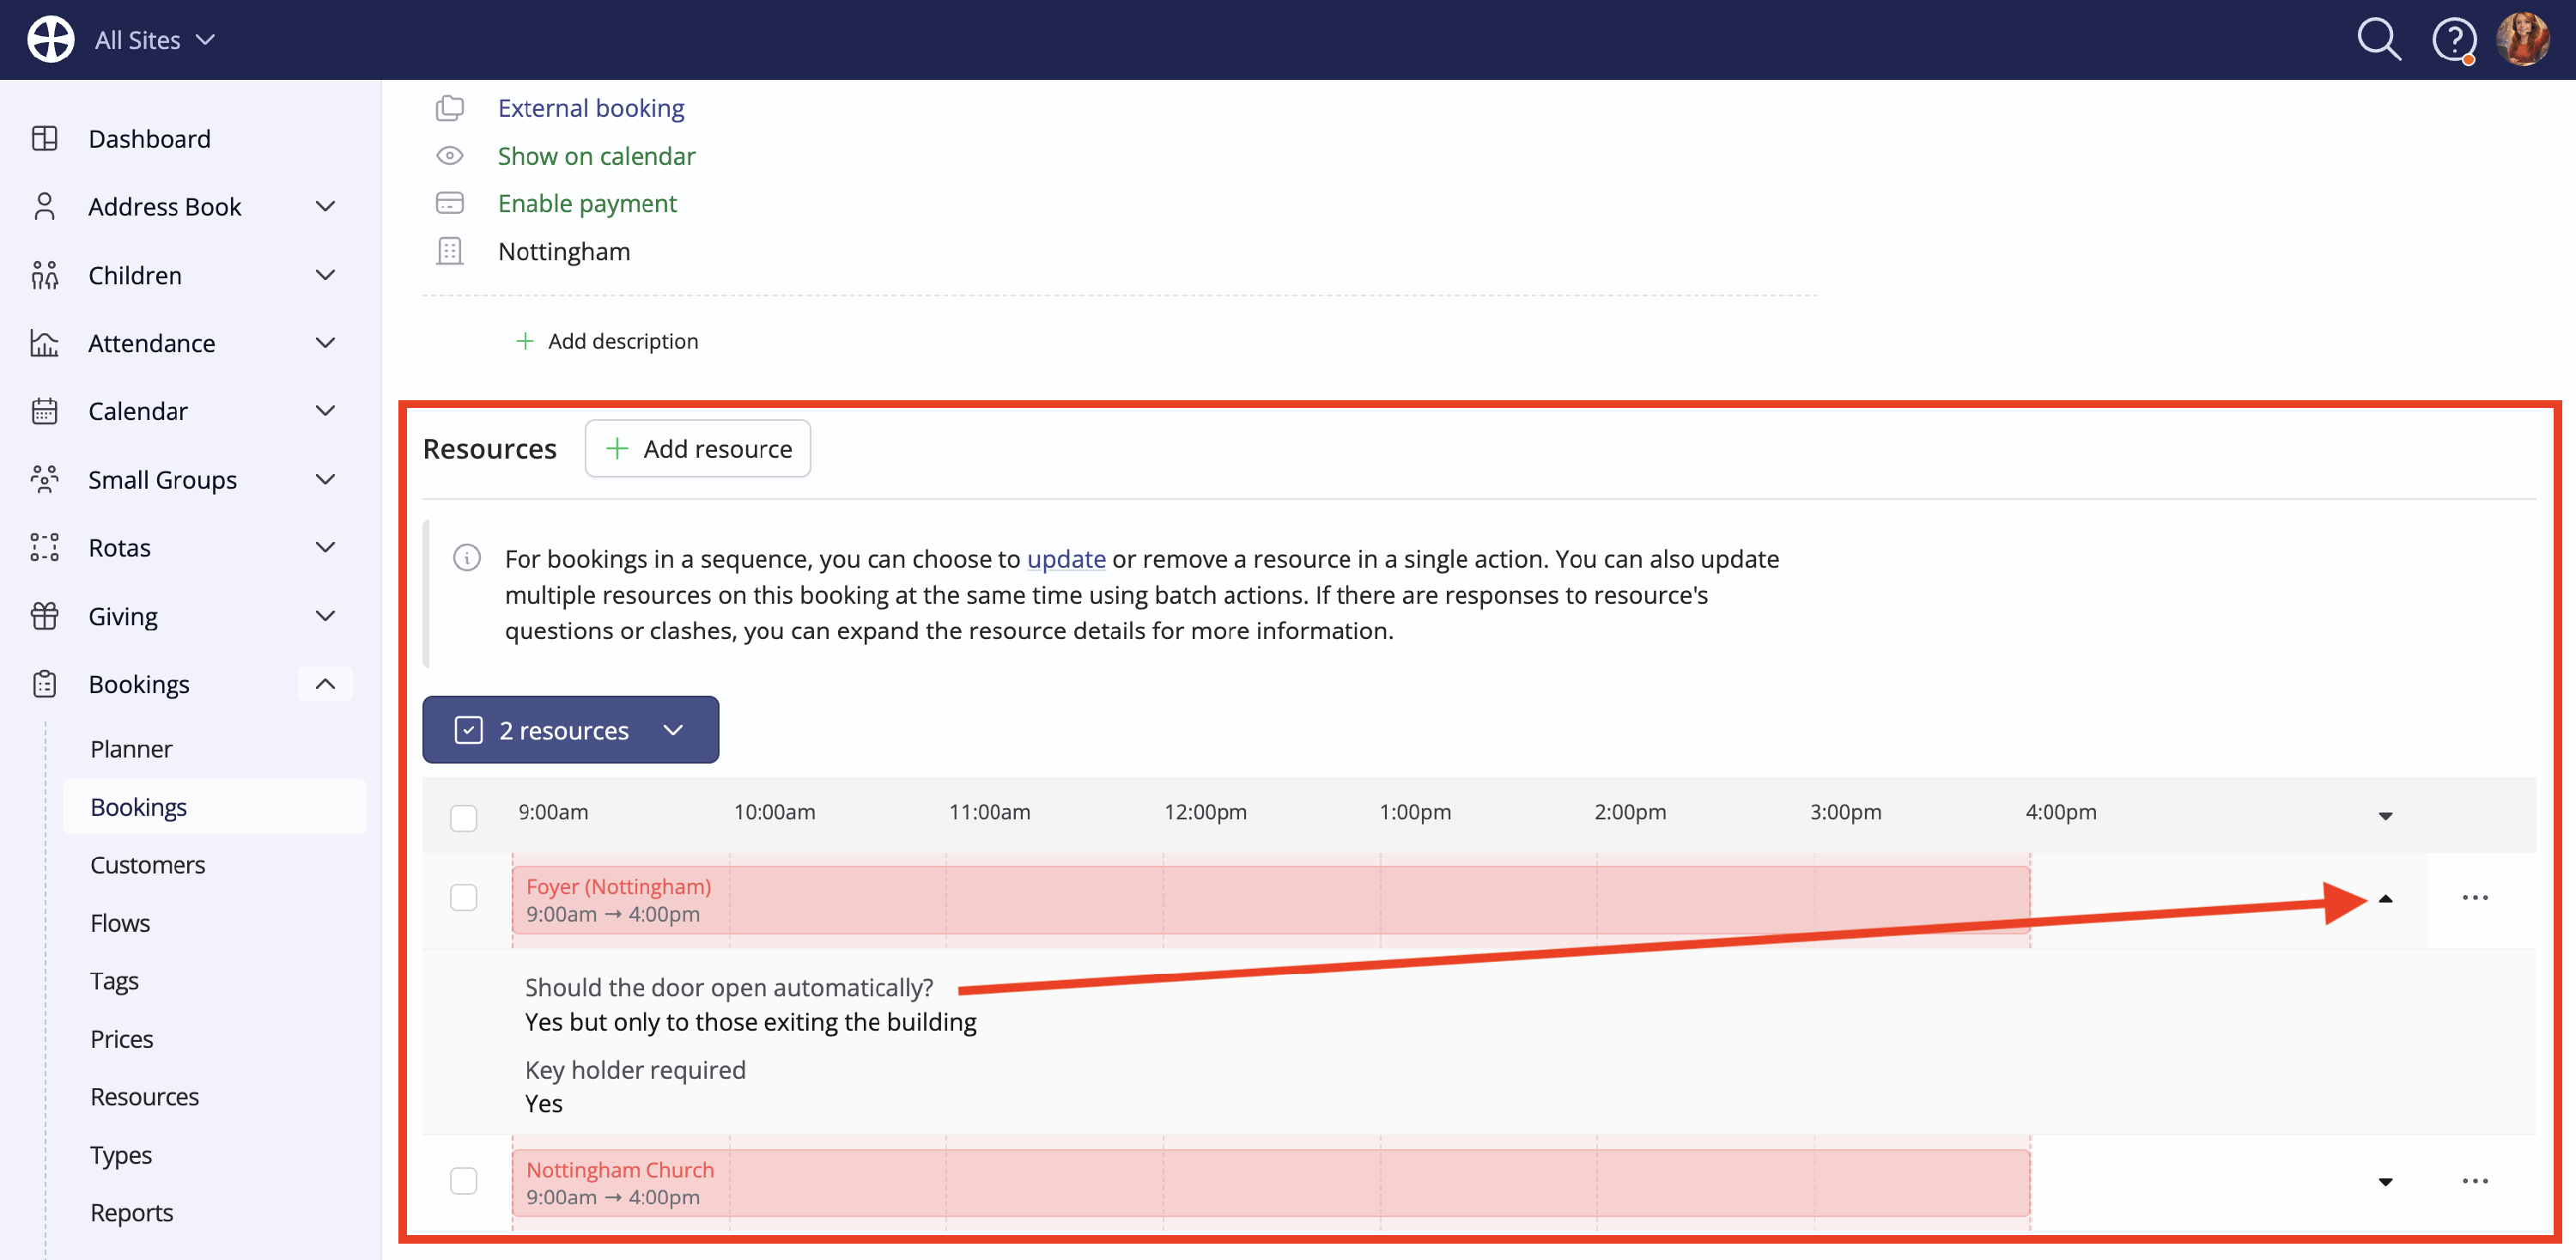
Resource-related questions and responses are displayed in the Resources table on a booking View and questions that are set as Visible are also shown on the customer's booking page.
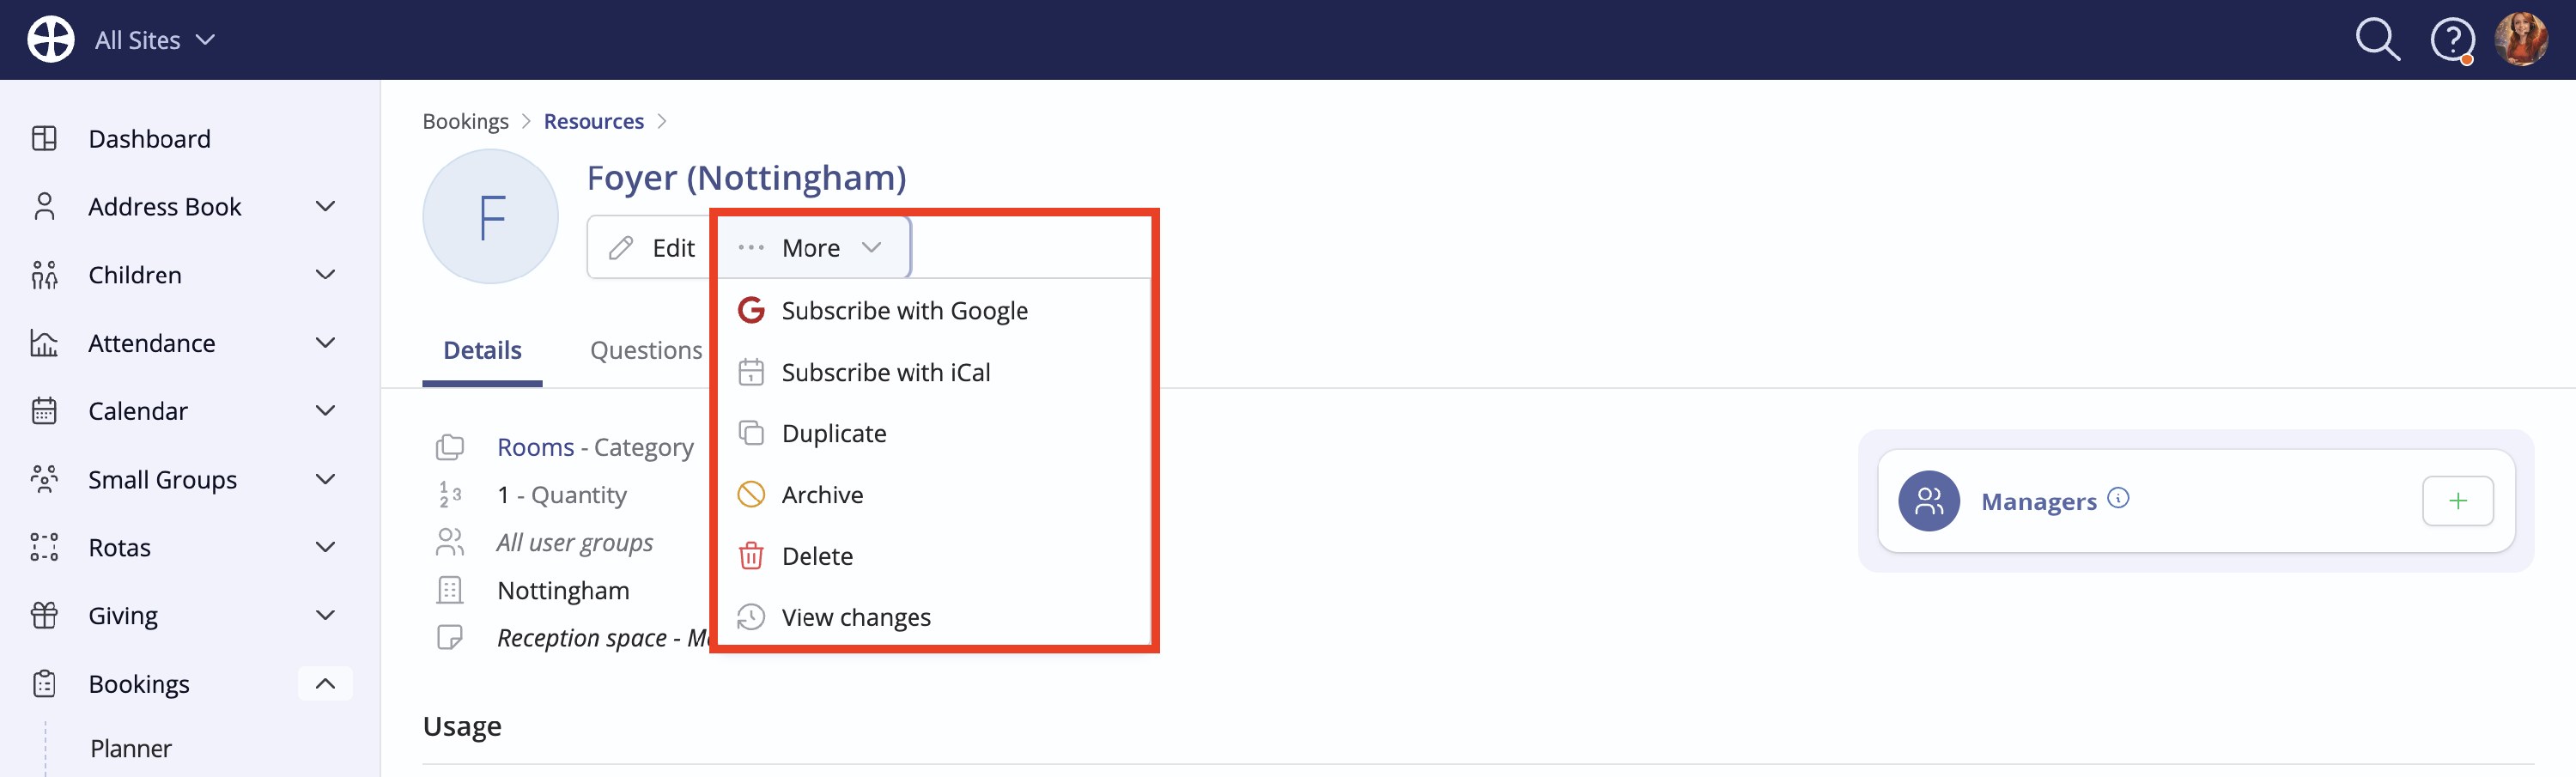
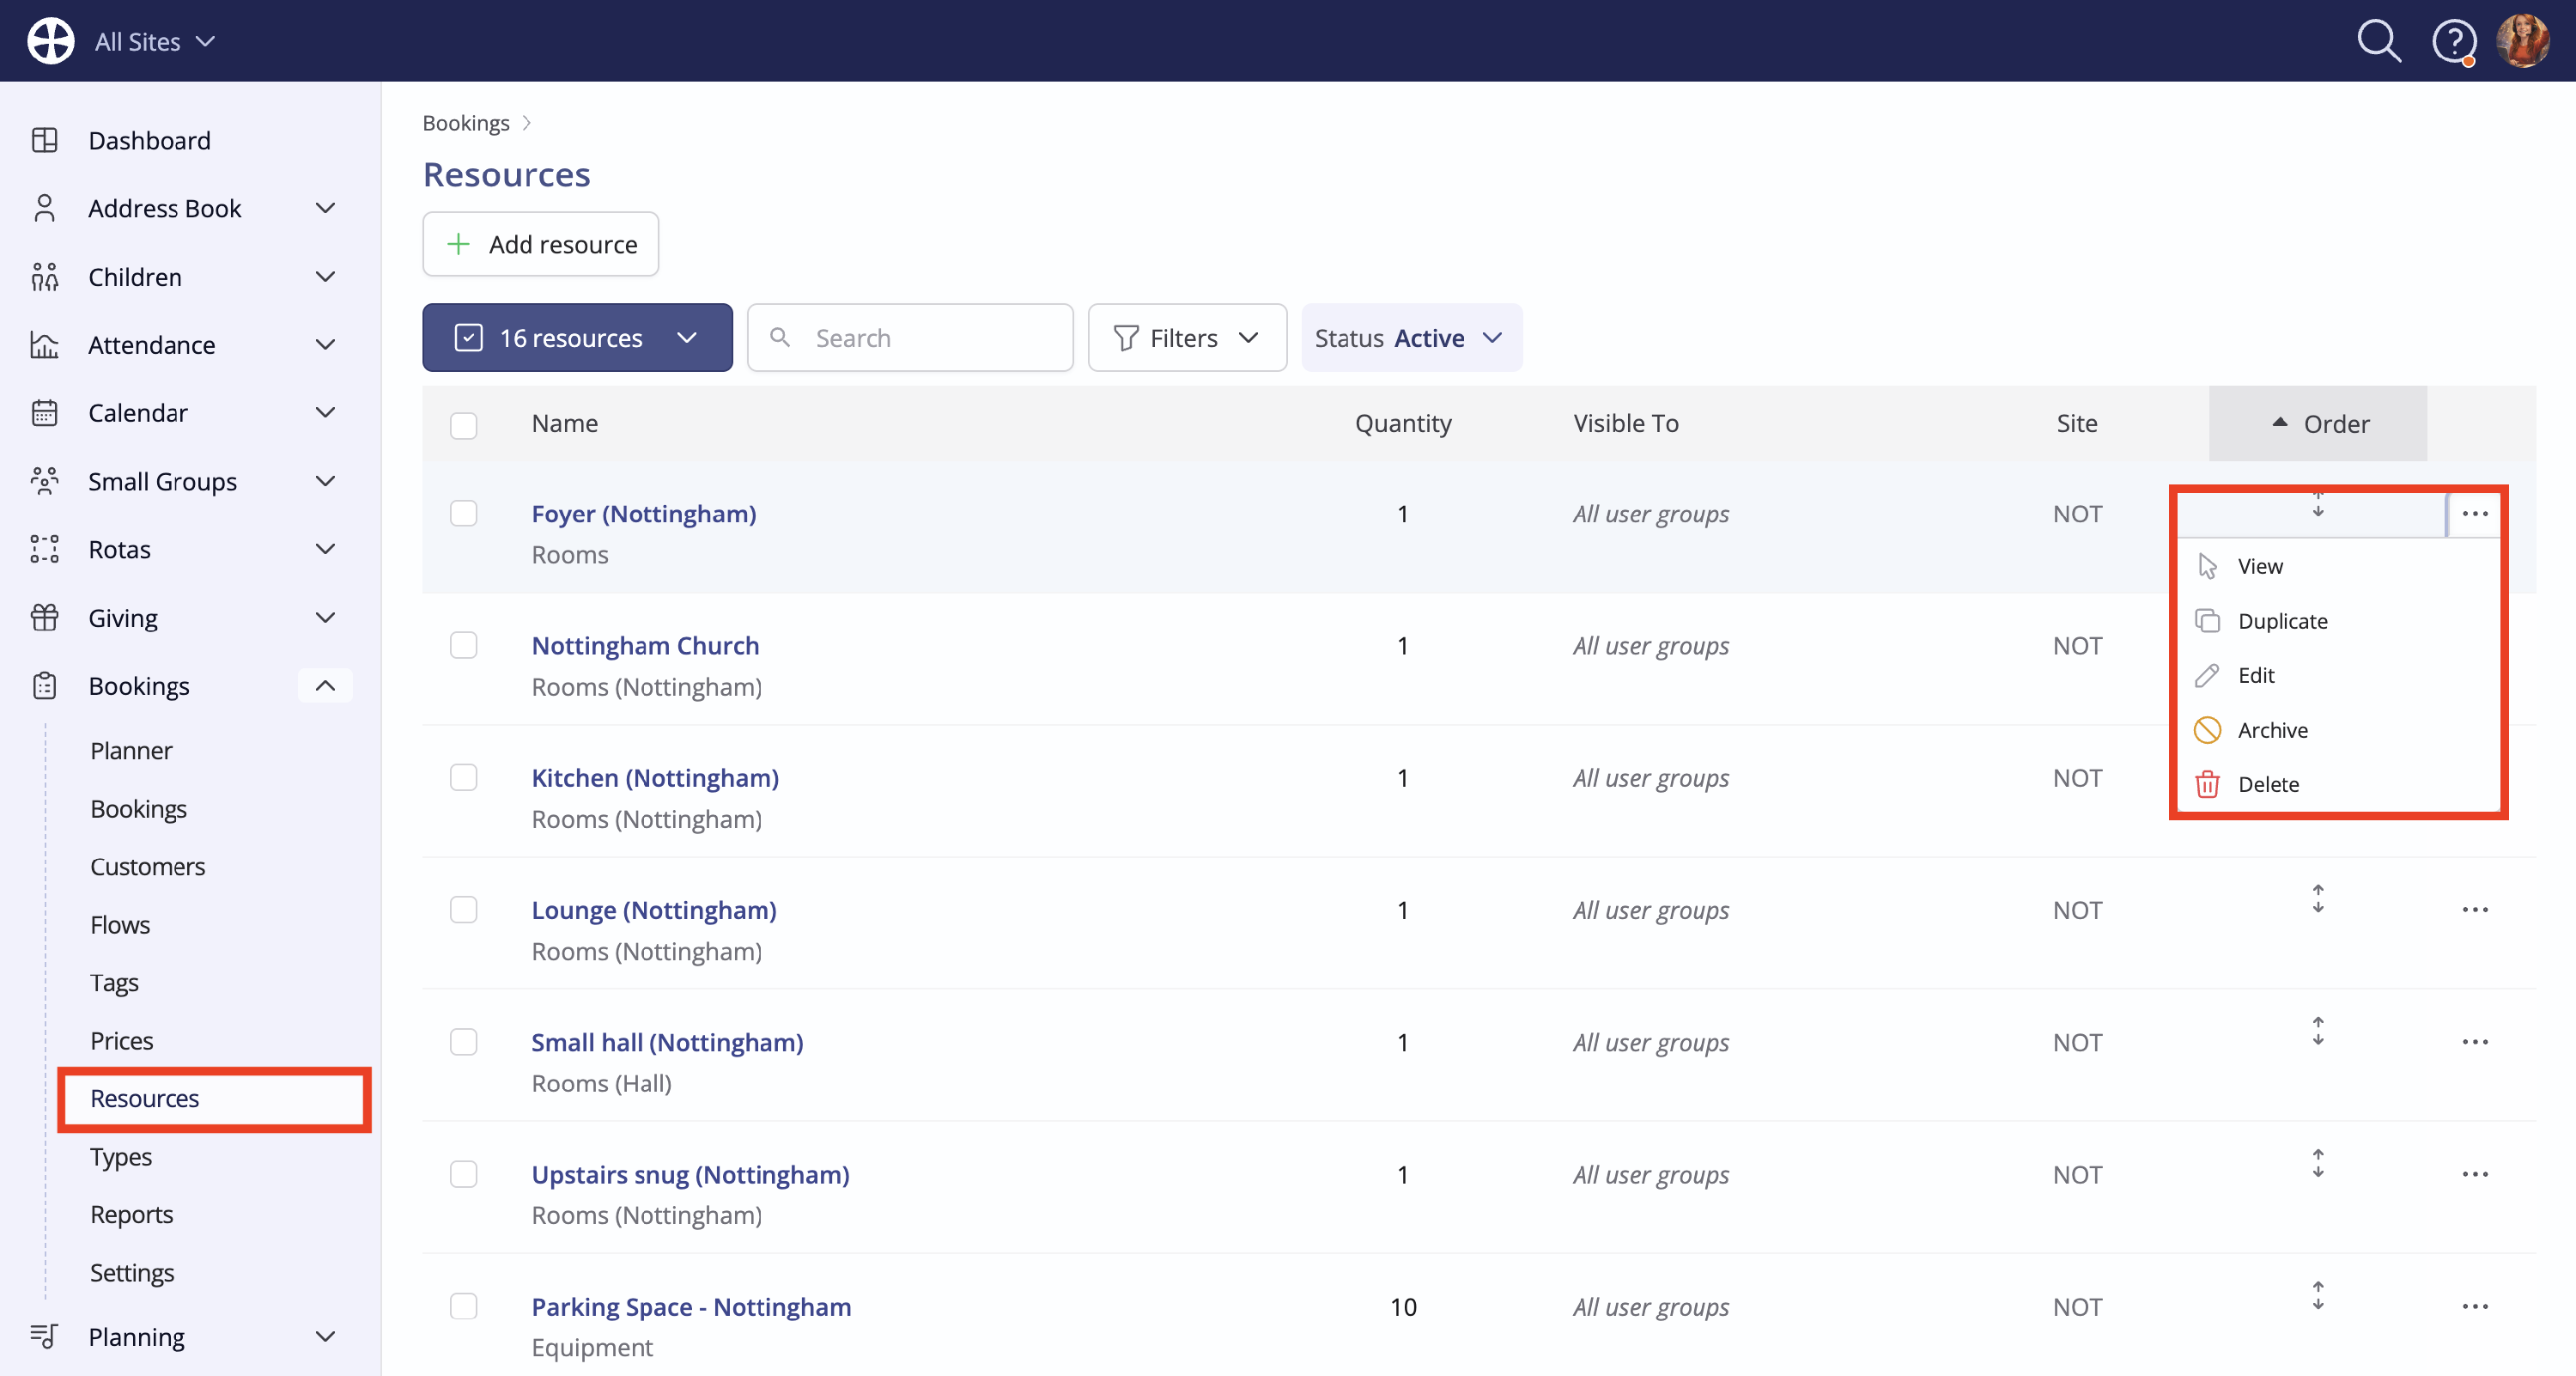
Finally, in this section, returning to the Resources section, note the resource Actions to View, Duplicate, Edit, Archive or Delete resources. Note also that you can Order resources - perhaps so that commonly-used resources show at the top of the resource lists. When adding resources to bookings, the resource Order is respected on the Planner and also in the resource selector that's seen when adding a resource to a booking. Duplicating an existing resource will copy all the resource details, managers and questions.
Managing resource usage
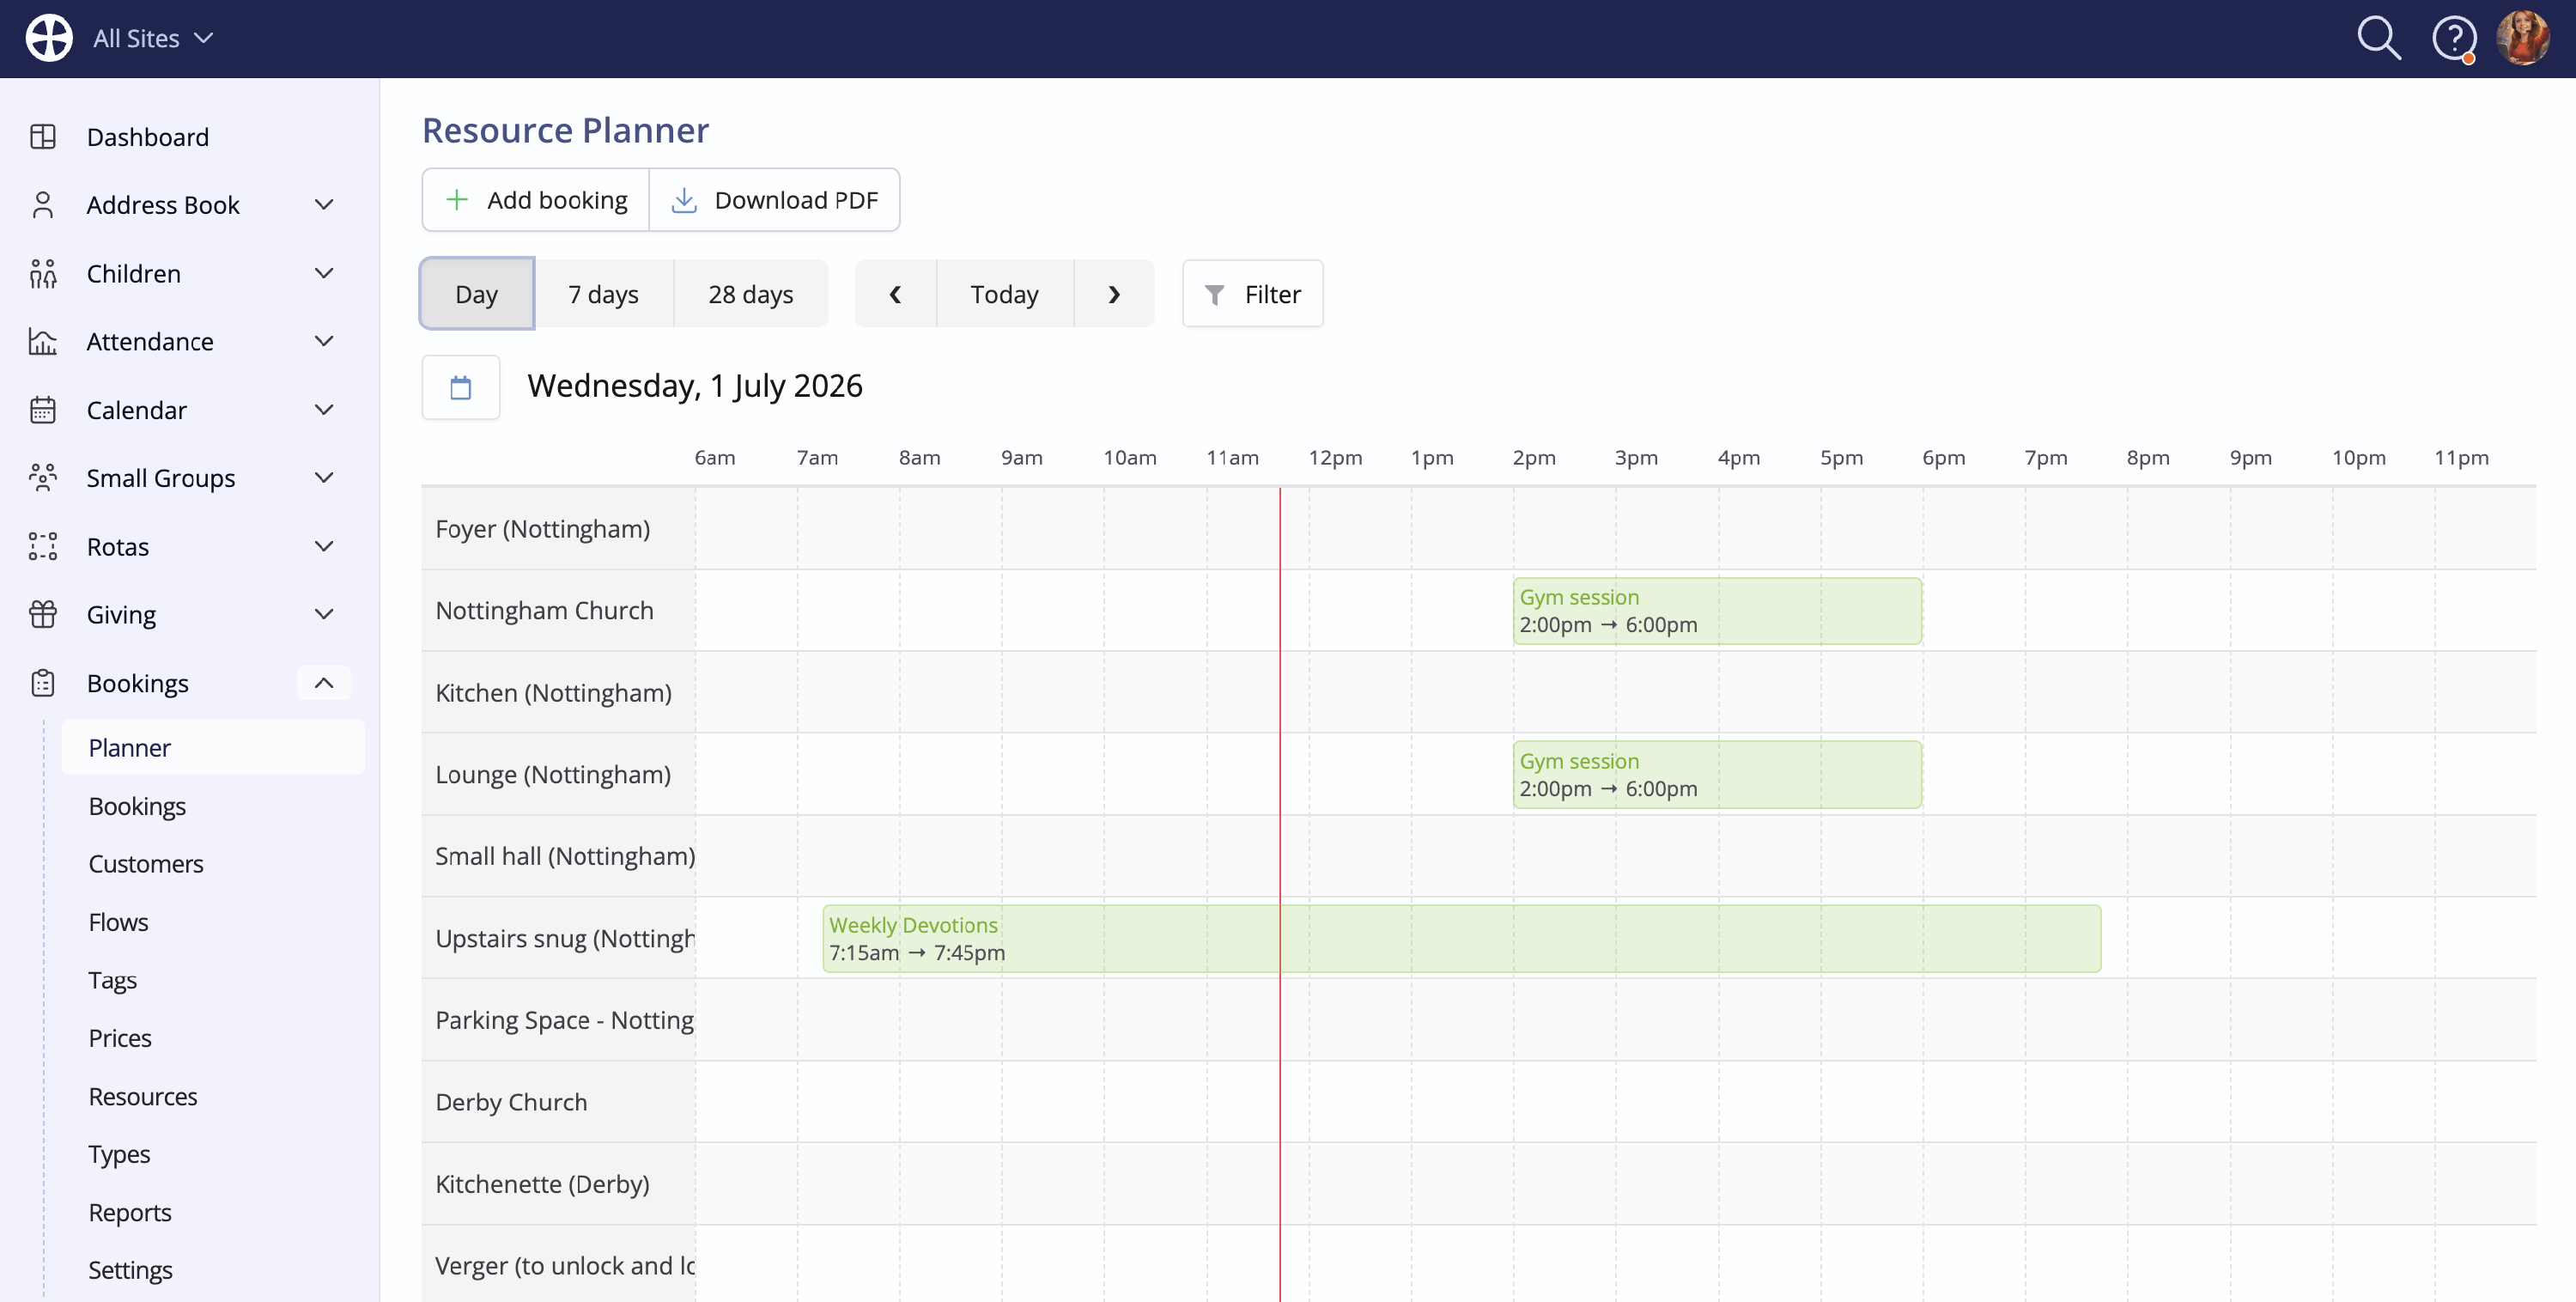
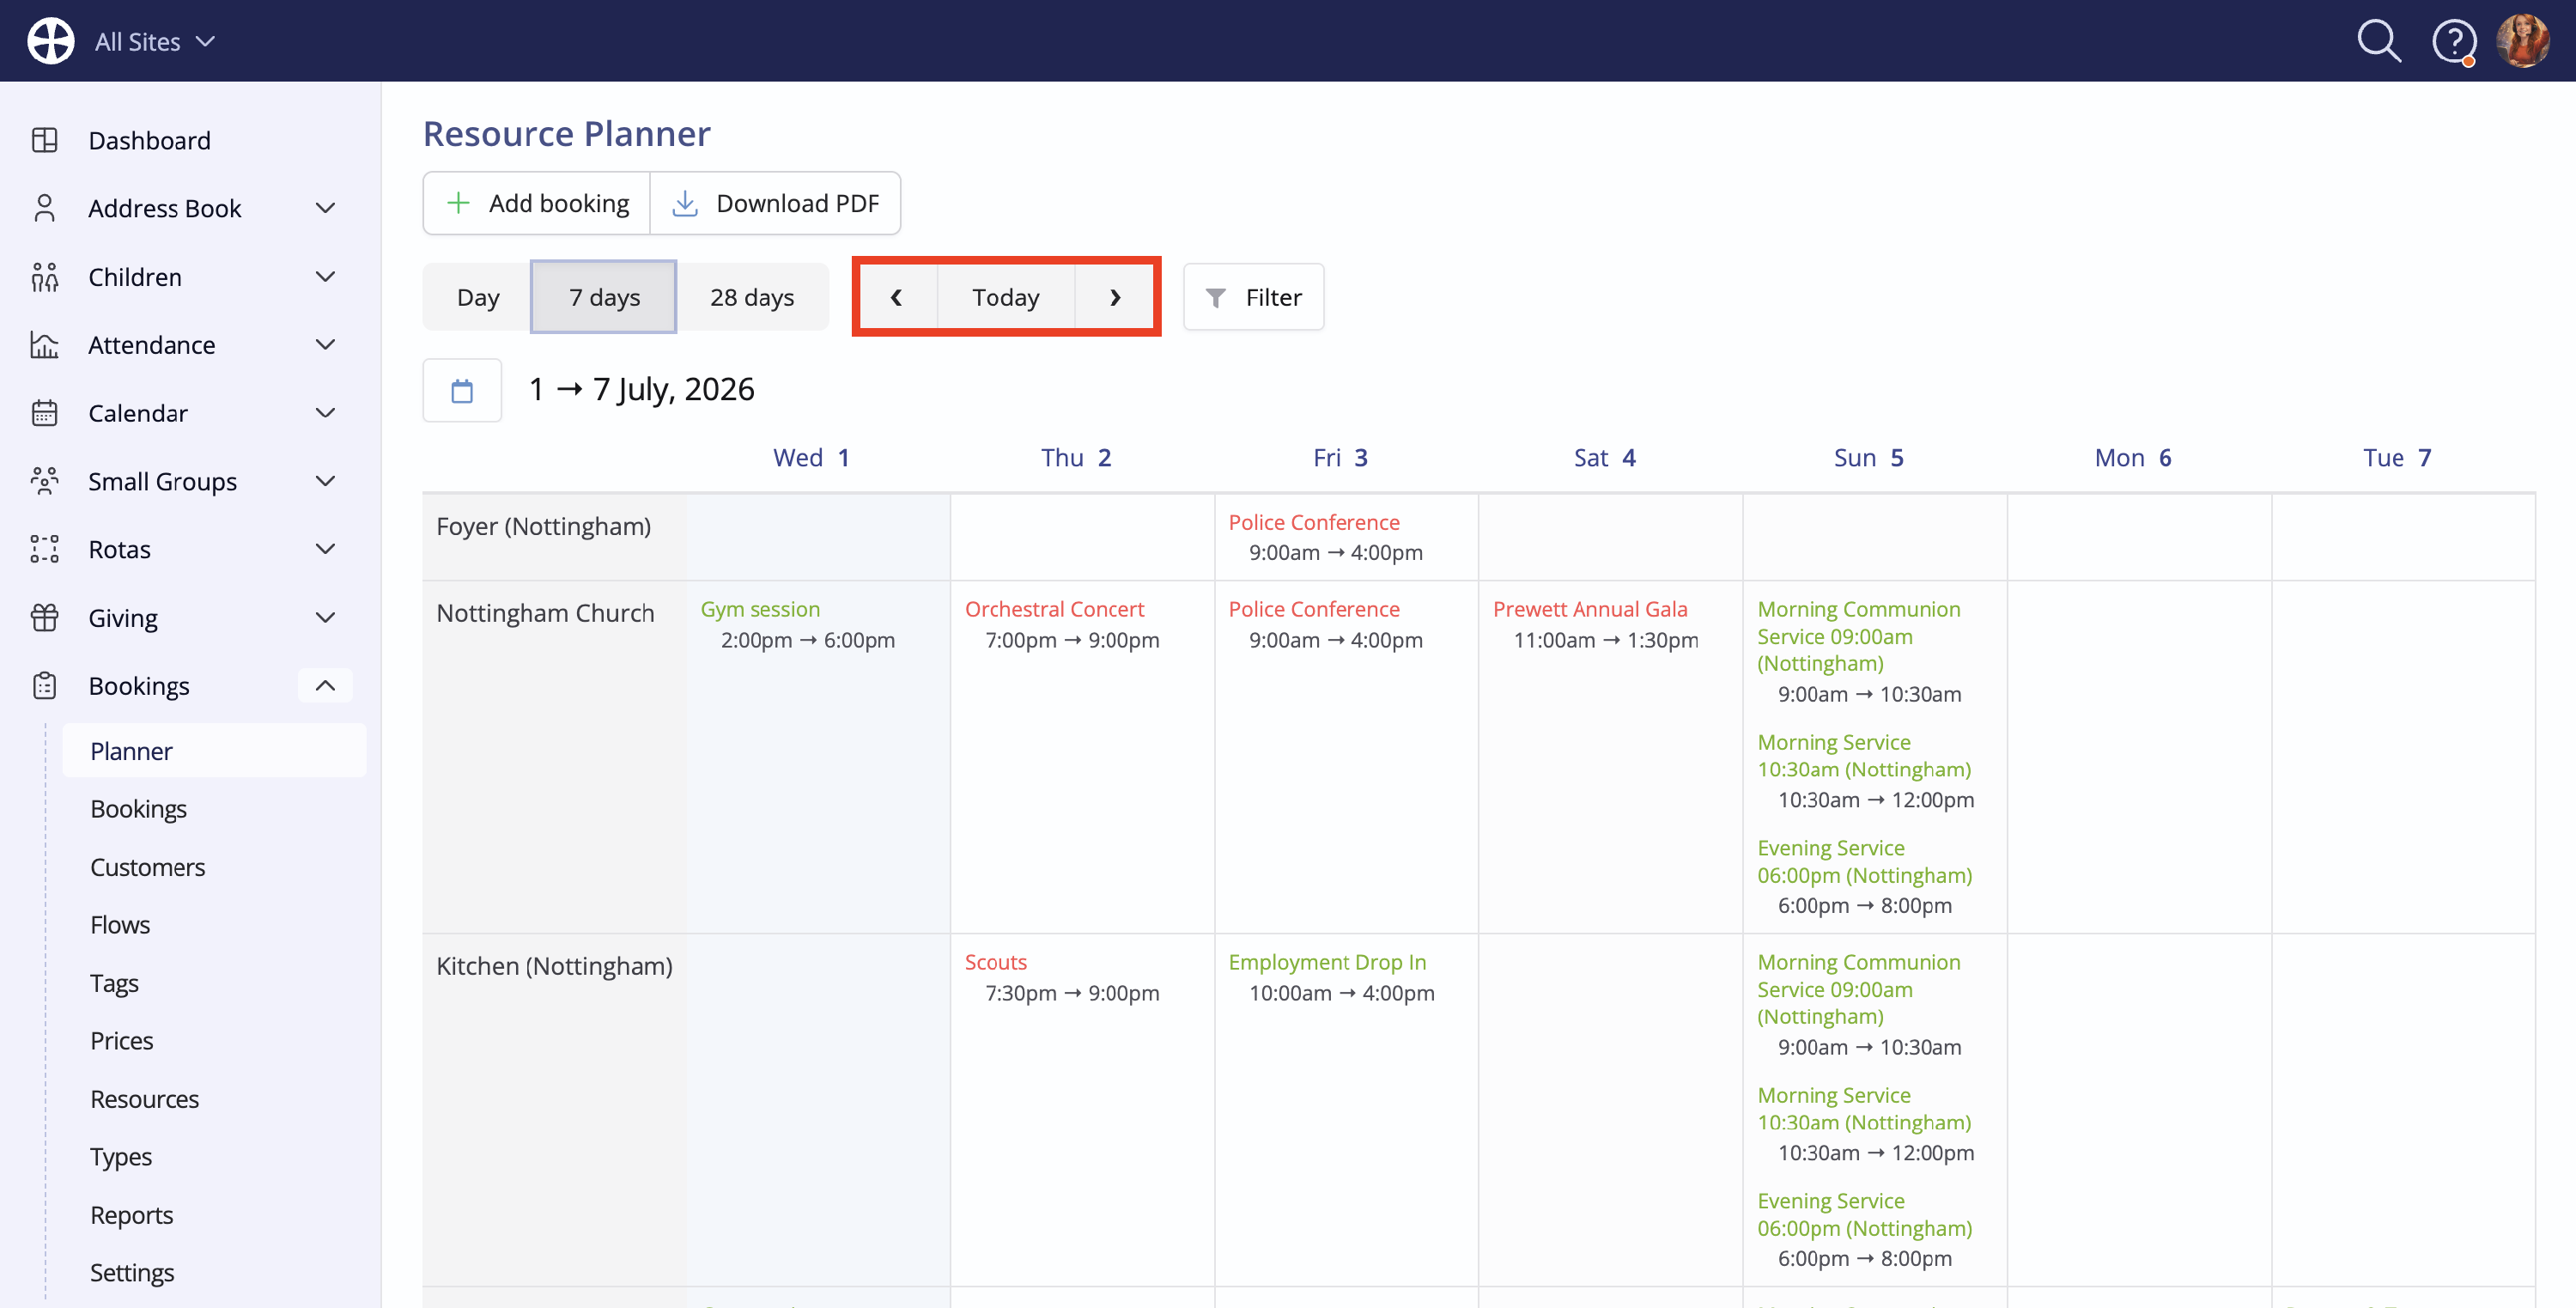
The Bookings module Planner displays all resource usage for the Site being viewed. You can switch between Day, 7-day and 28-day views and Filter by booking type and resource category to see booked resources of interest.
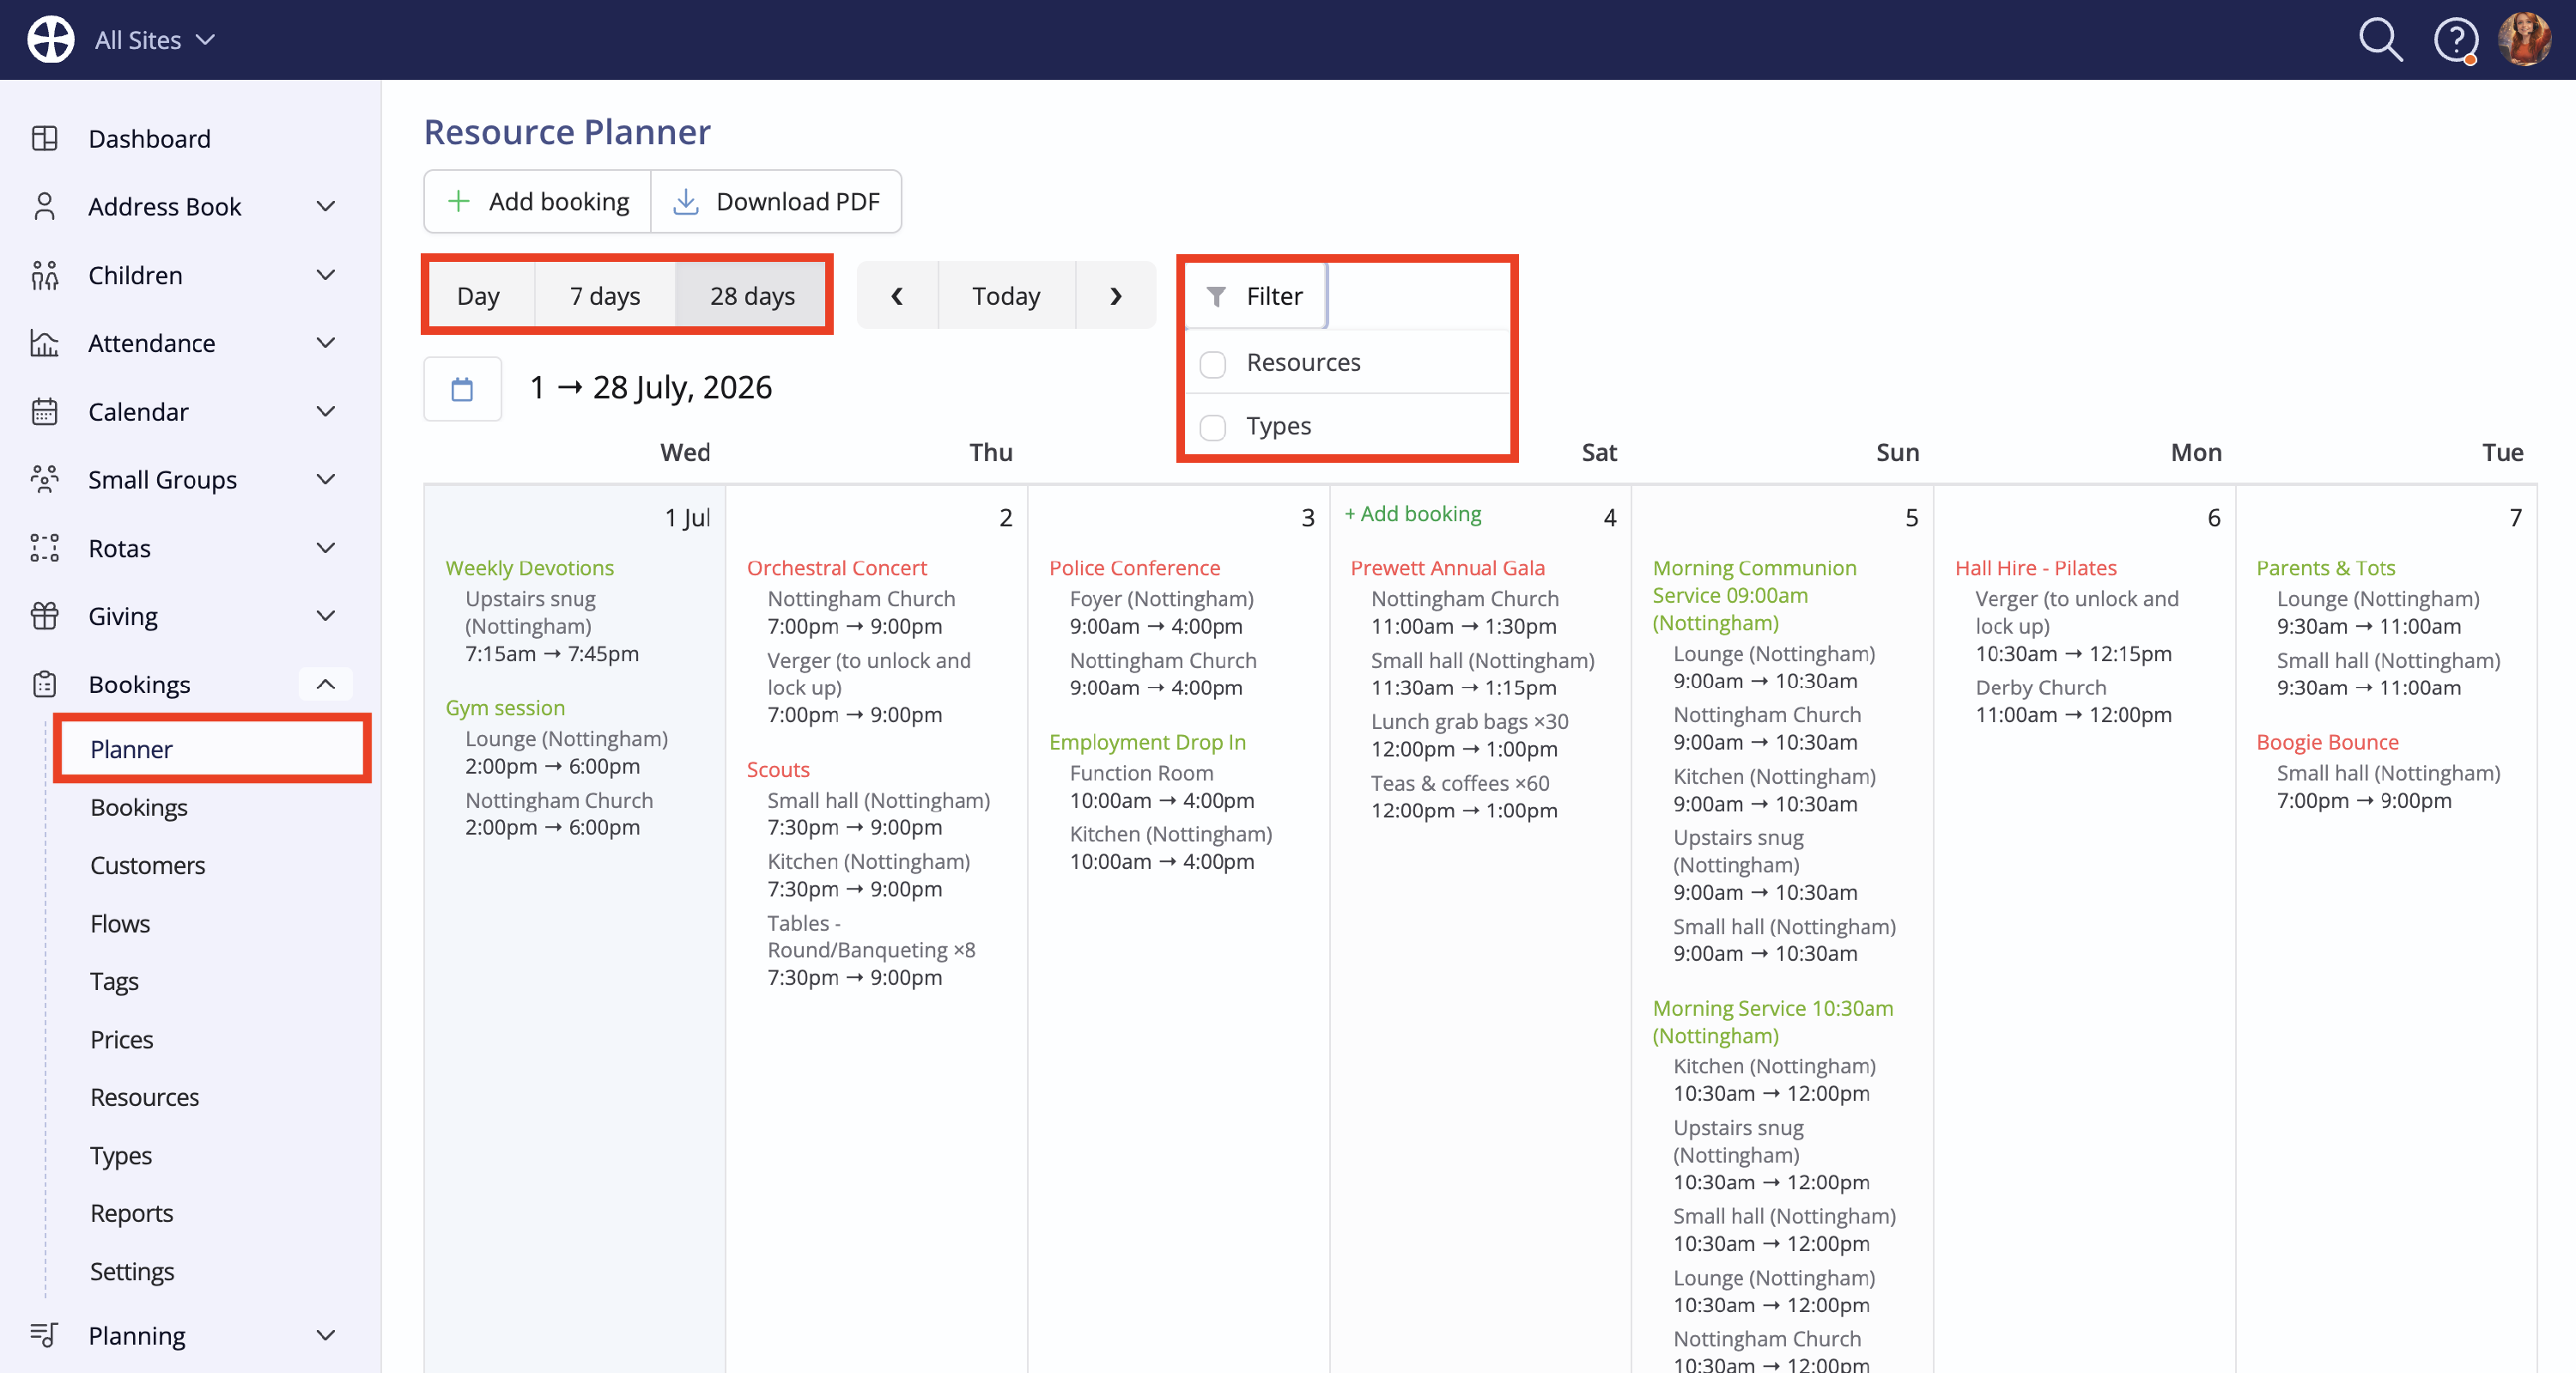
In Day view, a real-time timeline moves across the Planner, providing a visual indicator of where you're at with your bookings today.
Navigate dates and date ranges in each view using the Planner controls, moving forward or backwards one date range at a time or clicking Today to return to today's bookings. The date picker can be used to focus the Planner on a specific date or a date range in the past or the future. If you navigate away, your most recent Planner view is remembered in your browser, so you can pick up where you left off.
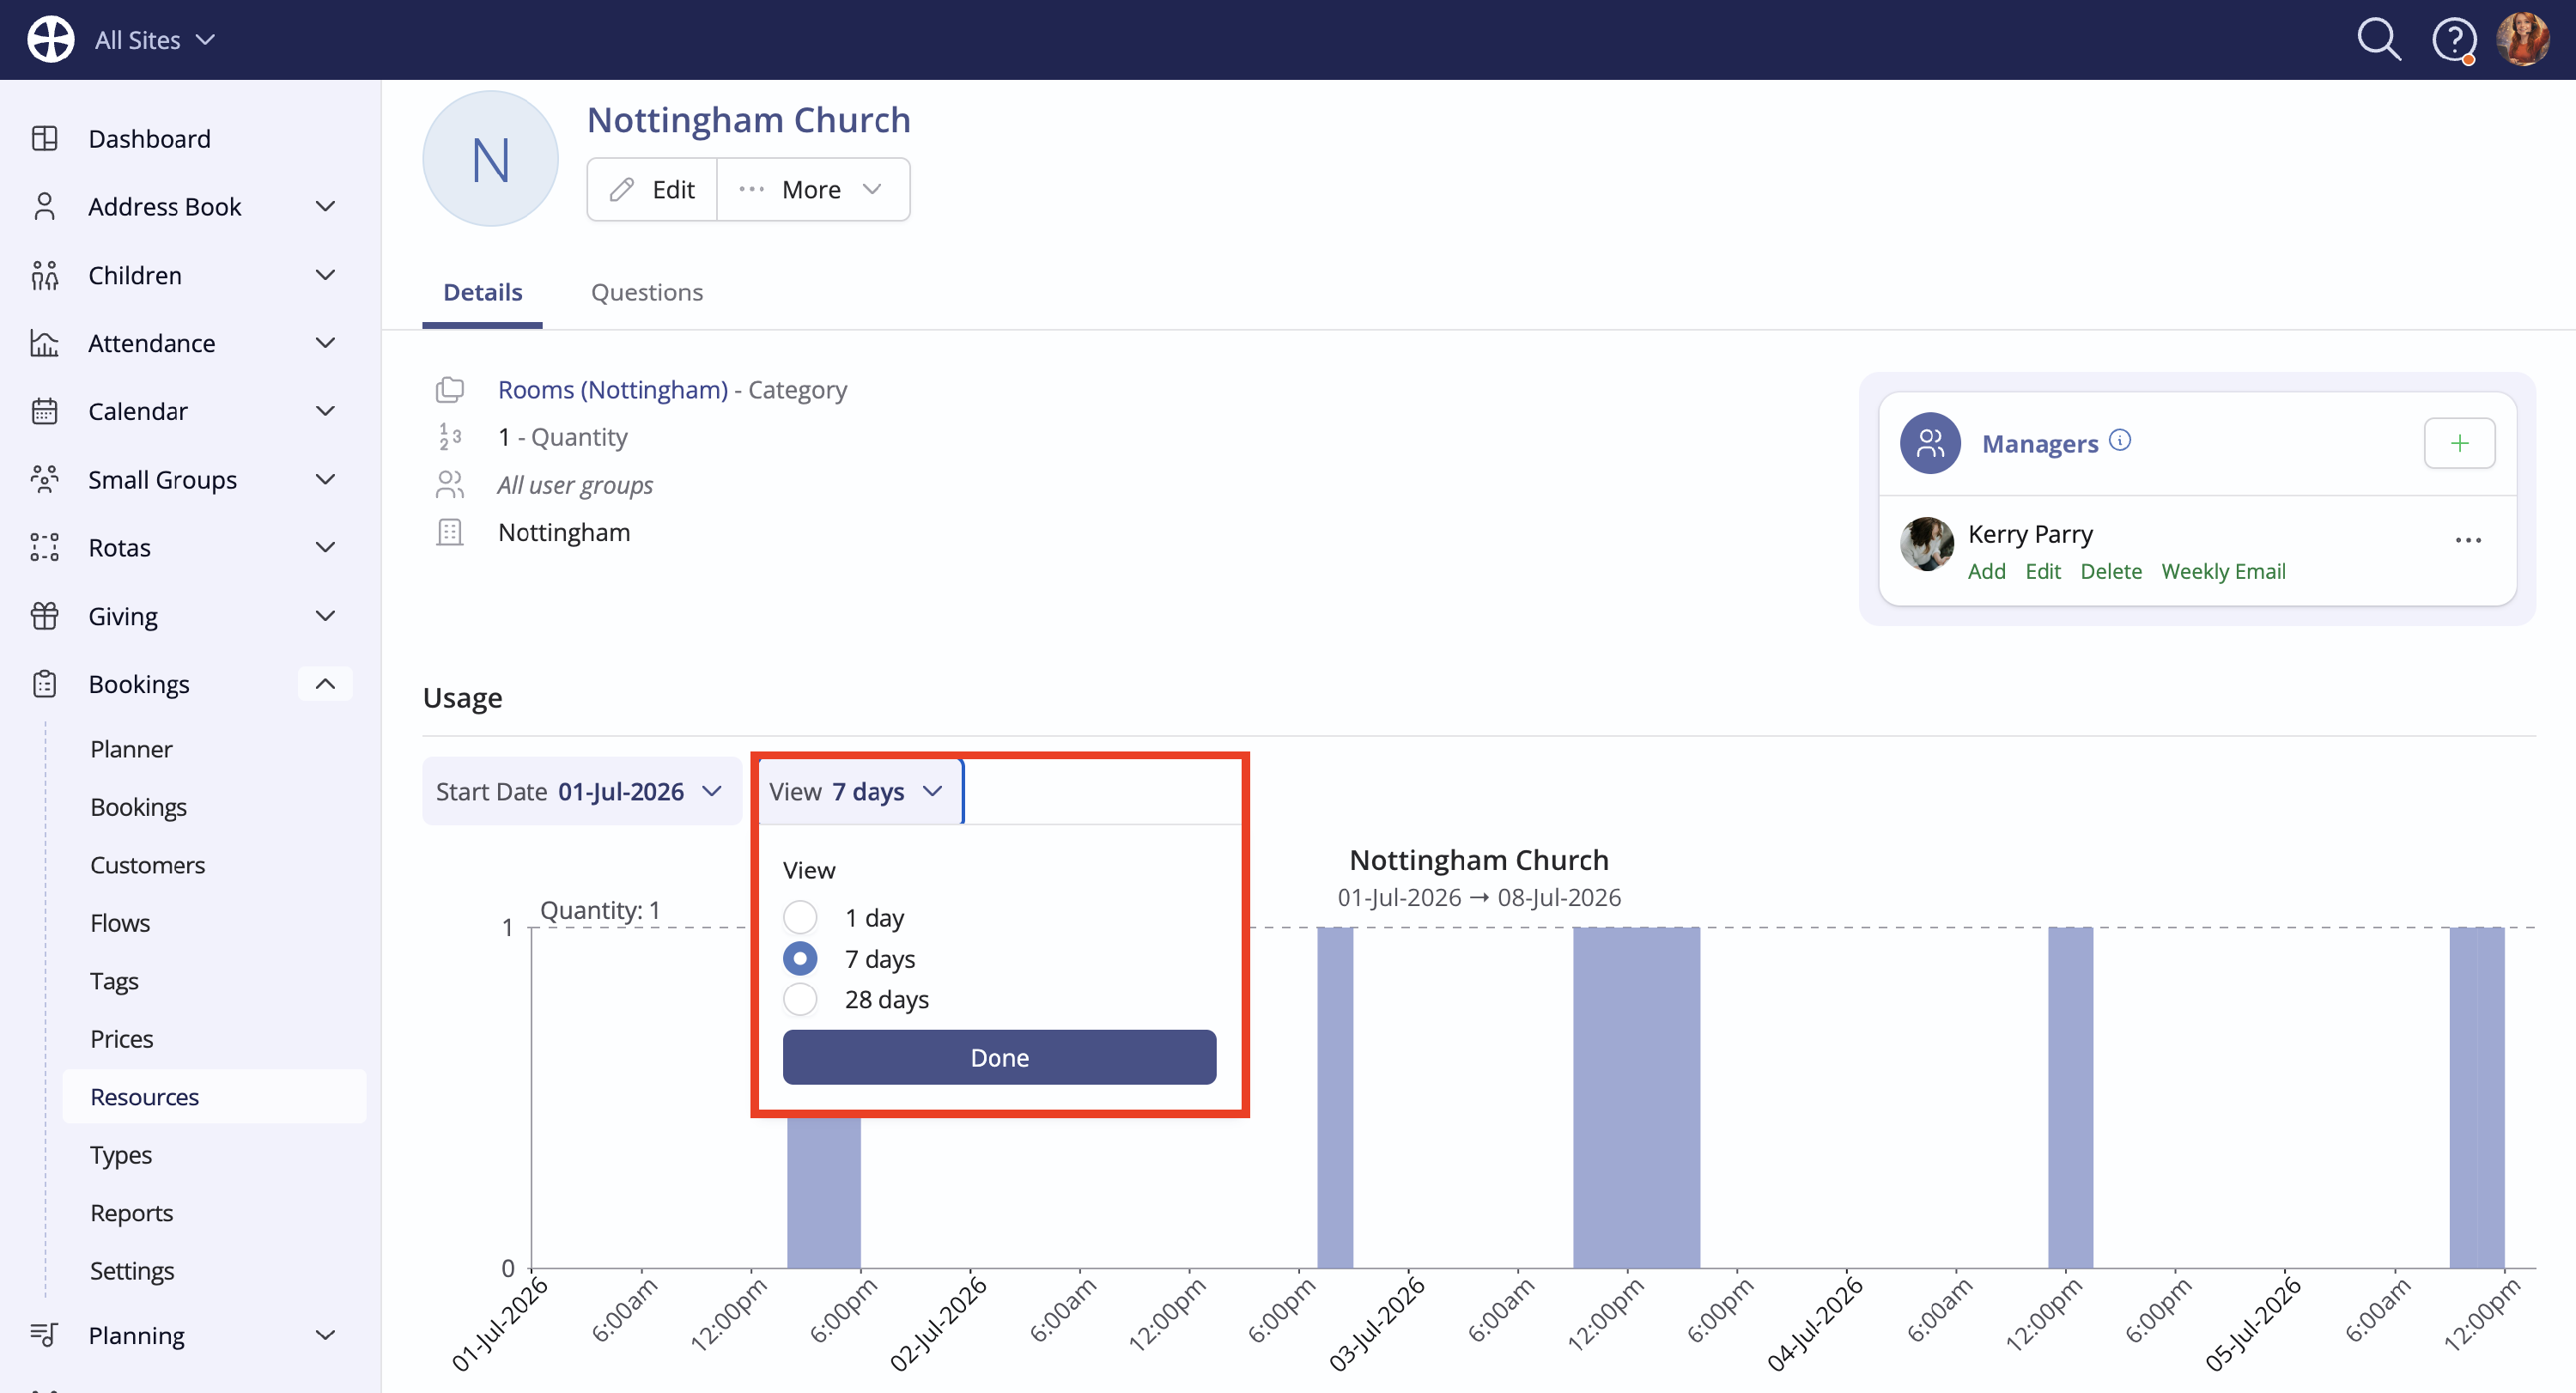
Finally, the Usage tab on a resource View provides helpful insights into usage highs and lows, as well as when the maximum resource capacity is being exceeded. Filter to see usage for 1, 7 or 28 days from a selected date.