Embed a free/busy resource planner on your website
In this article
Introduction
Overview of free/busy embed configurations
Adding and managing embed configurations
Introduction
The Bookings module includes a helpful website integration that enables you to easily embed a free/busy planner in your website so that website visitors can visualise resource availability before making a booking request. Once embedded, your website planner remains up to date as booking changes are made in ChurchSuite.
Overview of free/busy embed configurations
The Bookings module settings include a section for adding and managing embed configurations. An embed configuration contains all the settings for each free/busy resource planner you have embedded in your website. Each configuration has its own HTML code that you'll copy from the configuration into the appropriate page on your website, which creates a secure connection between your embedded ChurchSuite content and your Bookings module. Once embedded, subsequent changes to the configuration settings in ChurchSuite are immediately reflected on your website without requiring you to add new HTML each time. You can create multiple configurations - ideal for multi-site customers who want to embed a separate free/busy resource planner for each site's website.
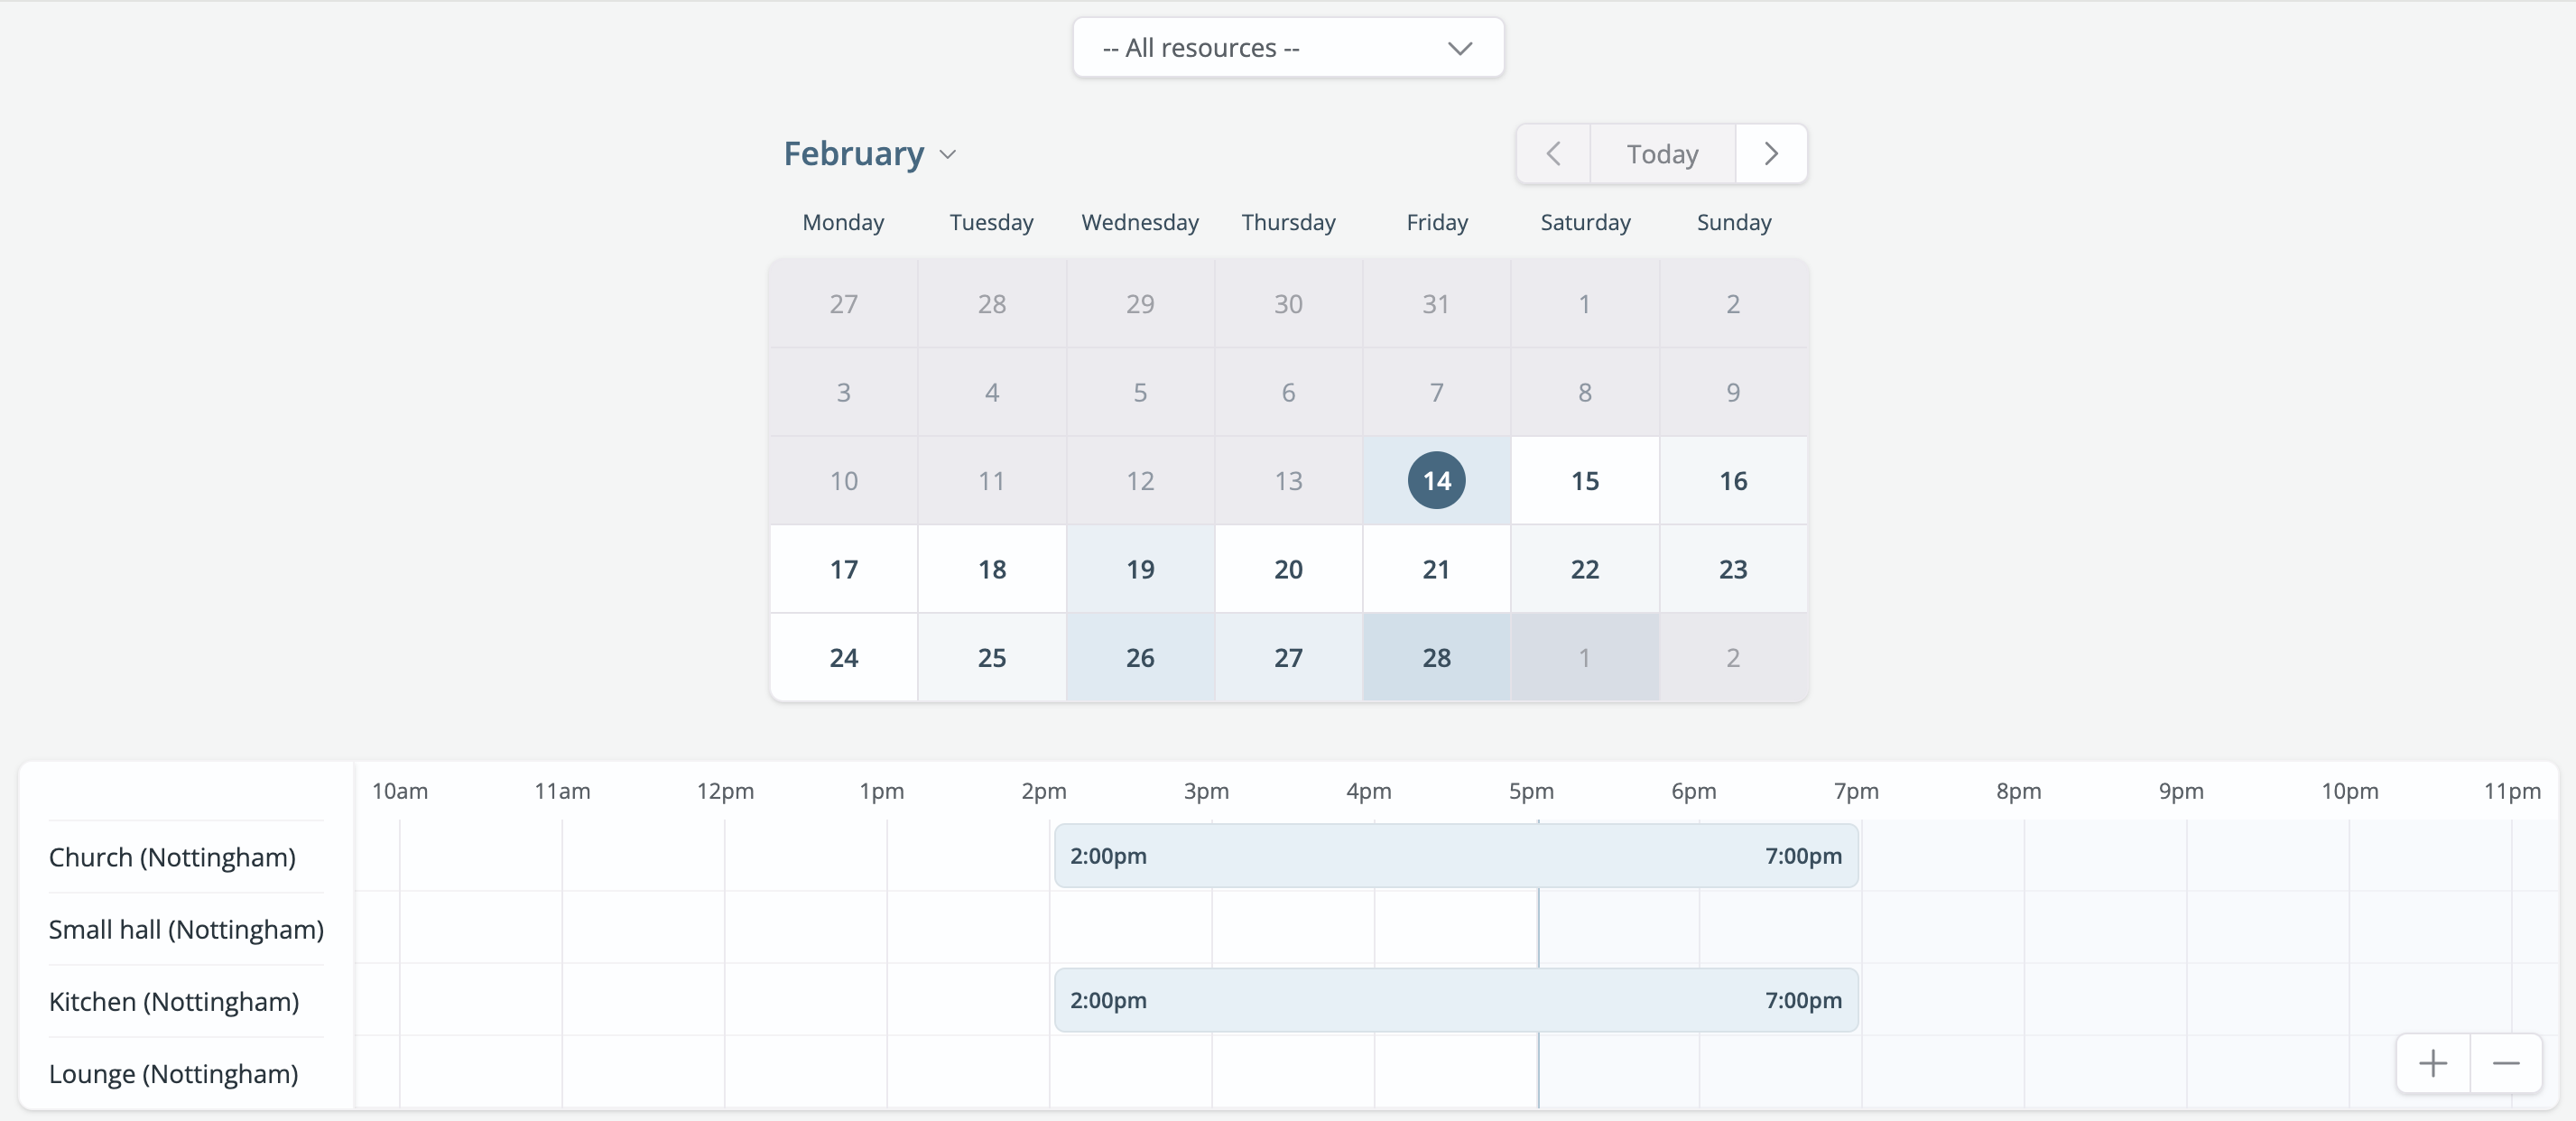
The embeddable free/busy planner sports a chosen brand - green in the example below - and shows anonymised busy times for pending and confirmed status bookings for selected resources. Overlapping (clashing) and consecutive usage of a resource are merged into a single busy block-out. The grid calendar uses a heat map to give website visitors a sense of resource availability for each date, ranging from white, meaning good resource availability on that date, to a progressively darker brand colour on days when resources are less available.
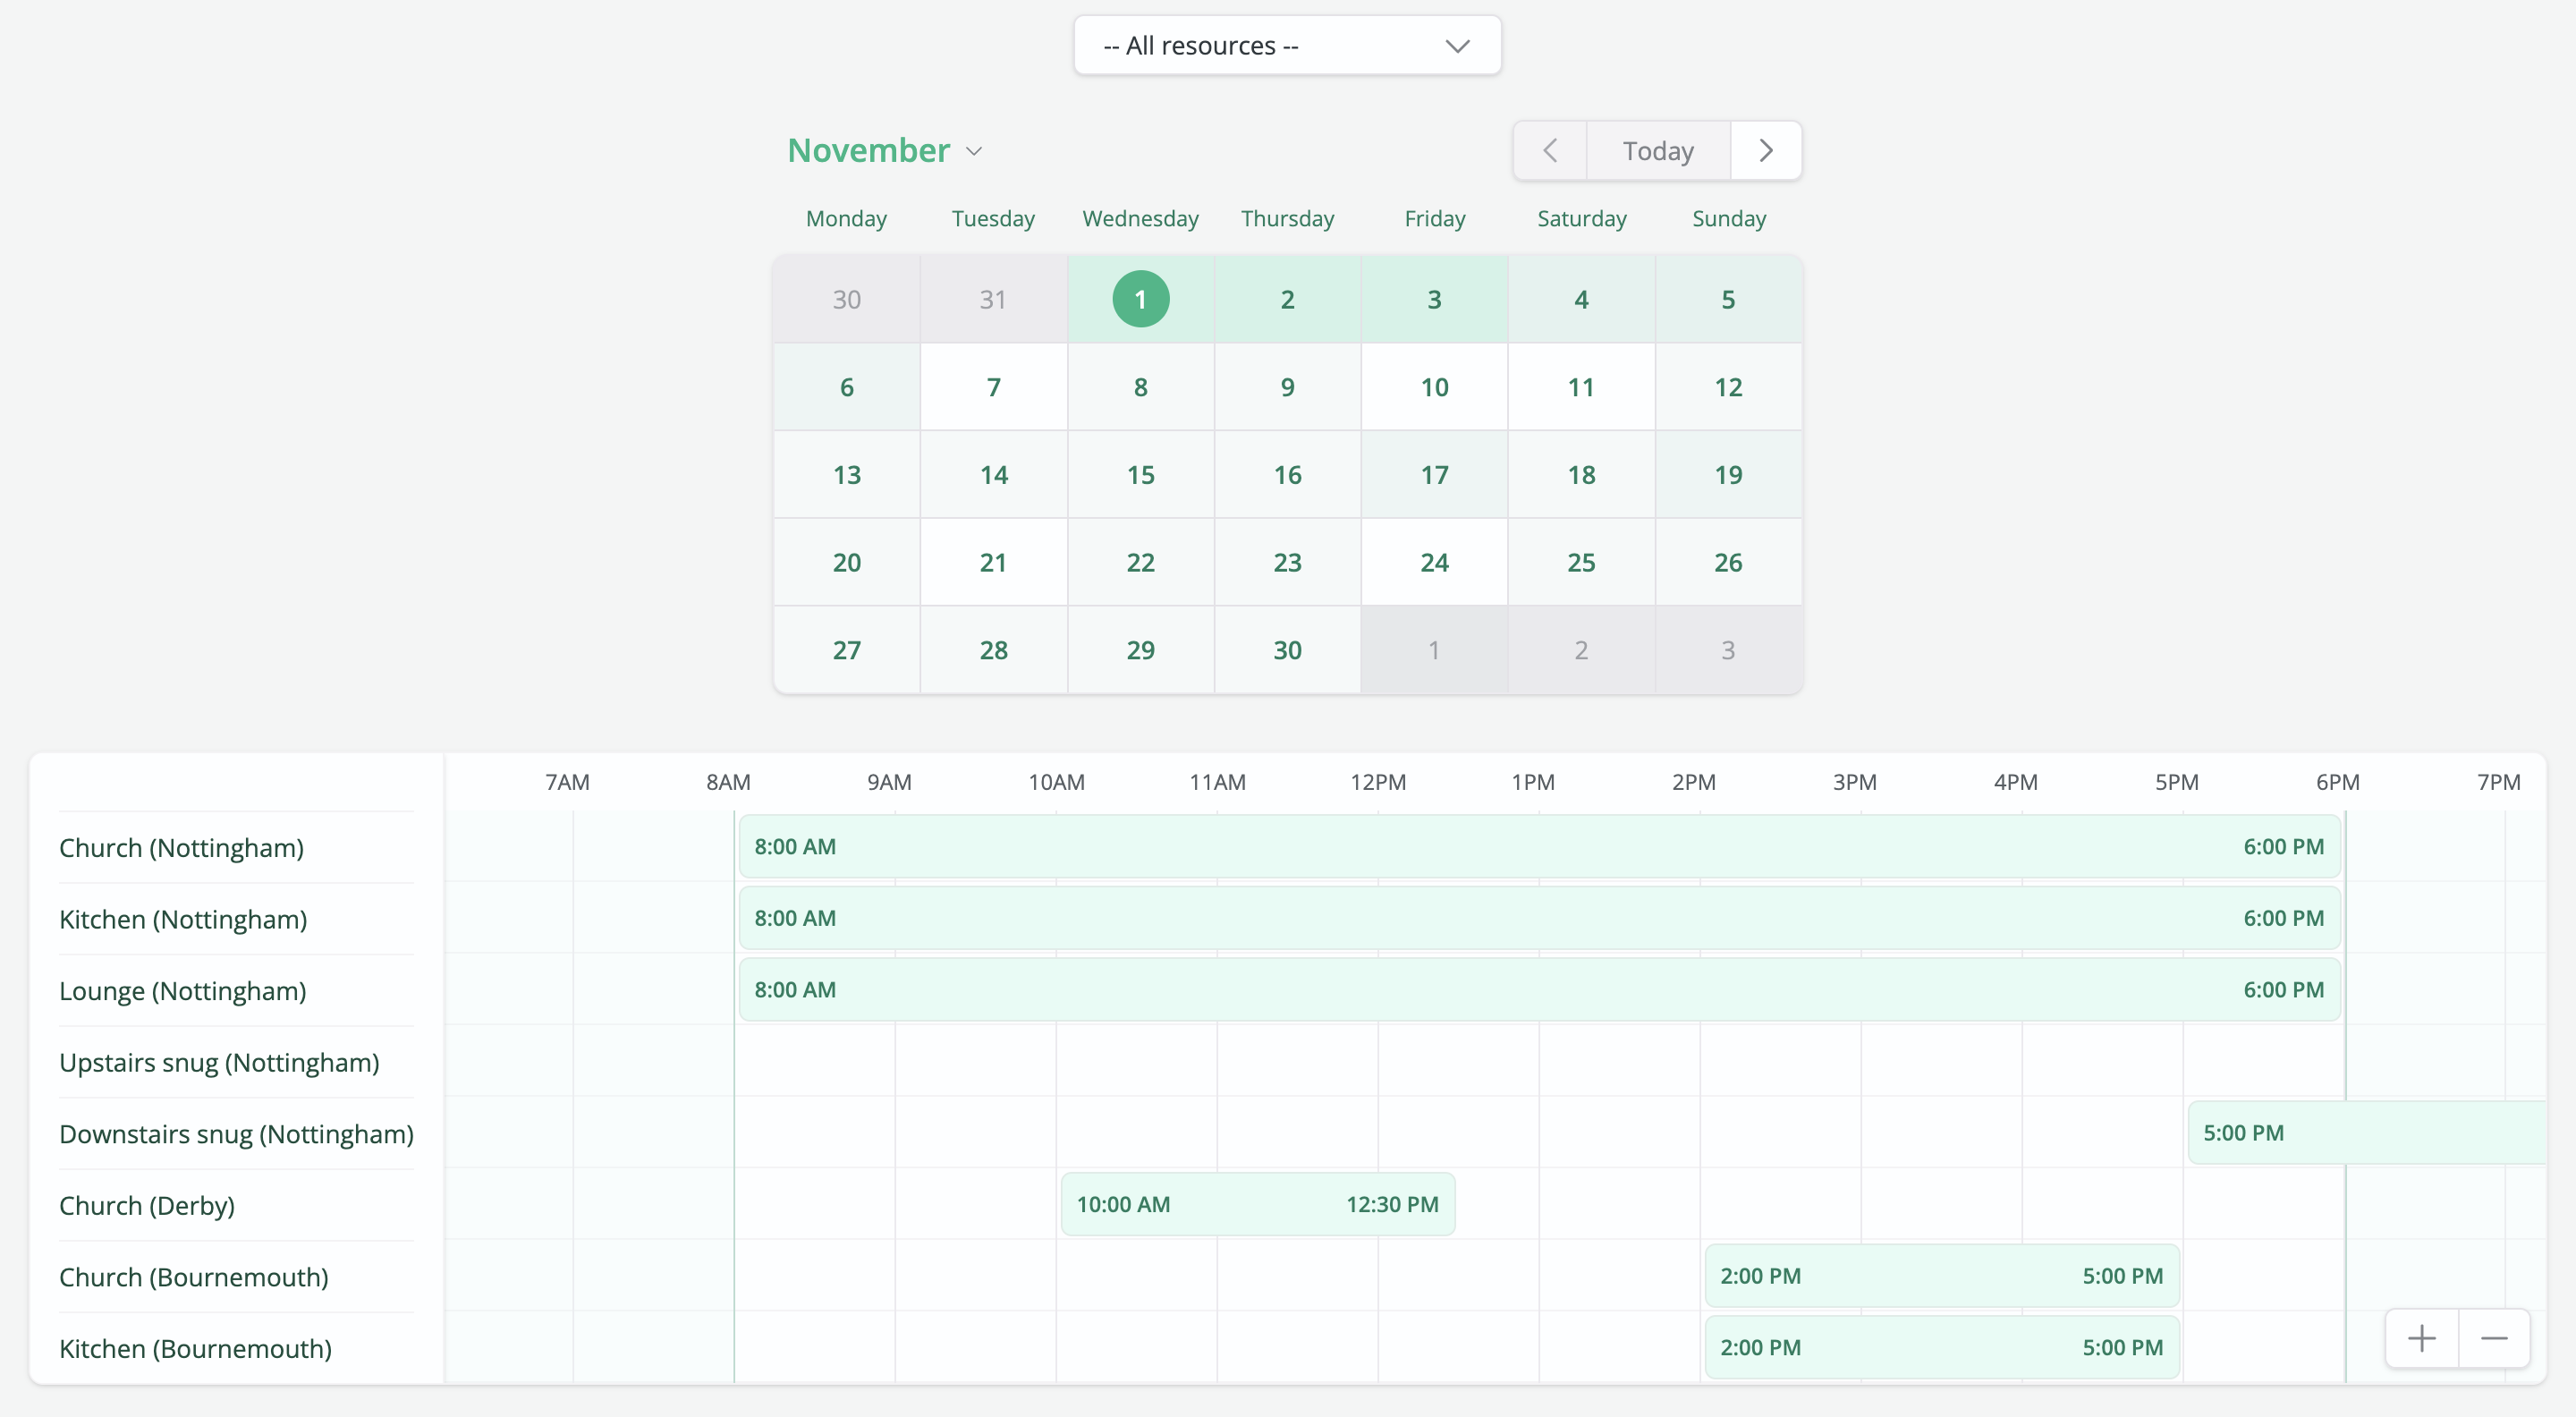
The remainder of this article explains how to add and make changes to a configuration. To visualise what your embeddable free/busy planner will look like and how it will function for website visitors, read on - configurations have a helpful Preview so you can easily visualise the free/busy planner user experience before adding the HTML code to your website.
Adding and managing embed configurations
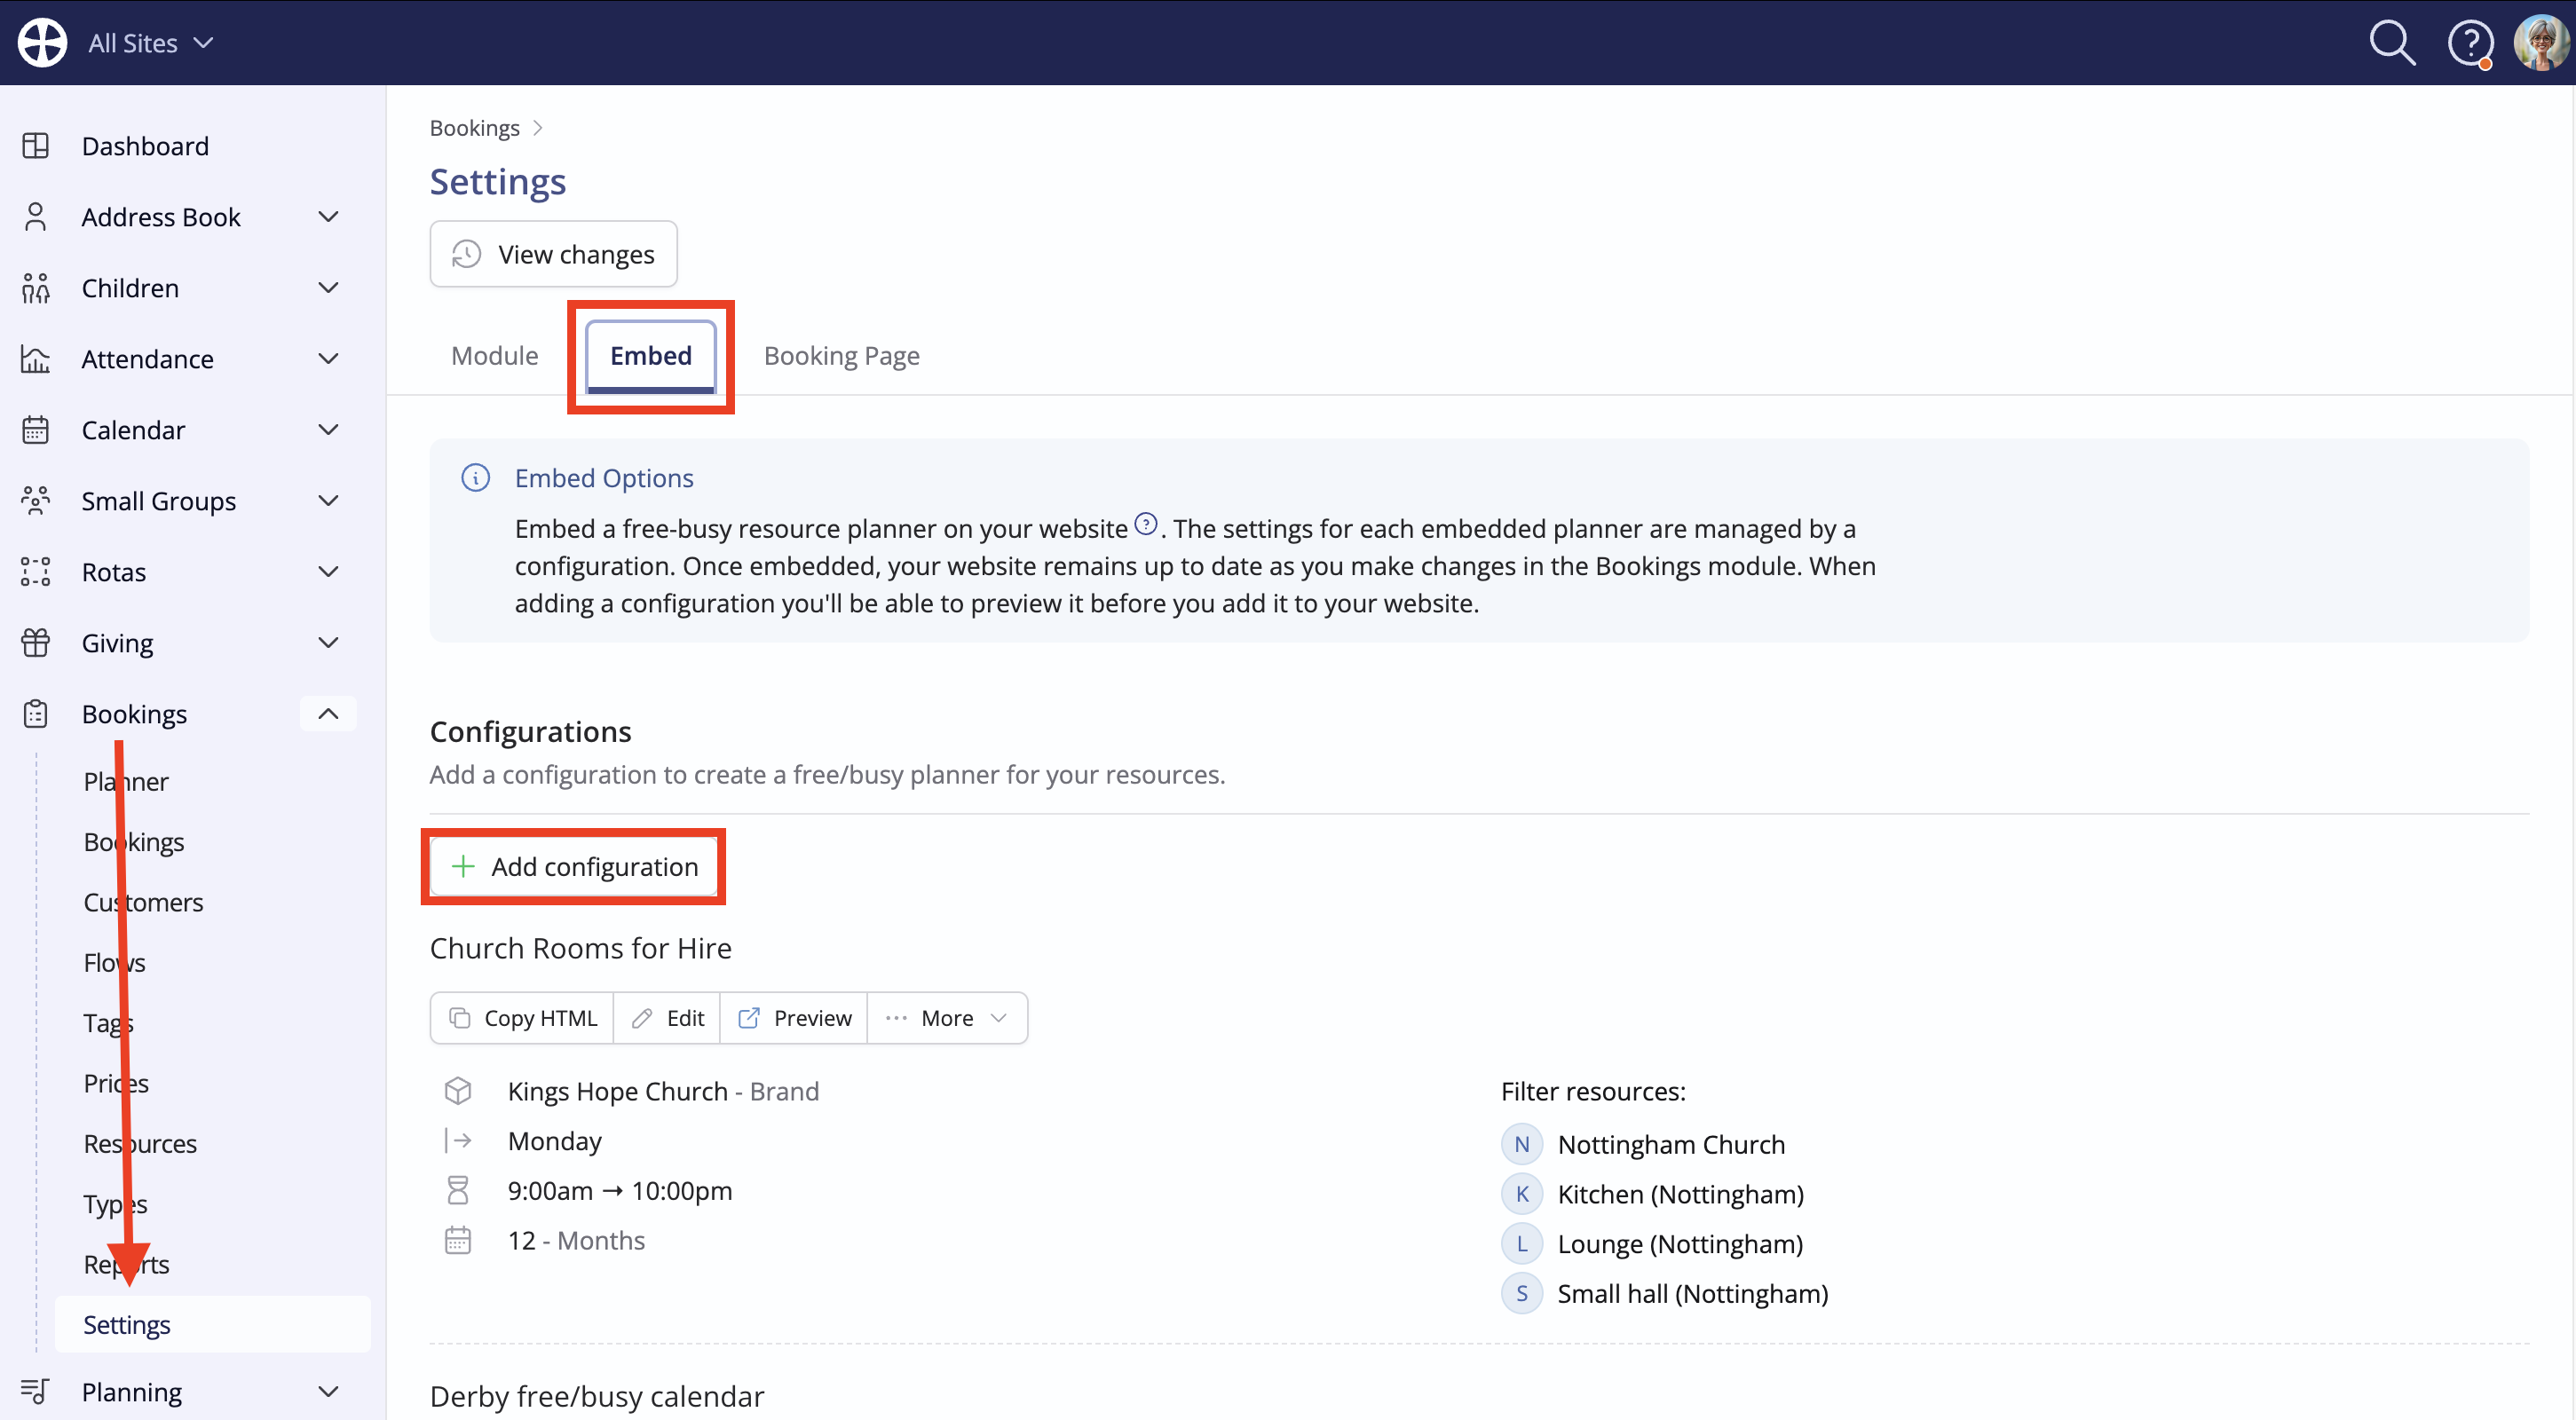
Working within the Bookings module, navigate into the module settings. On the Embed Options tab, click Add configuration (or click Edit to make changes to an existing configuration).
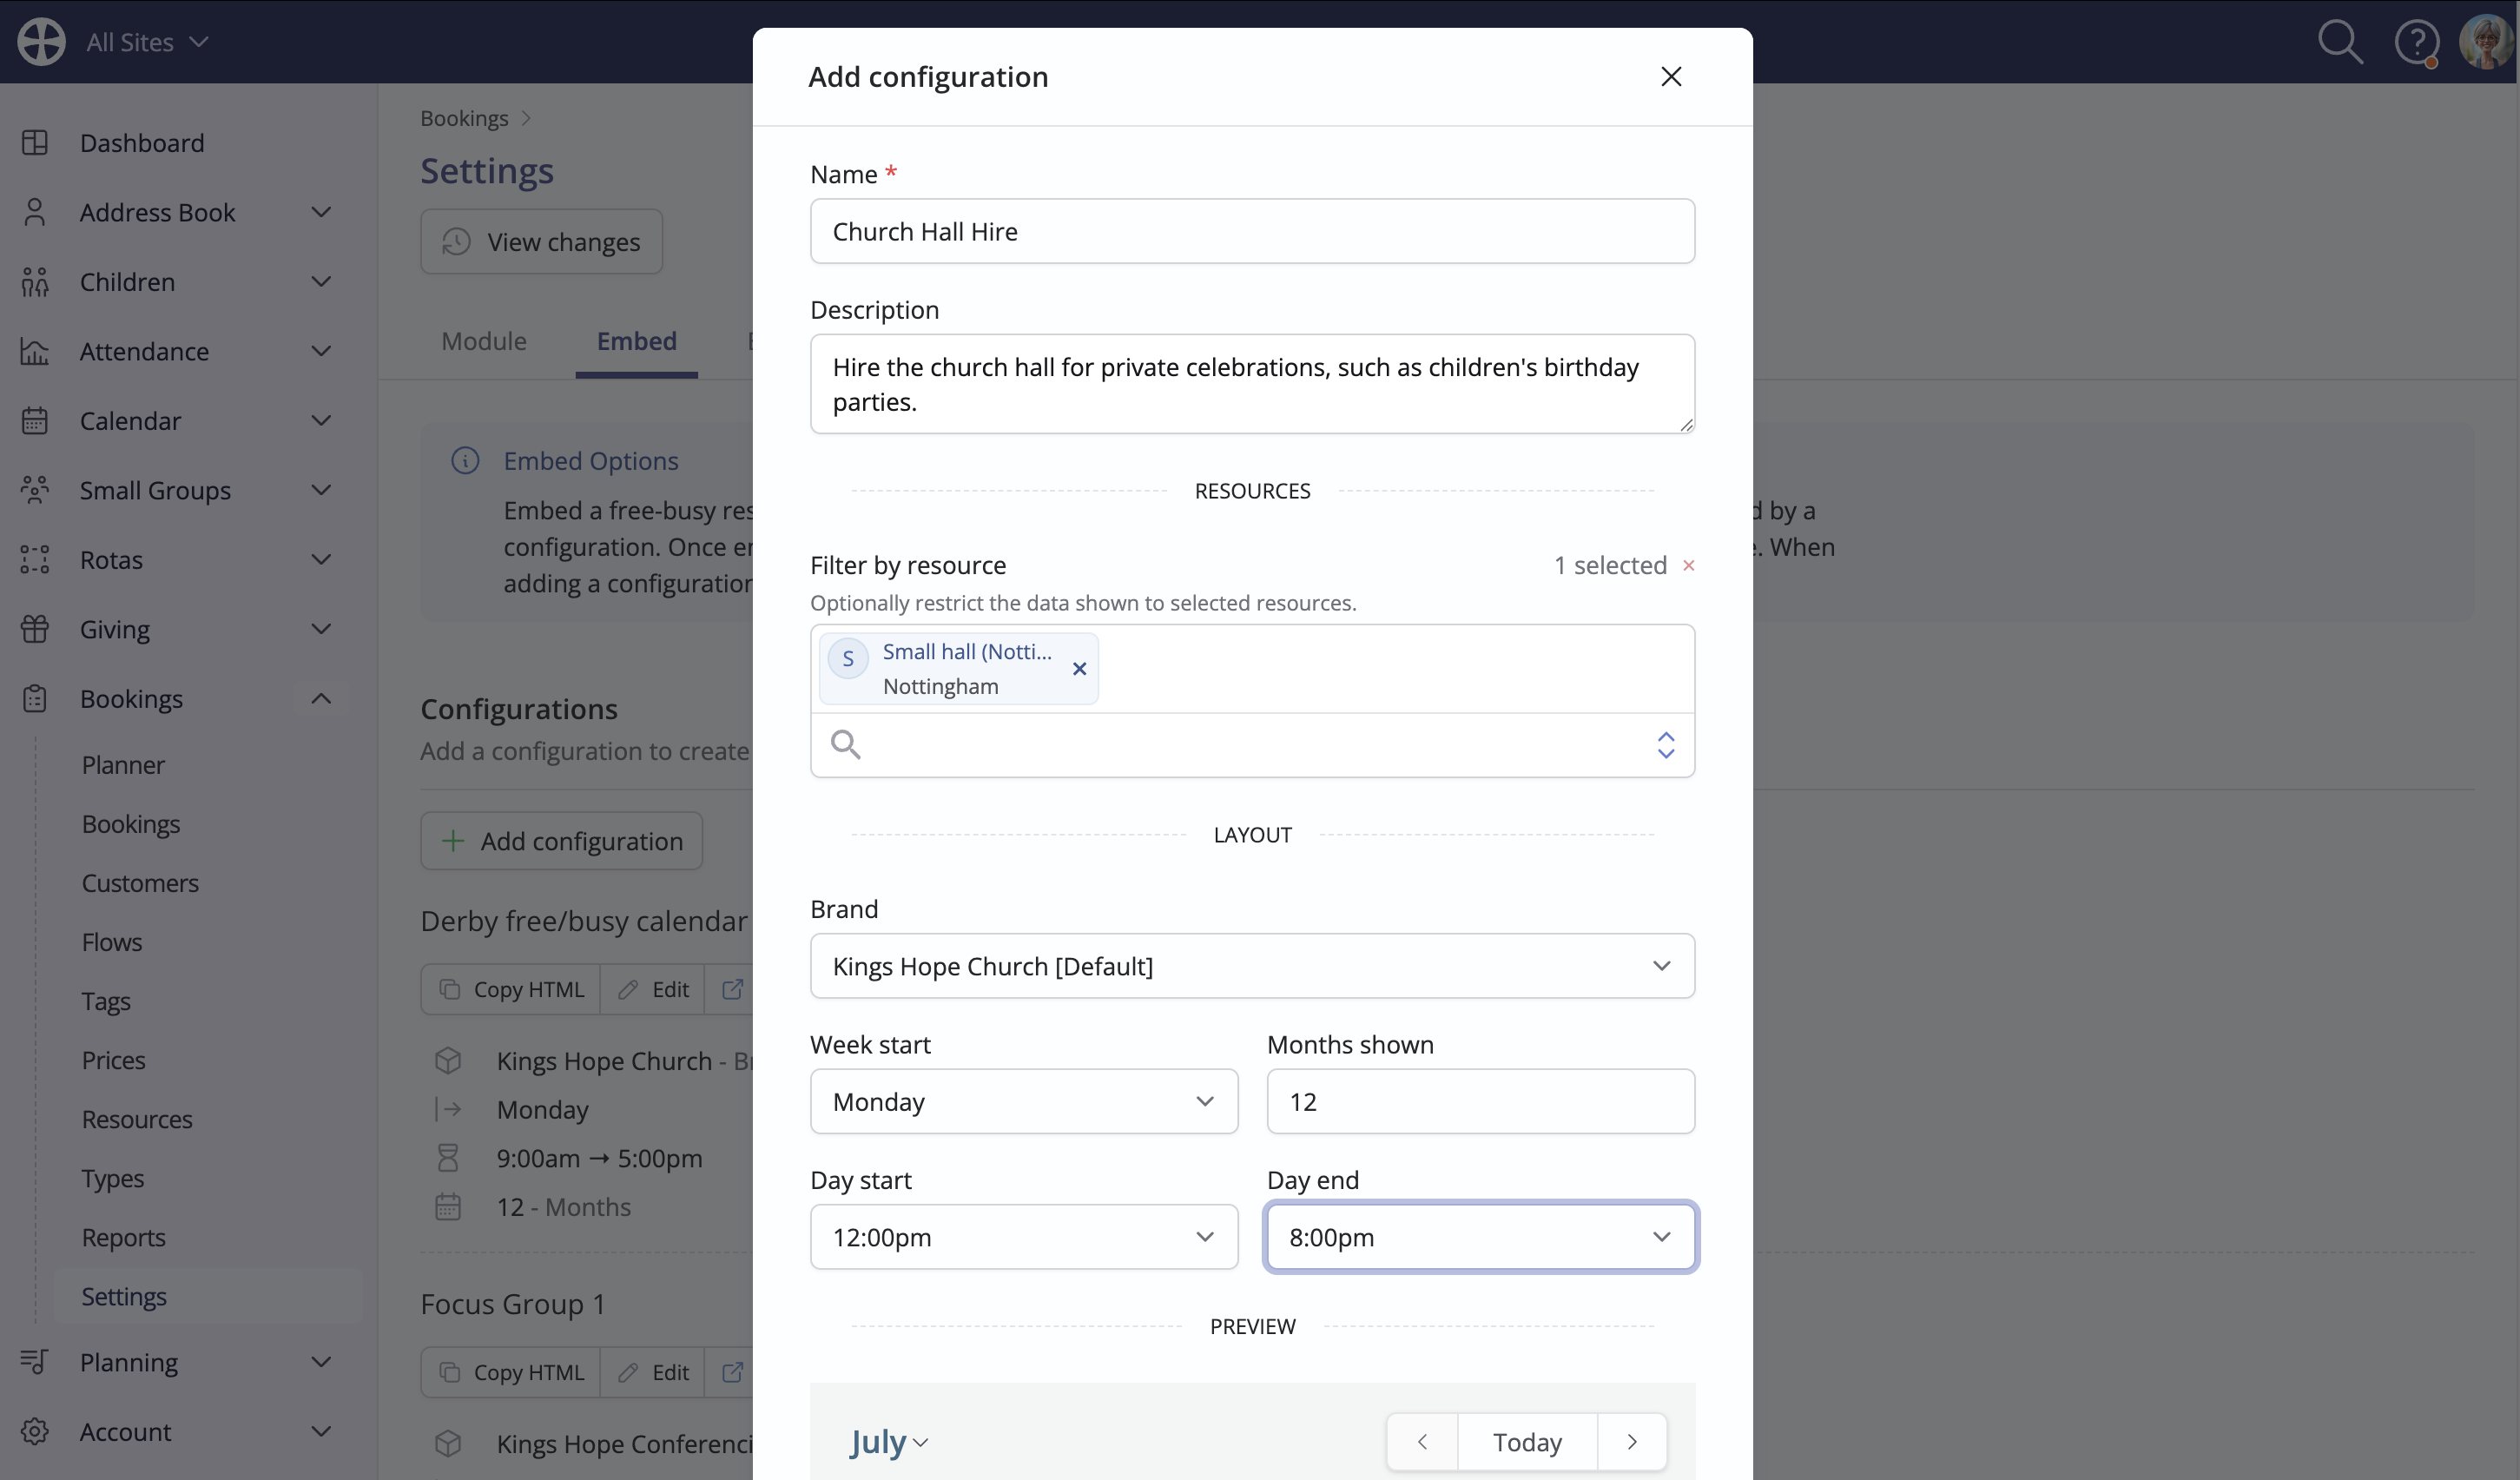
On the Add/Edit configuration pop-up, enter a suitable configuration Name and optional Description, used internally to help you identify this configuration within a list. For example, you might find it helpful to note the website page URL where the configuration HTML will later be deployed. Optionally Filter resources that you want shown. In this way, you can choose to only show selected resources, perhaps just for a particular site, rather than all resources. Optionally select a custom Brand - the selected brand colour is used to style certain elements of the embedded free/busy planner. You can customise the website visitor user experience by setting the planner's first day of the week and the default Start and End times the planner will zoom to - perhaps the typical working day when most bookings happen. You can also restrict free/busy navigation to a maximum number of Months into the future - note that it is not possible to navigate to past dates.
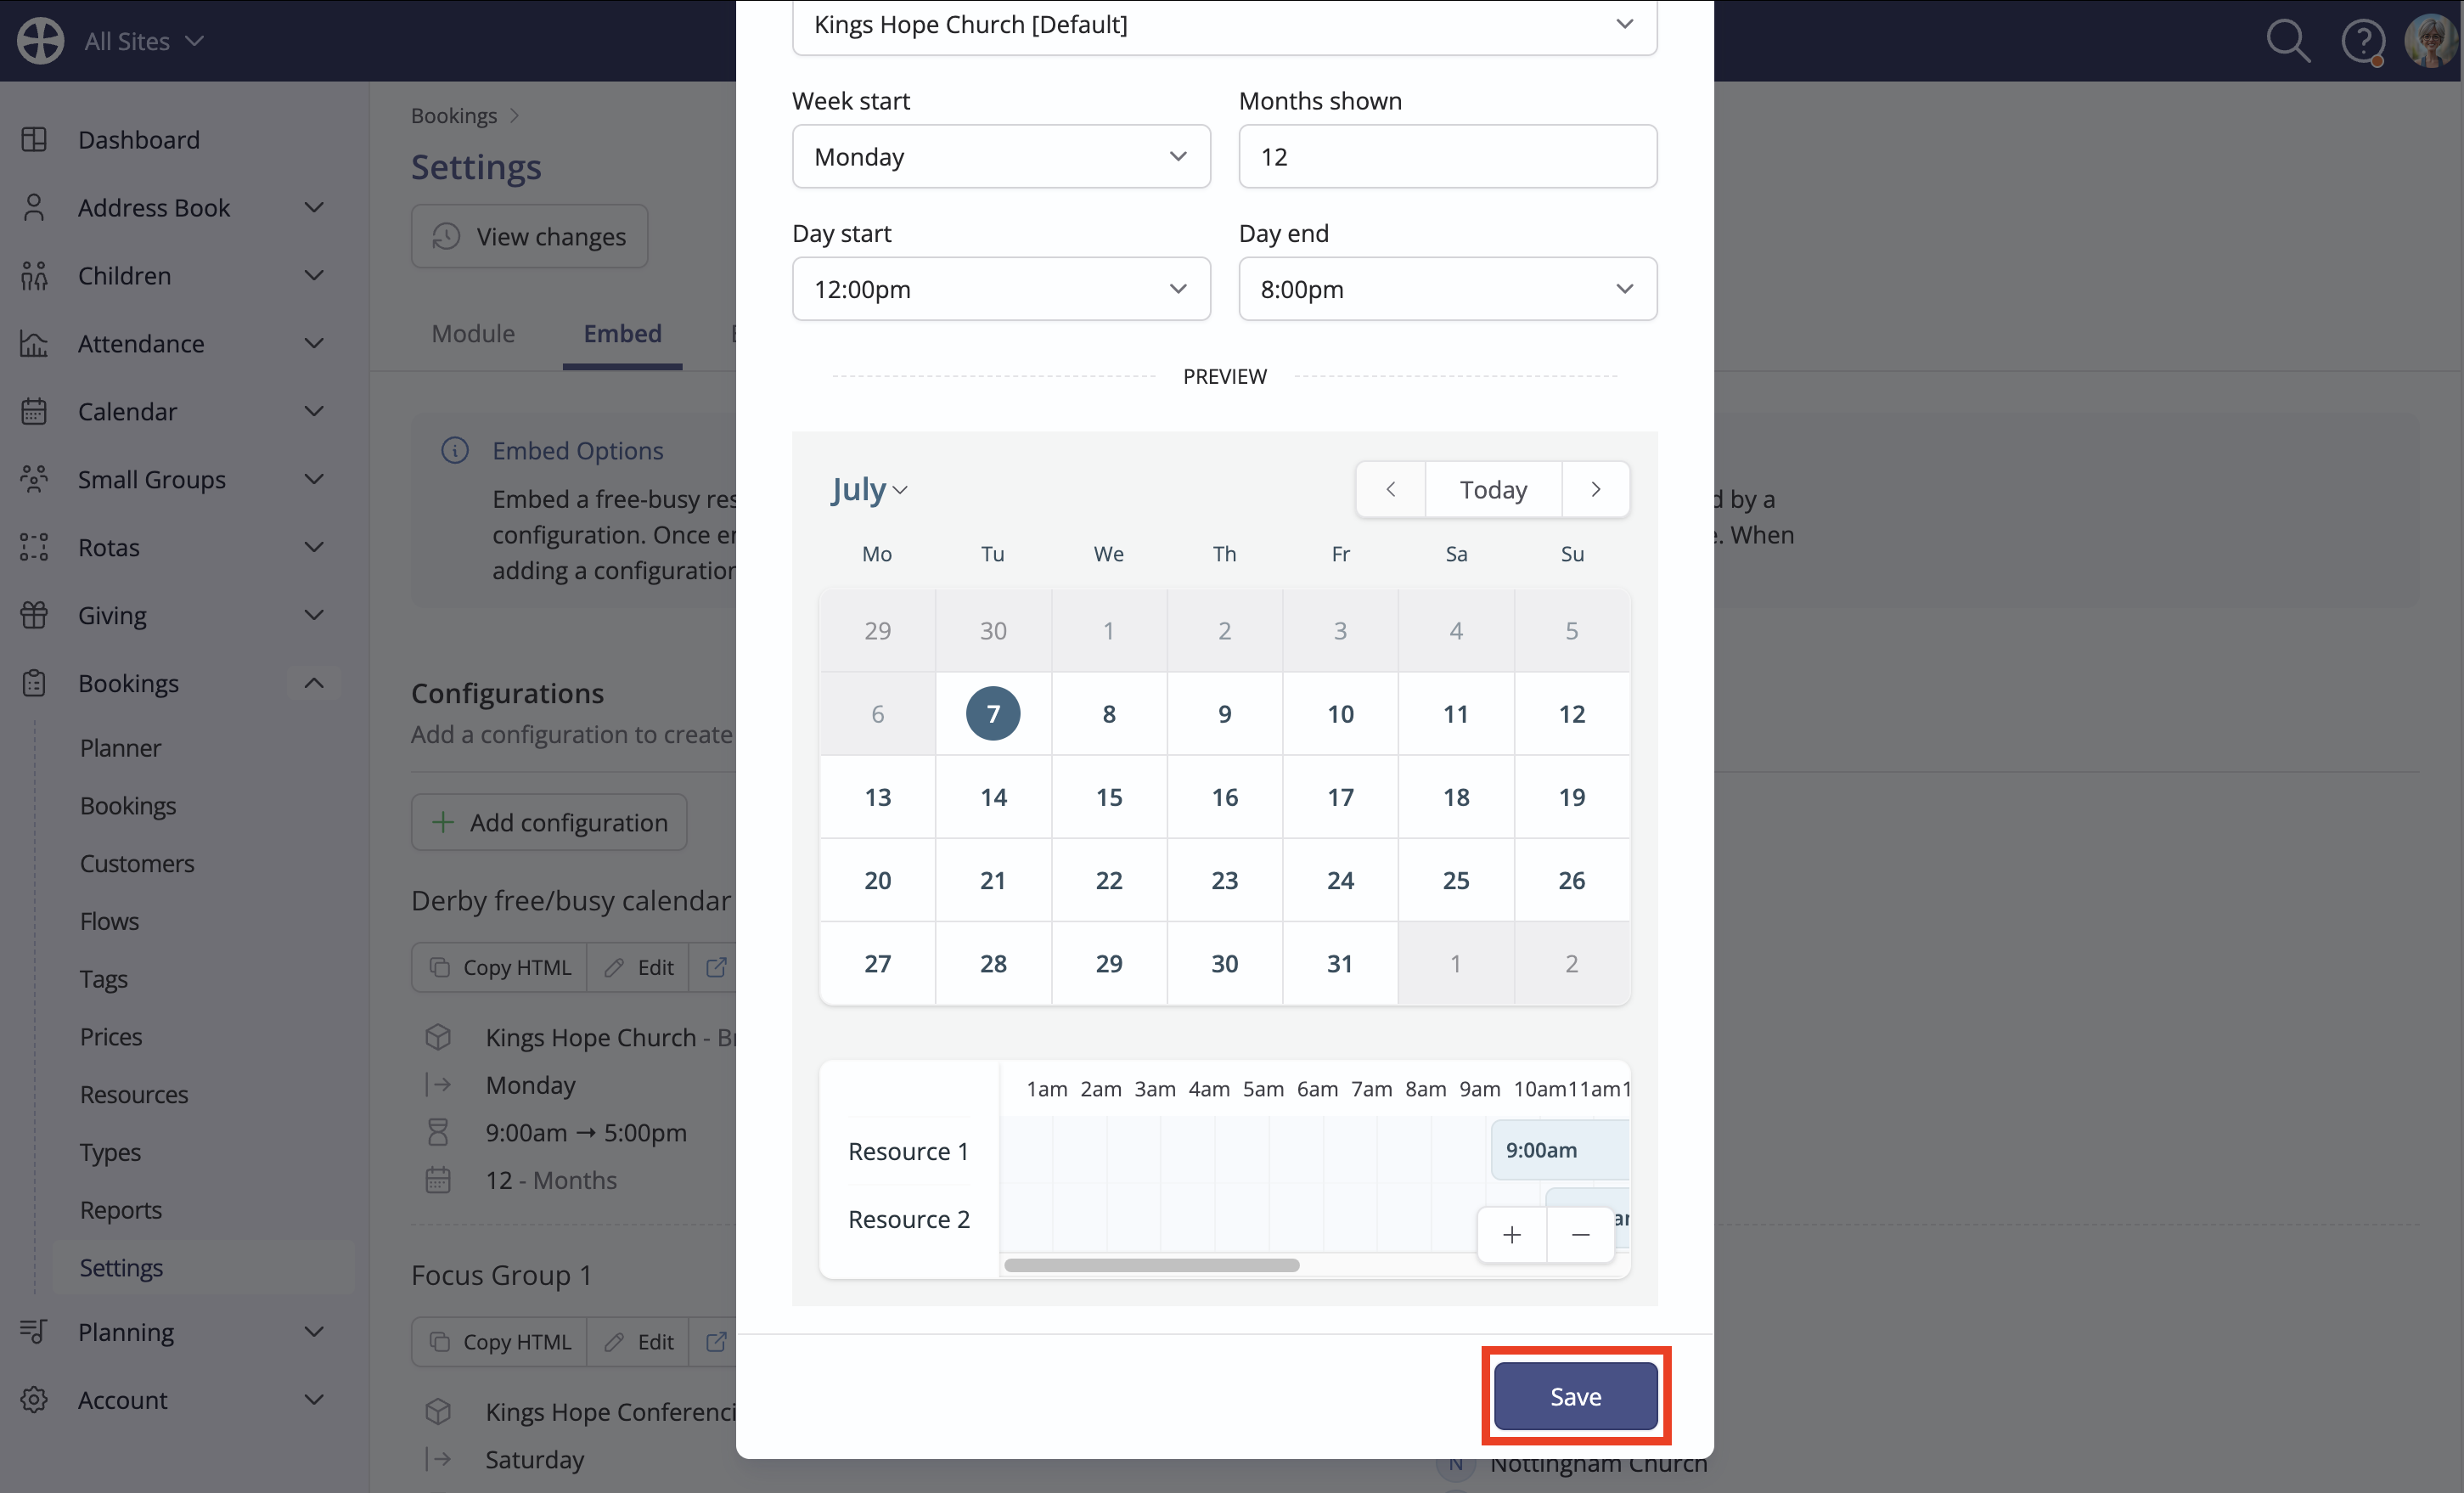
The Preview shows a likeness of how the free/busy planner will be styled based on the configuration settings selected. Click to Save configuration changes.
Saving the configuration returns you to the Embed Options tab and the list of Configurations, including all the details you just added for a new configuration. From here, you can Add further configurations, Edit or Delete a configuration or View changes made to a configuration's settings. You can Preview a configuration at any time to visualise in a new browser tab how the free/busy planner will look for your website visitors.
The Developer JSON option will take you to the JSON feed of raw data, which can be helpful if you want to programmatically control your venue's central heating based on bookings, for example. For more information, see the related support article on Developer API.
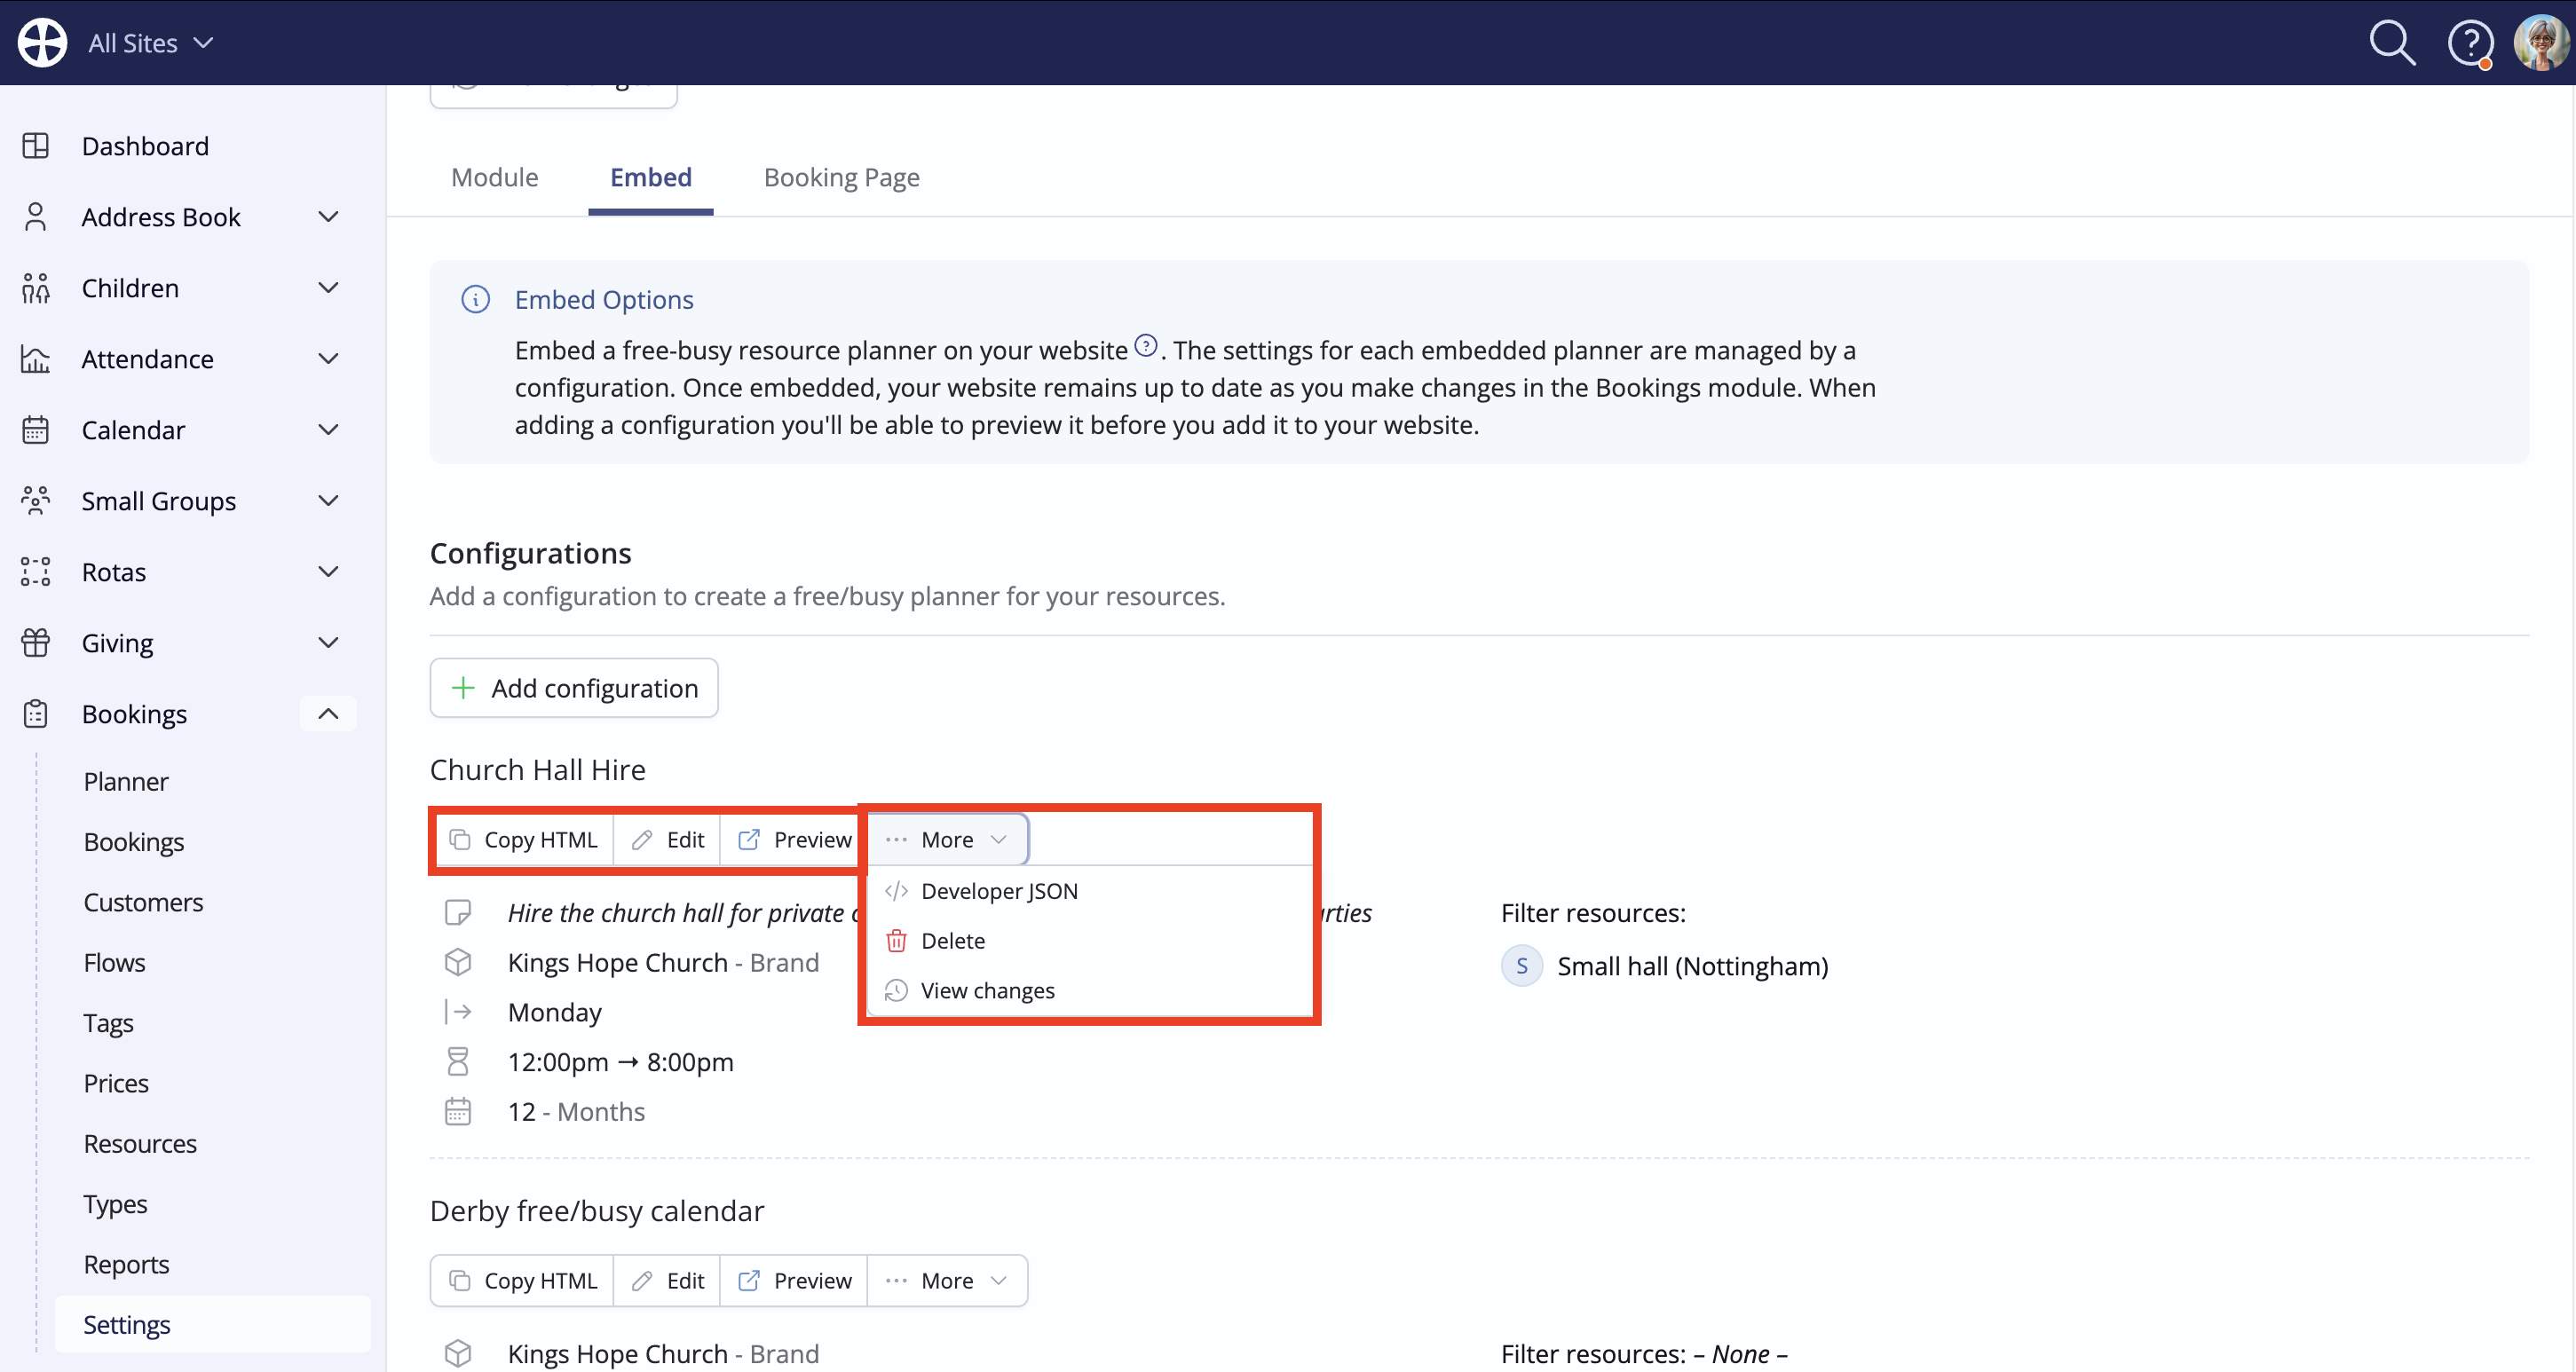
When you are happy, you can Copy HTML (to copy the configuration HTML code to your device clipboard) and then paste it into the Source Code or Embed Block section of the appropriate page of your website. Most modern websites are easily managed through a user-friendly content management system; however, you may wish to seek assistance from your website service provider to complete the task of adding the HTML code to the appropriate page and position on the page.
Here's the HTML generated for an example configuration. For those familiar with HTML, note that you can manually edit some of the iframe parameter values if you wish, e.g. the iframe height, scrolling, iframe width etc.
<iframe frameborder="0" height="800" allowtransparent="yes" scrolling="yes" src="https://training.churchsuite.com/-/bookings/7fabc3f6-0a7b-48ff-ac7e-6cd93afaa4fe" style="border-width:0" width="100%"></iframe>
You can return to the Embed Options to make subsequent changes to a configuration. Once a configuration's HTML has been added to your website, subsequent changes to the configuration settings in ChurchSuite are immediately reflected in your website - it's not necessary to embed new HTML.