
Managing subscriber mailing lists
In this article
Introduction
Creating a subscriber list custom field
Building smart tags for each subscriber list option
Communicating to opted-in subscribers
Introduction
Many organisations will manage multiple mailing lists, with members subscribing to one or multiple different areas of interest. Using a combination of Custom Fields and Smart Tags, you can simply manage multiple subscriber mailing lists, enabling you to effectively communicate with specific groups of people within your organisation.
Creating a subscriber list custom field
To create a mailing list, create a custom field for the various subscriber/mailing list options you offer. See our related support article, Adding custom fields for people, for more information on custom fields. Head into the Address Book module settings and on the Module tab, scroll down to the Custom Fields section - click Add custom field.
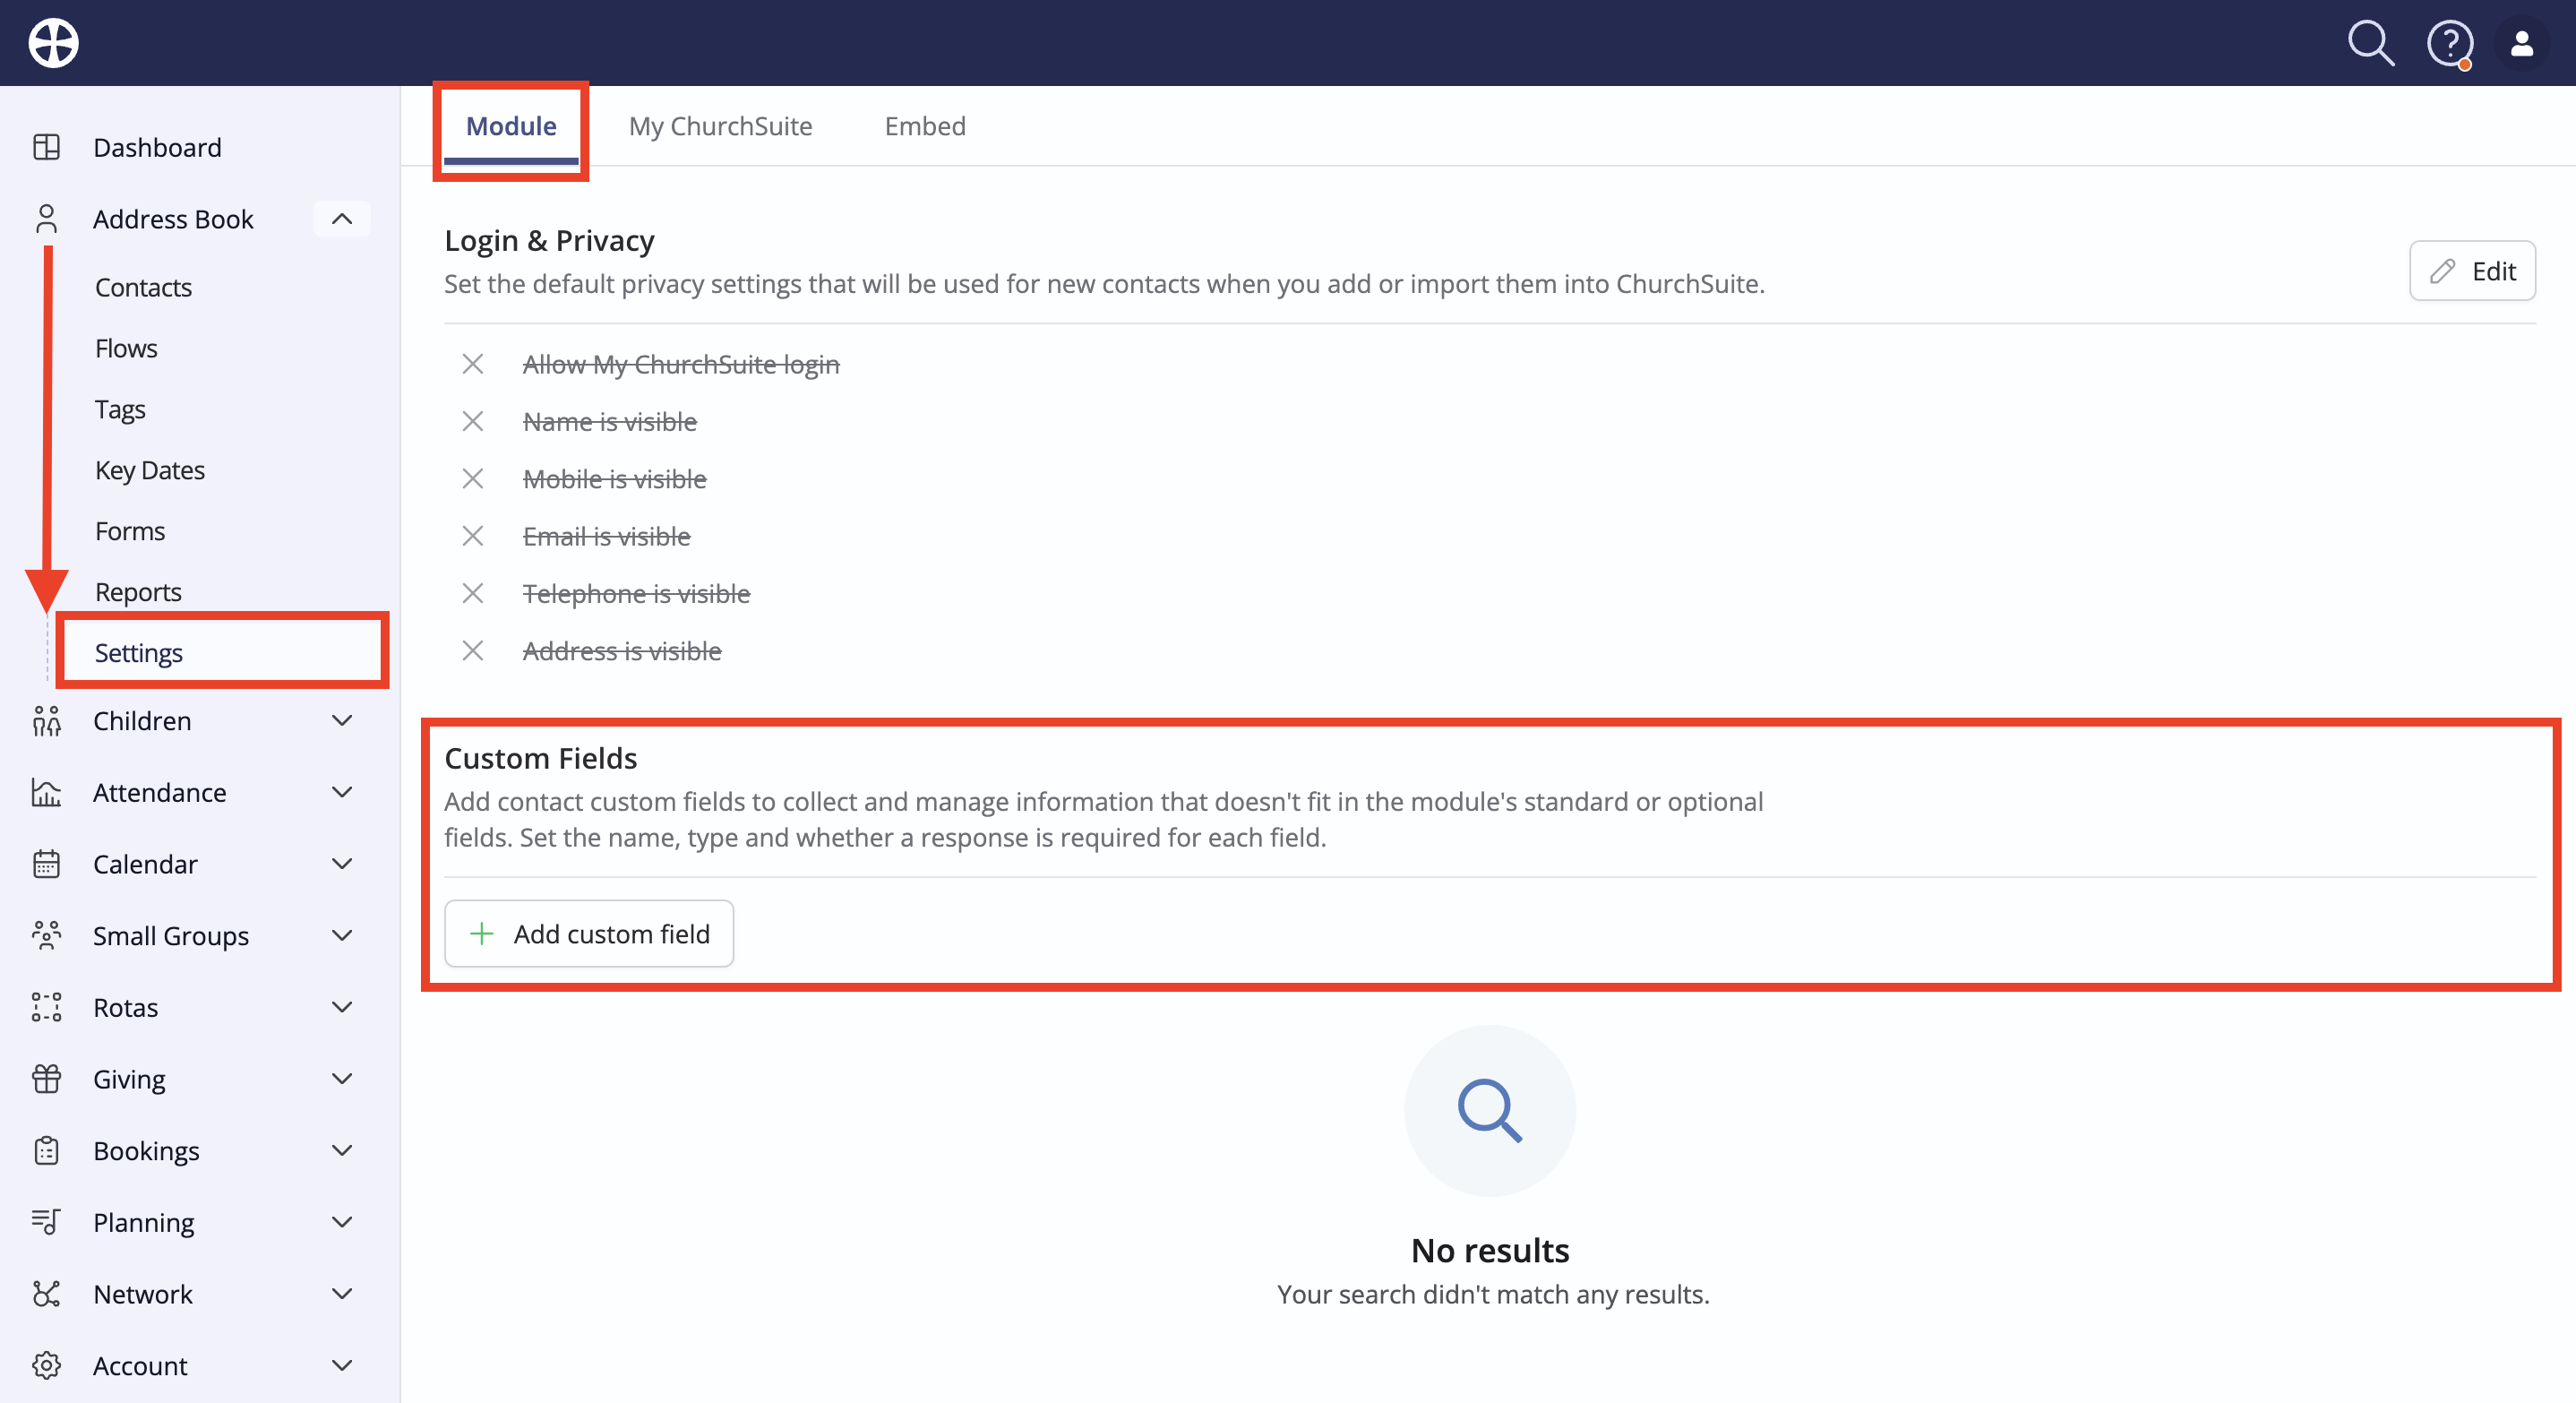
On the Add custom field pop-up, give the custom field a suitable Name. Set the field Type to Checkbox List and click the Add option button to add each of the subscriber list options you wish to offer. You can add further options in the future or archive (or delete) options no longer needed. The list of options can be ordered. The field should be set Not required as you'll want to give people the option to select no option if they prefer.
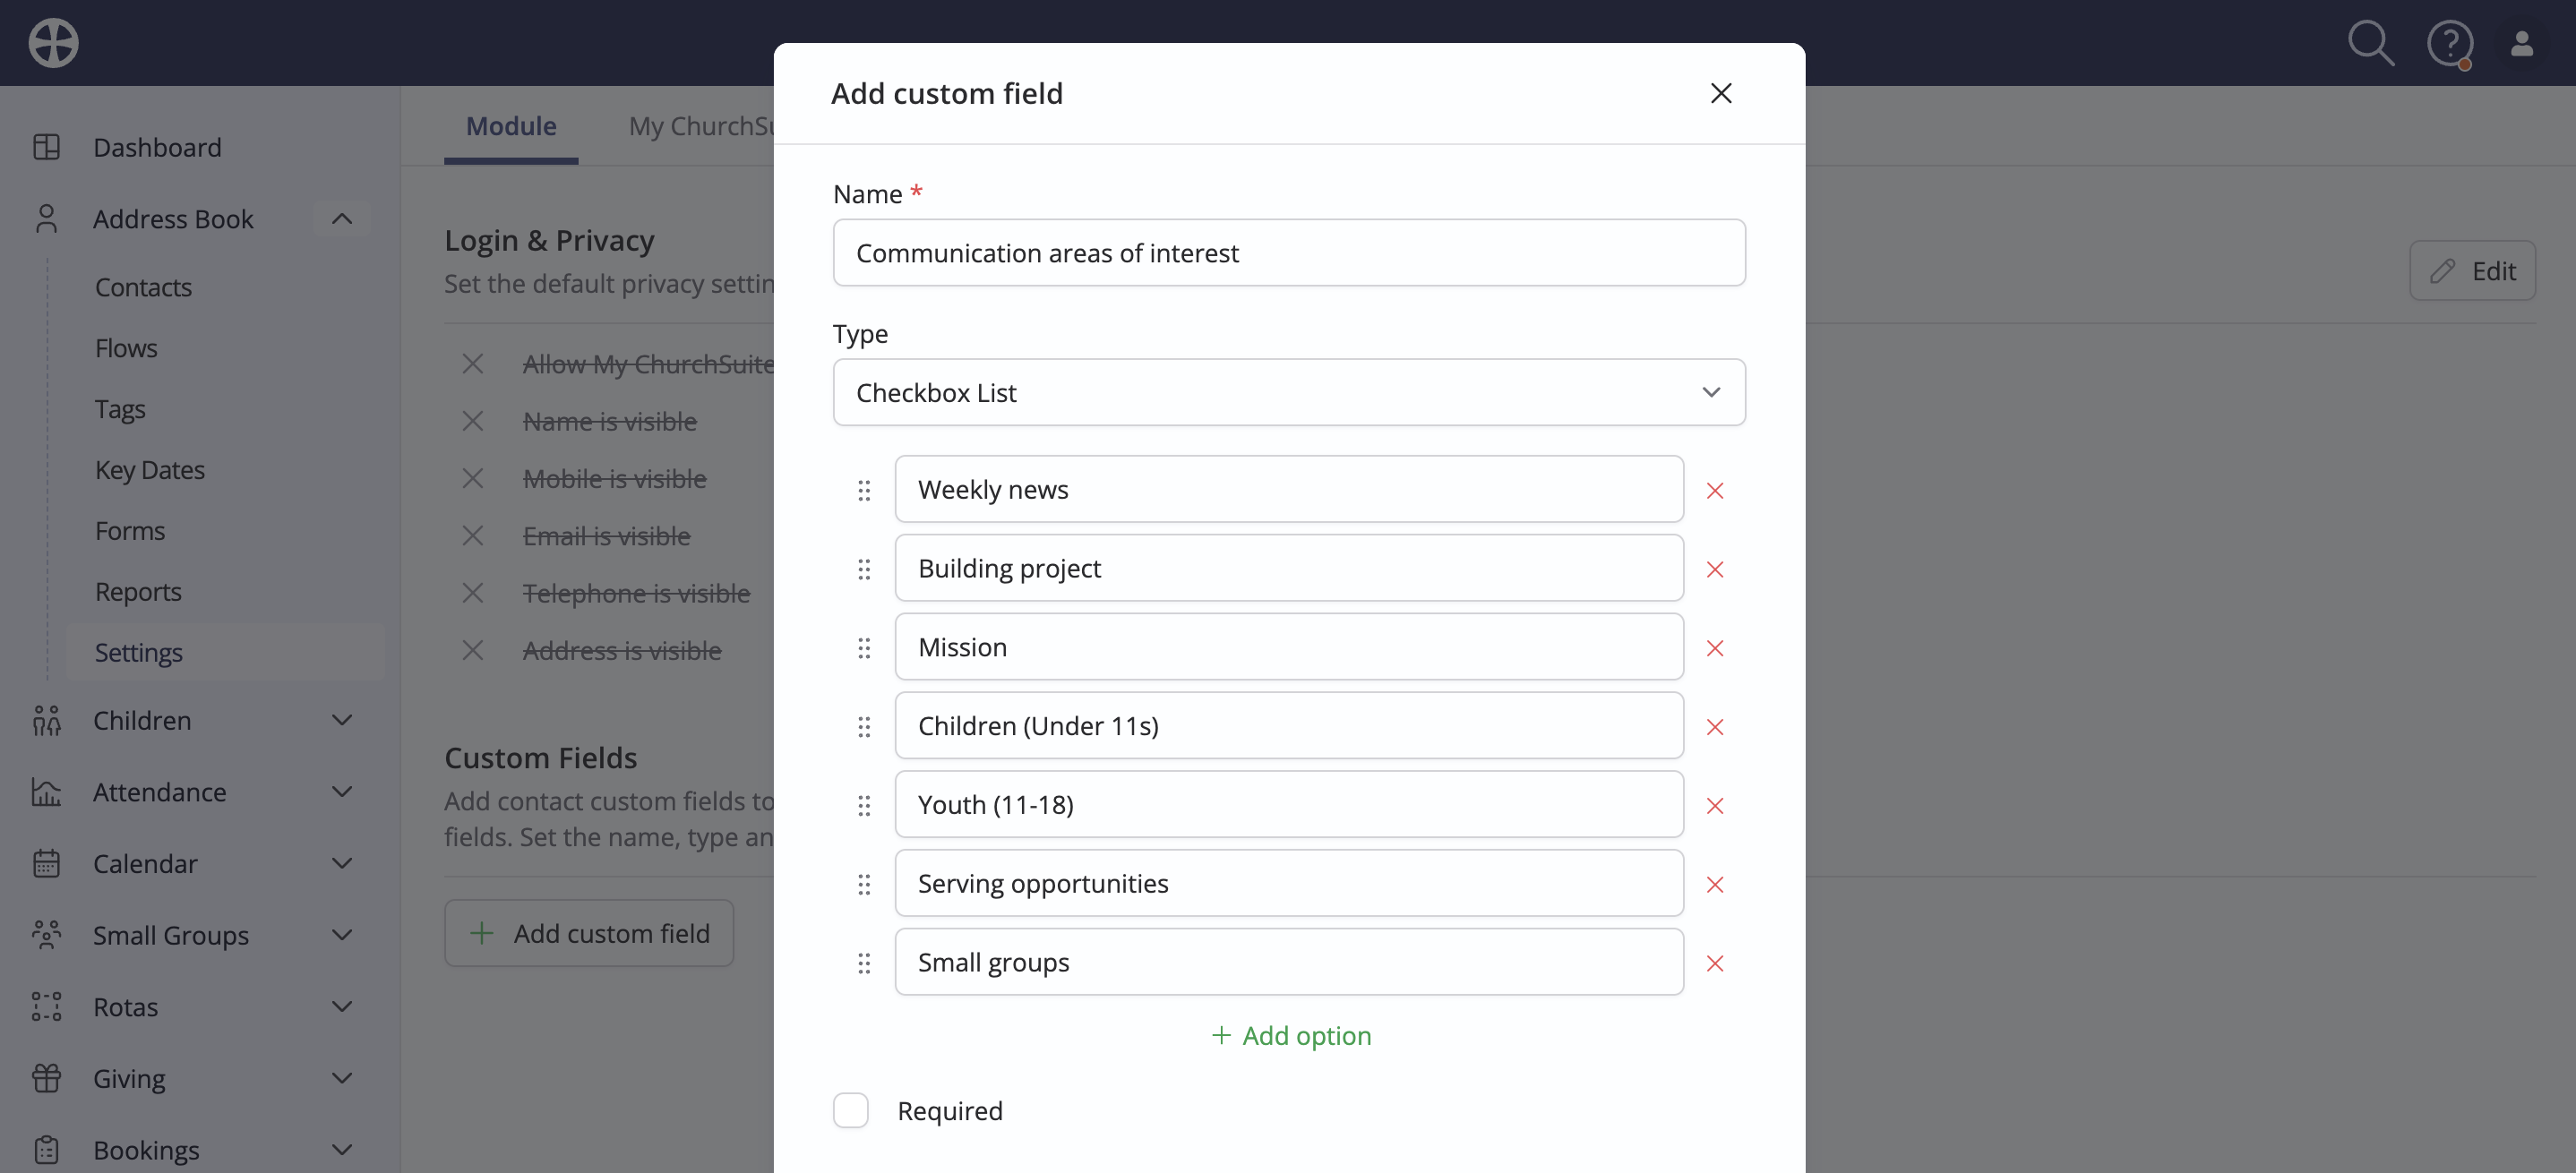
Still working on the Add custom field pop-up, set the field Settings. In the example below, the custom field will be editable by contacts in the member-facing My ChurchSuite (but will not be visible to others). The field will also be editable if the custom field is surfaced in the Address Book "Embed" form (see the related support articles for further information on this feature).
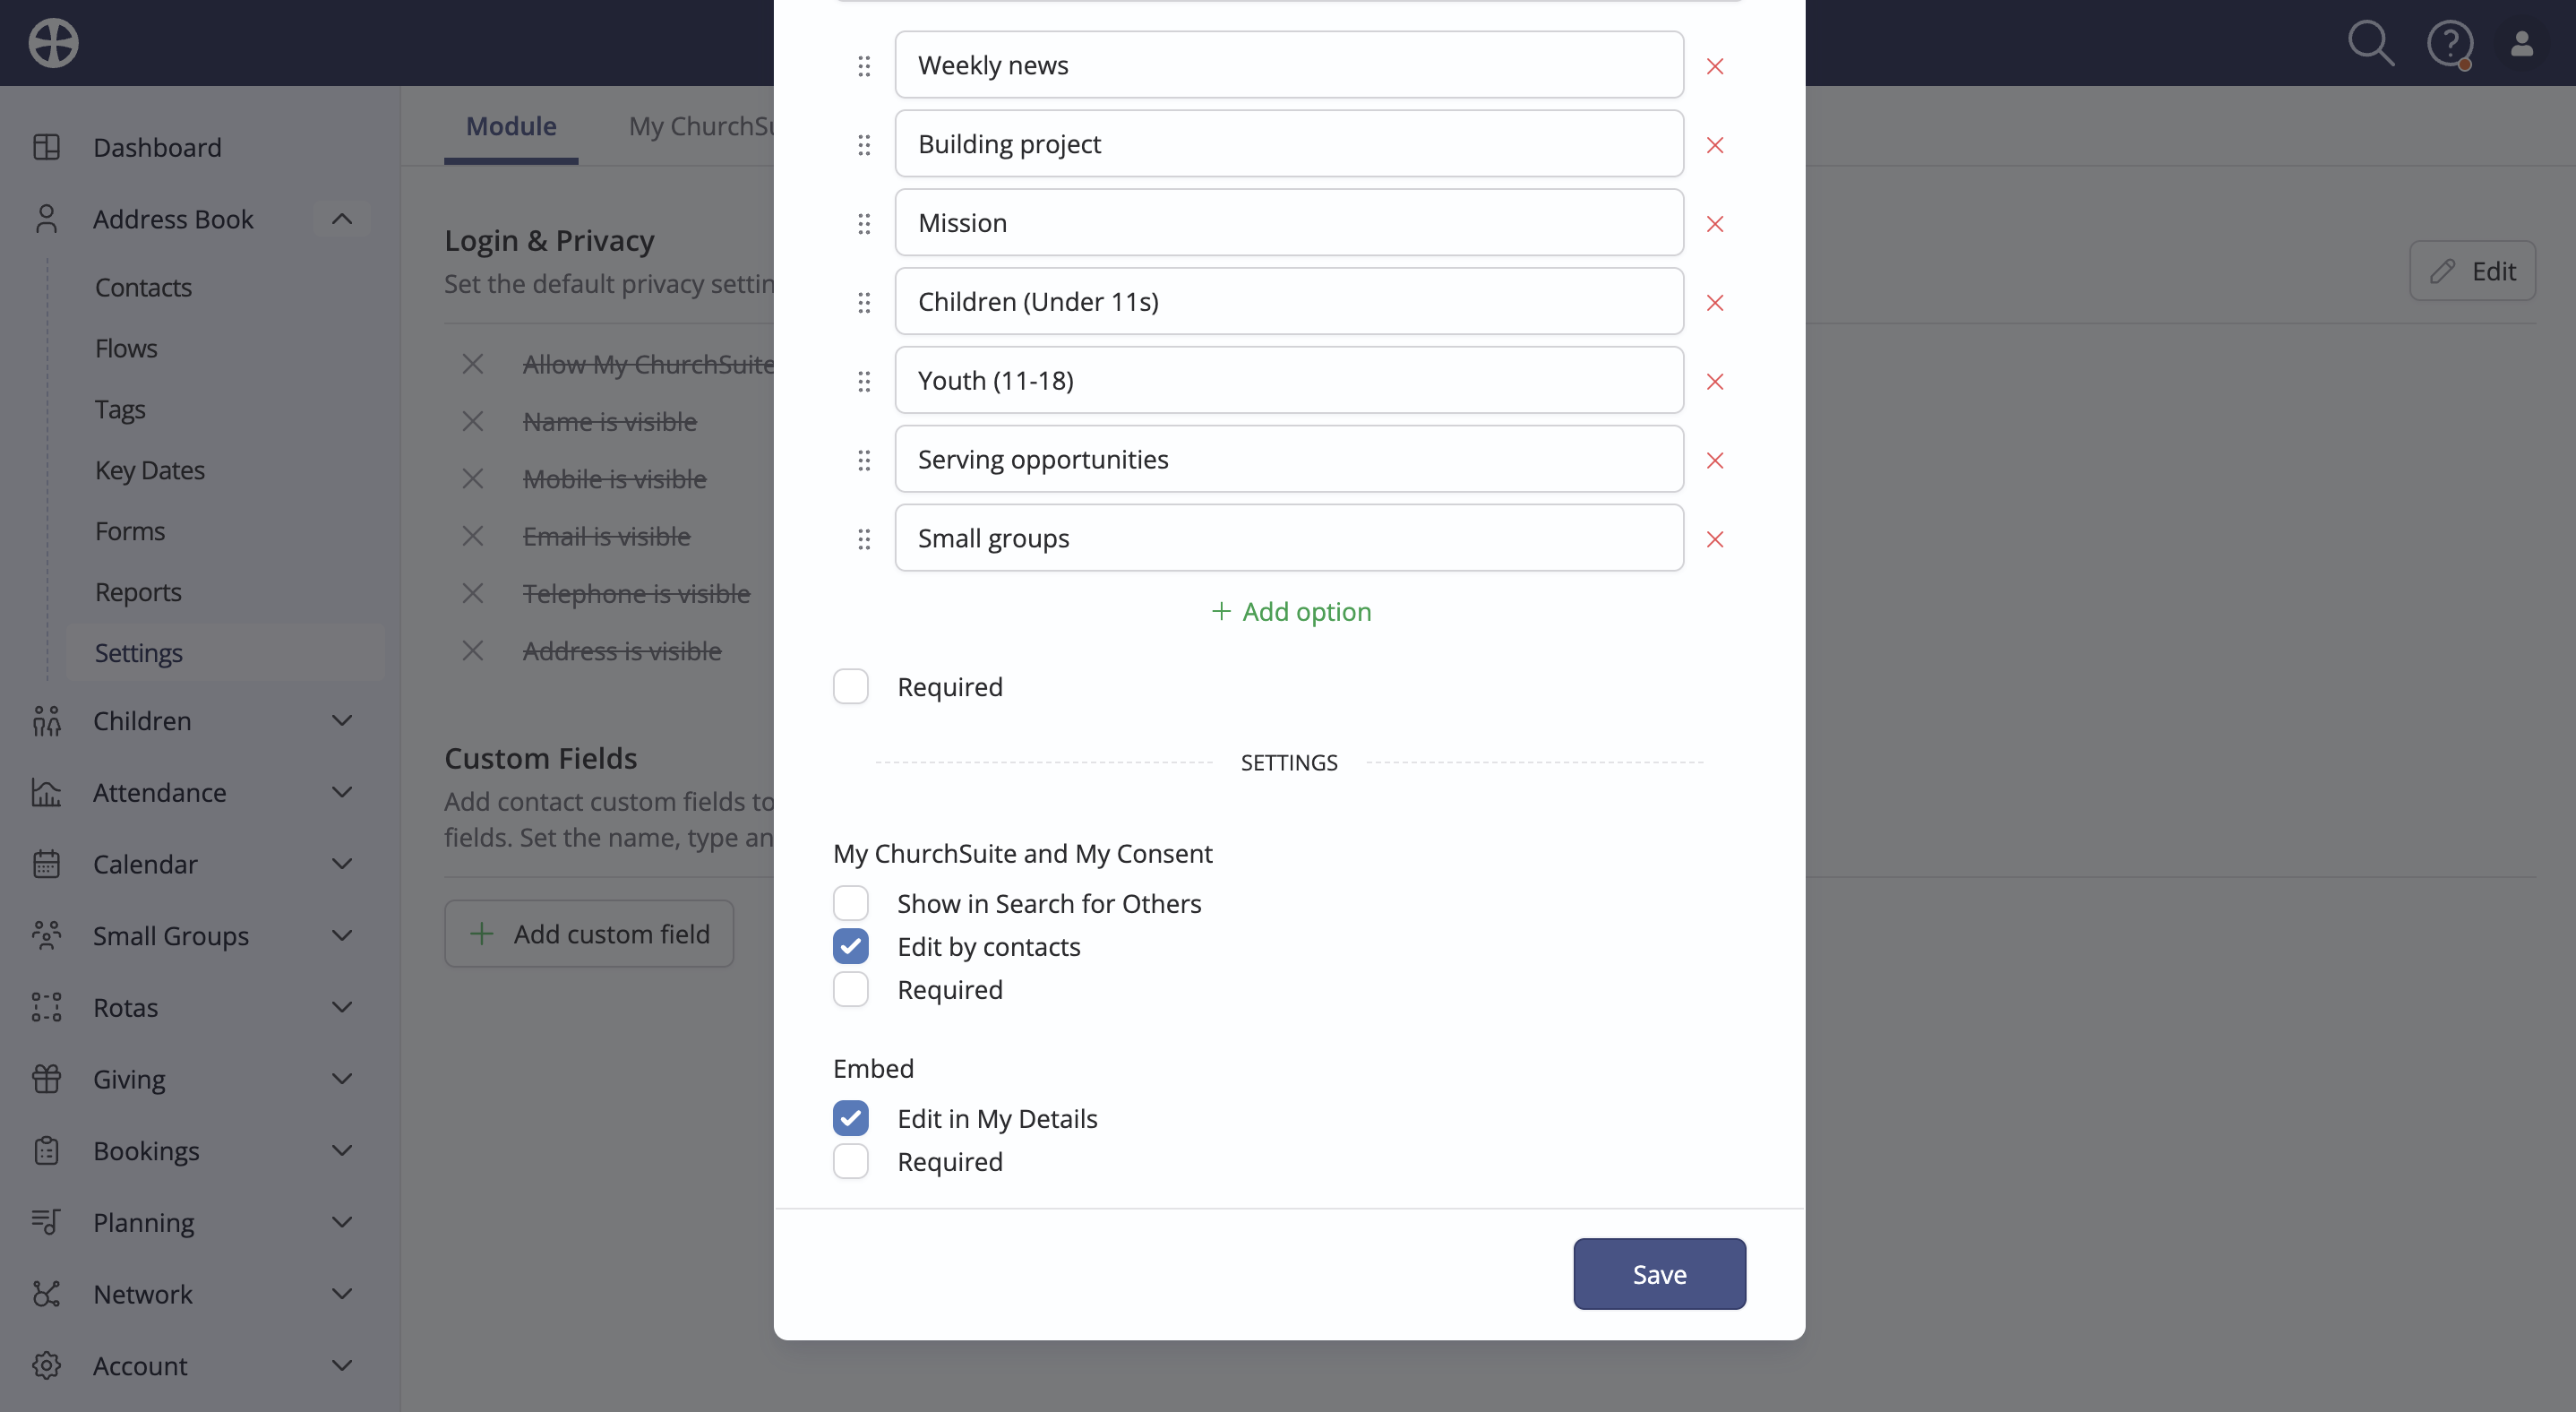
When finished, click to Save the new custom field.
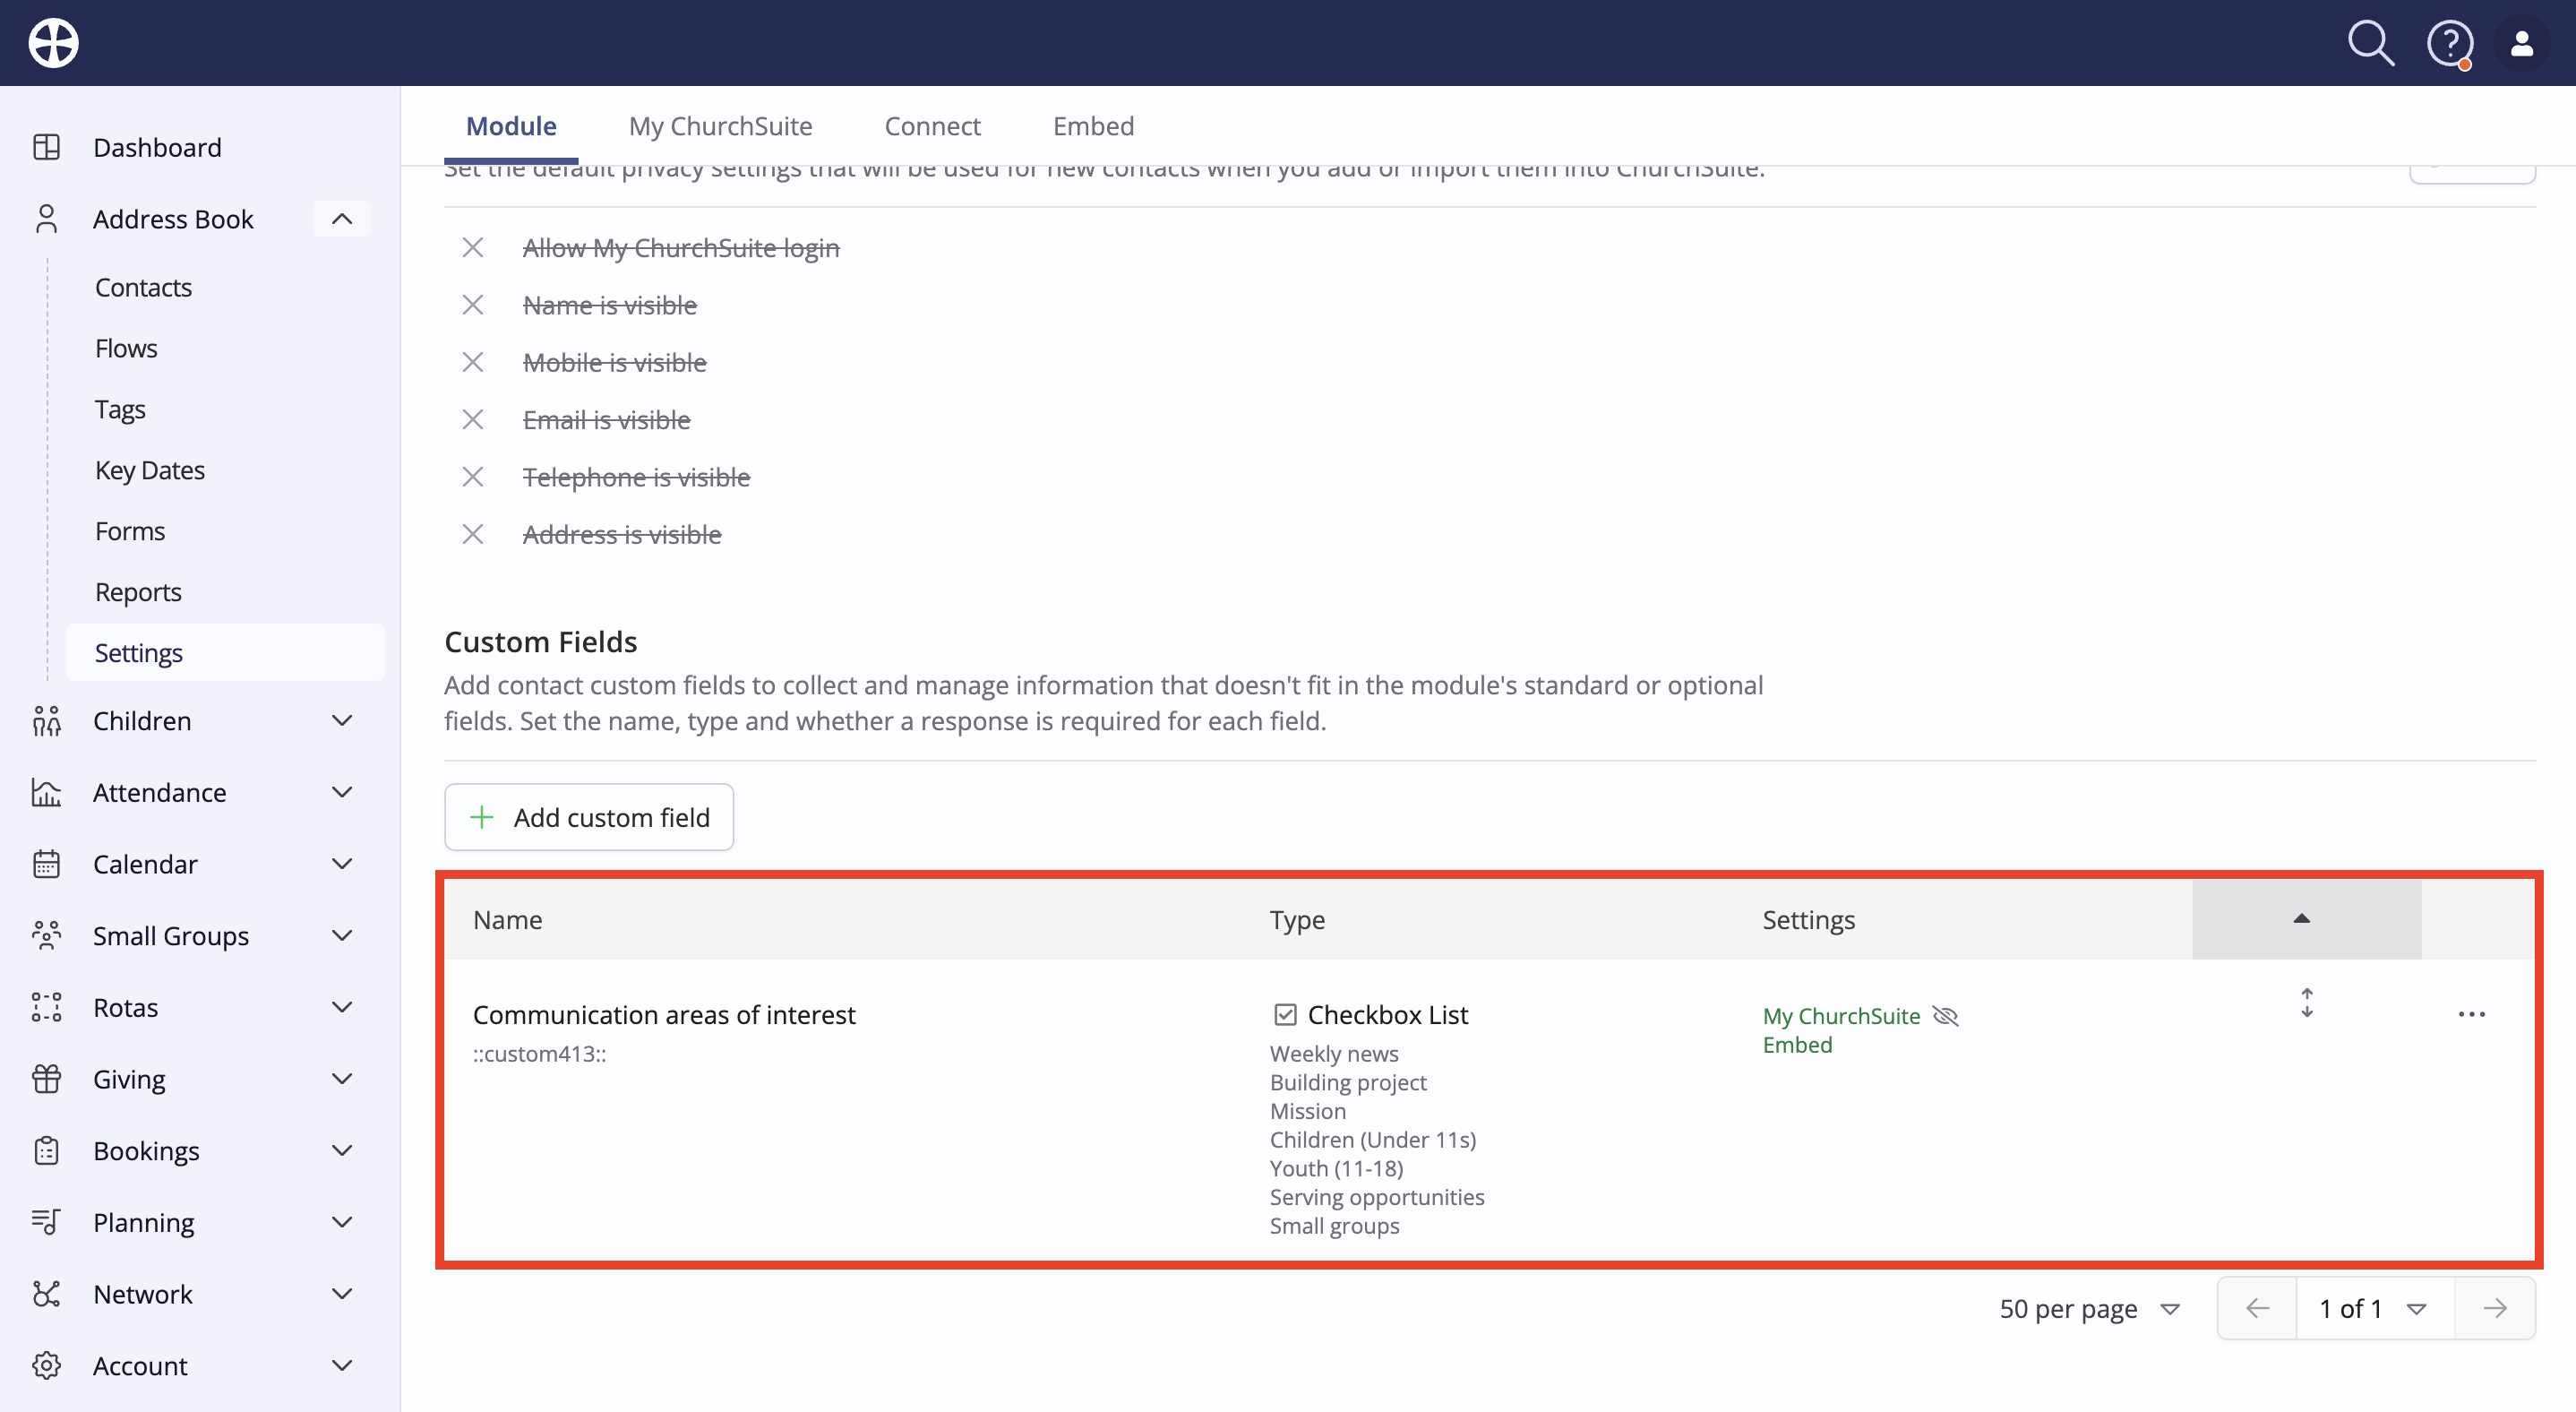
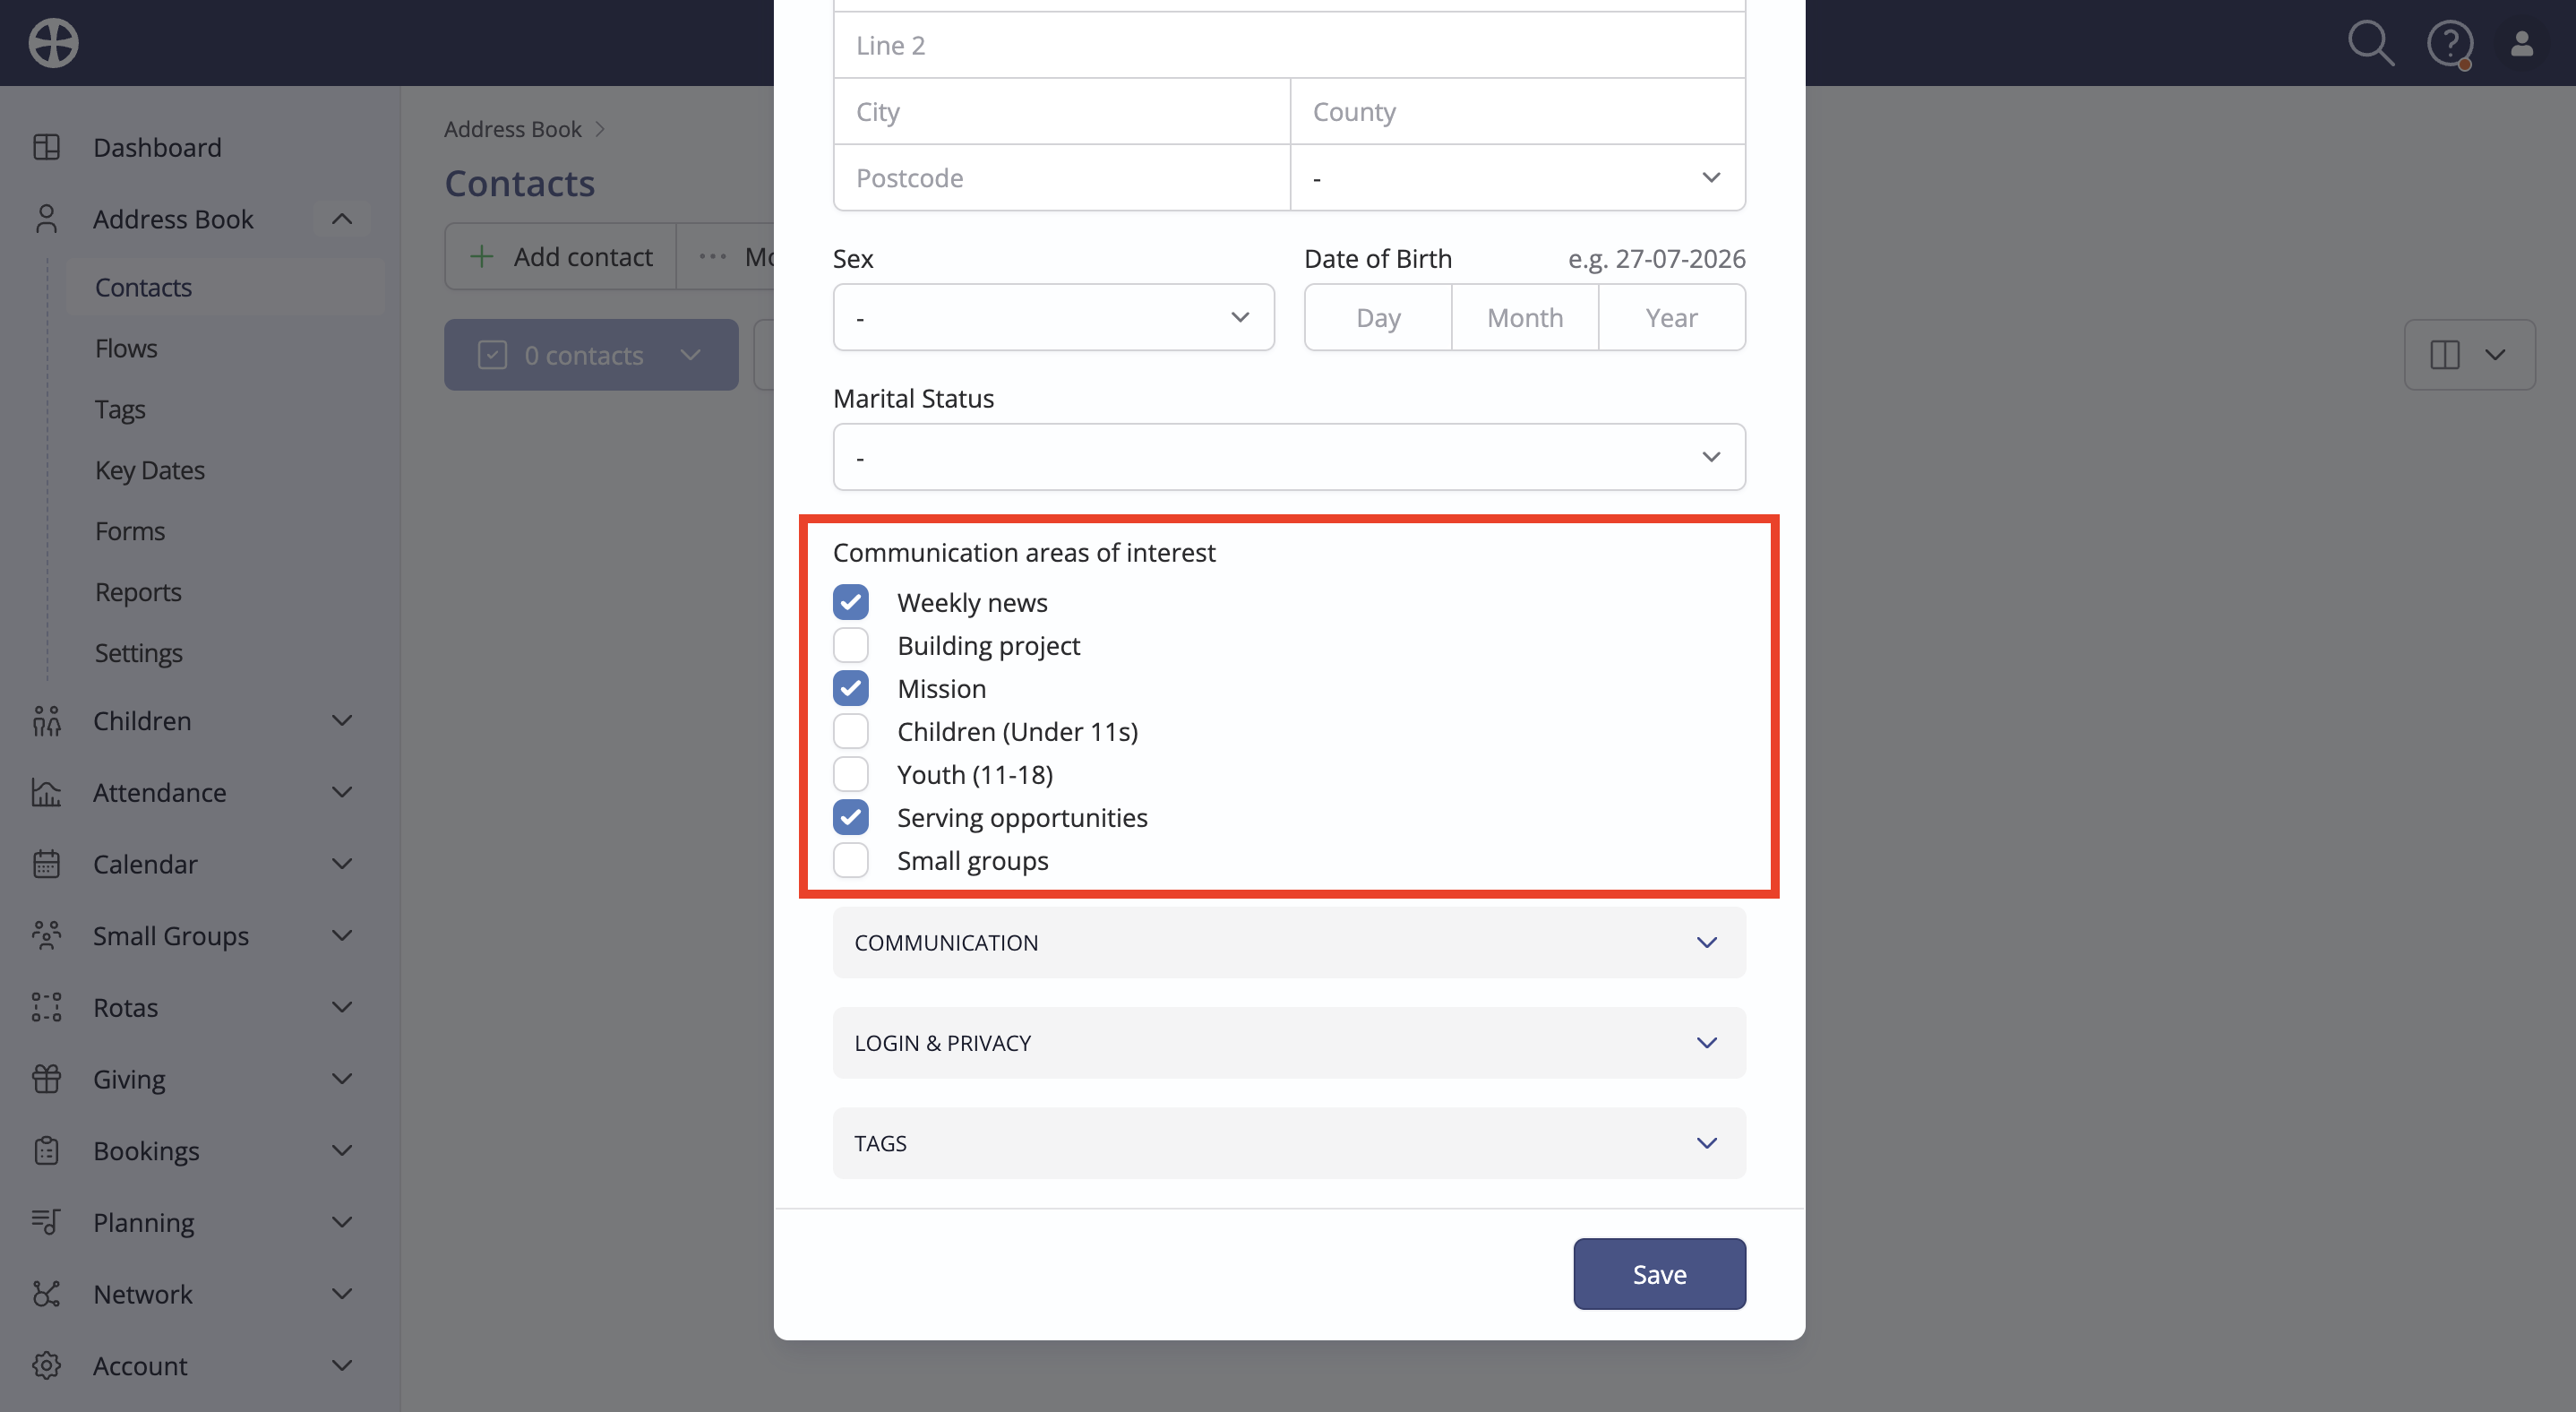
Now, when adding or editing Address Book contacts, the newly added custom field will be editable to your Users.
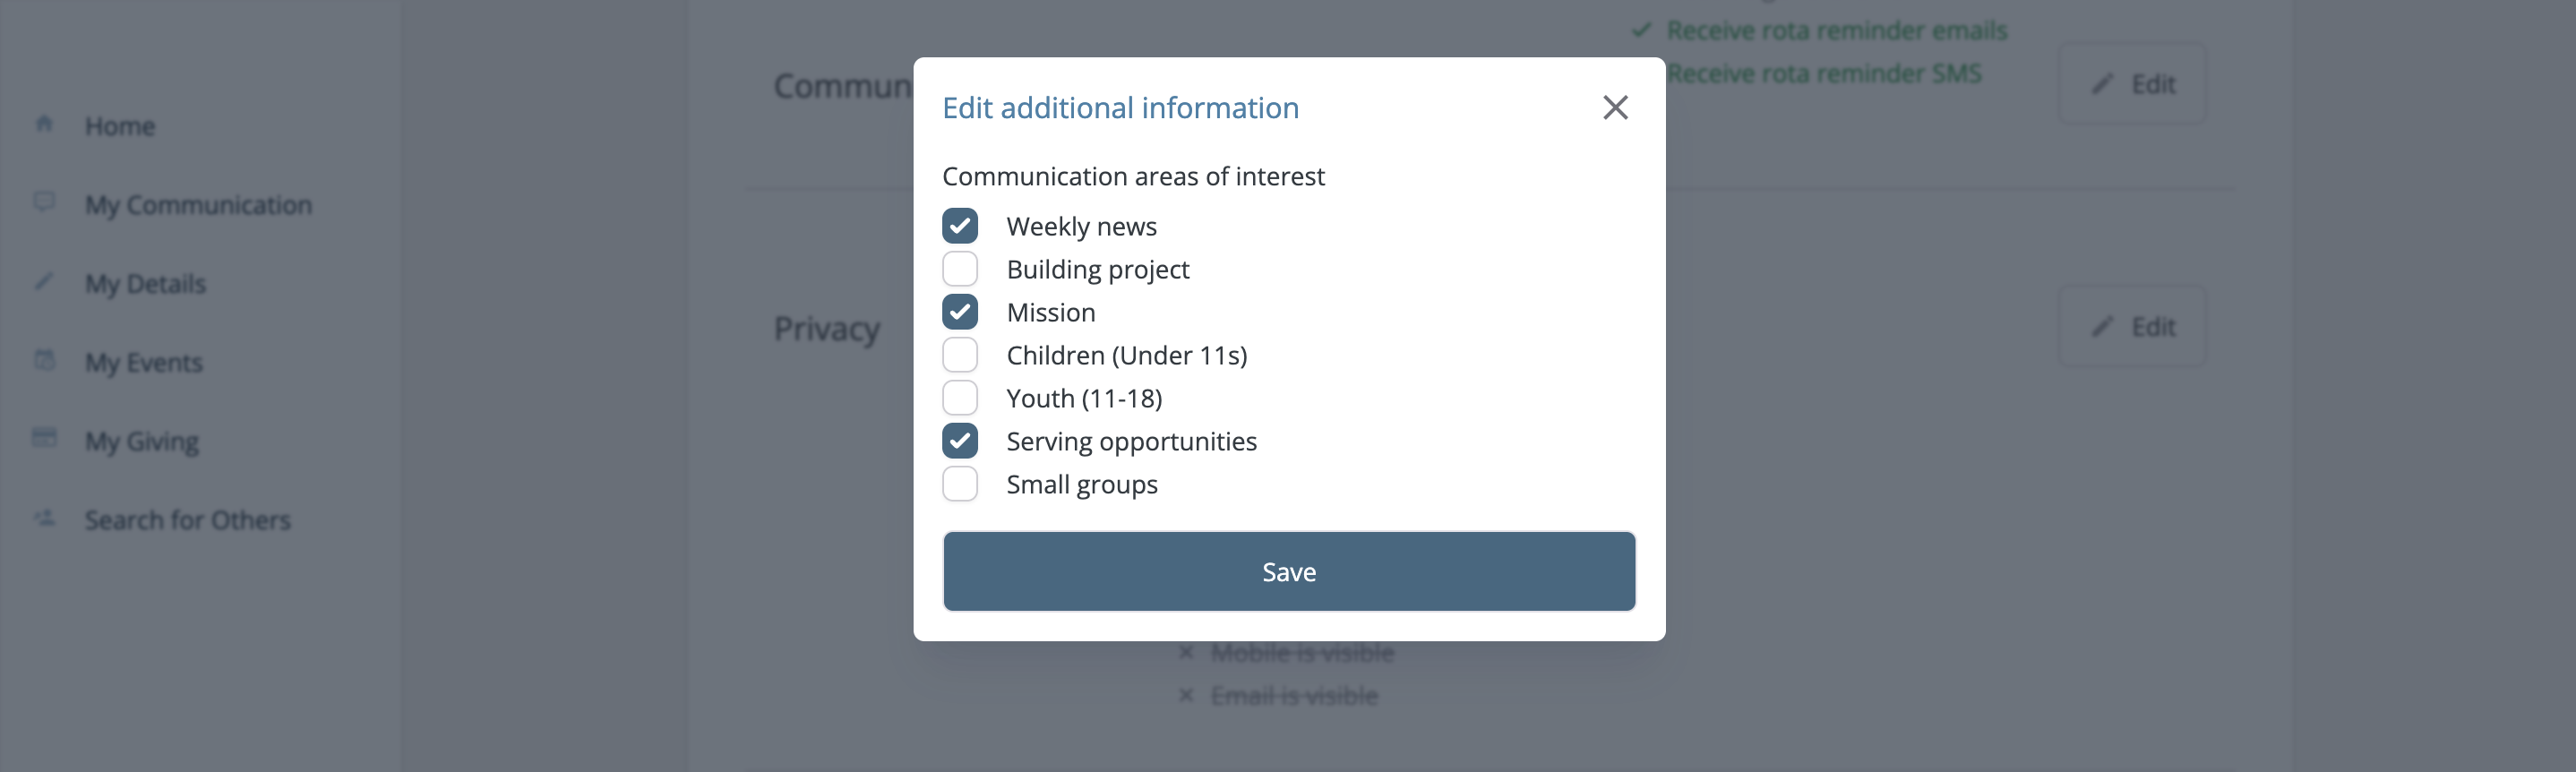
Similarly, members will be able to self-manage their subscriber/mailing list preferences when updating their details in the member-facing My ChurchSuite - opting in or out of the various options you provide.
Building smart tags for each subscriber list option
Having created a custom field to store each person's subscriber/mailing list preference, the next step is to create a series of Smart Tags - one for each subscriber list option that you added. It's these Smart Tags that will be used when sending communications, ensuring your message is only sent to those who have selected (opted in) to a particular option. See the related support article on Smart tags, for more information.
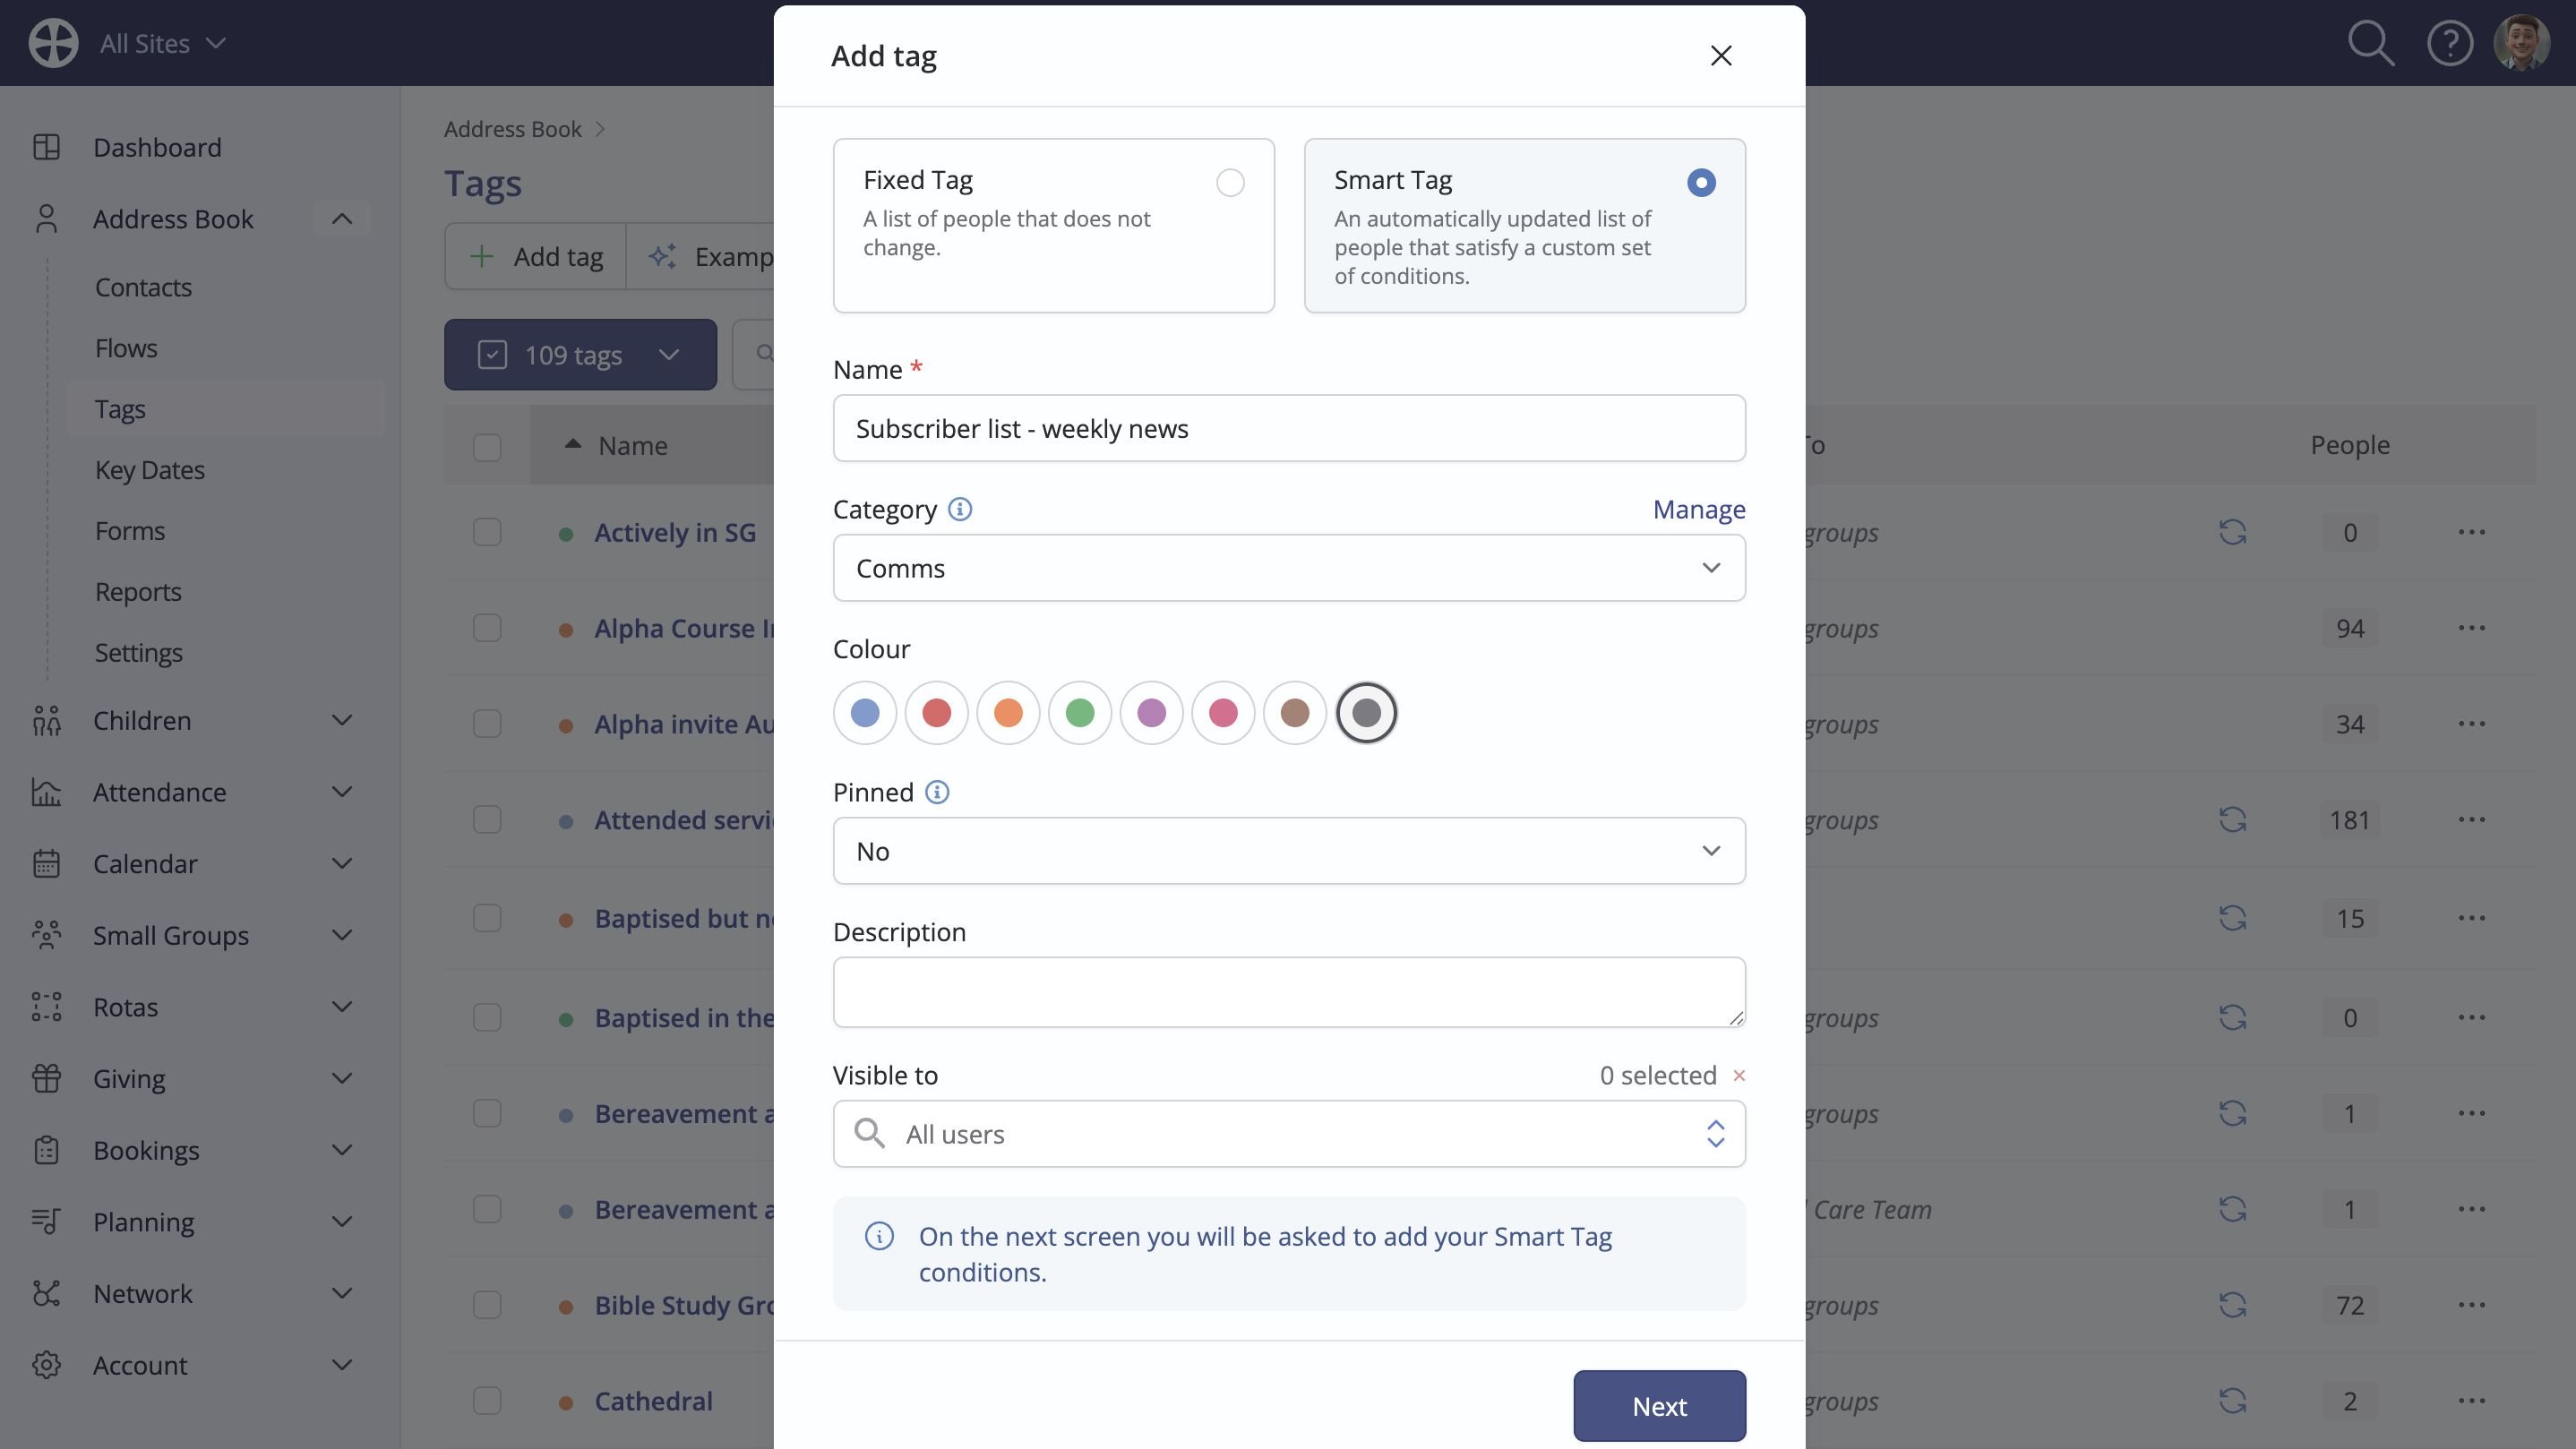
Head to the Tags section of the Address Book module and click Add tag. On the Add tag pop-up, choose Smart Tag then give the tag a suitable Name and optionally choose a category, colour, if the tag is pinned, tag visibility and add a description. Click Next.
Next, add a single condition - like the example shown below - the Module will be 'Address Book', the Option will be the newly-added custom field and the Value will be one of the custom field checkbox list options.
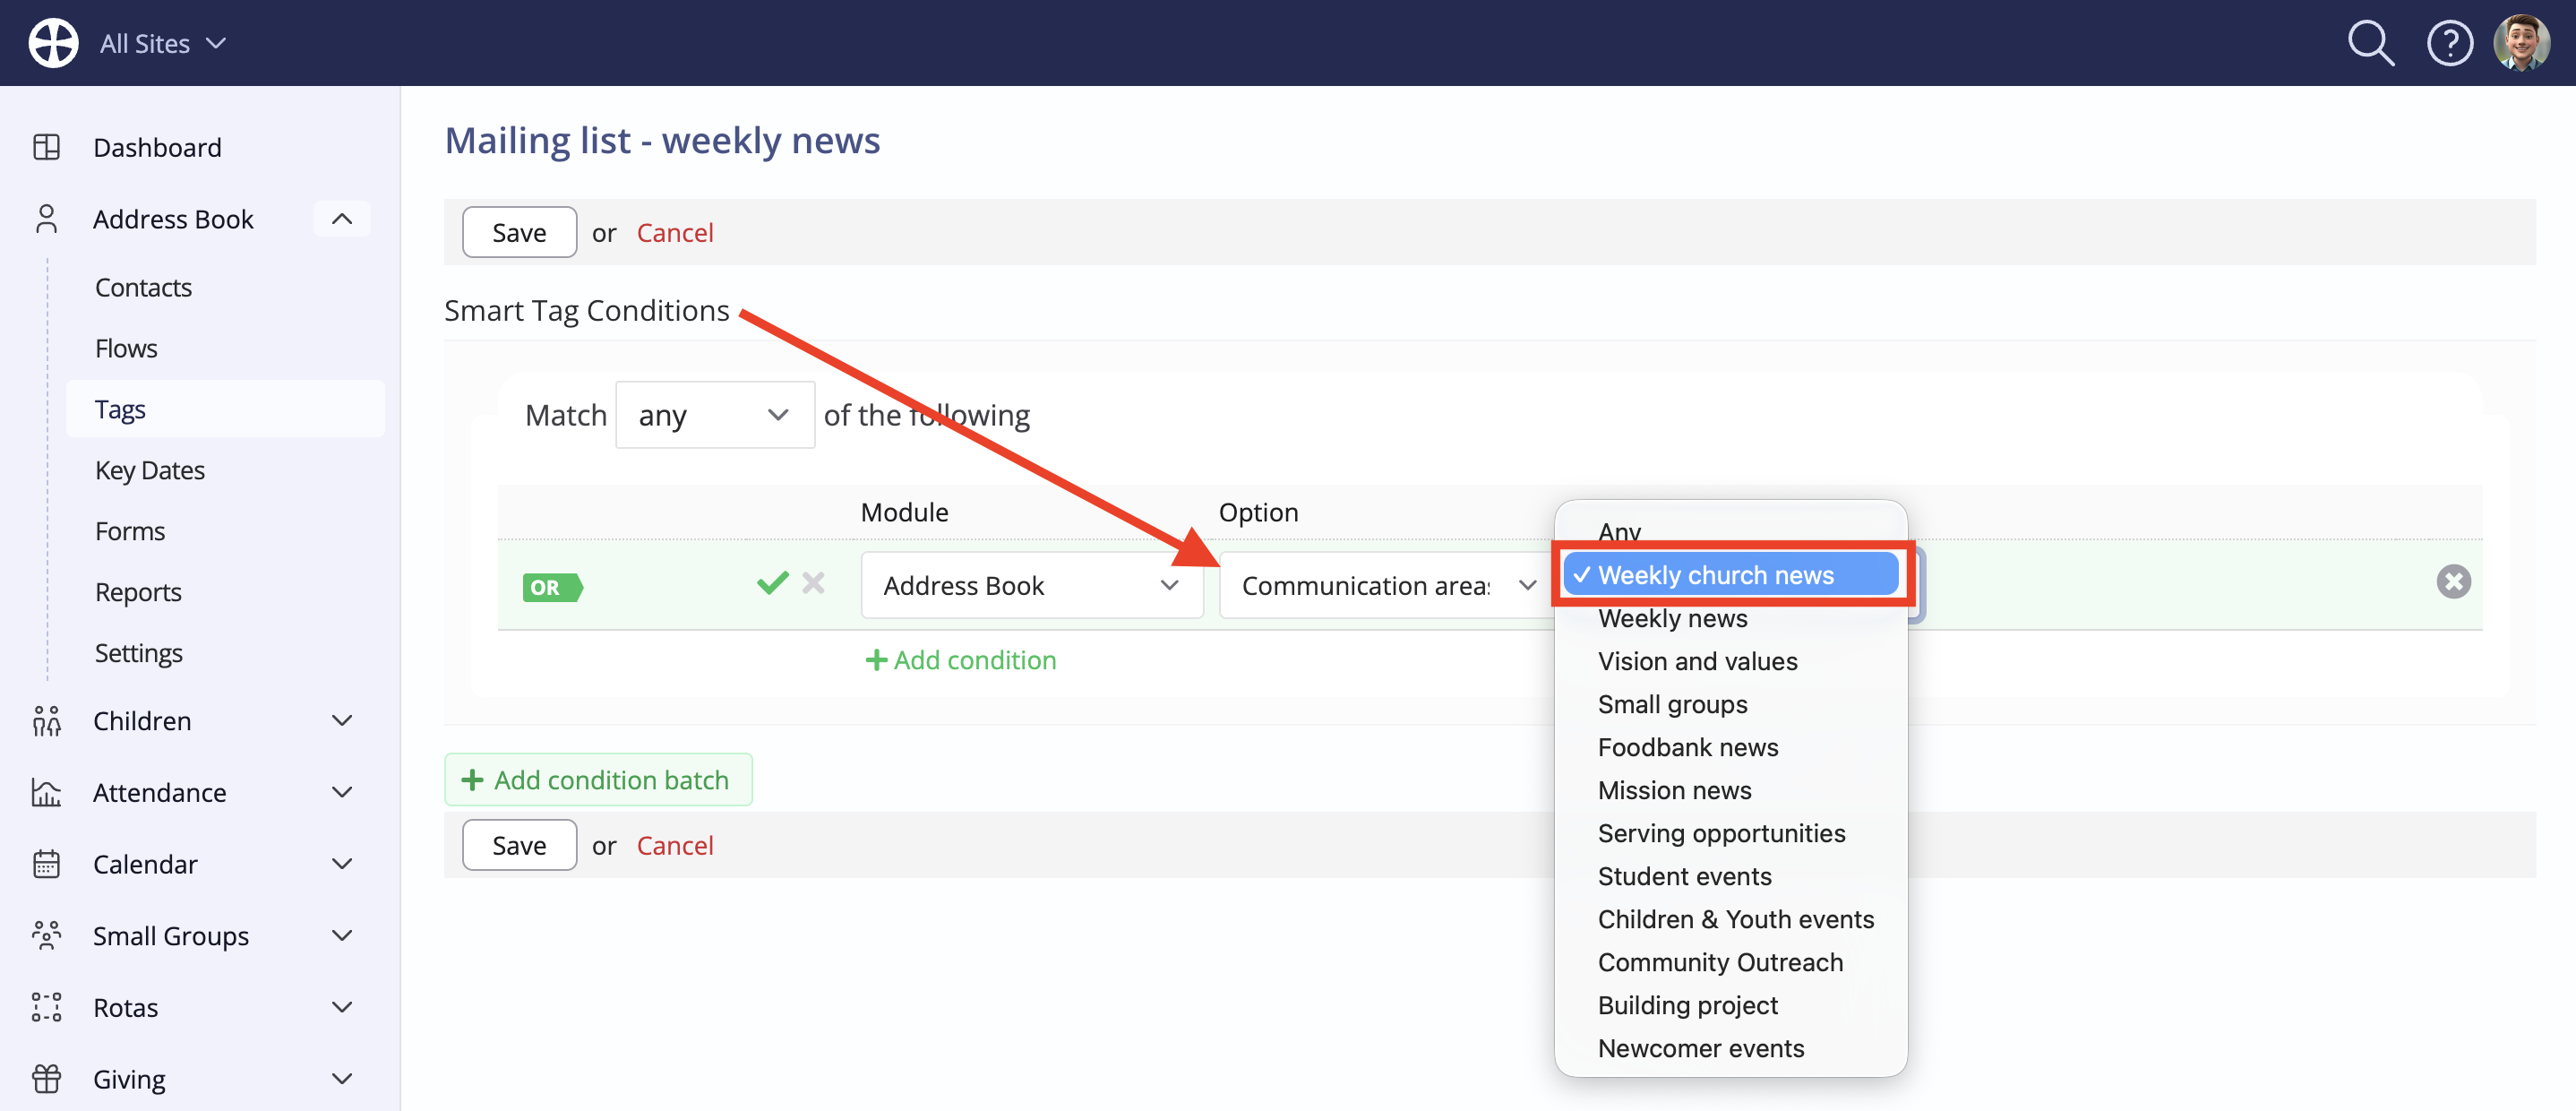
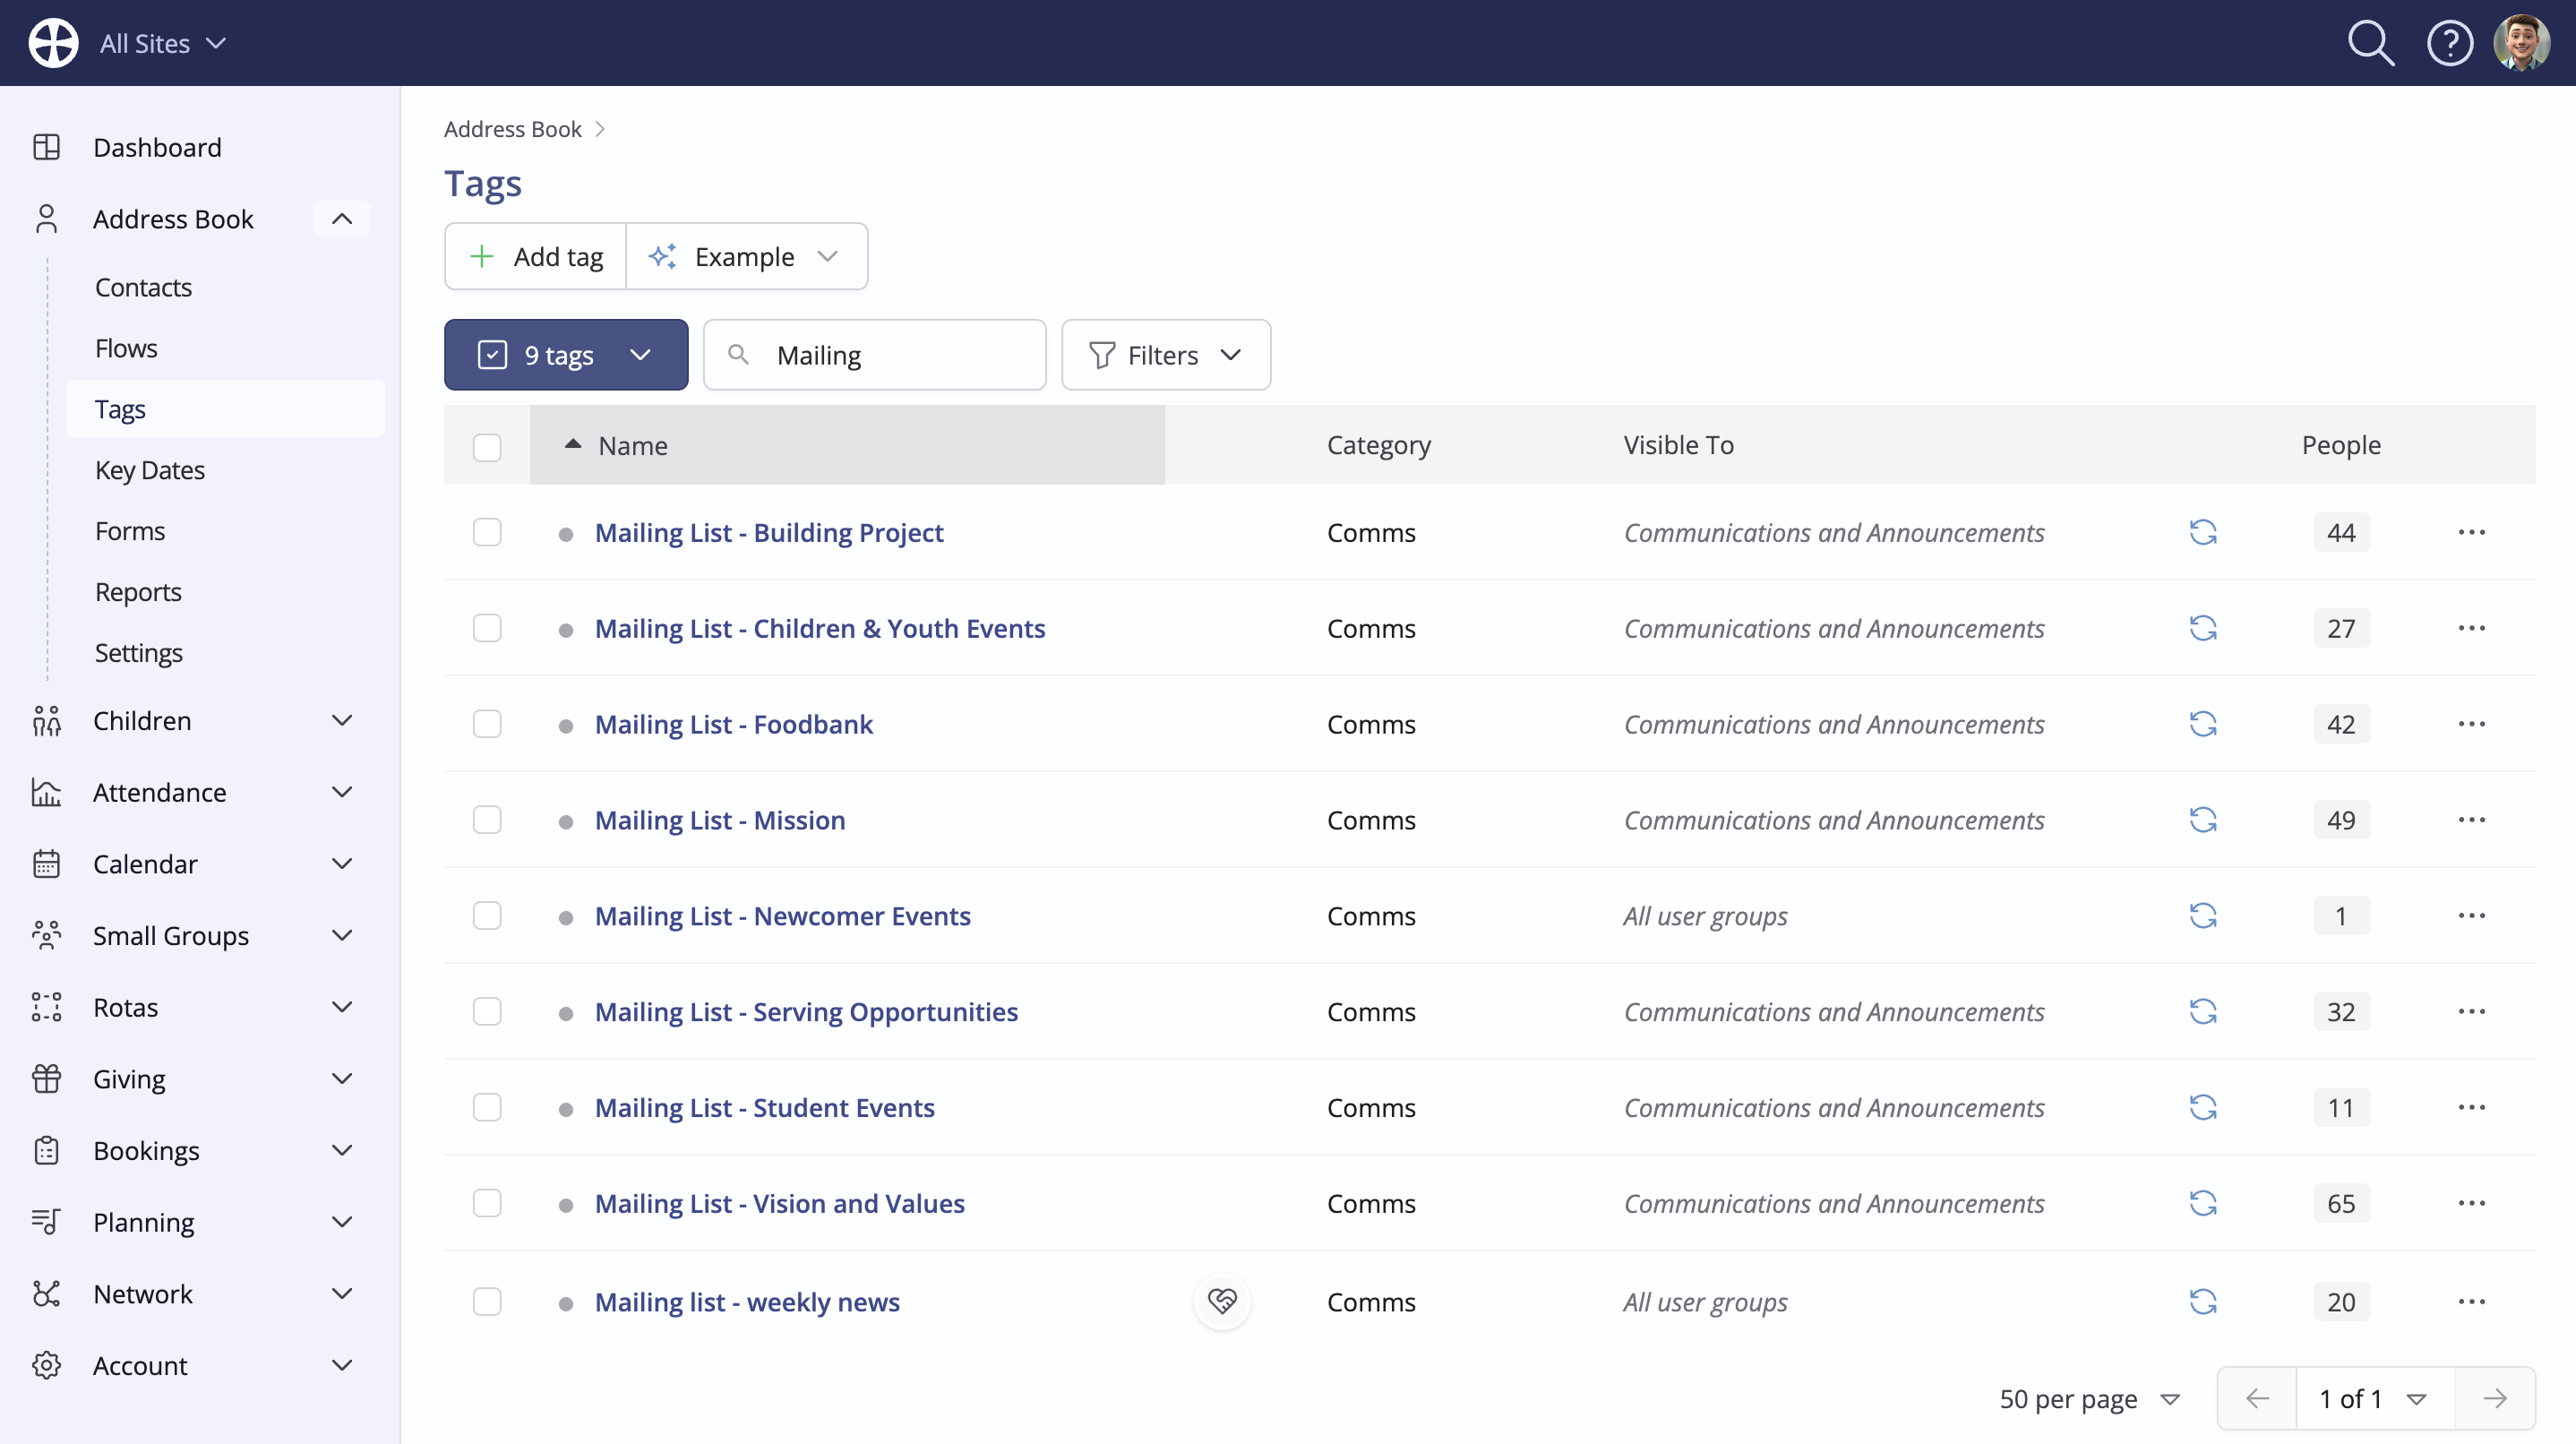
You can then create a separate Smart Tag for each of your subscriber/mailing list options. You can use the Duplicate tag option to speed up the process of creating multiple tags. Importantly, each Smart Tag will typically have just one condition relating to each custom field option. As people opt in or out of the various subscriber/mailing list options, each Smart Tag remains up to date. You should end up with a list of subscriber/mailing list tags, like this example...
Communicating to opted-in subscribers
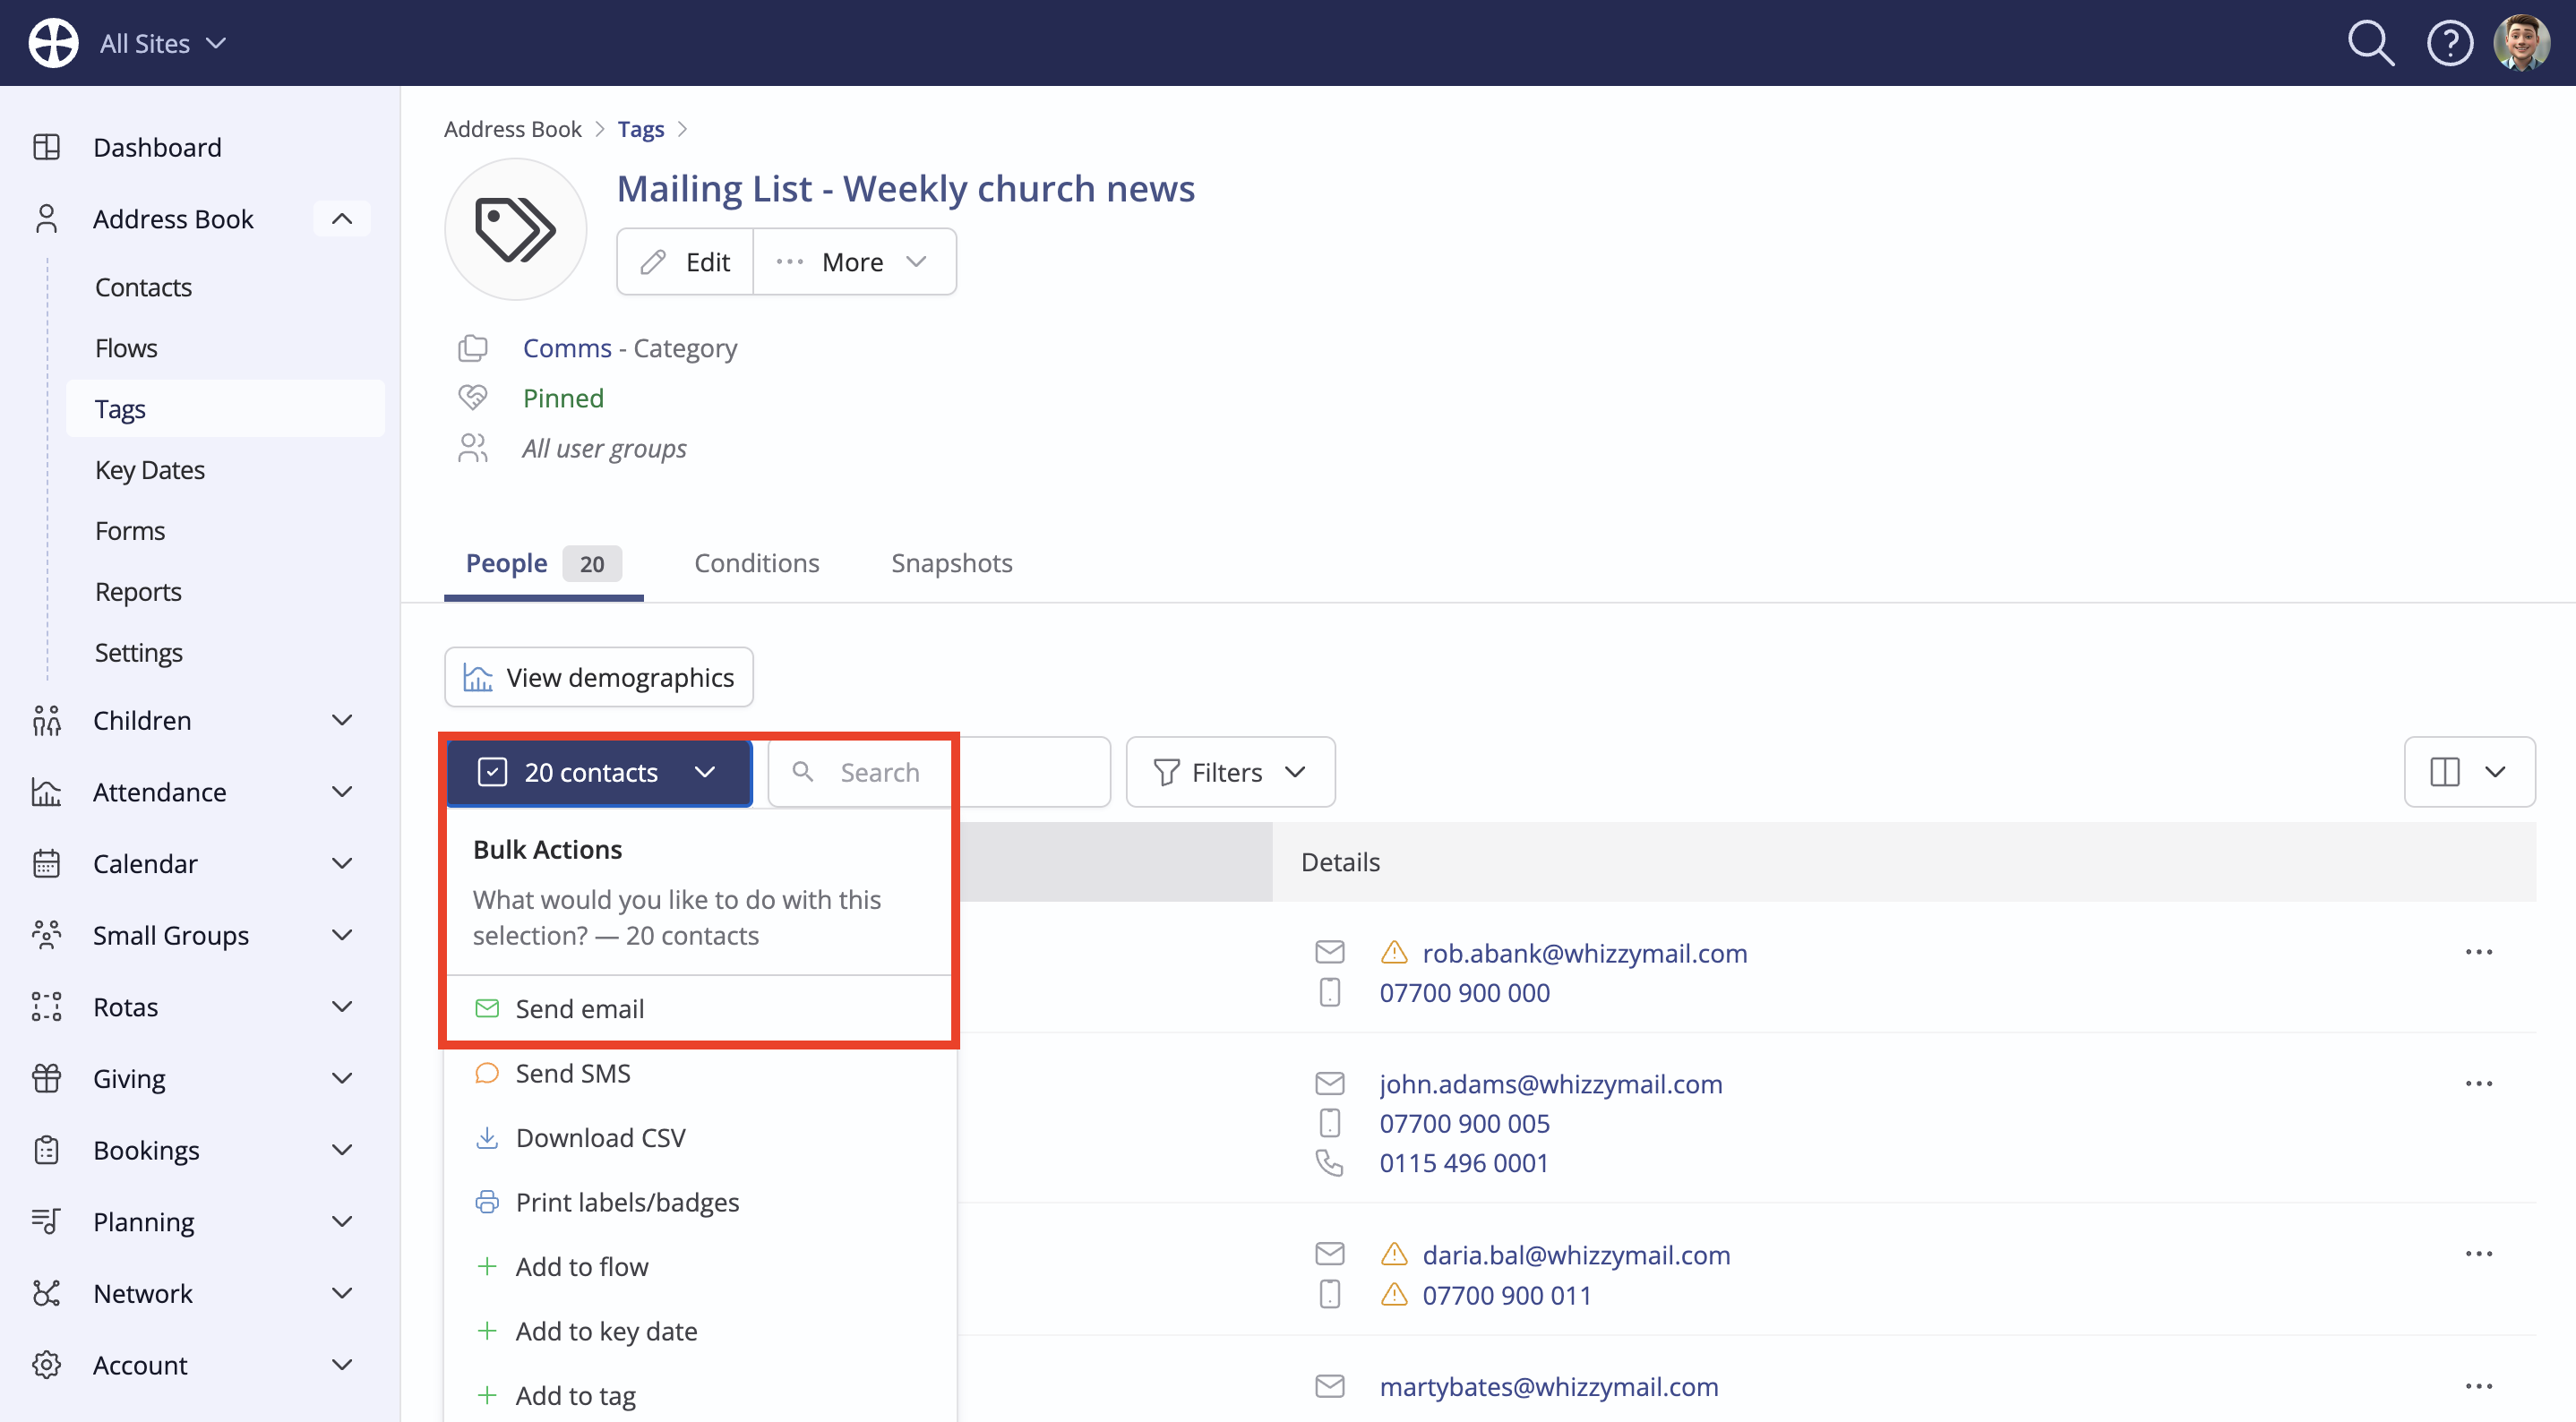
The Smart Tags created in the previous section are used to send targeted communications to just those who opted into a certain list. For example, from the "Mailing List - Weekly church news" tag 'view' page you can select Send email to email just those tagged contacts who have opted in to receive that type of message.
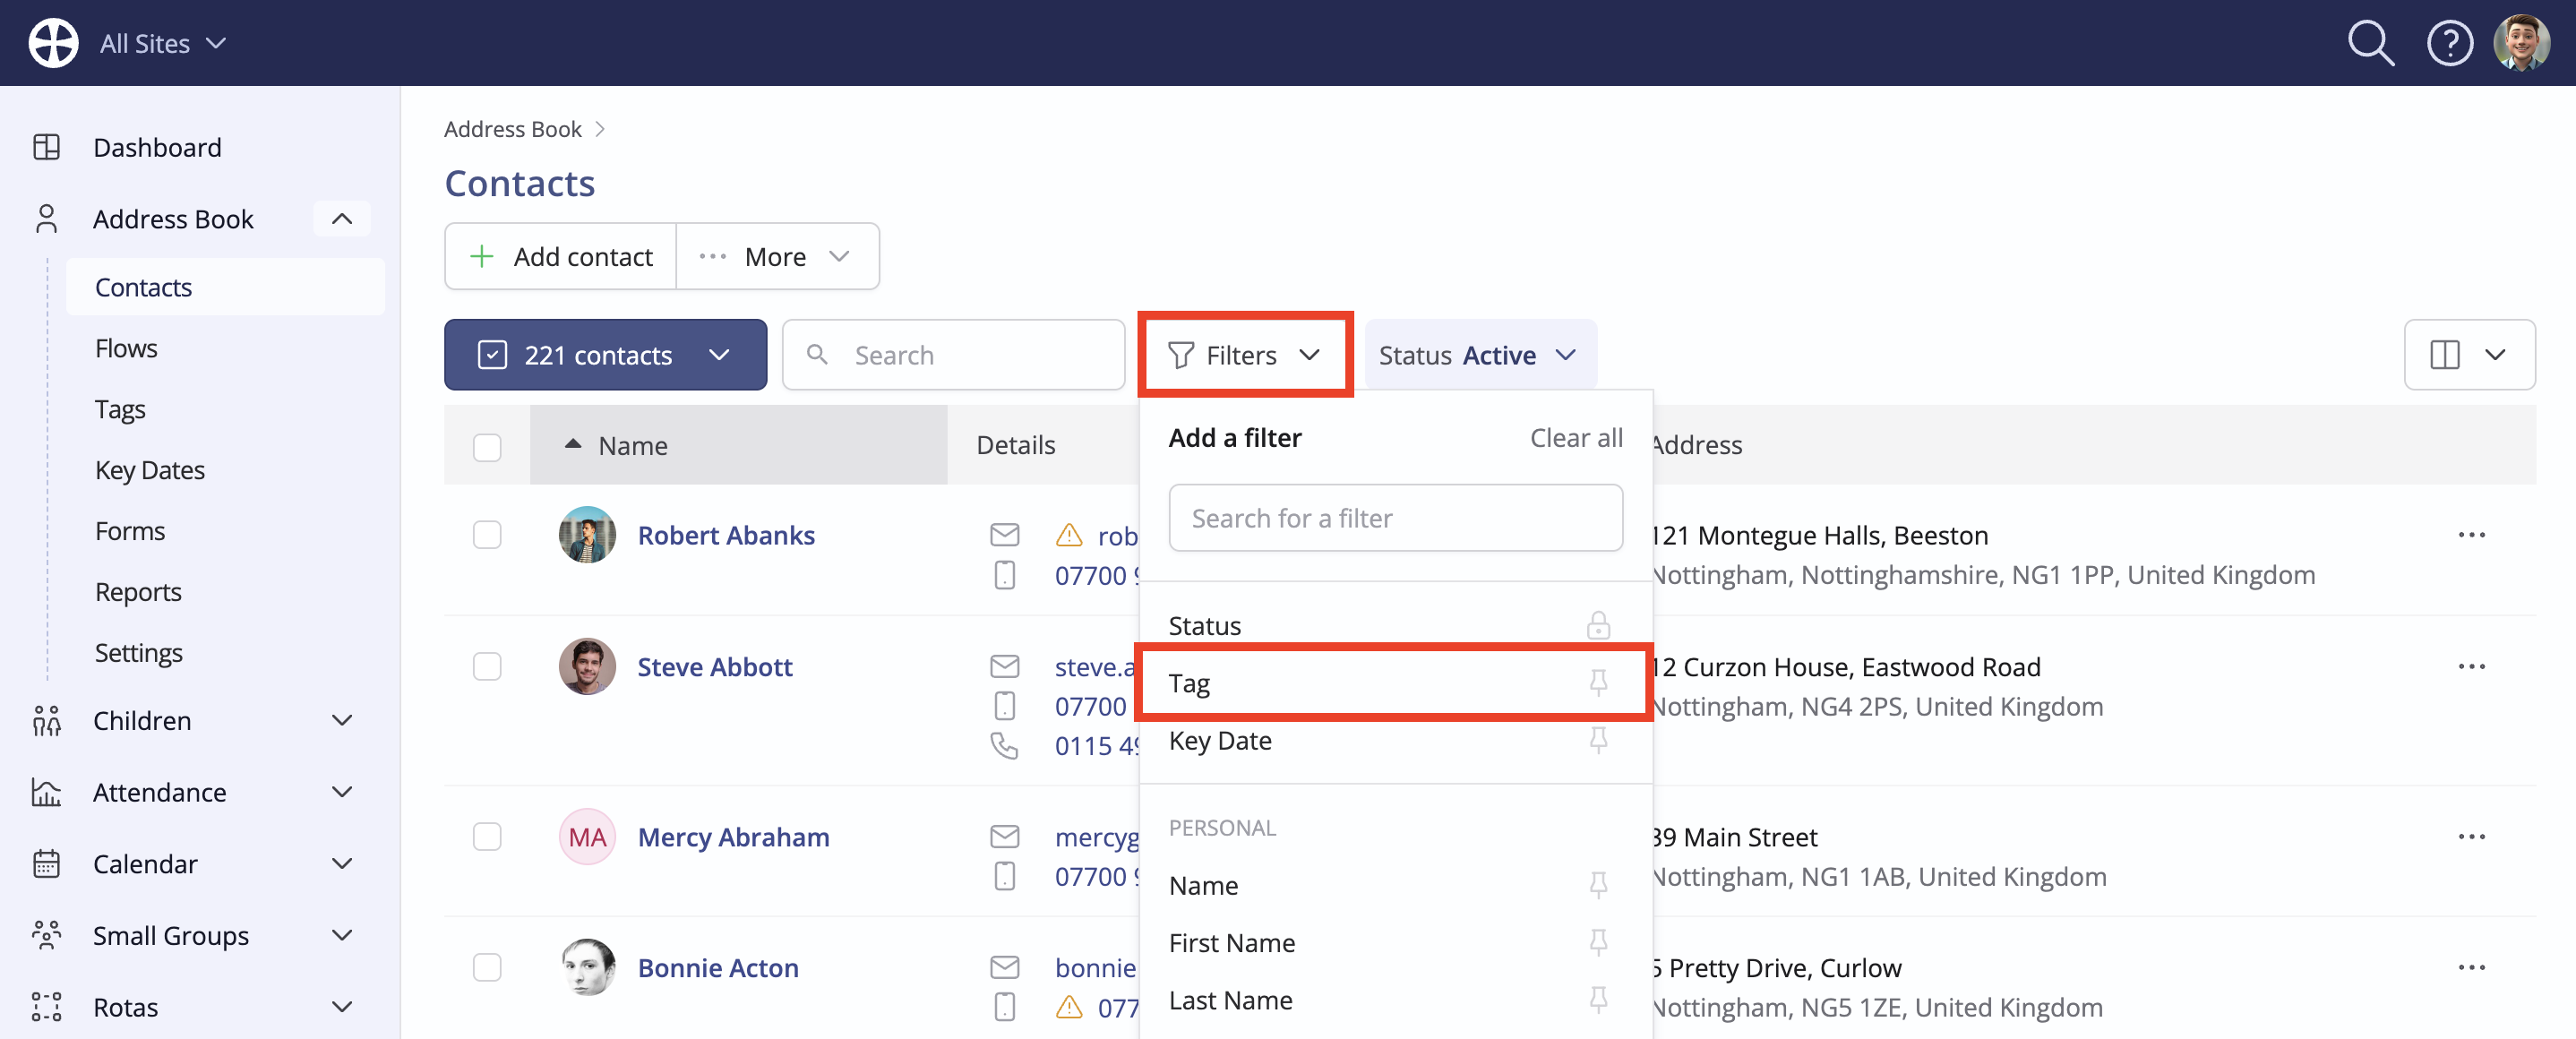
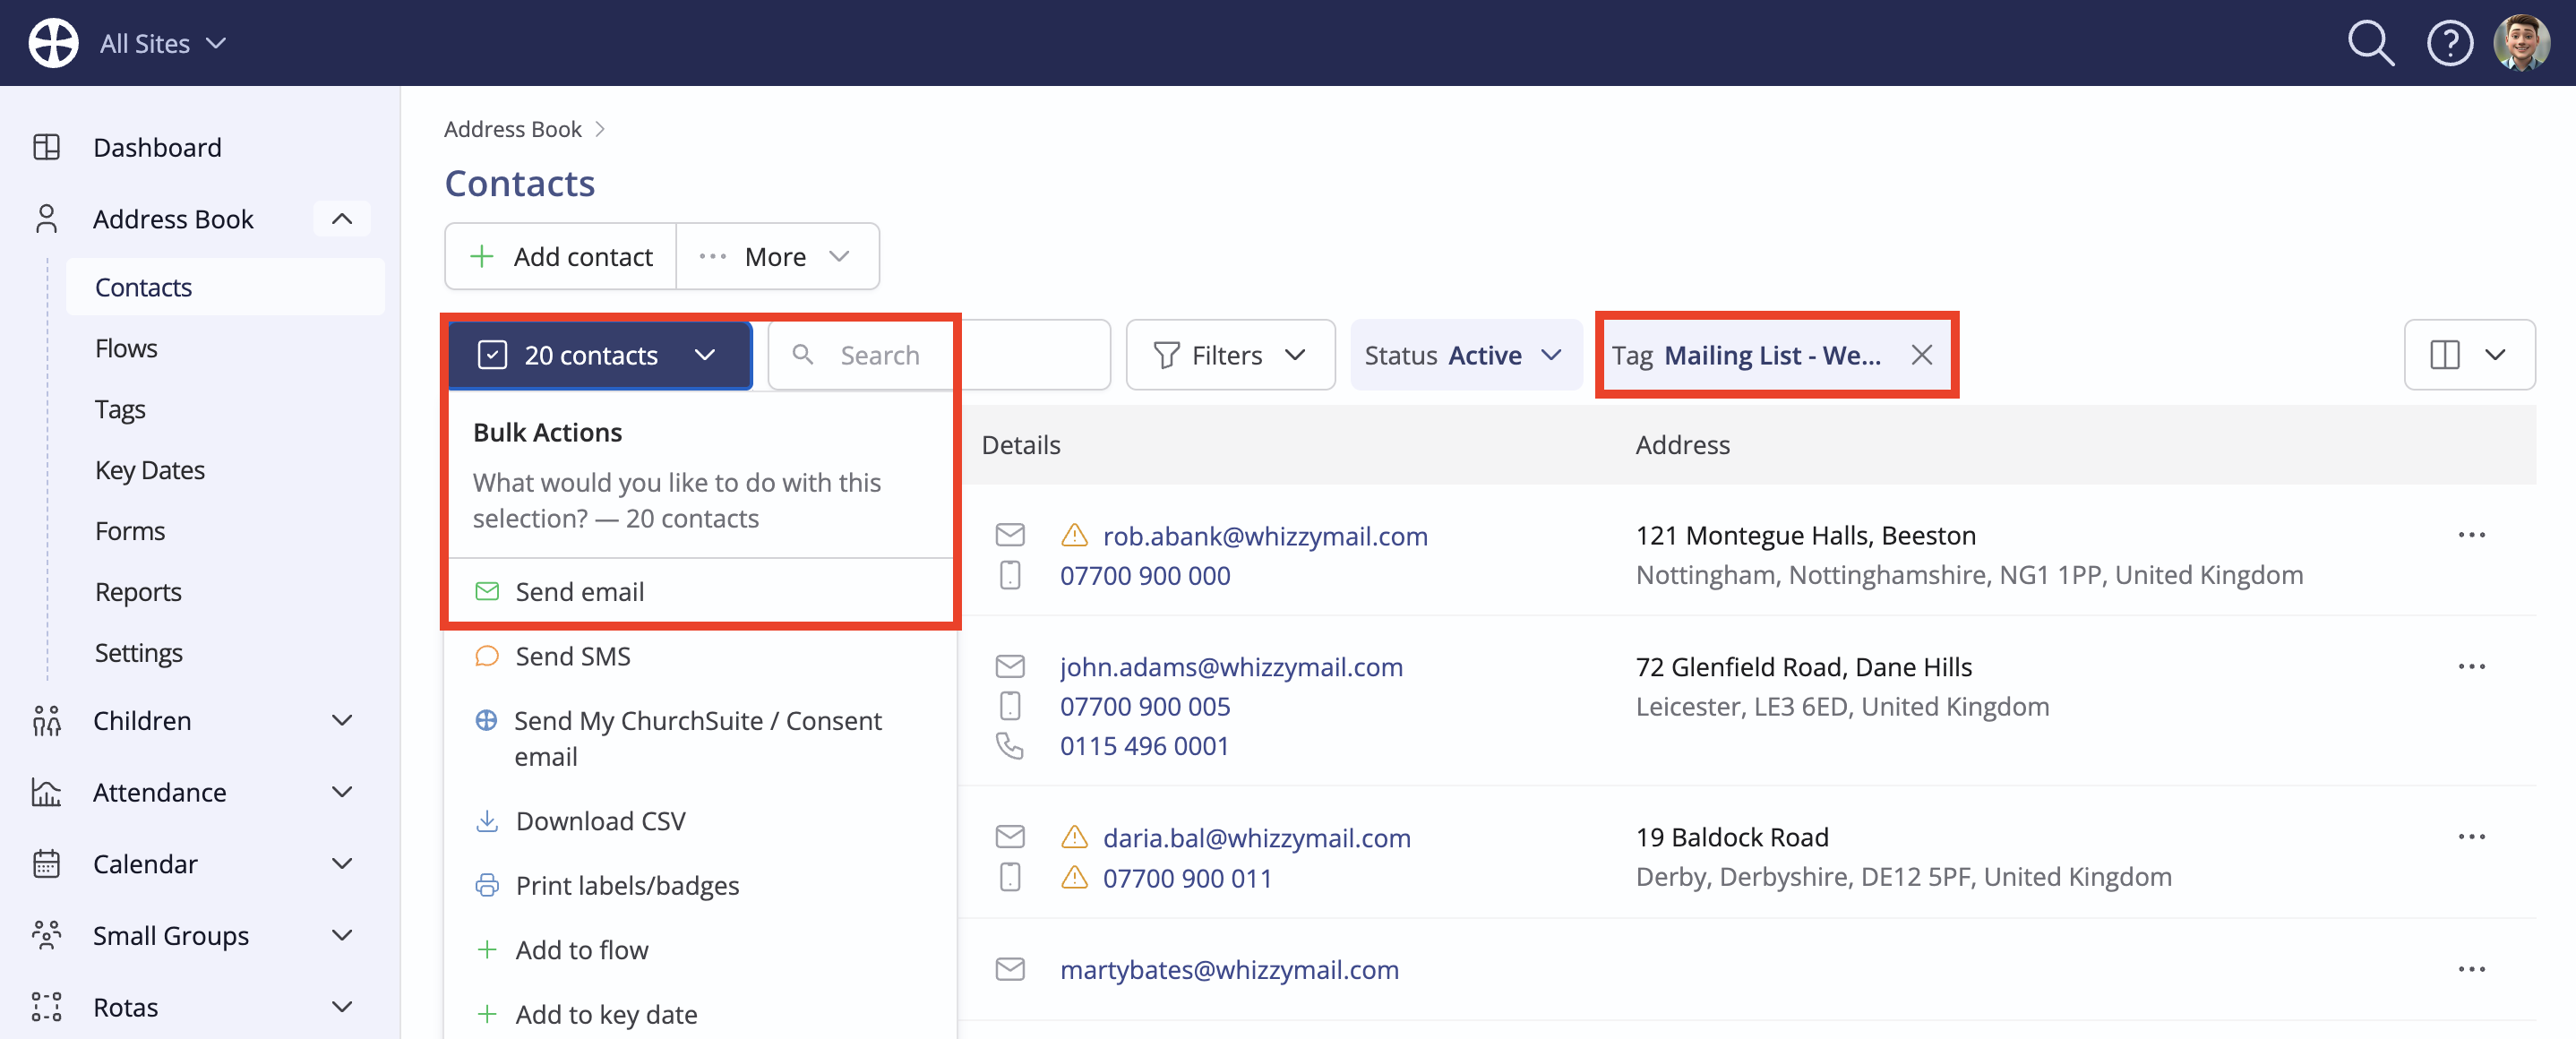
The functionality is the same in the Address Book module's Contacts section. Filter to a Tag and then choose the subscriber/mailing list Tag you wish to communicate to. Click the Bulk Actions menu and proceed with composing your Email or SMS message.
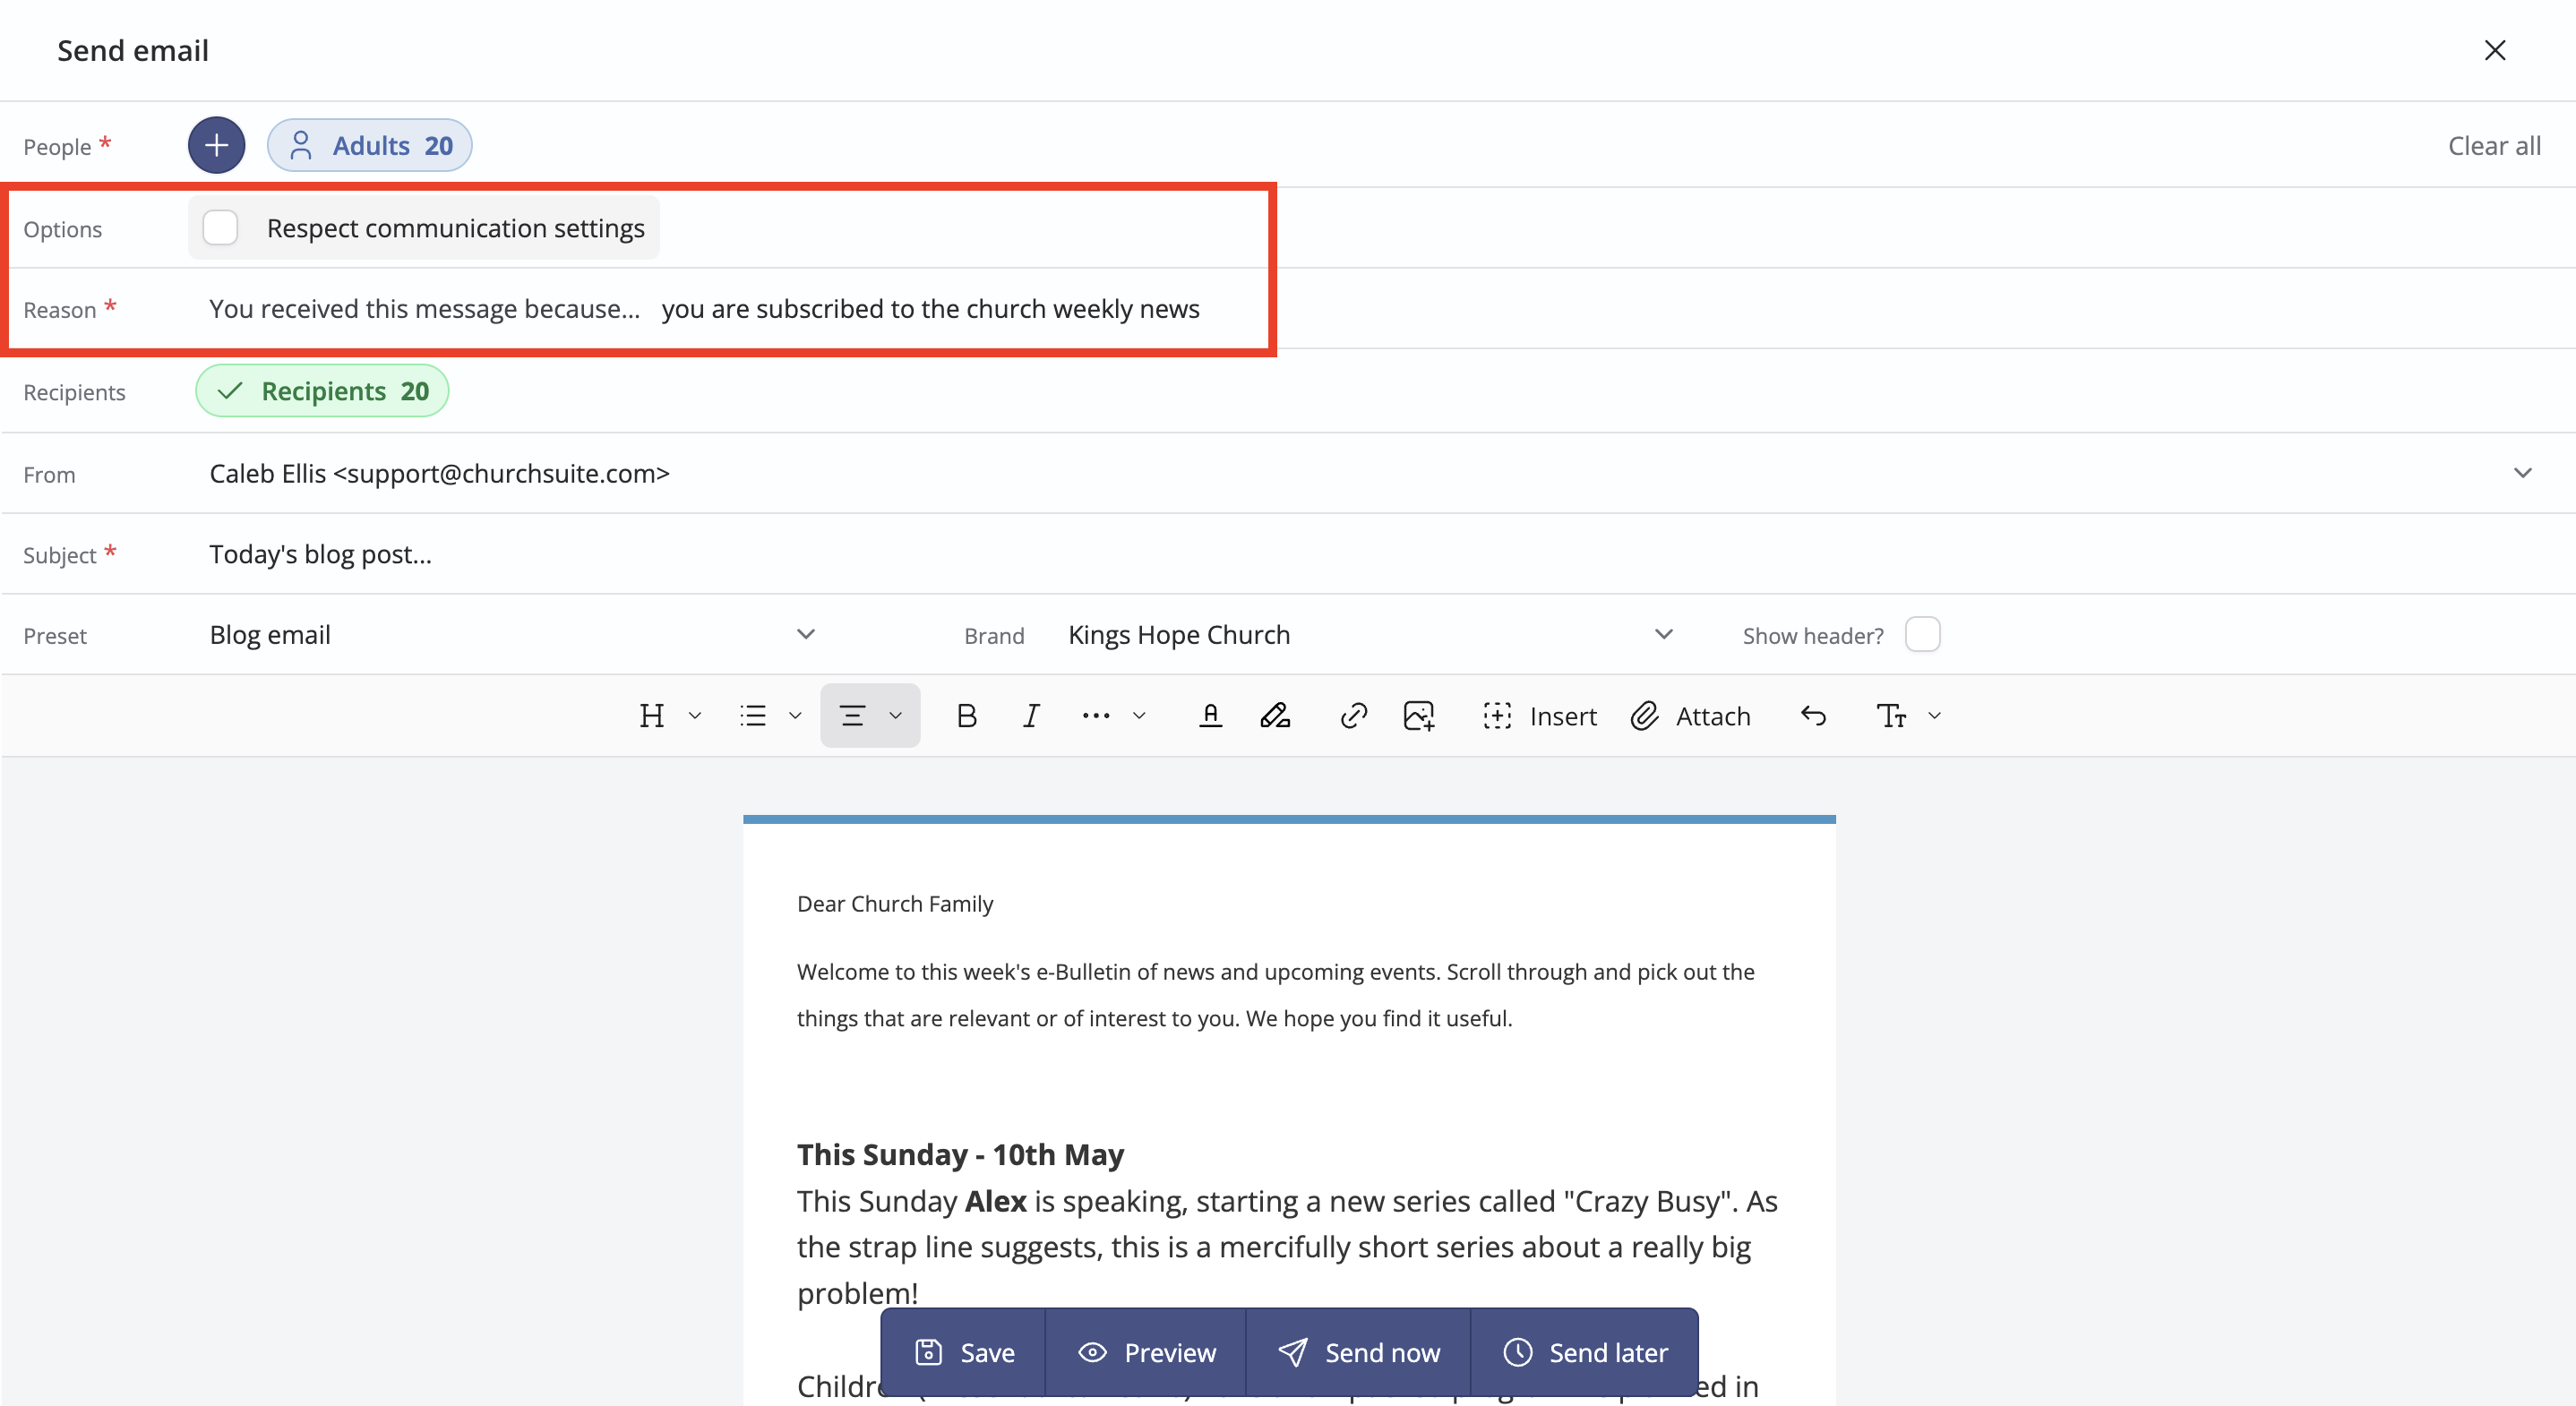
When composing messages, consider making use of the Communication override, selecting Do not respect Communication settings. Add an explanation of why the recipient is receiving the message, like the example below. Using the override will disregard the "Receive general emails" setting for each tagged recipient - relying instead on each recipient's subscriber/mailing list "opt-in" consent.
Having composed your message, you can Send or Schedule the message.