Importing data from Elvanto
For those migrating to ChurchSuite from Elvanto, we've built a helpful integration that can import your data directly from your Elvanto database into your ChurchSuite modules. No data in Elvanto is changed during the import process.
What Elvanto data is imported?
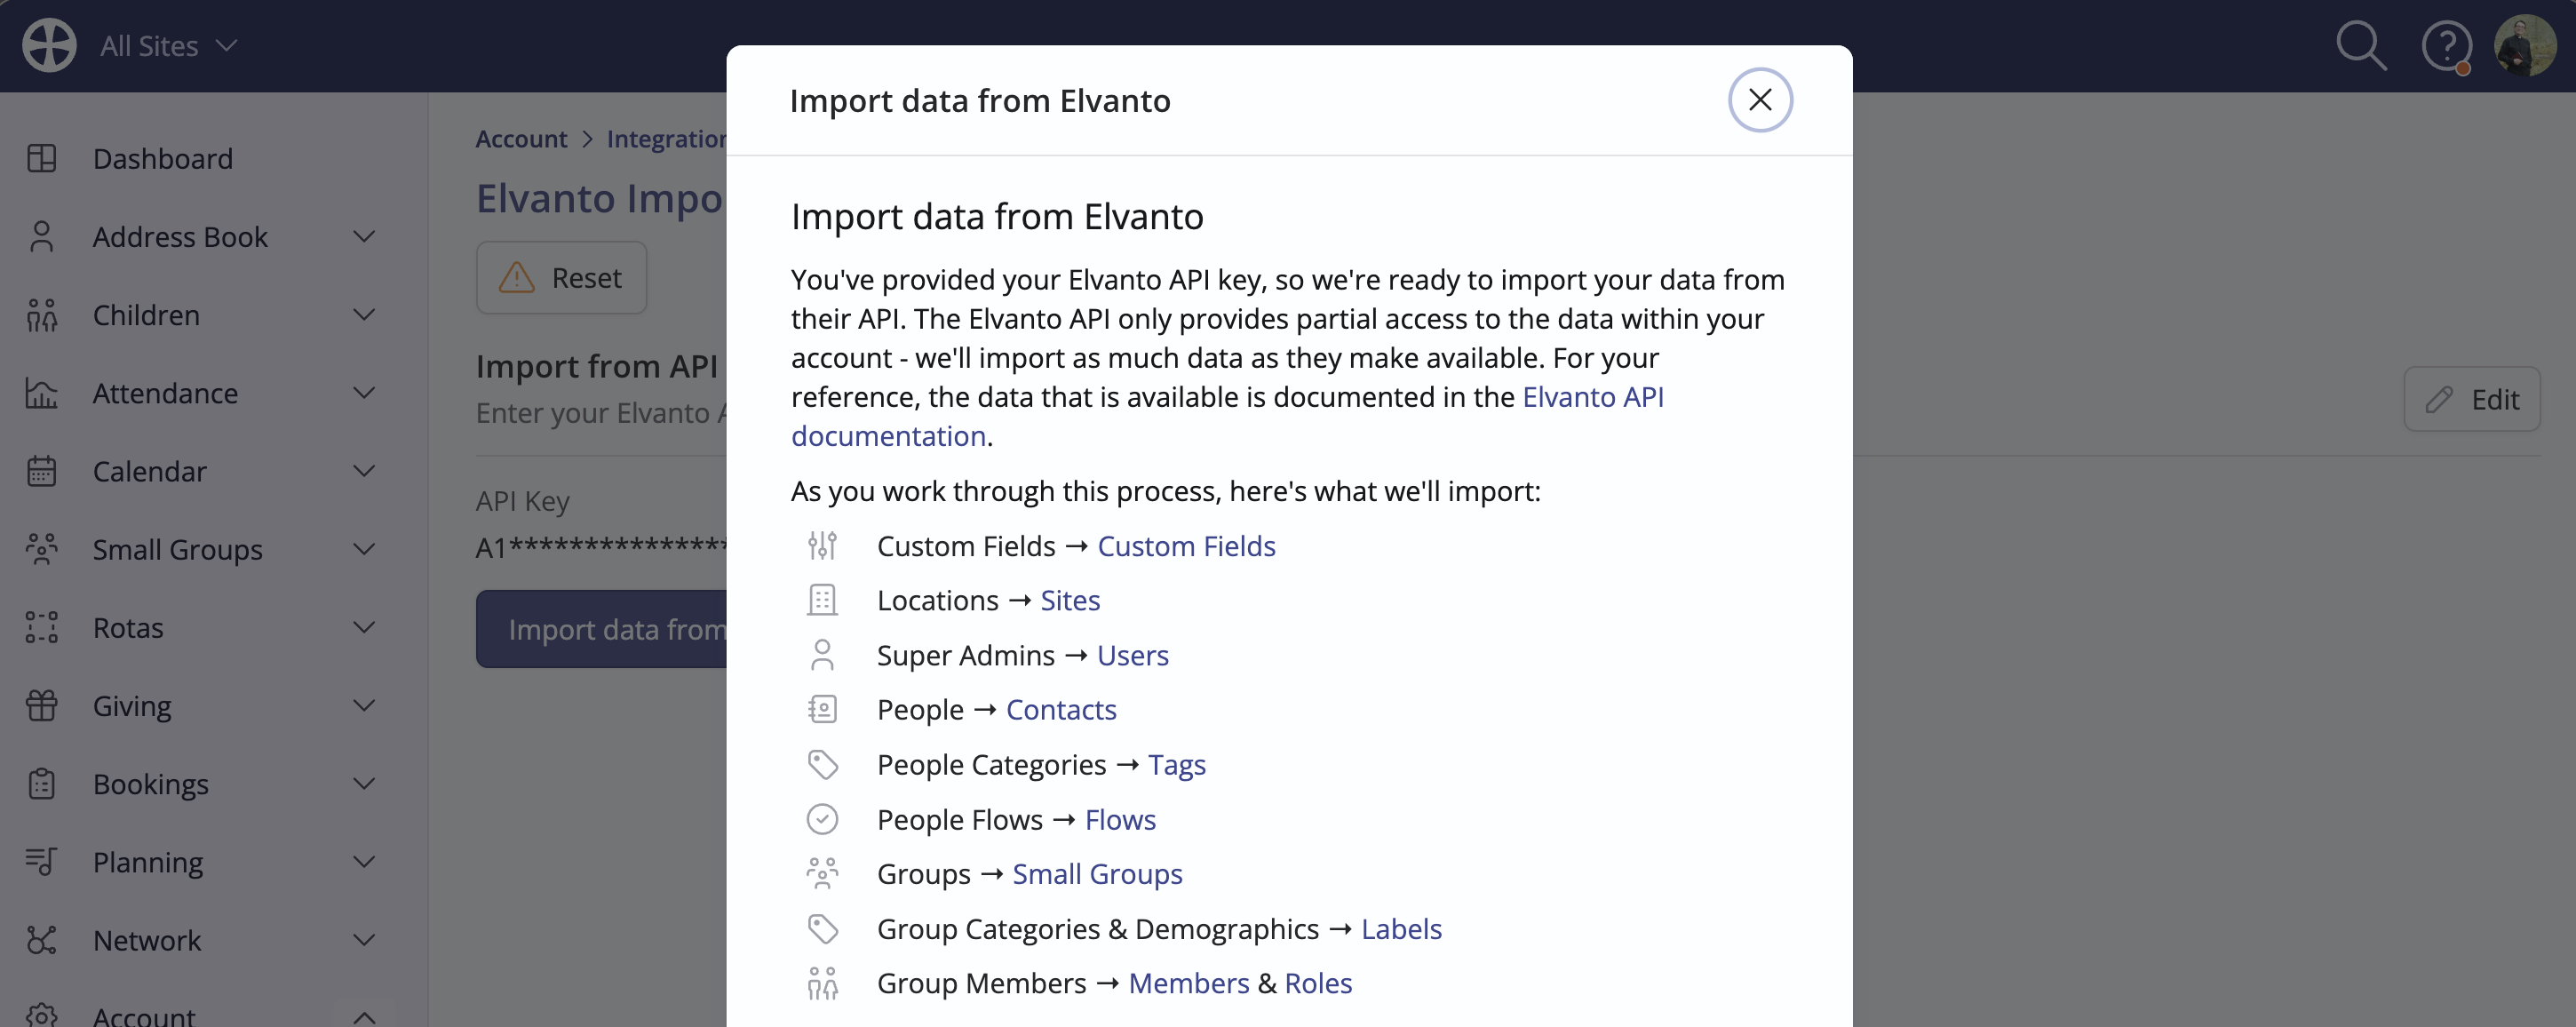
The Elvanto API only provides partial access to the data within your account. The integration will import as much data as they make available. The data that is available is documented here. The following data will be imported. We've provided support article links for each related ChurchSuite feature where the data is imported:
- Custom Fields → Custom Fields
- Locations → Sites
- Super Admins → Users
- People → Contacts
- People Categories → Tags
- People Flows → Flows
- Departments → Ministries
- Positions → Roles
- Groups → Small Groups
- Group Categories & Demographics → Labels
- Group Members → Members & Roles
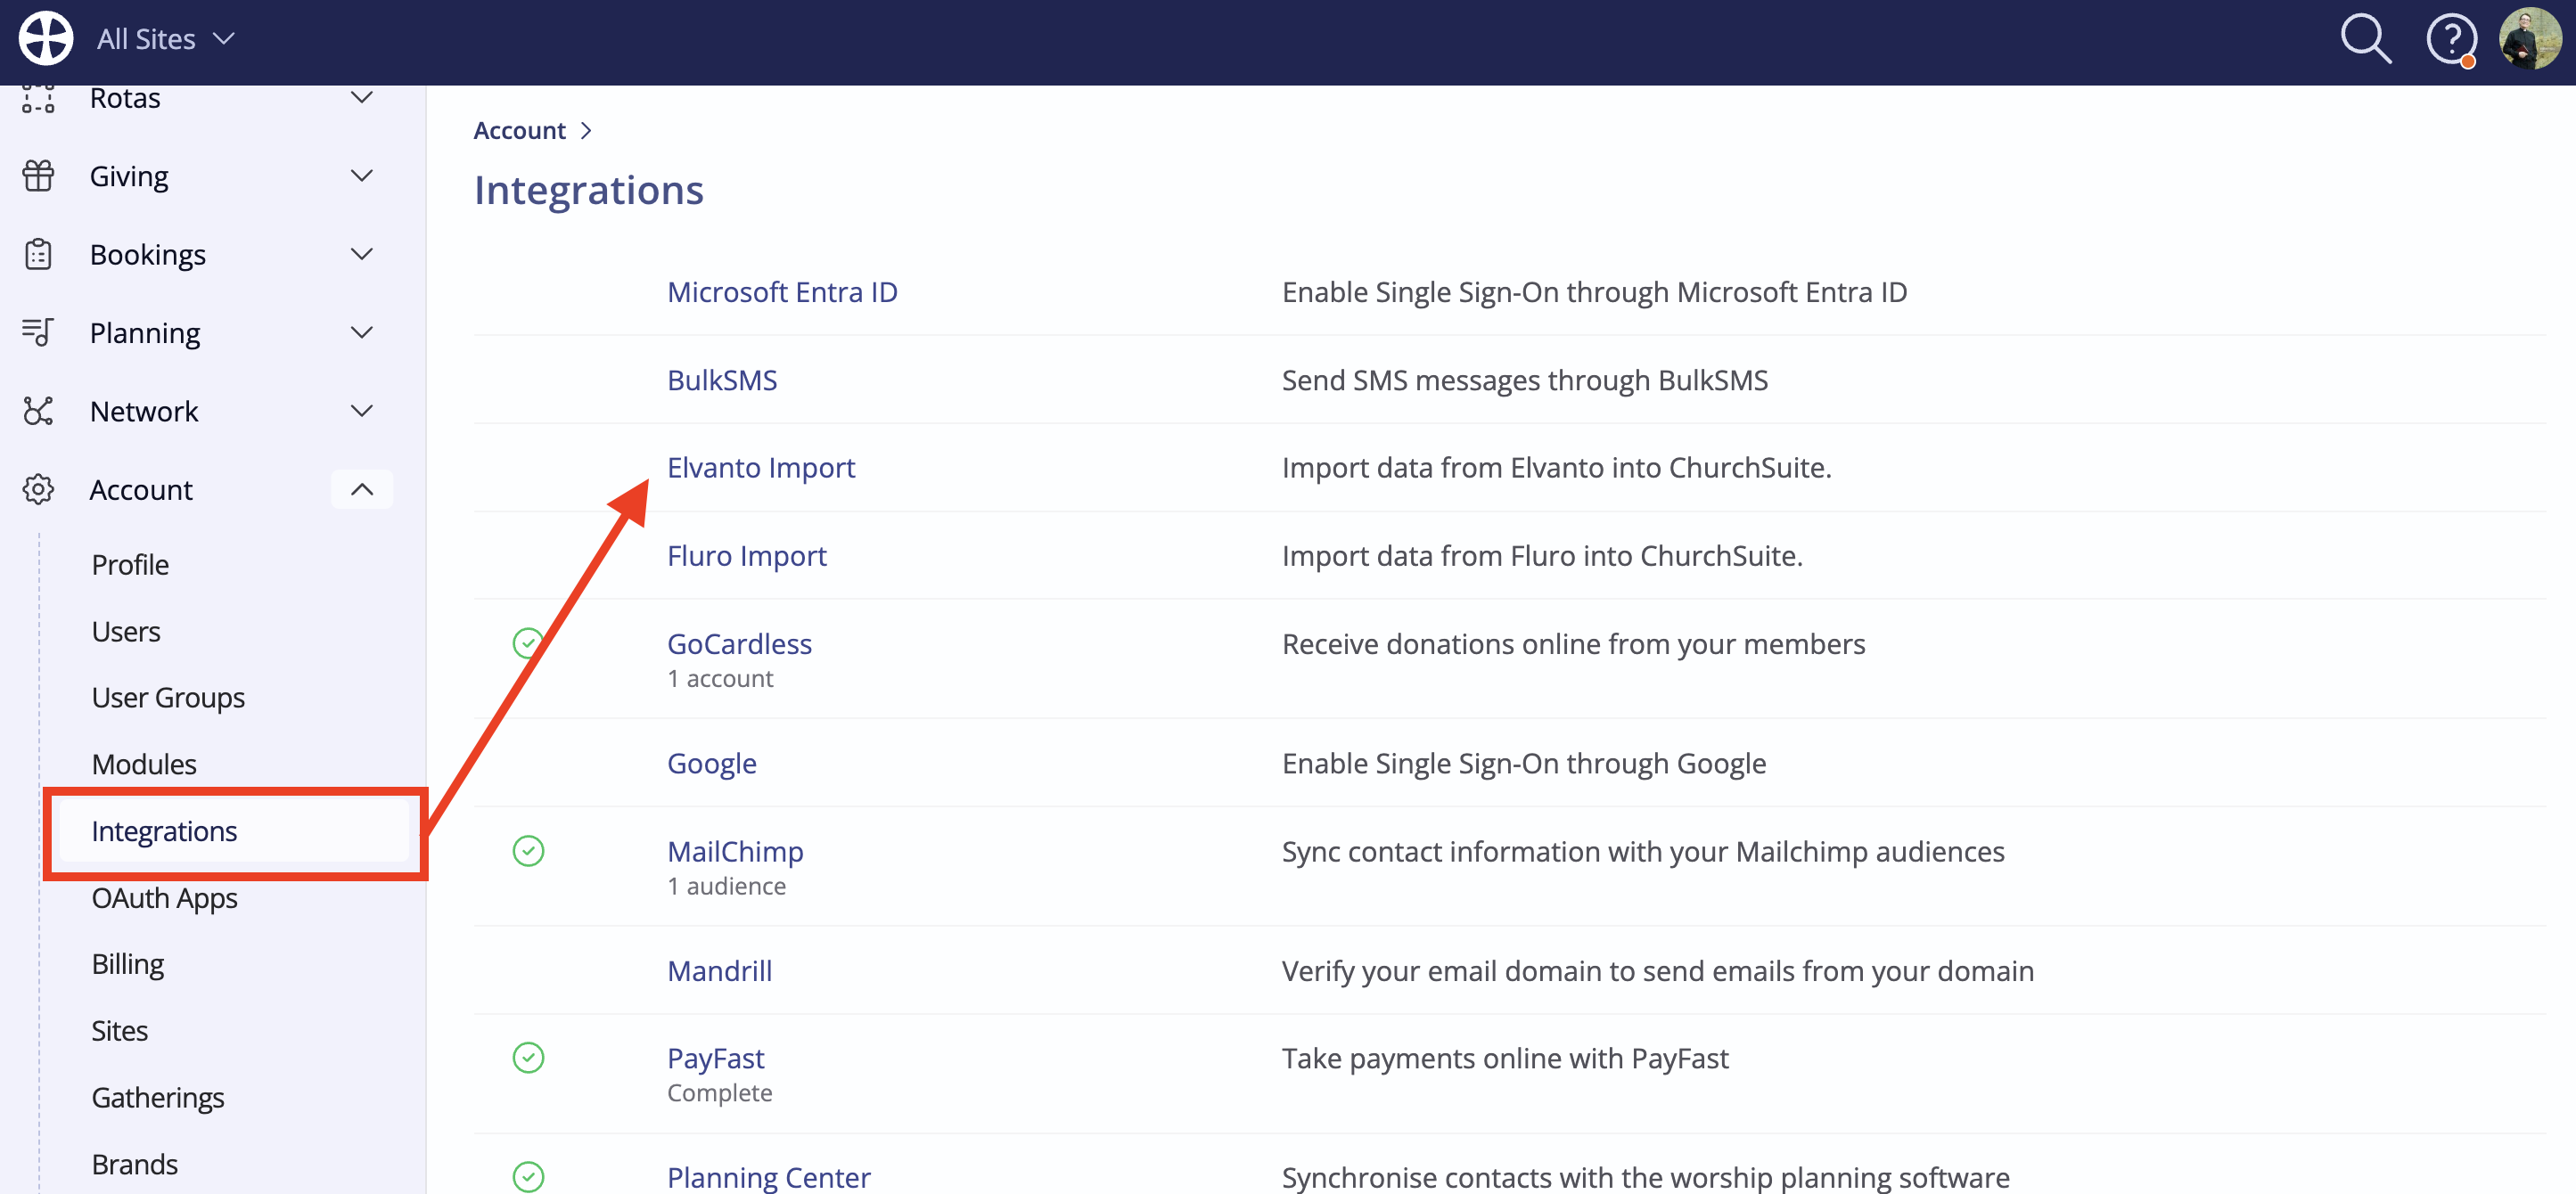
In the Integrations section, accessible from your Account Settings, click Elvanto Import:
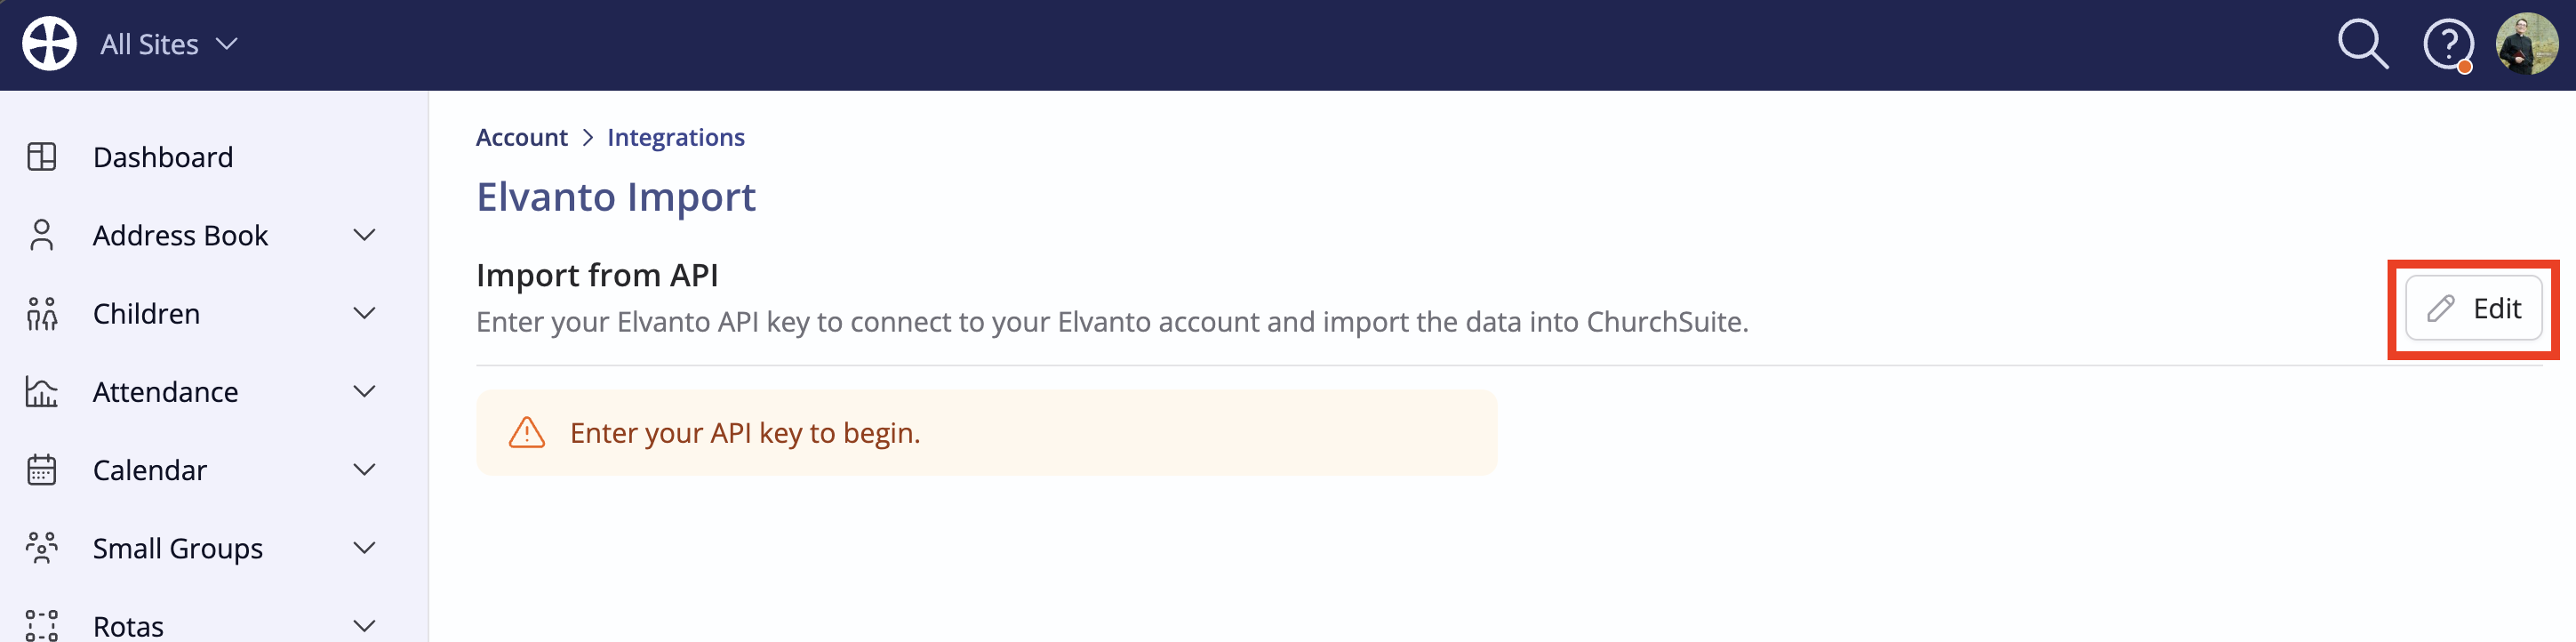
Begin by entering the Elvanto API key from your Elvanto account Admin Area > Settings > Developers > API. Copy the API key to your device clipboard and then click Edit on the integration page:
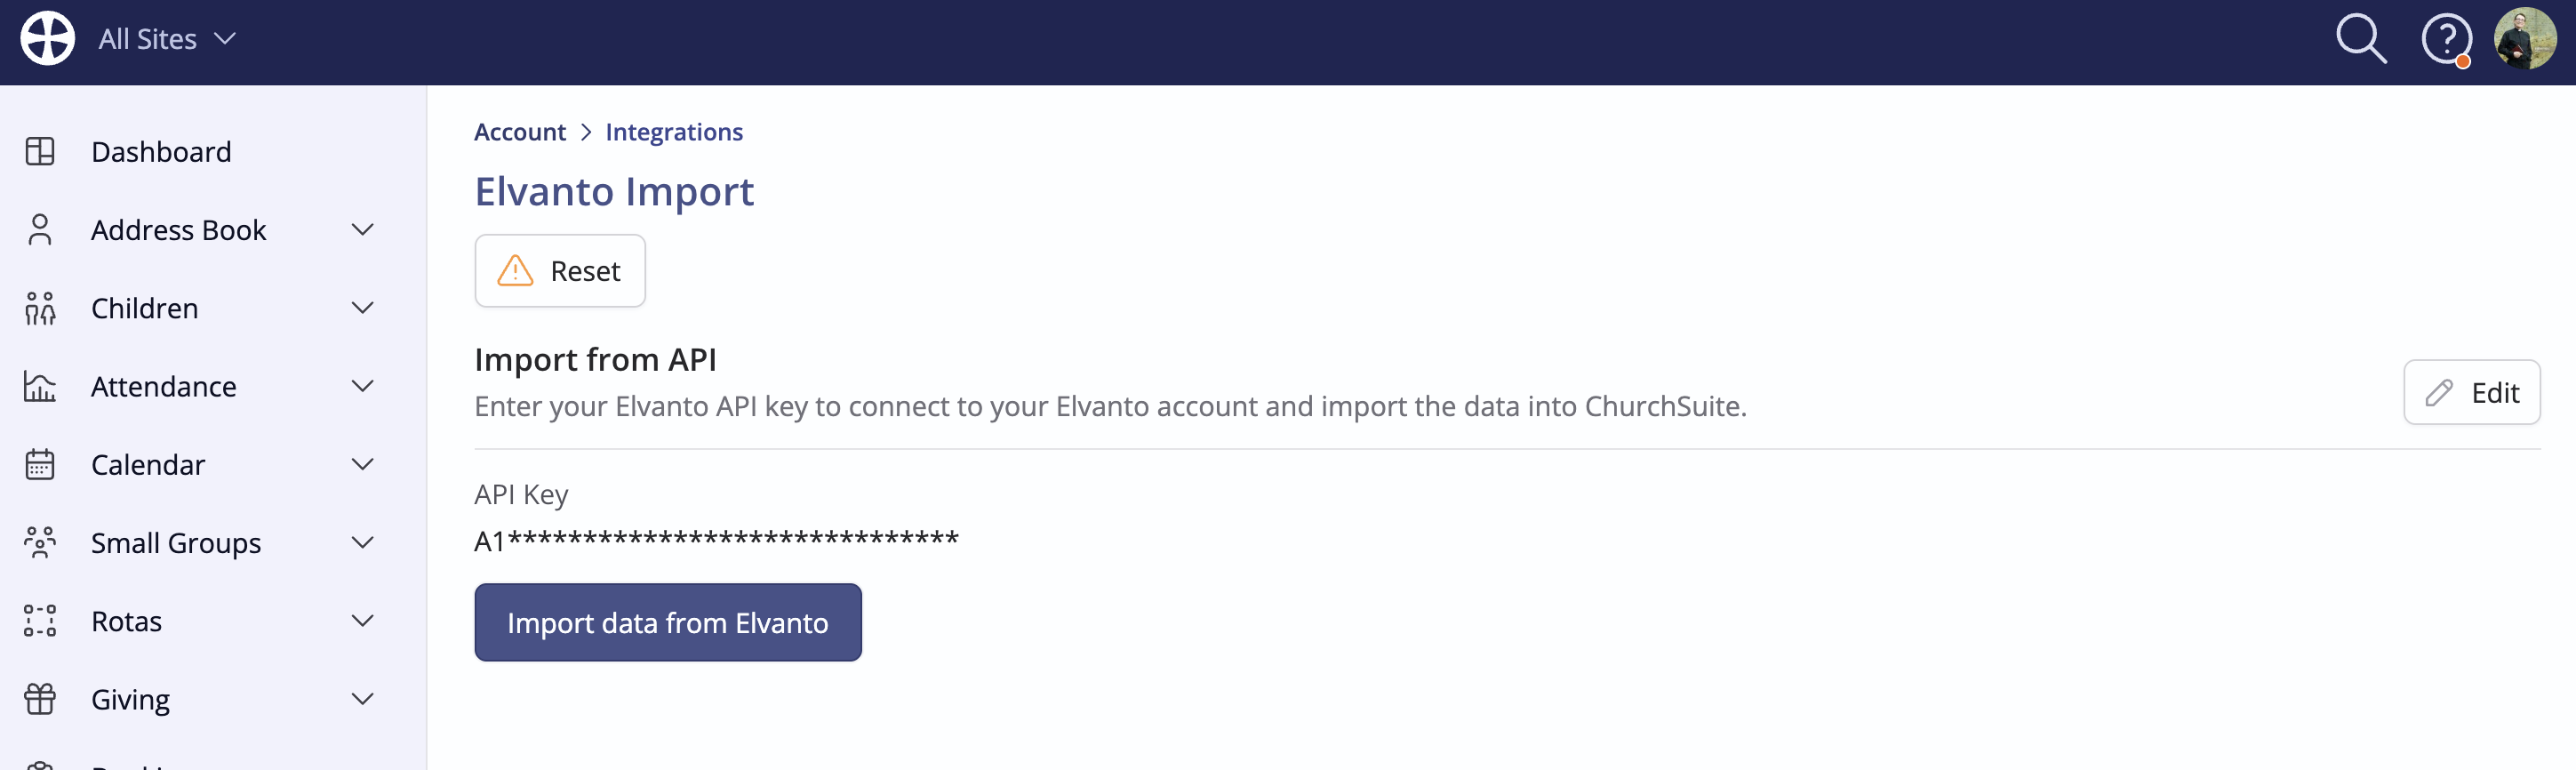
Paste the API Key into the box and click Save.

Returning to the integration page, click Import data from Elvanto to be taken through a series of steps to complete the import - each step is illustrated below:
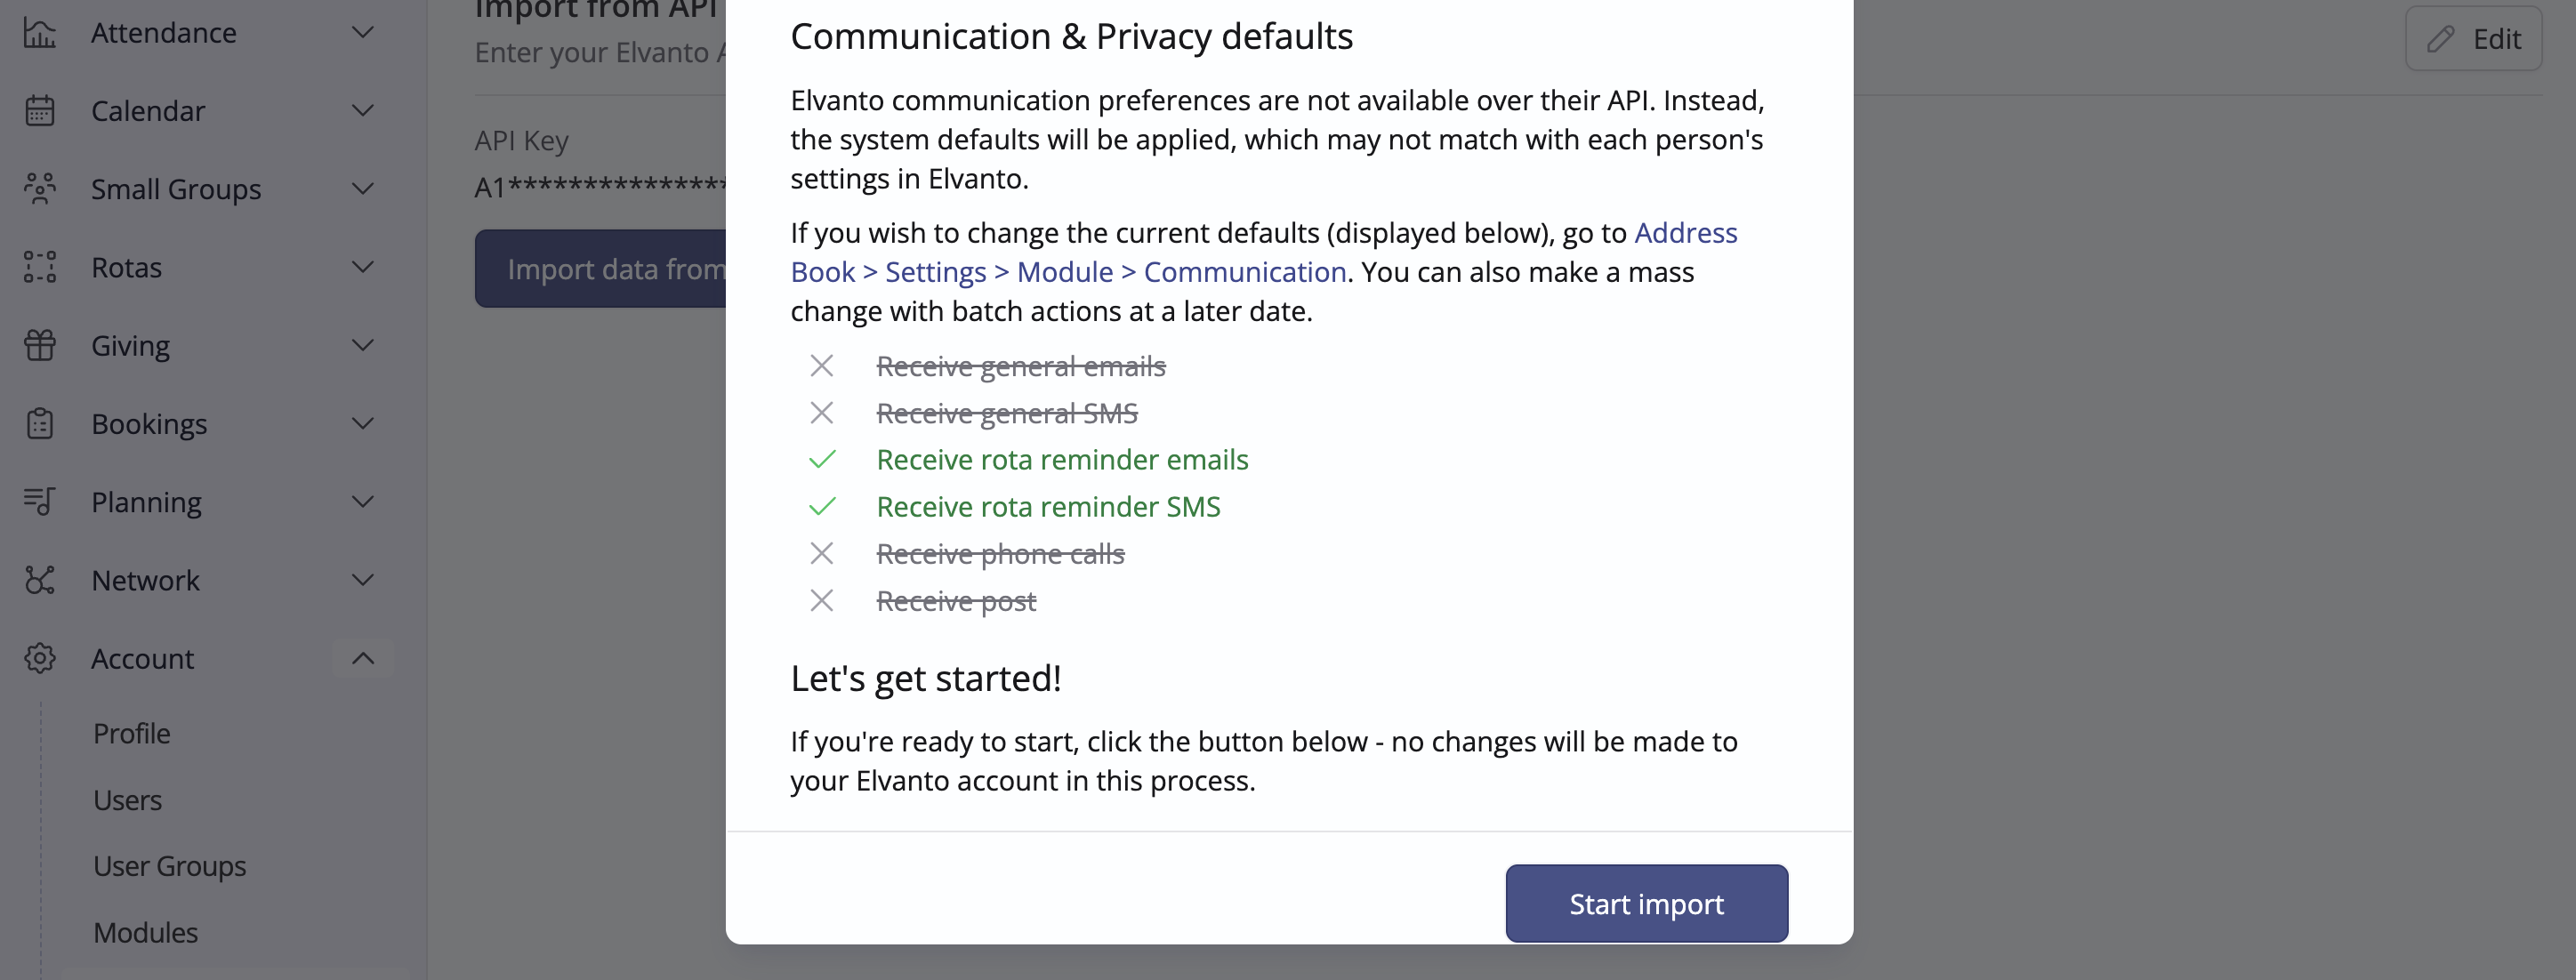
The process begins with a summary of the data that will be imported. Since Elvanto communication preferences are not available over their API, the ChurchSuite system defaults will be applied to each imported person, which may be different to their current preferences held in Elvanto. You can change the defaults that are used by clicking the link provided to navigate away from the importer to make the changes in the Address Book module settings. We've produced a related support article on Managing communication options, which explains how communication options work in ChurchSuite and how to make changes to the defaults that are applied to new contacts that are added or imported into the Address Book. Note that it is also possible to use ChurchSuite bulk actions to bulk-change people's communication options at a later date. Navigating back to the Elvanto Importer pop-up, click Start Import to begin:
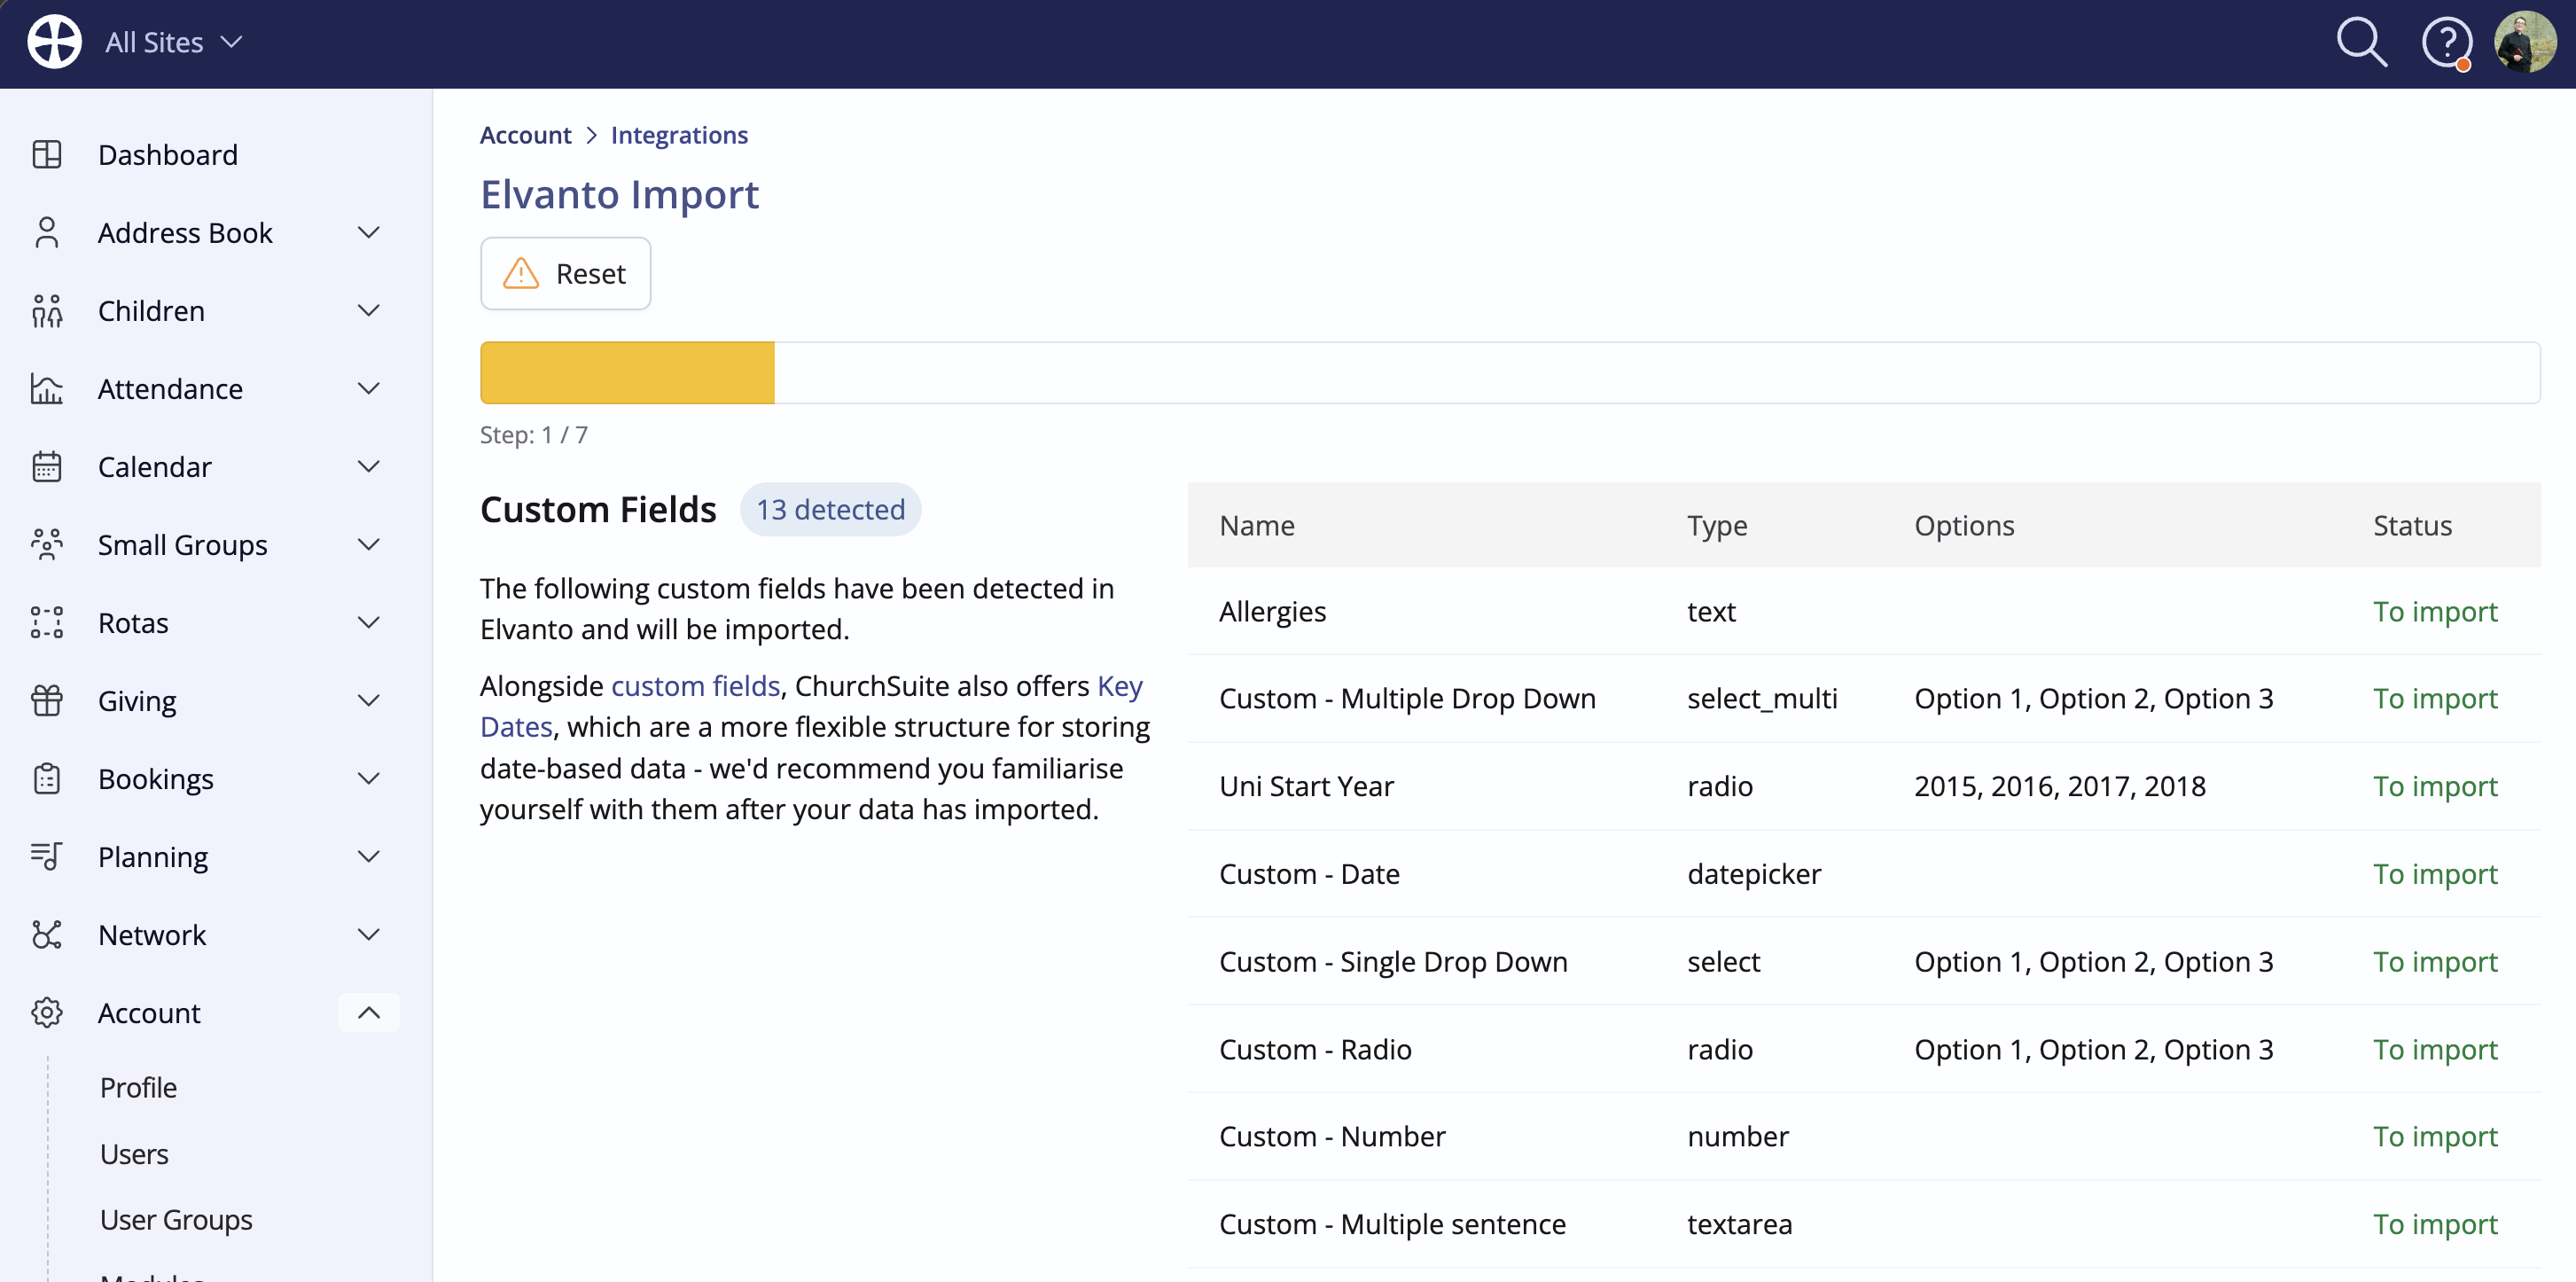
Step 1 detects any Custom Fields found in Elvanto. These will be imported into new custom fields created in ChurchSuite. ChurchSuite has a Key Dates feature that will give you a more flexible structure for storing date-based data, which may be of interest after the import has been completed. We've produced a related support article about Key Dates. Click Import and Proceed to move to the next step:
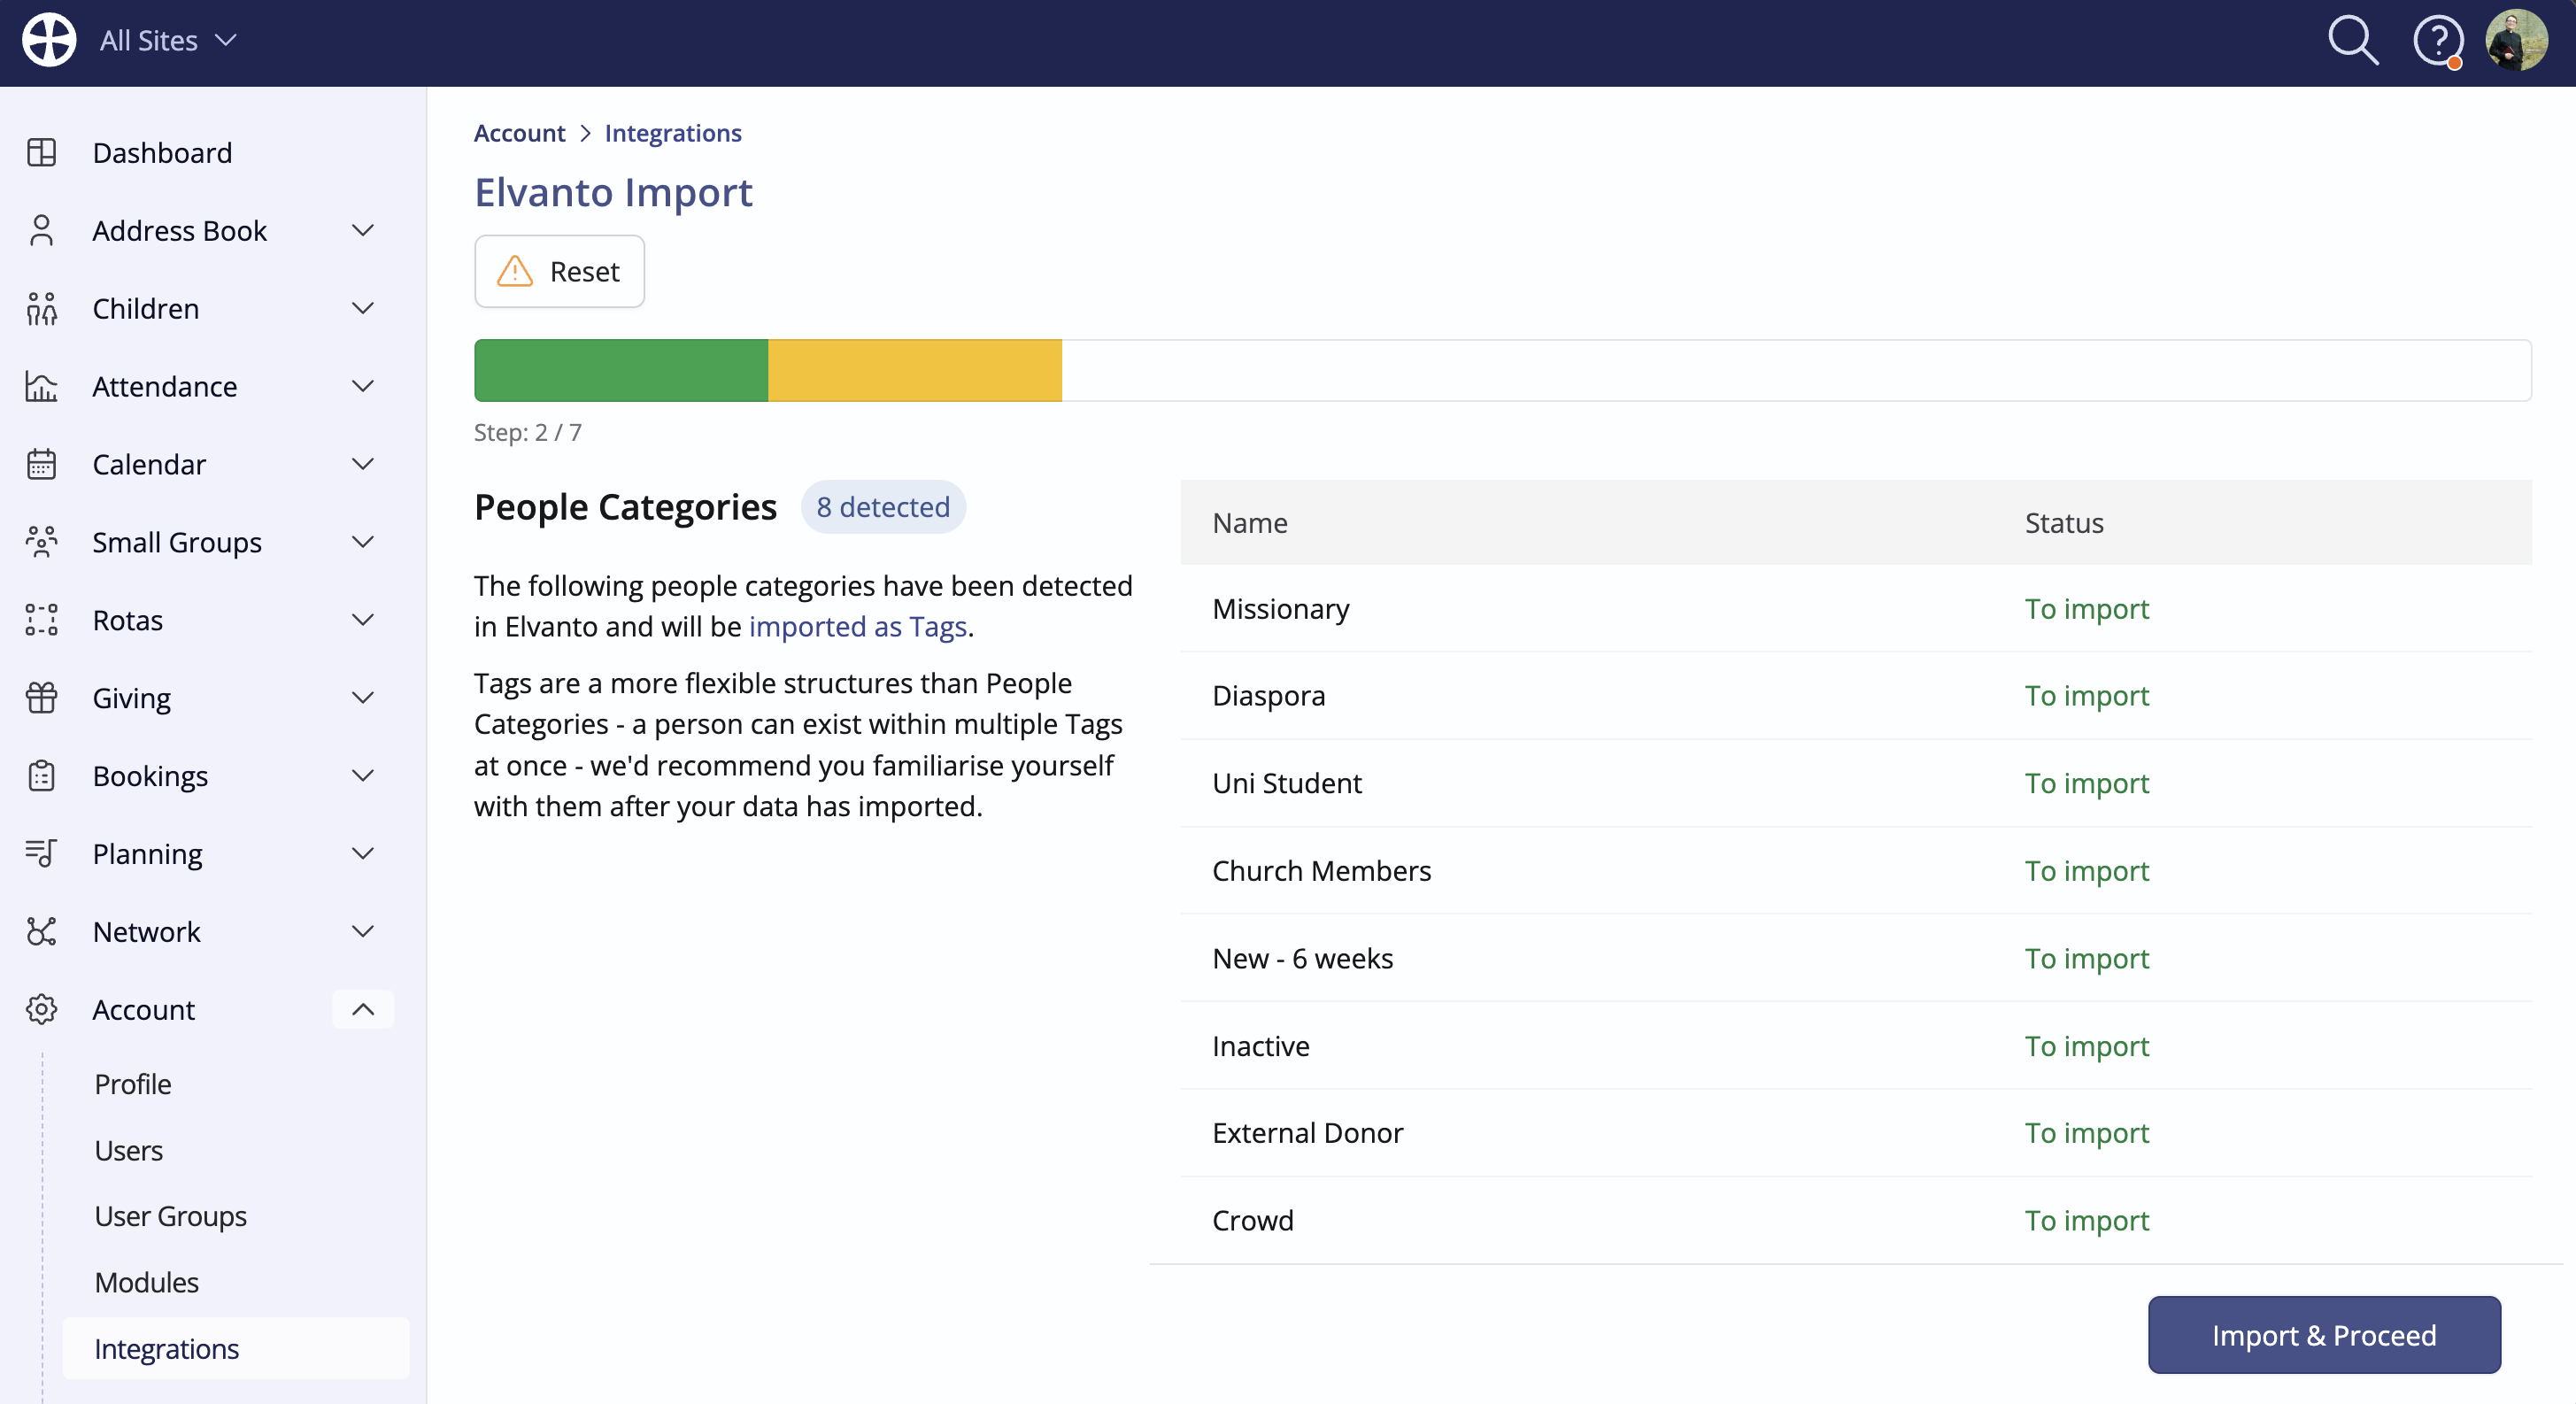
Step 2 detects all the People Categories in use in Elvanto. These will be imported as Tags in ChurchSuite. Tags are more powerful than categories because people can be assigned to multiple tags. Tags enable you to categorise or group people within a large Address Book, making it easier to communicate with or report on just those in selected tag groupings. We've produced a related support article about Tags that we encourage you to read and become familiar with. Click Import and Proceed to move to the next step:
Step 3 detects all Locations found in Elvanto. These will be imported as new Sites in ChurchSuite. Click Import and Proceed to move to the next step:
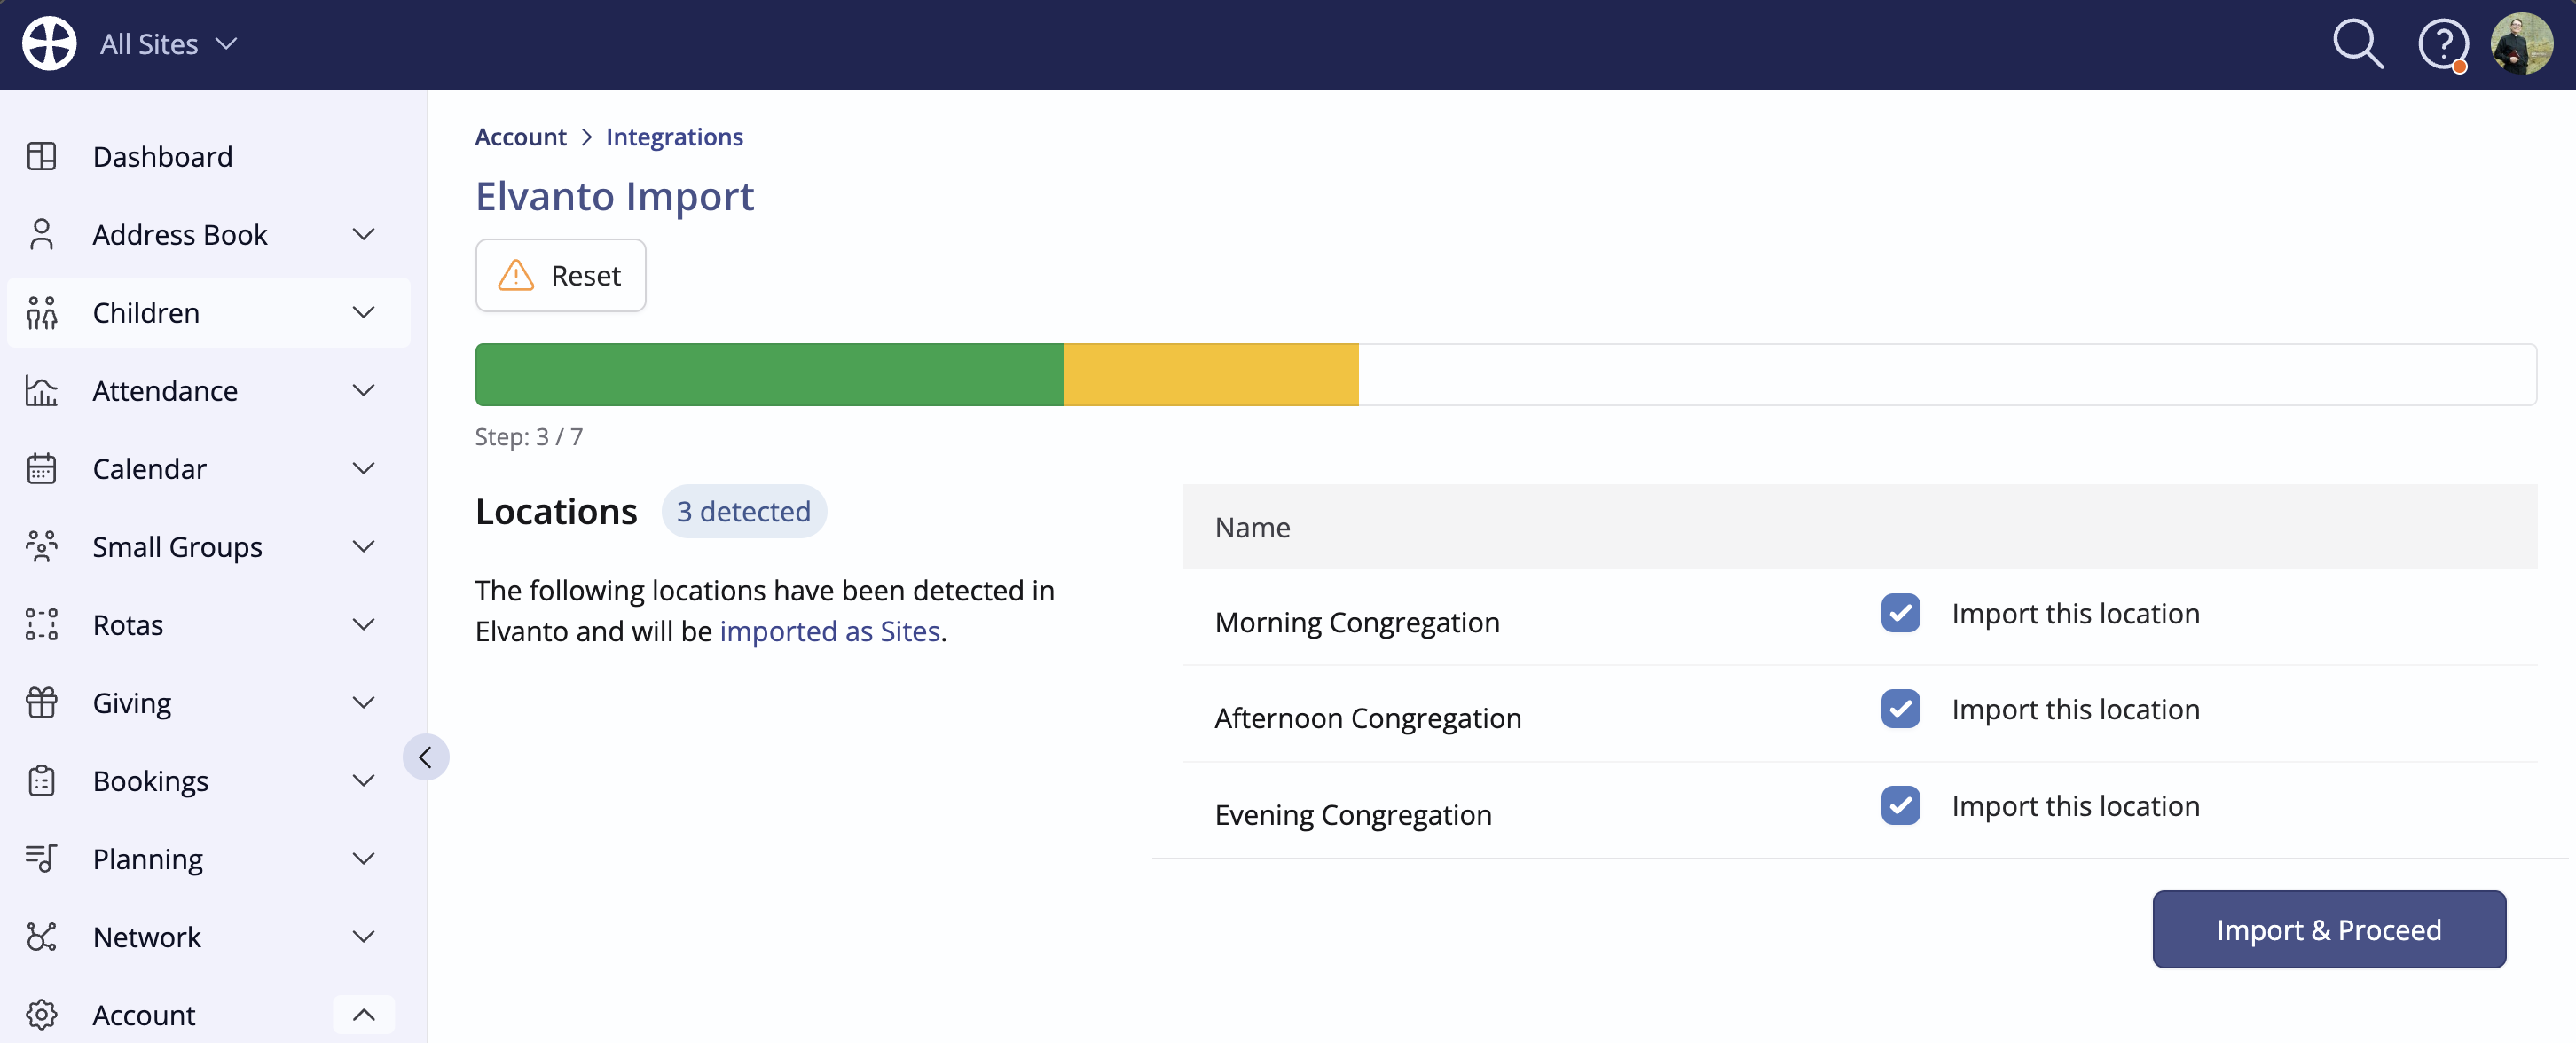
Importing specific locations...
If you'd like to import only specific locations from your Elvanto account, you can optionally select/deselect the appropriate locations at this point.
Step 4 detects the People in Elvanto and shows a sample. Location data will be imported into ChurchSuite as Sites, Demographics will be imported as Tags, and any Custom Fields will be imported in their original state. People who are detected as Super Admins will have a User account created in ChurchSuite, but they will not be sent the usual 'new user welcome email' - you will need to trigger this manually when you are ready. To help with reporting, the creation date in ChurchSuite for each person will be preserved from Elvanto. Click Import and Proceed to move to the next step - it may take some time to process large numbers of people:
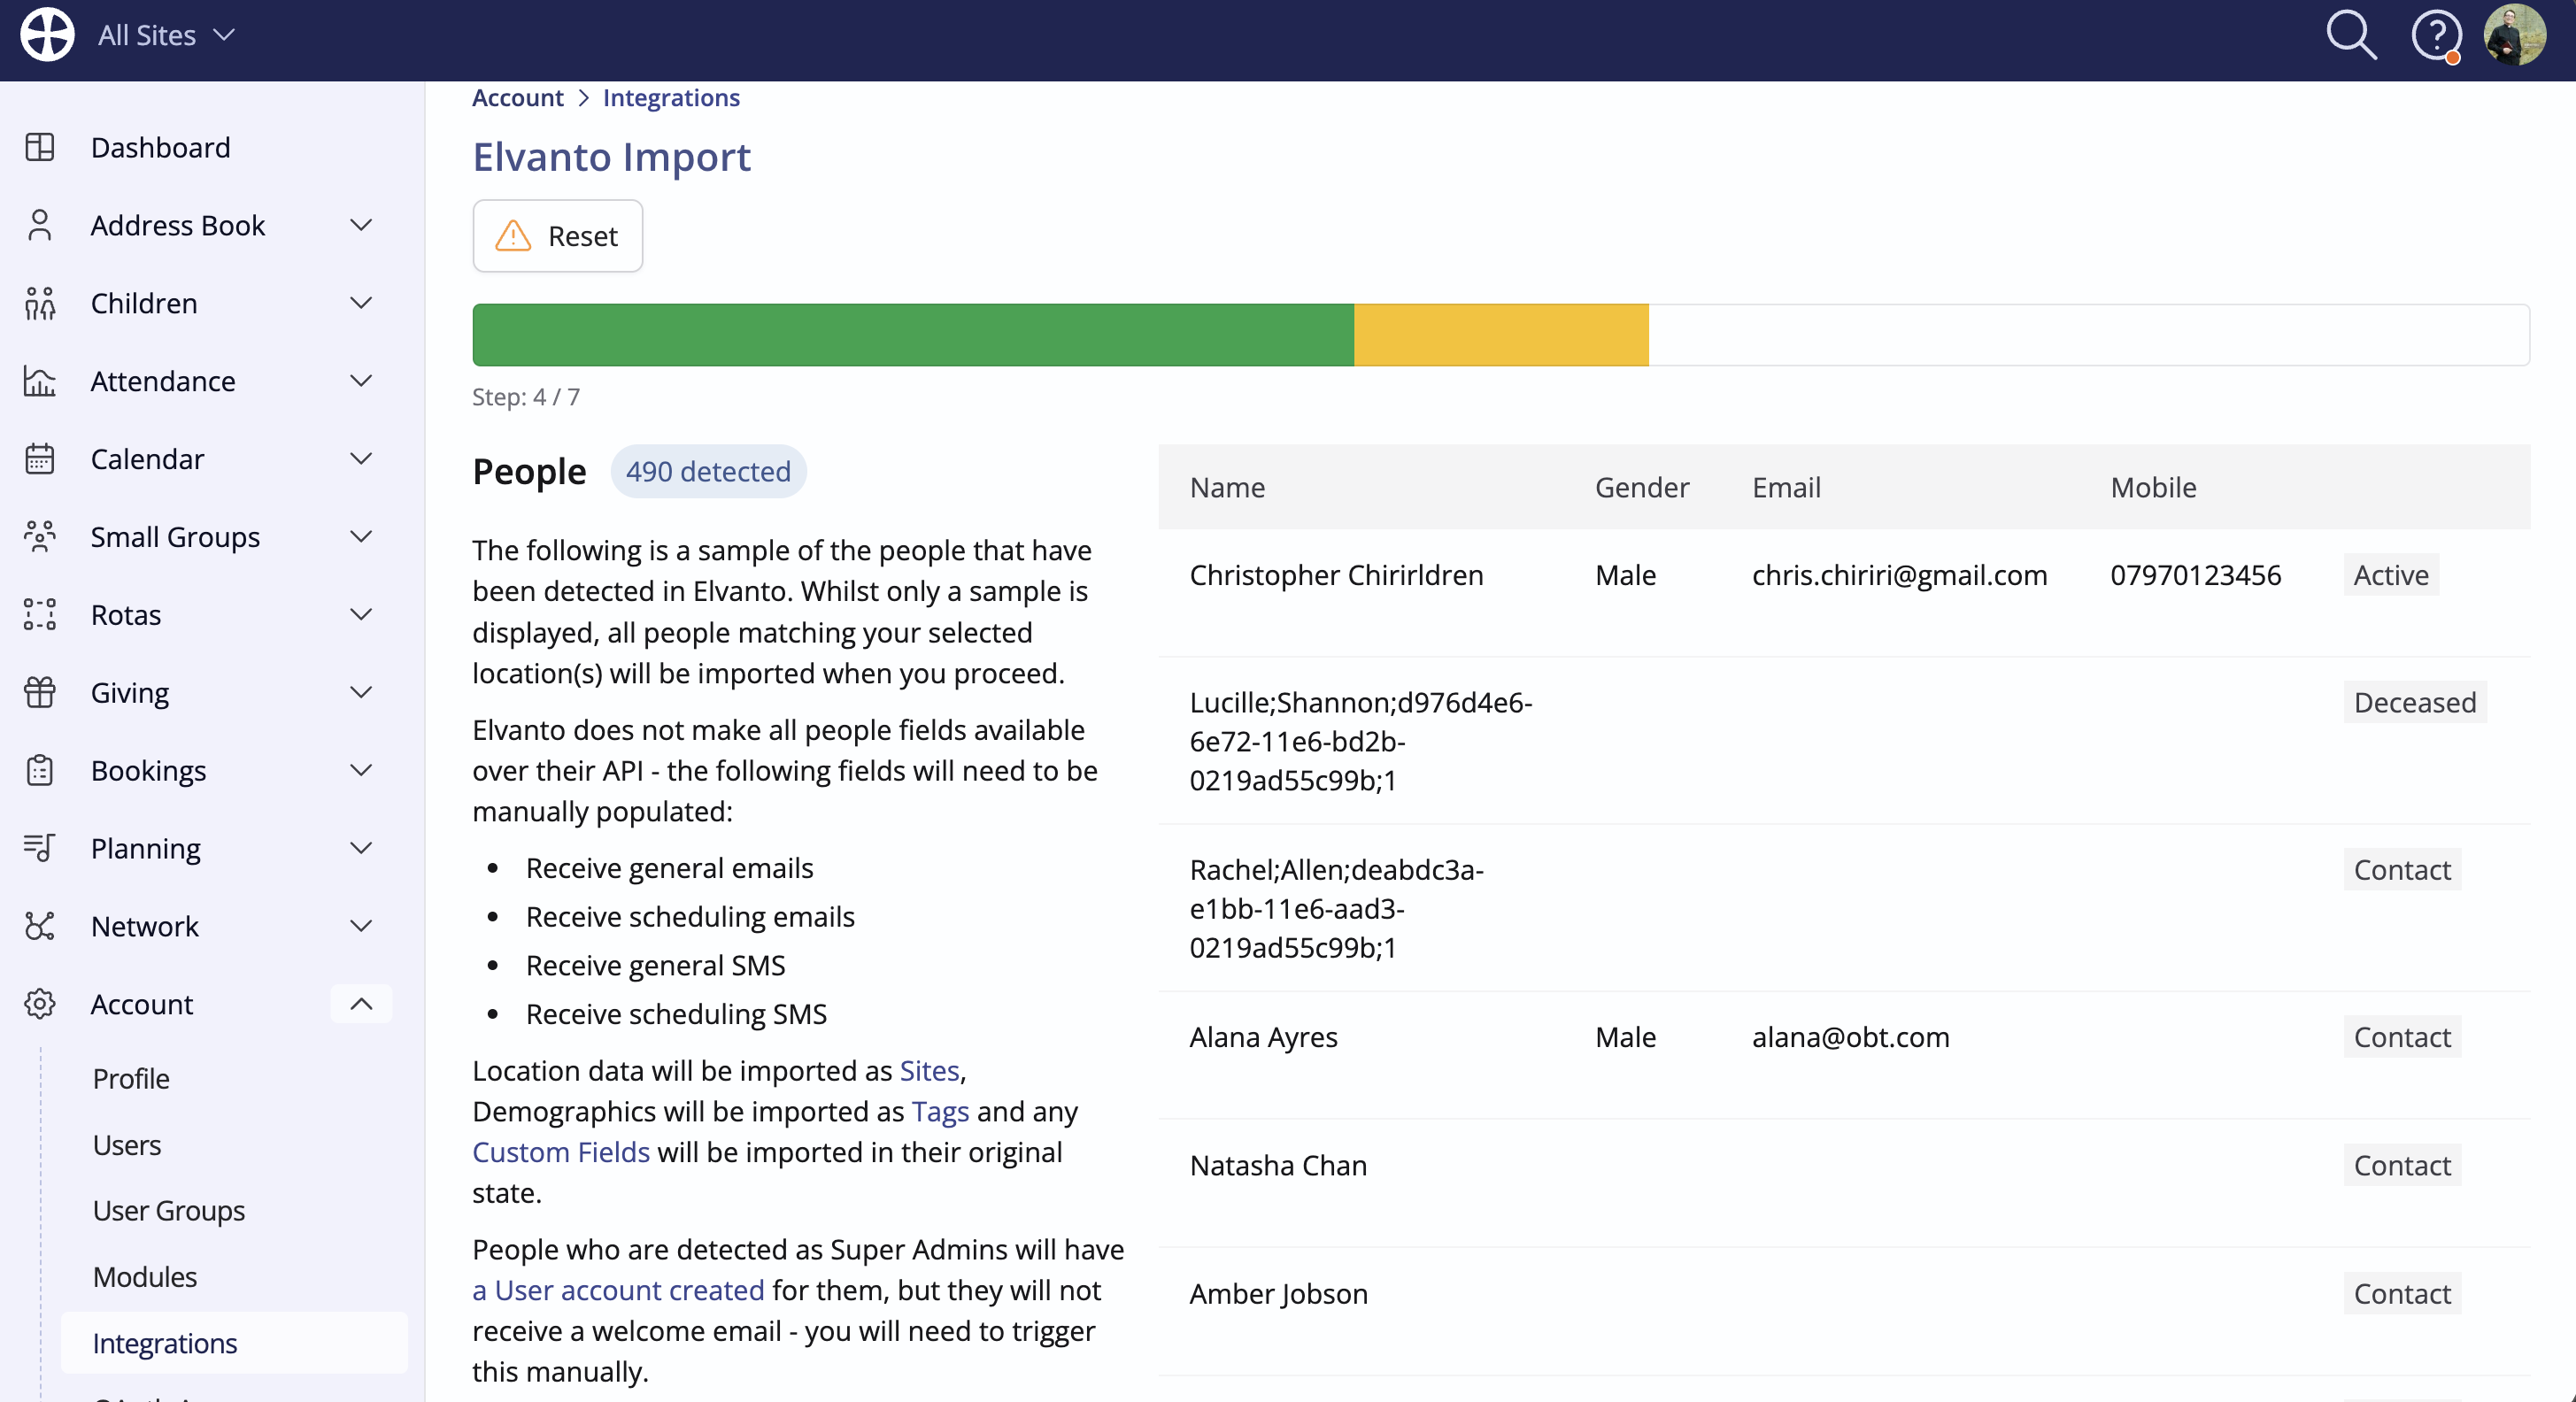
Children, family relationships and those marked as Deceased...
As part of the import process, ChurchSuite will detect those marked as a Child in Elvanto and import them into the Children module for you. Similarly, any family relationships such as spouse/partner or parent/carer and child will be retained during the import, with spouses linked to each other in the Address Book, and parents linked to their associated children in the Children module.
Those who are marked as Deceased in Elvanto will be imported as archived contacts.
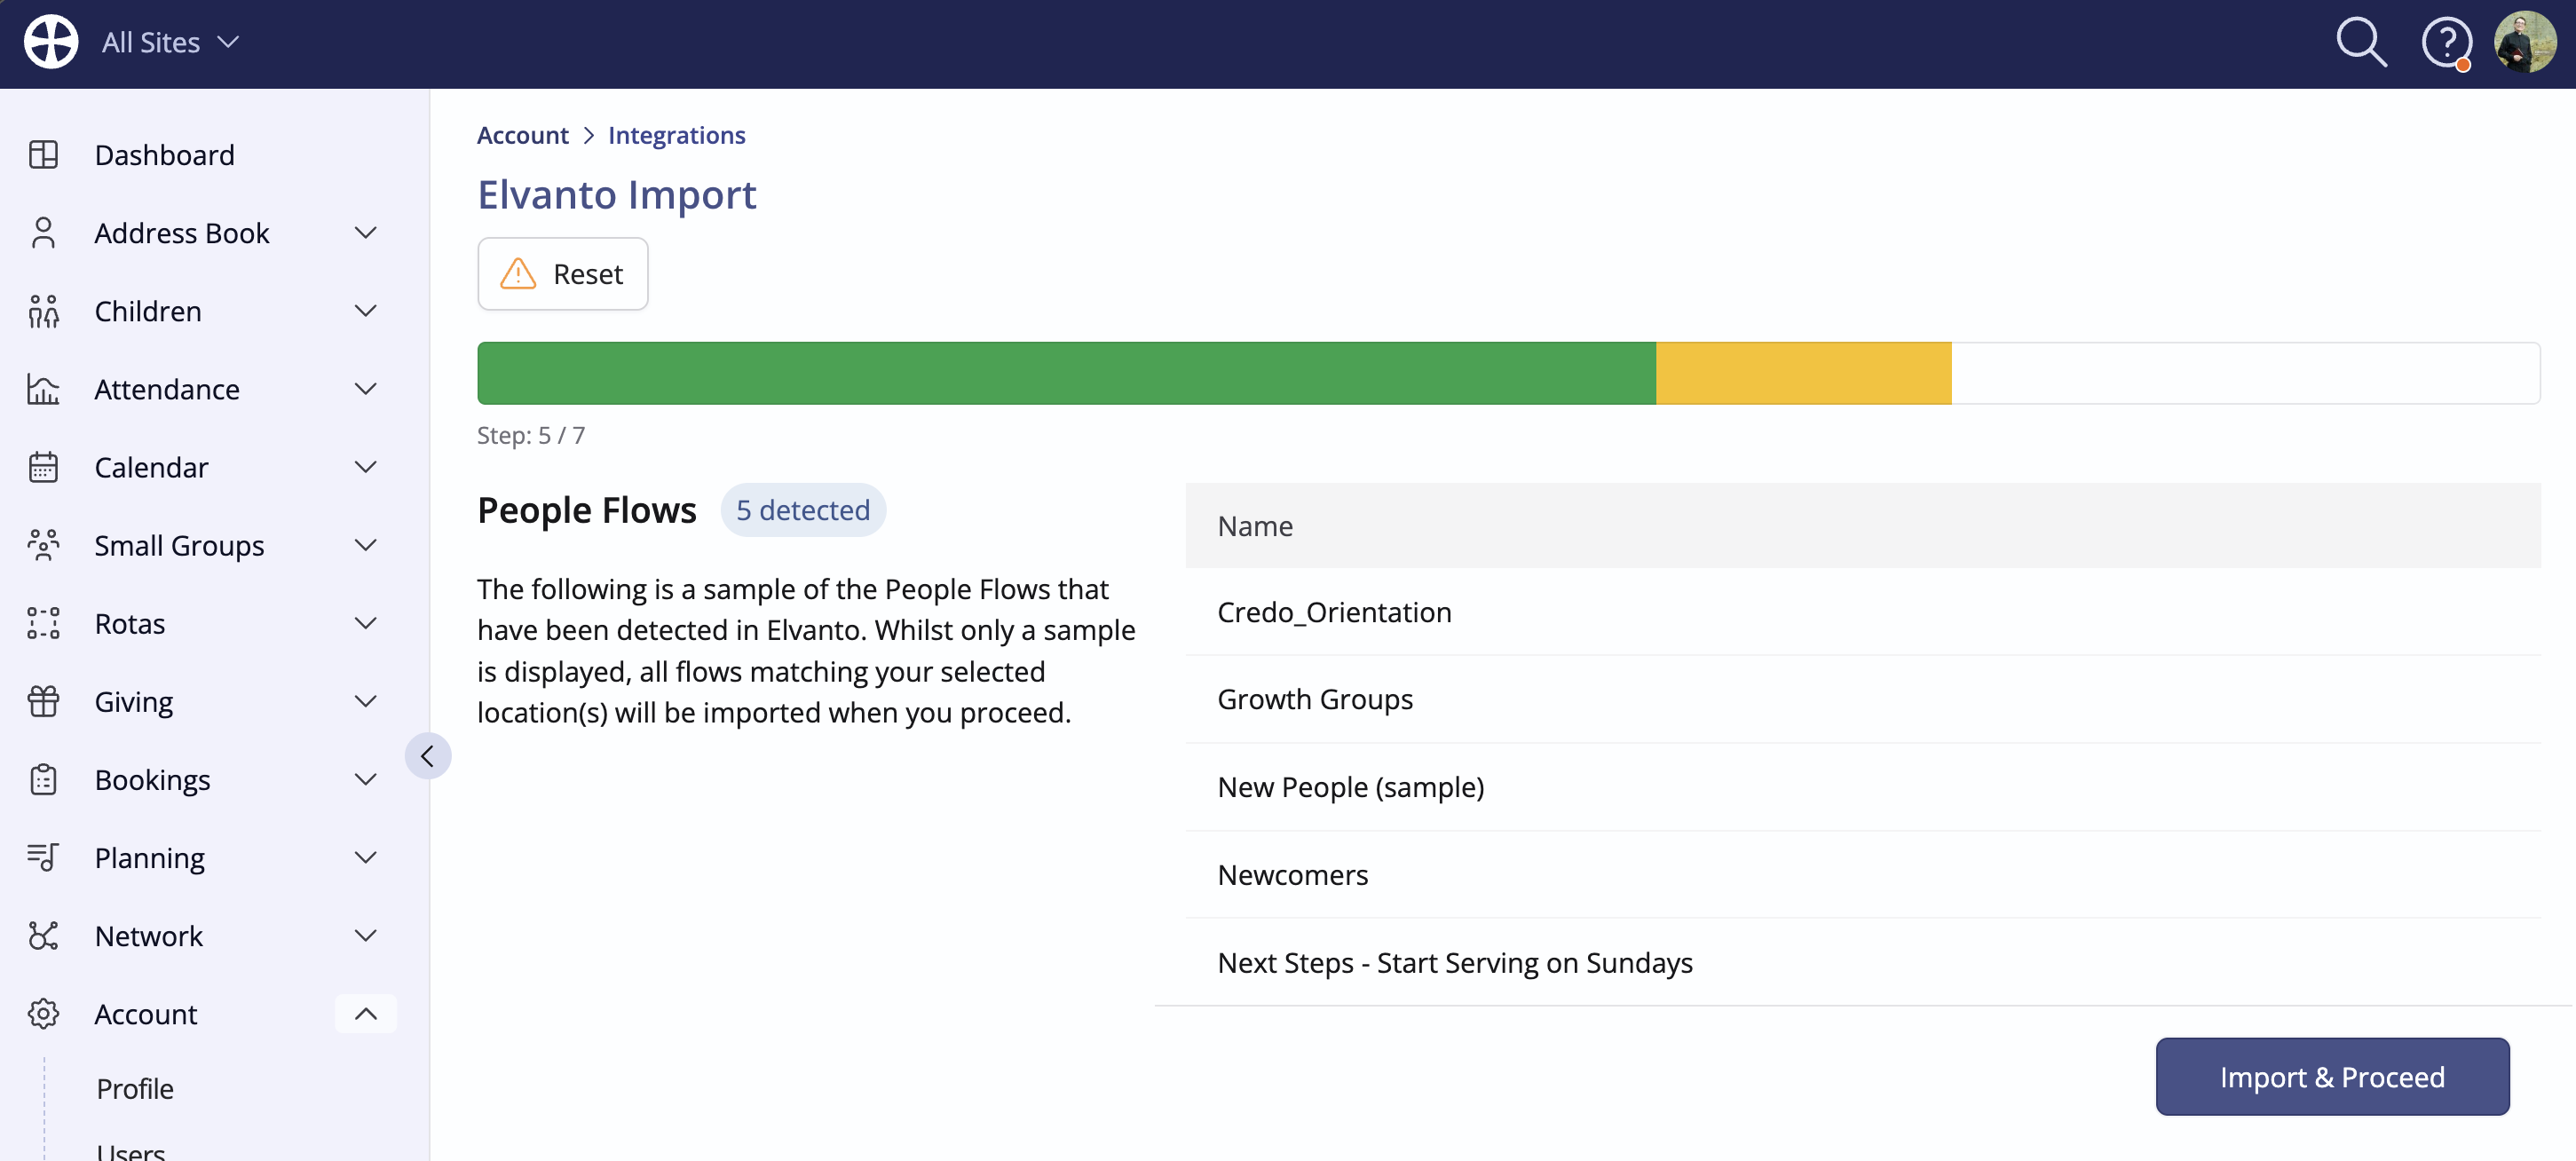
Step 5 detects the People Flows found in Elvanto. Each Flow will be imported with the relevant stages, and people in each stage, but you'll need to manually add actions to your Flow in ChurchSuite to be able to use the Flow going forwards.
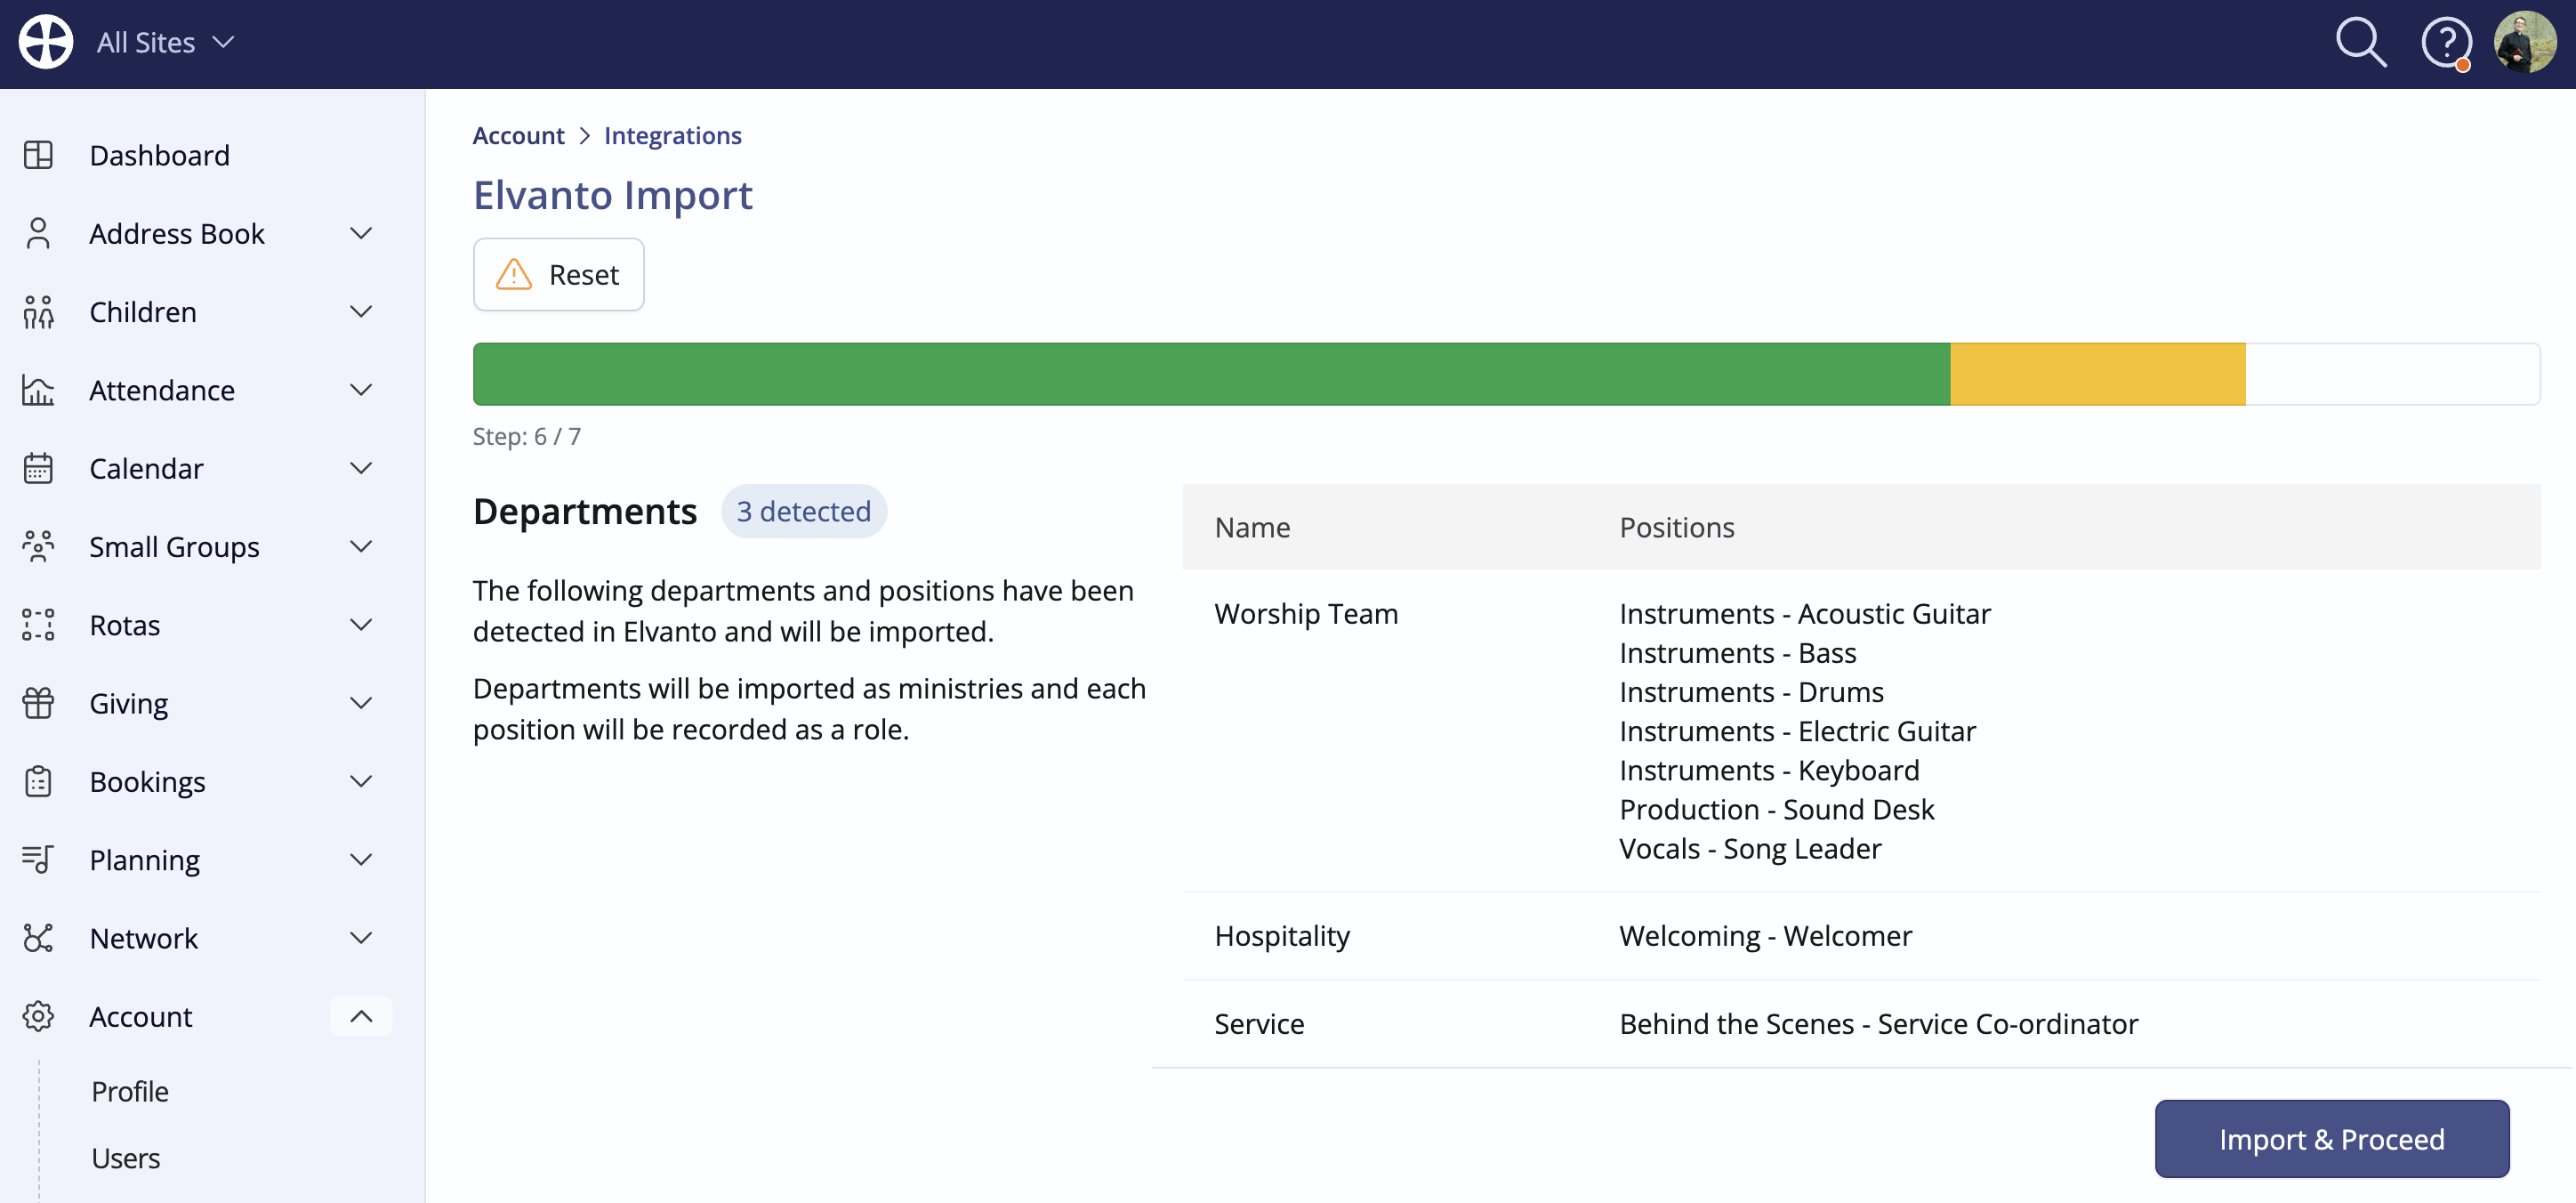
Step 6 detects the Departments and Positions found in Elvanto. Departments will be imported as ministries, and each position will be recorded as a role. Click Import and Proceed to complete the process:
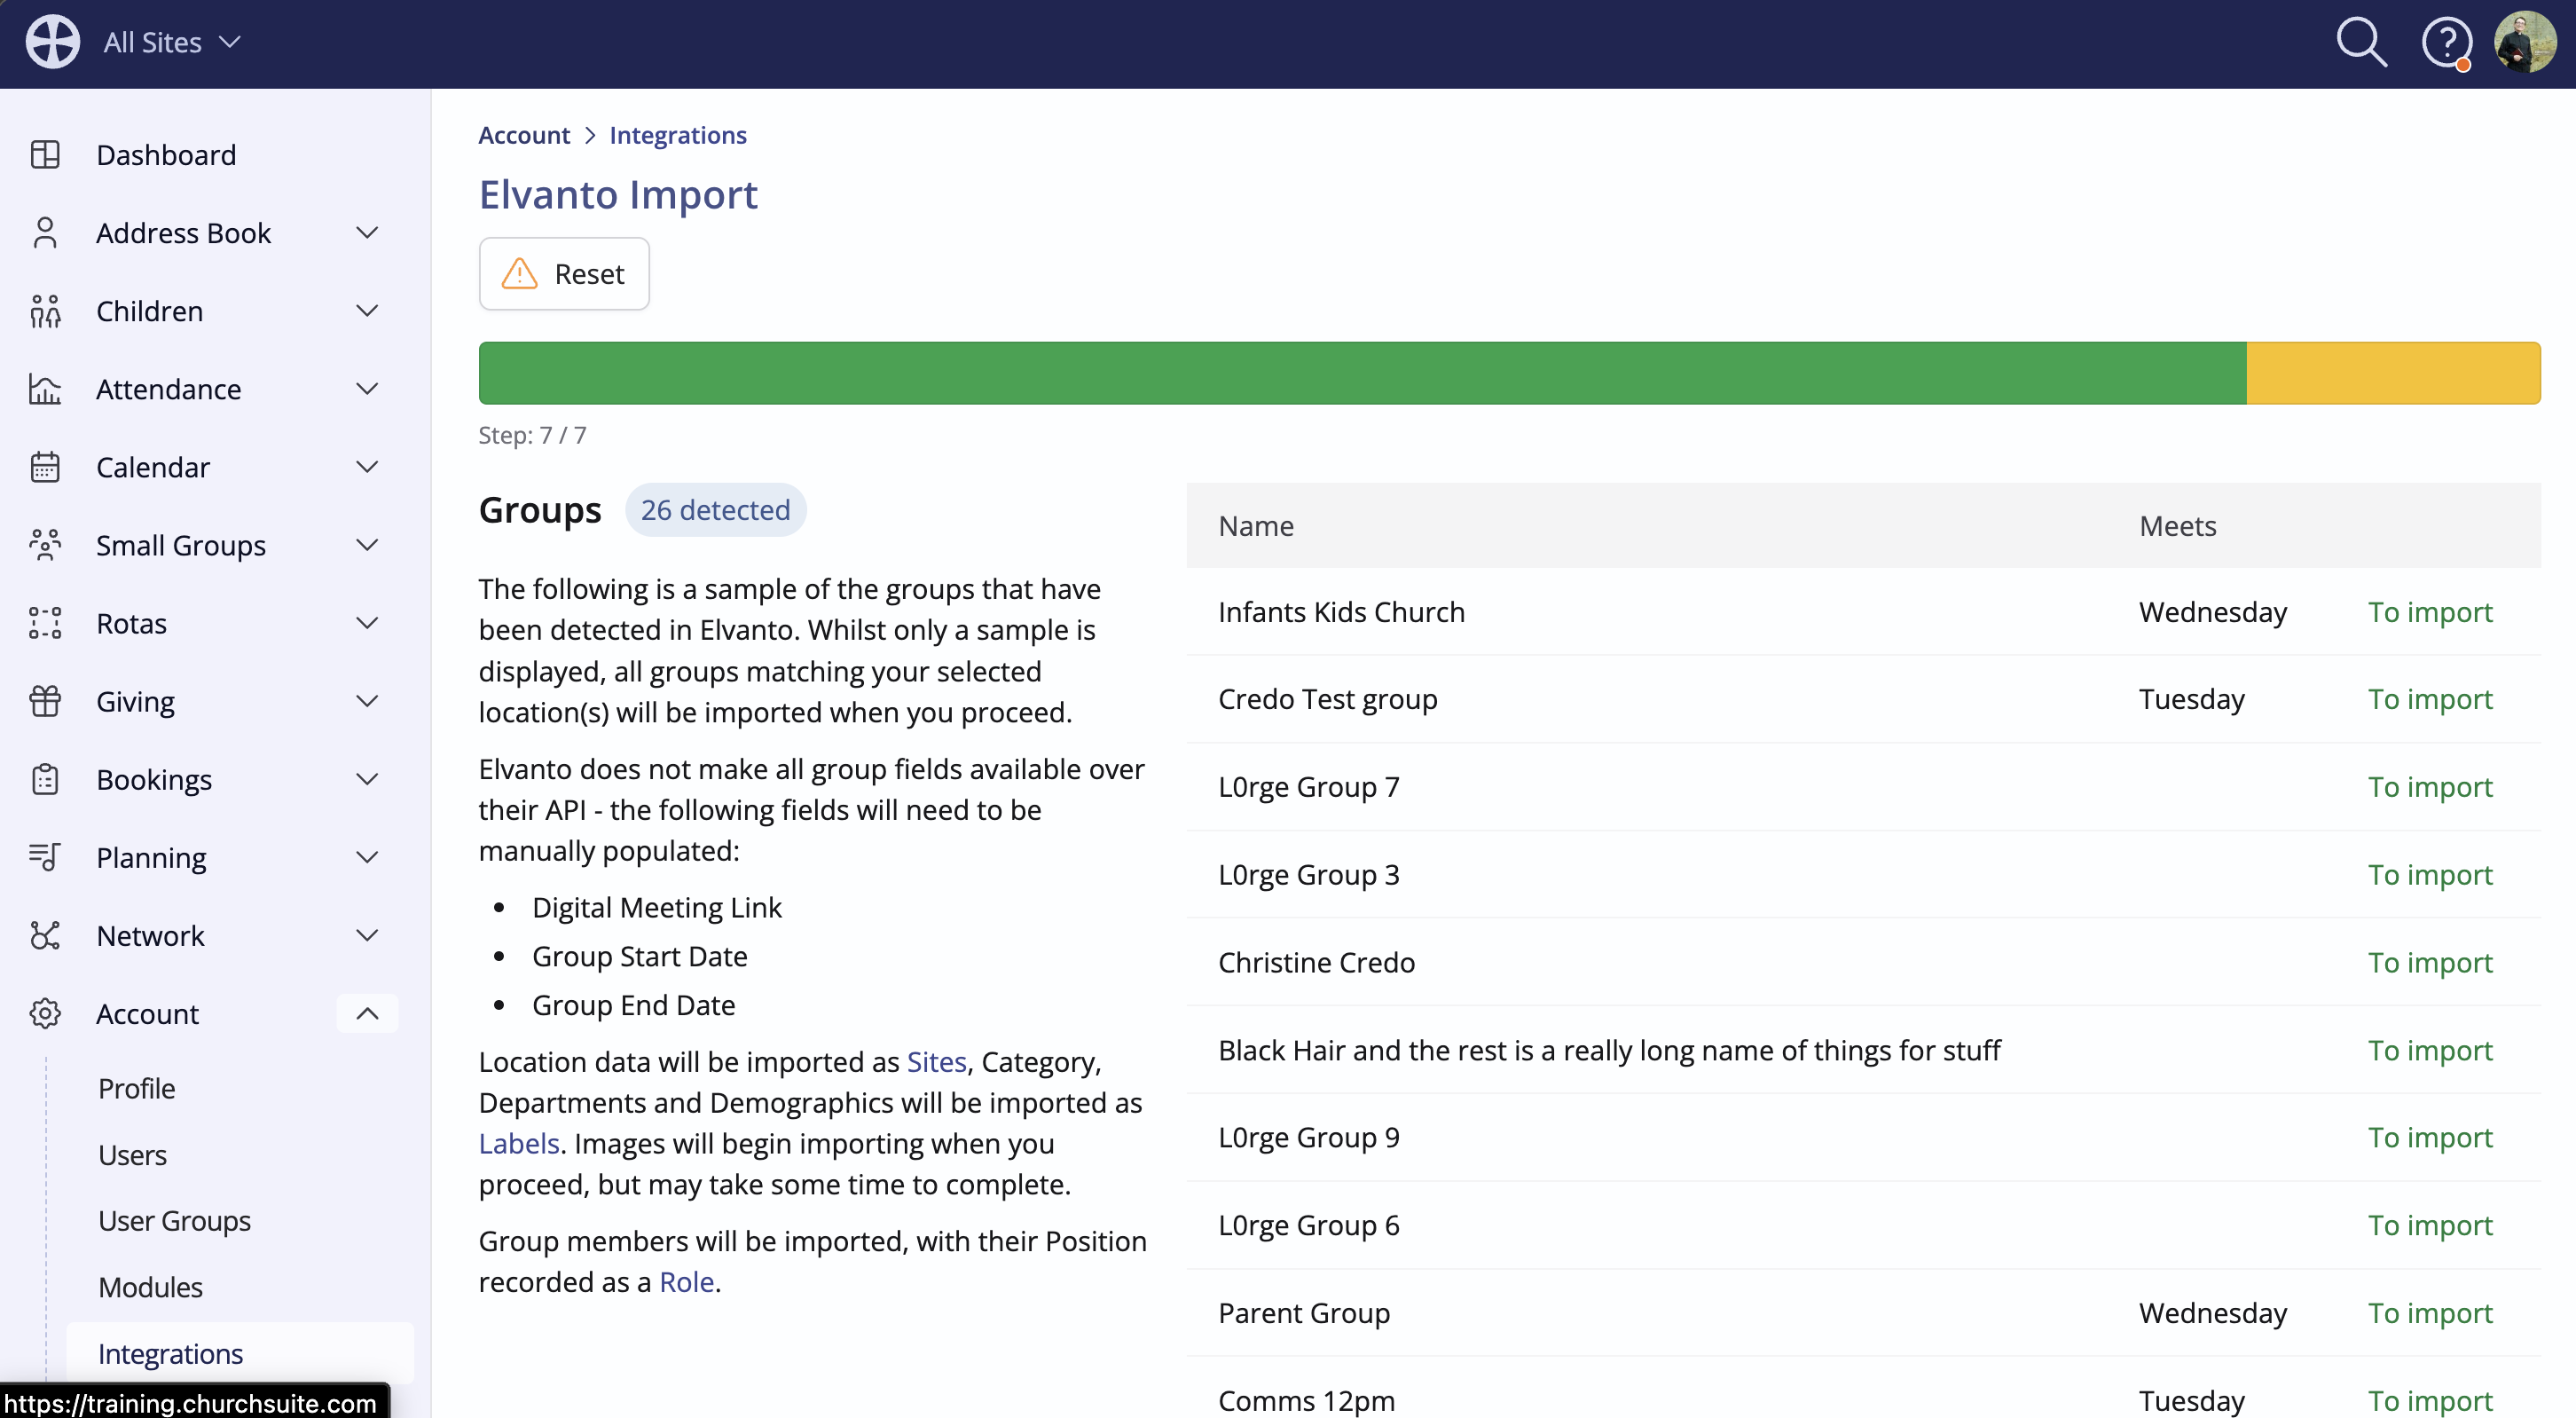
Step 7 detects the Groups in Elvanto and shows a sample. Elvanto only makes certain group fields available over their API. The Digital Meeting Link for each group will need to be manually populated. Location data will be imported as Sites in ChurchSuite, and group Categories, Departments, and Demographics will be imported as Labels. Group members will be imported, with their Position recorded as a Role in ChurchSuite. Groups with a past end date in Elvanto will show in Past Groups in ChurchSuite. Click Import and Proceed to complete the process:
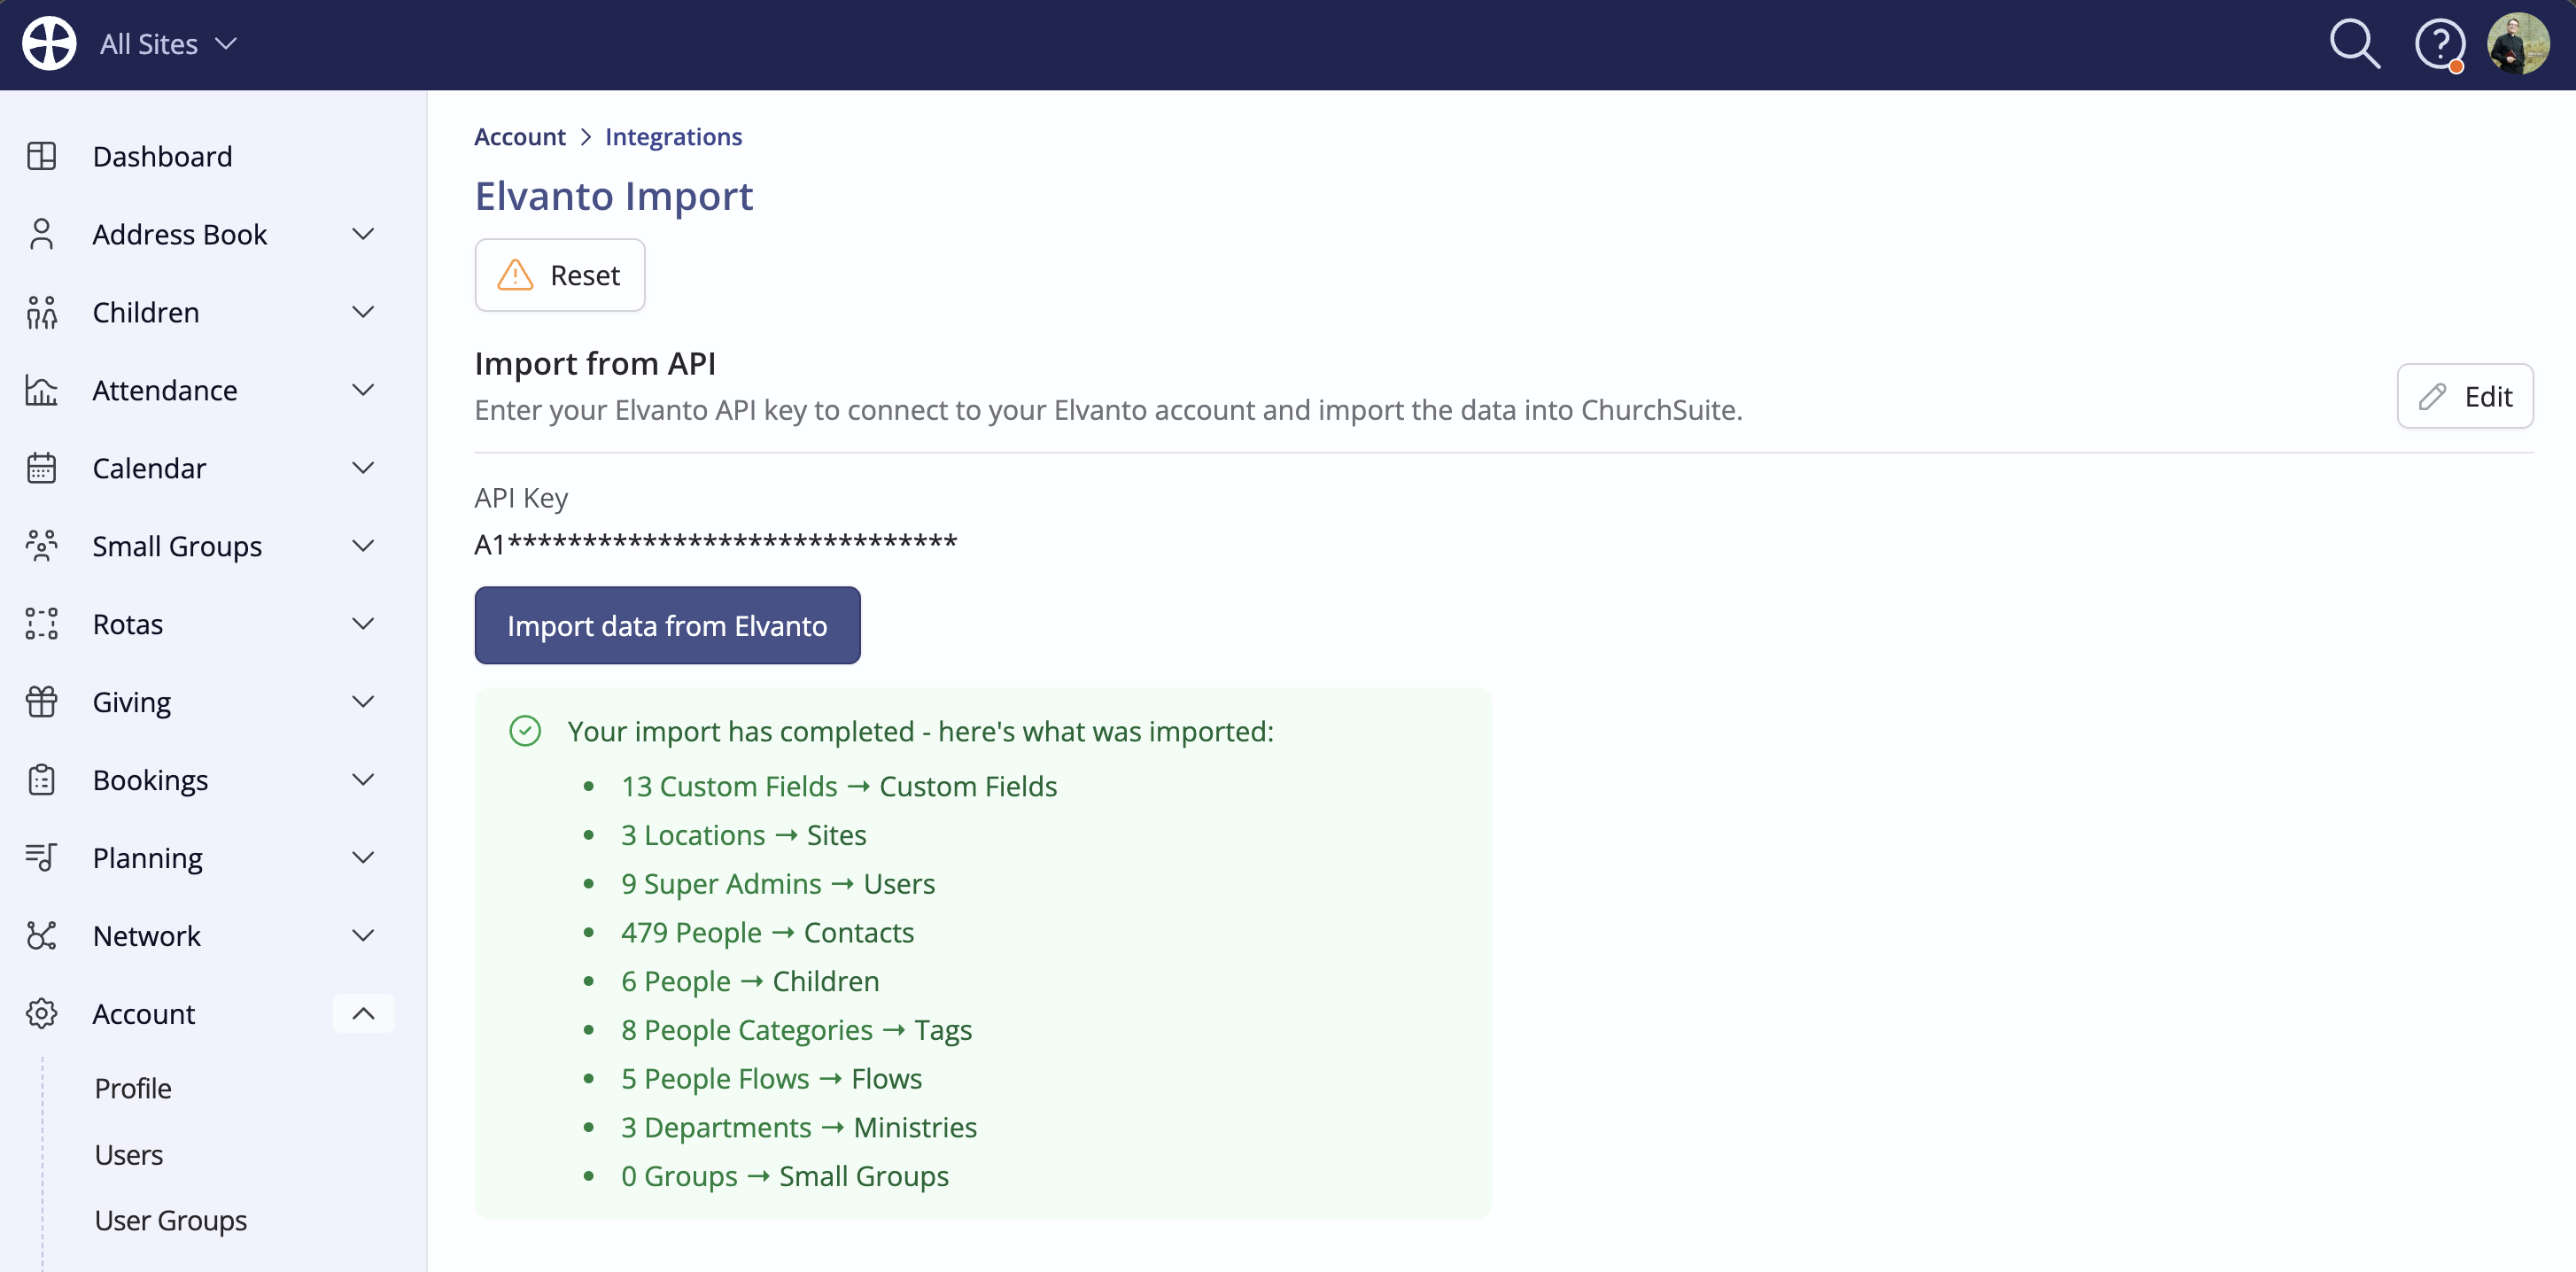
Note that depending on the volume of Elvanto data in the account, it may take some time for each step to complete. Once the process has finished, a summary of what's been imported is shown. You can now safely navigate away from the Integration page. Once you are happy, you can request the Elvanto Import integration be removed from your ChurchSuite account or Reset the integration to disconnect ChurchSuite from your Elvanto account.
Don't forget...
Earlier, we mentioned some follow-up actions that you may now wish to complete after your import:
1. Send your ChurchSuite module Users a 'welcome email'
See our related article about Adding and Managing Users. This article explains the difference between Users and Administrators and the levels of access you can grant on a module-by-module basis. Review each User in turn and set their permissions as appropriate. When you are ready for a User to have ChurchSuite access, head to their User profile and click Send Password Reset - this will allow them to set their preferred password and log into ChurchSuite for the first time.
2. Review small group details
Head to the Groups section of the Small Groups module, and for each group in turn, review the group details, adding anything that couldn't be imported from Elvanto - like a digital meeting link. See our related article for more information about Running online small groups.
3. Add actions to your Flows
Head to your Flows in the Address Book, and add actions to each of your imported Flows, allowing you to move people on in the flow and manage their data - Flows.
3. Update any additional information that the API does not allow to be imported
You may have other data in Elvanto that can't be directly imported over their API. Any important information in Elvanto that you wish to retain in ChurchSuite will unavoidably need to be manually added to the appropriate module in ChurchSuite but note that you can import CSV files of givers, donations, events, small groups, contacts, children and visitor children - see our related support articles for these Import options.
What's Next?
Here are some suggestions for things you may wish to do next:
1. Import your historic attendance data - both named data and metric data - Importing historic attendance data for a gathering
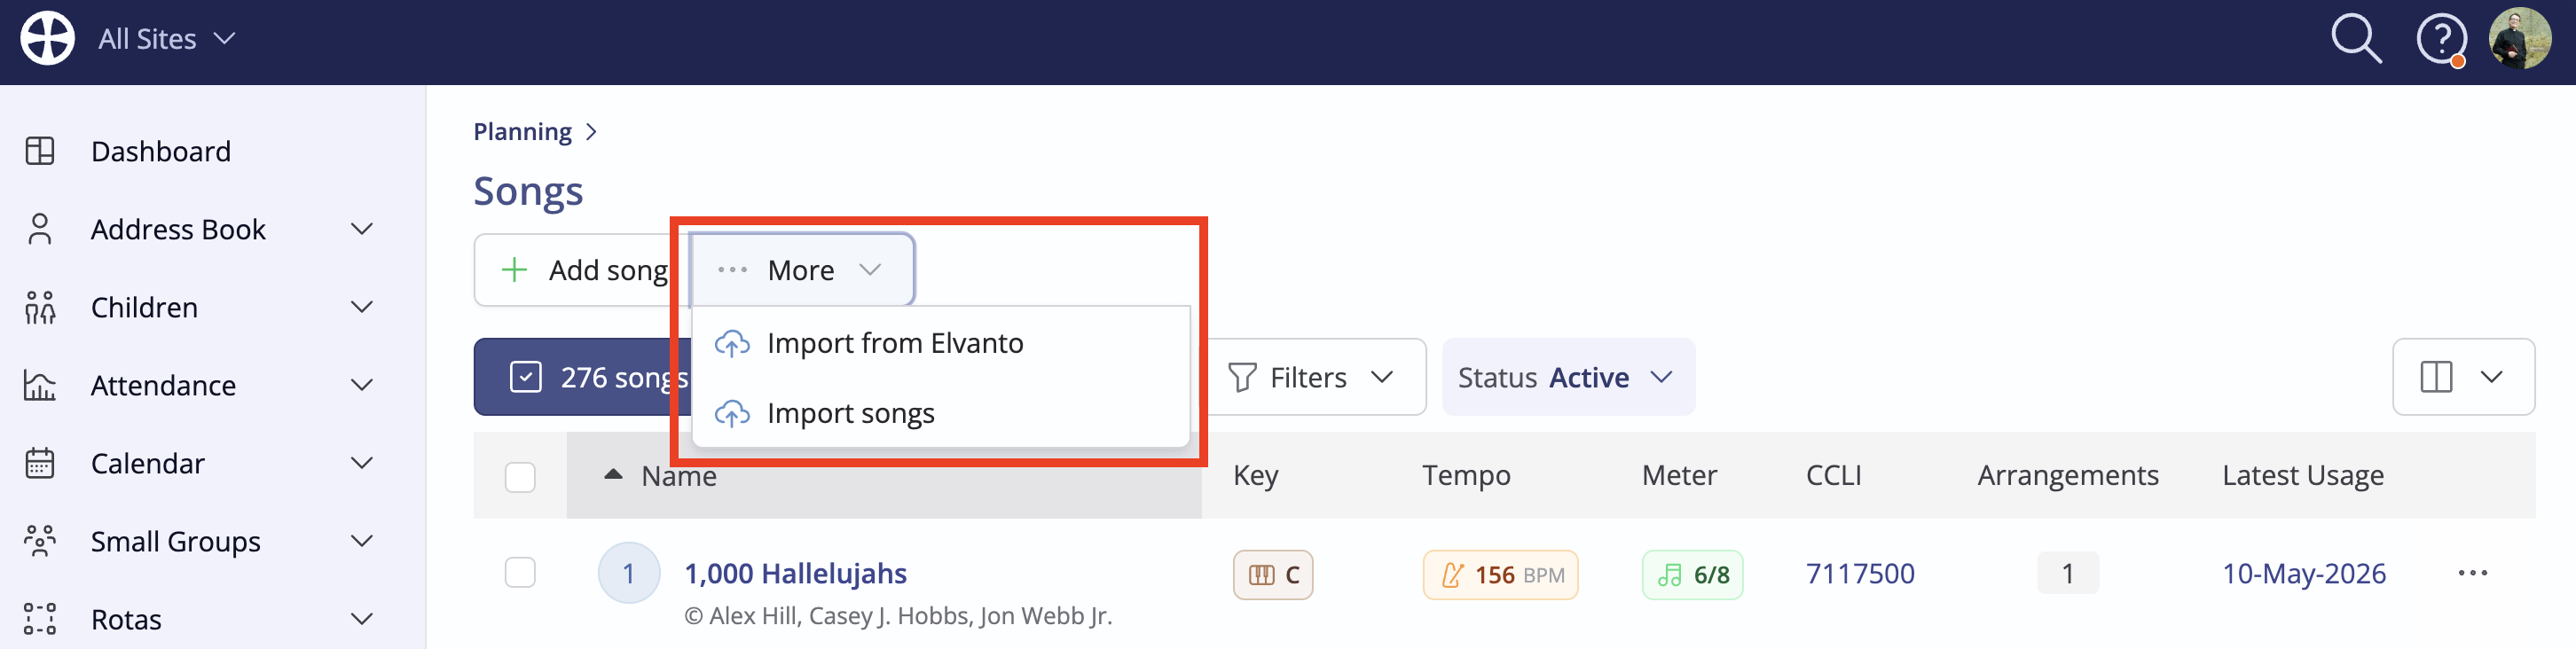
2. Import your Songs. Head into the Planning module Songs section and use the Import from Elvanto action:
3. Identify missing data that you may wish to obtain. You can use the Address Book and Children module's Missing Data reports to visualise missing data. You could send Consent Requests to encourage people to review the data you hold and provide missing information of interest
4. Carry
out some data cleansing using the Duplicated Contacts and Duplicated Children reports, which have a really neat Merge option
5. Work through our Getting Started articles, perhaps focusing initially on modules of interest
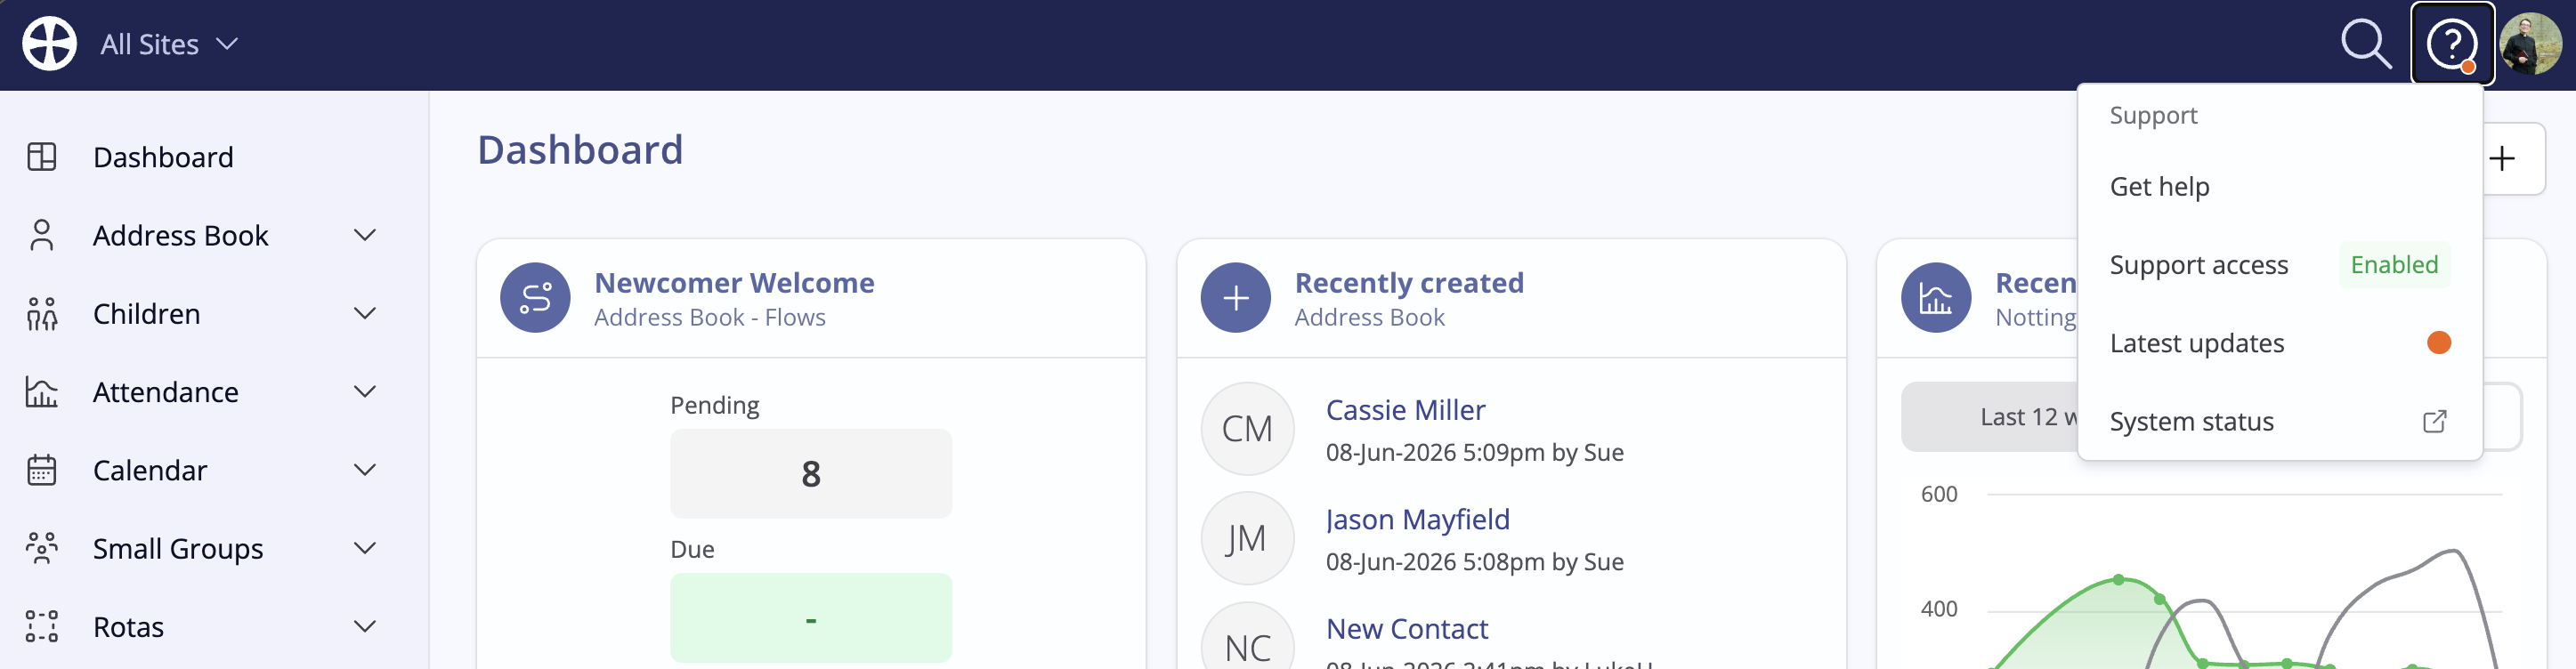
Do you have a question?
You'll find the answers to most questions in our support articles - they're all available through the Support menu located in the top-right corner of each page in ChurchSuite. Select Get help and search by topic, phrase or keyword. You can also access the Support Article library on our website. If you still can't find something you're looking for, click to contact one of the ChurchSuite team - we're happy to help!